Wiring harness design in CATIA V5 - 3D modeling Week 2 Challenge
Aim:
Download following connectors Deutsch DT06 - 08SA, Tyco 174357-2 and connector clip Tyco 85229-1 cad data from given link and define it as electrical connector using electrical part design workbench and define all the necessary properties to connectors & clip.
Deutsch DT06 - 08SA:
- In first we want to create the connection point like bundle connection point, Connector connection point.
Bundle Connection Ponit:
Use the point command in part design workbench and using between point command to create the bundle connection point.
Select the random point of the cad file of the connector to create the point.
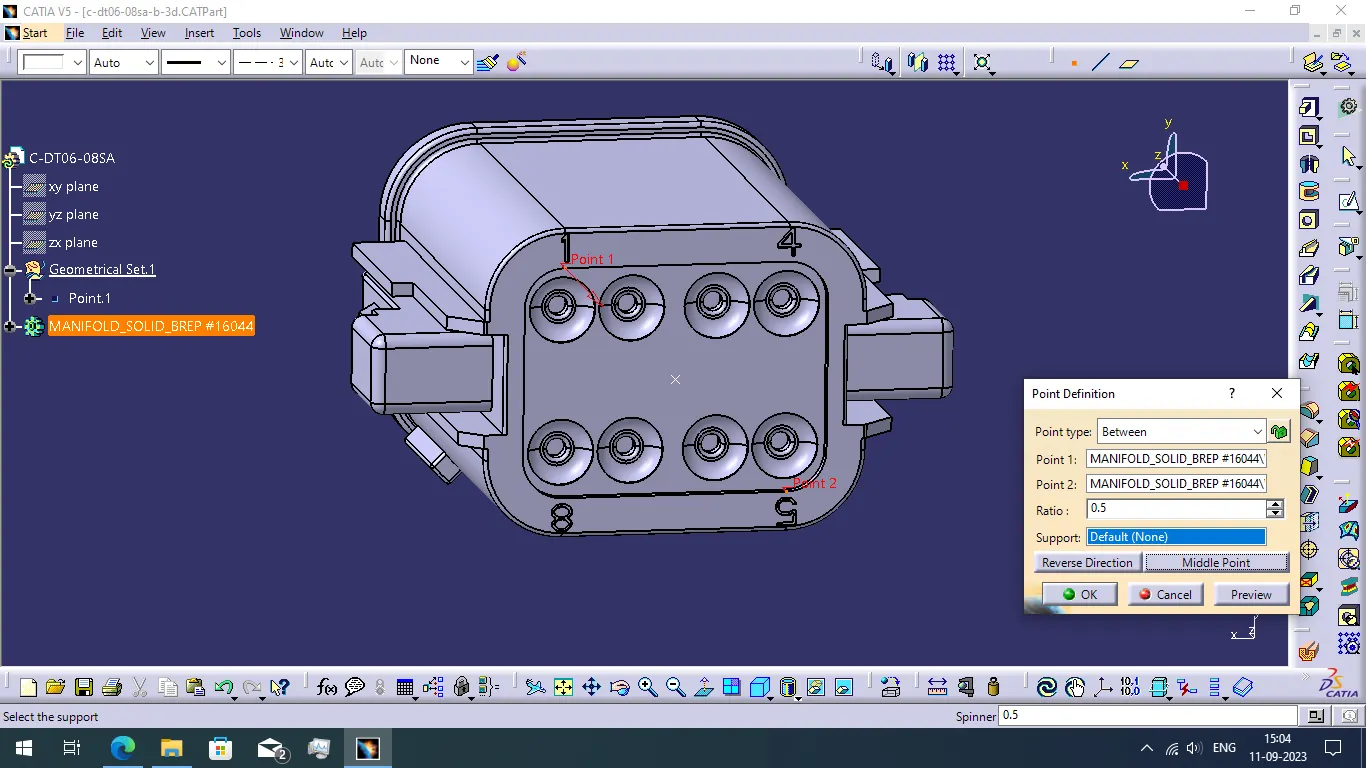
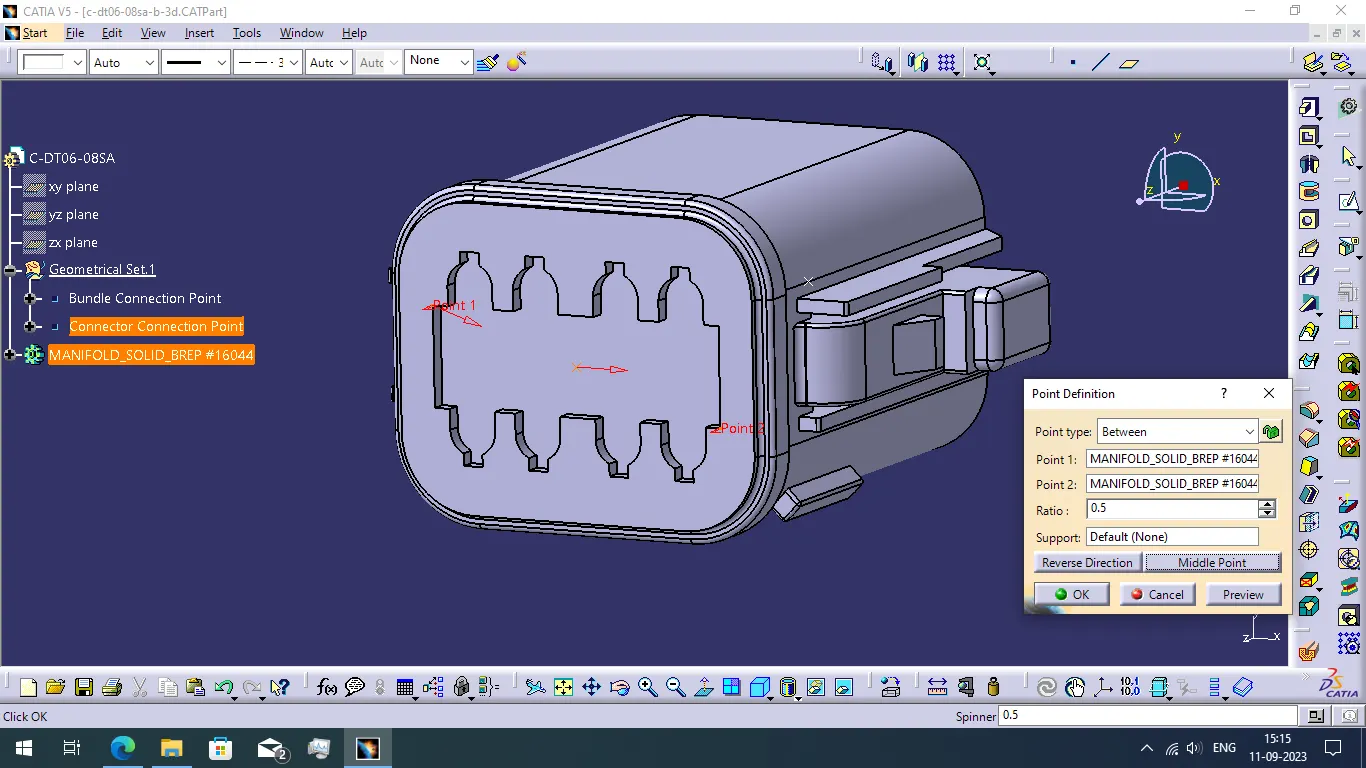
Connector Connection Point:
Similar method is used to create the connector connection point of the connector.
When completed to create the connection point create the axis system with the purpose of connect the connectors easily with help of the axis system.
Use the axis system command and select the connector connection point and modify the coincident direction of Y axis and orientation direction of X axis for the required direction.
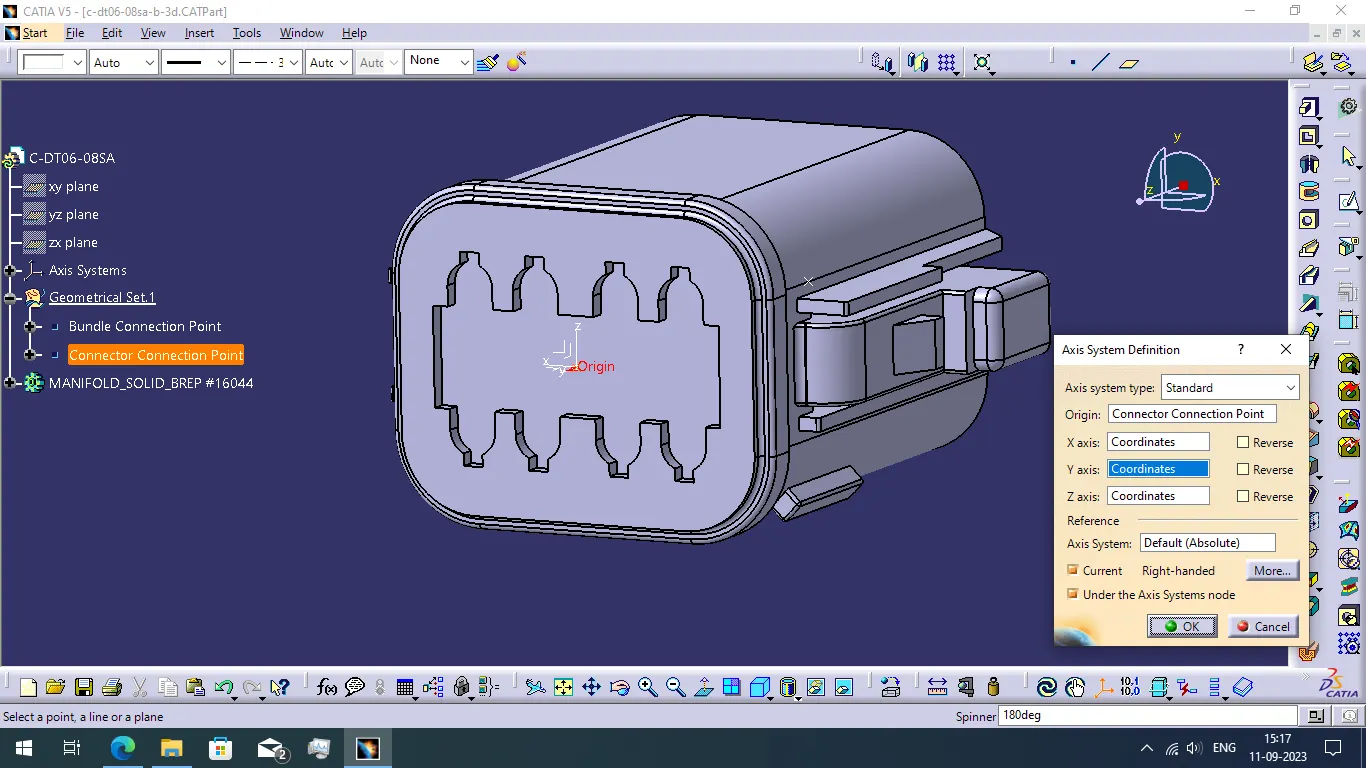
- When we completed to create the bundle connection and connector connection points then go to the electrical part design workbench for the reason of defining electrical properties of the connector.
- In the electrical part design, First we define the connector type and number of terminations of the connector.
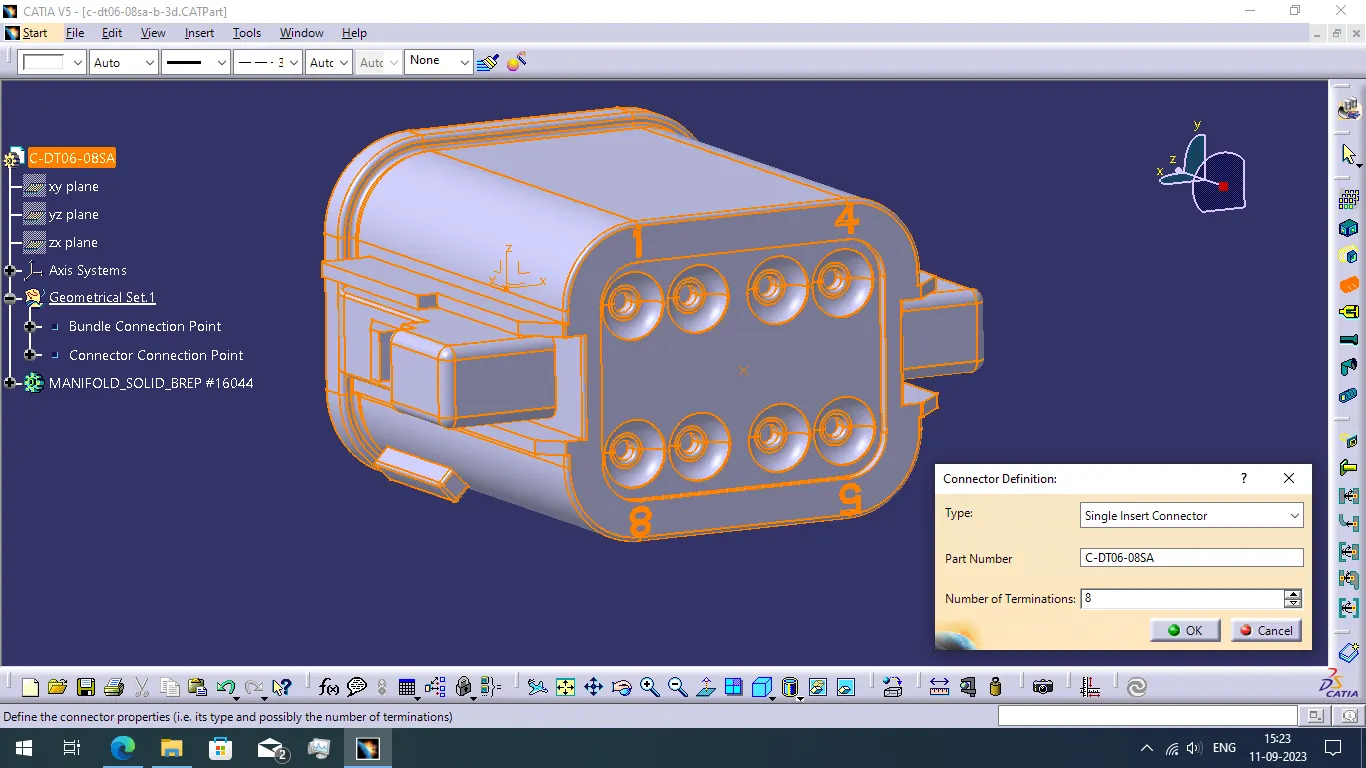
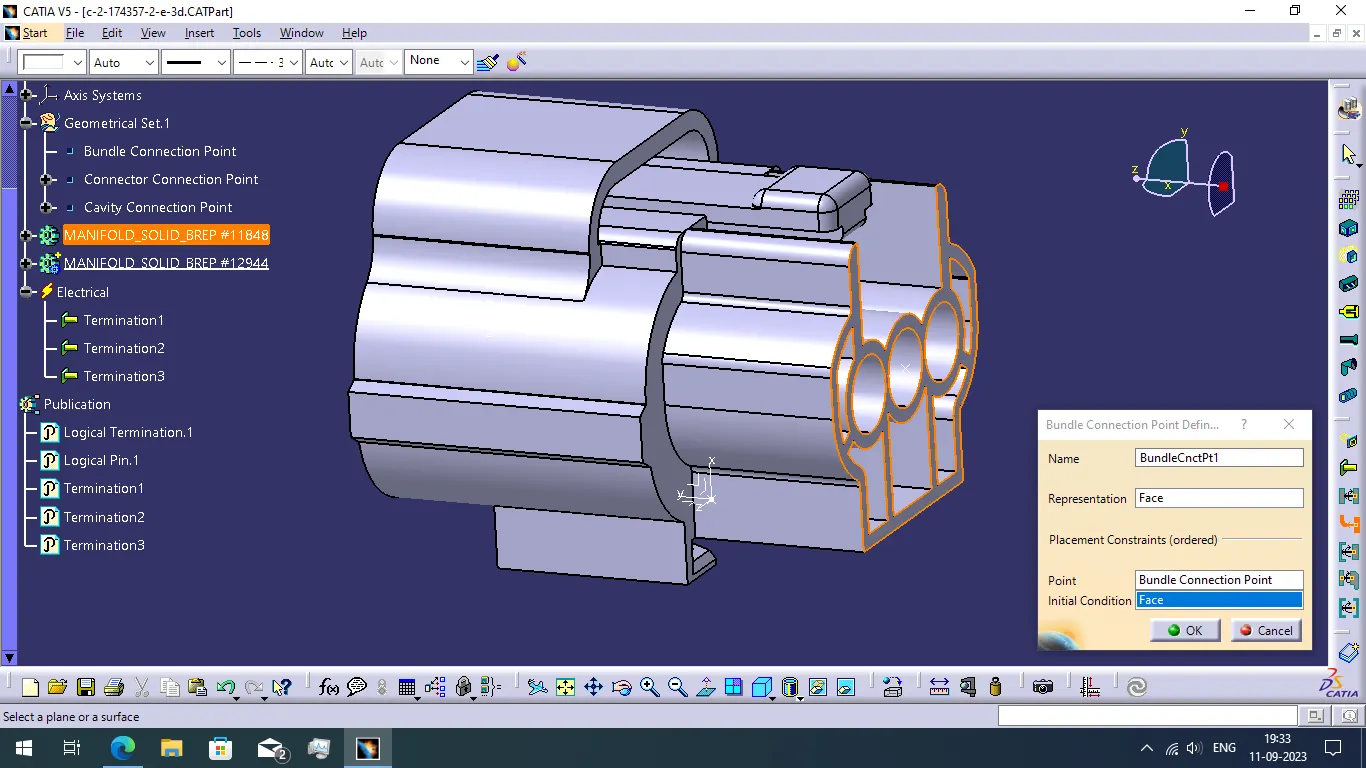
- When completing to define the connector then define the bundle connection point of the connector.
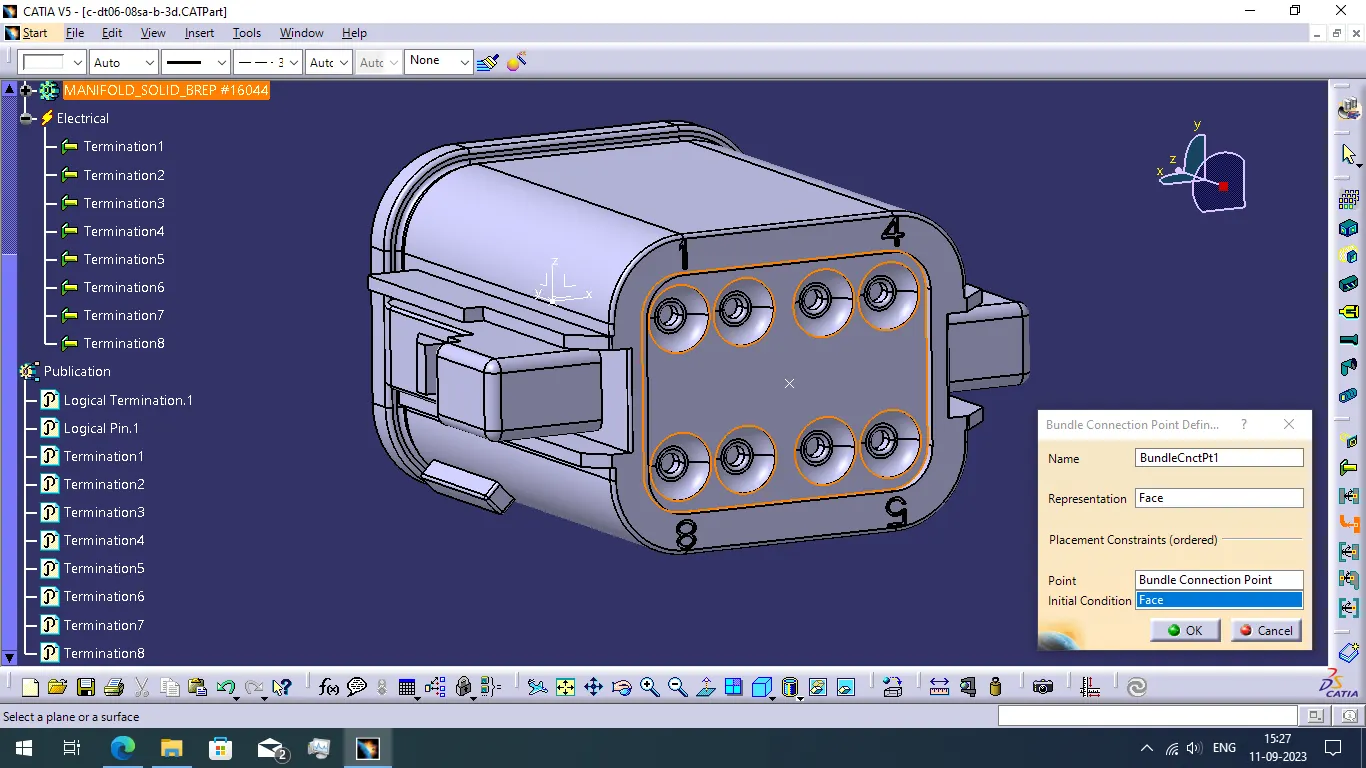
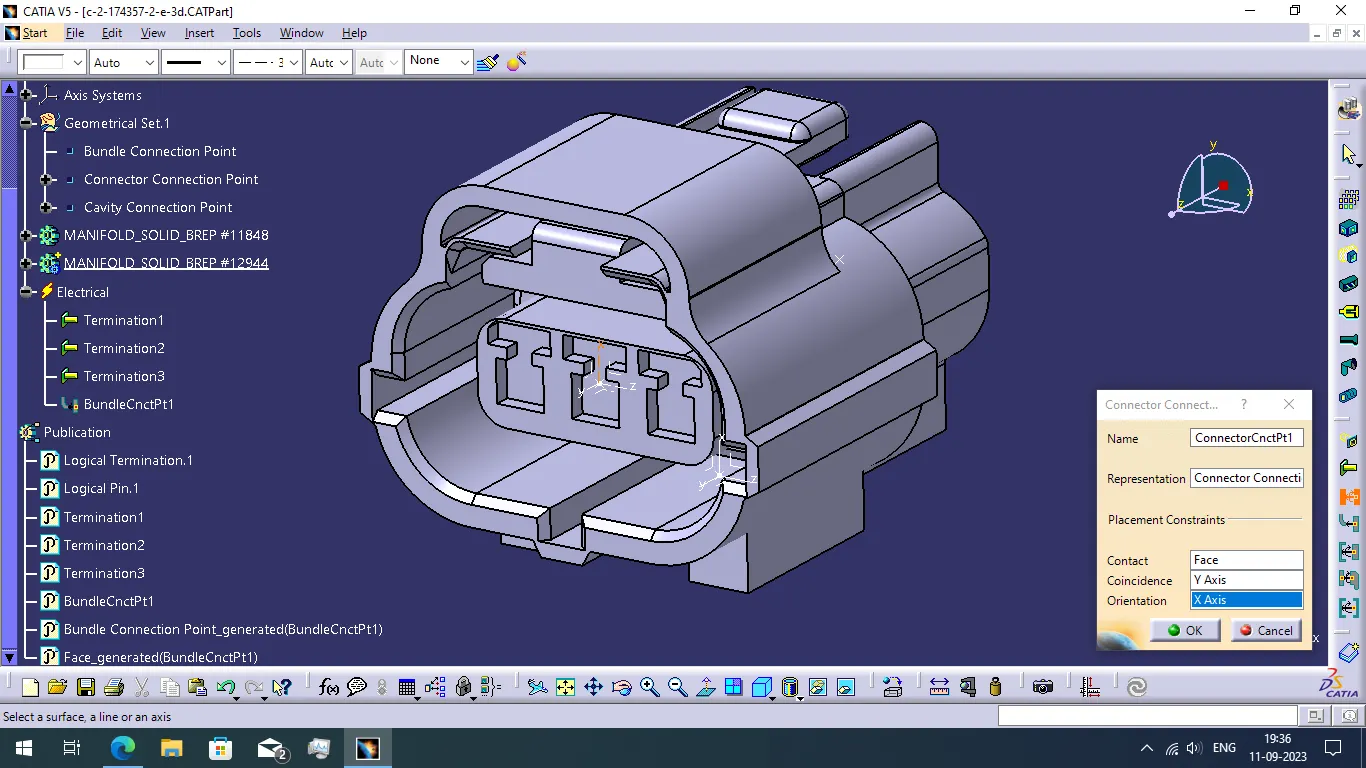
- Then we want to define the Connector connection point of the connector using define the connector connection point command.
- In connector connection point defining process, select the representation as the connector connection point, contact is a face of the connector, coincidence is Y axis and orientation is X axis.
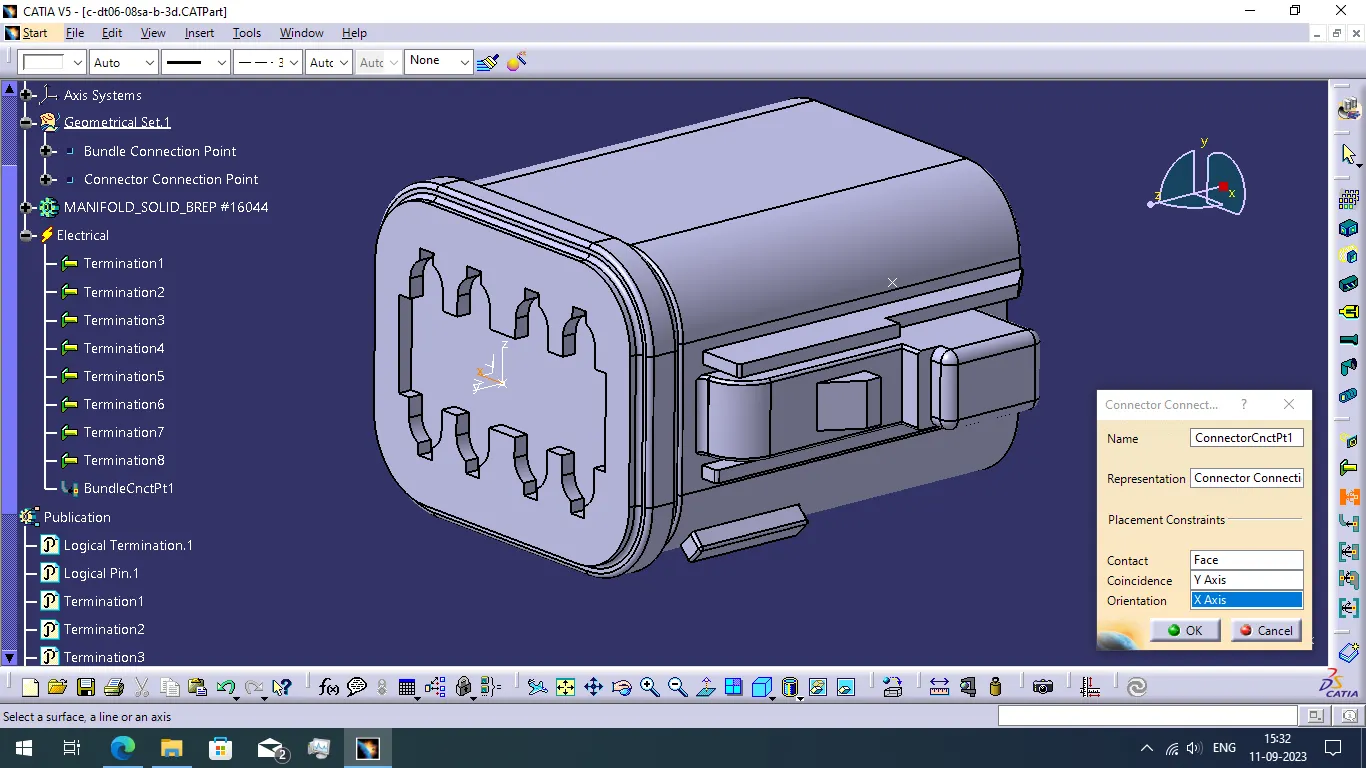
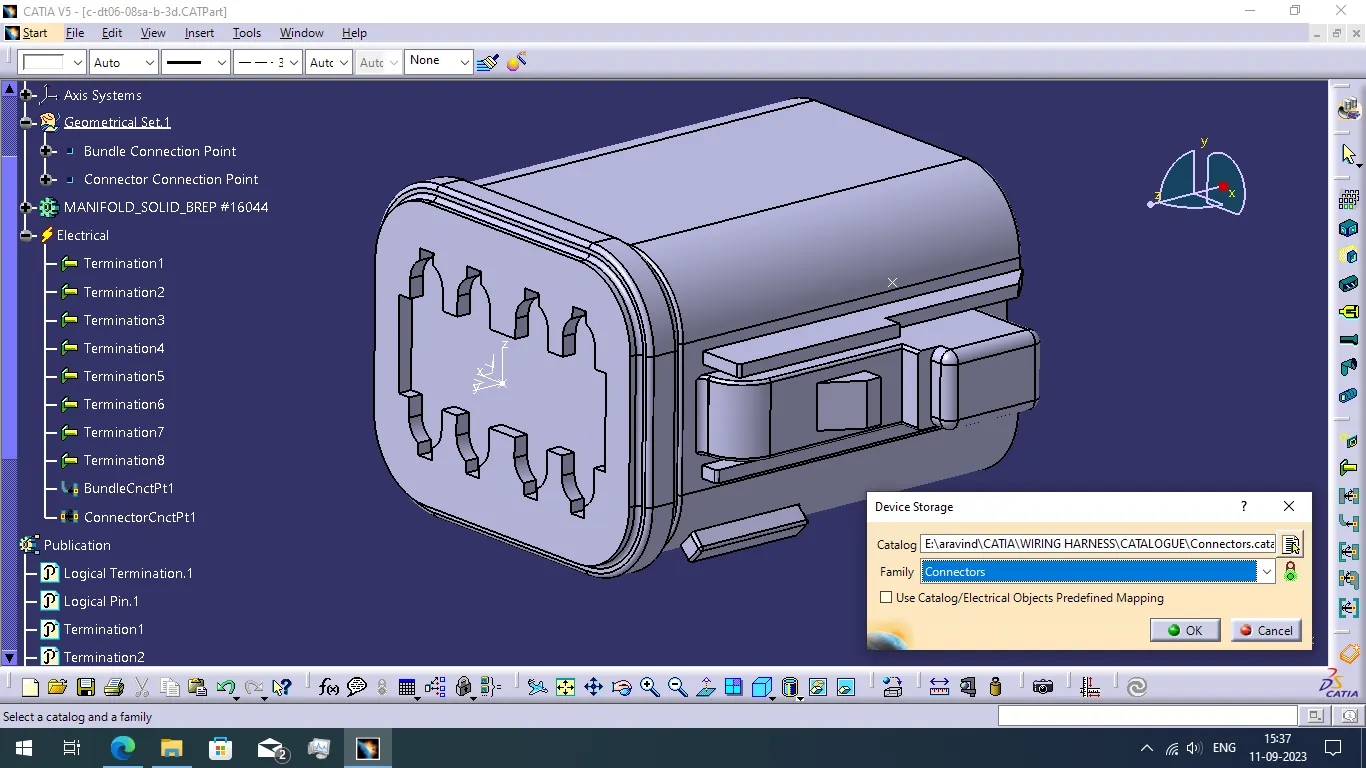
- Therefore completing to define the all required electrical properties of the connector then save the file and store the connector as a catalogue using store device command.
- This catalogue is help to using this electrical connector when and where ever we want in future.
PROPERTIES OF THE CONNECTOR Deutsch DT06 - 08SA:
- This is a housing for femile terminal connector with 8 position and wire to wire connection type connector.
- This connector is a sealable connector. And the centerline is 9.12mm.
- It is used to power and signal type connection.
- Mating alignment type is keyed and with mating alignment connector.
- connector mounting type is cable mounting(Free-hanging).
- Operating temperature range is -55 to 125 oC.
Tyco 174357-2:
- In the beginning we want to create the bundle connection point, connector connection point and cavity connection point for the mounting reason.
Bundle connection point:
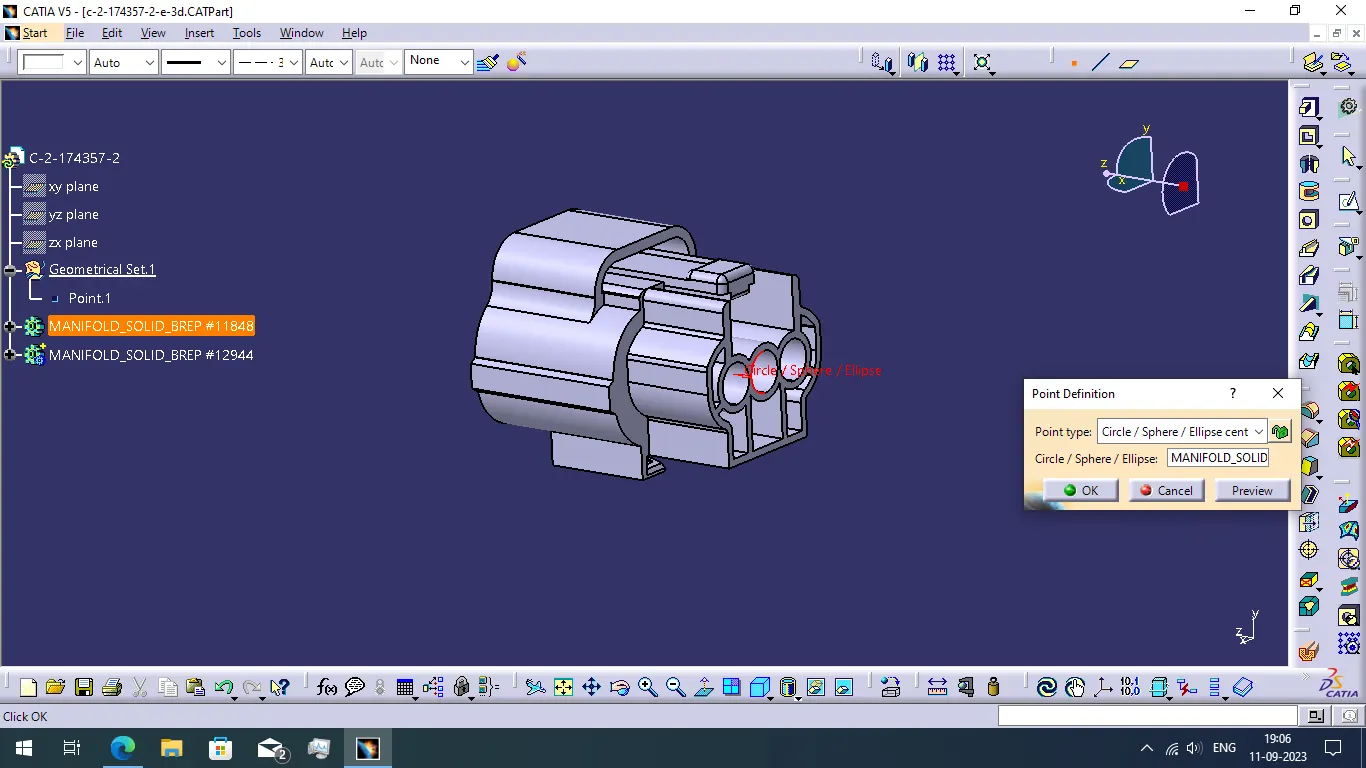
Use the point command to create bundle connection point. Use the circle center point type to create the point and select the middle connecting circle face for the point creatation.
Connector connection point:
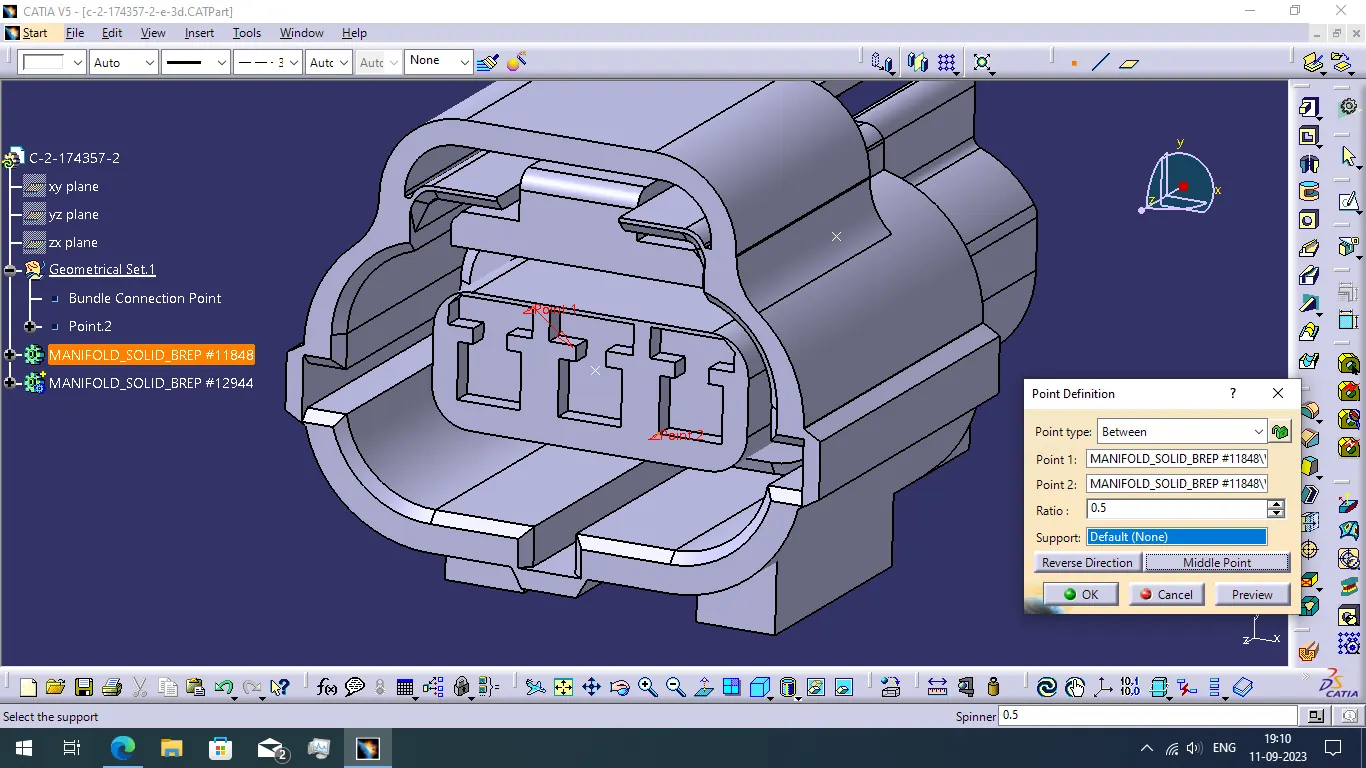
For creating the connector connection point with help of between point method. Select two random points of the connector face to creating the connection point.
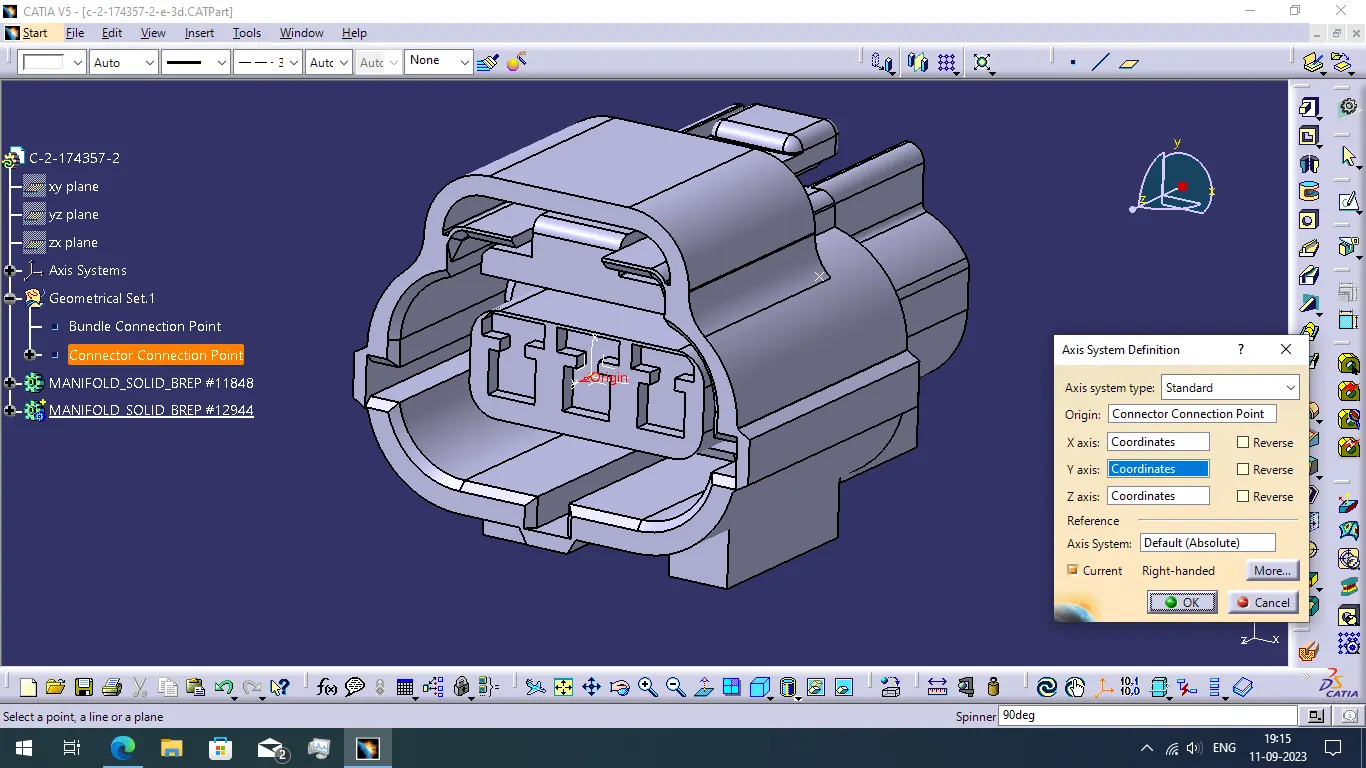
Then we want to create the axis system for the reason of assembly of the connector make easy. Form the axis system to coincidence direction is Y axis, Orientation direction is X axis.
Cavity Connection Point:
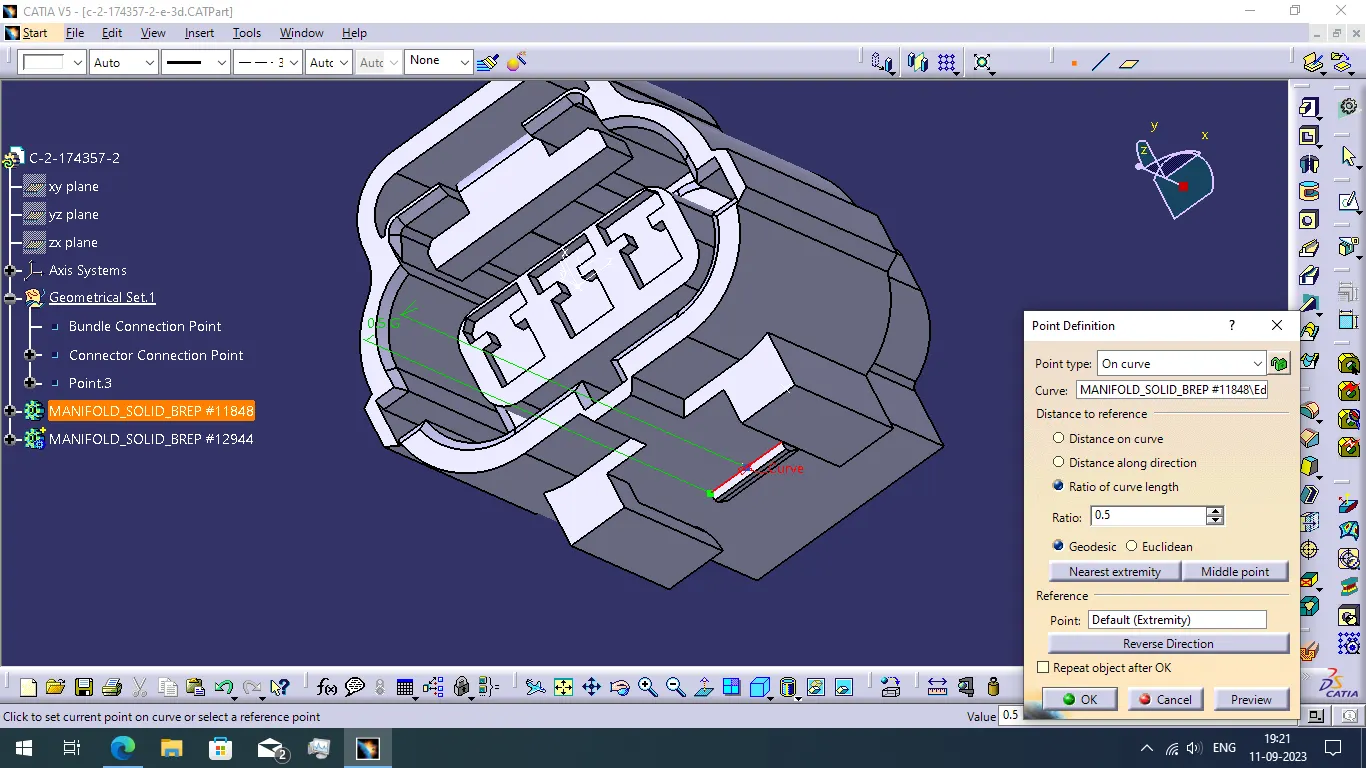
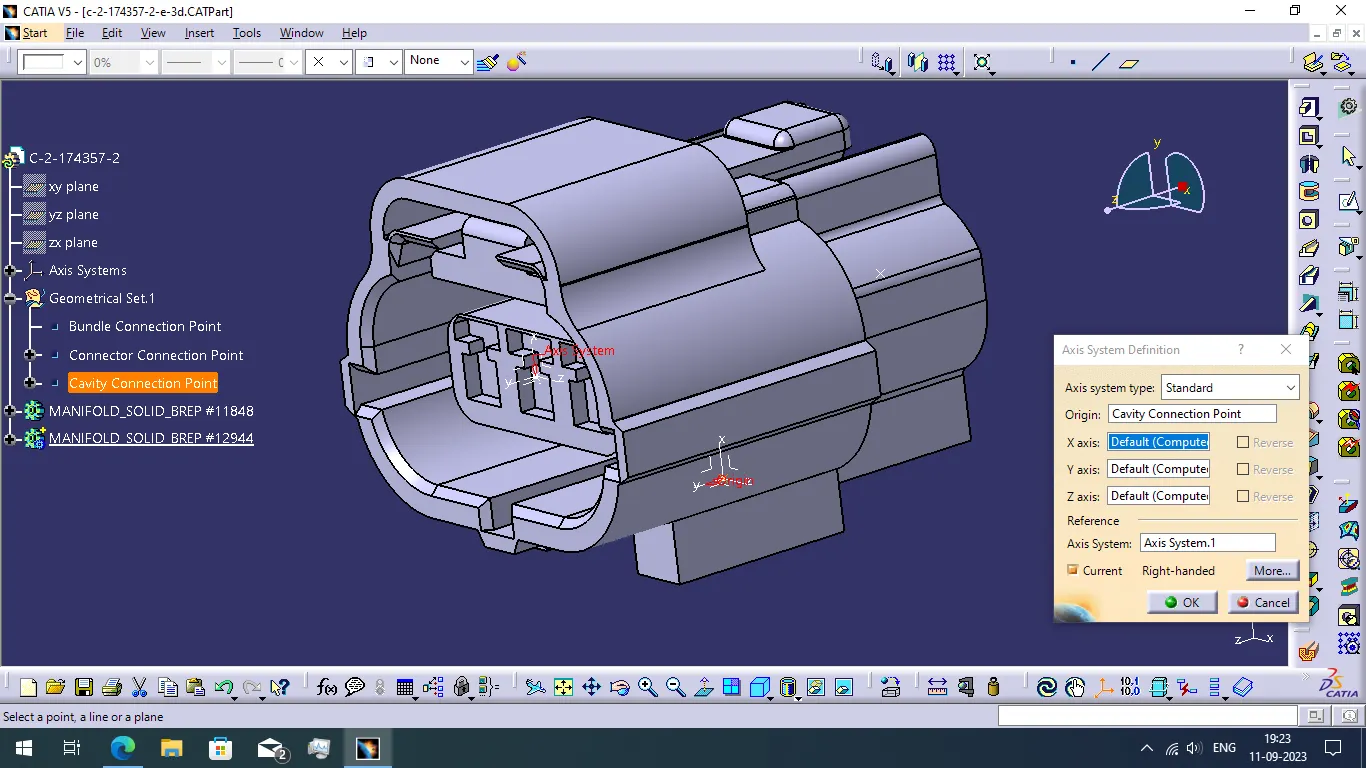
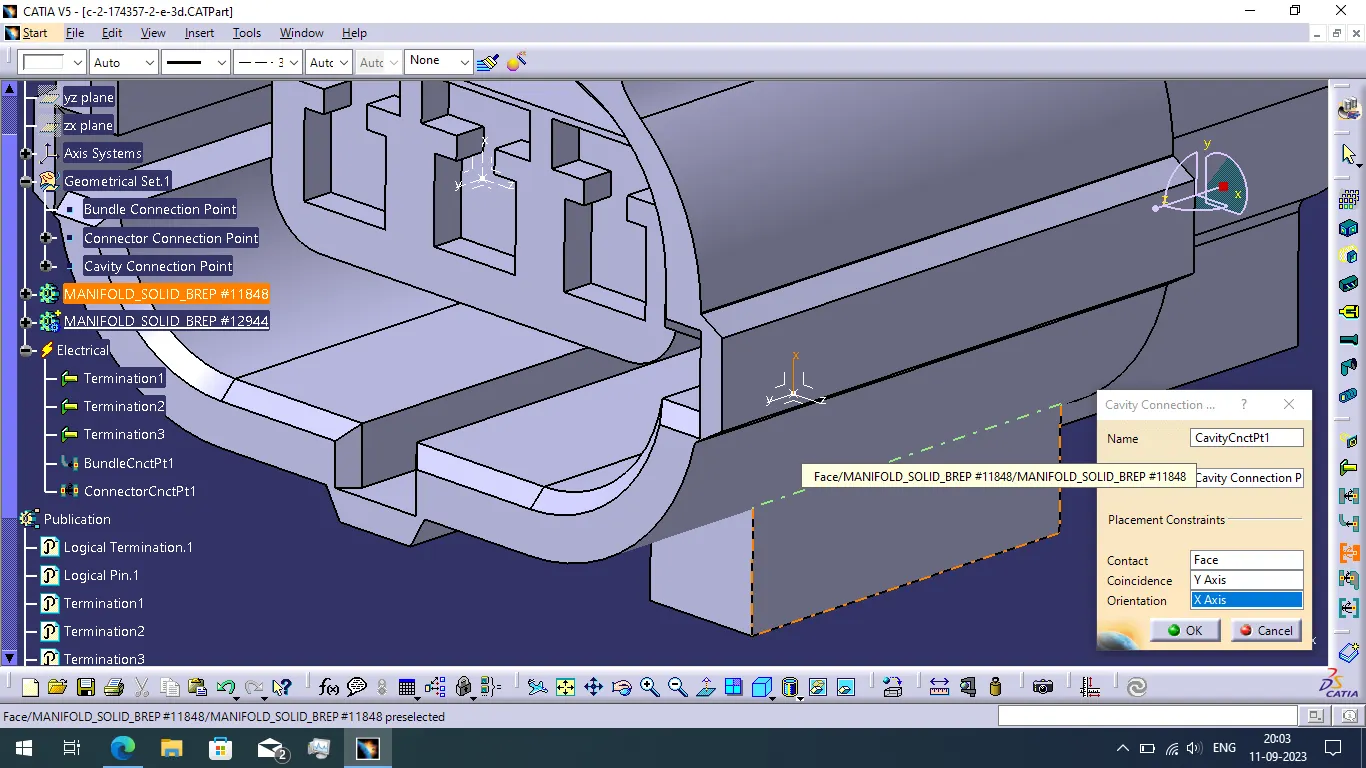
We want to create the cavity connection point to the mounting purpose. The clip is mount using this point. Also we want to create the axis system for this point.
The cavity point is created using on curve point type. And use the same direction as connection point creation method.
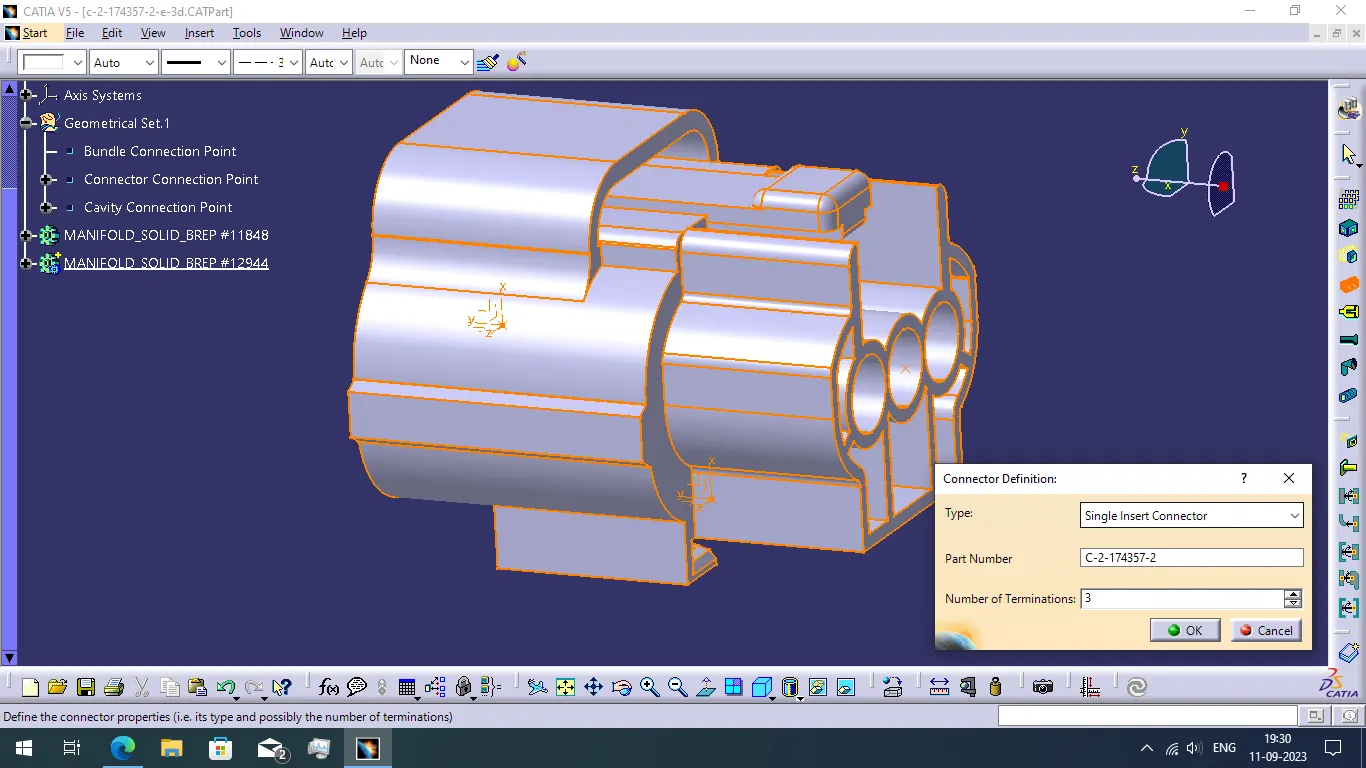
- When completed to create the connection points then we go to the electrical part design workbench. In this workbench we used to define the electrical properties of the connector and define the connection points.
- To define the connector with connector type single insert connector, number of terminations 3.
- Next we want to define the Bundle connection point, Connector connection point and cavity connection point.
- After completing the connector and connection point defined we want to add the connector to the catalogue using store device command.
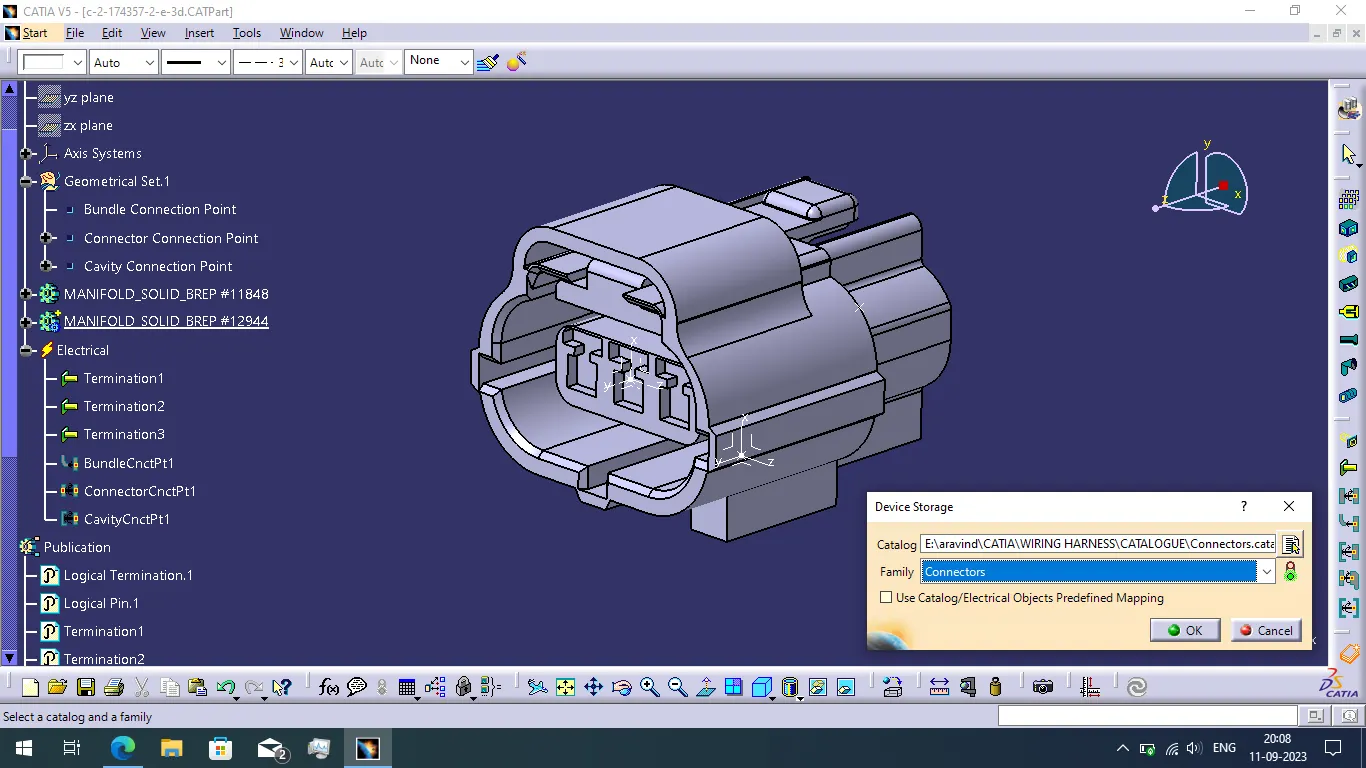
PROPERTIES OF THE CONNECTOR Tyco 174357-2:
- This is a housing for female terminal connector. It have 3 connection positions and wire to wire connection connector.
- It had a sealable and cable mount (Free-hanging) specification.
- This connector also use in the hybrid connection.
- Mating alignment type is polarization slot and with mating alignment.
- Operating temperature range is -30 to 105 oC.
Tyco 85229-1:
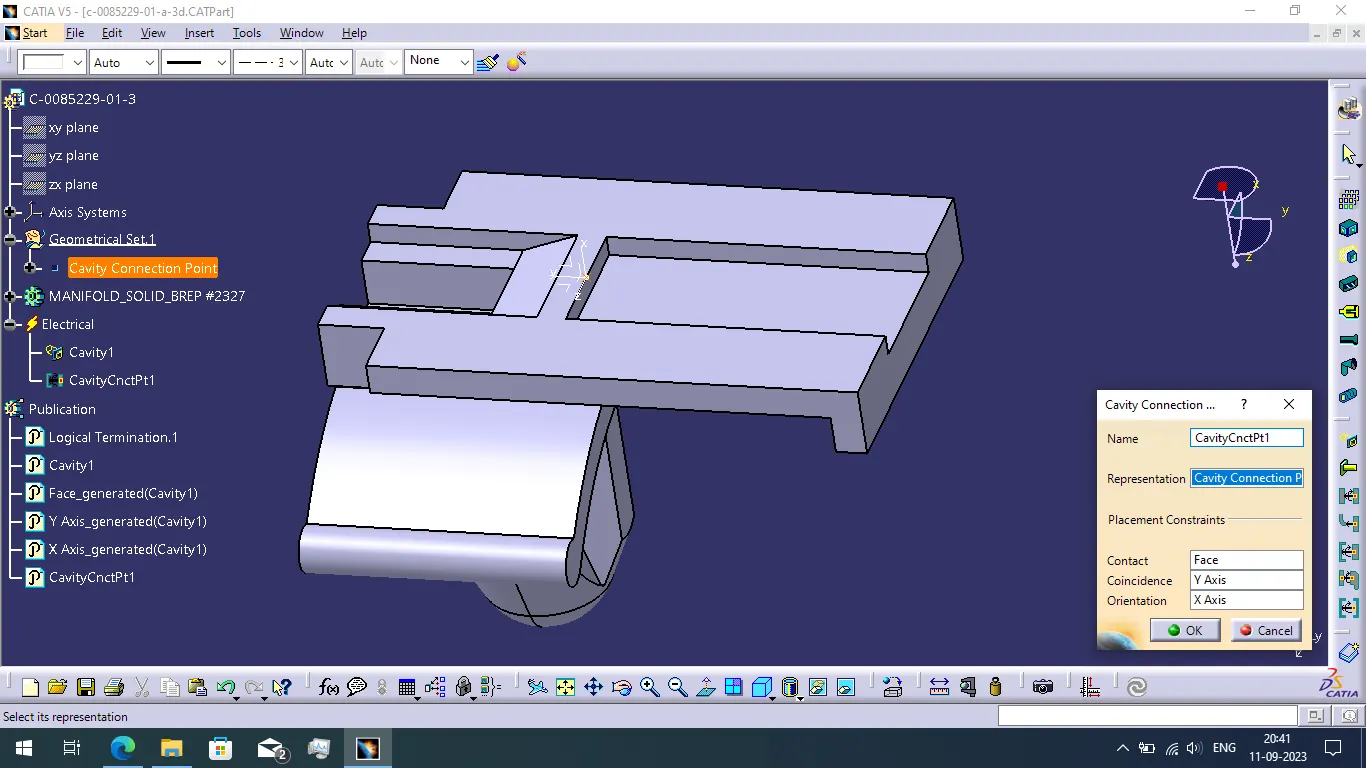
- This is the clip used to mounting the connector. In first we want to define the mounting equipment, cavity part and cavity connection point.
Cavity Connection Point:
We create the cavity point on the clip using on curve point creation method. Select the curve and use midpoint option to create the point. Then create the axis system for the purpose of easily assembly the connector and clip.
When create the axis system we consider the direction of axis cause of coincidence of the connector and locking direction of the connector as similar as the connector axis system.
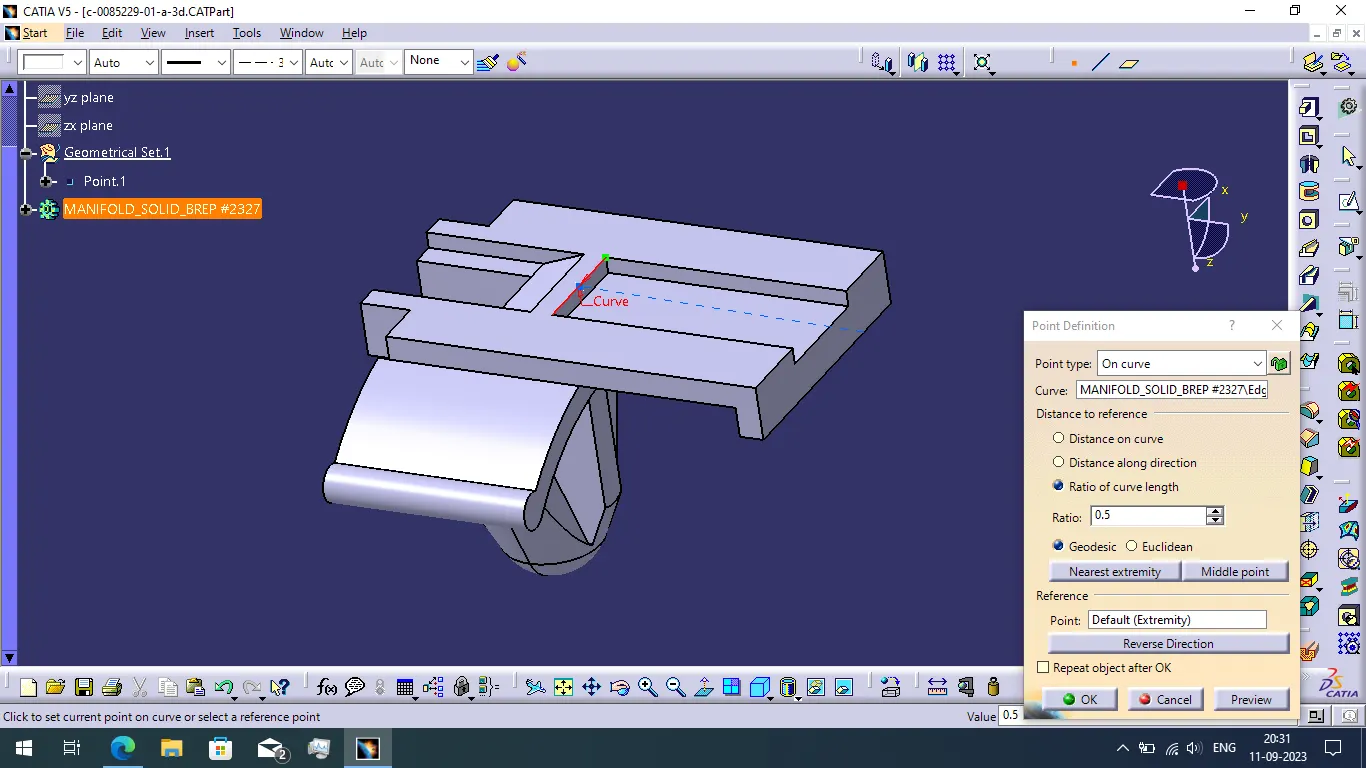
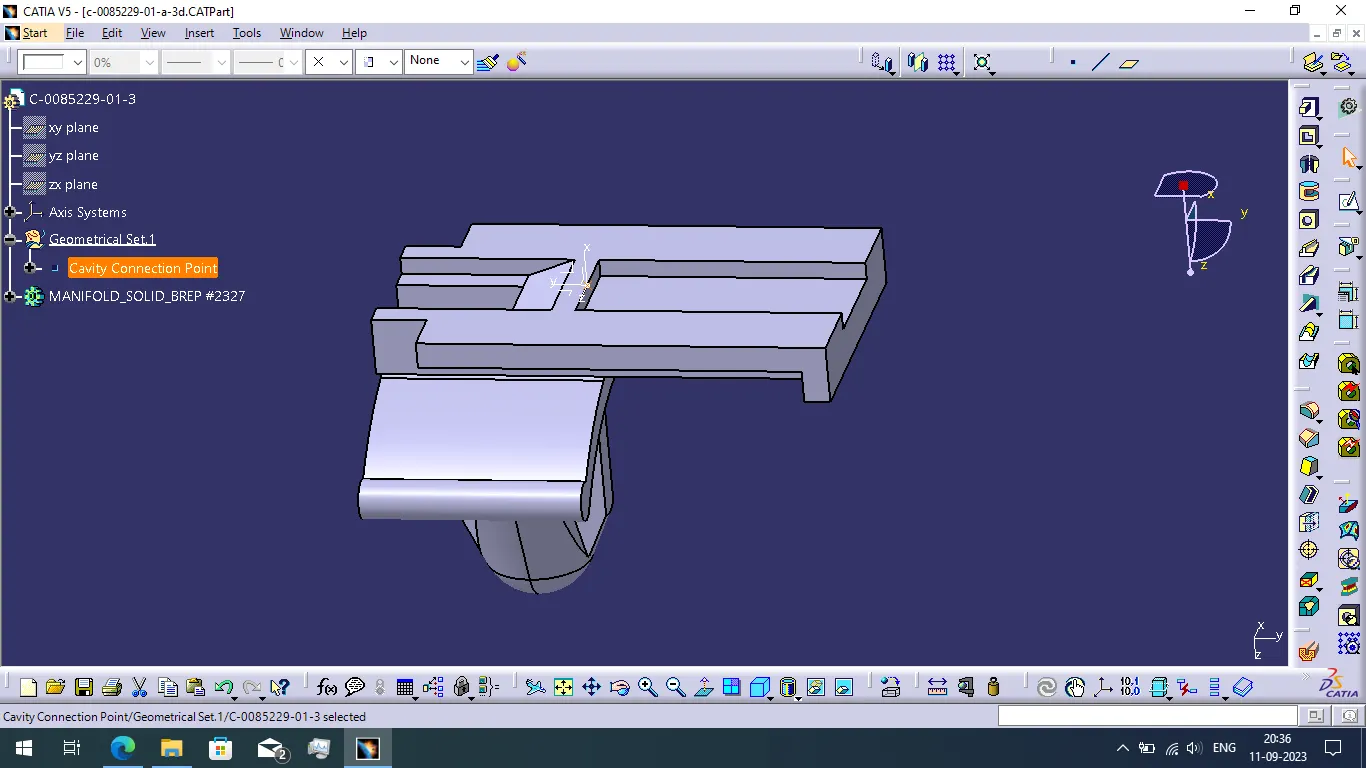
- When completing to create the point and axis system, we want to define the clip as cavity and mounting equipment. And also define the cavity point of the clip mounting.
- So we want to switch the electrical part design workbench and to the above mentioned process.
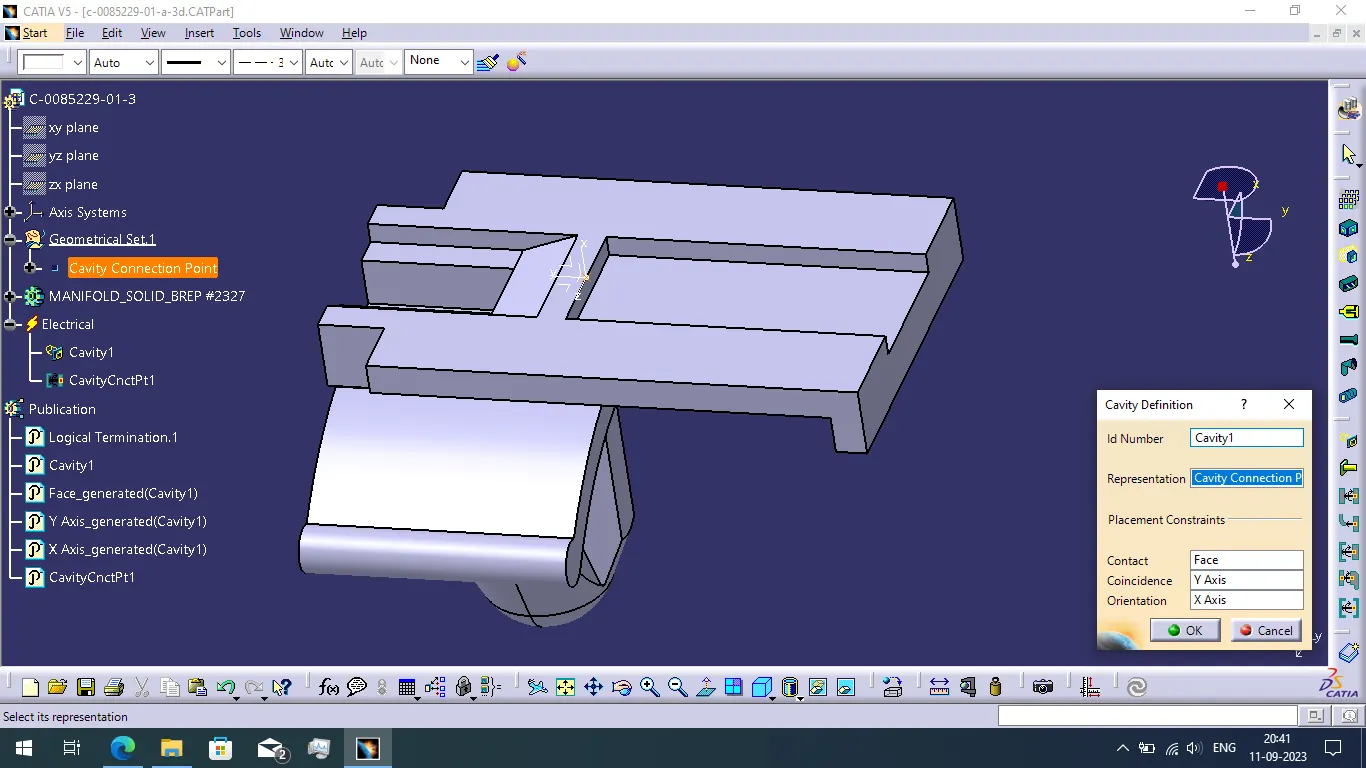
PROPERTIES OF THE CLIP Tyco 85229-1:
- Operating temperature range is -40 to 120 oC.
- UL flammability rating is UL 94V-2.
ASSEMBLY OF TYCO 174357-2 AND TYCO 85229-1:
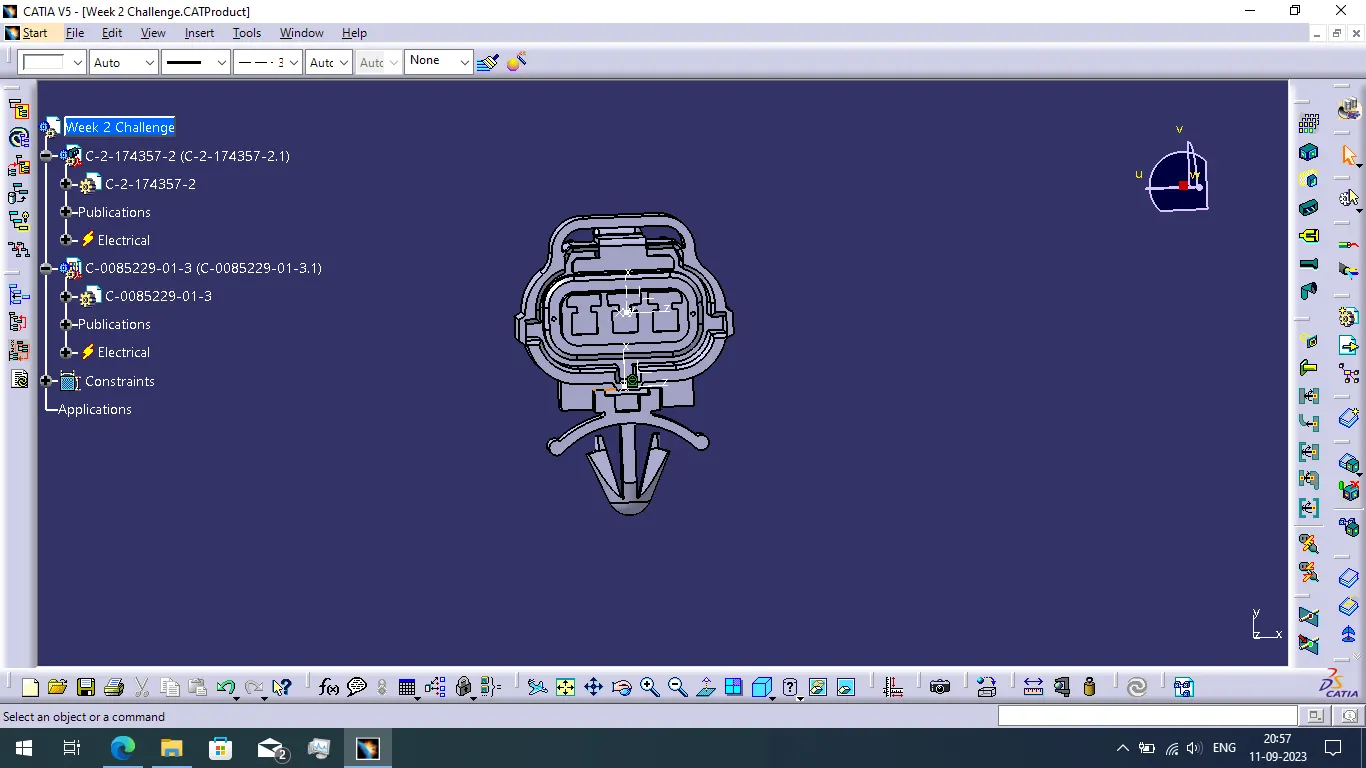
- Create the new product file and add the connector and clip to using existing component command.
- Go to the electrical assembly design workbench
- Use connect electrical devices command then select the clip and connector they are automatically assembe using created and defined cavity connection point.
CONCLUSION:
Finally, i defined the electrical connector using electrical part workbench and defined necessary properties of the connectors and clip.