Week 9 - Project 1 - Door Trim Lower with Engineering Features
Door Trim Lower with Engineering Features
AIM:
Create the Door Trim Lower Plastic component through the given Class-A surface. To begin with, the tooling axis for the given Class-A Surface should be created meeting the requirements of the draft angle and at the end perform the Draft analysis on the model.
Create the Heat Stakes and the locators considering the design rules mentioned in the video for the door applique.
NOTE:
- Sketches
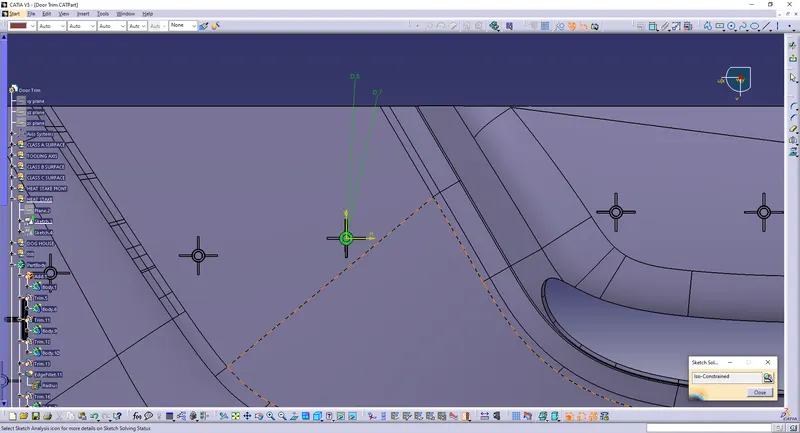
- Use Positioned sketch
- Sketches should be Iso-Constrained
- References
- Use the given points in the model to create the locators and Heat stakes
- Refer to the below-given image for more details
- Tree Structure
- Ensure Proper Tree Structure
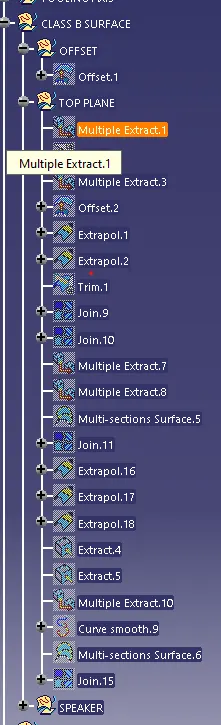
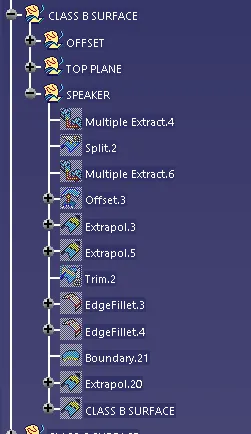
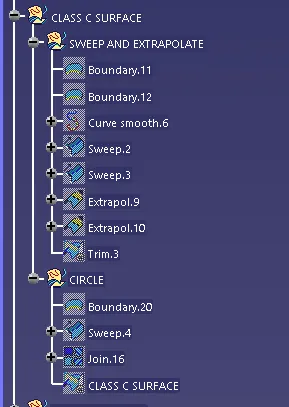
- Geometrical sets should have a proper name based on the sketches present inside of it
- All the sketches should be created under the Geometrical set
- Report
- A detailed report should be done explaining the draft analysis and the tooling axis creation.
- An explanation should be given on the way of creating the tooling axis, particularly the Bisecting method.
Submission Requirements:
- Submission in challenge box
- Below images/screenshots should be inserted into the challenge box
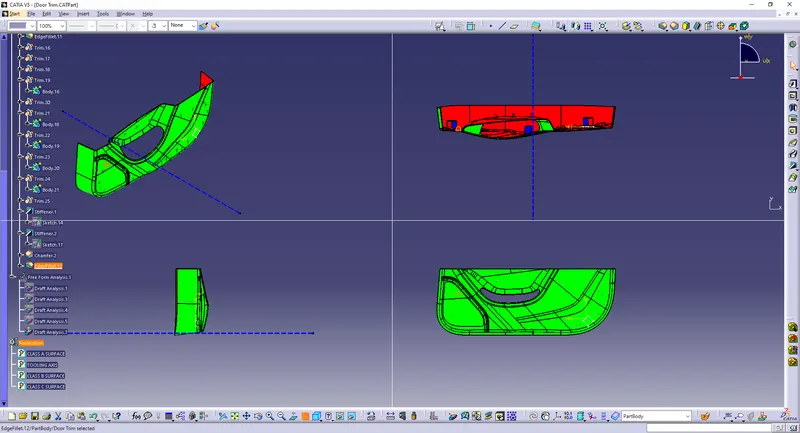
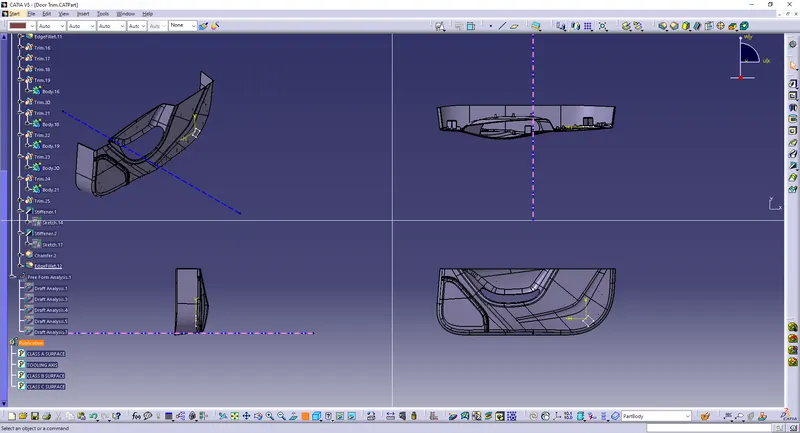
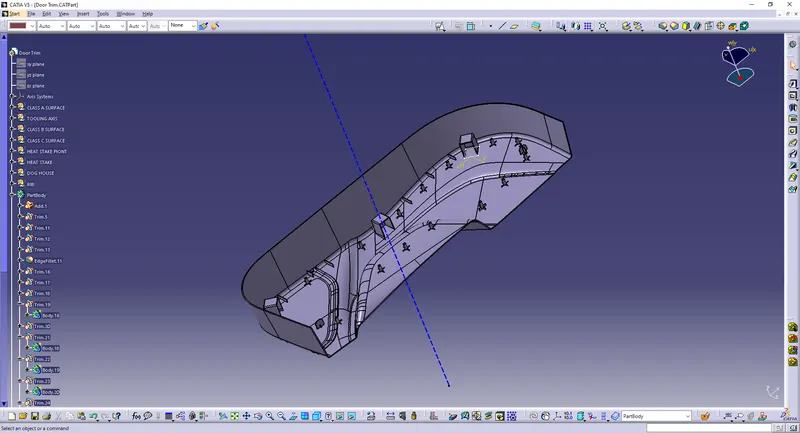
- Screenshots of the completed design in various orientations (Isometric, Front, Side, and Top View)
- Submission as an attachment
- CATpart should be submitted as an attachment using the below Browse option.
Objectives:
• Creation of Tooling axis with appropriate draft angle.
• Creation of other surfaces (eg, B and C surfaces) for creating a solid component. • Perform Draft analysis on Class A surface and Solid model hence created.
Draft
The draft is the amount of taper for moulded or cast parts perpendicular to the parting. line. Draft angles are a design consideration that makes it much easier for a part to release cleanly from a mould. A draft angle is calculated as a degree measurement (or, less often, an inch or millimetre measurement) from the vertical axis of a mould, and it helps account for thermoplastic shrinkage, a practical reality of the injection moulding process for most materials.
Draft angles are generally a requirement of injection moulding design (though there are a select few soft materials, like nylon, that can get away with draft angles of zero). The draft should be a part of the design for manufacture, and all stakeholders and contributors should be aware of its need at the outset of the design process. This includes product designers, design engineers etc and this allows considerations for design requirements to be taken into account. Any draft is always better than no draft.
Importance of Draft:
By accounting for thermoplastic shrinkage during the cooling process, draft angles significantly reduce friction between the finished, cooled part and the side of the mould, Not only does this create a much easier release process, but it also offers several other benefits, depending on the design of the part which is as follows:
• Reduces the chance of damage to the part due to friction during the release.
• Reduces wear and tear and chances of damage to the mould.
• Ensures a uniform, smooth, unscratched finish when required. • Ensures the integrity and uniformity of other surface finishes and textures.
• Reduces overall cooling time by lessening or eliminating the need for unconventional ejection setups.
• Most, if not all, of these benefits, offer either direct or indirect overall production cost reductions.
Procedure for creation of Solid model:
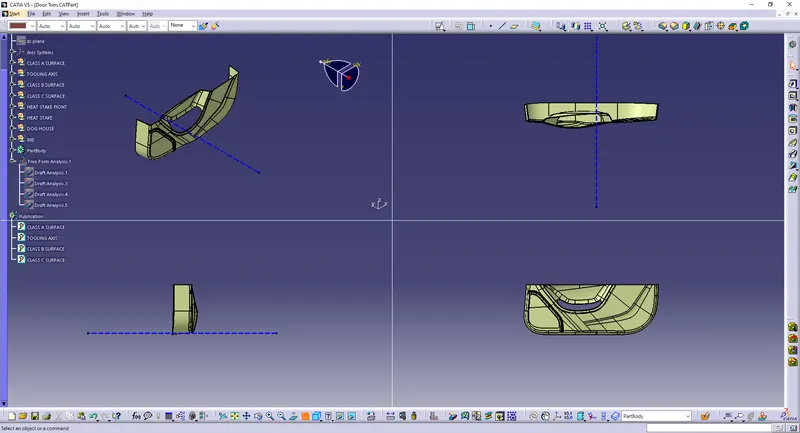
The image below shows the given class A surface for which a solid model is to be created. 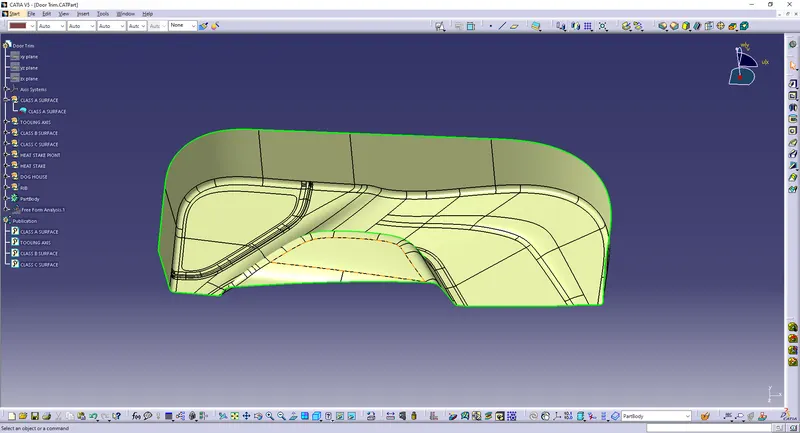
Tooling Axis creation:
It is defined as the direction in which the mould/core and cavity open. Selection of the direction of the tooling axis depends on the ease at which components can be easily ejected.
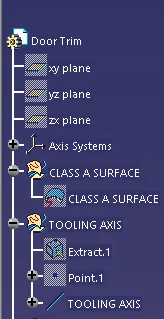
By analysing the component the most easily ejectable direction is somewhere close to the Z direction,(might be inclined to it) so we have made a sketch on the YZ plane of Axis System) to create a bisecting line considering the 2 faces which might be difficult to be tooled.
One more sketch is created on the ZX plane of Axis System for considering the lone side face for tooling direction. In the sketch, a line is drawn with a suitable angle to the lone side face so that with the resultant tooling axis the side face is cleared.
Then resultant tooling axis is created using the bisecting method.
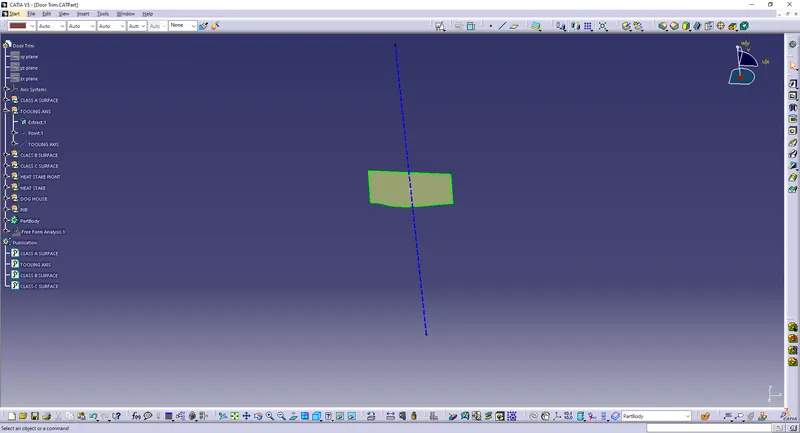
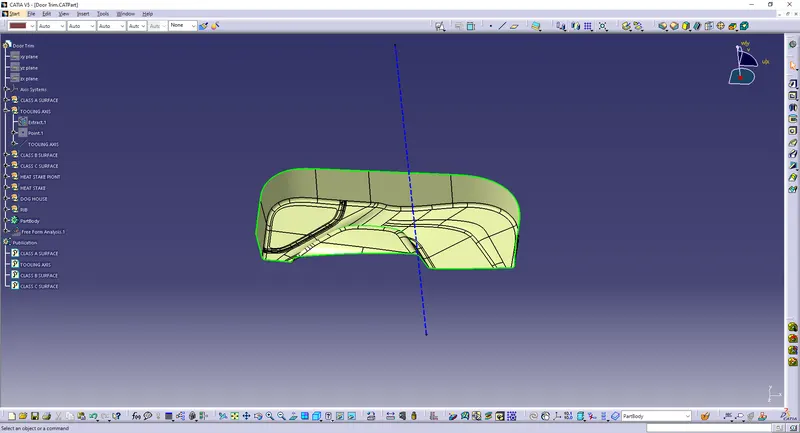
CLASS A SURFACE:
In automotive design, a Class A surface is any of a set of freeform surfaces of high efficiency and quality. Although, strictly, it is nothing more than saying the surfaces have curvature and tangency alignment – to ideal aesthetical reflection quality, many people interpret class A surfaces to have G2 (or even G3) curvature continuity to one another.
CLASS B SURFACE:
Class B surfaces are the secondary surfaces that you can see sometimes, but are less important, such as the inside of your glovebox, ash tray, etc.. These must be smooth and "error-free" as well, but are not held to the standards that class A surfaces are.
CLASS C SURFACE:
Class C surfaces are the backside surfaces that can have tool marks, flash and other imperfections without hurting appearance, function, etc.
Draft Analysis of Solid Model
Same steps are followed to get the draft analysis of the solid part as in Class A Surface
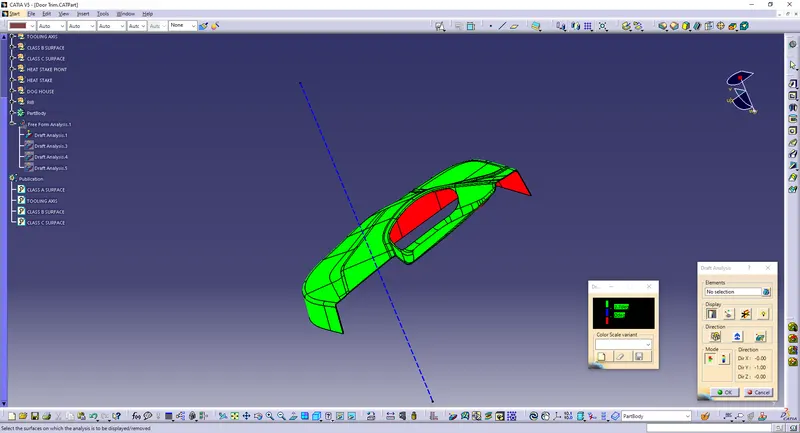
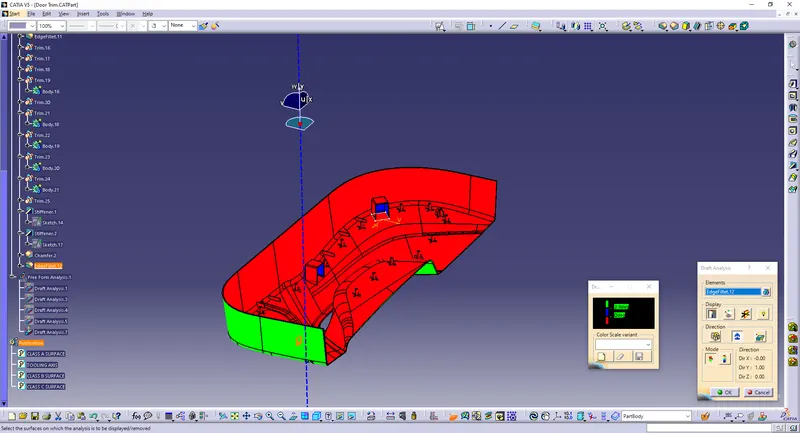
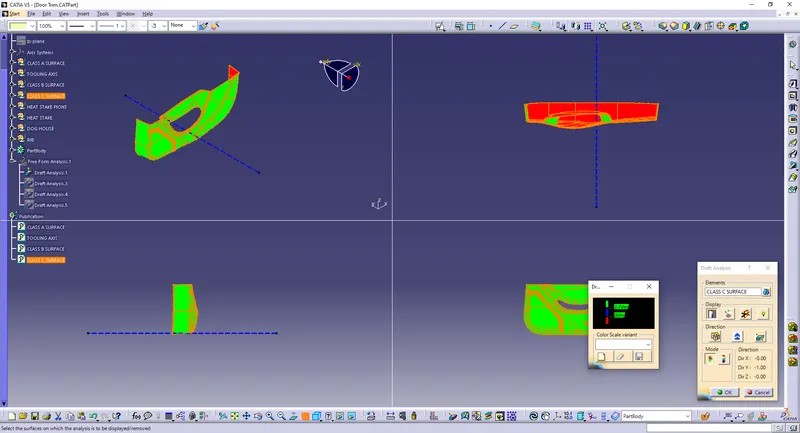
As we know minimum draft angle for the faces of the plastic component should be 3 degrees. So the value of 2.9 degrees (considering tolerance) is provided in the Draft analysis colour mode window Inside the colour scale, the GREEN bar shows the draft angle of 2.9 or above 2.9 degrees. The blue bar shows below 2.9 degrees draft angle the other limit being and the RED bar shows the negative draft angle. As shown in the image below all the top faces and side faces of the component are green, while the bottom faces are red. The line of demarcation between the green and red faces is the parting line which divides the core and cavity halves. The solid model has cleared the draft analysis successfully as shown in the image below.
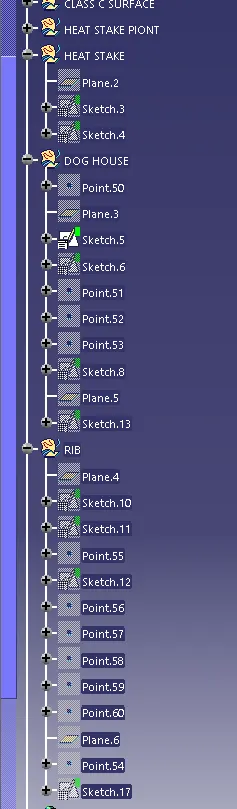
CREATING THE RIB
Ribs are thin wall protrusions that extend perpendicularly from a wall or plane. They are usually found in clusters offering support to a plane that would have otherwise been too thick, but can also be stand-alone support for a single wall. They are commonly used to provide additional support and strength to a part. Thickness and location are essential to rib design.
First, the base surface where the rib has to be created is extracted using the Extract command.
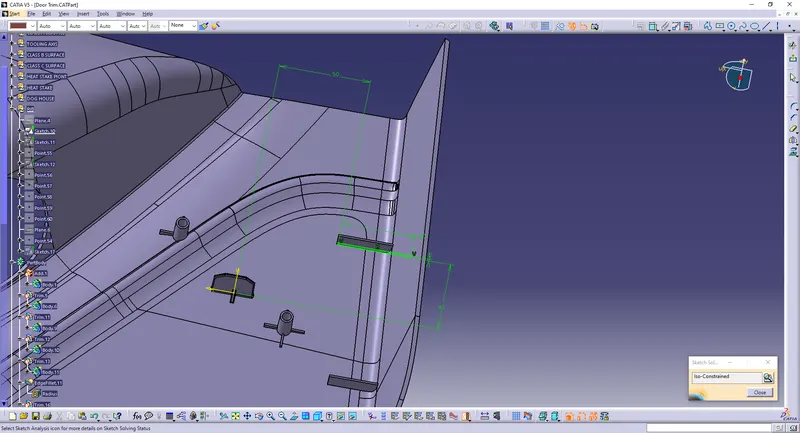
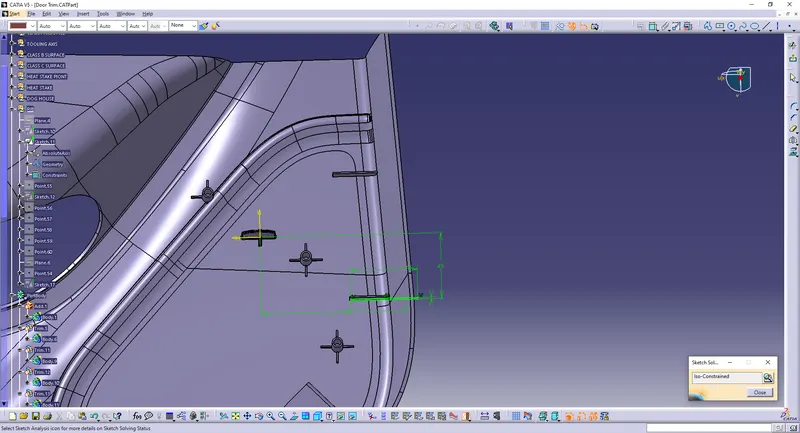
Next, the profile is extruded, to find the height,h=Wall thickness * 5
=2.5*5
= 12.5 mm
Therefore, the height is 12.5 mm
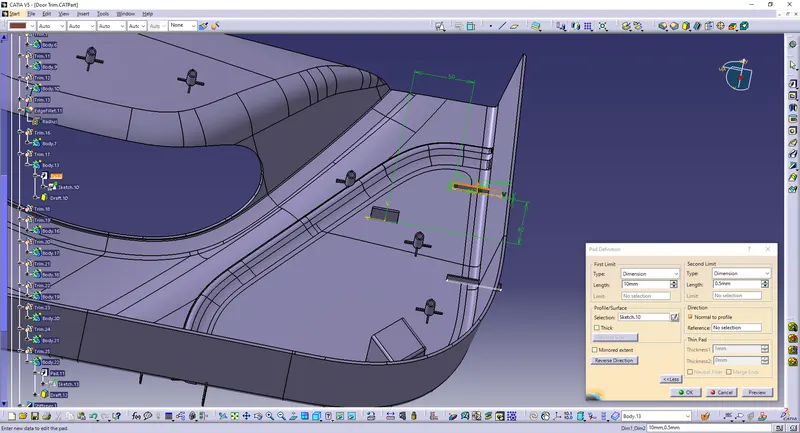
The extruded surface is thickened,
Thickness,w=0.4*t
=0.4 2.5
=1mm
Therefore, the thickness of the rib is 1 mm
The draft is applied to the sides of the ribs. As per the design rule, the ideal draft angle is 0.5 deg
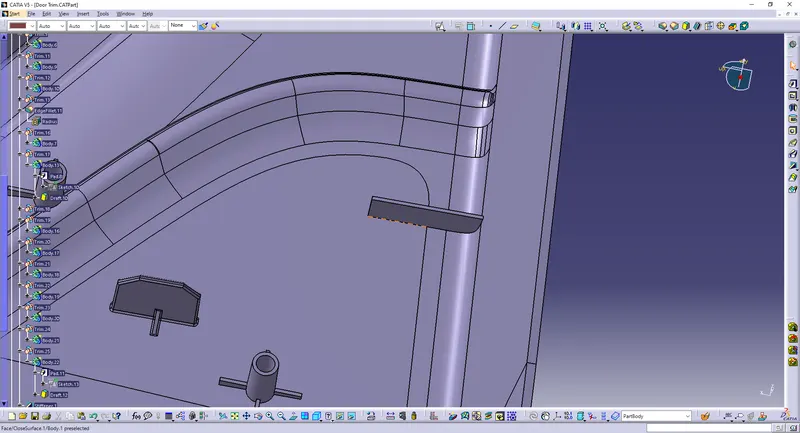
Then fillet is applied to the faces of the rib. As per the design rule, the fillet can be 0.25 mm.
Now, we have to check for the Rib root thickness.
To check for the Rib root thickness, We have to take an Intersection with the XY plane and the Coin holder component. Once we get to the intersection we have to create a tri-tangent circle at the rib area and measure it. The value must be within 30% greater of the wall thickness.
The locators restrict all the other degrees of freedom except the translation along the direction of tooling axis Le along y-axis. For restricting that degree of freedom we will be using the heat stakes.
In heat staking, we use local heating and cooling to raise the temperature of plastic components and allow plastic reforming to be carried out.
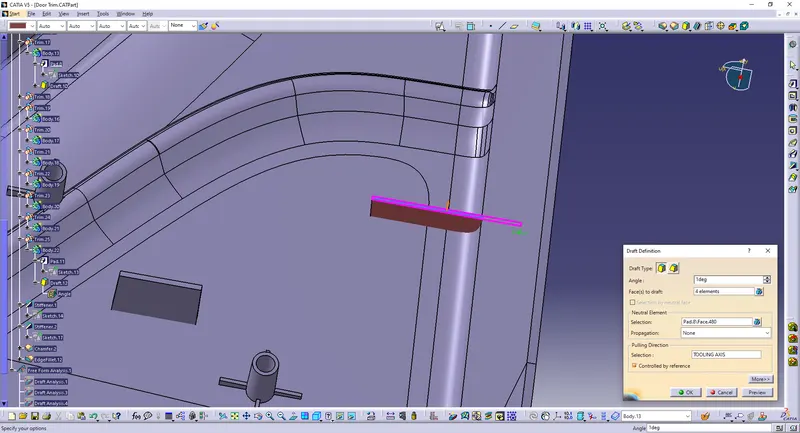
The draft is applied to the sides of the ribs. As per the design rule, the ideal draft angle is 1deg
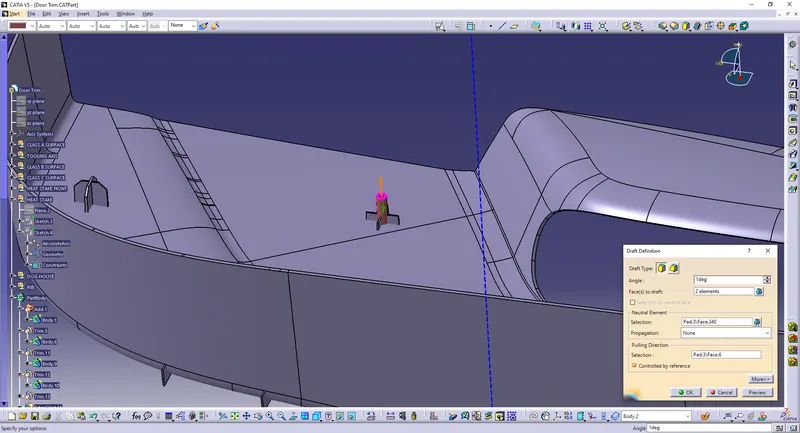
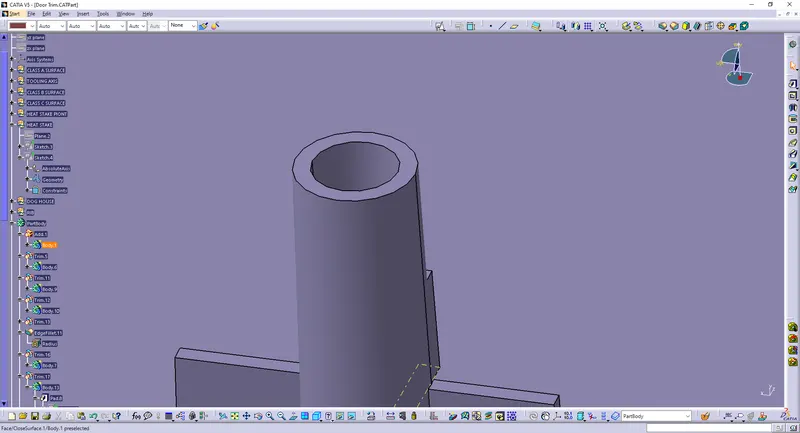
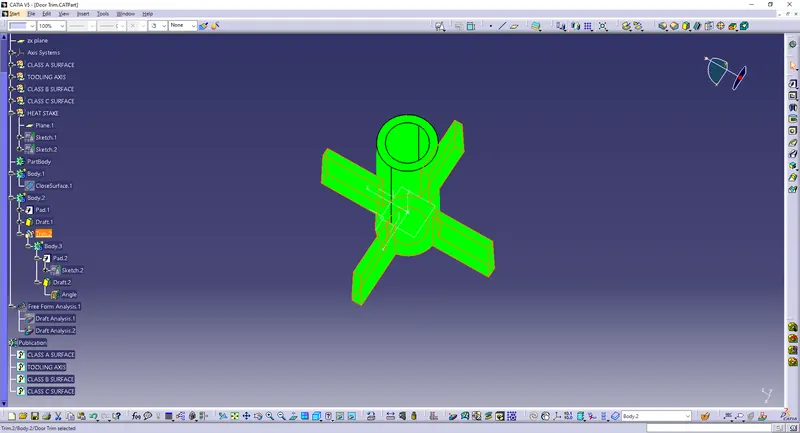
These heat stakes will enter the mating component and using a heat staking machine these heat stakes are melted and cooled. When cooled this will get hardened and the two components will stick together. Thus all degrees of freedom are arrested
Then, the ribs are created by following the rib design rules.
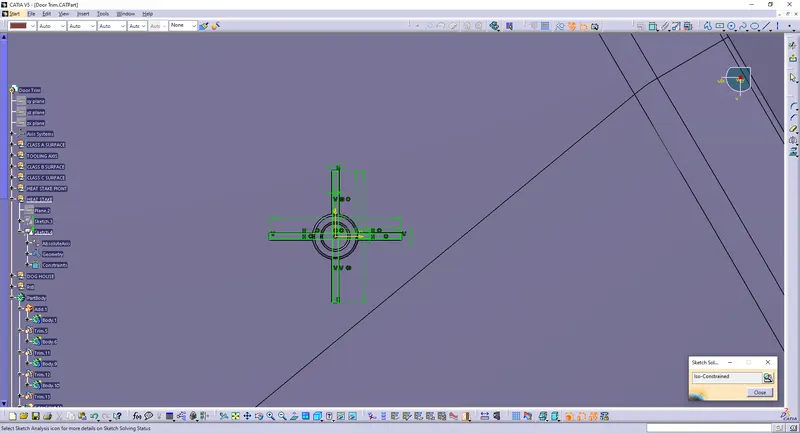
The draft is applied to the sides of the ribs. As per the design rule, the ideal draft angle is 1deg
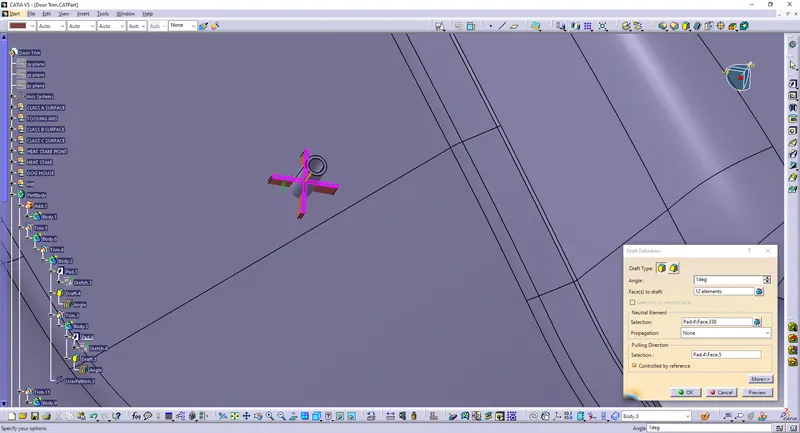
Hence, the ribs are created for the screw HEAT STAKES
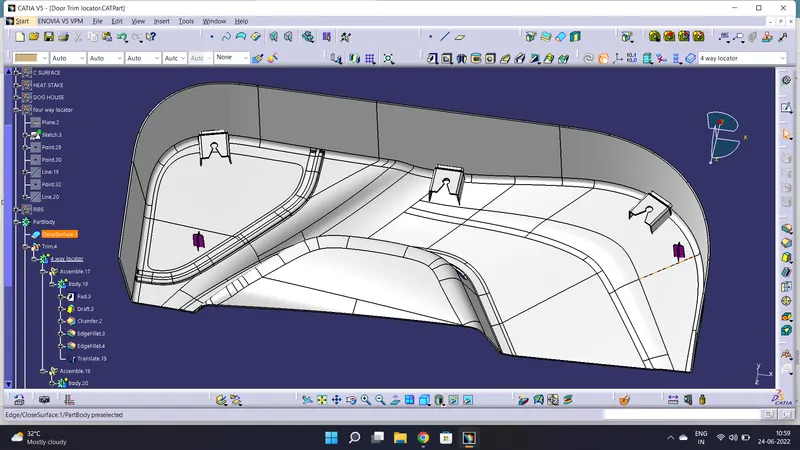
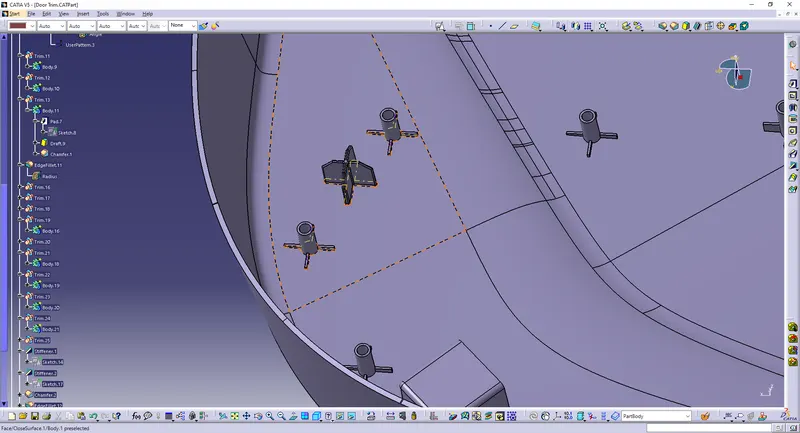
Now we will see how the plastic part is fixed onto the other plastic part. The door applique is fixed on to the door surface with the help of locators and heat stakes. Every component in space has 12 degrees of freedom. So these locators and heat stakes restrict all these degrees of freedom.
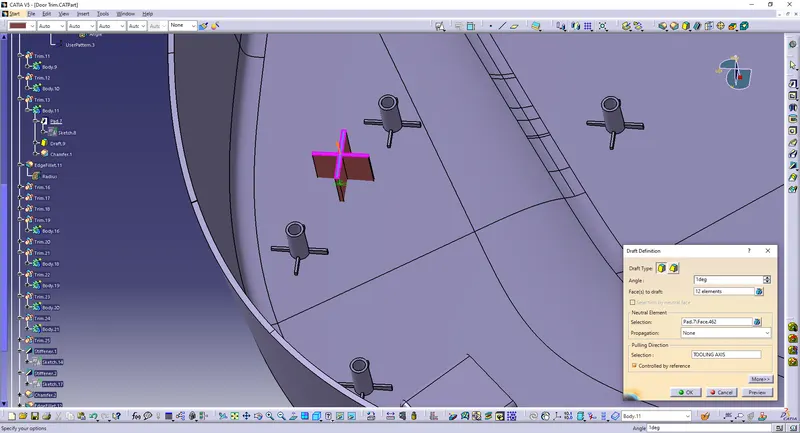
Locators are 4-way locators. The locators will follow the rib design guidelines and will be given a minimum draft of 0.5 degrees and a minimum fillet of 0.2mm and an entry chamfer of 3mm. This entry chamfer is given so that the locators can mate with the other part easily.
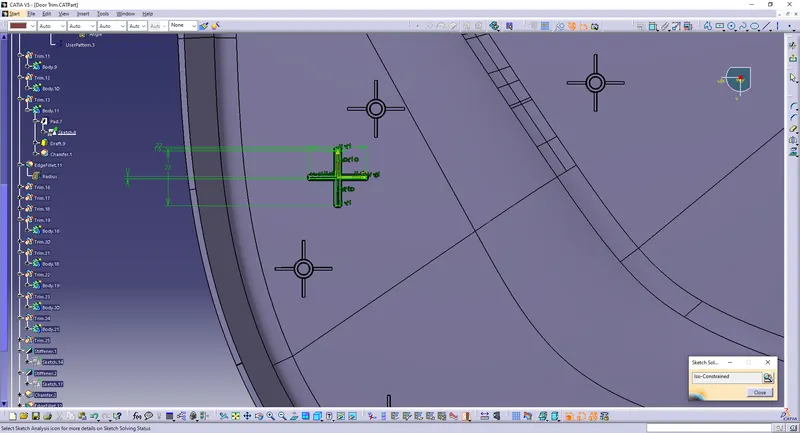
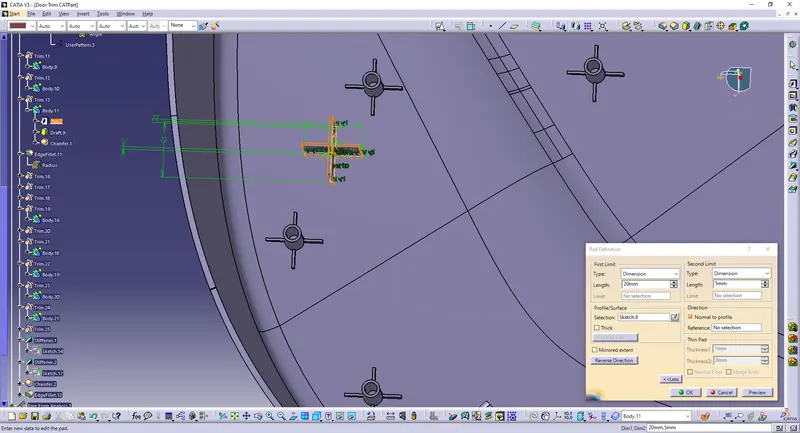
The draft is applied to the sides of the ribs. As per the design rule, the ideal draft angle is 1
deg
CREATING THE DOGHOUSE
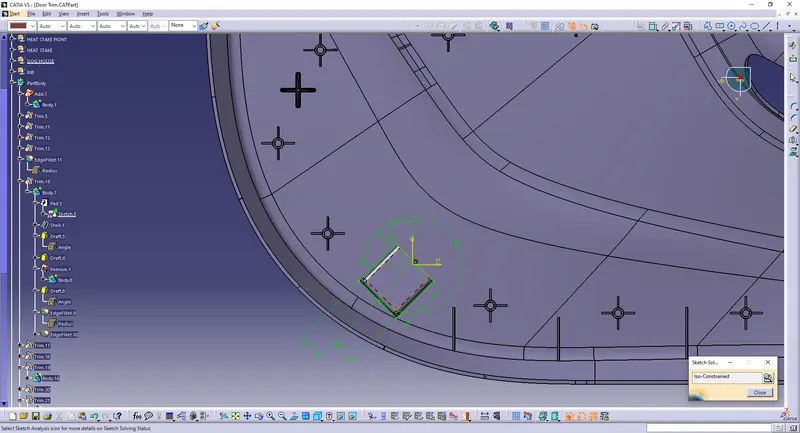
The dog house is an engineering feature used in the plastic trim design. Dog houses are used as a supporting feature. Sometimes other engineering features like snaps; locators, etc. are mounded on them to increase their strength.
The doghouse is created by following the design rules.
The nominal wall thickness guide range is from 0.75 mm to 3 mm for reinforced materials and 0.5 mm to 5 mm for unreinforced materials.
This process is usually done by Thicken surface command.
The fillets and the draft are given as per the design rules.
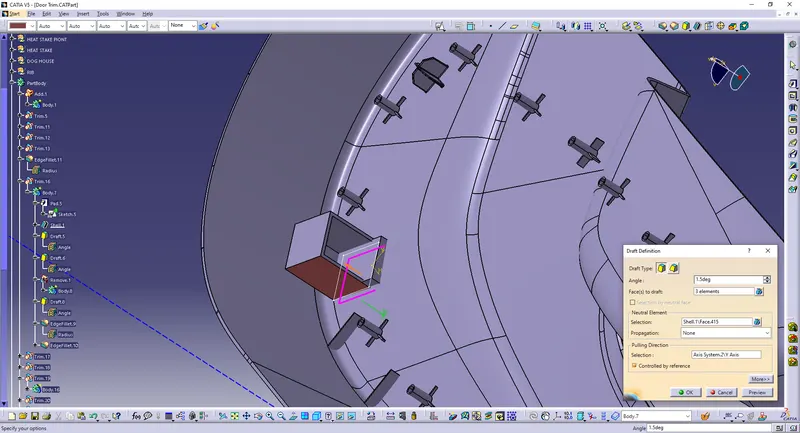
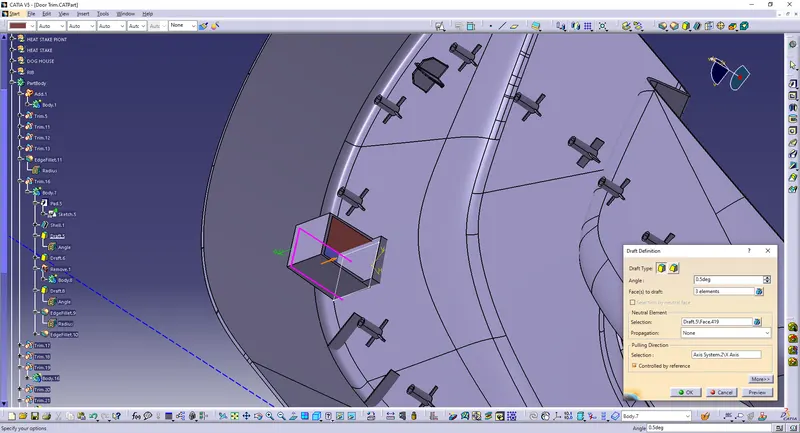
An important thing while designing a doghouse is to maintain 40% less thickness than the wall thickness (T) at the area of the intersection to avoid sink marks. So, a C shape is formed at the intersection.
This can be made using the split command to remove the solid at the intersection
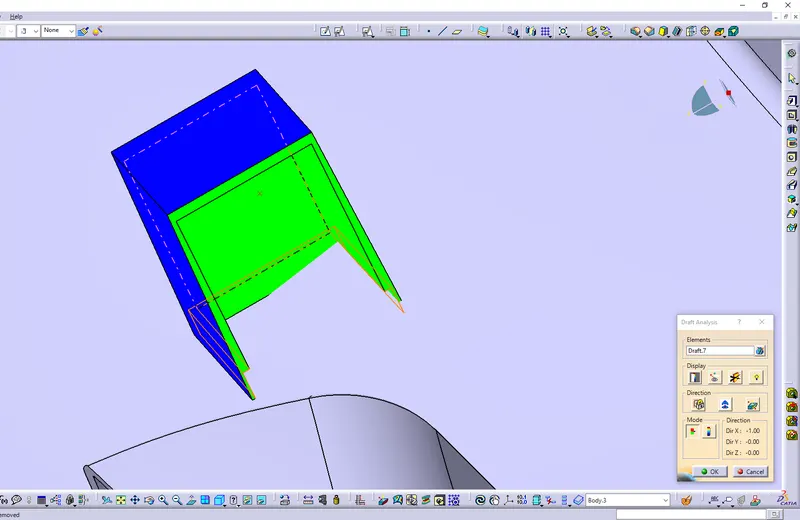
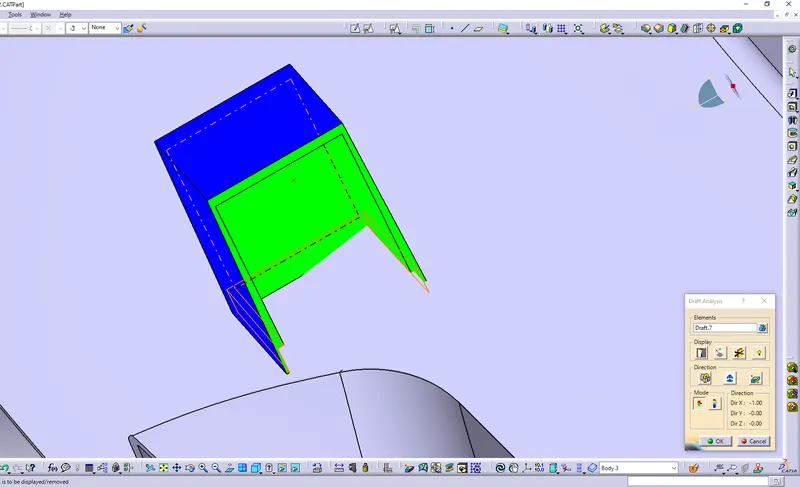
Draft Analysis