Week 9-Creation of 1D Connectors Challenge
Week 9-Creation of 1D Connectors Challenge
Objective:- To mesh the given geometry based on the given parameter and create connectors and attach to the various parts of the given model.
Target Element size - 5 Units
|
S.N |
Quality Criteria |
Value |
|
1 |
Aspect Ratio |
5 |
|
2 |
Skewness |
45 |
|
3 |
Warping |
15 |
|
4 |
Taper |
0.5 |
|
5 |
Min. Length |
2 Units |
|
6 |
Max. Length |
8 Units |
|
7 |
Min angle Quad |
45 |
|
8 |
Max angle Quad |
135 |
|
9 |
Min angle Tria |
30 |
|
10 |
Max angle Tria |
110 |
|
10 |
Tria % |
15 |
Create connectors and attach them to the various parts of the given model:-
1. Right_Rail_2 & Front_truss_1:- Seam-Quad(angled+capped+L)
2. Left_Rail_2 & Front_truss_1:- Quad elements
3. Front_truss_2, Front_truss_1 & Right_Rail_1:- Spot weld with 2 Layers and 5 mm Diameter
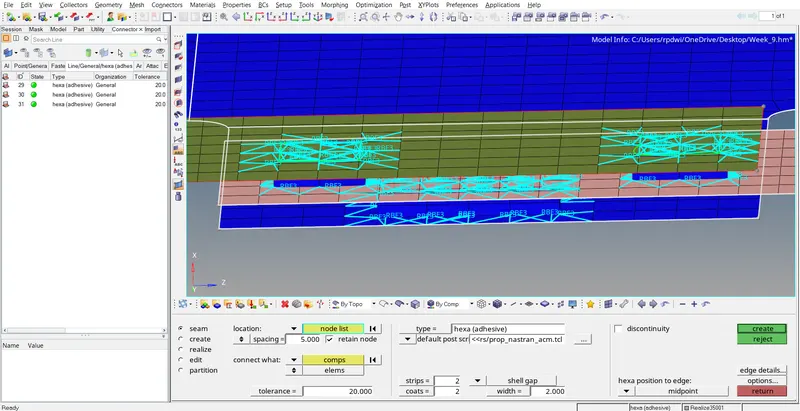
4. Front_truss_2, Front_truss_1 & Left_Rail_1:- Hexa (Adhesive)
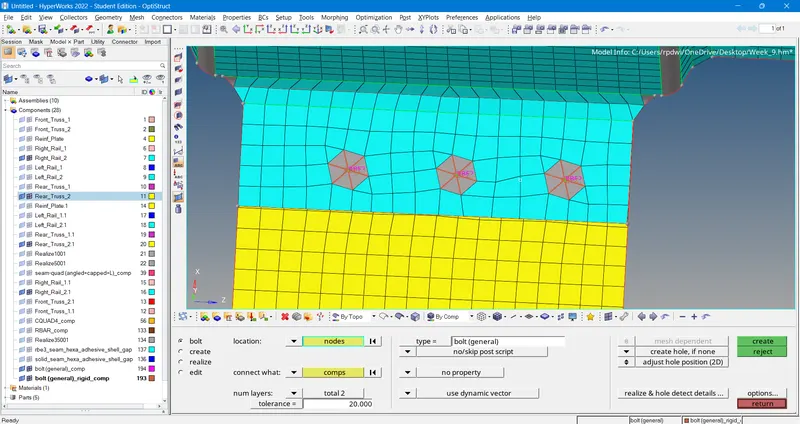
5. Rear_truss_2 & Right_Rail_2:- Bolt Connector
6. Rear_truss_2 & Left_Rail_2:- Bolt Connector
7. Right_Rail_1 & Right_Rail_2:- Spot-weld with Rigid Elements
8. Left_Rail_1 & Left_Rail_2:- Spot-weld with Spring Elements
9. Rest all the component left Join them with suitable connectors.
About CONNECTORS:- It is a geometric entity that defines the connection between other entities. It is used for welding, bolt, adhesive.
→ It links geometry or FE entities.
→ Types of connectors:-
1. Spot:-
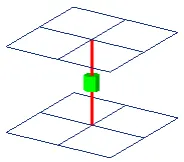 * Connection at a point.
* Spot welds, rivets, etc.
2. Bolt:-
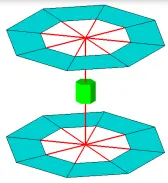 * Connection at hole location.
3. Trim mass:-
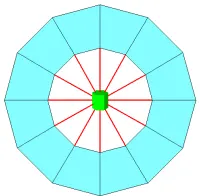
* Non-physical mass.
* Simplification through replacement of parts with mass only or adding mass to existing parts.
4. Seam:-
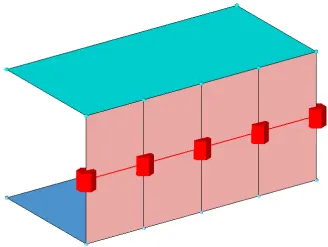
* Connection along a length.
* Connects geometry only.
5. Area:-
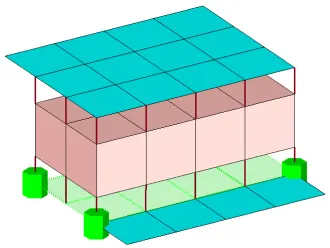
* Connection of Areas.
* Adhesives.
Procedure:-
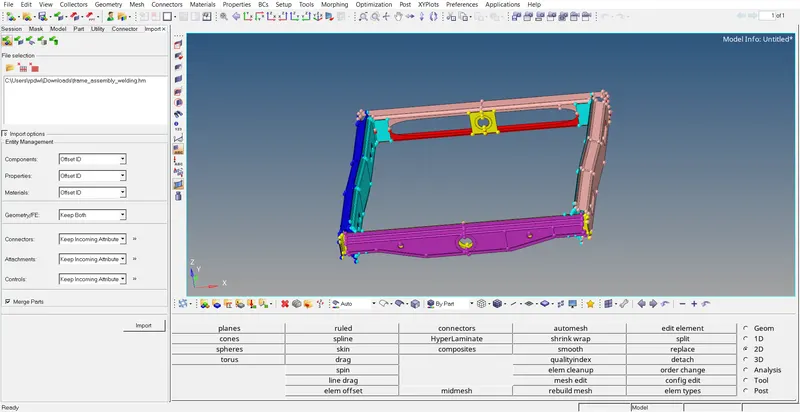
1) Import CAD model:-
this cad model file in .hm so that import this file by using option (File>Import>Model>select CAd model>import)
→ Import the given truss and rail assembly.
2 . Creating mesh on the component within given quality criteria:-
Target Element size - 5 Units
|
S.N |
Quality Criteria |
Value |
|
1 |
Aspect Ratio |
5 |
|
2 |
Skewness |
45 |
|
3 |
Warping |
15 |
|
4 |
Taper |
0.5 |
|
5 |
Min. Length |
2 Units |
|
6 |
Max. Length |
8 Units |
|
7 |
Min angle Quad |
45 |
|
8 |
Max angle Quad |
135 |
|
9 |
Min angle Tria |
30 |
|
10 |
Max angle Tria |
110 |
|
10 |
Tria % |
15 |
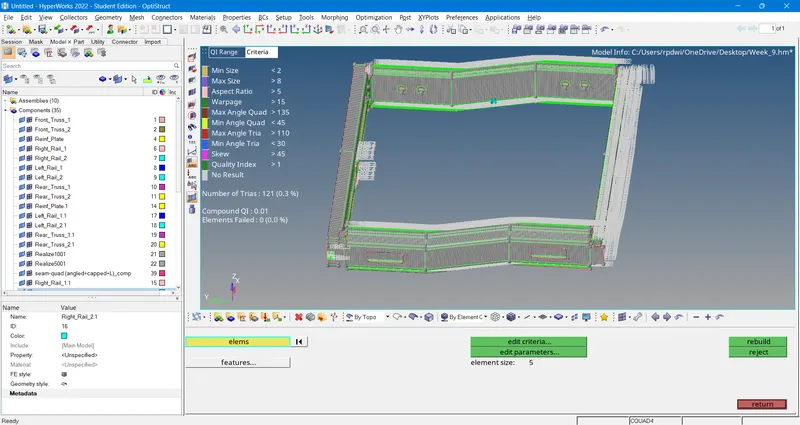
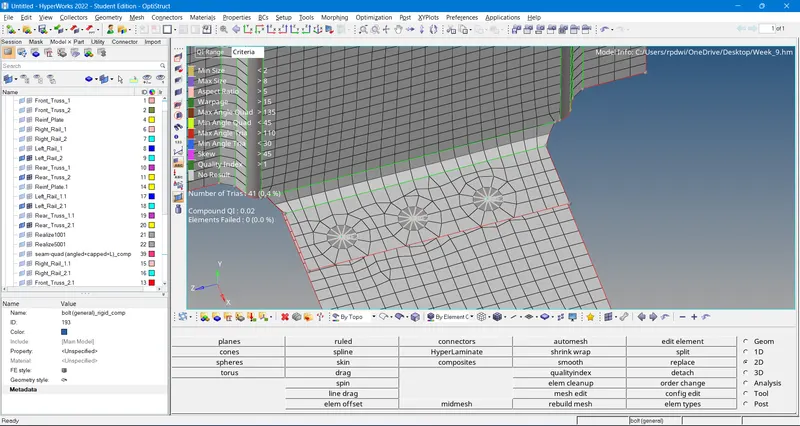
As per above Quality Criteria mesh every component one by one by using (2D>Automesh>Select surface>Enter Traget element Length As 5>Mesh)
in mesh operation once the mesh is done than rebuild mesh or using Num+-, we found best mesh flow and less element faild or achive less No of trias.
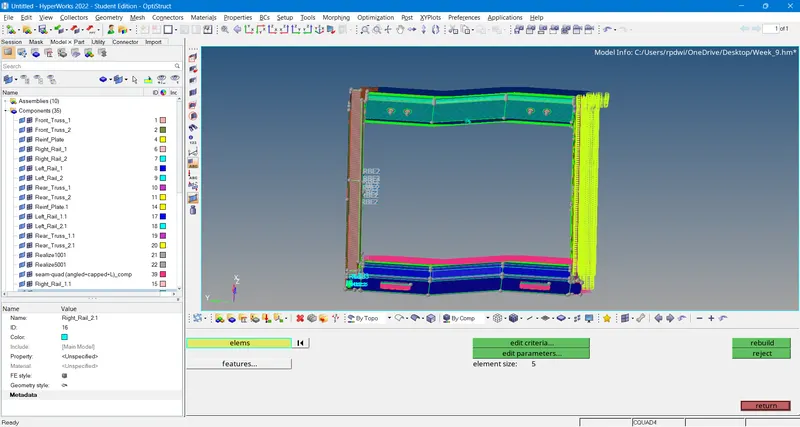
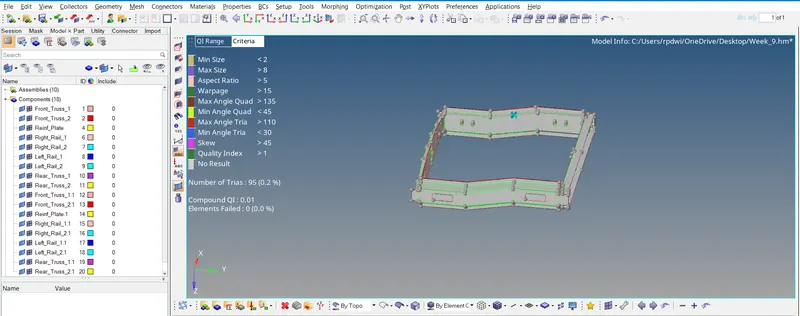
Final Image after meshing.
3) Create connector :-
Create connector and Attach the various parts of the given model
1. Right_Rail_2 & Front_truss_1:- Seam-Quad(angled+capped+L)
2. Left_Rail_2 & Front_truss_1:- Quad elements
3. Front_truss_2, Front_truss_1 & Right_Rail_1:- Spot weld with 2 Layers and 5 mm Diameter
4. Front_truss_2, Front_truss_1 & Left_Rail_1:- Hexa (Adhesive)
5. Rear_truss_2 & Right_Rail_2:- Bolt Connector
6. Rear_truss_2 & Left_Rail_2:- Bolt Connector
7. Right_Rail_1 & Right_Rail_2:- Spot-weld with Rigid Elements
8. Left_Rail_1 & Left_Rail_2:- Spot-weld with Spring Elements
9. Rest all the component left Join them with suitable connectors
1. Right_Rail_2 & Front_truss_1:- Seam-Quad(angled+capped+L):-
First, we will visible the only components which we are going to connect in the component tree window which is Right_Rail_2 & Front_truss_1 and the connector type is Seam-Quad(angled+capped+L)
Connect these two part by using (2D>Connector>Seam>Select node by path>Specing Value as 5>Comps>Select both component>Tolerance>As 20>connector type >Seam-Quad(angled+capped+L)>Create)
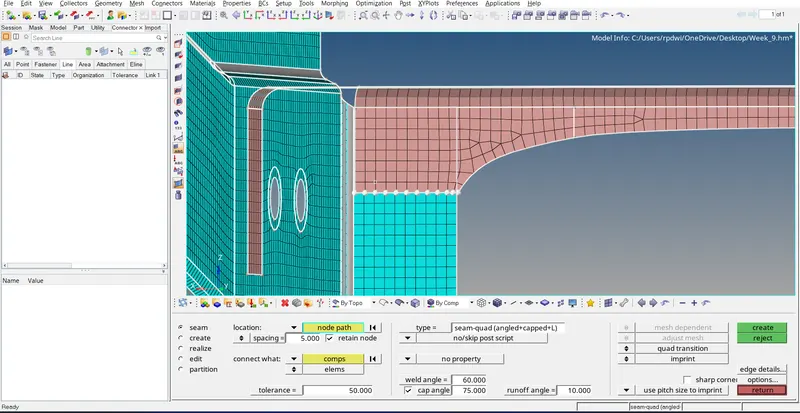
conector created As below image but mesh flow is not good to achive the good mesh flow by using (2D>Rebuild>Select surface>Rebuild)
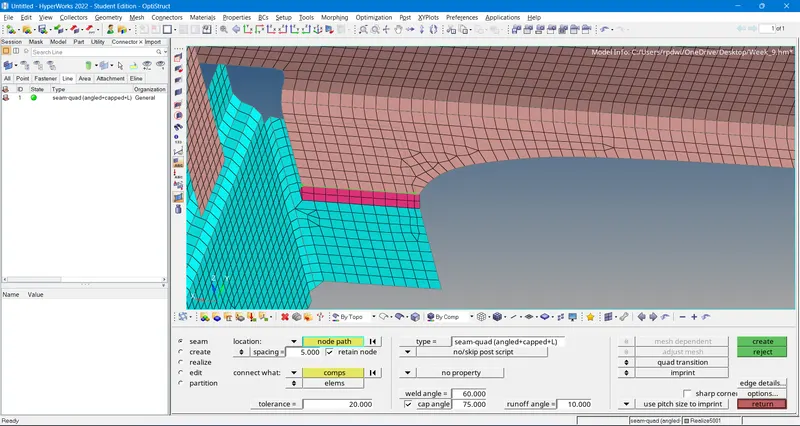
After Rebuild Good mesh flow achive
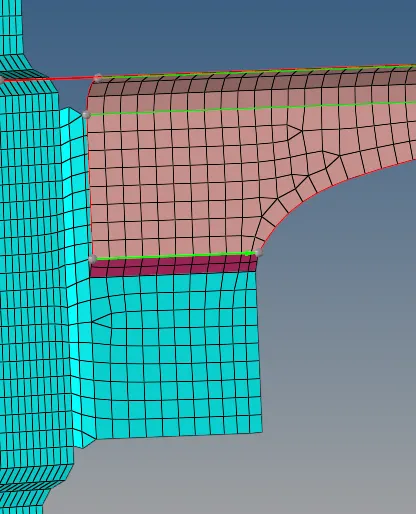
2. Left_Rail_2 & Front_truss_1:-
To achive this conctor following Some stage as follow:-
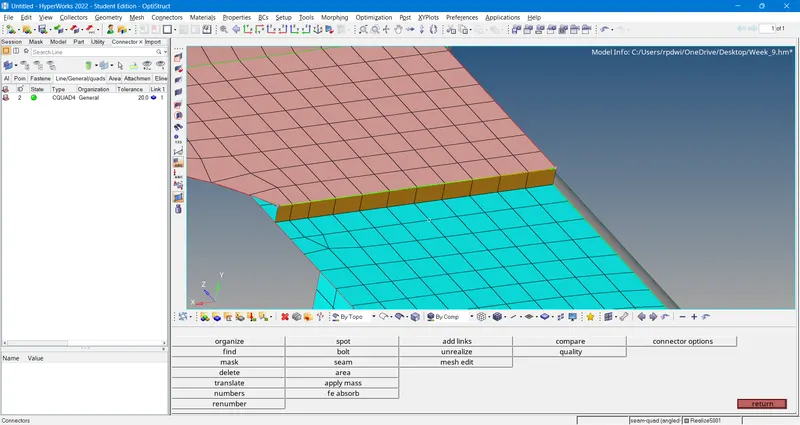
- Go To ((2D>Connector>Seam>Select node by path>Specing Value as 5>Comps>Select both component>Tolerance>As 20>connector type >Quads>Create)
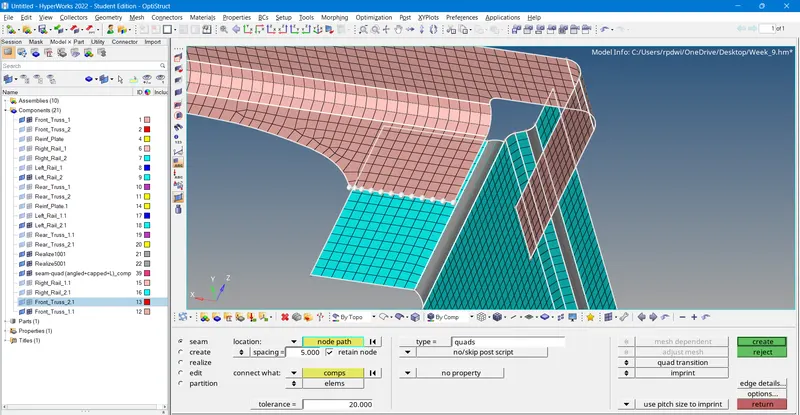
- Connector Create A below image
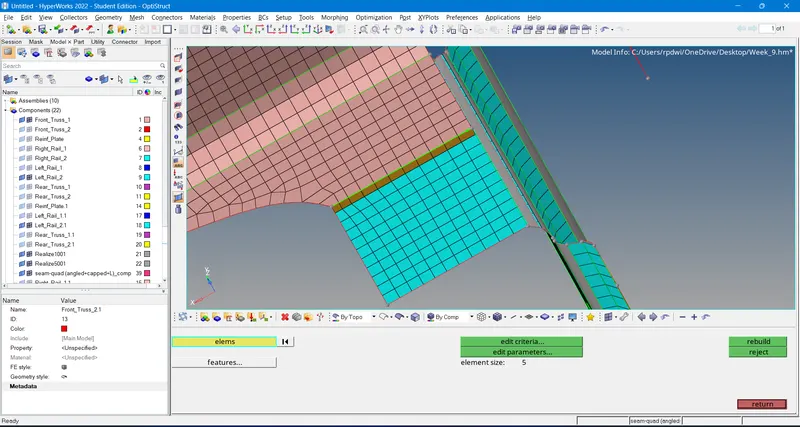
- Improve mash flow By iusing (2D>Rebuild>Select surface>Rebuild)
3. Front_truss_2, Front_truss_1 & Right_Rail_1:-
Go To (2D>CONNECTOR>SPOT>LOCATION(NODES)>SPACING(which we are using according to our connector type>CONNECTION WHAT(three components we are going to connect>number of layers (2)>TOLERENCE(10.00)> Diameter (5)>TYPE(connector type as (weld))>CREATE.
Result
After comletion of spot weld, the component will be connected as shown below image:-
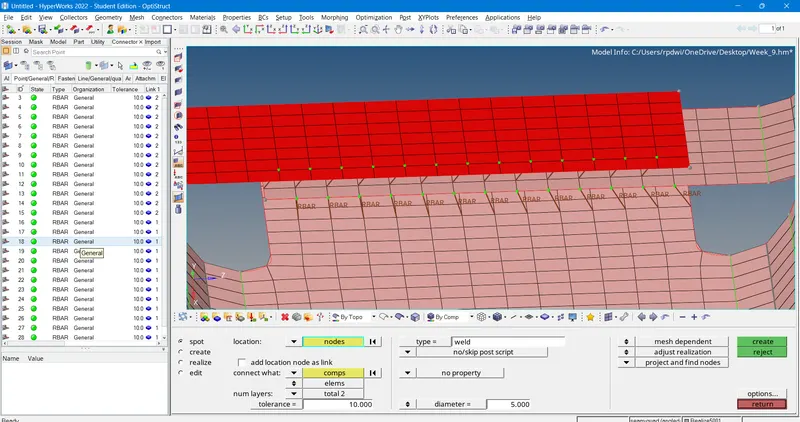
4. Front_truss_2, Front_truss_1 & Left_Rail_1:- Hexa (Adhesive)
(2D>Connector>Seam>Select node by path>Specing Value as 5>Comps>Select twocomponent>Tolerance>As 20>connector type >Hexa (Adhesive)>Strip(2)>Coats(2)>Width(2)>Create)
After comletion of Seam weld, the component will be connected as shown below image:-
5. Rear_truss_2 & Right_Rail_2:- Bolt Connector
Go to (2D>CONNECTOR>BOLT>LOCATION(NODES)>Select component>Tolerance>Type>Bolt (General)>Crate hole if need>Create)
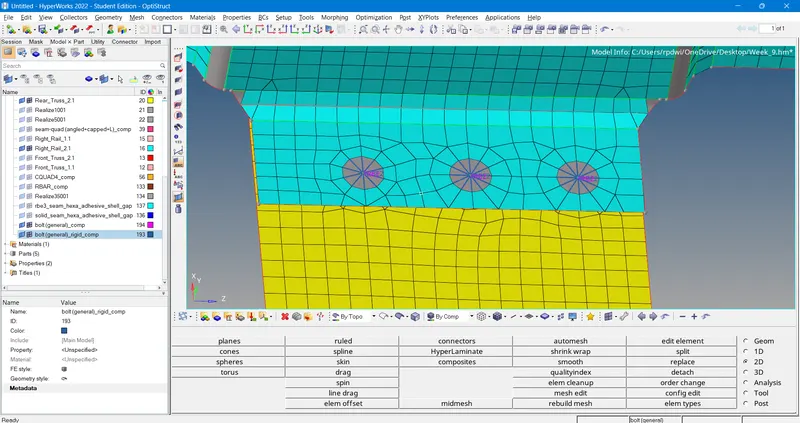
- Improve mash flow By iusing (2D>Rebuild>Select surface>Rebuild)
6. Rear_truss_2 & Left_Rail_2:- Bolt Connector
Go to (2D>CONNECTOR>BOLT>LOCATION(NODES)>Select component>Tolerance>Type>Bolt (General)>Crate hole if need>Create)
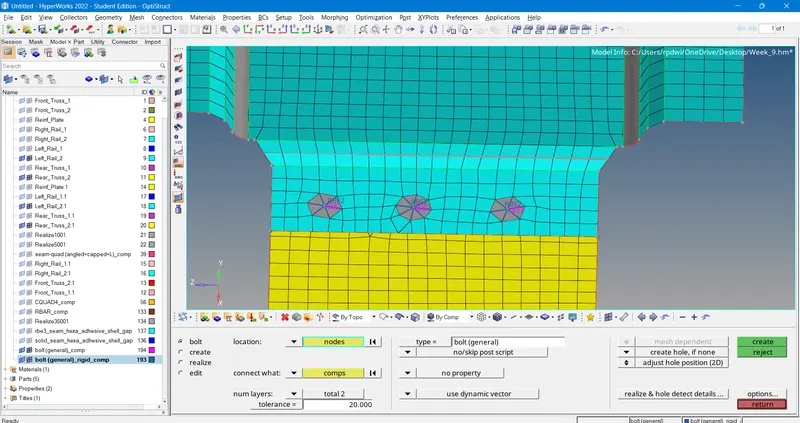
- Improve mash flow By iusing (2D>Rebuild>Select surface>Rebuild)
7. Right_Rail_1 & Right_Rail_2:- Spot-weld with Rigid Elements
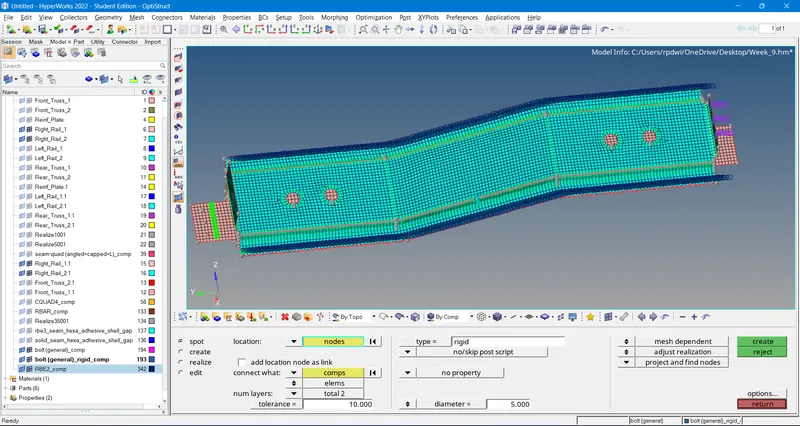
2D>CONNECTOR>SPOT>(NODES)>CONNECTION WHAT(two components we are going to connect>number of layers (2)>TOLERENCE(10.00)>Diameter(5) >TYPE>Spot weld(Rigid element ))>CREATE)
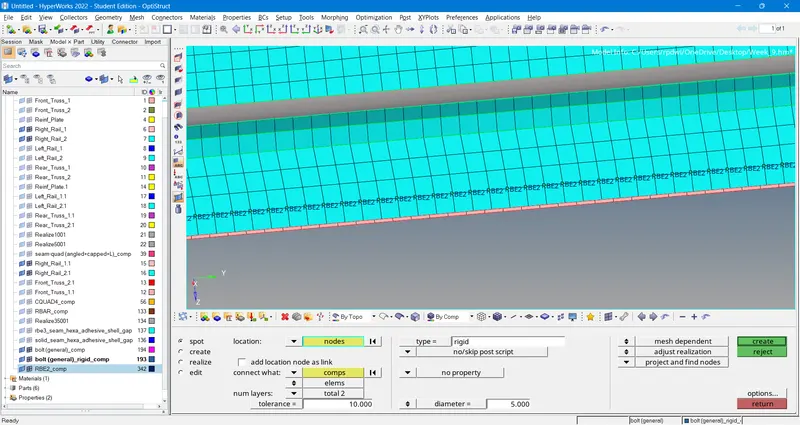
After comletion of Spot weld with Rigid element, the component will be connected as shown below image:-
8. Left_Rail_1 & Left_Rail_2:- Spot-weld with Spring Elements
2D>CONNECTOR>SPOT>(NODES)>CONNECTION WHAT(two components we are going to connect>number of layers (2)>TOLERENCE(10.00)>Diameter(5) >TYPE>Spot weld(Spring element )>CREATE)
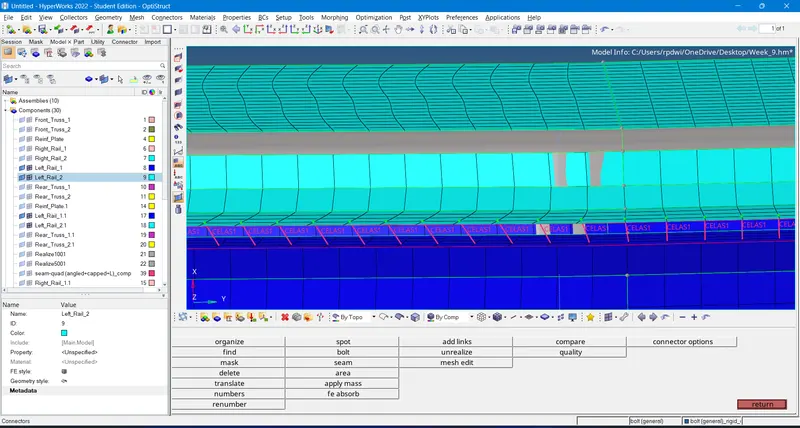
After comletion of Spot weld with Rigid element, the component will be connected as shown below image:-
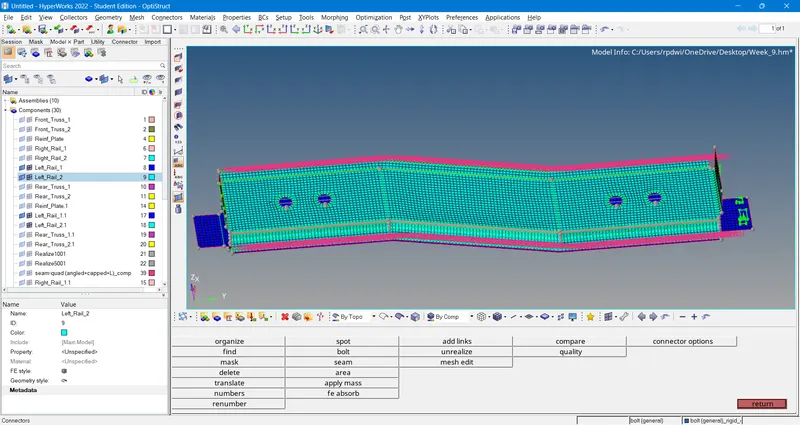
9. Rest all the component left Join them with suitable connectors
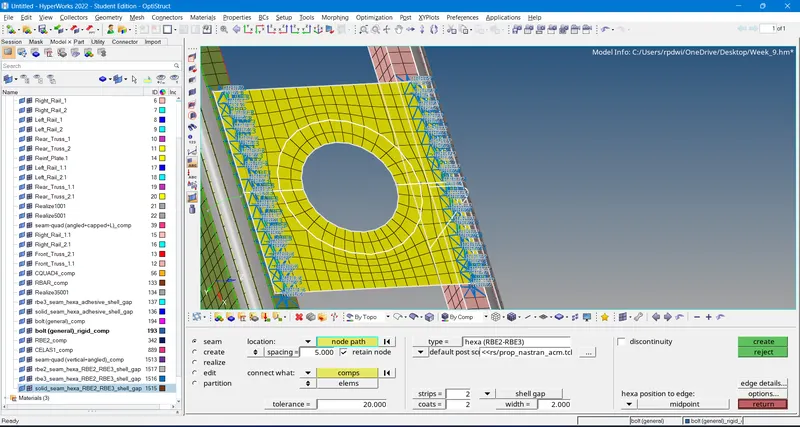
connect these two component with Hexa (RBE2-REB3)
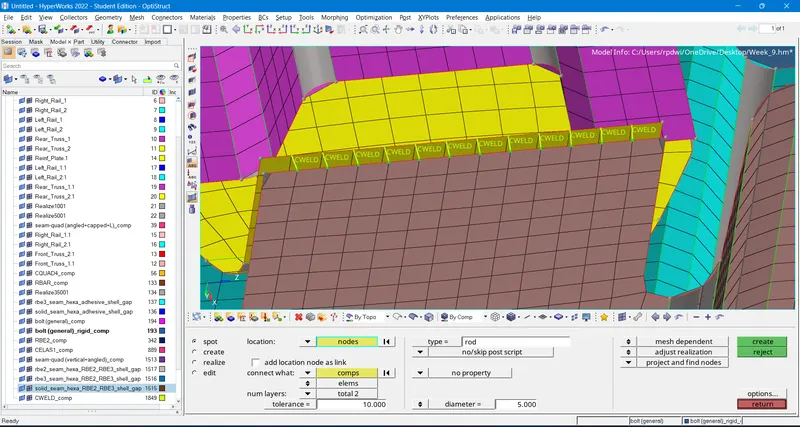
connect these two component with (Rod)
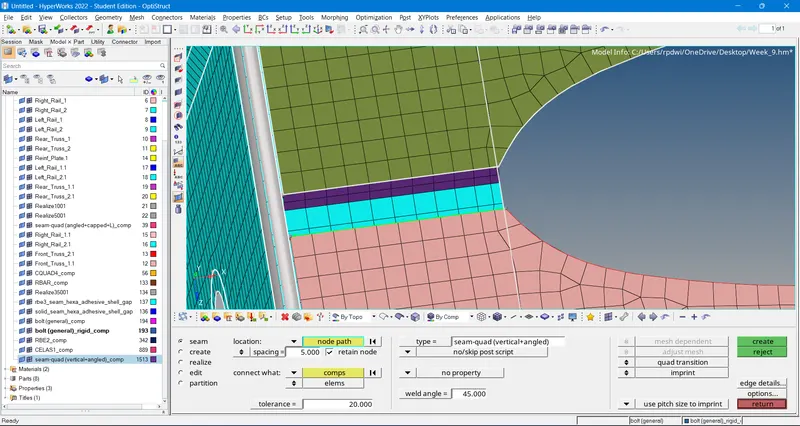
connect these two component with (Seam-Quad (Vertical + angled)
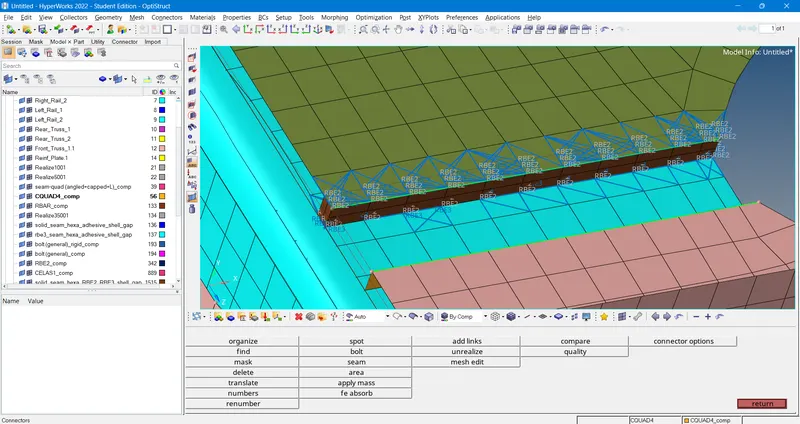
connect these two component with (Quads)
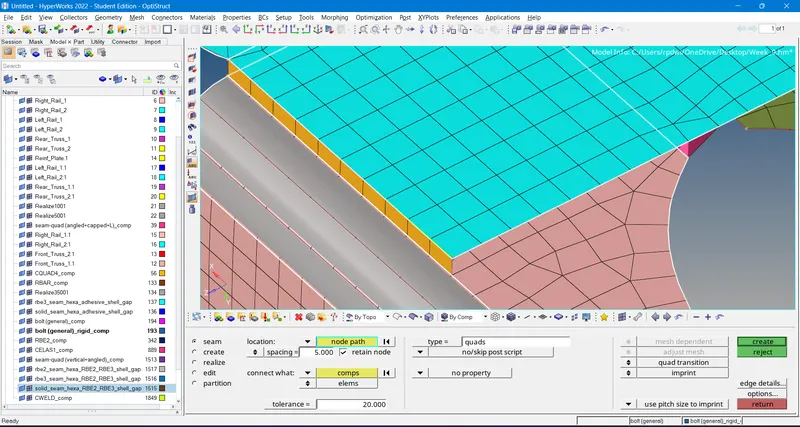
Final result:-
NO Element failed