Week 9 - Challenge 2 - Switch Bezel Design
REPORT ON SWITCH BEZEL DESIGN USING DRAFT ANALYSIS METHOD
AIM : Create the Switch Bezel Plastic component through the given Class-A surface. To begin with, the tooling axis for the given Class-A Surface should be created meeting the requirements of the draft angle and at the end perform the Draft analysis on the model.
Take the Thickness of the component to be 2.5 mm
Class A Concept sketches generated by free hand sketchers produce a surface known as Class A. The finalized sketch is then input into the computer, where a 2D surface is generated using a program or software like Alias. The Class A surface designation refers to this digital design.
Class B is a reference surface that the design engineer creates and which is a replica of class A at a distance equal to the part's thickness.
Class C also known as the side wall of the surface, is a reference surface that the design engineer creates to connect Class A and Class B surfaces.
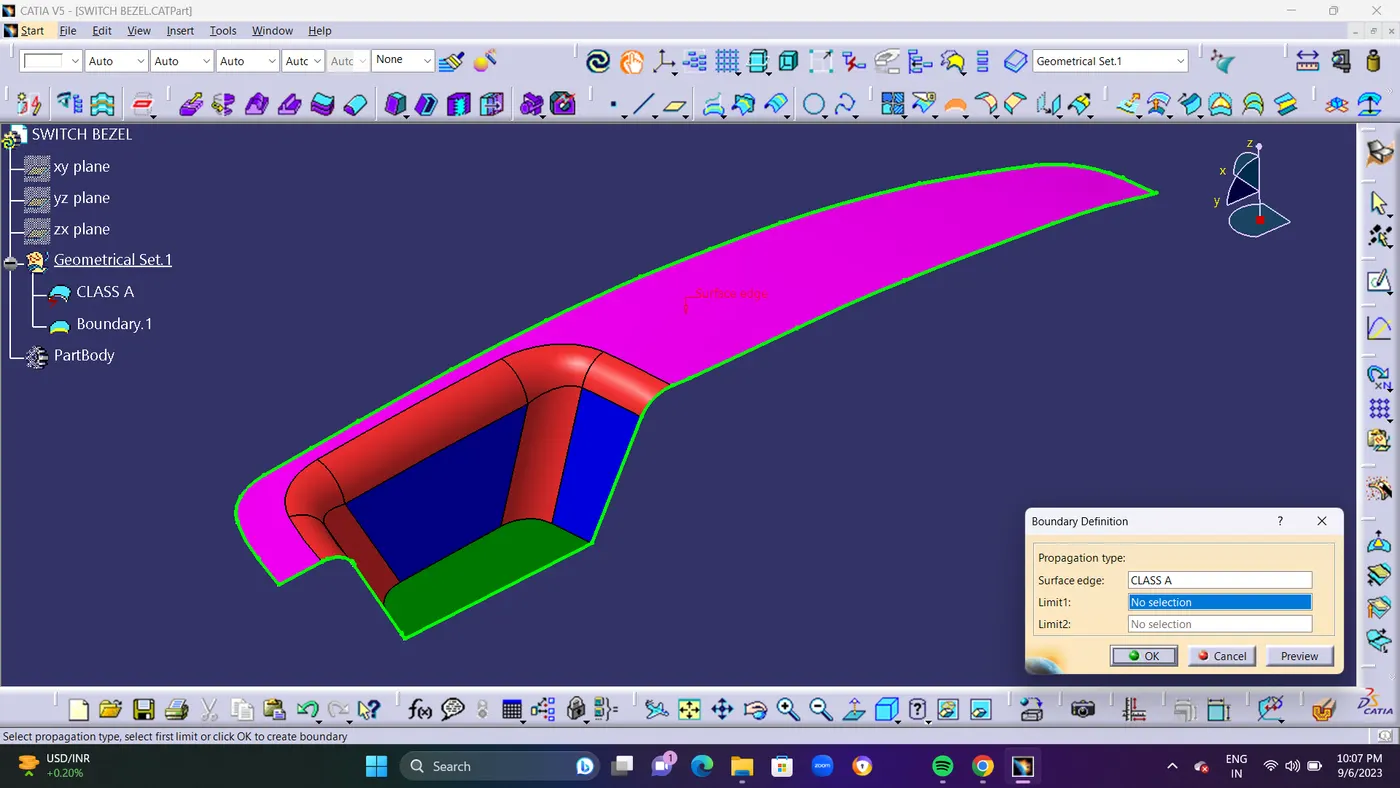
STEP 1 : Verify the Class A Surface's connection. Using the Joint or Boundary command, confirm that there is no space between the components.We have two options for checking it: visually or by using the border command.One outside and two inner circular limits make up its three borders.The first check was finished because if there is a green border in between, it appears that the surface has a gap.
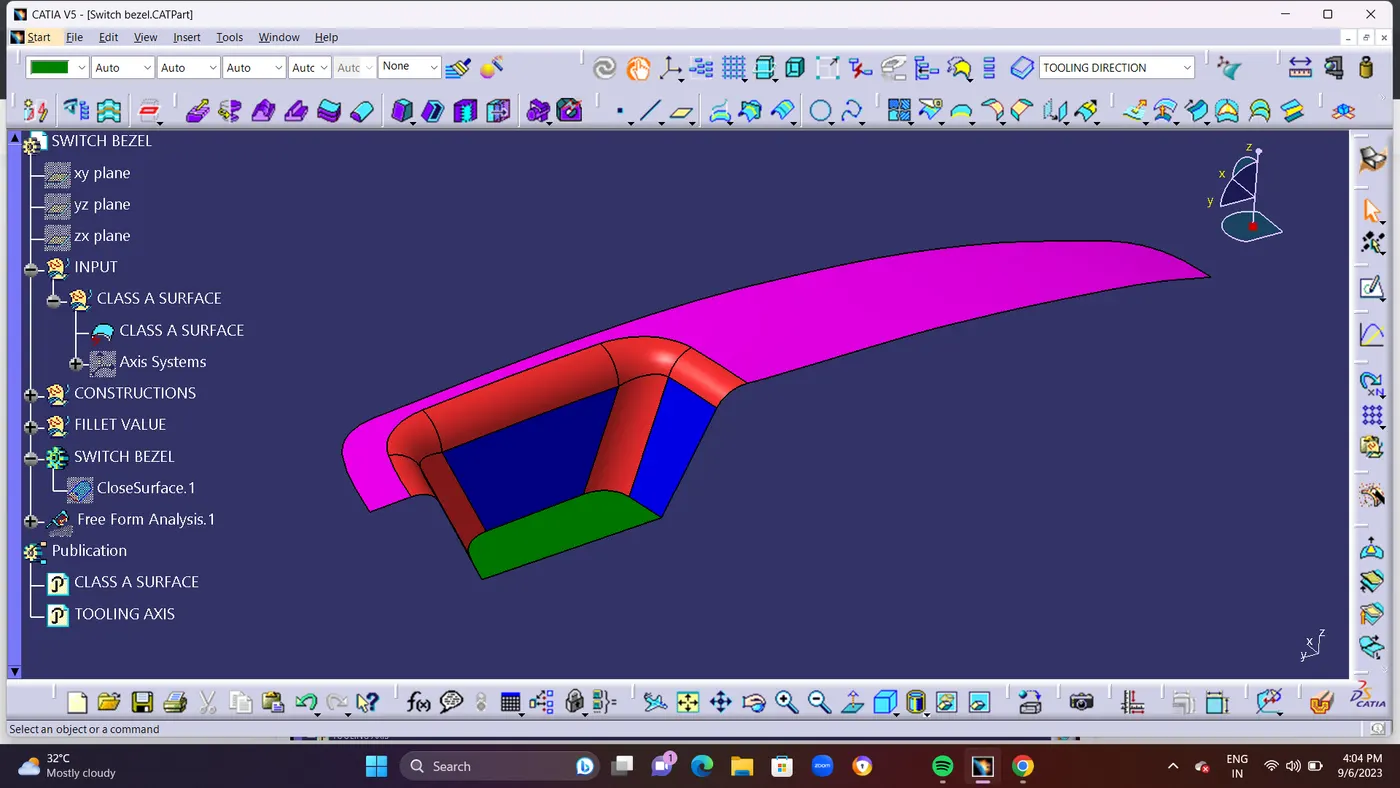
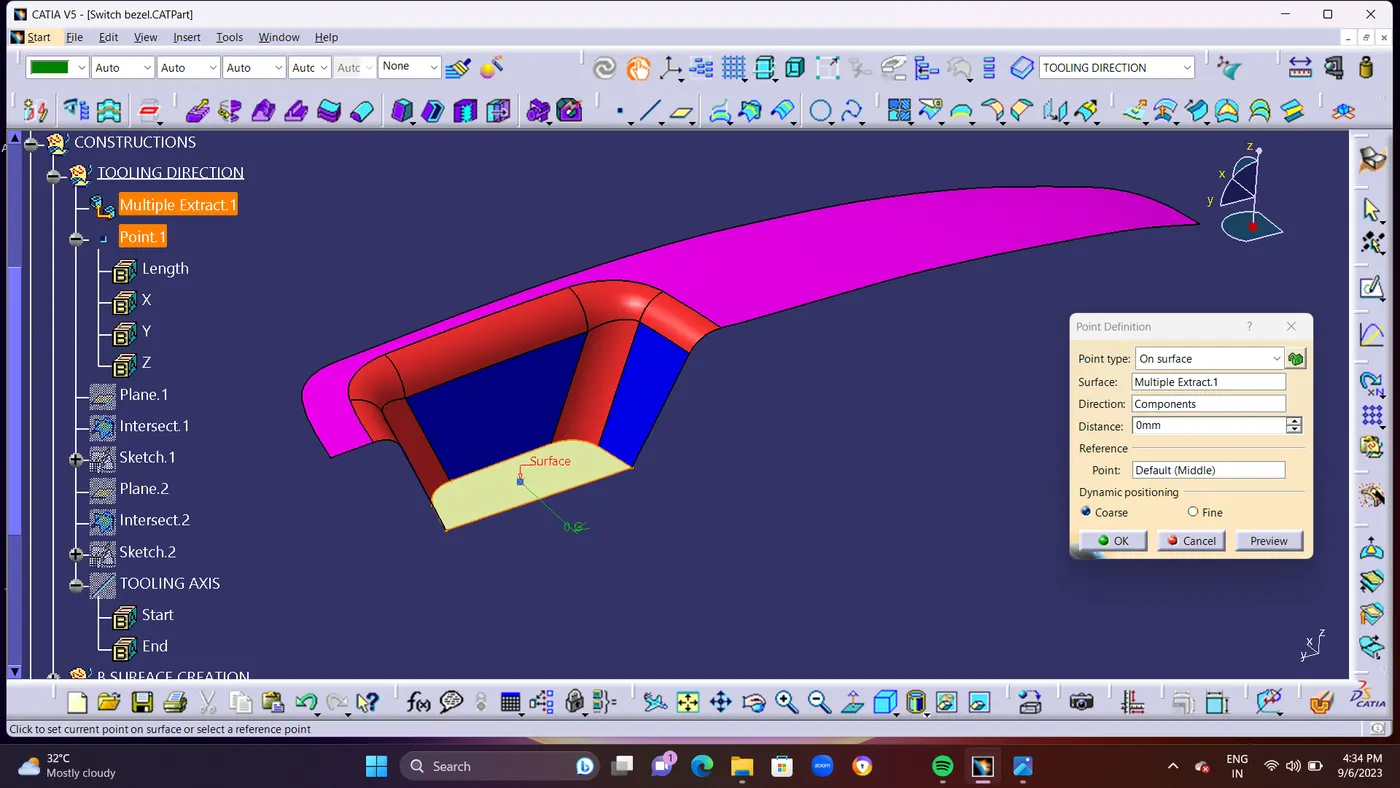
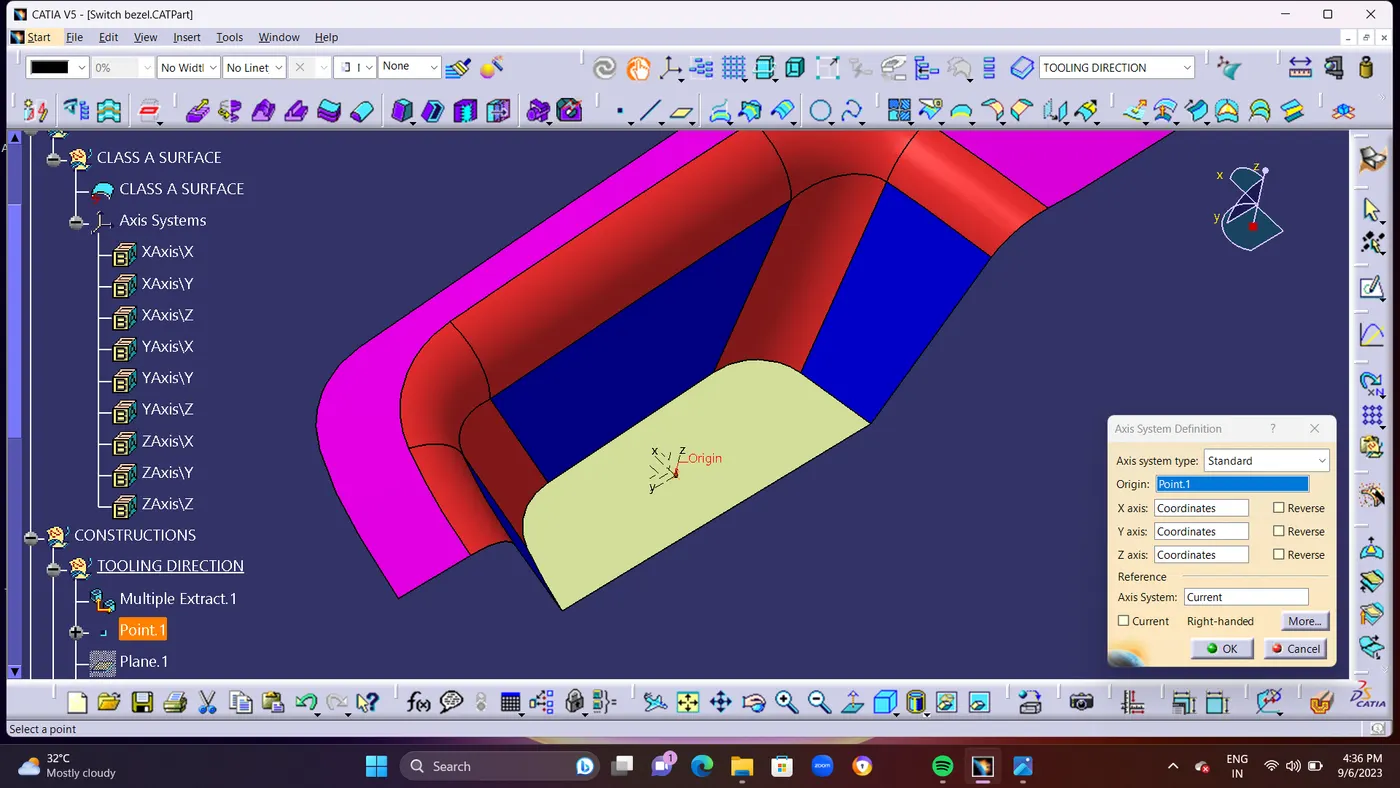
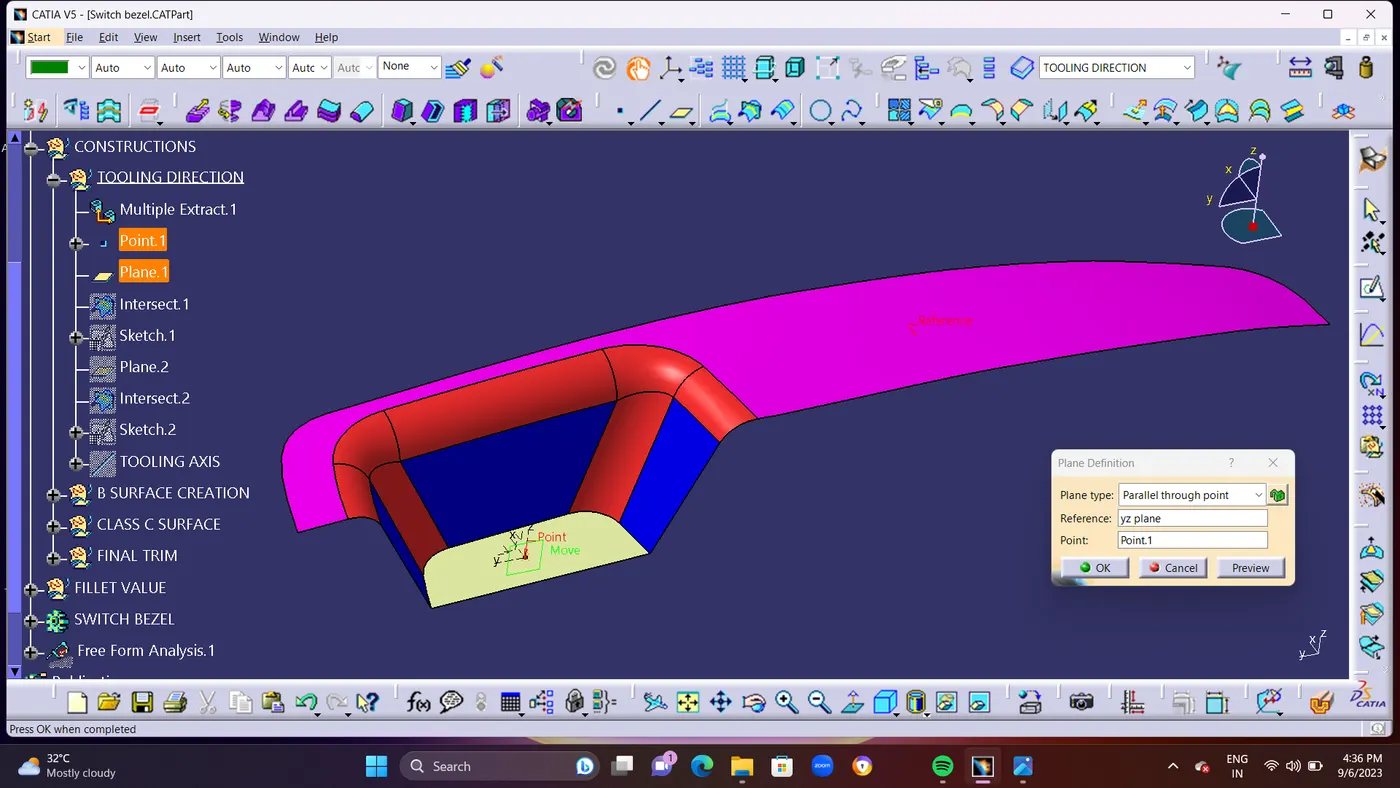
STEP 2 : By using MultipleExtract take the Base as an Extract From Class A surface. For Creating an Tooling Axis. The tooling axis is the direction in which the mold, core, or cavity opens.Using point command make a Center point on Base Surface.From the Center Point Take An Axis System.and plce the plane towards YZ AXIS and The plane type is PARALLEL THROUGH POINT.
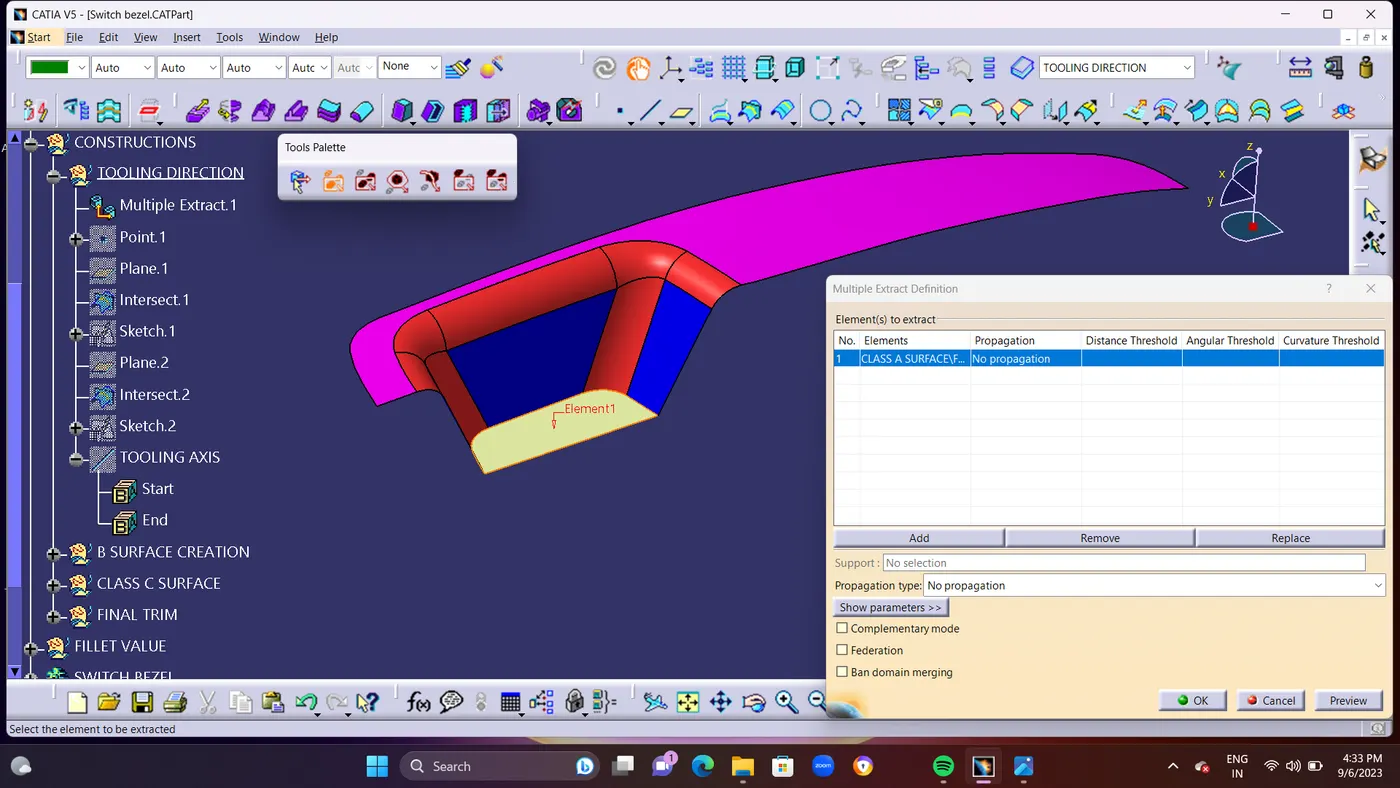
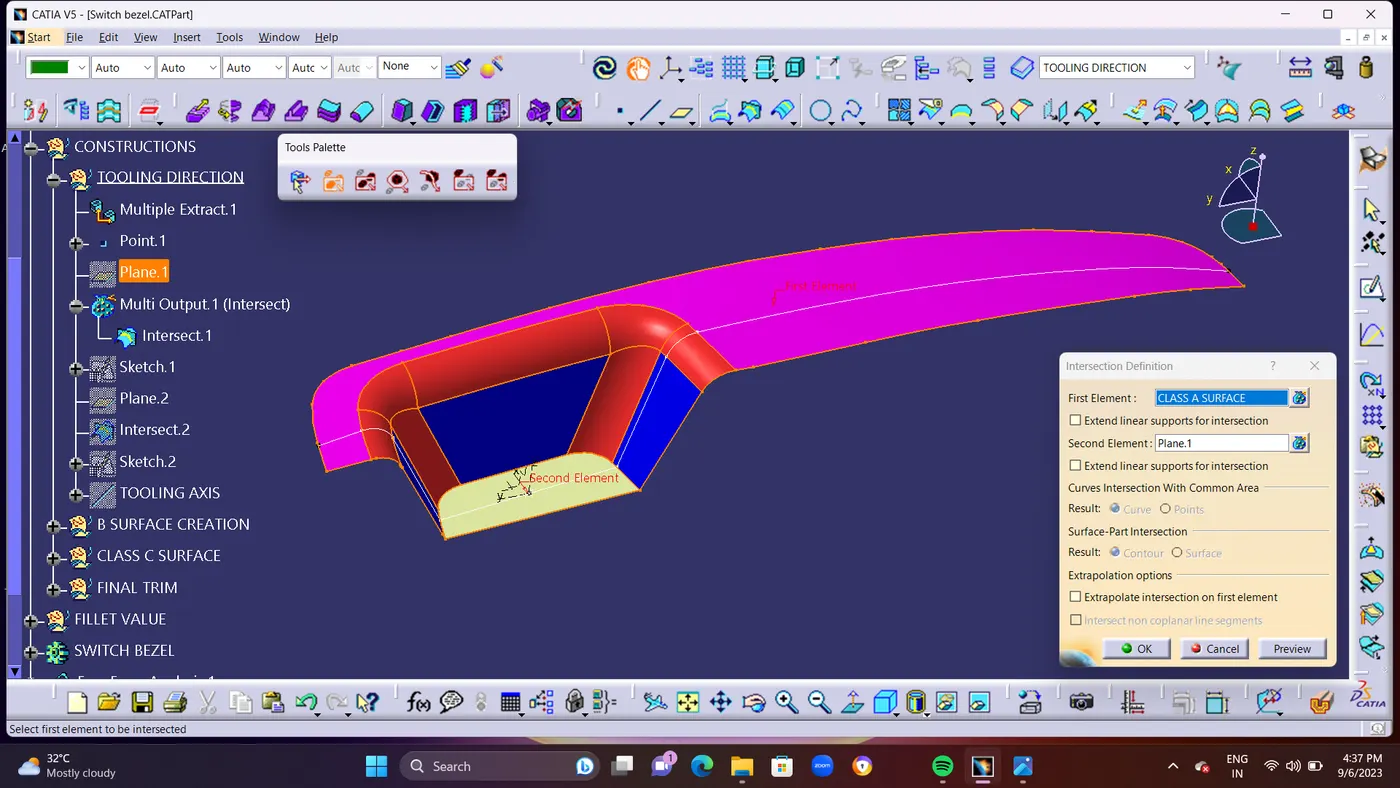
- Using an INTERSECT Command make an intersection line from the CLASS A surface.From the Sketch line create an Wall Edge side reference line and make a Center BISECTING LINE by using the 2 Wall side reference line. and the Center line will be created.Using the Plane Command Create a 2nd plane in POINT 1 By ZX AXIS.
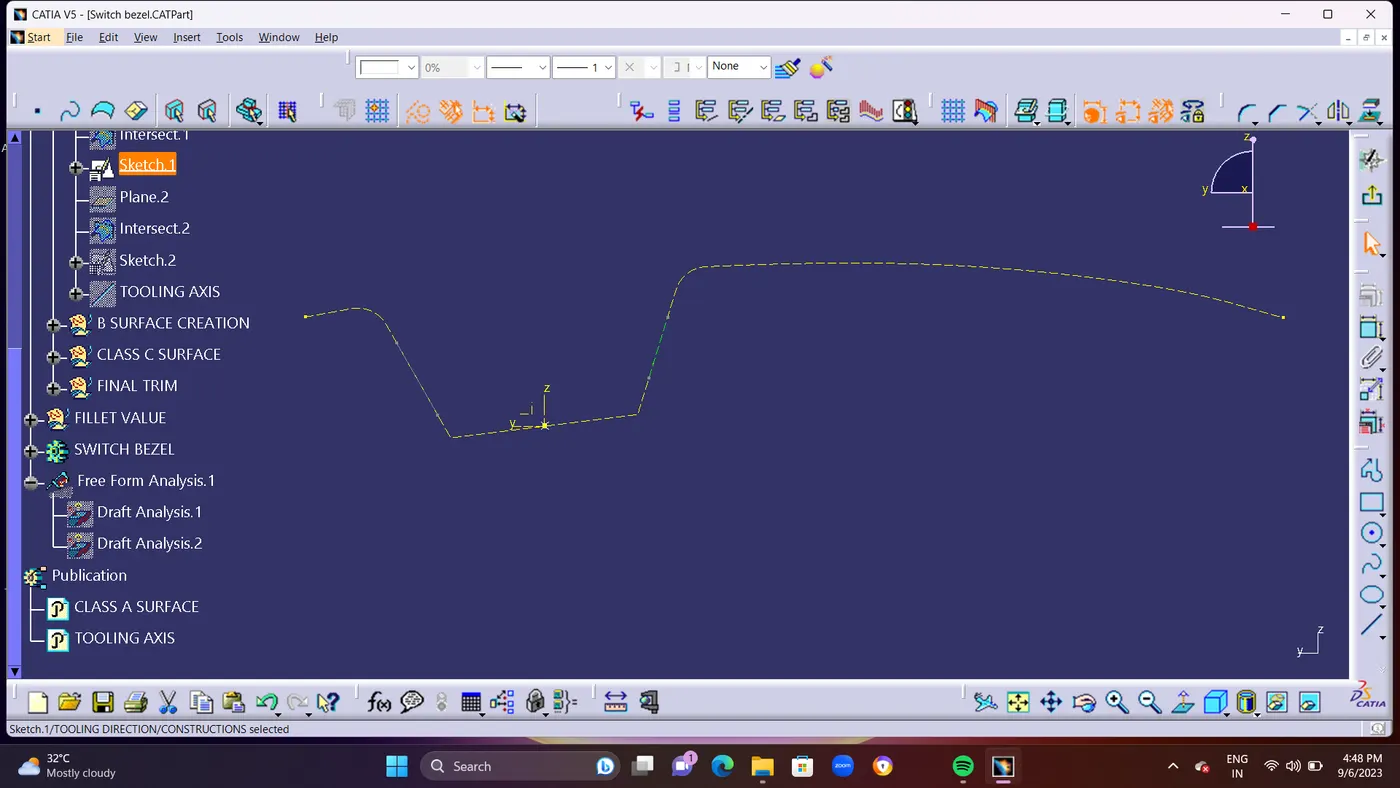
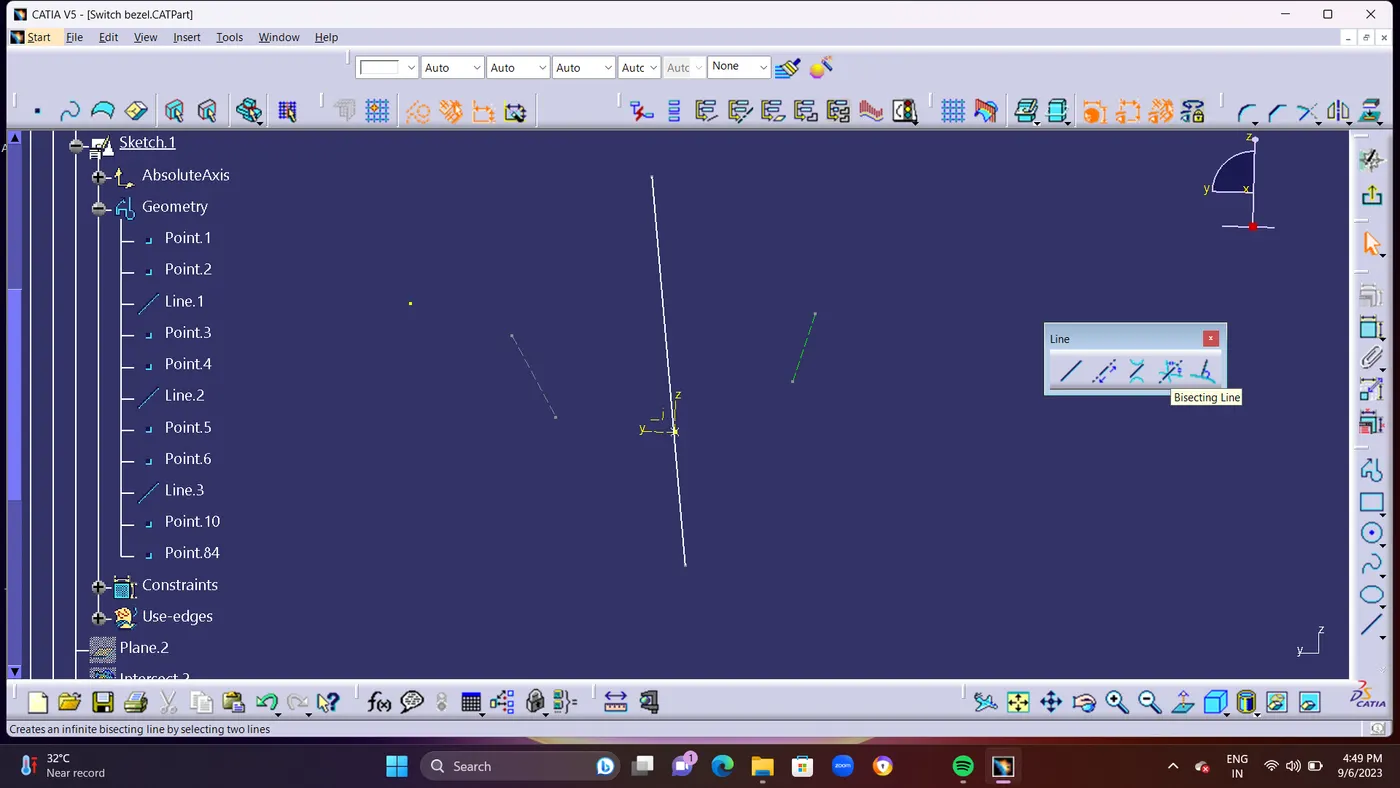
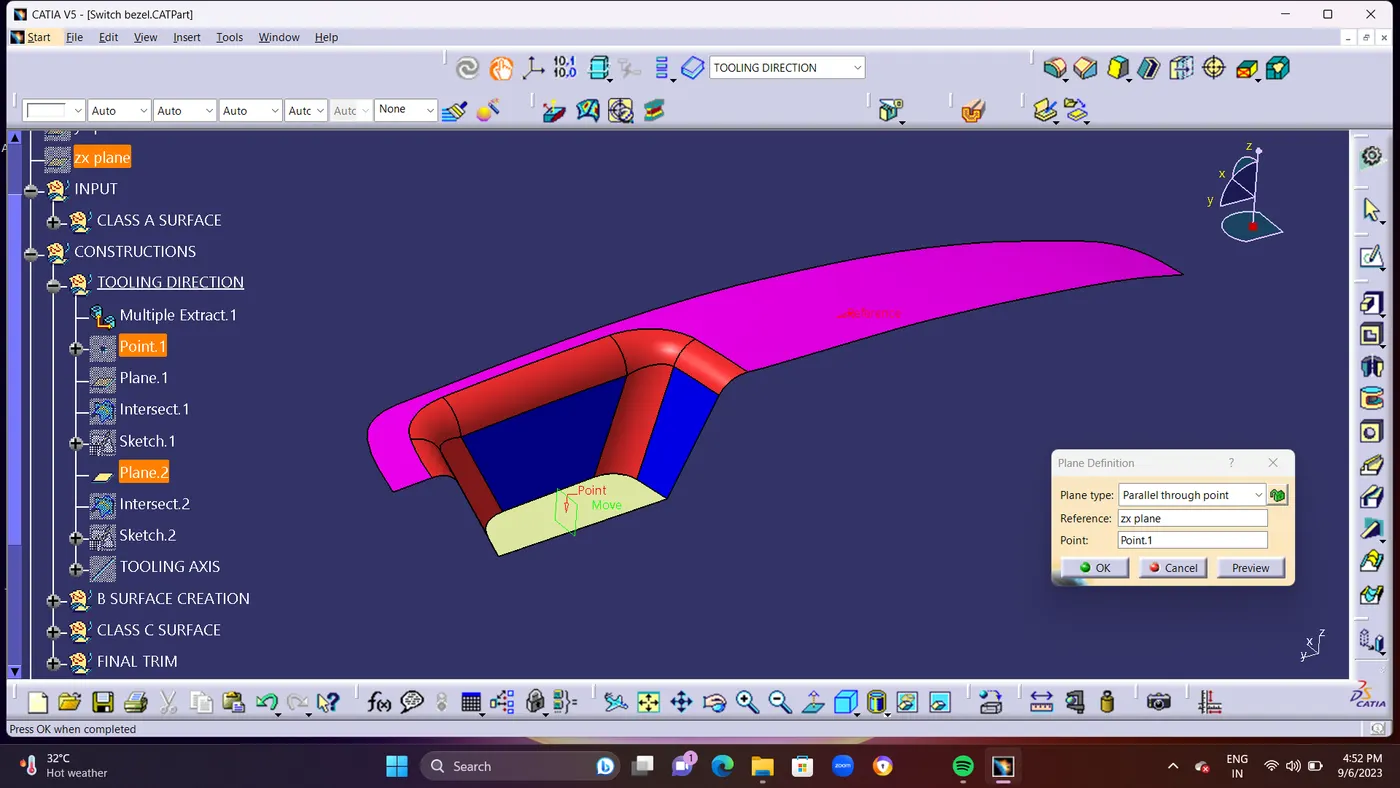
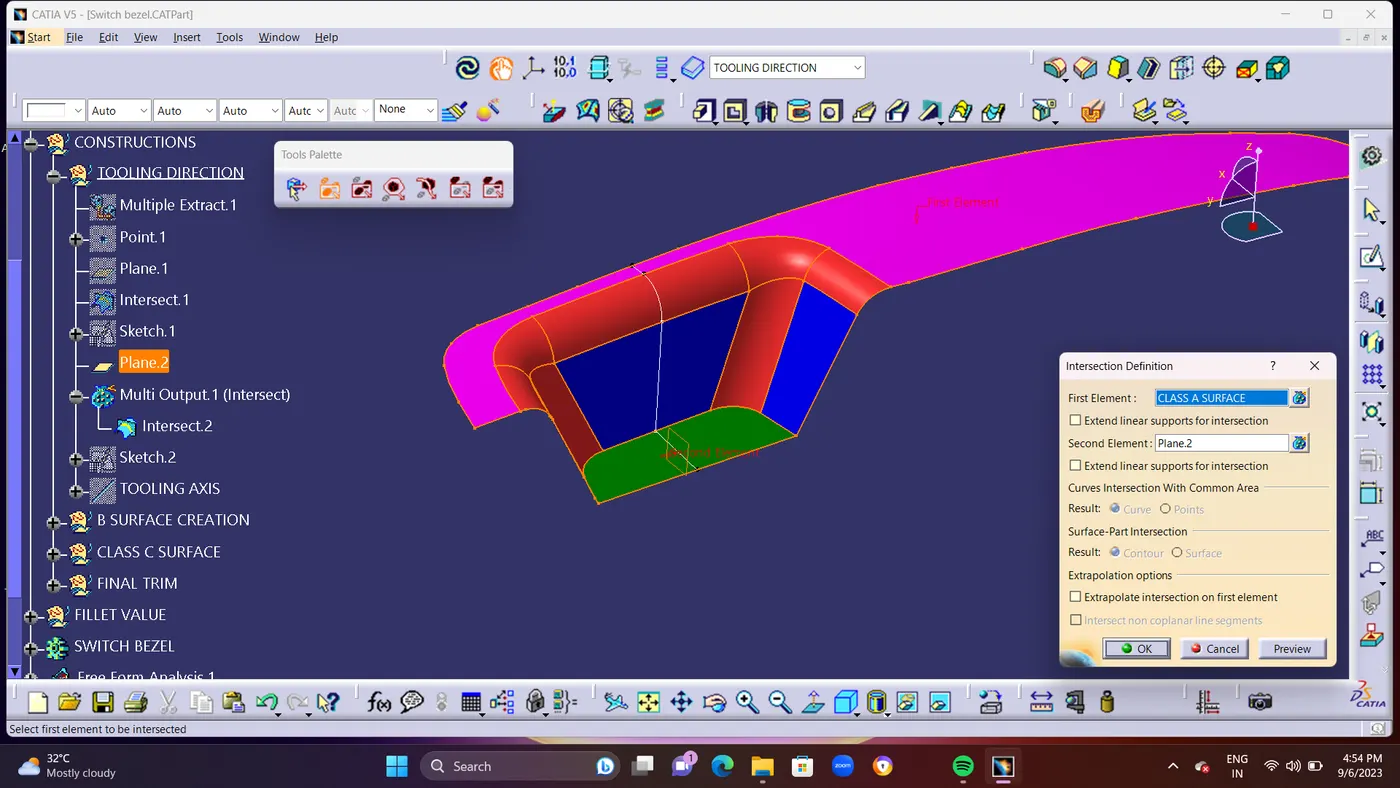
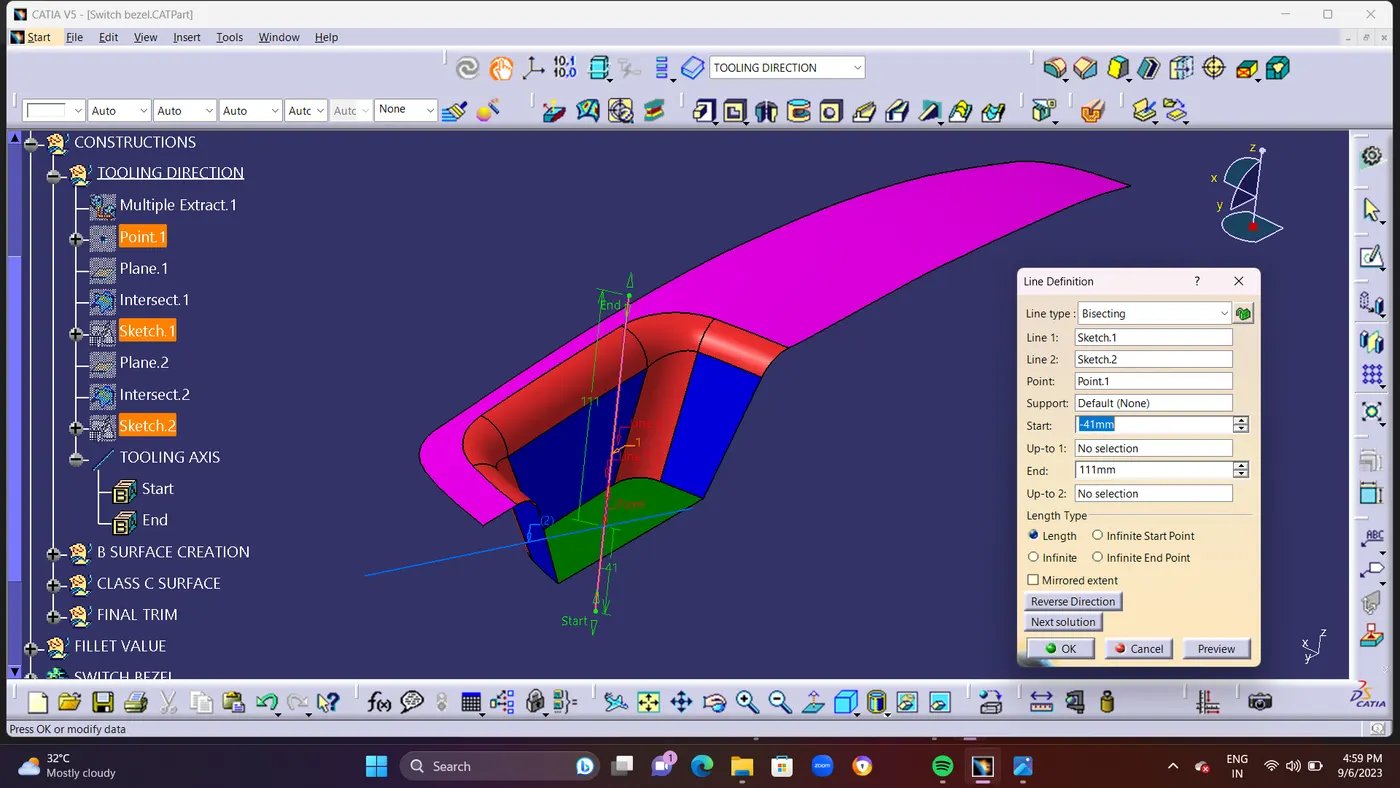
- Take an 2nd INTERSECT LINE from CLASS A Surface PLANE 2 ZX Direction.and Create 4 Degree Line from the given INTERSECT LINE shown in Below Screen shot.and From the SKETCH 1 Line and SKETCH 2 Line Creat and BISECTING Line To from an FINAL TOOLING AXIS.
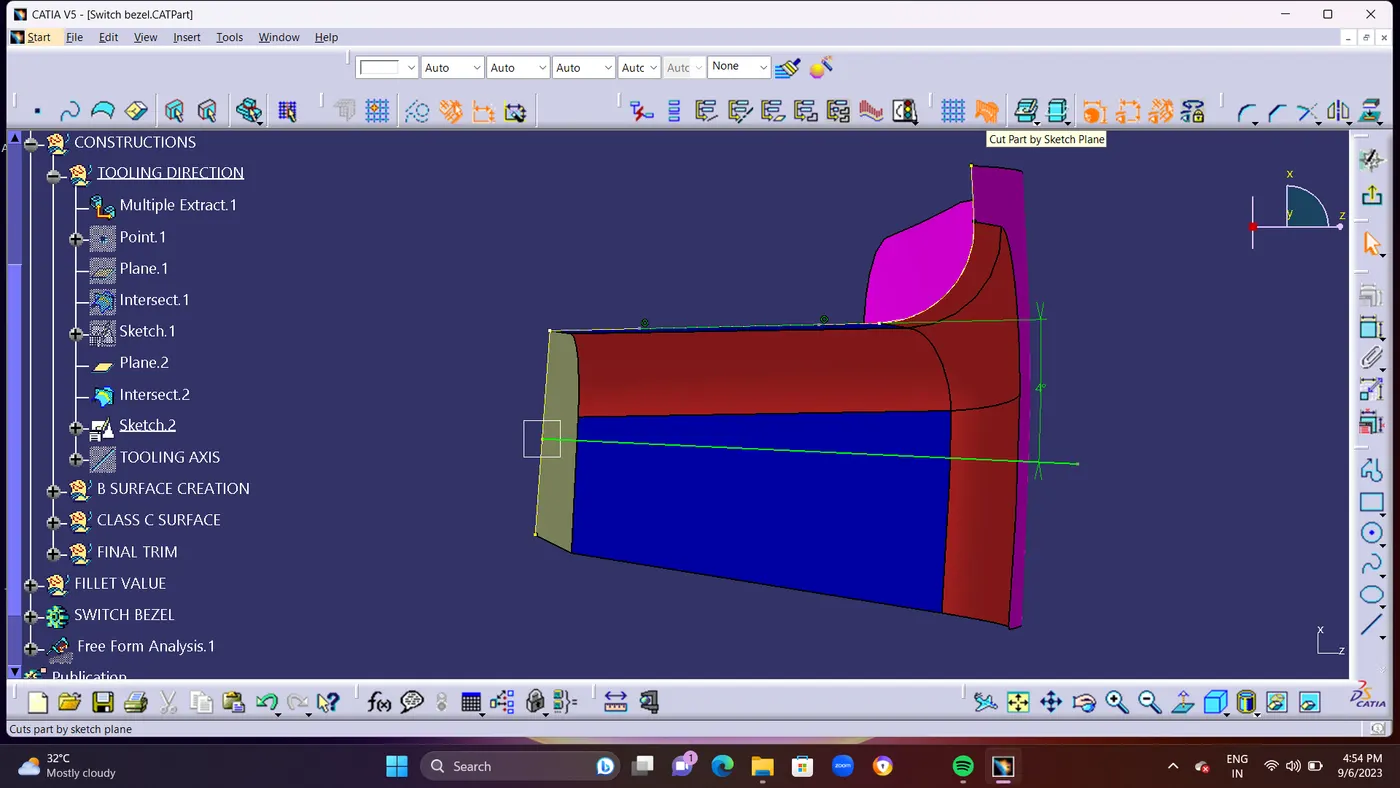
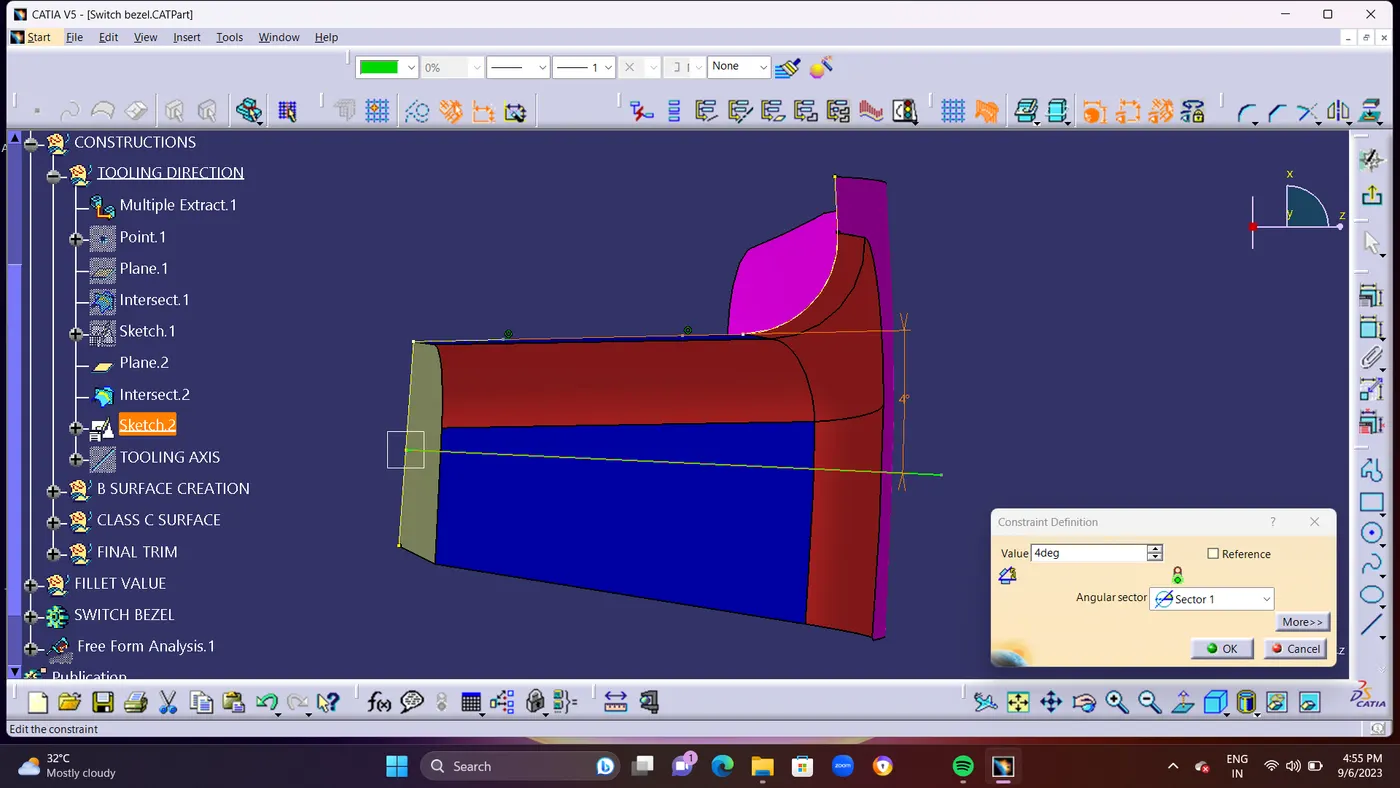
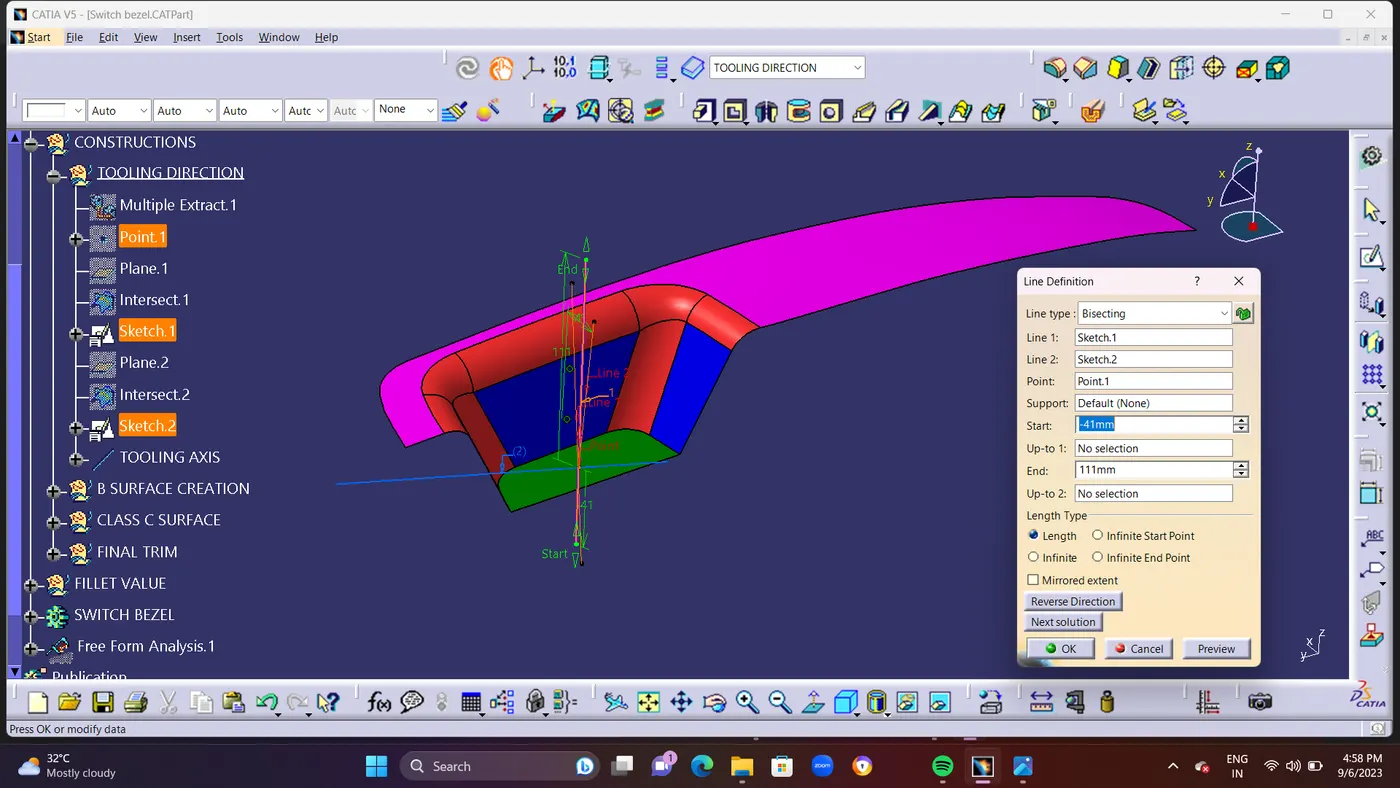
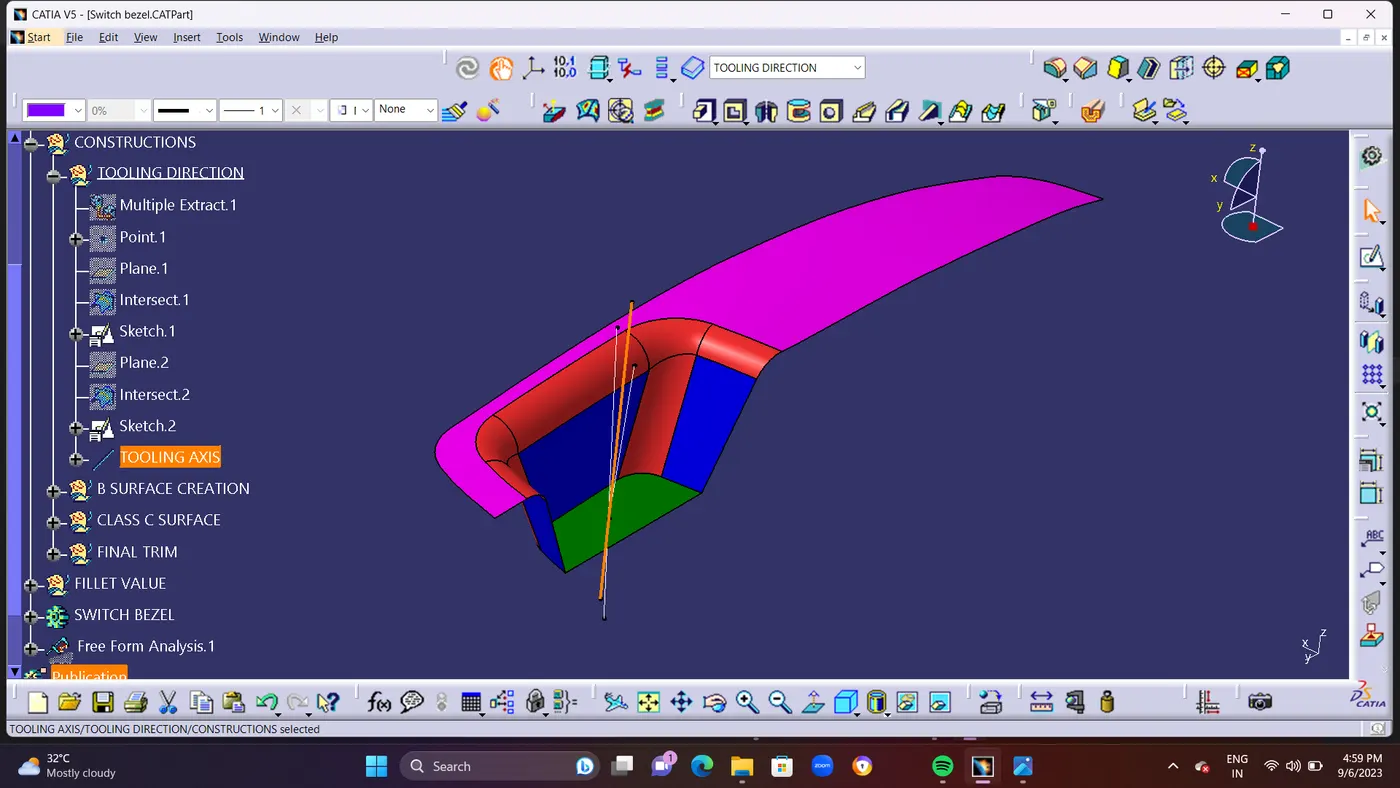
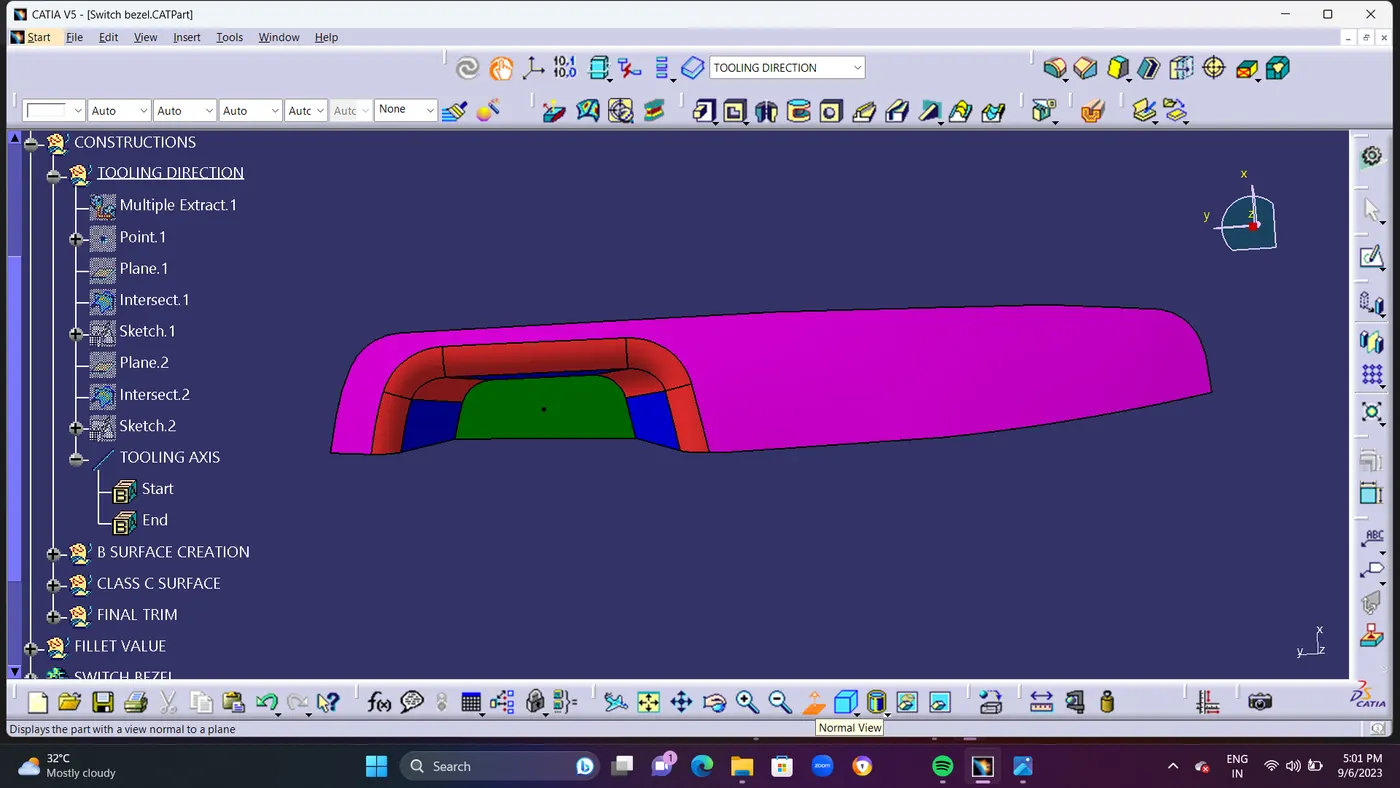
- STEP 3 : Using EXTRACT command Extract the BEZEL REST SURFACE.and UNTRIM it OFFESET for 2.5mm.and same for 3 WALL Surfaces also EXTRACT the 3 Surface and UNTRIM it. Use EXTRAPOLATE command for extend the Untrime Surface for the given 3 Walls and TRIM the EXTRAPOLATE 1,2,&3.to form a Single Wall Surface and Offset it for 2.5mm.
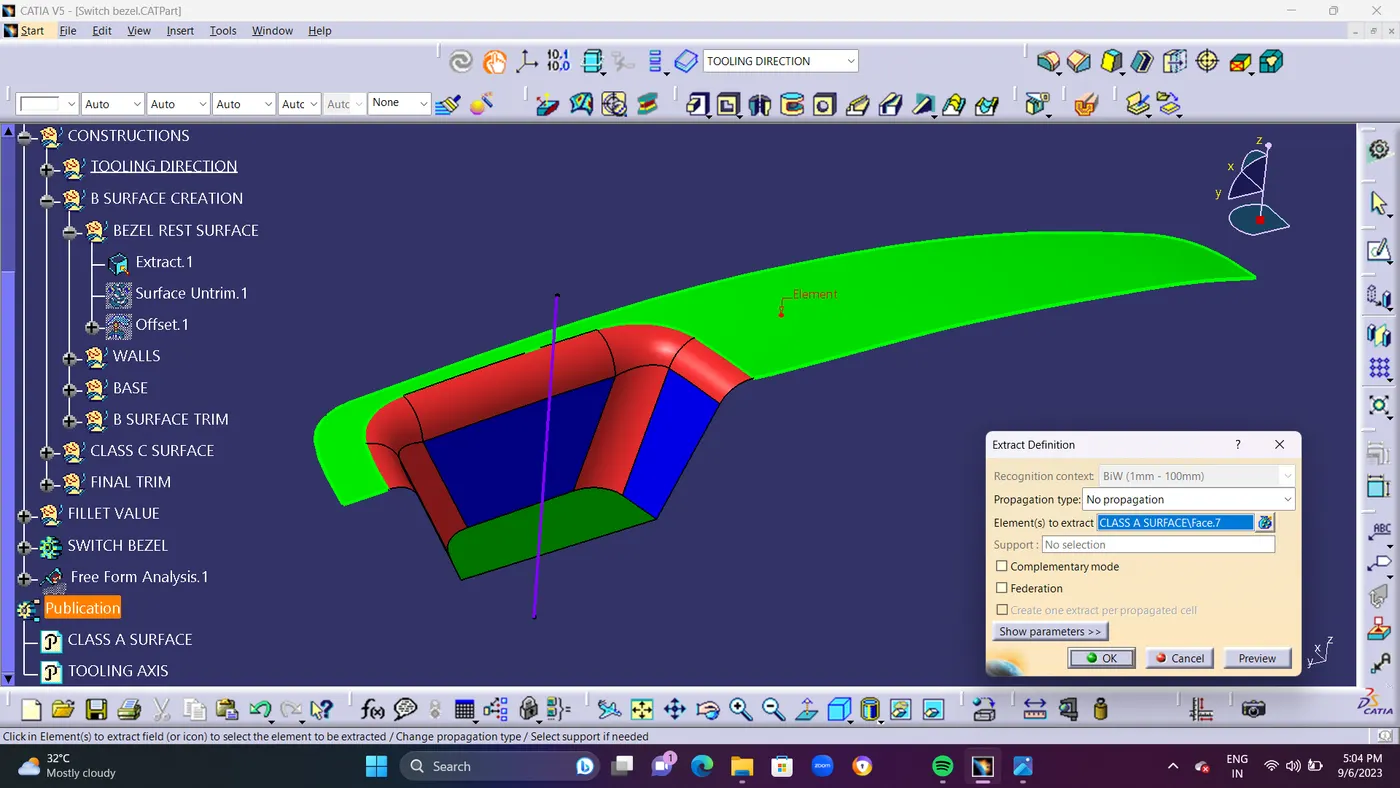
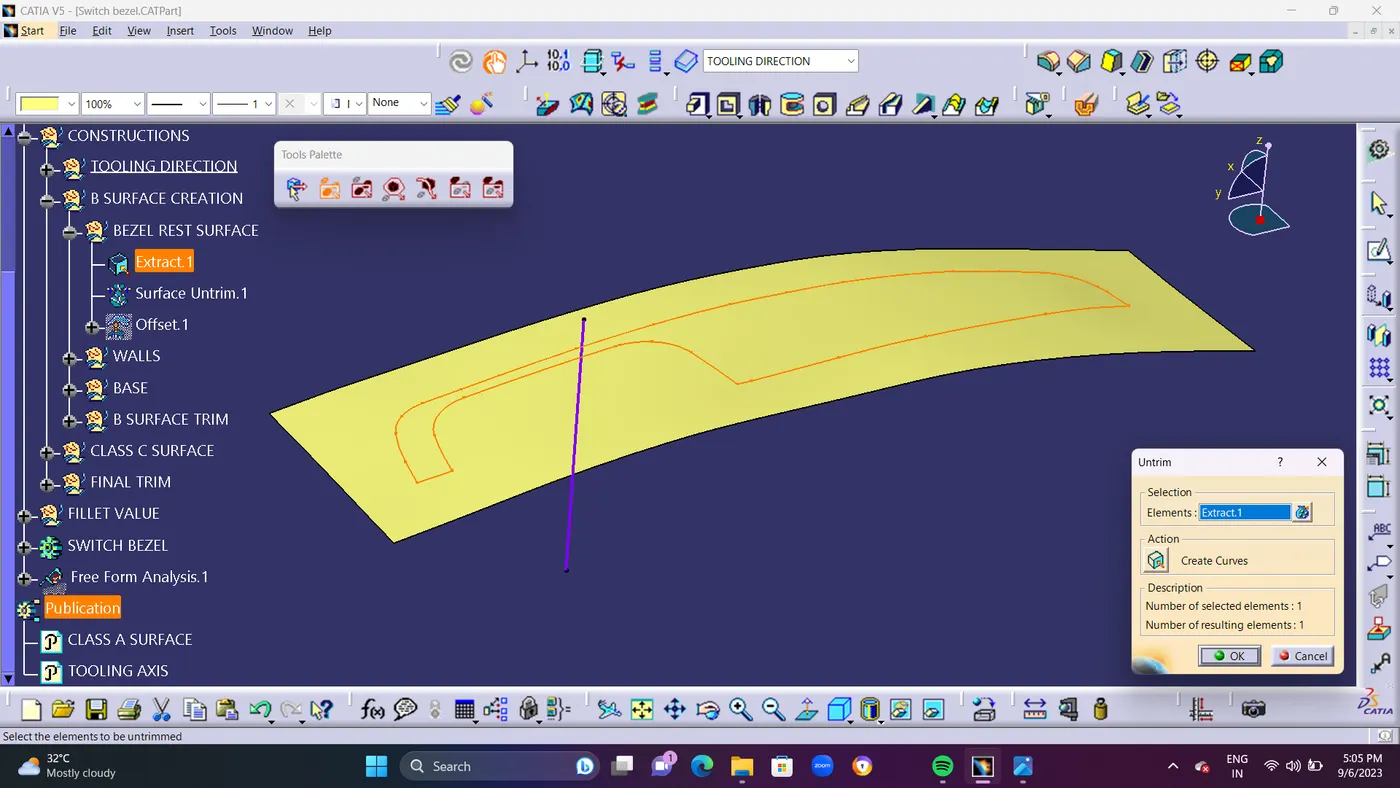
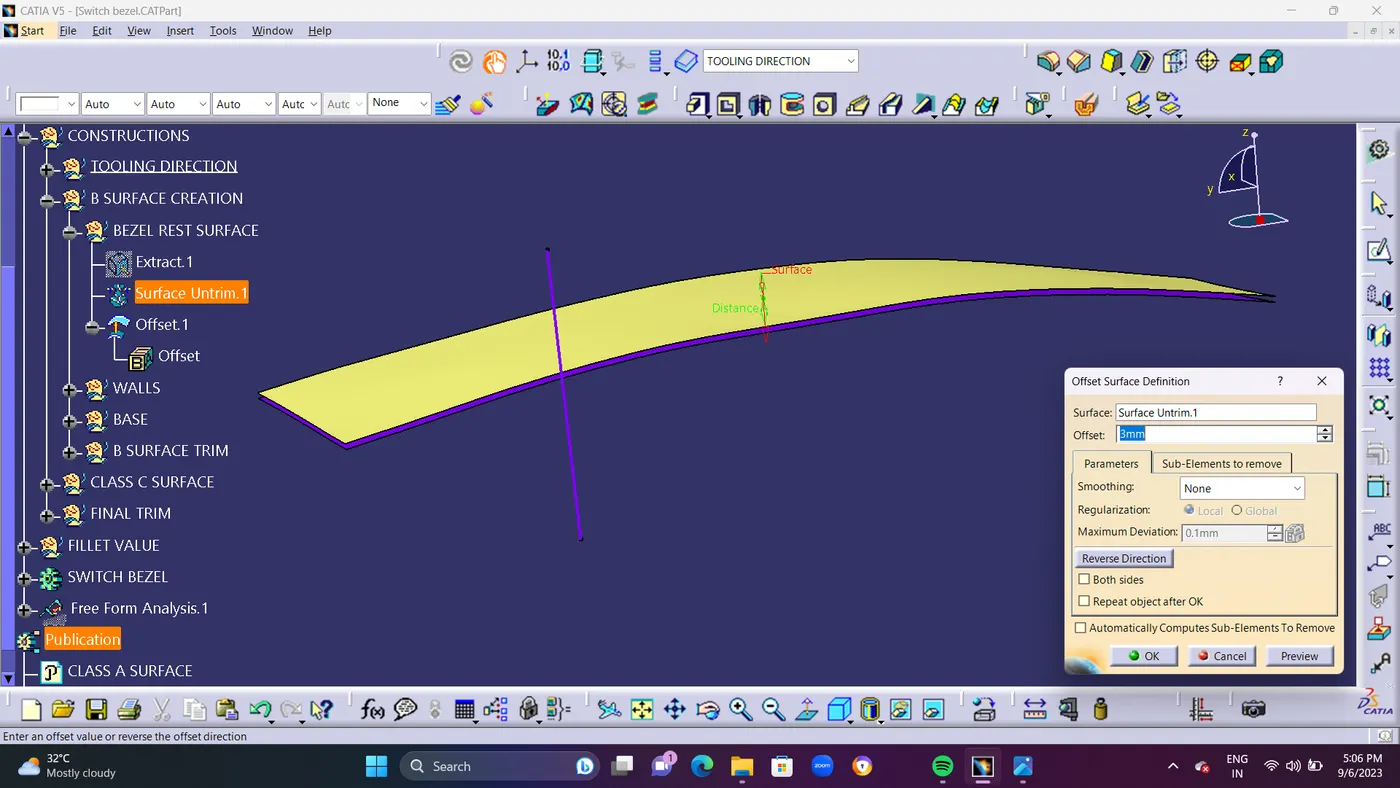
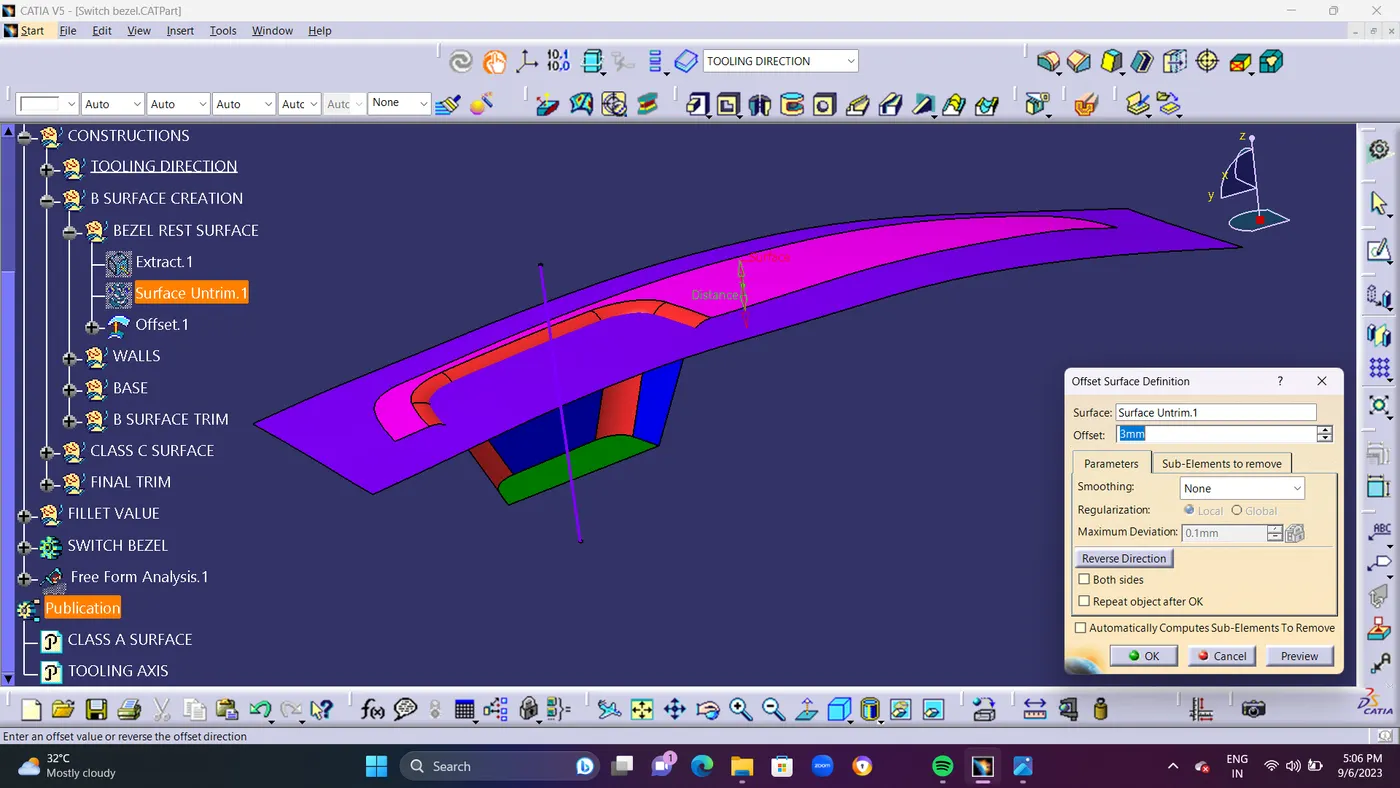
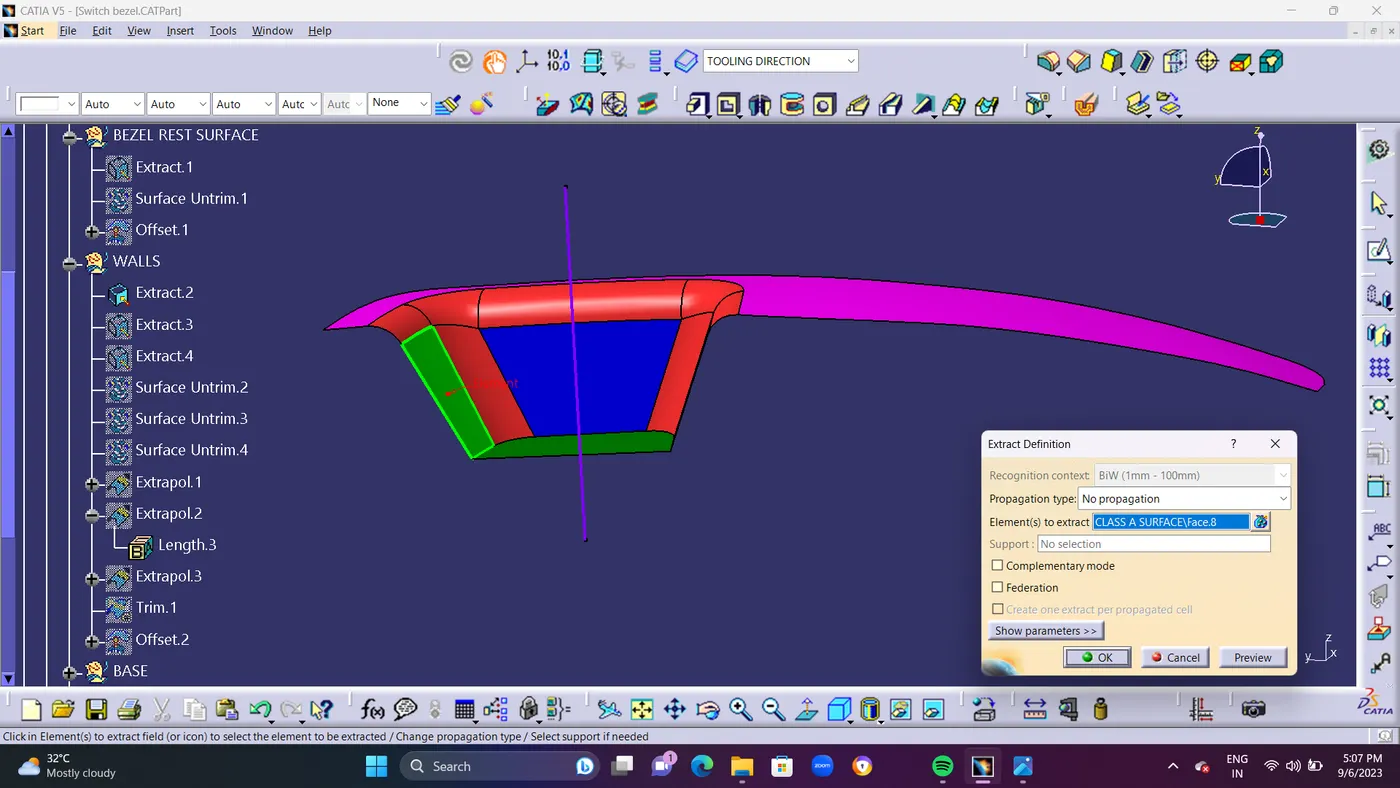
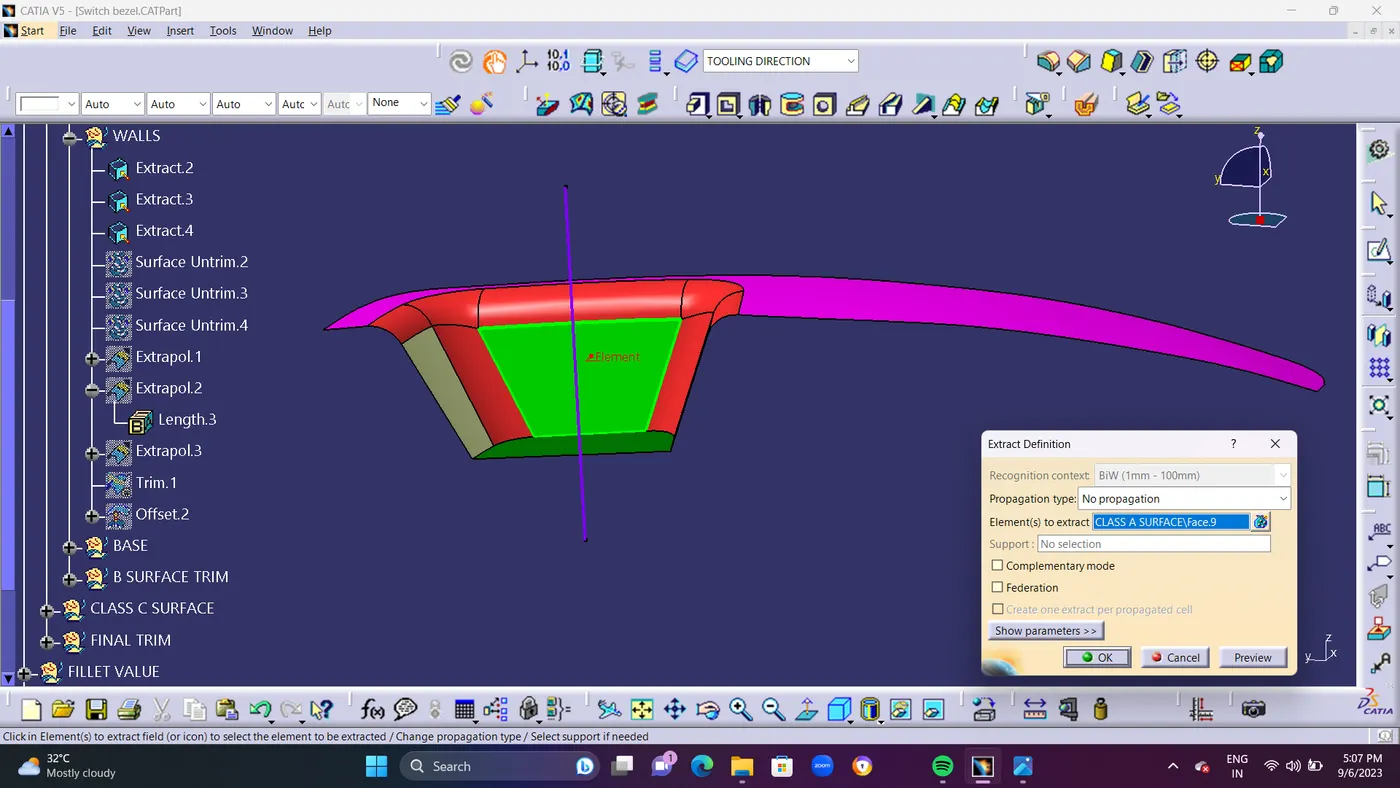
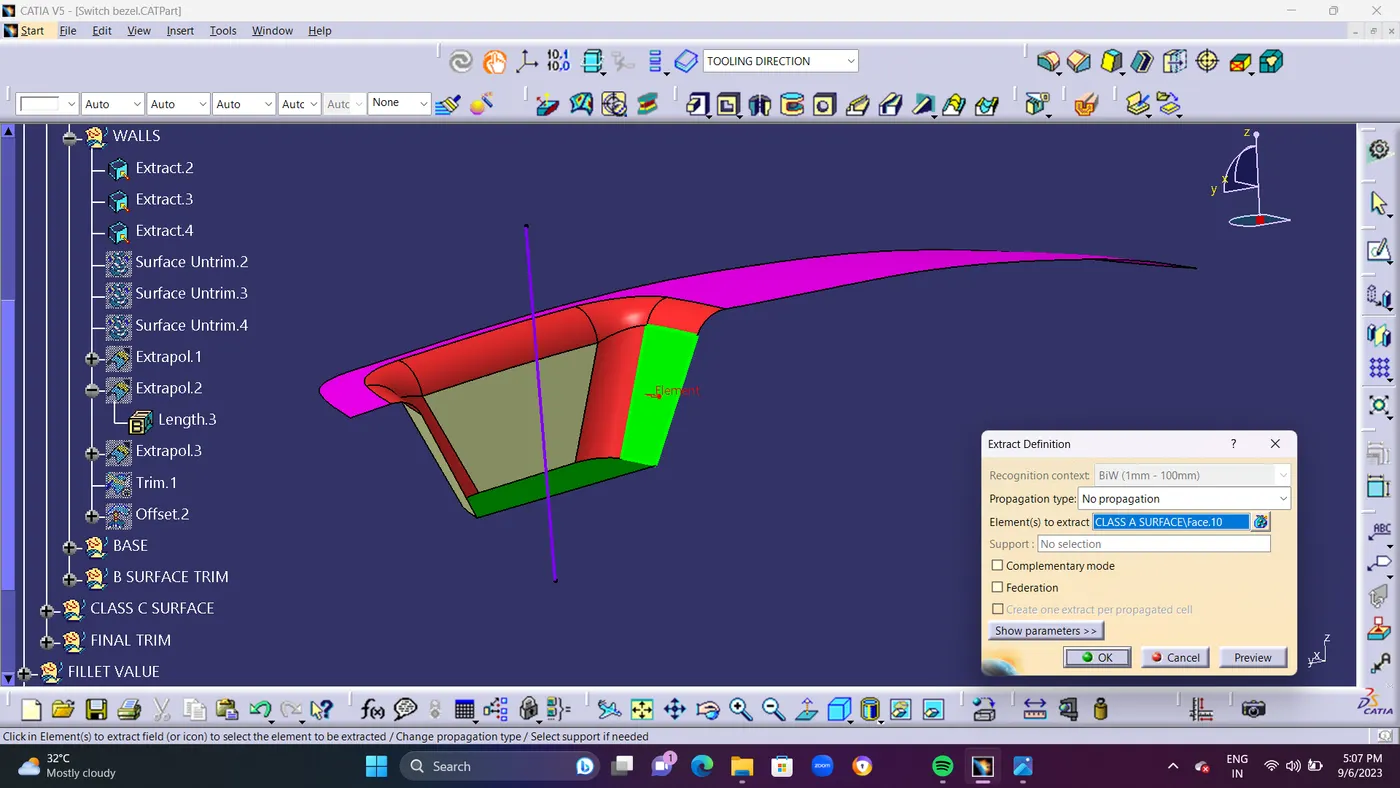
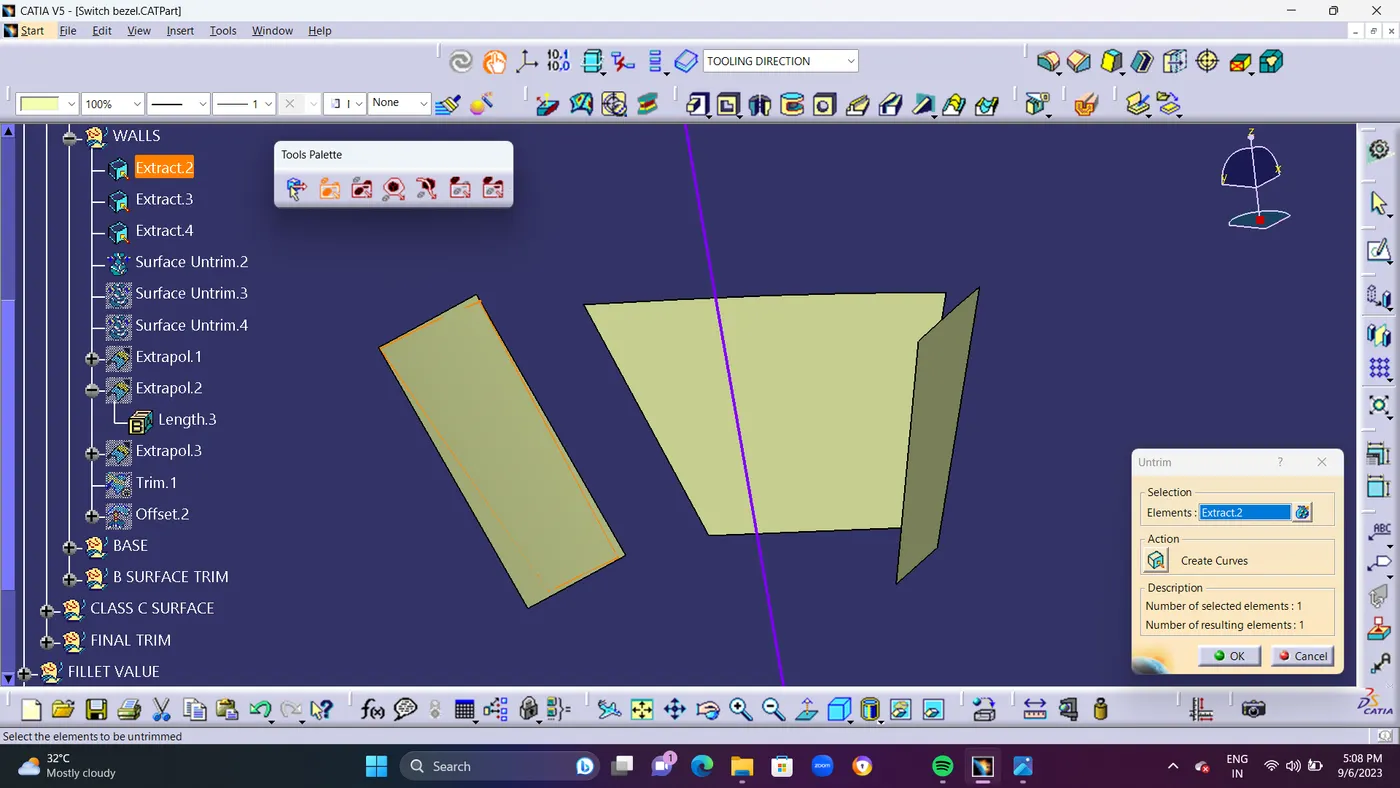
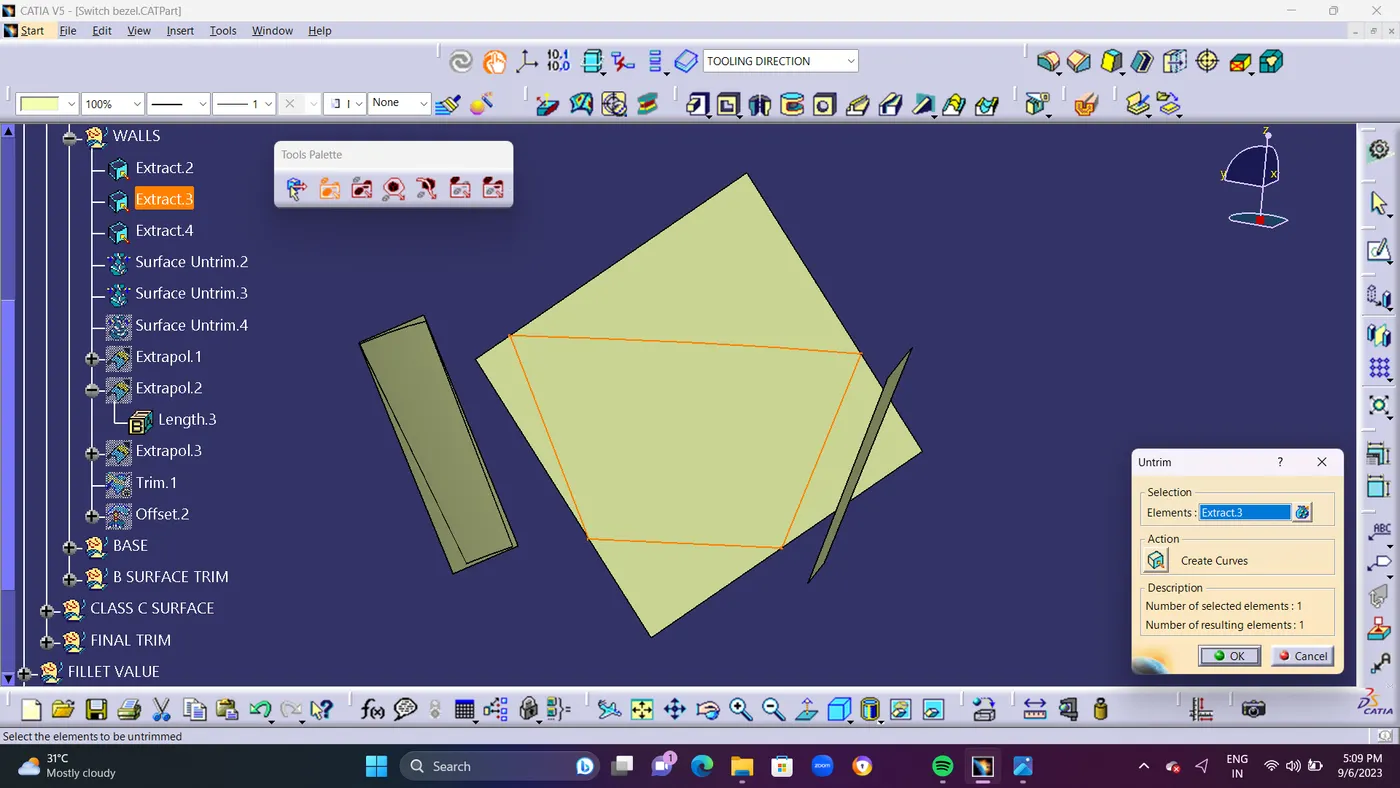
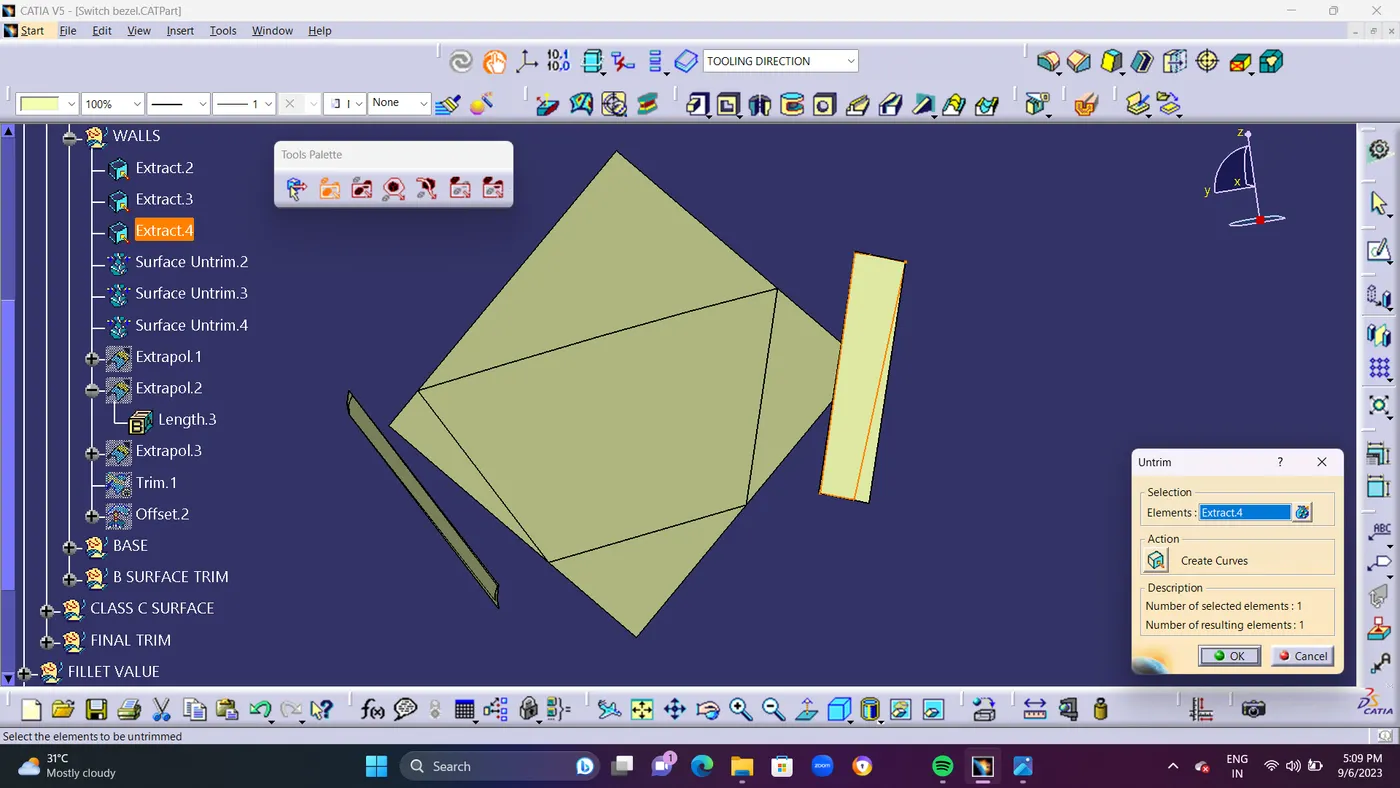
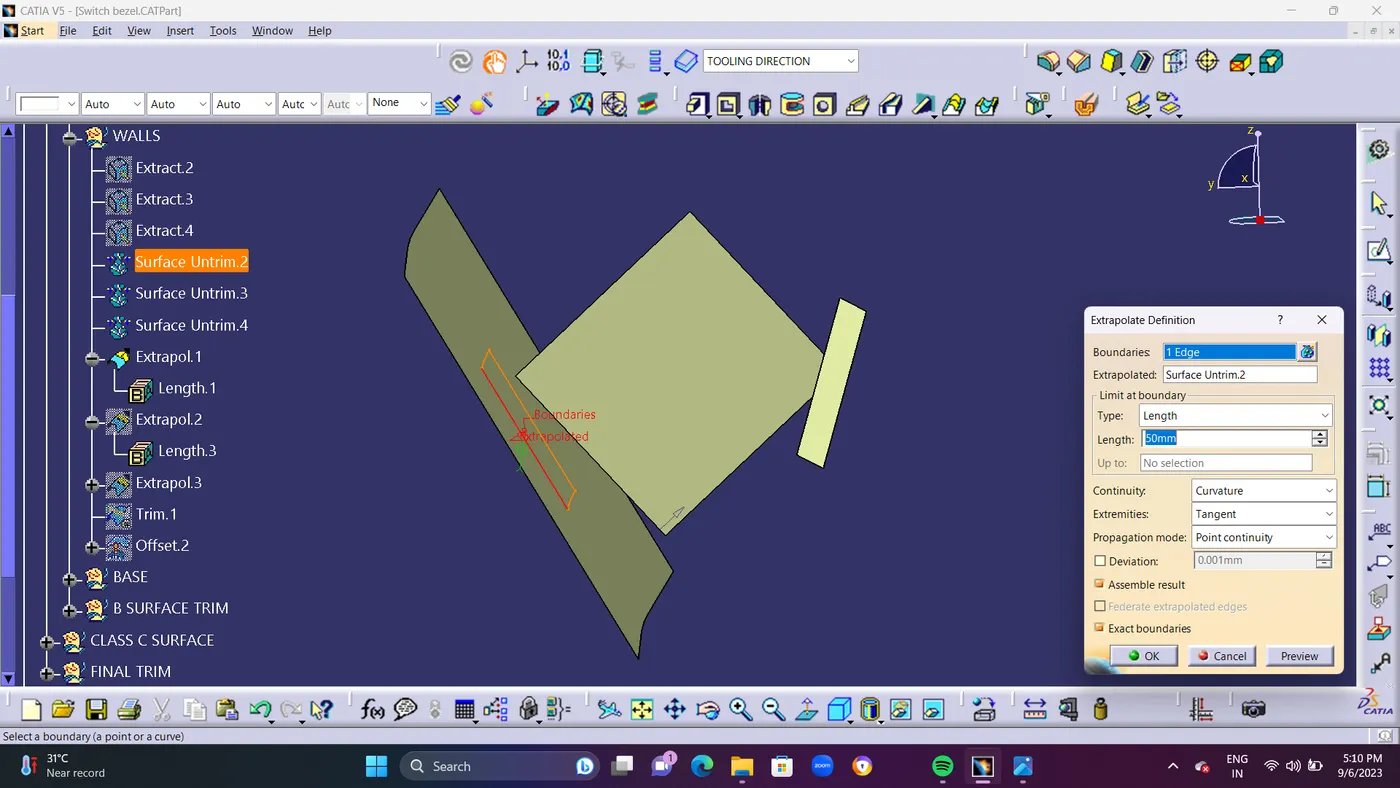
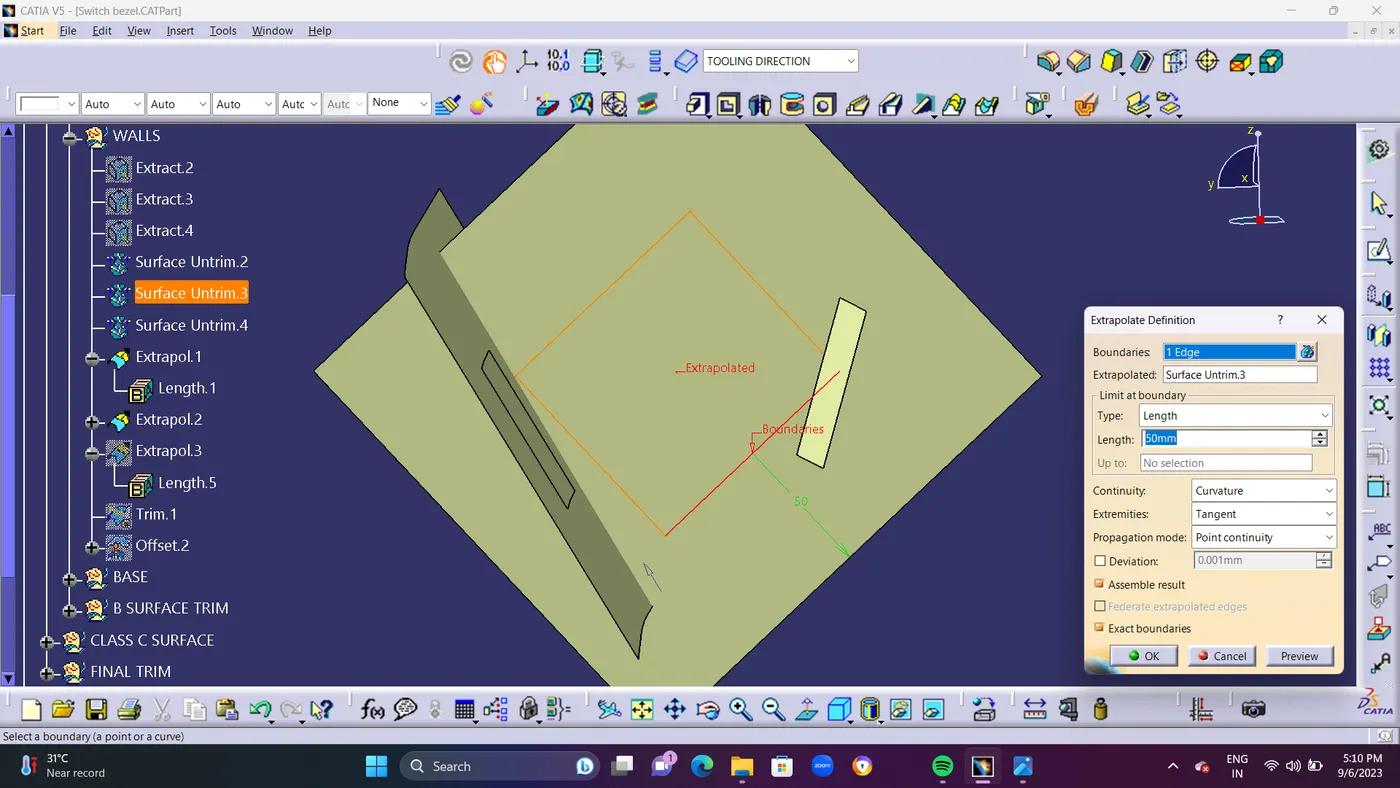
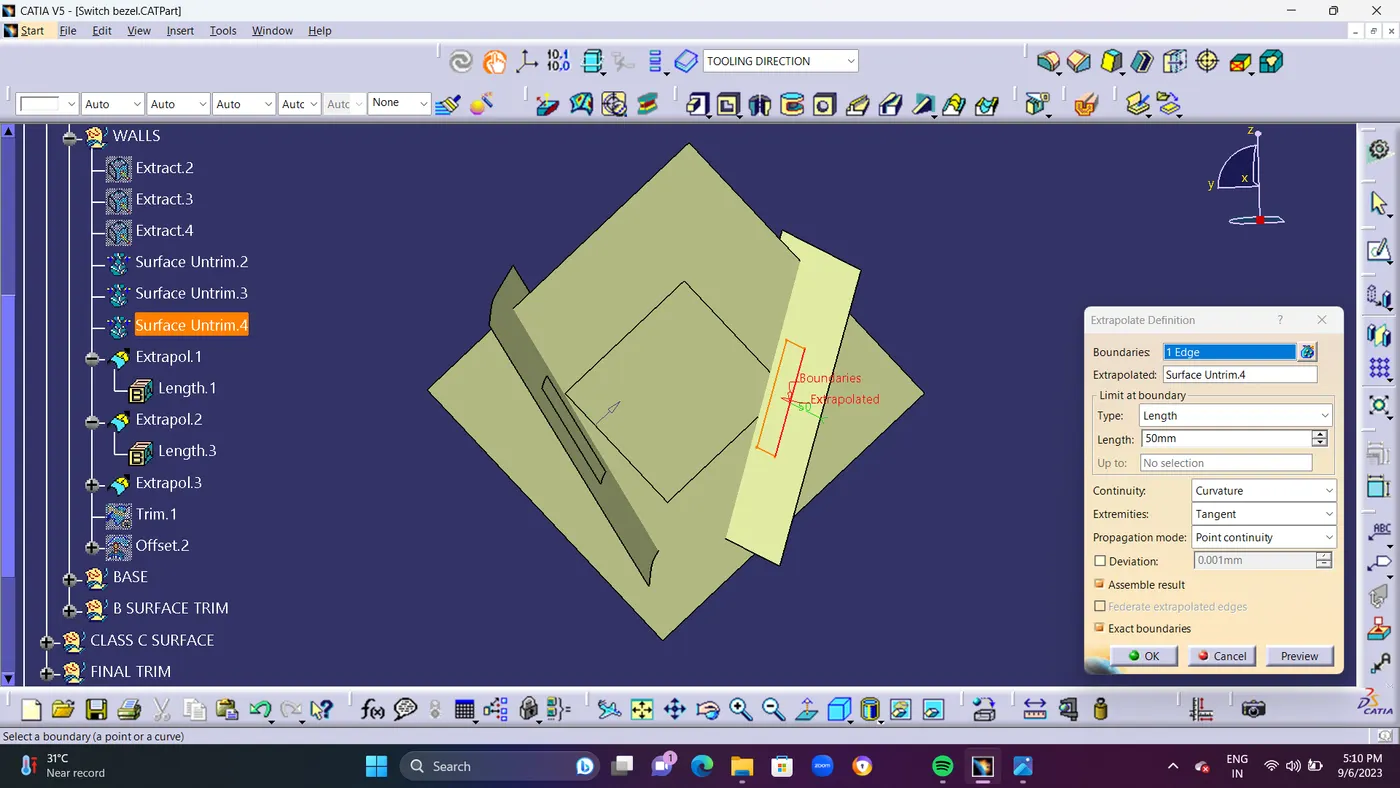
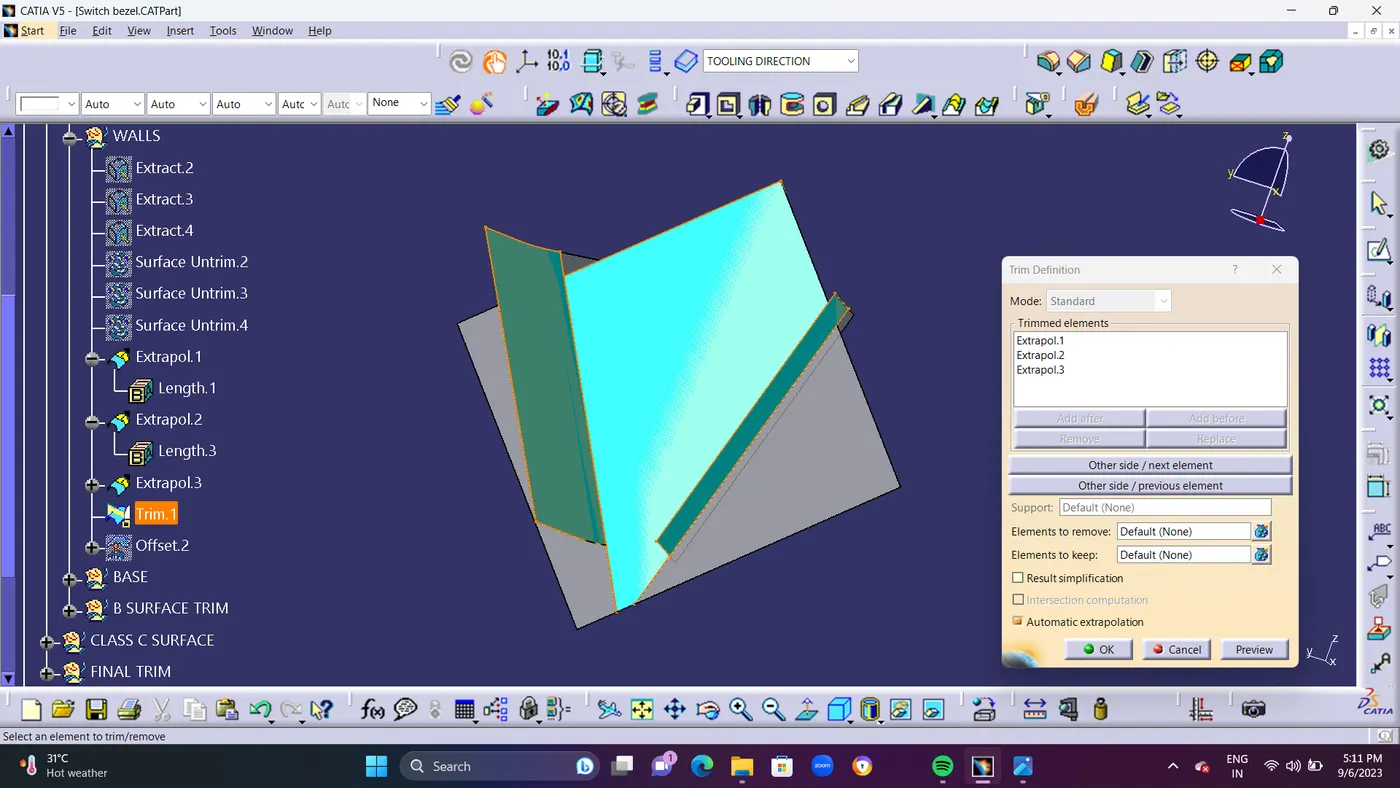
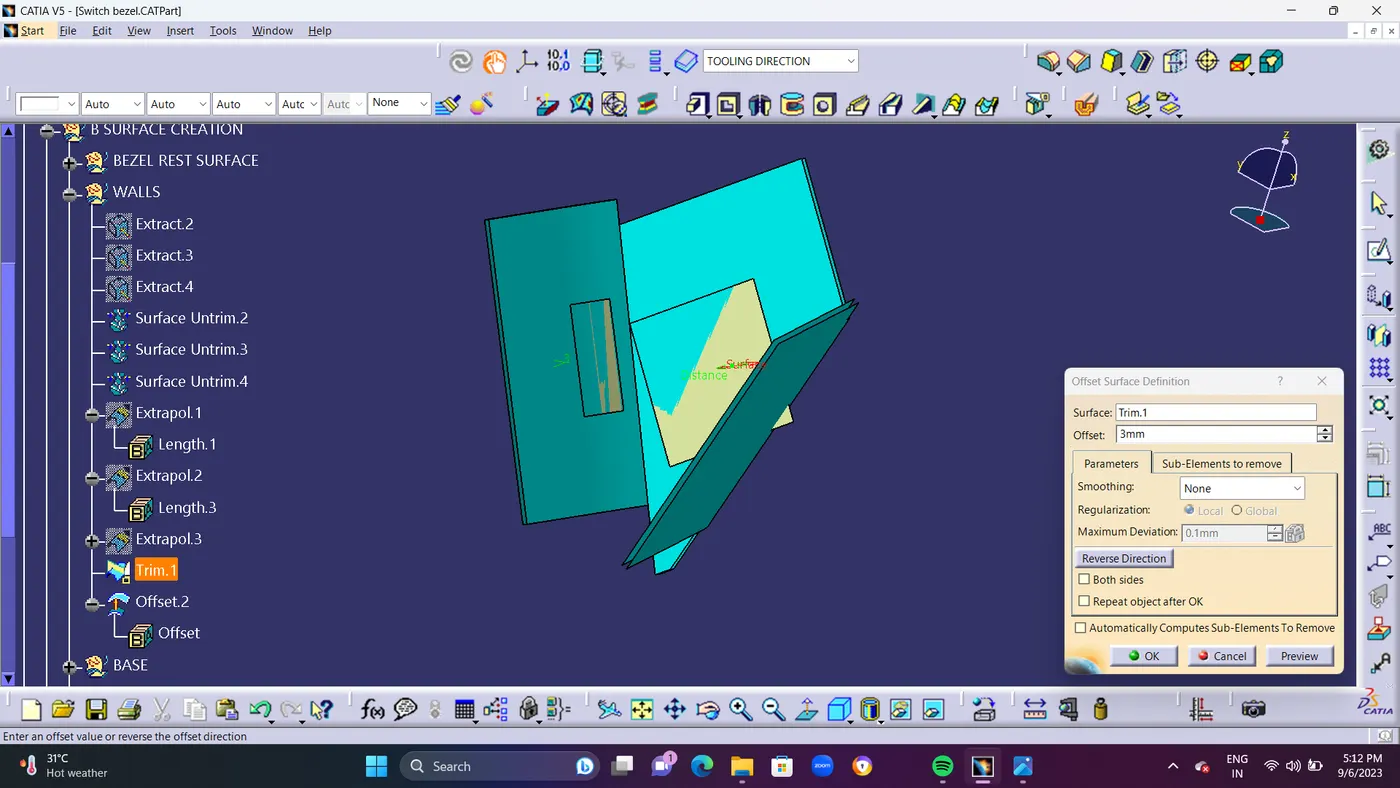
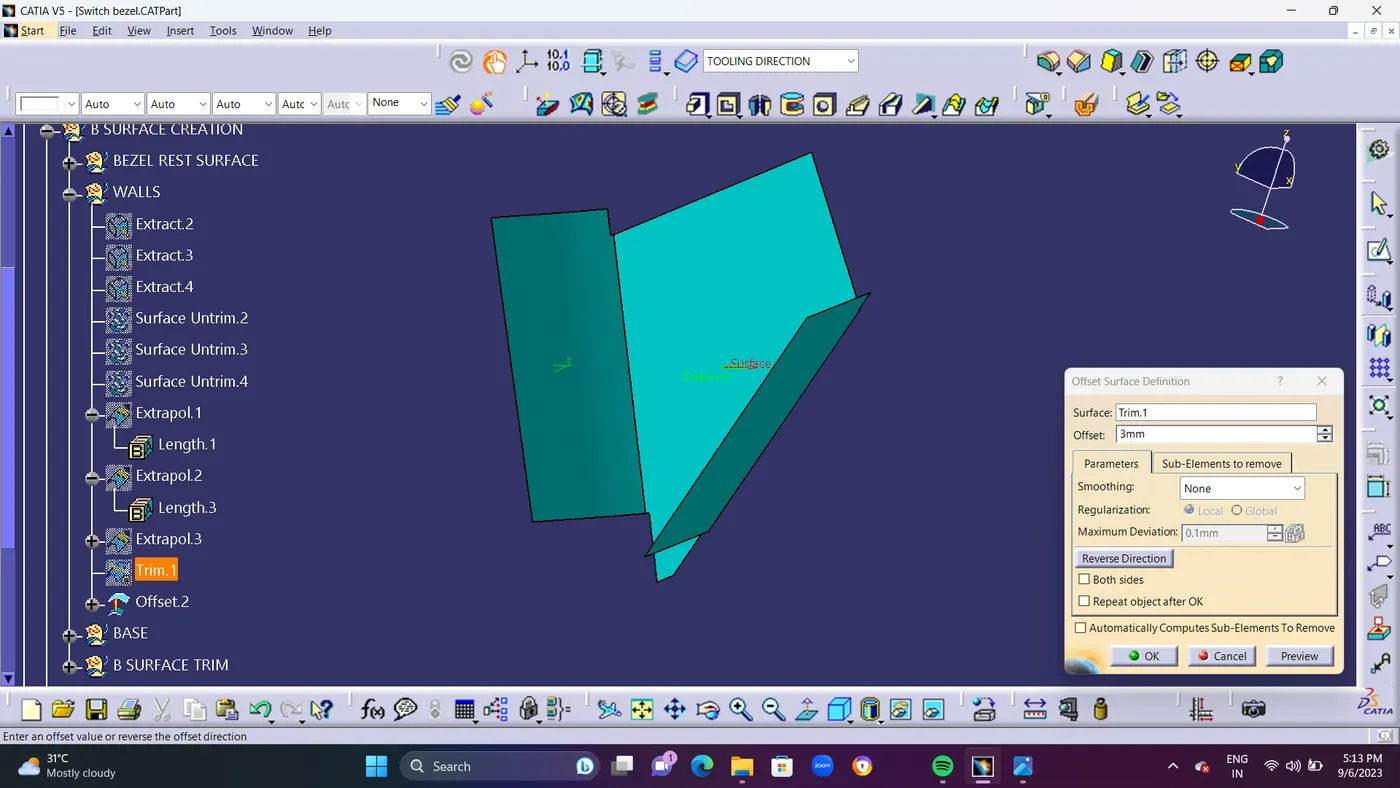
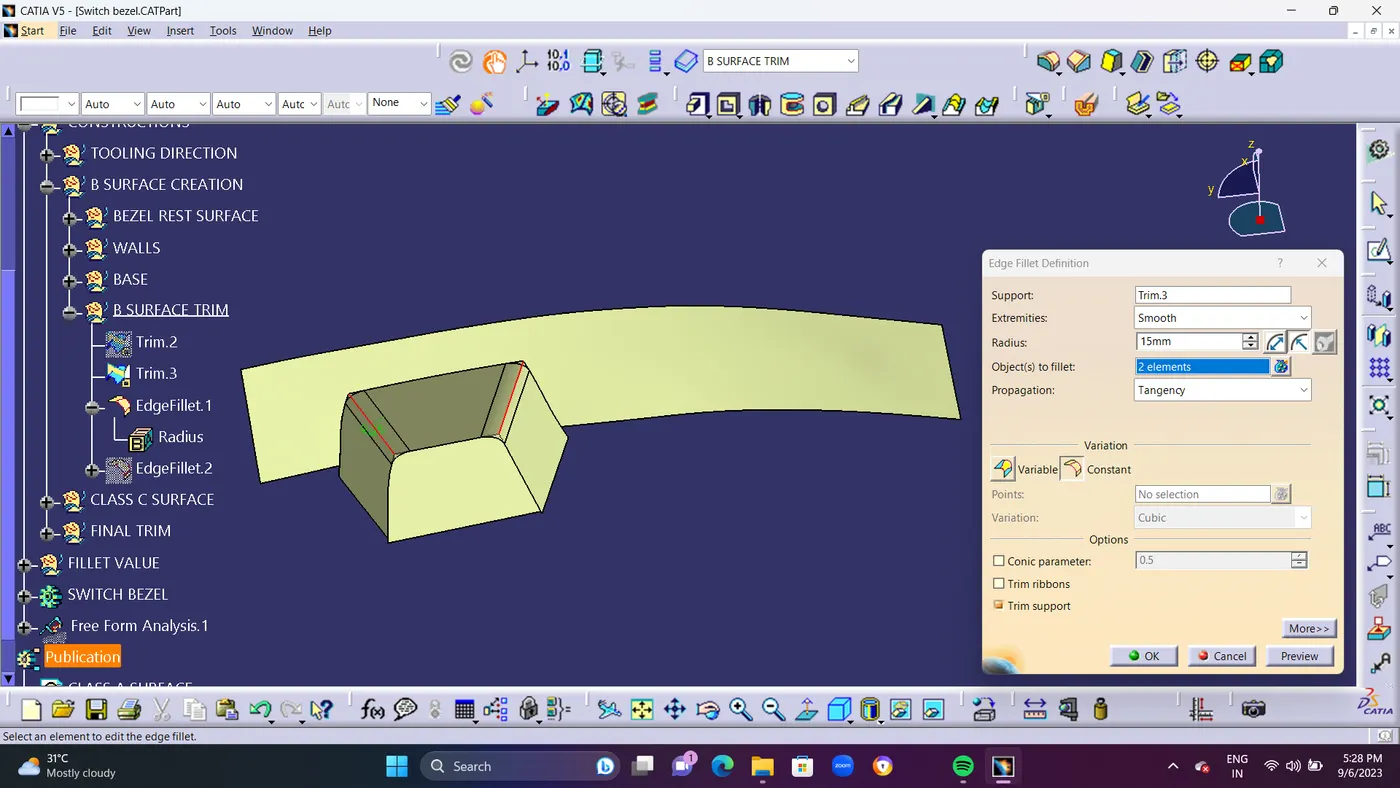
- and Finally EXTRACT the Base Surface.UNTRIM it and EXTRAPOLATE the base surface and OFFSET it For given 2.5mm.Final Trim ( trim the BEZEL REST SURFACE offset 1 with SINGLE WALL SURFACE offset 2.to form a single surface Name it as TRIM 2. and trim the BASE SURFACE offset 3 with TRIM 2.and Complet CLASS B SURACE as been Created.without fillets Name it as TRIME 3.
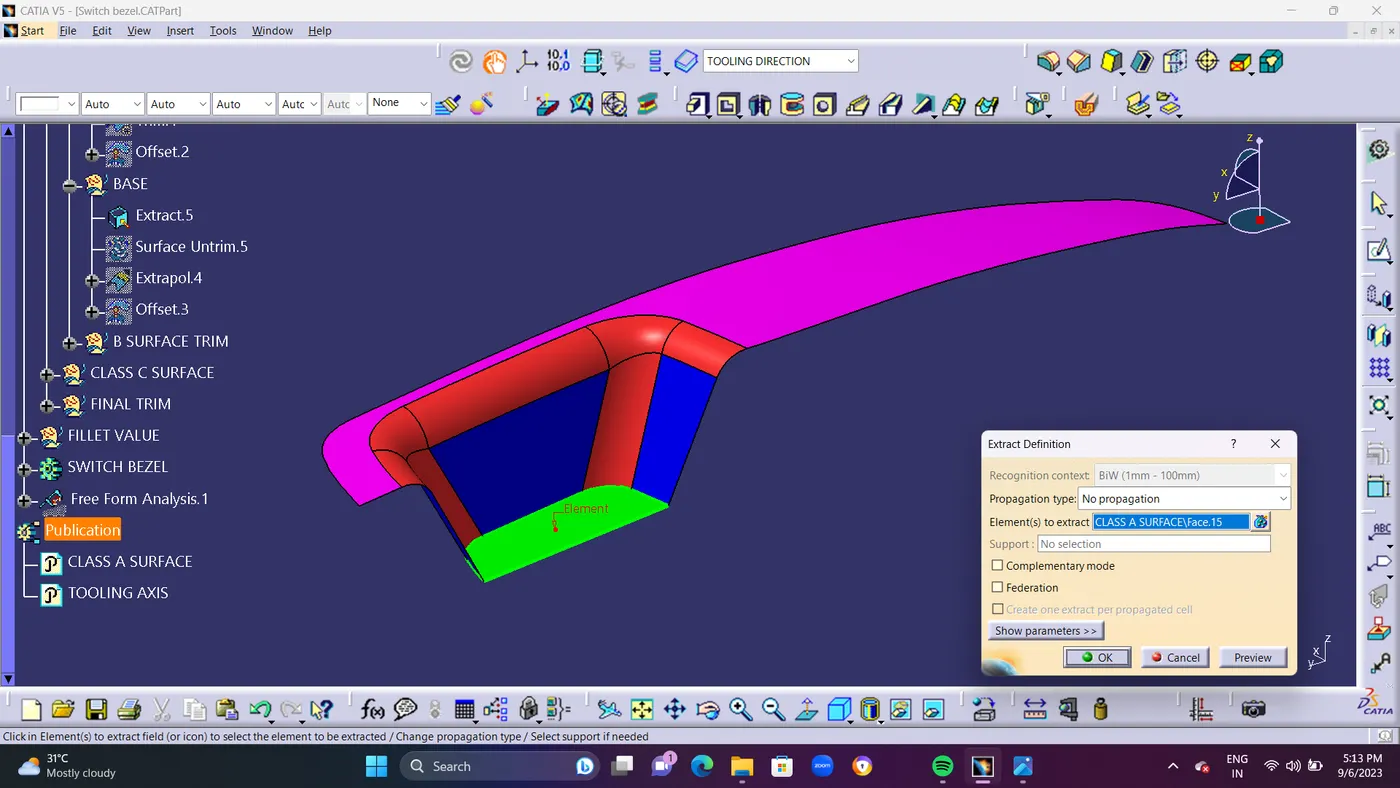
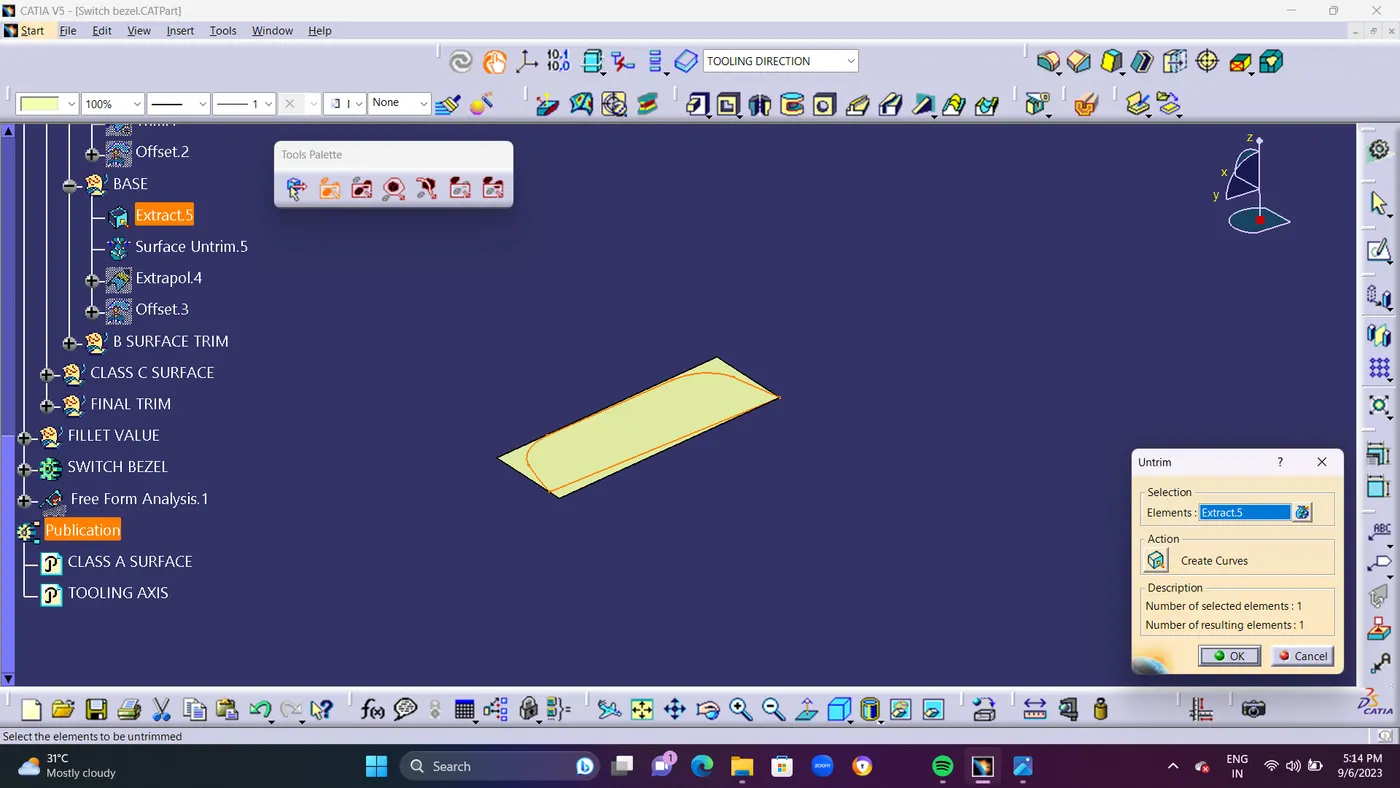
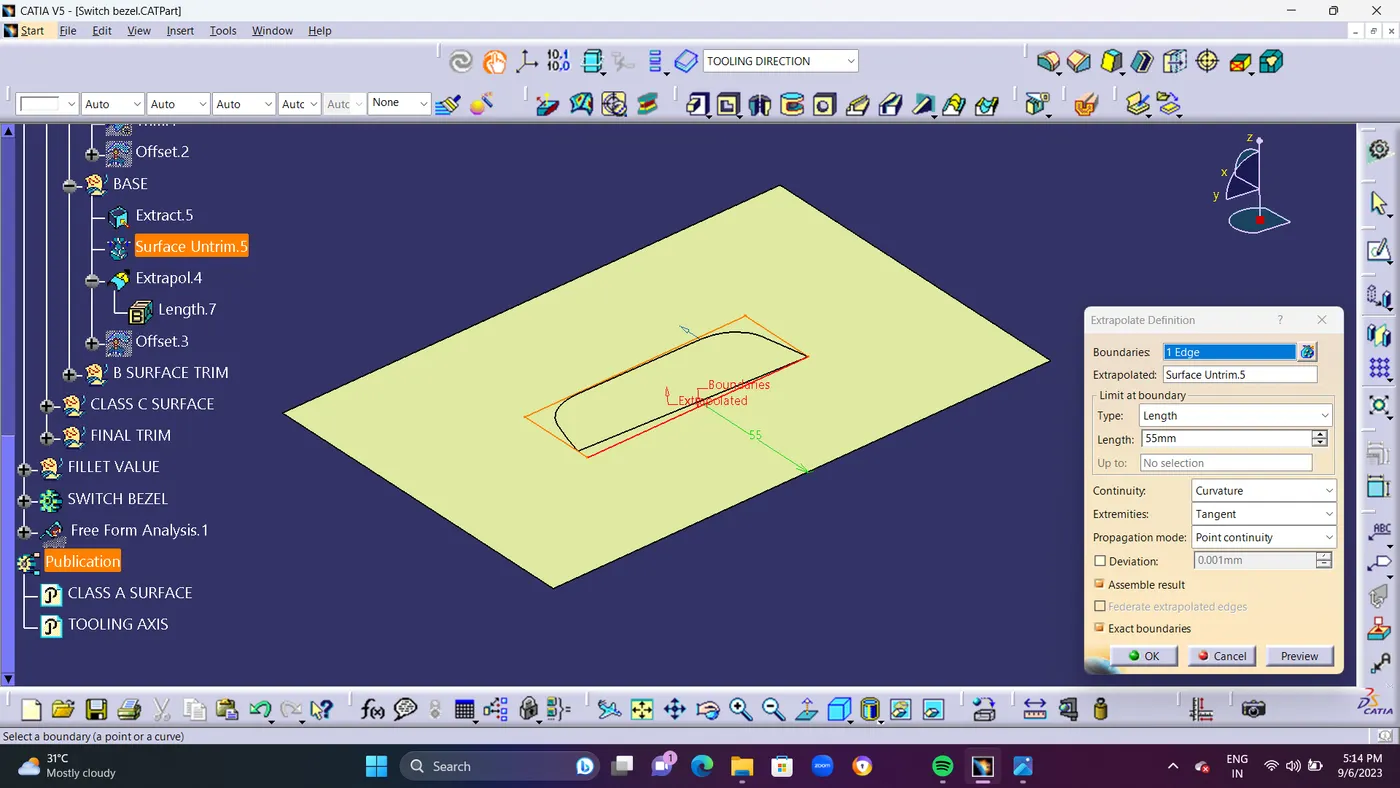
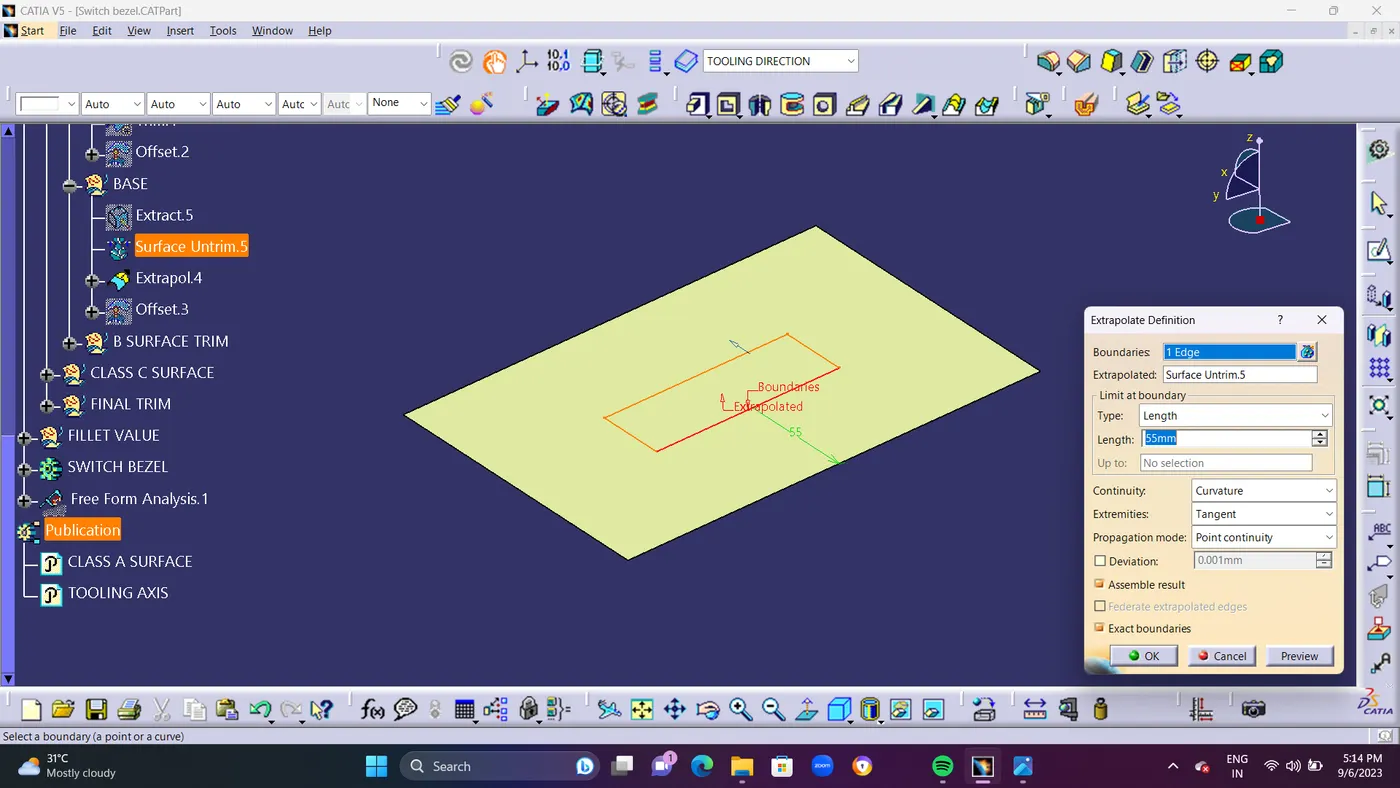
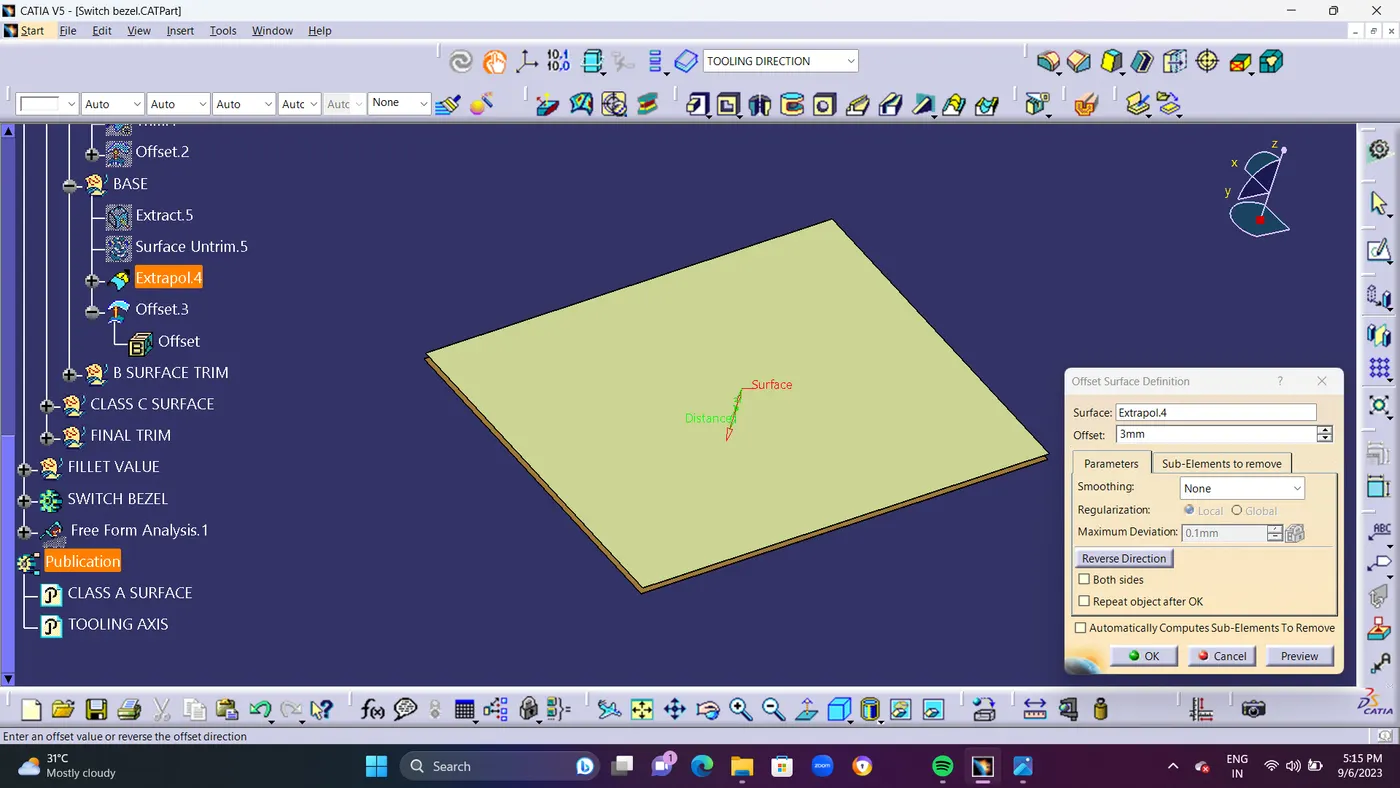
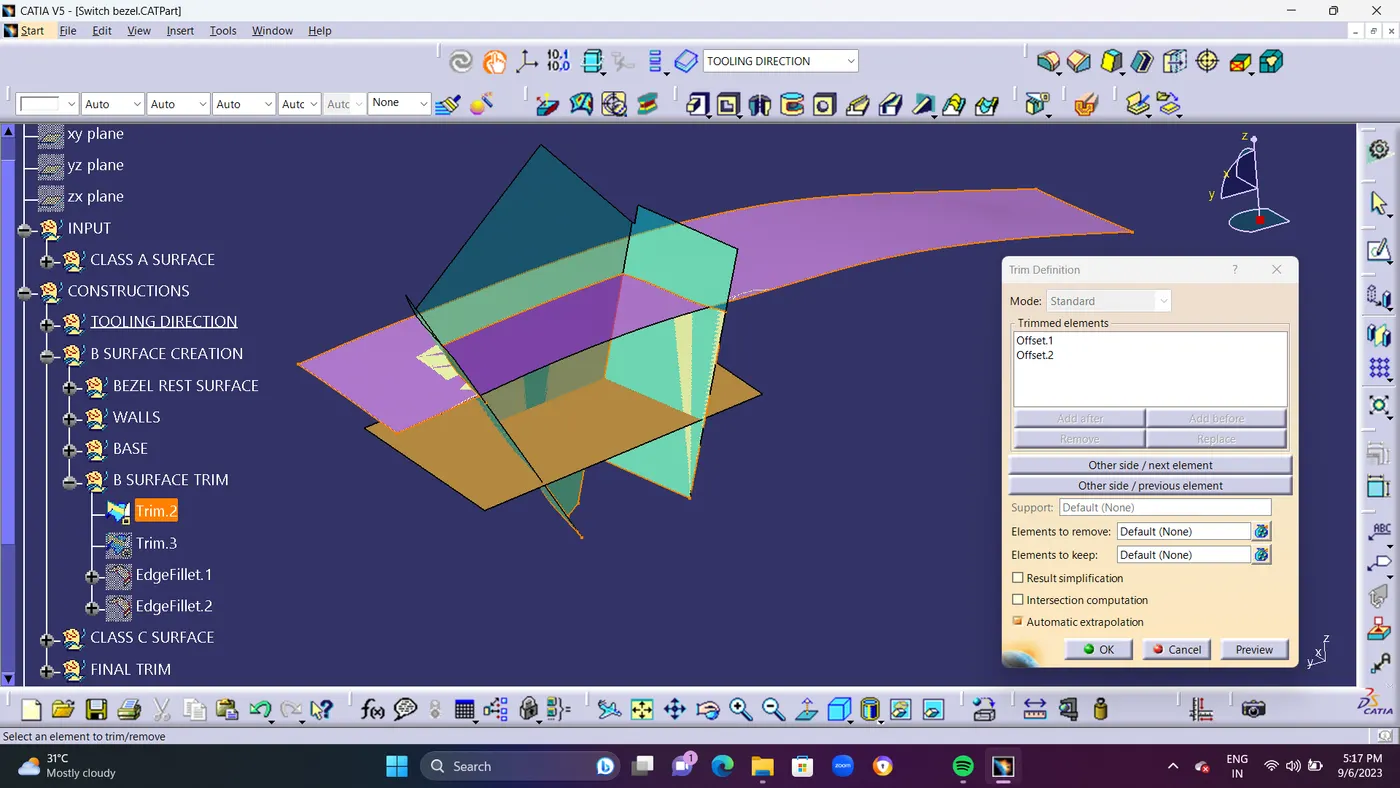
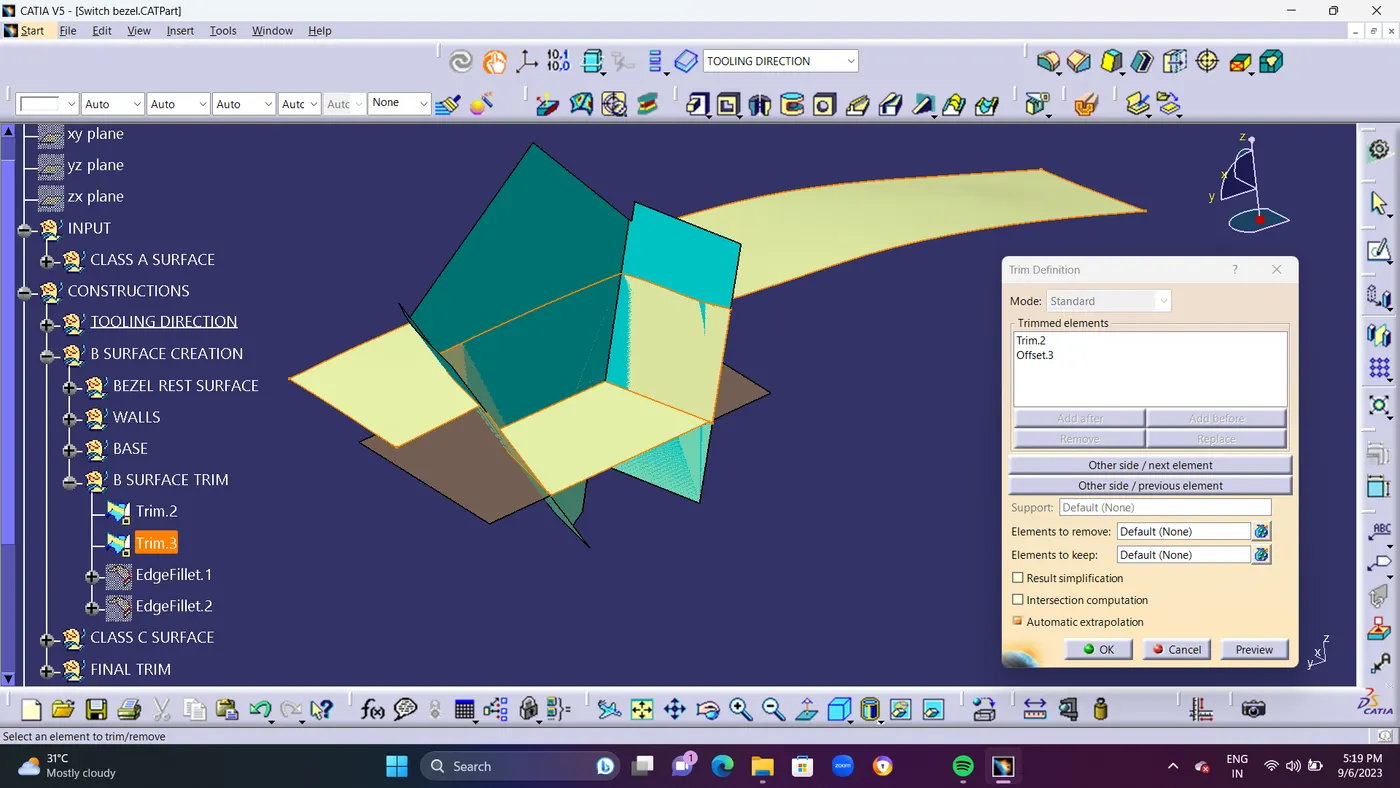
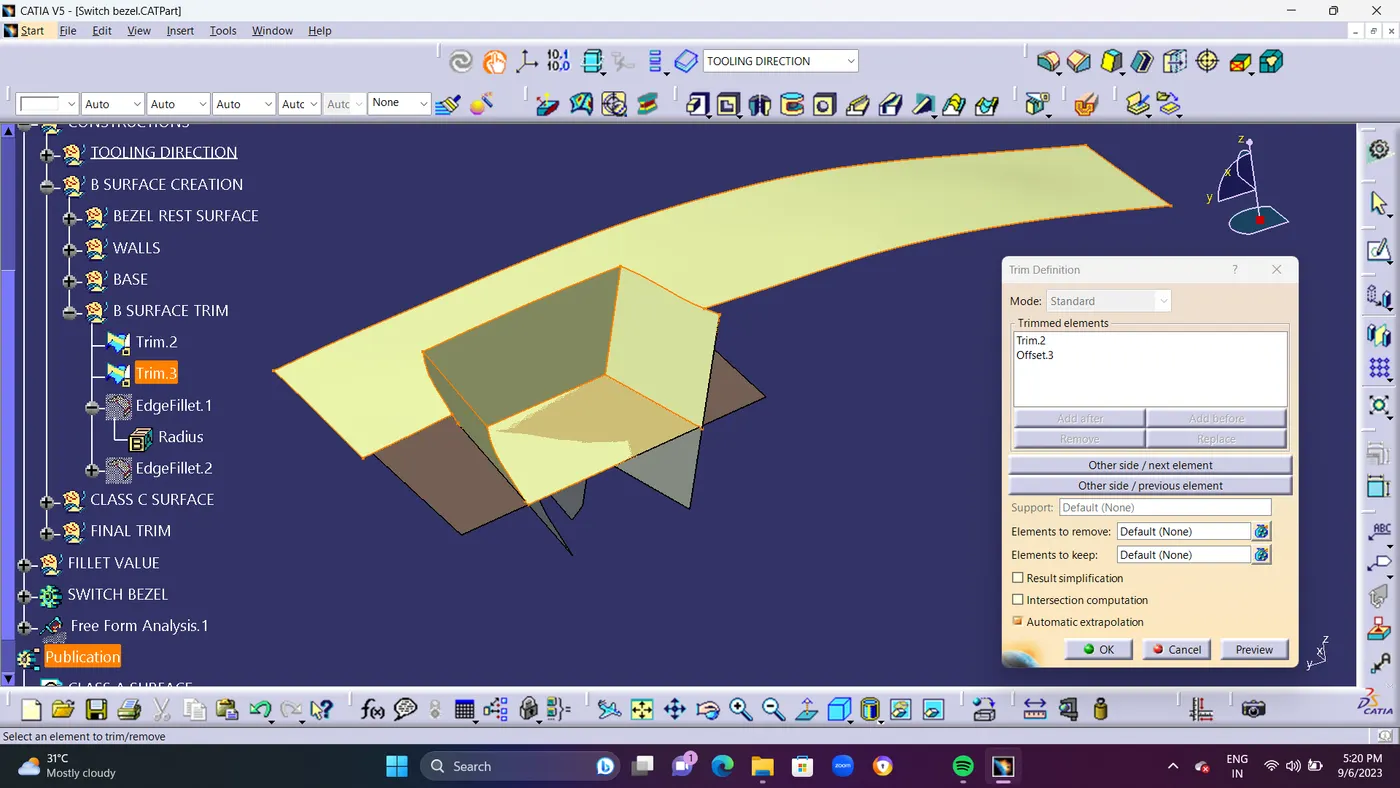
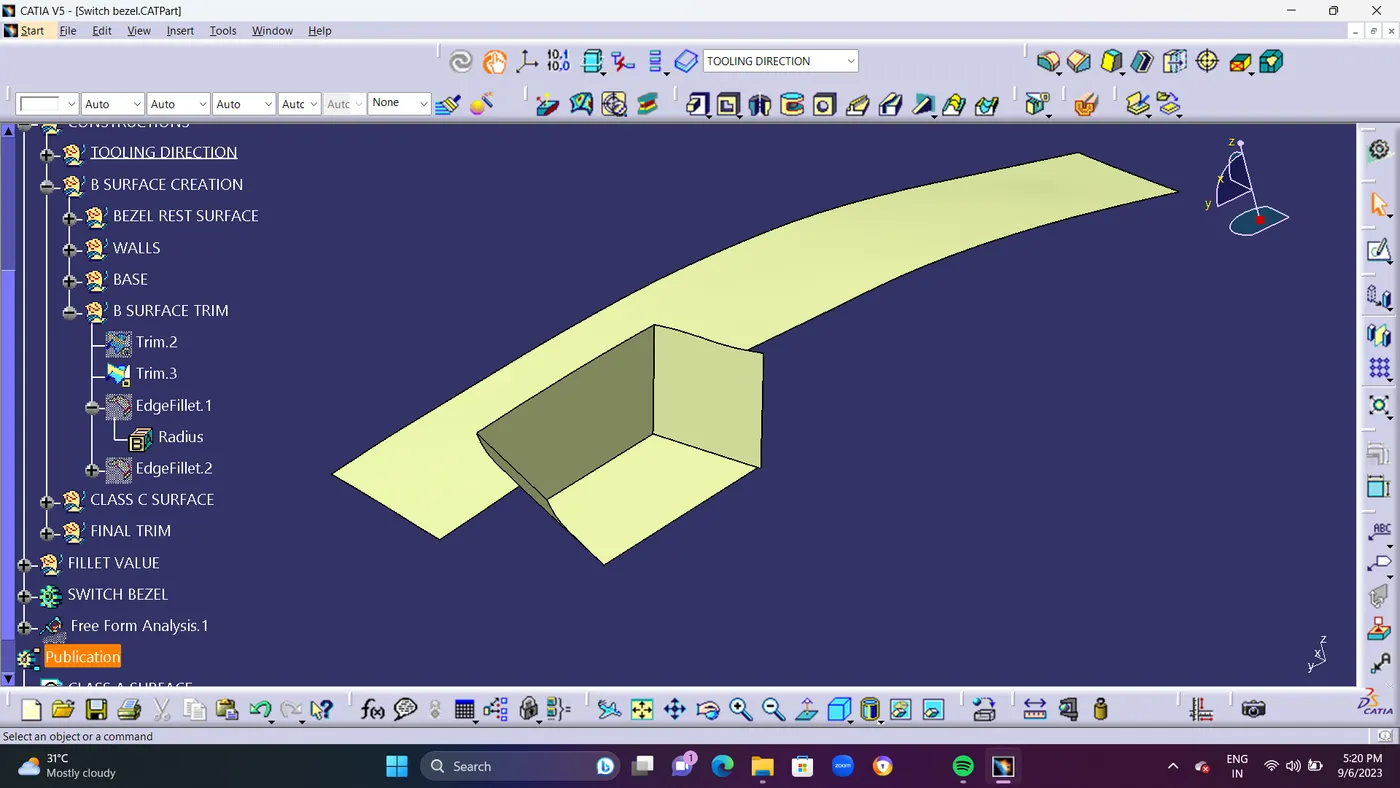
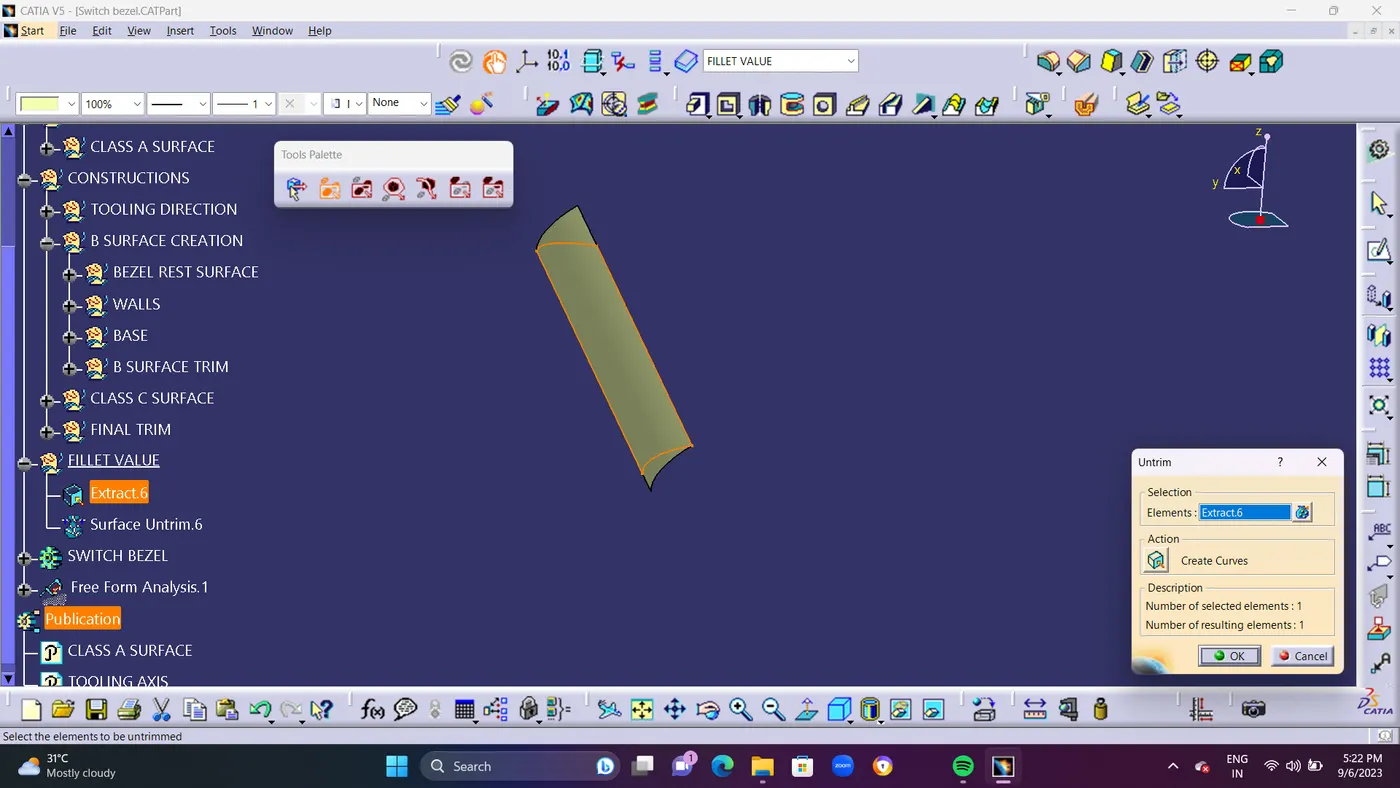
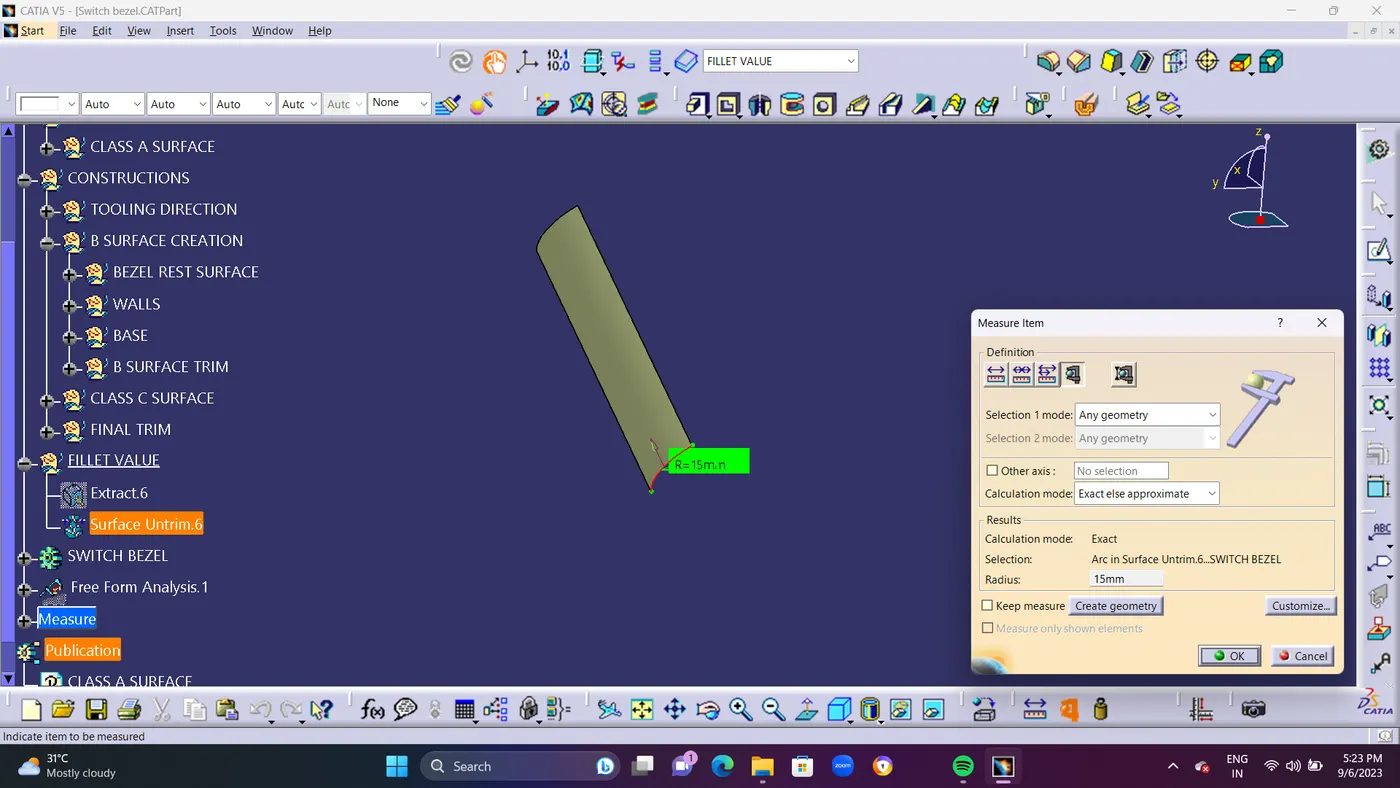
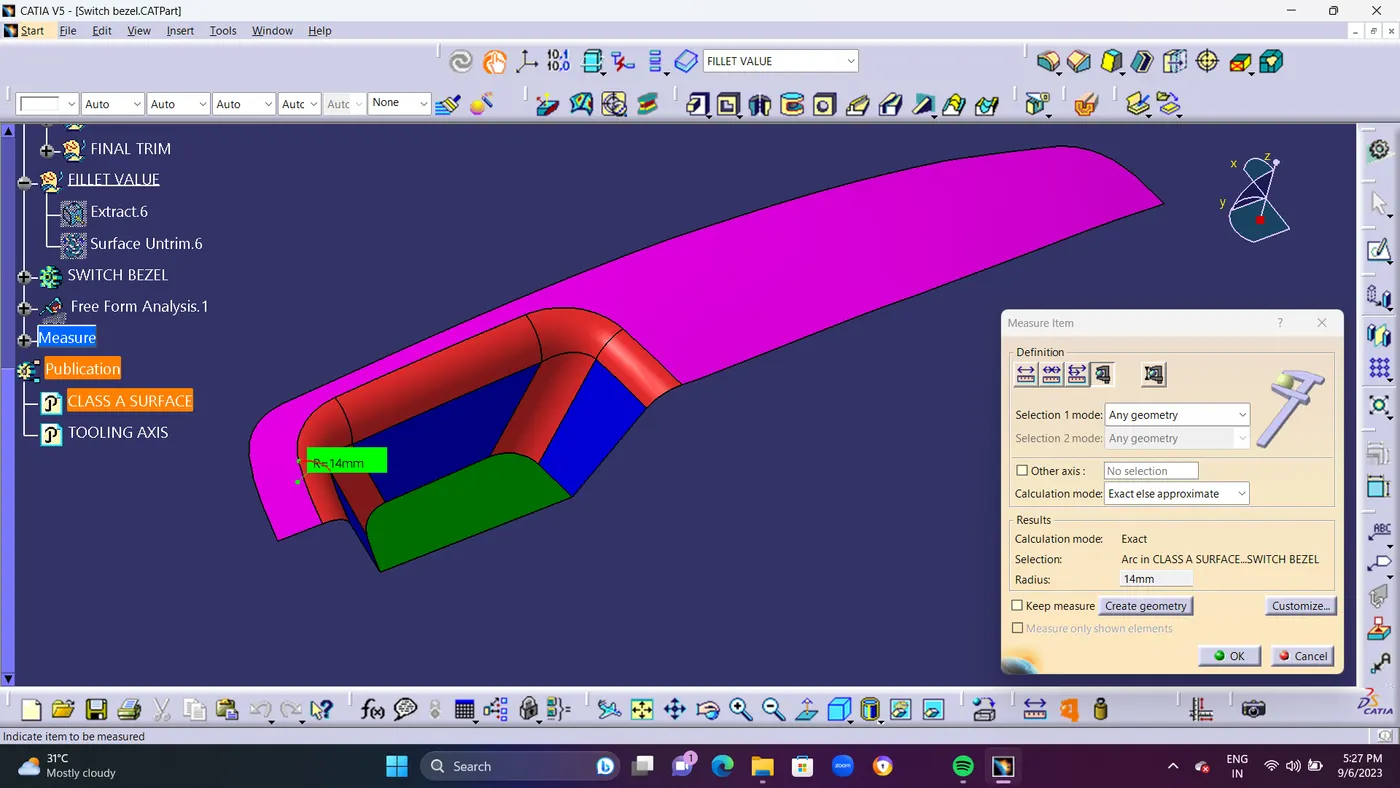
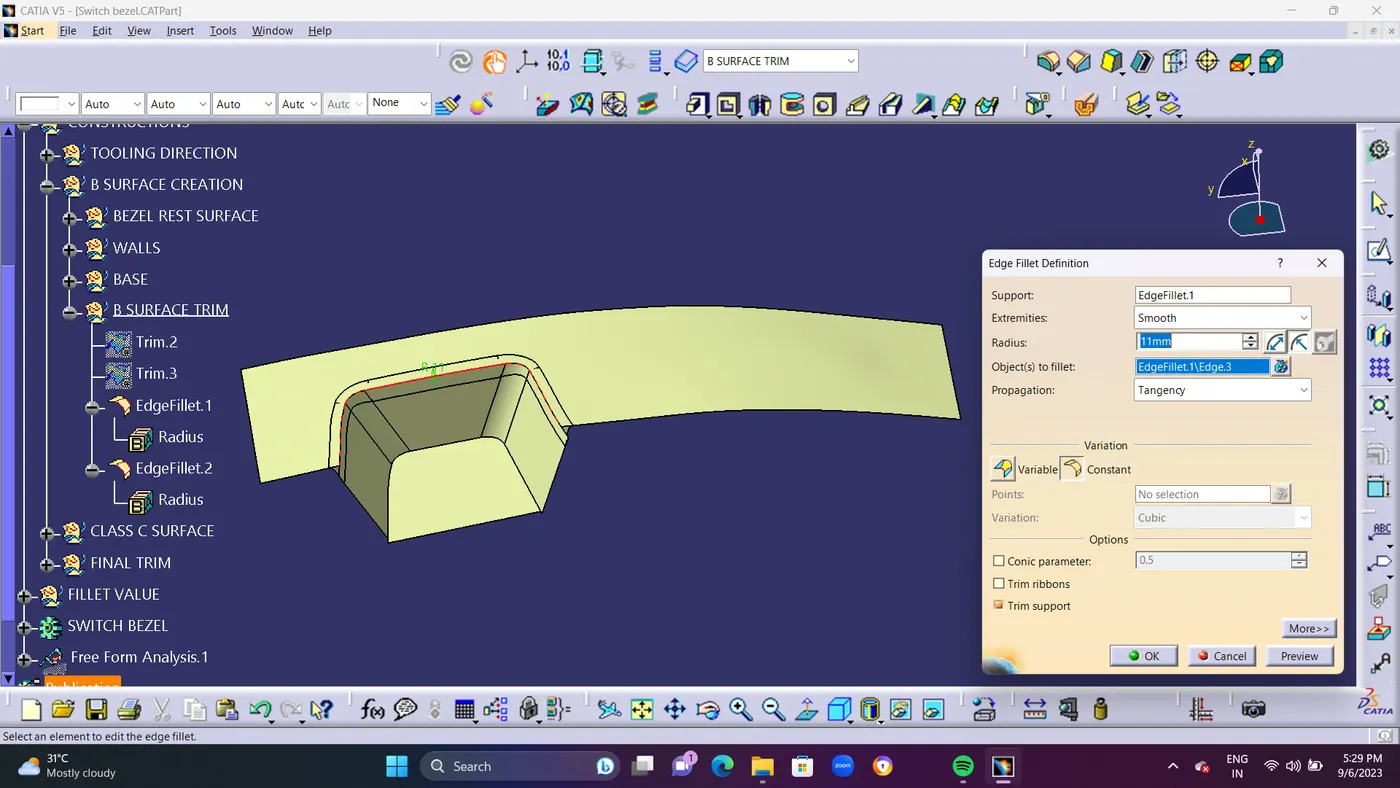
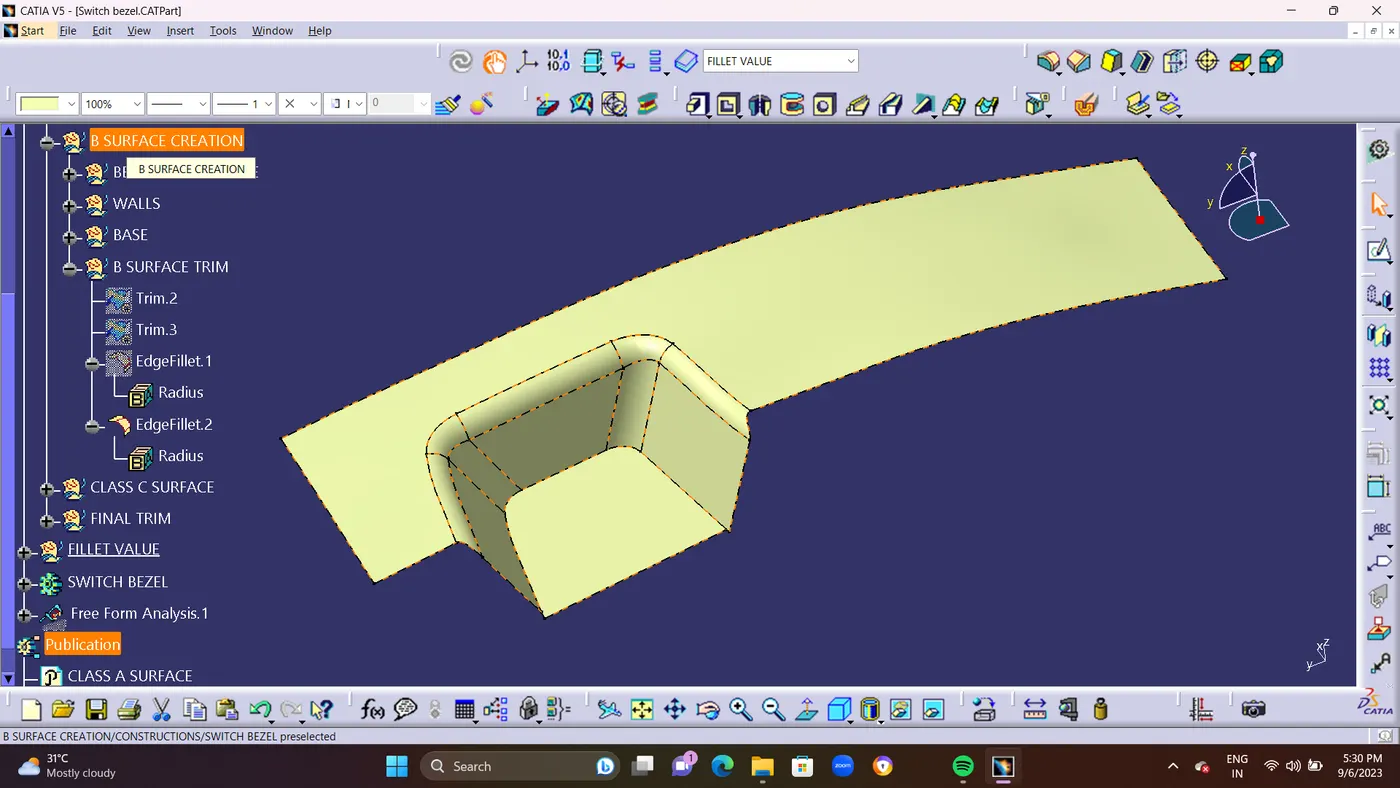
- By using Class A surface fillet Value as Been measured the Corner Fillet value is R 15mm and the top fillet Value is R 14-3= R11.as been Created.and Finally CLASS B Surface is Created.
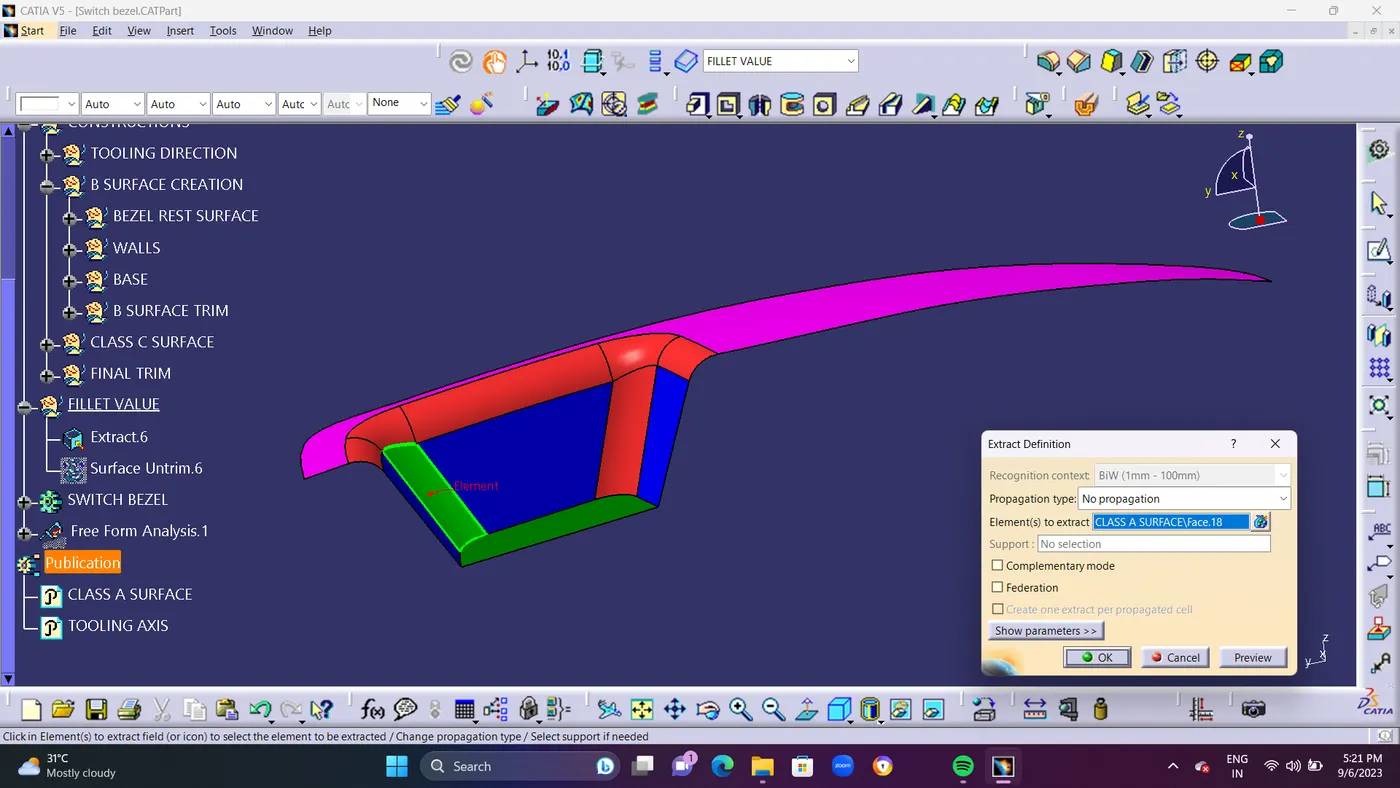
- STEP 4 : The boundary was developed by taking class A into account.To build a Class C surface, the sweep command was used for 3 DEGREE, and as a point of reference Line, the primary tooling axis and tooling direction were taken into account. Sweep Command is used to Extend the Border of Class A surface to Vertical direction for Creating Class C surface.Use CURVE Command For Smoothening the 2 Boundary Surface.
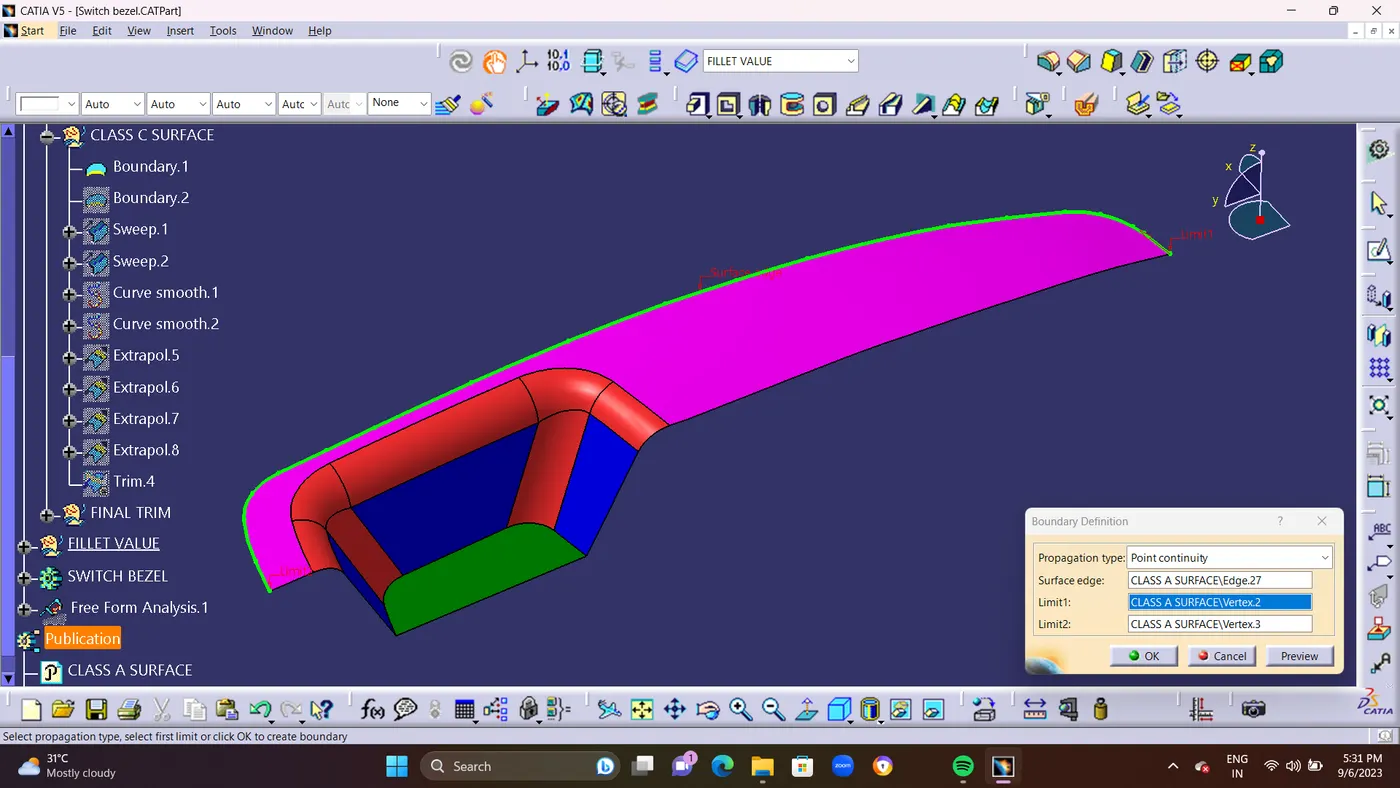
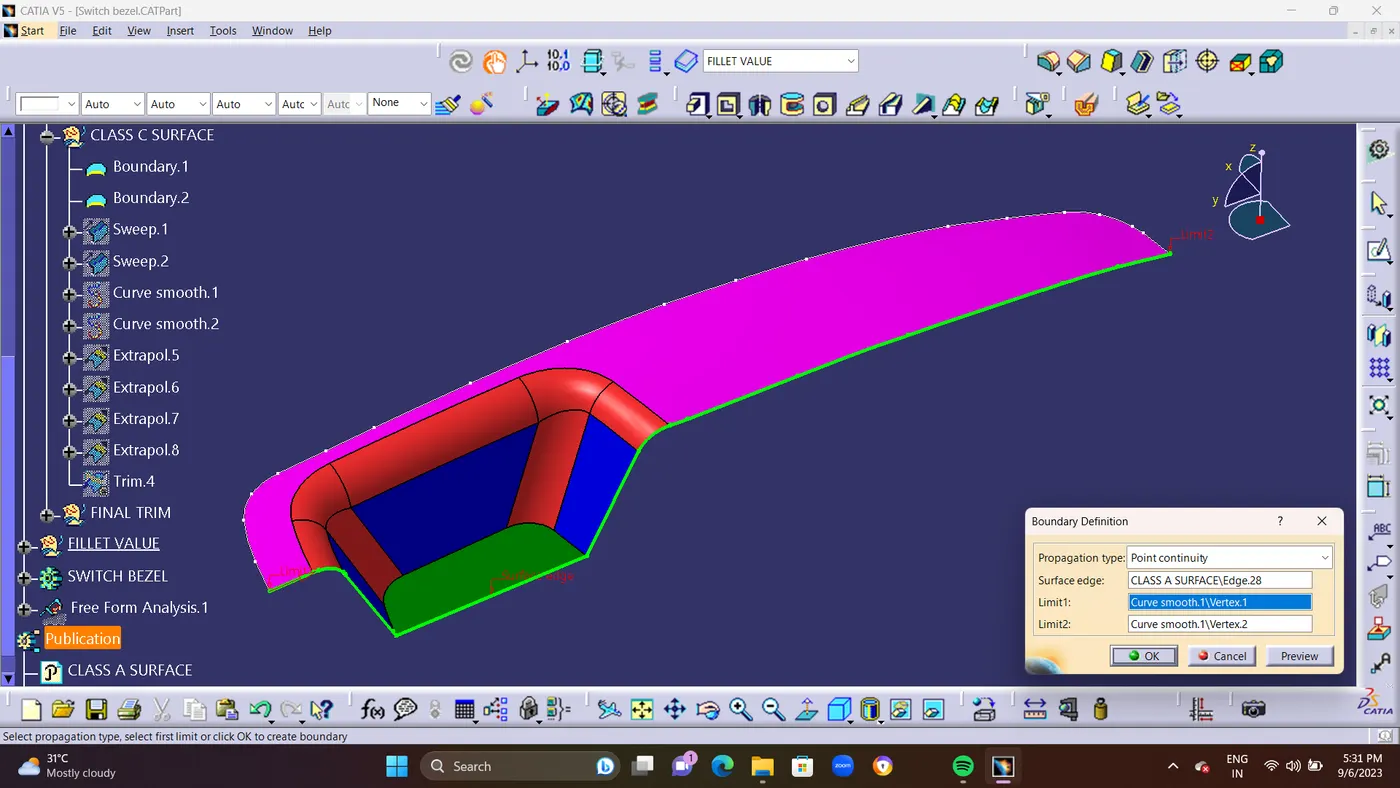
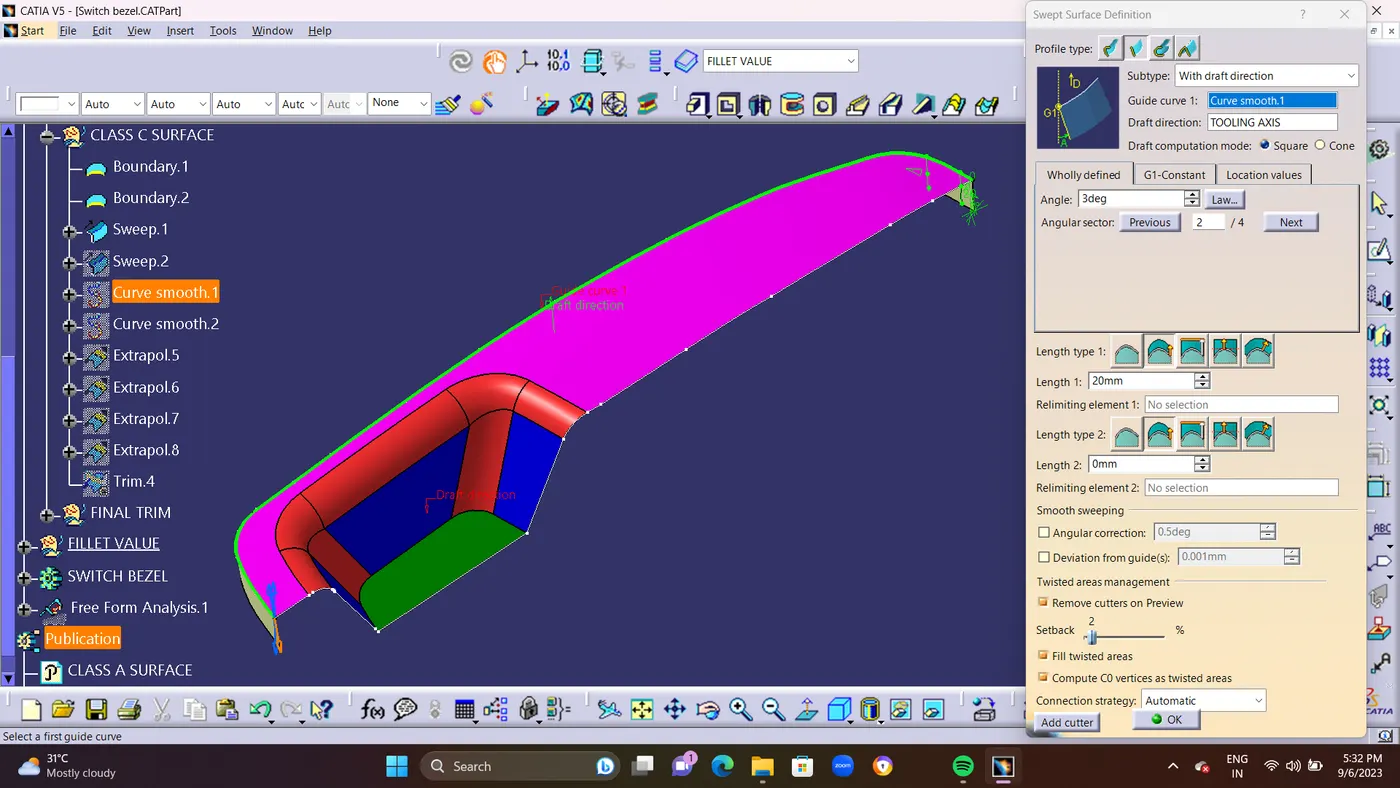
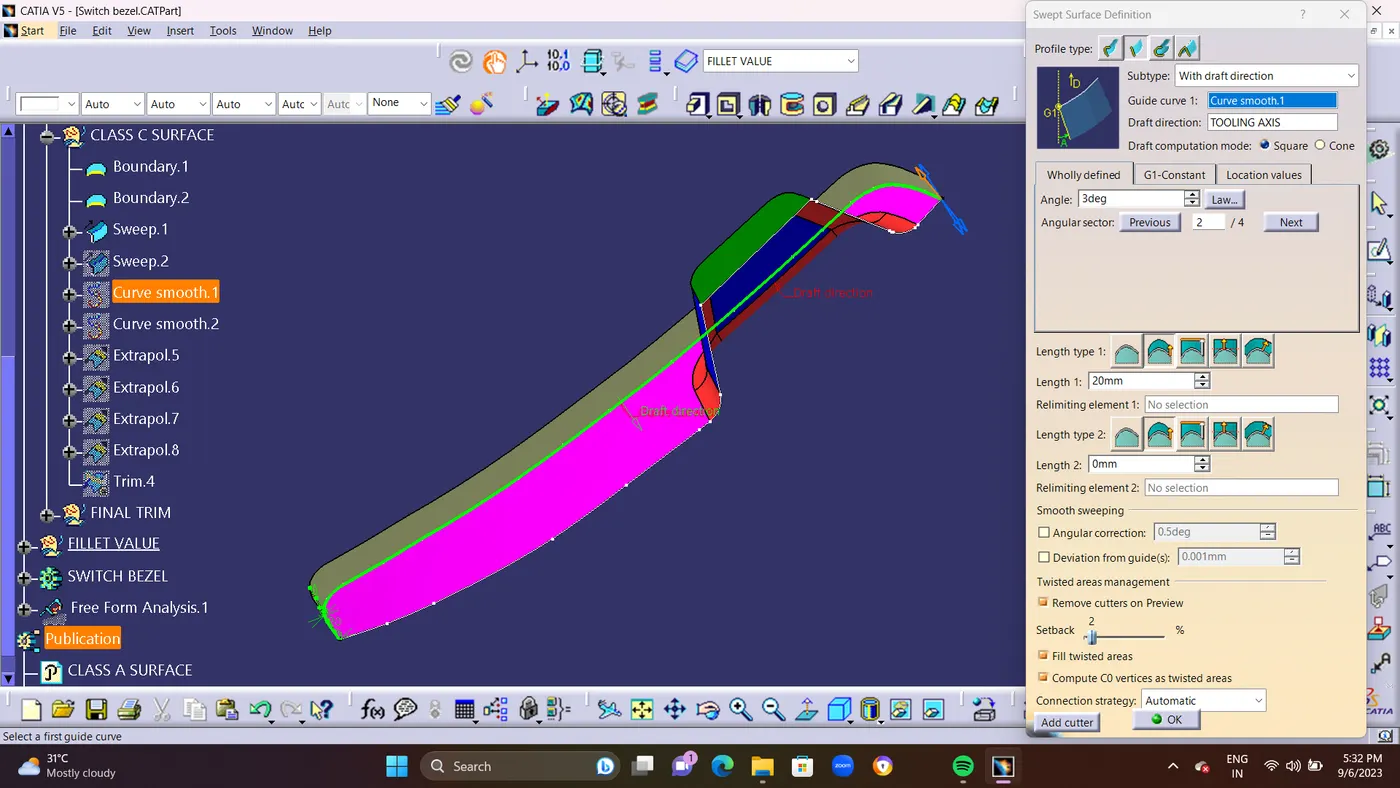
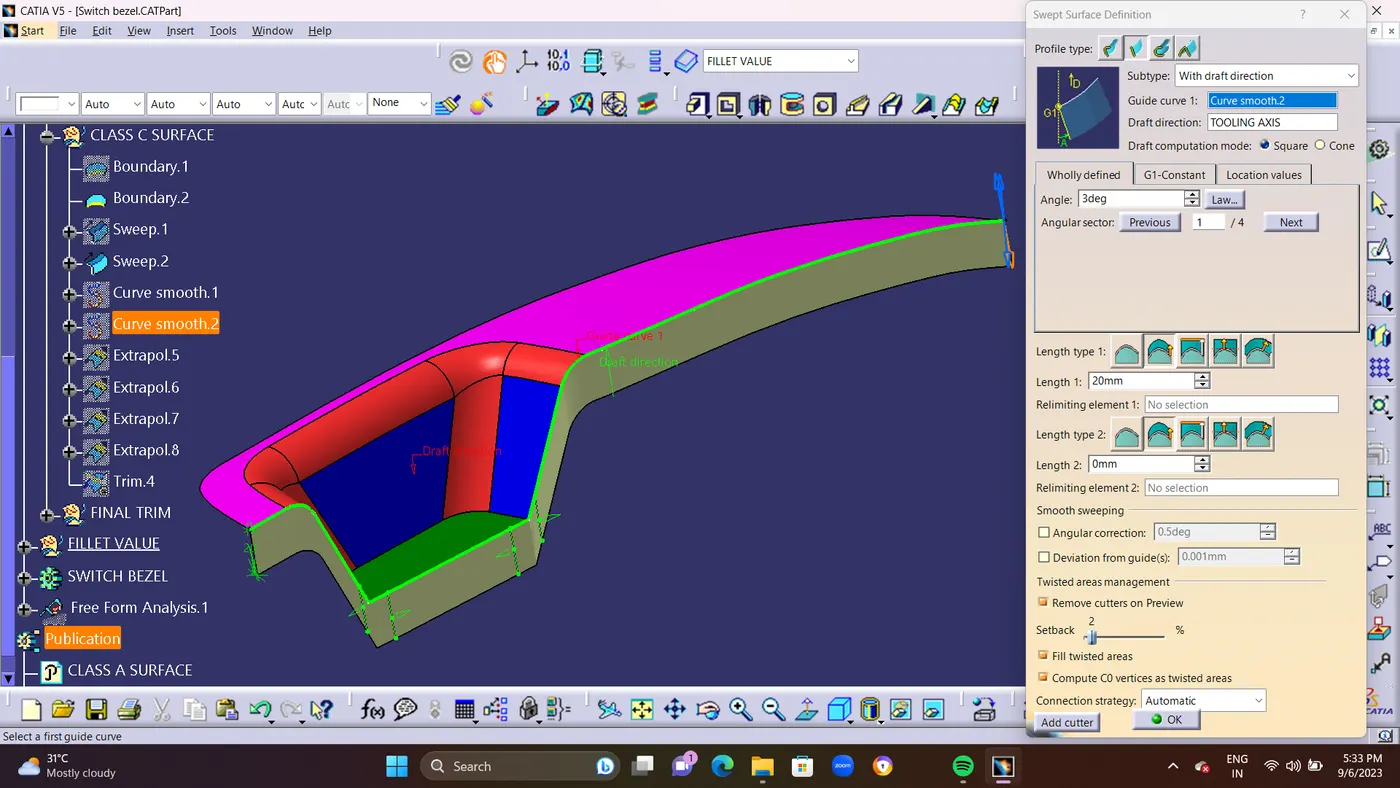
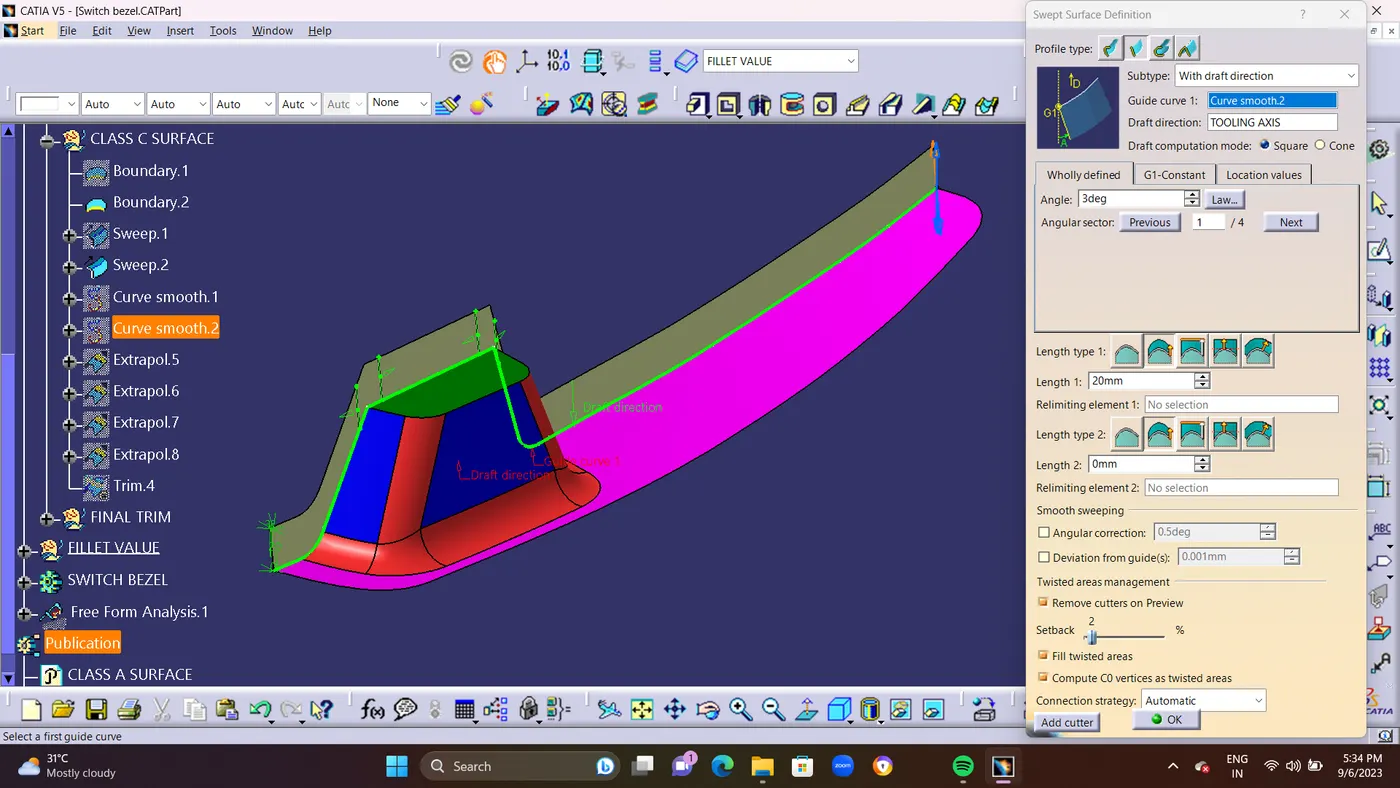
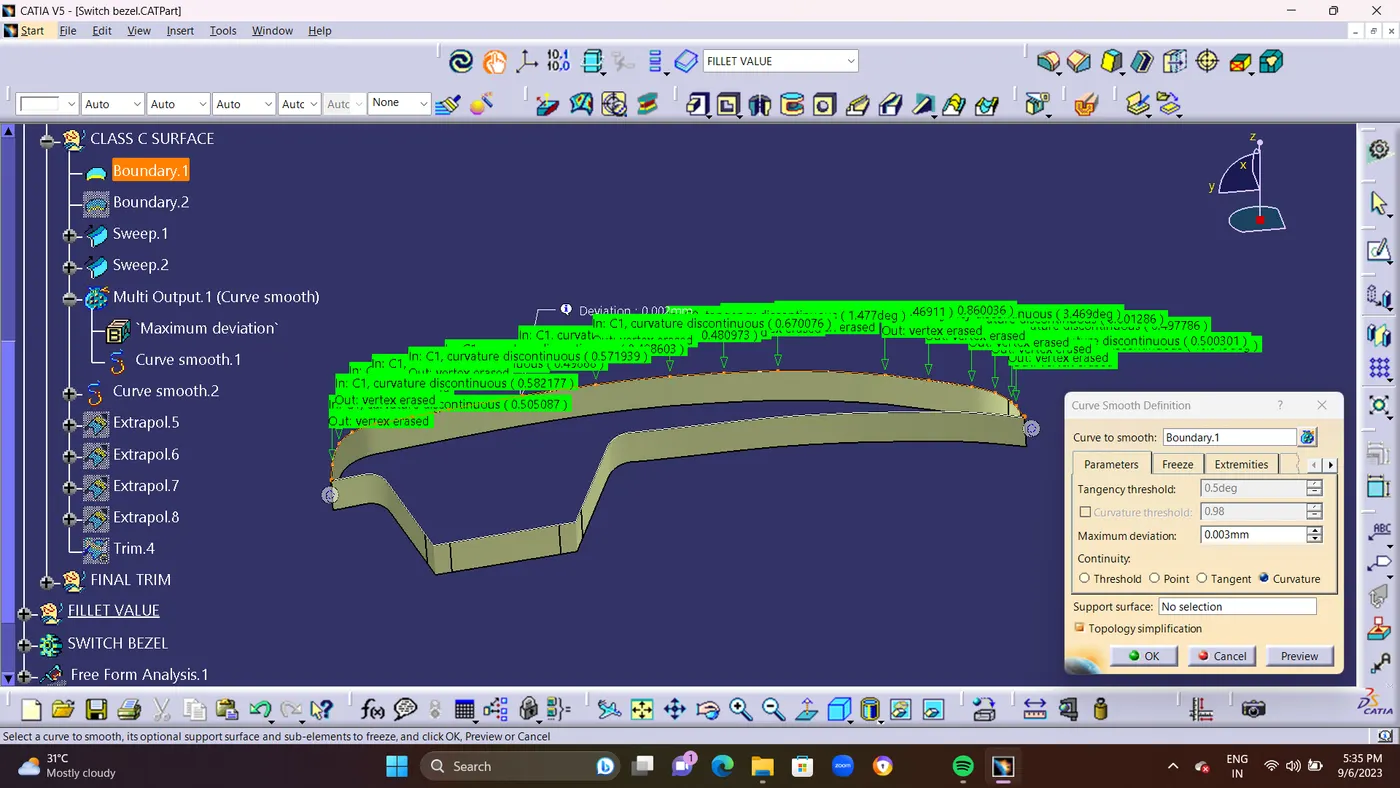
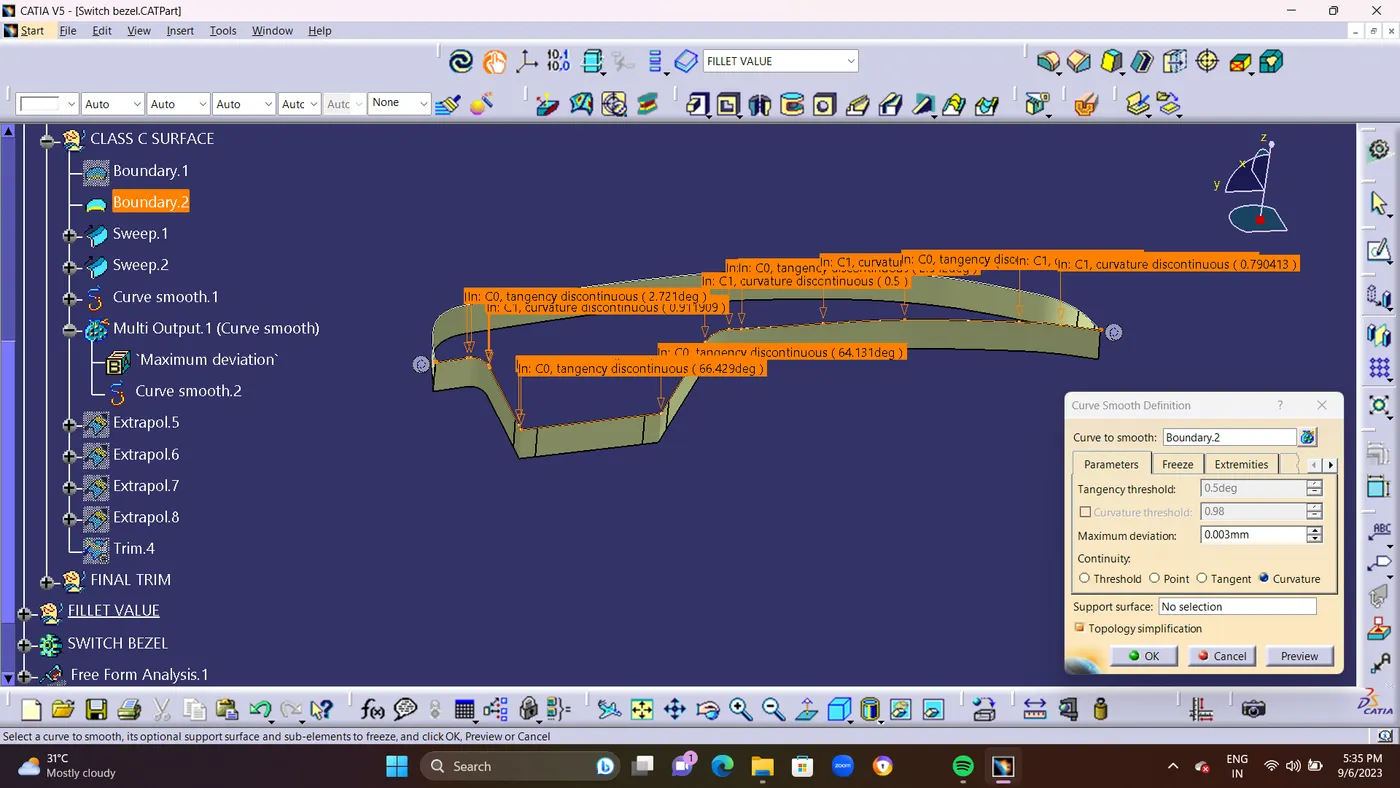
- There are Some Gaps In between Class C Surface as shown in Below Screen Shots. so we have to EXTRAPOLATE the Boundaries of the sweep Class C surface and TRIM it To Form Final CLASS C Surface.
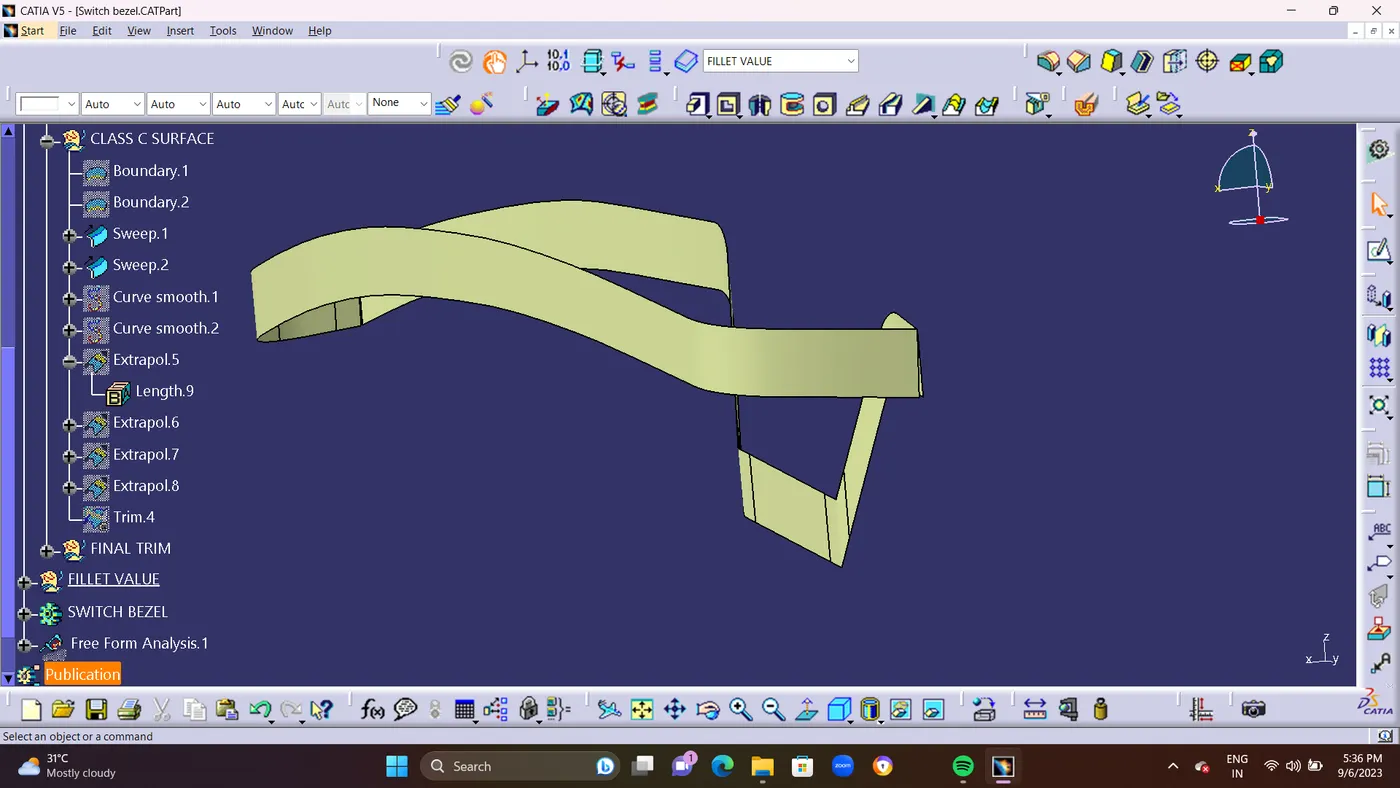
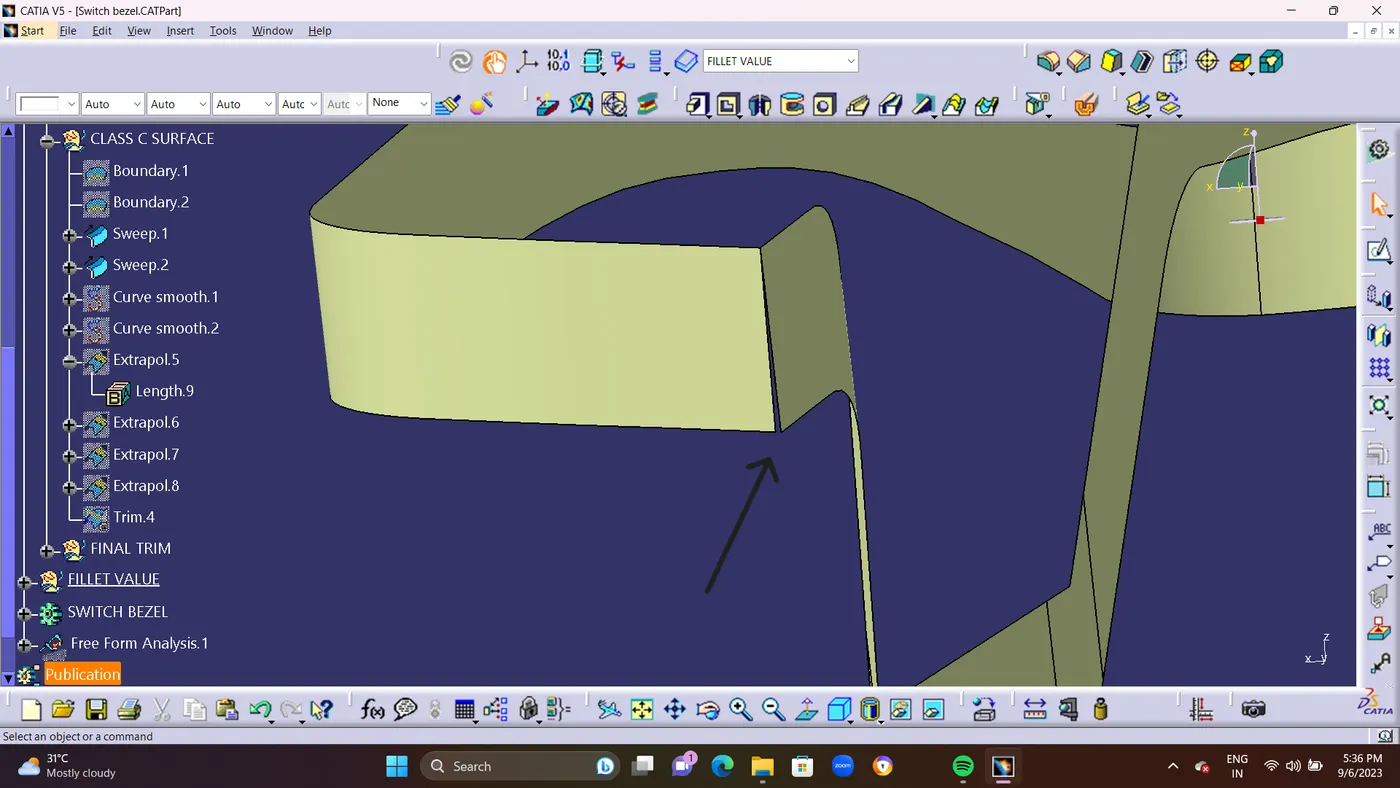
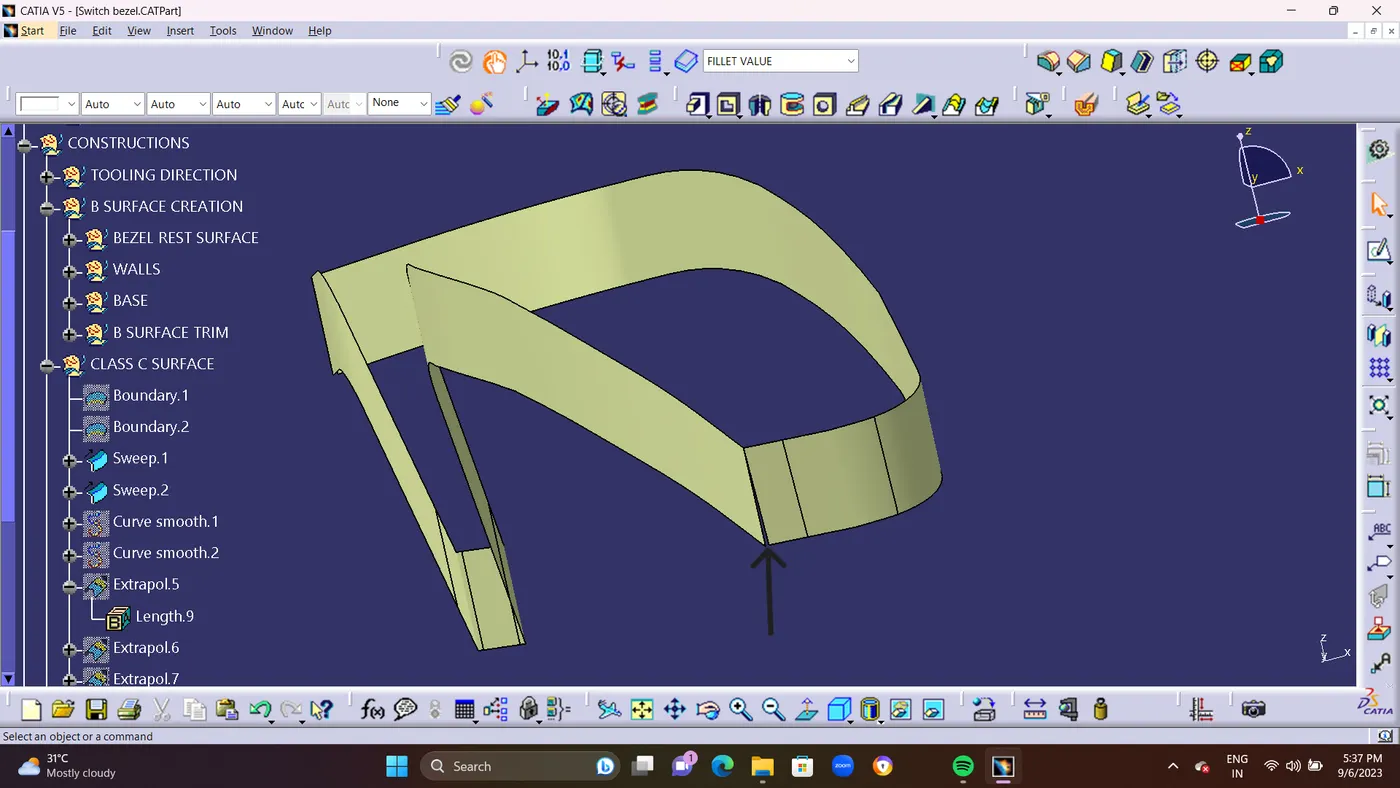
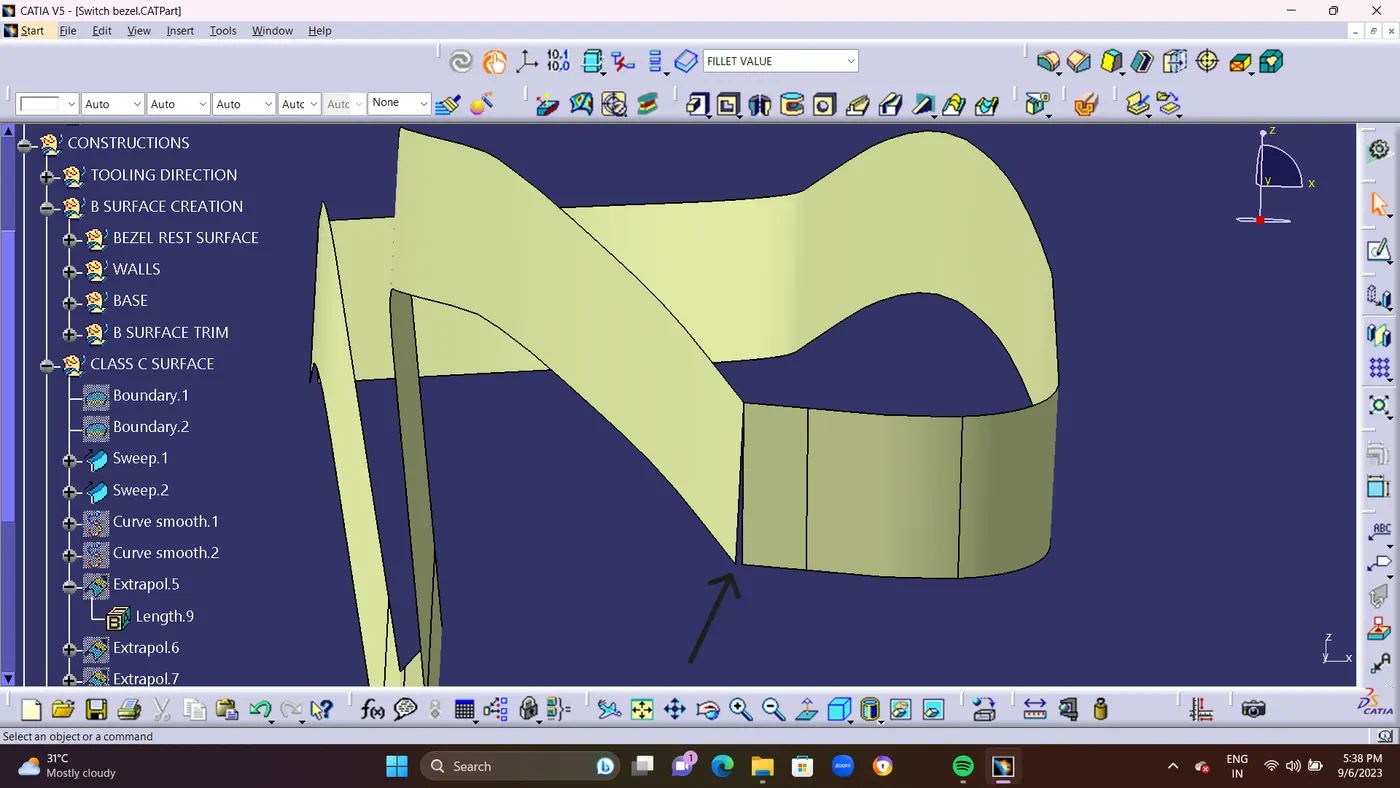
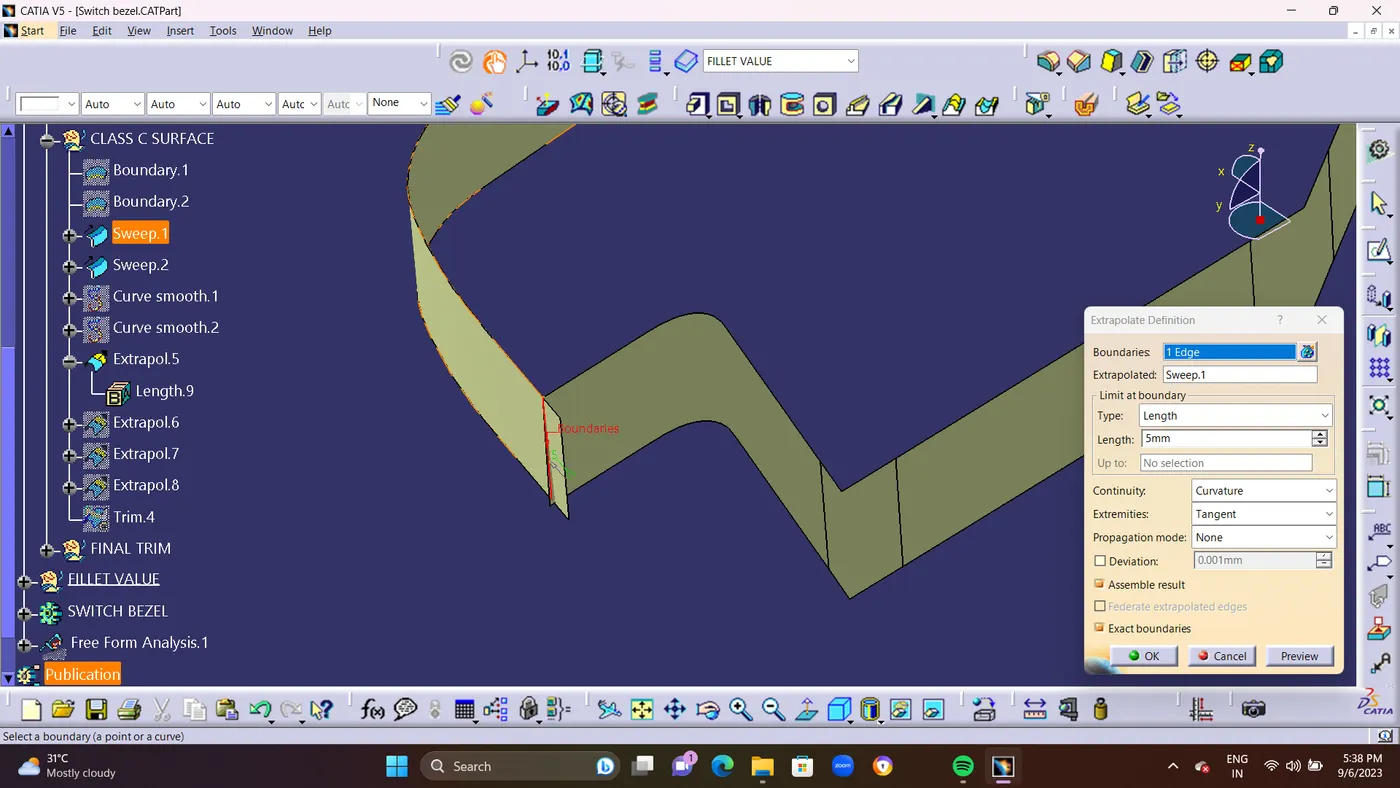
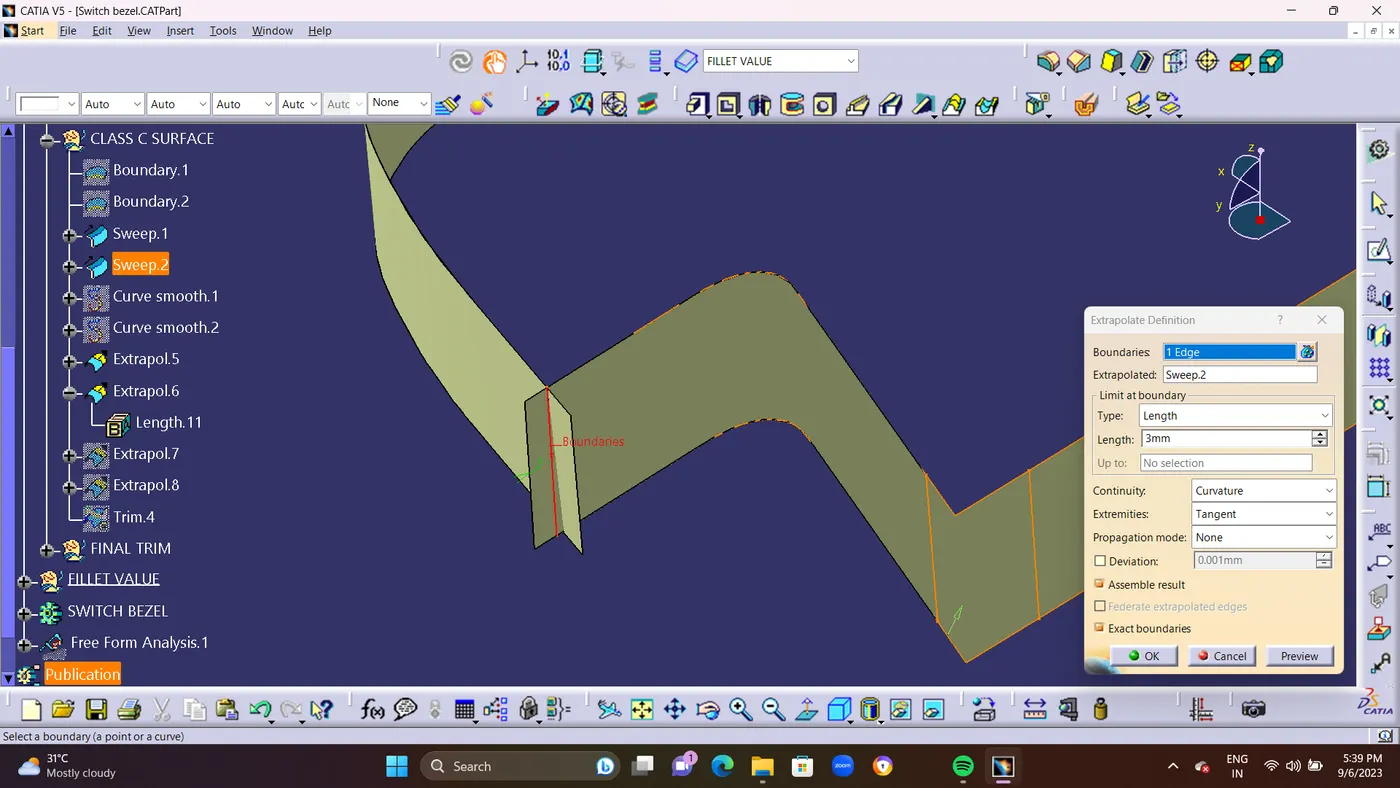
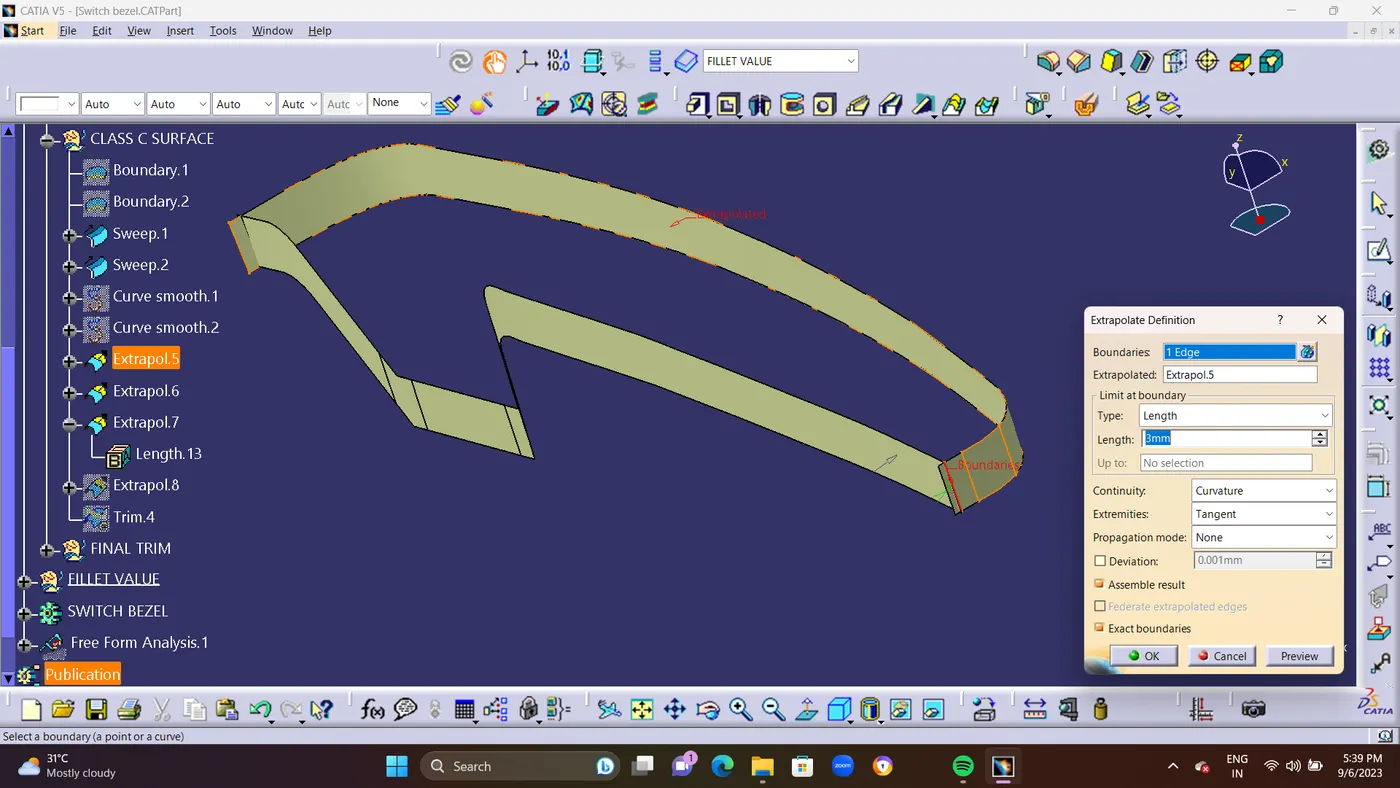
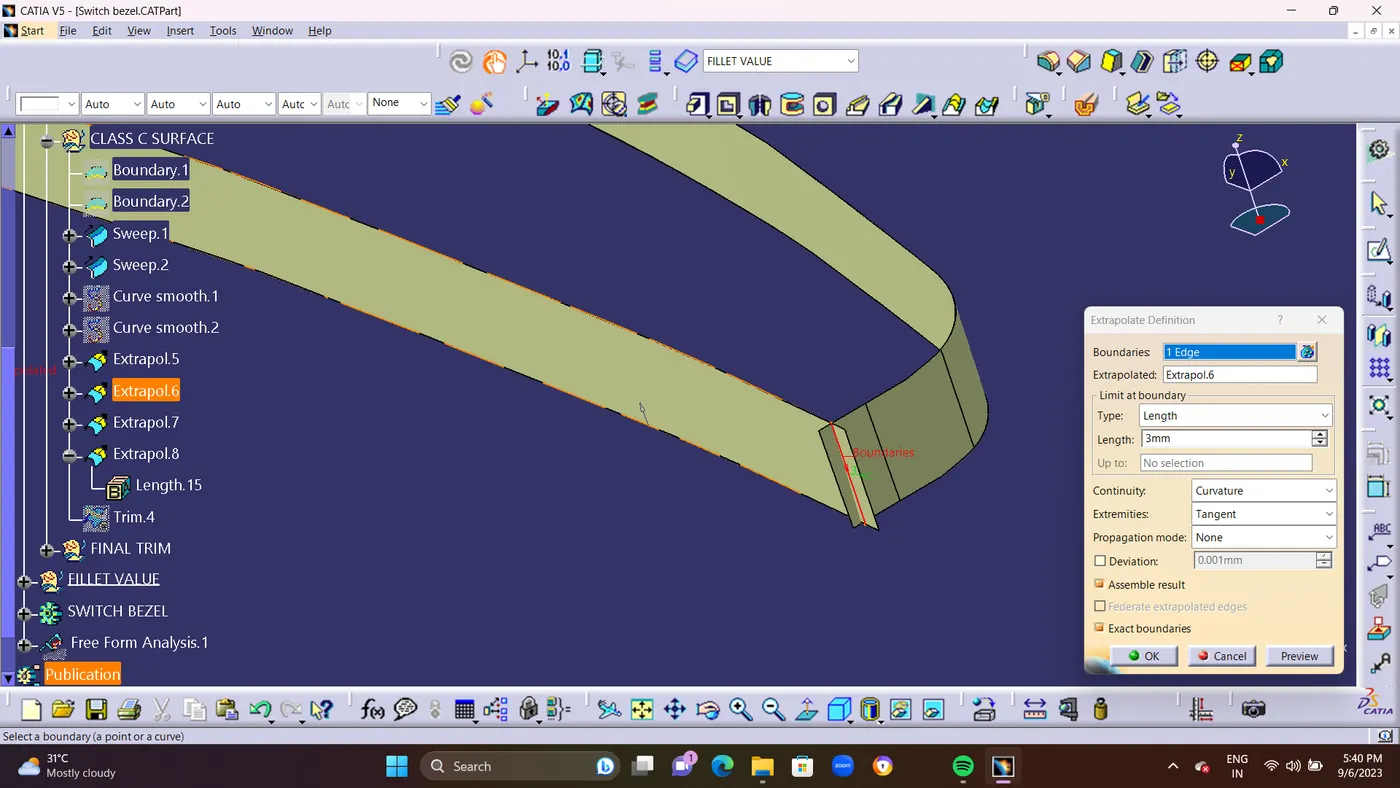
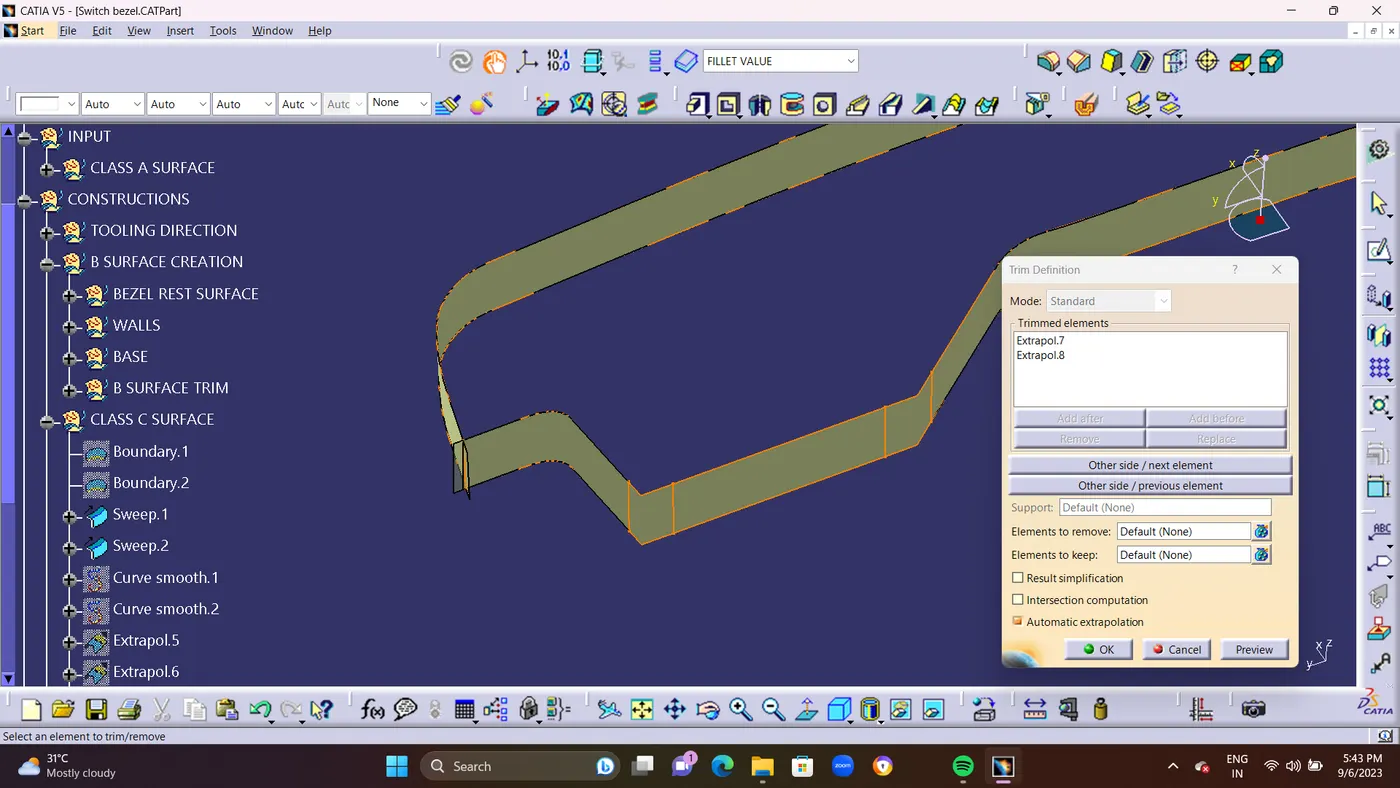
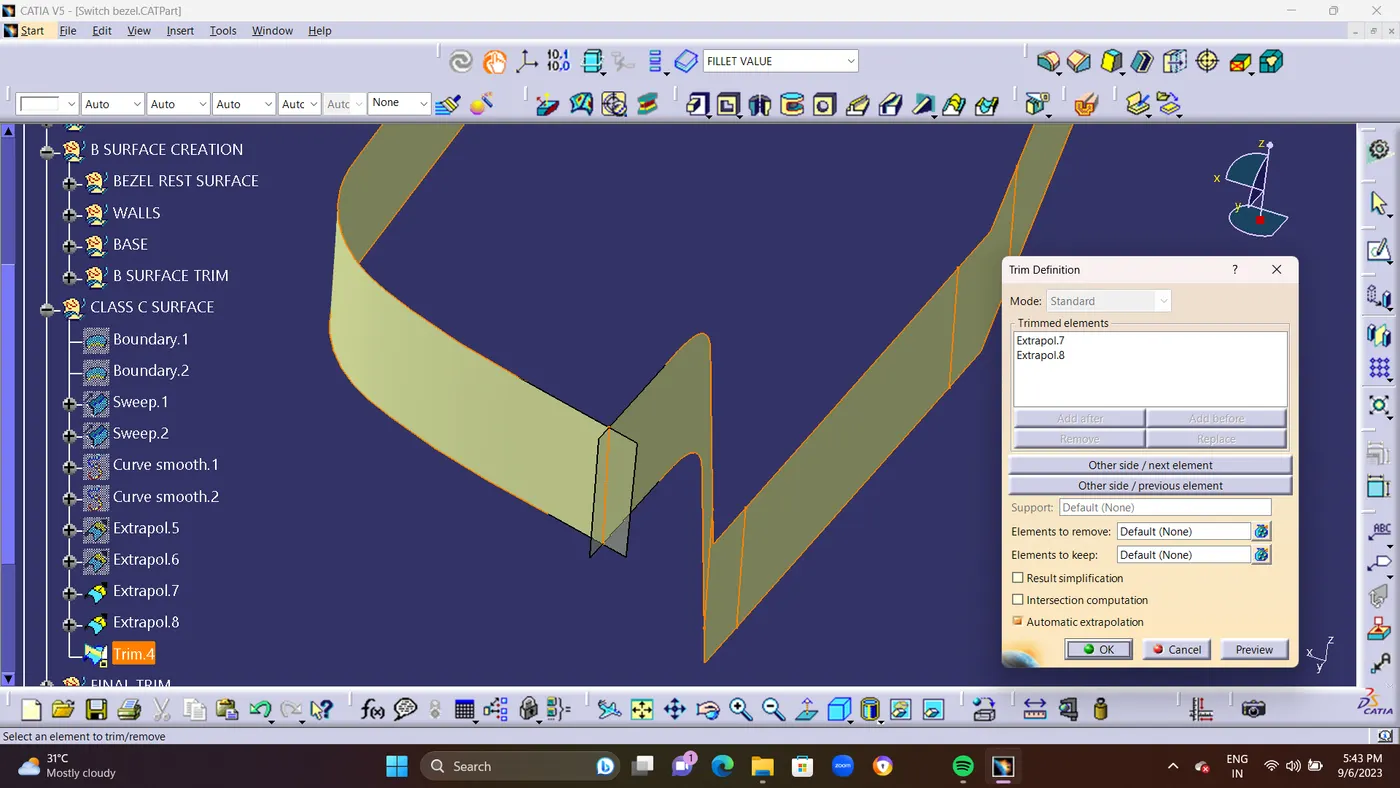
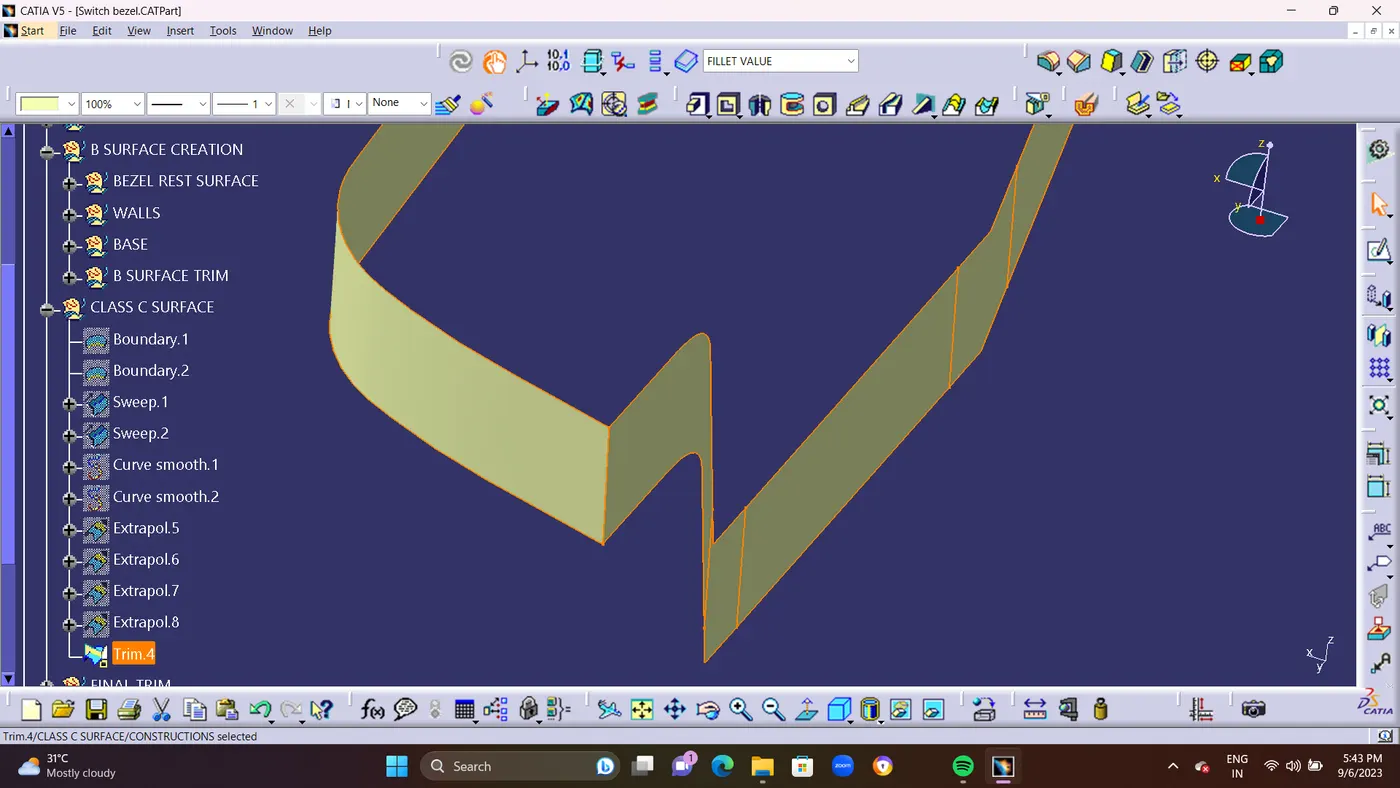
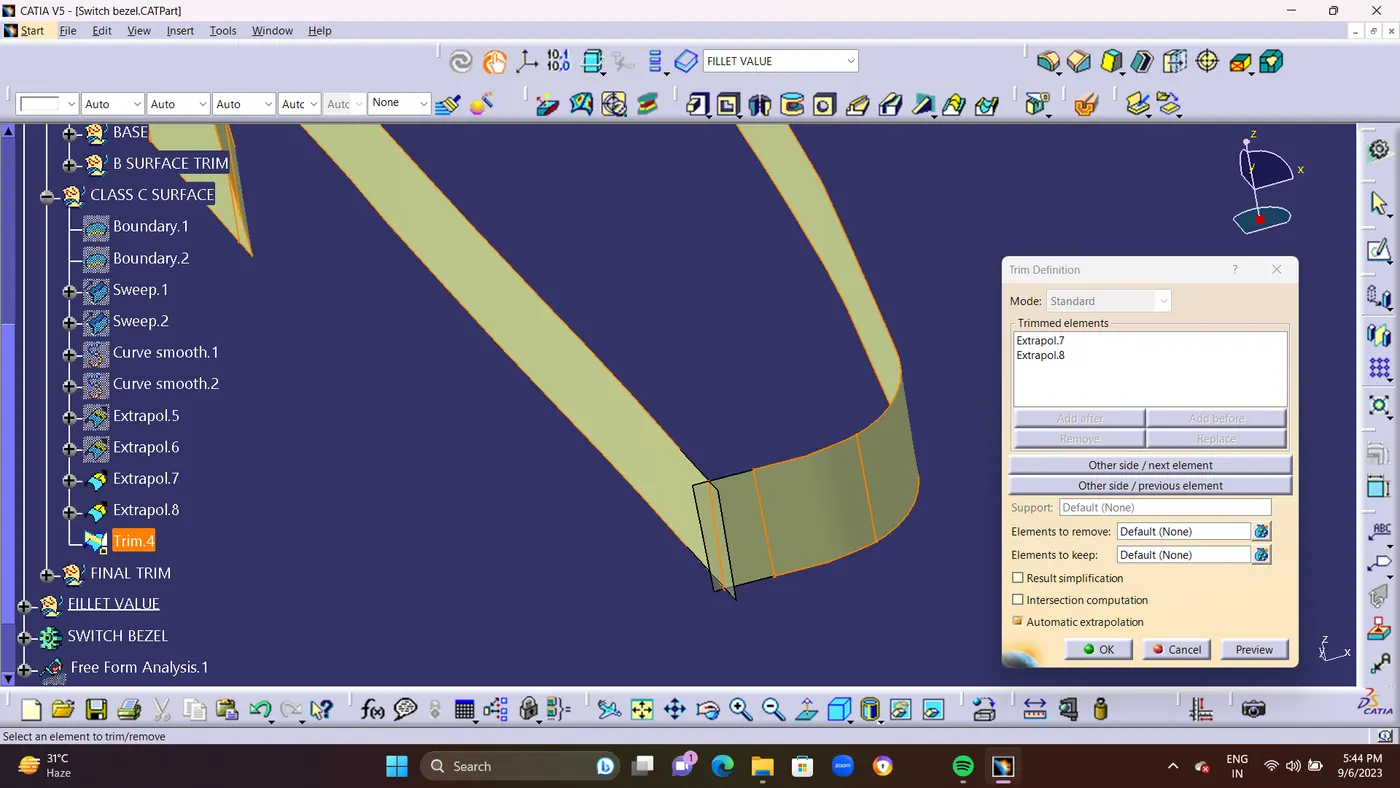
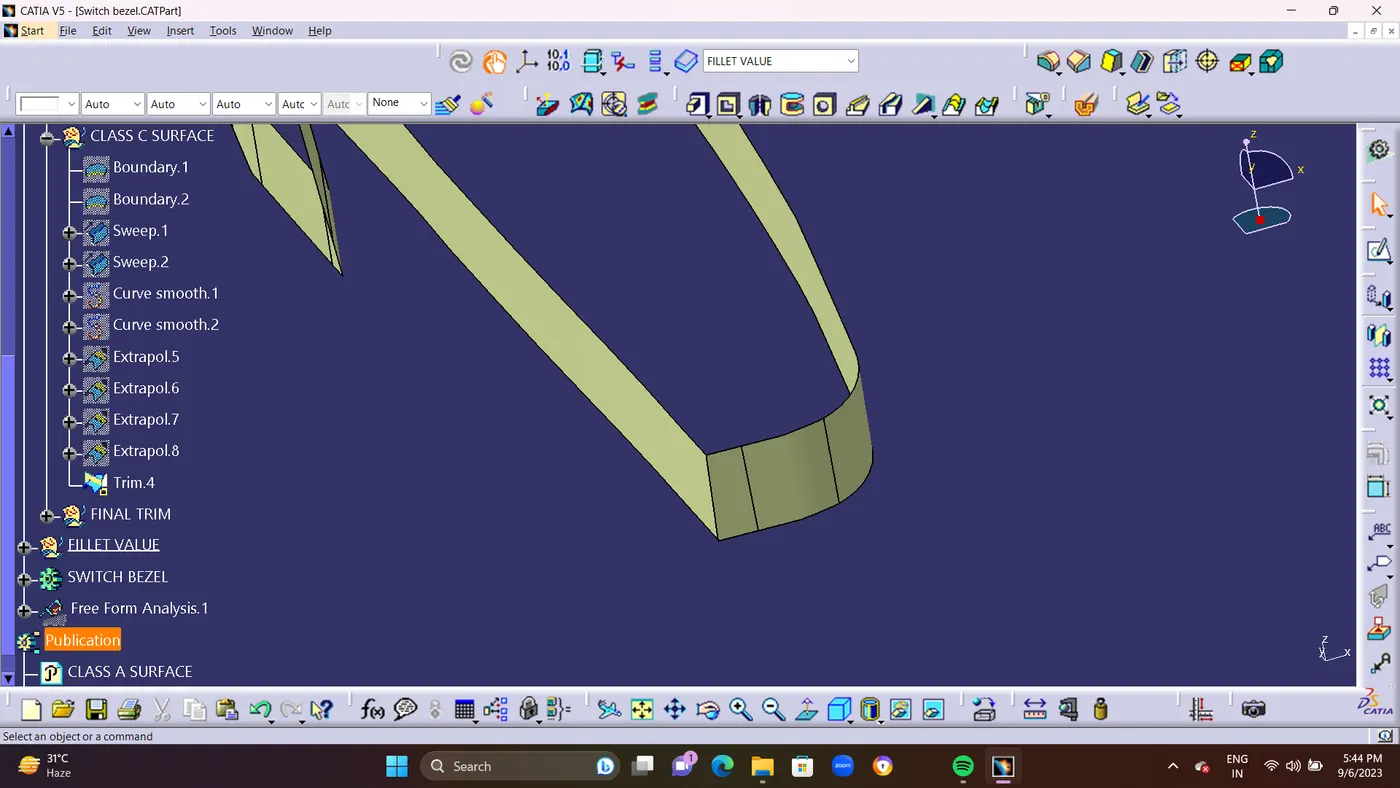
- STEP 5 : Using JOIN Command Join Class A Surface and Class C Sweep Surface Together. to make as single Join.(FINAL TRIM) TRIM the Class A and C with Class B Surface to form an hollow gap 2.5mm in Between A and B Surface.By using Section Command you can see the gap.
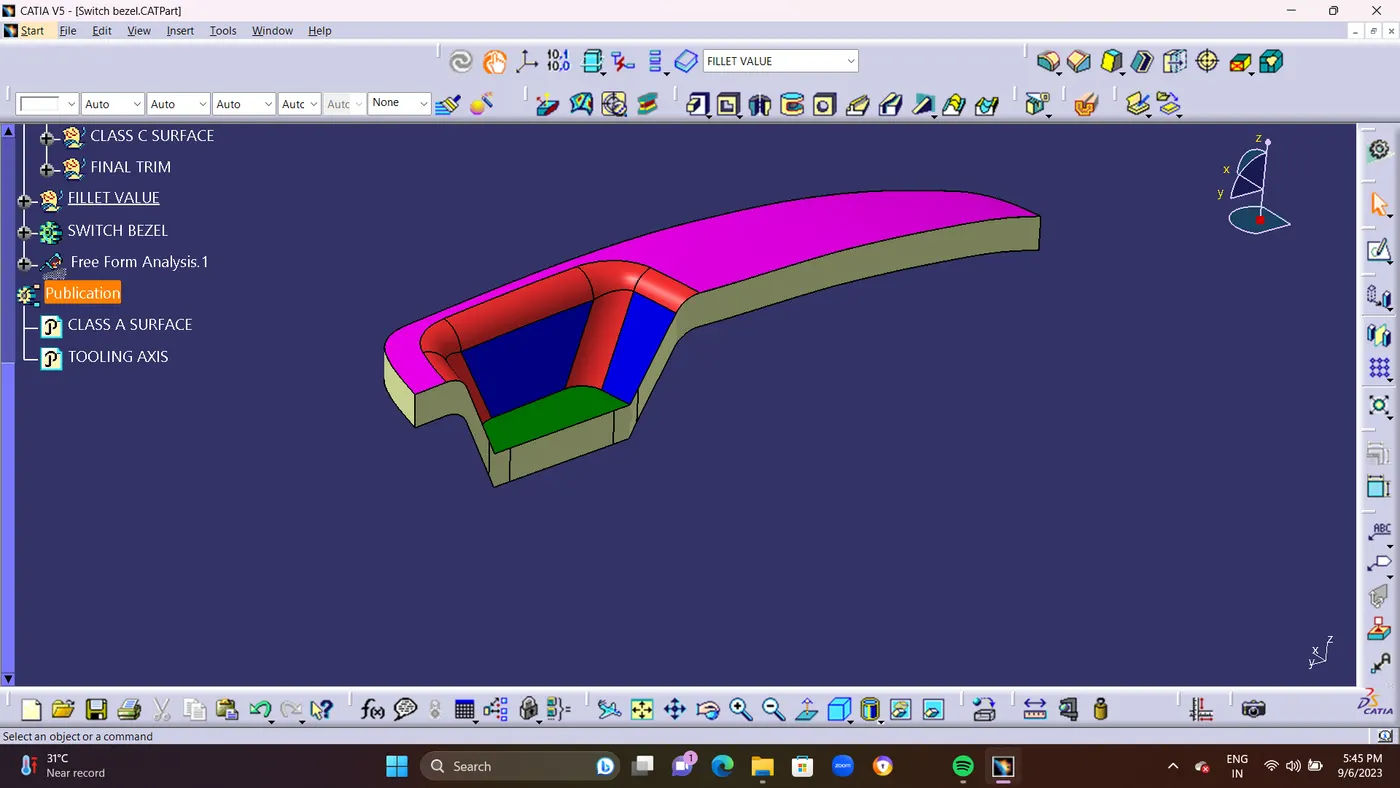
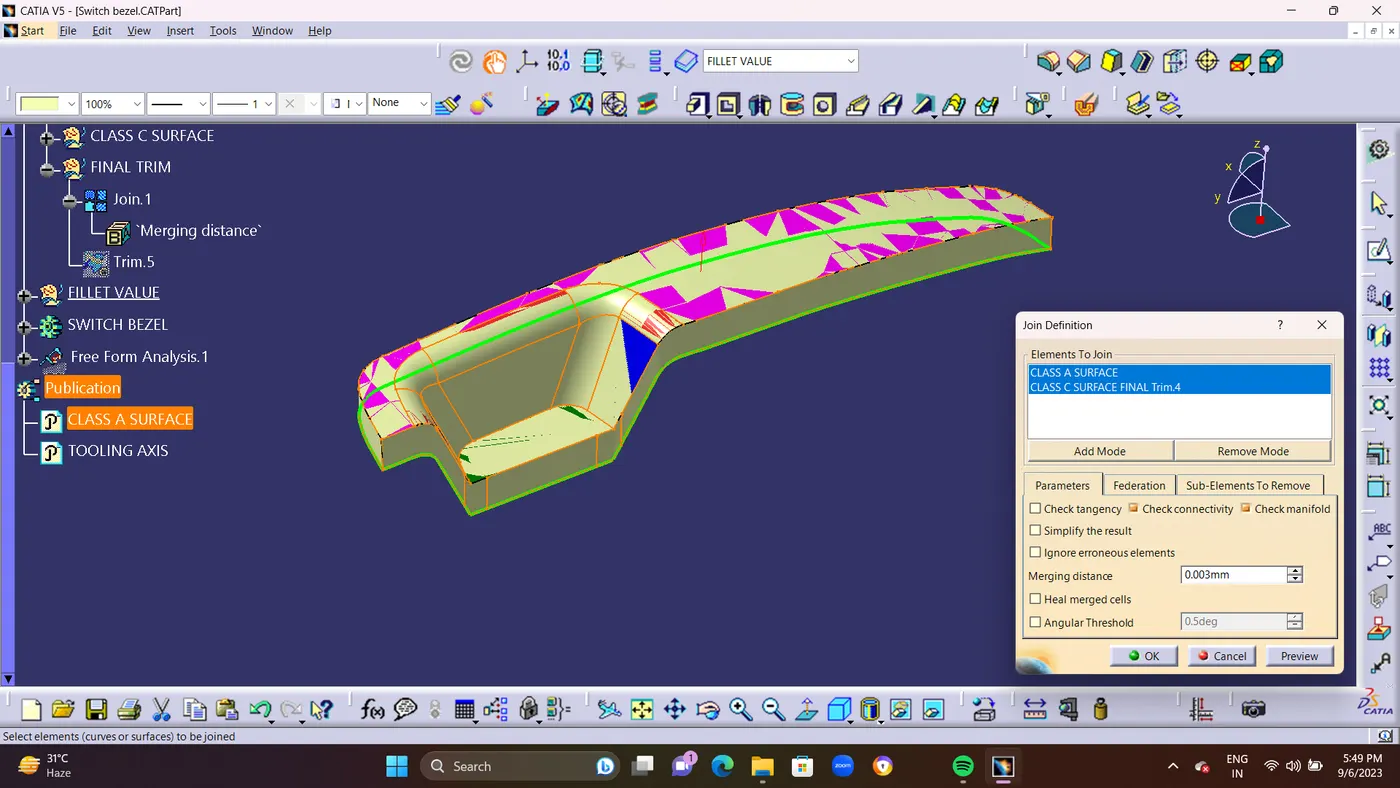
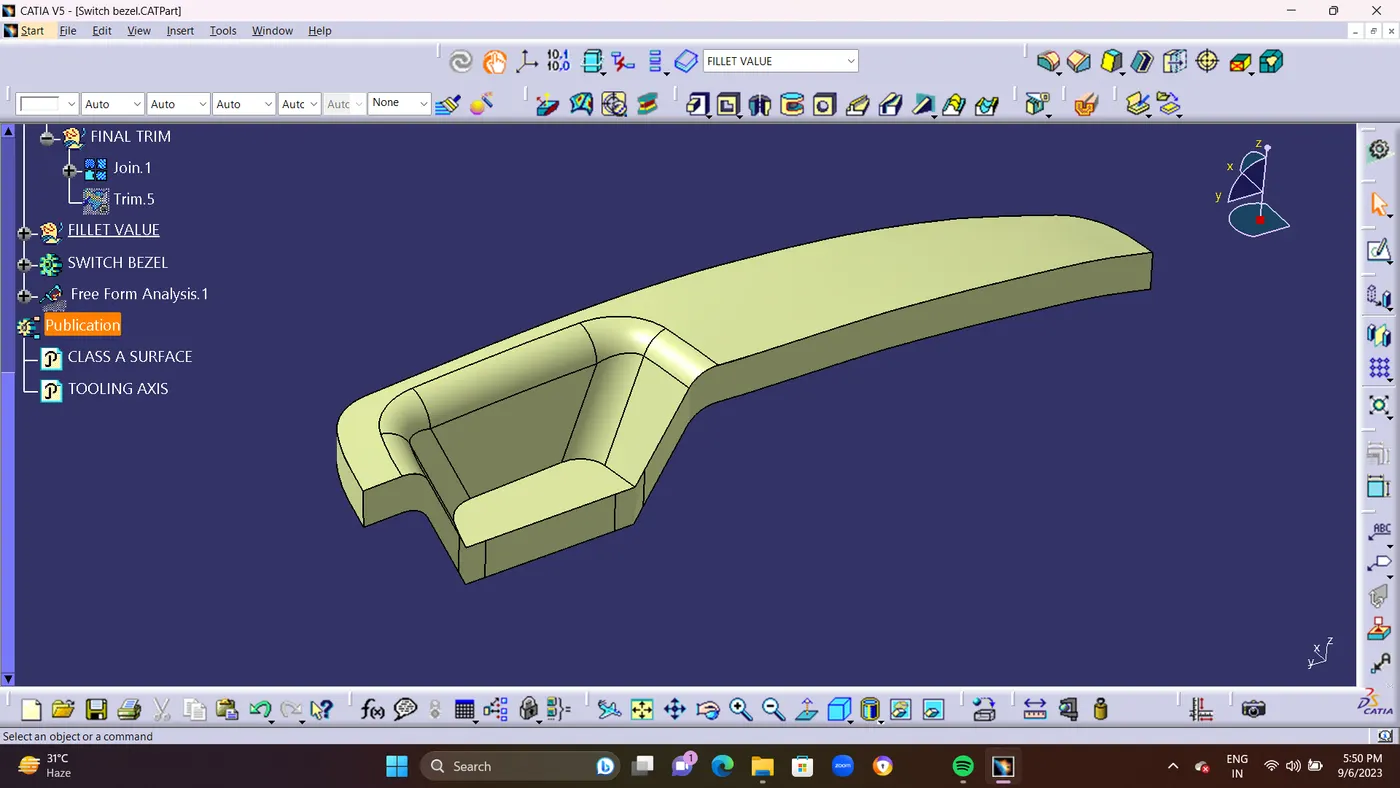
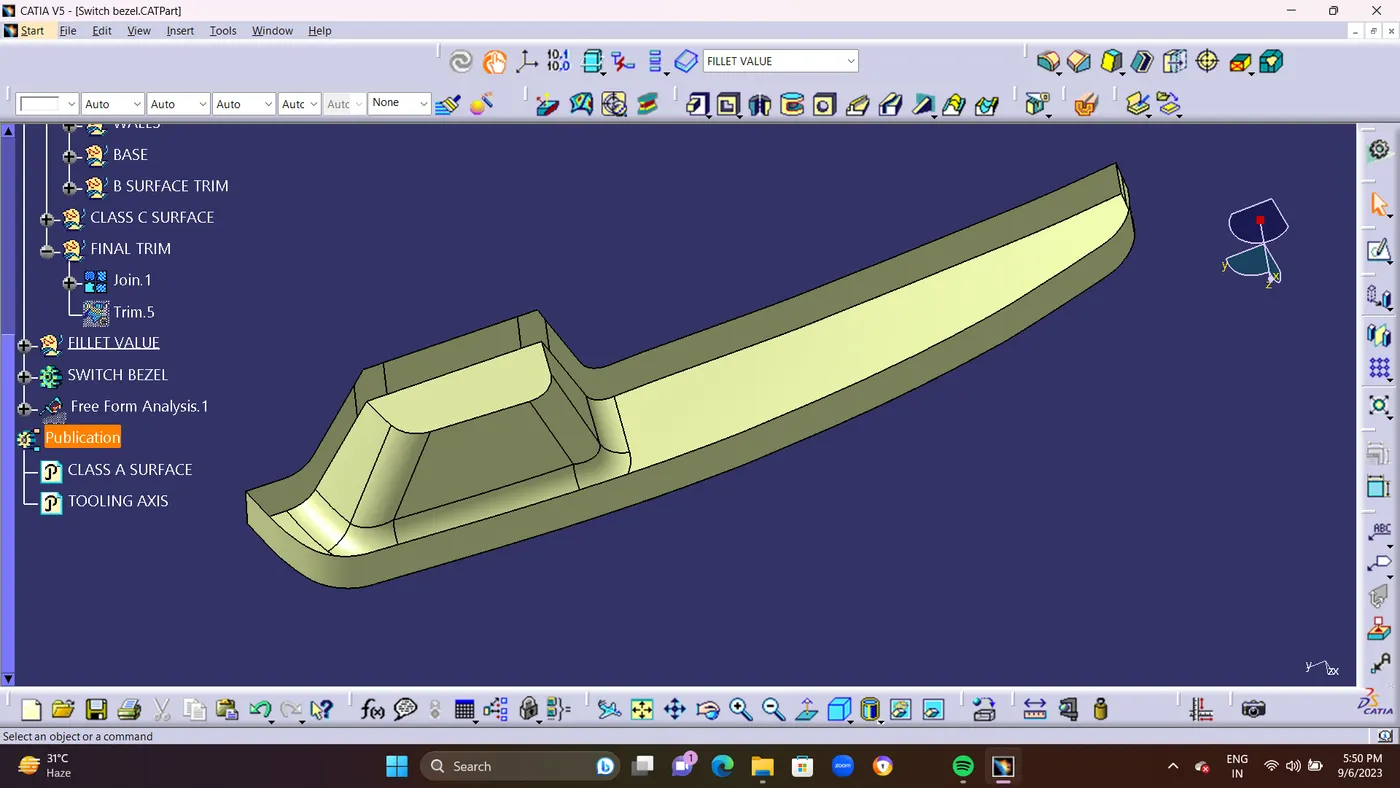
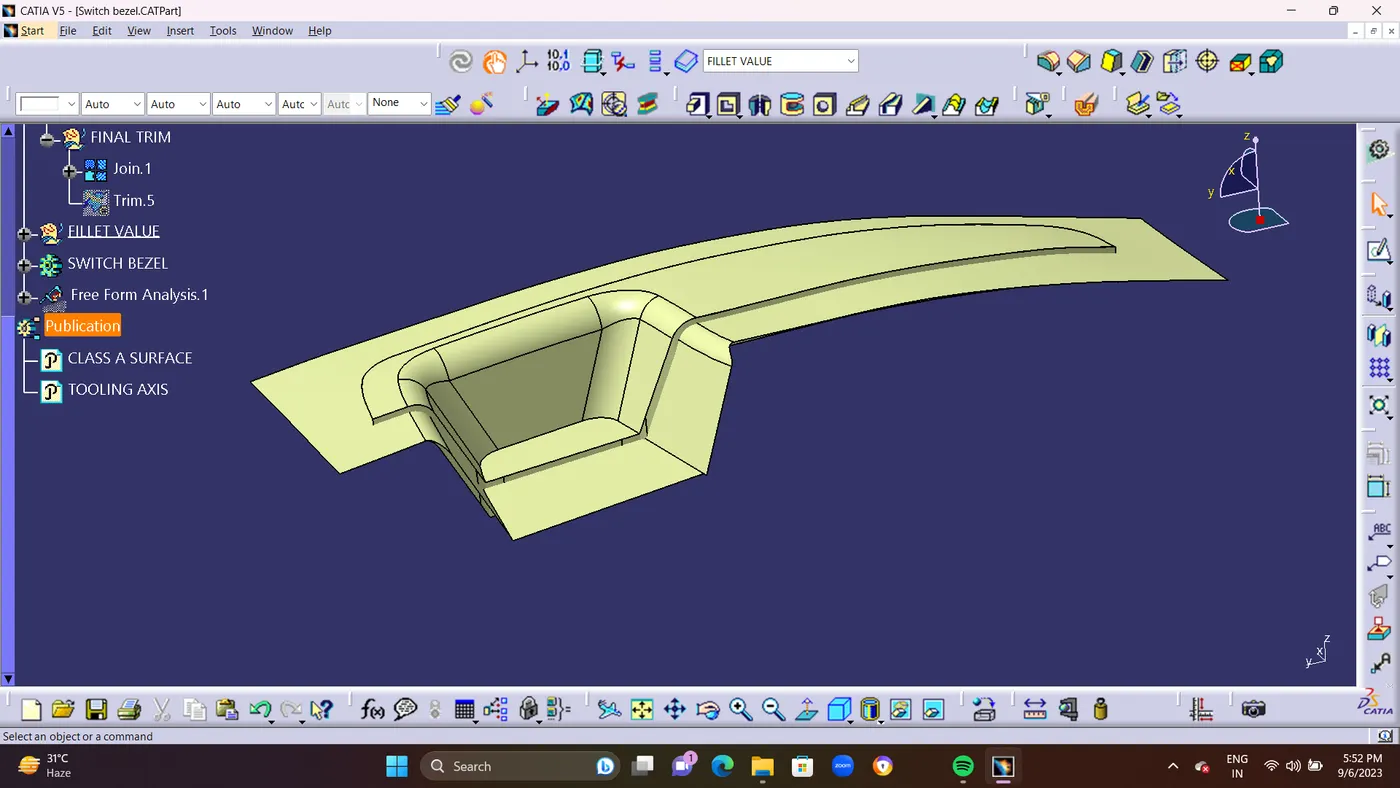
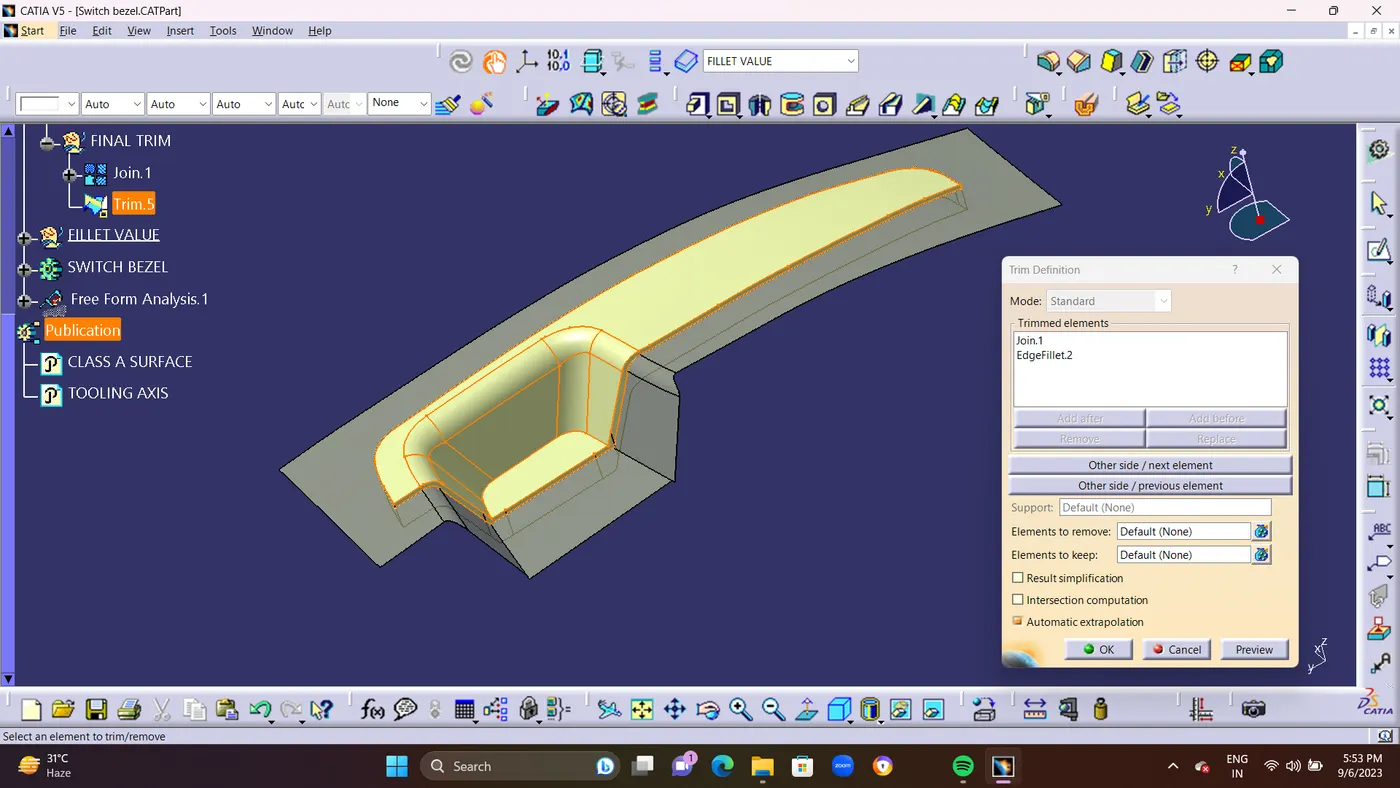
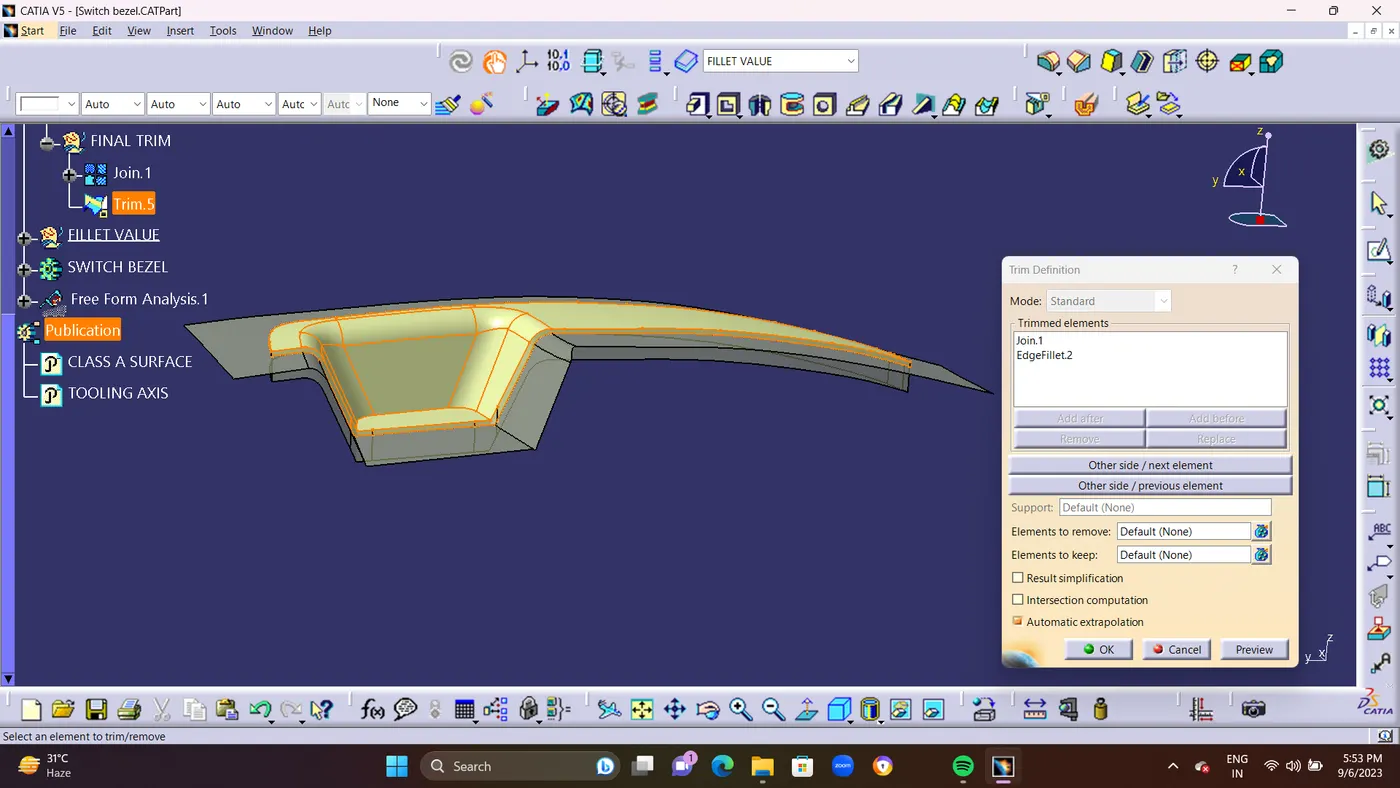
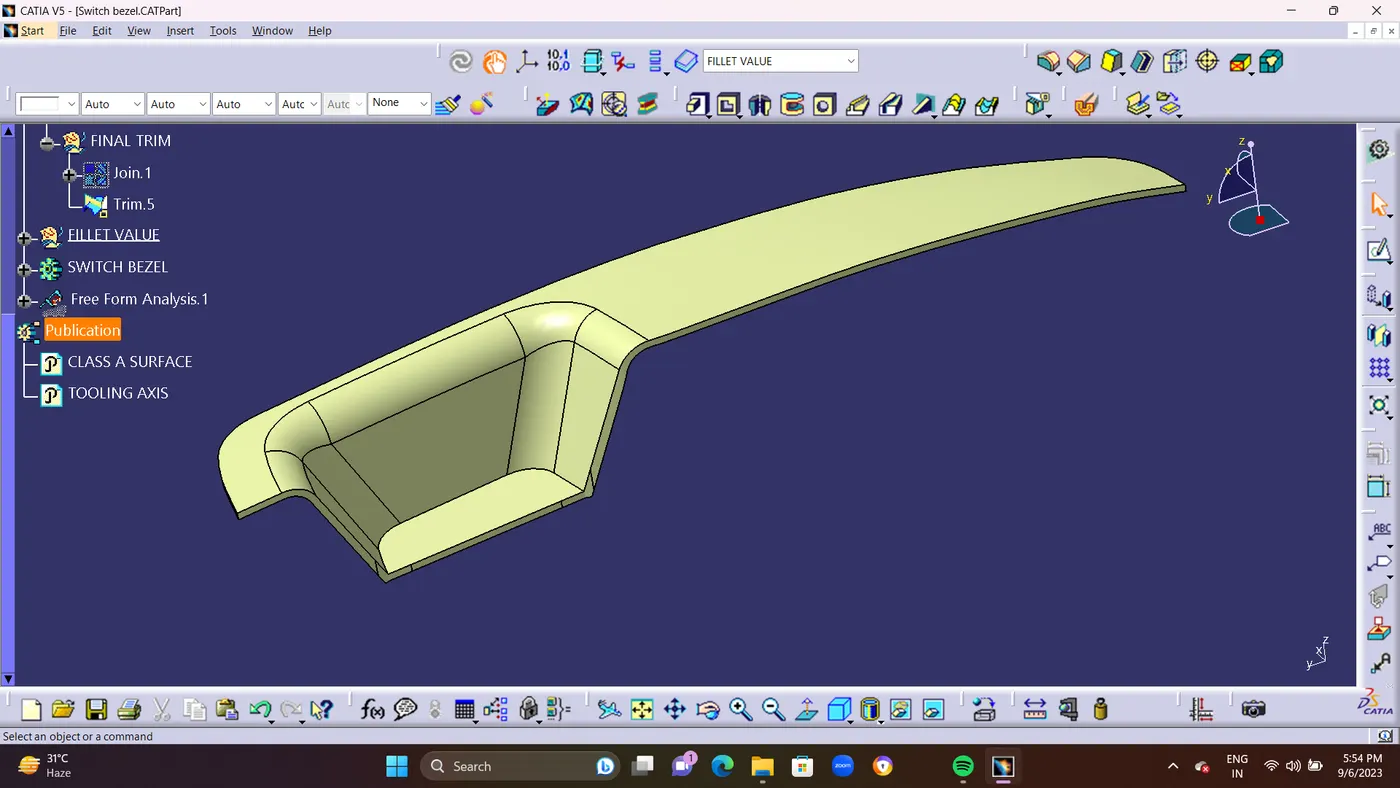
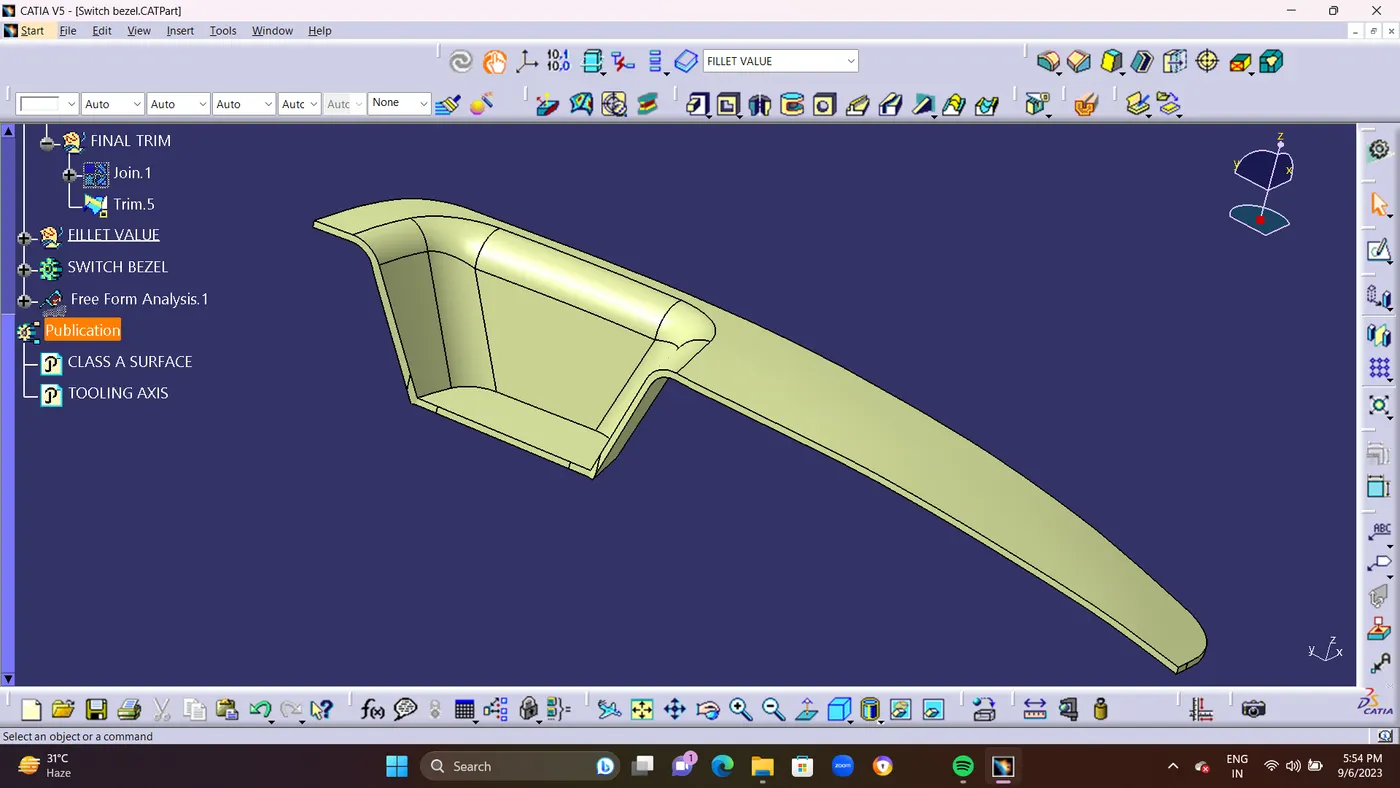
- Check Finally There is No any Boundary in the SWITCH BEZEL surface By using BOUNDARY COMMAND.if there is no any boundarys it shows Error and your work is clear. if you find any Boundary line its seems you done ah mistake or wrong surface while joining.so read do it.
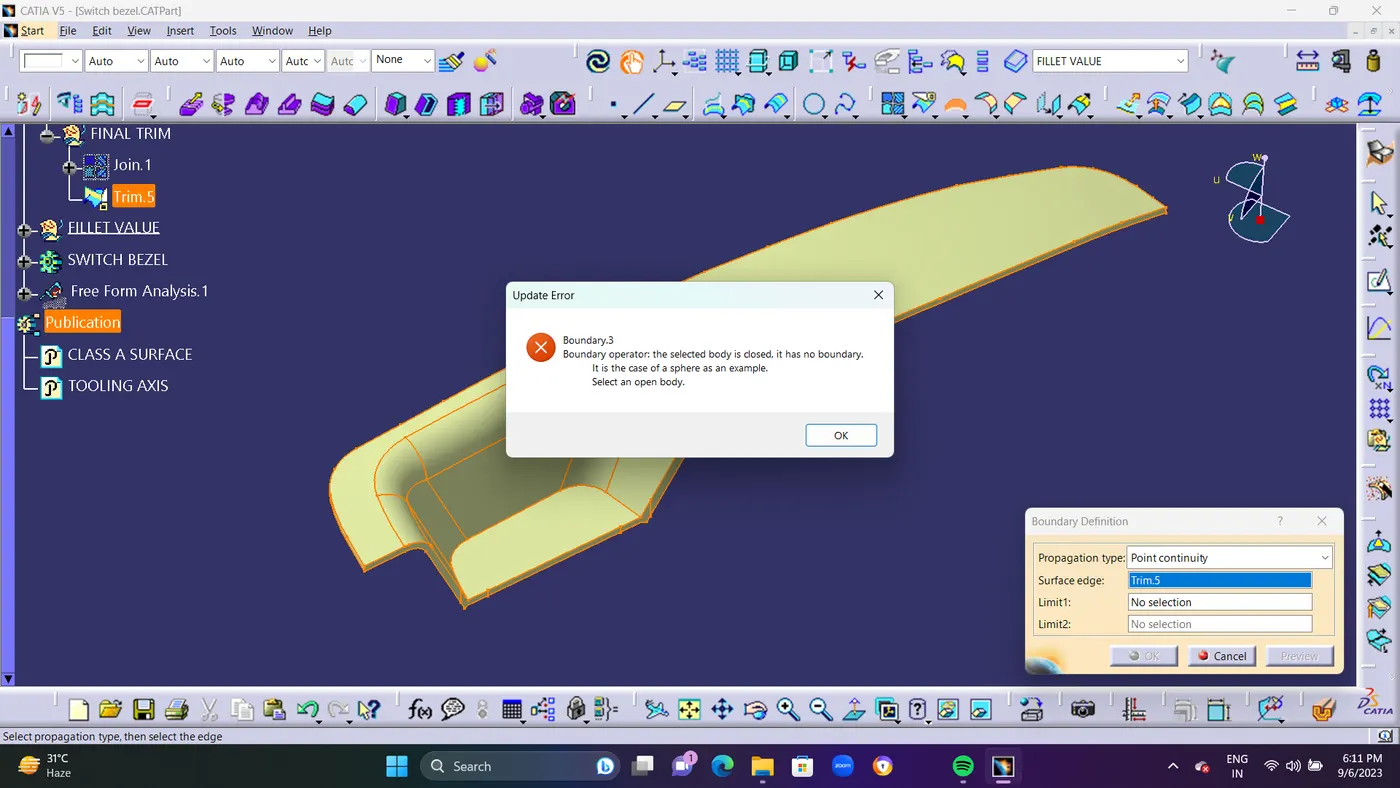
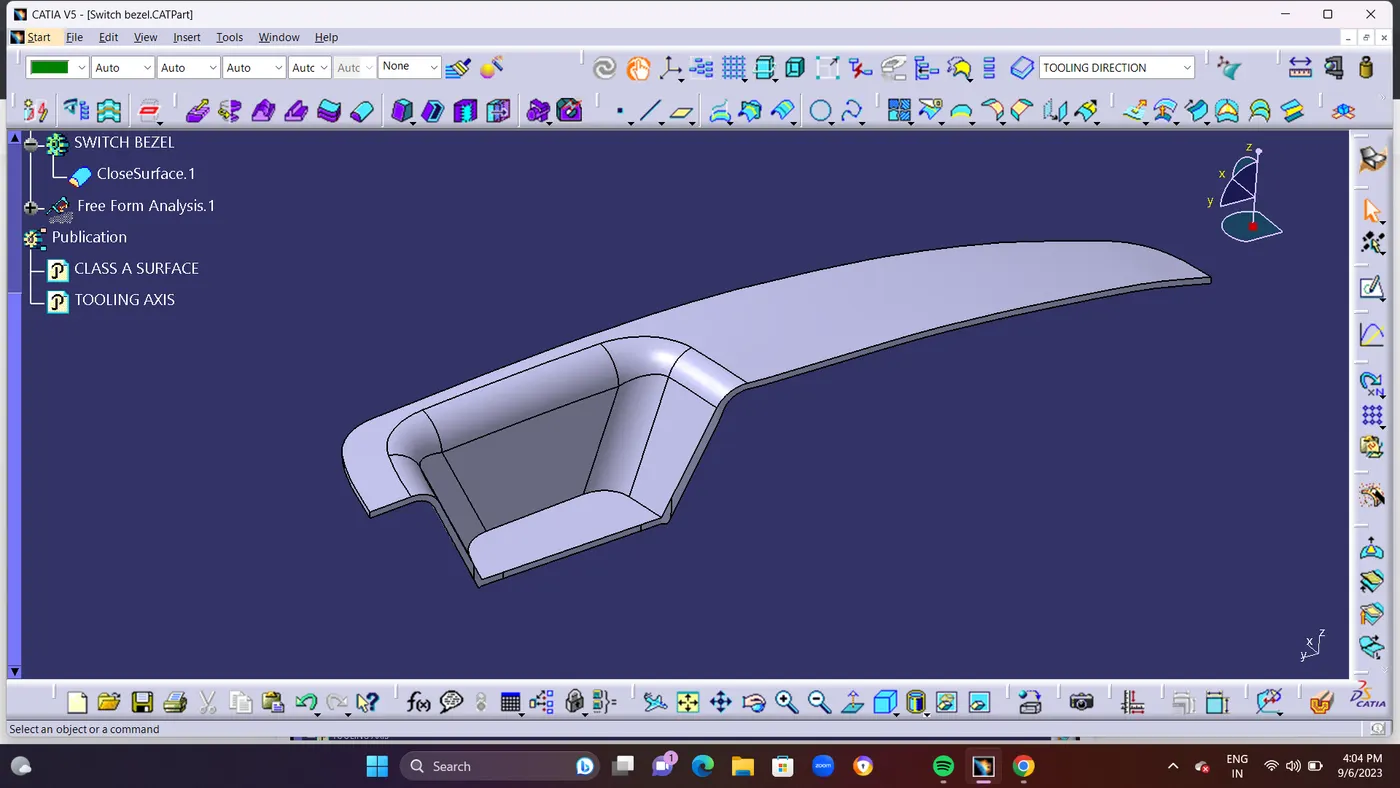
- STEP 6 : And Finally Created Close Surface in PartBody By Using CLOSE SURFACE METHOD.Using TRIM.5
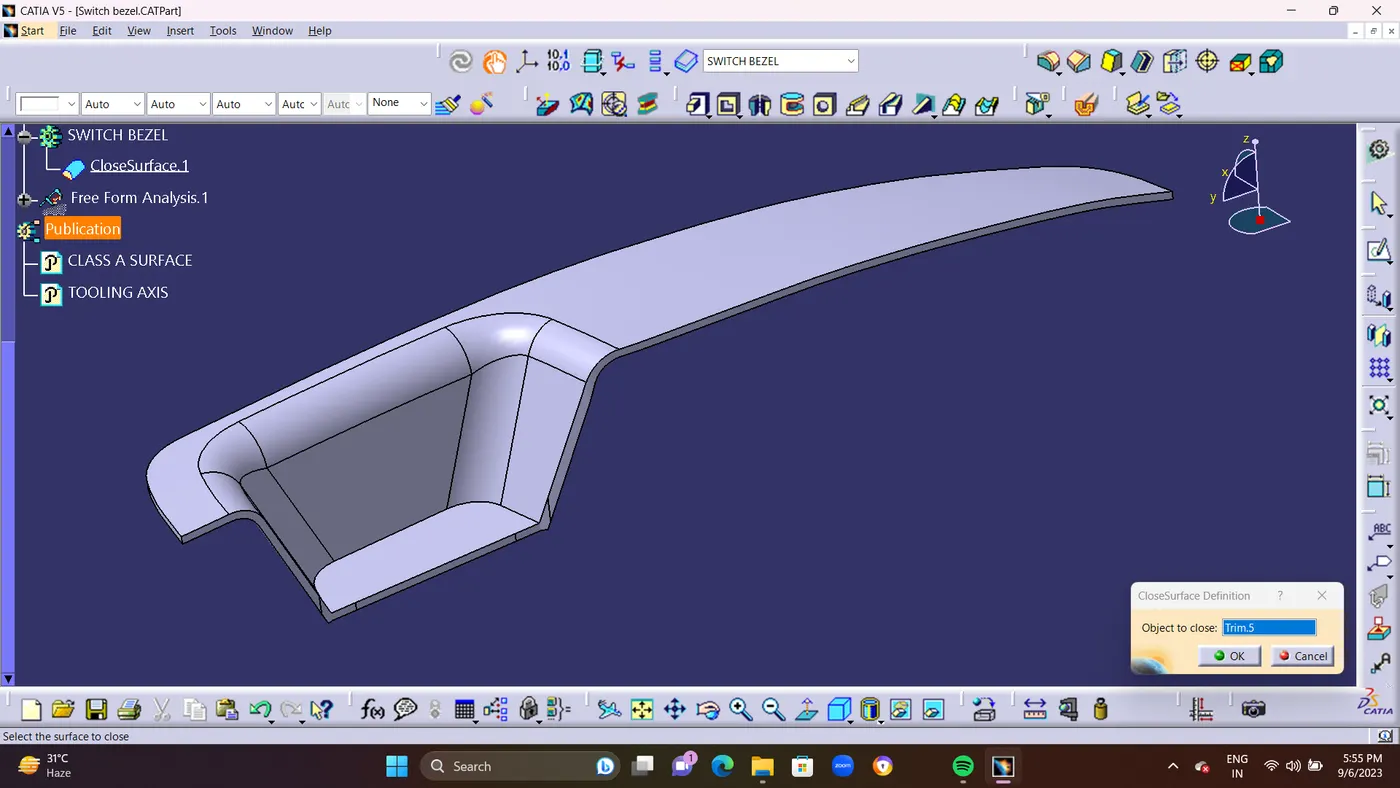
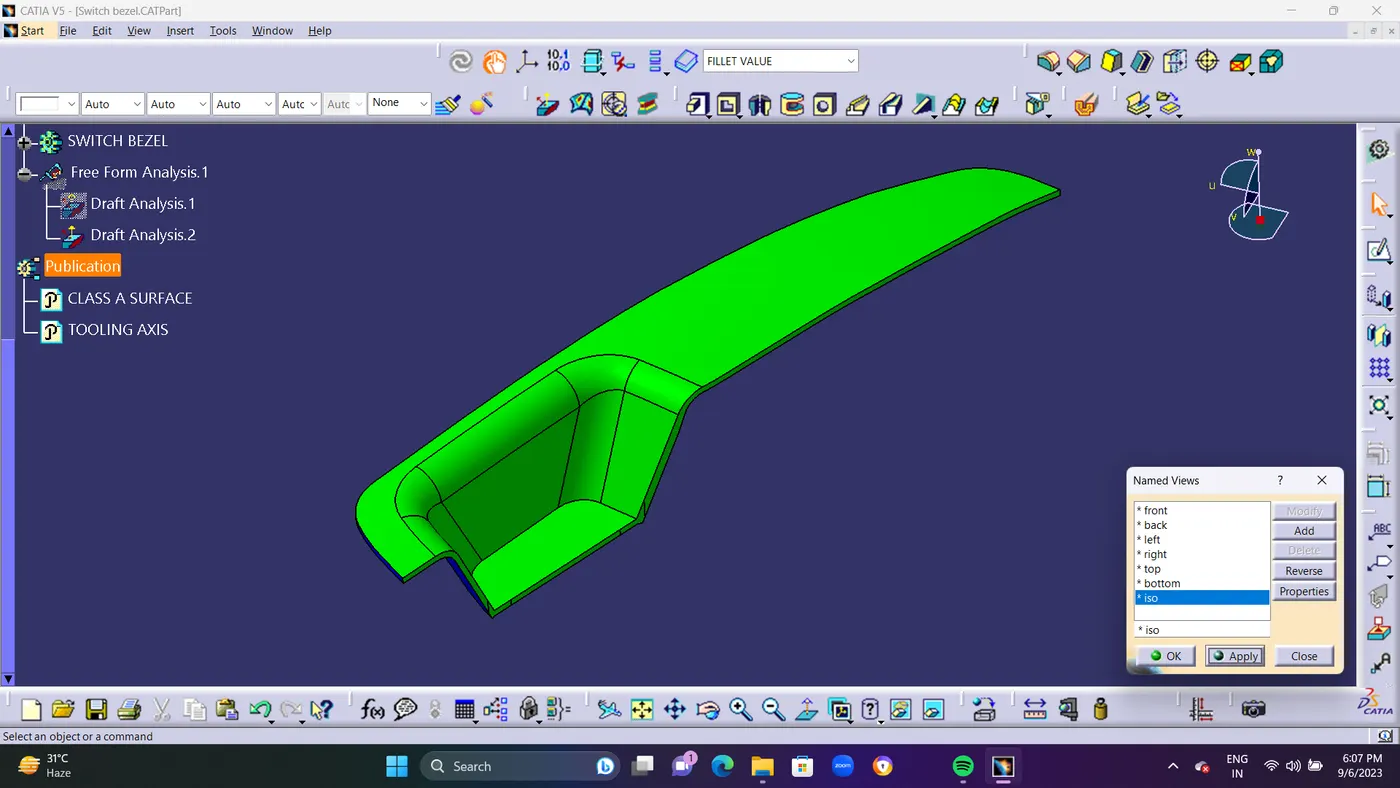
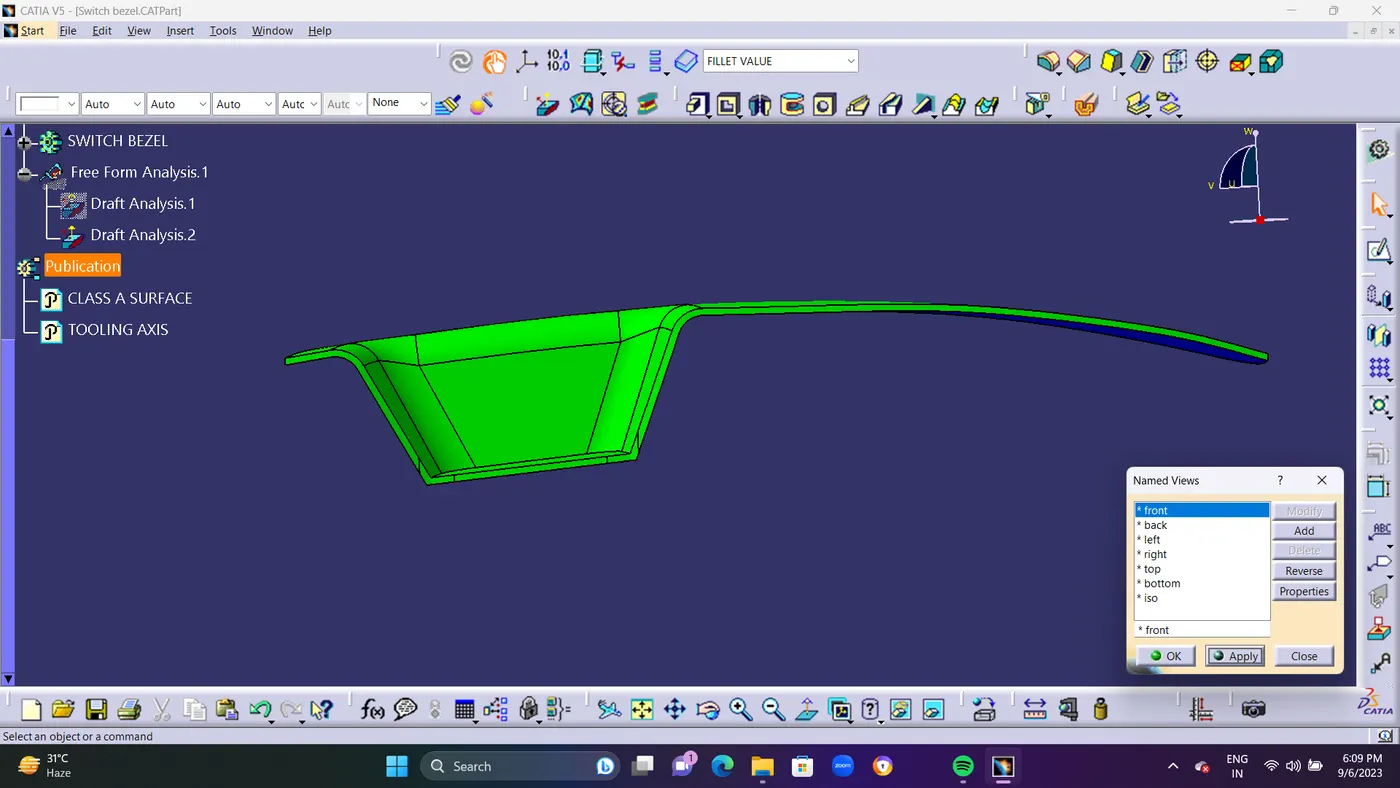
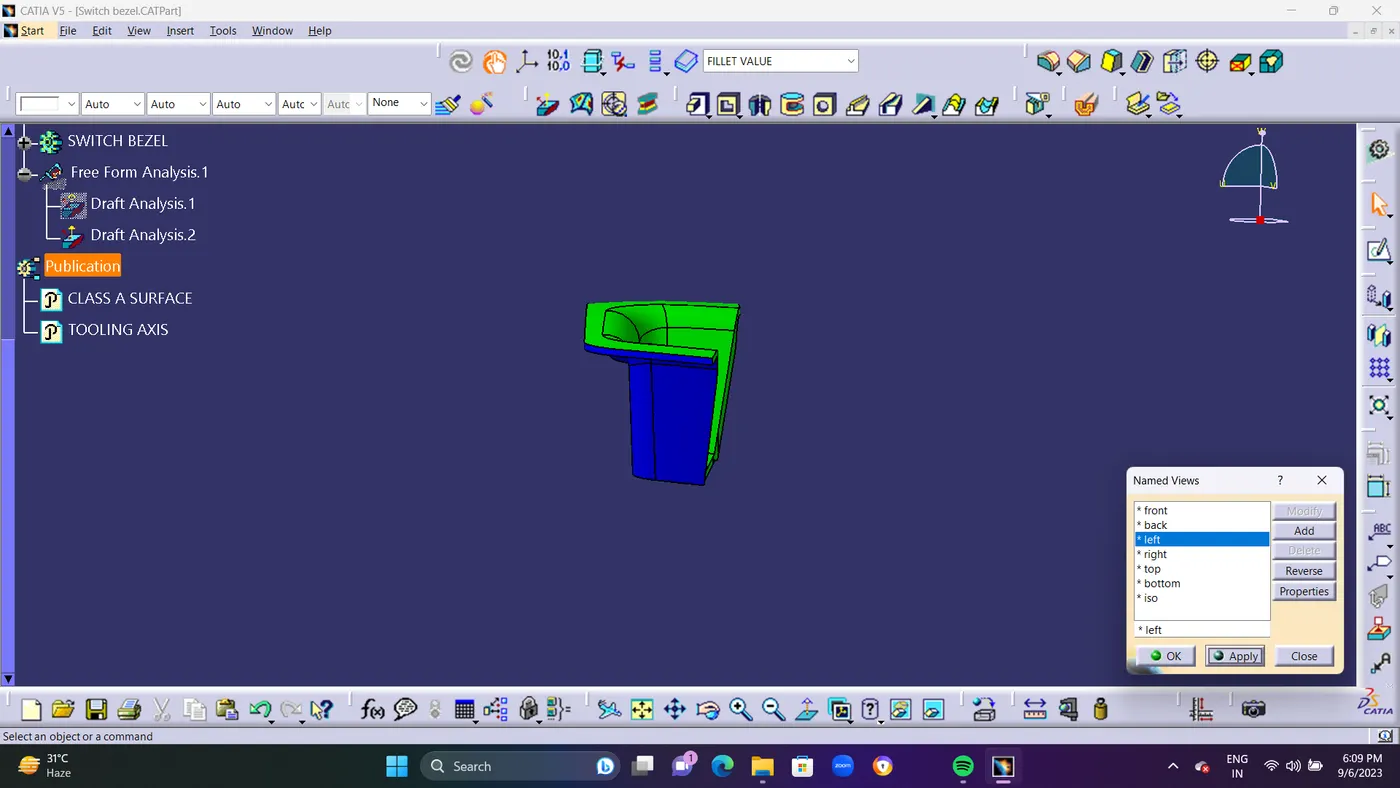
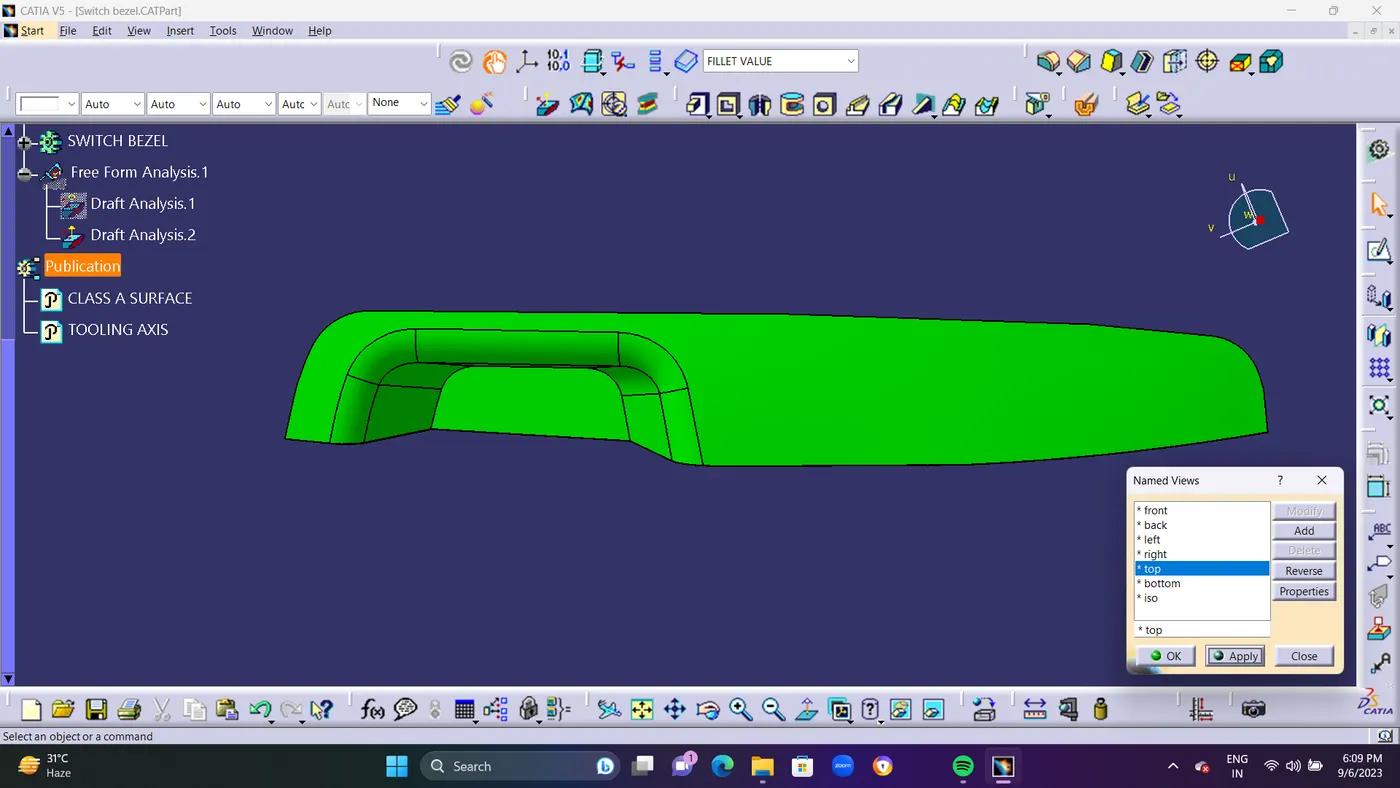
- STEP 7 : After Creating CLOSE SURFACE DRAFT ANALYSIS METHOD is used for Class A surface and Closed Surface.Draft analysis is required to check if a part has required draft or not. Draft is required so that a part can be ejected from its mould easily.Draft will be Maximum 3 Degree.But For me its failing at 2.8 Deg So i used to make it as 2.7 Deg As Maximum Level in Closed Surface Draft Analysis Method.Make Sure you are in MATERIAL MODE To Check Draft Analysis.Use Compass in Tooling AXIS while Drafting.
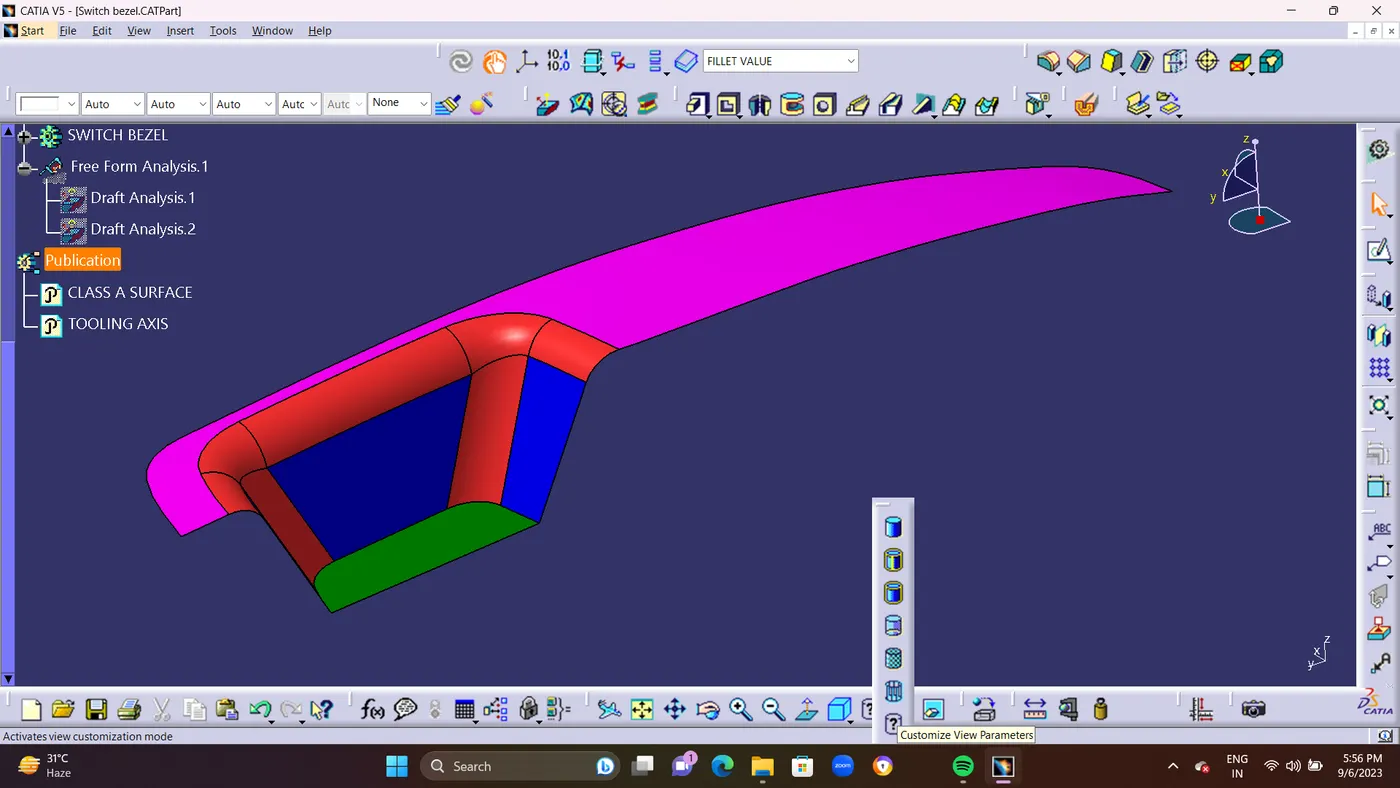
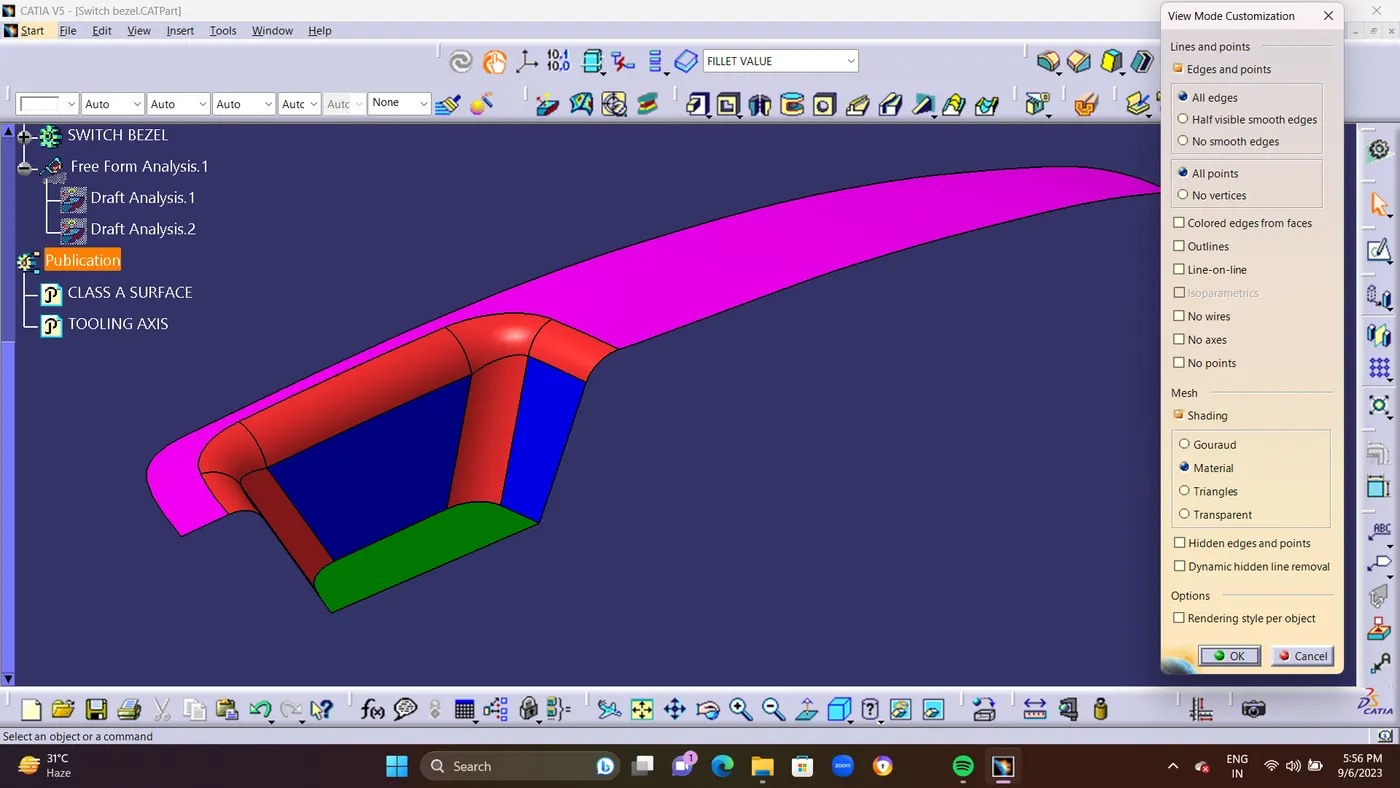
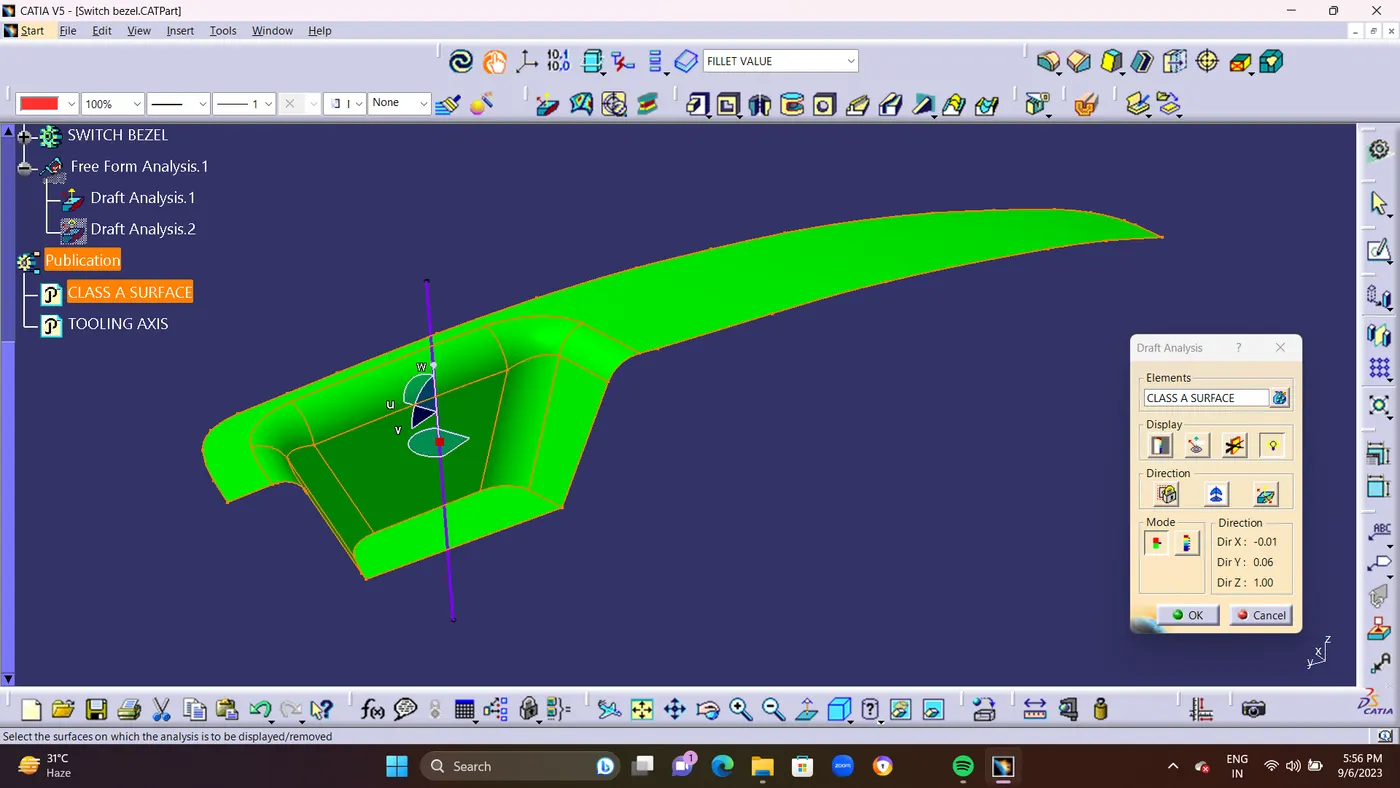
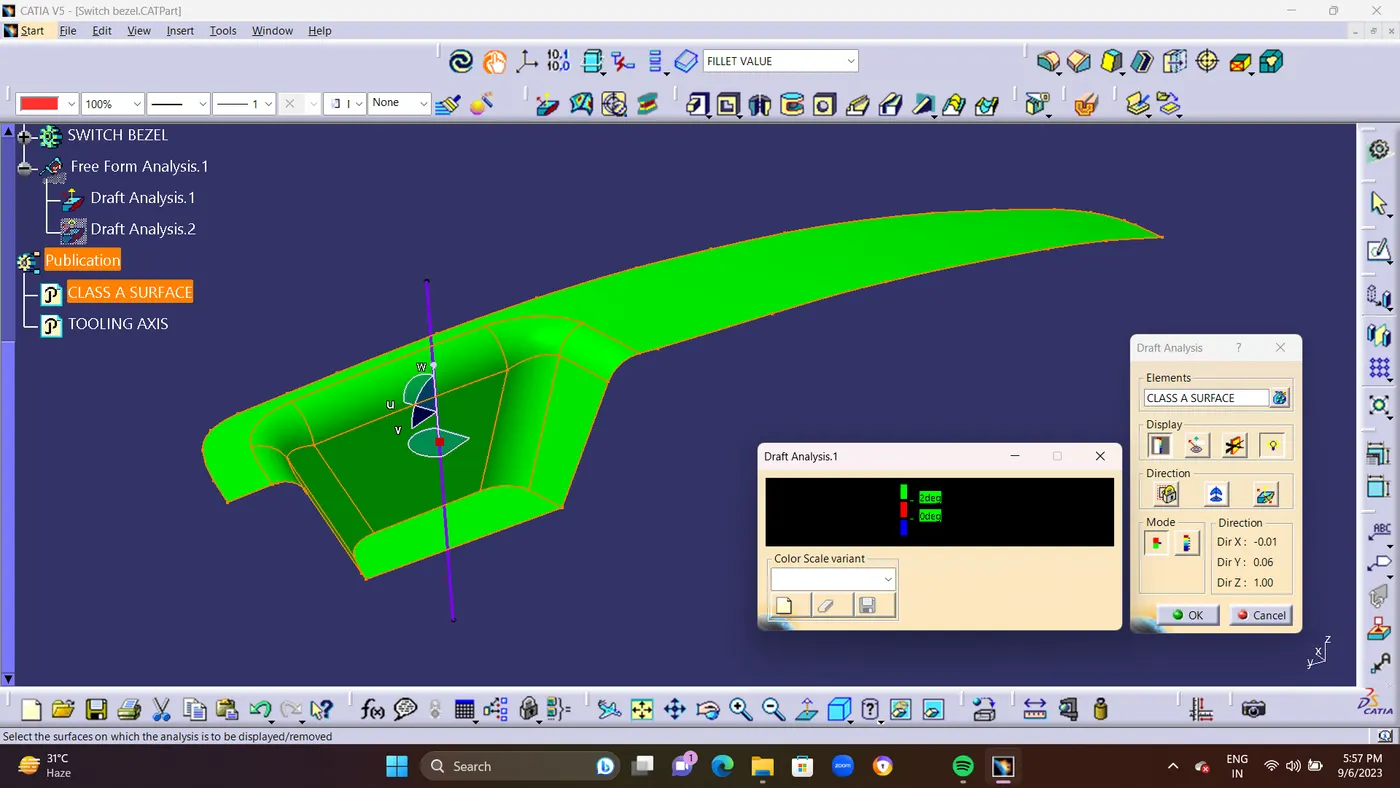
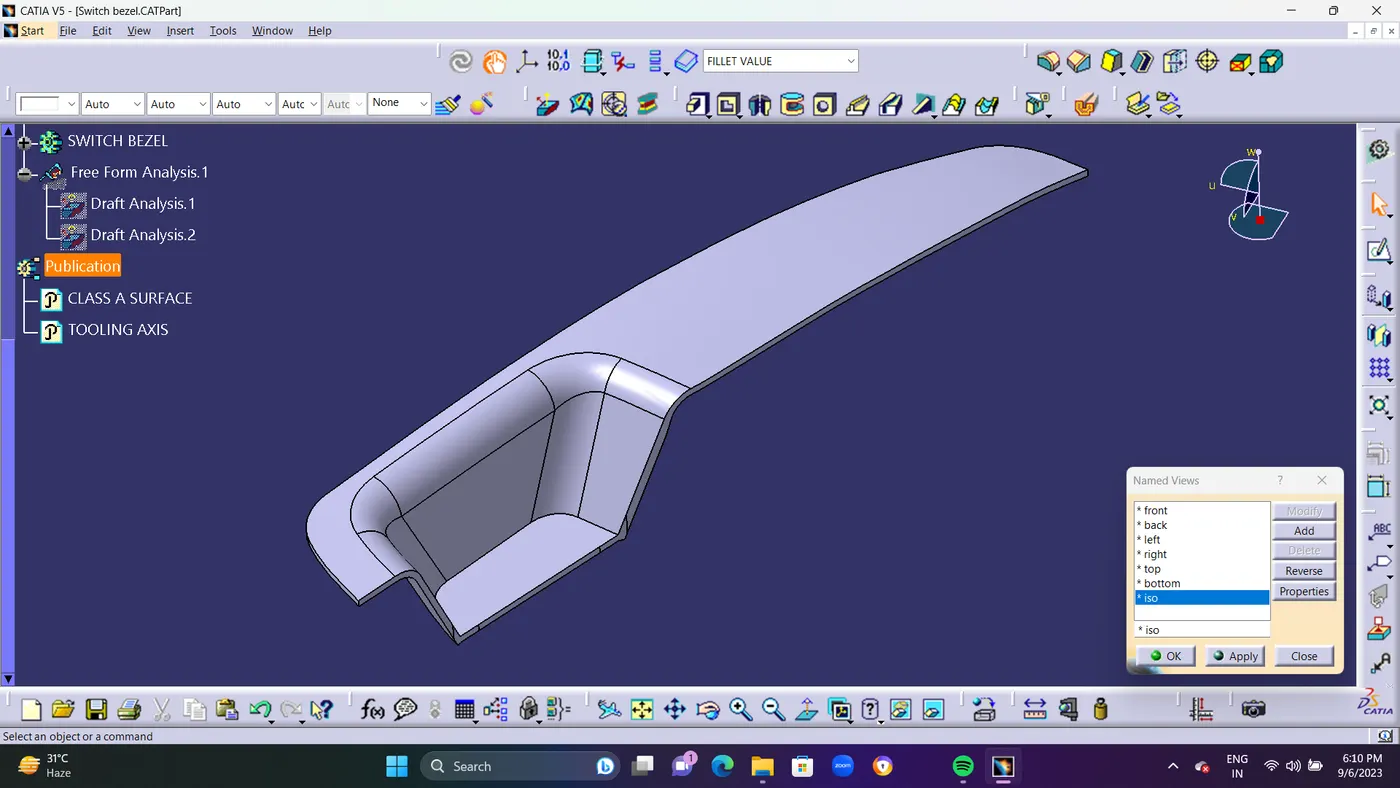
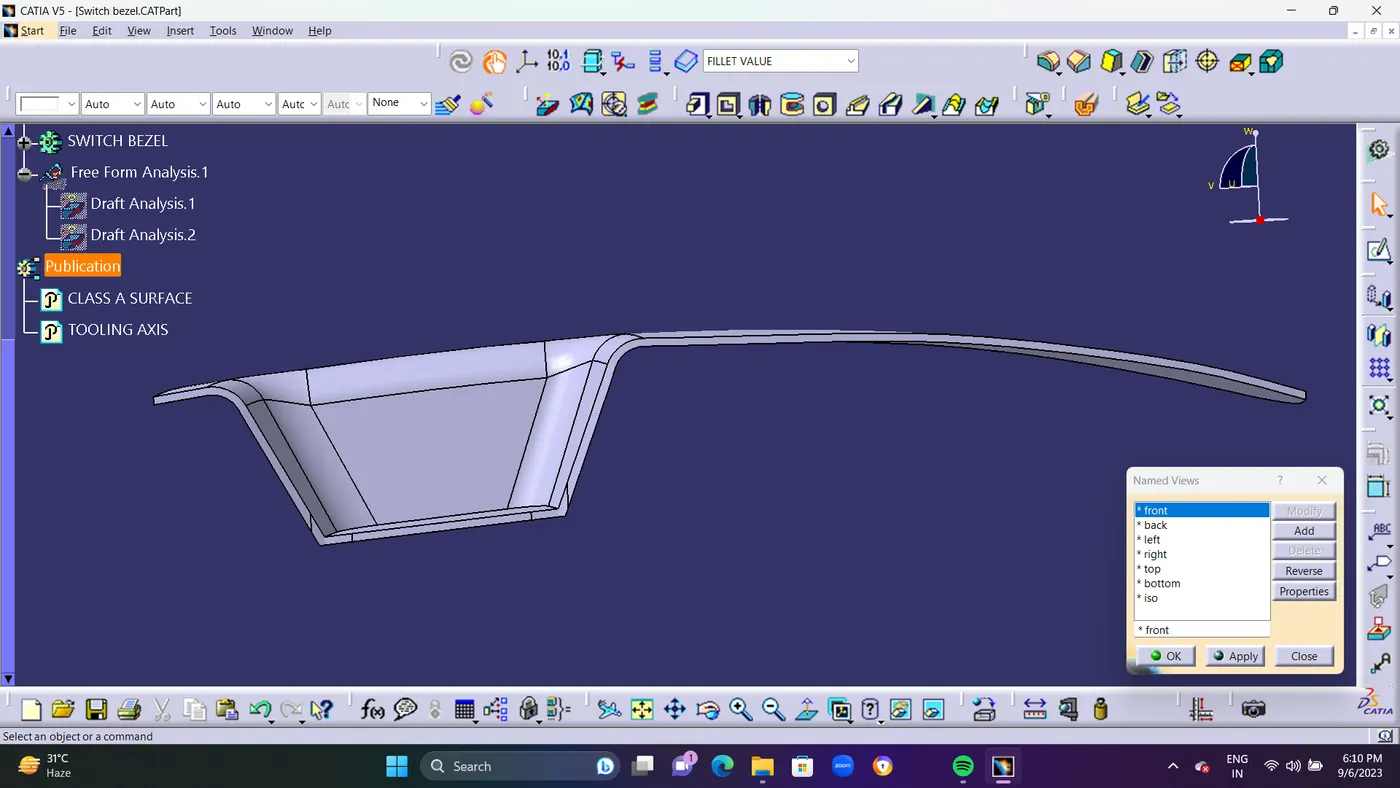
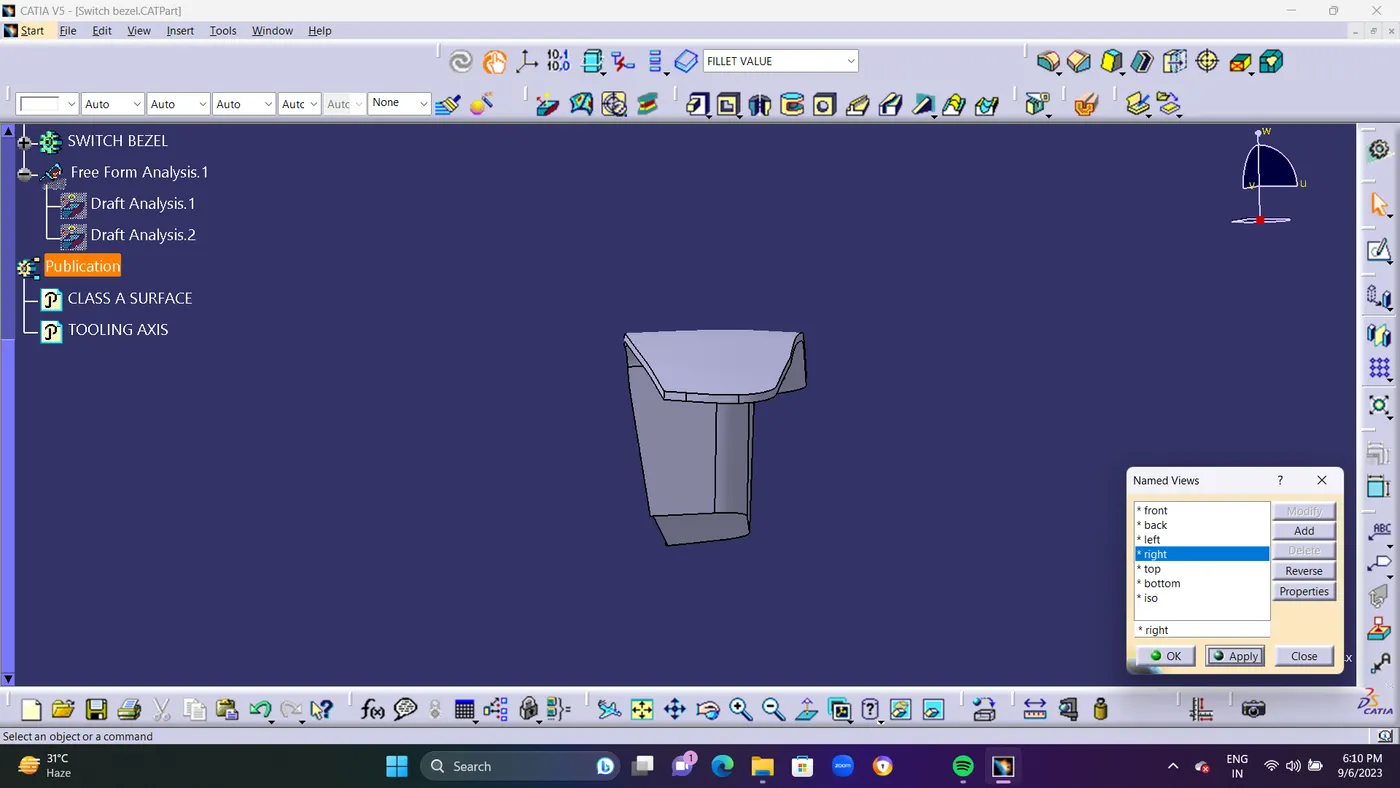
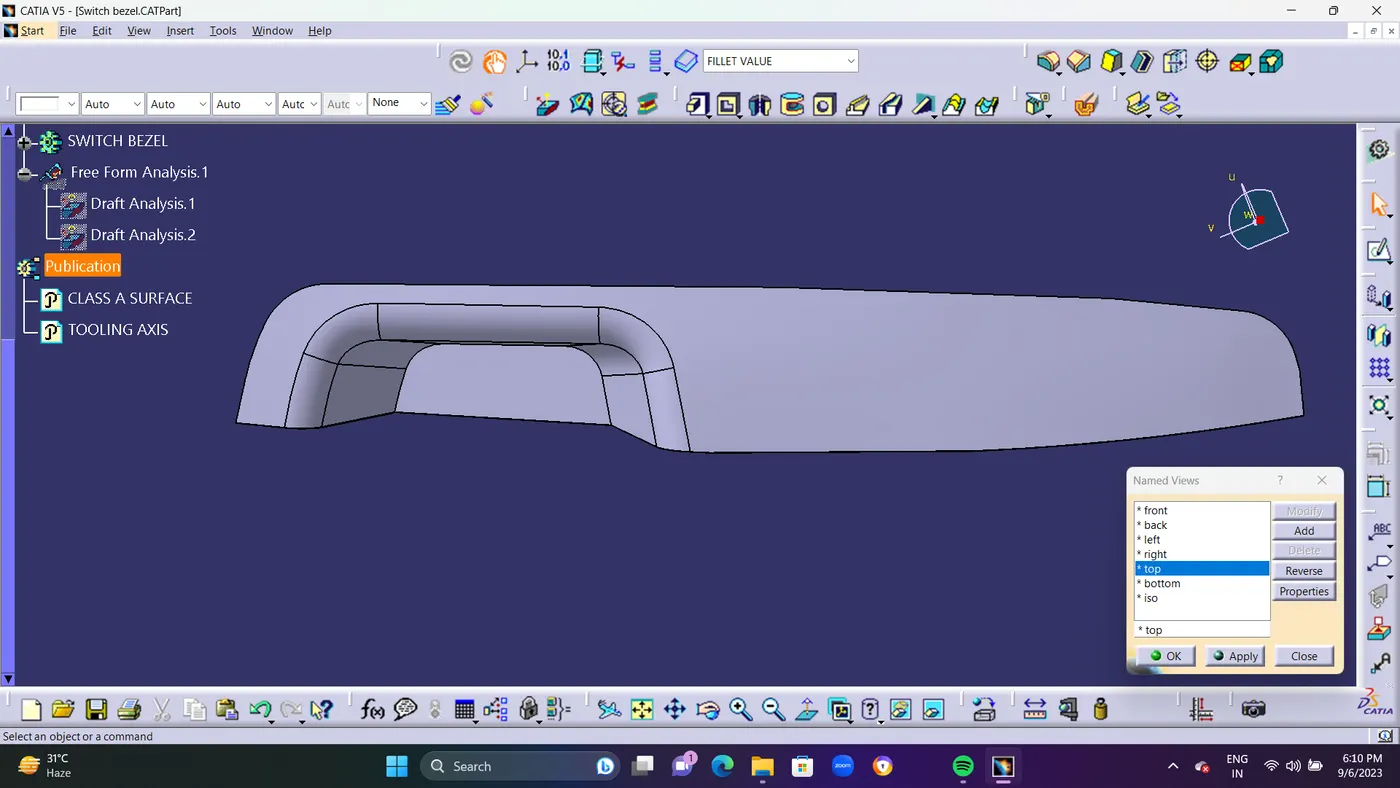
- STEP 8 : In Draft Analysis If it shows Green Colour Surface. its Pass in Drafting.Suppose its shows in Red Colour Surface its Fails in Draft Analysis.and Finally ISO,FRONT,SIDE, and TOP View Should Be taken As ScreeenShots.
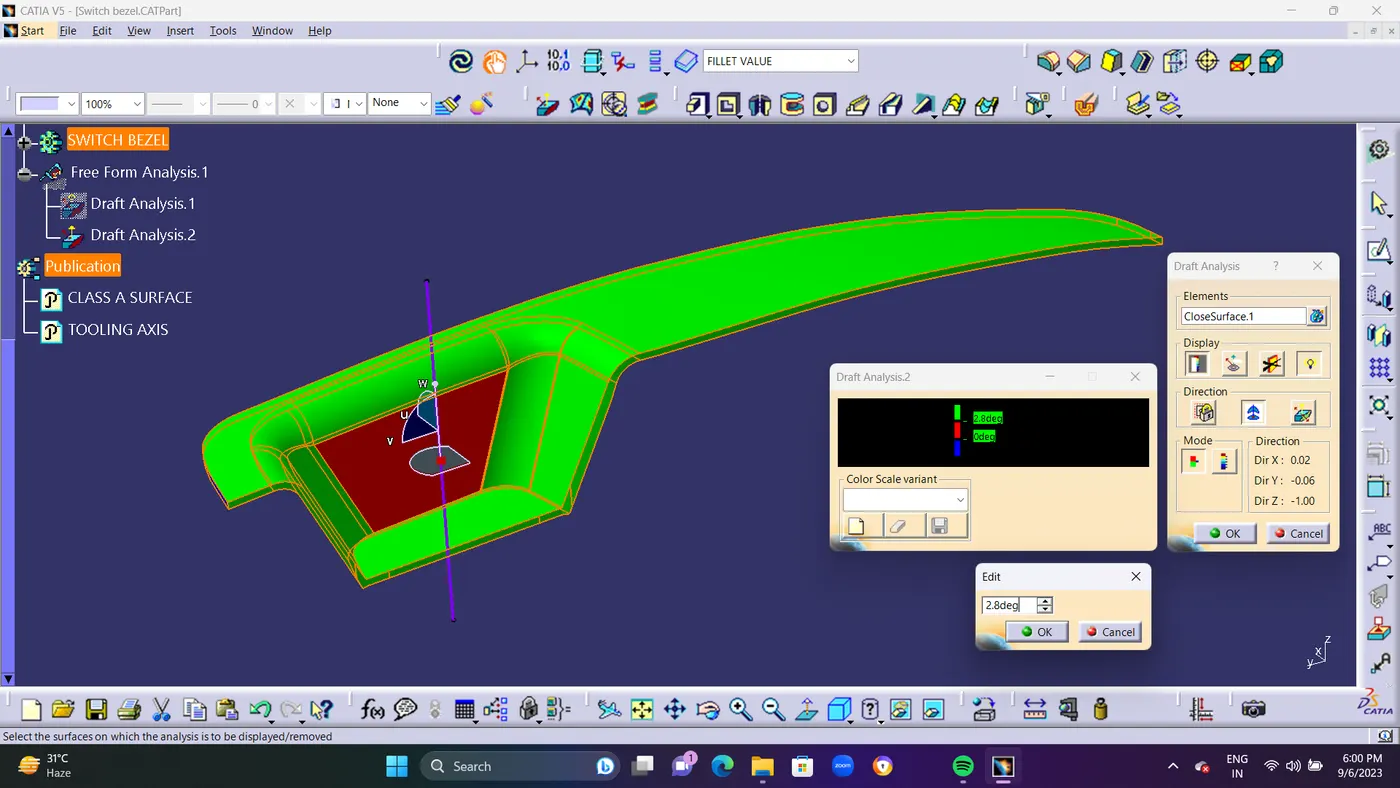
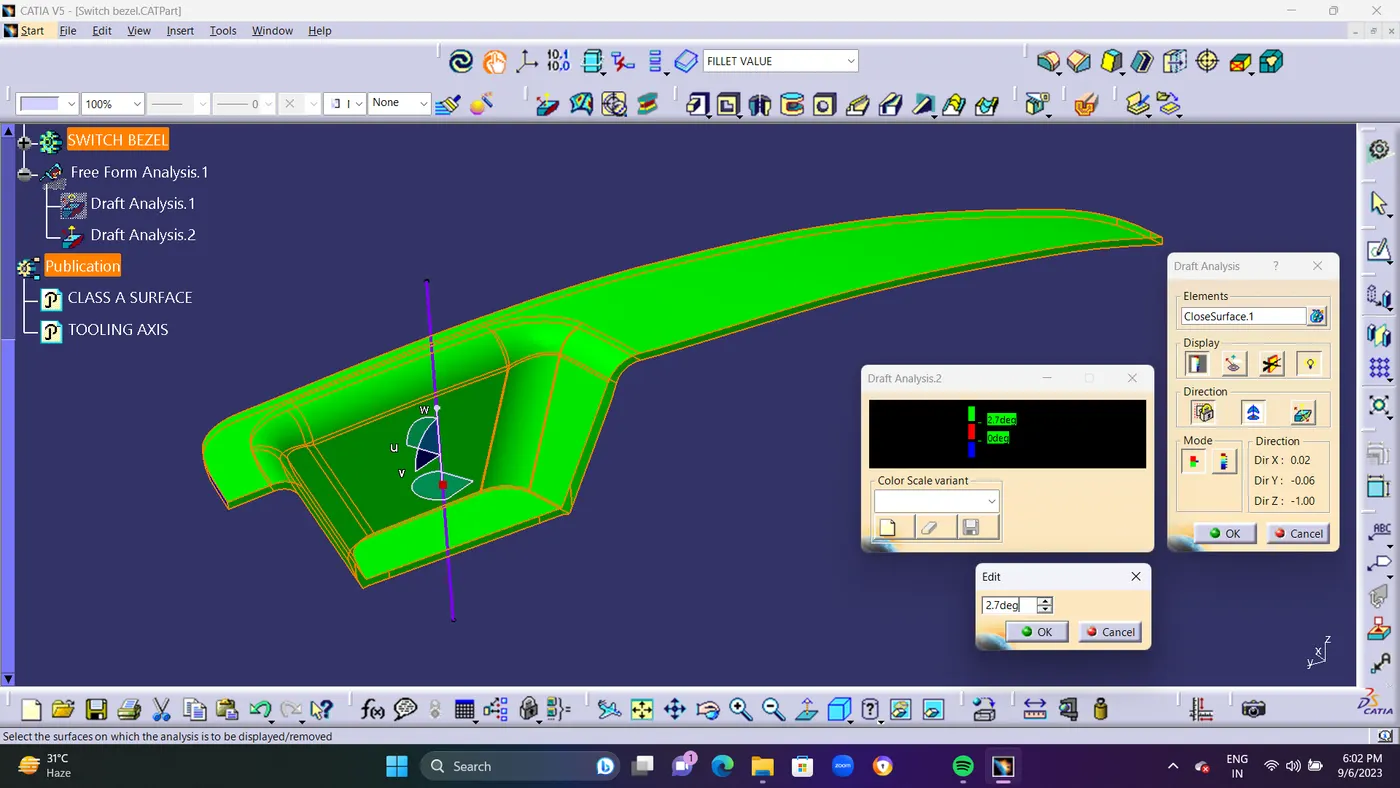
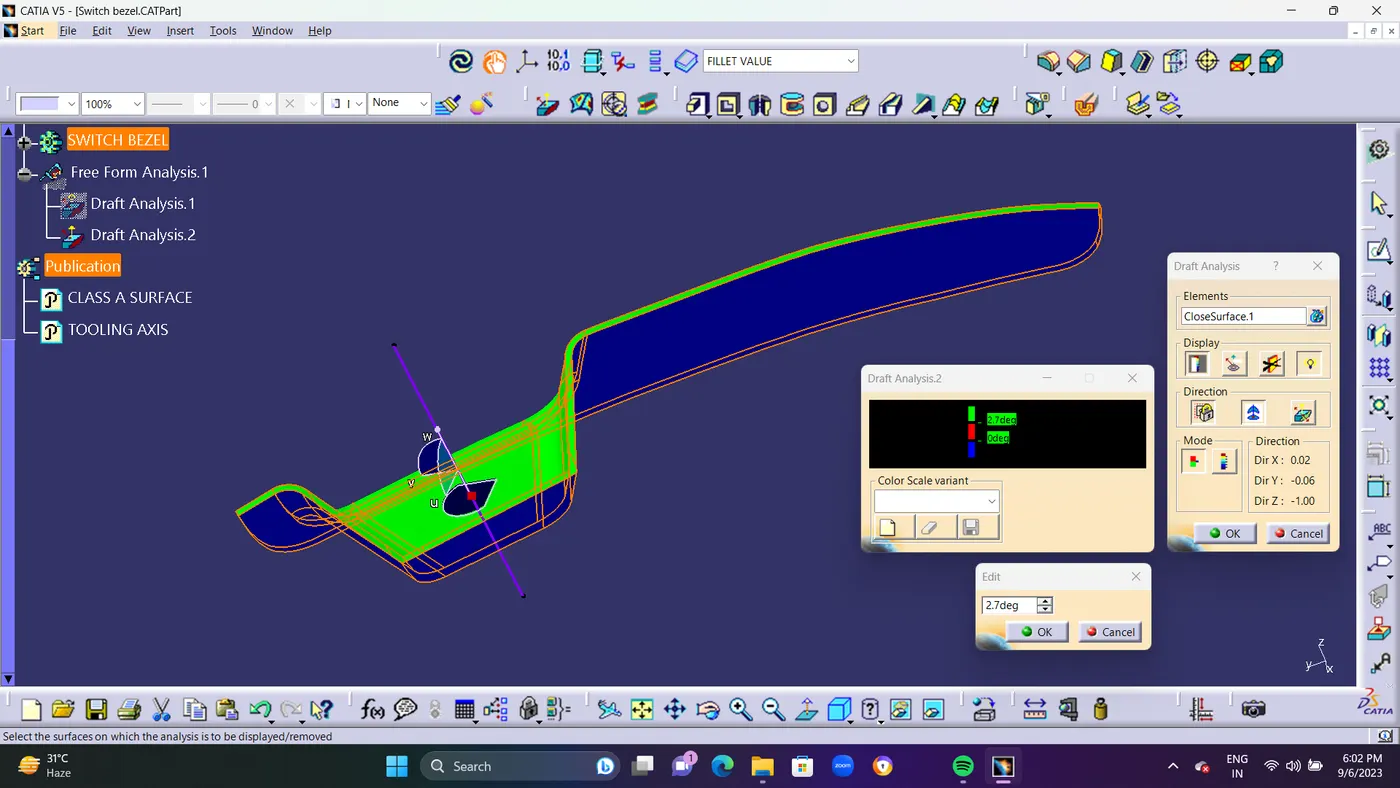
- STEP 9 : Finally take an Screen shots of ISO,FRONT,SIDE,&TOP View of Draft Analysis and Closed Surface.