Week 9 - Attachment Feature Creation - Challenge 1
AIM: To Create the Rib for the Centre console coin holder in Generative shape design using catia V5 software.
THEORY: Class-B surface contains all the engineer data required for the solid model to be completed. This data involves designing of various features. Some of the major features of the B-side are:
- Ribs
- Screw boss design
- Dog house design
RIBS:
A Rib increases the stiffness and strength to the component without increasing overall wall thickness of the model which is not desired. They also facilitate:
- Locating and arresting components of an assembly.
- Providing alignment in mating parts.
- Acting as stopper or guides for mechanisms
- They can also prevent aesthetic defects and non-fill risk.
DESIGN RULES FOR RIB CREATION: -
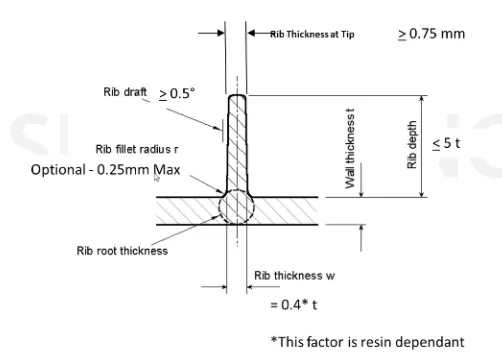
- Draft: 0.5 degree per side (minimum), but this value should not be high that will cause failure for other consideration. For example, more draft will result in less thickness at the top surface of rib.
- Thickness of ribs: thickness of rib should be 40% of wall thickness or 0.4*t where t is the wall thickness.
- Height: Height of the rib should be ≤ 5 times the wall thickness i.e. 5*t
- Spacing (for more than 1 rib): 3:1- steel height/width ratio (maximum). h/w =3or2(preferred) where h is the height of the rib and w is the space between two ribs.
- Minimum thickness at the tip of rib: 0.75
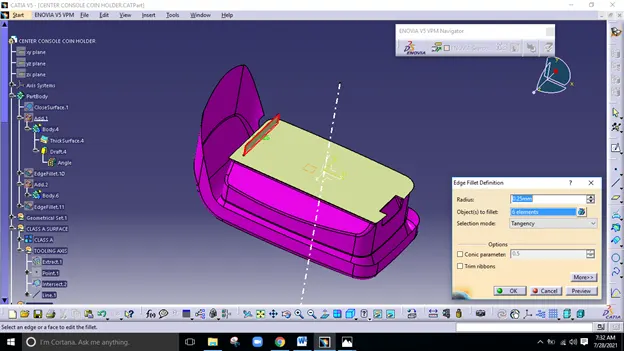
- Fillet Radius: 0.25mm (max)
- Ribs on opposite side of the wall should be offset
- Ribs should be connected to other structural features where ever possible.
- Rib root thickness should not be more than 30% of the wall thickness.
PROCEDURE FOR CREATING RIBS STEP BY STEP:
- Extract the base of the coin holder from outside that is from B side.
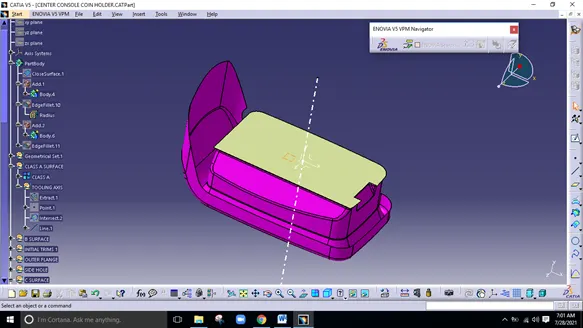
2.Sketching on the x-z axis or extracted. Using positioned sketch to draw the required length of rib.
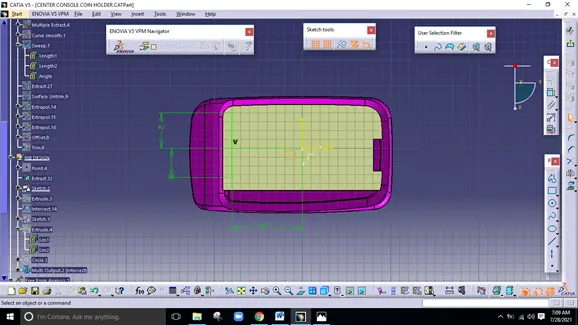
3.Extruding the created sketch. For the extrude distance we have to take design rules into consideration. Height of the rib should be 5*Thickness of components.
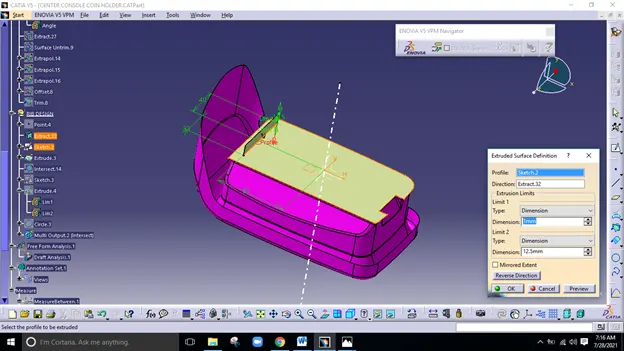
- Now insert a new part body to create a solid body for the extruded surface by using the thick surface option in the part workbench. By standard rule thickness of Rib should be 0.4*t where t (thickness of component).
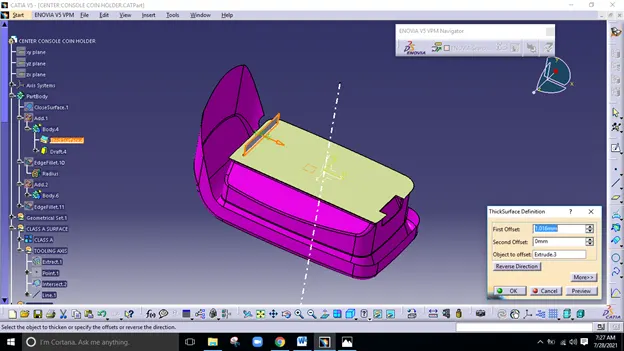
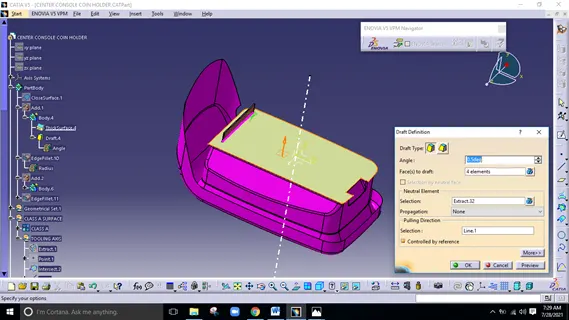
- Rib is being created at step 4. Now we have to work on other features to make it fit for production. Give a draft of 0.5 degree on all the vertical faces in the direction of tooling axis.
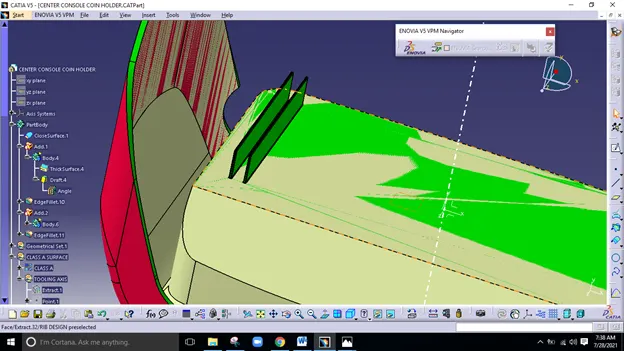
- Adding the Rib to the main body
7. Edge fillet radius of the Rib should be 0.25 mm (max). Measuring the tip thickness.It should be more than or equal to 0.75mm.
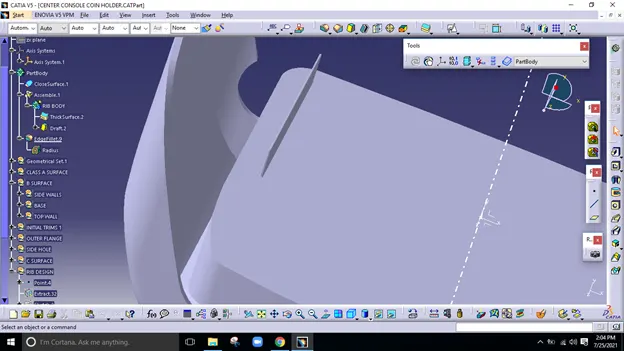
- Intersect XY Plane with Component Part Body.
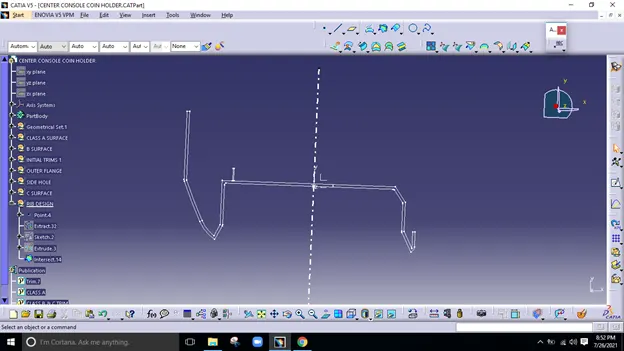
10.Checking Rib Root Thickness. Using tritangent Circle from circle definition.
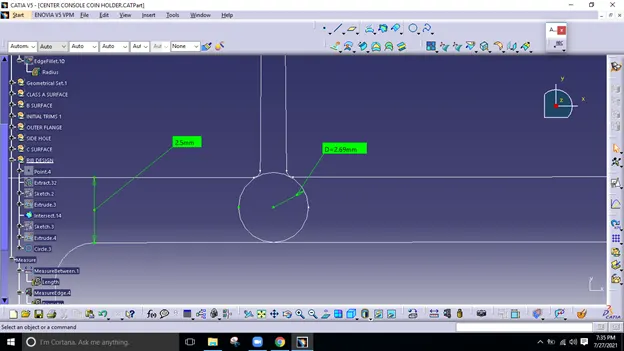
By standard rule rib root thickness should be 30 % of component thickness.
CREATING MORE RIBS:-
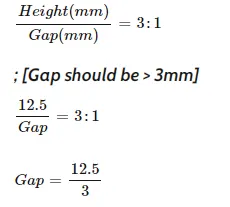
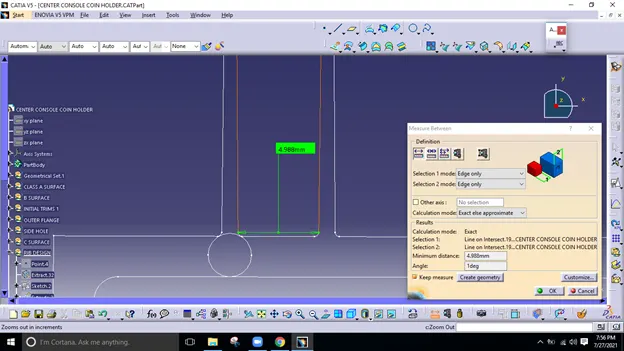
Gap= 4.16
As 4.16 is more than 3mm than we can 4.98 take as distance between the Ribs. We can create more ribs by using step 1 to step 7 as explained above.
PROCEDURE FOR DRAFT ANALYSIS:-
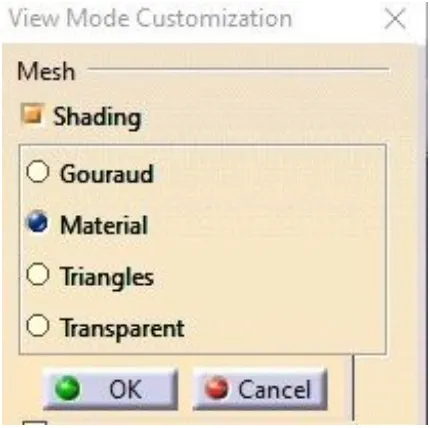
STEP 1: Changing view mode to material.
View mode>view mode customization>tick material>ok
STEP 2: Calling Draft Analysis.
Toolbar>Insert>Analysis>Feature Draft Analysis
STEP 3:
- Drag the compass from the draft analysis box on the tooling axis and place it properly.
- Click on locks so the compass will get locked to the tooling axis.
- Click anywhere on the component.
- Click OK.
- Analysis the colour of the failing and passing surfaces.
If a component is showing in Green colour that means our component is ready for manufacture.
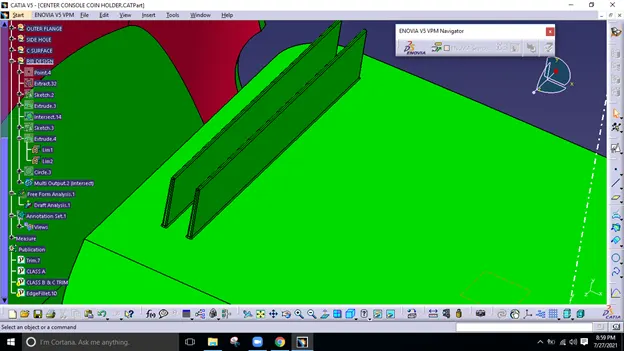
NOTE: If we find zero degree or negative degree filing colour, we can fix it by changing draft angle, sweep direction, modifying properly tooling axis etc.
CONCLUSION:
Creation of the Rib on Coin Holder has been successfully done by guidance of design rules. It has been converted from surface into solid body. The tooling axis has been created according to the OEM standard.