Week - 8 - Morphing
MORPHING
Aim:
1) Practice all the Morphing techniques that were shown in the video for Model-1.
2) Perform morphing for the Model-2 and Increase the Height of the Dog houses and Ribs.
Procedure:
Morphing is used to change the shape or design of the component without any numerical input. So, instead of going again to the CAD department and changing the design, we are doing it in ANSA and checking the modified model and if the modified model is giving results, we give it to the CAD team to refine the model in that direction. This morphing technique will give a basic idea when the design of the model is changed. If we have to change the model numerically, it will consume a lot of time and effort.
Applications:
Some of the applications of morphing techniques in the automobile industry are Hyundai brio and Hyundai Amaze. Hyundai Amaze (Sedan) is a morphed version of Hyundai brio (Hatchback). Both models are similar up to the B or center pillar of the car and the boot version is added to the hatchback version. Refer fig1. Similarly, there are other car models which changed by morphing techniques. Suzuki swift and ford Figo, Hyundai i10 and Hyundai xcent etc. These morphing techniques can be used in different industries also like aerospace. We always find similar or advanced versions of the same geometry with different outputs. These kinds of design changes will happen when the first model is successful and they go on increase the capabilities of the same model. So, they initially morph the same model and analyze it, if it is giving good results, then we will refine the model with numerical inputs with the CAD team.


Fig 1: Hyundai Brio( Hatchback, left) and Hyundai Amaze ( Sedan, Right)
1. Practice all the Morphing techniques that were shown in the video for Model-1.
Free Free morphing technique:
Free free morphing technique is a basic method of morphing. In this, we create a box that will bound the feature which has to change. And we have control points on the corners of the box. We can change the geometry of component or feature by moving these control points. There are many ways to create this box. And we can create a cylindrical box also in ANSA, and we load features in to the box. And we morph the geometry.
- Creating Morphing box: To create morphing box, Morph module > NEW > Ortho > select FE entities or nodes or geometry > Ortho or min volume > middle click. This new option creates Hexa hedral morphing box. Ortho option will create the box in the direction of the coordinate system. Min volume will create a box which will contain the feature with the minimum volume of the box
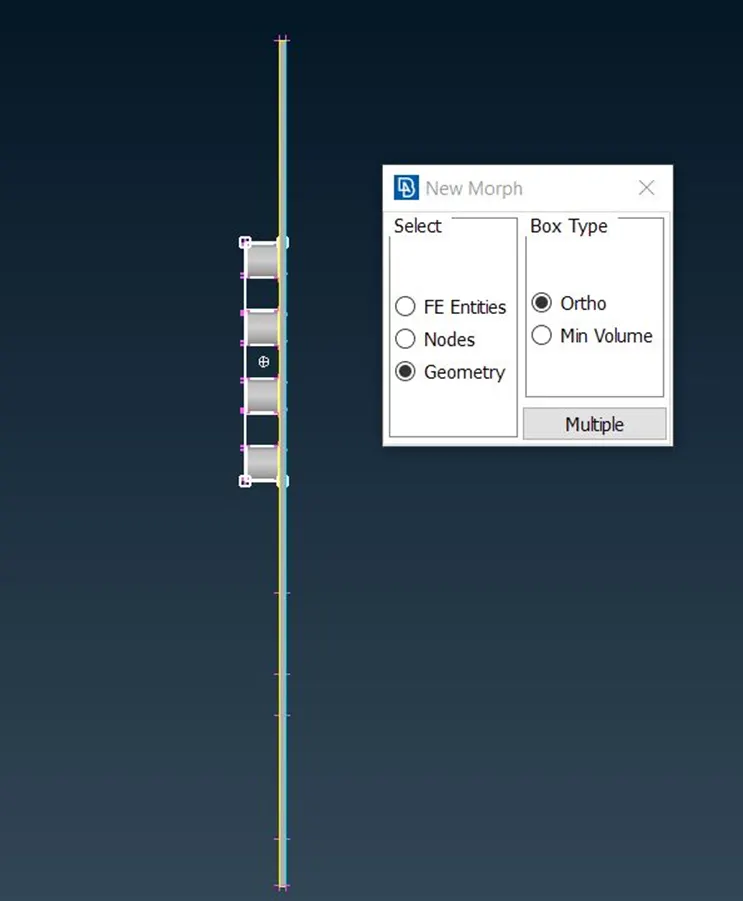
Fig 2: Creating morphing box using feature selection
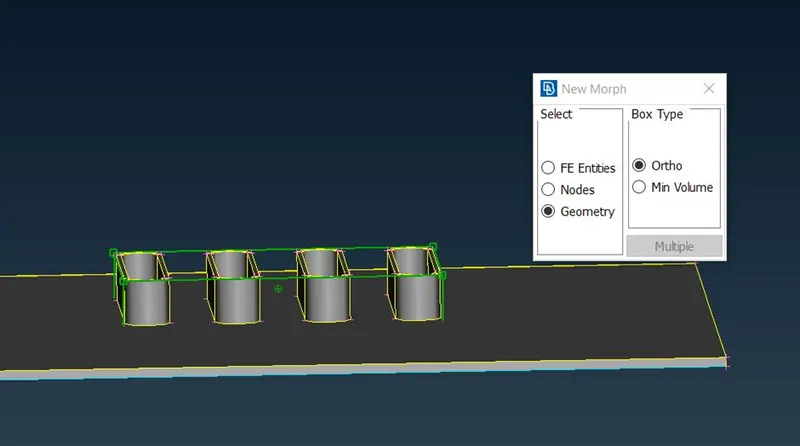
Fig 3: Hexahedral morphing box (green)
2. Moving the control points: In this, we select the control points and move the control points with the mouse or give the value in the x, y, or z-direction. The box will move along with the features contained in it. To move the control points, Morph module > Box morphing > move > Select the control points > drag the mouse or give the displacement value by number. When you are moving the box, you can give a local coordinate system to the morphing box by right-clicking on the area of the box. If we don’t give a local coordinate system, it will follow the global coordinate system.
Here I have increased the elliptical feature height. And also I have changed the total shape of the component as per the video. Refer fig5.
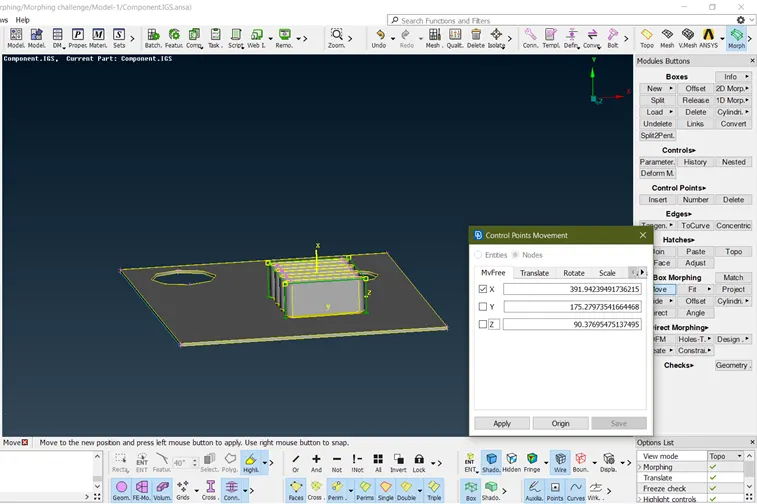
Fig 4: Moving the control points of the morphing box
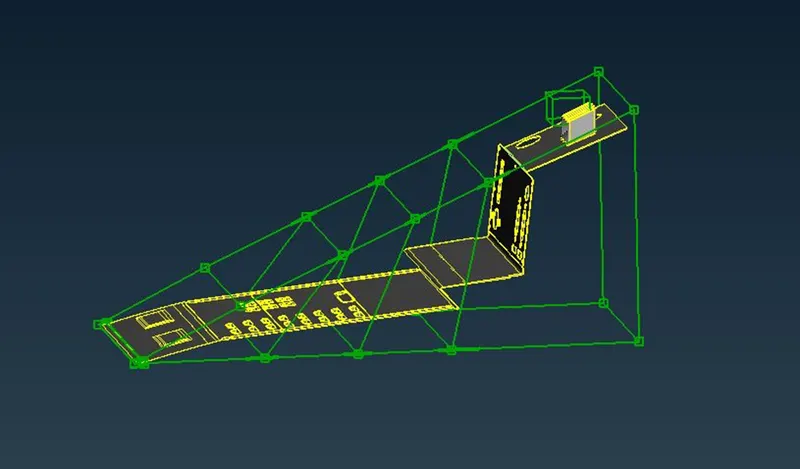
Fig 5: Final morphed geometry of the component
The middle-morphed boxes are created by the split option in the box menu. We can divide the morphing box into two or many no. of boxes to finely edit the geometry.
2) Perform morphing for the Model-2 and Increase the Height of the Dog houses and Ribs.
- Creating Morphing box: To increase the height of the Dog houses and ribs, we create the morphing box by selecting the specific dog houses and ribs. And we create the box with min volume as the global coordinate system is not aligned with the dog house and ribs. If we create the box using ortho type, it will create the box in oriented which is not parallel to the axis of dog house. To create the box,
Morph module > NEW > Ortho > select geometry > min volume > middle click.
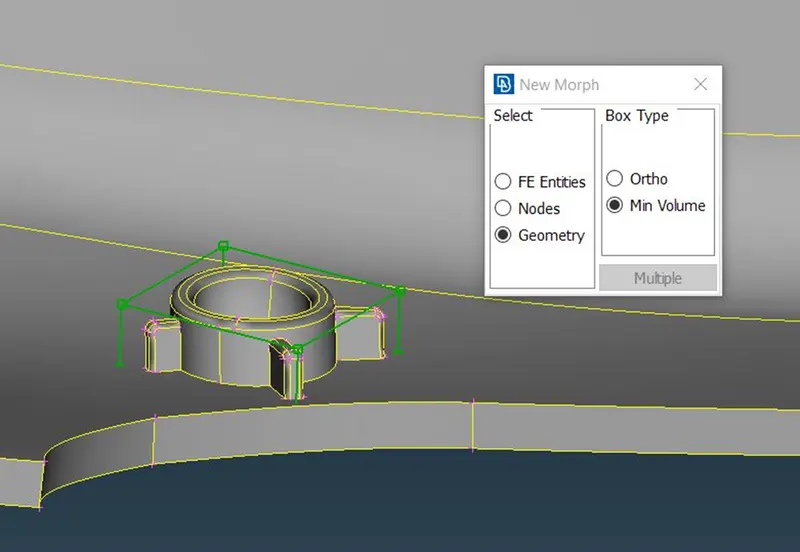
Fig 6: Morphing box created for the dog house
- Moving the control points: To move the control points, Morph module > Box morphing > move > Select the control points > drag the mouse or give the diplacement value by number. I have given local coordinate system to the morphing box by right clicking in the area of the box. If we don’t give local coordinate sytem, it will follow the global coordinate sytem which is different orientation from dog houses.
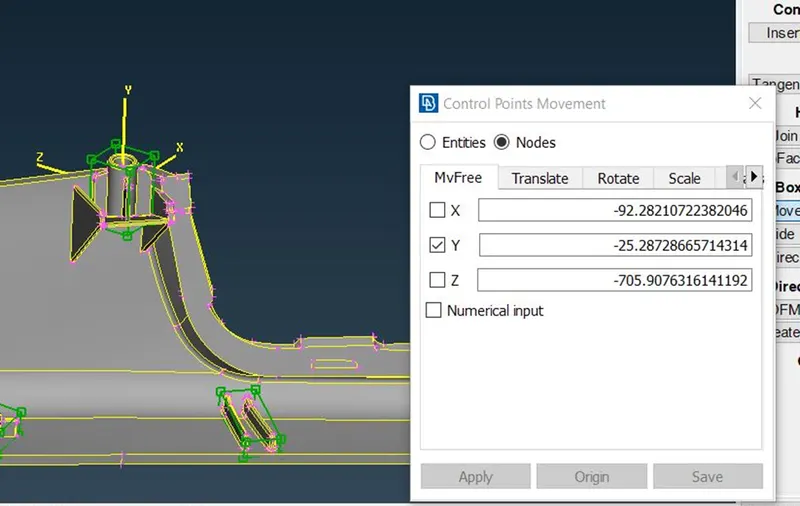
Fig 7: The height of the dog house increased by control points
I have created a morphing box for all the dog houses, and increased the height.
Learning Outcomes:
- I have learned the morphing techniques using the morphing box.
Result:
Practiced the morphing Techniques in model-1 and increased the height of dog houses and ribs in model-2.