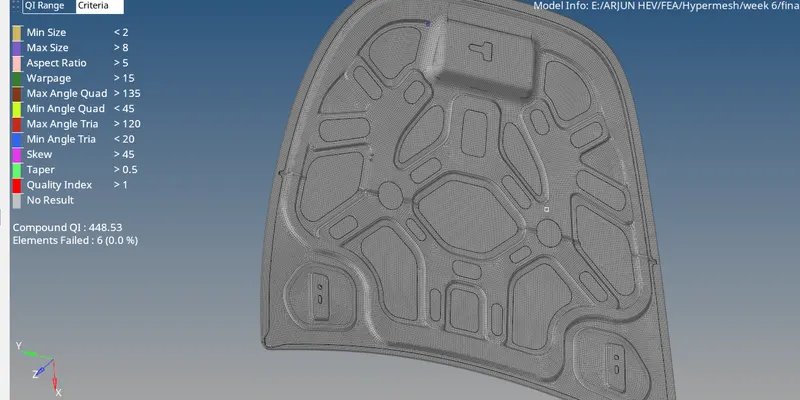
Week 6-Meshing of Hood Challenge
Meshing of Hood:
Here we will see the Meshing of different parts of Hood.
Hood consists four different components as below:
- Inner Extract
- Outer Extract
- Hinge Reinforcement Extract
- Latch Reinforcement Extract
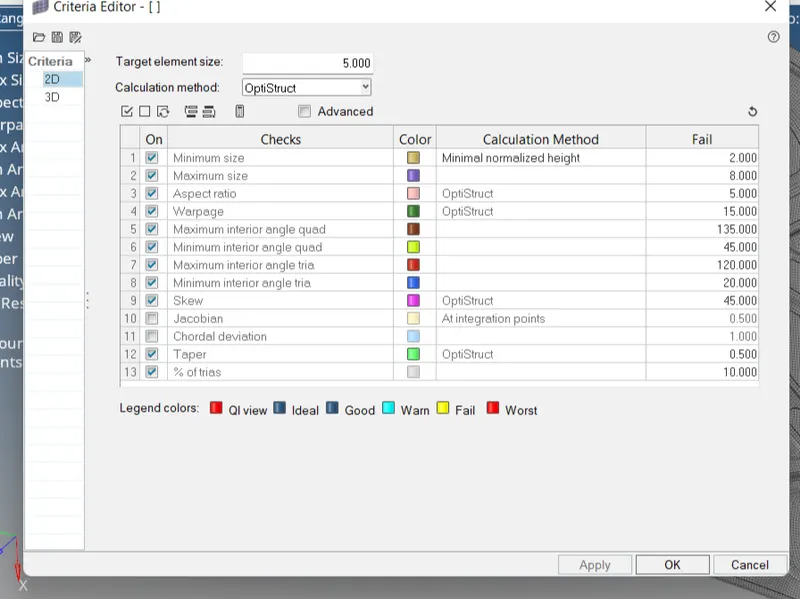
Target Element Length = 5 Units
| S.N | Quality Criteria | Value |
| 1 | Aspect Ratio | 5 |
| 2 | Skewness | 45 |
| 3 | Warping | 15 |
| 4 | Taper | 0.5 |
| 5 | Min. Length | 2 Units |
| 6 | Max. Length | 8 Units |
| 7 | Min angle Quad | 45 |
| 8 | Max angle Quad | 135 |
| 9 | Min angle Tria | 20 |
| 10 | Max angle Tria | 120 |
| 10 | Tria % | 10 |
Qaulity criteria.
Procedure:
Now we will see all the components one by one.
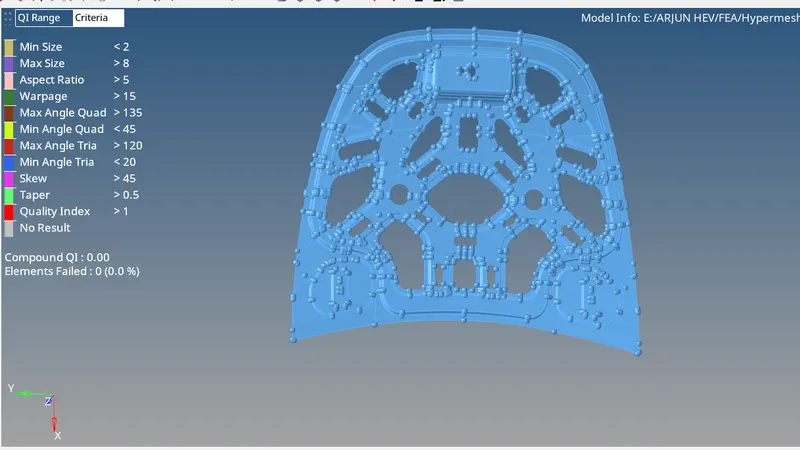
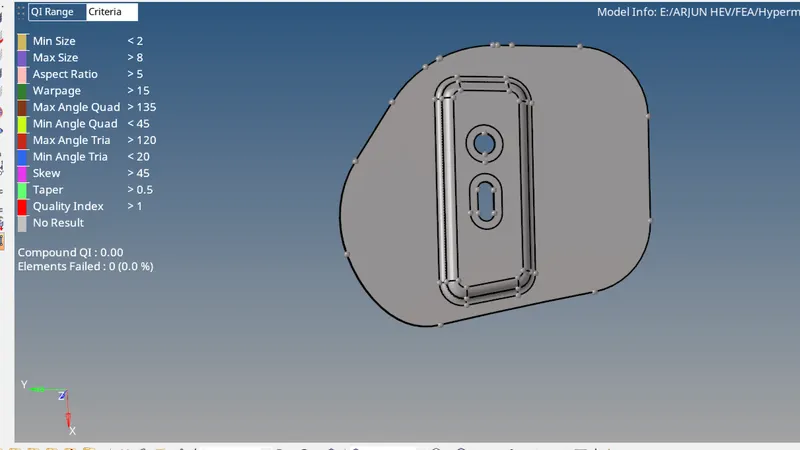
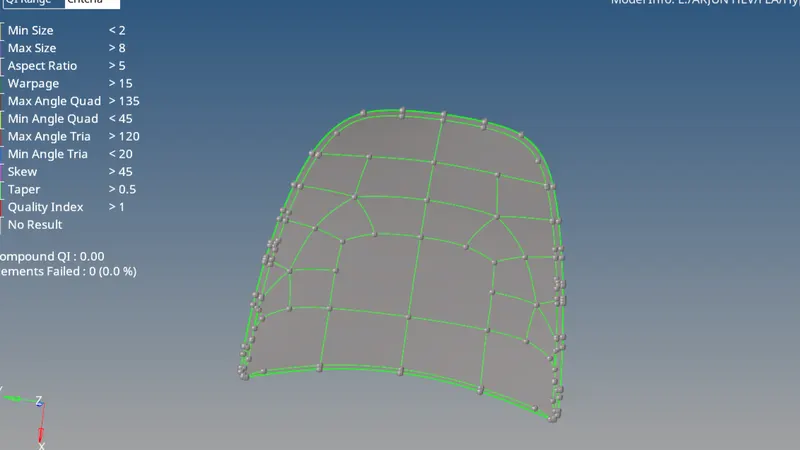
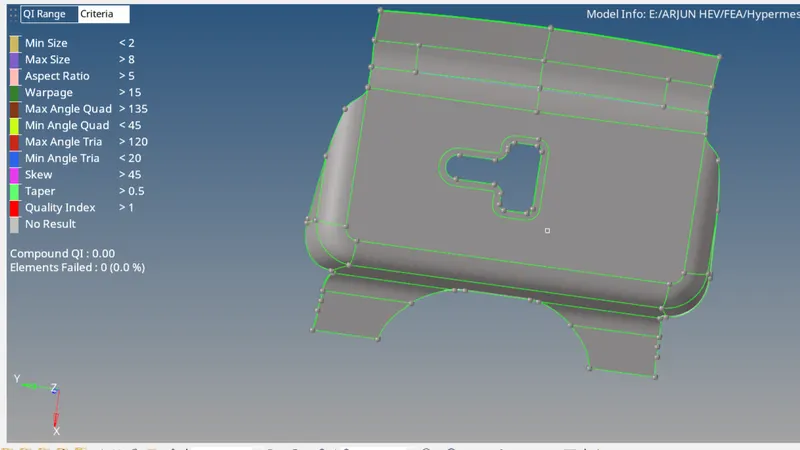
As shown in above image, there are four different components.
In this paper, meshing of these four components is described one by one.
Procedure:
Now we will see all the components one by one.
Inner Extract:
- There are four different components in the file when we import it.
- First of all make sure that only “Inner Extract” component is active.
- Delete all solids from the component.
- Create Mid surface for only Inner Extract by selecting particular surfaces.
- Since this component is axis symmetric, we can cut it in to half and mesh it.
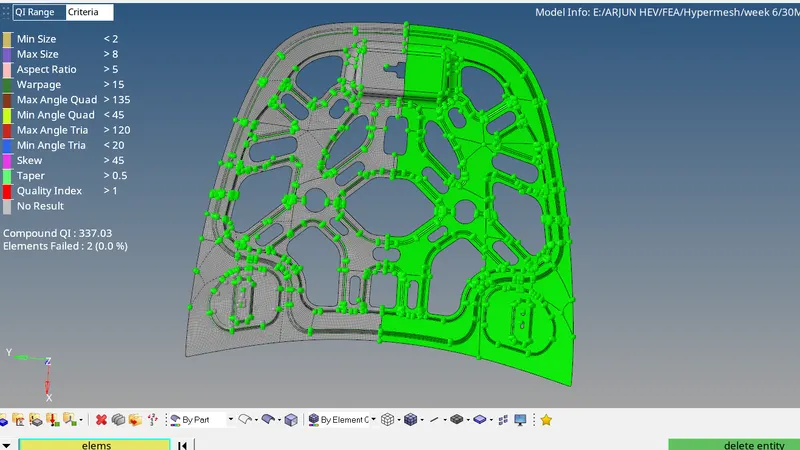
- As shown in above image, only the marked portion is not symmetric.
- So we can mesh that at the last.
- As shown in above image, split the midsurface and keep half of that for meshing.
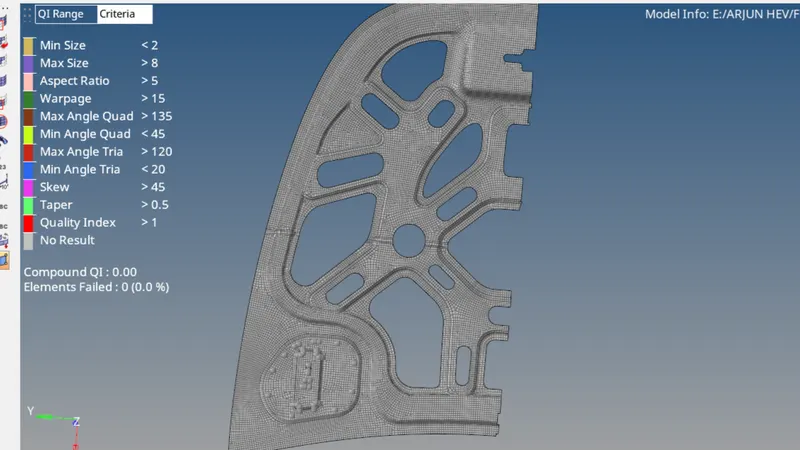
- Complete the mesh of the hald portion of the Inner Extract as shown in above image.
- Now we can reflect the elements on the other side and complete the total mesh on the component.
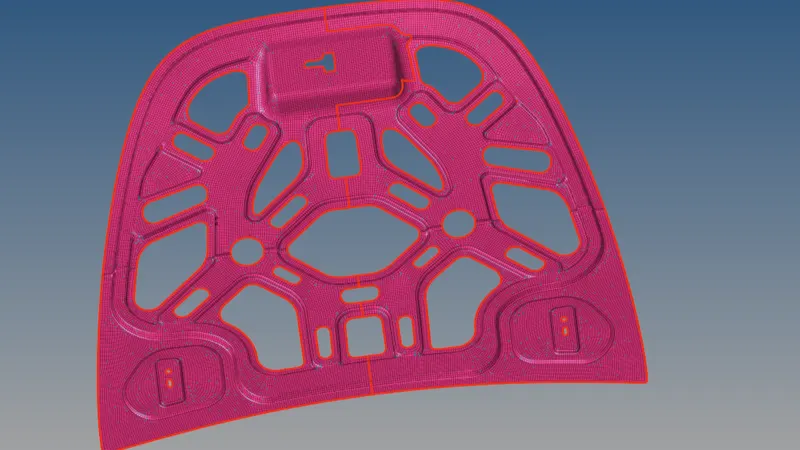
- As shown in above image, elements are reflected on the other side.
- Make sure that elements are in proper connectivity.
- So, create equivalence between the elements which are in symmetric line and make them connected as shown in above image.
- Thus we can complete the Meshing process for “Inner Extract” component.
Outer Extract:
- Here we can see the component is axis symmetric, so we can cut it into half.
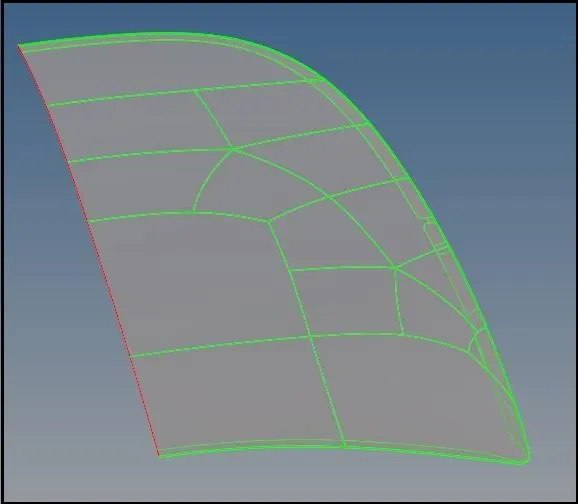
- As shown in above image, the component is divided in to half.
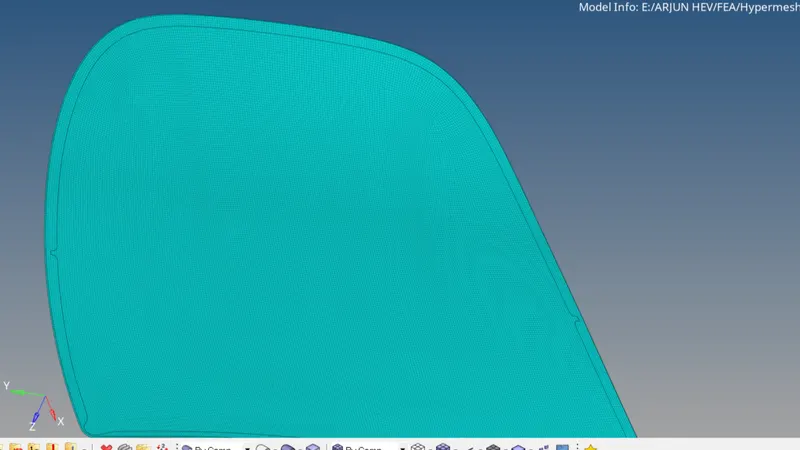
- Create Midsurface after deleting solids from Outer Extract as shown in below image:
- As shown in above image, the hemming portion of the component is very thin.
- So, after creating midsurface, we can toggle the extra edges and split the component from the curvature area as shown in above image and easily create mesh without minimum length element.
Latch Reinforcement Extract:
- Delete solids and create Mid surface for Latch Reinforcement Extract component.
- Do necessary cleanup and toggle extra edges.
- Remove edge fillets from marked portion for better mesh quality.
- As shown in above image, create washer surface with 5 mm distance and split the surface for better mesh structure.
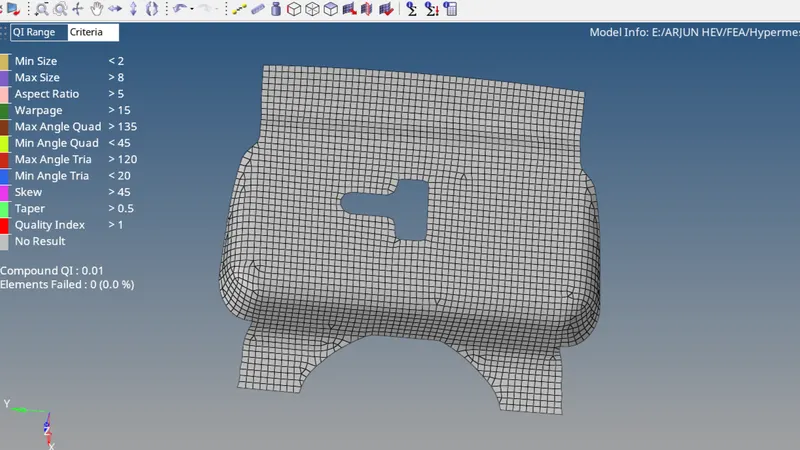
- Keep the mesh flow as per geometry.
- Avoid tria elements at the free edges.
- As shown in above image, create mesh at the centre first and then proceed further for good mesh and complete the entire mesh for Latch Reinforcement extract.
Hinge Reinforcement Extract:
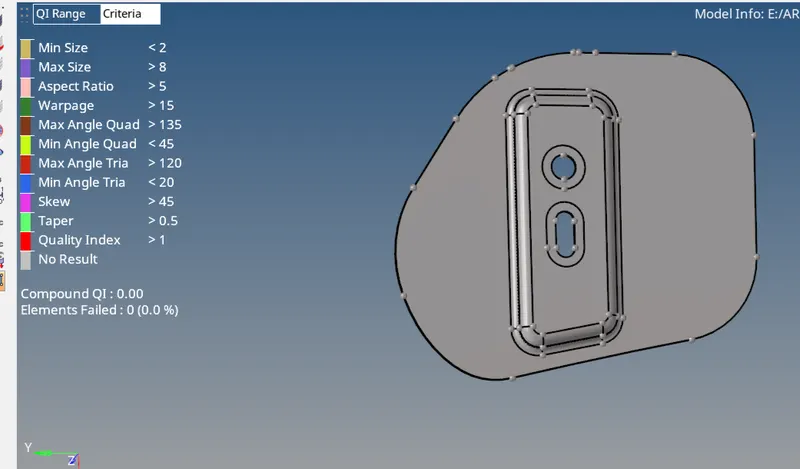
- Here there are two components in Hinge Reinforcement Extract.
- If we create mesh only for one, we can reflect it on other.
- So, delete solids and create midsurface for only one part.
- As shown in above image, avoid creating washer surface for the holes for better mesh arrangement.
- Toggle the edges where minimum length element can occur.
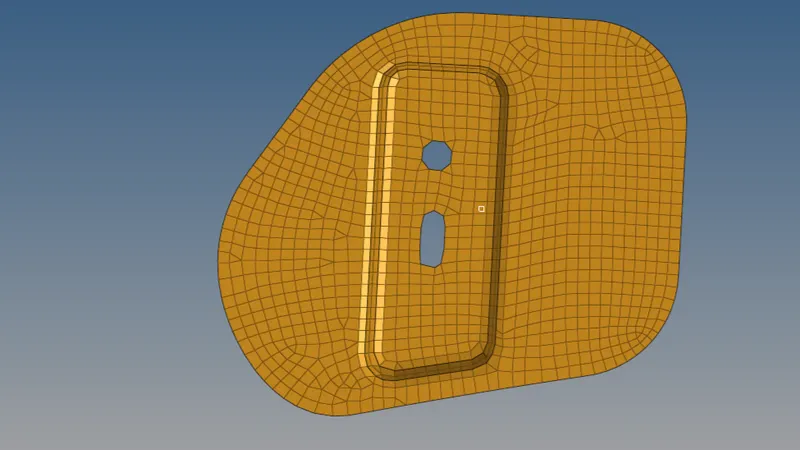
- As shown in above image, mesh is created at the inner most area where less free edges are there.
- Then followed by them, rest of the part is meshed.
- As shown in above image, after creation of mesh on one part, with reflect option, mesh is reflected on the other part as well.
- Thus we can apply mesh on both the parts of Hinge Reinforcement Extract.
Property
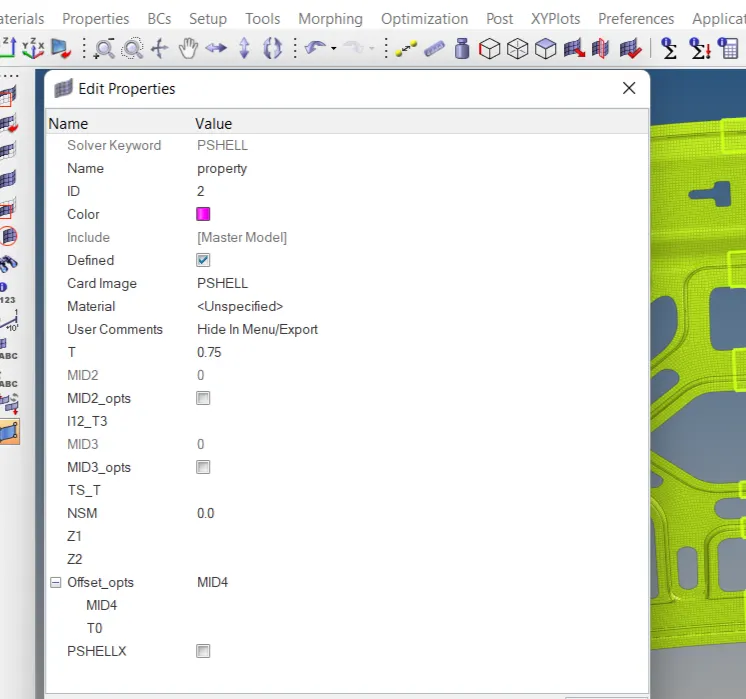
- After meshing all the components, apply 0.75 units thickness to all.
- After applying thickness, complete Meshed Hood will look as shown in above image.
Final part