Week - 4 - Crash Box Simulation
Aim: Perform the crash test of crash box for two different thicknesses having definite velocity on to the rigid wall and check for the stress and strains in the crash box for both the cases.
Procedure:
- Input file is given with only crash box and there is a need to create the rigid wall for crash test.
- First step is to create the rigid wall which can be done by clicking on Model>create entity> Rigid wall > create .Select the type of rigid wall need to be created. In this case planar rigid wall is choosen. In this way rigid wall is created at a specific distance.
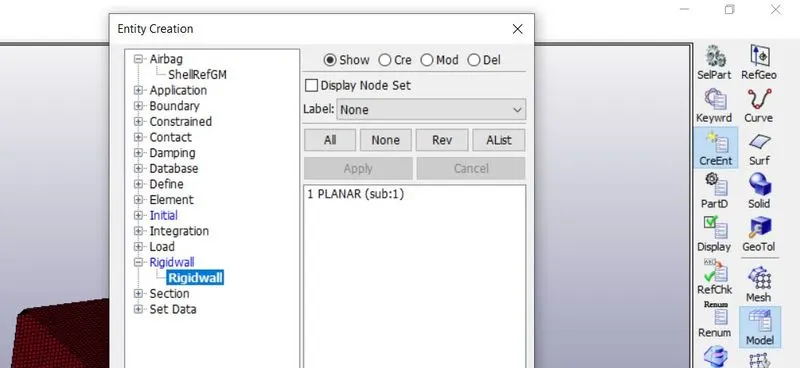
Fig : 1 Showing the Rigid wall creation window
- Now material and sectional properties need to be defined for crash box. For Crash box, material is choosen as MAT001. In that key in all the required quantities like Density, Youngs modulus and Poissions ratio.
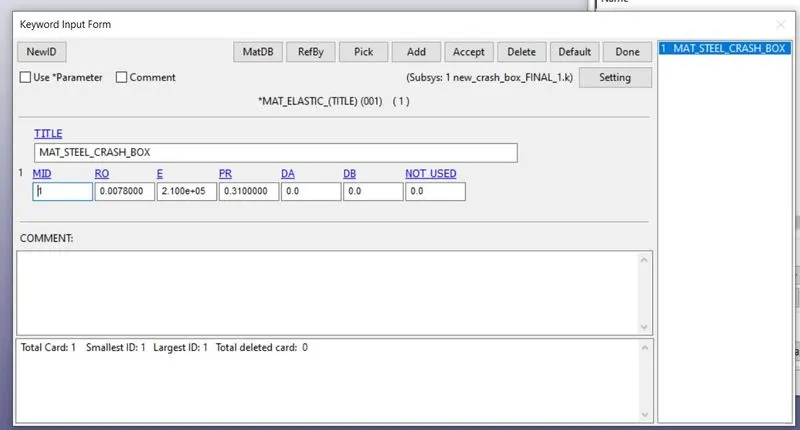
Fig :2 Showing the material Property window.
- For Sectional properties, Click on Model> Keyword manager > Section>Shell. Choose element formulaton as ELFORM 16 and No of integration points as 2 and thickness of shell is defined as 1.2 mm. For repeating the same test for other thickness , Thickness will be changed to that specified value of 1.5mm.
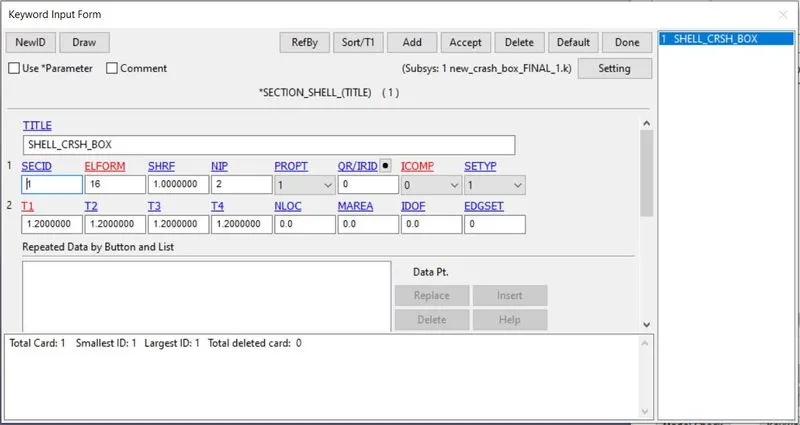
Fig : 3 Showing the sectional properties of Crash Box
- After defining the material and sectional properties, these should be assigned in the "PART" of the crash box.
- Next step is define the velocity to crash box which can be done by clicking on Create Entity > Initial> Velocity. In this, give the velocity as 13.88 mm/ms. Make sure the direction of velocity is given in a correct manner.
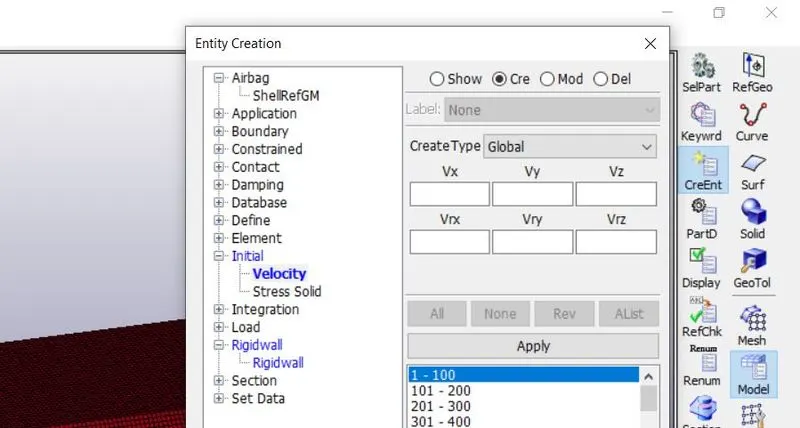
Fig : 4 Showing the intial velocity creation for Crash box.
- Next step is to define contact cards. This is done by clicking on Keyword manager >contact> Automatic surface to surface. This is choose to avoid penetration of Crash box on to rigid wall. Here there is no need to define master. Just define the crash box as slave.
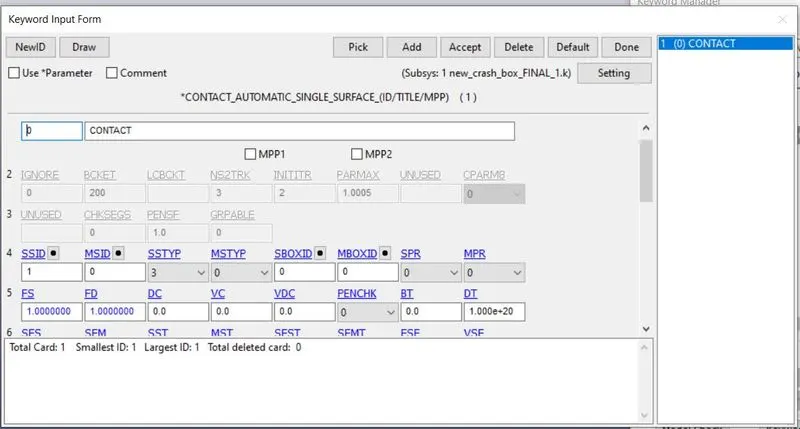
Fig : 5 Showing the Contact card definition
- An important point to note is that direction of velocity of the box and normal of rigid wall should be in opposite direction.
- Next step is to define the output cards for requesting the output of simulation. This can be done by clicking on Keyword manager > Database > Binary_D3plot. In this key in the Dt time.
- Last step is to define the control card. This can be done by Clicking Keyword manager> control> Control termination and key in the Termination time of simulation.
conclusion:
The maximum stress and strains in the case of crash box with 1.2 mm thickness is found as follows in each direction.
Max. Stress in X- Direction is 482 MPa.
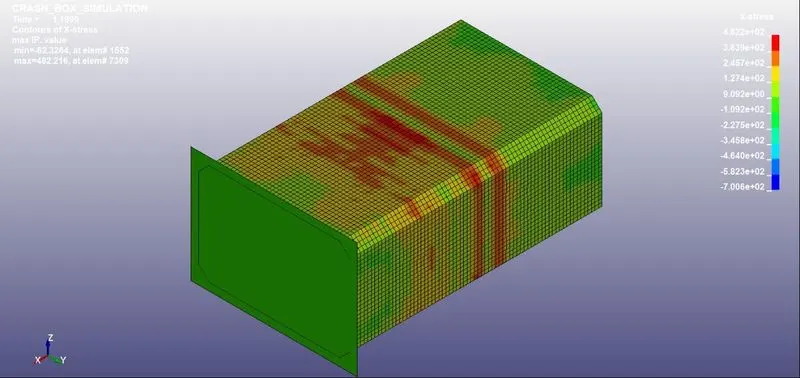
Fig : 6 Showing the Max Stress in X-Direction
Max. Stress in Y- Direction is 497 MPa.
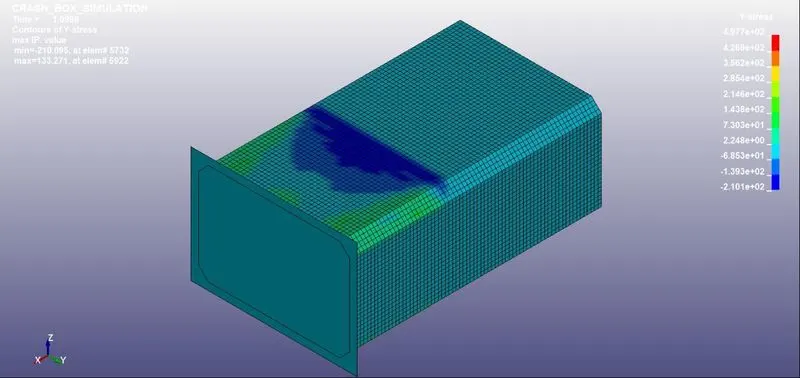
Fig : 7 Showing the Max Stress in Y-Direction
Max. Strain in X- Direction:
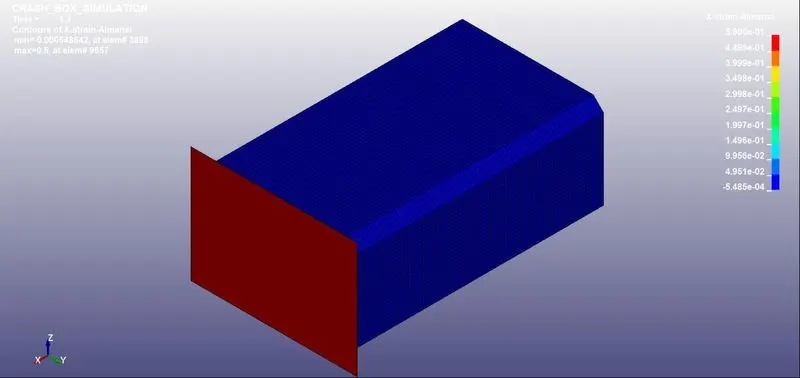
Fig : 8 Showing the Max Strain in X-Direction
Max. Strain in Y- Direction:
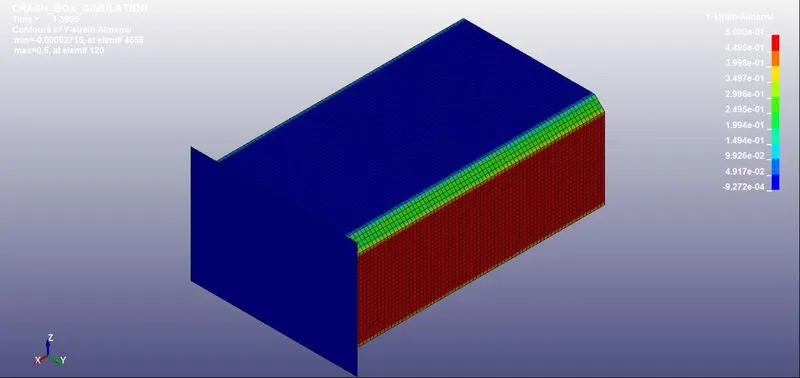
Fig : 9 Showing the Max Strain in Y-Direction
The Total resultant force is obtained as follows:
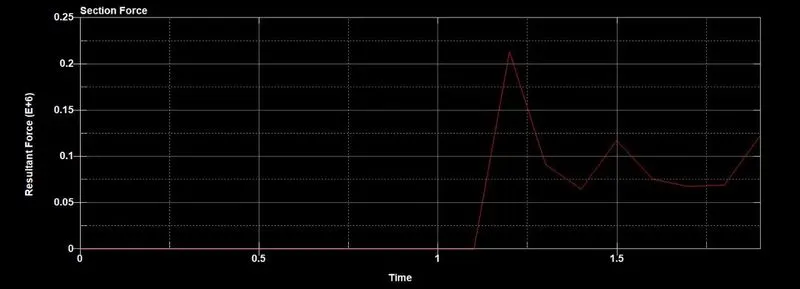
Fig : 10 Showing the Resultant Force
The Following figure shows the various energies:
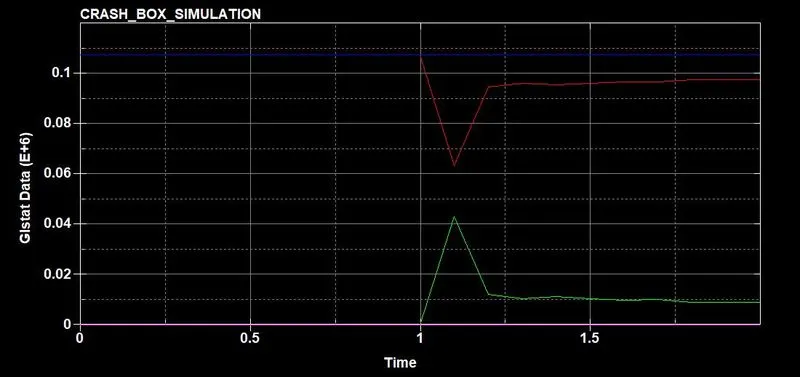
Fig : 11 Showing the Resultant Force
The following figure shows the Nodal Acceleration:
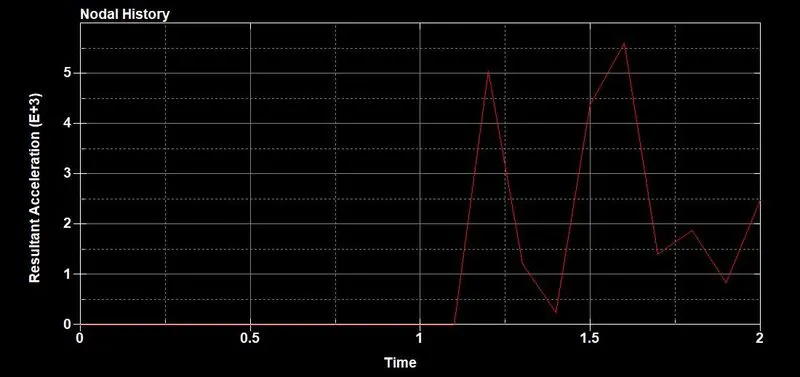
Fig : 12 Showing the Nodal Acceleration
The maximum stress in the case of crash box with 1.5 mm thickness is found as follows
Max. Stress in X- Direction is 528 MPa.
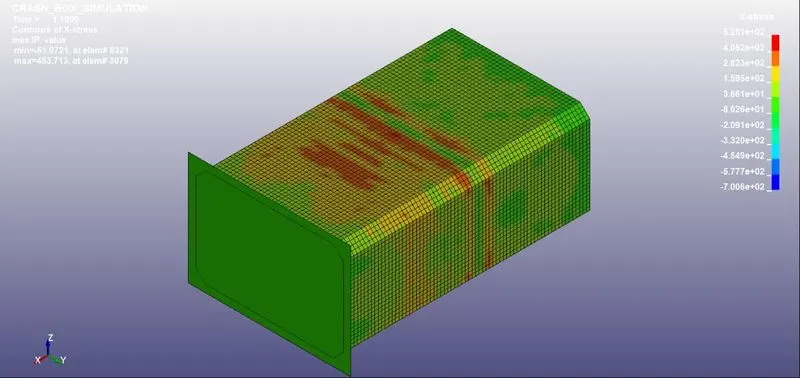
Fig : 13 Showing the Max Stress in X-Direction
Max. Stress in Y- Direction is 469 MPa.
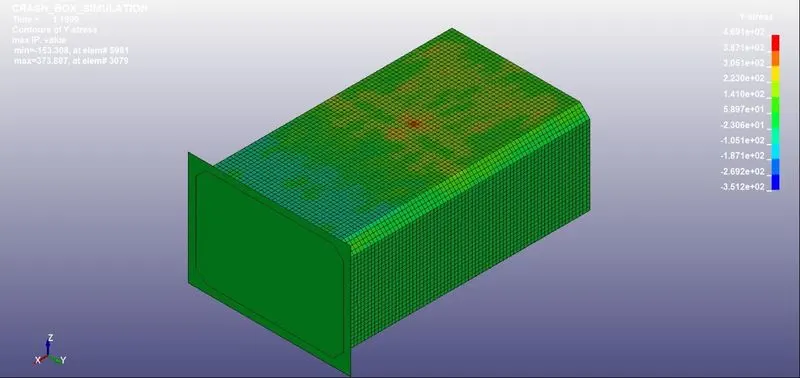
Fig : 14 Showing the Max Stress in Y-Direction
Max. Strain in X- Direction:
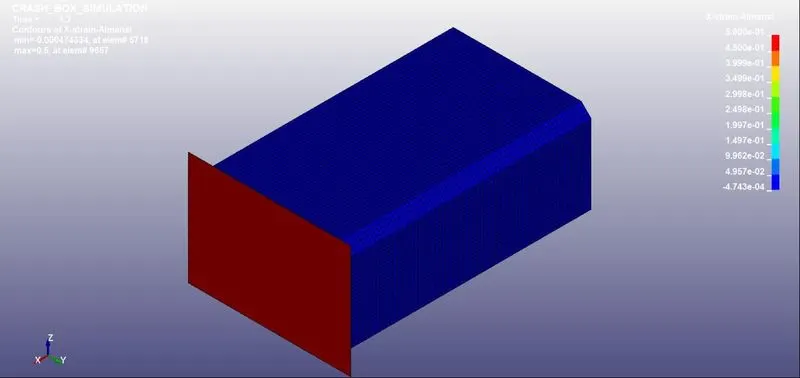
Fig : 15 Showing the Max Strain in X-Direction
Max. Strain in Y- Direction:
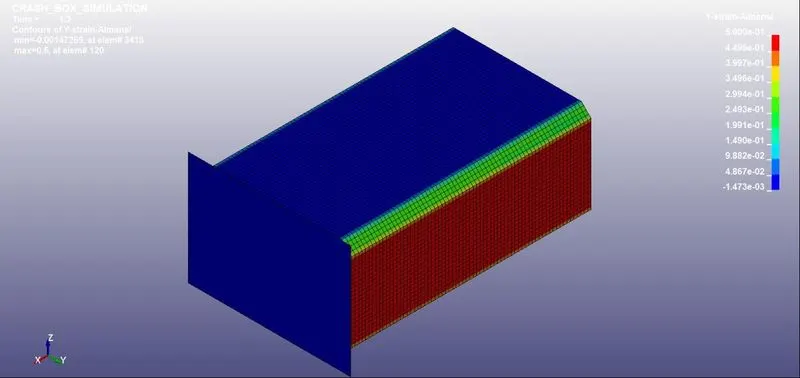
Fig : 16 Showing the Max Strain in X-Direction
The Total resultant force is obtained as follows:
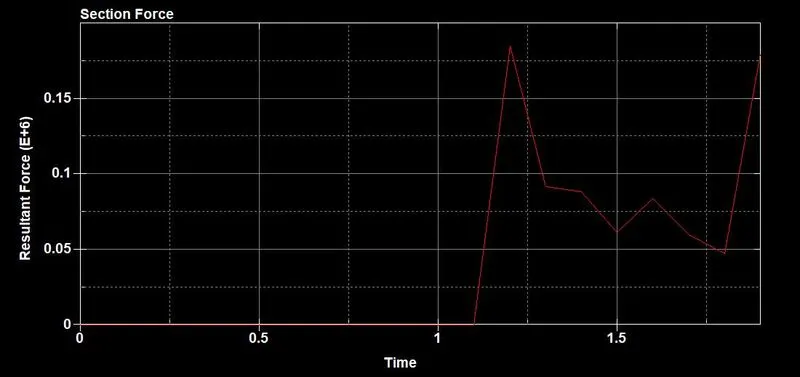
Fig : 17 Showing the Resultant Force
The Following figure shows the various energies:
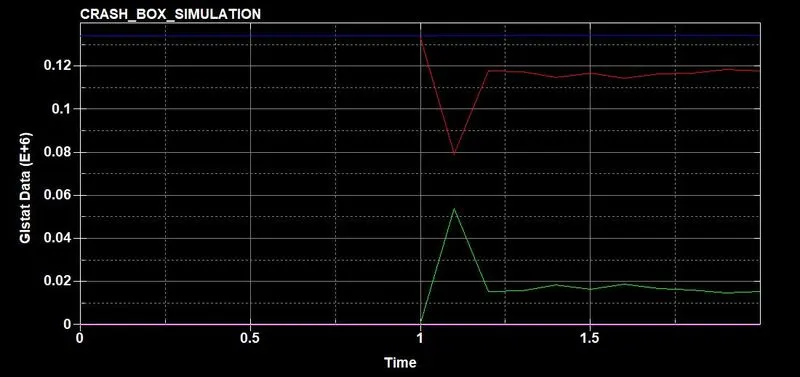
Fig : 18 Showing the Resultant Force
The following figure shows the Nodal Acceleration:
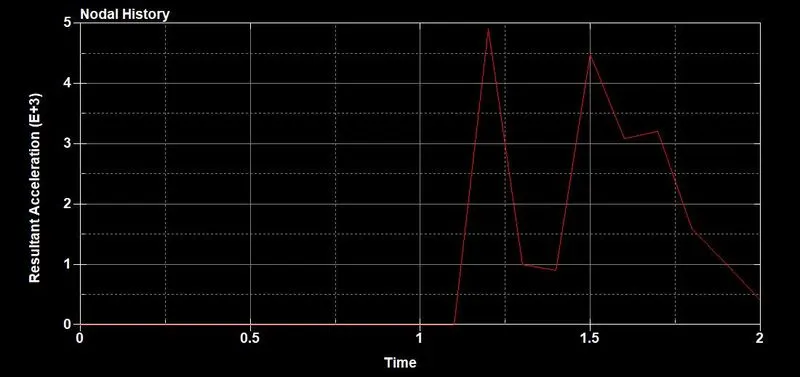
Fig : 19 Showing the Nodal Acceleration
Learning Outcomes:
- Creation of Rigid wall
- Material definition
- Sectional Properties Definition
- Contact cards defintion
- Control cards definition
- Running a simulation
- Extracting the results
- Observing the stress flow patterns through animations.