Week 4 Challenge : CFD Meshing for BMW car
AIM - Perform topological cleaning of a BMW automobile, wind tunnel construction, and CFD meshing in ANSA.
two diamensional surface meshing following contrains should be use
- body- 3 units
- light- 4units
- grills-1unit
- tires and rims-2units
- window and mirror- 2 units
- silencer-3 units
- logo-1 units
procedure-
- Import CAD file in ANSA
- perform Geometrical Quality Check
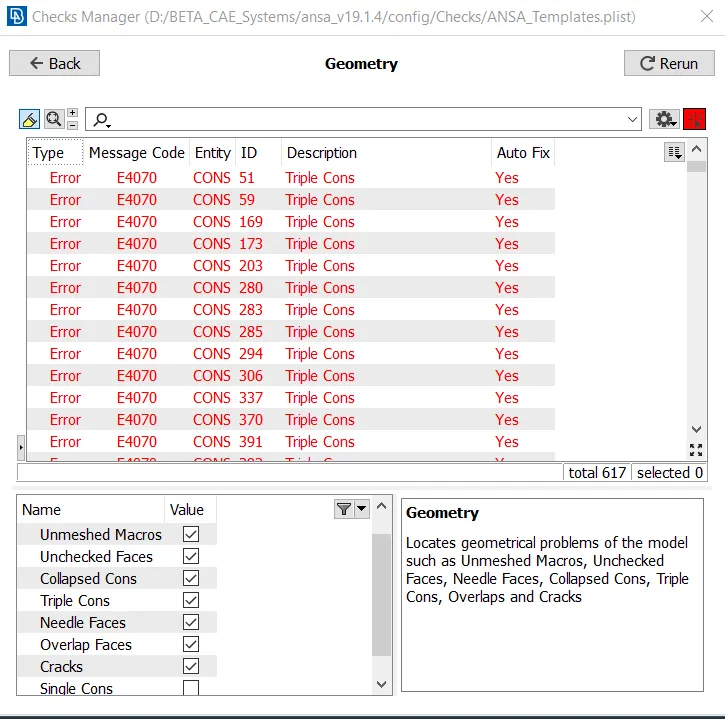
- As the geometry is not perfect we neeed to do topop clean up in topo modethe goal is to creata a single volume with still maintaining ouside features
- as the model is symmetrical aside logo it can be halved than mirrored to certain axes
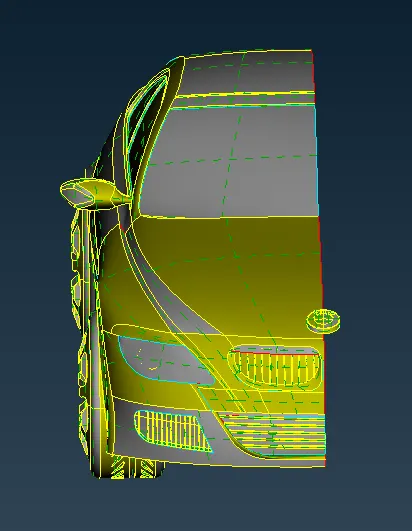
- We will first perform the geometry clean-up of the LOGO using relax we can smoothen out the edges overlaping surfaces can be deleted using intersect we can make sure there is no single con
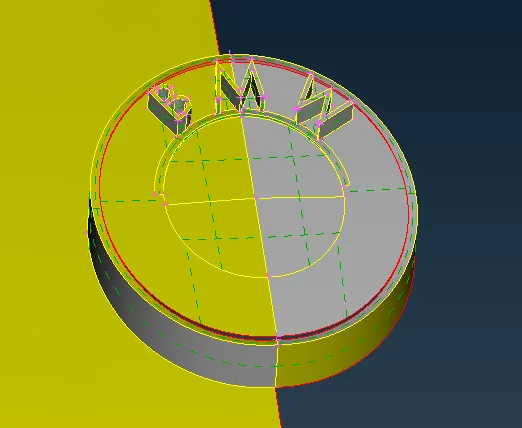
- now we can move to grills for the analysis internal features are not needed so we onlu need outer features internal faces can be deleted and crackks needes to be filled using new face option
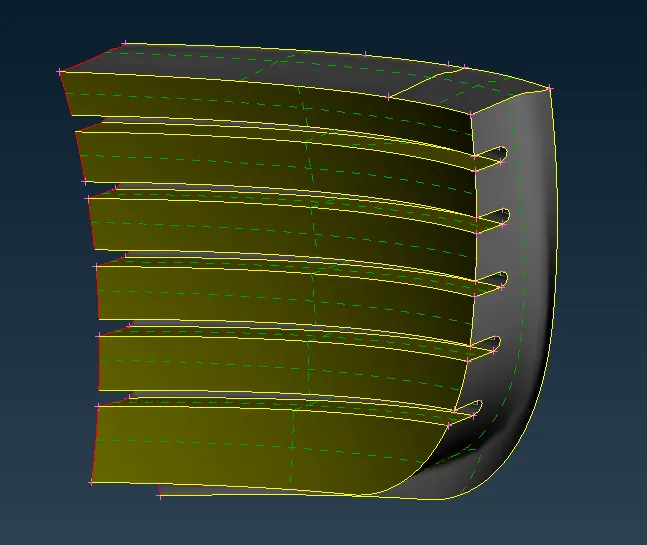
- same can be done for front grill its internal features mut be deleted and outer features must be preserved ensuring there is no triple gon an well as no single con unwanted surfaces in back of grilll can also be deleted.
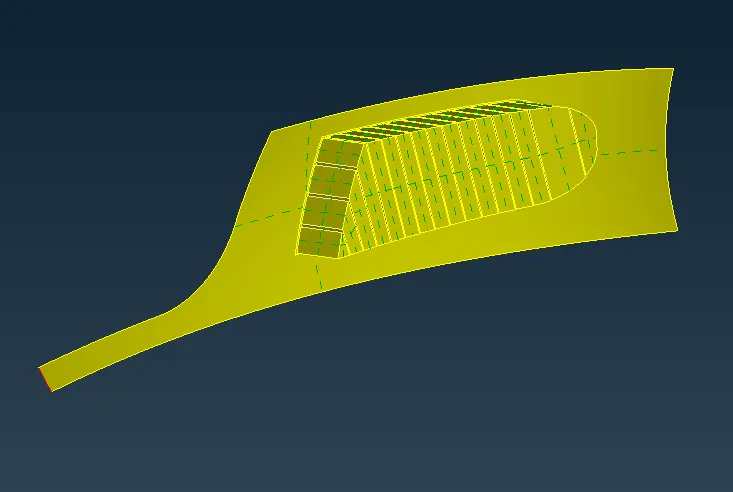
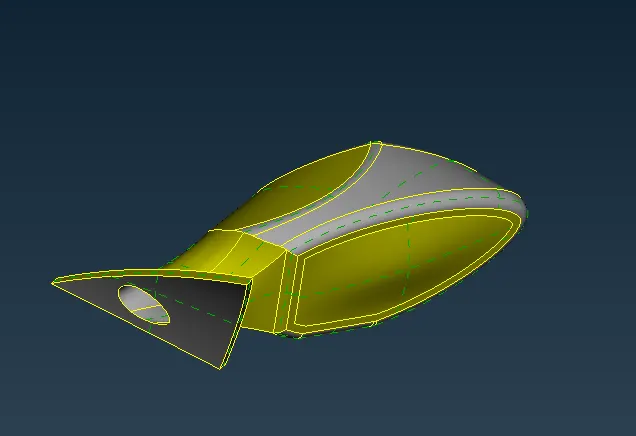
- We will perform topo clean-up of the optical rearview mirror.
- we will use the intersect tool so it can have common vol with body, than we can remove the duplicate surfaces and also keep only the outer surfaces so that there are no triple cons
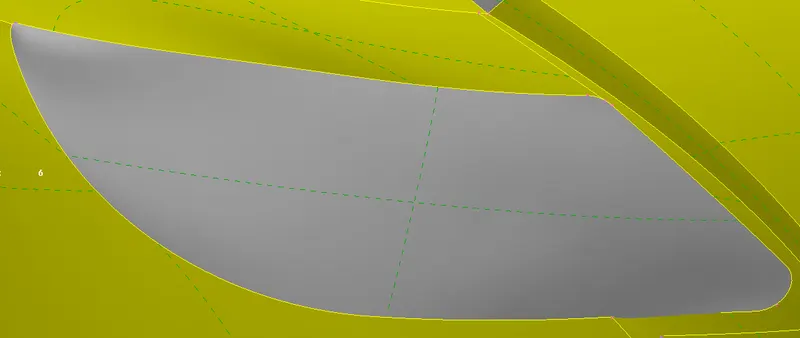
- now we can topo clean up the lights as they have triple con which mean there are extra surface so we need to delete these extra surface
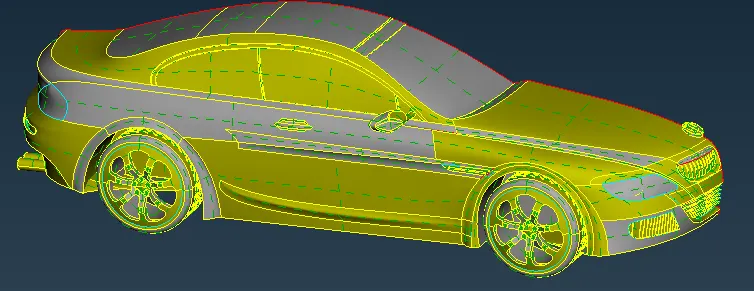
- now we can move onto tyres
- the tyres have triple cons so we need to delete the extra surface
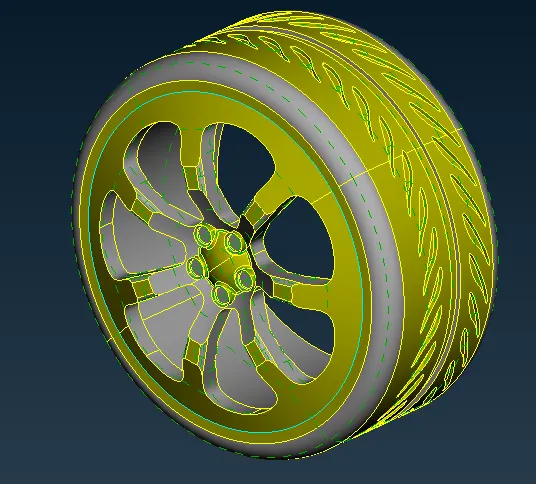
- after solving the triple con, we can see some single cons are generate we can delete that surface and create a new one there using the coons option.
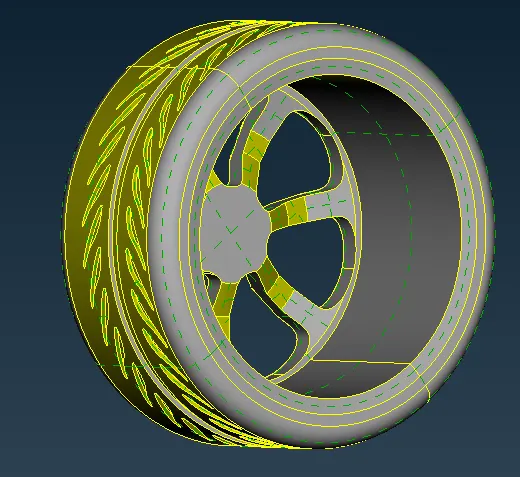
- now only the floor of car is left
- as there are many non connected intersecting surfaces it is better to detete them and create new
- using cons 2 curve we can reservr essential curves for surface creation
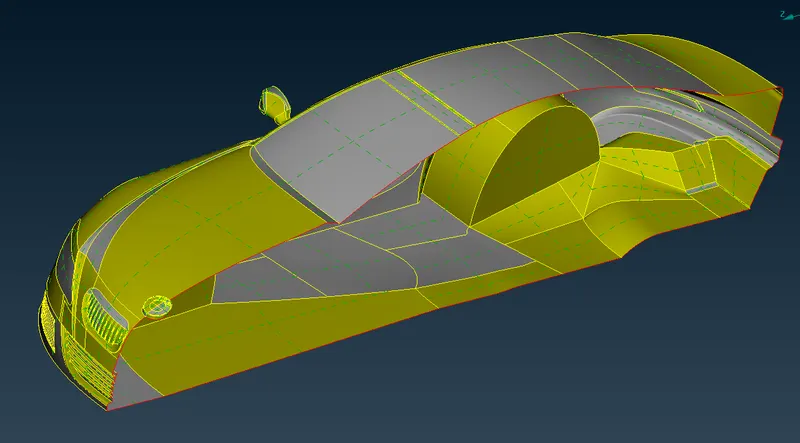 Geometry check-up : after cleaning the topo of mode we need to do a geo check to ensure nothing is left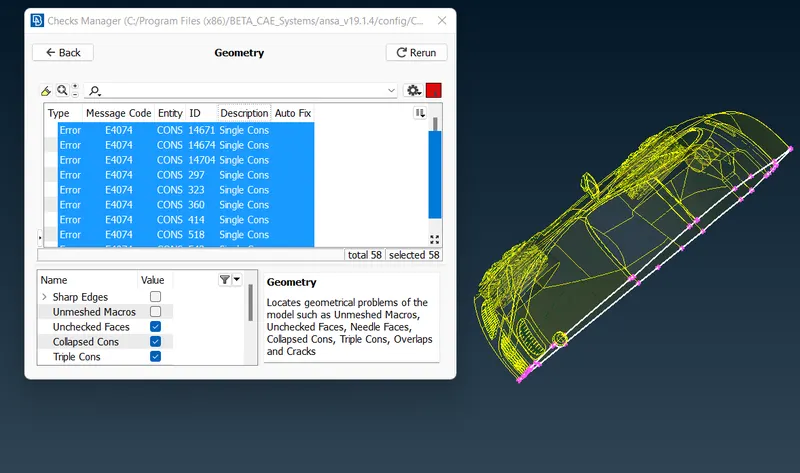
- as we can see only single caons are present which will be fixed when we symmetrize our mesh
PID assignment-
- we will assign the PID for different parts and give a name and colour to differentiate between the components and ease up the working on the components individually.This is also done to specify names to different boundary conditions for various parts.We need to activate cross hatches before setting-up PIDs.
- the defau;t Pid can be deleted
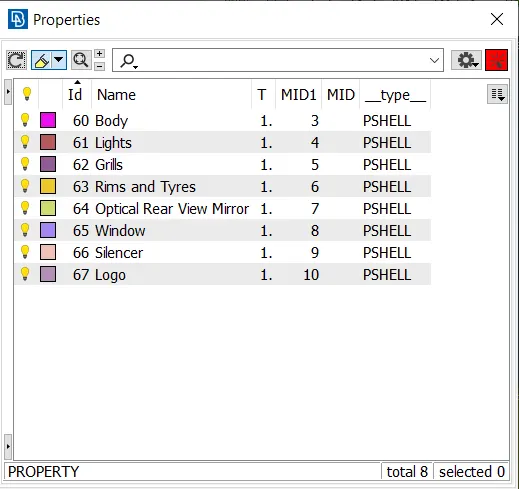
- once new pid are created asiigned to the respective surfaces
Surface Meshing-
before starting meshing visually inspect these surfaces to check if any surface is lower than its target length if it is then we can modify the con till it haves an acceptable distance or length.
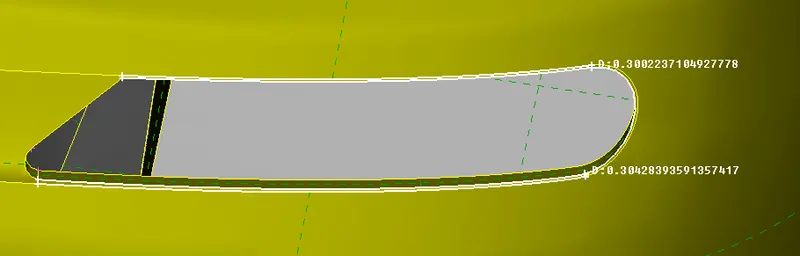
we can see here that the distance between this two cons is less than its target length i.e 1mm so we deleted extra con that is not required
in similar way we can check other surfaces
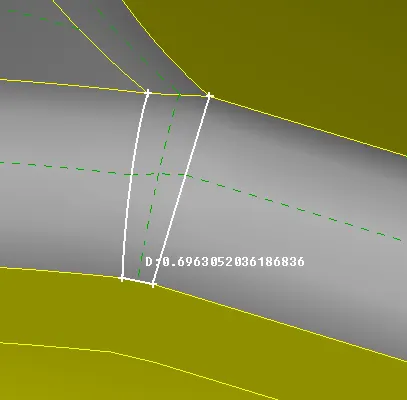
in optical rear view mirror also require some modification the extra edge needs to be deleted as it is not required
after inspection of all surfaces we can move to 2d meshhing
as given-
- Target lengths for the different parts of a model are as follow:
- Body - 3 mm
- Lights - 4 mm
- Grills - 1 mm
- Rims and Tyres - 2 mm
- Optical Rear view mirror - 2 mm
- Window - 2 mm
- Silencer - 3 mm
- Logo - 1 mm
meshing to parts of same mesh length can be done
meshing of main body will be done at the end as it is connected with other parts and some coons will need to be deselected
meshing of 2mm elements-
selecting PID for Rims and Tyres ,Optical Rear view mirror, Window
- After giving quality criterias, give length parameters and macros
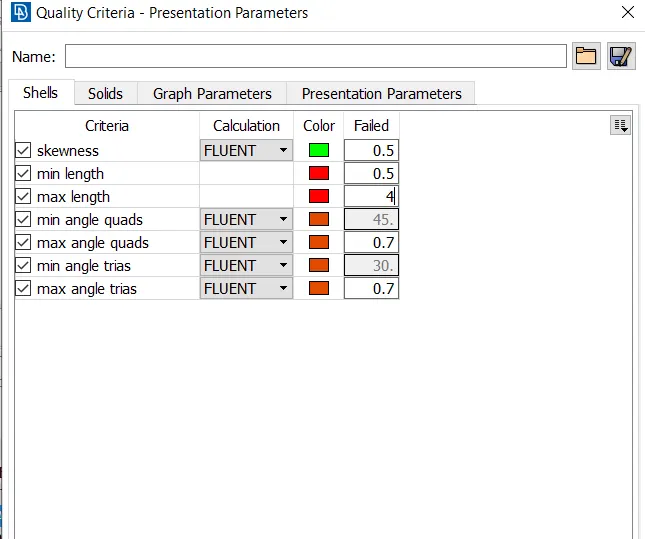
- select length parameter select PID mclick and than give taraget length i.e 2mm
- similarly do for macro
- make sure only pid of 2mm target length are visible use spot mesh to mesh
- use the hidden mode to look for off elements
- if elements are off limit try remesh option to correct them
- if still some elements are off limit thaen we need to remove off elements by using options such as MOVE, SPLIT, RECONSTRUCT,SMOOTH the grid respectively ,from this we can improve our meshing after correction we can remesh them
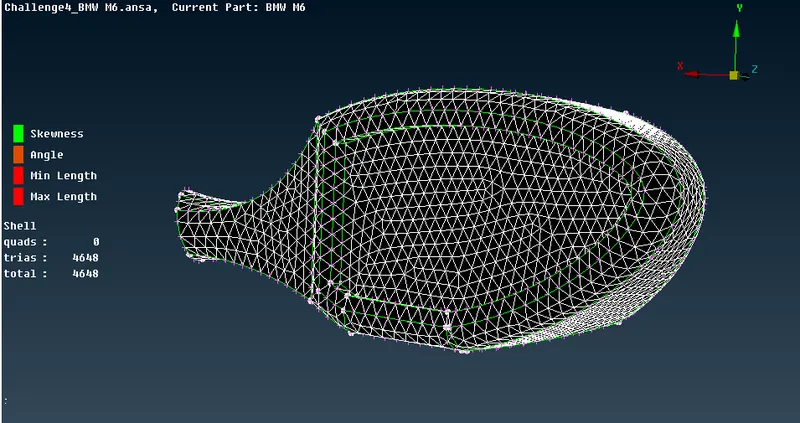
meshing of 1 mm elements
selecting PID for Logo ,Grills
- After giving quality criterias, give length parameters and macros
- select length parameter select PID mclick and than give taraget length i.e 2mm
- similarly do for macro
- make sure only pid of 2mm target length are visible use spot mesh to mesh
- use the hidden mode to look for off elements
- if elements are off limit try remesh option to correct them
- if still some elements are off limit thaen we need to remove off elements by using options such as MOVE, SPLIT, RECONSTRUCT,SMOOTH the grid respectively ,from this we can improve our meshing after correction we can remesh them
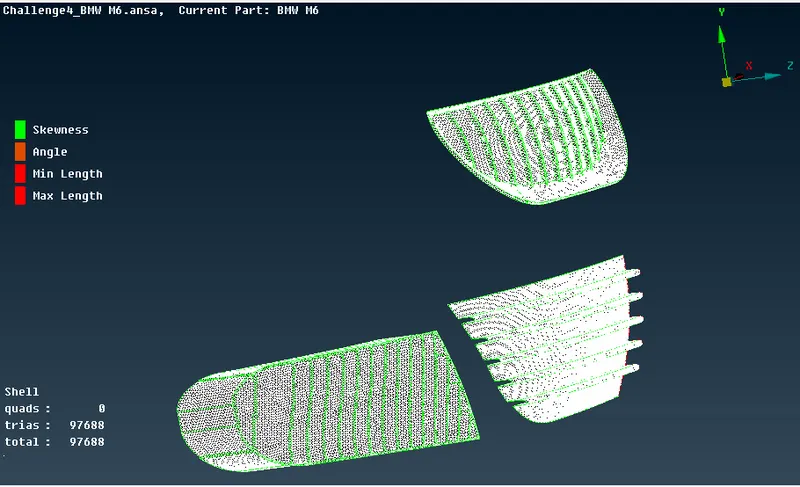
Similarly we can perform meshing for other elements
Symmetry-
-
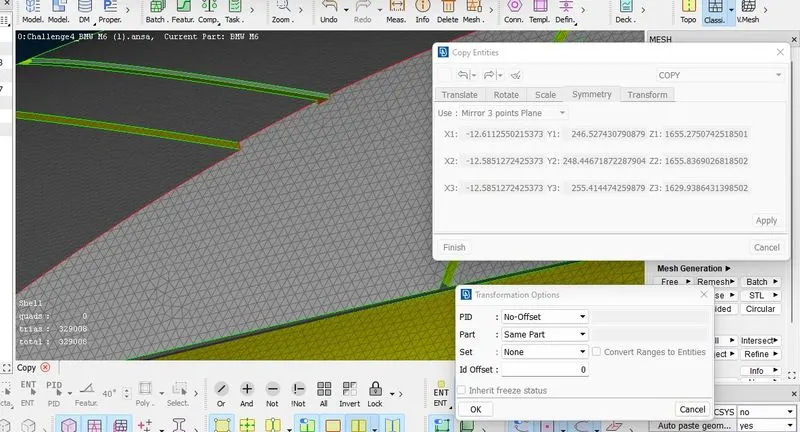
Symmetry need to be performed on the other half of car in which the all the components with mesh are copied directly to the other side using Transform option from the top side option list we need to make sure that logo is not selected suring symmetry and we neet to selct 3 points as ref points
WIND TUNNEL :
Data for wind tunnel are as follow:
The wind tunnel dimensions are, if x is the lengths of car then
Front of wind tunnel is 4X from the car.
Rear of wind tunnel is 6X from the car.
Top of wind tunnel is 3X from the car.
Side walls of wind tunnel are at X from the side portion of the car
Bottom of wind tunnel is in close proximity of wheels
Points are created by using 'Reative option' in points of Topo Deck.
- first we can create a point at bottom using the relative option selecting a pint from bottom of vehicle
- similarly with ref to that point we can create points at right left
- using the create curve points we can form a floor
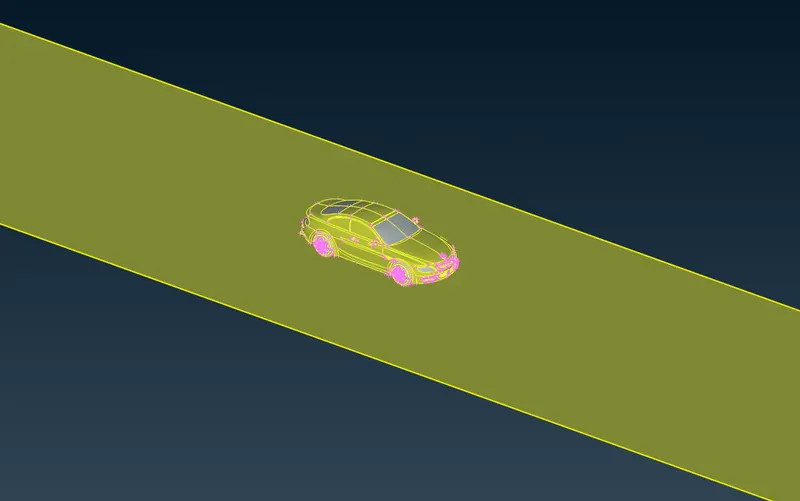
- Create all the other wind tunnel surface using the offset and new surface option.
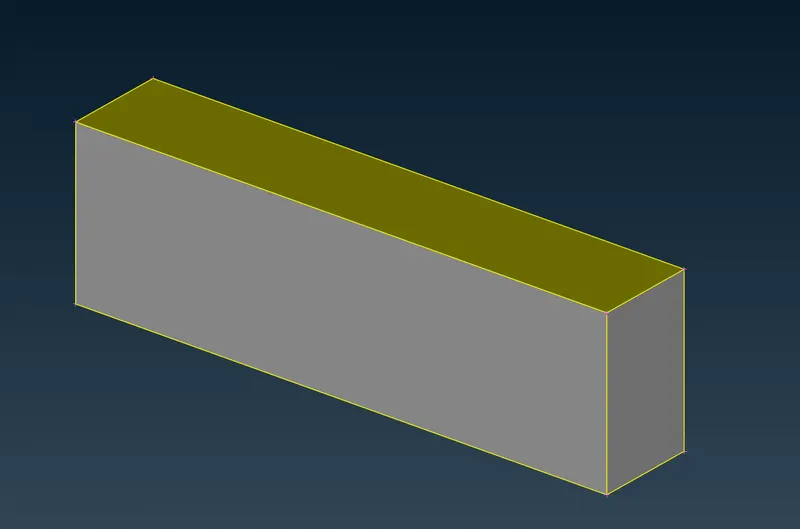
Surafce meshing of wind tunnel:-
We need to apply surface meshing depending the mesh length near the car and regions far away from it. the region near car body willl be having more mesh density We need to use spacing option to have a mesh length varying from the small mesh length (20) size to larger mesh length(100).
this can be done with help of spacing option using it we can define upper limit i.e 100 an lower i.e 20 and select the surface which is going to have these spacing
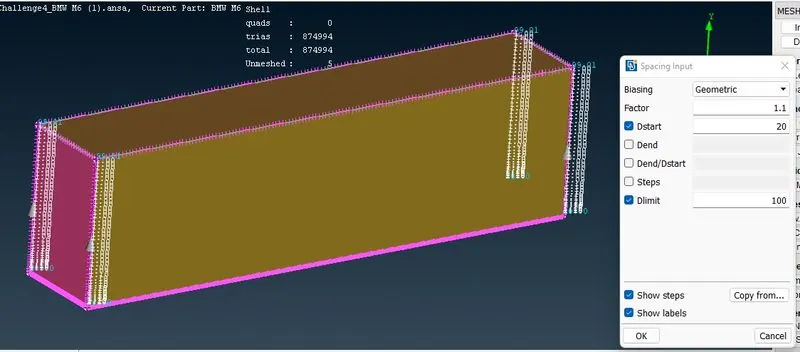
- Mesh is generated by applying Spot mesh for individual surfaces.
volumetric meshing-
as all surfaced are meshed we can proceed with v meshing open vmesh deck click on define
ANSA will automatically detect all the possible volume delete the unwanted volume and start vmeshing
Learning -
- go to know various topo clean-ups tools.
- learnt the use of symmetry
- Create surfaces using the reference hot points by using relative points.
- Create surfaces using the curves to cons
- Using re-construct option to reduce off elements to a level where we can edited it manually.
- Using spacing option in surface meshing helps in having varying mesh lengths along the surfaces.
- Using the mesh cleaning tools like move, split and smooth options.
Results-
- BMW car model is topo-cleaned and surface meshed appropriately
file link-https://drive.google.com/file/d/1_s6Fbs4iBoe9zE9tbZGubweRc-vUb5py/view?usp=sharing
- .