Week - 4 - 2D meshing for Plastic components
AIM: To extract the manual mid surface of the bottle cap and the mesh the component with given quality parameters and assign thickness.
OBJECTIVE: The Bottlecap components are given with various thicknesses in threads, teeth, and ribs. Extract the mid surface with different procedures and meshing the model with given quality parameters.
|
S.No |
Quality Criteria |
Value |
|
1 |
Target/Average length |
1 |
|
2 |
Minimum Length |
0.5 |
|
3 |
Maximum Length |
3 |
|
4 |
Aspect |
3 |
|
5 |
Warpage |
15 |
|
6 |
Skewness |
45 |
|
7 |
Jacobian |
0.7 |
|
8 |
Minimum Quad Angle |
45 |
|
9 |
Maximum Quad Angle |
135 |
|
10 |
Minimum Tria Angle |
30 |
|
11 |
Maximum Tria Angle |
120 |
|
10 |
Tria Percentage |
15 |
Table 1
PROCEDURE:
Open given model in ANSA.
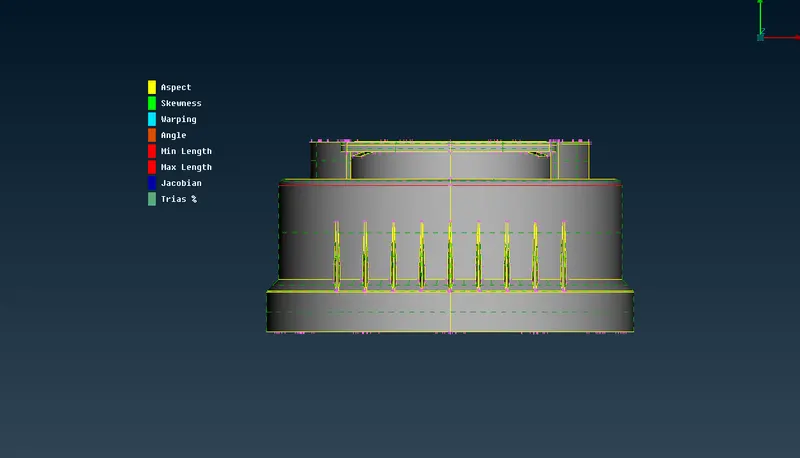
Fig.1 Model
Give Topo to the whole model
Go to faces Select topo select the whole and press middle mouse click for confirmation.
Now, After that Check the geometry
Go to checks and select geometry and execute
Checking the geometry with errors such triple cons unchecked faces etc. Try the auto-fix option to remove the error, If some error left to try to fix out manually. And changing the perimeter and macros by 1 which is qual to 1mm length which is our target length as per
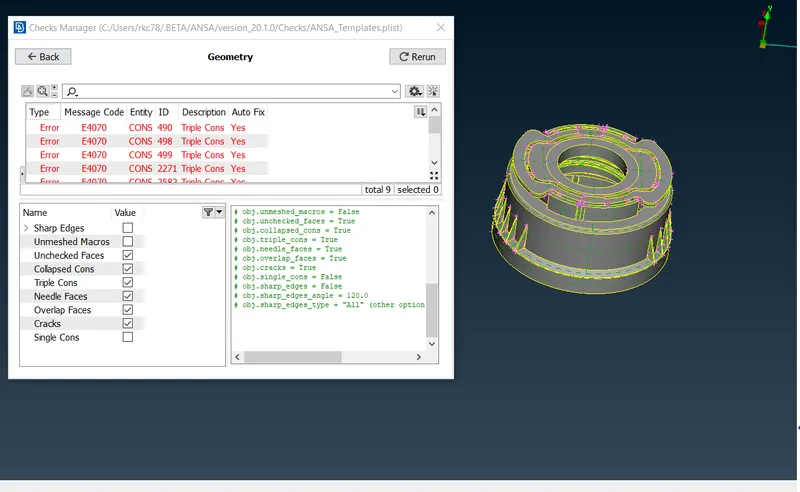
Fig.2 Geometry Check-Up
After removing all possible errors from the model, we move toward the mid-surface extraction.
MID SURFACING:
Extraction for the mid surface of this component tried both method AUTO and MANUAL mid surface extraction. On Auto option because of inner ribs, outer ribs, thread, teeth mid surface does not extract properly. So, Work with the manual option and extract mid surface properly.
We have a number of options to extract the mid surface like the Offset option, middle option, middle multi-option, on the other hand, curves middle option can be used to create the surface for teeth, threads.
Before that set PID for every component separately like the bottom part, upper part, Ribs teeth.
Extract the mid surface of the bottom part first.
Use the Offset command to extract the mid surface of the bottom and upper part.
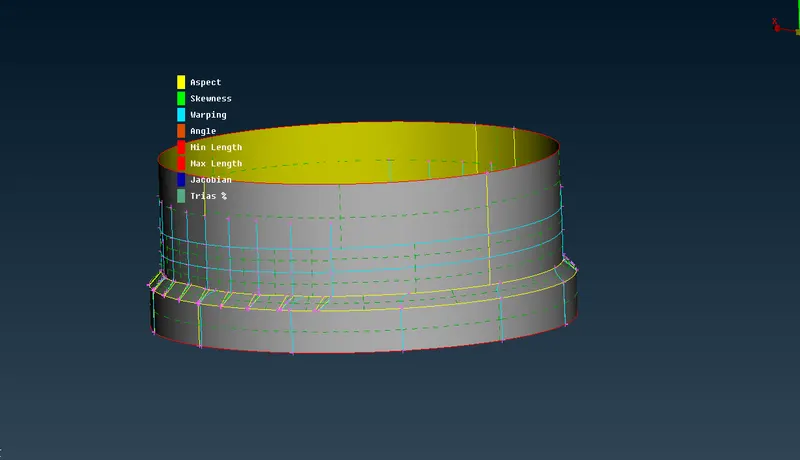 Fig.3 Bottom mid
Now Extract mid surface of Inner Ribs and Outer Ribs
Use Middle Multi for inner ribs as shown in the below figure.
Select outer and inner surface separately, after selection press middle mouse click for confirmation then it has to be extended to the mid surface.
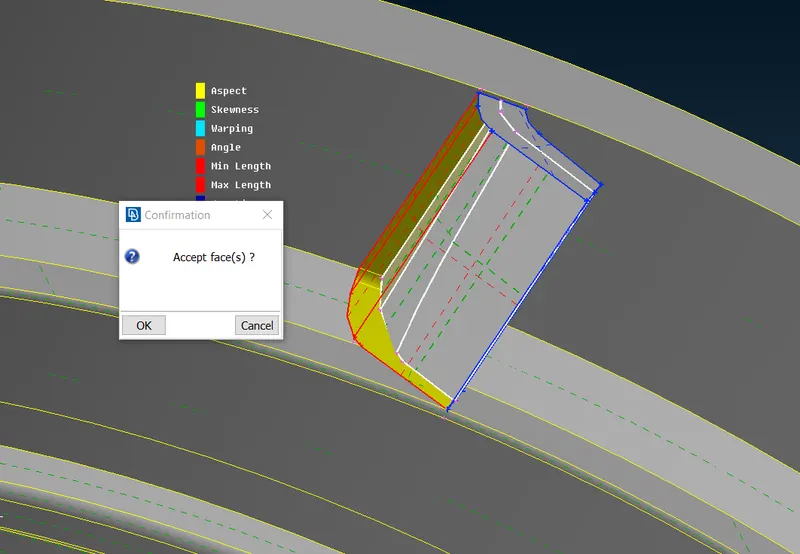
Fig.4 Middle Multi for Inner Ribs
For the outer Rib, we have two option one is by using middle multi-option and middle curve and after creating create new surface there
Now we go with the curve option for a good mid-surface.
Create a Curve middle and create a new surface there with the help of the curve you created then extend the surface to the mid surface of the bottom cylinder part.
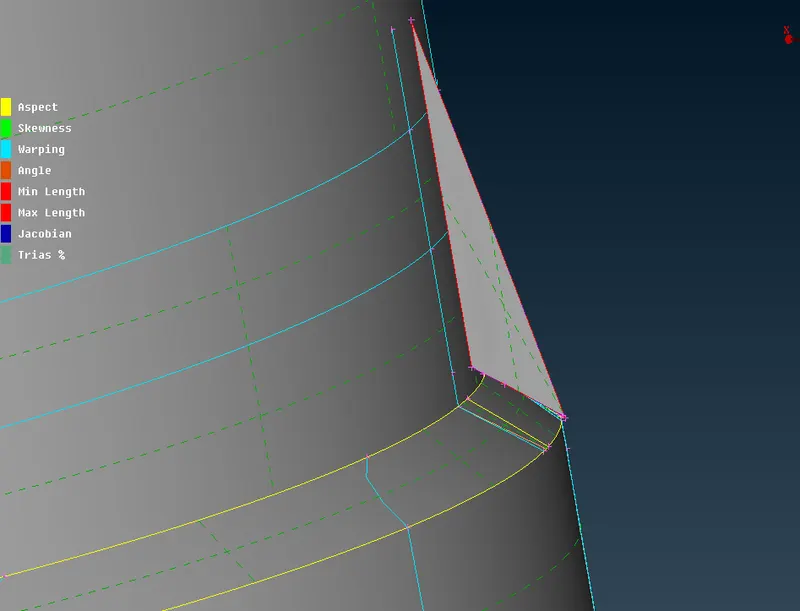
Fig.5 Outer Rib
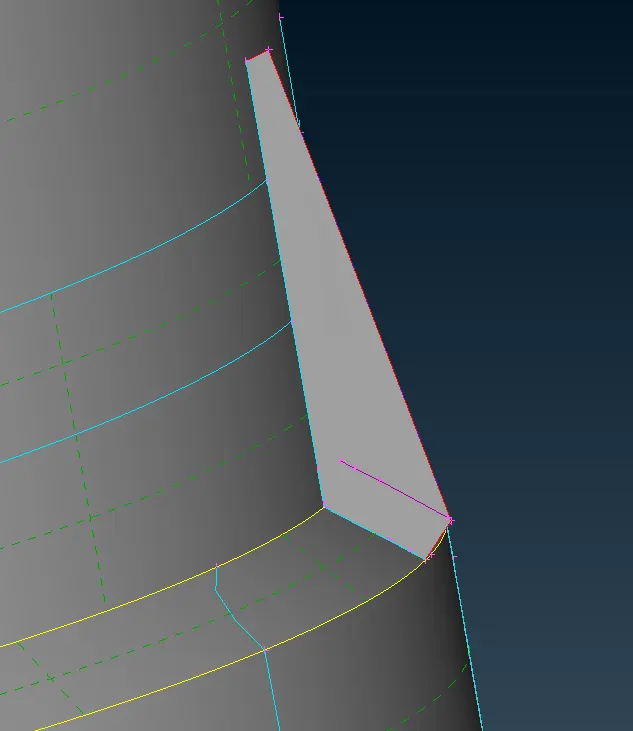
Fig.6 Extended to mid surface
Now, for thread part mid surface extraction Create a curve with cons use cons2curve to create a curve with cons.
After creating cons to curve project those curves on the Bottom part mid surface using Cons project option. Create surface between curve and cons projected on the mid surface as shown in below figure
Follow the same step for every thread feature in the model.
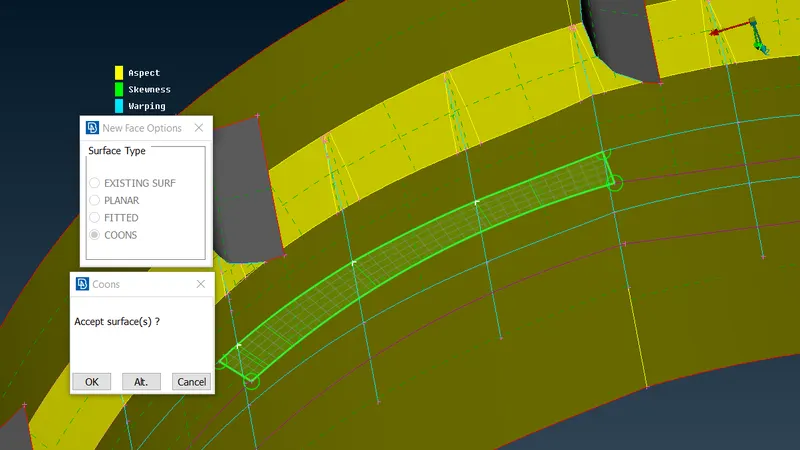
Fig.7 Thread Mid Surface
After completing extraction of the mid surface of the outer rib, inner and thread of bottom part
Now, we have the teeth feature in the model, for mid-surface extraction of that part here we again used the Curve middle and cons project option to extract mid-of-one teeth.
We have 36 teeth in the parent geometry so taking the individual mid surface of each tooth is time-consuming, so to save time and effort we use the transformed copy option to create a mid surface in one shot. The COG points are created by selecting any two circles and with the help of these points teeth are transformed.
Select one mid surface then go to transform copy option select COG point then give input parameter such as angle which is calculated by dividing no of teeth to 360 degrees, after confirmation we got mid surfaces of teeth to feature in one shot.
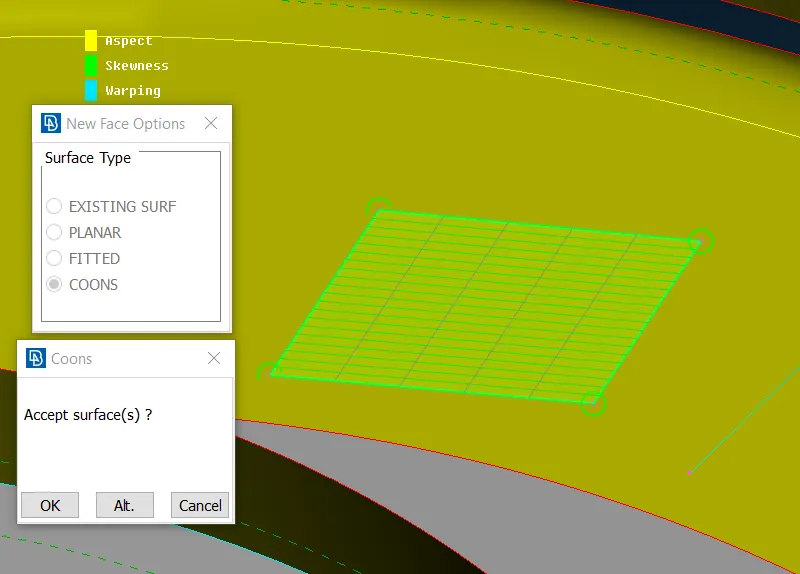
Fig.8 Teeth Mid surface
In the above figure, we use curve middle to create the middle of cons and cons to curve, Now project one curve (left) to the mid surface then create a new surface between 2 cons.
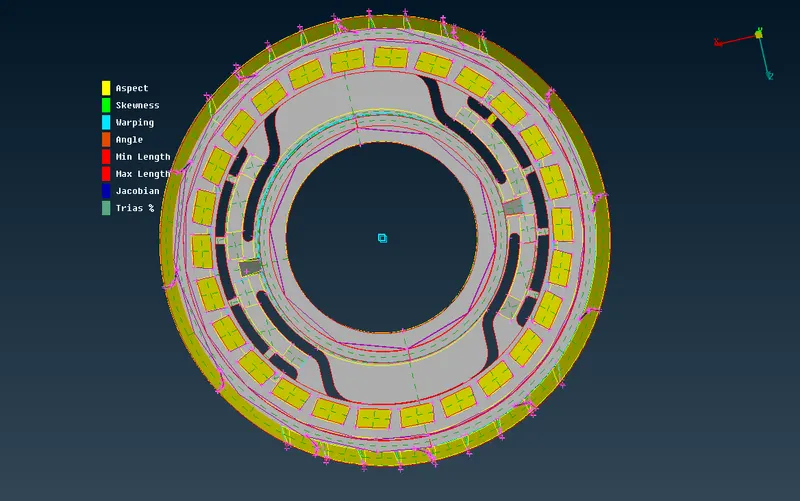
Fig.9 Teeth Mid Surface
After getting the mid surface of all faces, ribs, teeth, and threads, and don’t forget to give a proper thickness to every mid surface. The below Figure shows the complete mid-surface of the bottle cap.
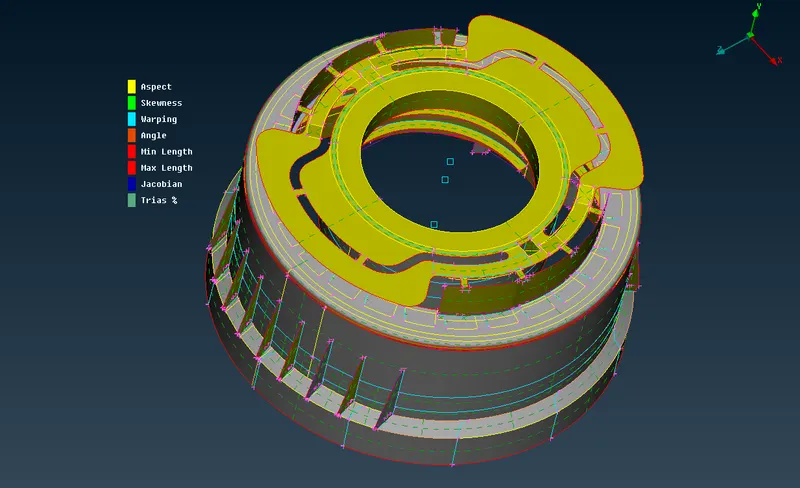
Fig.10 Complete Mid surface
MESHING:
The element size for this component is 1mm which given in the quality parameter.
Fill in all the parameters according to the given criteria.
Use the BEST option for meshing the component and Use RECONSTRUCT and SMOOTH option to get a proper mesh flow.
Start the mesh with the bottom part then cover the outer and inner ribs which have some tria element reconstruct and smooth it to get a proper mesh flow. In some areas, you got an issue because of triple try to remove it.
Use the CUT option to cut the model as per your convenience to get a proper mesh.
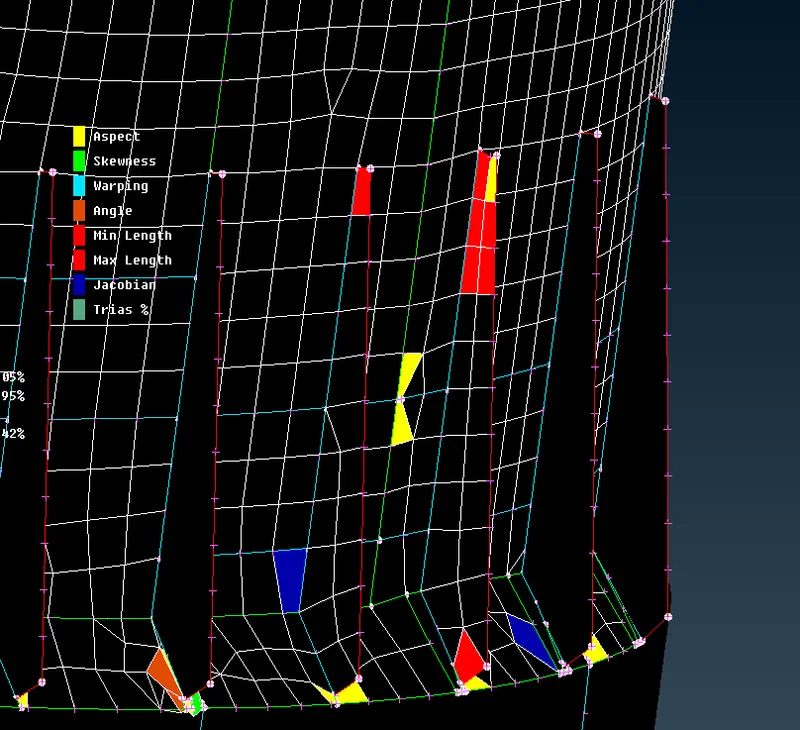
Fig.11 Bottom Outer Rib Mesh
Most of the area near to the rib is failing quality, Use Reconstruct option to remove off the element.
Some of the elements were for Jacobian they are fixed by moving the element. Warpage elements are fixed by moving coordinates of the element.
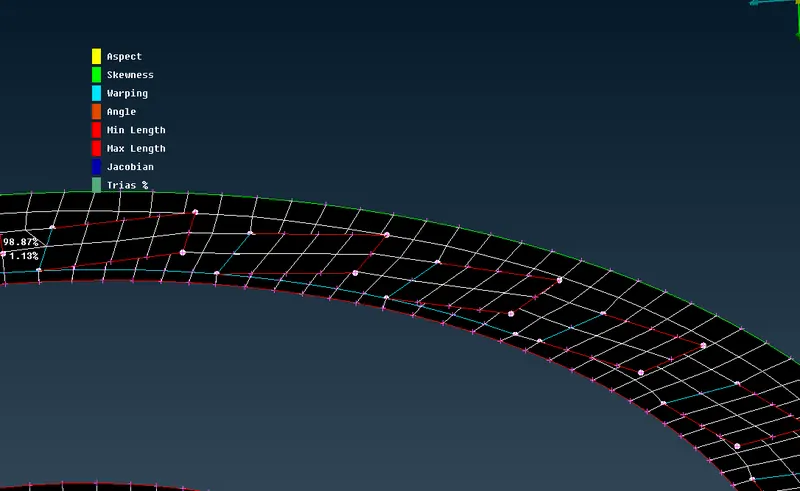
Fig.12 Teeth Mesh
As we move toward the teeth part we need to cut some of the teeth as there is no element failing quality.
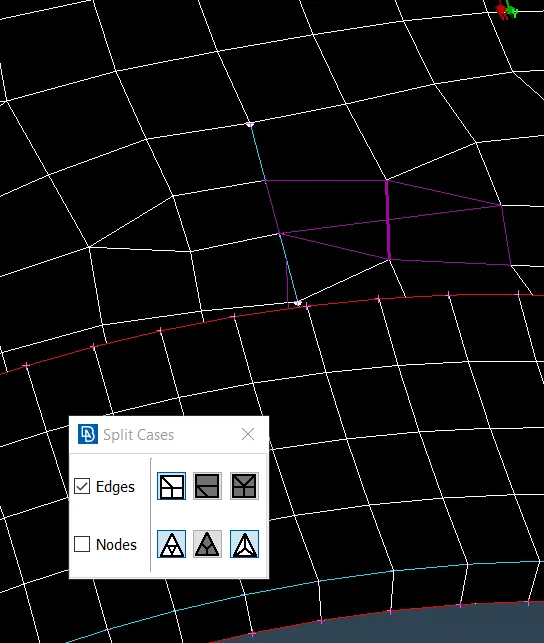
Fig.13 Converting tria into the quad.
Remove tria element by using split command. The tria which are opposite facing they are fixed by splitting the tria and joined to obtain the quad element.
After completing the mesh and fixing the elements the component is given with particular property and thickness to each part of the bottle caps such as Ribs, teeth, and thread.
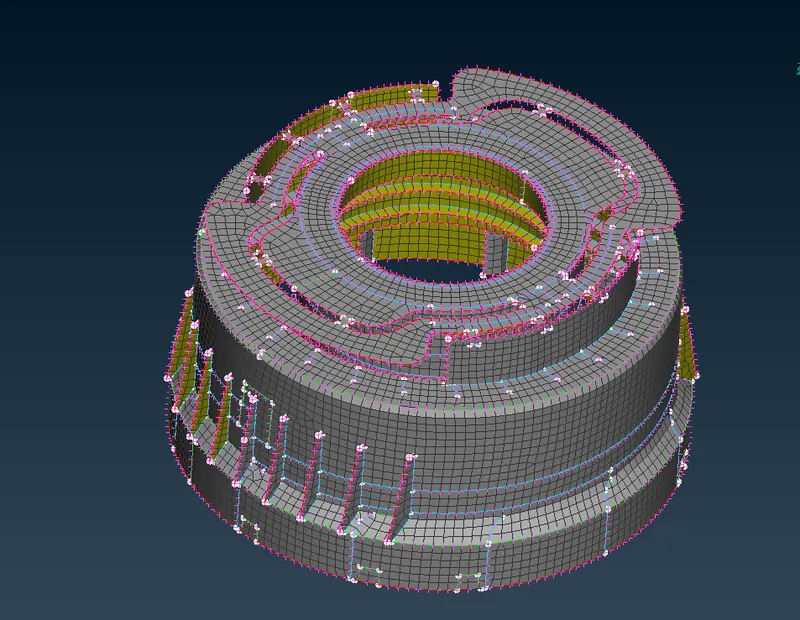
Fig.14 Mesh Model
RESULT:
The bottle cap component has varying surfaces such as teeth, ribs, and thread, so to mesh on this part is critical and getting the fail element but to obtain good quality and smooth mesh flow. We fix most of the fail elements. Overall, the model is achieved with good quality mesh with 97.52% quads, 2.48% of tria and 0.19%off element.
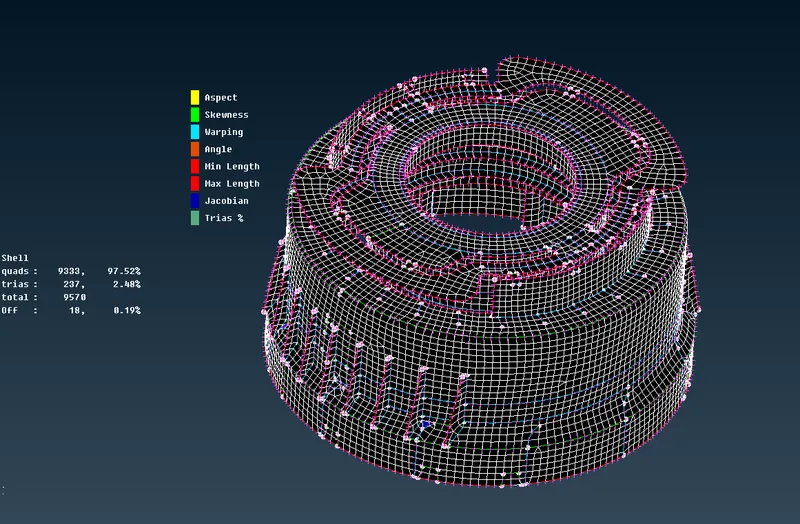
Fig.15 Quality output
CONCLUSION:
The bottle cap component has a complex part with varying thickness in threads, different types of inner and outer ribs, teeth feature, the mid surface of this feature are done with different options. While meshing some of the element failing quality are fixed auto or manually by using reconstruct and smooth and achieved with good quality mesh.