Week - 4 - 2D meshing for Plastic components
AIM : - 2D meshing for Plastic components (given Bottle Cap)
OBJECTIVE: -
- To check the Geometrical errors and fix that error.
- To take mid surface for entire model.
- Mesh the mid surface with the given element quality criteria.
Given Quality Criteria: -
|
S. No. |
Quality Criteria |
Value |
|
1. |
Target/Average length |
1 |
|
2. |
Minimum Length |
0.5 |
|
3. |
Maximum Length |
3 |
|
4. |
Aspect |
3 |
|
5. |
Warpage |
15 |
|
6. |
Skewness |
45 |
|
7. |
Jacobian |
0.7 |
|
8. |
Minimum Quad Angle |
45 |
|
9. |
Maximum Quad Angle |
135 |
|
10. |
Minimum Tria Angle |
30 |
|
11. |
Maximum Tria Angle |
120 |
|
12. |
Tria Percentage |
15 |
PROCEDURE/STEPS: -
- IMPORT CAD GEOMETRY FILE:
Command: - File >> Open >> Bottle cap(1).ansa
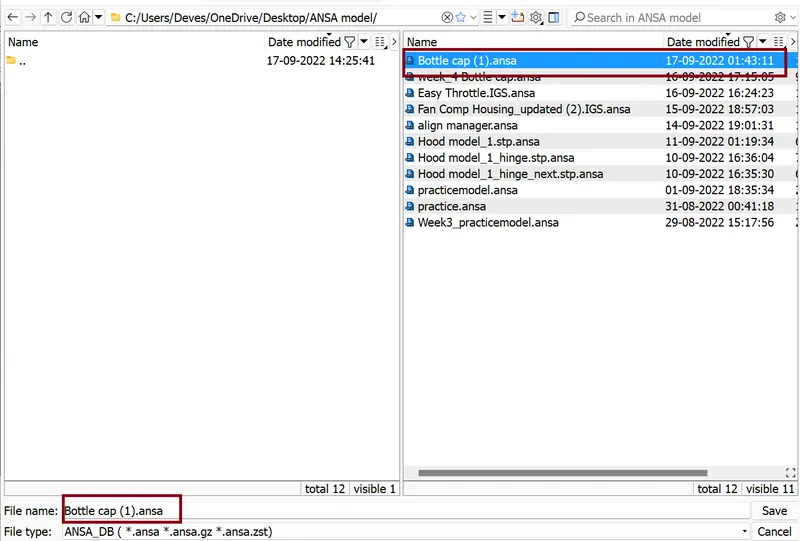
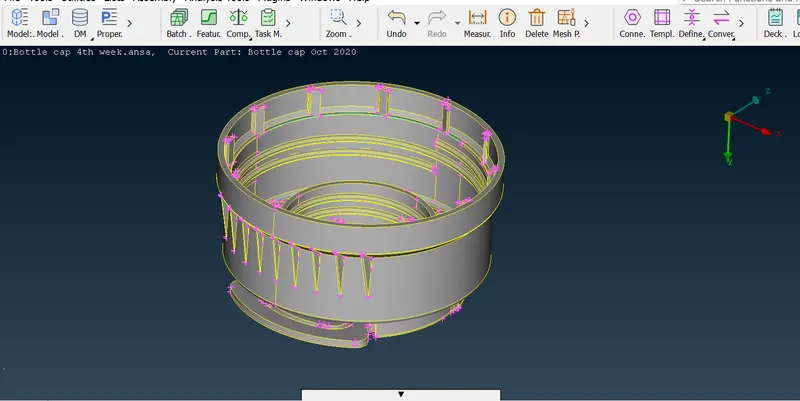
- Geometry Clean up: -
Very first we visually analyse the geometry that What are the major and minor geometrical parts are present in this CAD model. After that wo go to Geometry Clean up. whenever CAD model is imported into the ANSA, there might be several geometrical errors like intersecting surfaces, missing/distorted surfaces etc. due to the format conversion process or inherent bad model. And, it is important to clear all these errors before starting meshing. To ensure that all the surfaces are connected properly we use command Faces>>Topo is used for all the edges of each individual component at a time.
Command: - Tools >> Checks >> Geometry >> Execute >> right click on errors >> fix
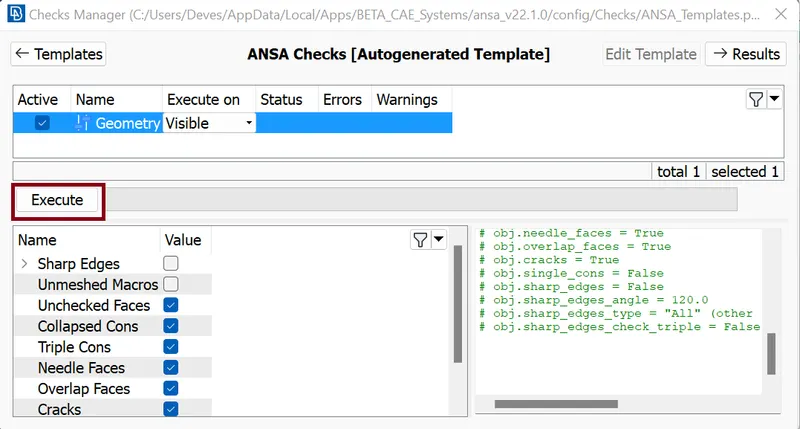
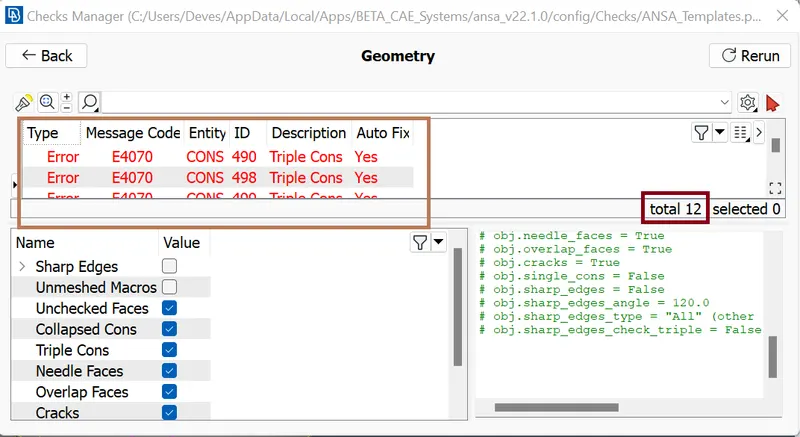
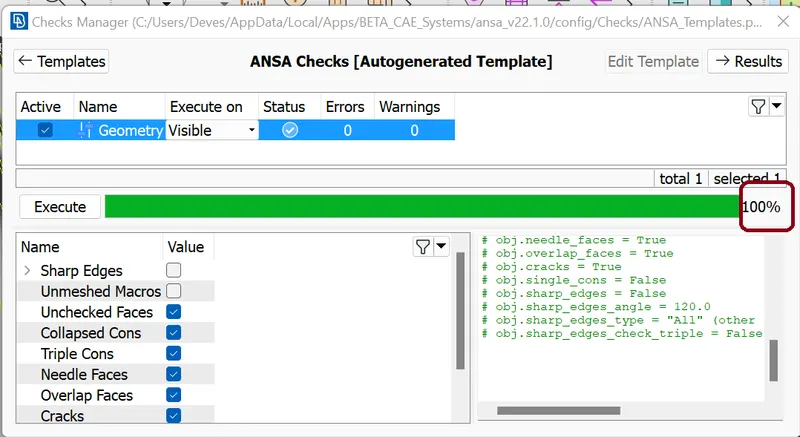
Most of the errors are fixed by right-clicking on the error. We fix two triple CONS error Manually.
- Mid surface: -
The next, step is to extract the mid surfaces for each part.We extract mid surface one by one. very first we extract mid surface for base surface
BASE SURFACES:
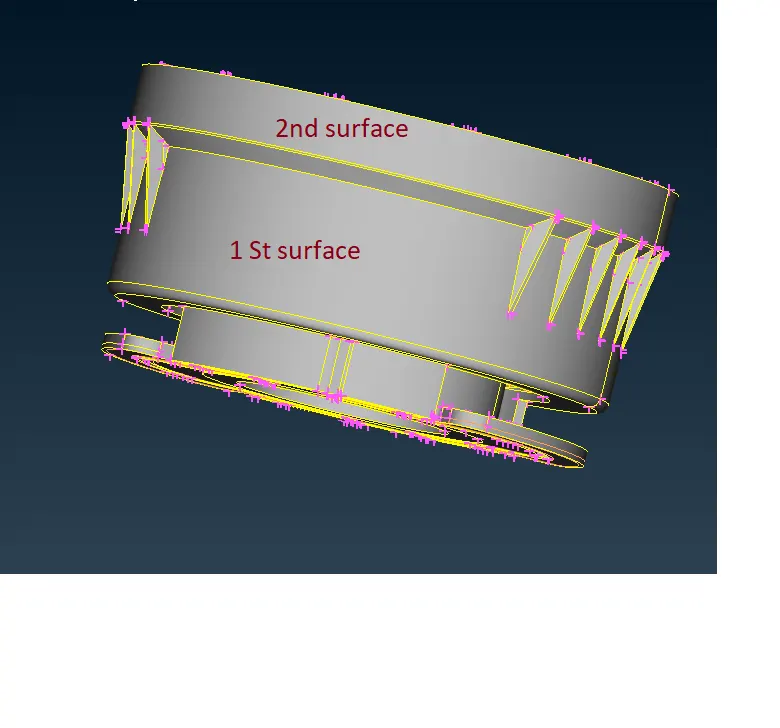
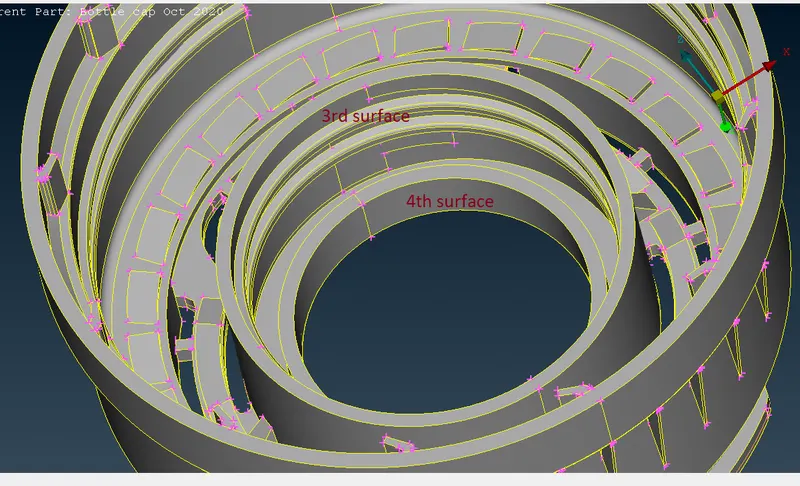
Steps for taking mid for Base surface
- Measuring thickness of the surfaces
- Taking mid by offset option (Command: Topo >> Faces >> offset >> Faces >> selecting surfaces by left click >> hit middle mouse (put offset value i.e., half of thickness) >> hit middle mouse click.
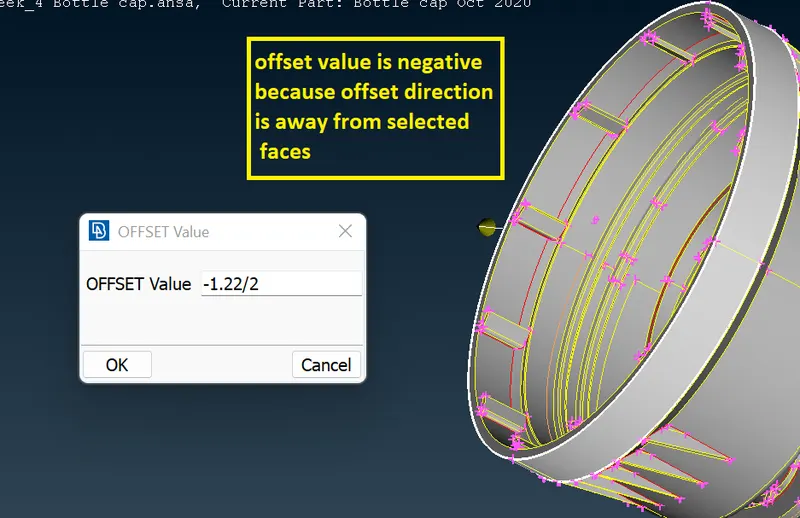
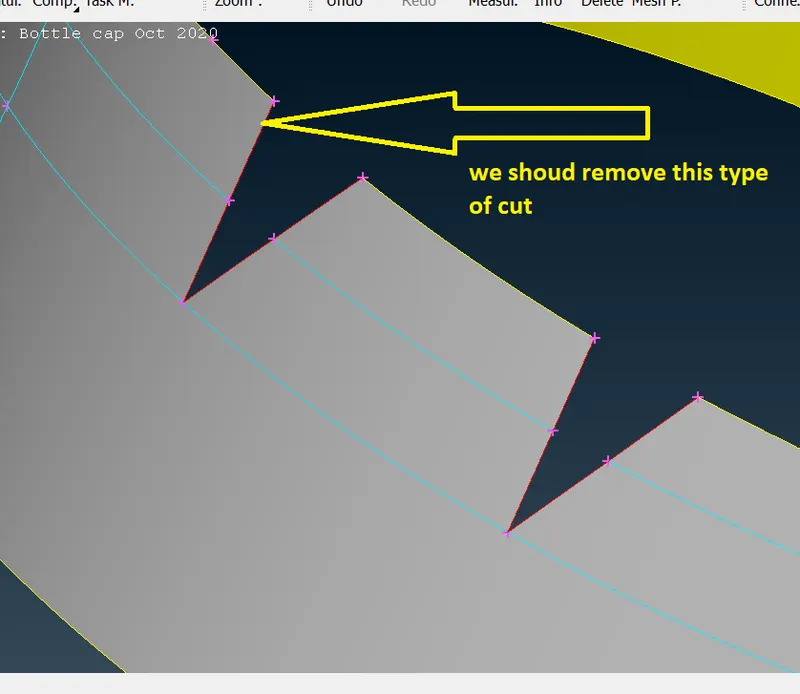
- This surface is not prismatic so, we need prismatic surface. For this we use command: Topo >> Curves >> Cons2curves >> Selecting coons by left clicking
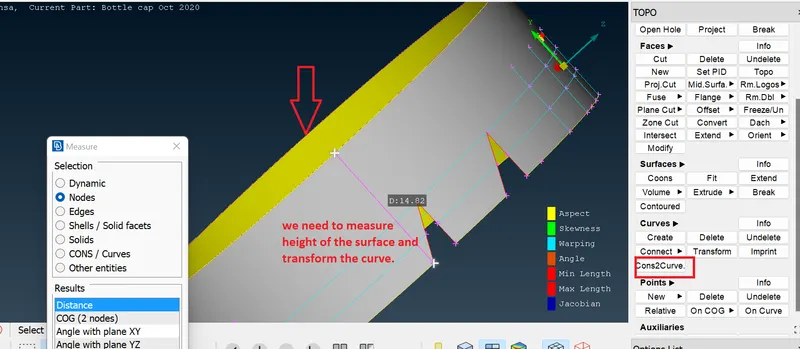
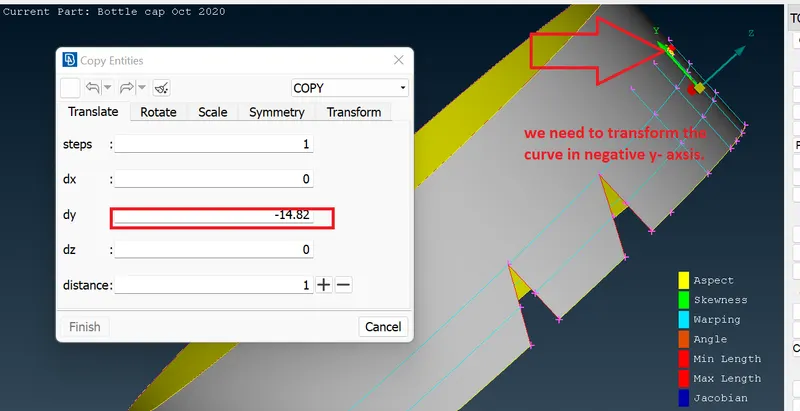
now we use command : Transform >> copy >> selecting curves >> hit middle mouse >> hit finish.
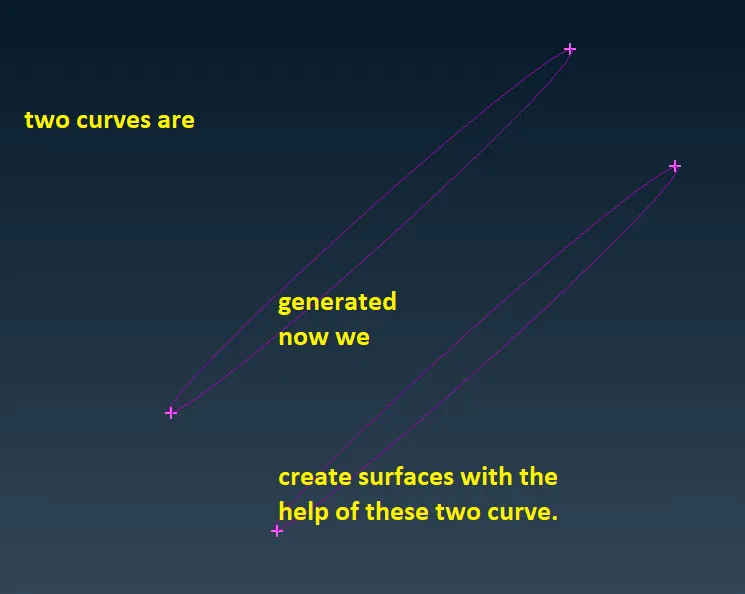
For generating new surface with help of these two curve we use command : Topo >> Faces >> new >> coons >> selecting both the curve by left clicking >> hit middle mouse >> ok
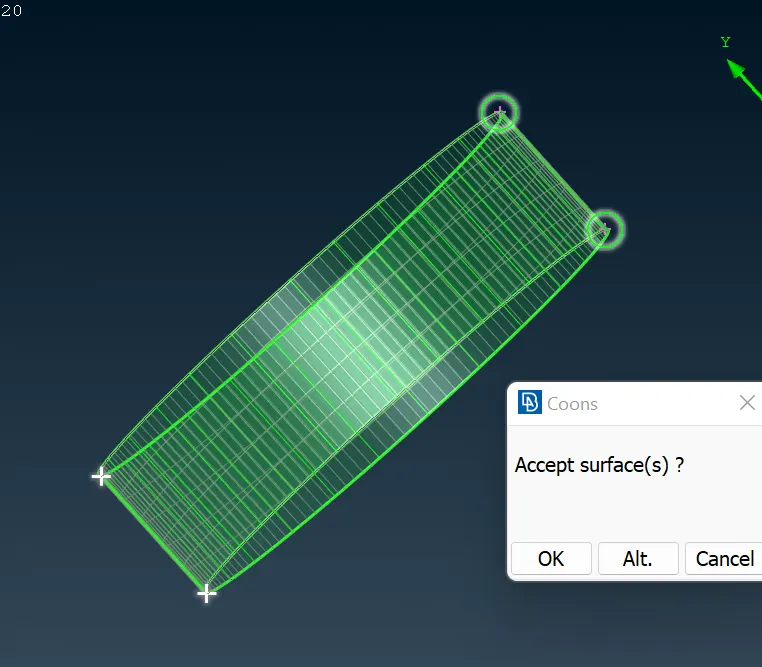
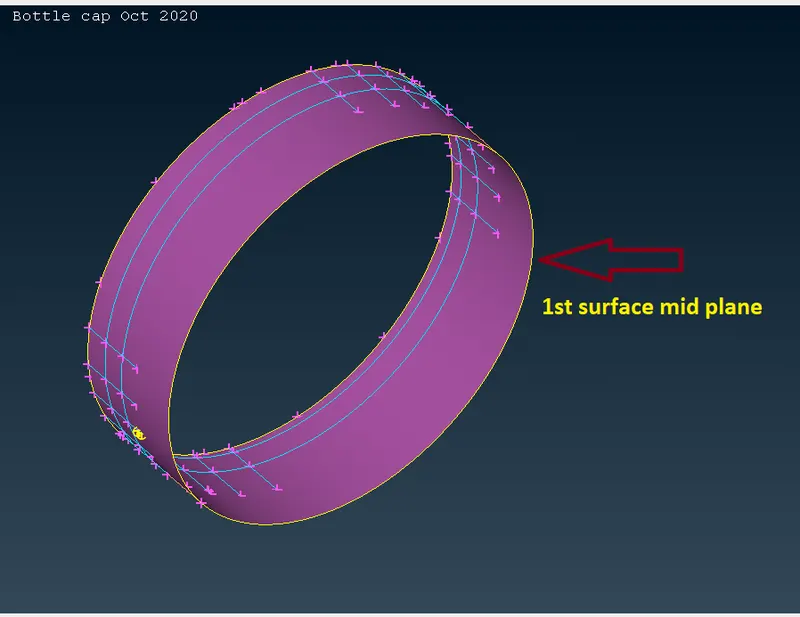
and my mid plane is genearted. we use this method for all base surfaces.
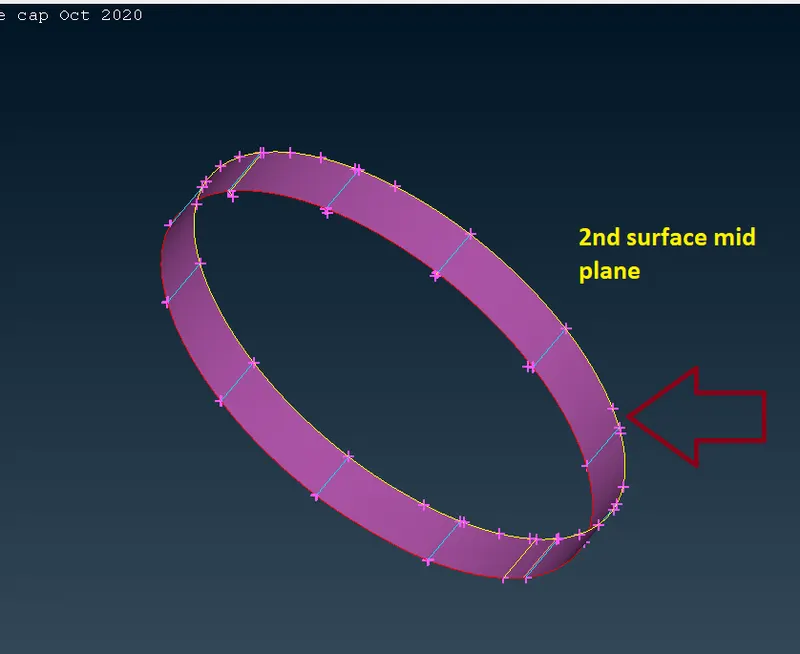
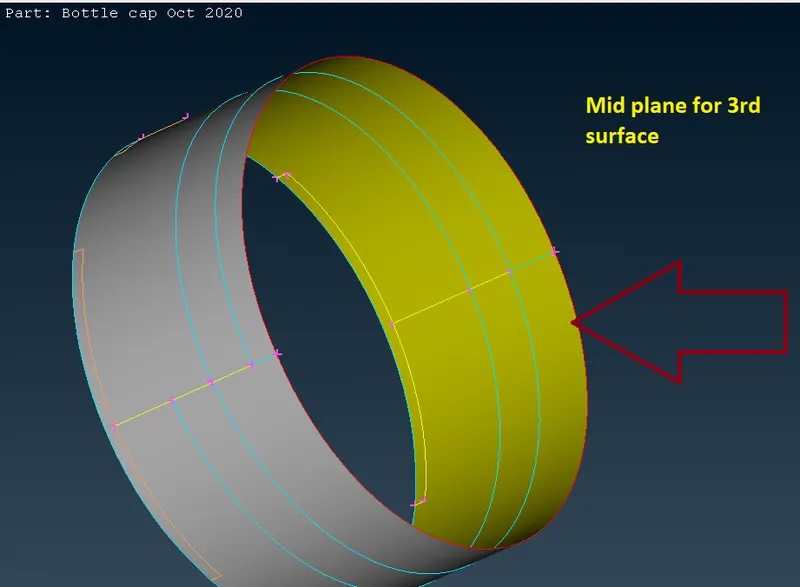
mid plane are
1st surfaces:
2nd surface:
3rd surface:
4th surface:
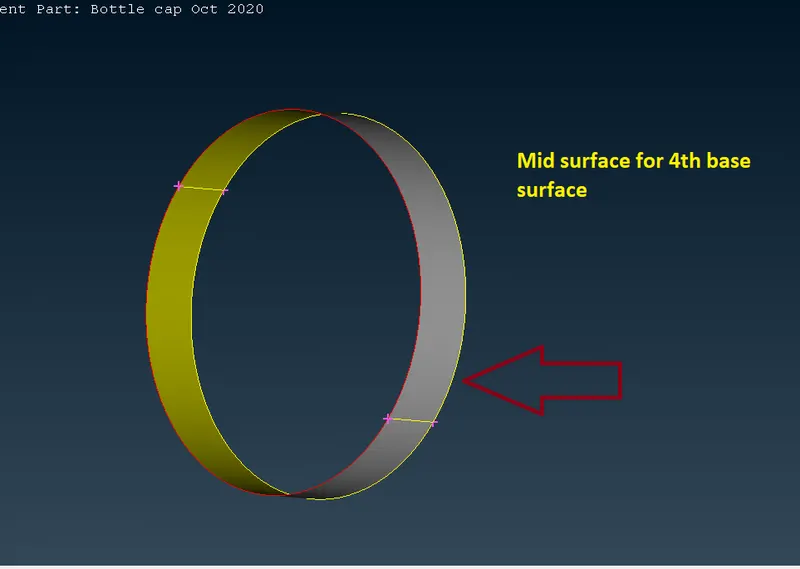
now we take mid plane for Internal/other surfaces
- For the thread part we use command: Topo >> curves >> Middle >> selecting upper side first coons >> hit middle mouse click >> selecting upper side second coons >> hit middle mouse click.
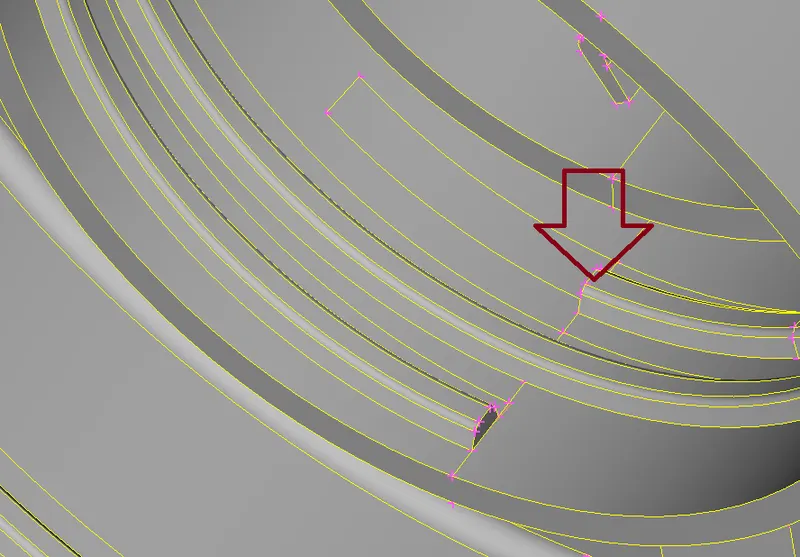
Command for projection: Topo >> Cons >> Project >> selecting newly generated curve >> hit middle mouse click >> selecting base surface by left clicking >> hit a middle mouse click.
For creating faces with the help of these two curve/coons we use command: Topo >> faces >> new >> coons >> selecting both the coons (i.e., upper and lower) >> hit middle mouse click.
Finaly we get mid plane for thread
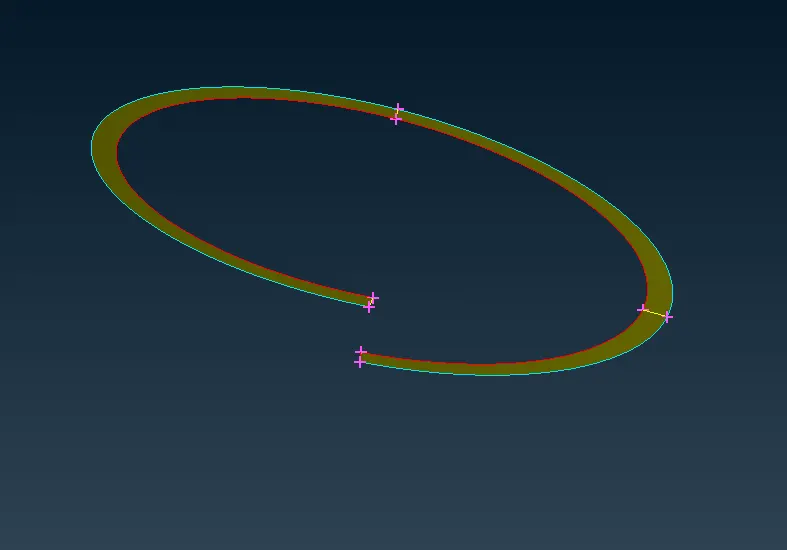
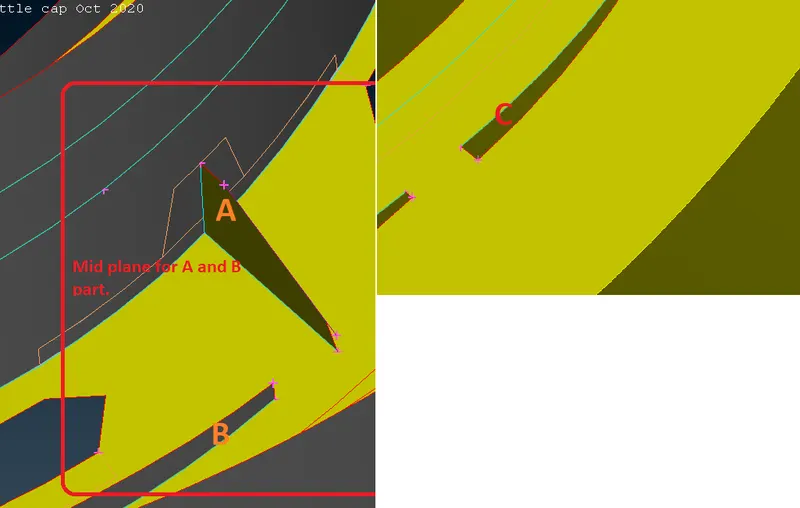
Similarly we can take middle for A,B and C component which are shown in the image.
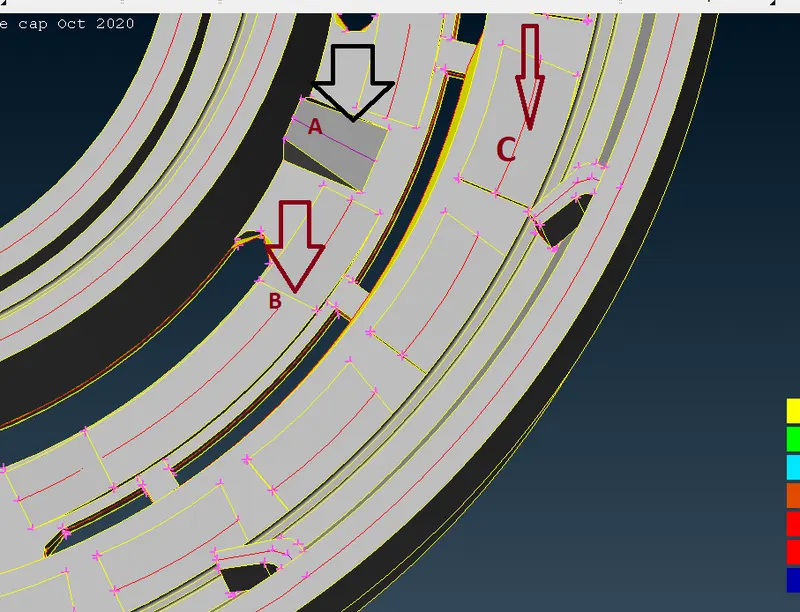
mid plane for A,B and C part.
For D and E part
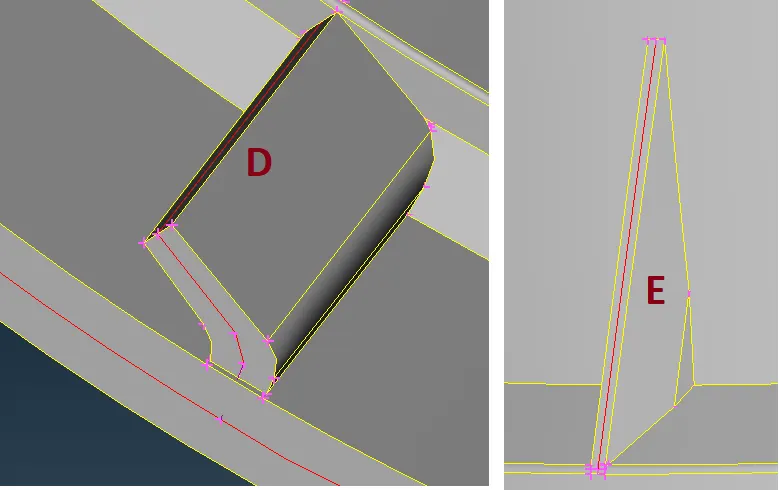
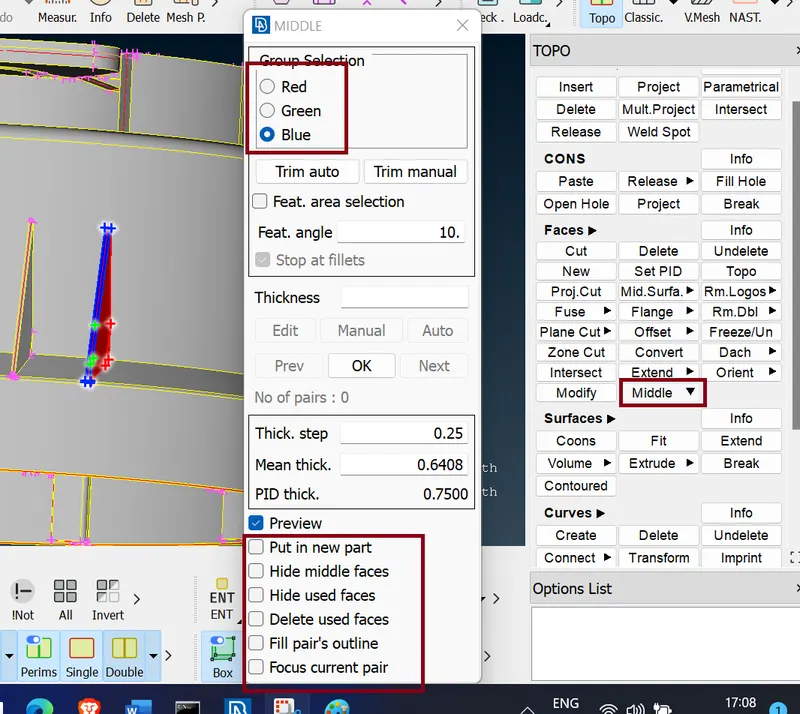
for this two part we use command : Topo >> Faces >> Middle >> Multi >> selecting the faces (by left clicking ) >> hit middle mouse >> selecting other faces (by left clicking) >> hit middle mouse >> selecting thickness faces >> hit middle mouse.
as per given figure
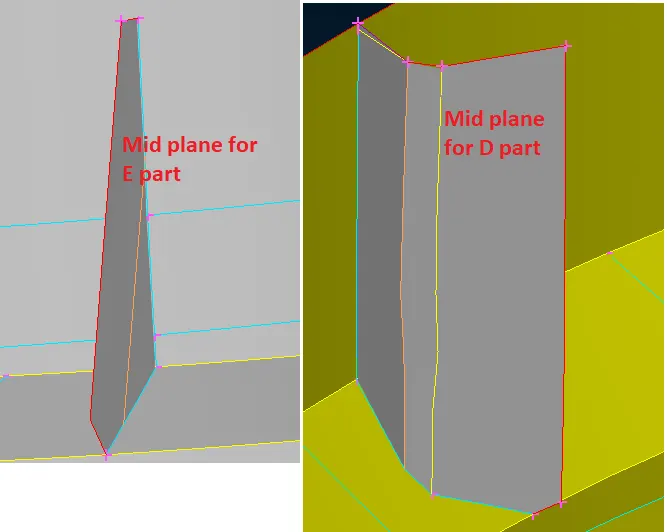
and final mid surface for D and E part is..
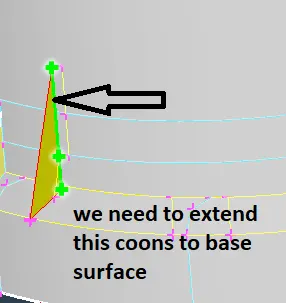
here we need to stiched mid surface of part A,B,C,D,E ... etc over base surface. for this we use command: Topo >> Faces >> Extend >> Target >> select the coons >> hit middle mouse >> left click for selecting surfaces.
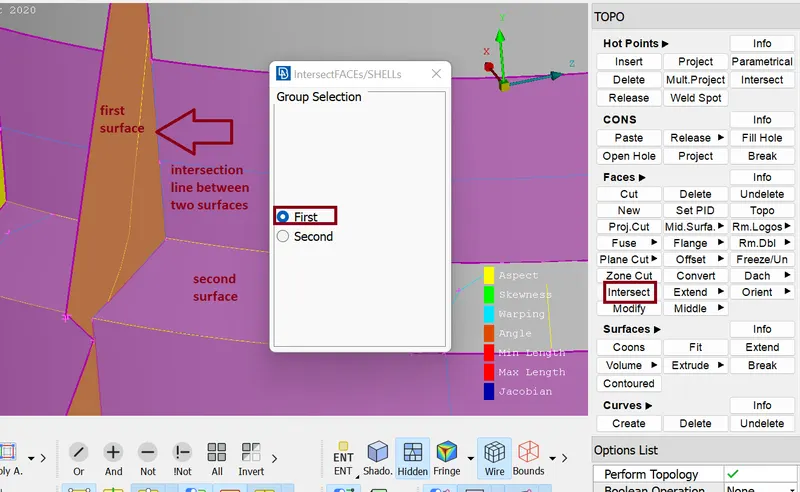
We also use one more command: Topo >> Faces >> intersect >> selecting first surface (left click) >> middle mouse click >> selecting second surface (left click) >> hit middle mouse click.
and we delete unwanted surfaces.
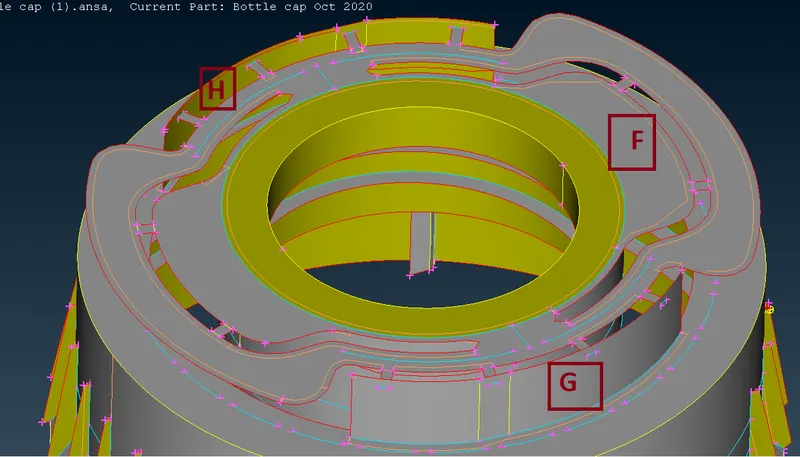
For part F,G and H we can use offset method and Transform method. we use Transform method for F part.
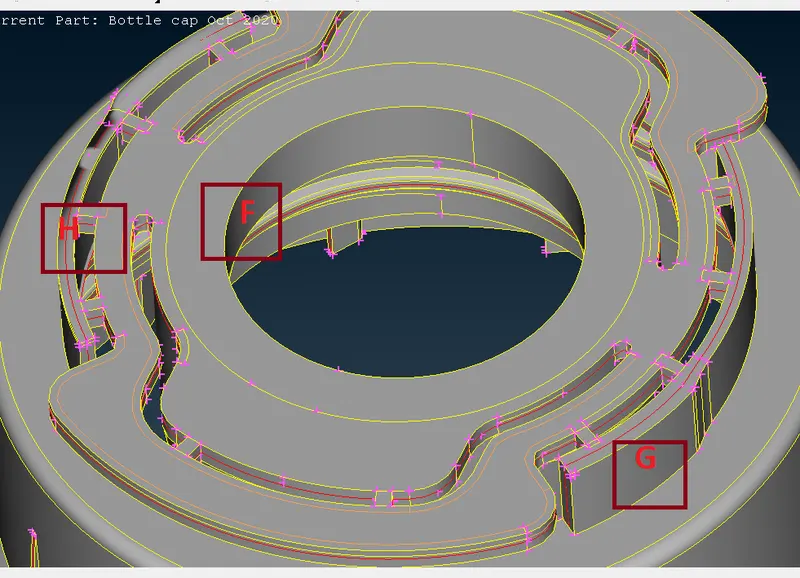
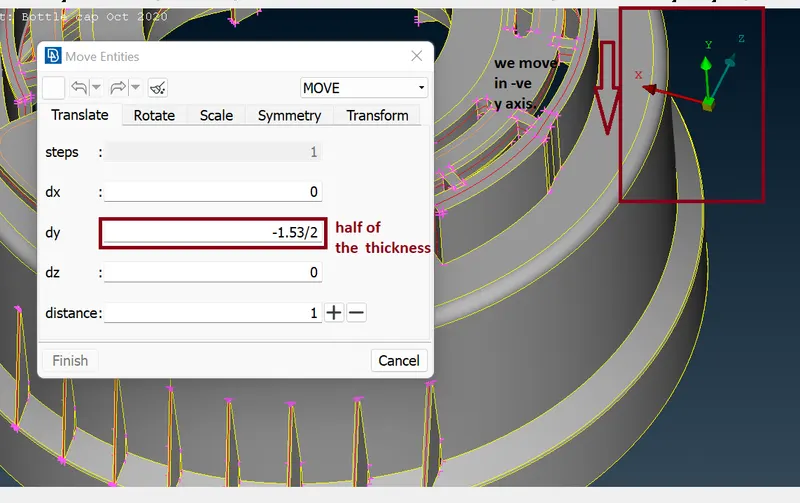
command : Utilities >> Transform >> move >> select surface F (only) >> hit middle mouse >> put half of thickness value in dy >> hit middle mouse >>finish.
and we use offset command for G and H part.
The final mid surface for the entire component is...
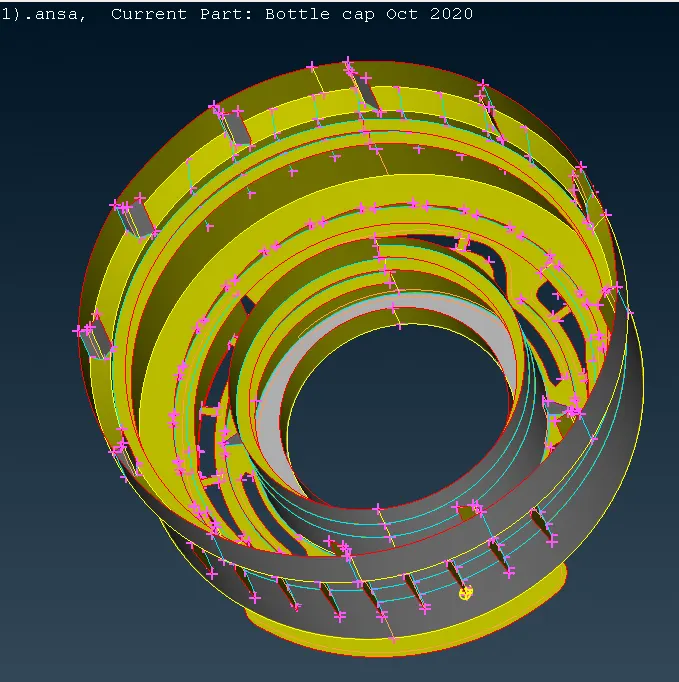
Setting Quality Parameters: -
quality parameters are configured by using command: Utilities >> Quality Criteria
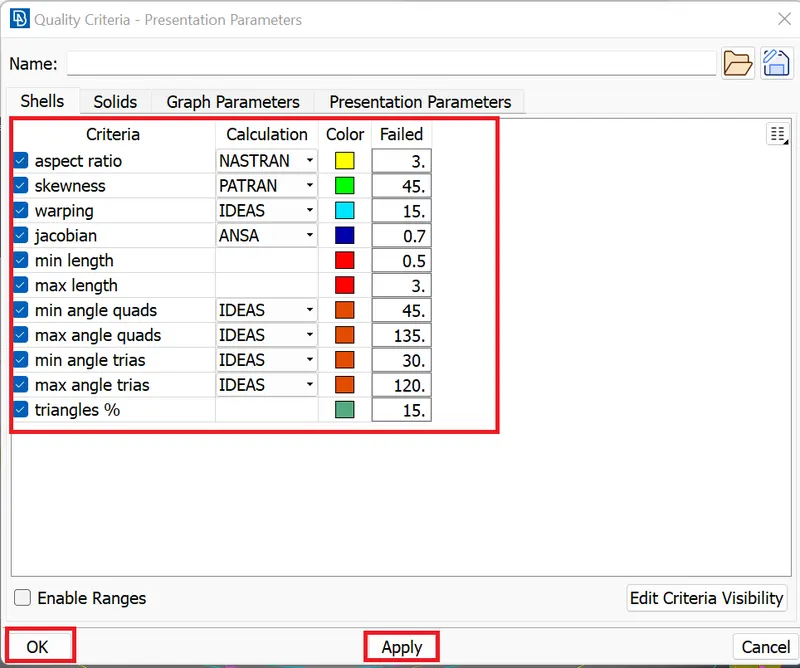
After setting all given quality Criteria hit Apply and press OK.
we set Detail on Demand effect at its lowest value point.
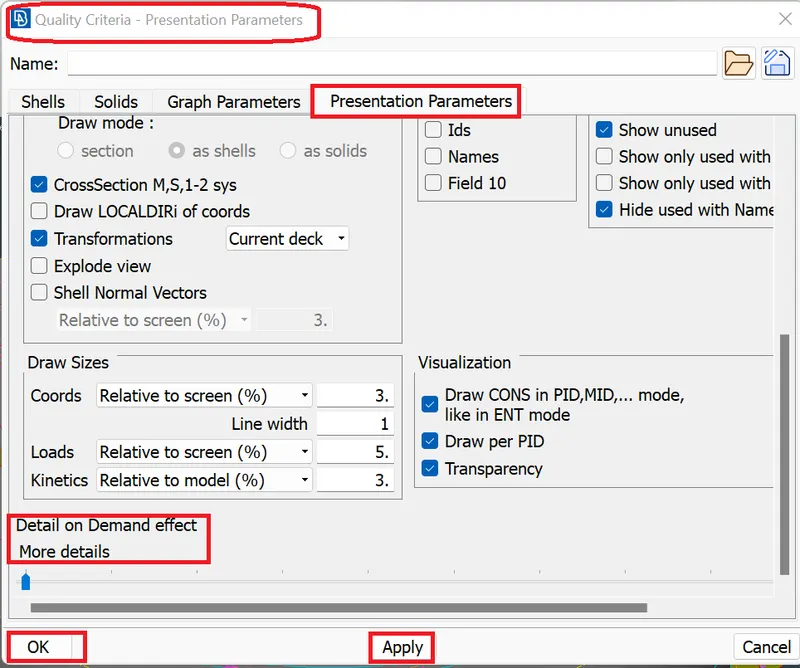
After that we hit Apply and press OK.
Next we open Utilities >> mesh parameters.
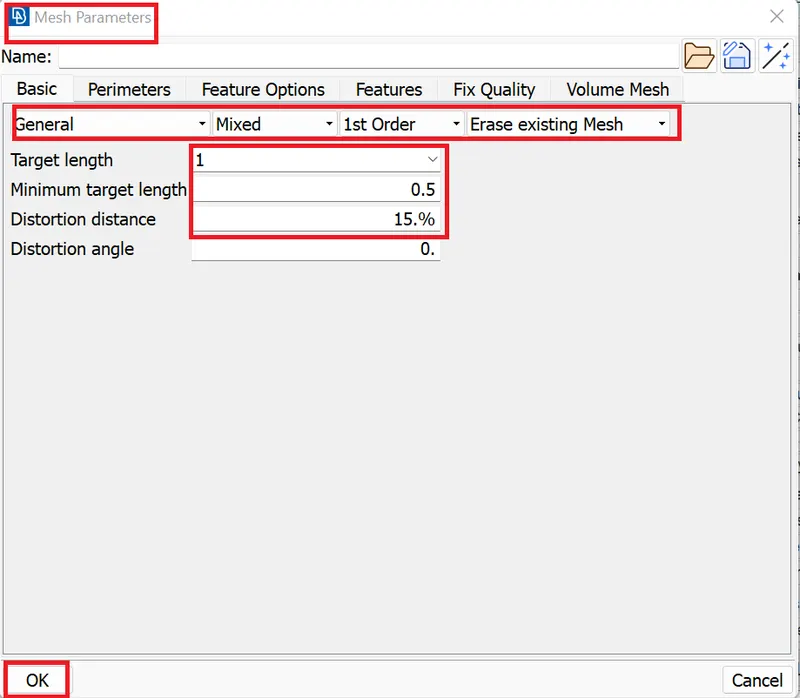
we edit some parameters and we mention their appropriate values in red box.
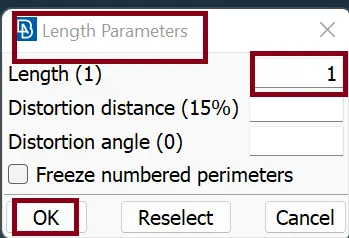
After that we go Classical mesh >> Perimeters >> Length >> Perimeters >> selecting full component by using left mouse click >> hit middle mouse click.
and select length 1
- Meshing: -
next step is to prepare the mid surfaces for meshing follows these steps
- All the areas are checked for minimum element length and altered where elements might fail for minimum length.
- CONS that are not essential to define a feature are removed by joining the surfaces using Macros >> Join >> selecting CONS and press left click (this will work in Classic mesh mode) in Topo mode we use Faces >> cut >> selecting CONS by right click. for generating CONS, we use Macros >> cut >> selecting CONS and press left click in Classic mesh mode and in Topo Faces >> cut >> selecting and press left click.
- meshing is done using the Mesh generation >> Best tool. This tool generates the mesh using the best algorithm applicable in selected area.
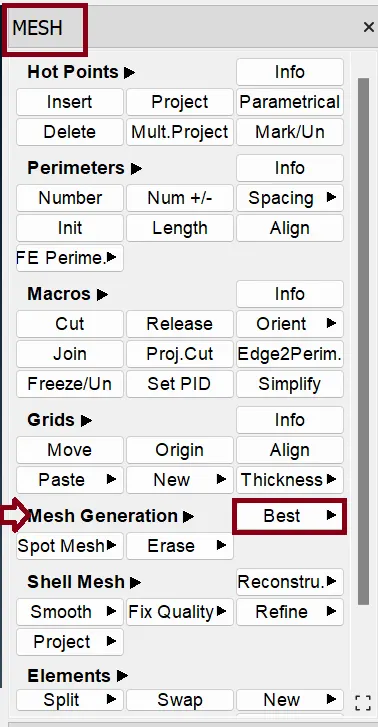
mesh is refined by using command: Shell Mesh >> Reconstruct. Or shell Mesh >> Improve .It is ensured that there are no rotating quads. Also, trias are kept as low as possible.
Things need to be ensured while meshing
- Avoid back-to-back triangle.
- Avoid opposite trias.
- Avoid triangle element at the edges.
- To fix Elements quality Criteria and trias are removed using >>Split, >>Swap, >>Join (Elements Tab), >>Smooth (Shell mesh tab), >>Paste (Grids), >> Num +/- (perimeter tab), >> Move (Grids) and >> origin (Grids).
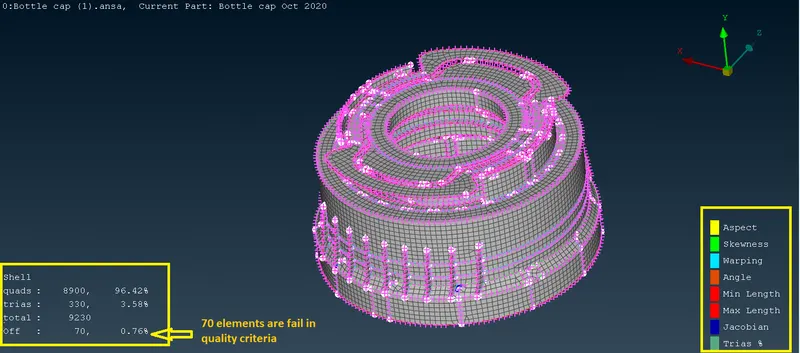
Mesh results:
- Mesh Cleaning: -
To deal with quality failure or trias elements, the following tools/Commands are used
- Grid >> Paste to paste the nodes and move the triangle element backward.
- Grid >> Move to move element node in any direction.
- Grid >> Origin to re - originated element
- Elements >> Split to split an element and move tria forward
- Elements >> Swap to move the tria left or right
- Elements >> Join to join two trias to make a quad After modifying the mesh,
- Shell Mesh >> Smooth tool is used to smoothen the flow of the mesh.
Any elements failing for quality criteria are also fixed by either re-meshing or smoothing the elements.
Why 70 elements are fail??
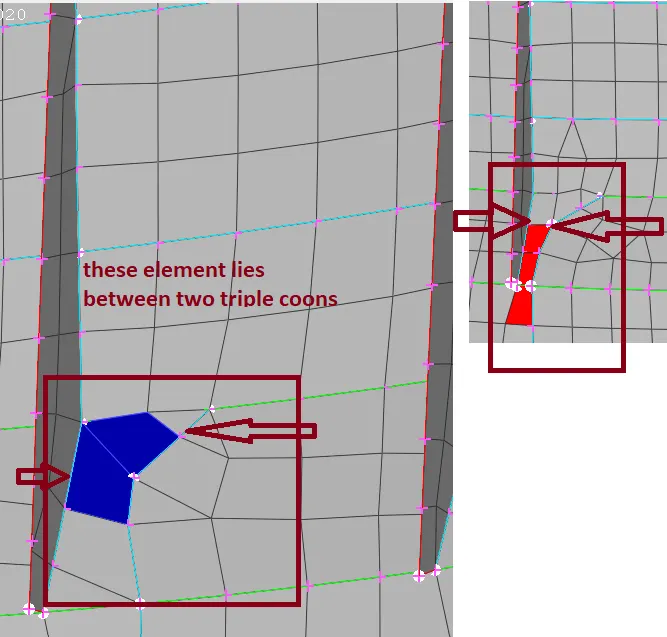
If elements are in between two triple coons we are not able to fix them in quality failure. generally, or most of the failing element lies between two triple coons. We try and fix most of them but some are not fixed.
Finally, the shell element representation is changed by going to Utilities >> Quality Criteria >> Presentation parameters and tick Draw shell as solid.
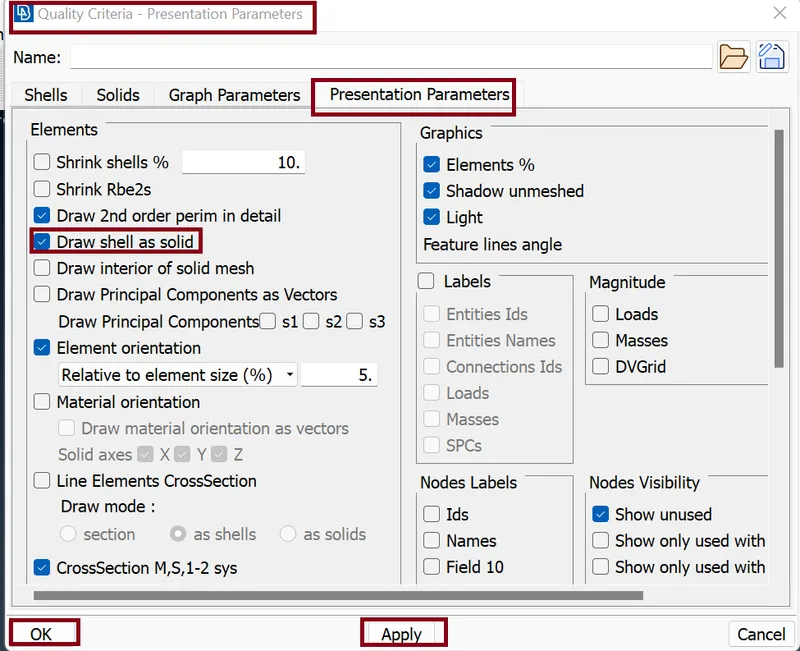
hit Apply and press OK.
CONCLUSION:
Here we done Geometry clean-up, mid-surface extraction, and 2D meshing of the given Plastic Bottle Cap model. And all the elements do not pass the quality criteria. All the features in the model are captured properly with good mesh flow.
Learning outcome: -
- How to take mid surface for complicated area.
- How to use Extend and intersect command for two surfaces.
- How to create curve, how to generate new surface using curve.
- How to use transform option to taking mid or rotation.
****************************************************************************************************************************************************************************************************************************************************************************************************************END