Week 4-1D Element Creation Challenge
1D Element Creation
OBJECTIVE:-
To mesh the Given component with the Size of 5 Units and Create 1D elements on the following component with given cross-section and DOF.
a. Rod element:- Translational DOF should be Constrained with RBE2 link
Cross-Section: BOX- Dimension a= 12 mm
dimension b=10 mm
Thickness t= 0.75 mm
b. Beam element:- All DOF should be constrained with RBE3 link
Cross-Section: I Section- Dimension a= 8 mm
Dimension b= 10 mm
Dimension c= 8.5 mm
Thickness t1= 0.75 mm
Thickness t2= .6 mm
Thickness t3= .6 mm
c. Bar element:- Constrain only x and y DOFs With RBE3 link
Cross-section: X section- Dimension DIM1= 5 mm
Thickness DIM2= 1.2 mm
Dimension DIM3= 10 mm
Thickness DIM4= 1.2mm
d. & e. Apply the mass of magnitude 10 with the RBE2 link
f. Join the two components with Spring elements
PROCEDURE:-
1) Meshing of the given component-
Import the .IGS file into the software environment using File > Import > Geometry > IGES >Locate the file > Import command.
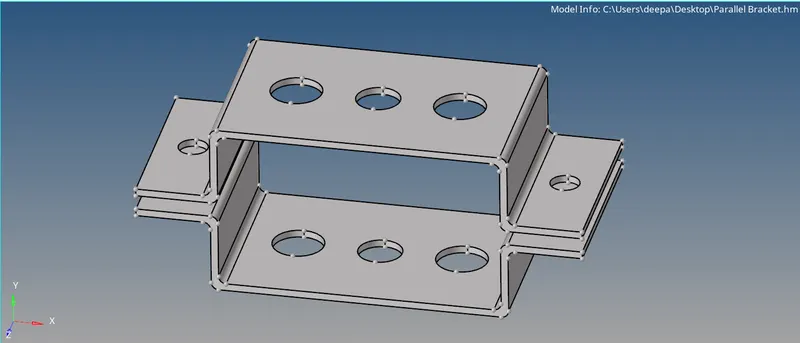
Fig: File Import
Now go to Tools > delete > solids >Select the whole model > click on delete and delete the solid surfaces.
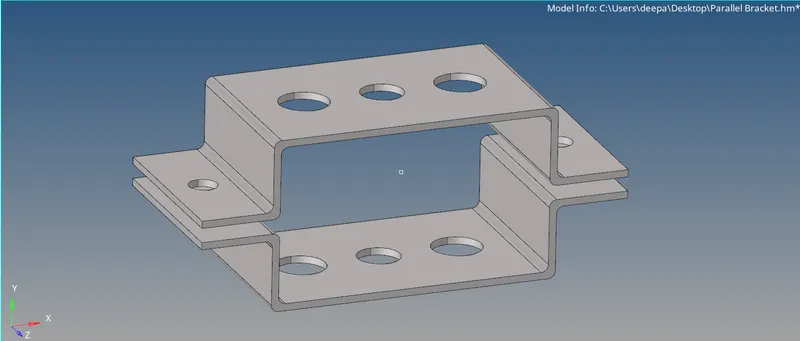
Fig: Solids deleted
Now measure the thickness of the component using Geom > dimensioning option and then select the surfaces as shown and offset them by (thickness/2)mm to get mid surfaces.
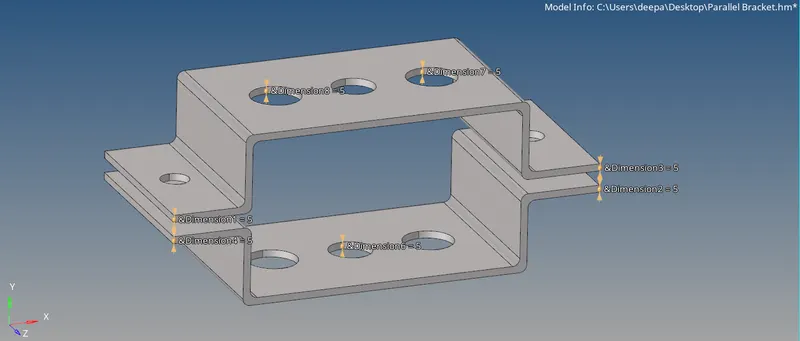
Fig: Measurement
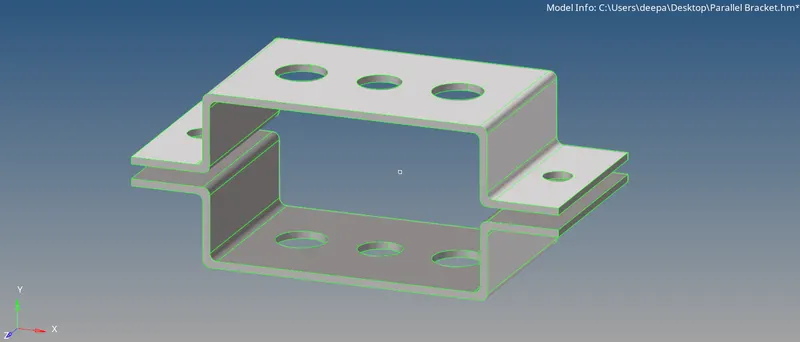
Fig: Surface Selection
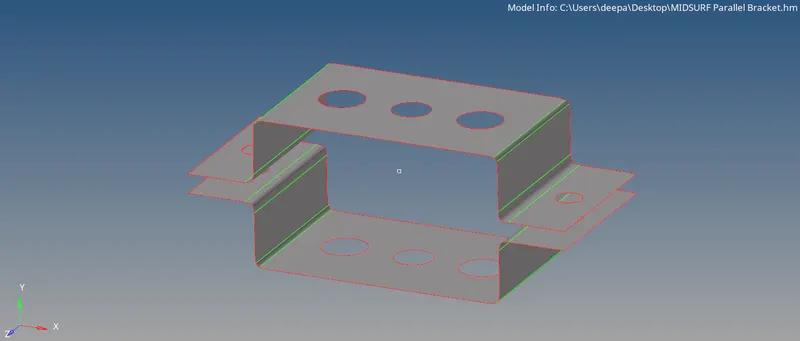
Fig: Mid Surface Created
Create seperate component for both the mid surfaces generated by using Right click > Create > Component command and assign them to their respective component ID also create a material card having name steel using Right click > Create > Materials.
Now create properties for both the mid surface components same as components and material and then define the material already created for them and assign these properties to their respective components .
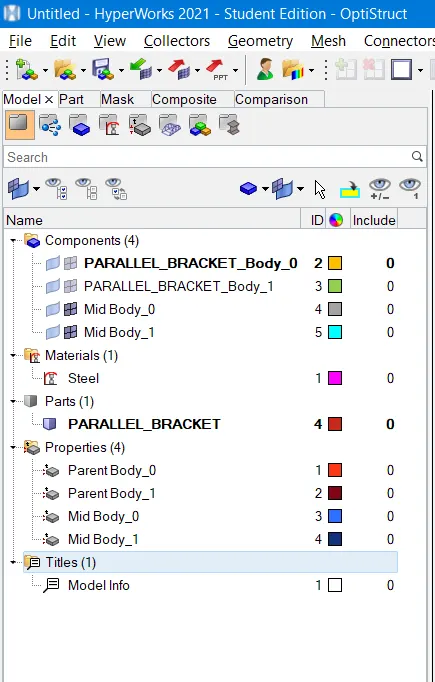
Fig: Components and Properties
Now go to Geom > quick edit > washer split > Enter offset value > Select the holes and create washer element around each of the holes and then mesh the mid surface with the Size of 5 Units using 2D > automesh > surfs > Select both the mid > mesh option.
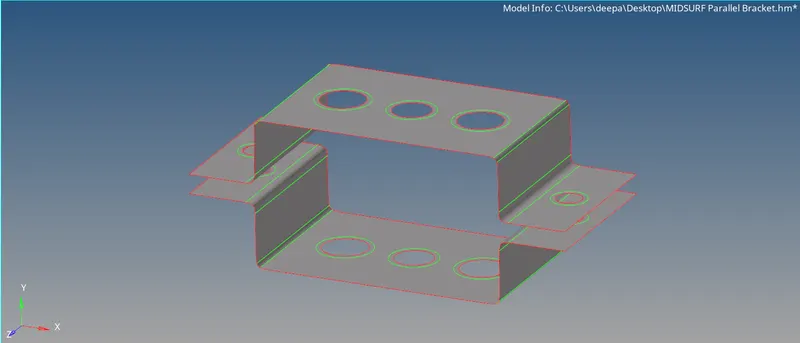
Fig: Washer Created
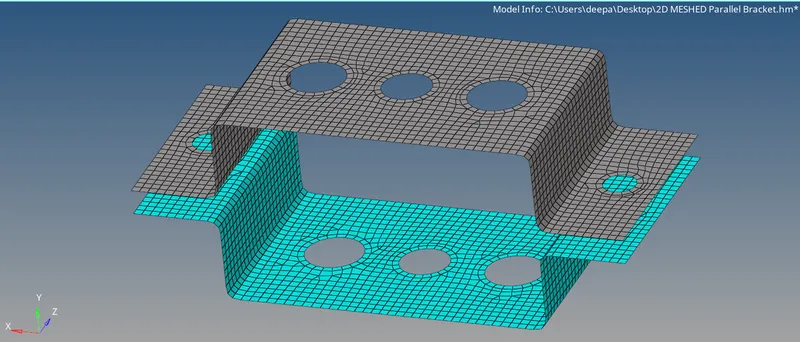
Fig: Mehsed Bracket
2) Deploying 1D connections-
- Creating HyperBeam Views for Rod, Beam and Bar elements:-
Rod-
Cross-Section: BOX- Dimension a= 12 mm
dimension b=10 mm
Thickness t= 0.75 mm
Go to 1D > HyperBeam > standard section > section library - HyperBeam, section type - thinwalled box > create. Now it will lead us to HyperBeam view section of the software, give dimensions as per specified and now we have a rod with box section.
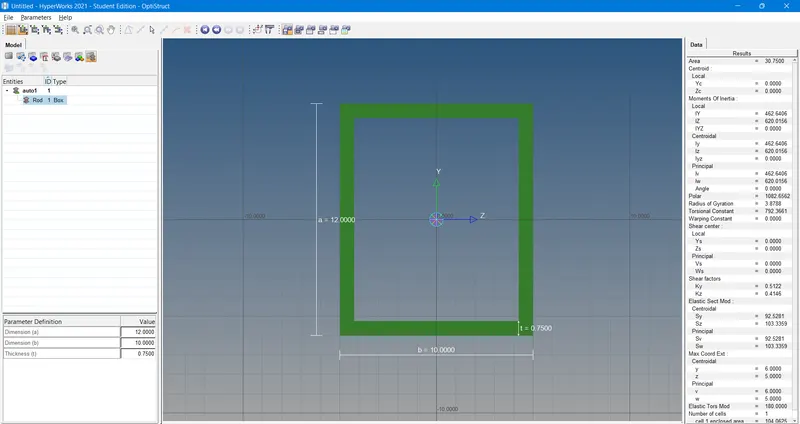
Fig: Rod Section
Beam-
Cross-Section: I Section- Dimension a= 8 mm
Dimension b= 10 mm
Dimension c= 8.5 mm
Thickness t1= 0.75 mm
Thickness t2= .6 mm
Thickness t3= .6 mm
Go to HyperBeam view > Create > Standard Section > HyperMesh > Standard I Section to create I beam section and then give dimensions as per specified and now we have a beam with I section.
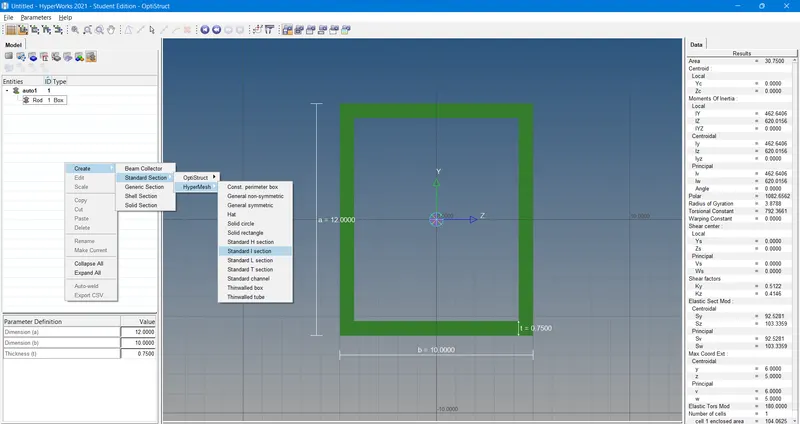
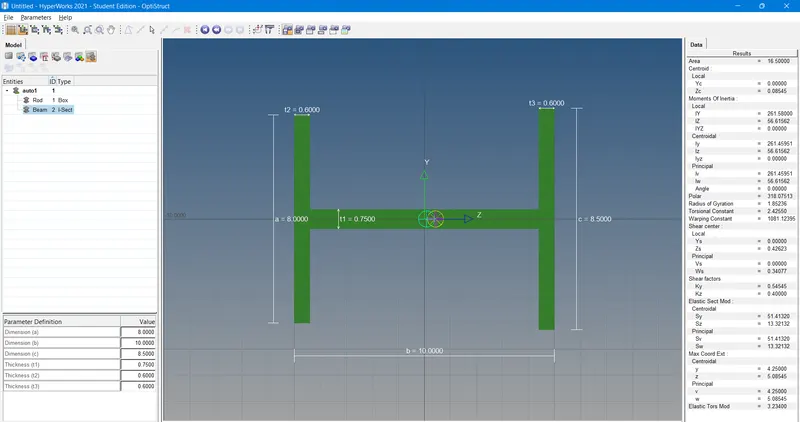
Fig: Beam Section
Bar-
Cross-section: X section- Dimension DIM1= 5 mm
Thickness DIM2= 1.2 mm
Dimension DIM3= 10 mm
Thickness DIM4= 1.2mm
Go to HyperBeam view > Create > Standard Section > OptiStruct > CROSS to create X bar section and then give dimensions as per specified and now we have a bar with X section.
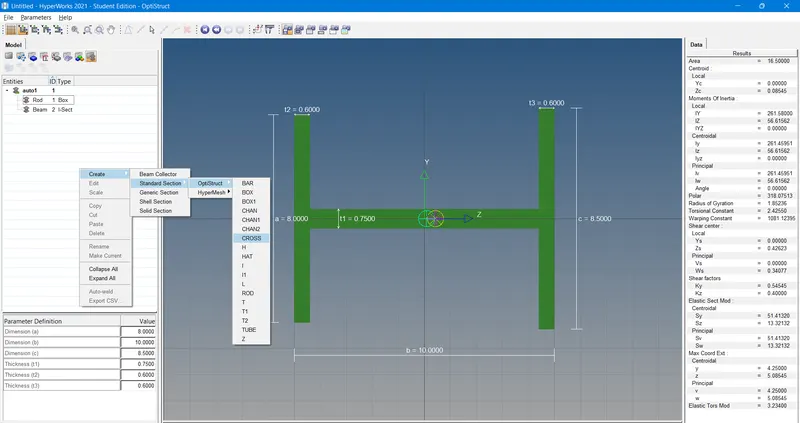
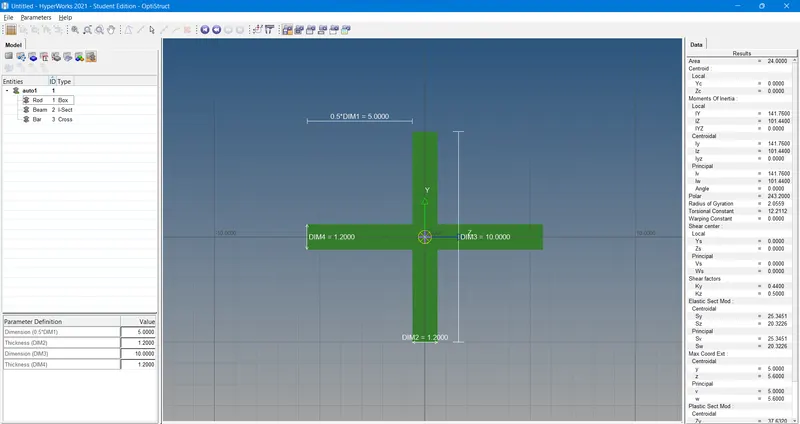
Fig: Bar Section
- Deploying RBE2 and RBE3 and Bar, Rod, Beam elements:-
For holes at section a-
a. Rod element:- Translational DOF should be Constrained with RBE2 link
Go to 1D > rigids > Independent node - calculate node, Dependent nodes - multiple nodes > dof > elem types - RBE2 > Select the nodes > create.
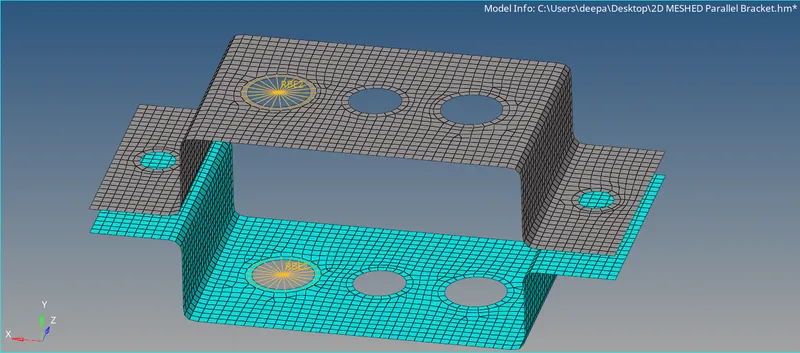
Fig: RBE2 Elements for CROD Element
Now create property for rod element. chose card image - PROD and beam section - Rod and then go to 1D > rods. Enter property and elem type as input and select both the nodes and then click on create.
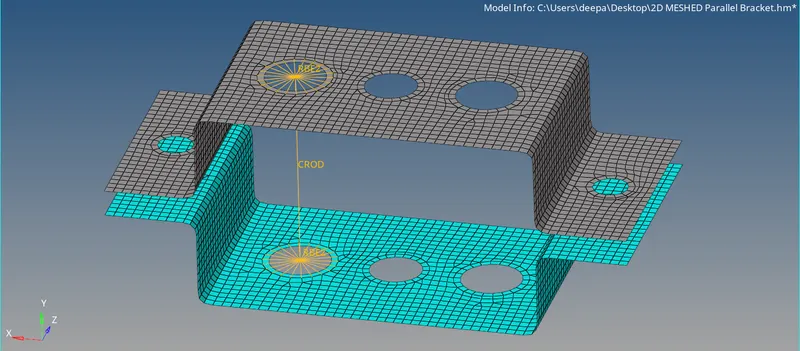
Fig: Rod Element Deployed
For holes at section b-
b. Beam element:- All DOF should be constrained with RBE3 link
Go to 1D > rbe3 > Dependent nodes - calculate node, Independent node - multiple nodes > dof > elem types - RBE3 > Select the nodes > create.
Now create property for beam element. chose card image - PBEAM and beam section - Beam and then go to 1D > bars. Enter property and elem type as input and Select both the nodes and then give orientation for beam cross section in the form of nodes to select orentation plane. lastly, click on create.
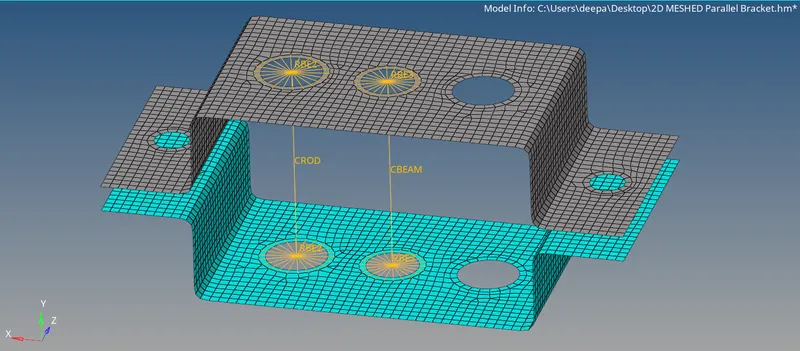
Fig: Beam Element Deployed
For holes at section c-
c. Bar element:- Constrain only x and y DOFs With RBE3 link
Go to 1D > rbe3 > Dependent nodes - calculate node, Independent node - multiple nodes > dof > elem types - RBE3 > Select the nodes > create.
Now create property for beam element. chose card image - PBAR and beam section - Bar and then go to 1D > bars. Enter property and elem type as input and Select both the nodes and then give orientation for beam cross section in the form of nodes to select orentation plane. lastly, click on create.
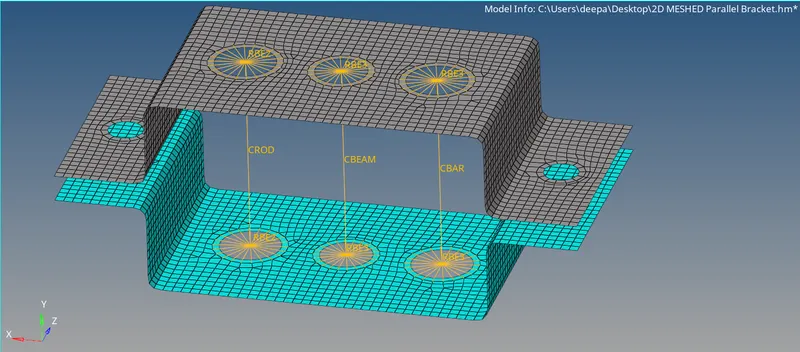
Fig: RBE3 Elements for CBAR Element
- Deploying RBE2 and RBE3 and Mass, Spring elements:-
For holes at section d-
Create property with name mass and give card image - PMASS, M - 10. Now create RBE2 elements for d and e sections as shown.
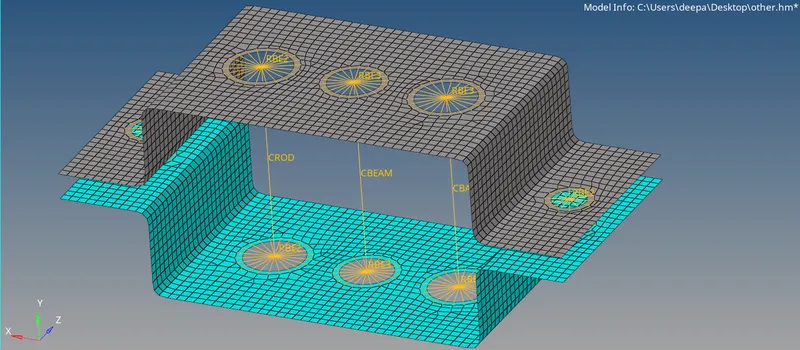
Fig: RBE2 Elements Created
Go to 1D > masses > dof. Now enter values like mass - 10, property - mass and elem type - CMASS1 and select the center of all the RBE2 elements, lastly click on create to create mass elements at that place.
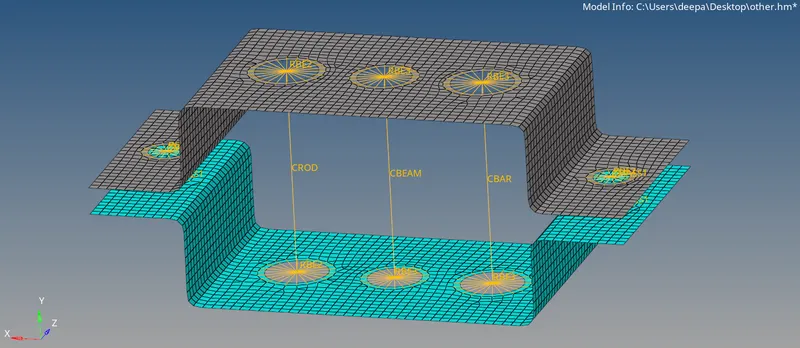
Fig: Mass Elements Created
For spring elements at section f-
Create property with name spring and give card image - PELAS. Go to 1D > springs > dof. Now give property - spring and elem type - CELAS1 and select the nodes to deploy spring element between them.
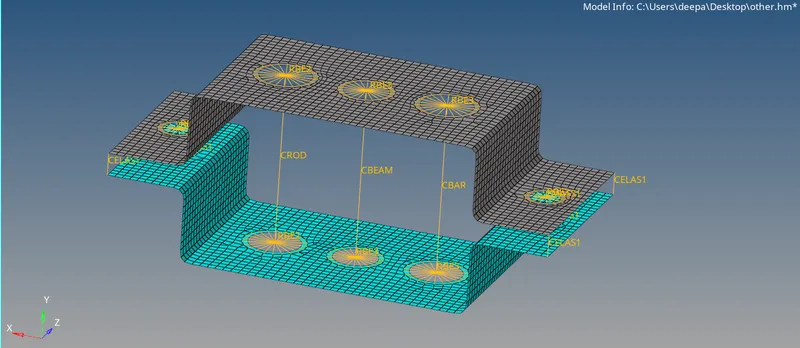
Fig: Spring Element Created
Final Images-
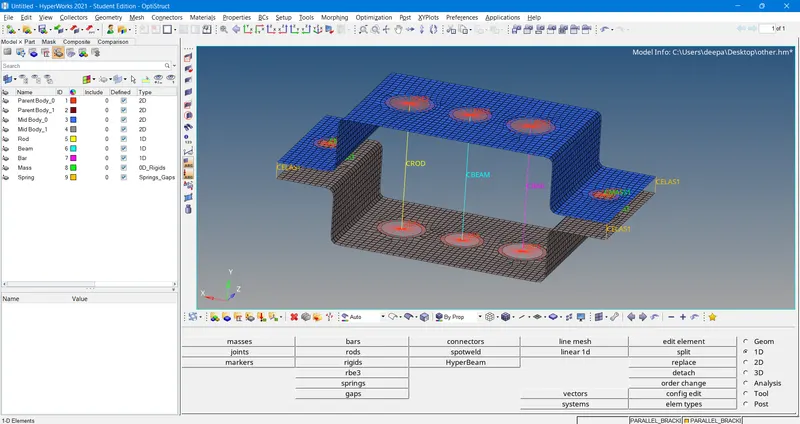
Fig: Image in Property View
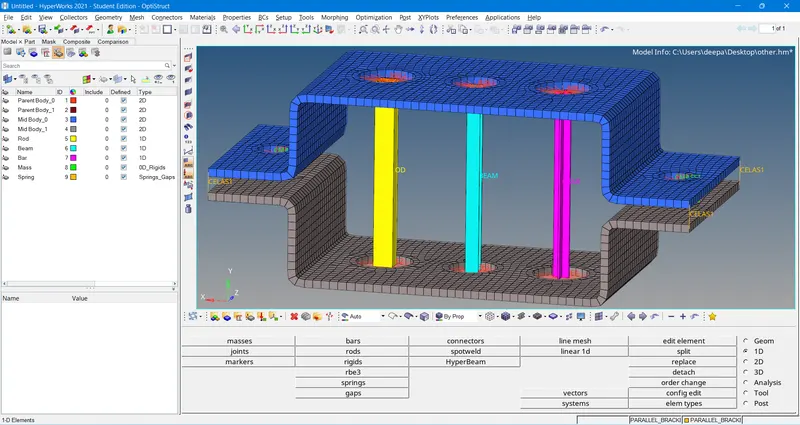
Fig: Final Image With All Elements Deployed in Property View
RESULT:-
Successfully meshed and deployed 1D elements for the given bracket model also learned about creating mid surface, HyperBeam View and various section for bar, beam and rod element. Learned about property creation and assigning etc.