Control Logic of a Washing Machine
AIM:
- To implement control logic of a “Washing Machine” using State Flow as per given sequence.
- Make a Simulink chart for the “Gear Shift” logic as per given conditions.
OBJECTIVES:
- Implement a control logic of a “Washing Machine” using State Flow as per given sequence. Create a model and Operate the model logic system and Display the Output of the results by using a Lamp Indicator.
- Create a model for “Gear Shifting Logic” as per given conditions. Give the Speed input while simulation is running and Display the gear number.
EXPLANATION:
TASK 1:
State Flow:
State Flow provides a graphical language that includes state transition diagrams, flow charts, state transition tables, and truth tables. By using State Flow to describe how MATLAB algorithms and Simulink models react to input signals, events, and time-based conditions.
Control Logic:
Control Logic is model system logic using State machines, Flowchart and Truth Tables.
Explanation of Control Logic of a Washing Machine using State Flow:
State Flow is a Simulink tool to implement the state machine. Here, the model system logic of a Washing Machine using State Flow has been done.
Step 1: Create a chart and enter the given input conditions.
Given Input Conditions:
- If the power supply is available, the system gets activated.
- If the Water supply is not available, stop the process & indicate through LED.
- Soaking time should be 200s followed by Washing time of 100s.
- Then Rinsing happens for next 20s & dryer runs for 50s.
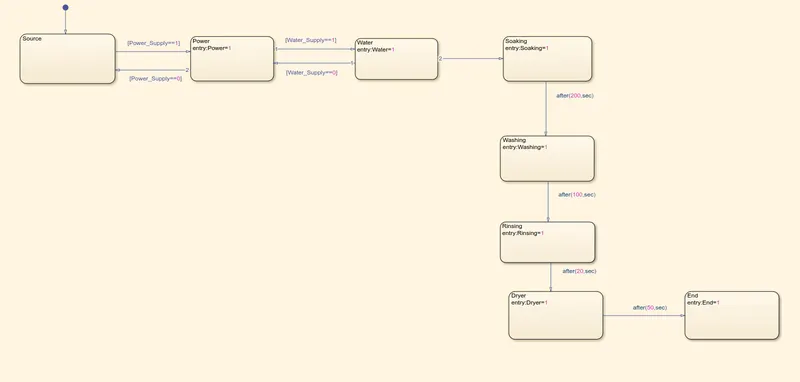
After all the processes have completed turn on the finished LED.
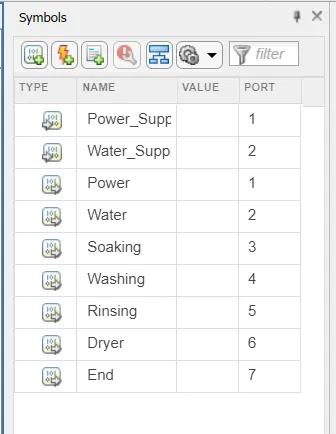
Step 2: After entering the input conditions in the chart, Go to Symbols pane and assign the given variable. (Example: Input data, Output data, etc.,).
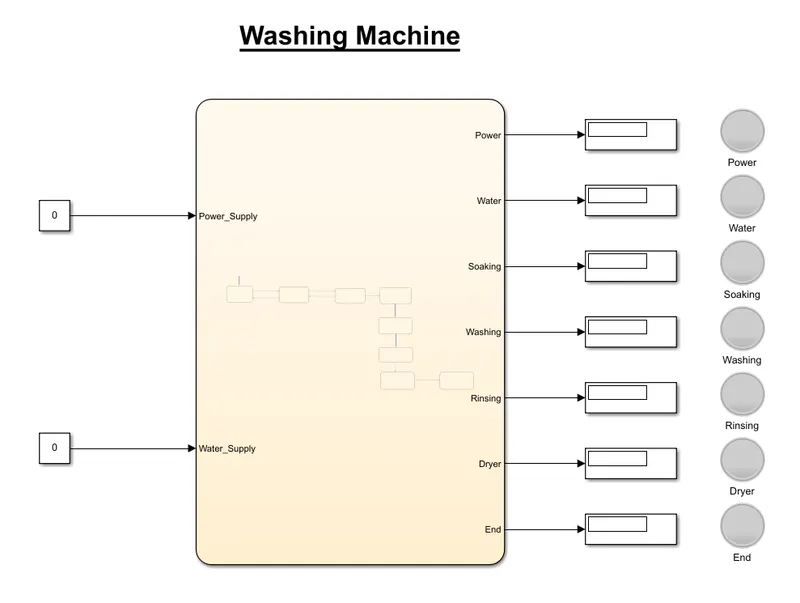
Step 3: Give the input values for turning ON or OFF for the Power Supply and Water Supply.
Condition:
If value = 1, Power and Water Supply will turn ON.
If value = 0, Power and Water Supply will turn OFF.
Step 4: Use ‘display’ block and ‘Lamp’ indicator to display the results.
TASK 2:
Gear Shifting Mechanism:
Mechanical devices that enable the driver to engage gears in such a way as to obtain the desired transmission ratio are called ‘Shifting Mechanism’.
Explanation for Gear Shifting Mechanism using SIMULINK:
Step 1: Create a chart and enter the given conditions for gear shifting.
Given Conditions:
Speed Range (kmph) Gear
0 to 15 1
16 to 25 2
26 to 40 3
41 to 60 4
Above 61 5
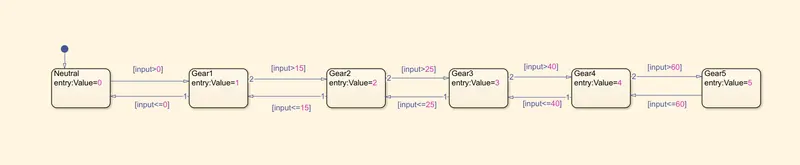
Step 2: After entering the input conditions in the chart, Go to Symbols pane and assign the given variable. (Example: Input data, Output data, etc.,)
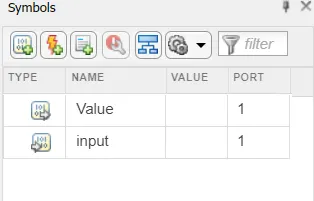
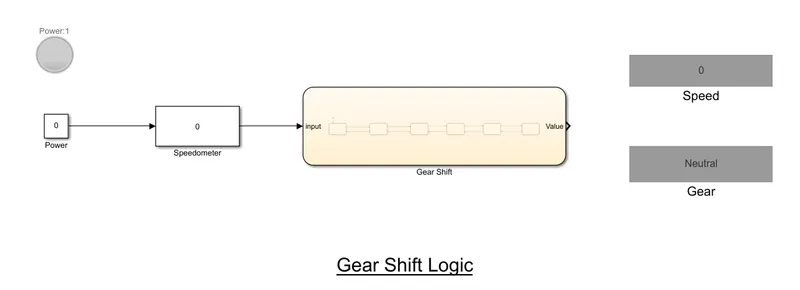
Step 3: Connect the ‘Slider Gain’ to vary the speed while simulation is running.
Step 4: Create a Constant and giving value 1 or 0 for turning ON & OFF.
Step 5: Create ‘Lamp’ to indicate the power ON or OFF.
Step 6: Use ‘display’ blocks to display the Gear position and Speed.
OUTPUT:
TASK 1:
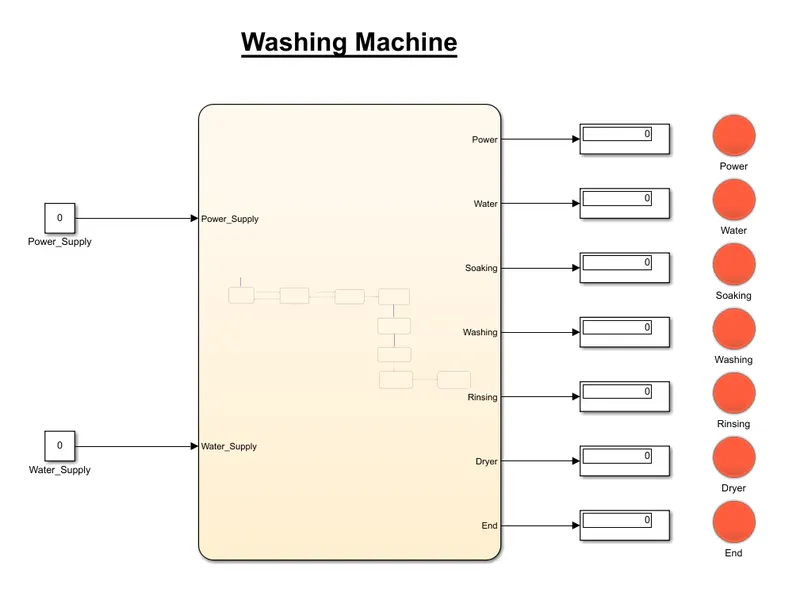
Control Logic of a Washing Machine using State Flow has been implemented.
Case1:
If the Power Source = 0, Power Supply is not available and system will not be activated.
Case2:
If the Power Source = 1 and Water Source = 0, then the Power Supply will turn ON and Water Supply will not be available. So, system will not be activated.
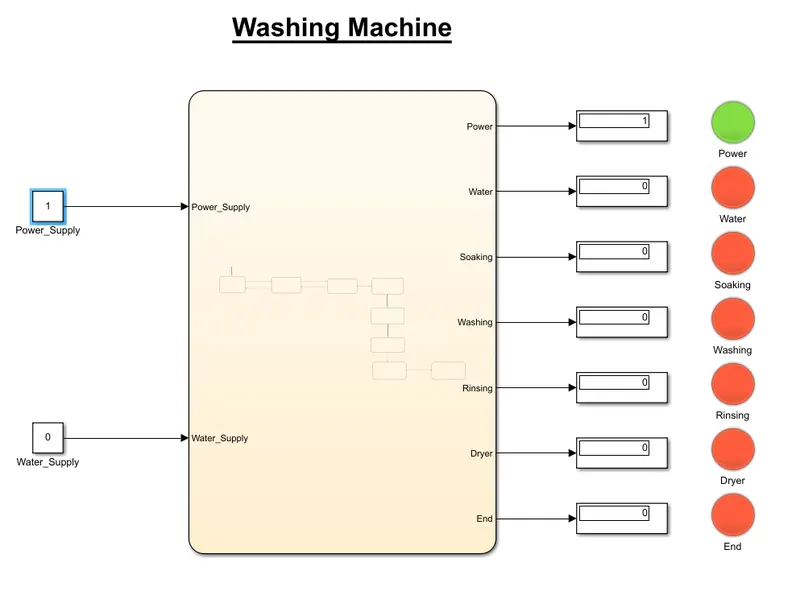
Case3:
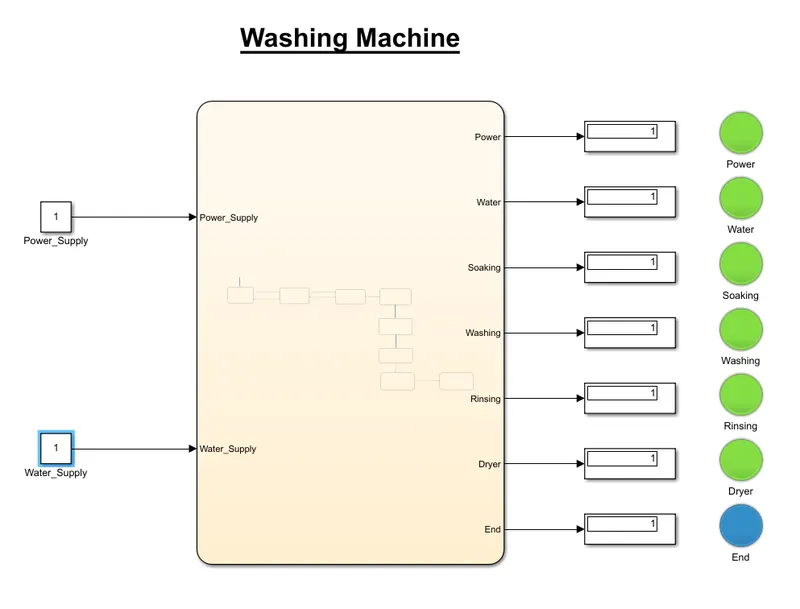
If the Power Source = 1 and Water Supply = 1, then Power Supply will turn ON and Water Supply will be available. So, system will be activated and after all process completed, end lamp will turn ON.
TASK 2:
Gear Shifting Logic has been created and by using Slider Gain block the speed has been varied while running the simulation.
Case1:
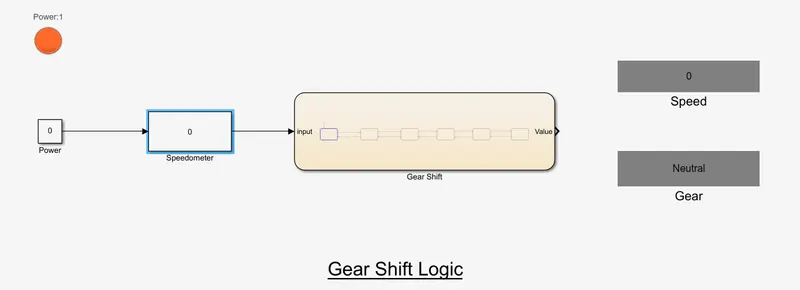
If the constant Power = 0, then the power will turn OFF, and the Lamp indicates the Red Colour and Gear shifting mechanism will not be activated.
Case2:
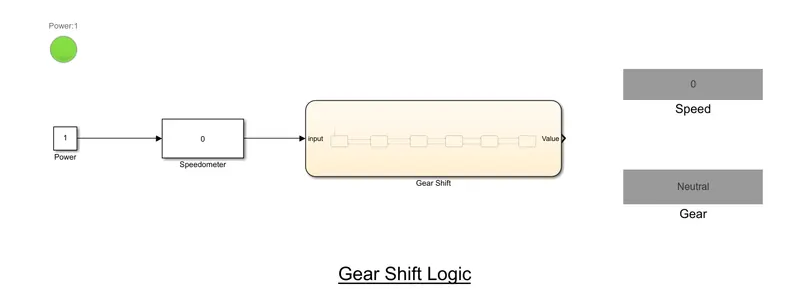
If the constant Power = 1, then the power will turn ON, and the Lamp indicates Green Colour and Gear shifting mechanism will be activated.
Case3:
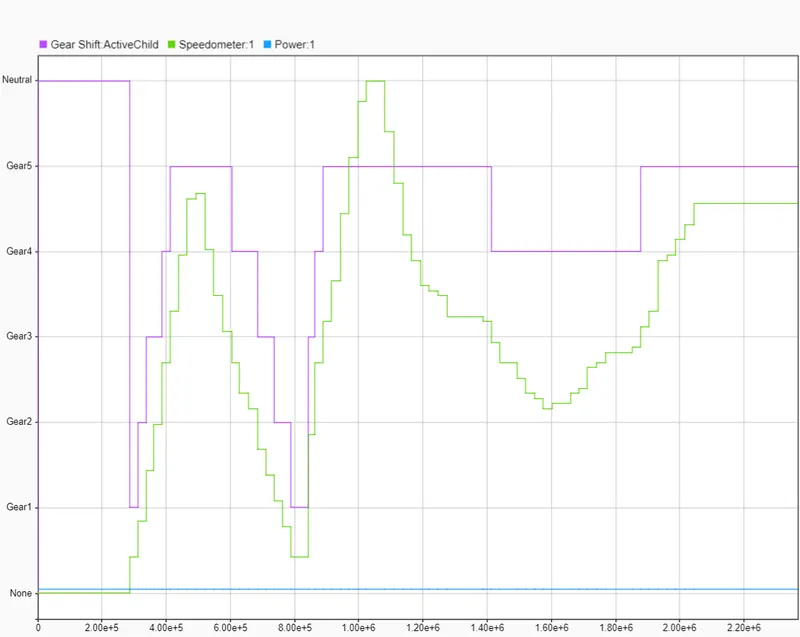
By varying the speed(Parameter) in the speedometer(Slider Gain), gear position will change according to the given condition.
Giving Speed = 0km/hr in Speedometer, the Gear Display displays “Neutral” while, at Speed = 104km/hr, the Gear Display reads “Gear5”.
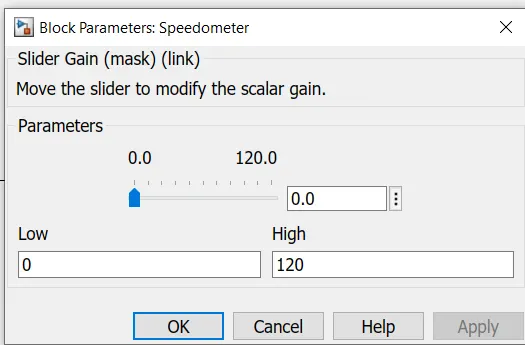
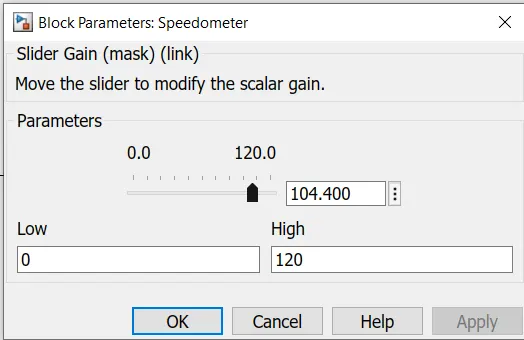
Likewise, changing the speed in the speedometer according to the given condition, Gear position will change.
From Data Inspector option in the tool, bar we can see the graph on the Gear Shift at respective Speed change.