BOTTLE CAP
AIM :
Check for the geometrical errors, mesh with the given element Quality criteria and assign thickness to the component.
PROCEDURE:
- Select top mode and using topo command select the entrie body and click middle mouse button to join any cons(if there are any)
- In mesh mode select length command from perimeters and give the value as 1 and select the entire body.
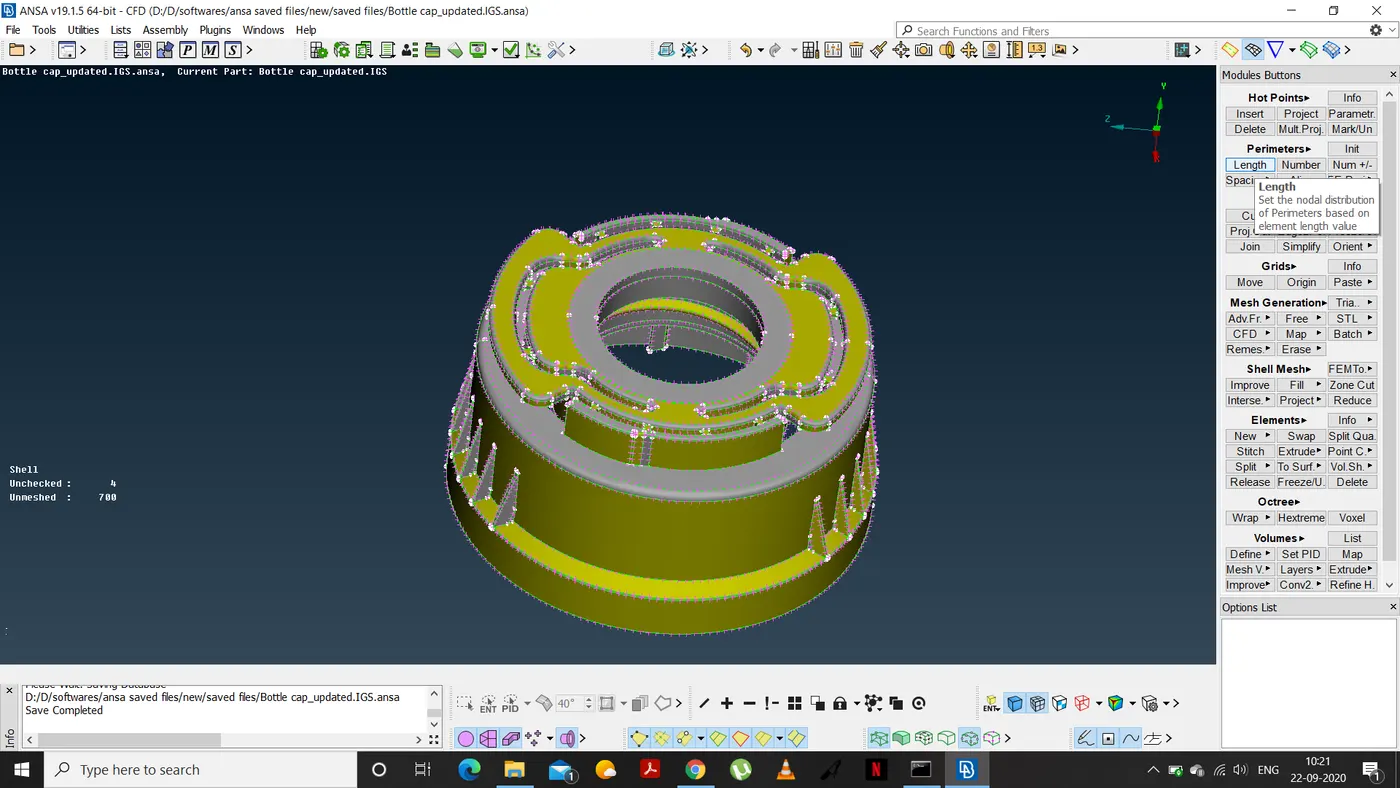
- GEOMETRICAL ERRORS:
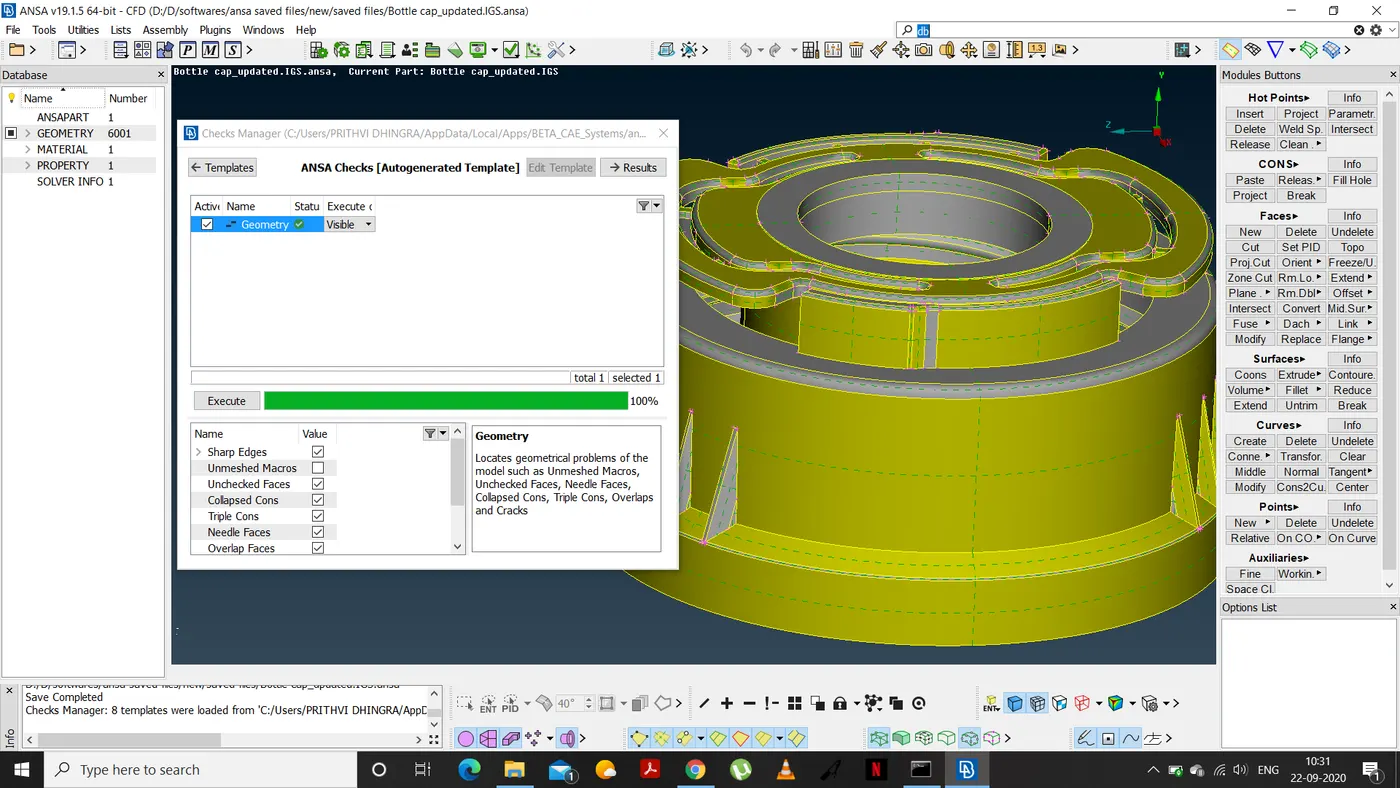
Check the given component for geometrical errors using the geometry option under checks manager and click execute.
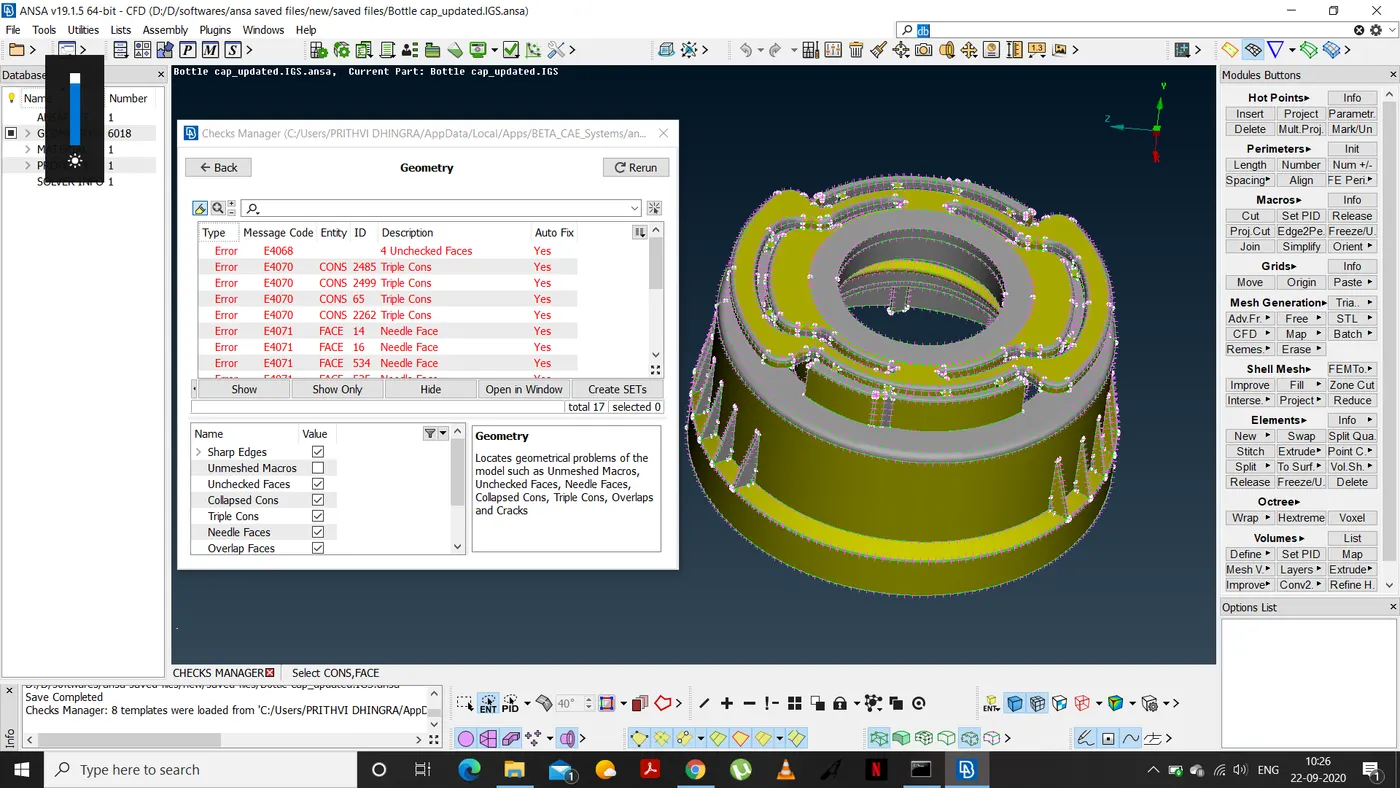
- Several errors including unchecked faces, single/triple cons and needle faces were found.
- In checks manager, right clicking and selecting fix option for each and every error fixes them all as shown below.
- MID SURFACE EXTRACTION:
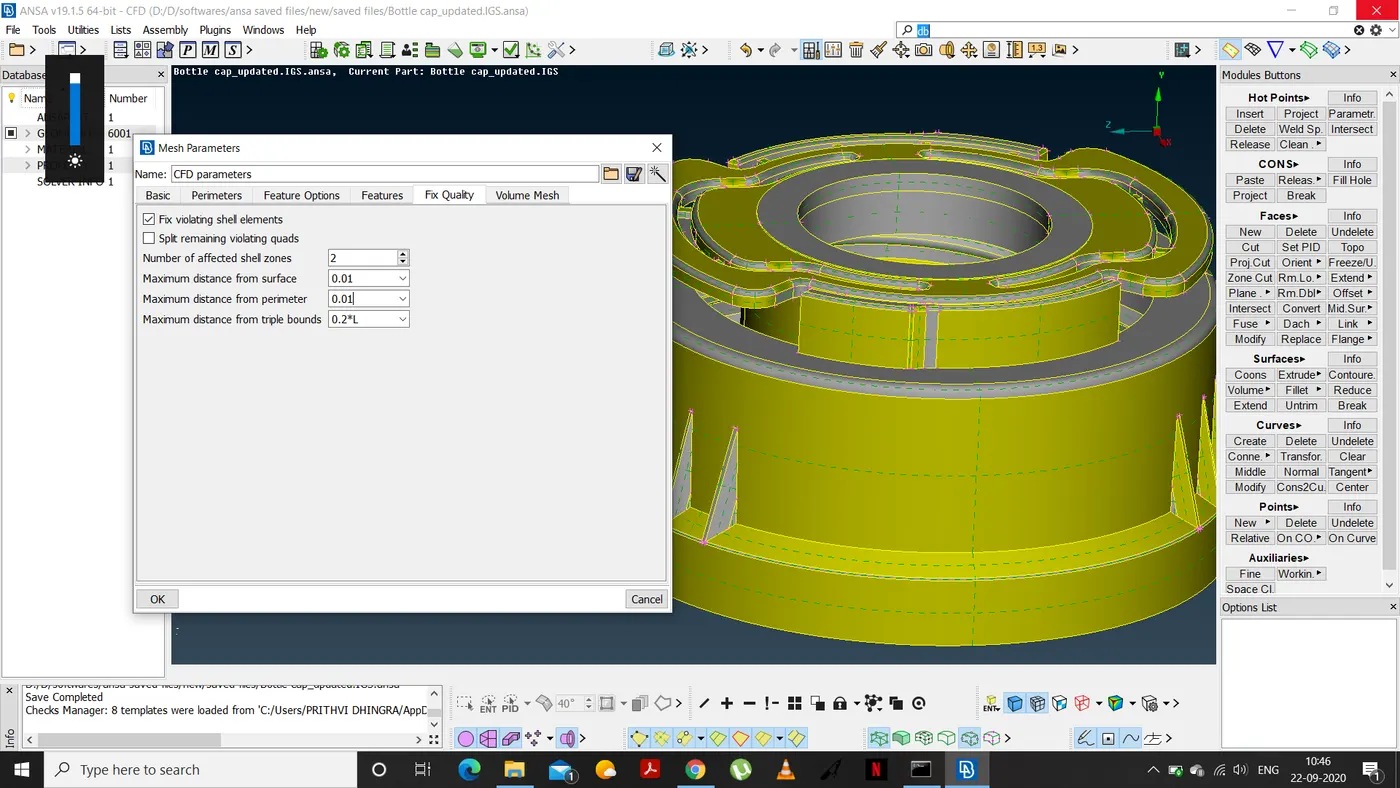
Before this step we first set the quality criteria and the mesh parameters as shown below-
MESH PARA.1-
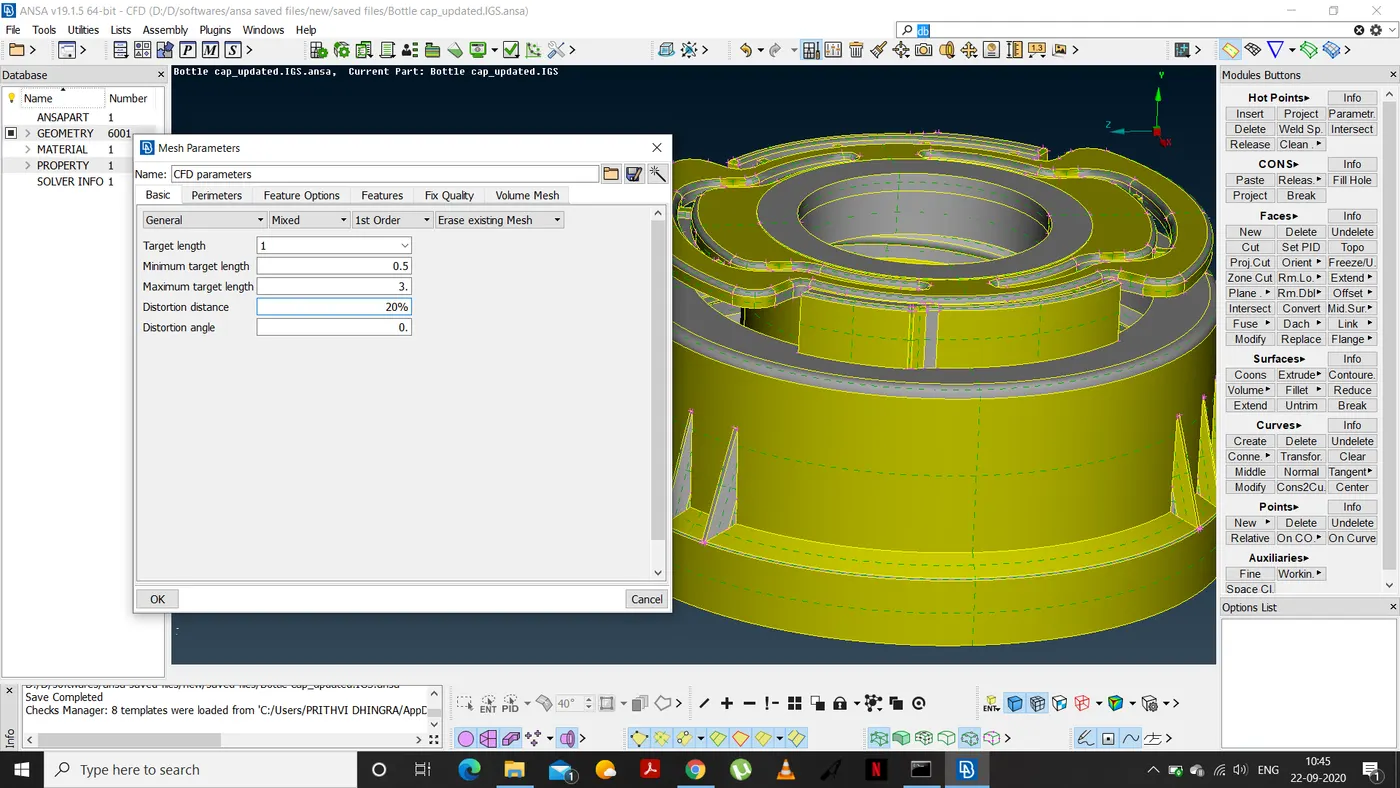
MESH PARA.2
QUALITY CRITERIA-
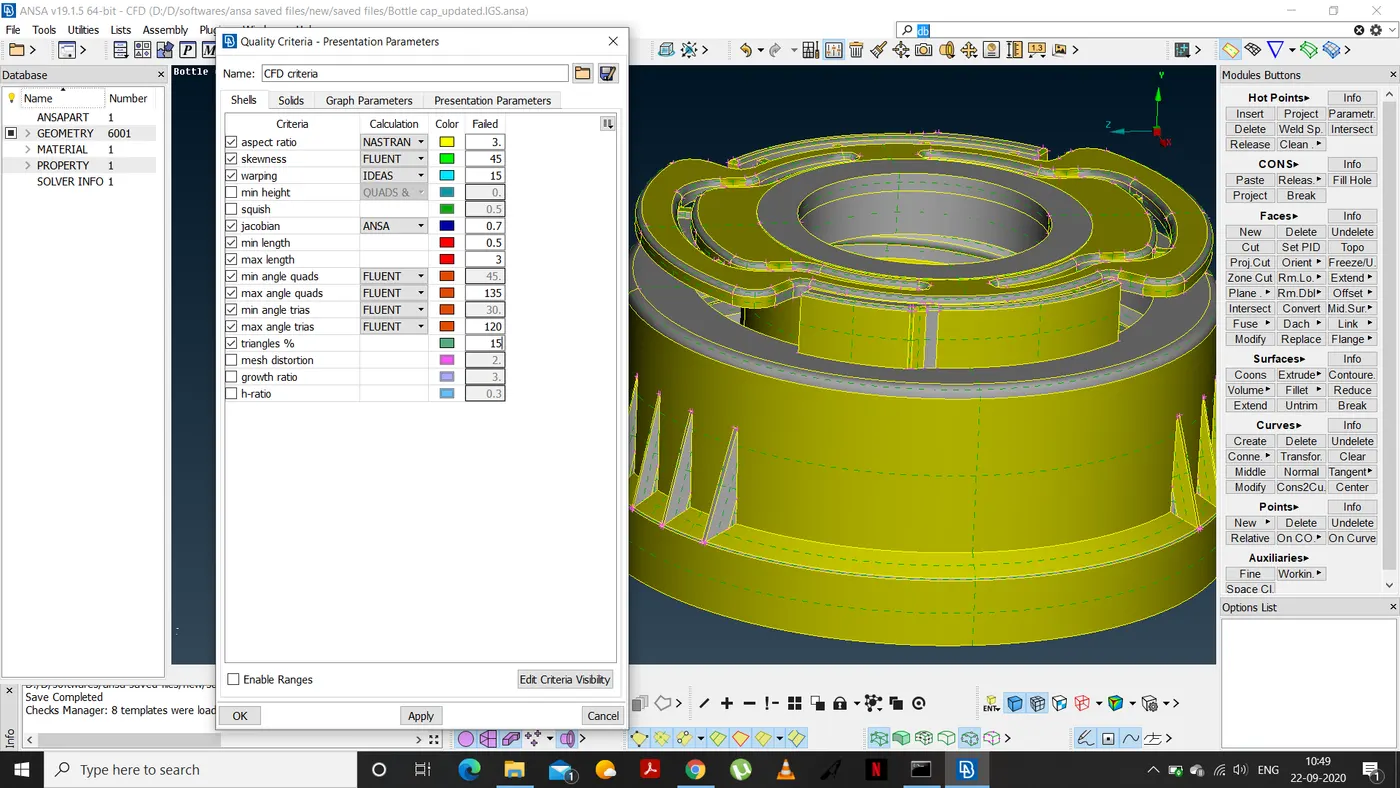
Also, in quality criteria, under mesh parameters-->graphics, switch on element% and click the "Detail on Demand effect" "all details" to extreme left (max) then click apply and then OK.
Now, checking for thickness.
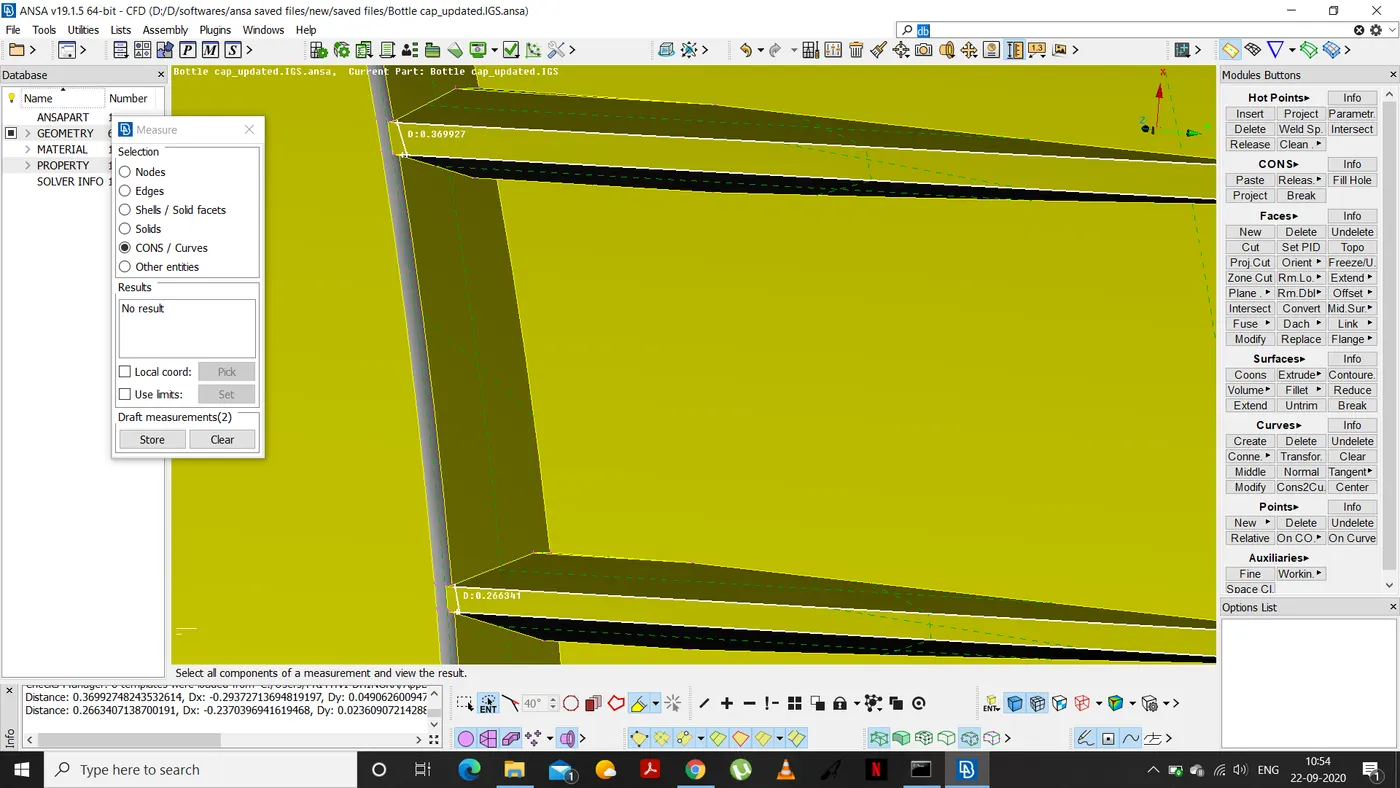
Since the component has variable thickness and only one PID is present, using mid surface(casting) option is more feasible than using offset command however using offset command gives a perfect mid surface without any errors.
Now, using offset and single/multi middle command and then fixing the errors along the way using topo, extend, add new face, cut face and release and paste cons options we create a mid surface.
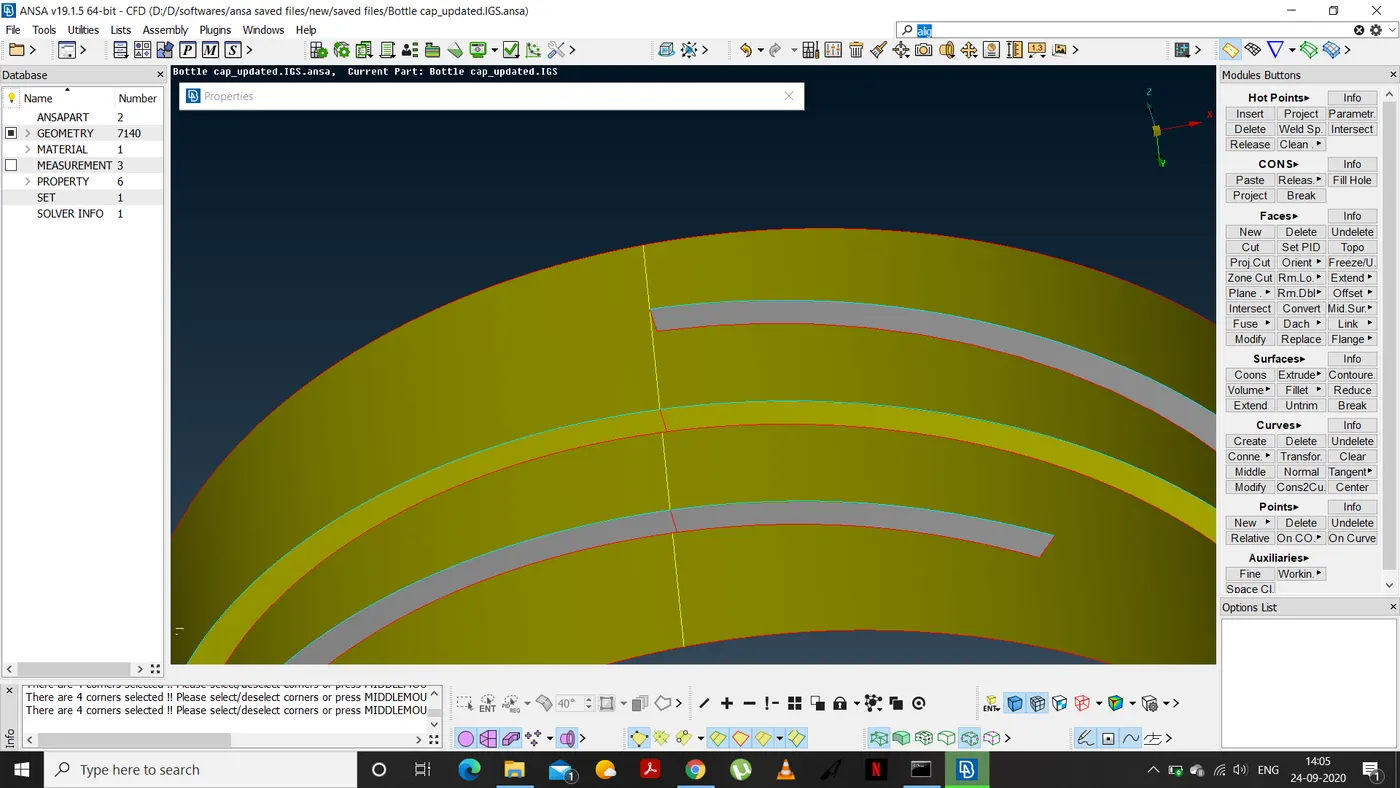
MID SURFACE FOR THREADS-
Using middle option under curves create a mid surface for the thread using top two double cons of the thread. Then project the middle curve on the base surface of the original thread and using new face command create a rectangular face with the curve and the projected curve on the base surface. Finally using fine option under auxilaries fix the thread.
MID SURFACE FOR TOOTH-
First create the mid surface for the base of the tooth by selecting two base cons and setting offset value as -0.702.
Then using middle in curve generation we create a curve for the top region of the tooth and then project the bottom end of the tooth on the base mid surface for the tooth. Connect both using a new face command. Finally use fine option to improve the quality of the tooth mid surface created.
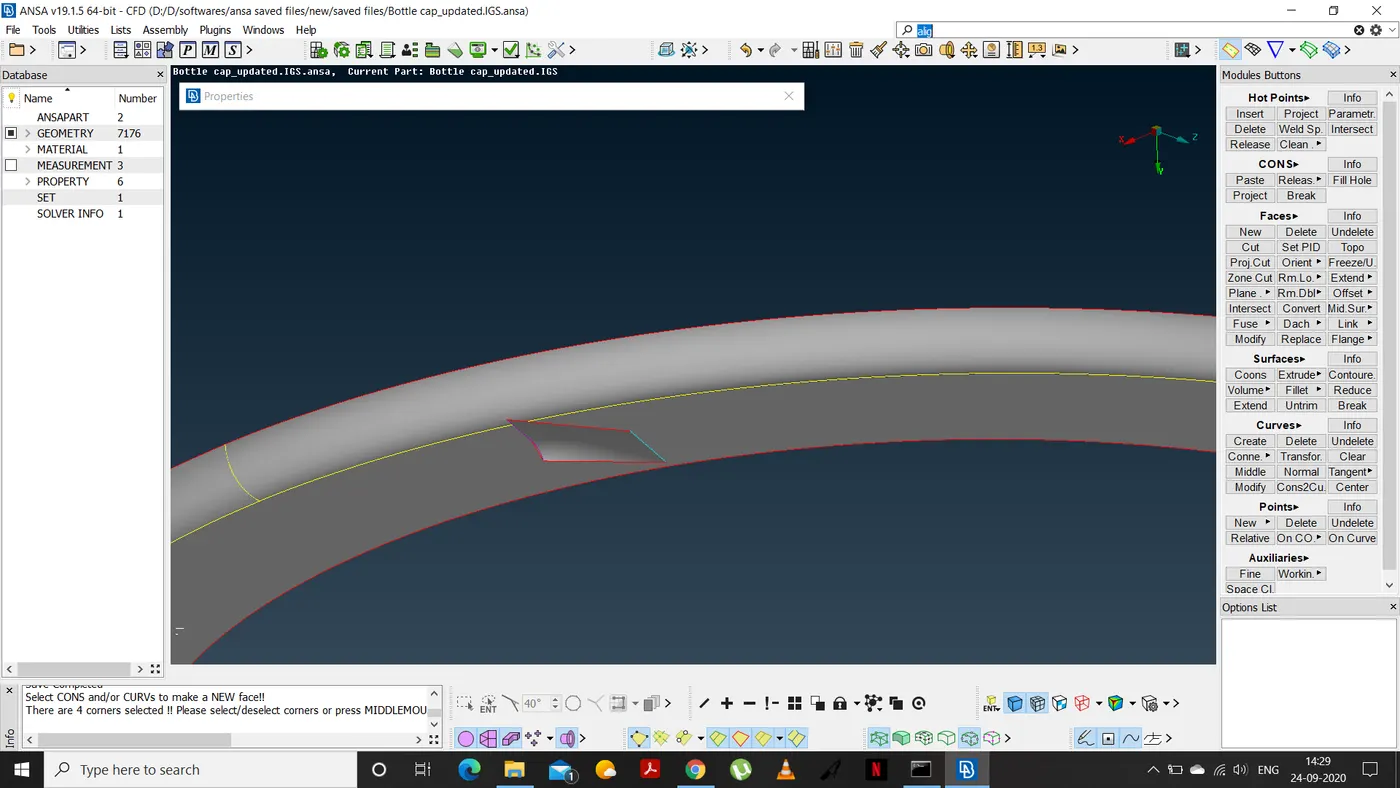
COPY ROTATE THE TOOTH MID SURFACE-
First create an axis of rotation using ON COG under points option and create two points using two circles.
Then using Transform-->copy-->select tooth mid surface click middle mouse to confirm. Then enter the details as follows-
at point X- on cog pt 1.
at dx- on cog pt2.
angle-360/36(angle of circle/total number of teeth)=10
Then click finish.
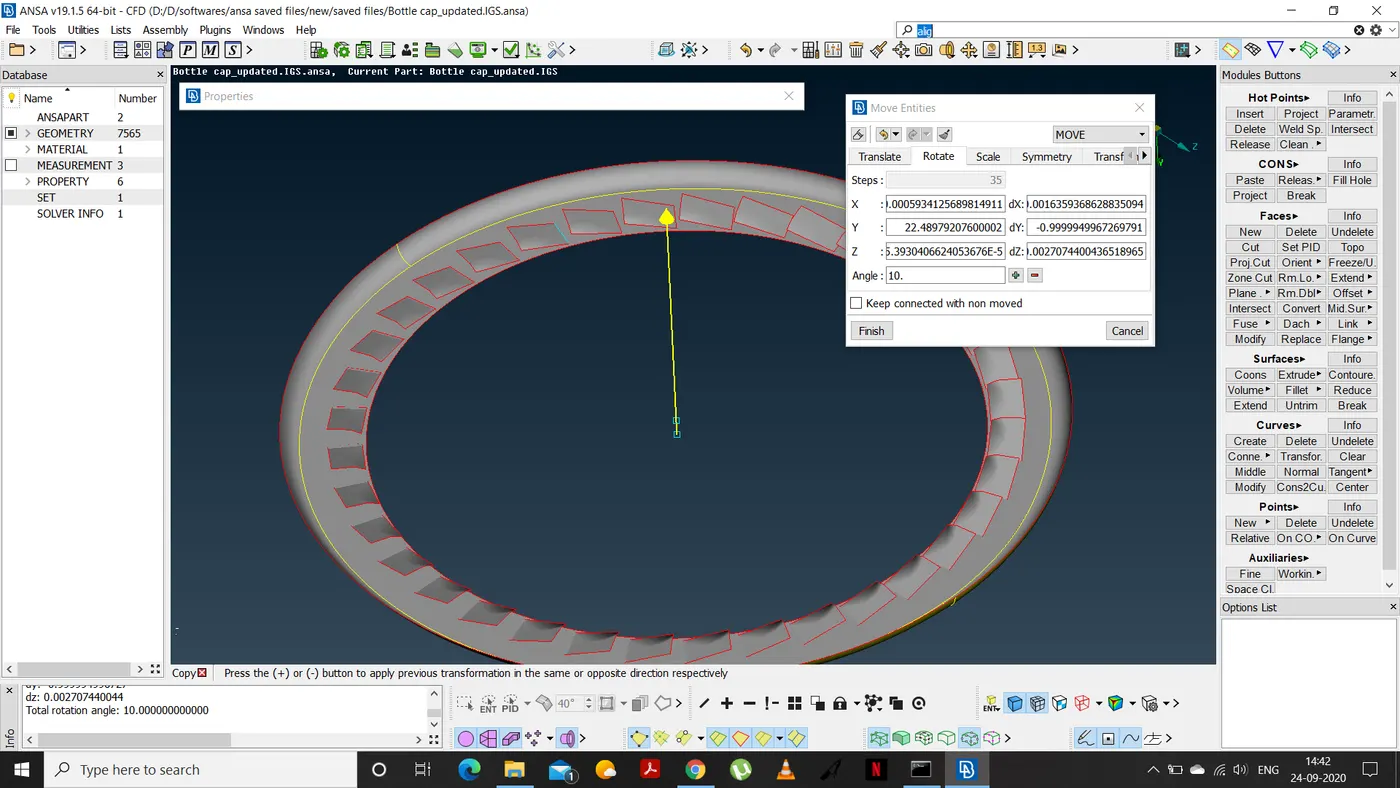
After creating a mid surface for all the components we set the mesh parameters and quality criteria as shown before and start with meshing the entire component.
- MESHING:
HIDE THE PARENT GEOMETRY AND START MESHING EACH COMPONENT INDIVIDUALLY USING COMMANDS LIKE SPOT MESH, BEST MESH, FREE MESH ETC.. UNDER MESH GENERATION TOOLBAR.
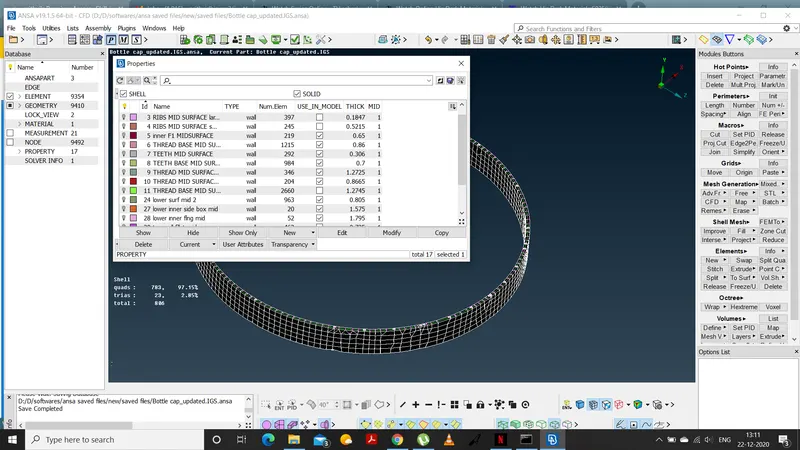
NOTE: FIX ALL MESHING PARAMETER ERRORS USING COMMANDS LIKE- IMPROVE, RECONSTRUCT, SMOOTH, RESHAPE.
TO FIX THE TRIA ERROR USE COMMANDS LIKE MOVE AND PASTE FROM GRIDS TOOLBAR IN MODULES BUTTONS.
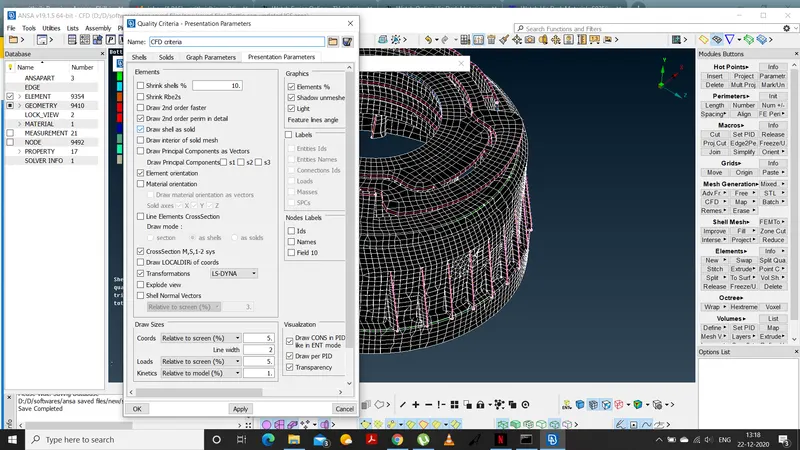
FINALLY, UNDER QUALITY CRITERIA-->PRESENTATION PARAMETERS-->ELEMENTS, SWITCH ON-->DRAW SHELL AS SOLIDS AND CLICK APPLY.
LEARNING OUTCOMES:
In this challenge we learned how to extract middle surface of a complex component using severel commands.
Also learned how to mesh this complex component by separating it into smaller components and then meshing it.
Also learned how to fix all kinds of errors like geometrical errors, tria errors, meshing errors etc...
CONCLUSION:
In conclusion,middle surface for the bottle cap was extracted in parts(several components)and then the meshing was done of each component separately after removing all geometrical errors and then fixing all the meshing errors.
Finally a thickness was assigned using "draw shell as solid" command.
TRIA ERROR:5.38%