Week 3 Verification of Weld Joints
Week 3 Challenge: Verifications of Weld Joints Challenge
Course: Structural Analysis Using Ansys Workbench
Submitted by: Amanpreet Singh Whan
Supervisor: Vineet G
March 03, 2022
List of Figures
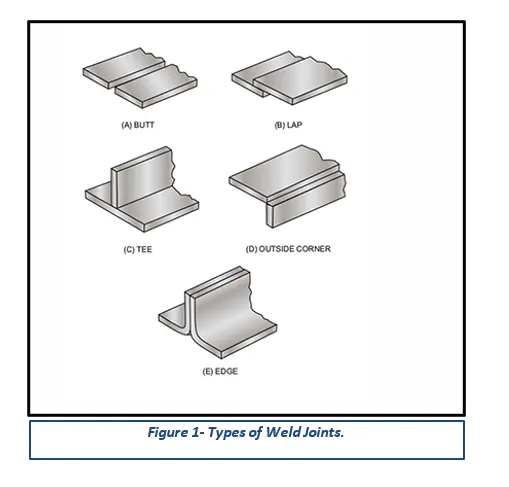
Figure 1- Types of Weld Joints.
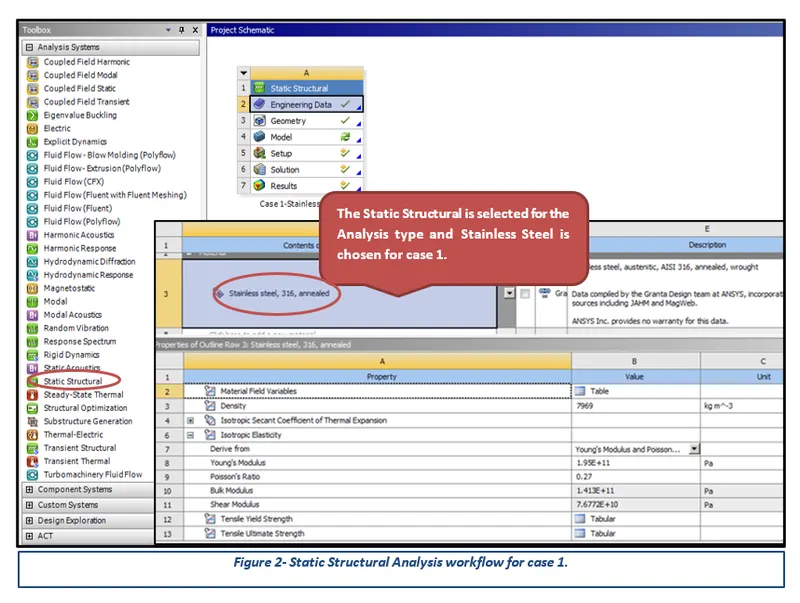
Figure 2- Static Structural Analysis workflow for case 1.
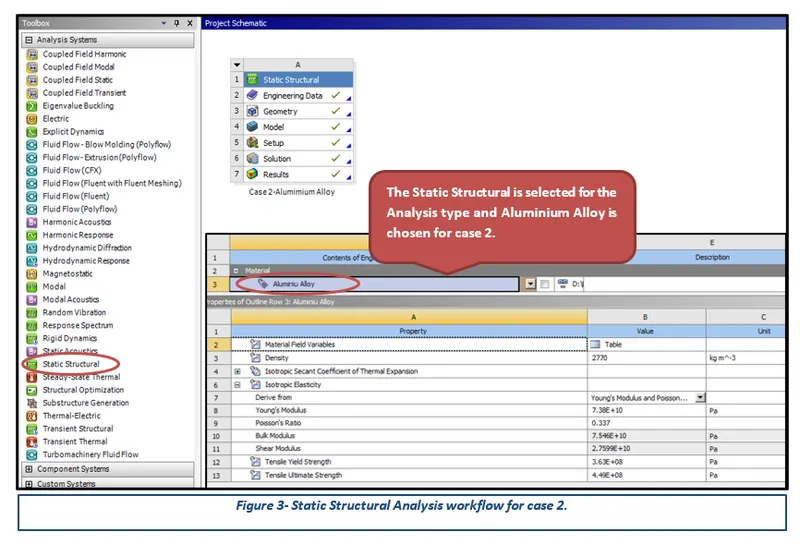
Figure 3- Static Structural Analysis workflow for case 2.
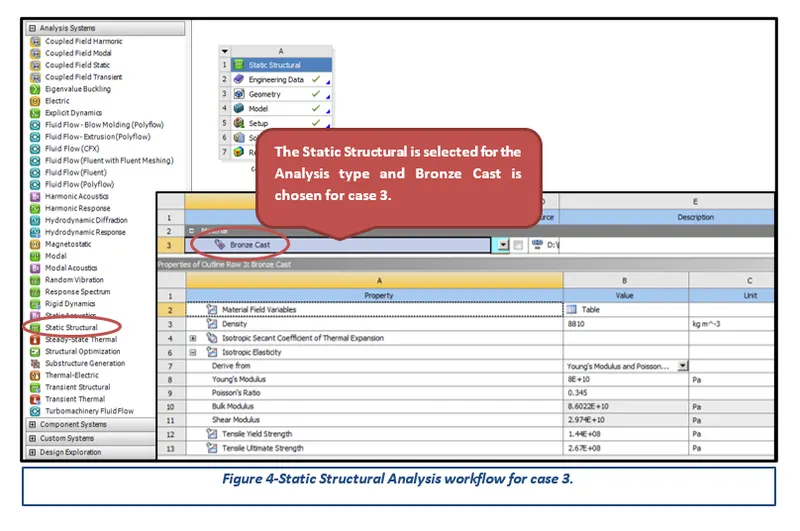
Figure 4-Static Structural Analysis workflow for case 3.
Figure 5-Imported given CAD Model.
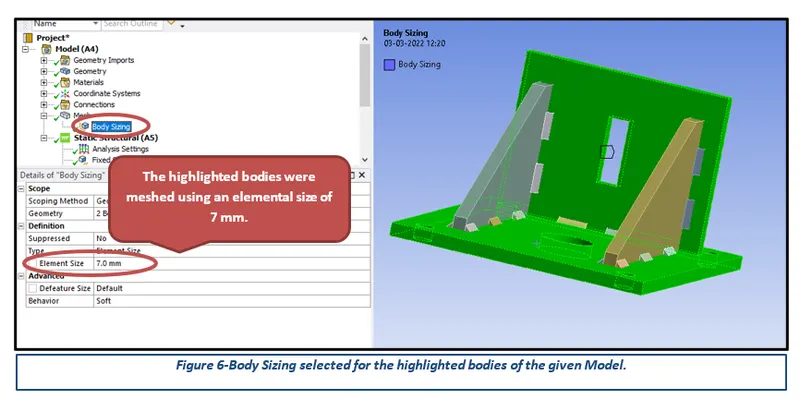
Figure 6-Body Sizing selected for the highlighted bodies of the given Model.
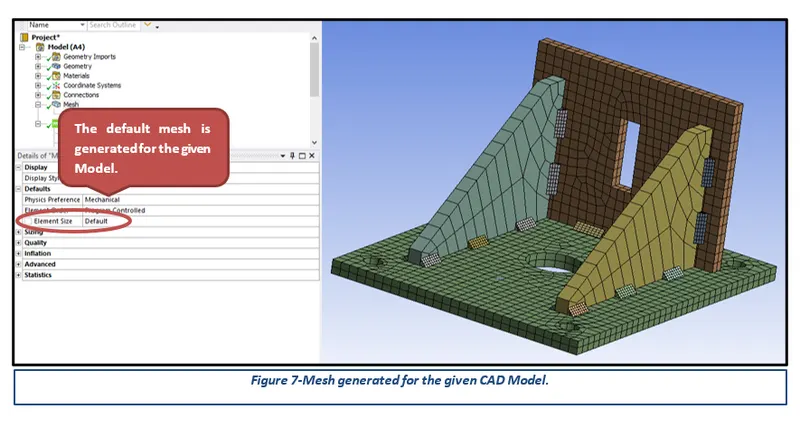
Figure 7-Mesh generated for the given CAD model.
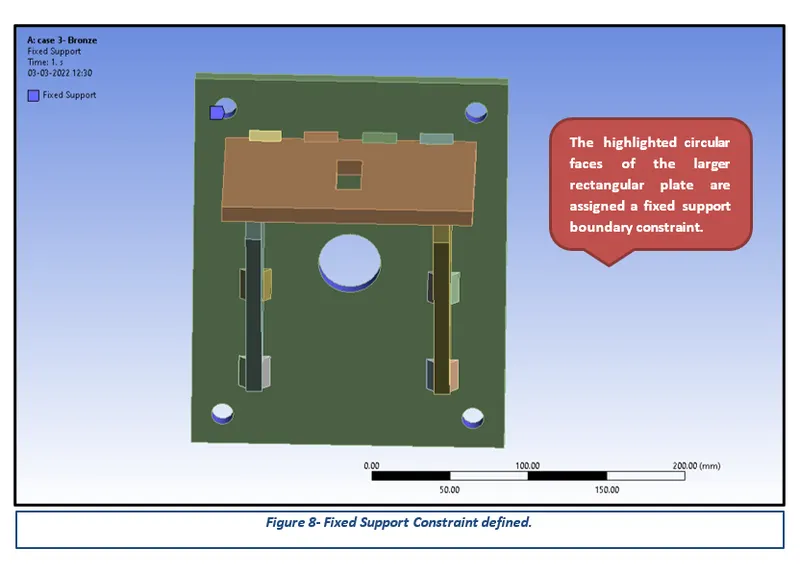
Figure 8- Fixed Support Constraint defined.
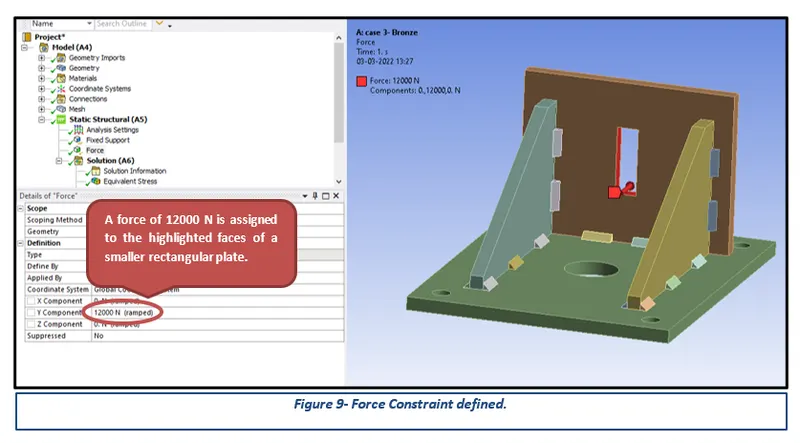
Figure 9- Force Constraint defined.
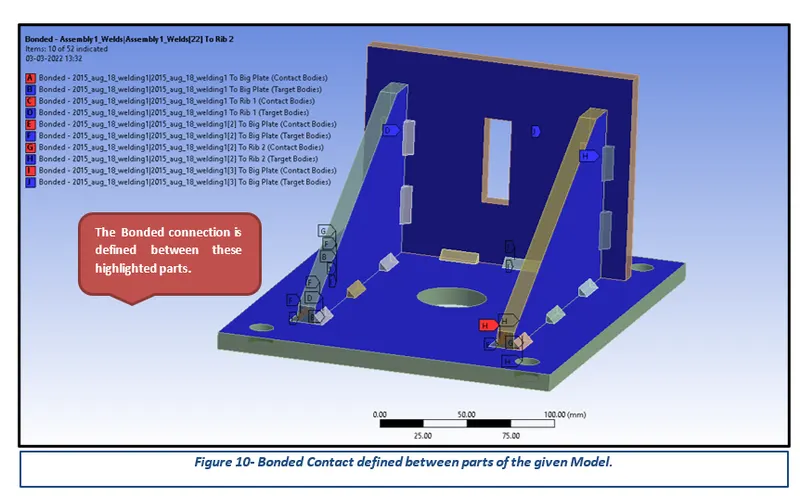
Figure 10- Bonded Contact defined between parts of the given Model.
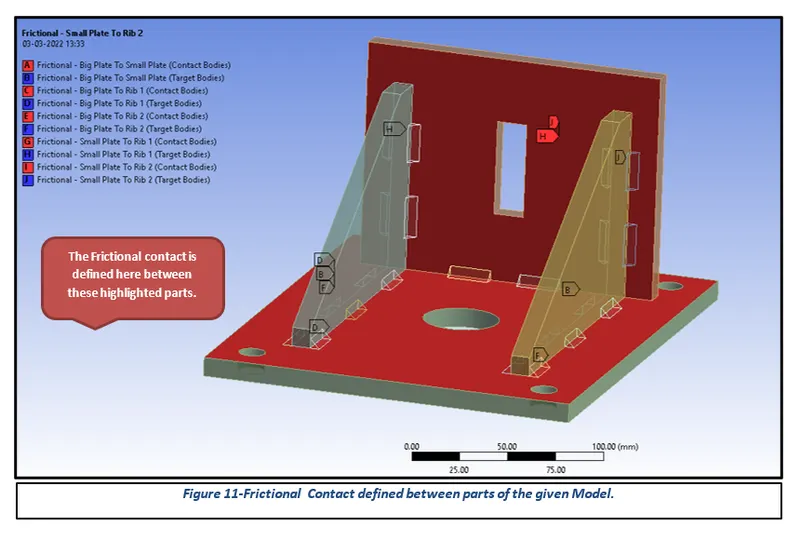
Figure 11-Frictional Contact defined between parts of the given Model.
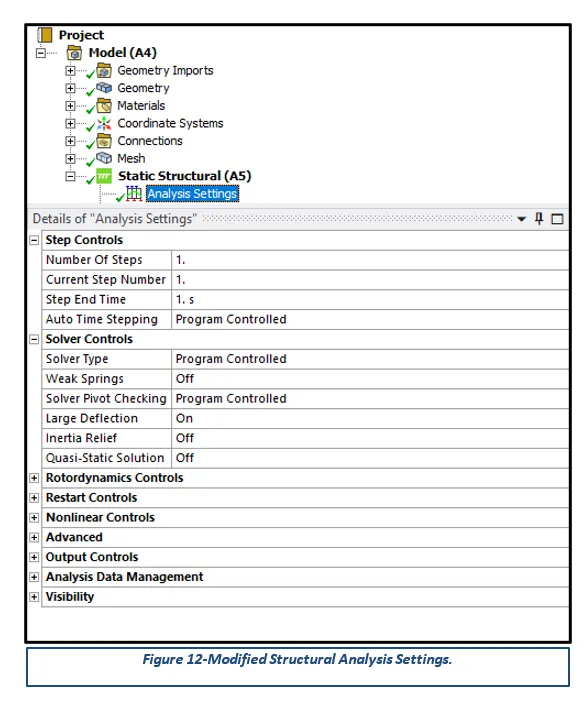
Figure 12-Modified Structural Analysis Settings.
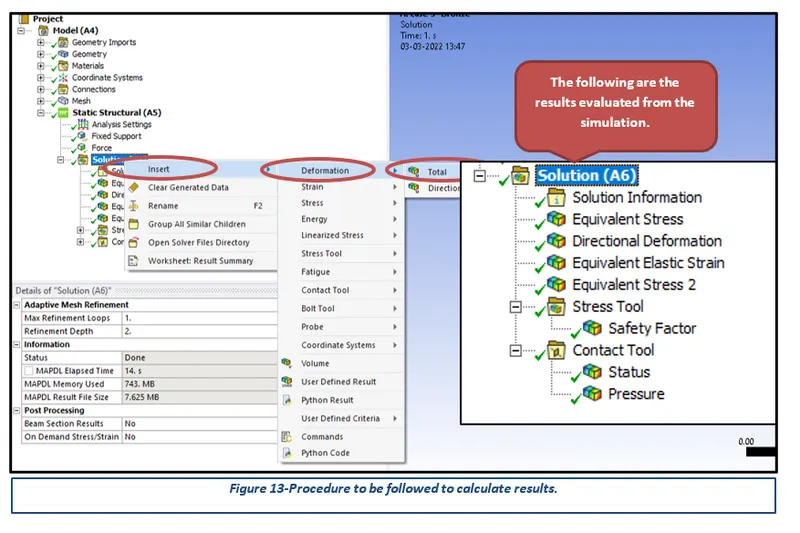
Figure 13-Procedure to be followed to calculate results.
Table of Contents
3.1 Importing and Meshing of CAD Model
1 Introduction
ANSYS is a general-purpose, finite-element modeling package for numerically solving a wide variety of mechanical problems. These problems include static/dynamic, structural analysis, heat transfer, and fluid problems, as well as acoustic and electromagnetic problems. There are two methods to use ANSYS. One method is to use the graphical user interface (GUI). This method follows the conventions of popular Windows and X-Windows-based programs. Another method is to use command files. The command-file approach has a steeper learning curve for many, but it has the advantage that the entire analysis can be described in a small text file, typically in less than 50 lines of commands. This approach enables easy model modifications and minimal file-space requirements. The ANSYS environment contains two windows: the main window and an output window. A large number of files are created when ANSYS simulation is run.
Theory
Welding is a complex craft that requires patience, an eye for detail, and creativity. In order to do their job successfully, welders must have an in-depth understanding of the various techniques and practices used in the industry, which includes welding joint types. According to the American Welding Society (AWS), a joint can be defined as, “How materials fit together.” The applications of welding are endless, and different jobs require different types of welds and joints. There are five major welding joint types, which are each made to stand up to the needs and forces of different applications.
The term “weld joint design” refers to the way pieces of metal are put together or aligned with each other. Each joint’s design affects the quality and cost of the completed weld. Selecting the most appropriate joint design for a welding job requires special attention and skill. There are five basic welding joint types commonly used in the industry, according to the AWS: Butt joint, Tee joint, Corner joint, Lap joint, Edge joint.
Butt Joint Welding:
A butt joint, or butt weld, is a joint where two pieces of metal are placed together in the same plane, and the side of each metal is joined by welding. A butt weld is the most common type of joint that is used in the fabrication of structures and piping systems. It’s simple to prepare, and many different variations can be applied to achieve the desired result.
Butt welds are made in a variety of ways, and each one serves a different purpose. Varying factors include the shape of the groove, layering, and width of the gap. Listed below are some typical examples of butt weld joints: Square, Single bevel, Double bevel, Single J, Double J, Single V, Double V, Single U, Double U grooves.
Tee Joint Welding:
Tee welding joints are formed when two pieces intersect at a 90° angle. This results in the edges coming together in the center of a plate or component in a ‘T’ shape. Tee joints are considered to be a type of fillet weld, and they can also be formed when a tube or pipe is welded onto a base plate. With this type of weld, it’s important to always ensure there is effective penetration into the roof of the weld. There are a handful of welding styles that can be used to create a tee joint: Plug weld, Slot weld, Bevel-groove weld, Fillet weld, J-groove weld, Melt-through weld, Flare-bevel-groove weld.
Corner Joint Welding:
Corner joints have similarities to tee welding joints. However, the difference is the location of where the metal is positioned. In the tee joint, it’s placed in the middle, whereas corner joints meet in the ‘corner’ in either an open or closed manner—forming an ‘L’ shape. These types of joints are among some of the most common in the sheet metal industry, such as in the construction of frames, boxes, and other applications. The styles used for creating corner joints include V-groove, J-groove, U-groove, spot, edge, fillet, corner-flange, bevel-groove, flare-V-groove, and square-groove or butt.
Lap Joint Welding:
Lap welding joints are essentially a modified version of the butt joint. They are formed when two pieces of metal are placed in an overlapping pattern on top of each other. They are most commonly used to join two pieces with differing thicknesses together. Welds can be made on one or both sides. Lap joints are rarely used on thicker materials and are commonly used for sheet metal.
Edge Joint Welding
In an edge joint, the metal surfaces are placed together so that the edges are even. One or both plates may be formed by bending them at an angle. The purpose of a weld joint is to join parts together so that the stresses are distributed. The forces causing stresses in welded joints are tensile, compression, bending, torsion, and shear. The following styles are applicable for edge joints: U-groove, V-groove, J-groove, Corner-flange, Bevel-groove, Square-groove, Edge-flange.
The challenge presents an FEA study conducted using ANSYS to simulate three different types of welding using three different weld materials.
2 Aims
- Simulate three different types of welding using three different weld materials.
- Apply appropriate Boundary Conditions and Joint Loads.
- Determine Total Deformation and Maximum Stress results for the performed simulations and compare the results for the same.
3 Methodology and Results
The section describes the different stages that were performed using an engineering tool Ansys Workbench 2022 for the completion of the Week 3 Challenge. These stages can be further broadly sub-categorized into three key steps, importing the CAD model to apply the boundary conditions and finally performing the simulation to obtain the desired results.
3.1 Importing and Meshing of CAD Model
After opening the Ansys Workbench, the first step is to select the Analysis type and then define appropriate material from the Engineering Data options for the given CAD model. Considering the challenge requirements, Static Structural was selected for the System Analysis type while three different materials such as Stainless Steel, Aluminium Alloy, and Bronze Cast were selected for the challenge purposes. The following figures highlight the analysis system and material card parameters in detail.
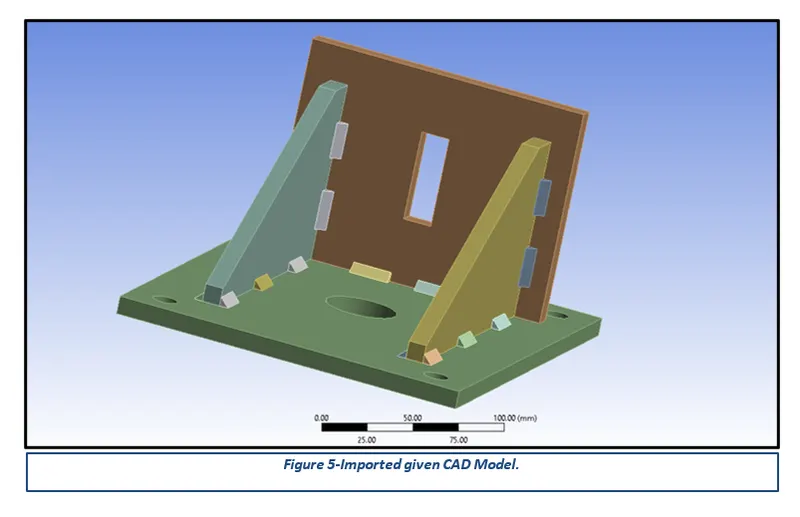
After updating the CAD model in the Ansys Workbench, the next step is to generate a good quality mesh. Meshing is a phase where the CAD geometry is discretized to represent the computational domain in which the solver will discover a solution. A refined mesh helps to achieve better results. The mesh was generated in two steps: a body sizing method with an element size of 7 mm was used to refine the faces in contact; for other areas, the mesh was generated using the default element size.
3.2 Boundary Constraints
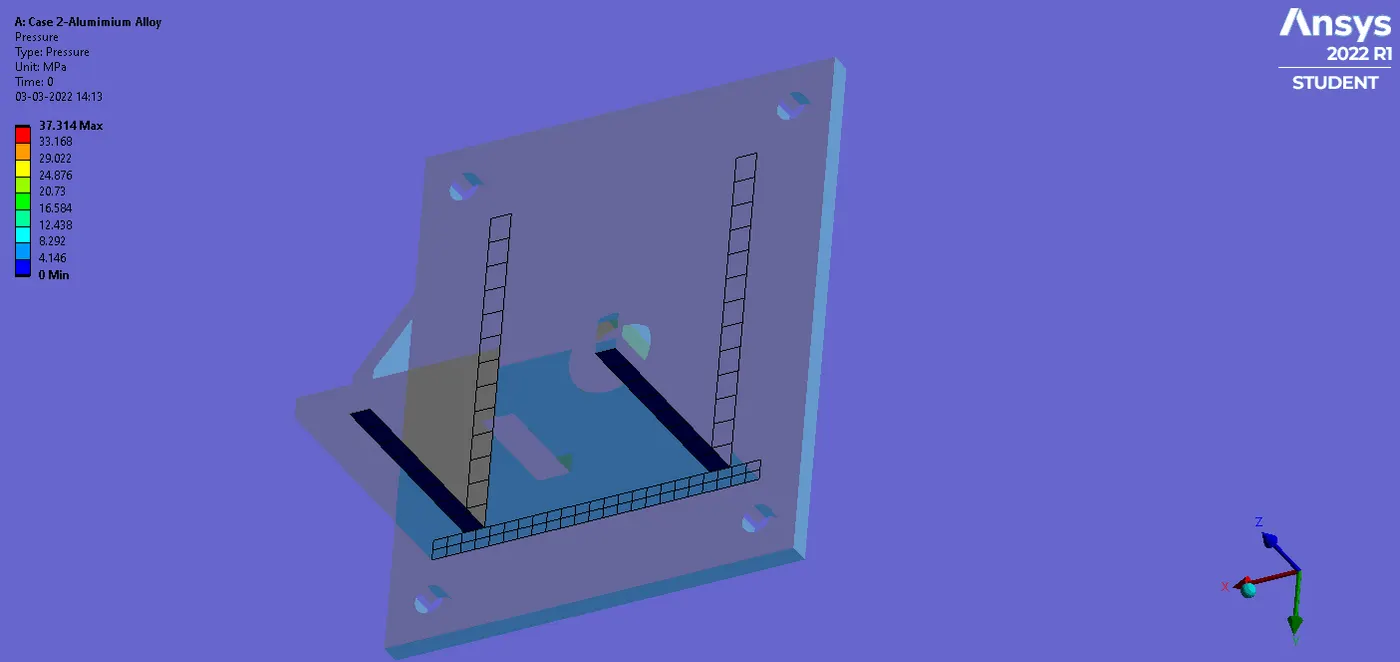
Boundary conditions are constraints necessary for the solution of a boundary value problem. The Fixed support constraint restricts all the translation degrees of freedom over the assigned entities to be zero. The force boundary condition applies a distributed force to the structure. It can be assigned to any number of faces of a structure. This boundary condition works as surface traction on each element of the assigned topological entity and its value is proportional to each element’s area.
Two Boundary constraints, Fixed Support, and Force (directional) are assigned to fulfill the challenge requirements. The process followed to assign both the boundary constraints are presented in the following figures.
3.3 Contact
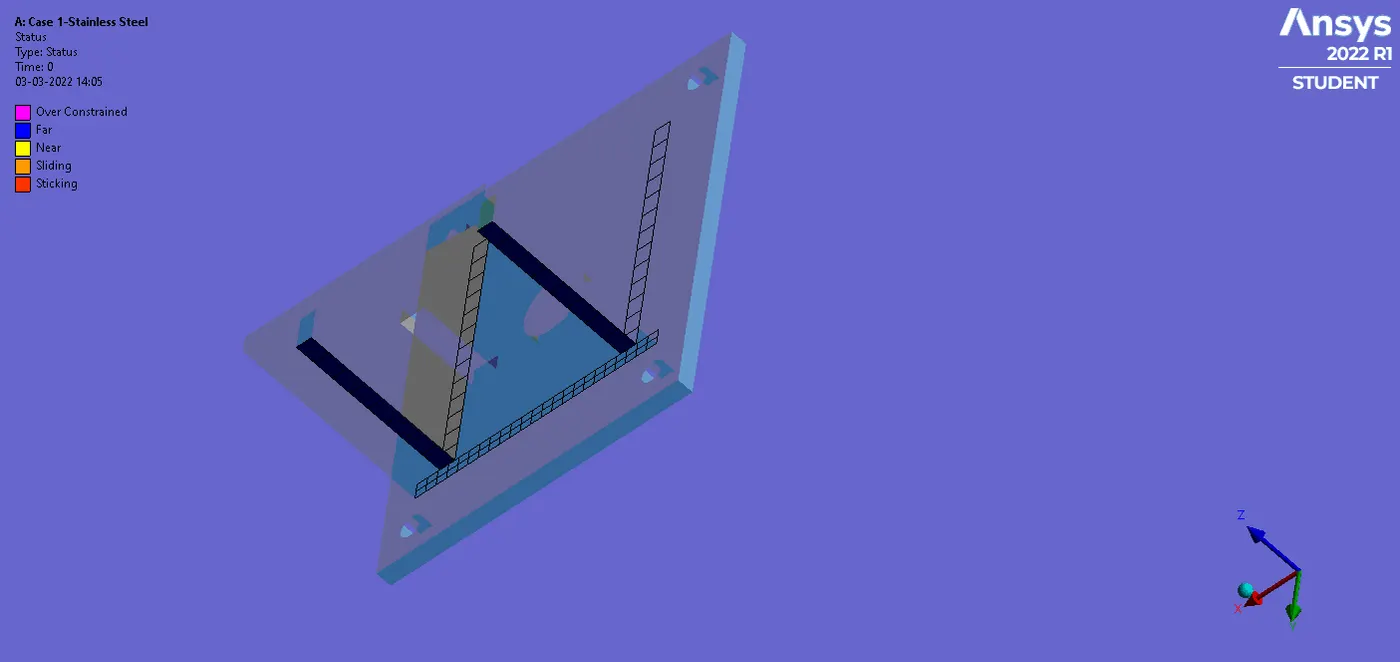
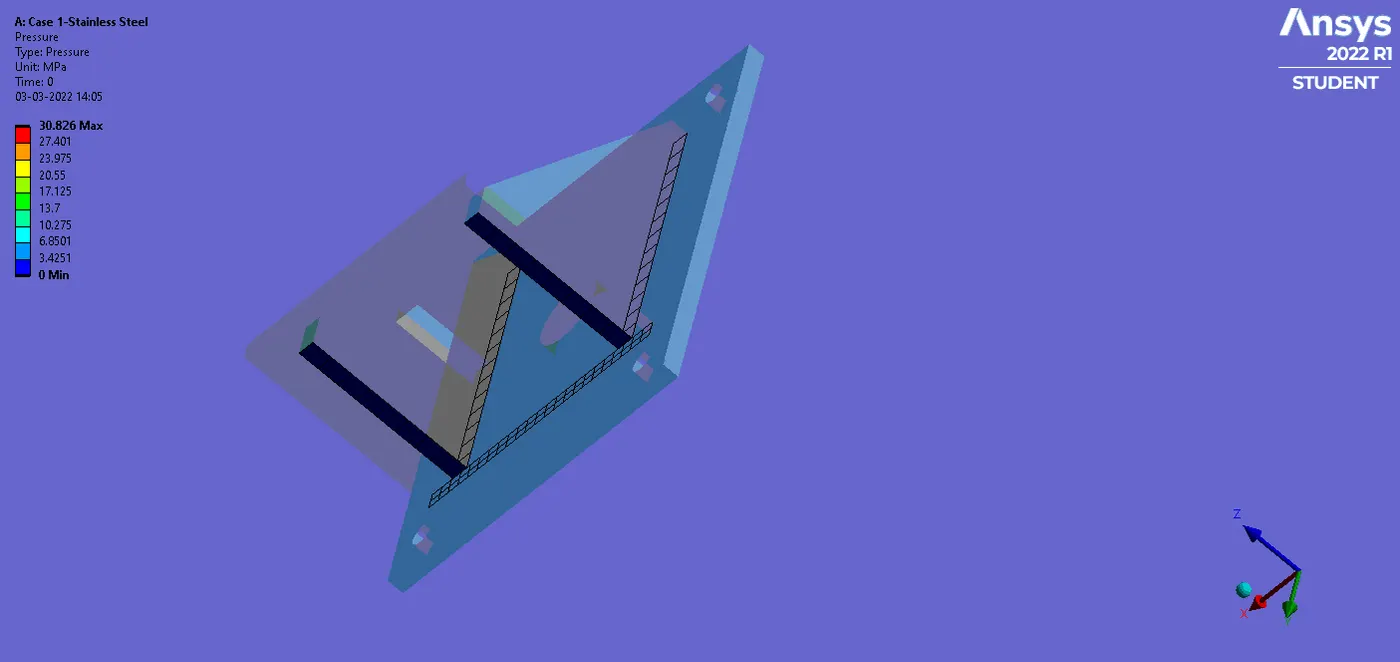
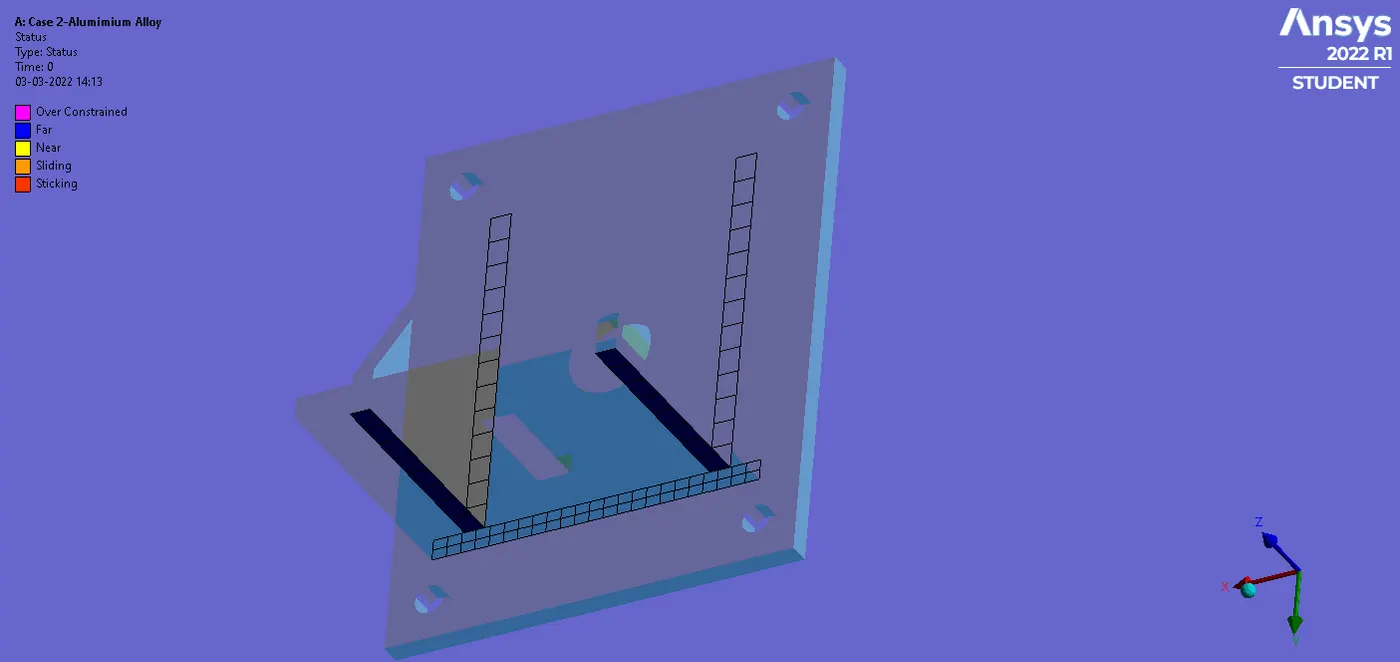
In structural analysis software, the contact is generated by pair. Three different contact behaviors are available. They are named node to node (point to point), node to the surface (point to the surface), and surface to surface. As default in Ansys software, point to surface and surface to surface contact types are used. For the point to surface contact, the “point” is contact, and the “surface” is the target. Several contact types are used. These names might be called with different names according to software. In Ansys software, contact names are titled frictional, frictionless, rough, bonded, and have no separation. The Frictional Contact and Bonded contact were defined for the challenge purposes and are represented in the following figures.
3.4 Analysis Settings
The given spur gear model was simulated for a single step to determine appropriate total deformation and other stress-strain results. Therefore, the Large Deflection option was turned on to prevent Penetration and Intersection errors. The following figure represents the modifications performed in the analysis settings.
Simulation Results
To visualize the simulation or results, the desired output cards have to be created. Total Deformation, Equivalent Elastic Strain, and Equivalent Stress (Von Mises Stress) cards were created using the procedure illustrated in the following picture. It must be noted that the results have to be generated by running the solve command.
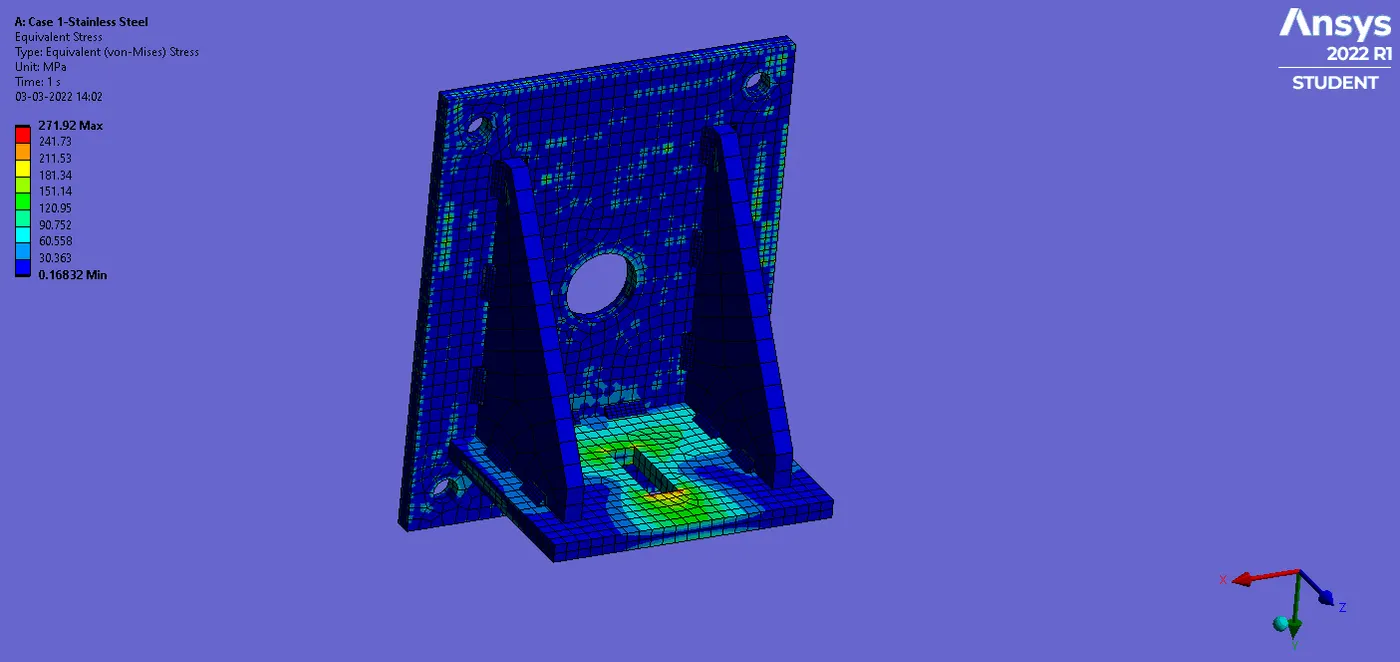
Case1: Simulation Results of Model having Stainless Steel Material
Stress Results:
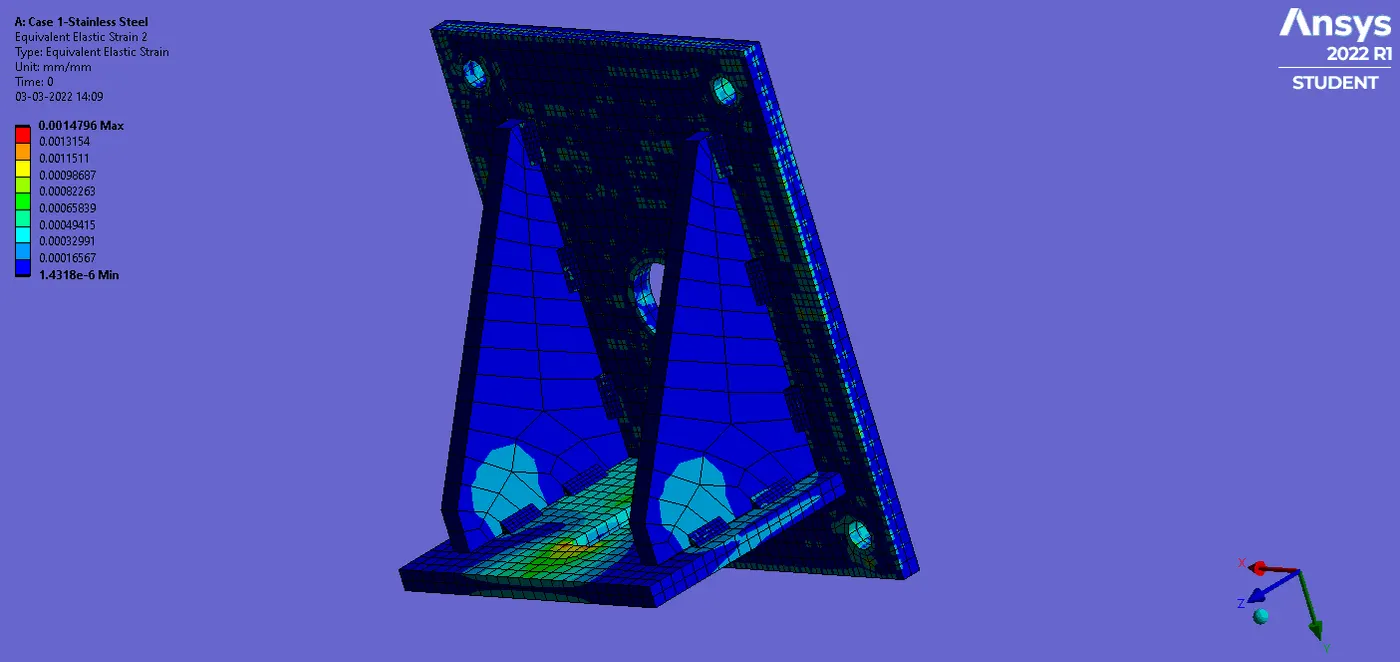
Strain Results:
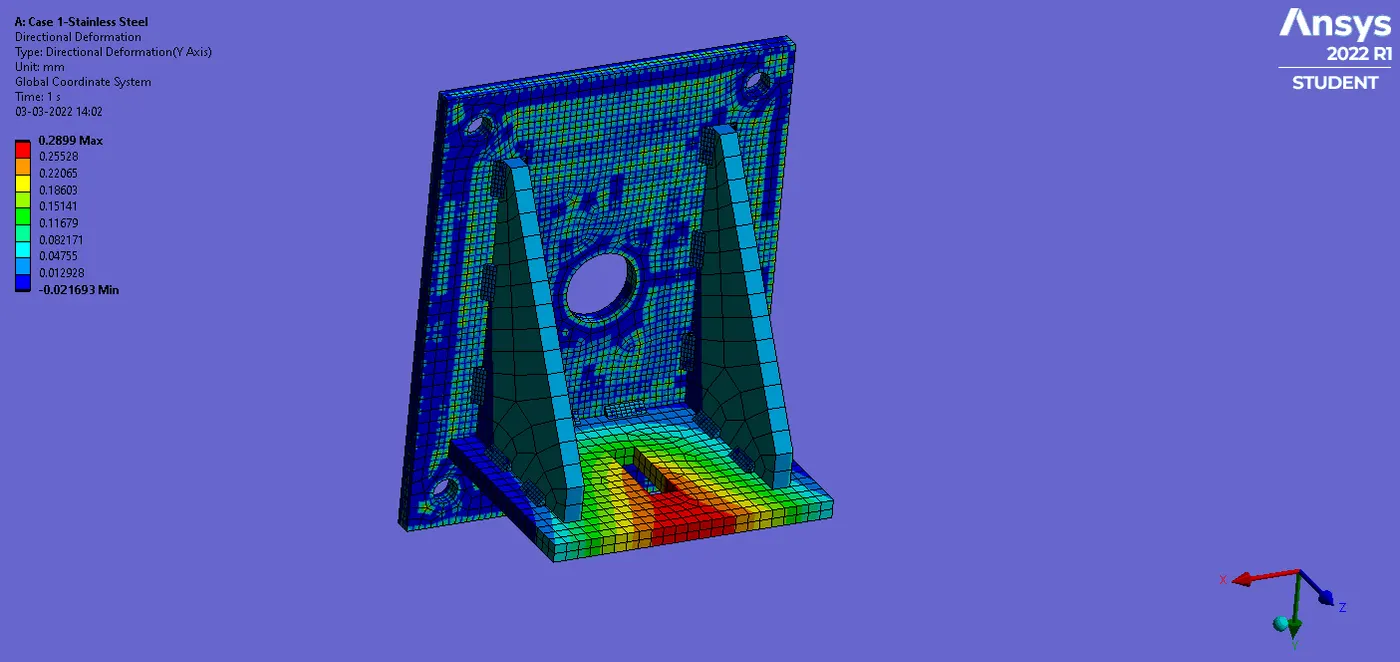
Deformation Results:
Contact Tool Results:
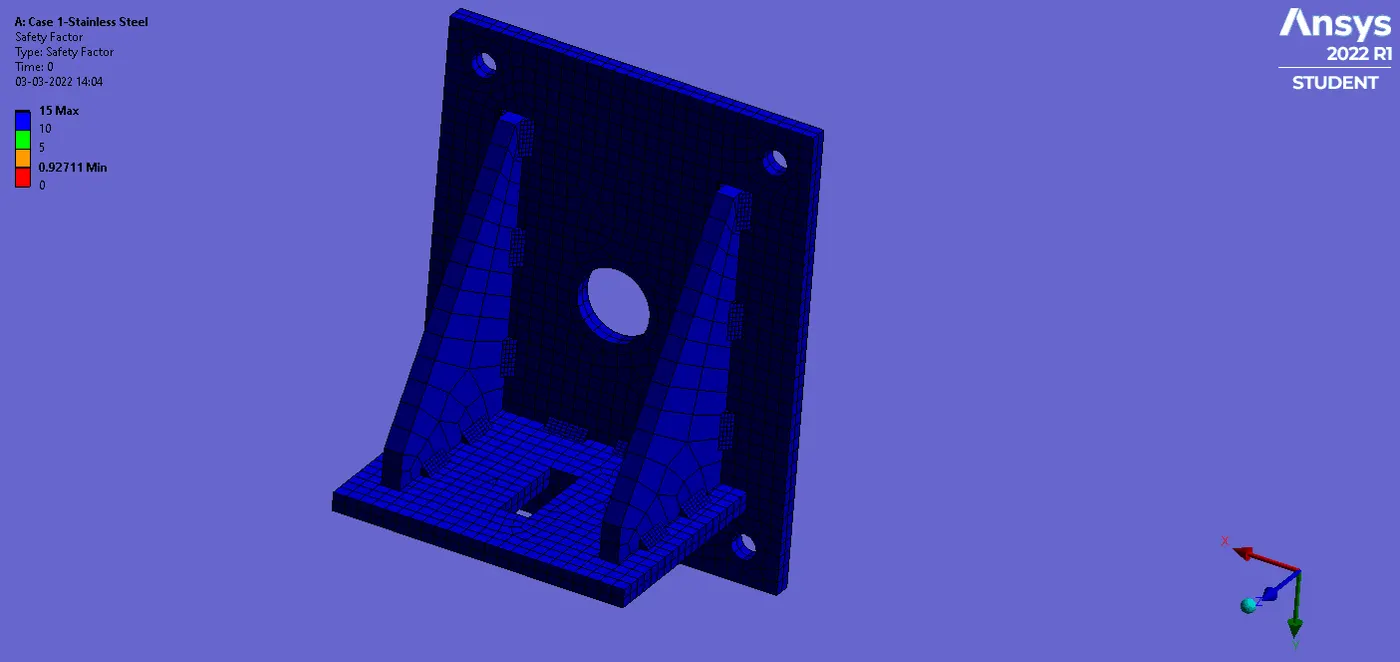
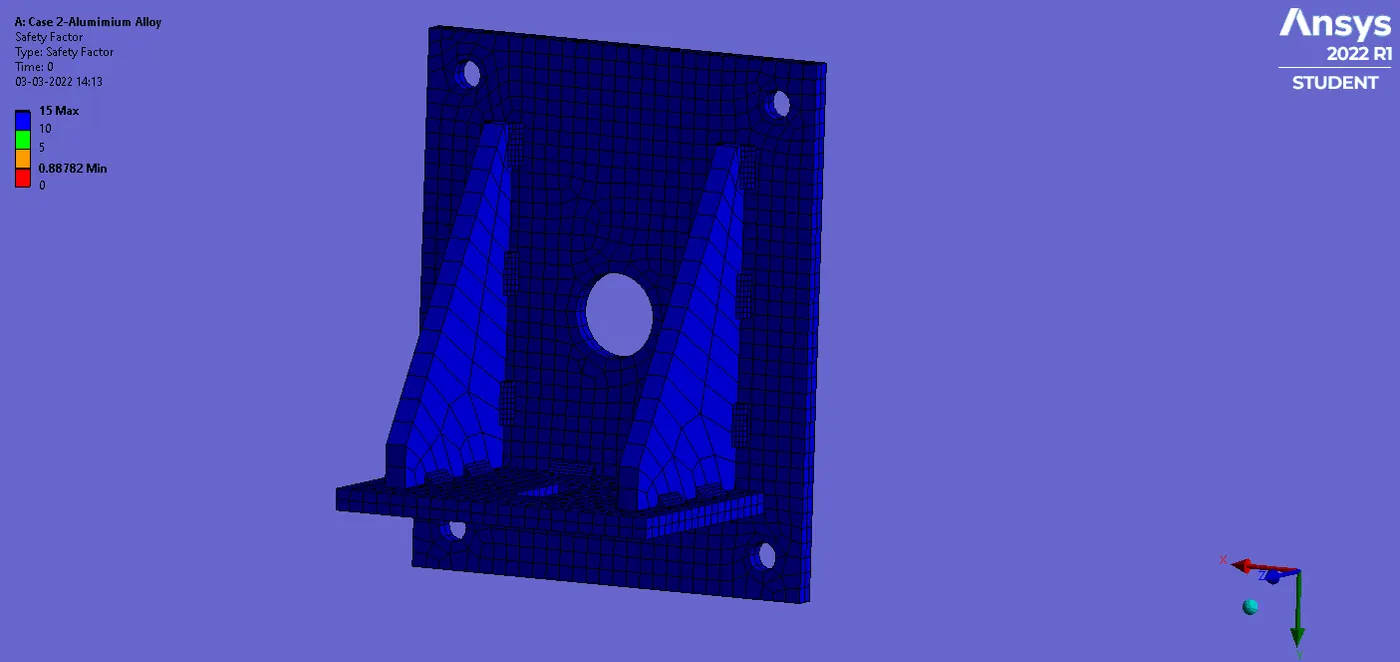
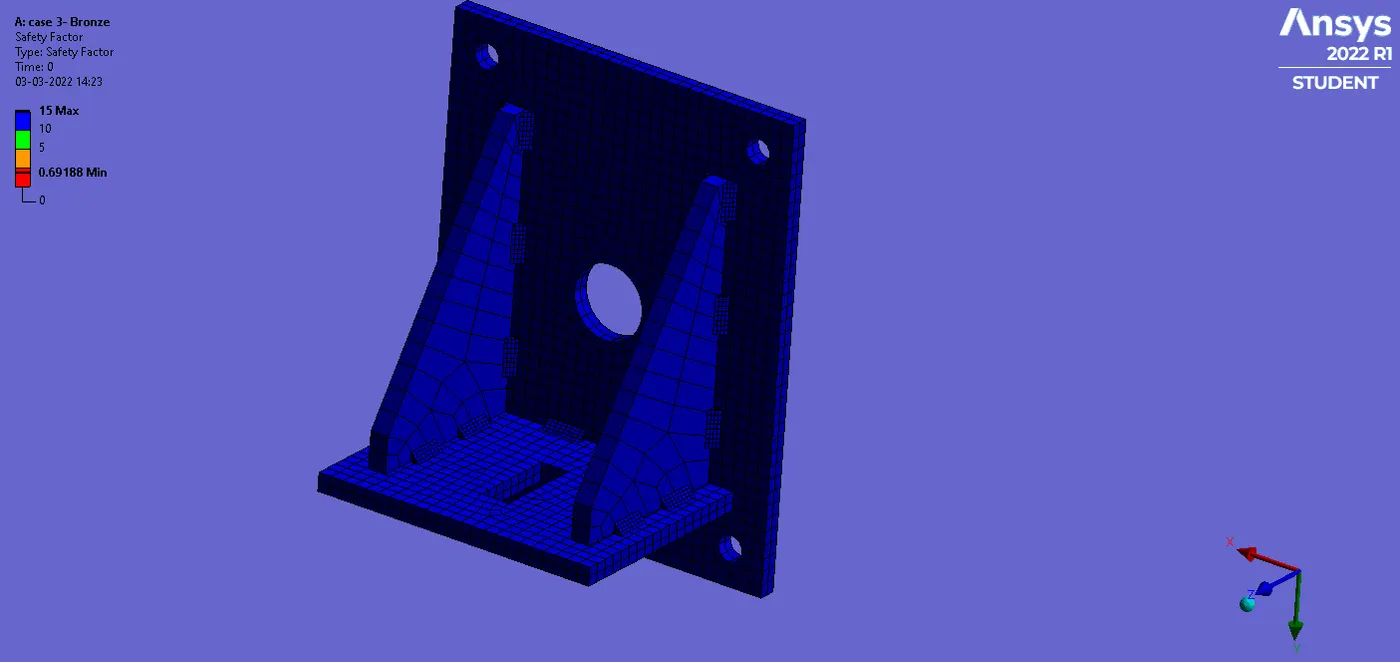
Safety Factor Results:
Case2: Simulation Results of Model having Aluminium Alloy Material
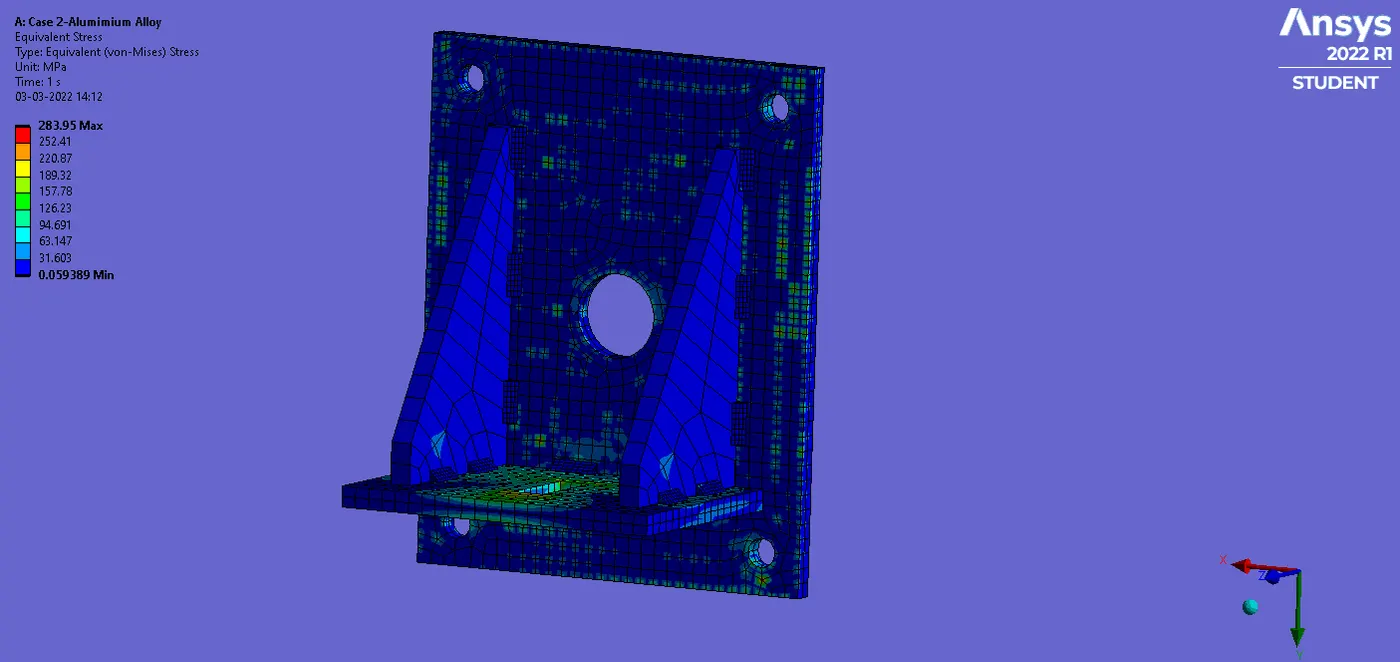
Stress Results:
Strain Results:
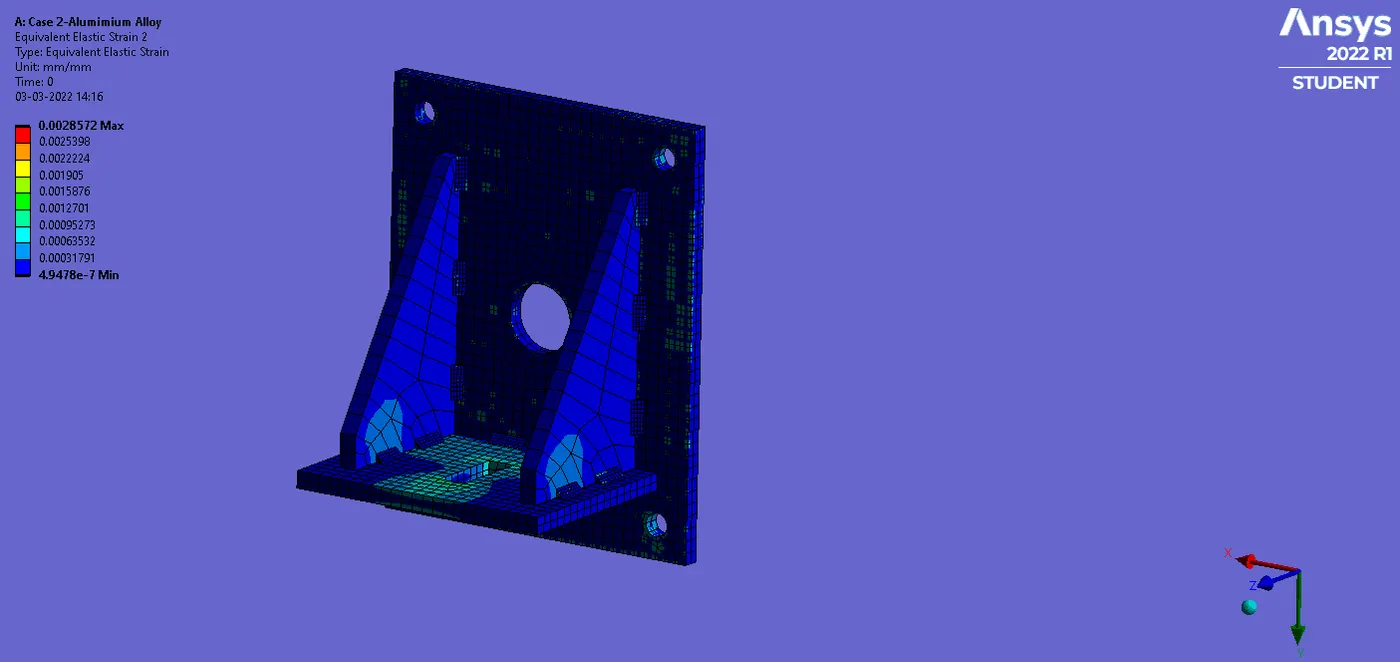
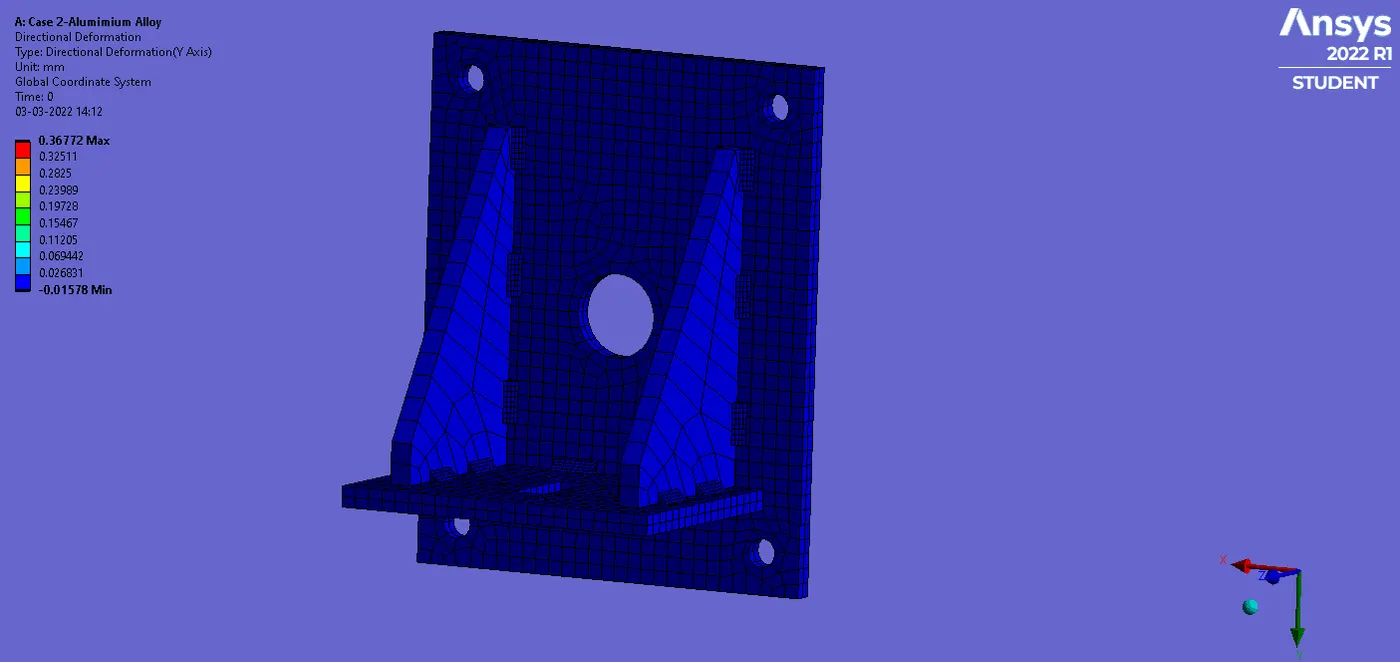
Deformation Results:
Contact Tool Results:
Safety Factor Results:
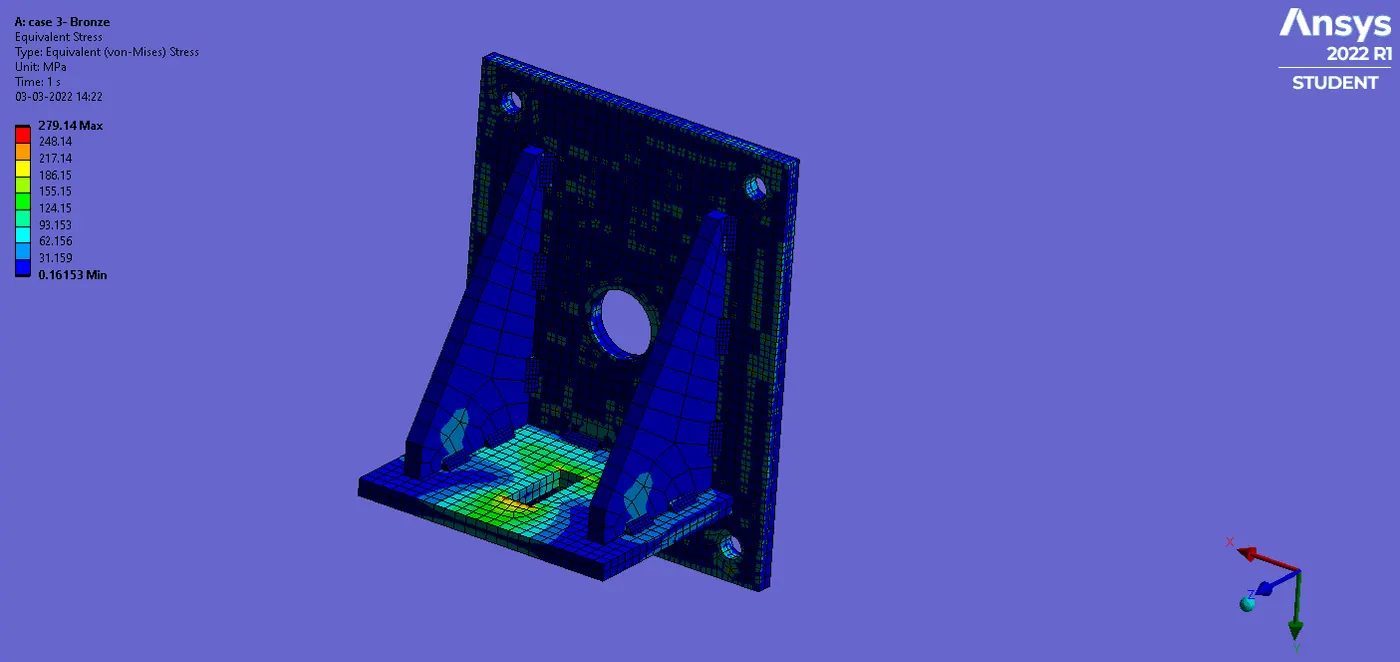
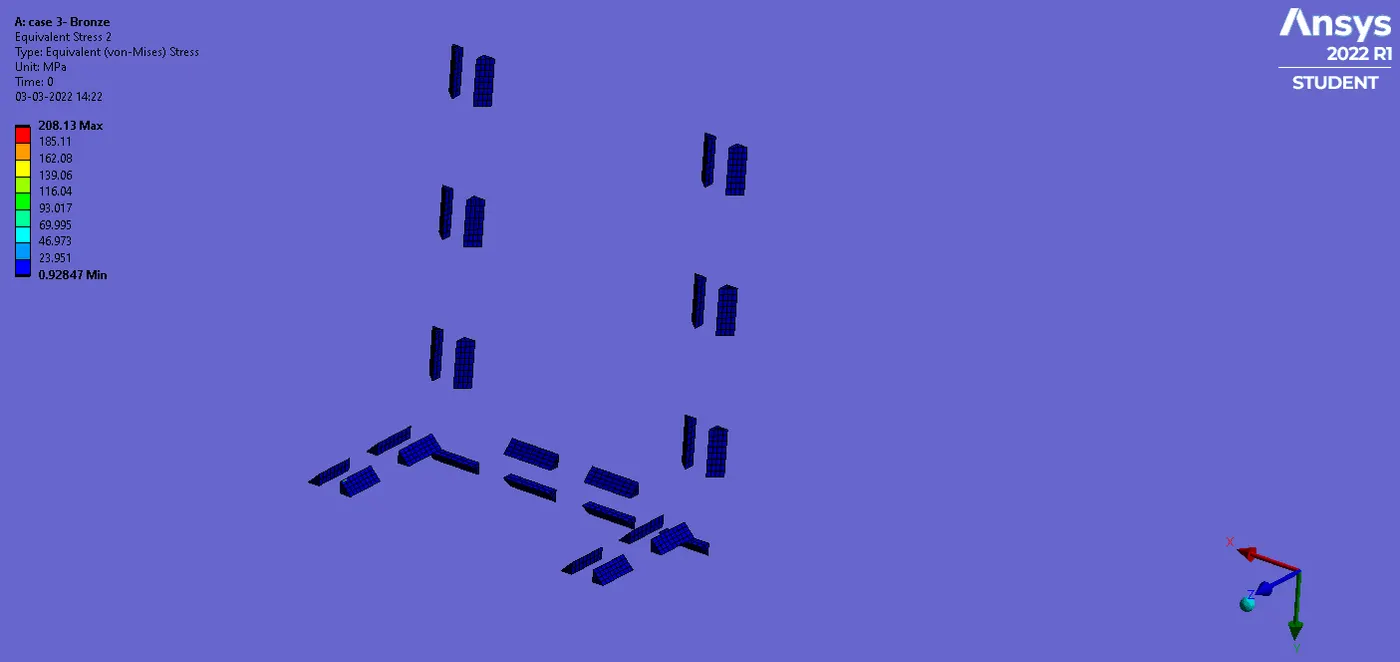
Case3: Simulation Results of Model having Cast Bronze Material
Stress Results:
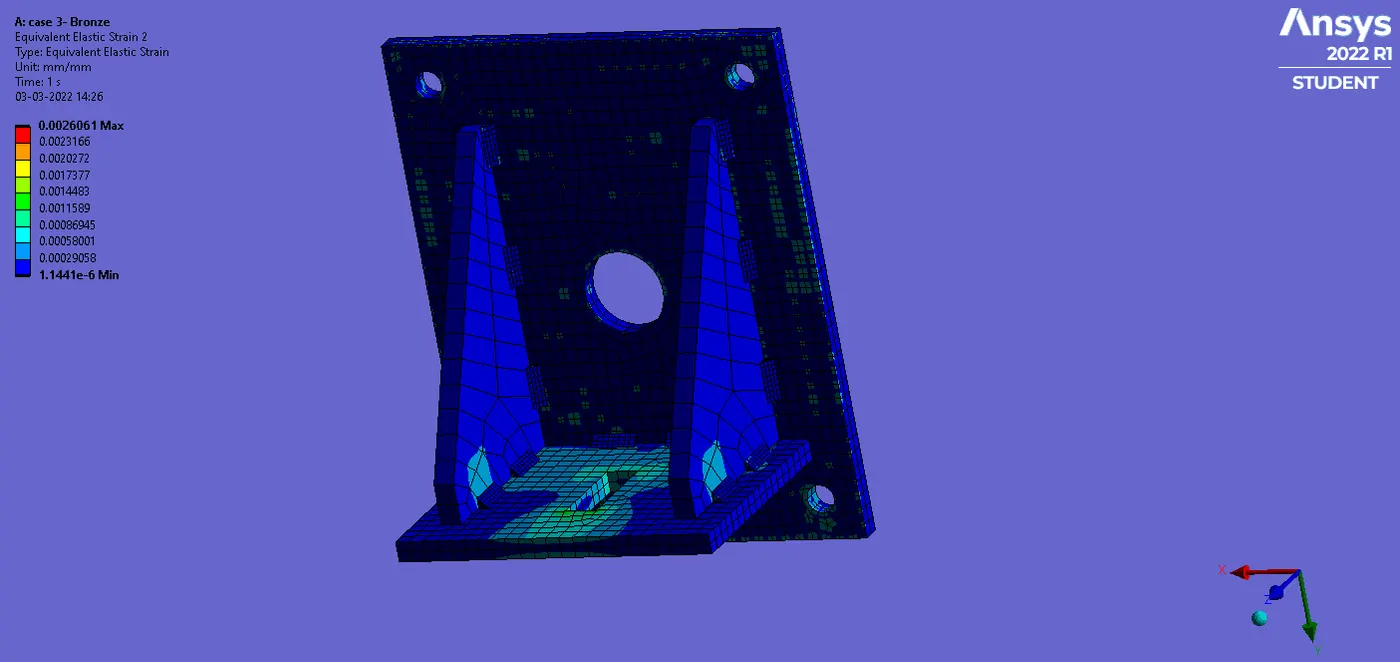
Strain Results:
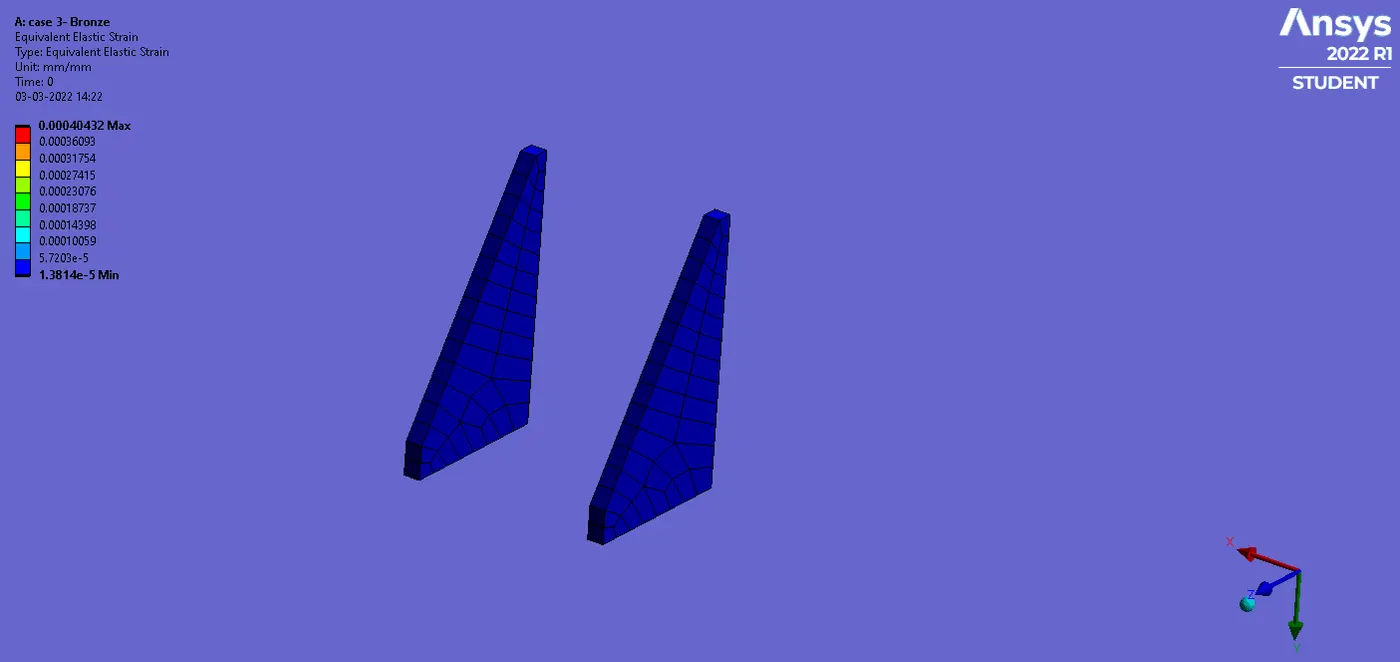
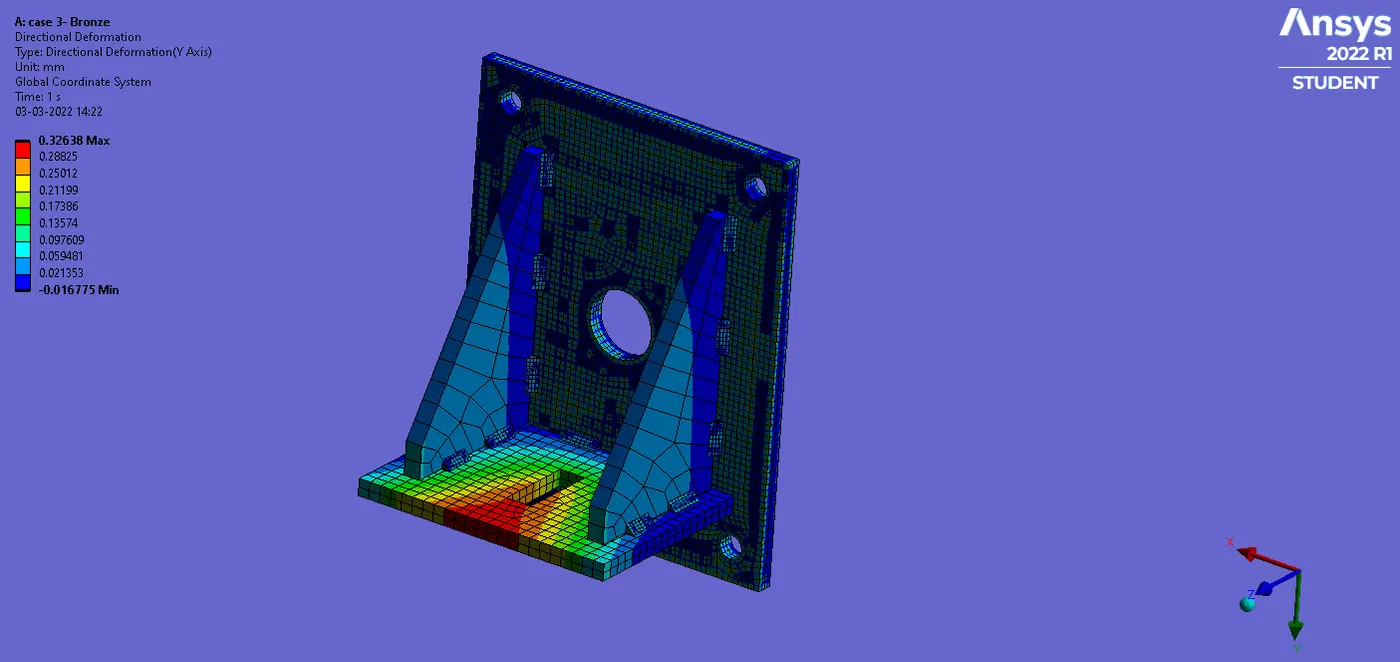
Deformation Results:
Contact Tool Results:
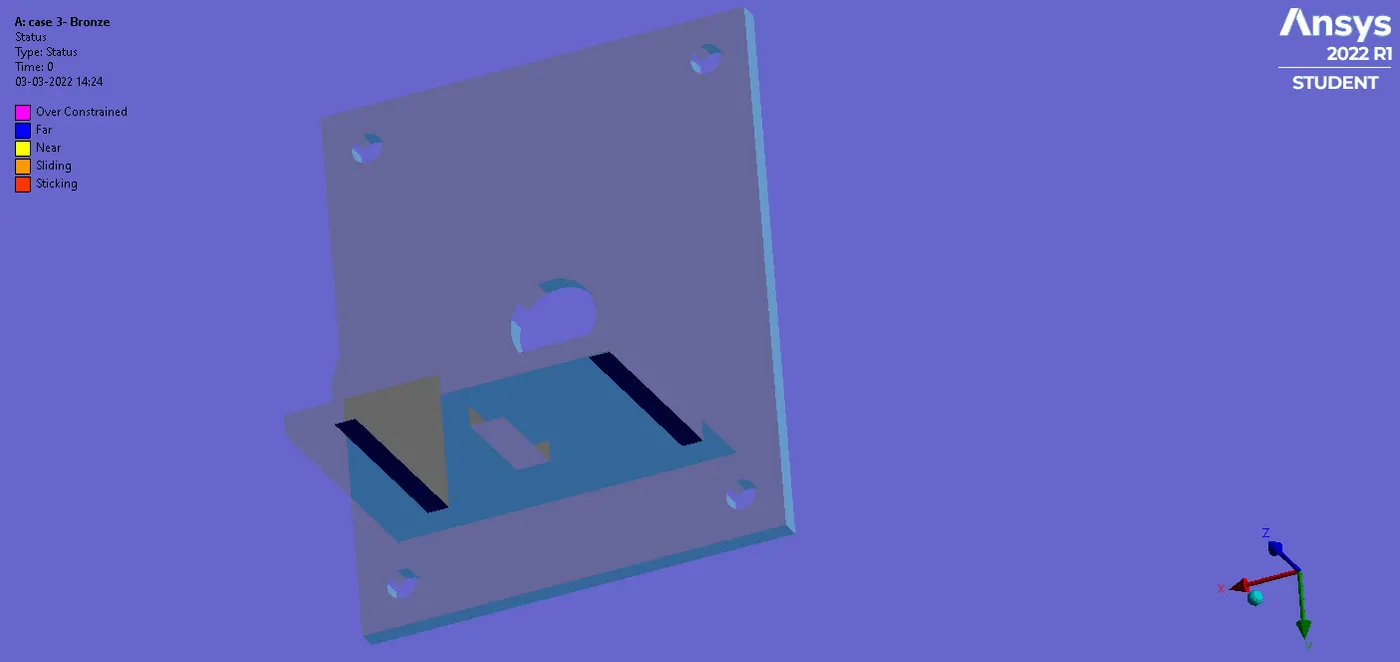
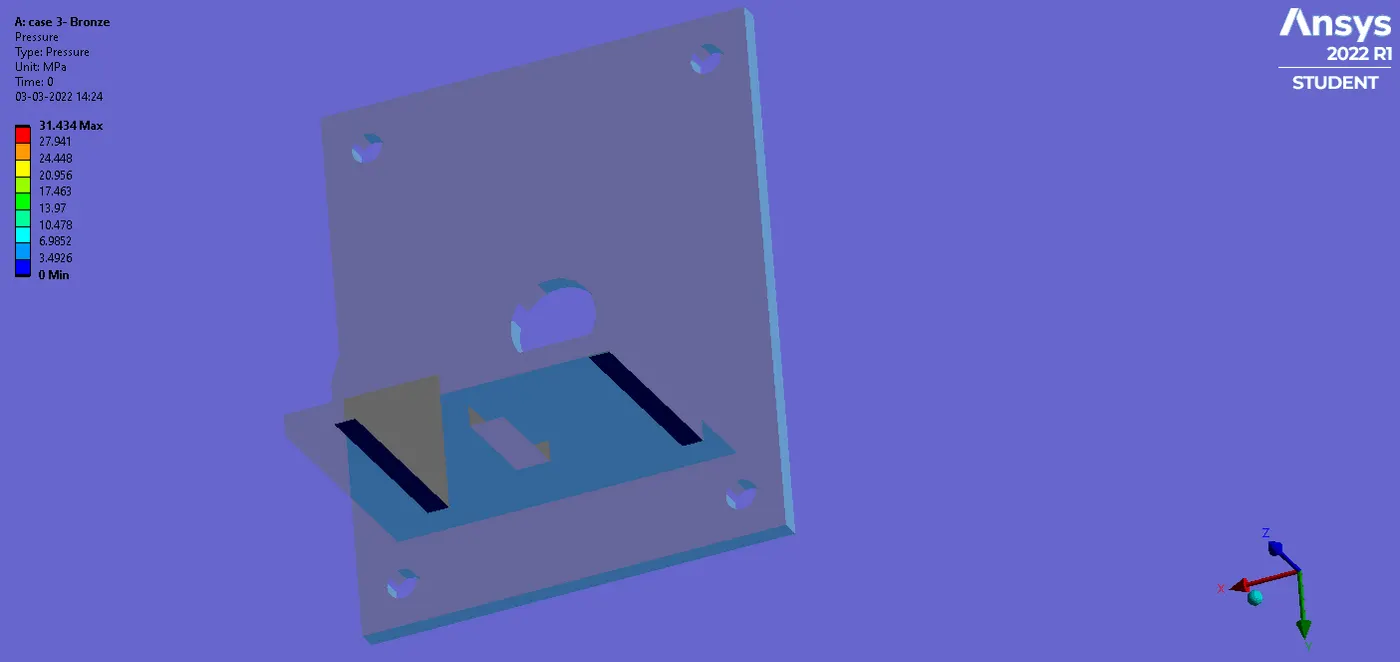
Safety Factor Results:
4 Conclusion
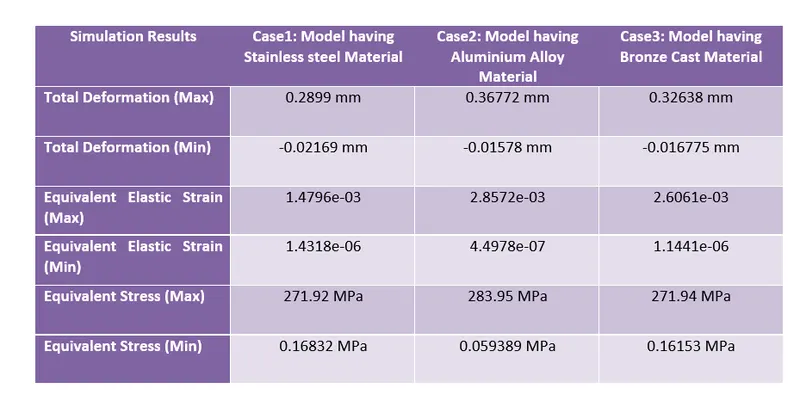
In conclusion, the main aim of the Week 3 challenge was to perform a structural analysis of three different types of welding using three different weld materials. It was found that the total deformation resulting in case 1 is minimum in comparison to case 2 and case3. In addition, the max strain resulting in case 1 is least in comparison with the resulted strains in case 2 and case 3. However, the equivalent stresses resulting in case 1 and case 3 are almost similar and are smaller in comparison to case 2.