Week-3 Challenge: ADVISOR Tool
Week-3 Challenge
Aim: To use the Advisor tool and simulate the given conditions
Part 1
i) Objective: To find if, for ‘EV_defaults_in’ file with a cargo mass of 500 kg and all other default conditions, can the vehicle travel for 45 km with FTP drive cycle?
Solution:
As this challenge is based on the ADVISOR tool we need the ADVISOR tool at first. The same can be downloaded from here: https://sourceforge.net/projects/adv-vehicle-sim/. Let’s know about the ADVISOR tool firstly.
ADVISOR, NREL’s (National Renewable Energy Laboratory) ADvanced VehIcle SimulatOR, is a set of model, data, and script text files for use with Matlab and Simulink. It is designed for rapid analysis of the performance and fuel economy of conventional, electric, and hybrid vehicles. ADVISOR also provides a backbone for the detailed simulation and analysis of user defined drivetrain components, a starting point of verified vehicle data and algorithms from which to take full advantage of the modeling flexibility of Simulink and analytic power of MATLAB. ADVISOR was preliminarily written and used in November 1994. Since then, it has been modified as necessary to help manage the US DOE Hybrid Vehicle Propulsion System subcontracts. Only in January 1998 was a concerted development effort undertaken to clean up and document ADVISOR.
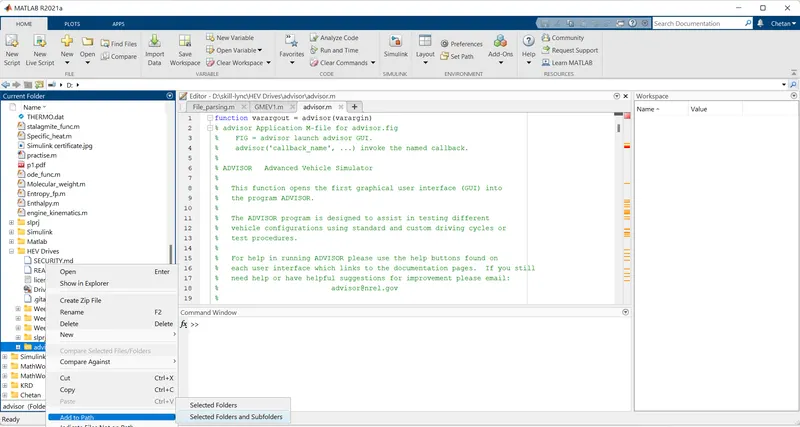
Now, on downloading the ADVISOR tool files, firstly add them to the path as shown below(right click on the folder containing the ADVISOR files).
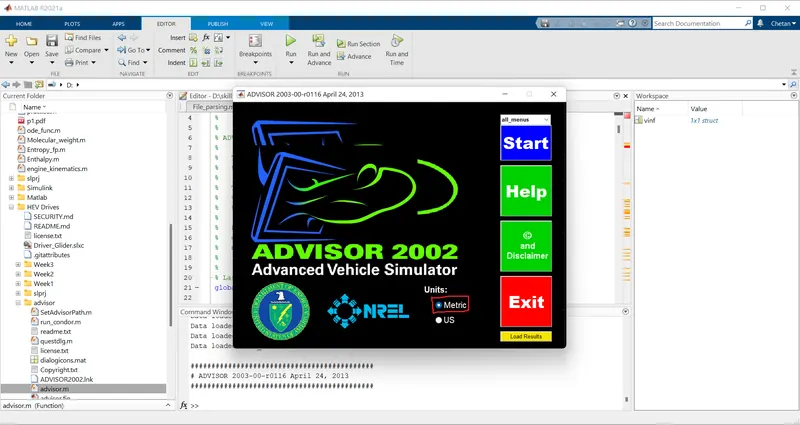
Then in Matlab command window type ‘advisor’ and the UI will open as shown. From the 2 options for units of measurement, select the ‘Metric’ one.
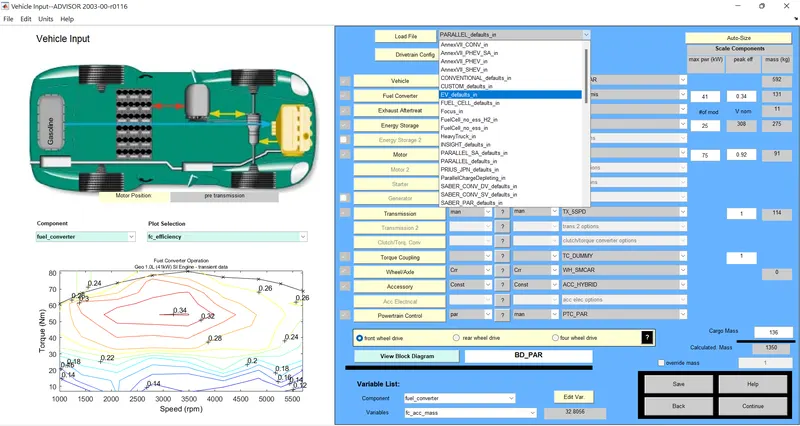
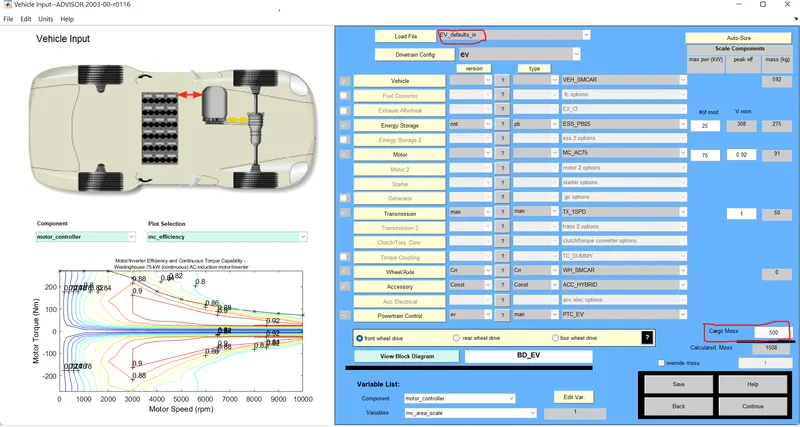
Then click on ‘Start’ and the ‘Vehicle Input’ window will appear. When on this window, from the ‘load file’ section, select the ‘EV_defaults_in’ option. Also, at the bottom right there is the ‘Cargo mass’ display. We have to change it to 500 kg as has been asked in the question. After this click on continue.
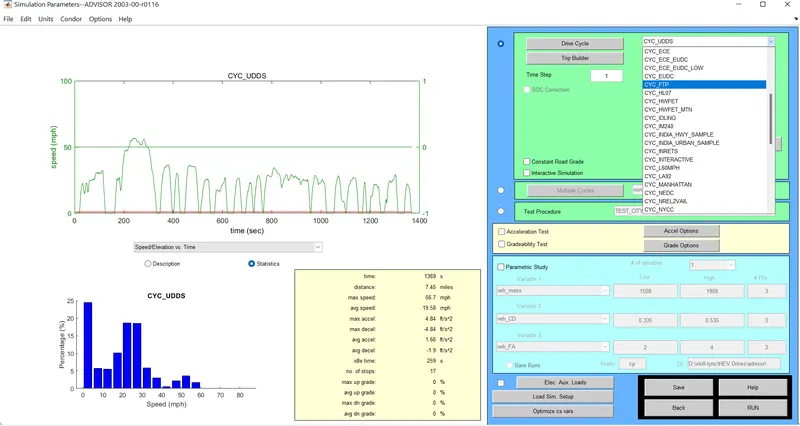
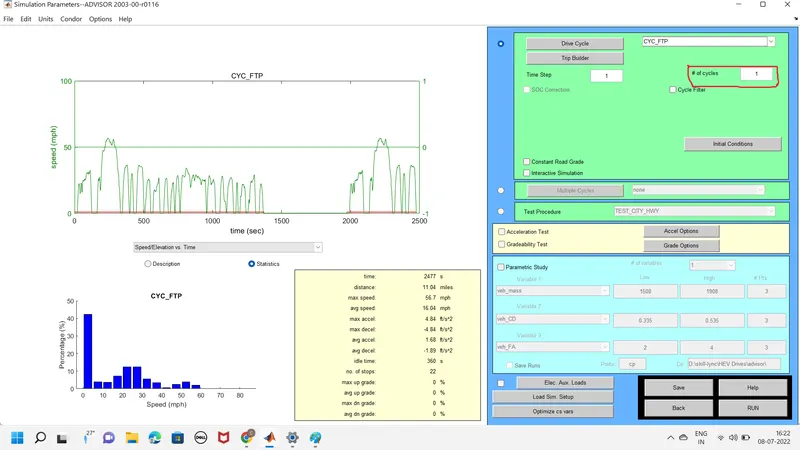
The next window is the ‘drive cycle’ window. In this window, select the ‘CYC_FTP’ option from the drop down menu against the drive cycle selection. Now, we have to check the range of the battery here, so we will check it cycle by cycle. So, let the number of cycles be 1 and click on ‘run’.
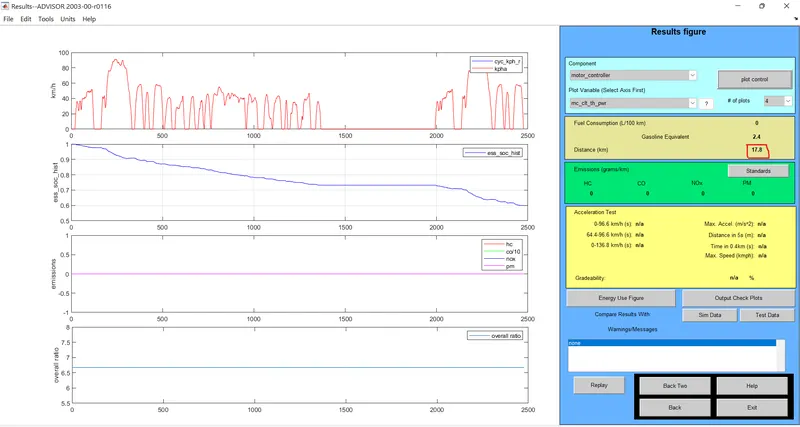
The next window is the results window. As is evident, for the first cycle, the vehicle travels 17.8 km and the battery drains more than 30%.
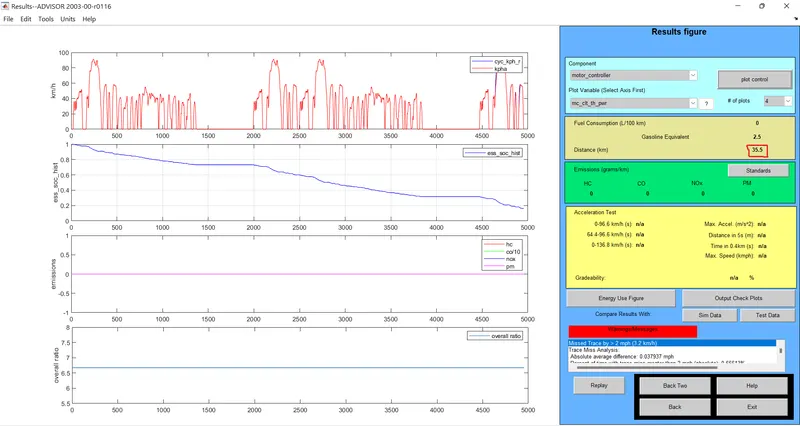
For the second cycle, click on the ‘back’ option to get to the drive cycle window. Here, change the number of cycles to 2. Again, click on run. The results show that the vehicle travels a total of 35.5 km after completing two drive cycles and the battery drains about 70%. As there’s still charge left in the battery we’ll have to check for the next cycle as well.
Repeat the procedure for second drive cycle with a change in number of cycles to 3 now. After running, the results show that the battery drains before completing the third cycle and the total distance covered by the vehicle is 41.4 km.
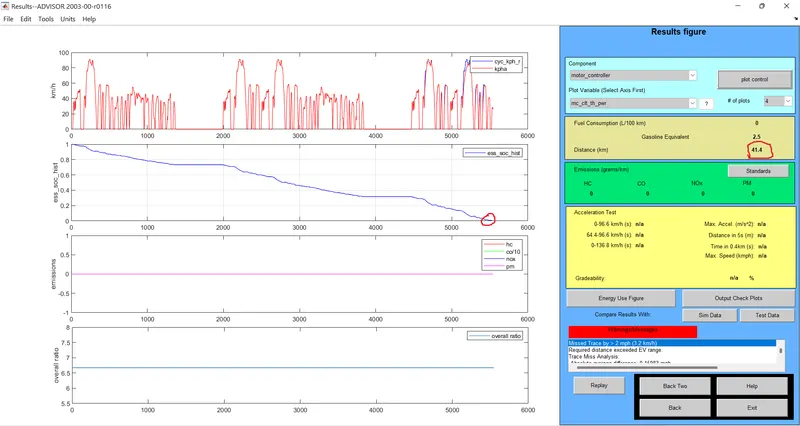
Therefore, it is evident from the simulation that the vehicle cannot travel 45 km for the given conditions of the vehicle.
ii) Objective: For the above parameters of the vehicle, for what battery capacity can the vehicle travel a distance of 45 km or more?
Solution: For this part of the problem, we will be changing the number of battery modules and hence the battery capacity to see for what value the vehicle can travel a distance of 45 km or more. On the vehicle input window there is a ‘# of mod’ section. Its default value is 25. We, will change it with a step of 1 and see for the results. In addition, we will keep the number of drive cycles at 3 itself as that’s the duration required to exhaust the charge of the battery. So, firstly for 26 number of battery modules we have the result as.
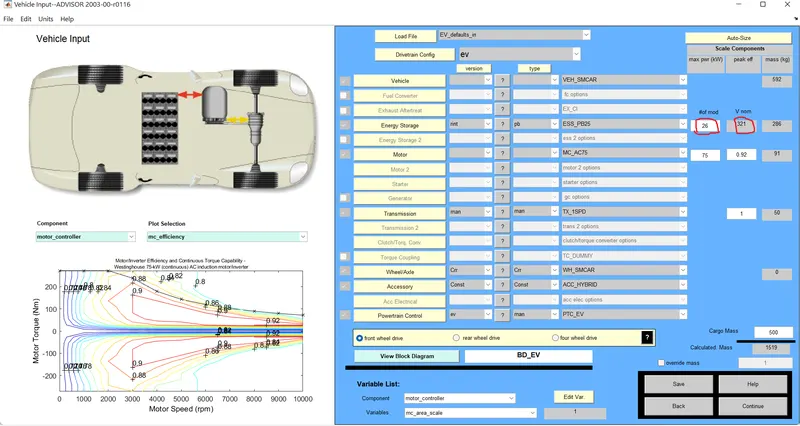
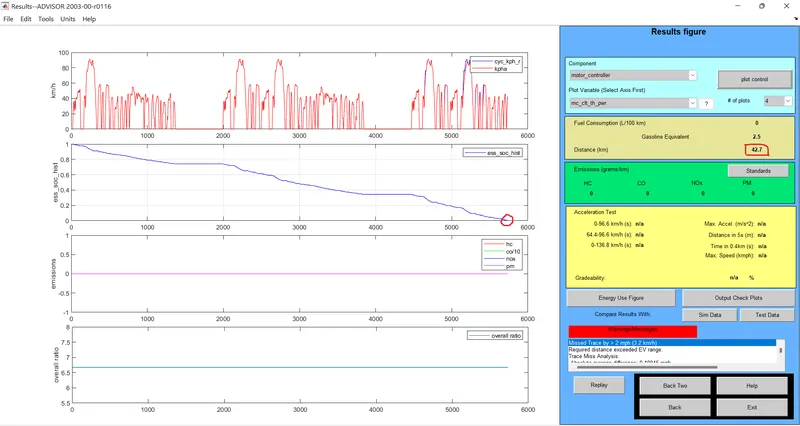
As is evident the vehicle travels 42.7 km before the source of charge discharges completely. Moving on to the next value then. Changing the number of modules to 27 and checking the results, we have:
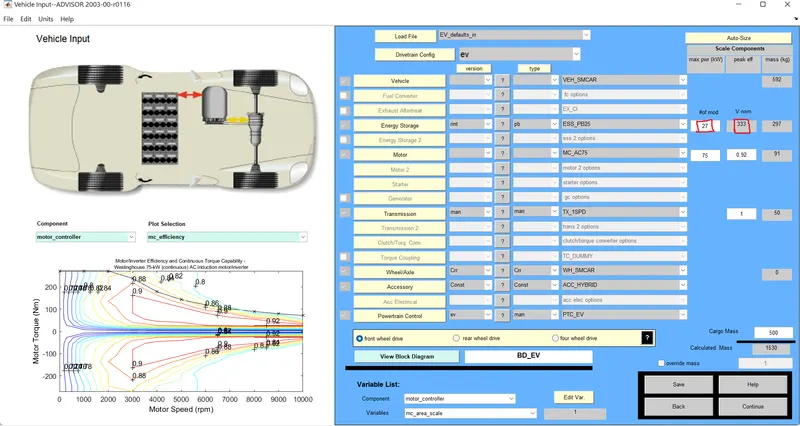
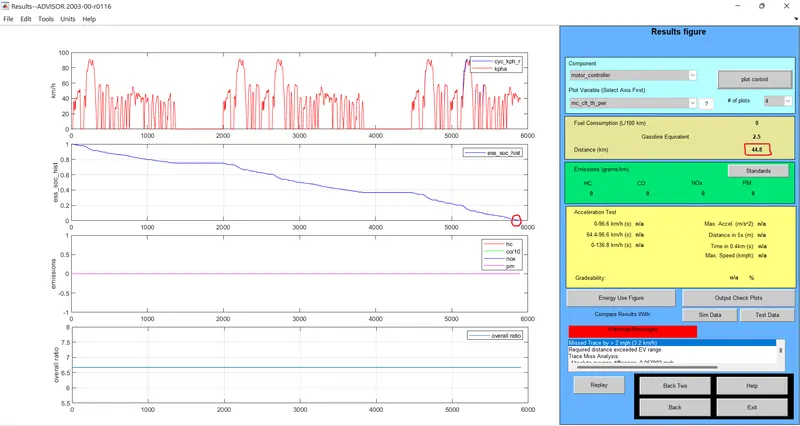
Again, on exhaustion, the vehicle has travelled 44.8 km, just short of our required value. This takes us to our next step. With 28 battery modules now the results are as:
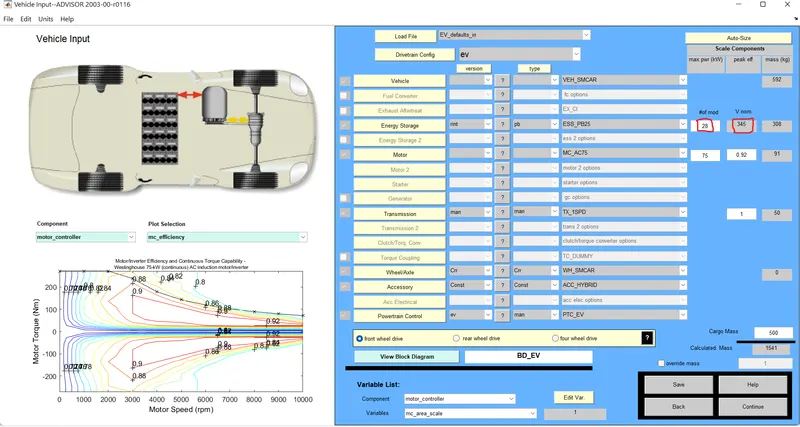
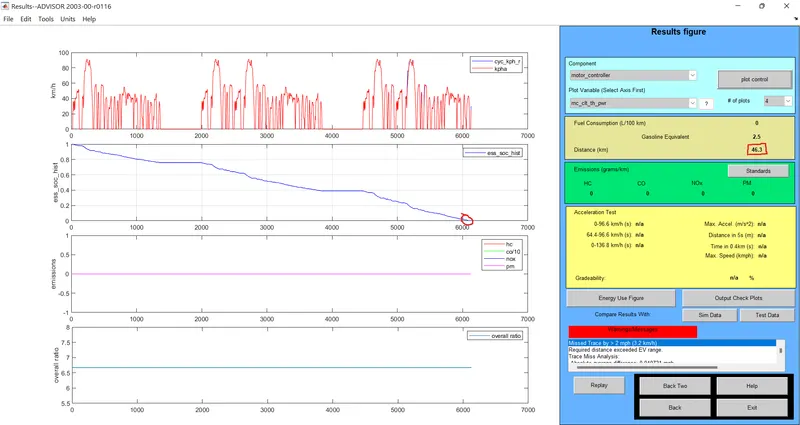
So, for a battery pack of 28 modules carrying a voltage of 345 V, the vehicle is able to achieve a distance more than the required distance of 45 km.
Part 2
Objective: To perform gradeability test with ‘PRIUS_Jpn_defaults_in’ file
Solution: For this part of the challenge, we have to perform gradeability test on the vehicle model of a Toyota Prius. For it lets know about gradeability at first. A car's gradeability is its ability to climb slopes. Gradeability is measured either in degrees or percentage. A 45 degree gradient is equivalent to 100 per cent. Gradeability is dependent on engine power, drivetrain type, gear ratio, weight, weight distribution, car's centre of gravity and traction.
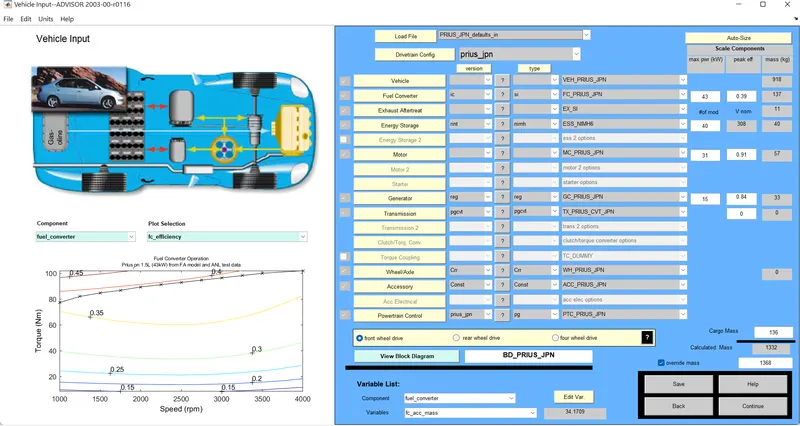
For the simulation, we will again return to the vehicle input window of the ADVISOR tool. From the load file drop down we will select ‘PRIUS_Jpn_defaults_in’ file and click on continue without changing the defaults.
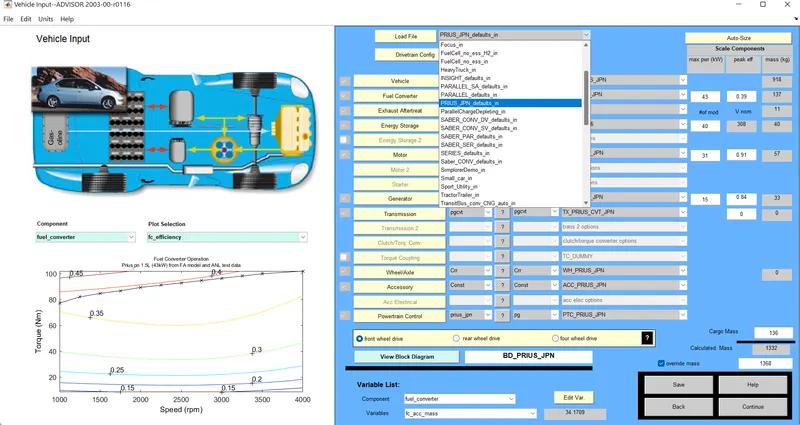
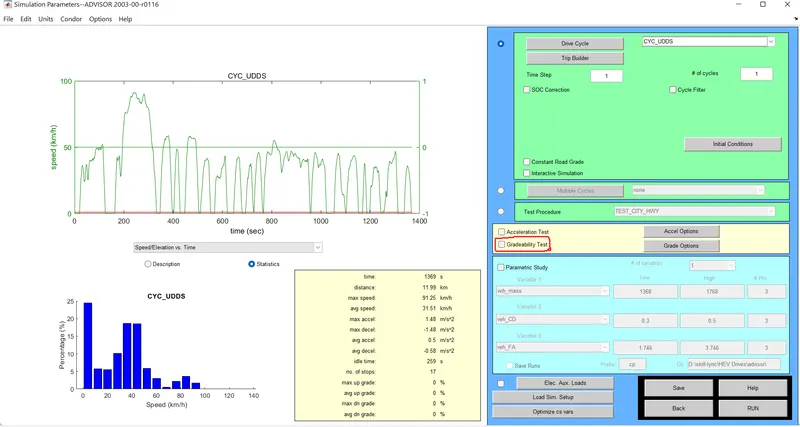
This will bring us to the drive cycle window. Now, we will be using the default drive cycle of ‘CYC_UDDS’ i.e the urban driving schedule. Also, in this very window we have the 'Gradeability test' selection at the middle right. We will check the box against it and click on ‘Grade Options’.
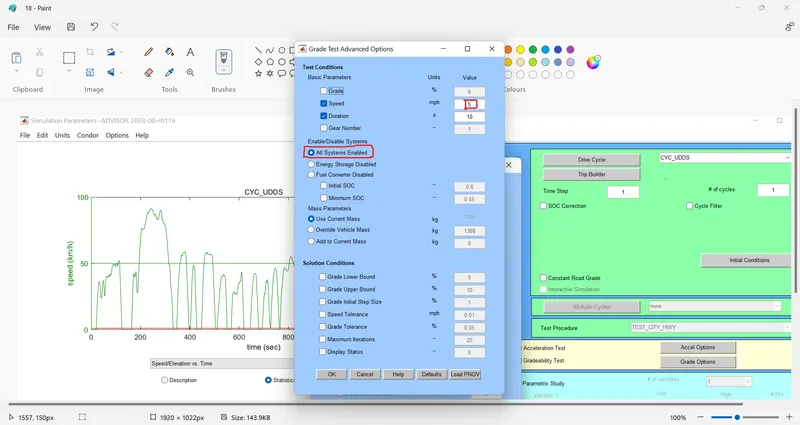
This will open the ‘grade test advanced options’ window. In this, select the ‘all systems enabled’ option. Also, at the top is the speed option. From here, we will be changing the speed of the vehicle and checking the gradeability at each speed. For the first iteration we will be checking the gradeability at 5 mph and moving ahead with a step of 5 mph. So change the speed to 5 mph and hit run.
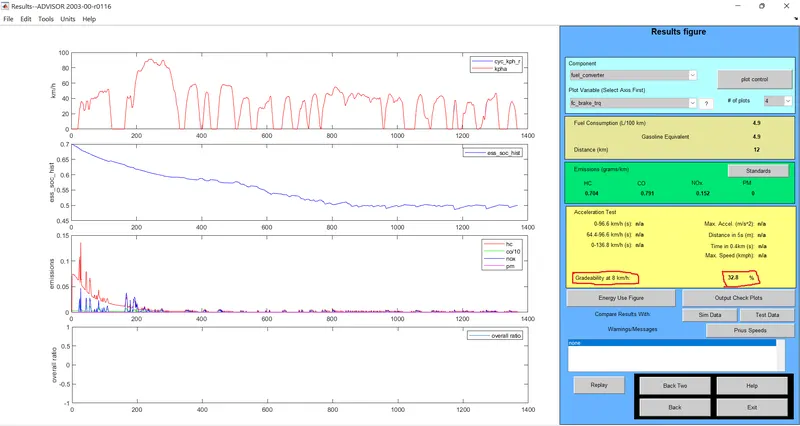
The results window will appear and it displays the gradeability of the vehicle against the speed (in kmph now) among other things.
Similarly, we will check for speeds up to 50 mph. The table below summarises the simulation.
|
Hence, we can conclude that as the speed of the vehicle increases, the gradeability of the vehicle decreases. This is due to the fact that, to ascend, a vehicle requires torque but with the increase in speed after the critical velocity, the torque of the vehicle decreases and as a result the gradeability decreases.