Week 3 - 2D meshing for Sheet metal
Objective:
The objective of this project is to perform pre-processing i.e. geometry clean-up, mid surface extraction, and 2D shell meshing for the hood component of a car. After meshing, component thickness needs to be assigned to the mesh. And the mesh should follow the following quality criteria,
|
S.no. |
Quality criteria |
Value |
|
1 |
Target/Average length |
5 |
|
2 |
Minimum Length |
2 |
|
3 |
Maximum Length |
7 |
|
4 |
Aspect |
3 |
|
5 |
Warpage |
15 |
|
6 |
Skewness |
45 |
|
7 |
Jacobian |
0.7 |
|
8 |
Minimum Quad Angle |
45 |
|
9 |
Maximum Quad Angle |
135 |
|
10 |
Minimum Tria Angle |
30 |
|
11 |
Maximum Tria Angle |
120 |
|
12 |
Tria Percentage |
15 |
Procedure:
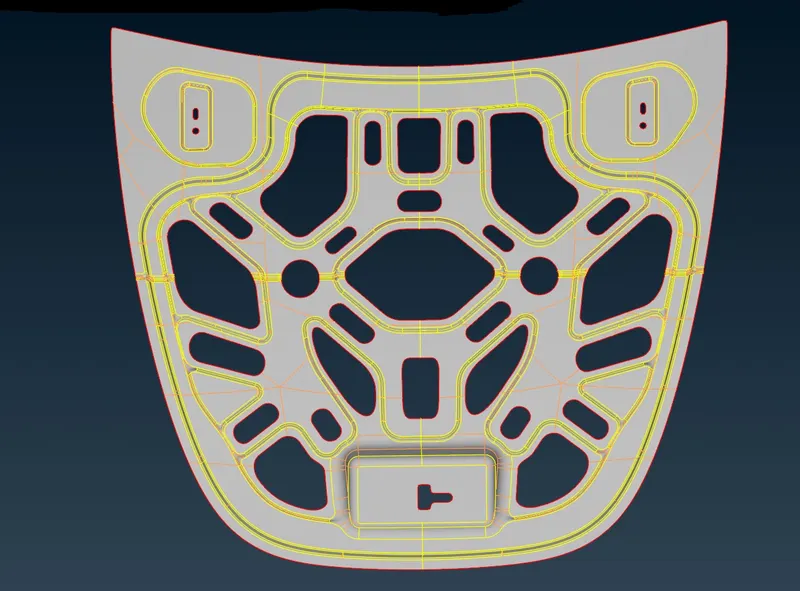
First, the CAD File of the hood model is imported into the ANSA. The hood model contains individual components as shown below,
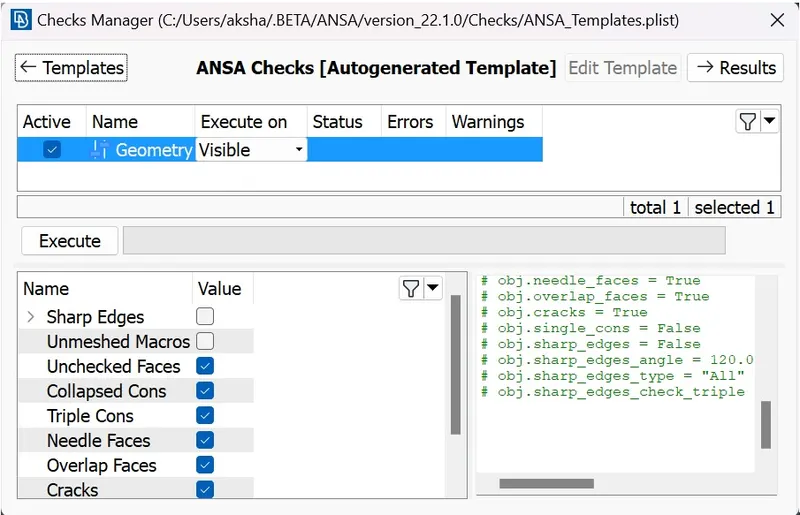
The first step after importing the CAD model is to properly analyze and understand the geometry. When a CAD model is imported into the ANSA, there might be several geometrical errors like missing/distorted surfaces, intersecting surfaces, etc. due to the format conversion process or inherent bad model. And, it is important to clear all these errors before starting meshing. So, the next step is to clean up the geometry. To ensure that all the surfaces are connected properly Faces>Topo tool is used for all the edges of each individual component at a time. Next, geometry check is performed by going to Checks>Geometry and running it for parameters as shown in the image below. Another image shows the errors detected.
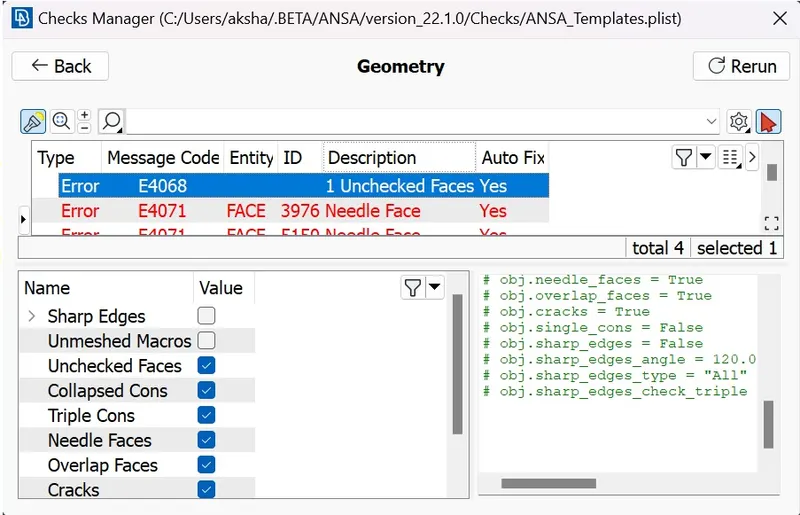
Most of the errors can be auto-fixed by right-clicking on the error>fix. Next, the orientation of all the faces is modified by going to Faces>Orient. This ensures that all faces are oriented similarly.
The next step is to assign desired length to the component.in this case minimum length to obtain or to apply is 2 mm whereas average length is 5 mm & maximum length is 7 mm.assigning length is done using CLASSIC MESH>PERIMETERS>LENGTH option.we have to assign length to both perimeters & also to macros then with middle click of the mouse length is aasigned to the component
Then next step is to extract the mid surfaces for the component & assign them separate property id using FACES>SET PID Option. Mid-surfaces are extracted using the manual method i.e by offsetting the surface to the middle using FACES>MID SURFACE>SKIN. First, the thickness of each component is measured using the Measure tool from UTILITIES>MEASURE.As they are sheet metal components, the thickness is uniform across the component.
Here is the image of mid surface that is extracted
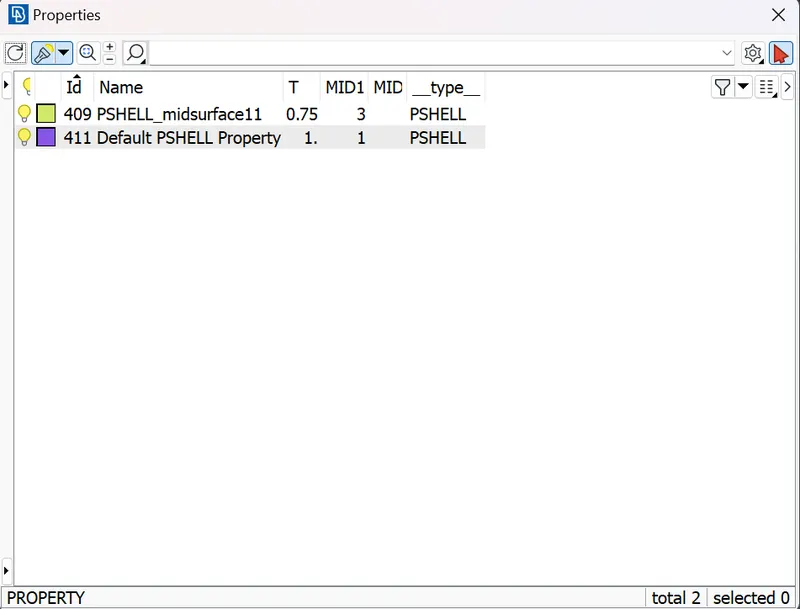
in the above image we can see two property cards one aasigned to the parent geometry & the other to the mid surface that we extracted with the said tools.
Next, mesh parameters are assigned to the component,by using UTILITIES>MESH PARAMETERS. There, target length, minimum element length, and maximum element length are configured as 5mm,2mm,& 7 mm respectively.Next, quality criterias are configured by using UTILITIES>QUALITY CRITERIA Tab. given values are enytered and then applied.the quality criteria file is saved for future reference. The created quality criteria parameters are shown in the image below.
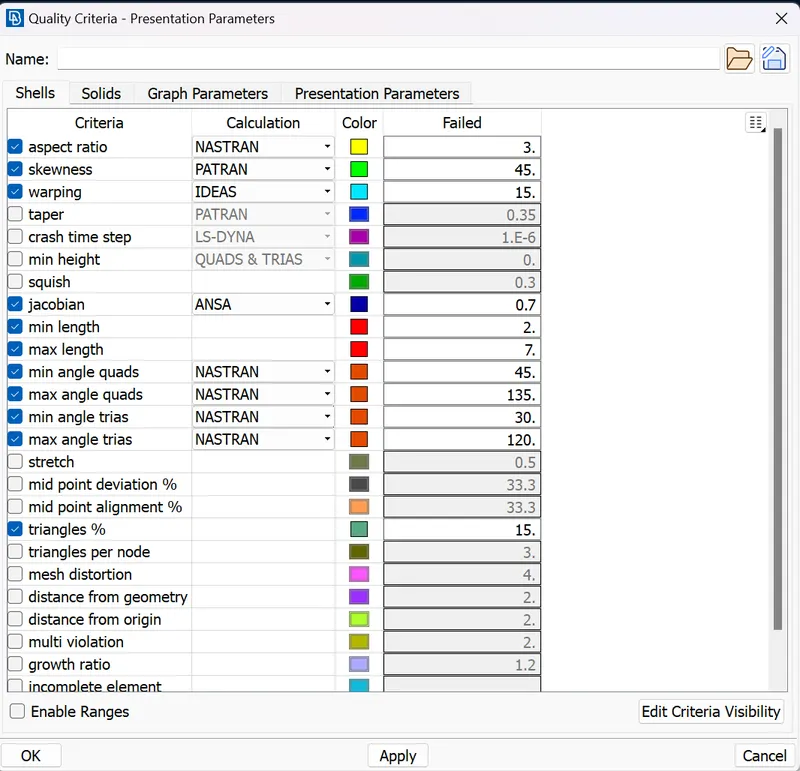
The next step is to prepare the mid surfaces for meshing. For that, switch to the Mesh module. First, the shell element length is checked again and if changed then it is altered by going to Perimeters>Length and all the CONS are selected and target element length 5 is fed as length value. The same is done for all the Macros (surfaces).
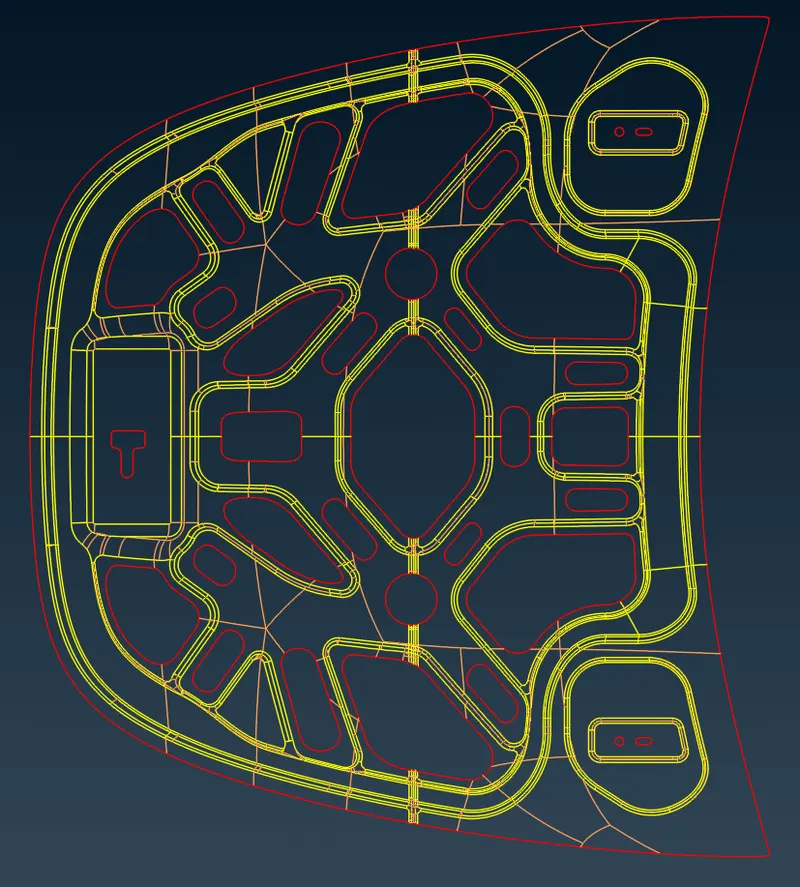
Next, all the areas are checked for minimum element length and altered where elements might fail for minimum length. Similarly, CONS which are not essential to define a feature are removed by joining the surfaces using the MACROS>JOIN tool. Also, the complete mid surface model is divided strategically into sections using MACROS>CUT tool. main objective of cutting the geometry or part into small & different sections is obtain better mesg flow across divided parts. The same process is repeated for all the mid surface components.The result of the above steps is shown in the image below.
Orange CON (edge) represents the joined macros (surfaces) and yellow CON is the new split done to divide the geometry into sections. Also, elements would fail for minimum length in the hemming region. So, for the hemming region, it is split into half along its length and the CON above and below are removed by joining the macros (surfaces) as shown below.
Before proceeding to meshing the component as the hood component is symmetric and is of uniform thickness it is divided into two sections out of one is deleted.purpose of doing it is to obtain good mesh flow across half the geometry and the same mesh later can be transformed on to the other symmetric side using transform tool.
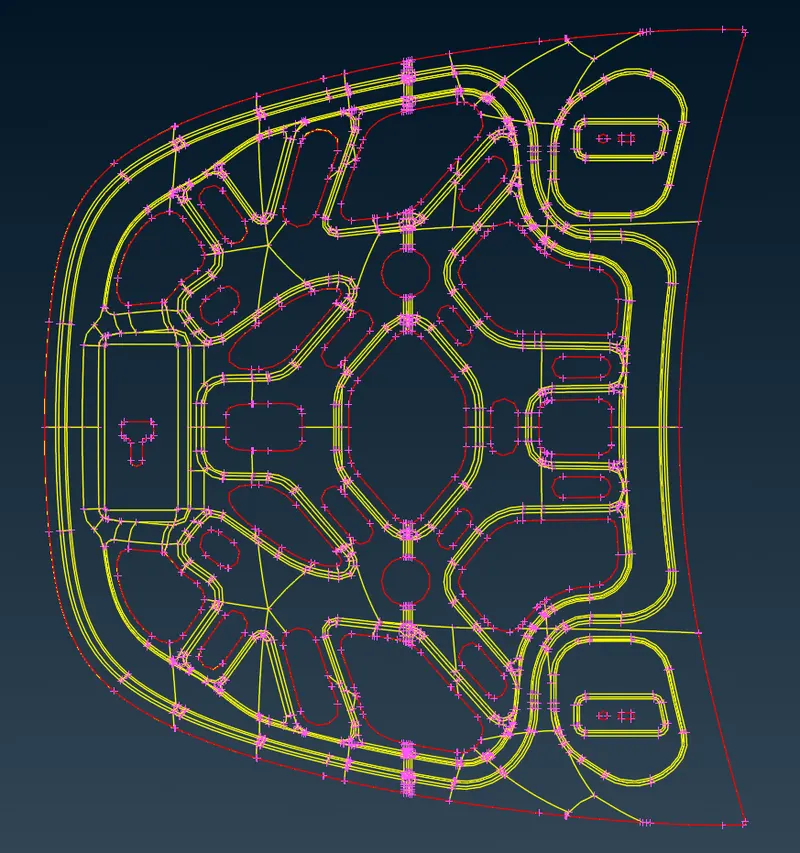
Above Image shows midsurface before deleting or deviding oit into two symmetries.symmetry is cut using FACES>CUT Tab
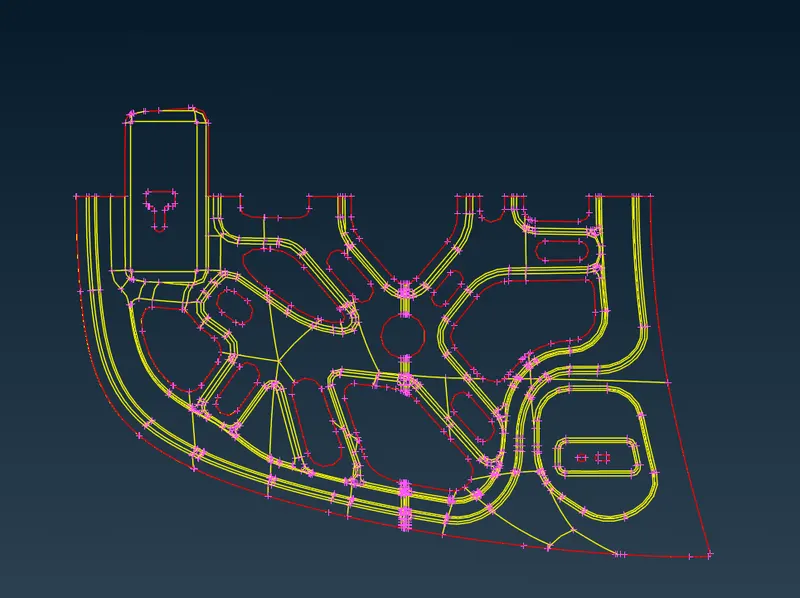
Above FIgure shows the cut face
Next, meshing is done using the MESH GENERATION>BEST tool. This tool generates the mesh using the best algorithm applicable. Then, the created mesh is refined using the SHELL MESH>RECONSTRUCT or SHELL MESH>IMPROVE MESH tabs. trias are kept as low as possible. While dealing with trias, the following things need to be ensured.
- No back to back trias touching each other
- No opposite trias
- No trias touching the edges
- No trias on a feature
- Low concentration of trias in a region
To deal with trias, the following tools are used,
- Grid>Paste, to paste the nodes and move tria backward
- Elements>Split, to split an element and move tria forward
- Elements>Swap, to move the tria left or right
- Elements>Join, to join two trias to make a quad
After modifying the mesh, Shell Mesh>Smooth tool is used to smoothen the flow of the mesh. Any elements failing for quality criteria are also fixed by either remeshing or smoothing the elements. The created mesh is shown below,
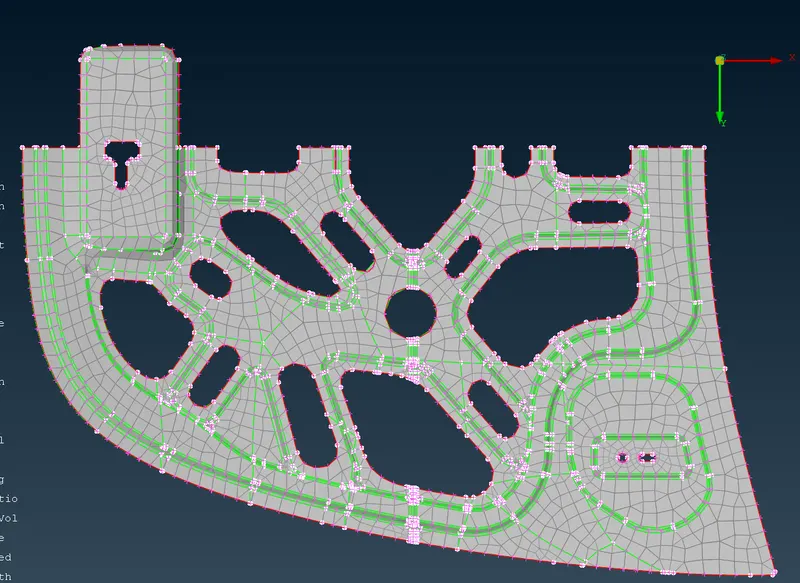
Finally, after creating the mesh and clearing for quality criteria, the mesh is mirrored for the outer panel, inner panel, and hinges by going to UTILITIES>TRASNFORM>COPY>SYMMETRY Tab. All the entities to be mirrored are selected and then mirrored using the mirror points plane option. Then, the mesh is checked for equivalence by changing to the Topo module. The model is checked for any free CONS and pasted using the Topo tool if any. Again, the mesh is checked for quality criteria. Finally, the shell element representation is changed by going to UTILITIES>QUALITY CRITERTIA>PRESENTATION parameters and enabling the 'Draw shell as solid'.
Conclusion:
Geometry cleanup, mid surface extraction, and 2D meshing of the given hood model were successfully done. And all the elements pass the quality criteria. All the features in the model are captured properly with good mesh flow. Tria concentration is kept low.