Week 2 Challenge : Surface meshing on a Pressure valve
Aim:- To find the geometrical errors and perform Topology cleanup accordingly. Set three different target lengths as three different cases and mesh the model.
- Target length = 1mm, 3 mm and 5 mm (i.e. 3 cases)
- Element type = Tria
Procedure:-
1. load the .ansa file
file>open>go to option>select .ansa
2. check for the errors
tools>check>geometric checks> select the criterions> execute.
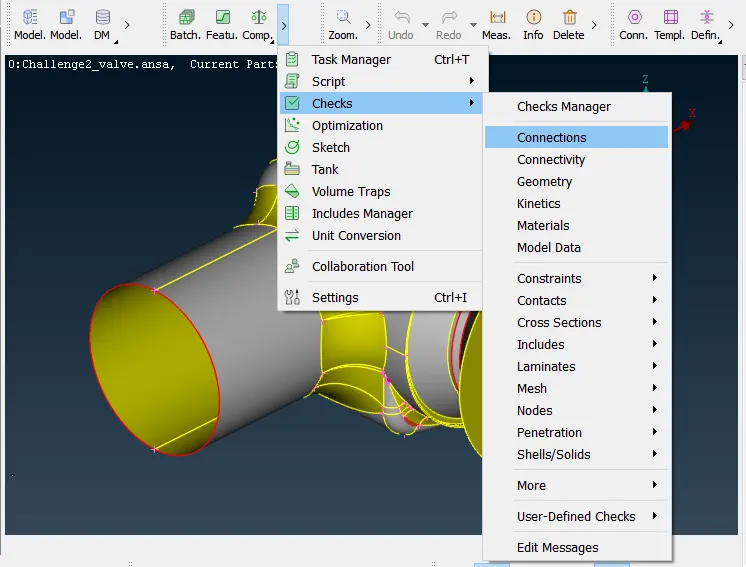
select the criterion
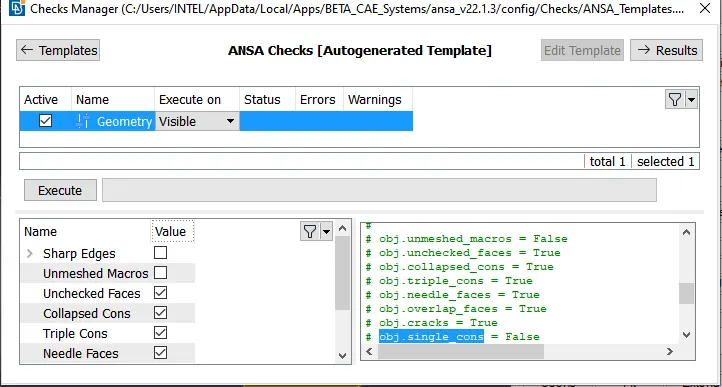
then execute. set execute on to visible so that we can analyse the whole model.
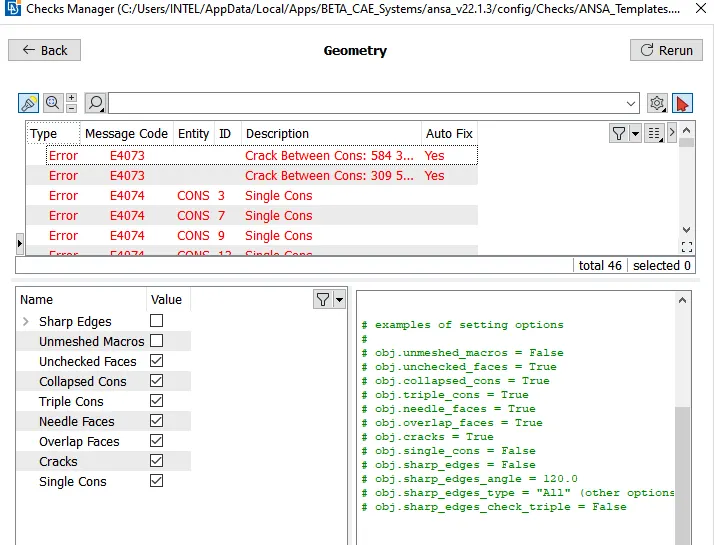
3. select ther error with mouse to locate the errors related to the model(error will be soon in wire frame mode with white color)
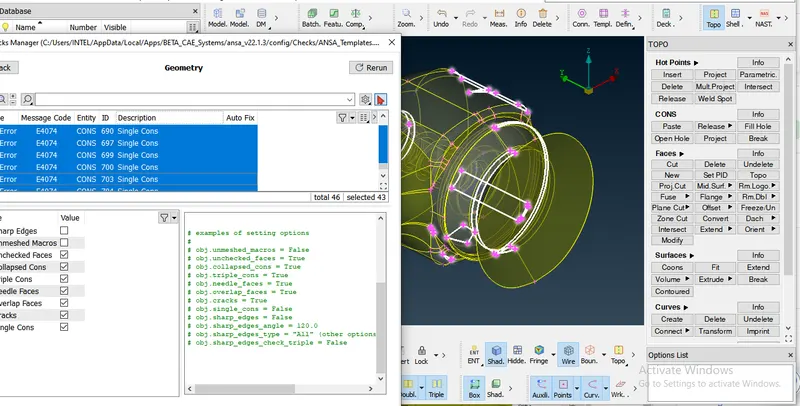
4. we need to find a way to eliminate all the error one by one.
errors may content: - single cons, unwanted hot points, overlaping
5. to eliminate those array use topo>faces>new
there are four option.
- existing surface
- plannar
- fitted
- coons
make surethat we used above mentioned tools in such a way that it will not create overlapping
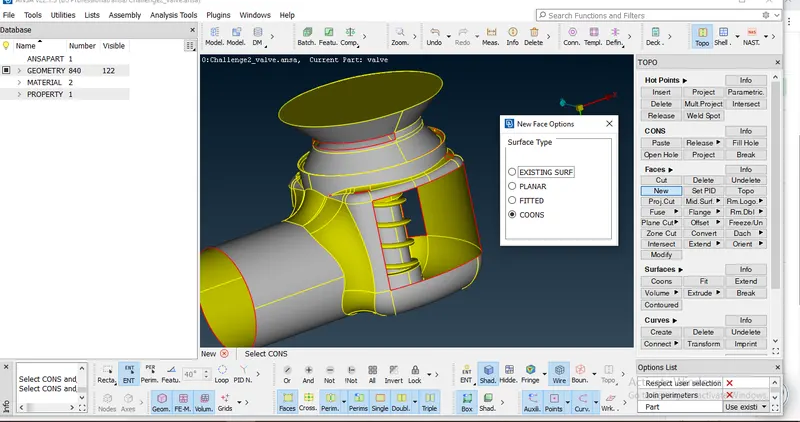
click the middle button to confirm it willl show the predicted face surface or coons, we can go for alternatives surfaces if any.
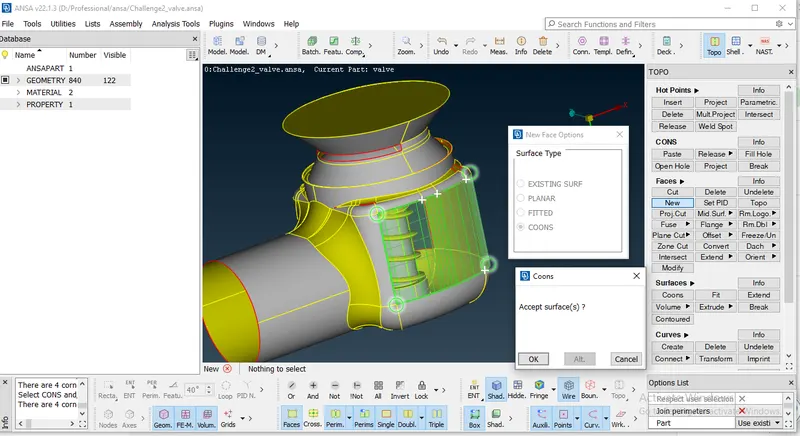
In similar manner remove all the error using appropiate option in face to create the required surfaces.
6. After eliminating all the errors we find the final model ,now we can create properties.
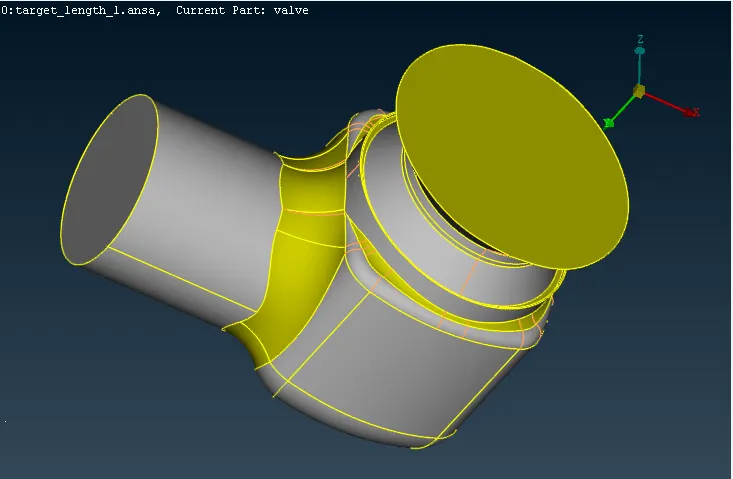
7. to Create Properties.
go to property manager
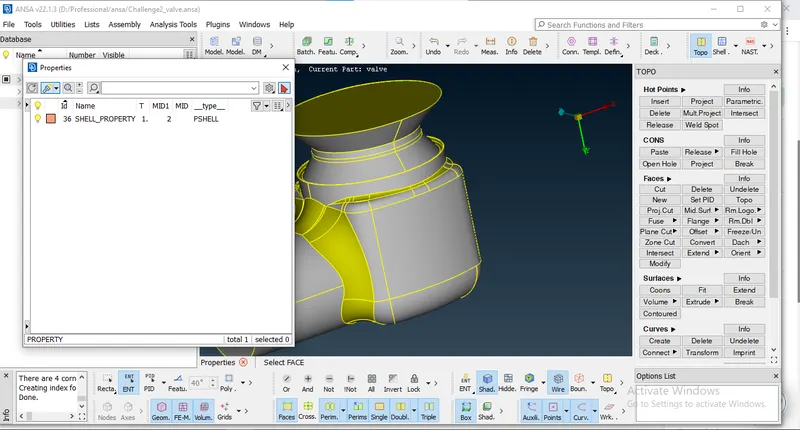
to create new property.
right click in the property manager>pshell >pshell
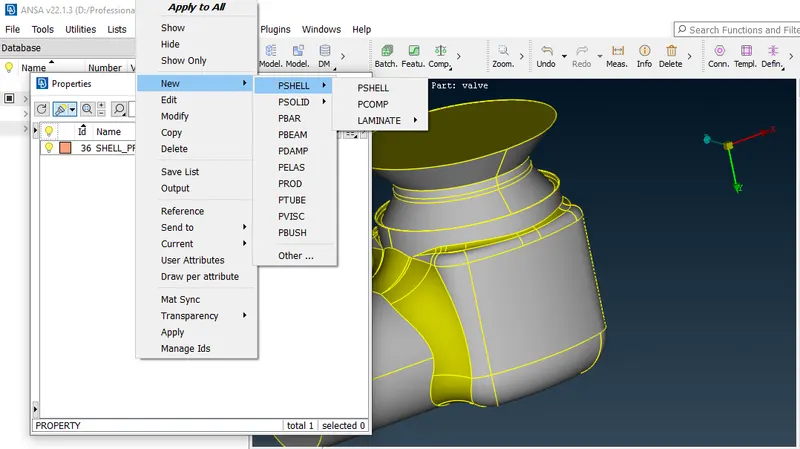
create all the properties.
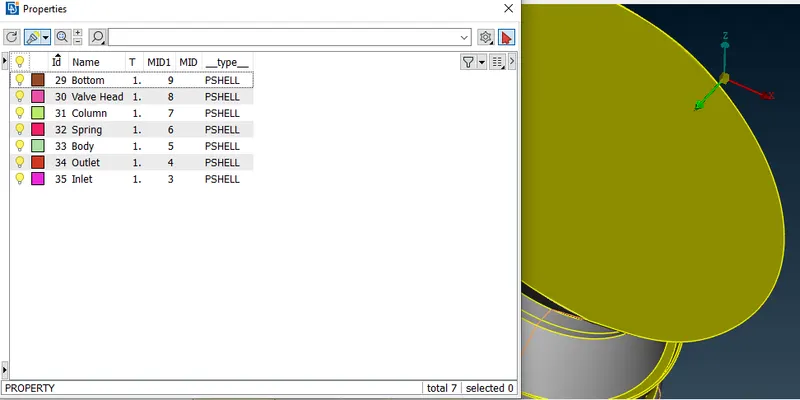
8. For Property assinging
right click on the property name>apply>select the surface.
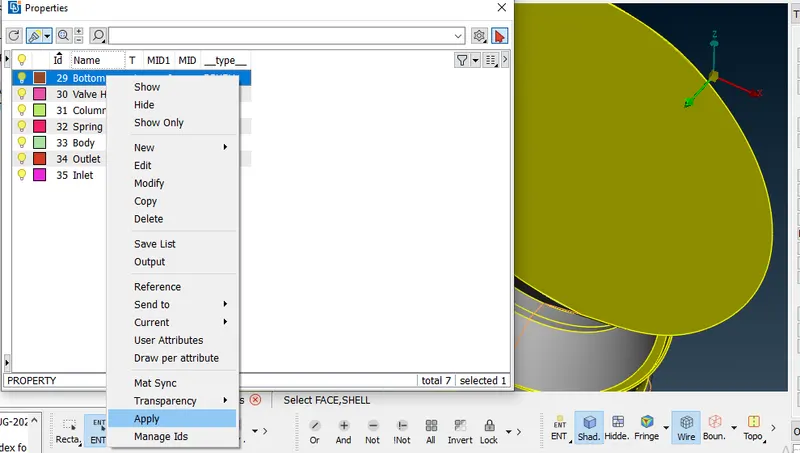
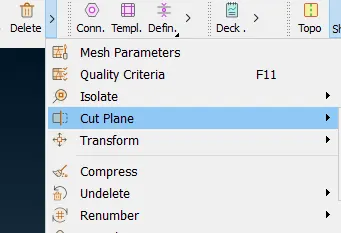
Similarly assign all the properties. make sure there is nothing in the predefined property i.e. SHELL_PROPERTY
to delete the predefined SHELL_PROPERTY i use compress tool.
9. Check for the error again before start meshing components.
after doing this much we can start meshing.
10. to start meshing go to mesh module. present at top right corner.

11. Cut/Join the small surface,face or macros. so that we can elimite the error caused by overdimension of target or mesh length.
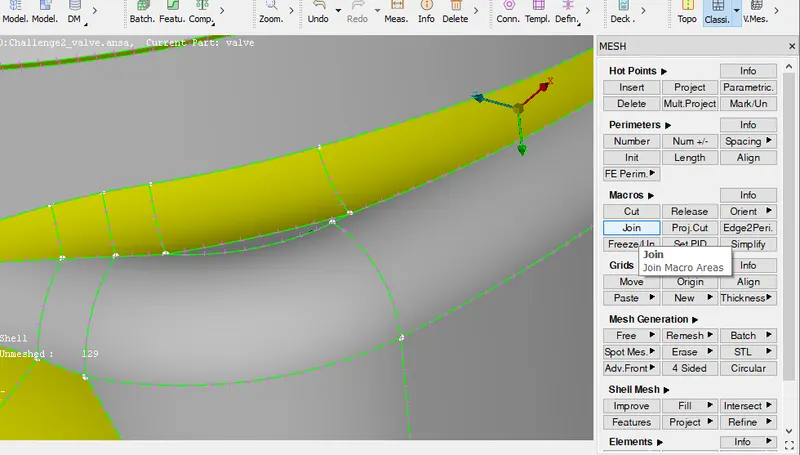
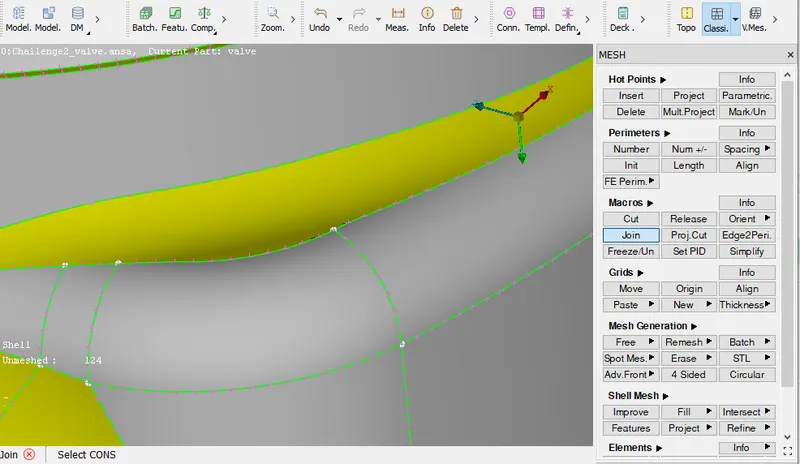
after doing all the correction we can start meshing.
12. go to perometers>length
we find 2 option here
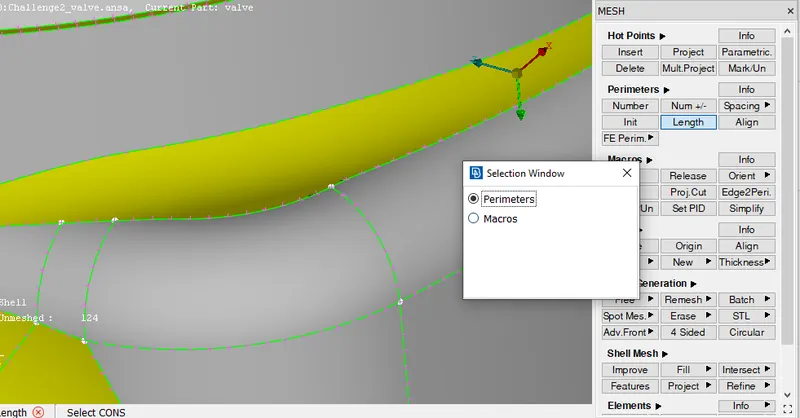
- perimeters
- macros
define length here.
to define length in perimeters.
select the model with box selection click middle button to confirm.
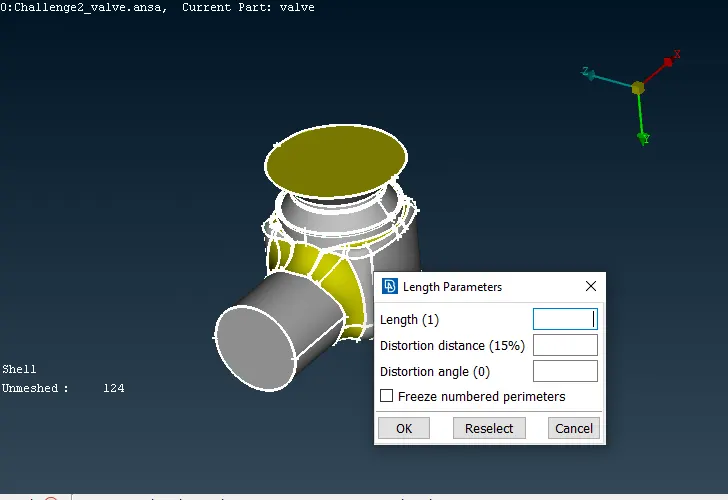
enter length here.
in similar manner do with macros.
13. then go to mesh parameter.

define target length.
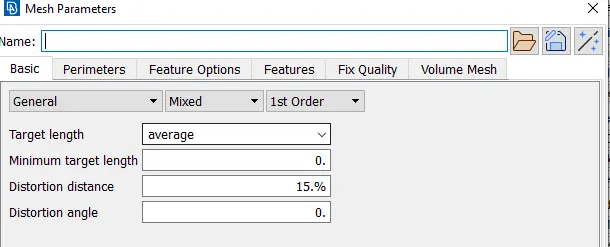
Put target length as per requirement.
and set element type to tria
14. define the quality criterion.
here we can enables the length limits i.e. max lenght and minimum length and other criterions too.
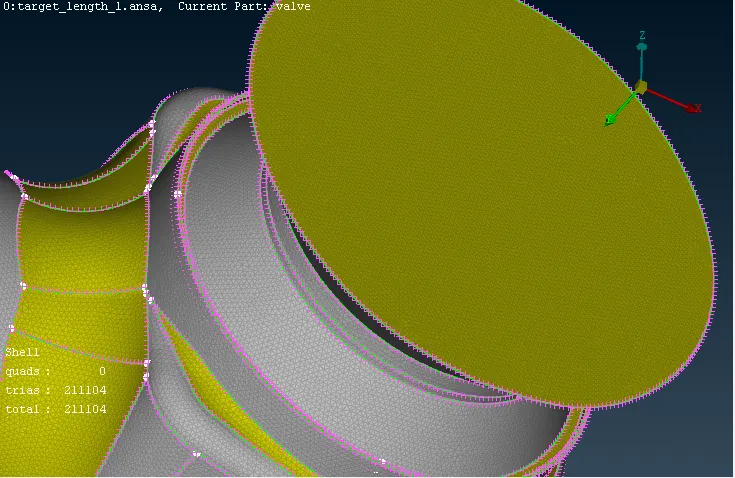
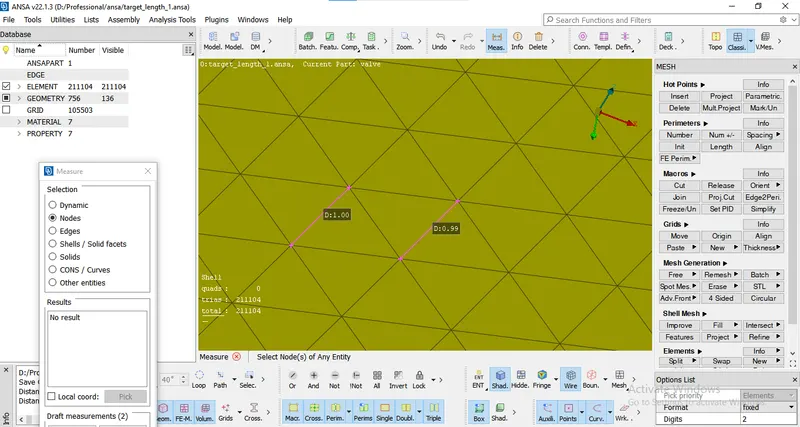
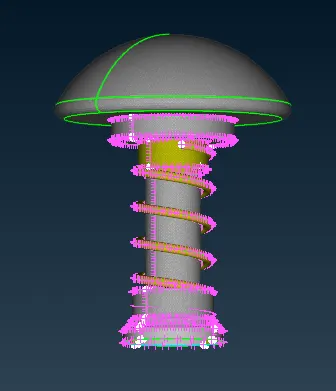
15. i can obtain different mesh just by varring the target length.
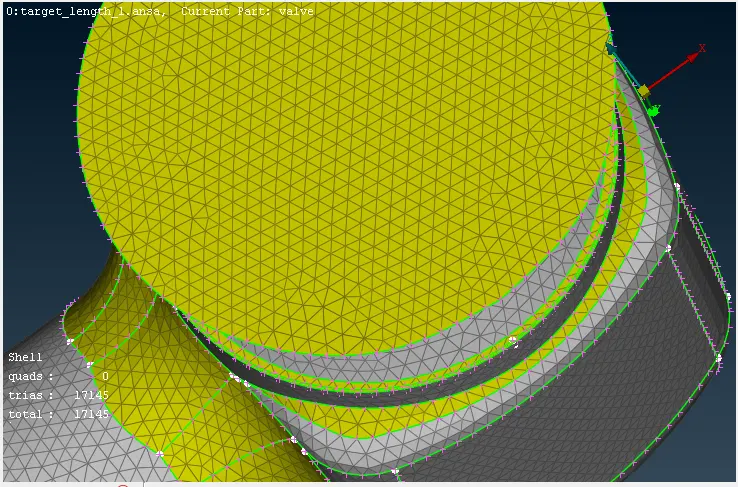
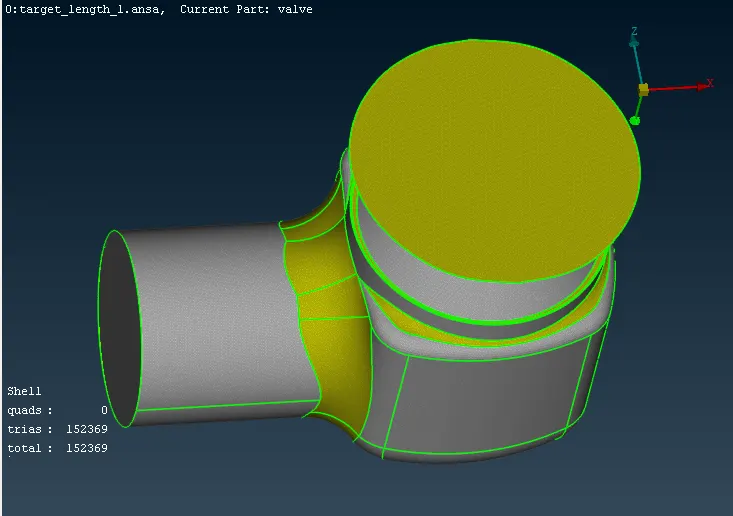
case 1:- target length is 1mm
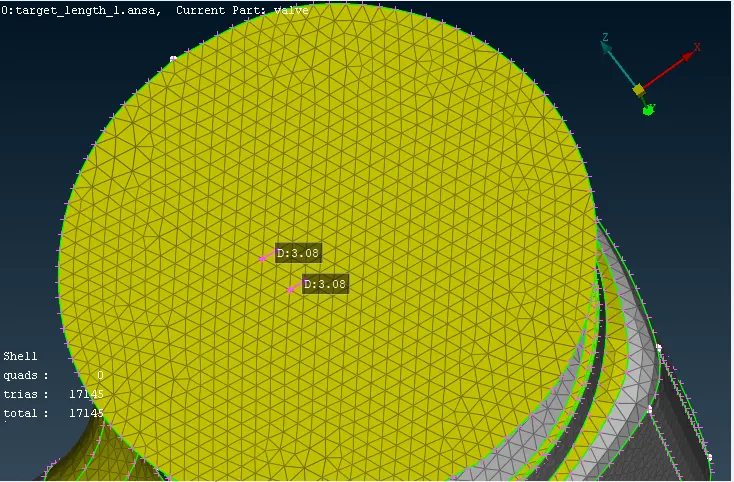
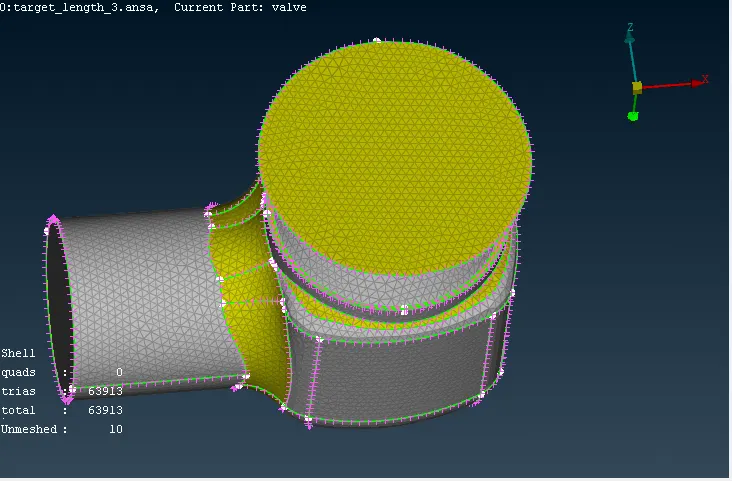
case 2:- Target length is 3mm
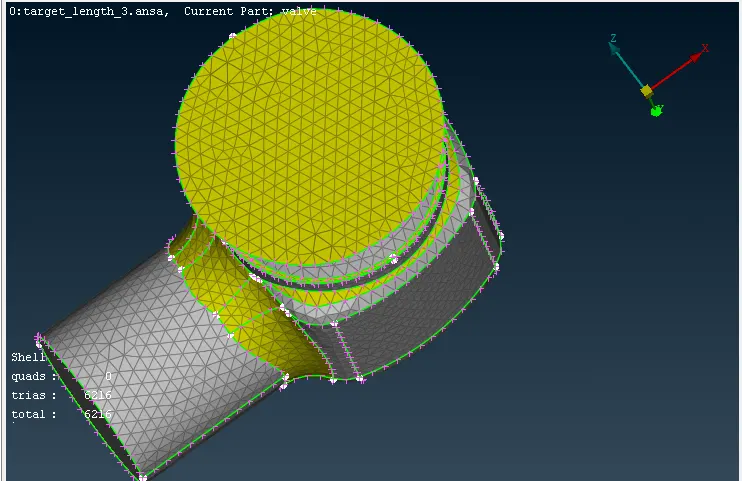
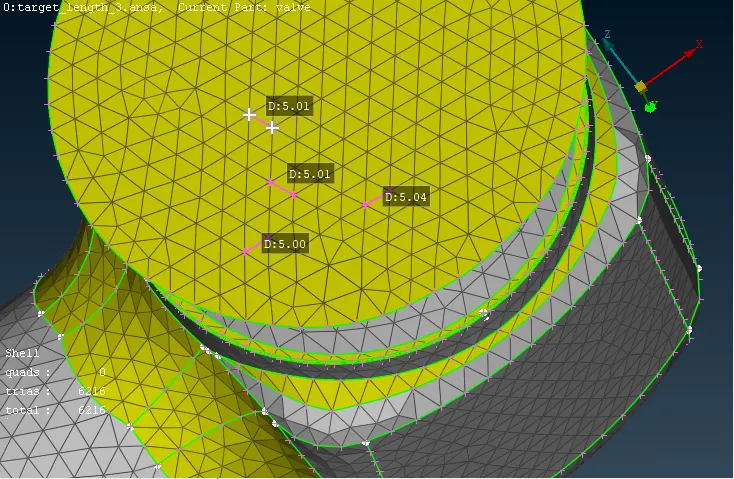
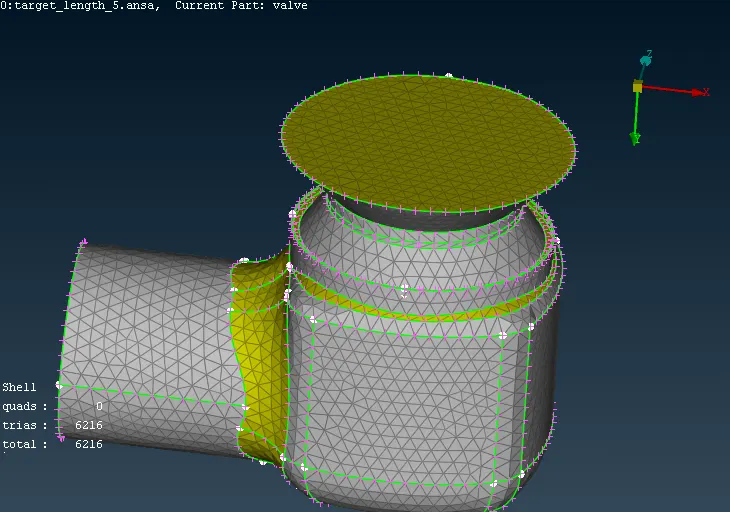
Case 3:- target length is 5mm
Learning Outcomes:-
1. higher will be the no. of elements greater will the accuracy.
2. lower the node length higher will be the elements.
3. higher node length low no. of elements
4. basic procedure for creating mesh.
5. how to use join tool
6. use mesh perimeter based on the size of component.
Result:-
we get three different mesh.
Target length 1mm
Target length 3mm
Target Length 5mm
Target length 1mm link:- https://drive.google.com/file/d/13oBfIGuMIAVk9xQiuW5fGoXCye59yrBh/view?usp=sharing
Target length 3mm link:- https://drive.google.com/file/d/1TSde8FazFqH_CVAdMcQt25D2feq8nep_/view?usp=sharing
Target length 5mm link:- https://drive.google.com/file/d/1hL2BYbuRewzRwS1Nk8EprIsLRFpOFH0e/view?usp=sharing
Conclusion:-
1. smaller the target length, higher will be the element numbers.
2. higher elements gives good accuracy and makes model smoother
3. selecting appropiate target length is very important.
4. Triple coons is not an error.