Week 2 Challenge : Surface meshing on a Pressure valve
Aim:
The objective of this project is to create a Surface meshing on a Pressure valve with an element type of triangle 'tria' and mesh the model with three different target lengths i.e., 1mm, 3 mm, and 5 mm by using ANSA.
Steps:
Import the CAD model.
Geometry check-up.
Topo/Geometry cleanup.
Setting up of relevant PIDs.
Defining the element size or length.
Selection of Meshing type.
Generating Mesh.
Procedure:
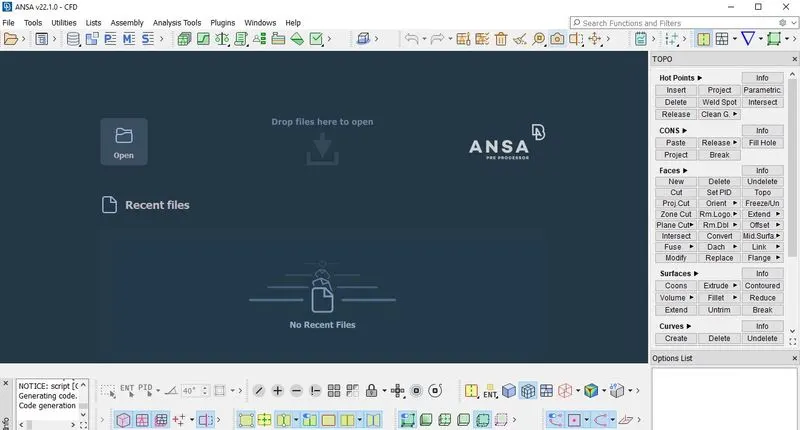
To import the CAD model we follow the below steps,
Go to file -> open -> browse the location of the CAD model -> select it to click on open.
Below is the image of the wireframe model of our uploaded model.
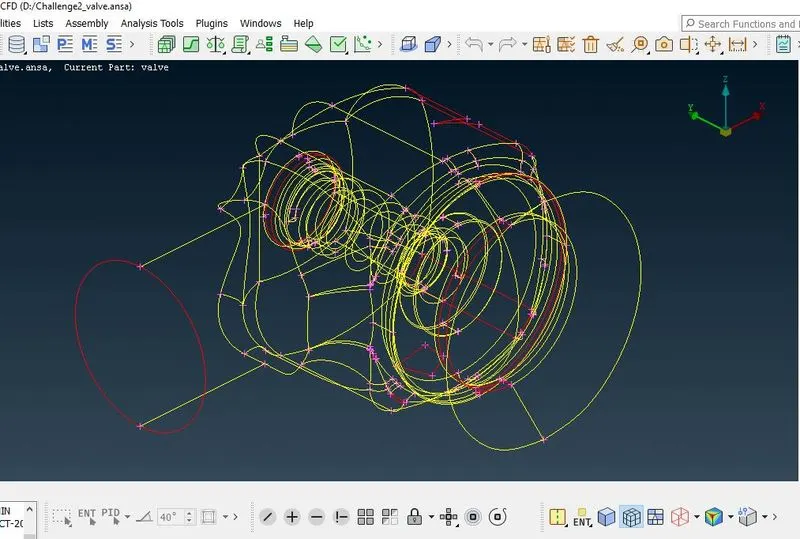
We can see a lot of topological errors, but before topo clean up let's do a geometry check to see all the errors in the model.
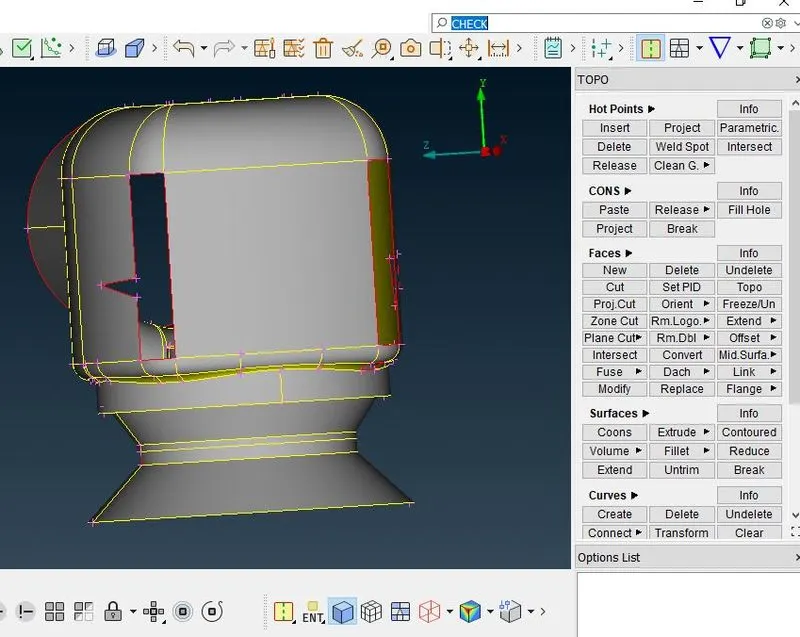
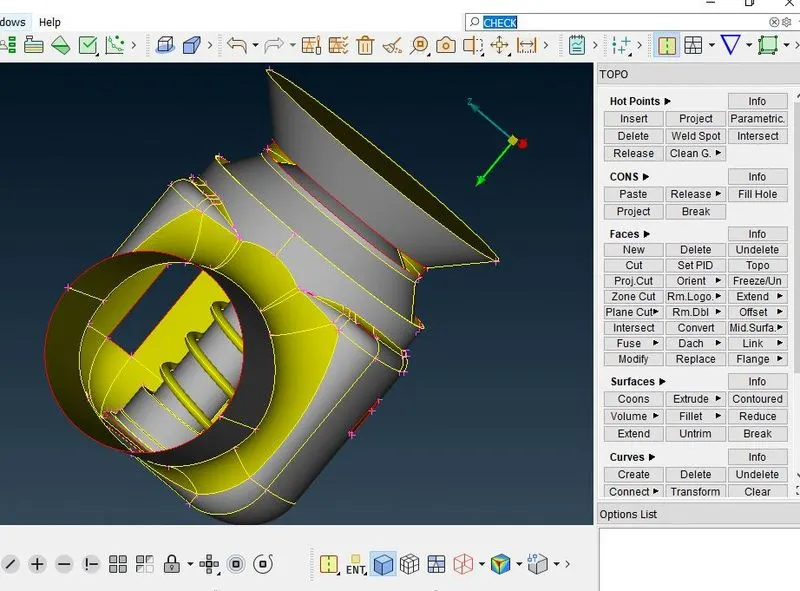
Geometry check-up :
A geometry check-up is done to check whether there are any errors in the model like Unclosed faces, Super Imposing faces any holes or any geometry disorder. etc...
To do this operation , go to toolbar -> checks -> geometry -> visible -> execute
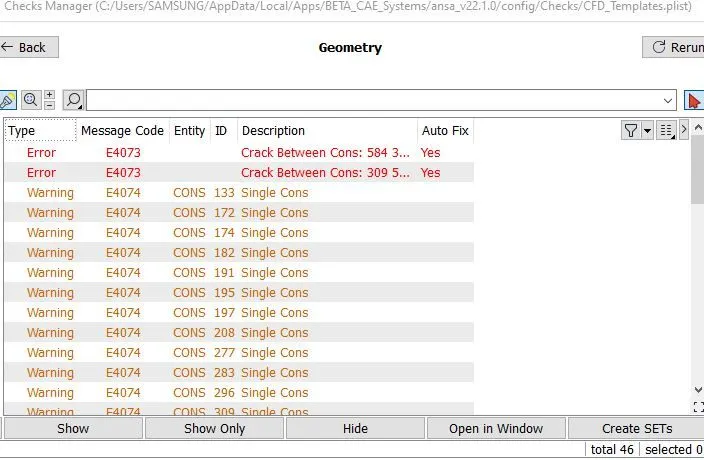
In the above image, you can see a lot of errors after the geometry check-up. These are the errors that need to be solved. In those errors, if you see there are a lot of single cons to be resolved. As single cons will be present when there are open surfaces or cons that share an edge with only one surface, as this is 3D geometry for CFD applications we need closed surfaces to do volumetric mesh and we need to fix single cons.
The below image is the wireframe model of our model with only single cons made visible.
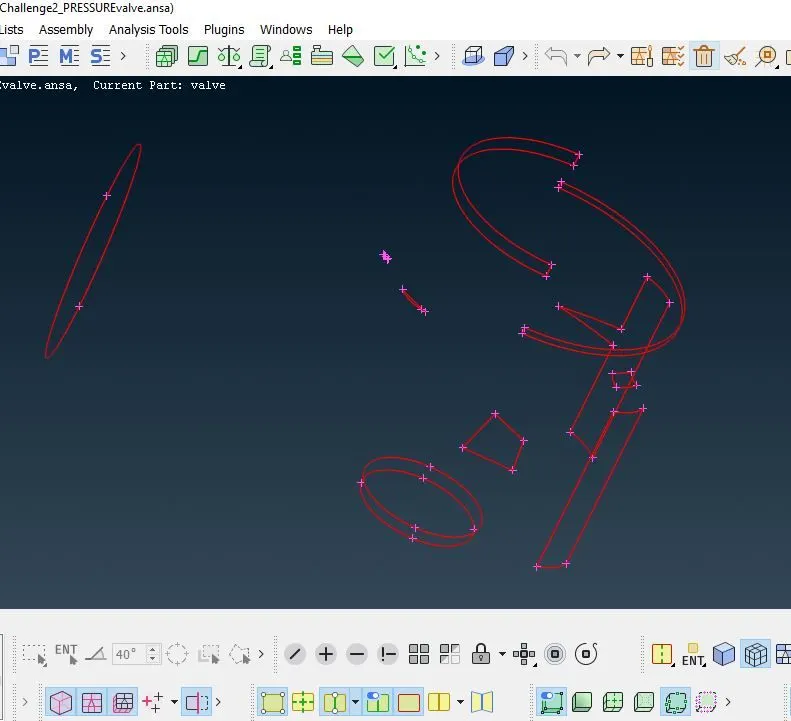
Now we need to clear all the topo errors one by one. For any geometry we expect double cons, we never consider them errors.
Topo/Geometry cleanup:
If you want to see the location of the error shown in the geometry check-up, you can select pick and select the con to see where it is present and see the preview of the error(single con) in the model.
We will use visibility tools to see the single cons and we have to clear the single cons wherever they present.
We will patch all the single cons by creating a new face over there.
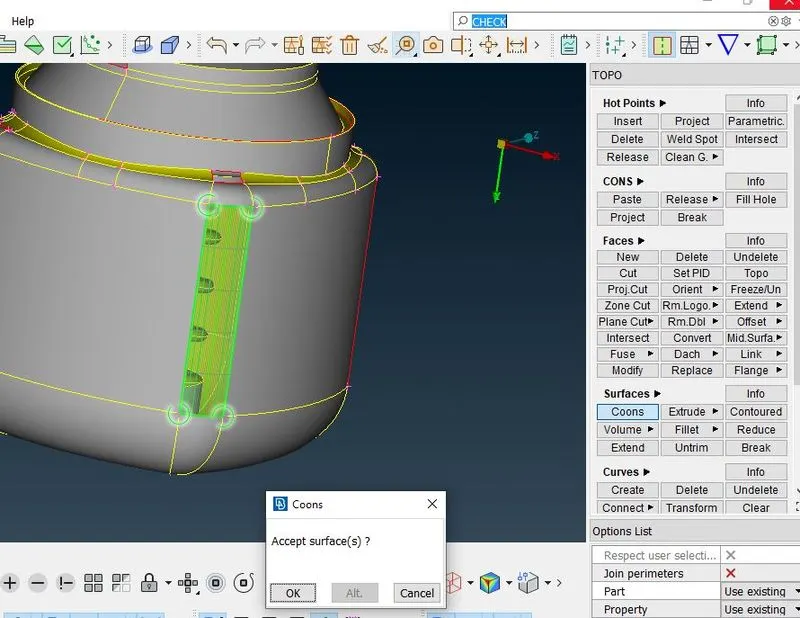
We will create/patch the surface by using the new under faces.
Here we have 4 options to use under new, they are existing surface, planar, coons, and fitted. We will also use fill holes under cons.
We use these different types of algorithms to create faces depending upon the applications. So when one fails to create a better surface, we try with other alternatives/algorithms.
If you feel difficult to select cons inside the model, you can go to wireframe mode by turning off shadow mode or by clicking Cntrl +shift and double clicking on the con to select. you can also use this wireframe mode also to verify/check the selection.
In the below image you can see the preview of the face created by using coons.
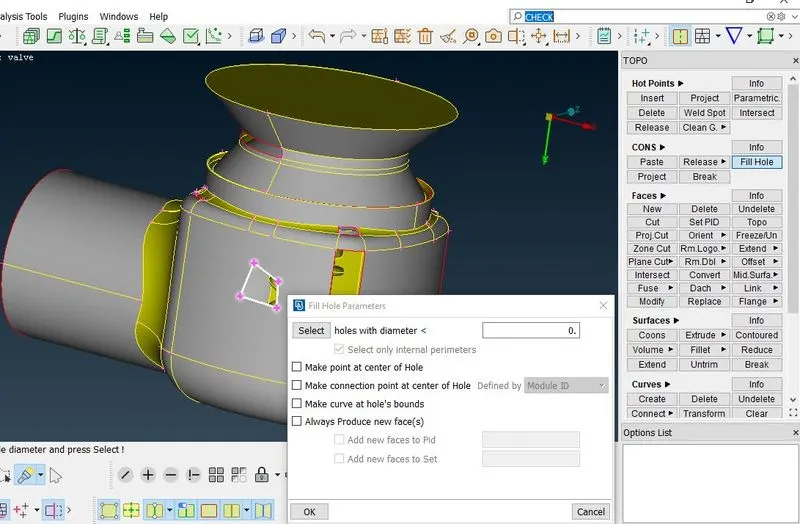
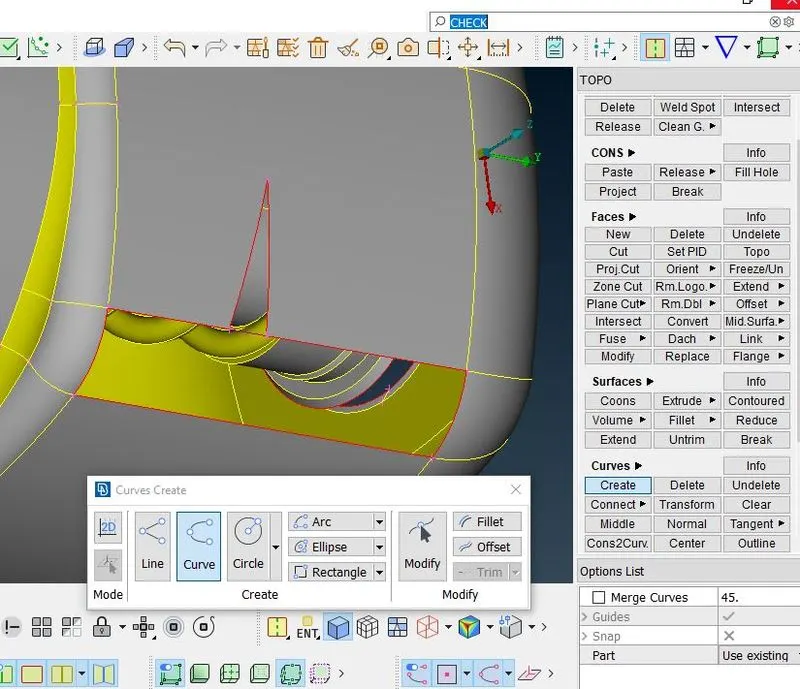
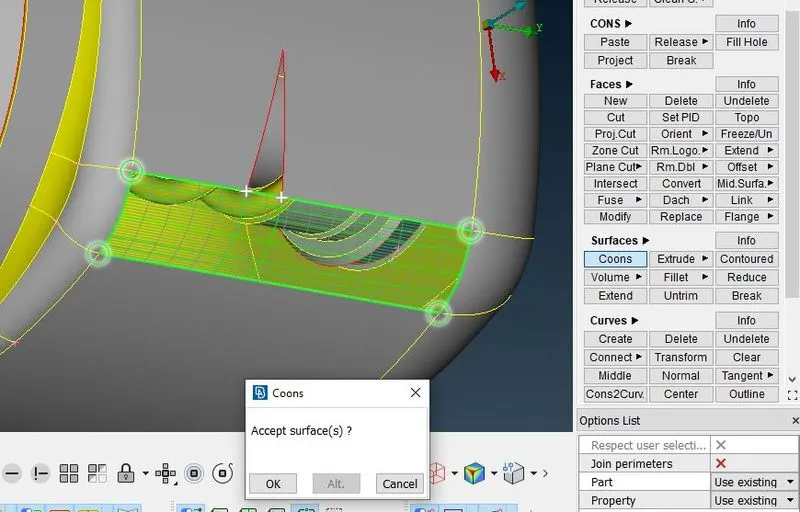
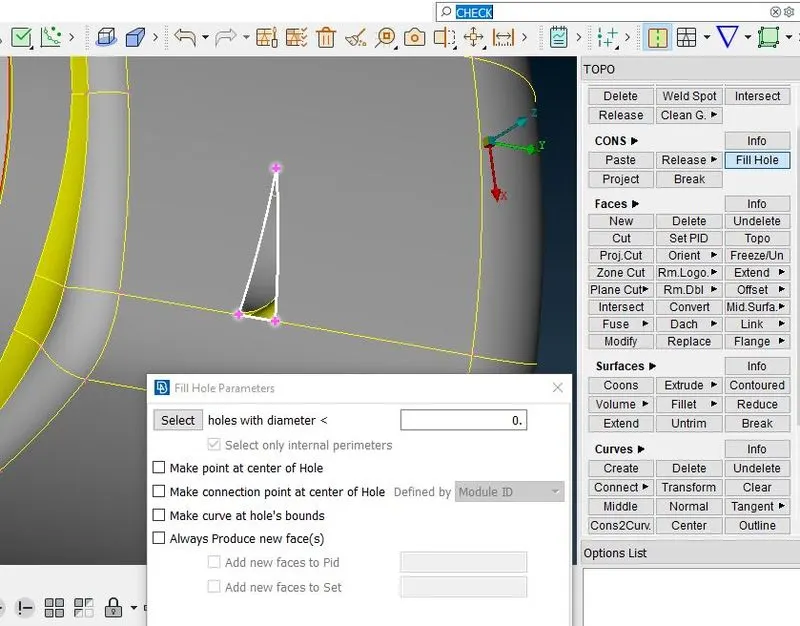
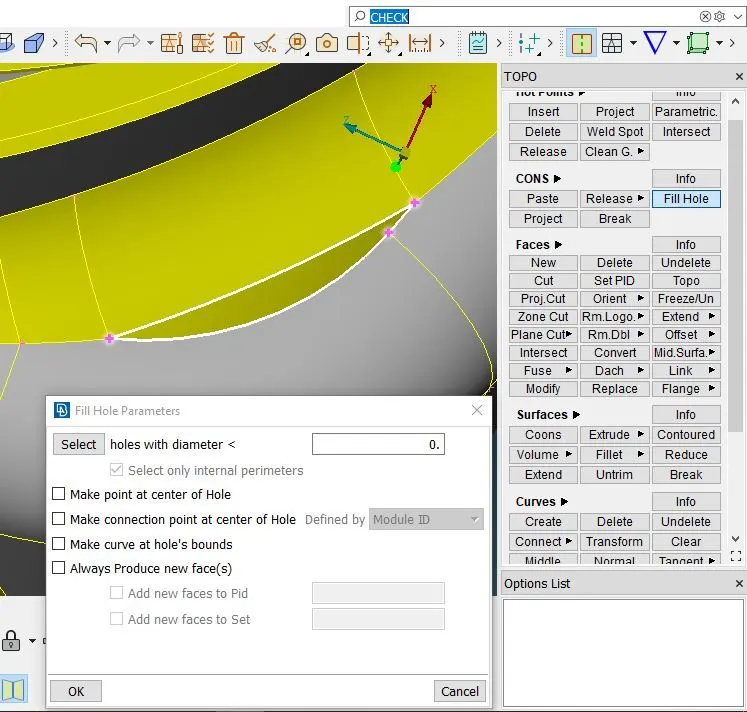
In a similar way, we create surfaces wherever there are single cons by using the above algorithms.
After all the patching let us do the geometry check again, to see whether any error exists or not.
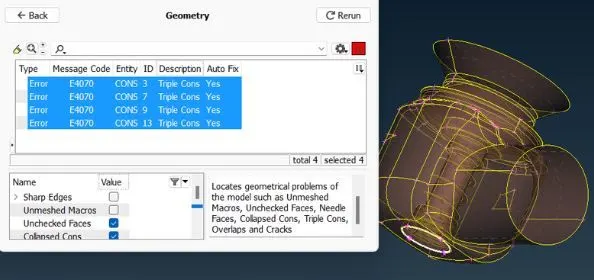
In the above image, you can observe that there are no single cons errors, but you have only triple cons existing at the bottom of the geometry as we have closed the bottom with a surface. Actually, the triple con is not an error it's just a warning. We should always go to locations where there are triple cons and see whether triple cons are necessary or not. If not try to remove them. Here in our case as all three surfaces are important, so there will be the formation of a triple con and we will ignore this triple con as all surfaces are important.
The next thing is to assign PIDs, but before that, we need to clear small surfaces. We are not supposed to have those, because they may interfere while meshing, like the mesh element, may not fit in that small surface. So we clear those small surfaces by selecting cut under faces and clicking the right mouse button on the con we want to remove. In this way, we can restrict smaller surfaces.
Setting-up of Relevant PIDs:
This is done to specify names to different boundary conditions for various parts. We need to activate cross hatches before setting-up PIDs.
If you open properties manager at the top, you will have only one default PID. In order to create new PID , right click on properties manager -> click new -> then select shell -> then again select shell -> then give name in the popup box -> then ok .You can change the color by double clicking on the color box -> then ok.
In a similar way create PID for the inlet, outlet, spring, valve head, body, column, and base surface.
The next thing is to assign these PIDs to the components of the geometry.
To apply, we select /click on the PID to apply in the PID manager -> then right click on it -> then click on apply -> then in the geometry select the crosshatch of the surface you want to assign -> then middle click. In a similar way, we have to apply PIDs we have created. To give the PID we select the different types of selection available to select the exact surface needed.
Then after assigning the PID, delete the empty original PID which has no components assigned by using compress.
In the below image you can see the list of PIDs we have assigned.
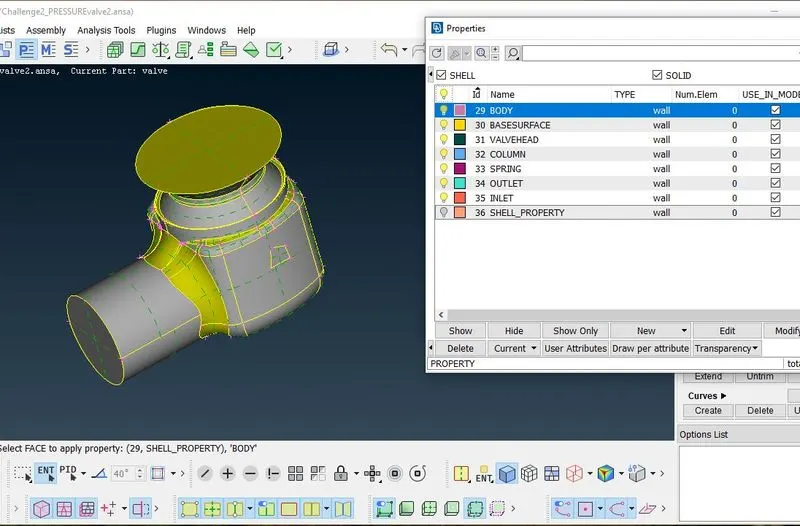
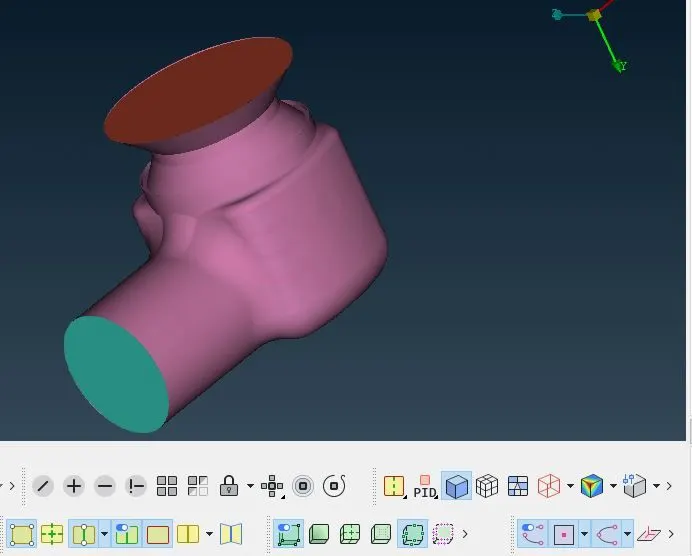
In the below image you can see the image of the model after assigning PIDs.
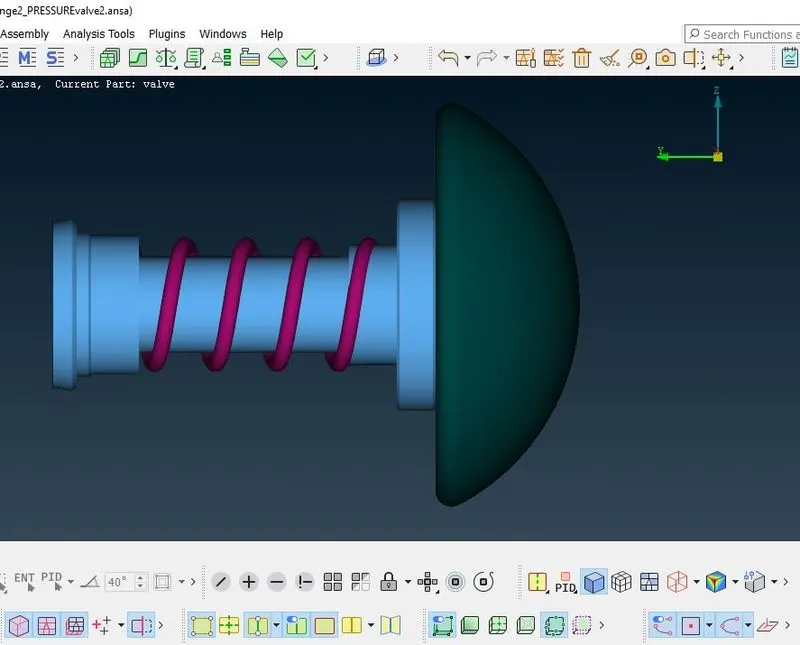
In the below image you can see the image of the interior parts of the model after assigning PIDs.
Now the next thing to do is meshing for that we have to go to the meshing module.
Defining the element size/length:
Here we have three different target lengths as three different cases and we have to mesh the model with all three different lengths.
Target length = 1mm, 3 mm and 5 mm (i.e. 3 cases).
Let's first mesh with three different sizes and then finally conclude by comparing the results of all three cases.
Case -1:- Target length = 1 mm :
We have to give the mesh length parameters at four places.
under perimeters, we give the length as 1mm.
under macros, we give the length as 1mm.
We follow the below steps for that,
Go to mesh utility -> perimeters -> length -> now select perimeters and then-> click left mouse button and drag and select the entire model -> click middle mouse button -> Enter the element length as 1 mm -> Click middle mouse button.
In a similar way select macros instead of perimeters under length and give mesh length as 1 mm.
Under mesh parameters, we have to give the target length as 1 mm and select element as tria and also give min and max length as 0.5 mm and 2 mm respectively and keep remaining to default.
In quality criteria, we have to give min and max length as 0.5 mm and 2 mm respectively.
Then the next thing is to generate the mesh.
Selection of meshing type & generating mesh:
Here we will select the Meshing algorithm. We follow the below steps for that:-
Go to Mesh Generation -> spot Mesh -> tria -> drag and select the entire model -> to click on the scroll button/ middle mouse button on the mouse to mesh (or) we can directly select visible under drop-down menu of spot mesh instead of drag and select the entire model.
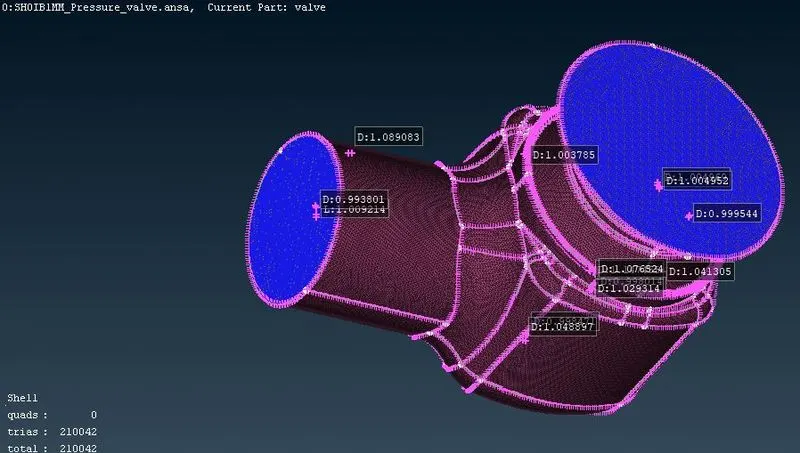
The model after the generation of mesh is shown in the below image.
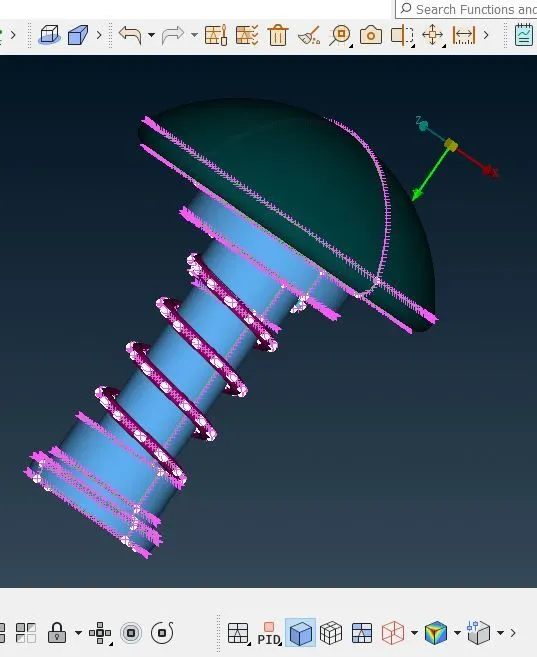
The below image is the final view of the inside parts of the model after the generation of the mesh.
Case one link: https://drive.google.com/file/d/17b_VMmEkuE9Rwv053WtsUZWKqI9CGx4J/view?usp=sharing
Case -2:- Target length = 3 mm
Everything is the same as in the above case but the only change here is, that the target length changes to 3mm.
Then you can see the geometry after giving the mesh length in the below image.
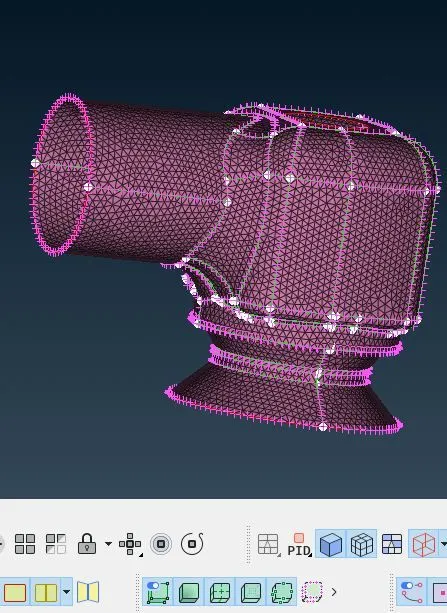
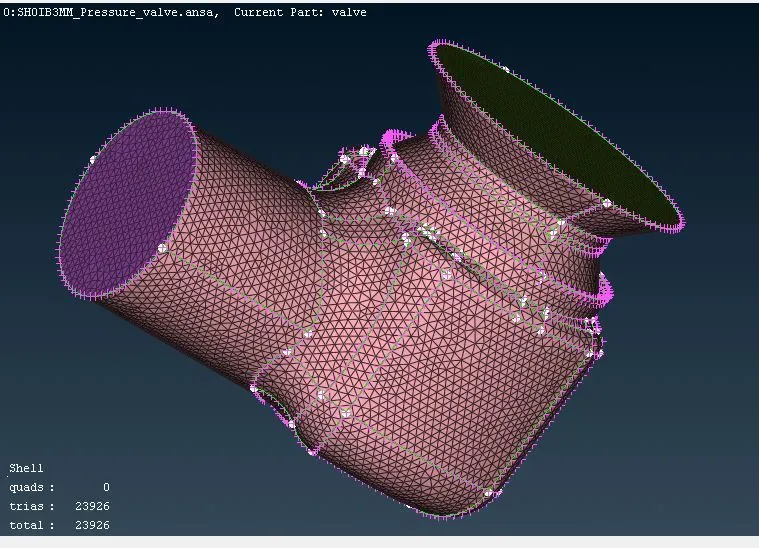
For meshing also follow the same process as in the previous case. The model after the generation of mesh is shown in the below image.
The below image is the final view of the inside parts of the model after the generation of the mesh.
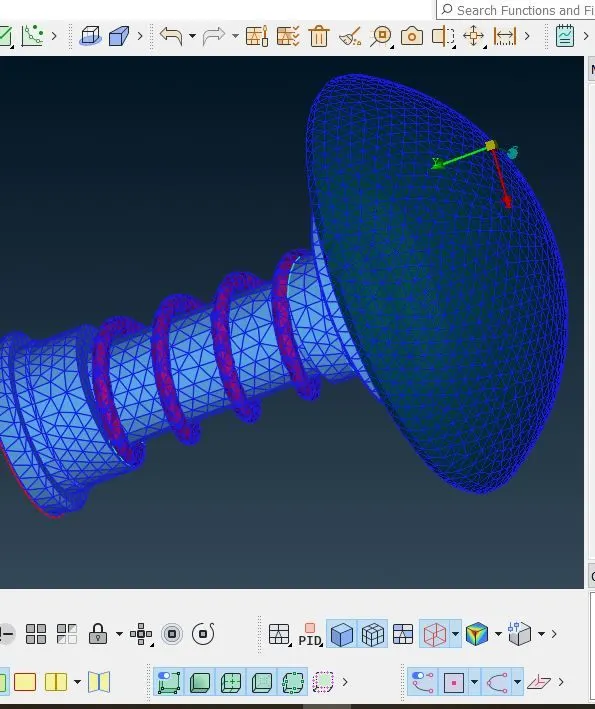
Case two link: https://drive.google.com/file/d/19HEFUATX7AoCK4YGX0ne6oIFajhR4qqY/view?usp=sharing
Case -3:- Target length = 5 mm
Everything is the same as in the above case but the only change here is, that the target length changes to 5 mm.
Then you can see the geometry after giving the mesh length in the below image.
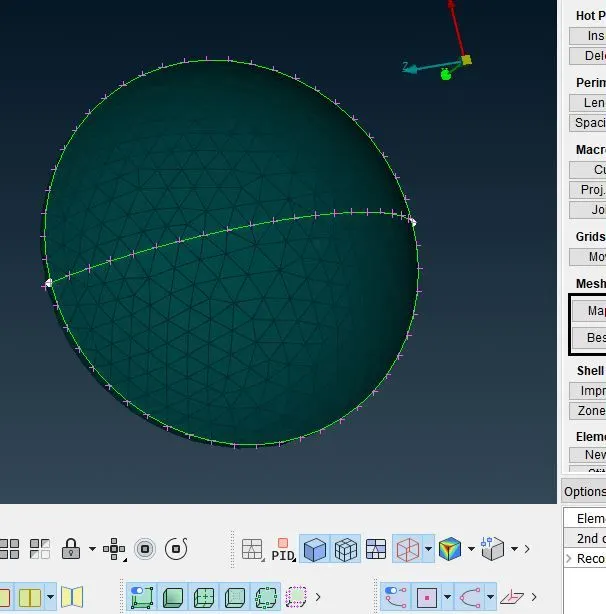
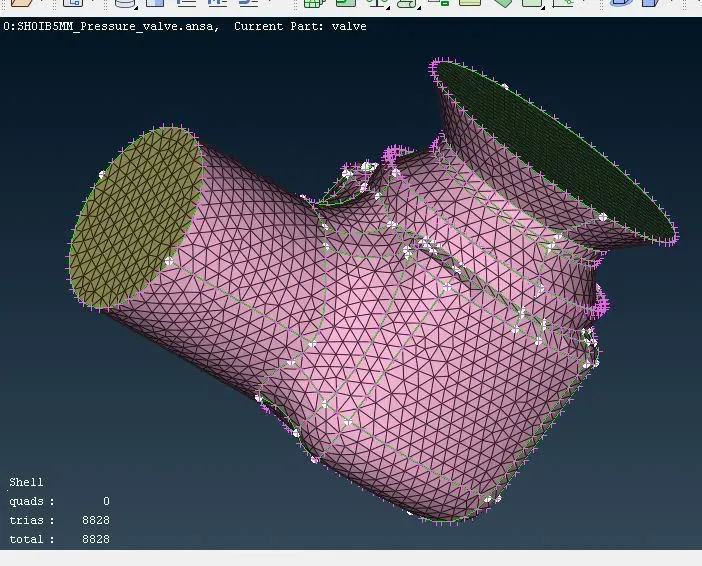
For meshing also follow the same process as in the previous case. The model after the generation of mesh is shown in the below image.
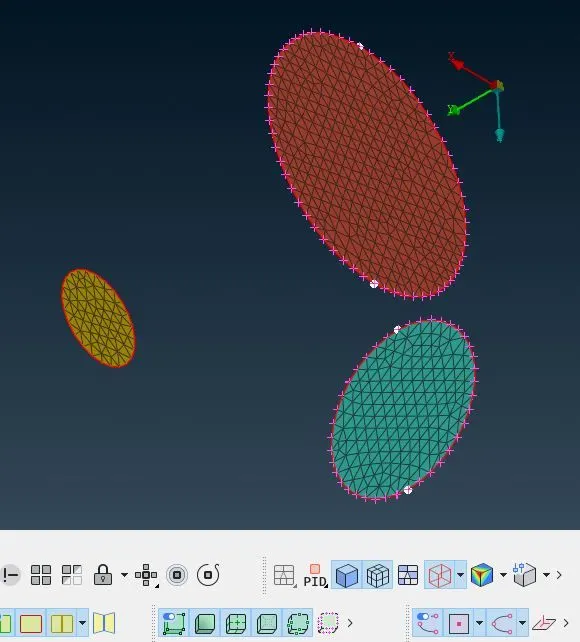
The below image is the final view of the inside parts of the model after the generation of mesh.
Case three link: https://drive.google.com/file/d/16SAaQE94sYjLsmv5q0JIS6JFdfpnFMLl/view?usp=sharing
Conclusion:
Here finally we have surface meshed the given model with three different lengths i.e., 1mm, 3 mm, and 5mm. By observing the above results we made the below conclusions.
You can also see the number of elements meshed in the model on the left side of the workbench. You can observe that as the mesh size is increasing there is a decrease in the number of elements.
In case 1, i.e., with 1mm mesh length as the size of the elements is small, we have more number of elements (210042), which also make the mesh capture the geometry very well as the surface quality is also very good.
When the target length is increased to 3 mm then we have less number of elements (23926) than in the previous case, the capturing of the geometry is also not as good as in the previous case. The surface quality is also less than in the previous case.
When the target length is increased to 5 mm then we have a very less number of elements (8828) compared to the previous two cases. The surface capture by mesh is also the worst.
In case 3, you can see in the valve head the surface is not captured very well, whereas in spring there is the failure of mesh, and the spring shape is totally lost. This happened because if you have a very small surface and if that surface meshes with a target length greater than the size of the surface then obviously a failure of mesh takes place. Here in the case of spring, we have used a mesh length of 5 mm whereas the size of the side surface is around 3.4 mm, you can simply understand that it is impossible to fit an element on a surface that is smaller than the mesh length.
The size of the target length should be such that, it should justify each and every component of our model mainly it should be taken by considering the smallest component in the model. No single component should face the error faced by spring as in case 3.
Even the valve head quality surface quality is also not good. The quality always depends upon the size of the target length. So if our target length is small, we have small elements, which eventually increases the number of elements, then we will have a good quality mesh such that our geometry is very well captured and surface quality is very good.
You can also observe as we have selected tria elements in all three cases we see quad elements are 0 in the model we meshed.
Learning outcome:
In this process, we have learned how to import the CAD model then how to do geometry check-ups and then how to do topo/Geometry cleanup and the Setting-up of relevant PIDs to different parts, and then define different element sizes or lengths then selection of meshing types then finally how to generate the surface mesh.
Here we also found that smaller element captures the curvature of geometry more accurately.