Week -2
1. Make a Simulink model of a doorbell using solenoid block with the following details :
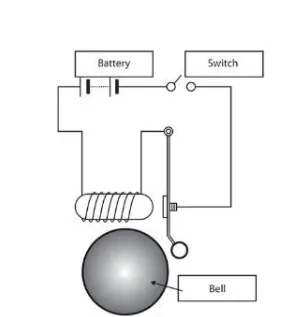
The following blocks used in this model are as follows :
- Solenoid: Electrical energy into kinetic energy, The Solenoid block represents the electrical characteristics and generated force.
- Battery: Gives supply for the solenoid.
- Switch: To complete the connection.
- Pulse generator: The Pulse Generator block generates square wave pulses at regular intervals pulse generated from PG is converted to Simulink to physical signal and given to switch for perform switch function.
- Ideal translational motion sensor: Physical movement done by the solenoid is sensed by the Ideal translational motion sensor.
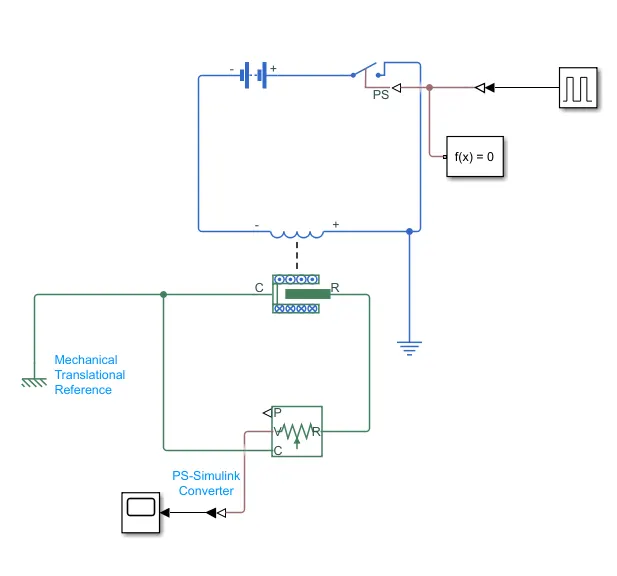
Simulink model of doorbell :
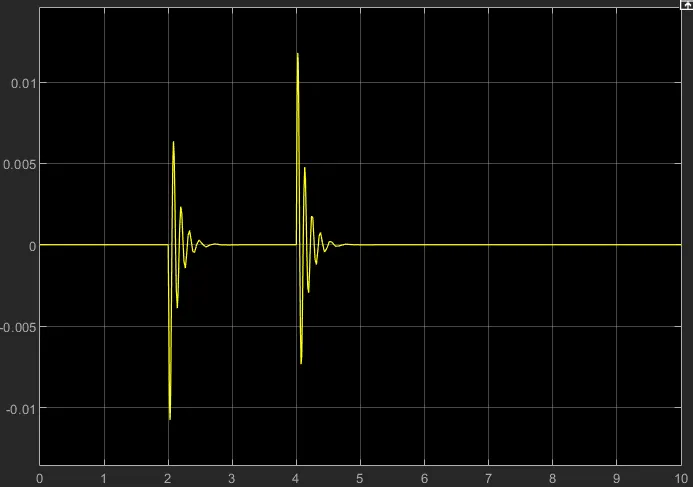
Output :
Model Explanation :
- A pulse generator is given as input with the following specifications.
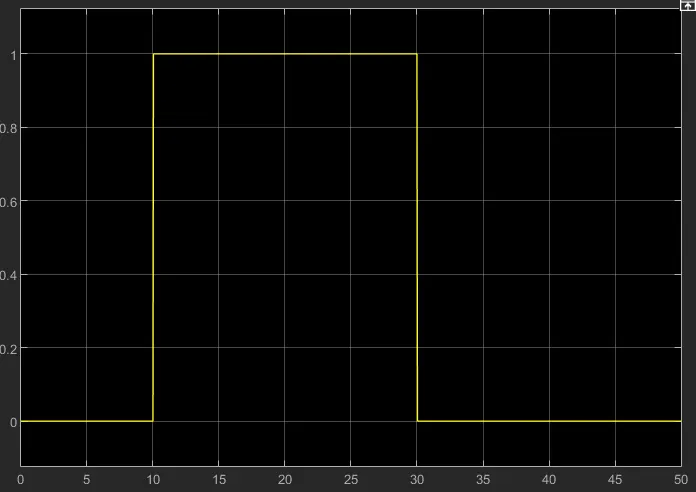
- The condition was that the bell is engaged for 2s and then released. Same was implemented by giving period as 4 seconds and width as 50% of 4 seconds, i.e, 2 seconds. Phase delay pulse was given as 2 seconds, so the simulation starts from the unengaged condition of switch.
- The signal from the pulse generator was converted using a Simulink-PS converter and is given as the input to the switch.
- A Solenoid is introduced and battery is connected to it. The voltage of the battery connected was made as the same as that of the rated voltage of the solenoid. The Switch is also connected to the same circuit.
- The position of solenoid plunger is measured using an ideal translational motion sensor connected to the circuit.
- Initial position was set to 5mm in translational motion sensor. Both mechanical and electrical references were connected to the respective circuits.
- The output from the ideal translational motion sensor is converted using a PS-Simulink converter and is given to the scope to display the results.
- A scope was also connected to the input to visualize its behaviour.
- The spring constant and damping parameters of the solenoid block was altered to obtain the desired graph.
2. Use a thermistor to sense the temperature of a heater and turn on or turn off the fan as per below conditions :
Conditions :
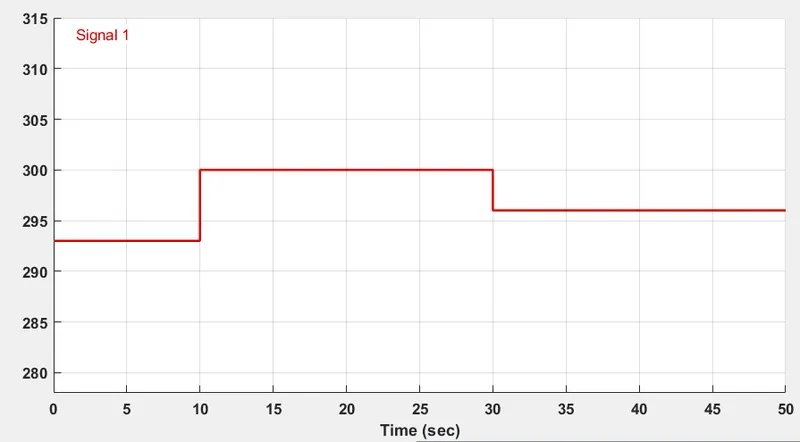
Temperature source : 20°C from 0 to 10 seconds, 27°C from 10 to 30 seconds, 23°C from 30 to 50 seconds.
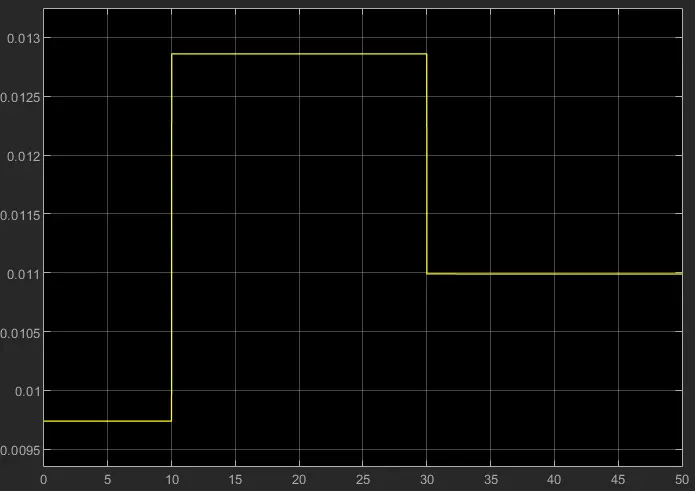
Fan conditions : ON if the temperature goes above 25°C, OFF otherwise.
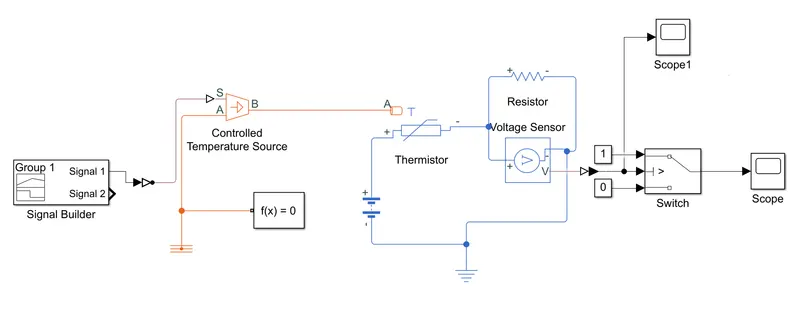
The following blocks used in this model are as follows :
- Thermistor: temperature sensing element, Negative temperature coefficient thermistor using B-parameter equate.
- Controlled temperature: This block represents an ideal energy source in a thermal network that can maintain a controlled temperature difference regardless of the heat flow rate.
- Signal builder: function to create and access Signal.
- DC voltage source: The DC Voltage Source block maintains a time-invariant (constant) voltage across its output terminals, independent of the current through the source.
- Voltage sensor: The block represents an ideal voltage sensor, that is, a device that converts voltage measured between any electrical connections into a physical signal proportional to the voltage.
- Switch: The Switch block passes through the first input or the third input signal based on the value of the second input. The first and third inputs are data input. The second input is a control input.
Simulink model of Thermistor :
Signal Builder : The figure obsereved below is how the signals are set in the signal builder block.
Scope1 : From the figure below we can observe how the voltage is changing with change in temperature. Using this information we can switch ON and OFF the Fan.
Scope :In the graph below we can observe that when the temperature is 300K the fan is ON and at the remaining temperature the fan is OFF.