Week 12- Final project
FINAL PROJECT - DOOR TRIM LOWER PANEL
Aim
The aim of the project is to create a CAD model for the door trim panel using the given Class A surfaces and master sections like in the OEMs and Tier 1 companies designing their components.
Objectives
- Check the given Class A surface for irregularities and correct them if present
- .
- Create tooling axes for each given surfaces and check whether they clear the draft.
- Create Class B and Class C surfaces for each parts.
- Convert the surfaces into solid bodies in part workbench.
- Decide and attachment strategy and follow the master sections to create the required engineering features on the main subsrate and the surrounding parts.
- Perform draft analysis on the part model and check whether they clear the draft.
- Assemble the components together using proper constraints.
Given Data
The Class A surface of all the components and master sections were already given as input data.
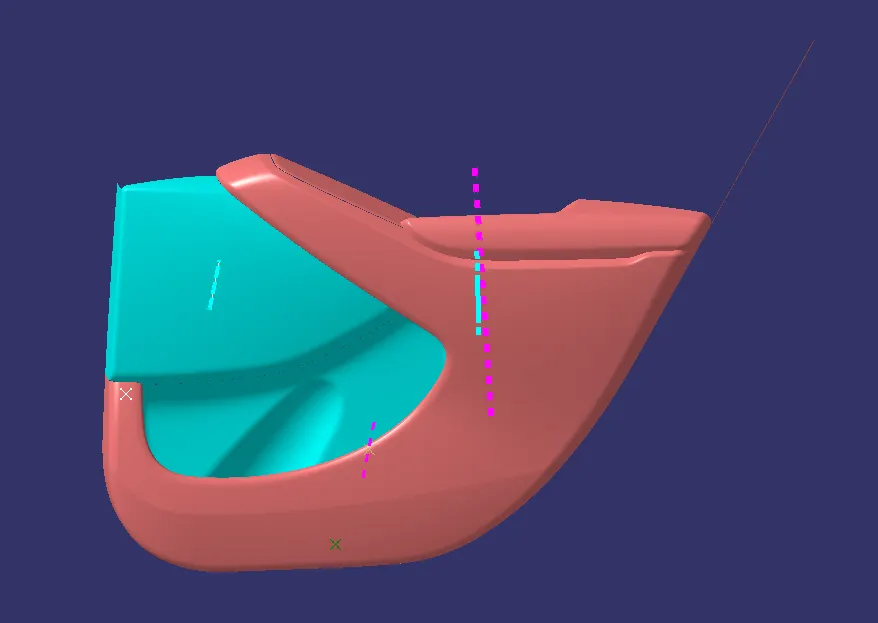
Fig 1. Class A surface of all components and master sections.
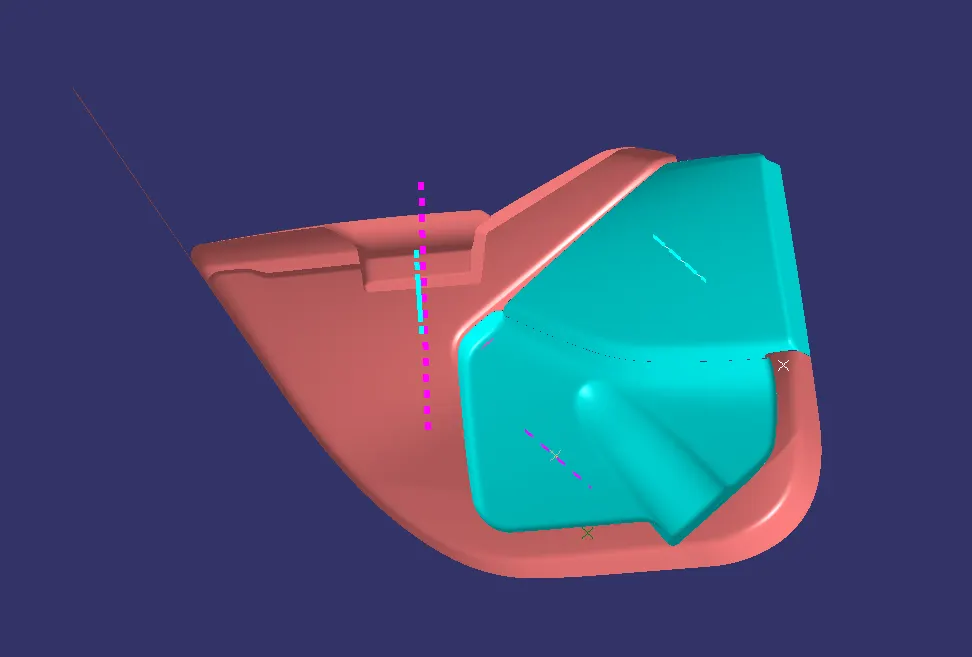
Fig 2. Class A surface of all components and master sections.
PROCEDURE
First we need to make it into an order and then, an assembly file is newly created with the name 'Door Trim Assembly' and the Class A surfaces of each components, the master sections and the push pins were placed under different part files created within the assembly file.
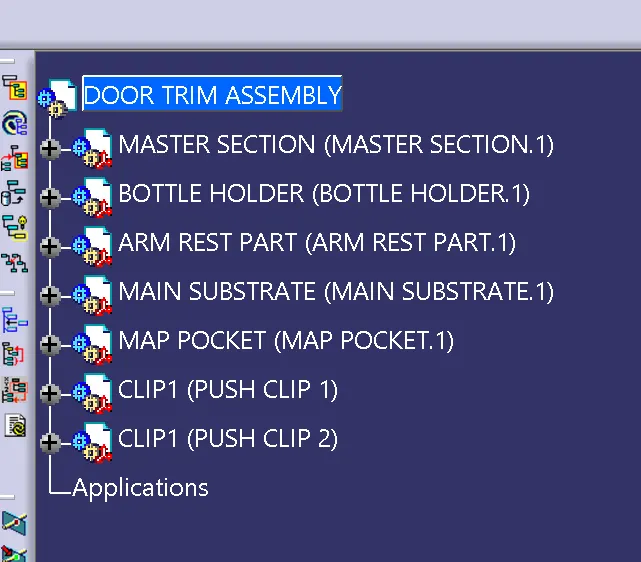
Fig 3. Assembly file and part files.
The part are seperately worked on the part workbench and made in to the final trim surface
BOTTLE HOLDER
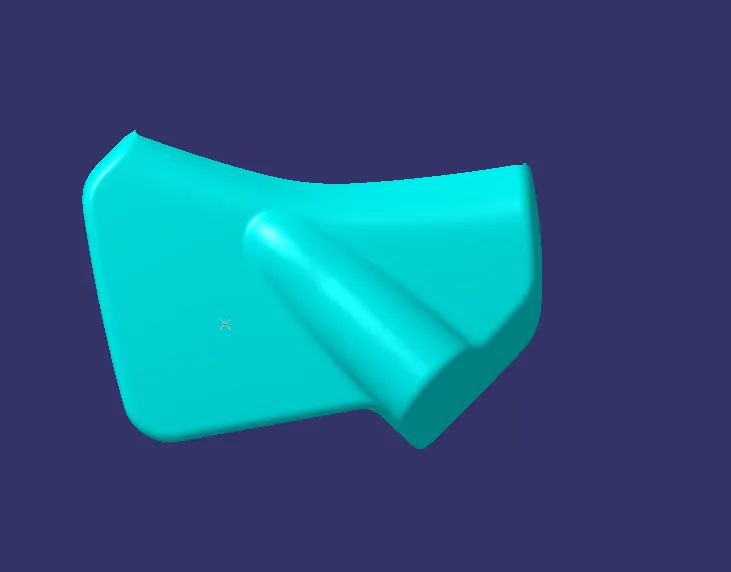
Fig 4 . Class A surface
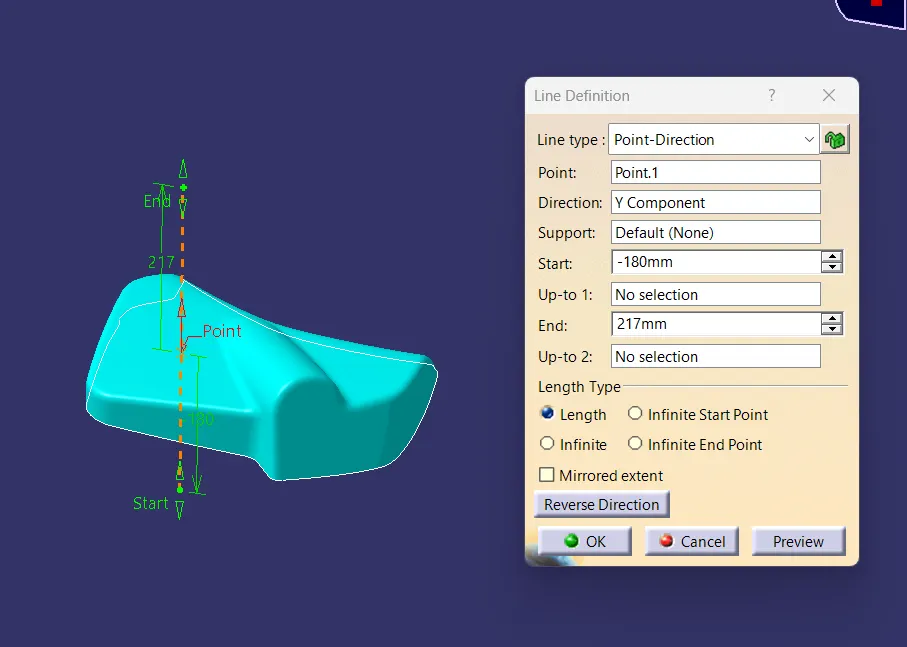
Fig 5. Tooling axis creation.
Draft analysis of class A surface is conducted for check.
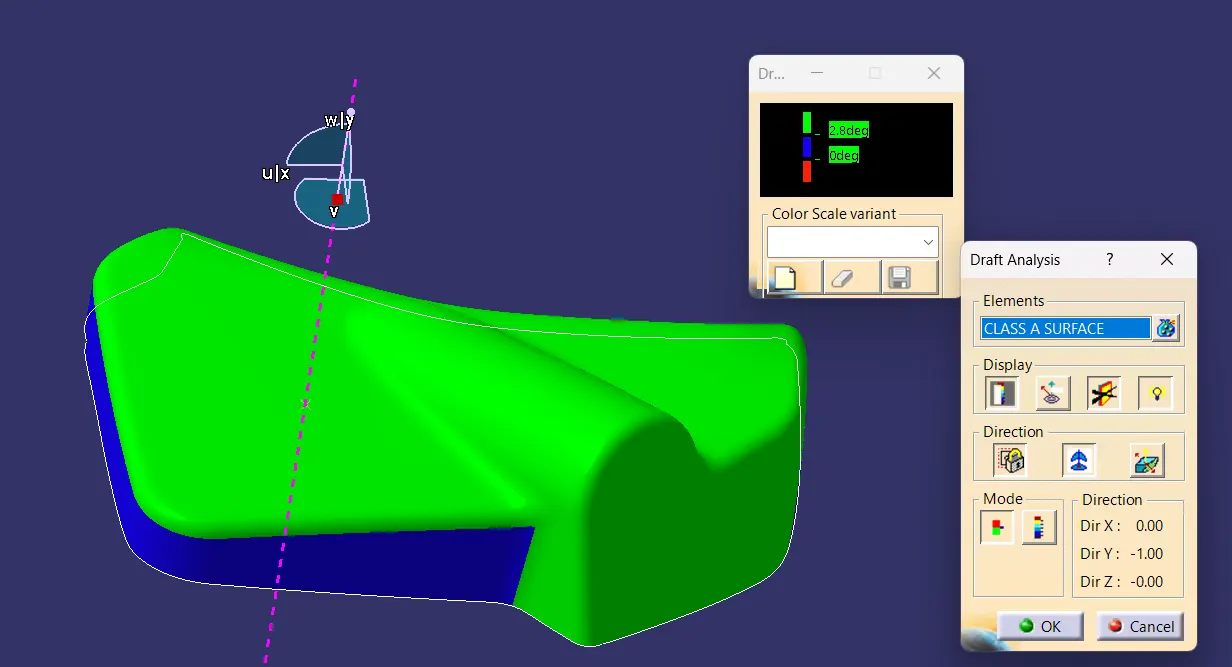
Fig 6. Draft analysis on Class A surface.
The Class A surface was offseted by 2.5mm to createthe Class B surface and the Class C surface was created by using sweep command from the Class A surface.
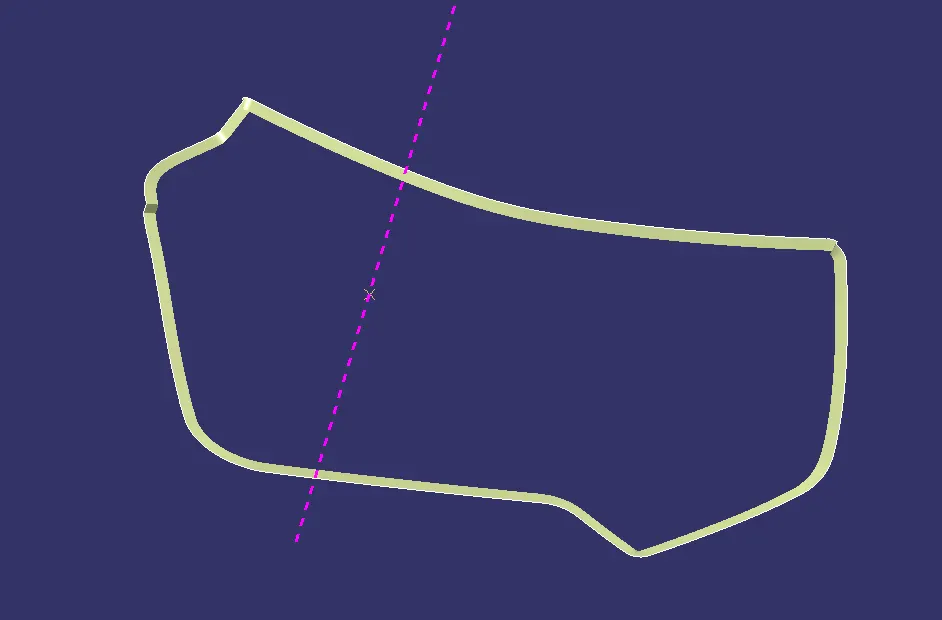
Fig 7. Class C surface.
The Class A and Class C surface are joined using join command and trimmed with Class B surface using trim command. The trimmed part is converted into a solid body using Close surface command in part workbench.
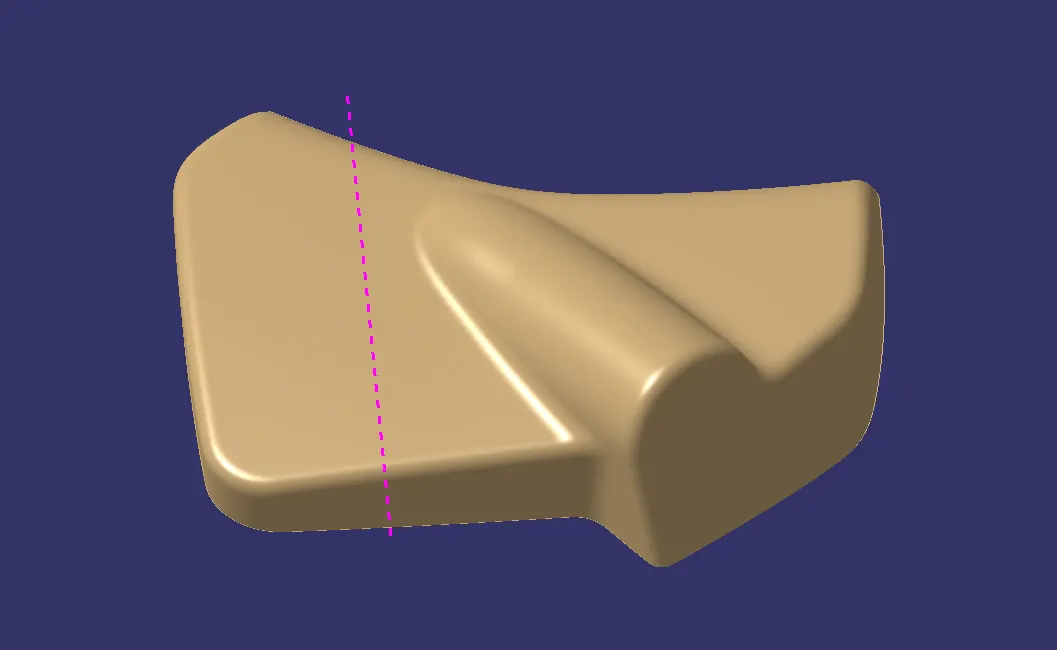
Fig 8. Solid body.
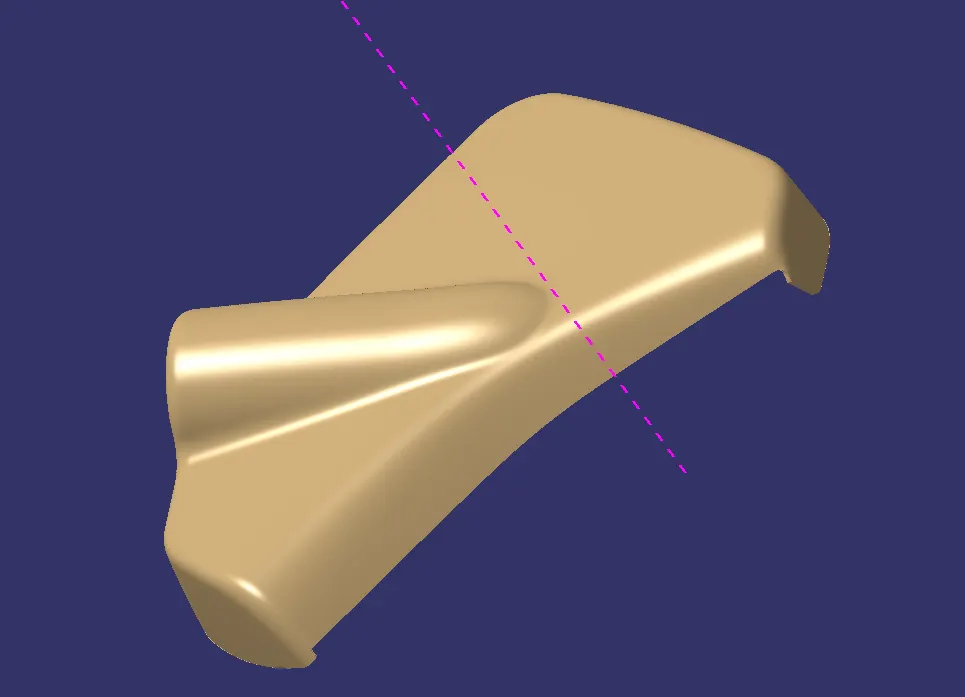
Fig 9. Solid body.
DRAFT ANALYSIS OF BOTTLE HOLDER
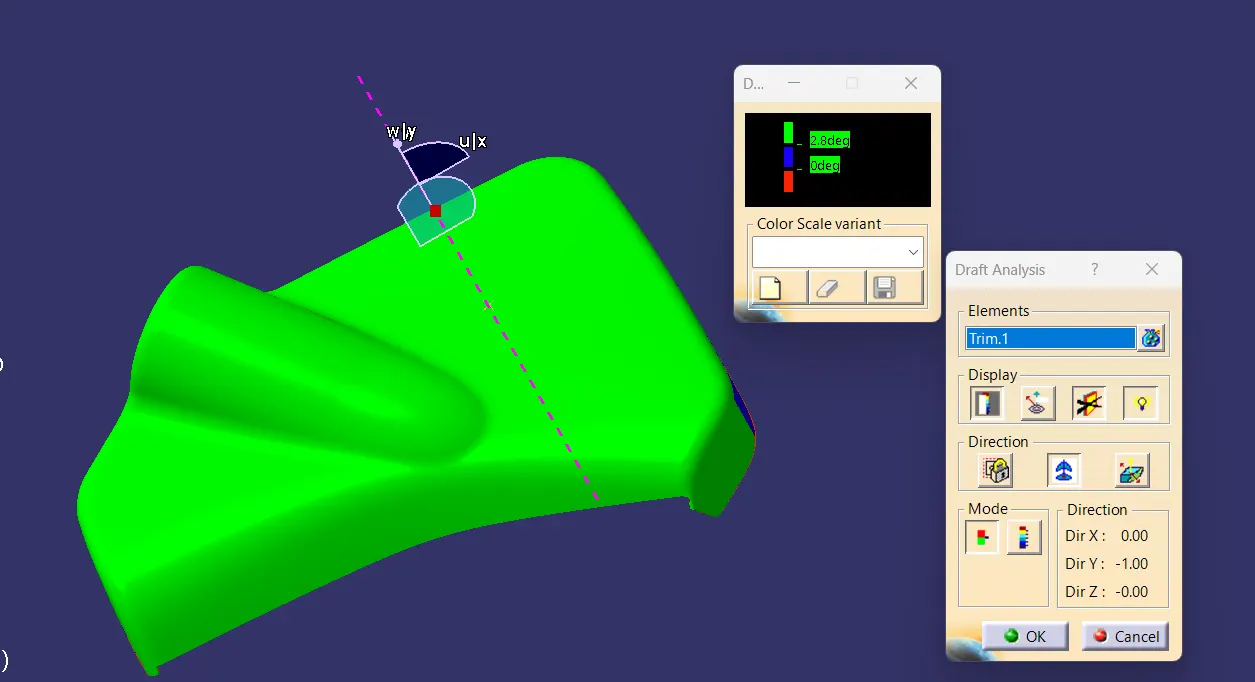
Fig 10 . Draft analysis on solid body.
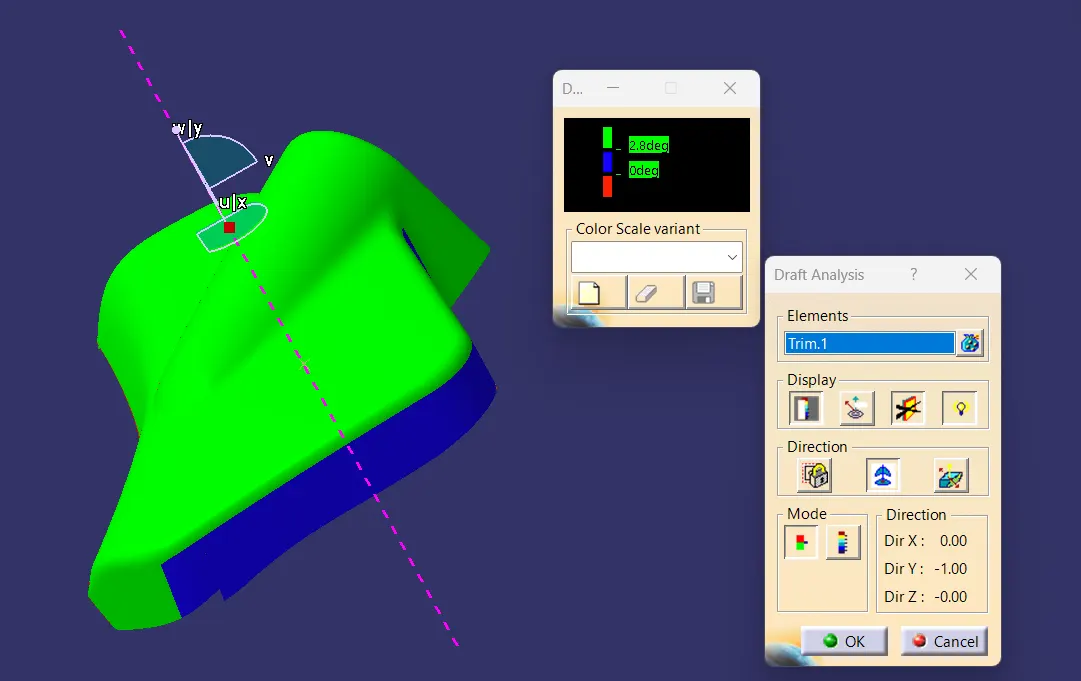
Fig 11 . Draft analysis on solid body.
ARM REST
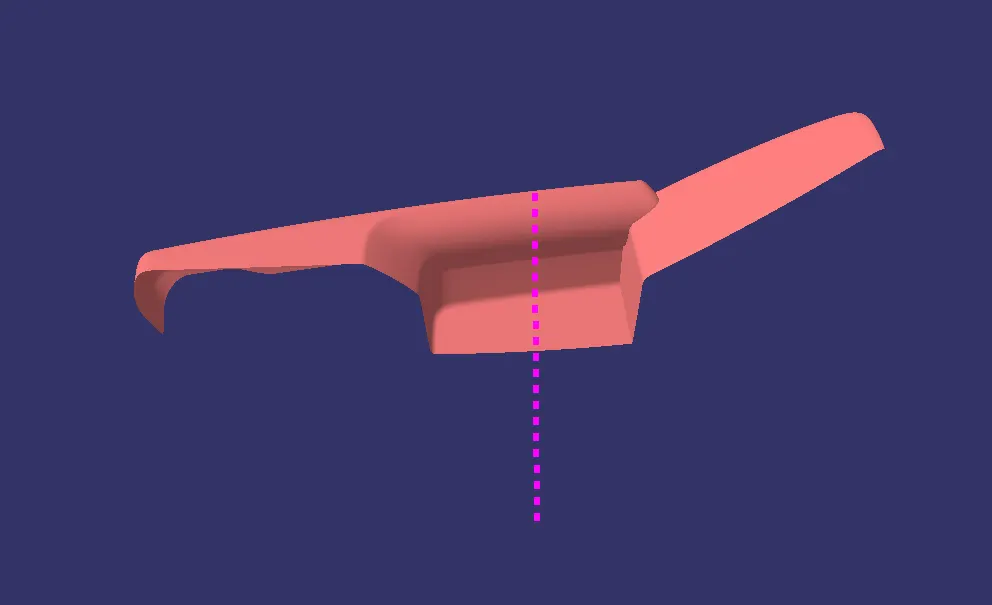
Fig 12. Class A Surface.
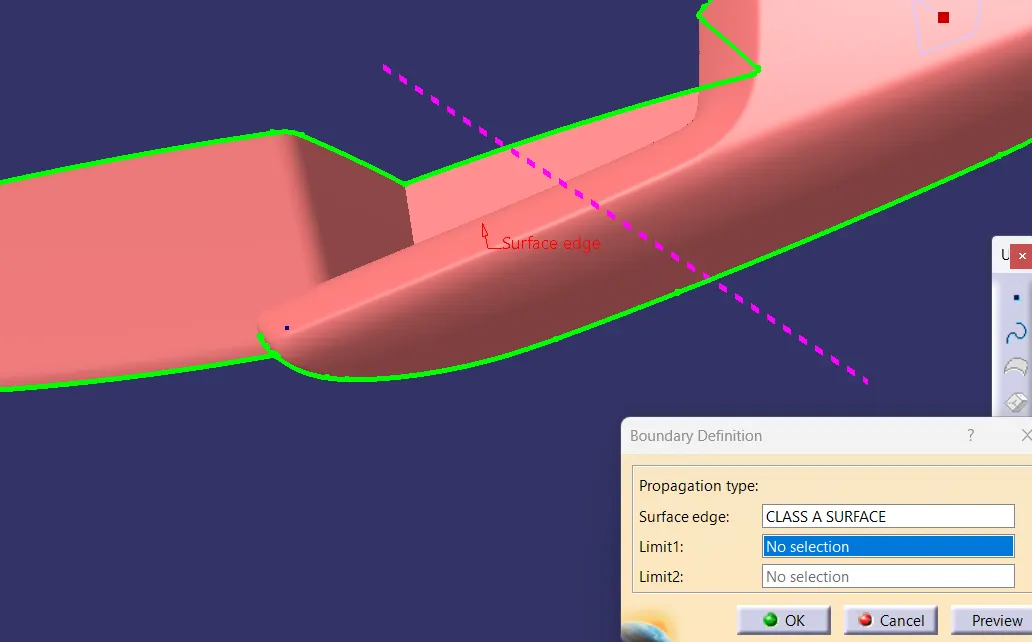
Fig 13. Irregularity check using boundatry command and founded.
So we need to modify the Class A surface using Extract, Extrapolate, Join and Trim commands.Then finally joining to make the improved class A surface.
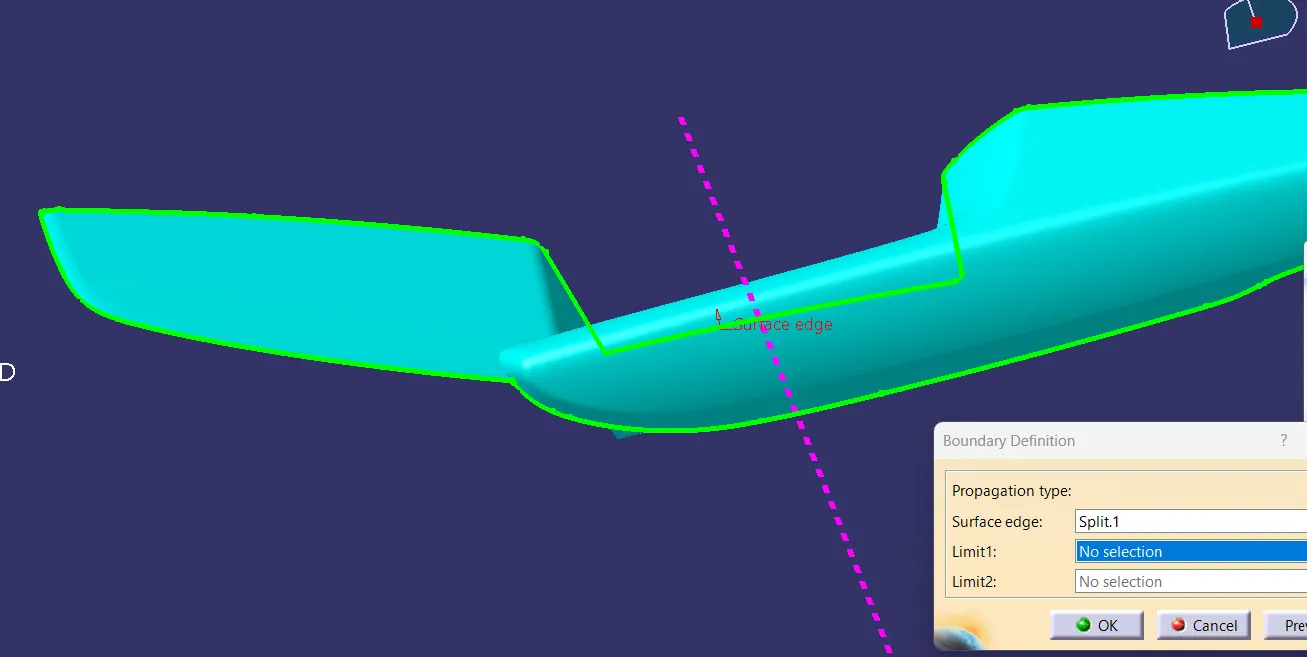
Fig 14. Modified Class A surface.
Creation of Tooling Axis:
For clearing all regions of the arm rest, two axes are required as tooling axis. One main tooling axis and a side core. The main tooling axis is created along the Z direction and the side core is created along the Y direction so that the draft analysis is satisfied.
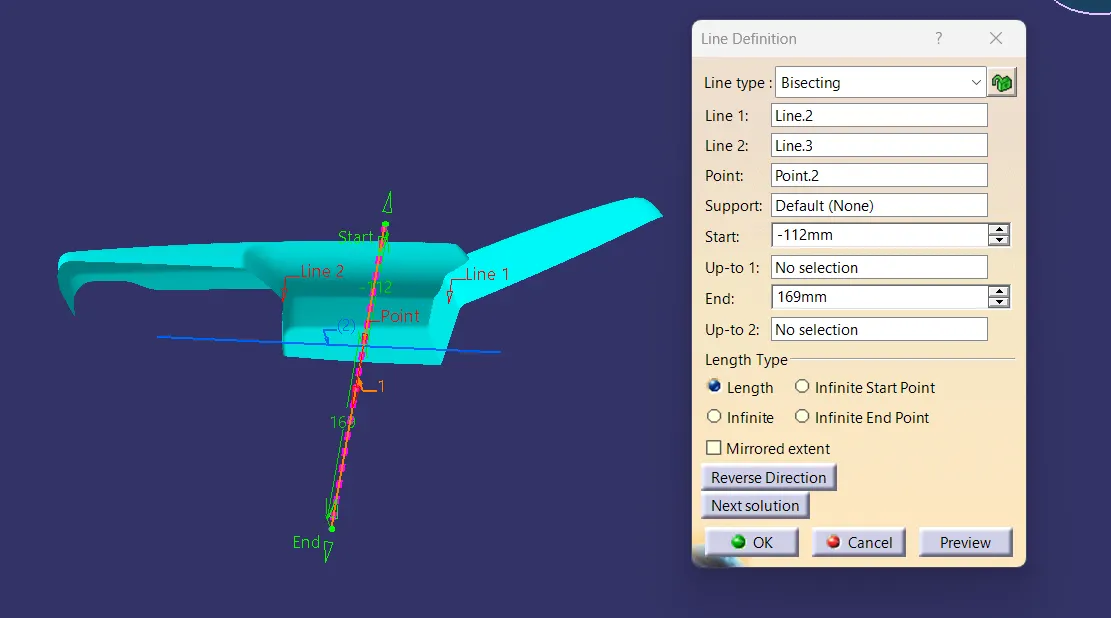
Fig 15. Main tooling axis for arm rest
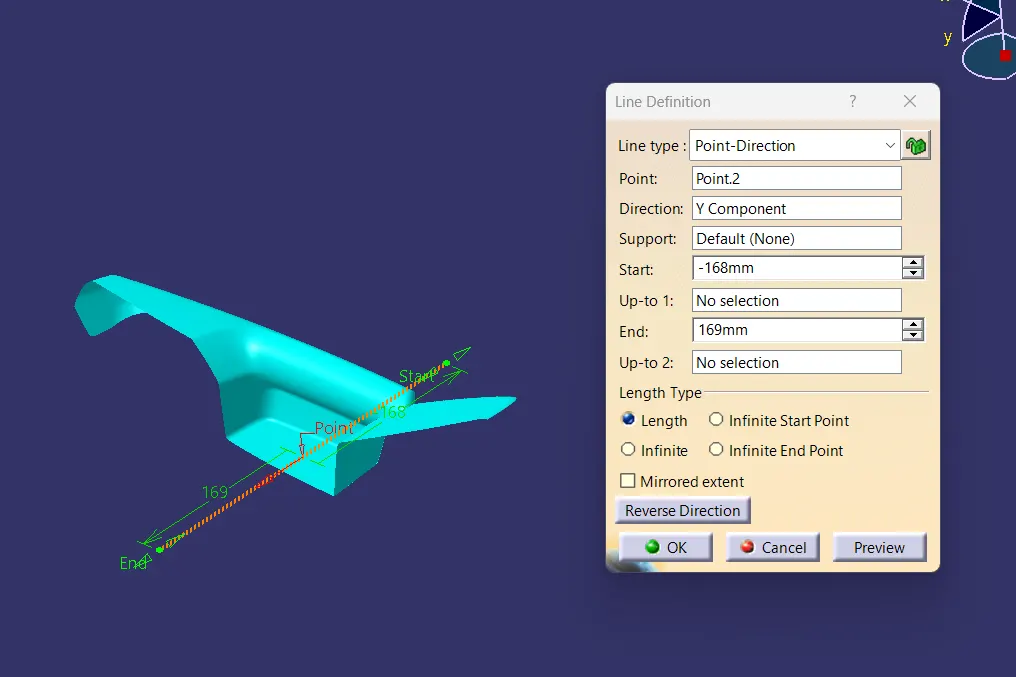
Fig 16. Side core tooling axis for arm rest.
Draft analysis of class A surface is conducted.
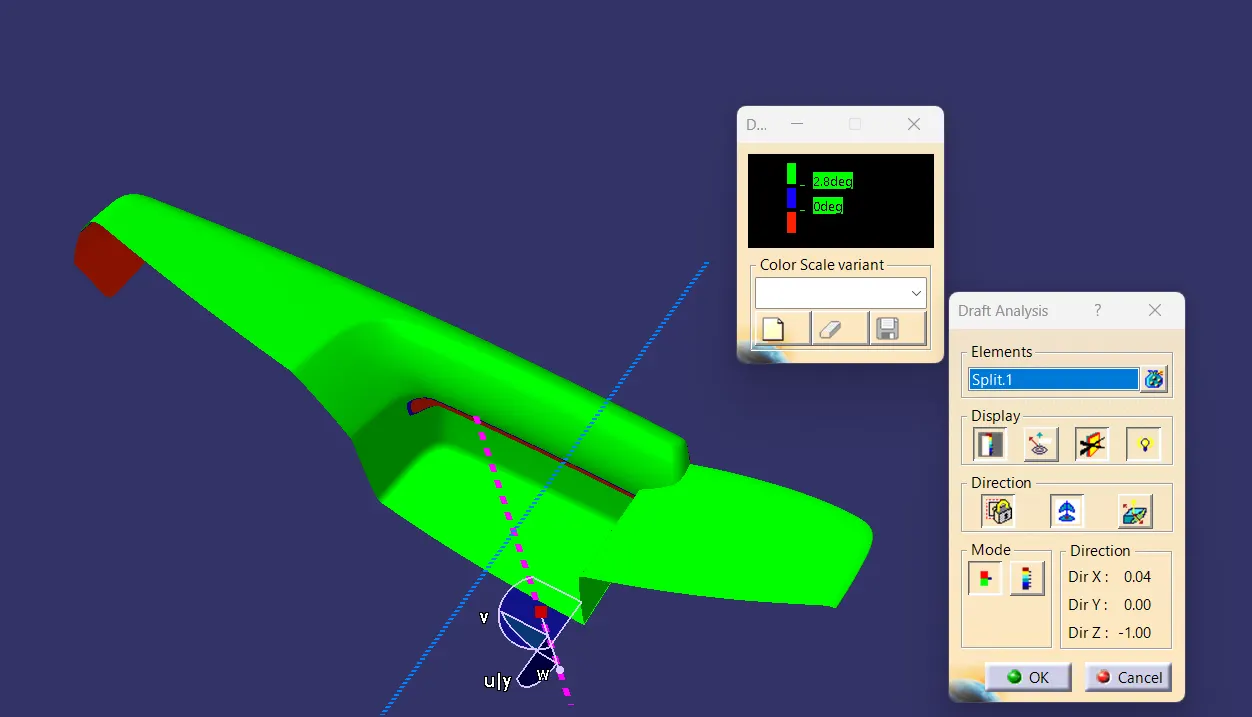
Fig 17 Draft analysis on Class A using main tooling axis.
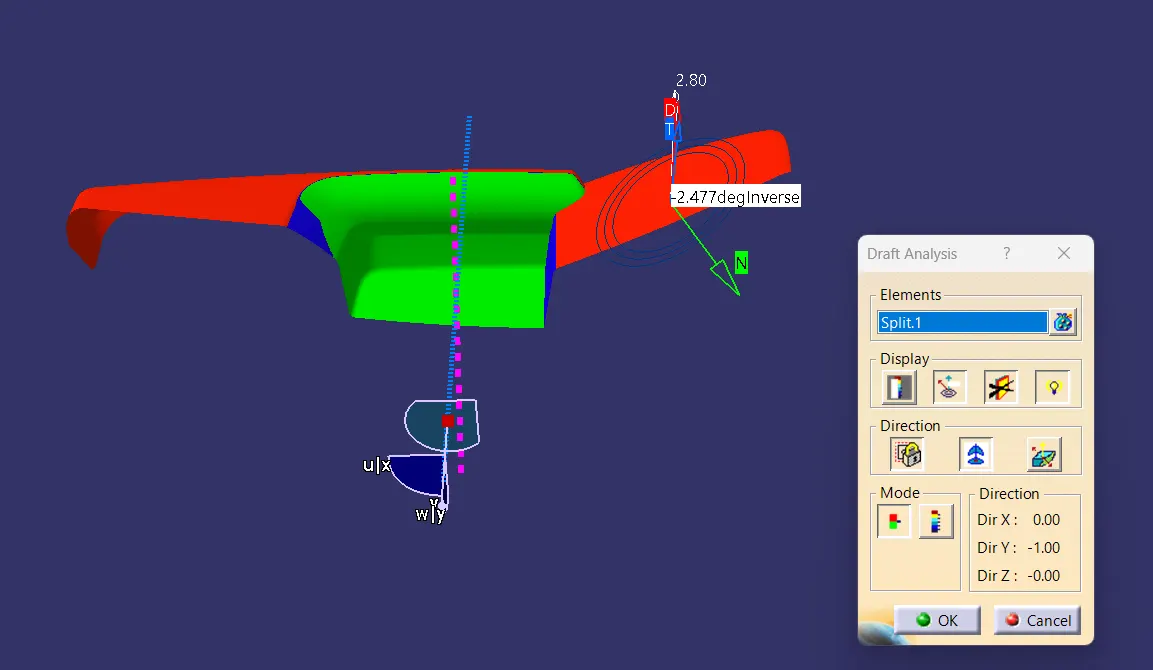
Fig 18 Draft analysis on Class A using side core tooling axis.
Creation of Class B surface
As always the a surface is offsetted to the required thickness and found some elements is missing in the offset.
After offsetting, some areas were missing in the newly created surface. Such portions were filled using the commands boundary, extract, sweep and blend and the Class B surface is created.
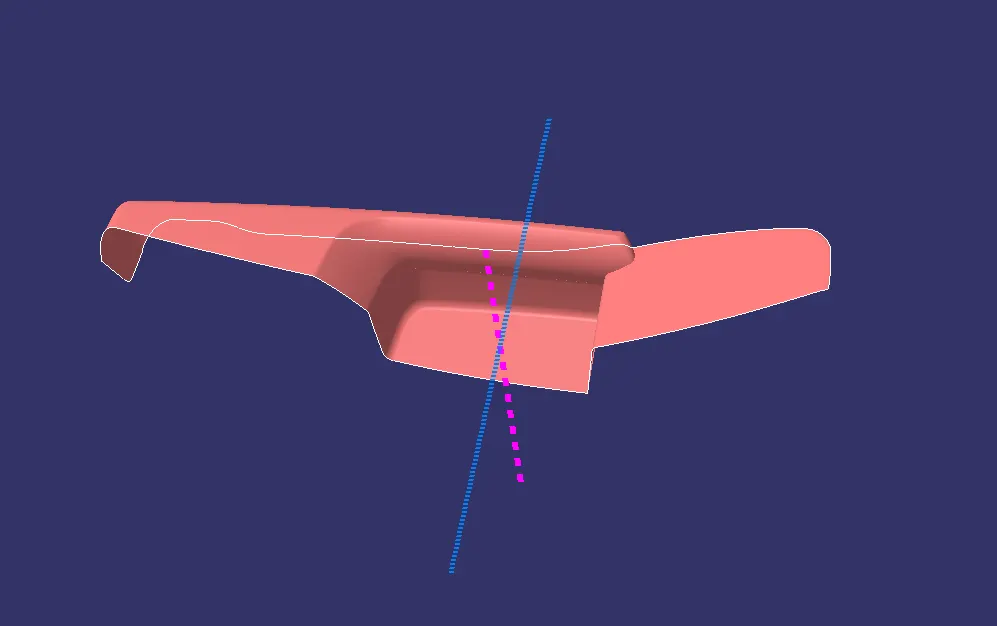
Fig 19. Creation of Class B surface by offseting Class A.
Creation of Class C surface:
Class C is created from Class A boundary. In most of the regions sweep command is used for creation of Class C surface with a draft angle of 3º. In some regions where the sweep is not adequate and sweep becomes imperfect, we can use commands like multi section surface and blend commands.
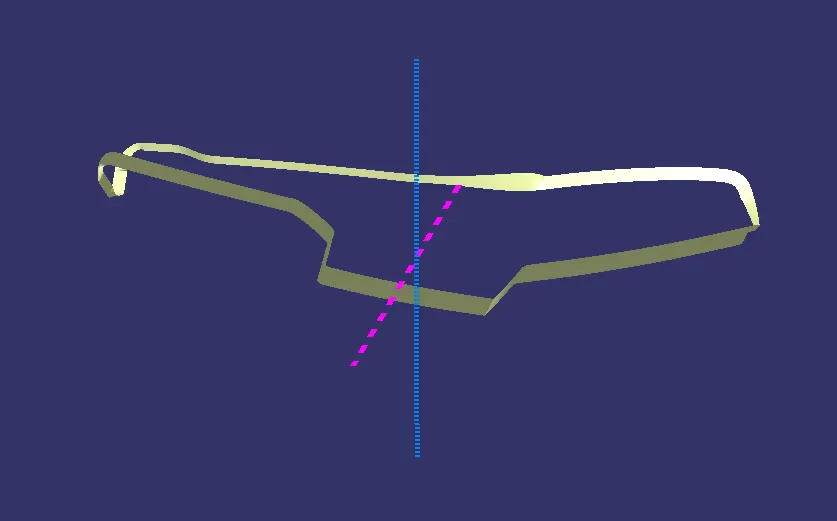
Fig 20. Class C surface.
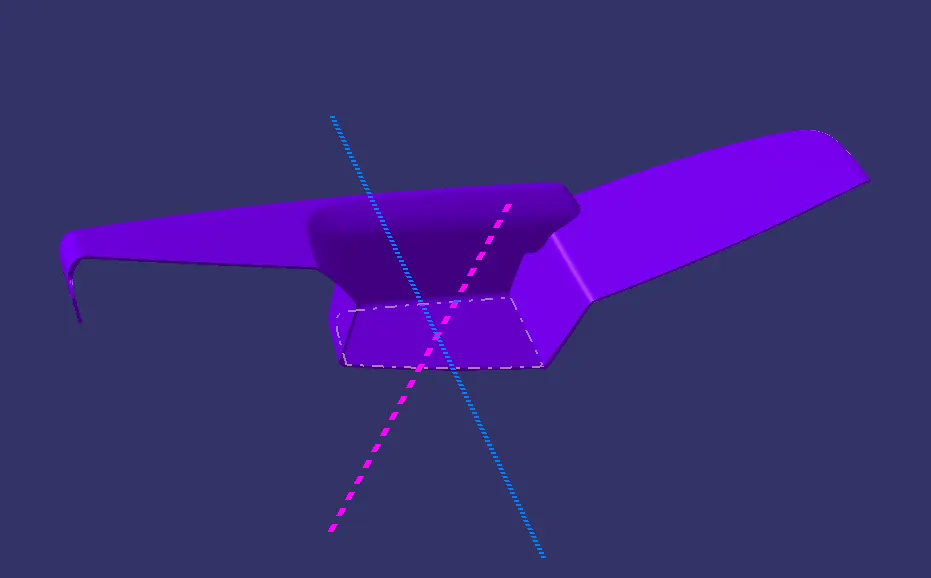
Fig 21. Final trim surface.
Creaton of Closed body:
Class C is joined with Class A using Join command and this joined part is trimmed with B surface using Trim operation.
Thus closed surface is obtained. For converting this surface to a closed body, we use the Close Surface Command in the part workbench.
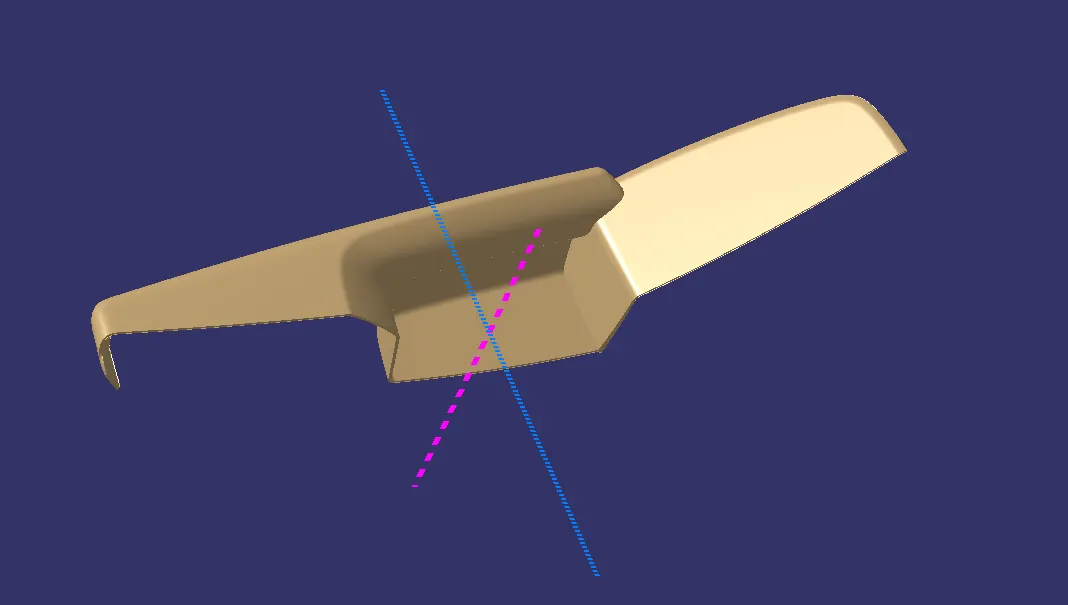
Fig 22. Closed body surface.
DRAFT ANALYSIS OF ARM REST
Draft is a taper applied to the faces of the part that prevent them from being parallel to the motion of the mold opening, thus facilitating the smooth ejection of the part from the mold without causing any damage to the part moulded.
Draft analysis is performed on the Closed body. As menioned in the case of Class A, a region fails to clear the draft due to the fault in the Class A design by the styling team. Here we are neglecting the fault.
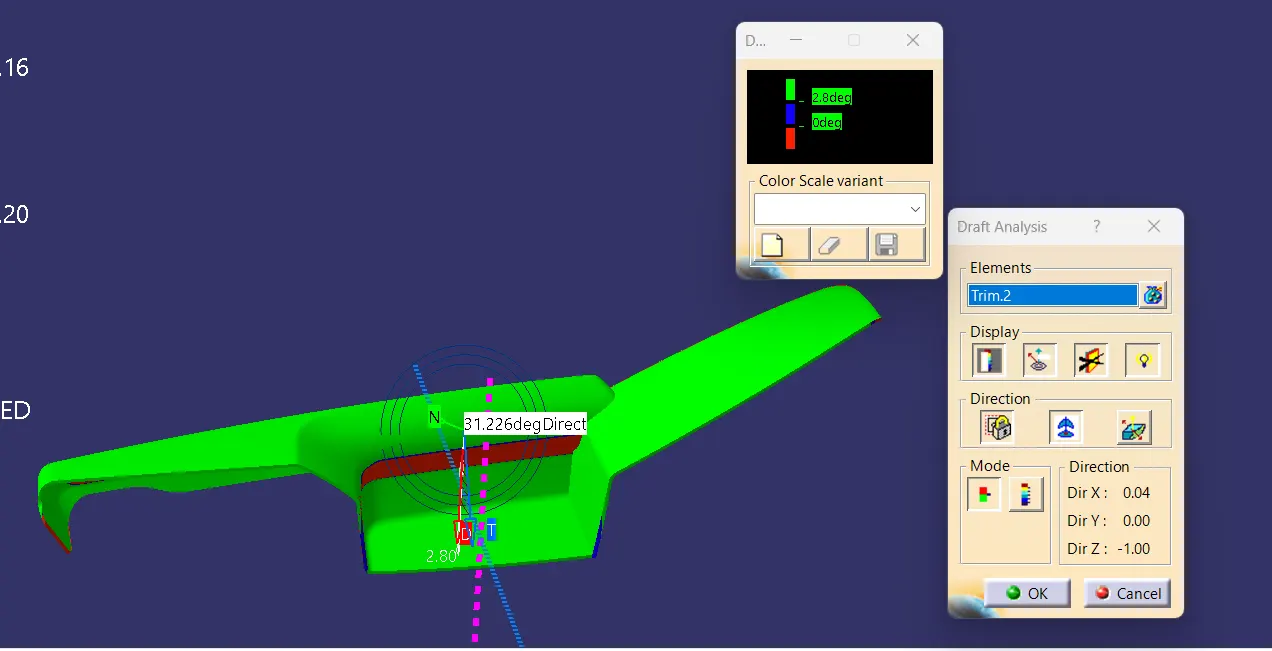
Fig 23. Draft analysis using the main tooling axis.
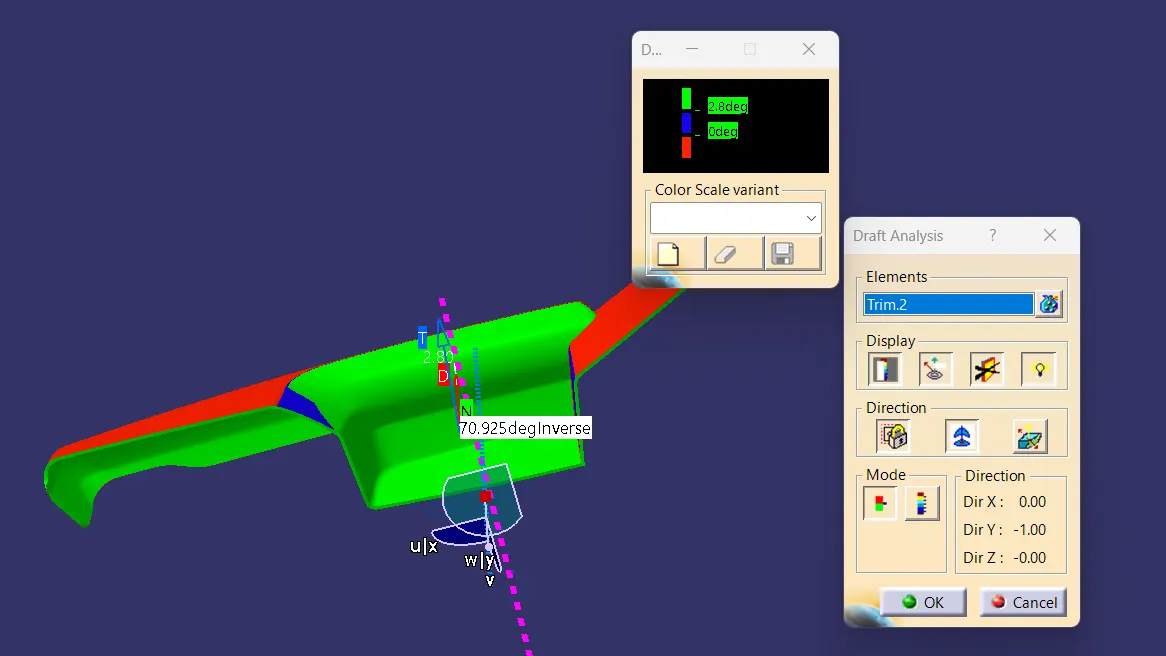
Fig 24. Draft analysis using the main tooling axis.
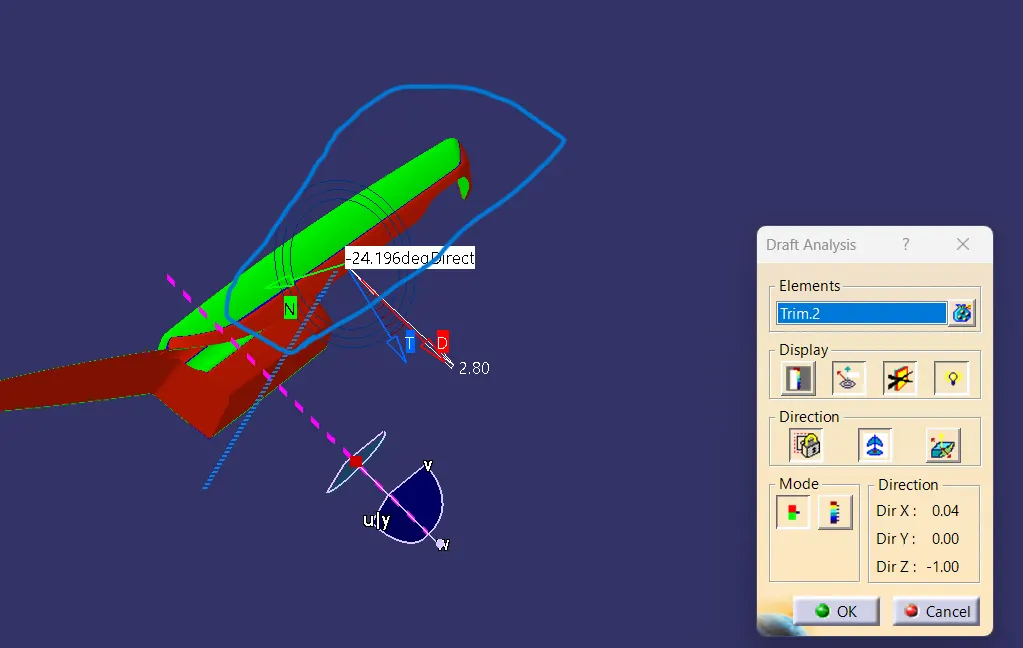
Fig 25. The red region inside the blue marking failed in both analyses.
The steps such as creation of Class B and Class C, trimming them together, converting the final trim to a solid body are repeated for main substrate, map pocket.As tihis involves same steps in correcting the patched surfaces and joining the surfaces.
MAIN SUBSTRATE
The given Class A surface is checked for gaps or other faults. But no such defects were present IN THE GIVEN FILE.
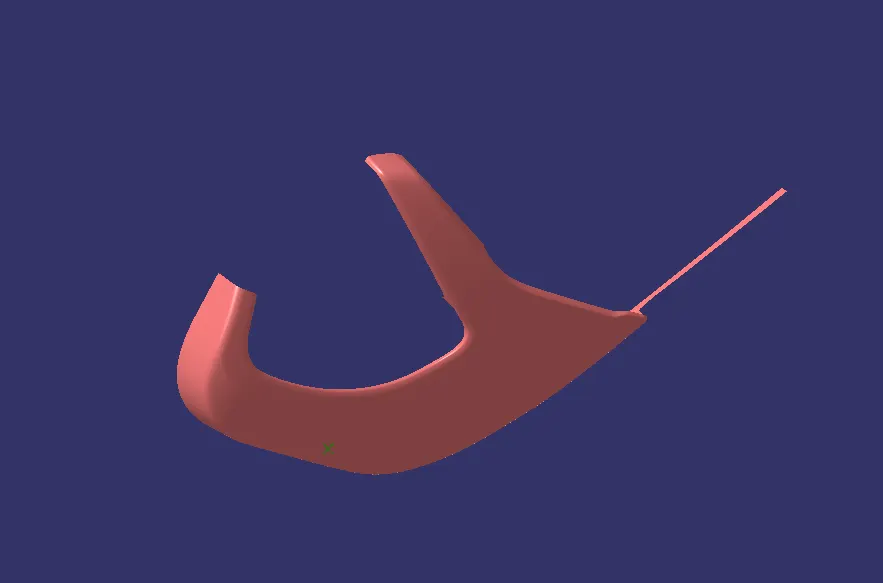
Fig 26. Class A surface.
Tooling axis creation
The tooling axis is created along the Y direction.
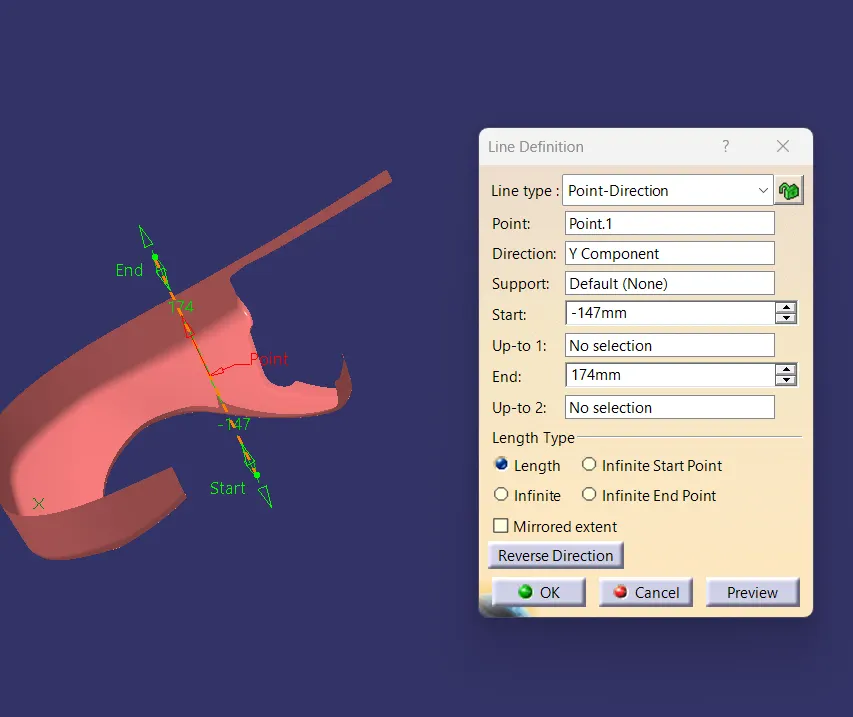
Fig 27. Tooling axis creation.
The draft analysis is conducted on the class A surface and it was found that the part was clearing 3° draft.
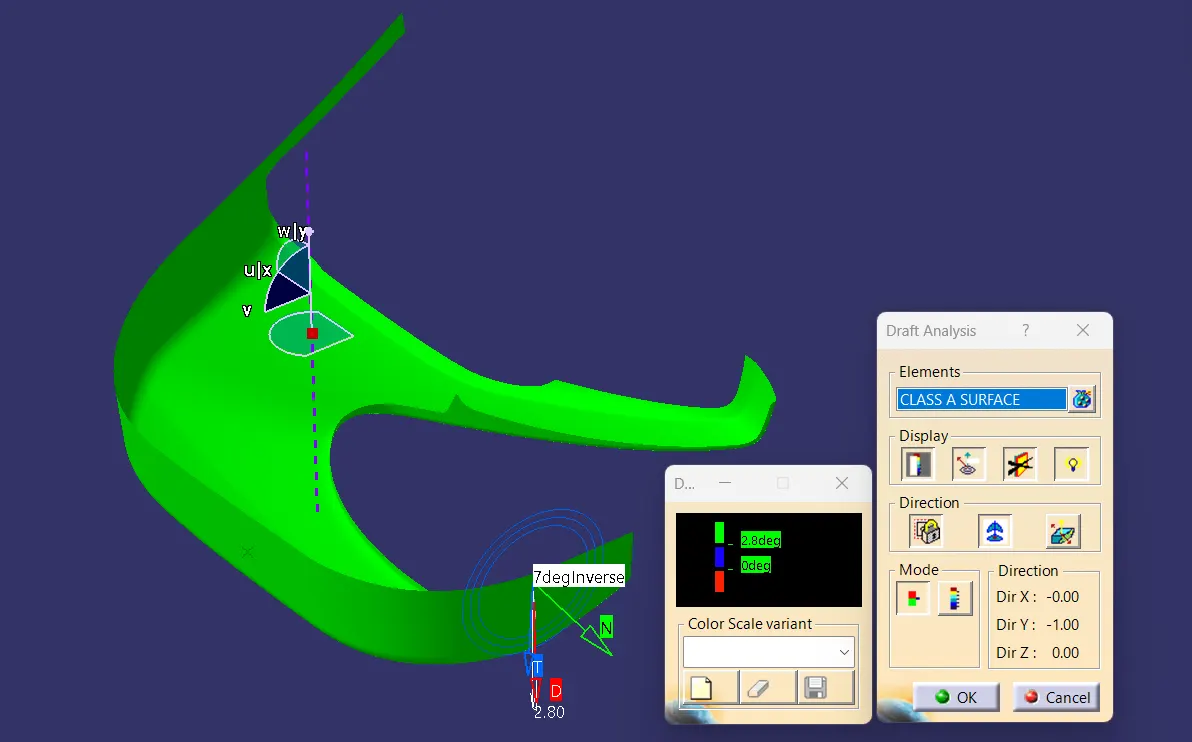
Fig 28. Draft analysis on Class A.
The Class B surface was created by offseting the Class A surface by 2.5mm.
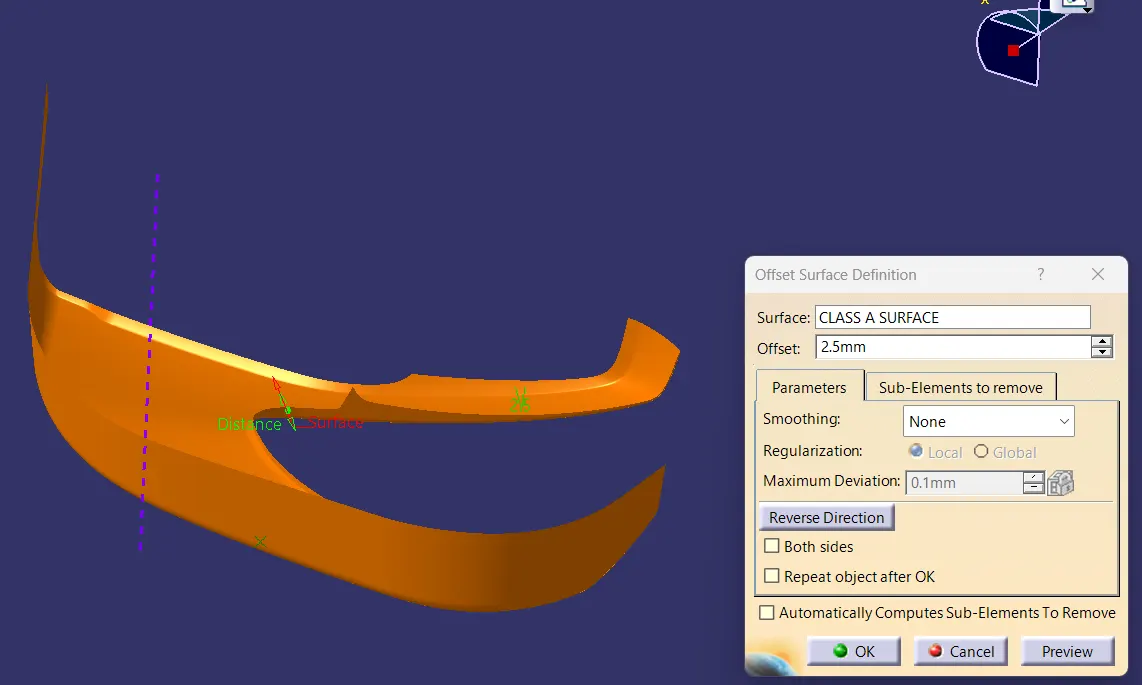
Fig 29. Class B surface creation.
The Class C surface was created using Sweep command from Class A surface.
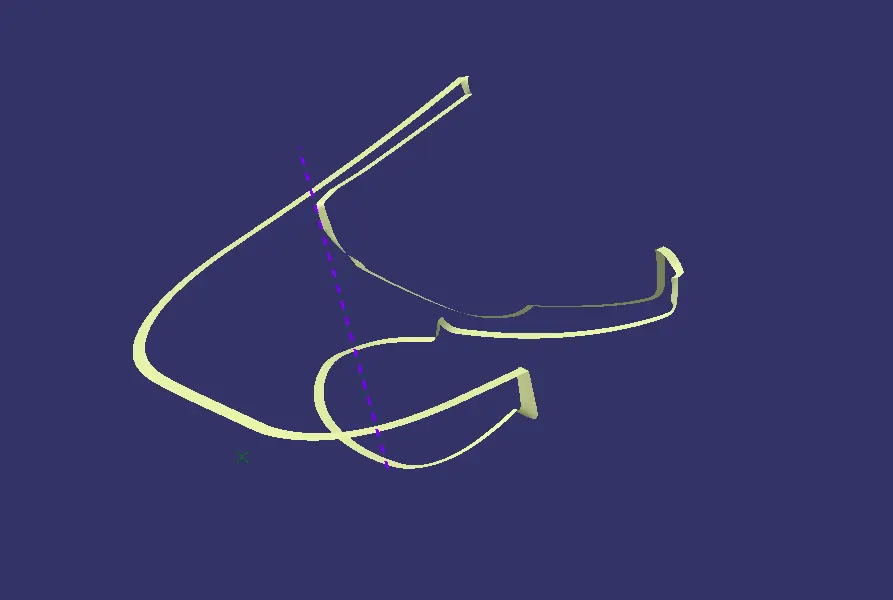
Fig 30. Class C surface.
After creating the final trim the final trim, solid body was created using Close surface in the part workbench.
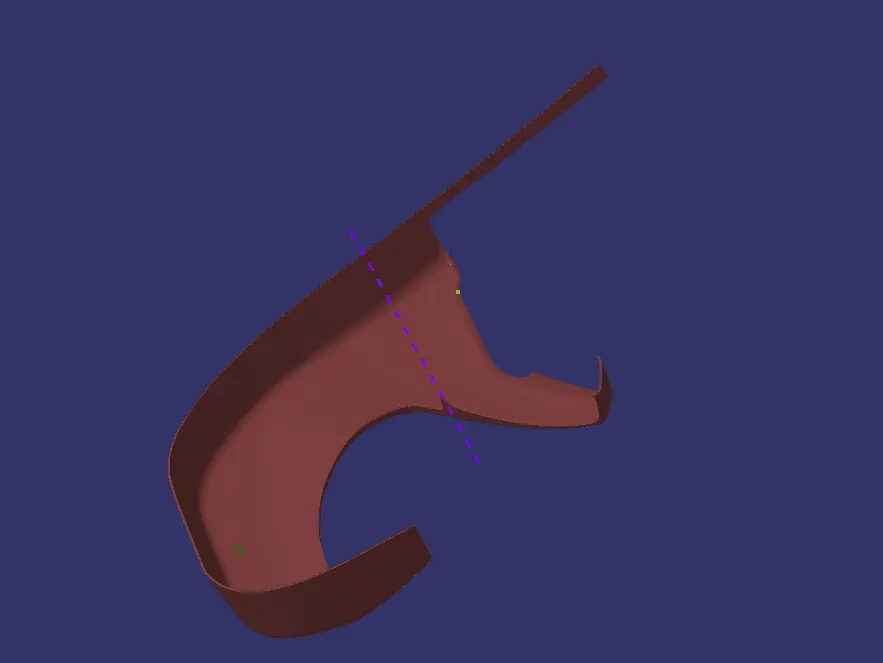
Fig 31. Solid body creation.
Draft analysis was done on the closed body.
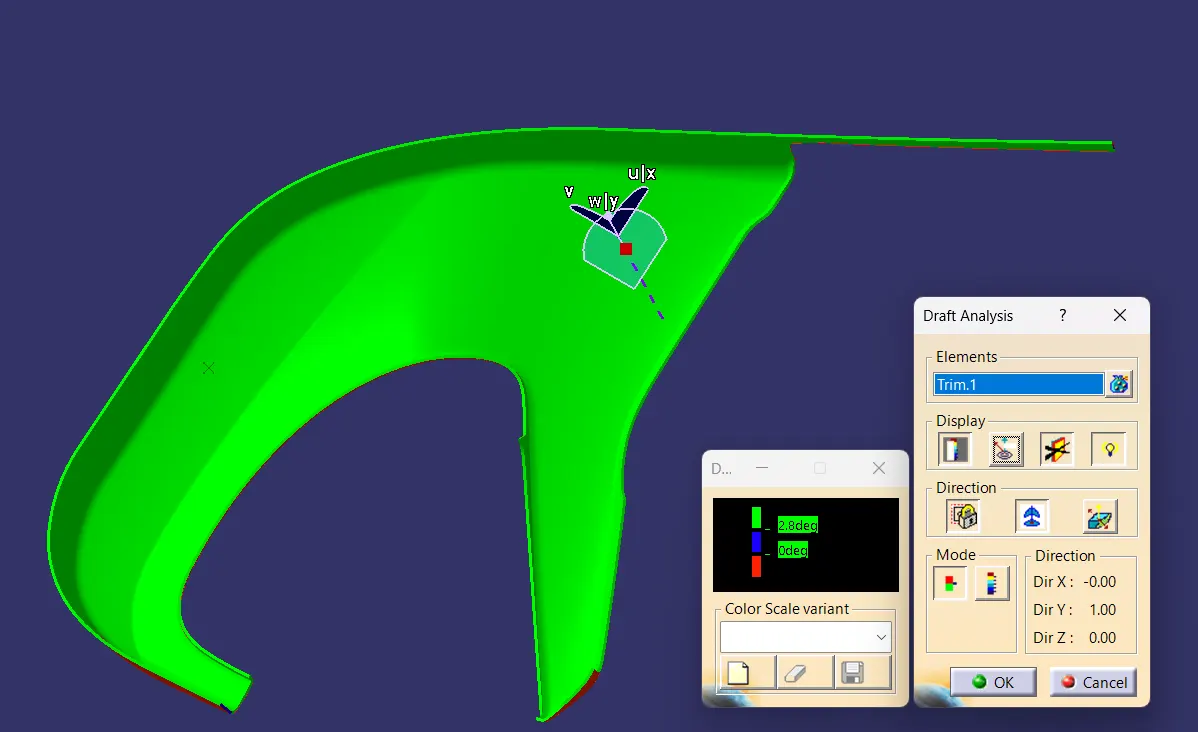
Fig 32. Draft analysis.
MAP POCKET

Fig 33 Class A surface
Tooling axis creation
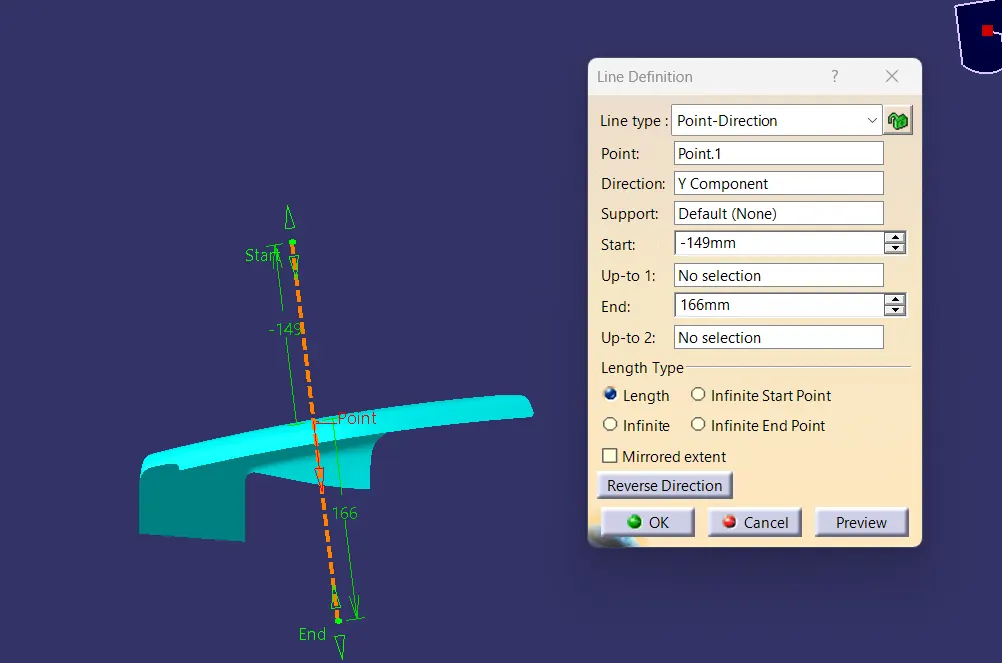
Fig 34. Tooling axis creation.
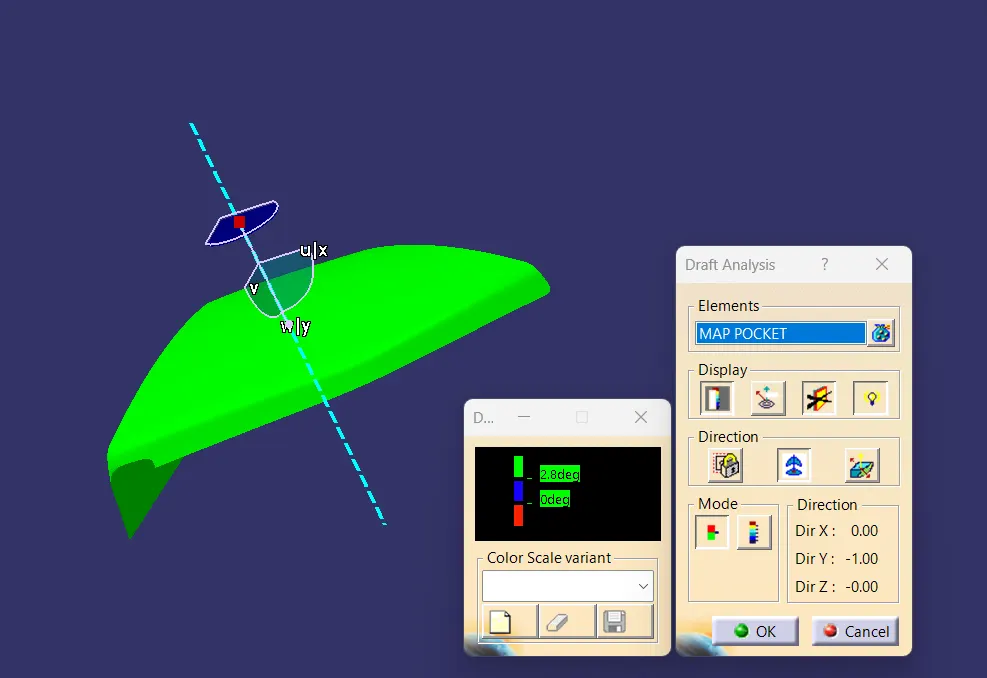
Fig 35. Draft analysis on Class A surface.
Class A surface was offseted by 2.5mm for the creation of Class B surface. A small region was missing in he newly offseted surface. It was cleared using multi section command and join command.
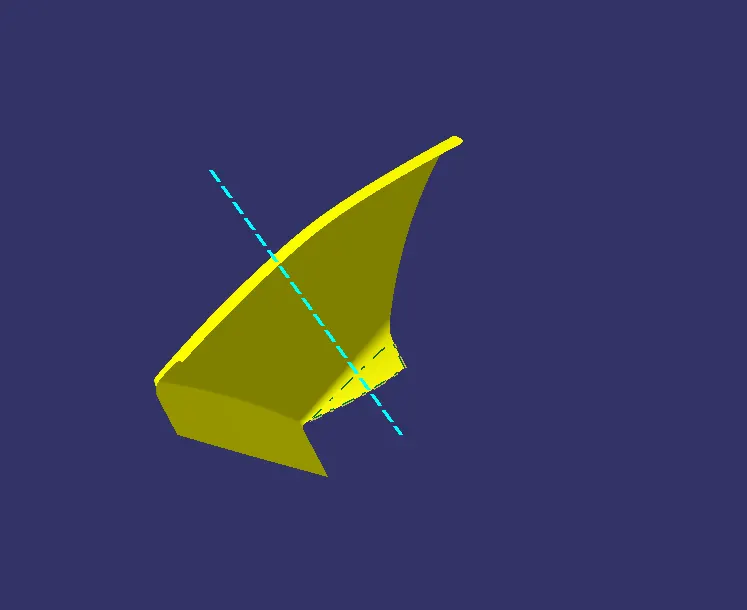
Fig 36. Class B creation.
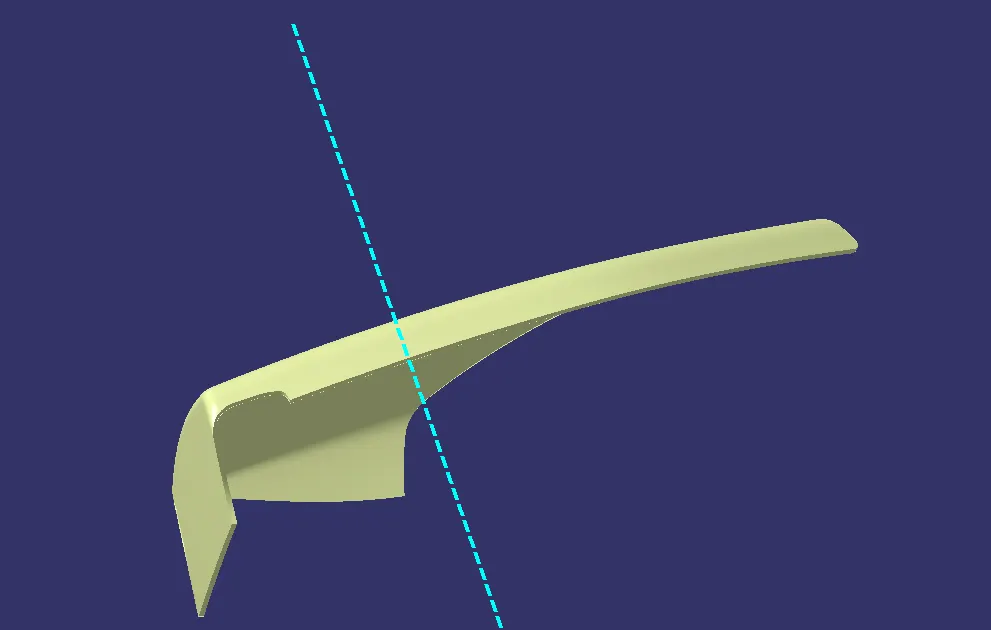
Fig 37. Final trim.
Class A and C is joined together and trimmed with Class B. Then the final trim part is converted into a solid body using Close Surface command in part workbench.
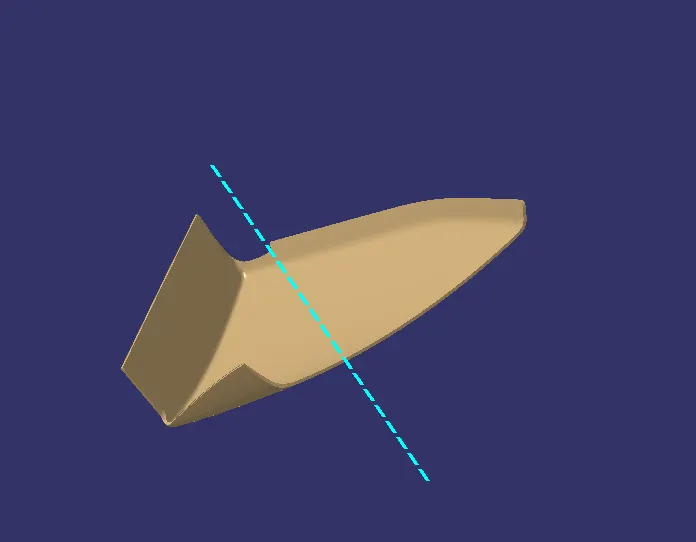
Fig 38. Solid body
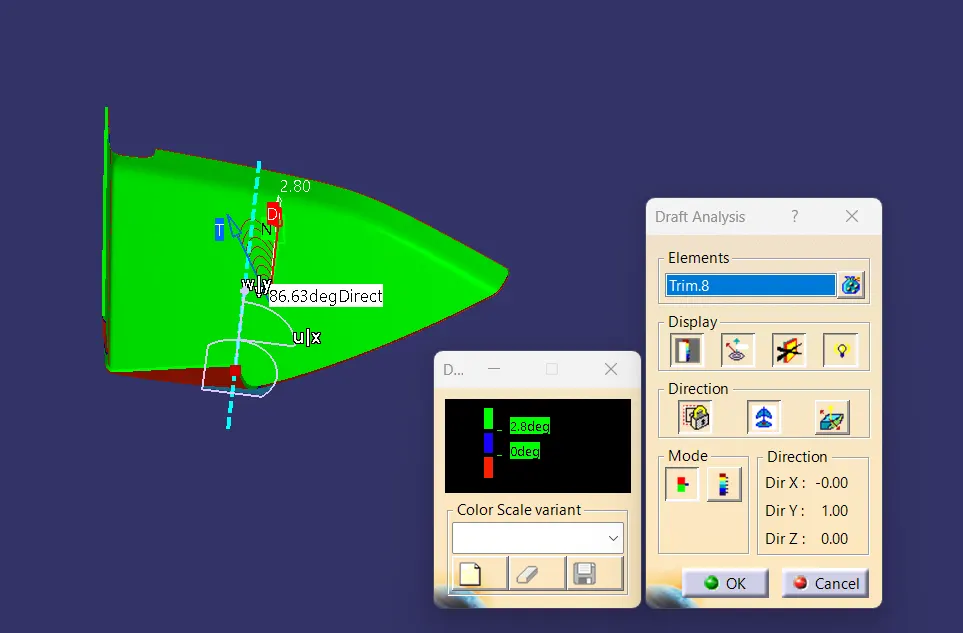
Fig 39. Draft analysis.
CREATION OF ATTACHMENTS
The attachments are created for joining the parts together firmly and to arrest the parts. The attachment features used here are heat stakes, locators, dog house and flanges.
Dog House
The dog House is a feature used in plastic design which helps to avoid sink marks. This is the primary function of a dog house.
It is also useful to house various attachment features like screw boss, locators, push pins etc. For instance, if we need a screw boss 100mm away from the B surface, creating a 100mm screw boss is not feasible. So we create a dog house on the B surface and attach the screw boss on the dog house.It is also used to provide strength to attechment features like screw bosses.
In this project, the dog house is designed to house the push pin for attachment. A slot is given at the top of the dog house for fixing the push pin.
The design rules for creating dog house are given below:
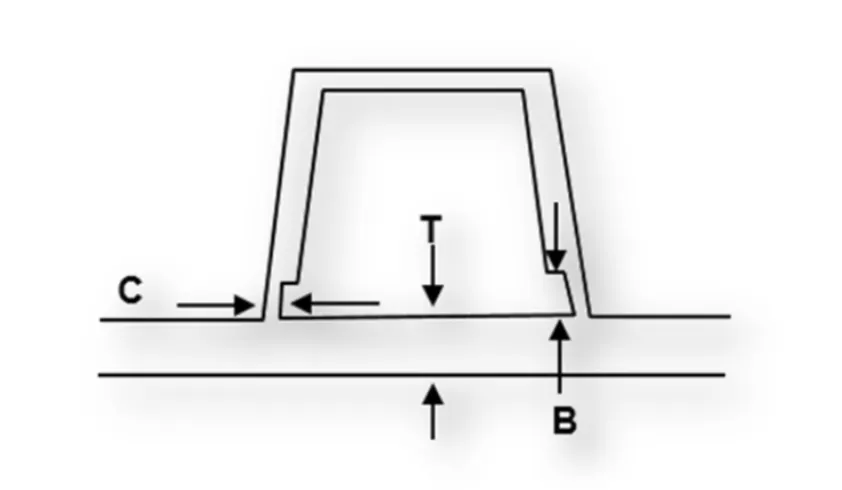
Fig 40. Parameters for dog house.
- * Dog house thickness at intersection of part wall (C) should be 40% or less than the main wall thickness.
- * Height B should be between 3-6mm.
- * Width of dog house should be minimum 12mm.
- * Minimum height of dog house should be 6mm. Less than 6mm causes weak steel condition.
- * There should be a minimum draft of 1.5° for the outer surface and 0.5° for the inner surface.
The creation of Dog House
A portion from the surface of the main substrate is extracted and a point is created on the location where we intend to fix the dog house.
An axis system is given at the point and the sketch for the dog house is done on the XZ plane of the axis system.
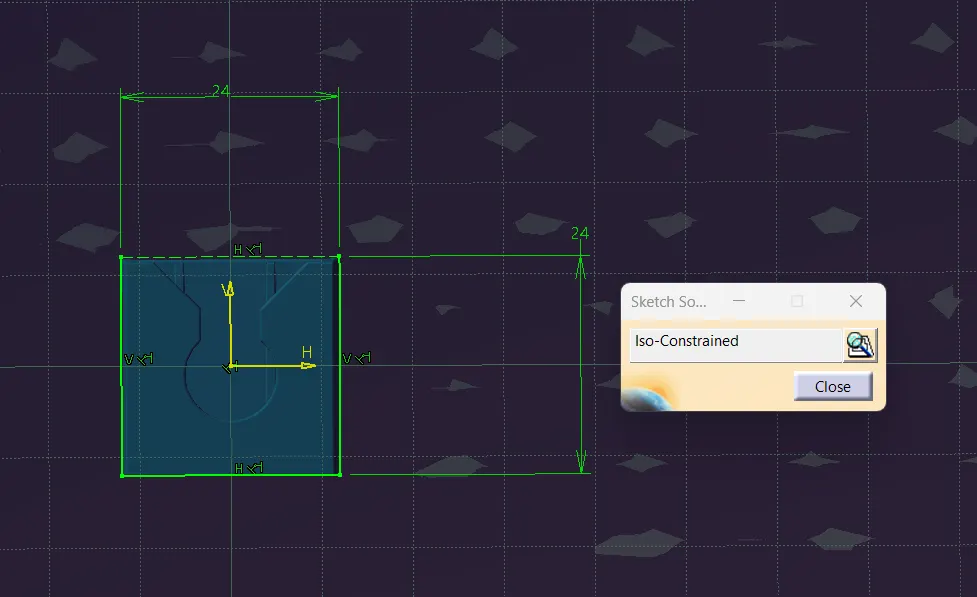
Fig 41. Sketch for dog house.
The sketch drawn is then sweeped to a draft of 1.5 degree.
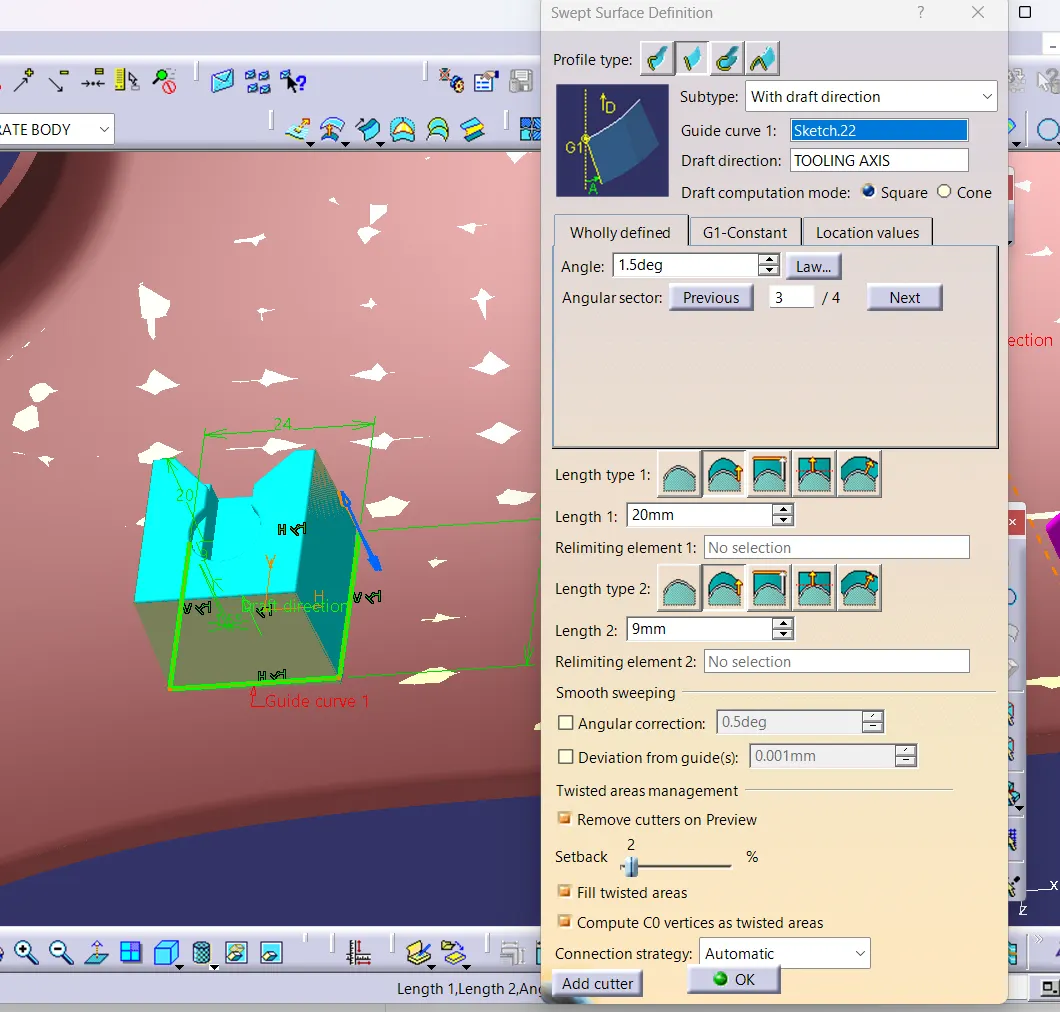
Fig 41. Sketch for dog house sweeped to 1.5 degree.
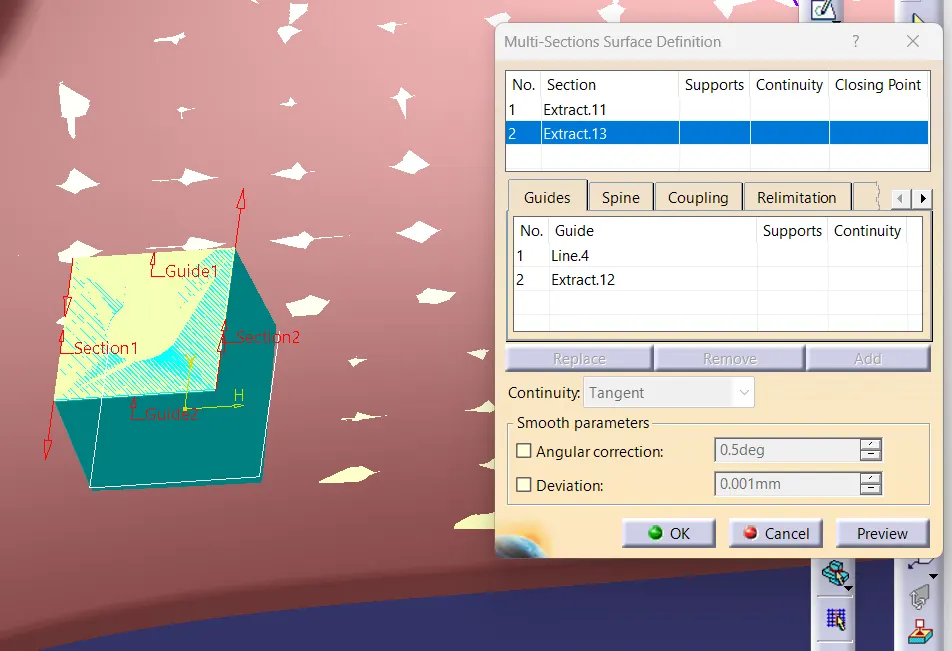
Fig 42. Upper surface is created by multi section
Since to outer surface is already drafted there is no need for drafting the outer surface.
For creating the under cut the top surface is extracted and offsetted to a required distance.
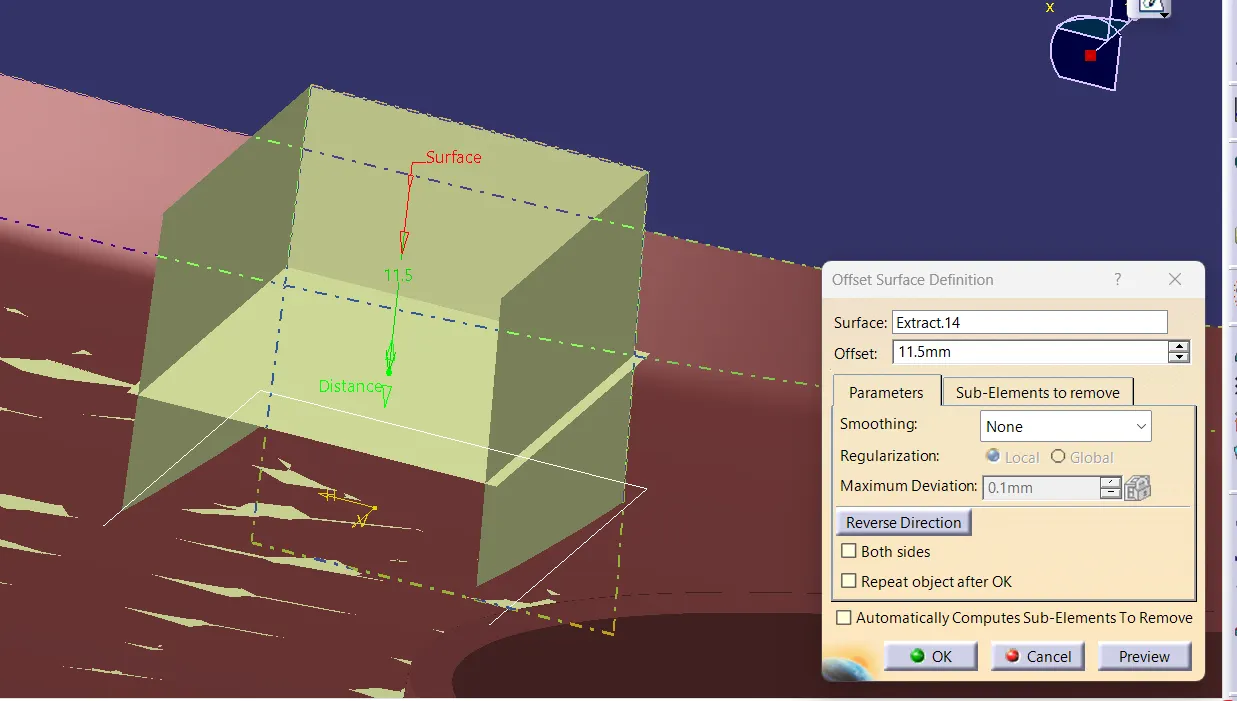
Fig 43. Under surface cut is created.
The surface is needed to be thickened in the part work bench to make a solid part .
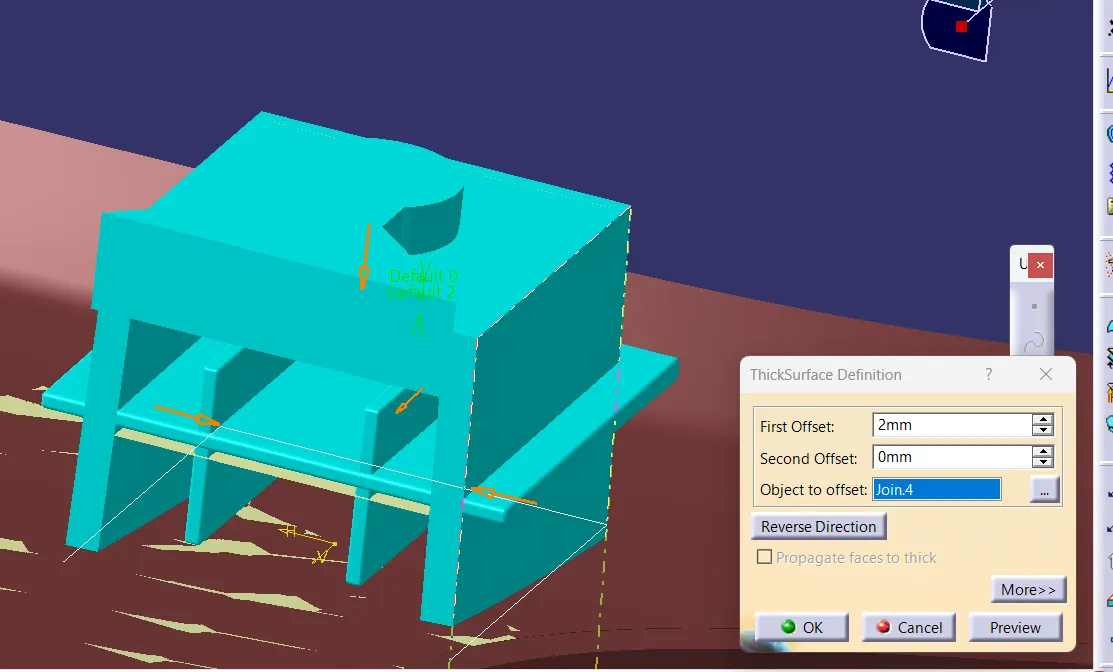
Fig 44. Surface is thickened.
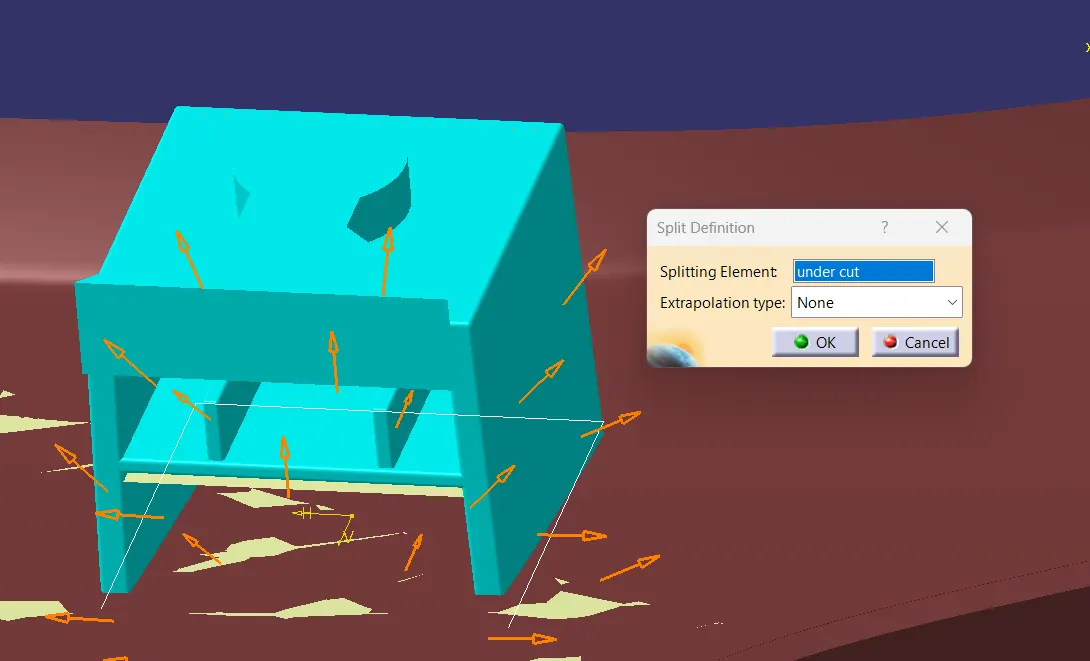
Fig 45. Splitting the thickenedsurface.
Drawing the side core axis for drafting the inner surface to 0.5 degree
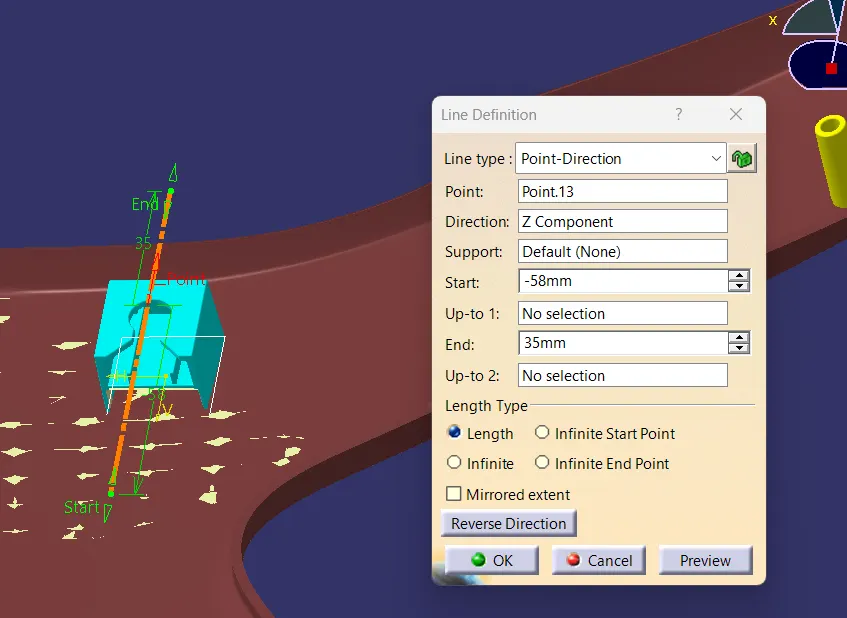
Fig 46. Side core axis.
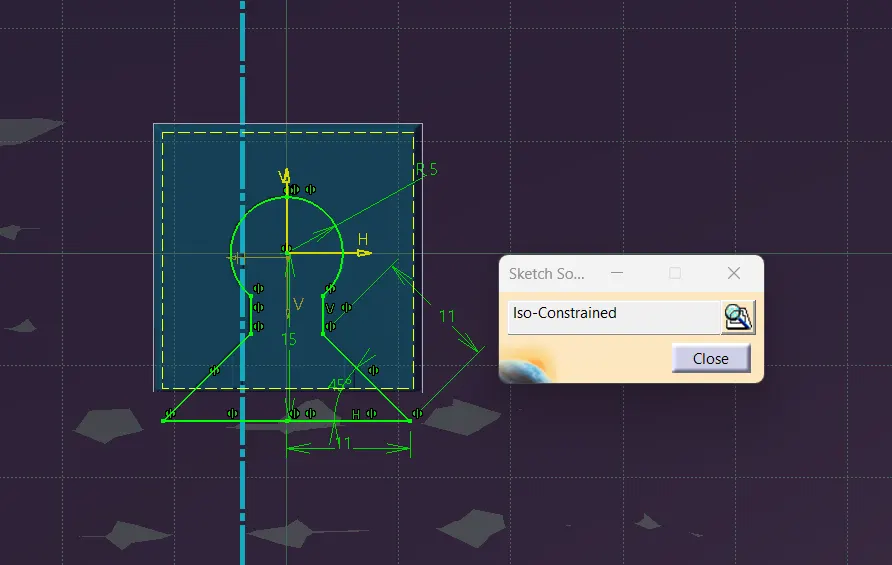
Fig 47. Sketch for dog house upper slot.
Draft analysis of the dog house
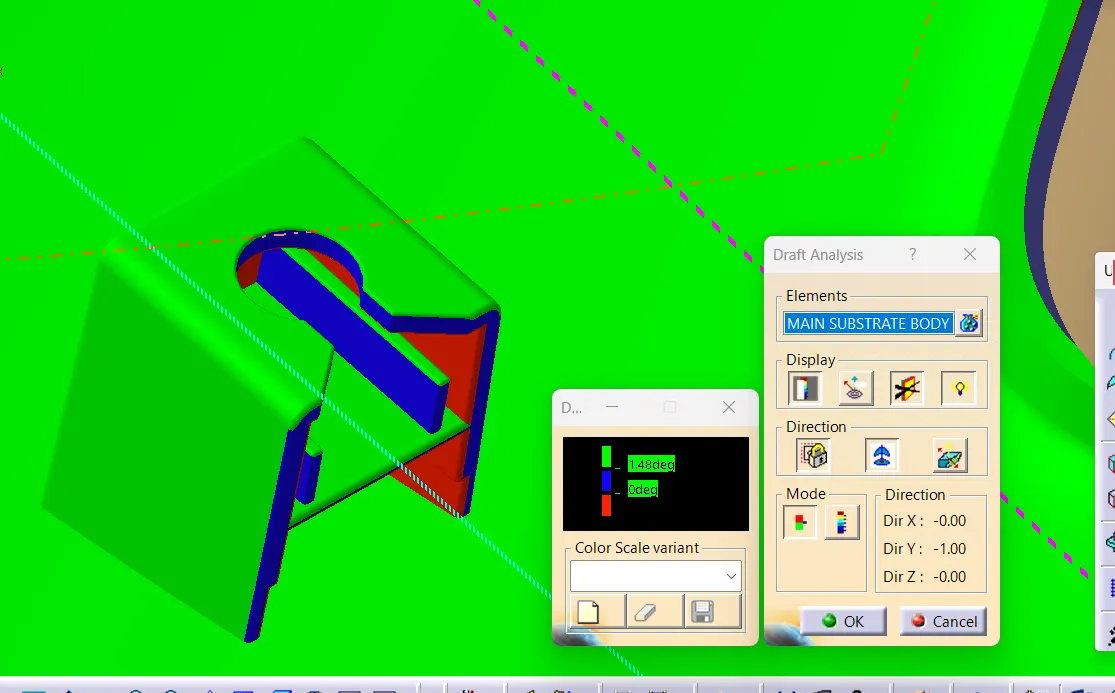
Fig 48. Draft analysis with respect to main tooling.
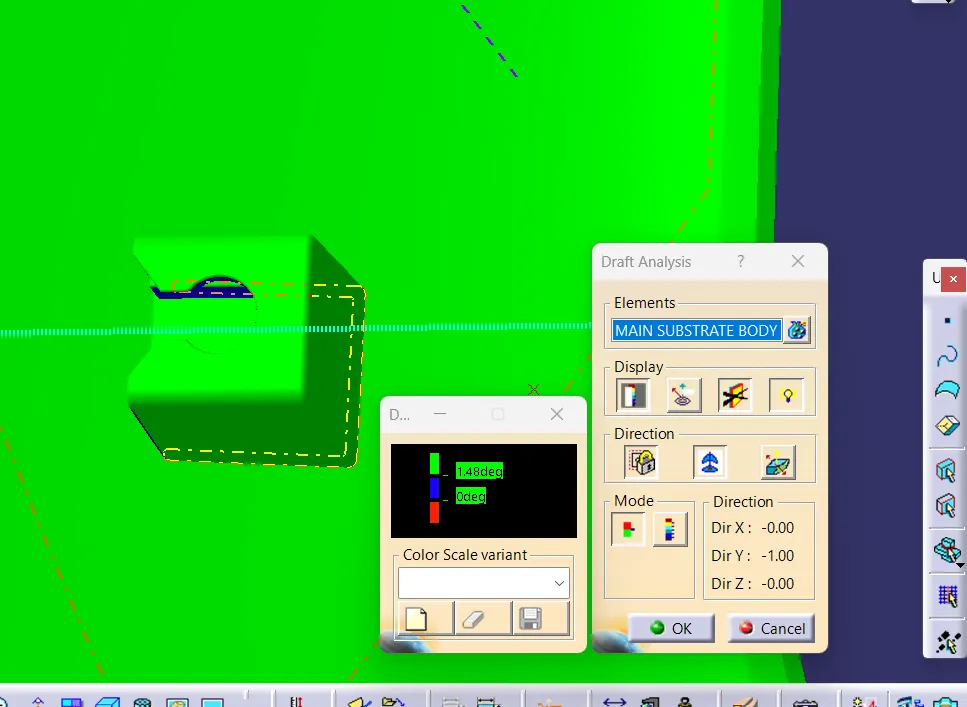
Fig 49. Draft analysis with respect to main tooling.
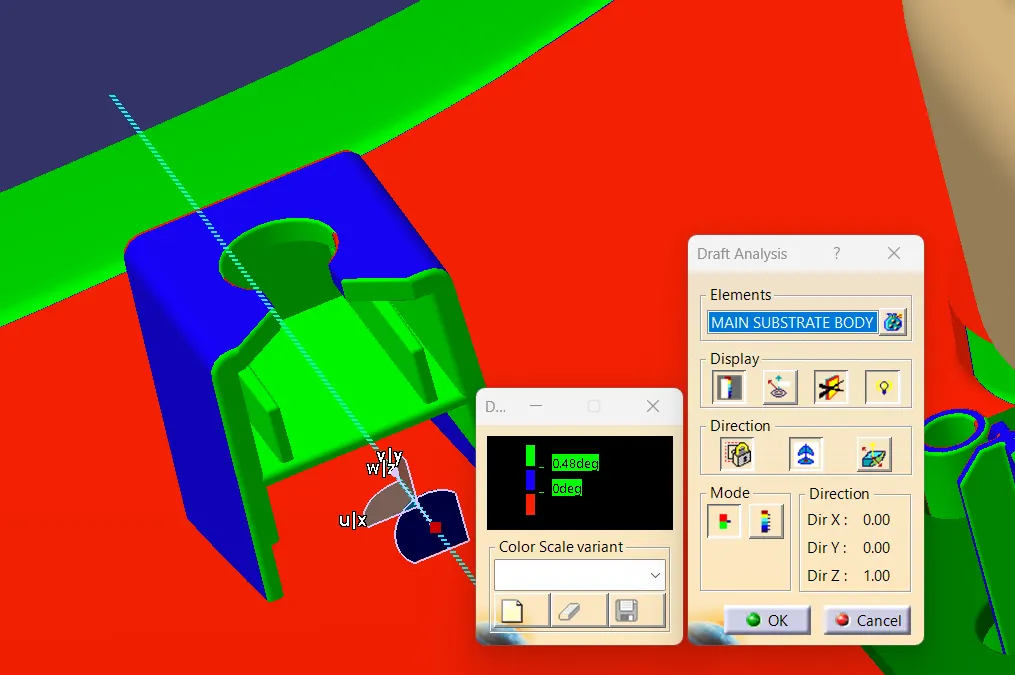
Fig 50. Draft analysis with respect to side core.
To make the fitment correct and with good strength the dog house can be 2 or more .
The dog house is fixed on the other locations by using translation feature. They are attached to the main part body by using boolean operation union trim.
Heat stakes
Heat staking is an assembly method that uses controlled melting and reforming of a pastic stud or boss to capture or lock another plastic material or metal component of an assembly in place. The plastic stud protrudes through a hole in the component to be locked in place.
If there are more than 3 heat stakes the heat stakes should be of comparably similar height inorder to avoid fitment issues.
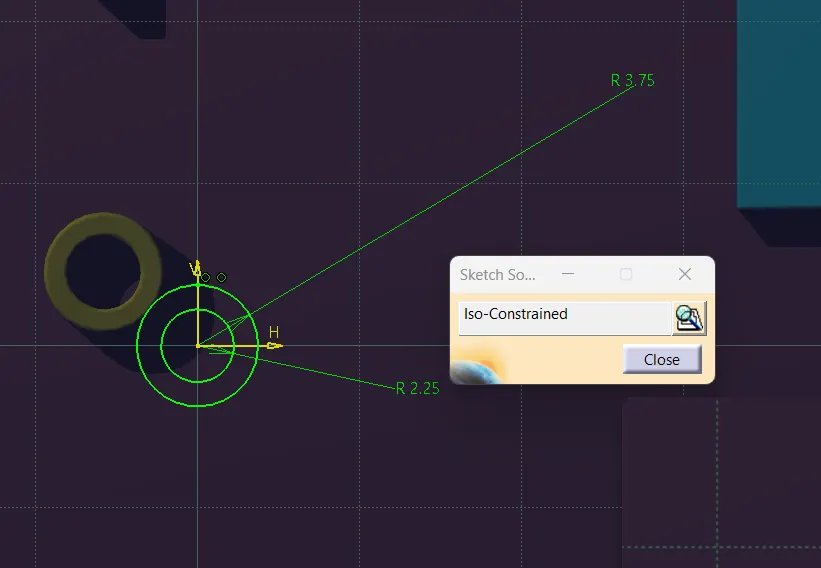
Fig 51. Sketch for heat stakes.
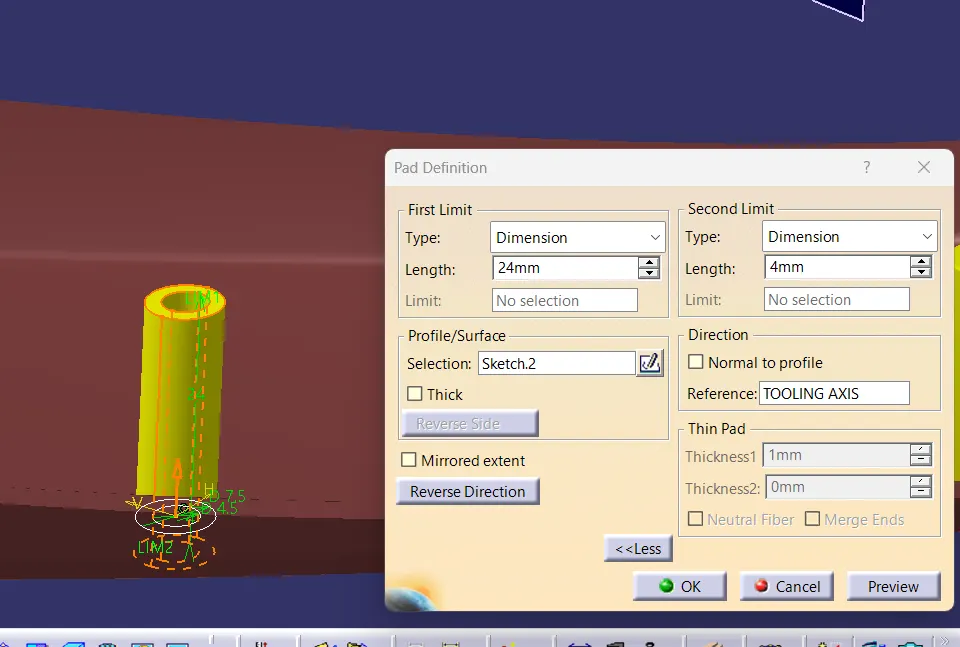
Fig 52. Pad operation for heat stake.
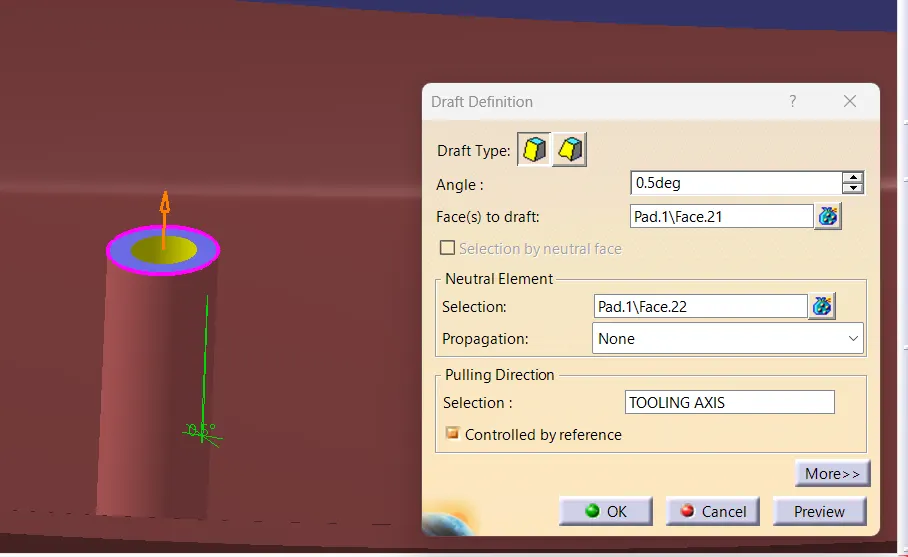
Fig 53. Draft operation of the heat stakes.
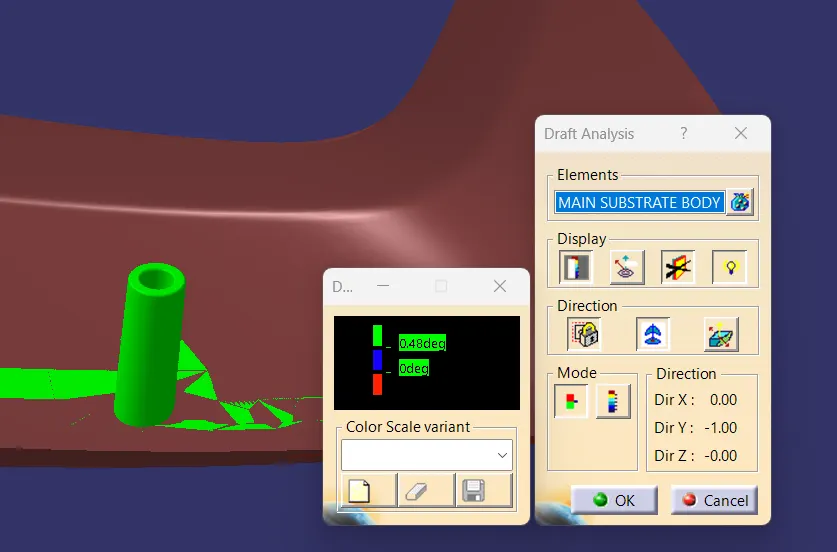
Fig 54. Draft analysis on Heat stakes.
Supporting ribs are also provided along with heat stakes for additional support. The heat stakes are transferred to other points by using translation command and they are attached to the main part body by using either one of the boolean operations union trim and assemble depending on the location.
Locators
The 3-2-1 principle is adopted for part to part fixation in automotive industry. According to this principle, a workpiece has 12 degrees of freedom
- Translational movement along X and -X axes.
- Translational movement along Y and -Y axes.
- Translational movement along Z and -Z axes.
- Rotation along X axis in clock wise and anti clockwise direction.
- Rotation along Y axis in clock wise and anti clockwise direction.
- Rotation along Z axis in clock wise and anti clockwise direction.
To fix two components together, at least 11 degrees of freedom should be arrested. In order to achieve this, we create 4 way locators. The height of locators should be greater than that of heat stakes.
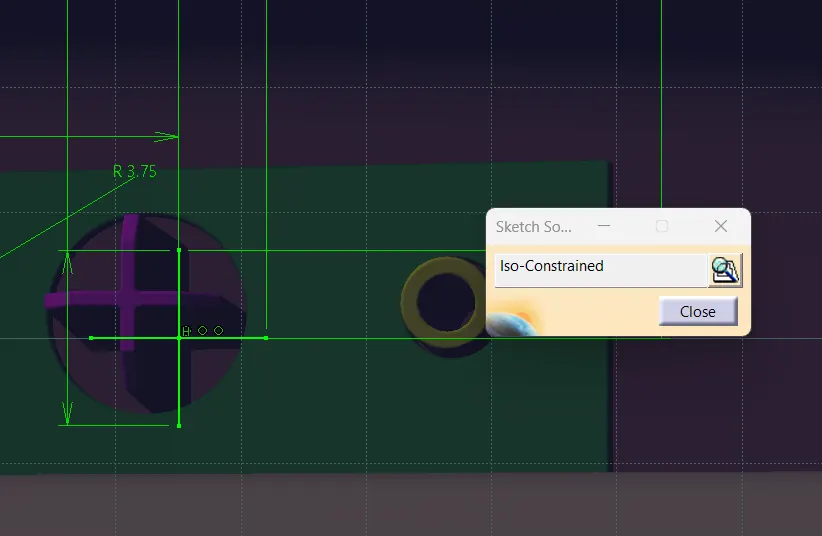
Fig 55. Sketch for 4 way locator.
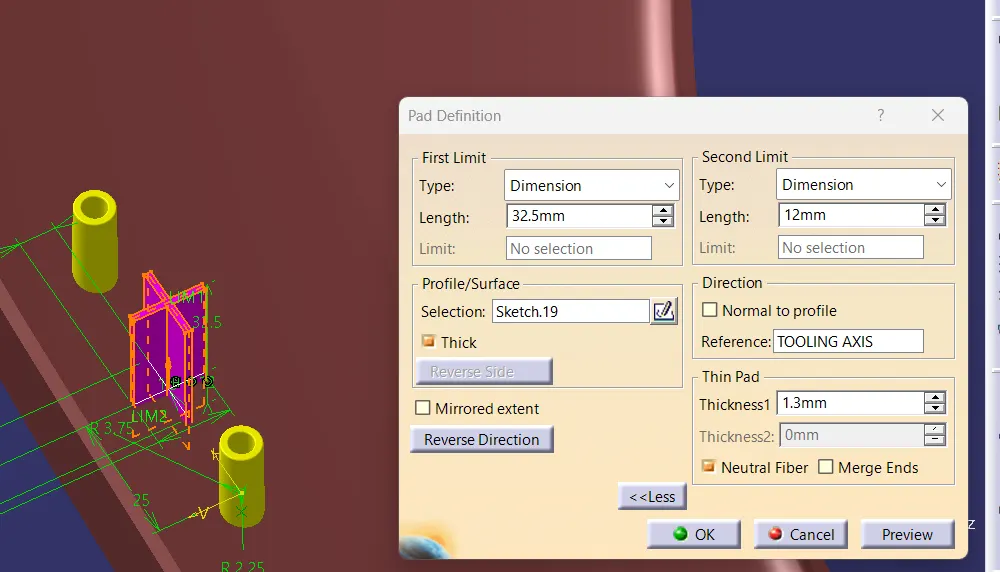
Fig 56. Pad operation for locator.
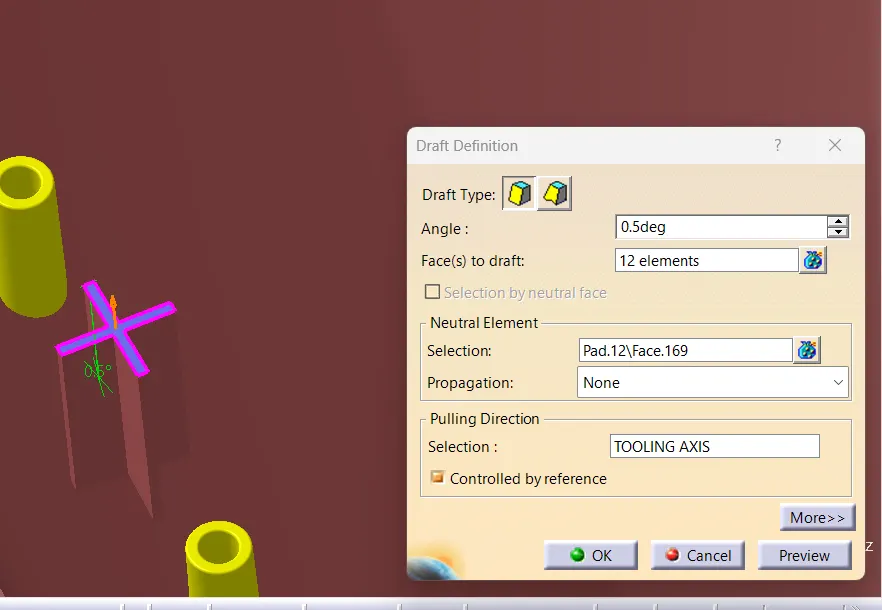
Fig 57. Draft operation.
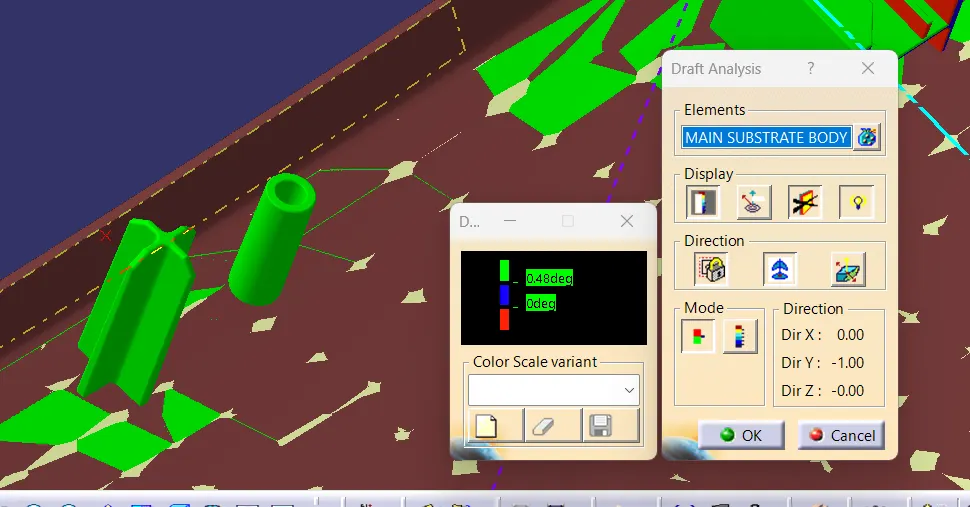
Fig 58. Feature draft analysis of locator.
The design of the locator satisfies the draft analysis.
The locator is copied to the other points by copying the part and using translation feature. It is then attached to the main body using the boolean operation Union trim or draw a fresh sketch for each heat stakes.
Flanges
Flanges are the joining feature that is used to assemble different components. Here we create flanges by following the master section. Flanges have a thickness of 2.5mm and they are given a draft of 0.5°.
For designing the flange for the arm rest:
- The master section is considered and a line is plotted along the master section.
- The line is extruded along X axis for the horizontal portion of the flange.
- For the vertical portion, sweep command is used, with subtype "with reference surface" in the profile type "explict".
- Both the vertical and horizontal potion is trimmed together using trim command.
- The trim surface is thickened using thicken command in the part workbench.
- Fillets are given following the master section's fillet radius.
- The hole at the flange is created using pocket command.
- A draft of 0.5° is given for the flange.
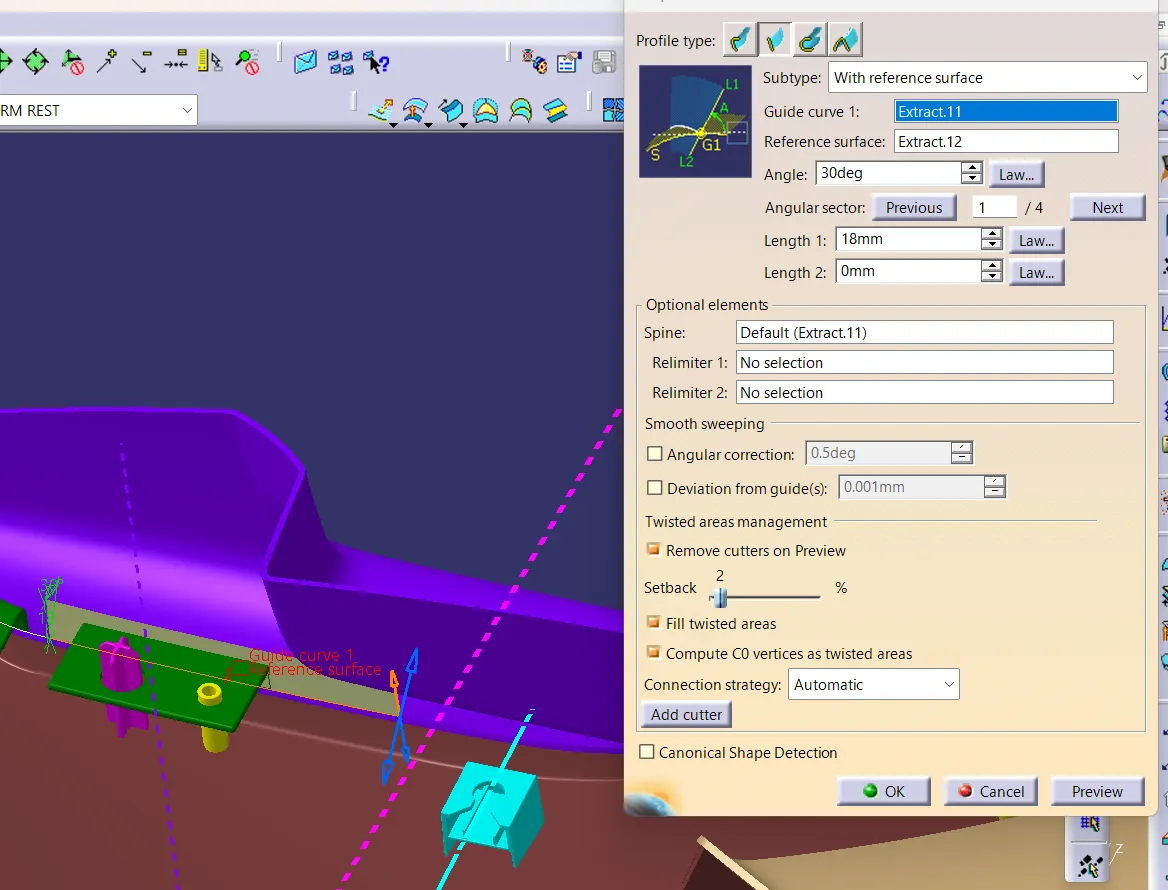
Fig 59. Sweep operation for creating the vertical surface.
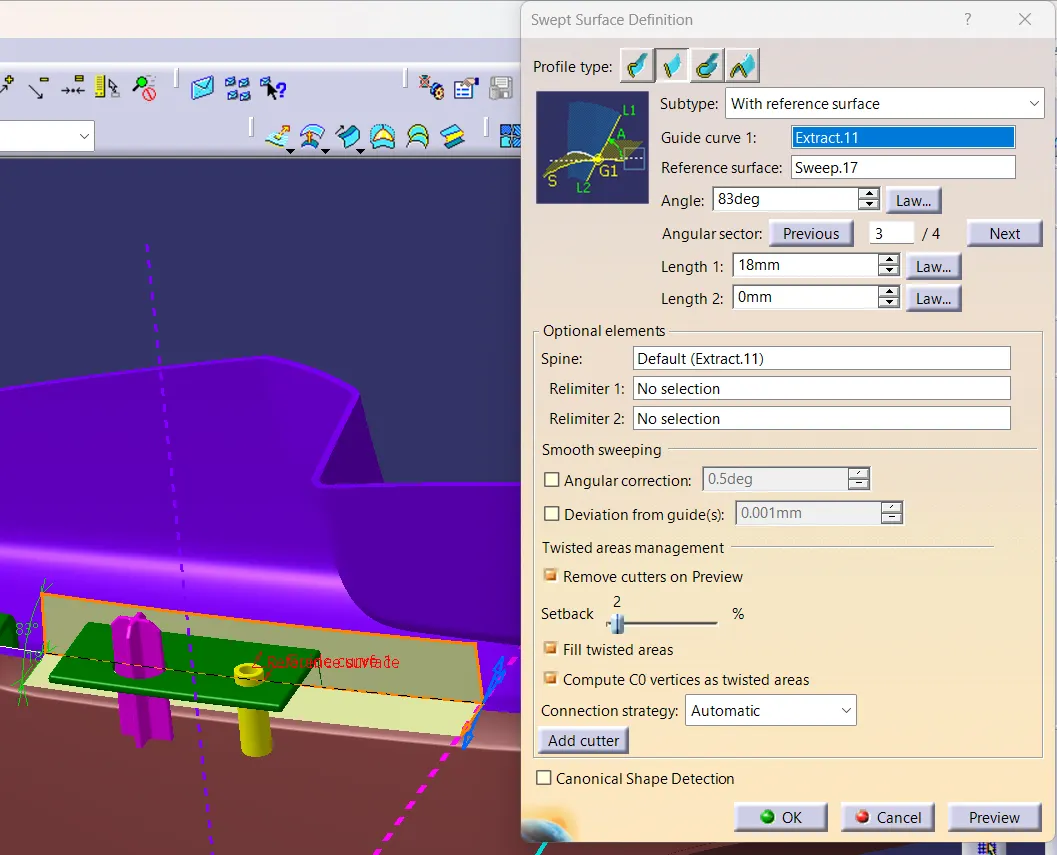
Fig 70. Sweep operation for creating the horizontal surface.
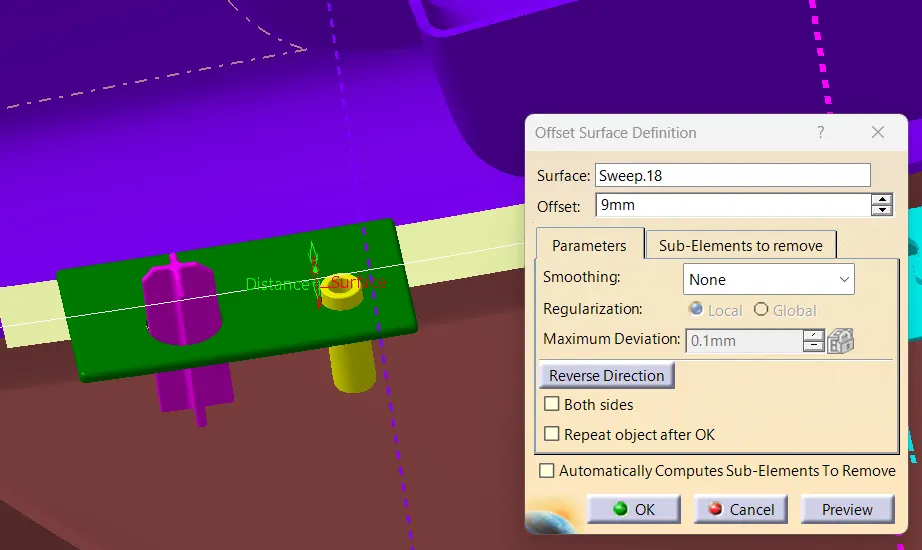
Fig 71. horizontal surface created is offseted.
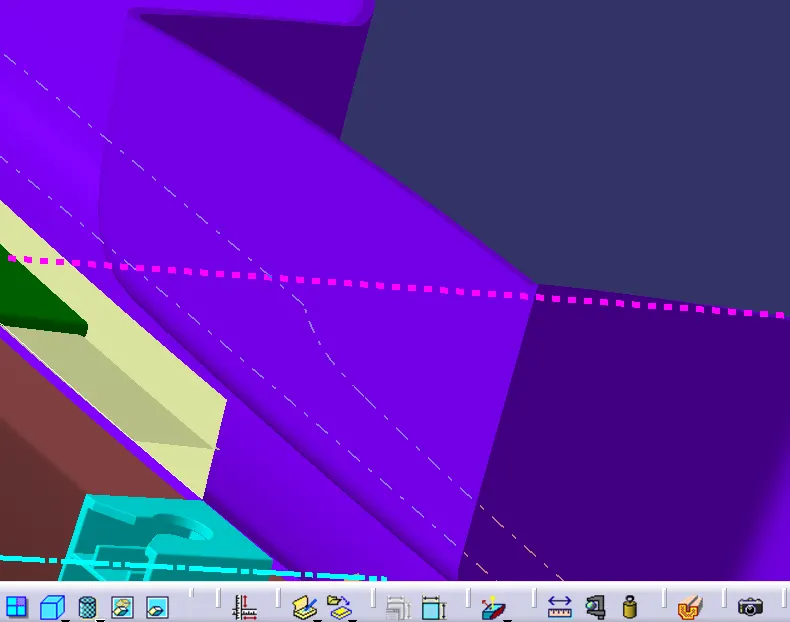
Fig 72. Flange surface created after offseting
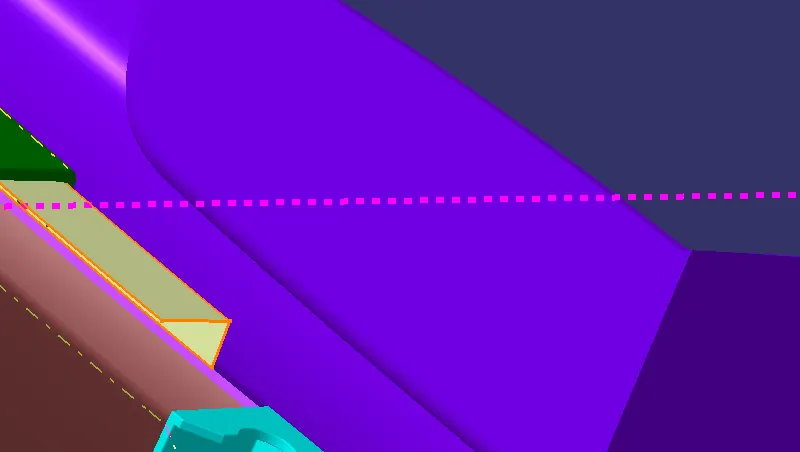
Fig 73. Flange surface created after trimming
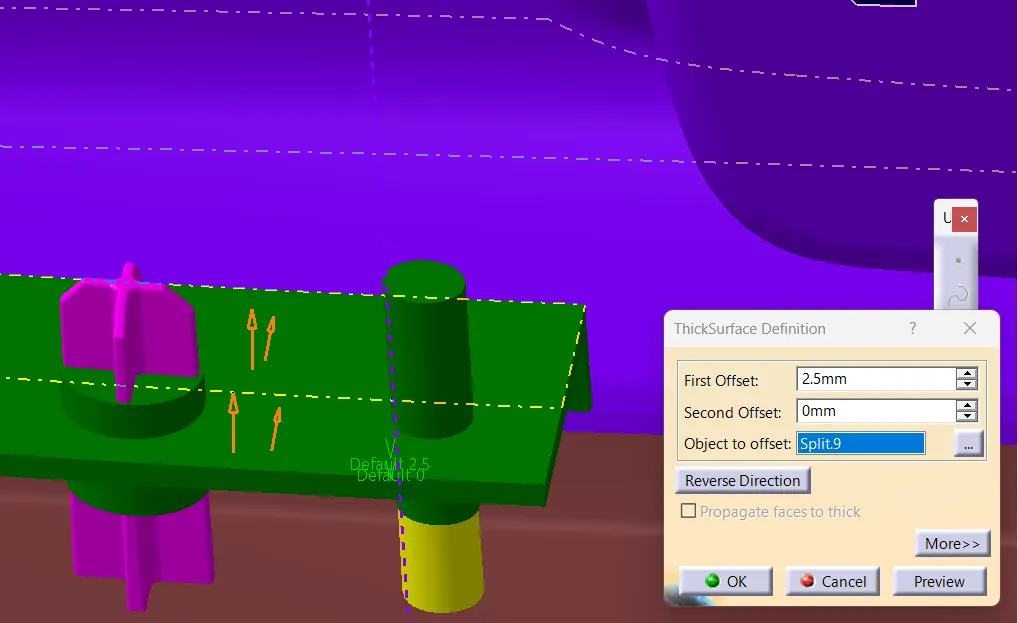
Fig 74. Flange surface created after thickening.
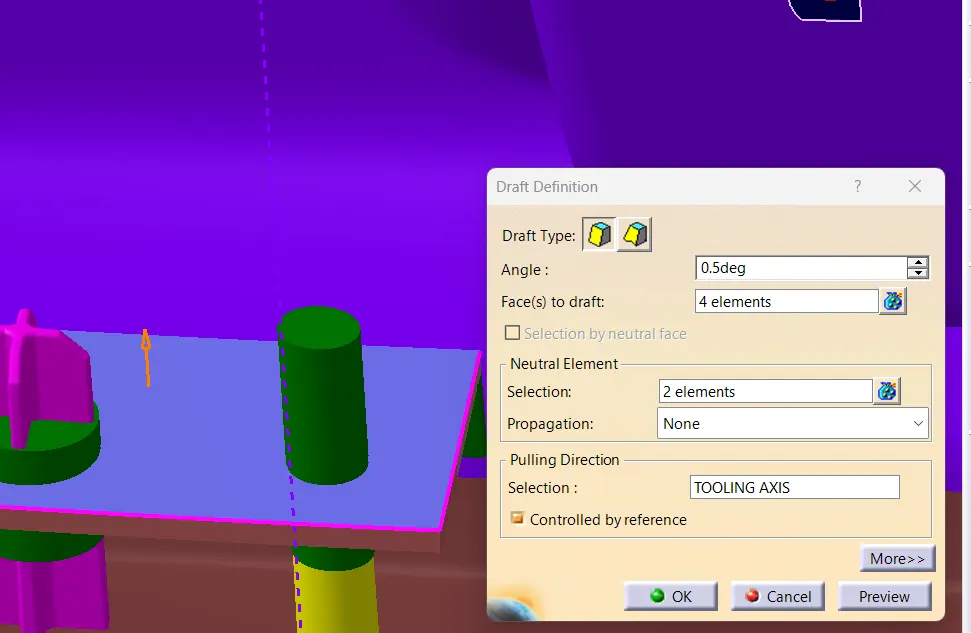
Fig 75. Flange surface created being drafted.
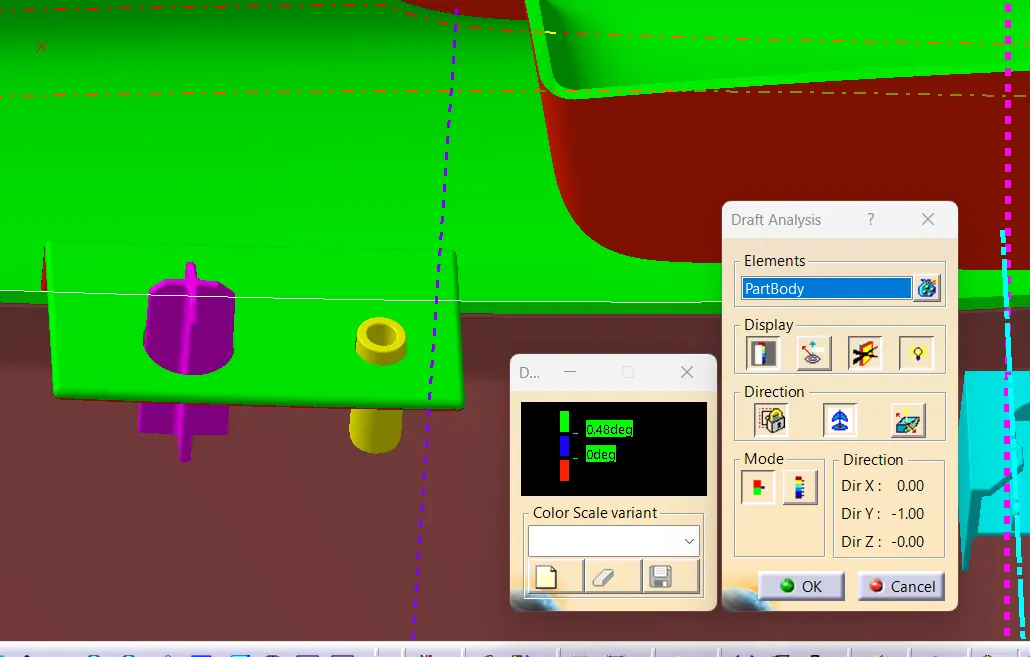
Fig 76. Draft analysis of the flange.
The similar method is adopted for the creation of other flanges also at the respective locations of the parts.
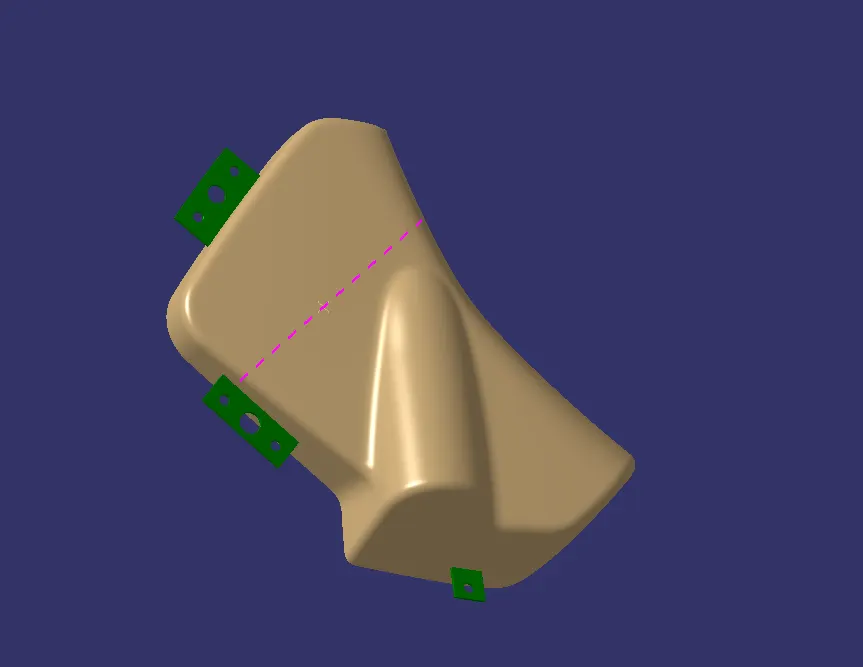
Fig 77. Flanges on bottle holder.
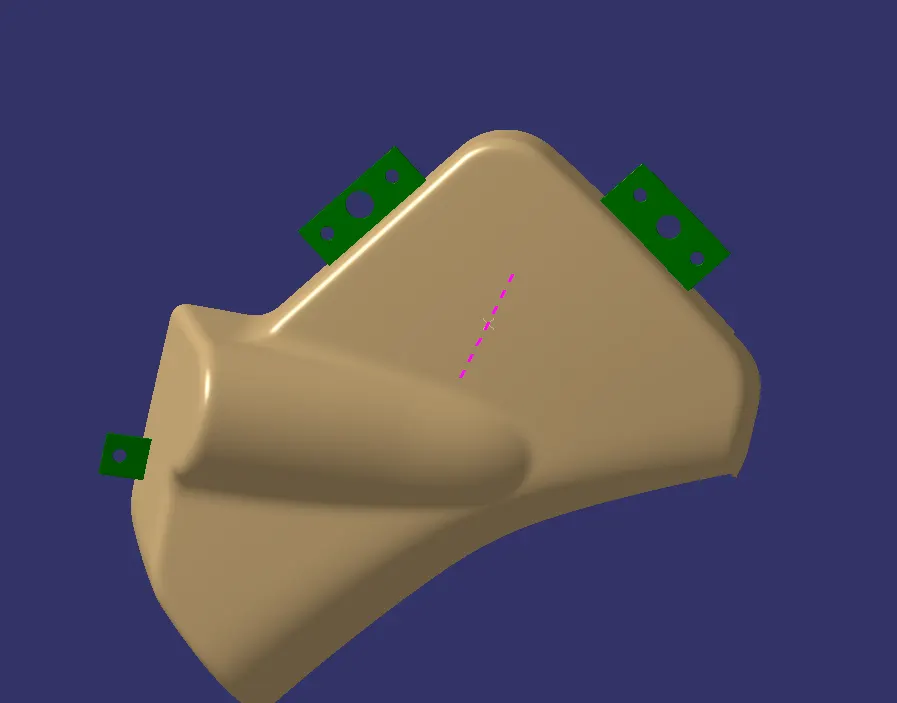
Fig 78. Flanges on bottle holder.
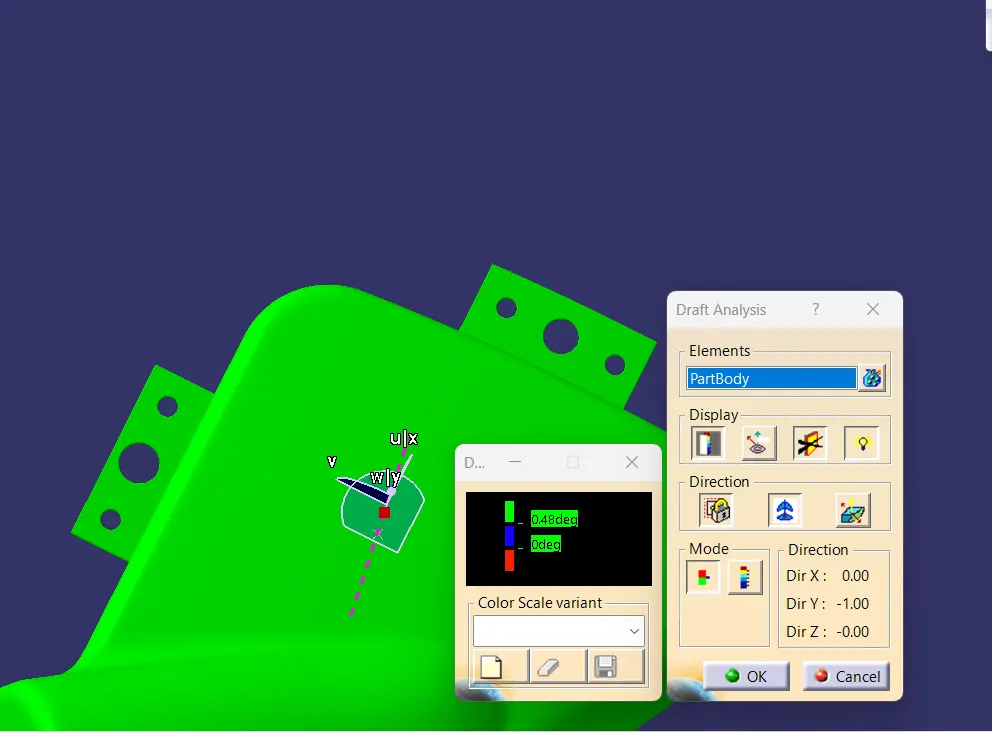
Fig 79. Draft analysis of flanges on bottle holder.
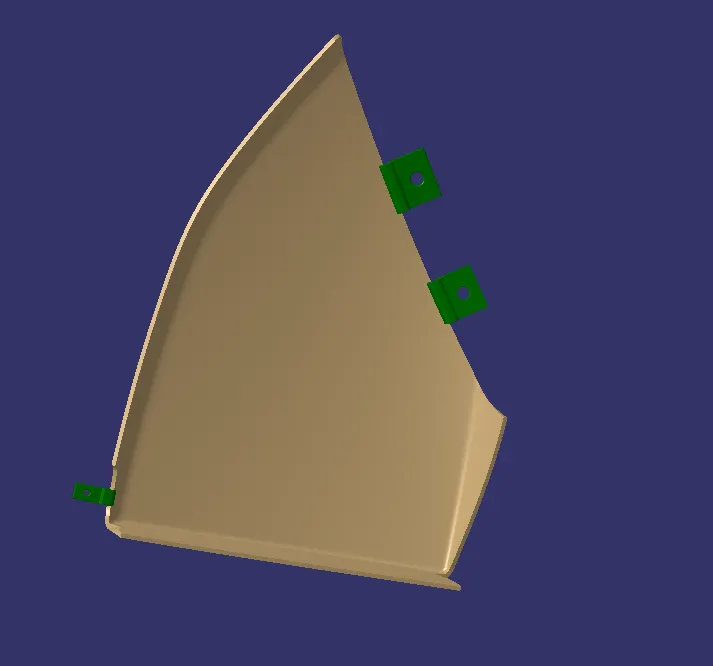
Fig 80. Flanges on map pocket
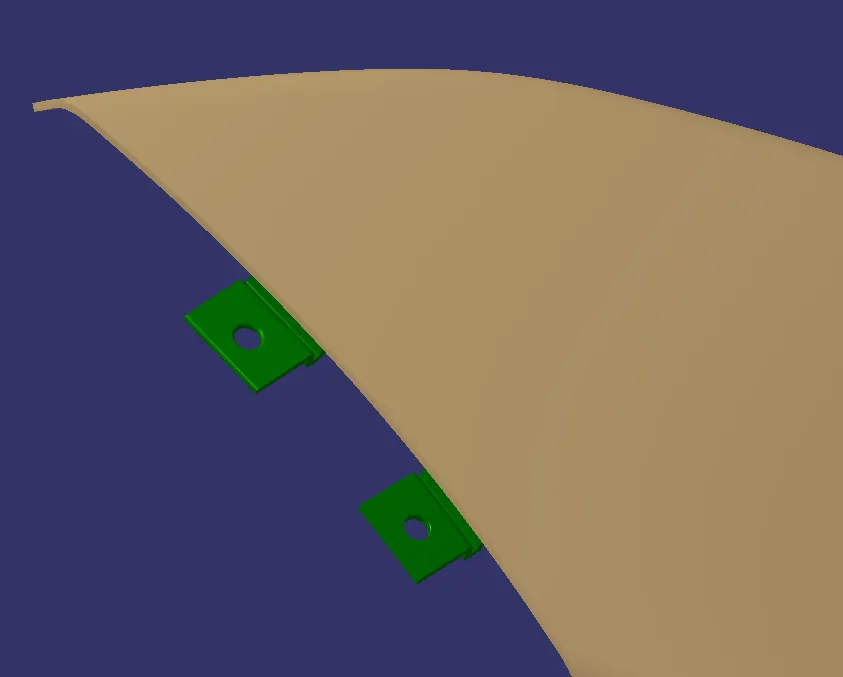
Fig 81. Flanges on map pocket.
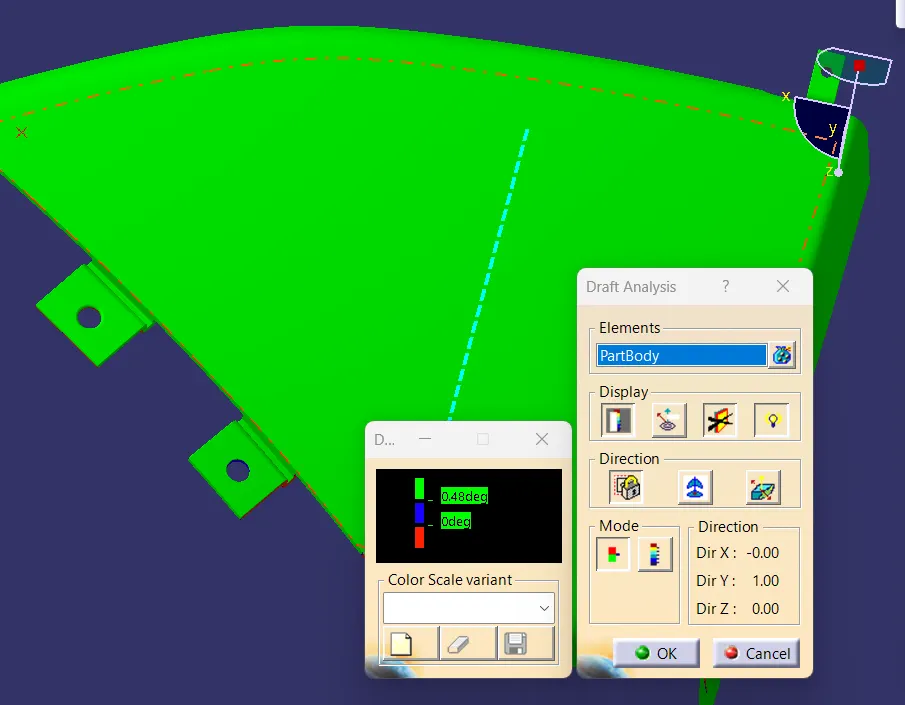
Fig 82. Draft analysis of flanges on map pocket.
Assembling push pins with dog house
The push clips are used as an attachment feature for holding two panels together. In cars, they are used for trim panels, door trim, fenders, bumpers, engine covers etc. Here they are mounted on the dog house.They are used to arrest the parts together firmly.
They are attached to the dog house by giving Coincidence and Contact constraints.
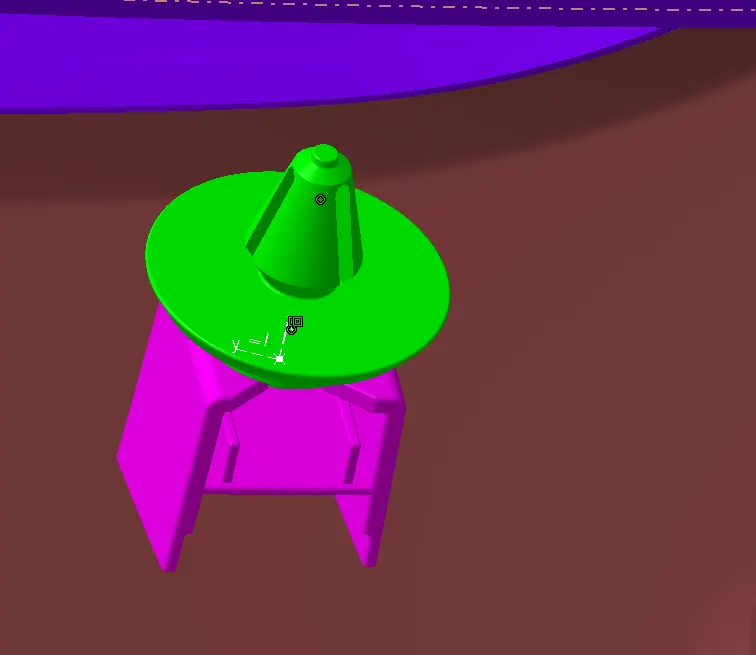
Fig 83. Push pin and Dog house assembly.
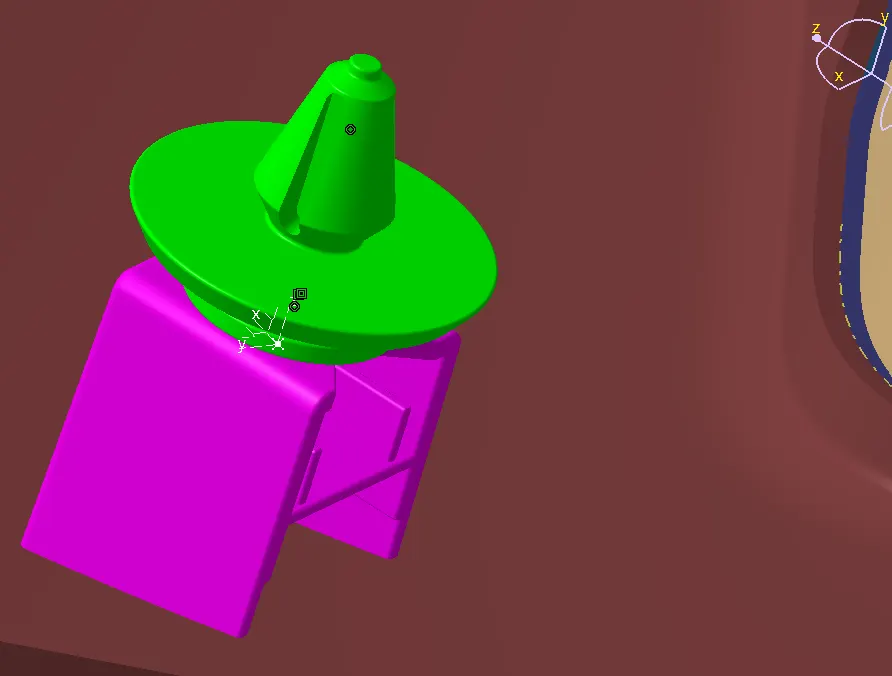
Fig 84. Push pin and Dog house assembly.
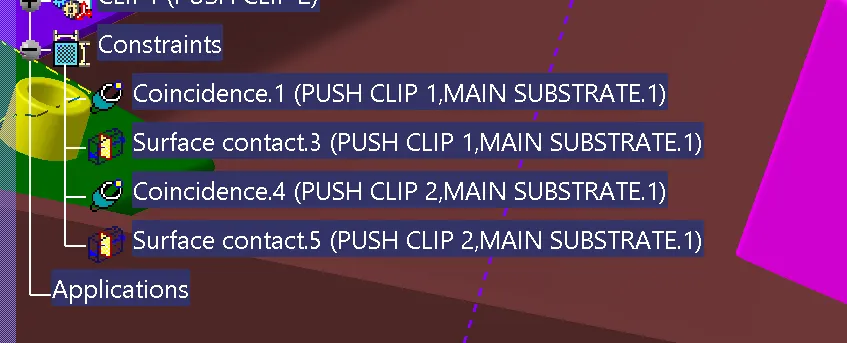
Fig 85. Constraints given.
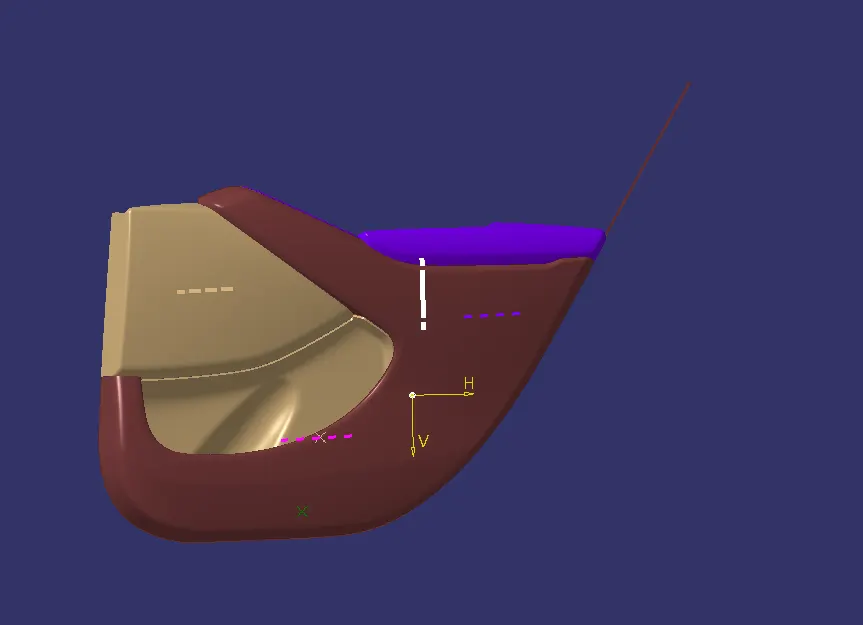
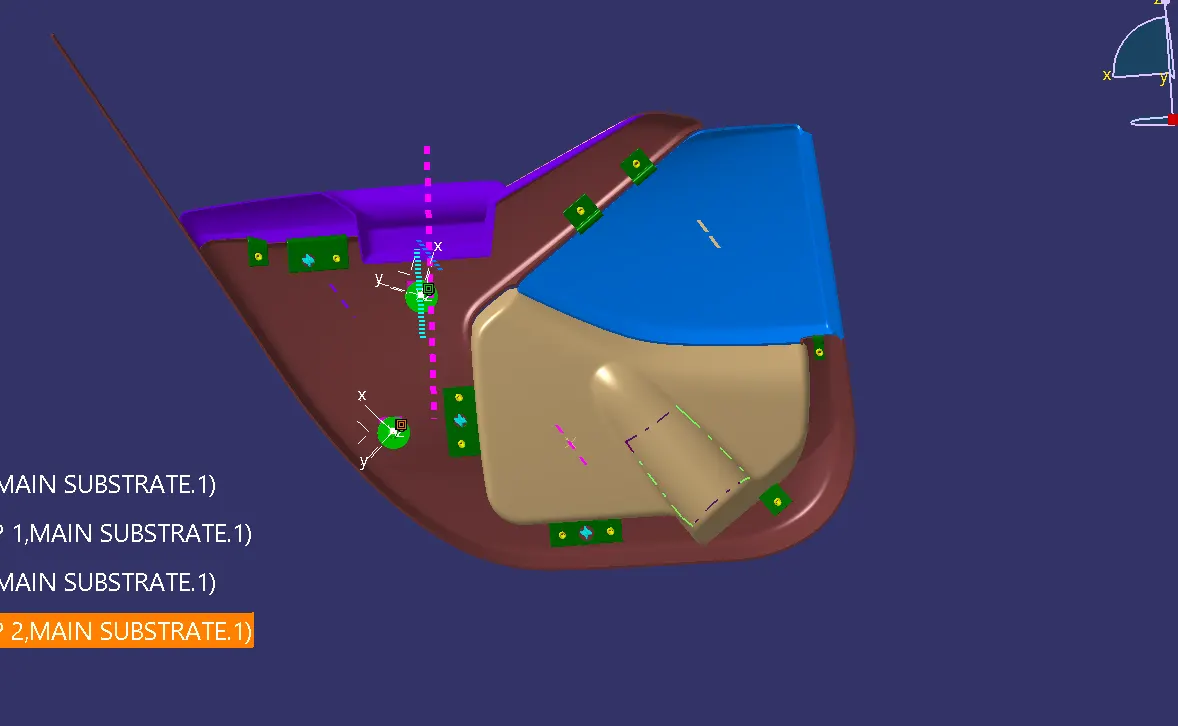
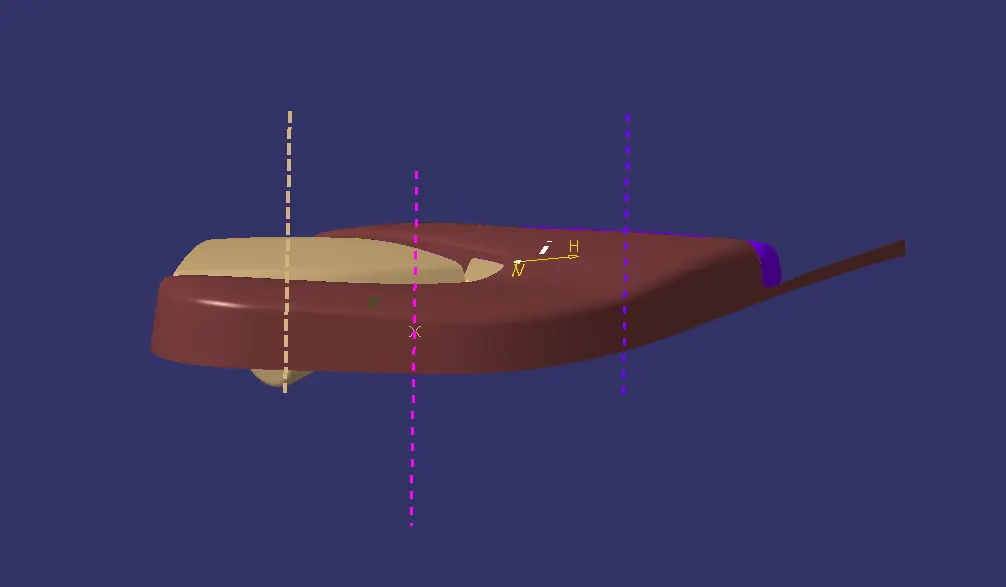
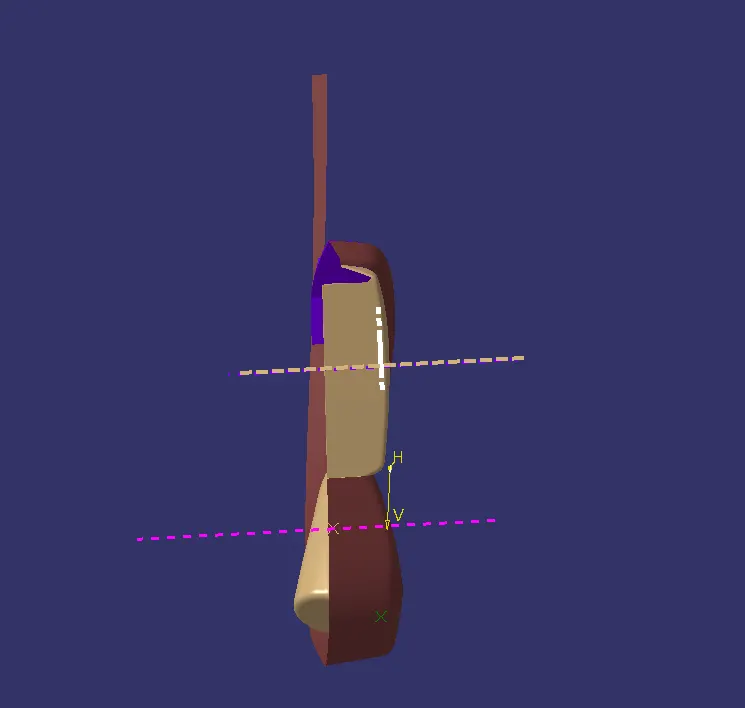
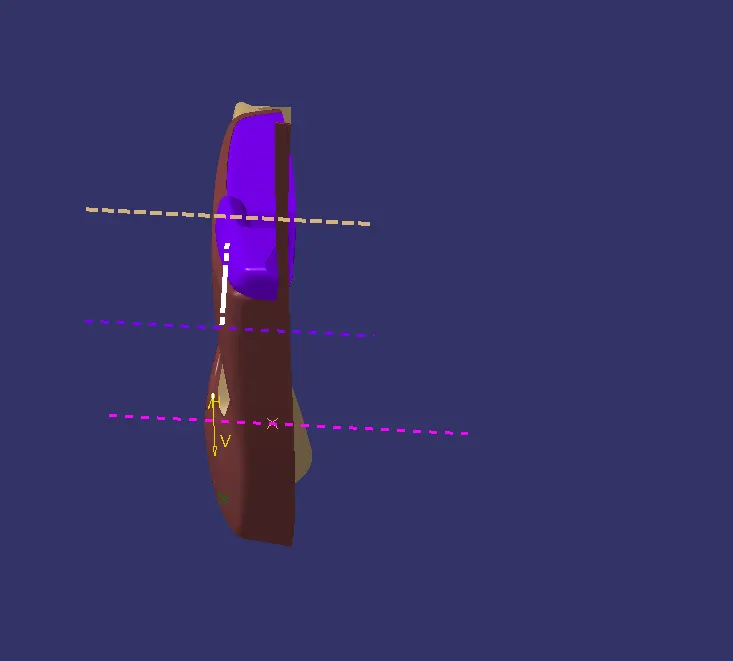
VAROIUS VIEWS OF THE ASSEMBLY
Conclusion
From the given Class A surfaces and master sections, an assembly of the door trim is done. For each part, class B and class C surfaces were created, trimmed and converted to solid bodies and draft analysis were performed. Then attachment features were created. Heat stakes, locators and dog house with push pin on the main substrate and flanges on the remaining parts to facilitate proper mating.
Draft analysis for the attachments were also done. By giving the required constraints, the final assembly was completed.