week-11 Joint creation and Demonstration
Objective :
To create a four types of joints using constrained extra nodes and constrained nodal rigid keywords with the help of Ls-Dyna.
Procedure :
1. The four types of joints which we are going to create i. Translational ii. Rotational iii. Spherical iv. Revolute. These has to be created using ls dyna.
Translational Joint(CEN)
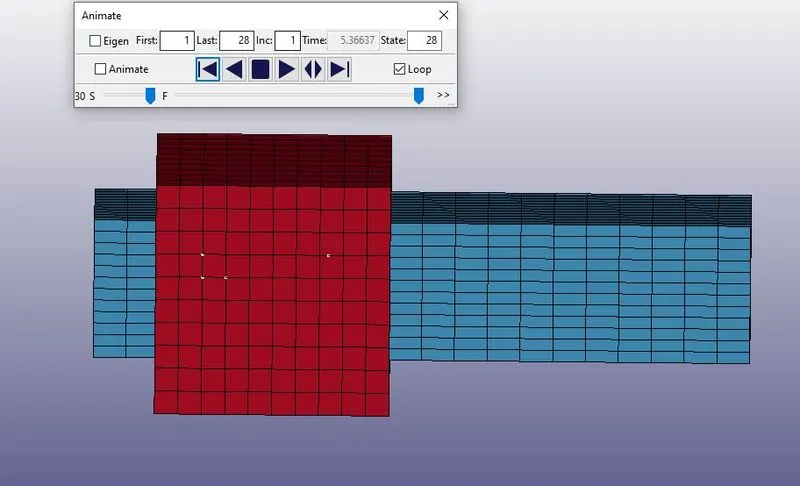
I. First we are creating a translational joint, so open the ls dyna and go to element and mesh option nd select the shape mesher and select the box shell and here we need to give co ordinates as shown in the below figure. Like this we need to create two box shell parts.
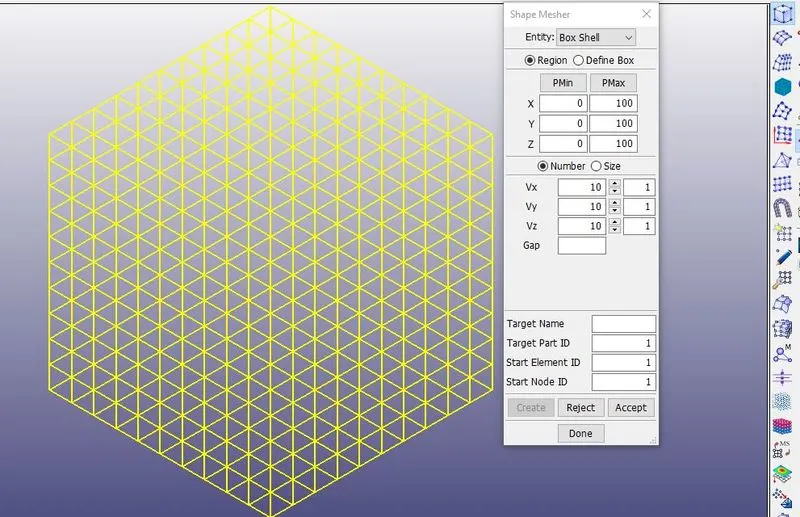
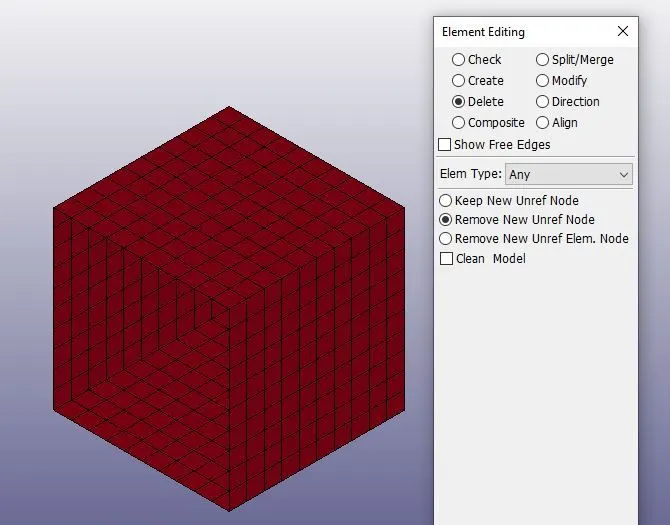
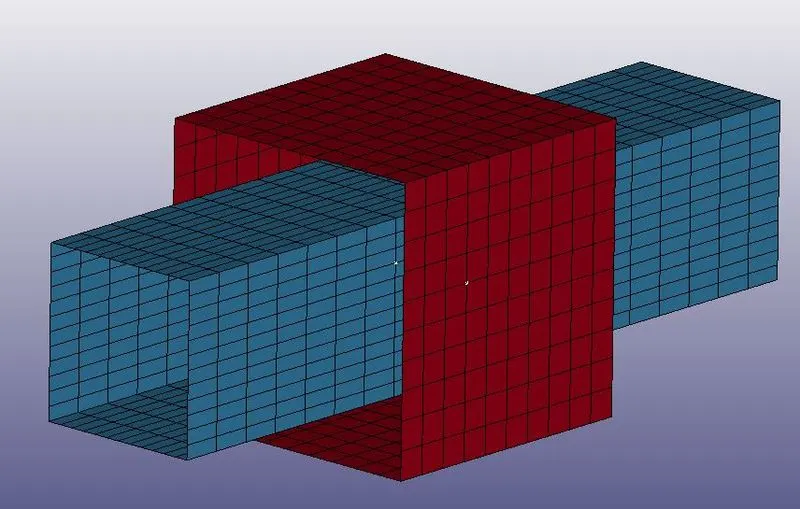
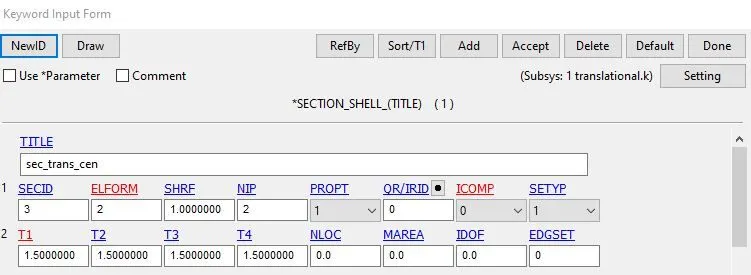
II. After creating the two box shells we need to delete some elements and we need to create section and material cards. Here we are using the rigid material card for all constrained extra node joints.
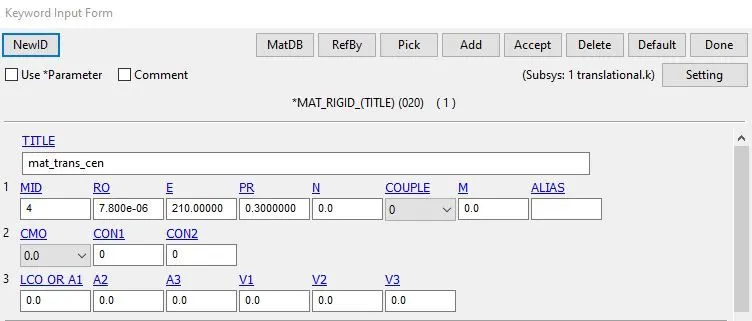
III. Now we need to create a extra nodes, go to element and mesh and select node editing and we have to create six extra nodes in the middle of the two parts.
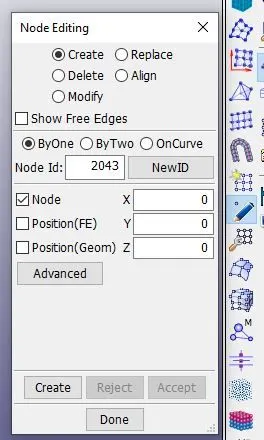
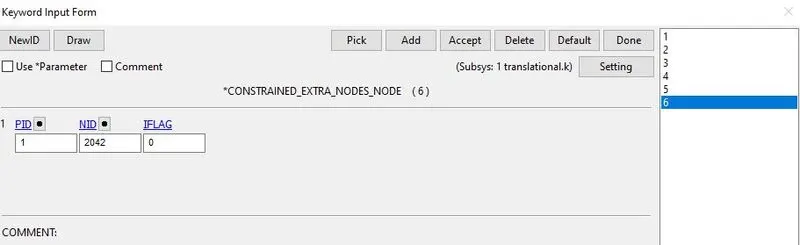
IV. Now we have created nodes these nodes has to be converted into the constrained extra nodes, go to keyword manager and select the constrained extra nodes and create six cards, three cards are created using node 2037, 2039, 2041 with part1 and another using node 2038, 2040, 2042 with part2.
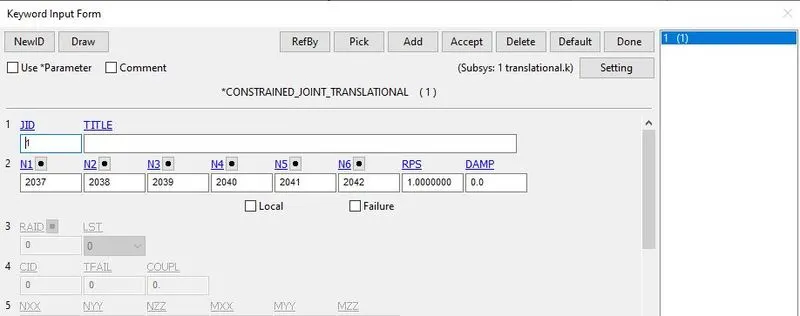
V. Now we need to create a joint using joint translational by inserting the six extra nodes
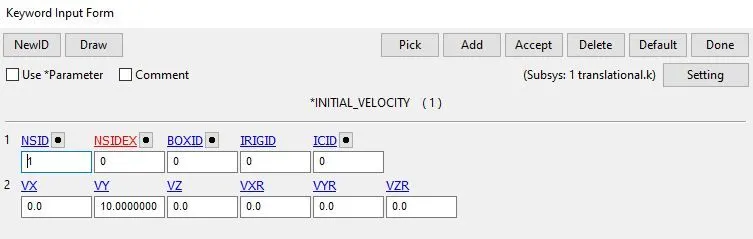
VI. Now we have to create a intial velocity keyword for the motion by giving 10mm/ms in the y - direction.
VII. After that we need to create control termination and binary d3plot card and save the keyword file.
Cylindrical Joint(CEN)
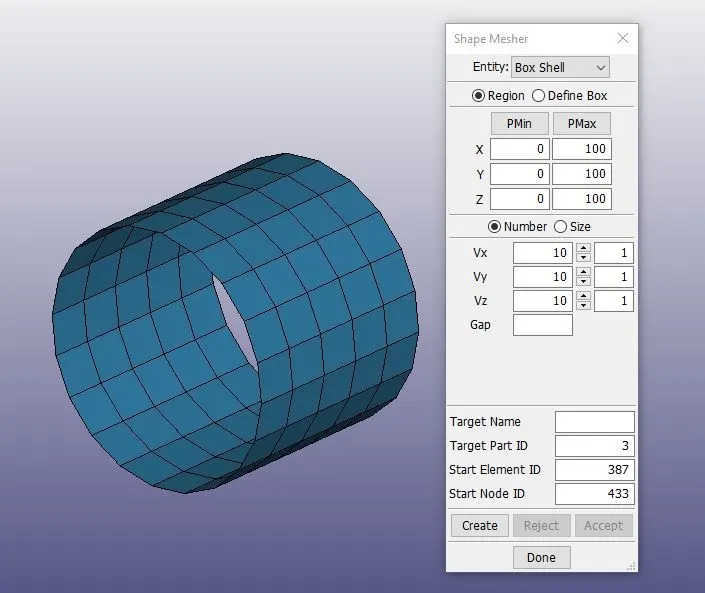
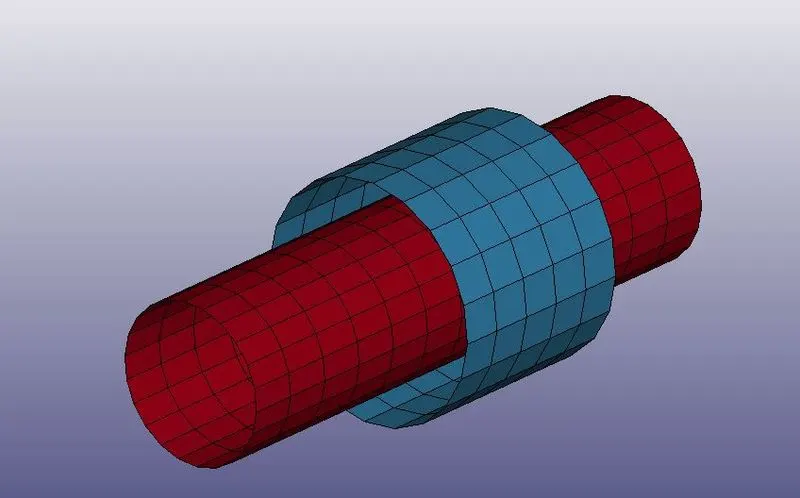
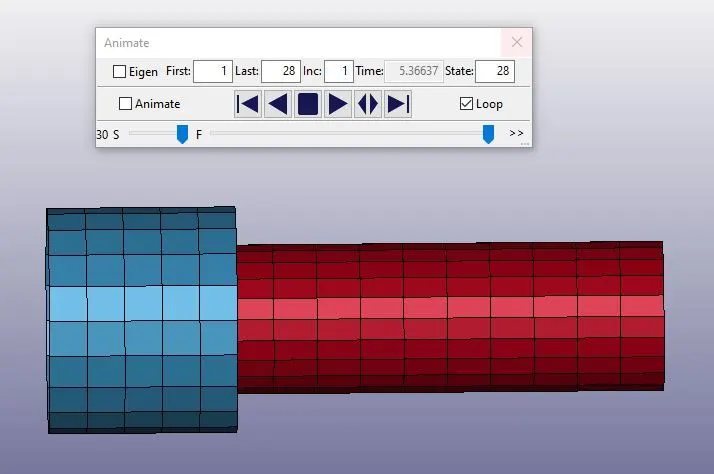
I. For rotational joint we need to create two cylindrical shells same as translational joint. Go to element and mesh option and select shape mesher and create two cylindrical shell parts.
II. Now we need to create a section and material same as translational joint.
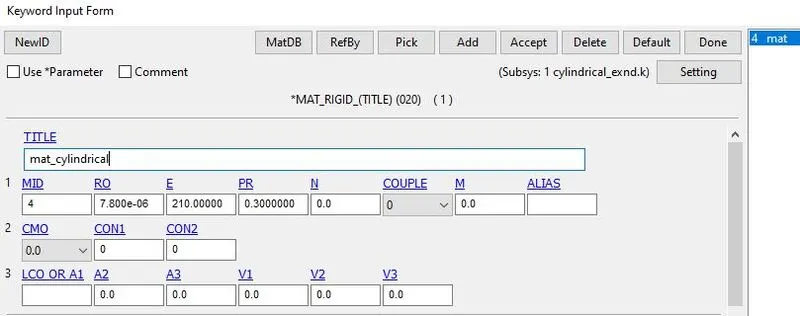
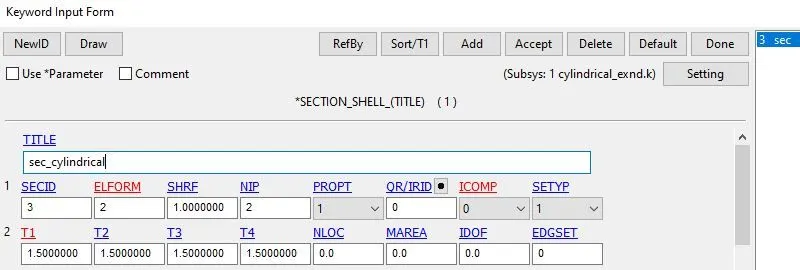
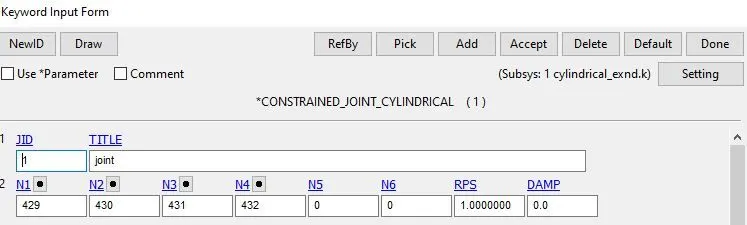
III. After that we need to create four extra nodes and turn them as constrained extra nodes. Two nodes are attached to part1 and another two nodes are attached to part2. After that go to joint cylindrical and attach these nodes and create a joint.
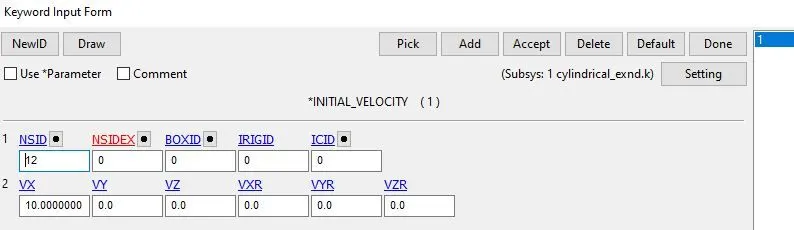
IV. For motion we use intial velocity as 10mm/ms in y-direction.
V. Now create control and database card and save the file and run th file in solver to see the results.
Spherical Joint(CEN)
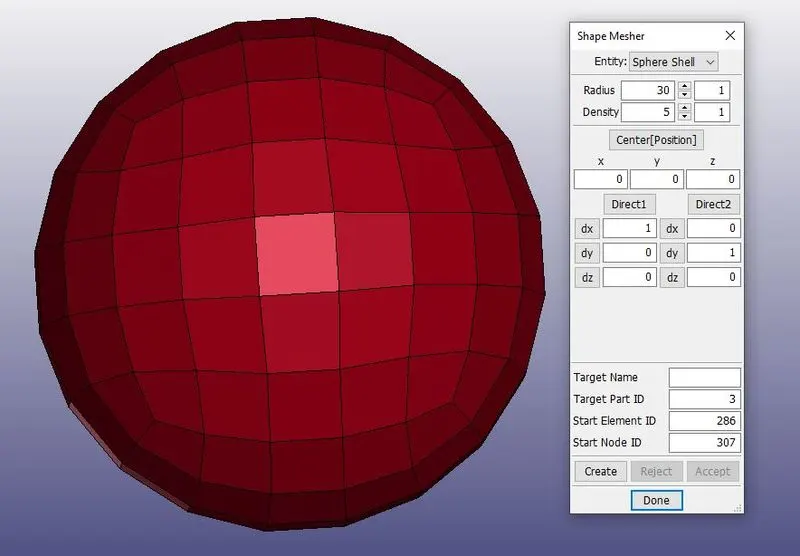
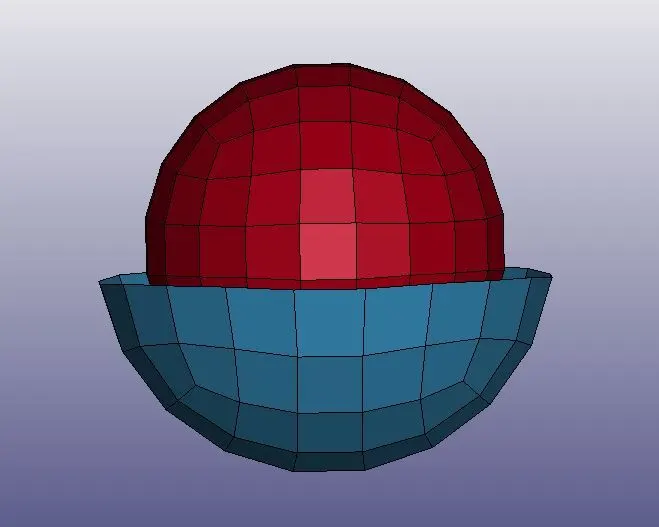
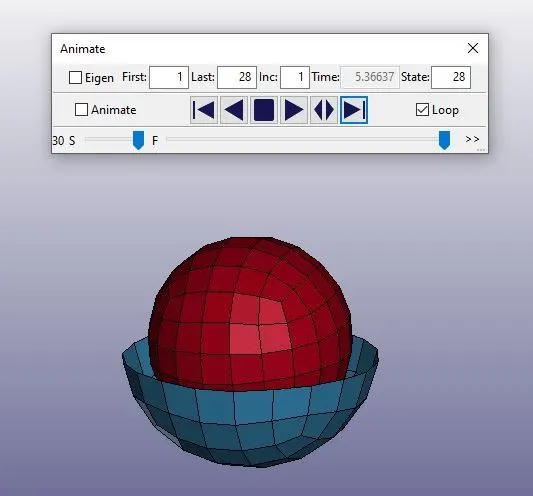
I. For creating spherical joint we need to create two spherical parts and one with smaller and another one with bigger. Bigger spherical part has to delete half of the elements in order to represent a joint.
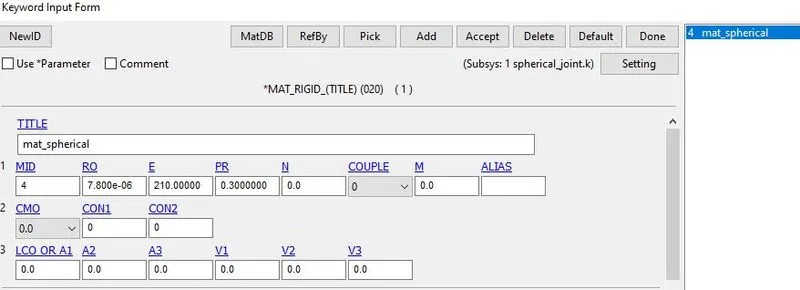
II. Create a section card and material card and assign them into part cards.
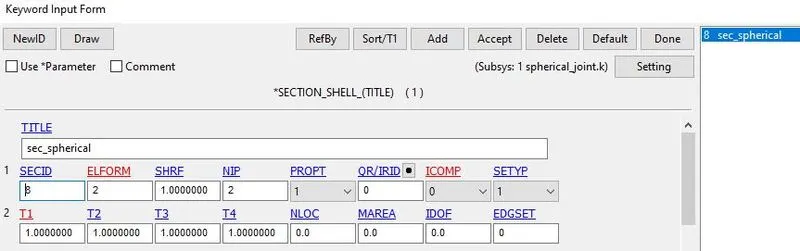
III. Now we need to create two extra nodes in the middle of parts and turn them as constrained extra nodes.
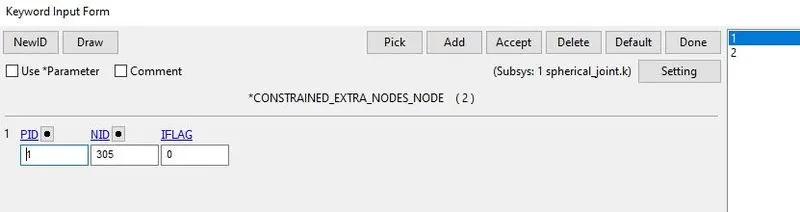
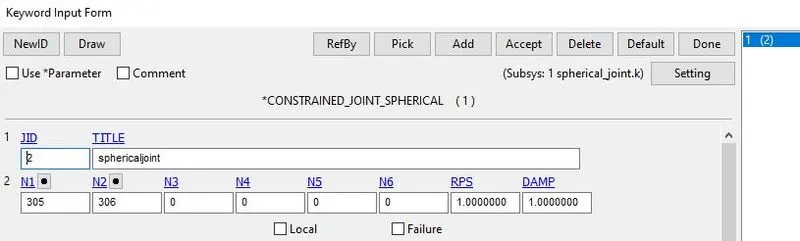
IV. After that go to joint spherical card and assign above nodes and create a joint.
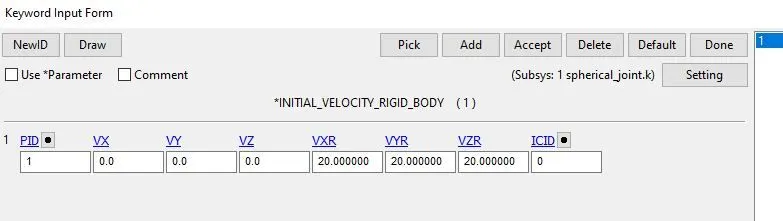
V. Now create a velocity card with 20.0mm/ms in xy, yz, zx direction.
VI. Now create control and database card and save the file and run the file in solver to see the results.
Revolute Joint(CEN)
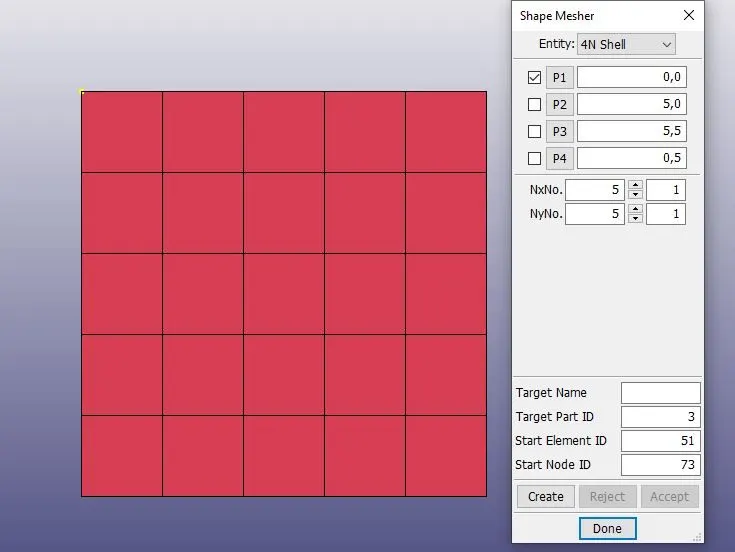
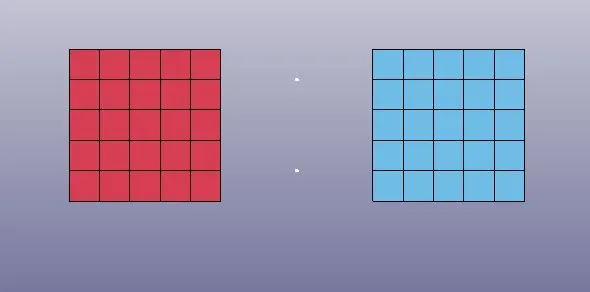
I. For revolute joint we need to create two 4N shells. Go to element and mesh option and select shape mesher and create two 4N shell parts with below shown co ordinates.
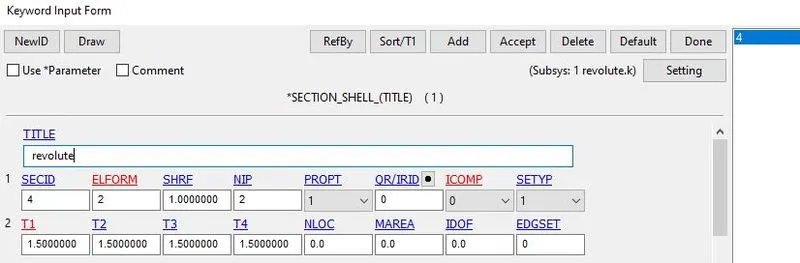
II. Now we need to create a section and material and assign them in part card.
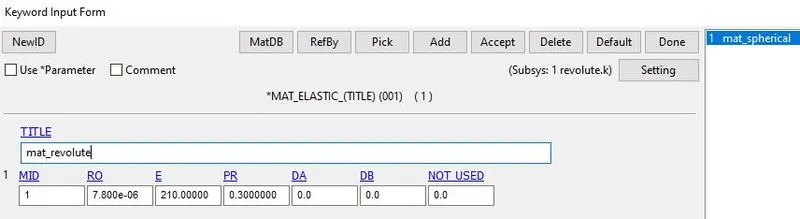
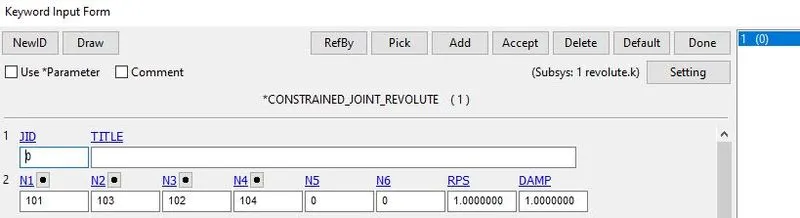
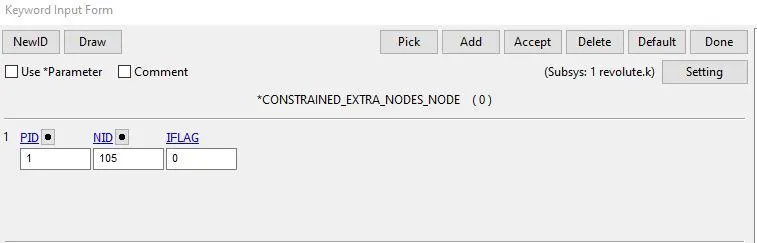
III. After that we need to create four extra nodes and turn them as constrained extra nodes. Two nodes are attached to part1 and another two nodes are attached to part2. After that go to joint revolute and attach these nodes and create a joint.
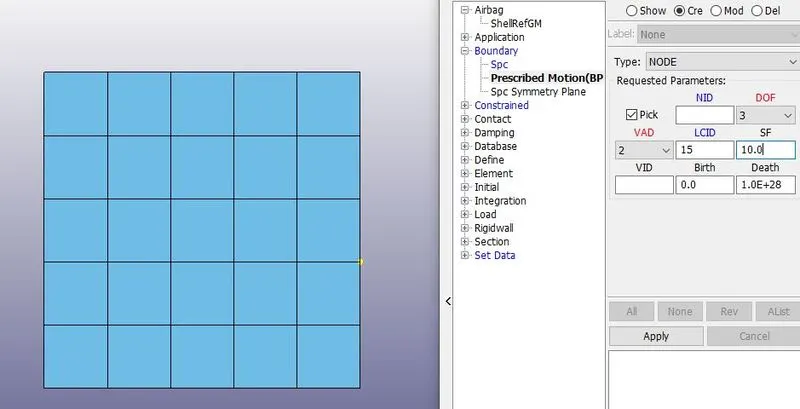
IV. For motion we use intial velocity as displacement curve so we need to create displacement curve card and then assign it in velocity card and create spc card for first part which is kept in rigid.
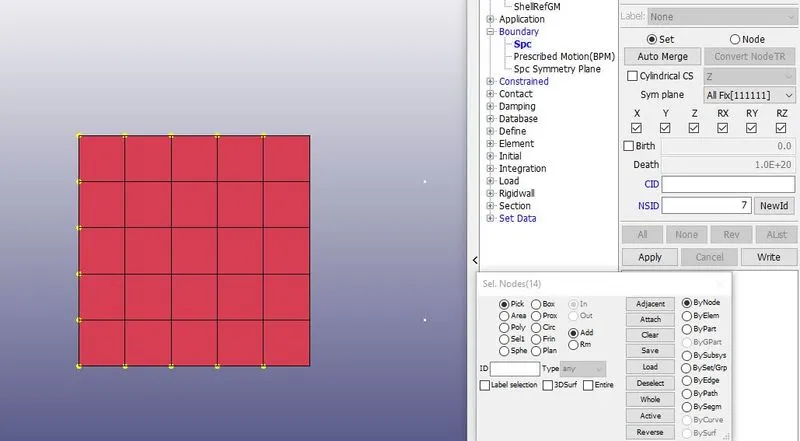
V. Now create control and database card and we need to create control time step and for that we need to create a lctm curve card and assign it here and save the file and run th file in solver to see the results.
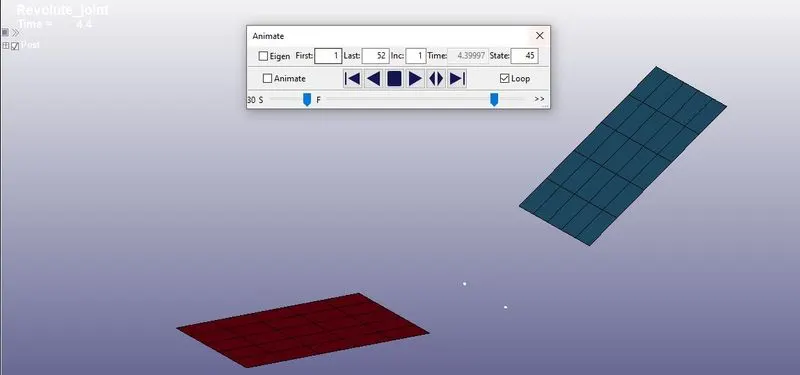
2. We have created four types of joints using the constrained extra nodes and like this we have to create constrained nodal rigid body for four types of joints.
Translational Joint(CNRB)
I. First two steps are common for all constrained nodal rigid body joint creation. After creating the parts and assigning the section and material cards we need to create 6 extra nodes in the middle of two parts.
II. After creating extra nodes go to create entity and select constrained nodal rigid card and switch off the pnode option and select one of the six nodes and select the first part of nodes and create CNRB and for another node select second part of the nodes and create CNRB. Like this we have to perform for remaining four nodes.
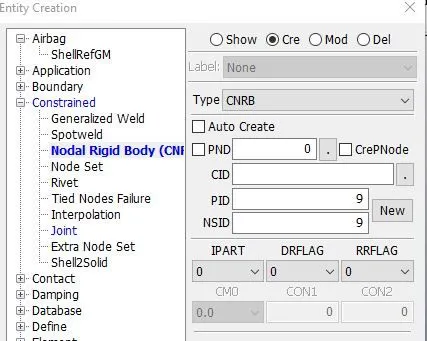
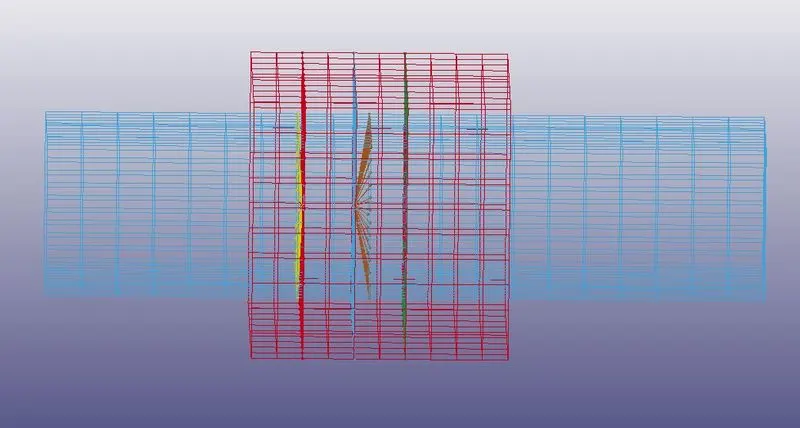
III. After creating CNRB we need to create a joint by assigning these nodes in the card.
IV. Remaining steps are same as CEN translational joint steps.
Cylindrical Joint(CNRB)
I. For rotational joint steps are same as first two steps of rotational CEN. After that we need to create four nodes in the middle of parts.
II. Now go to the create entity and select constrained nodal rigid body and switc off the pnode and select the extra node and select the first part of the nodes and create CNRB and same goes for next node but here we are going to select second part of nodes. Like this we need to create another two CNRB.
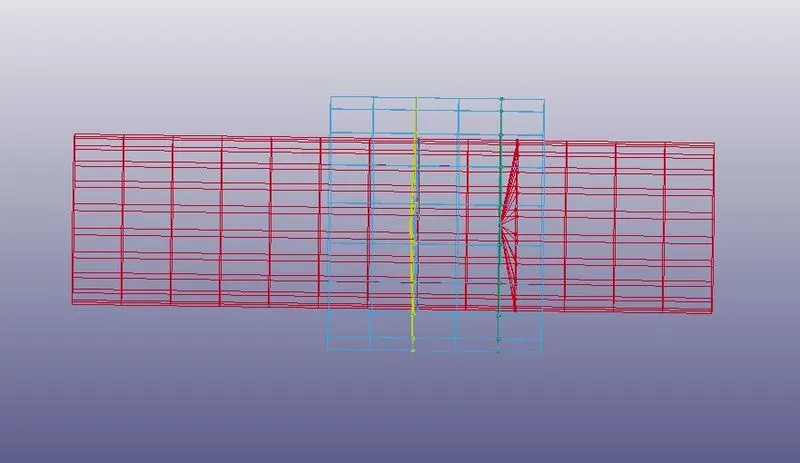
III. After creating four CNRB go to joint rotational and assign four nodes and create joint.
IV. Repeat the steps same as rotational joint CEN from step IV.
Spherical Joint(CNRB)
I. For spherical joint steps are same as first two steps of rotational CEN. After that we need to create two nodes in the middle of parts.
II. Now go to the create entity and select constrained nodal rigid body and switc off the pnode and select the extra node and select the first part of the nodes and create CNRB and same goes for next node but here we are going to select second part of nodes.
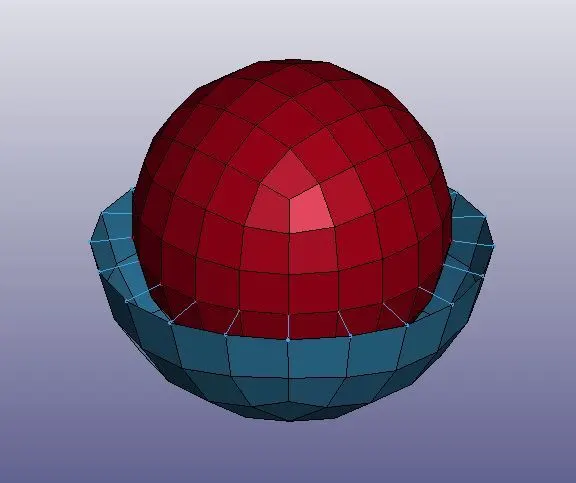
III. After creating four CNRB go to joint spherical and assign two nodes and create joint.
IV. Repeat the steps same as spherical joint CEN from step IV.
Revolute Joint(CNRB)
I. For revolute joint steps are same as first two steps of rotational CEN. After that we need to create four nodes in the middle of partsand these nodes four nodes are in separate positions.
II. Now go to the create entity and select constrained nodal rigid body and switc off the pnode and select the extra node and select the first part of the nodes and create CNRB and same goes for next node but here we are going to select second part of nodes. Like this we need to create another two CNRB.
III. After creating four CNRB go to joint we need to coincident the two node using tranform so go to... and select transform and select translation option and move the nodes until they coincident and do this same for remaining two nodes. After this assign these nodes in joint card and create a joint.
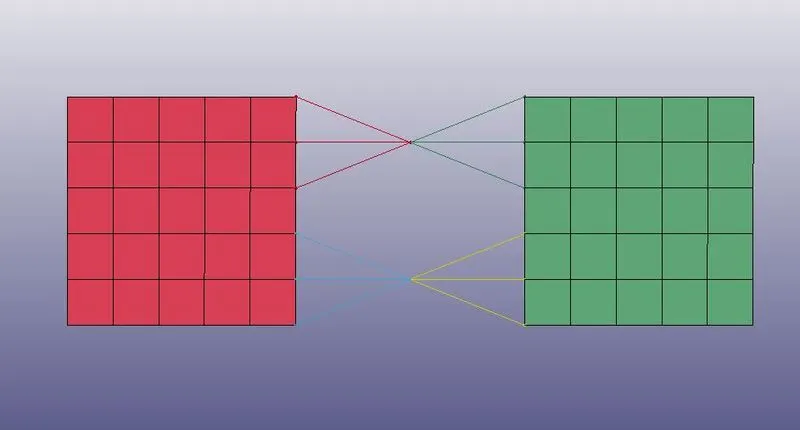
IV. Repeat the steps same as revolute joint CEN from step IV.
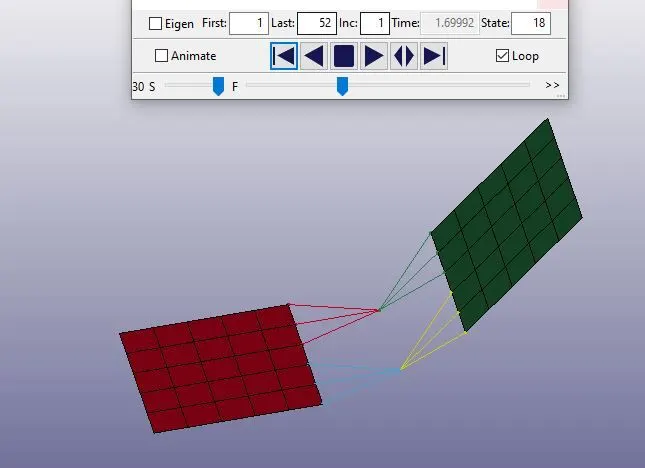
Conclusion :
Thus we created eight types of joints four are created using constrained extra nodes and another four are created using constrained nodal rigid body.