Week 11-3D Tetra Meshing Challenge
Week 11-3D Tetra Meshing Challenge
1. Aim
- Create a Teramesh using the mentioned generation methods and quality criteria for the given geometries.
Model 1: 2D to 3D Conversion
Model 2: Quick Tetra Mesh/ Volume Tetra Mesh
Model 3: Quick Tetra Mesh/ Volume Tetra Mesh
2. Objective
For Model 1,
- Import the geometry and Mesh the surface using trial elements (2D).
- Convert 2D elements to 3D elements and check for quality criteria.
Quality Criteria For the Model 1
| Sl No: | Quality Criteria | Value |
| 1 | Target Element Length | 5 |
| 2 | Minimum Length | 2 |
| 3 | Maximum Length | 7 |
| 4 | Tet Collapse | 0.15 |
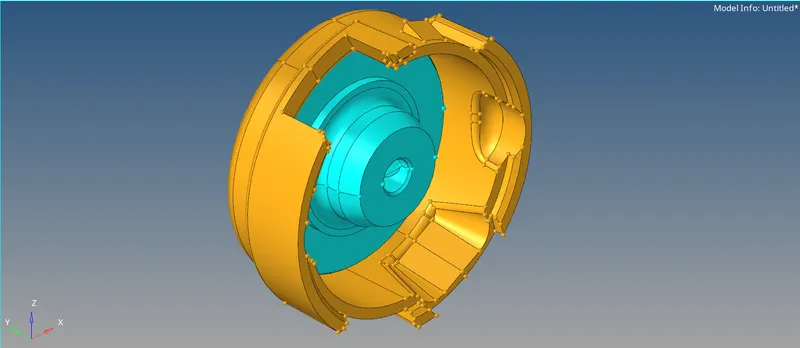
Fig 01: Isometric View Of Model 1.
For Model 2,
- Import the geometry Cleanup the Geometry
- Mesh the components using tetra mesh and check for qualities
Quality Criteria For the Model 2
| Sl No: | Quality Criteria | Value |
| 1 | Target Element Length | 3 |
| 2 | Tet Collapse | 0.15 |
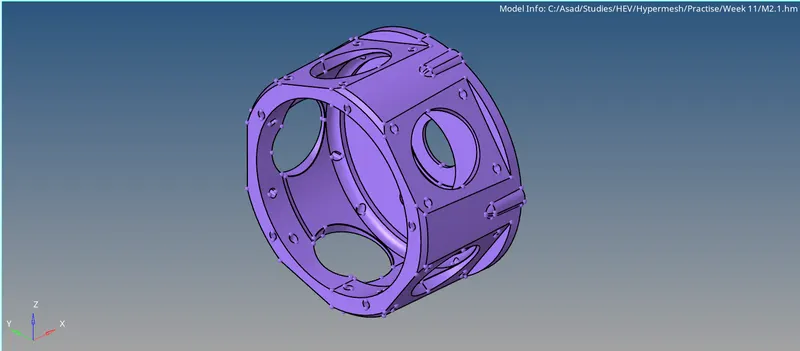
Fig 02: Isometric View Of Model 2.
For Model 3,
- Import the geometry Cleanup the Geometry
- Mesh the components using tetra mesh and check for qualities
Quality Criteria For the Model 2
| Sl No: | Quality Criteria | Value |
| 1 | Target Element Length | 4 |
| 2 | Tet Collapse | 0.15 |
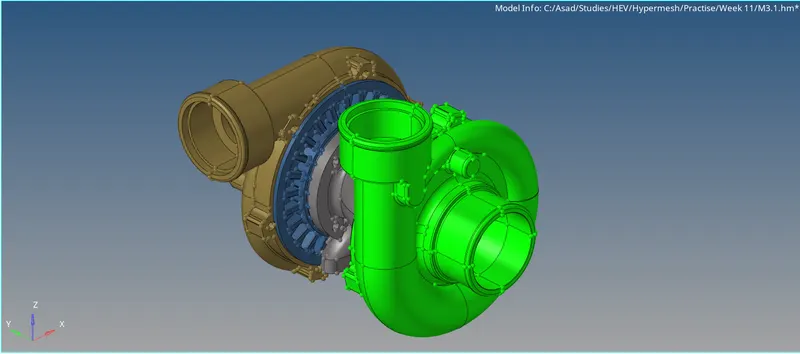
Fig 03: Isometric View Of Model 3.
3. Procedure
Model 1
Step 1: Surface Meshing Using Tria Elements and Quality Checks.
import the STP model to hyper mesh. Input the target element length and quality criteria for the mesh. Change the element type to 'Trias'. By inspecting the model, we can see that there are two components. Also, they are symmetric. Initially, we take the hub as the first component, and separate 2 halves in separate collectors or mask the half part.
Defeature if there any minimum radius fillets are present. Take one half and mesh the surface using only the Tria elements. Adjust the number of nodes. Rebuild it using the trial elements. Check for quality criteria failed elements.
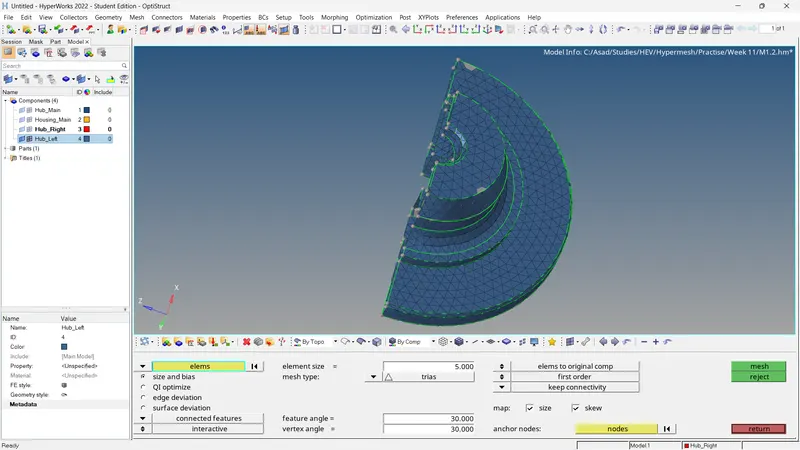
Fig 04: Meshing Using Tria Elements
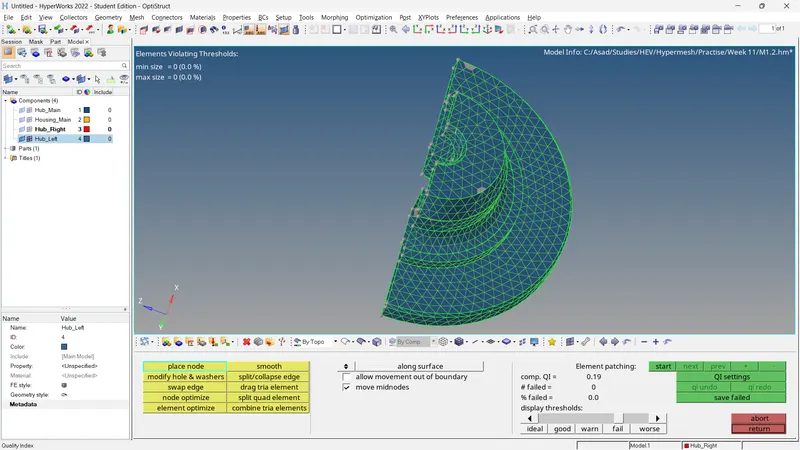
Fig 05: Quality Criteria Checking
Duplicate entire elements and Reflect the other side. Check for the equivalence and correct it. Because it is an enclosed mesh, there are no free edges present in this mesh.
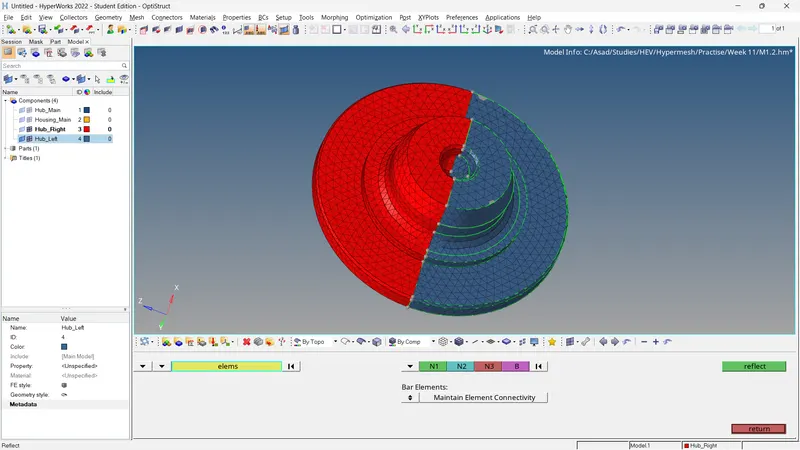
Fig 06: Duplicating and Reflecting Elements
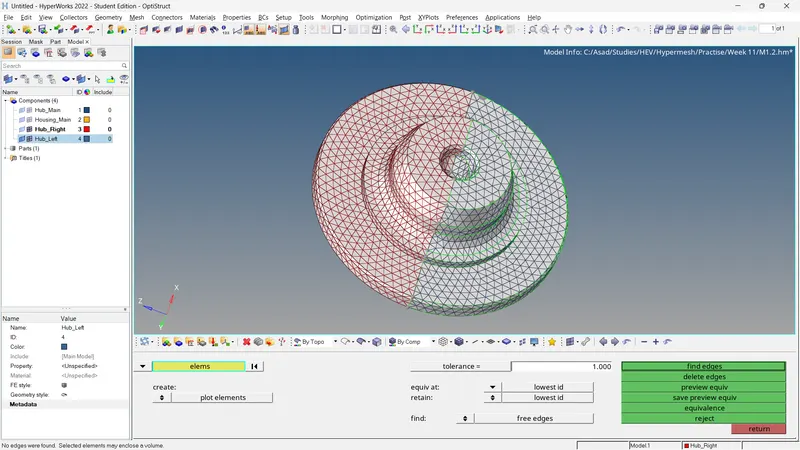
Fig 07: Check for Edges and Equivalence.
Step 2: Tetra Meshing and Quality Checks.
For generating 3D elements using the 2D elements,
- 3D >> Tetramesh >> Select all Tria Elements >> Mesh.
In this case, the 3D elements are stored in separate components.
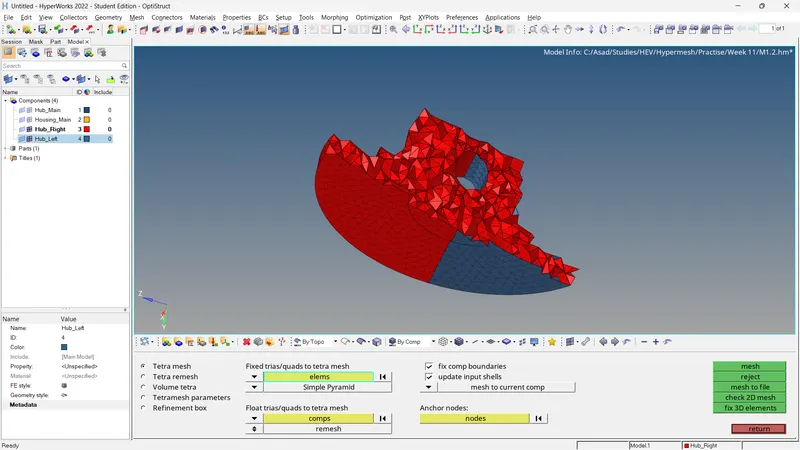
Fig 08: Tetra Meshing Component 1
For quality checking of 3D elements,
- Tools >> Check Elements >> 3D >> Tet Collapse= 0.15
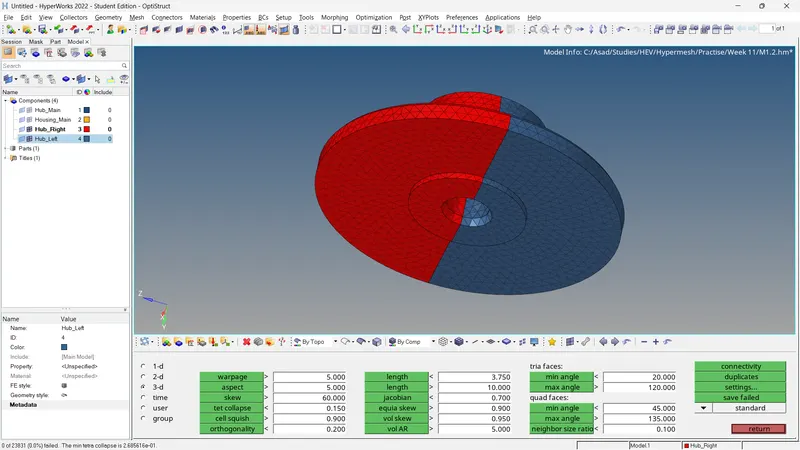
Fig 09: 3D Quality Checking
In this case, there are no failing elements. Move all elements to a single collector. Remove the empty components.
The second part is not a symmetrical one. This means we have to mesh the entire surface and repeat the remaining procedure for the remaining parts and generate the tetra mesh. Check for quality failures.
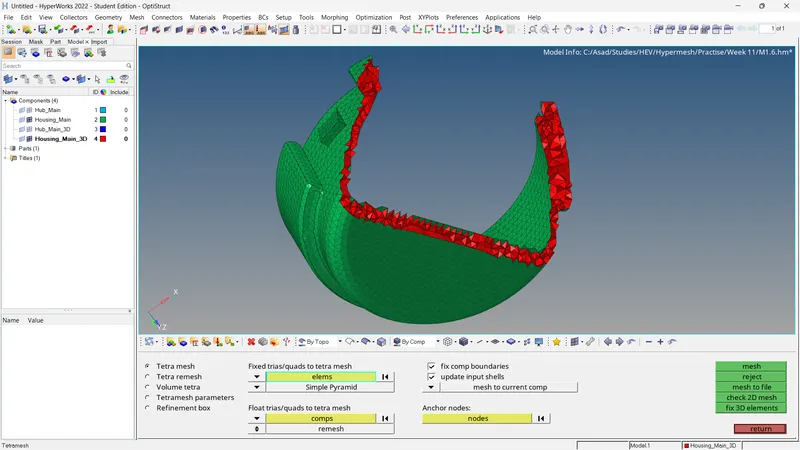
Fig 10: Tetra Meshing Component 2
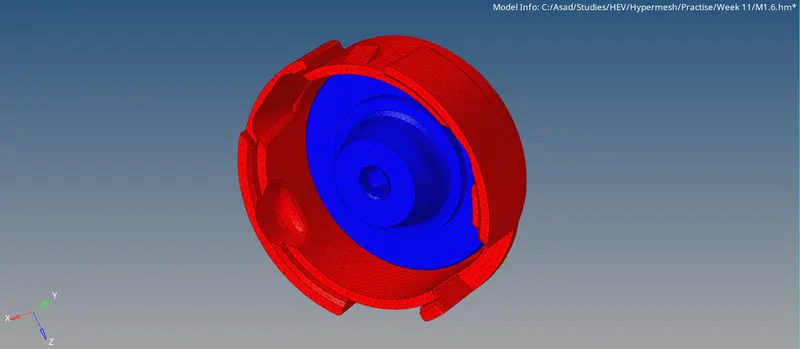
Fig 11: Final Result (Model 1)
Model 2
Step 1: Geometric Cleanup and Volume Tetra Mesh.
Import the model. Delete the solids and perform the geometric cleanup. Toggle extra lines and it may cause element failures. Perform 3D mesh using volume Tetra mesh.
- 3D >> Tetra Mesh >> Volume Mesh >> Select Displayed Surfaces >> Input Element Size >> 2D Type = Tria >> 3D Type = Tetra >> Element Order = First >> Mesh.
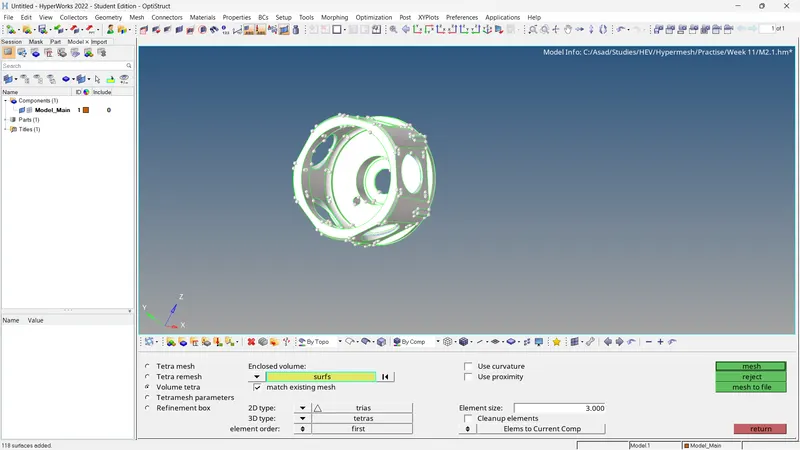
Fig 12: Volume Tetra Meshing
Step 2: Quality Checking and Element Correction.
Check the quality of 3D elements. Here there are no failed elements. If there are any failed elements we can use distance to change the distance between the nodes and get rid of tet collapse.
- Tools >> Check Elements >> 3D >> Tet Collapse= 0.15
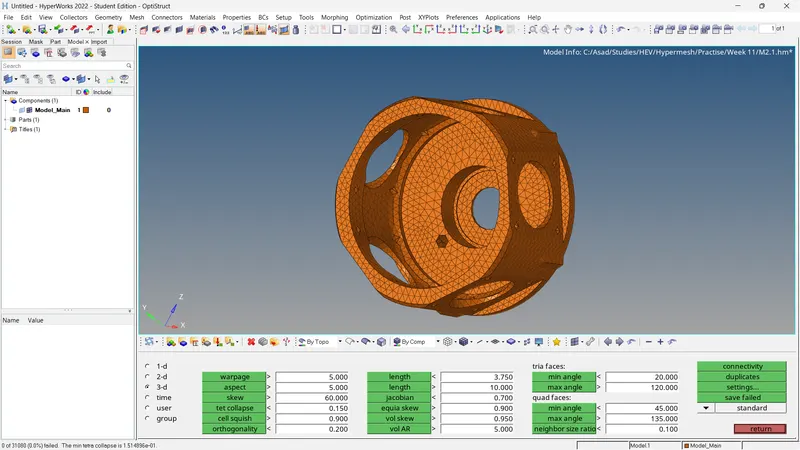
Fig 13: 3D Quality Checking
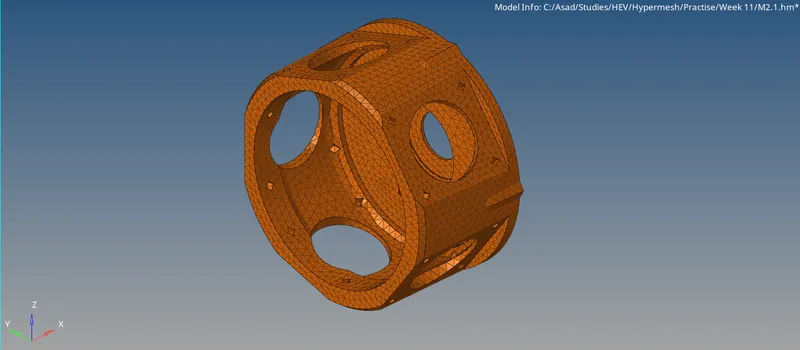
Fig 14: Final Result (Model 2)
Model 3
Step 1: Geometric Cleanup and Volume Tetra Mesh.
Import the model. Delete the solids and perform the geometric cleanup. The model consists of five components and the 2 of them are similar components.
Initially take the first component (ID=1) and perform tetra mesh using volume mesh. Check for quality and correct the elements if there any failing elements are present.
- 3D >> Tetra Mesh >> Volume Mesh >> Select Displayed Surfaces >> Input Element Size >> 2D Type = Tria >> 3D Type = Tetra >> Element Order = First >> Mesh.
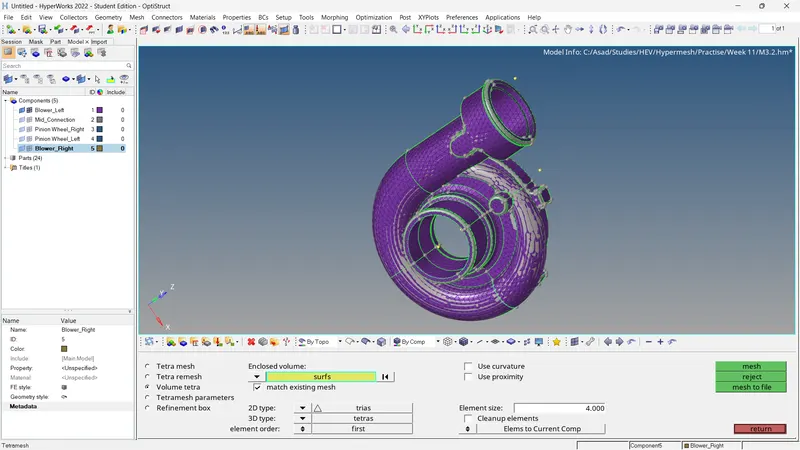
Fig 15: Volume Tetra Meshing of Component 1 (ID=1)
Step 2: Quality Checking and Element Correction.
Check the quality of 3D elements. Here there are no failed elements. If there are any failed elements we can use distance to change the distance between the nodes and get rid of tet collapse.
- Tools >> Check Elements >> 3D >> Tet Collapse= 0.15
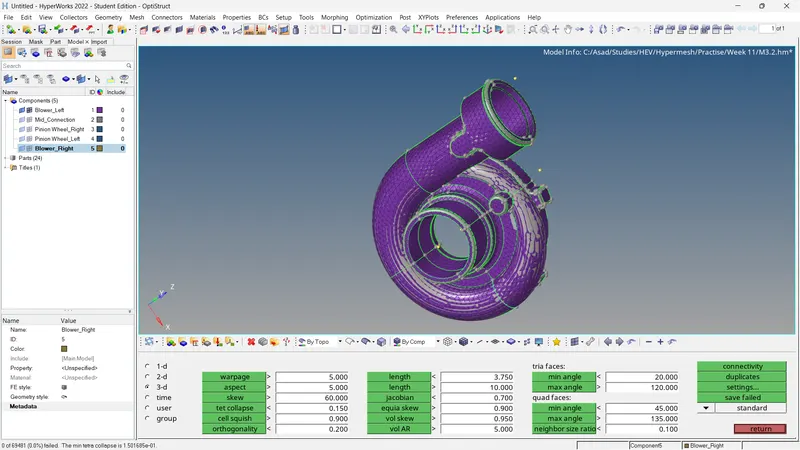
Fig 16: 3D Quality Checking of Component 1 (ID=1)
By inspecting the model, we can see that component 5 (ID=5) is the same as component 1 (ID=1). Create nodes in both components in the same position for reference. Using the Translate option we can duplicate elements to component 5 (ID=5) and translate the elements to the other side. Then using Rotate option, rotate the elements 180 degrees on the x-axis and approximately 50 degrees on the y-axis. Reduce the angle and rotate the elements to the correct position. Clear all the nodes. 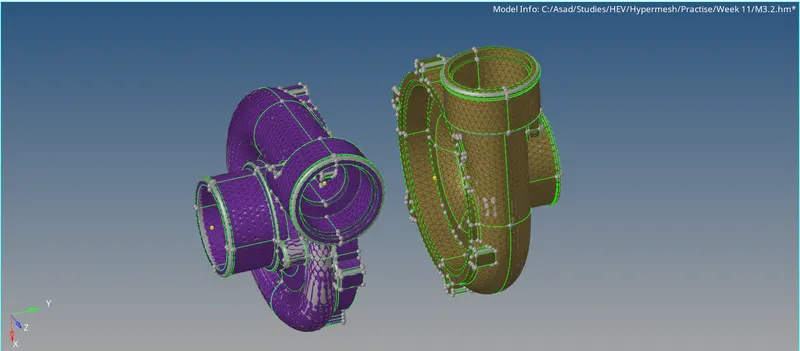
Fig 16: Component 1 (ID=1) and Component 5 (ID=5)
Mesh remaining components individually and check for tet collapse.
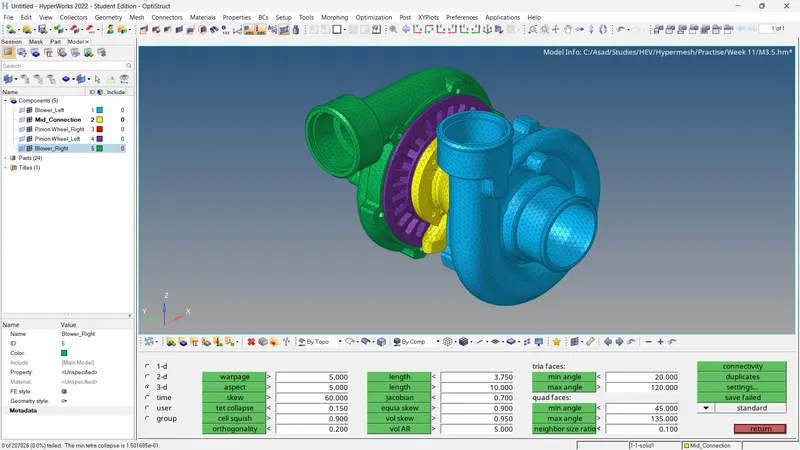
Fig 17: 3D Quality Checking
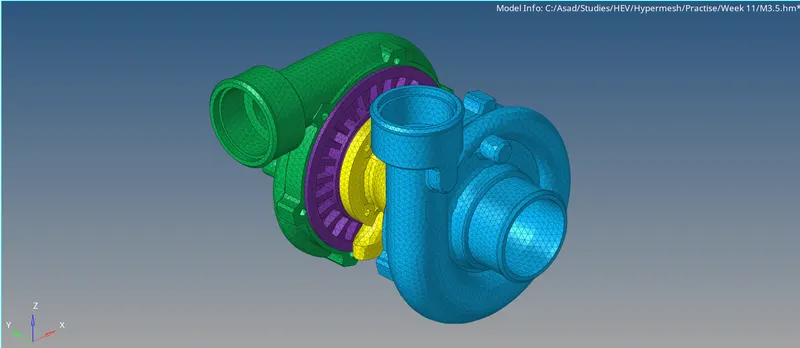
Fig 18: Final Result (Model 3)
4. Conclusion
For Model 1,
- For every component, the Tetra Meshing is achieved through mentioned generation method (2D to 3D) and 3D quality checking is completed.
For Model 2,
- For every component, the Tetra Meshing is achieved through mentioned generation method (Volume Mesh) and 3D quality checking is completed.
For Model 3,
- For every component, the Tetra Meshing is achieved through mentioned generation method (Volume Mesh) and 3D quality checking is completed.
5. Result
- The 3D tetra meshing is achieved in each and every model using mentioned generation methods and all the elements satisfy the quality criteria.