Project 1 - Meshing of Floor Panel
PROJECT 1 - Meshing Of Floor Panel
1. Aim
- To Generate a mesh on a given Floor Panel model after a proper geometry cleanup and mid-surface generation using 'ANSA' Preprocessing Software.
- Ensure the generated mesh obeys the mentioned quality criteria and the corresponding thickness, of each element assigned to the mesh.
2. Objective
- Import and perform a geometry cleanup on the given Floor Panel using ANSA GUI
- Fix errors shown during the geometry check-ups.
- Identify the model by measuring the thickness.
- Generate a mid-surface from the cleaned model.
- Mesh the generated mid-surface and reconstruct the mesh to satisfy the following quality criteria and mesh parameters.
Quality Criteria
|
Sl No. |
Quality Criteria |
Value |
|
1 |
Target/Average length |
5 |
|
2 |
Minimum Length |
2 |
|
3 |
Maximum Length |
8 |
|
4 |
Aspect |
5 |
|
5 |
Warpage |
15 |
|
6 |
Skewness |
45 |
|
7 |
Taper |
0.5 |
|
8 |
Minimum Quad Angle |
45 |
|
9 |
Maximum Quad Angle |
135 |
|
10 |
Minimum Tria Angle |
20 |
|
11 |
Maximum Tria Angle |
120 |
|
12 |
Tria Percentage |
10 |
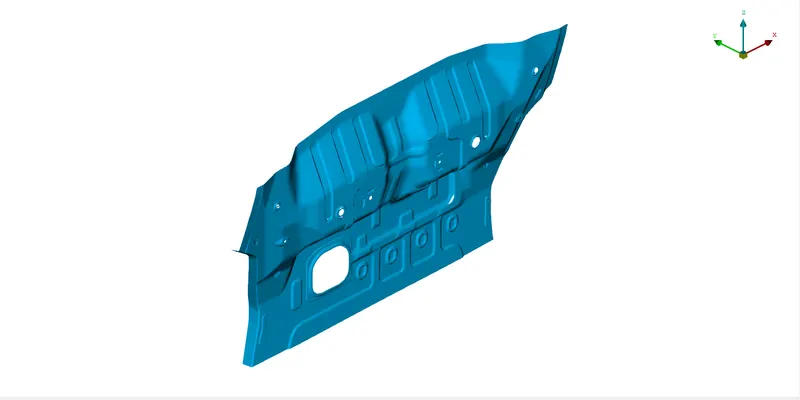
Fig 1: Isometric View Of Floor Panel Model
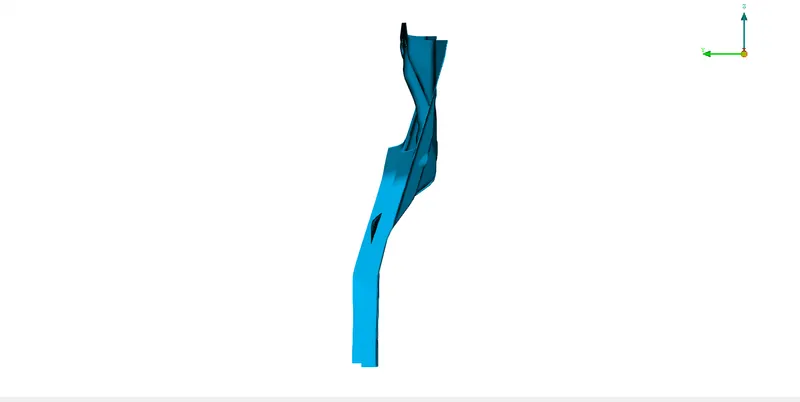
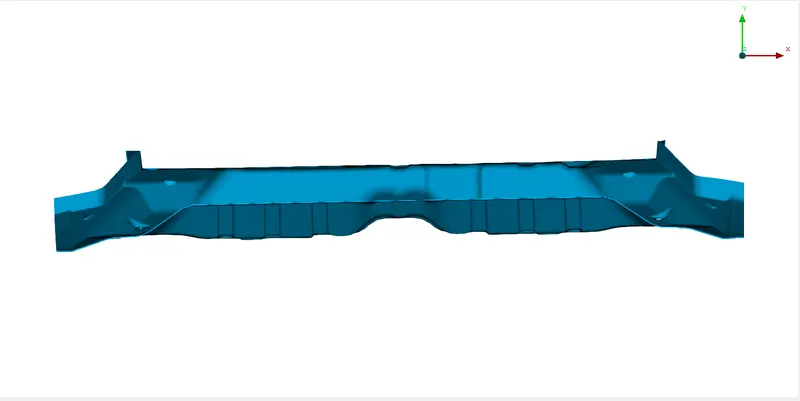
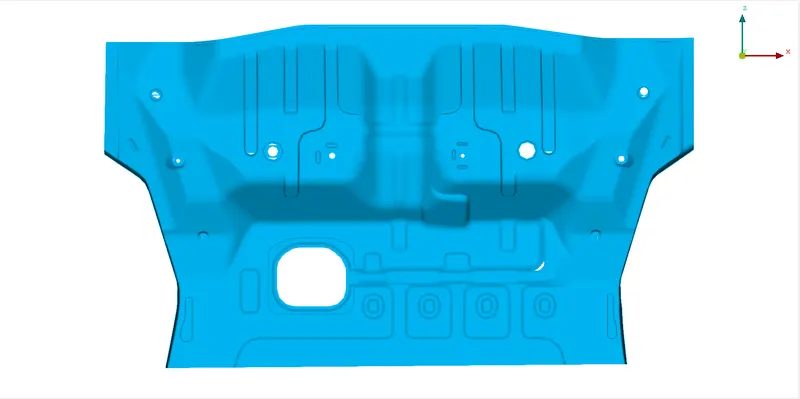
Fig 2: Front View Of Floor Panel Fig 3: Top View Of Floor Panel Fig 4: Side View Of Floor Panel
3. Procedure
Step 1: Import The Model to ANSA GUI and Perform Geometry Cleanup
For preprocessing the given model, the CAD model should be open and loaded in ANSA v22.1.0. The model has only one property. We need to check for the single CONS. Any single CONS (Red) present in the geometry needs to be converted into double CONS (Yellow) using the Topo operation.
After the topo operation, the model should be qualified for the geometric checking for the preprocessing. For Geometry Checkups,
- Tools bar >> Checks >> Geometry >> Execute on 'All entities' >> Execute.
As a result of the geometric checkup, the model has several errors and most of them can be addressed by ANSA itself by auto-fixing those errors. The remaining errors include 'unchecked faces' and they can be addressed by deleting those unwanted faces and fixing other errors by performing specific operations ((Faces >> Release/ New/ Cut), (Hot Points >> Insert/ Delete), (CONS >> Fill Holes/ Paste)) according to those errors.
Later, The errors are fixed and the geometry is ready for meshing.
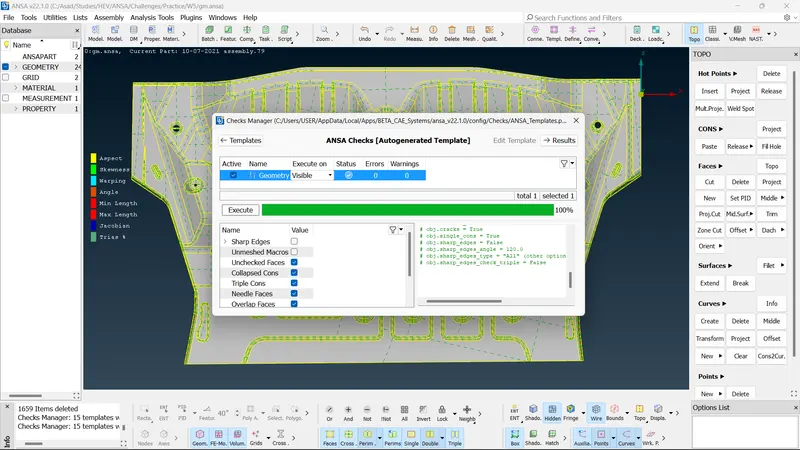
Fig 5: Successful Geometry Checkup
Step 2: Thickness Measurement and Mid-Surface Generation
After the successful geometry check, the thickness of the model should be checked across the model. It will help us to identify whether it's a sheet metal or plastic model. If the consistency is uniform throughout the PID region, then it's a sheet metal otherwise it's a plastic model.
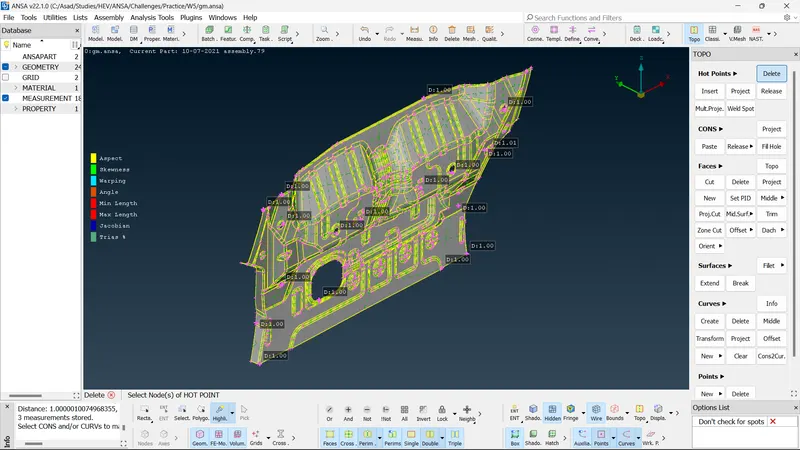
Fig 6: Thickness Measurement
Here, the thickness is uniform (D= 1 Unit) throughout all PID regions so it's a sheet metal model.
After that, we go for the mid-surface generation which can be done by the 'Offset' tool. Also, The feature area selection tool is used for ignoring the neighbour surfaces that are taking a deviation of more than mentioned angle value=40. Also, the offset value polarity (+ or -) indicates the direction in which the mid-surface should be generated. Remember that, It,s necessary to assign a new property for the mid-surface during mid-surface generation and also not to delete the original faces.
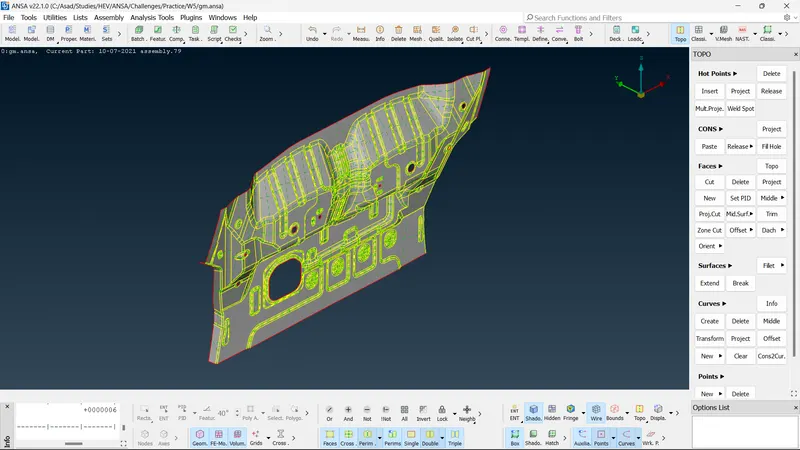
Fig 7: Mid-surface Generation (PSHELL_MS (PID=1))
Step 3: Adding Quality Criteria and Meshing
After the mid-surface generation, we have to add target/average length and other quality parameters. Try a suitable mesh generation mode for the meshing operations. In this case, Best, Spot, and Free Mesh techniques are used.
After meshing check for regions where quality criteria are not fulfilled and try to modify the mesh using Reconstruct/ Reshape/ Smooth /Zone cut also try to add, and delete faces, CONS to reduce no. of trias formed in the mesh. Because a high tria per cent will affect the results and mesh quality. Also, we can use the element commands like Spilt, Join, and Swap and grid commands like Move, and MV Hole for the modifications. Proper mesh flow, means
After the reconstruction and other modification commands, the mesh that satisfies the given quality criteria and mesh parameters is constructed.
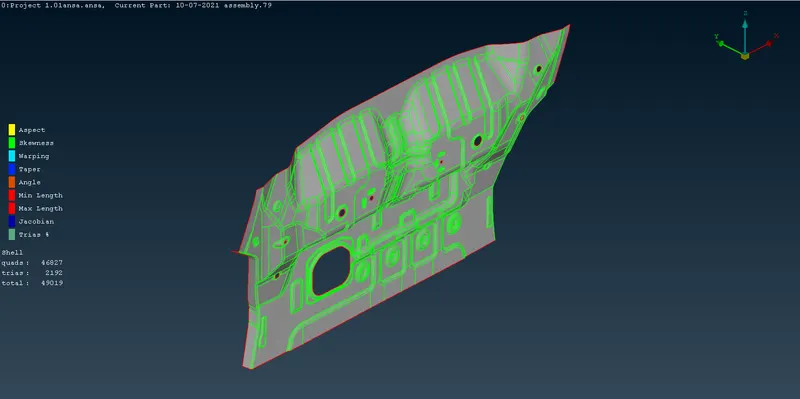
Fig 8: Final Result
4. Result
- The meshing of the Floor Panel Model is completed and every element/shell in the mesh satisfies the quality criteria.
- The mesh consists of a total of 49019 shells and 46827 quads and 2192 trias.
5. Conclusion
-
The given Floor Panel Model meshing is completed per the quality criteria mentioned. The meshing is done after the successful geometric clean-up and proper mid-surface generation for the Floor Panel Model.