Challenge

Week 10 - Challenge 2- Attachment Feature Creation (Dog House)

                                                                                    REPORT ON DOOR TRIM DESIGN WITH DOG HOUSE USING DRAFT ANALYSIS METHOD  

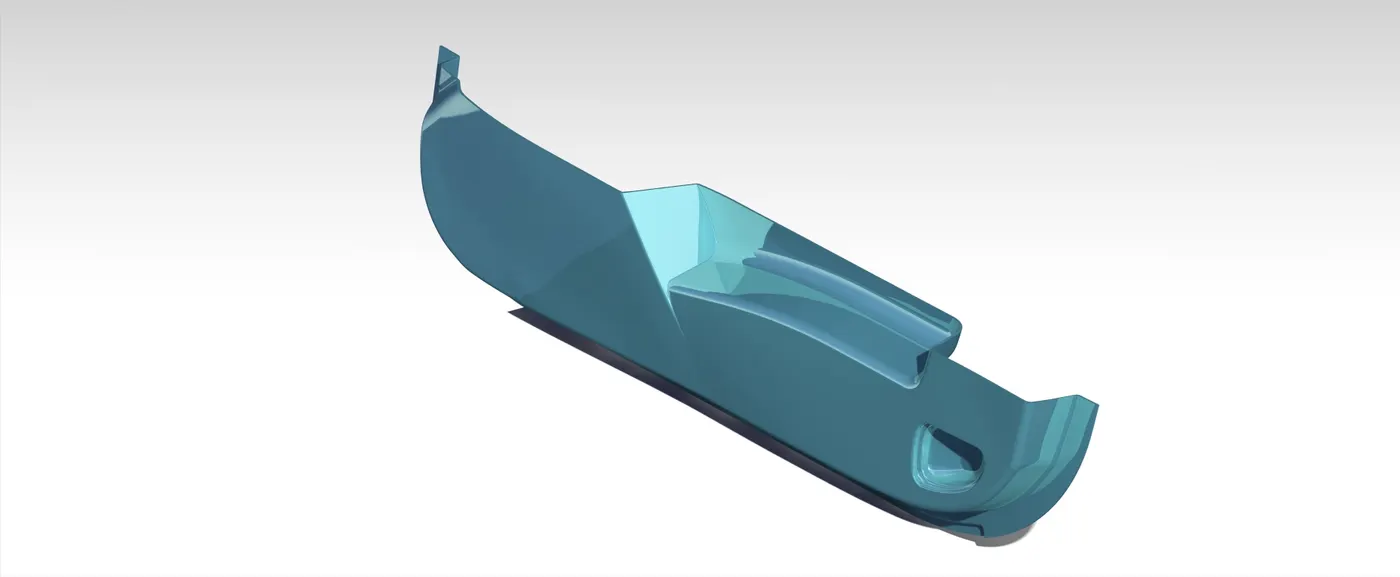
  • AIM : Create the Dog House for the Door Trim considering the design rules mentioned in the video. Consider the thickness of the part to be 2.5 mm
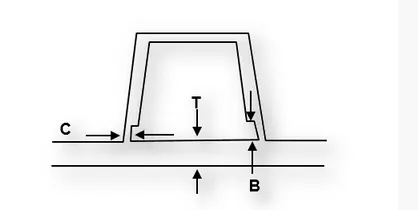
  • "C" is where the doghouse contacts the backside of the surface
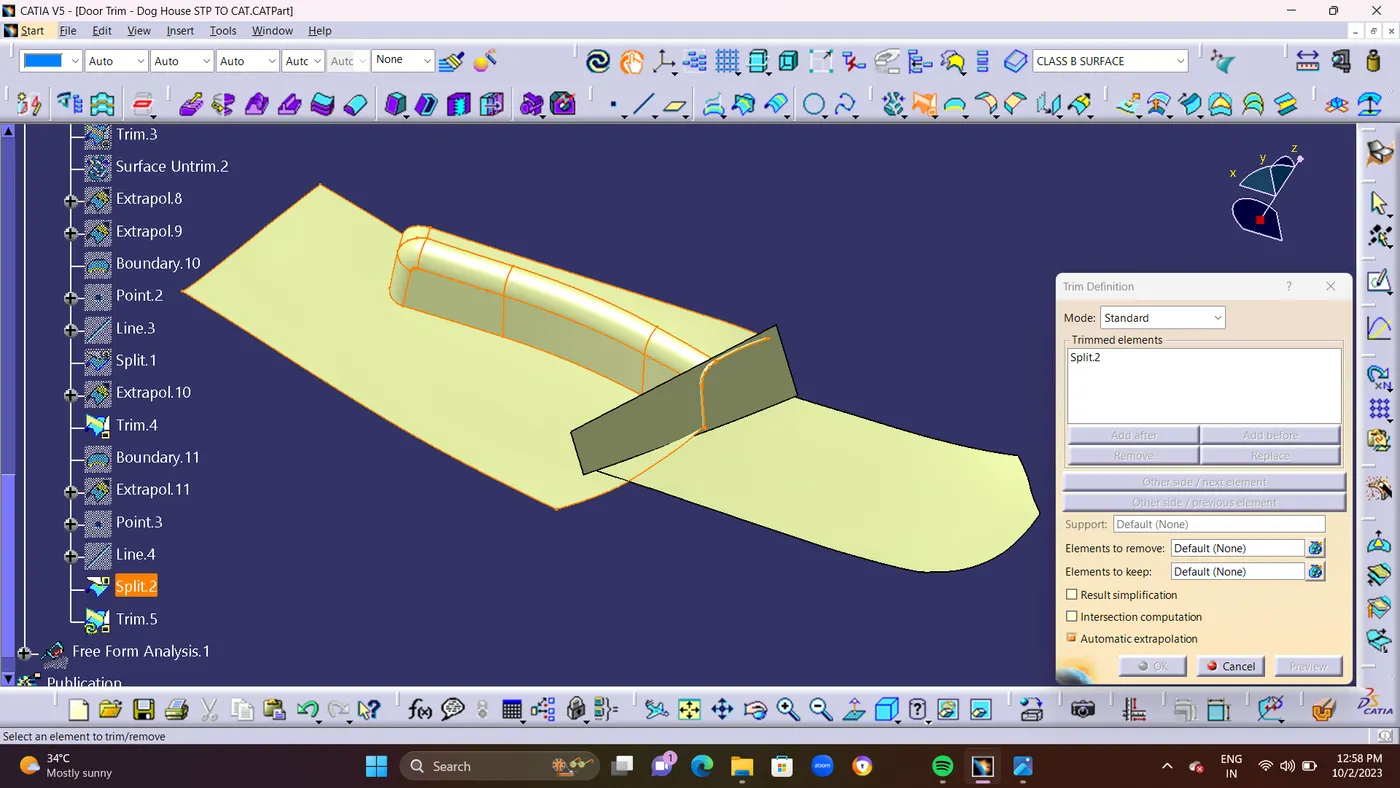
  •  Doghouse wall thickness at the intersection of the part wall ( C ) should be 40% or less than the main wall stock ( T ). 
  •  The height of  ( B ) should be between 3.0 – 6.0 mm 
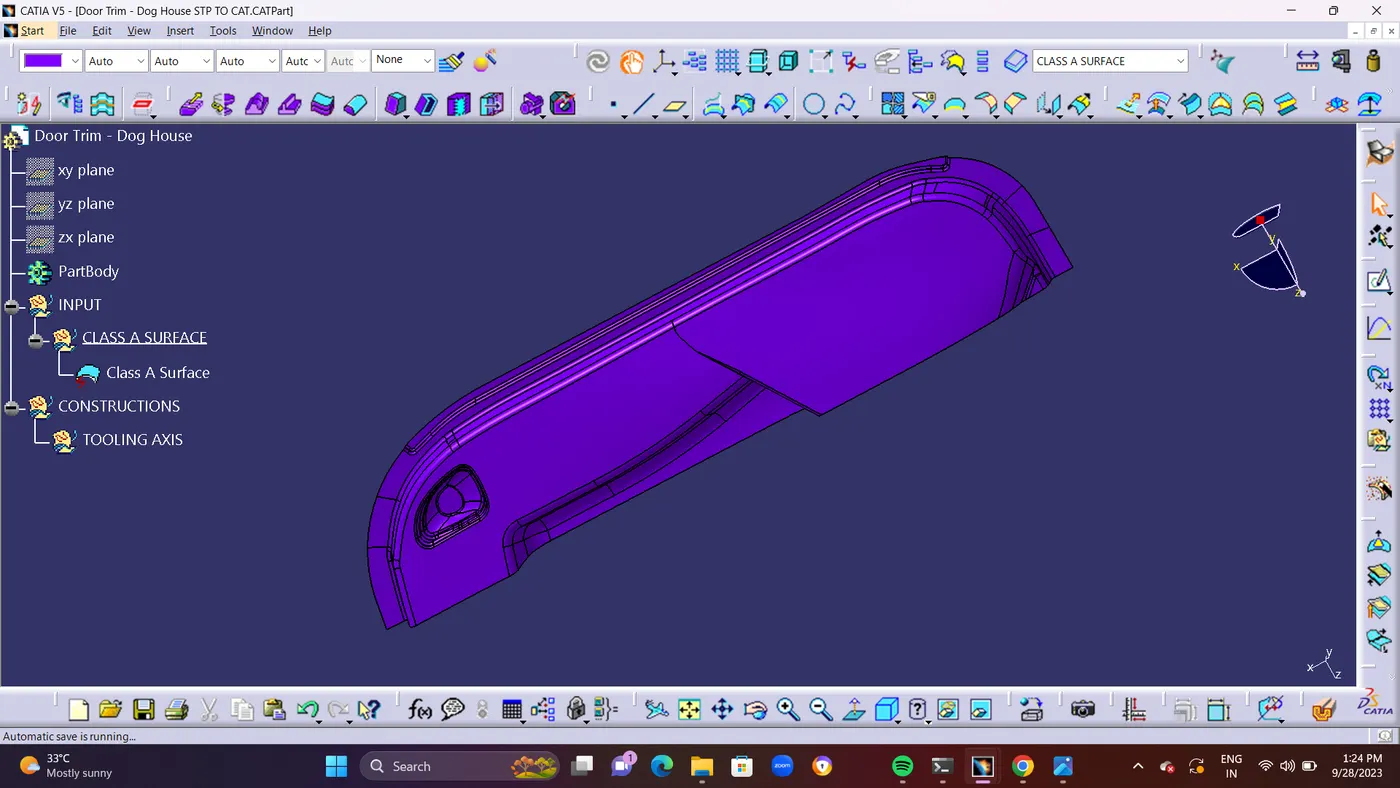
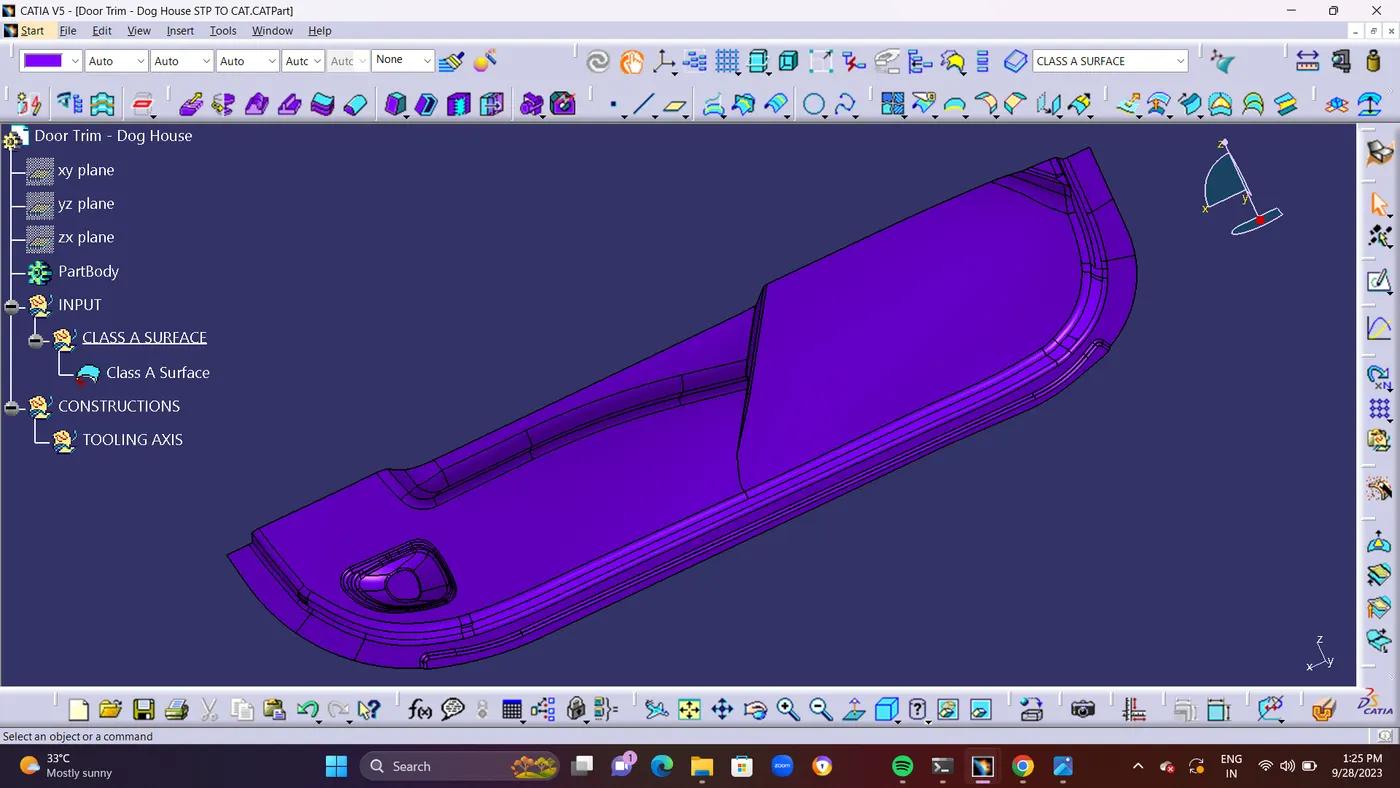
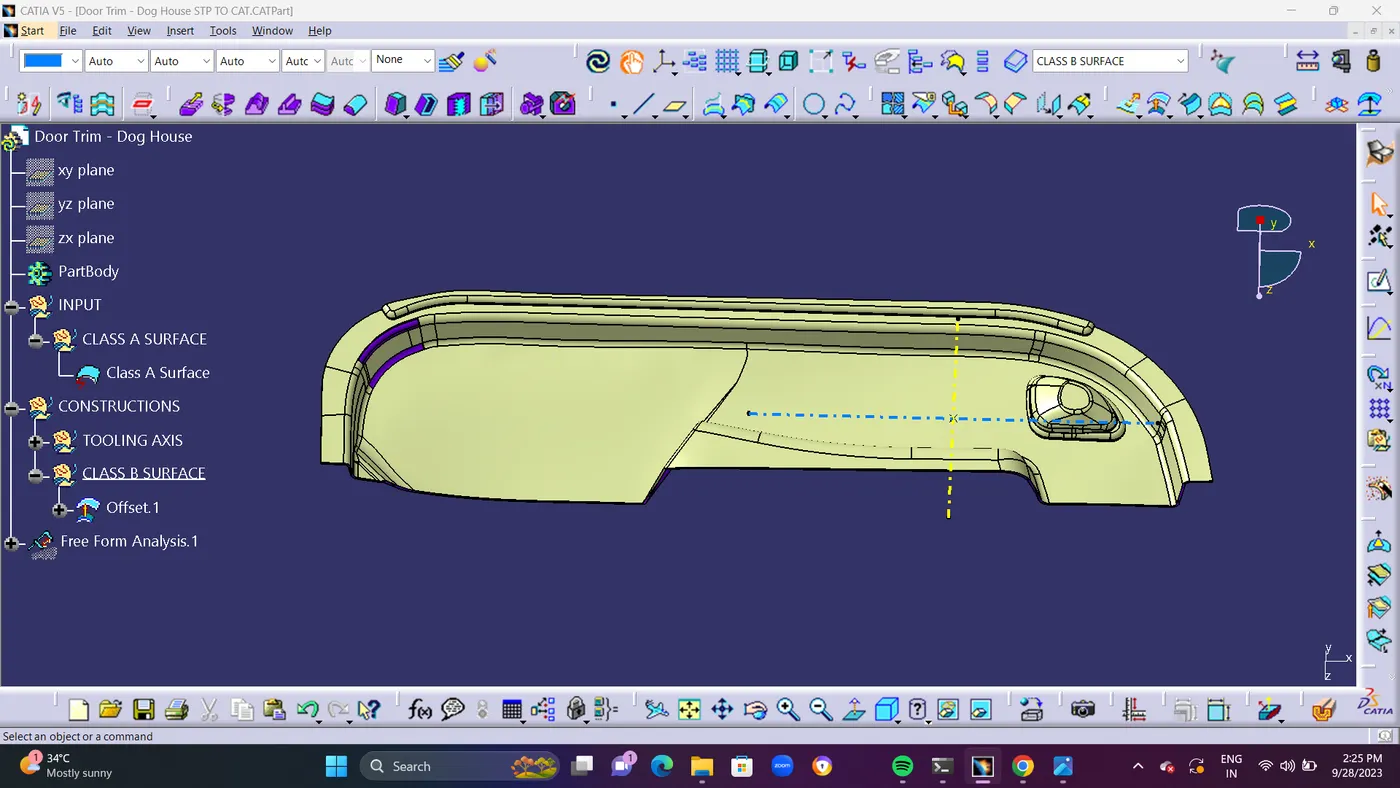
  • CLASS A SURFACE : Class A surface is the aesthetic skin data for the automotive part designing and  curvature surface to represent the main component.Befor proceed with A surface to analys the Draft angle, if get any mis-match surface reconstruct the A surface.


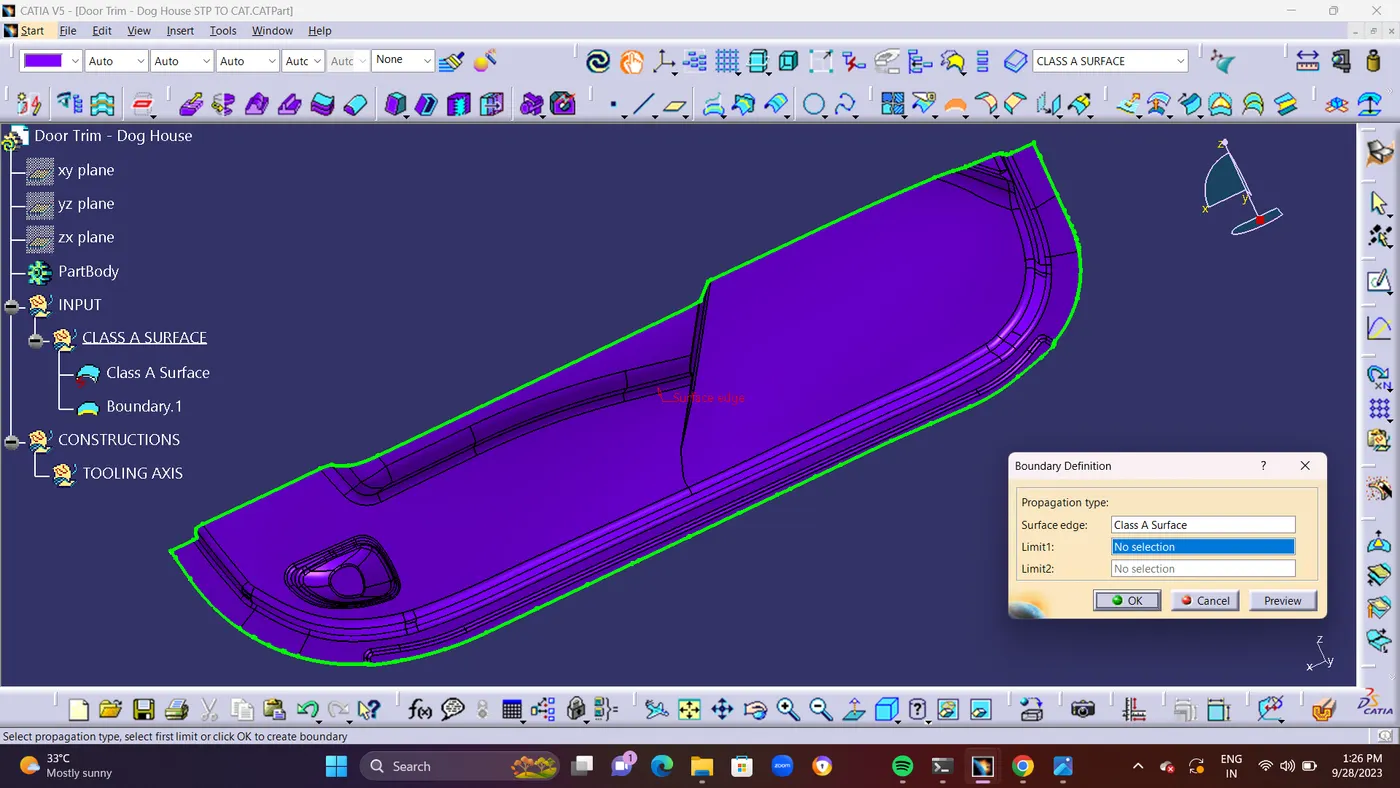
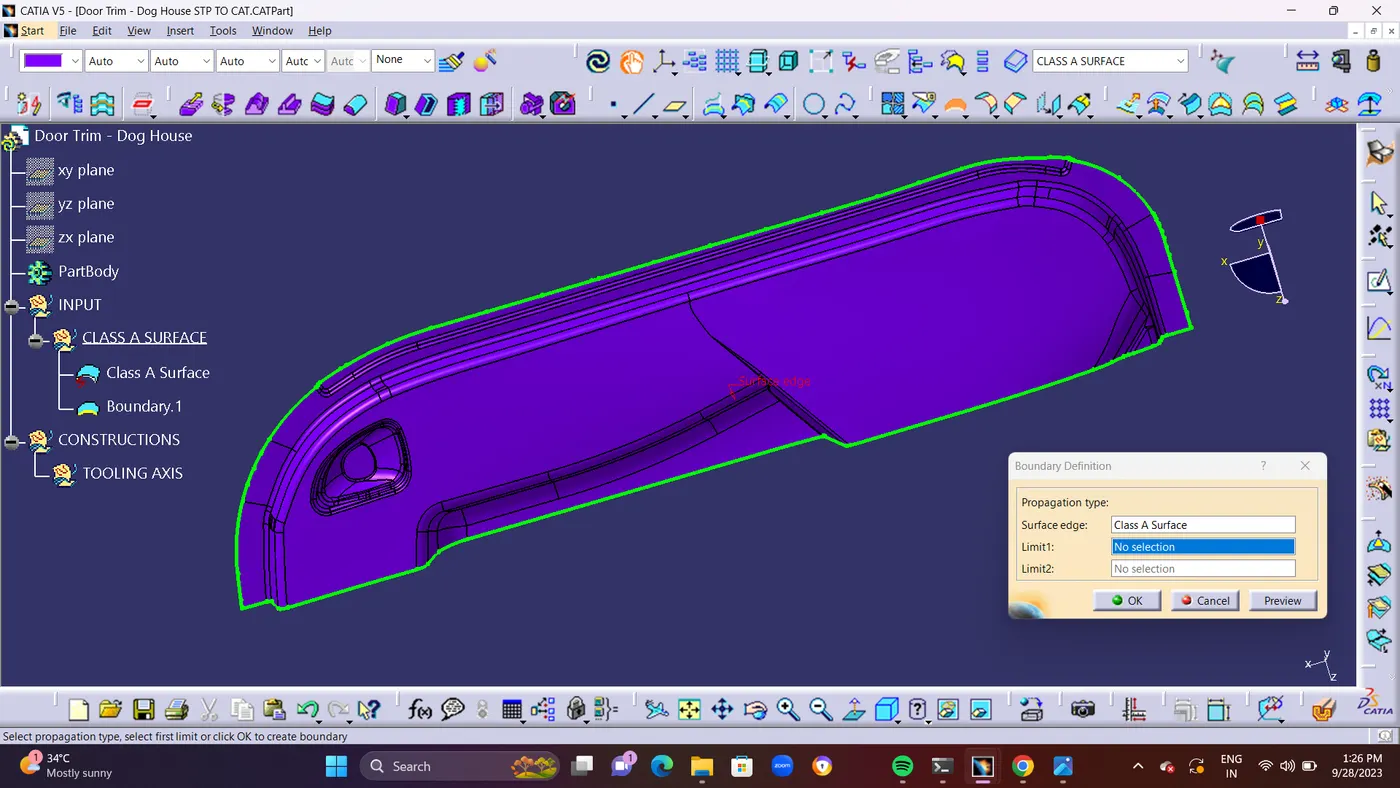
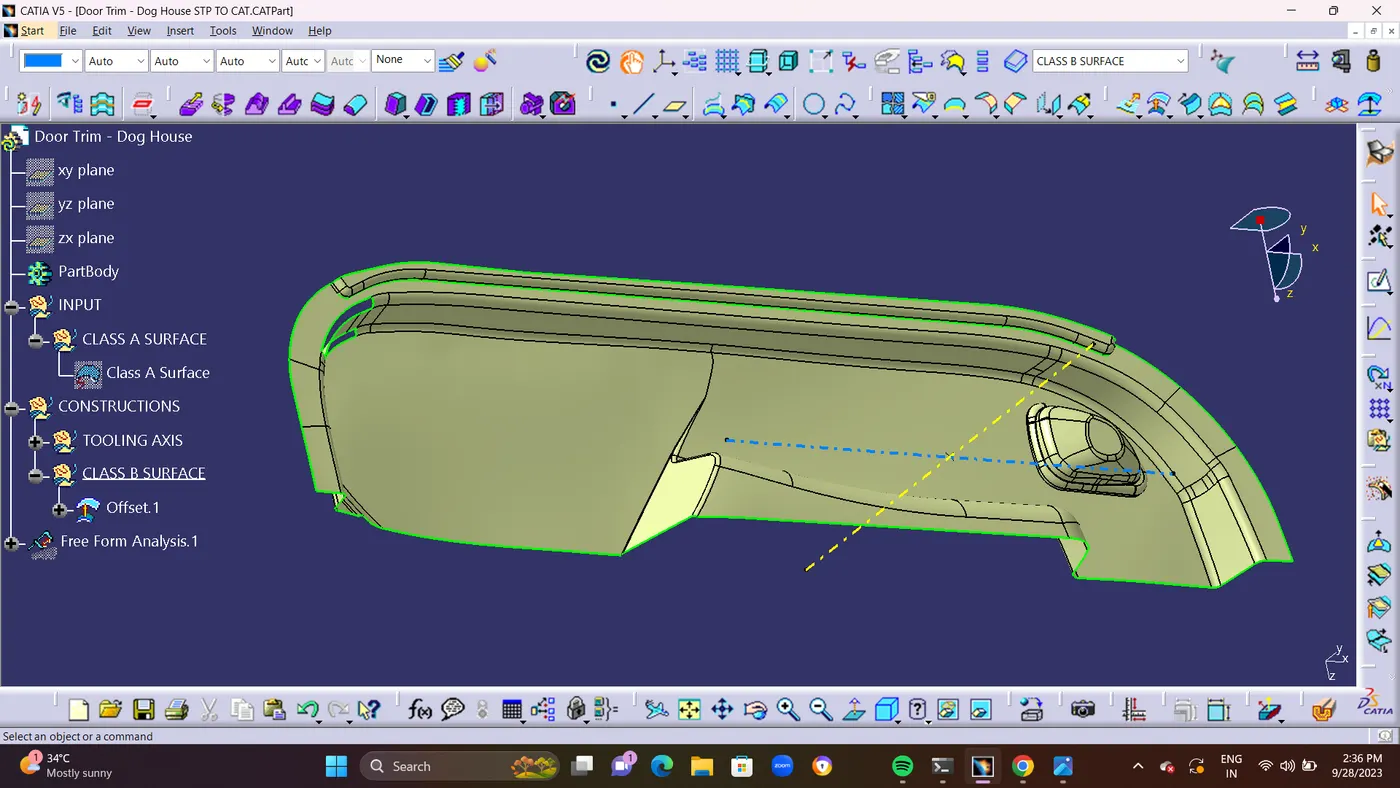
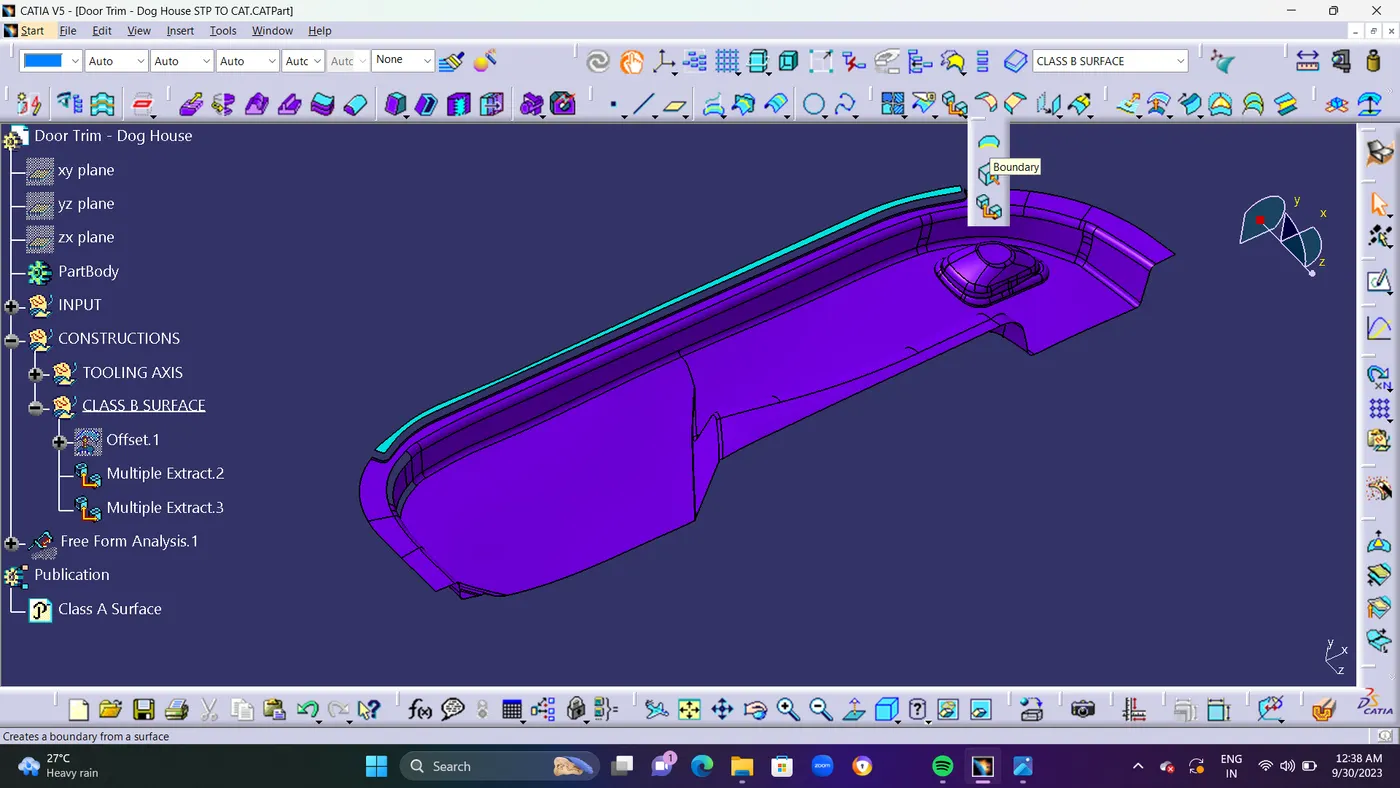
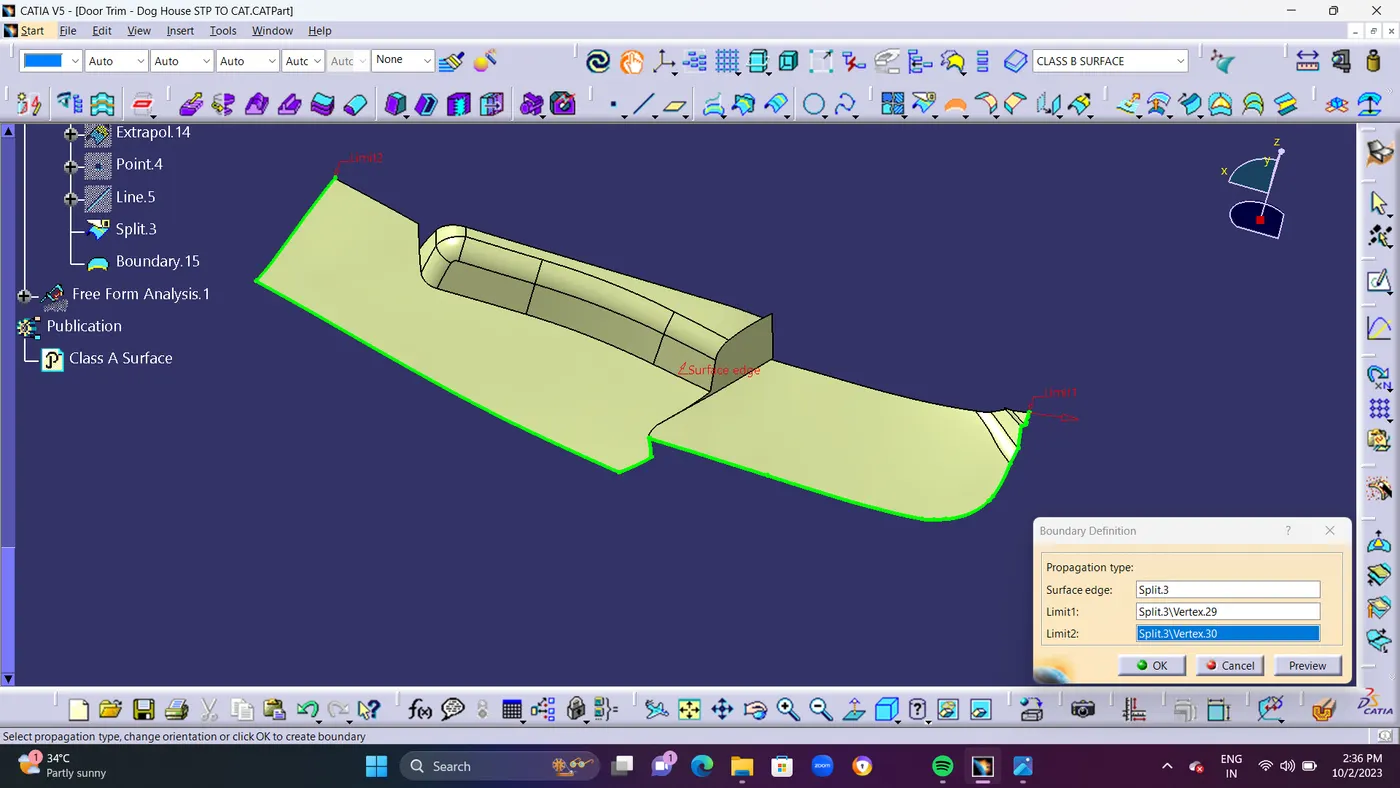
    • STEP 1 :  Verify the Class A Surface's connection. Using the Joint or Boundary command, confirm that there is no space between the components.We have two options for checking it: visually or by using                    the border command.One outside and two inner circular limits make up its three borders.The first check was finished because if there is a green border in between, it appears that the surface has                  a gap.
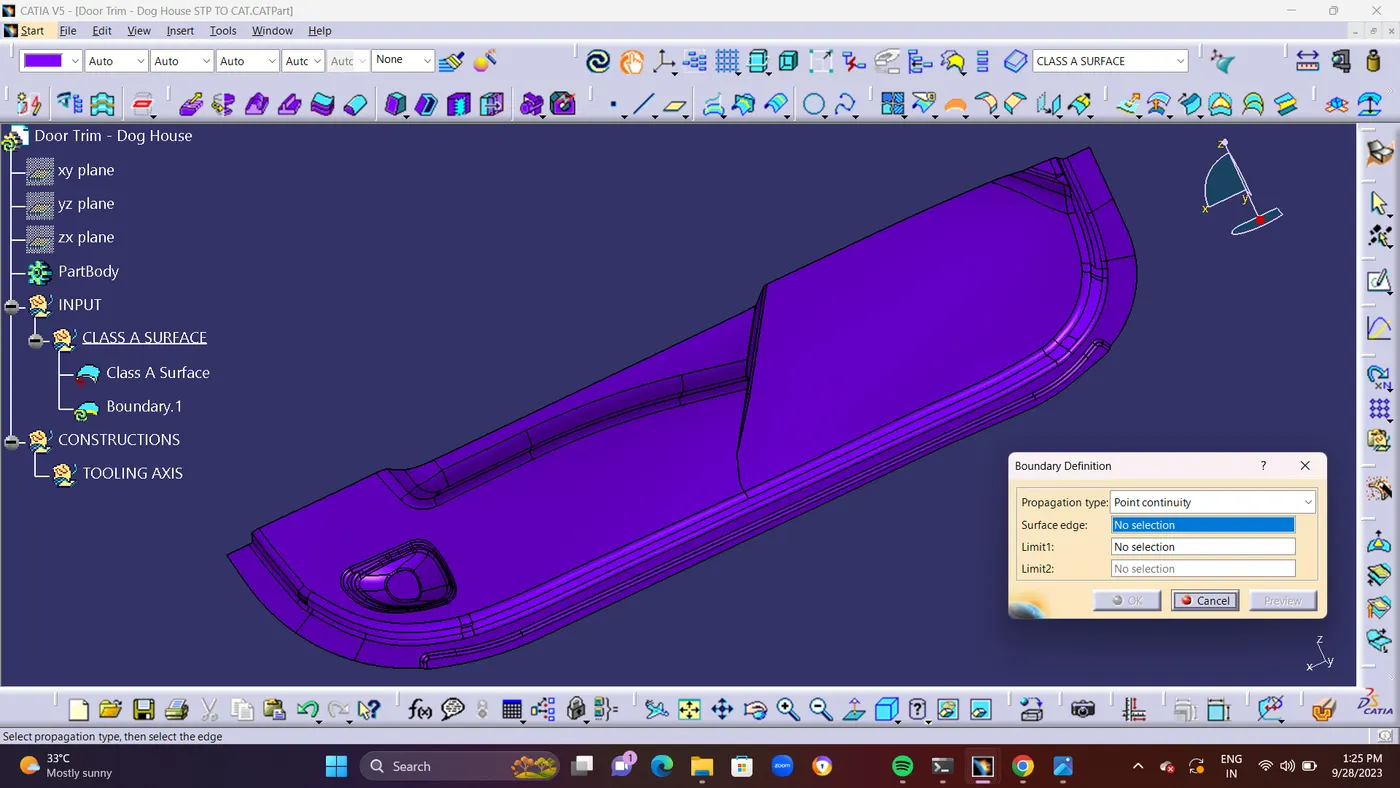


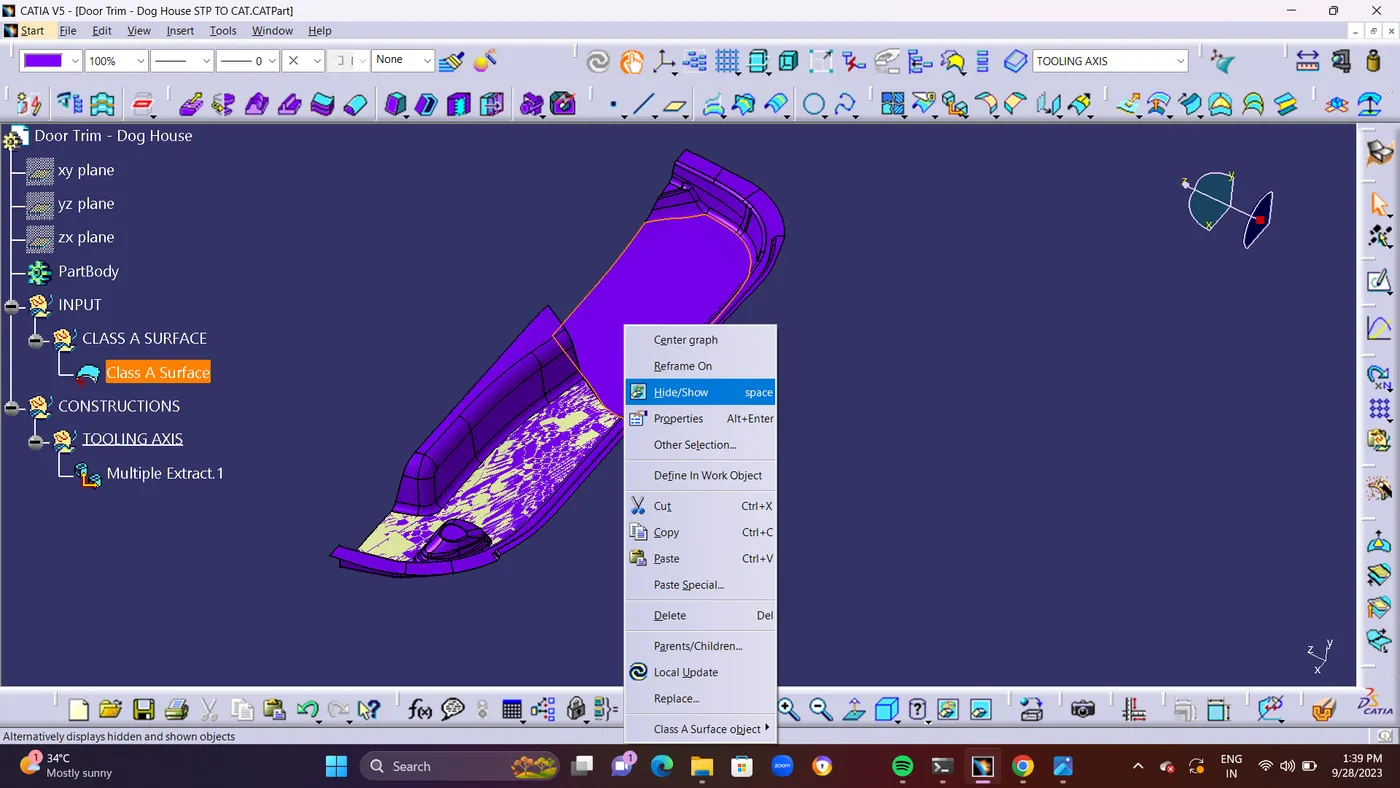
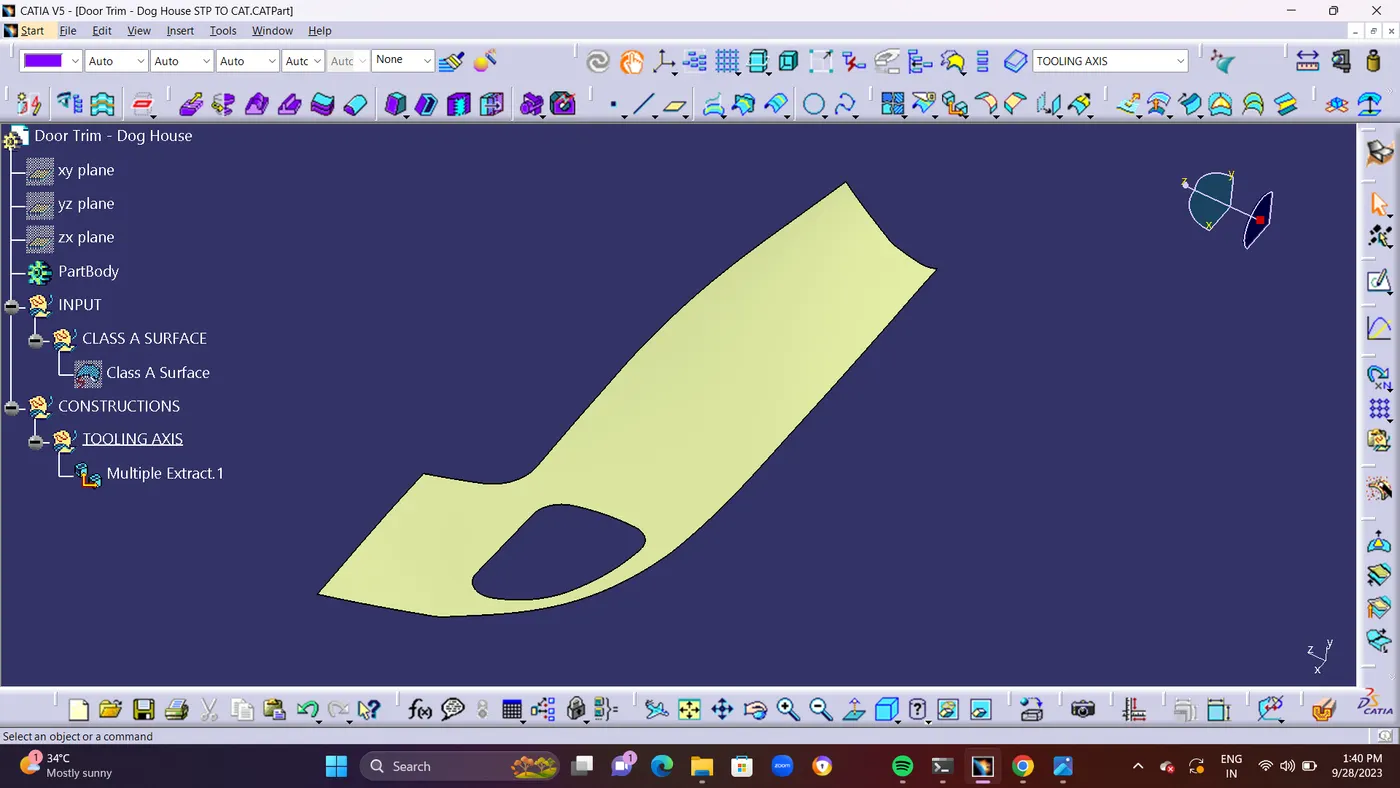
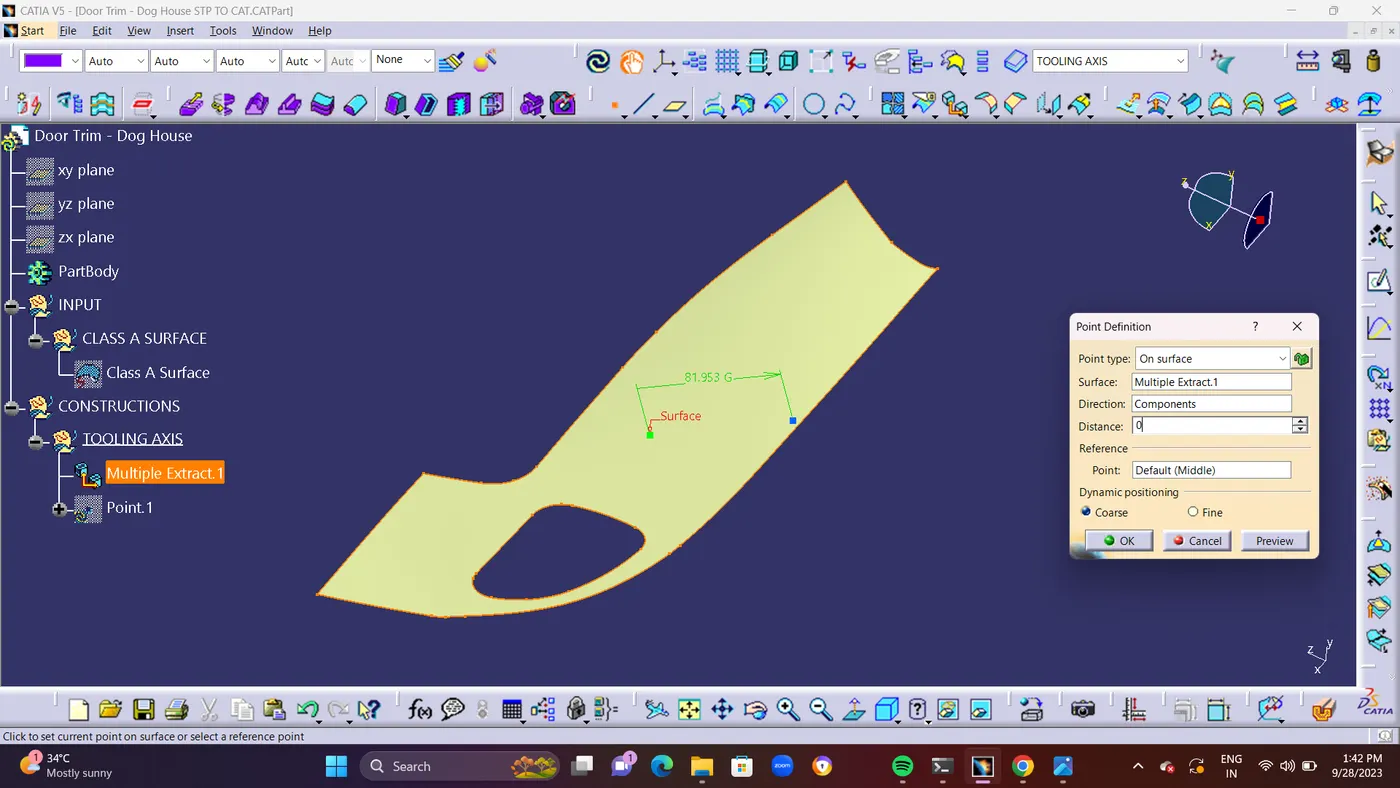
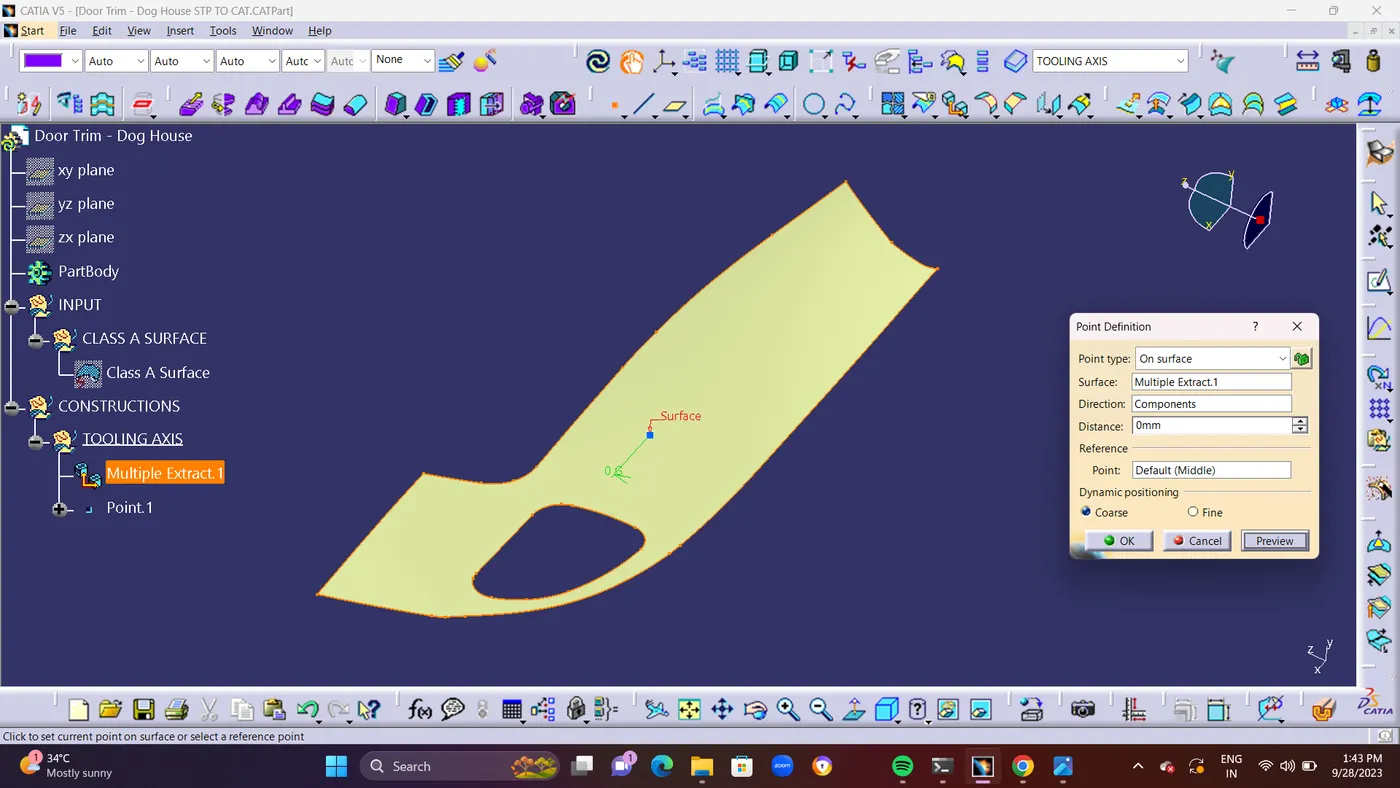
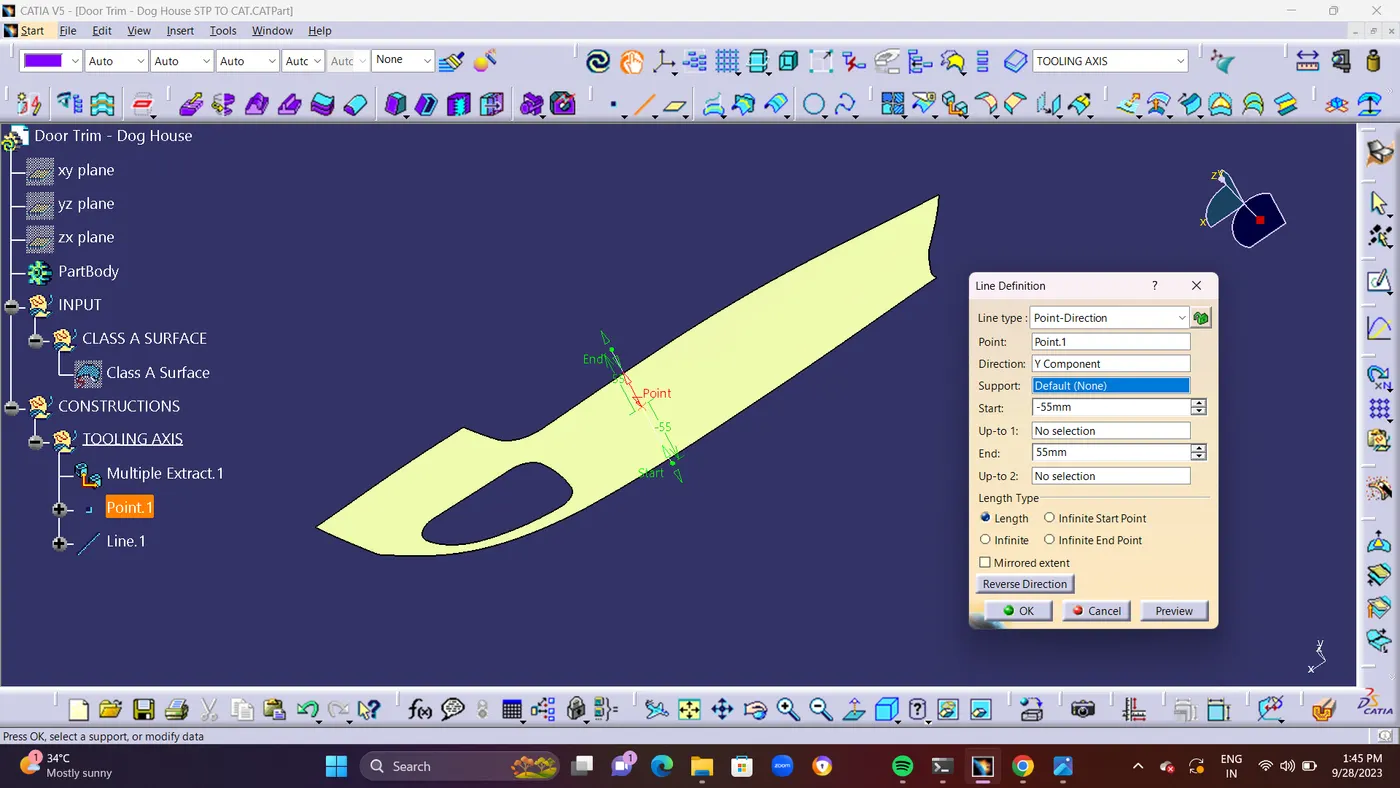
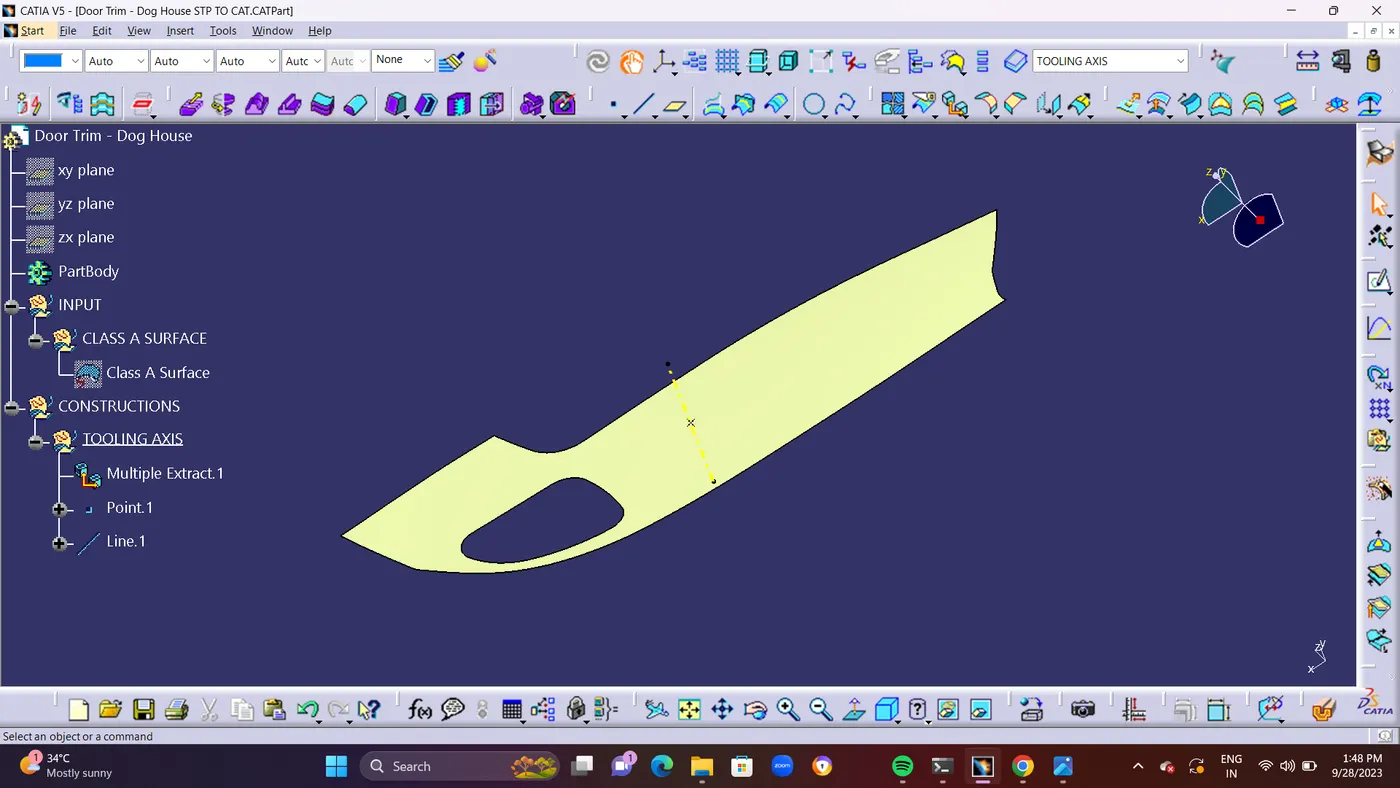
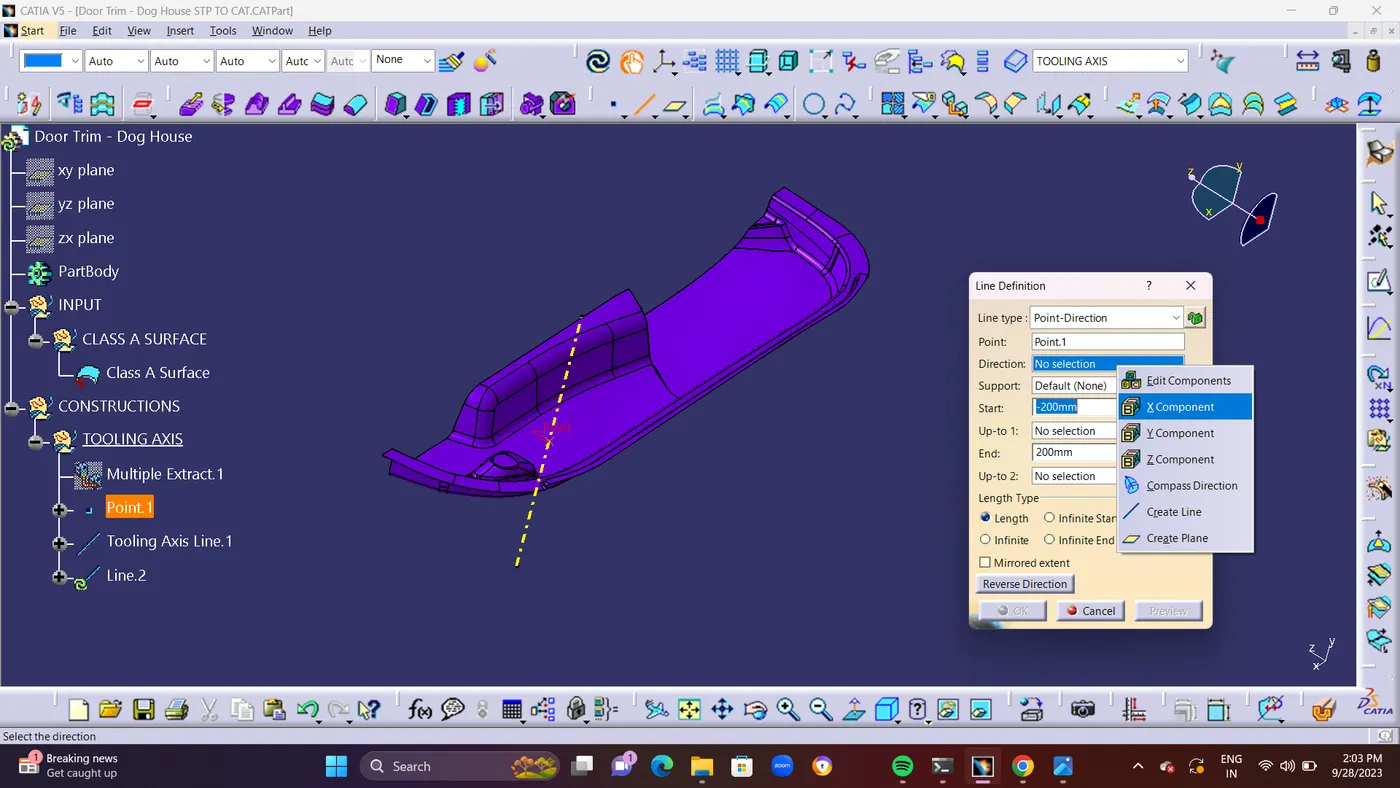
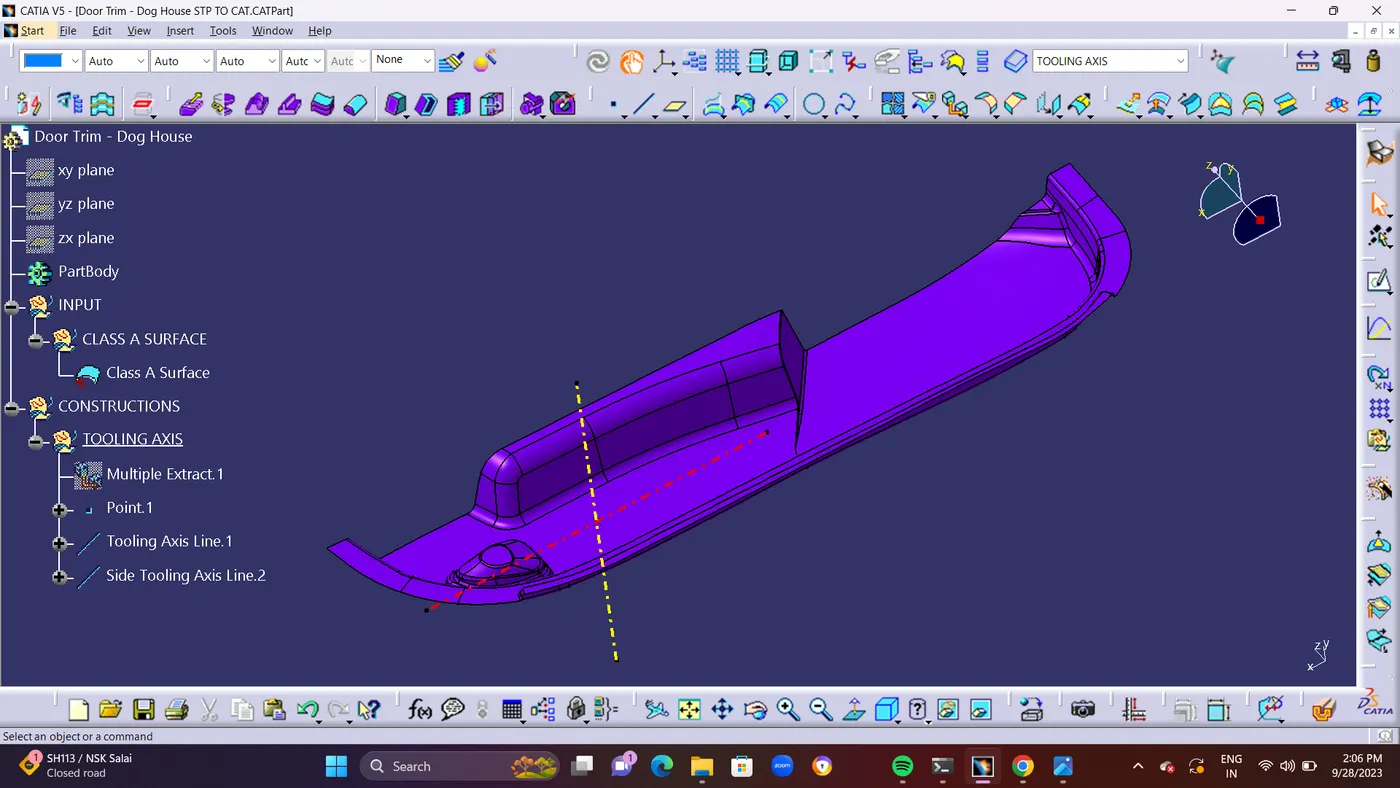
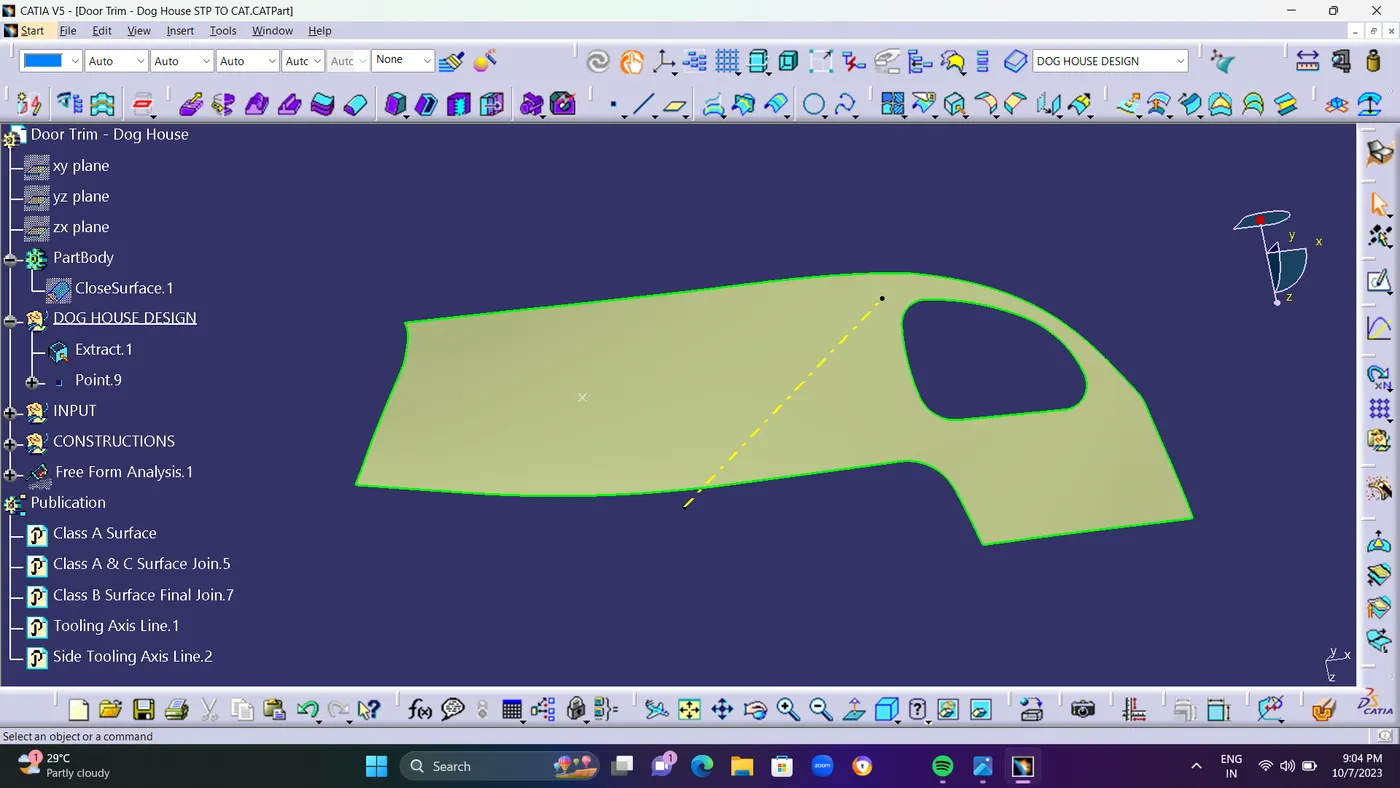
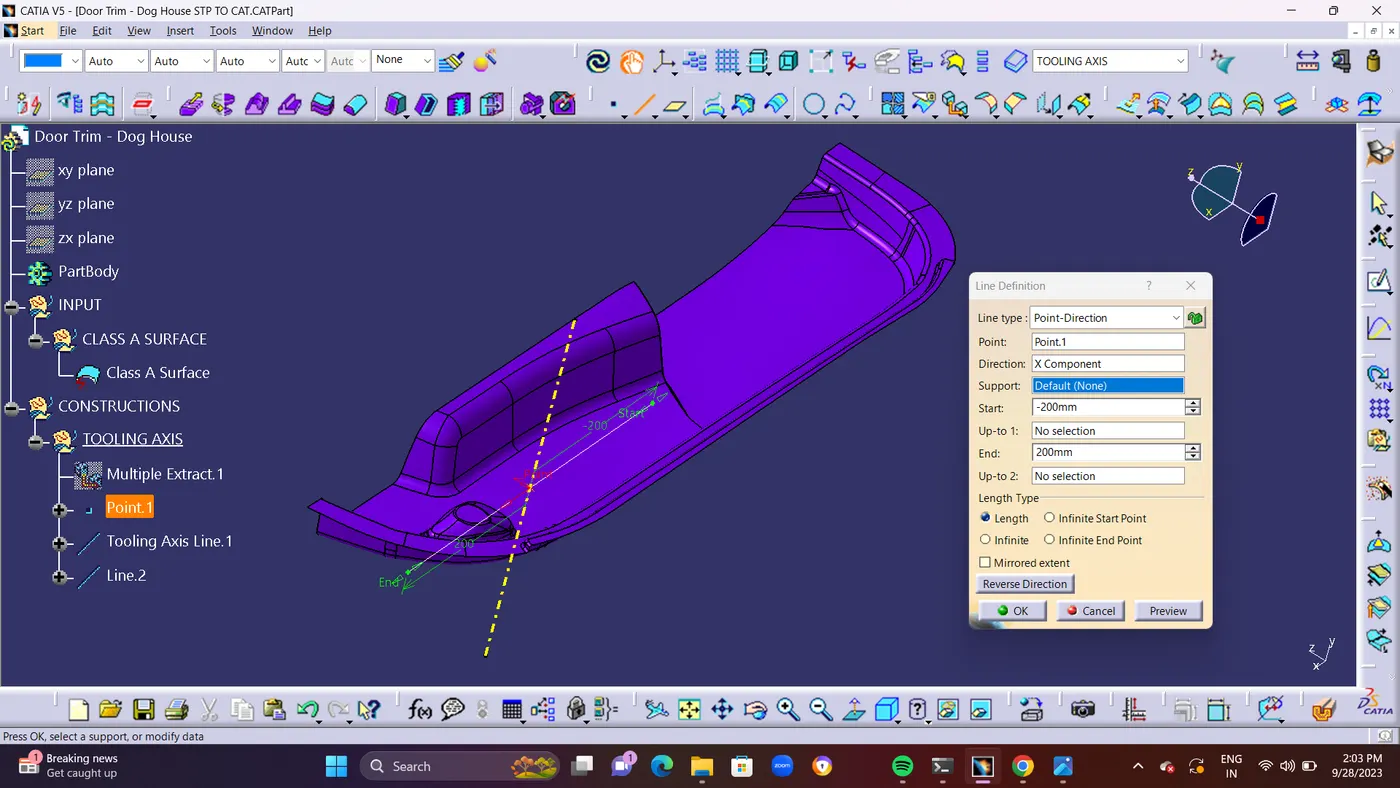
  • Tooling axis : also known as tooling direction, is the primary factor to take into account when considering plastic and mold parts because it determines how the mold part moves and the likelihood that the                        plastic component will emerge from the mold part (Core and Cavity). Tooling Direction is the direction in which the mold is opened in a molding machine configuration. The tooling orientation                        essentially determines which way the mold pulls apart. The mold is constructed from two distinct halves: the core and the cavity. Primary direction is another name for tooling direction.

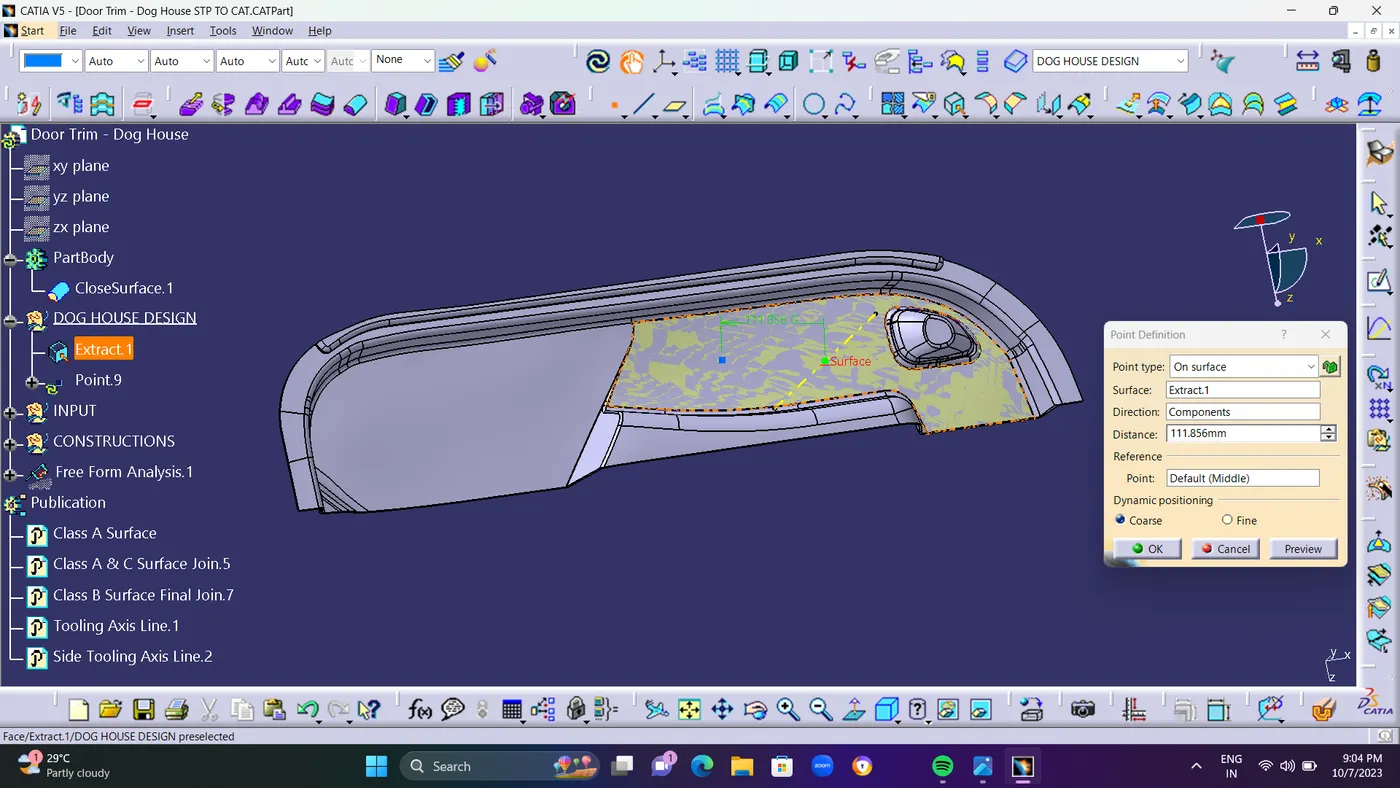
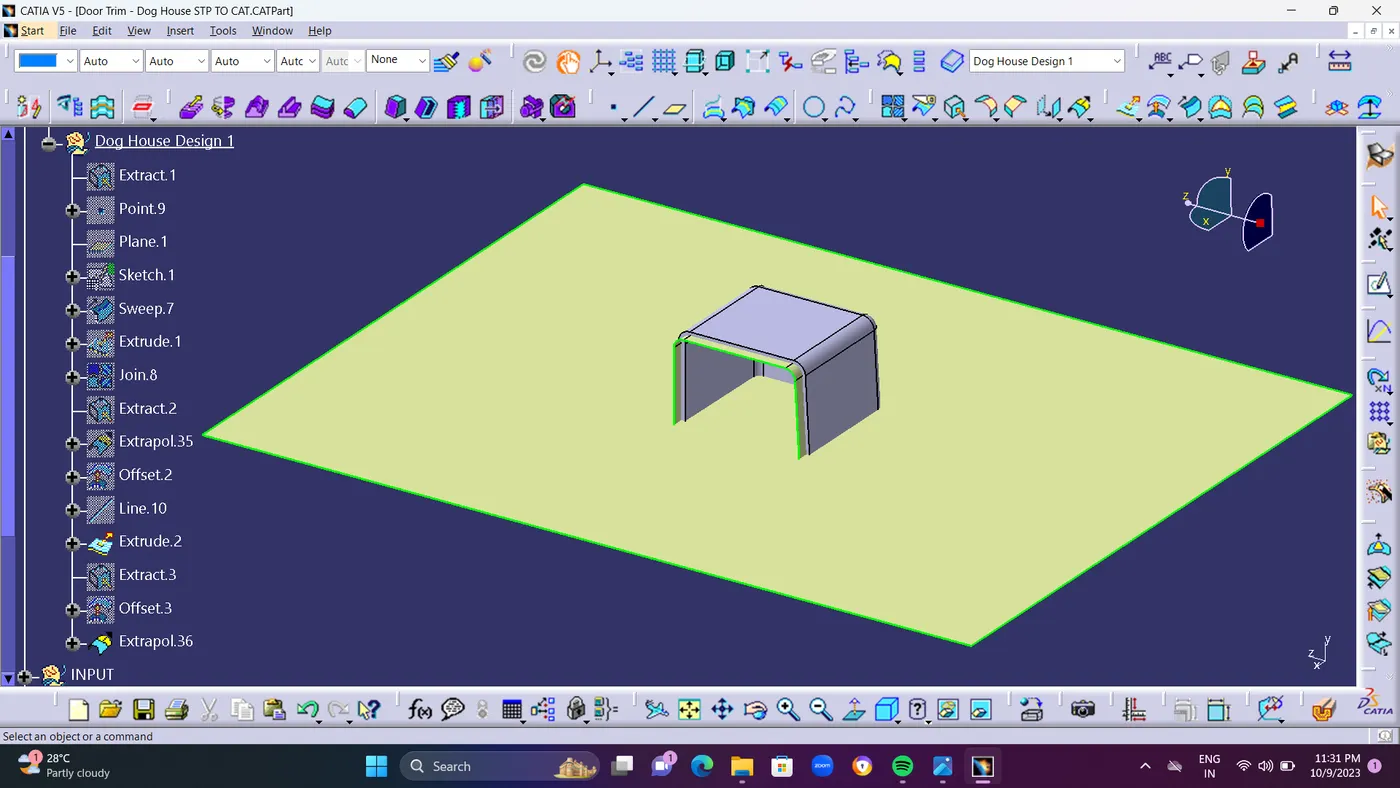
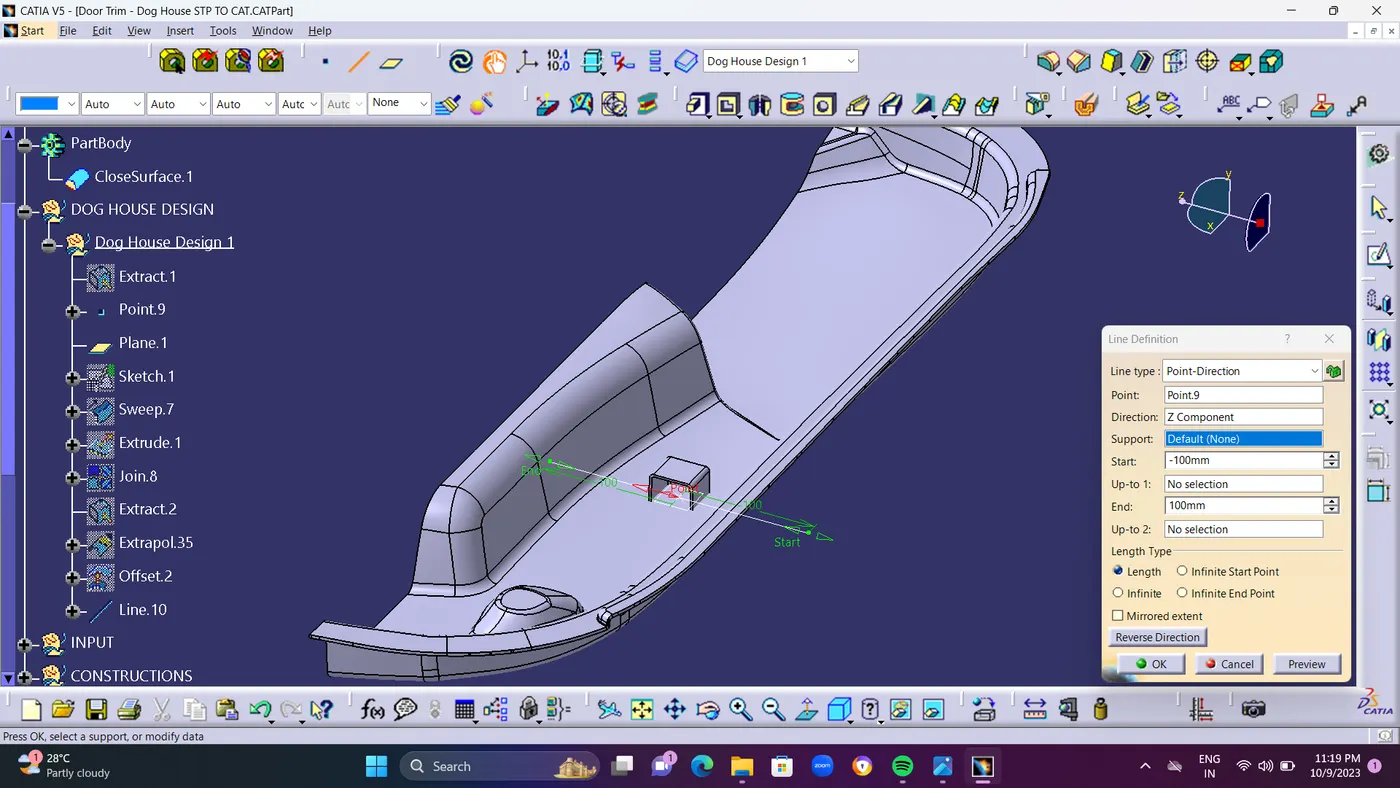
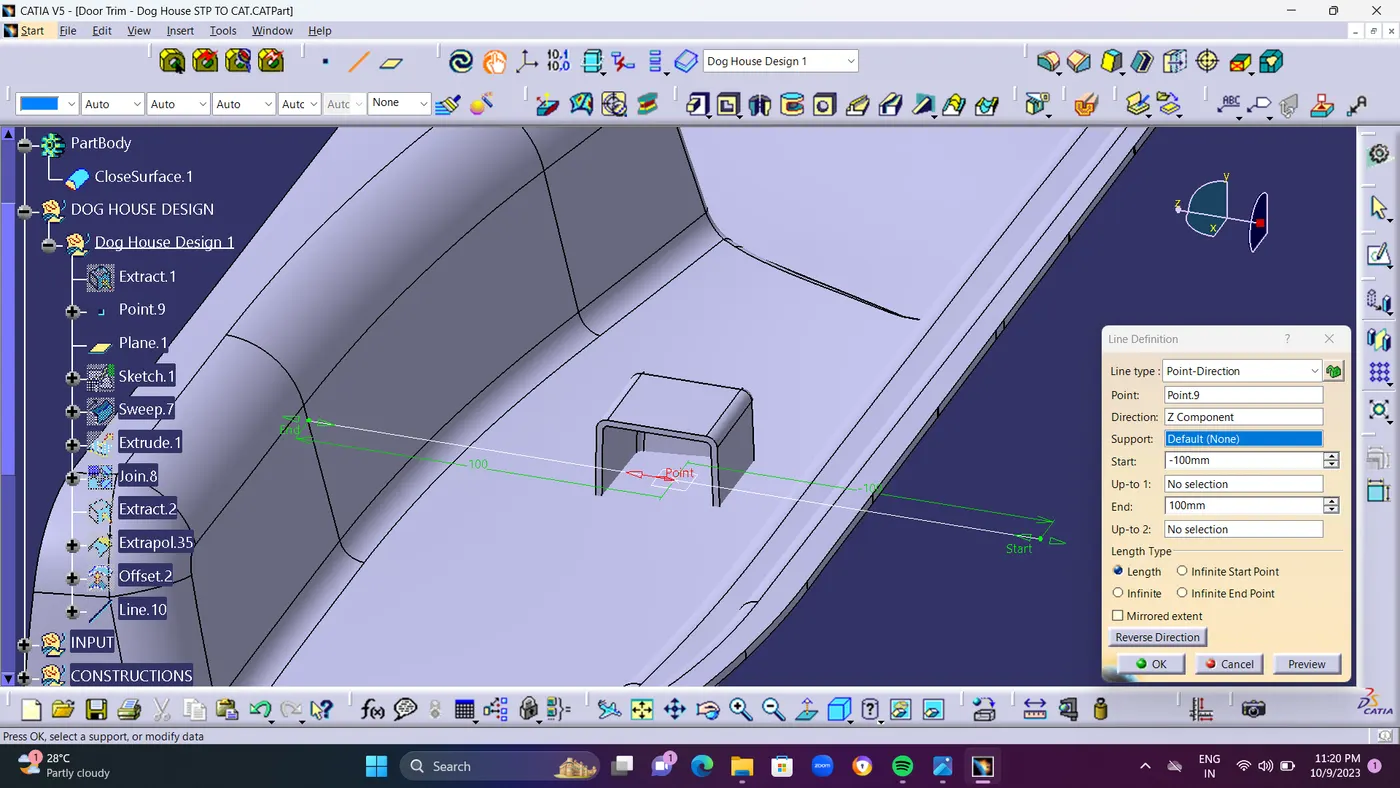
        I've made a tooling axis here. I start by removing a foundation surface and building a mid point on it. Subsequently, I draw a line perpendicular to the base surface across this point. I then completed the             draft.
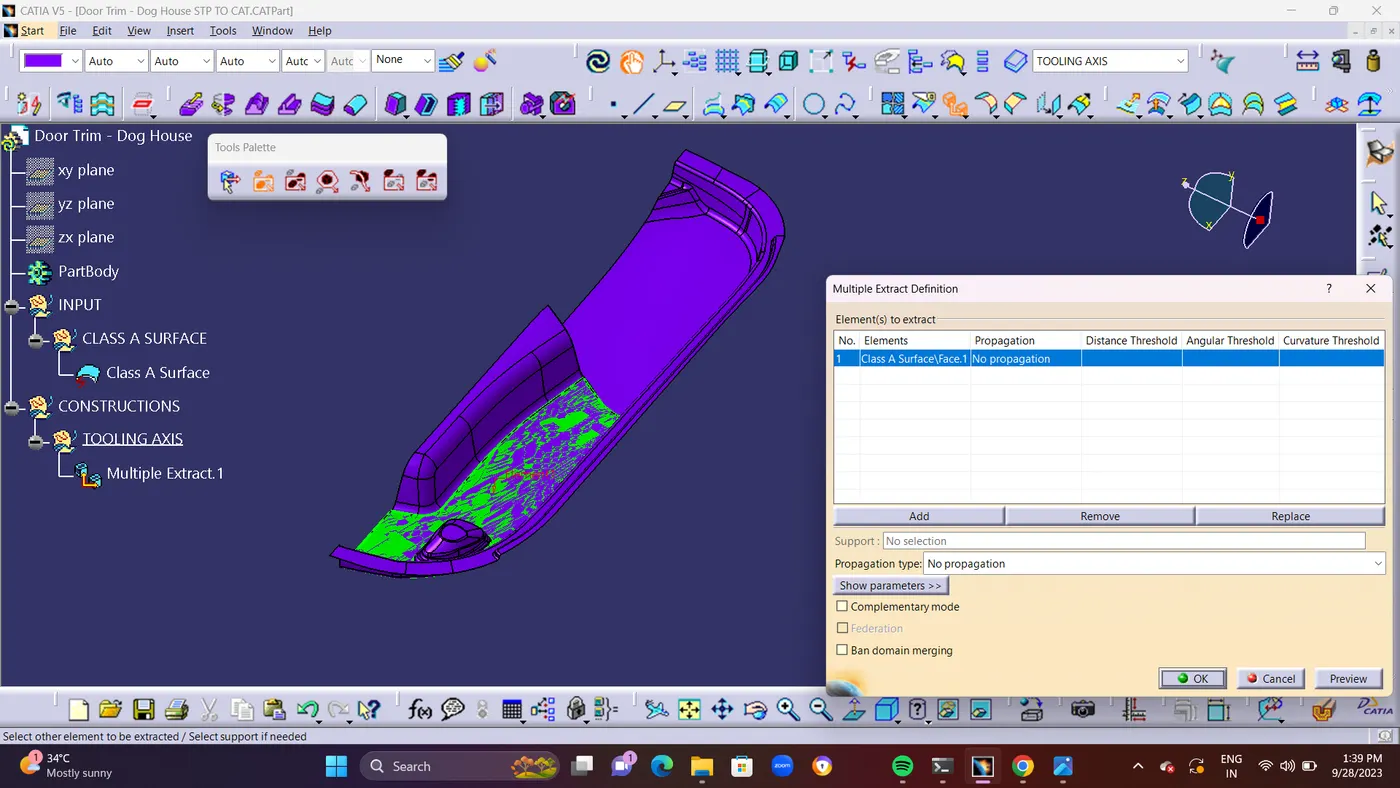


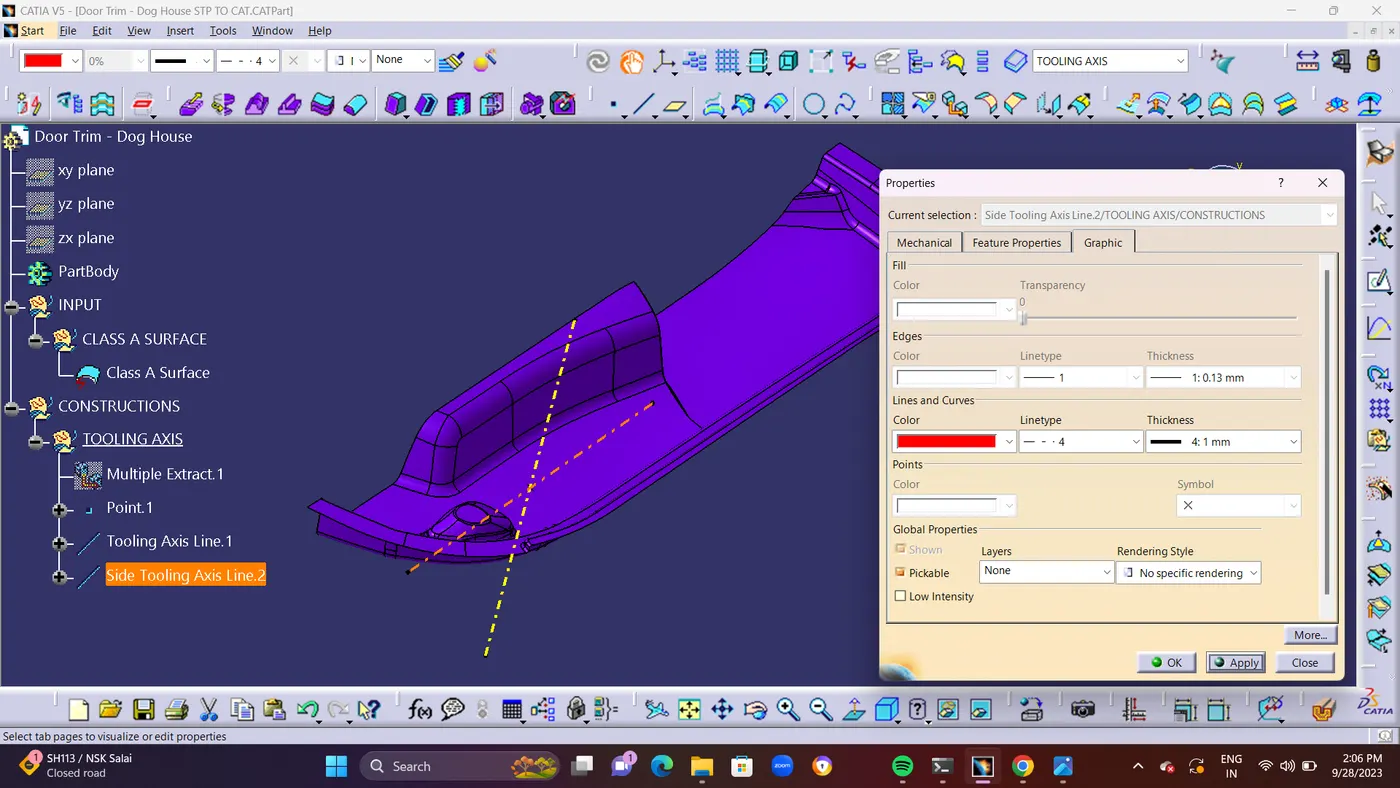
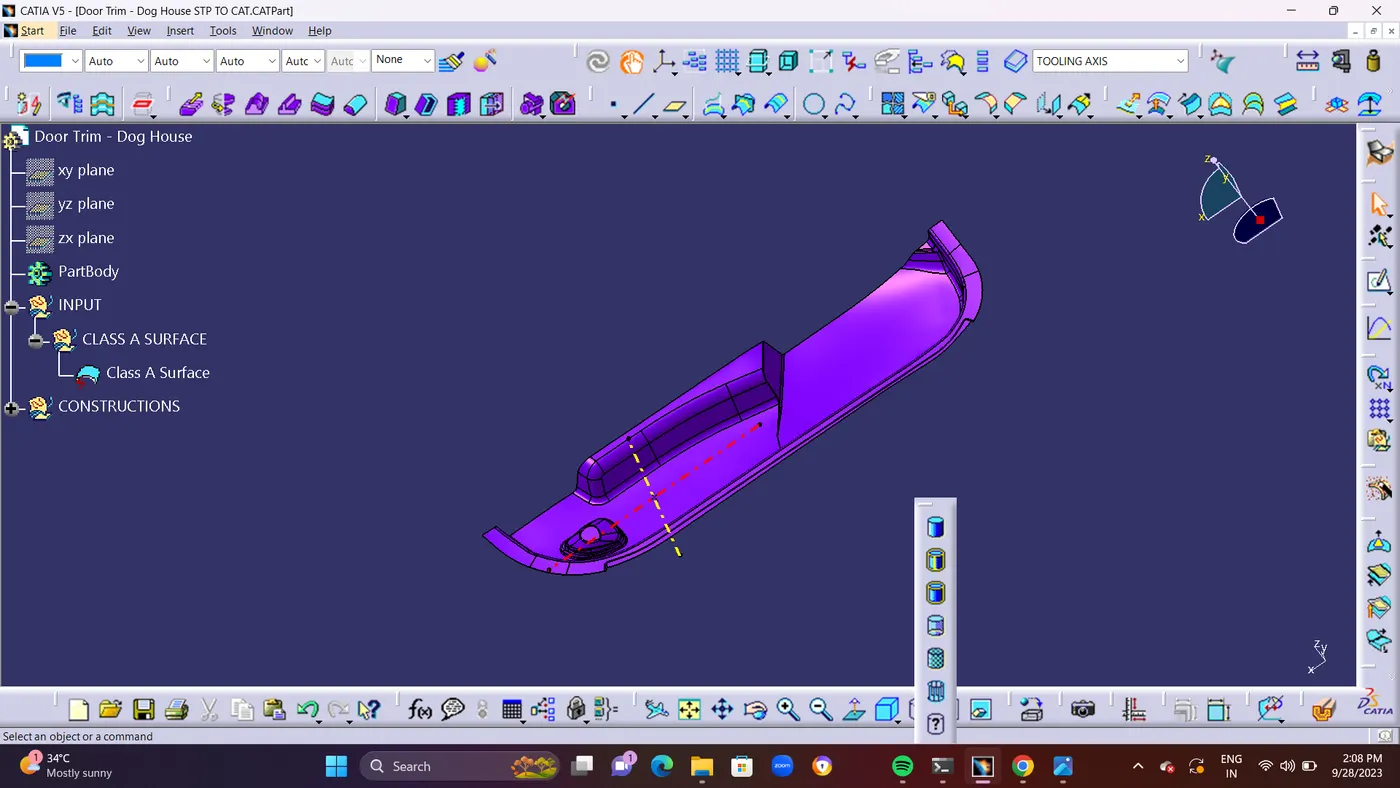
  • SIDE CORE TOOLING AXIS : The direction in which the mold or core and cavity opens is the tooling axis. Connectivity of Class-A surface: Checking the connectivity of the surface, this can be done by                                                      creating boundaries or by simply using the join option such that any openings can be easily visualized.and it is created by reference of main tooling axis in an Horizontal                                                        Direction.as shown in a below screen shots.


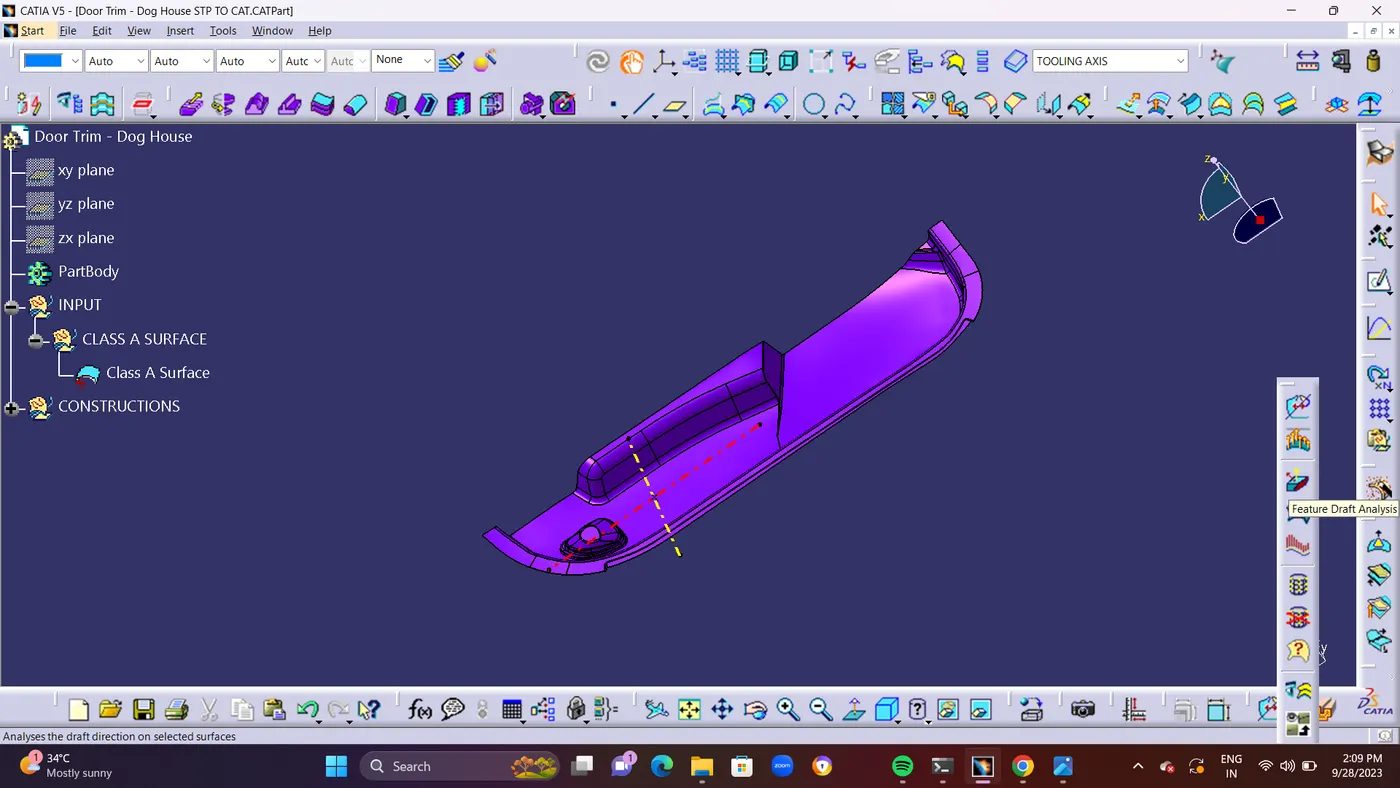
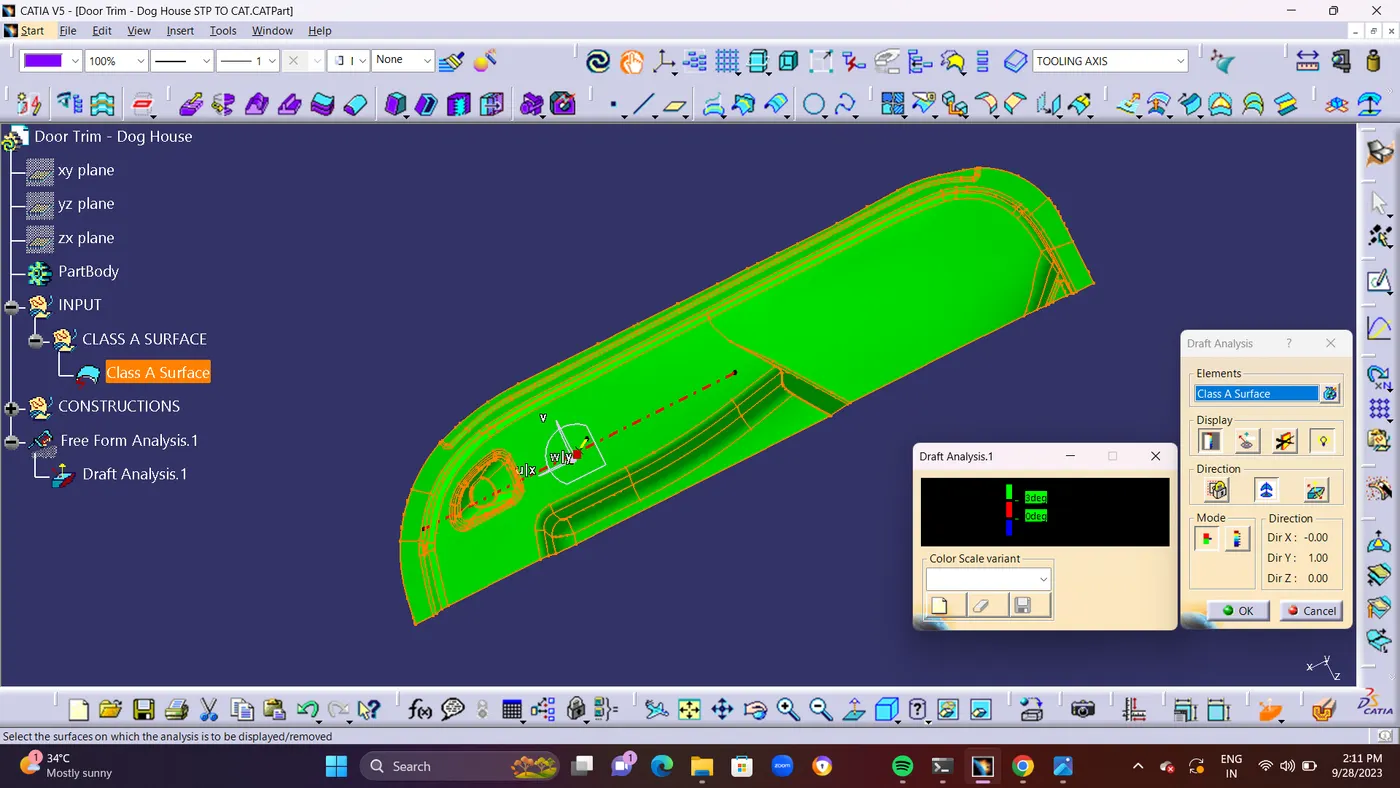
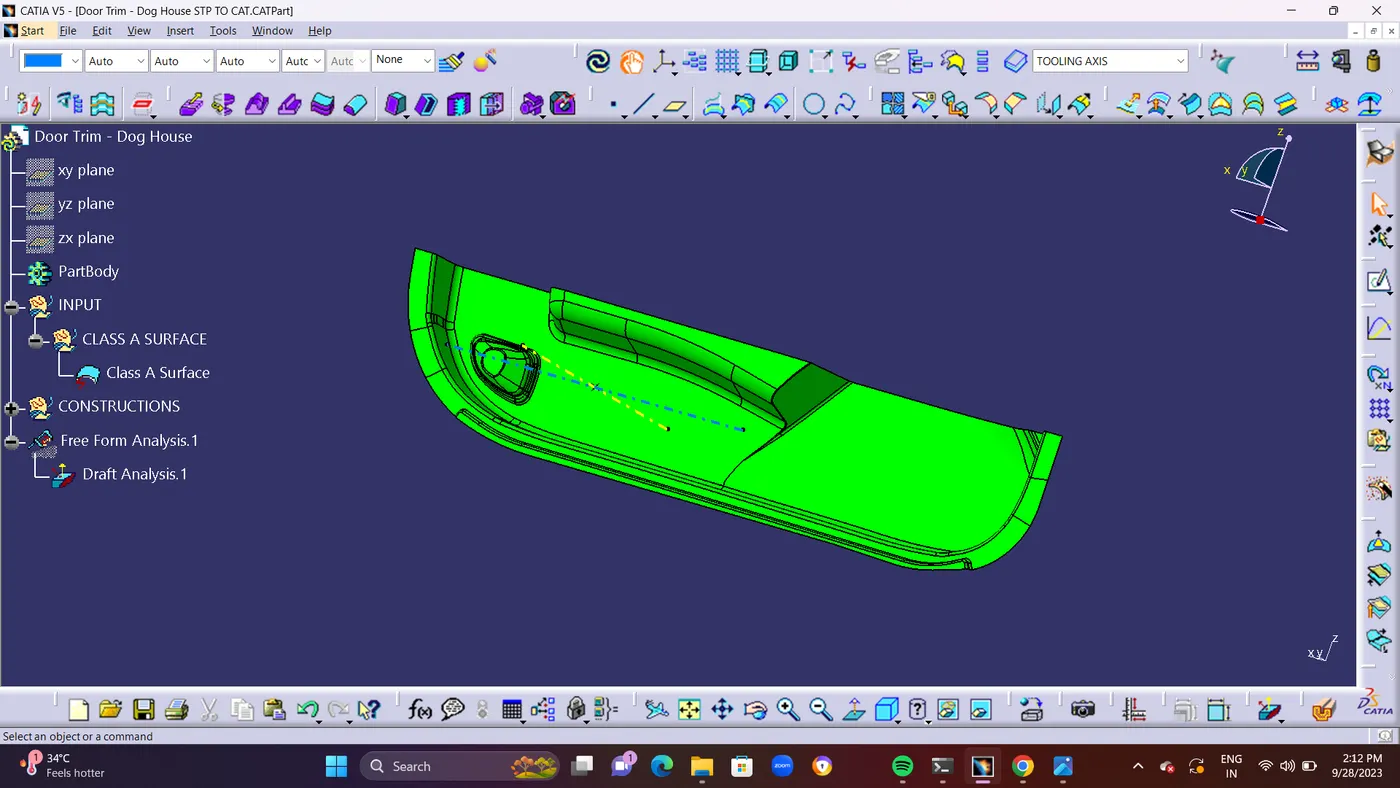
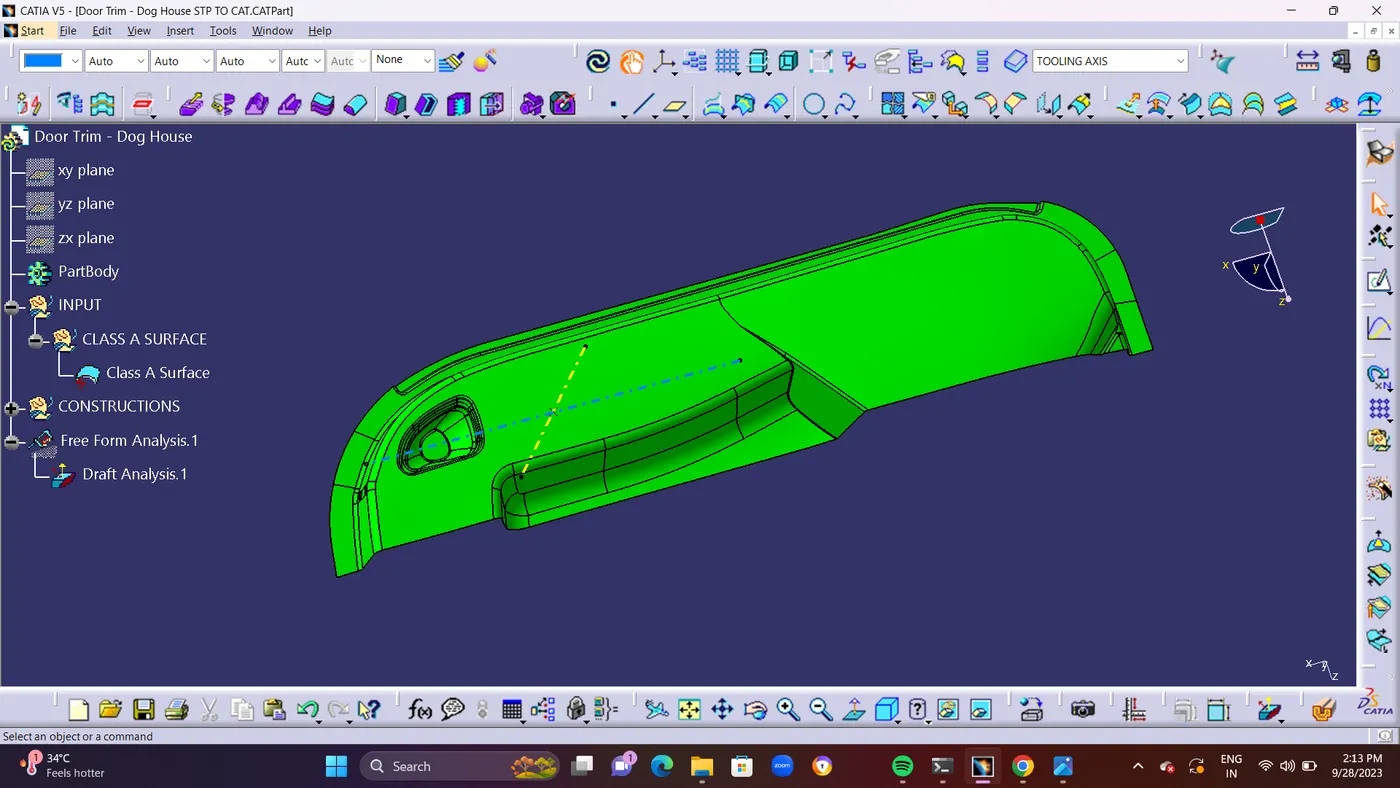
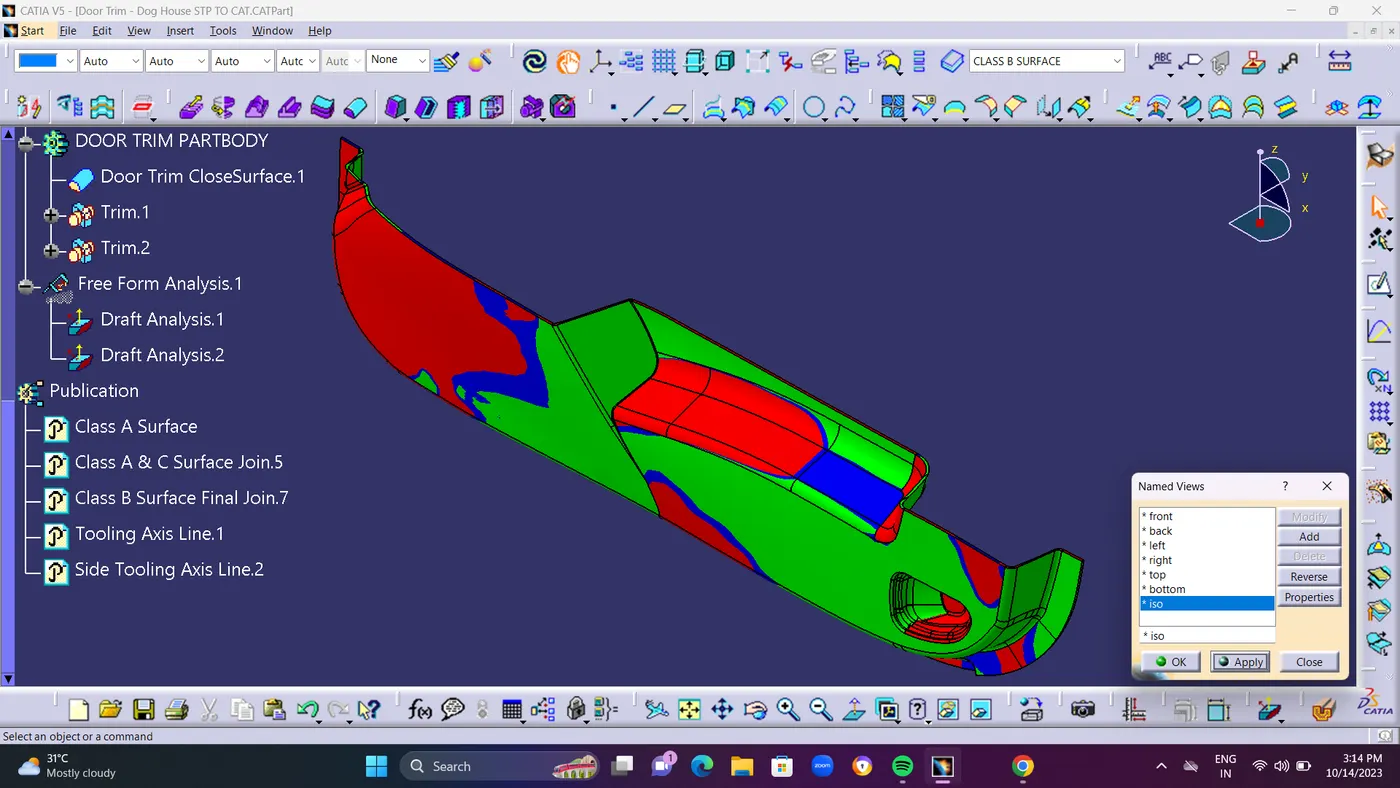
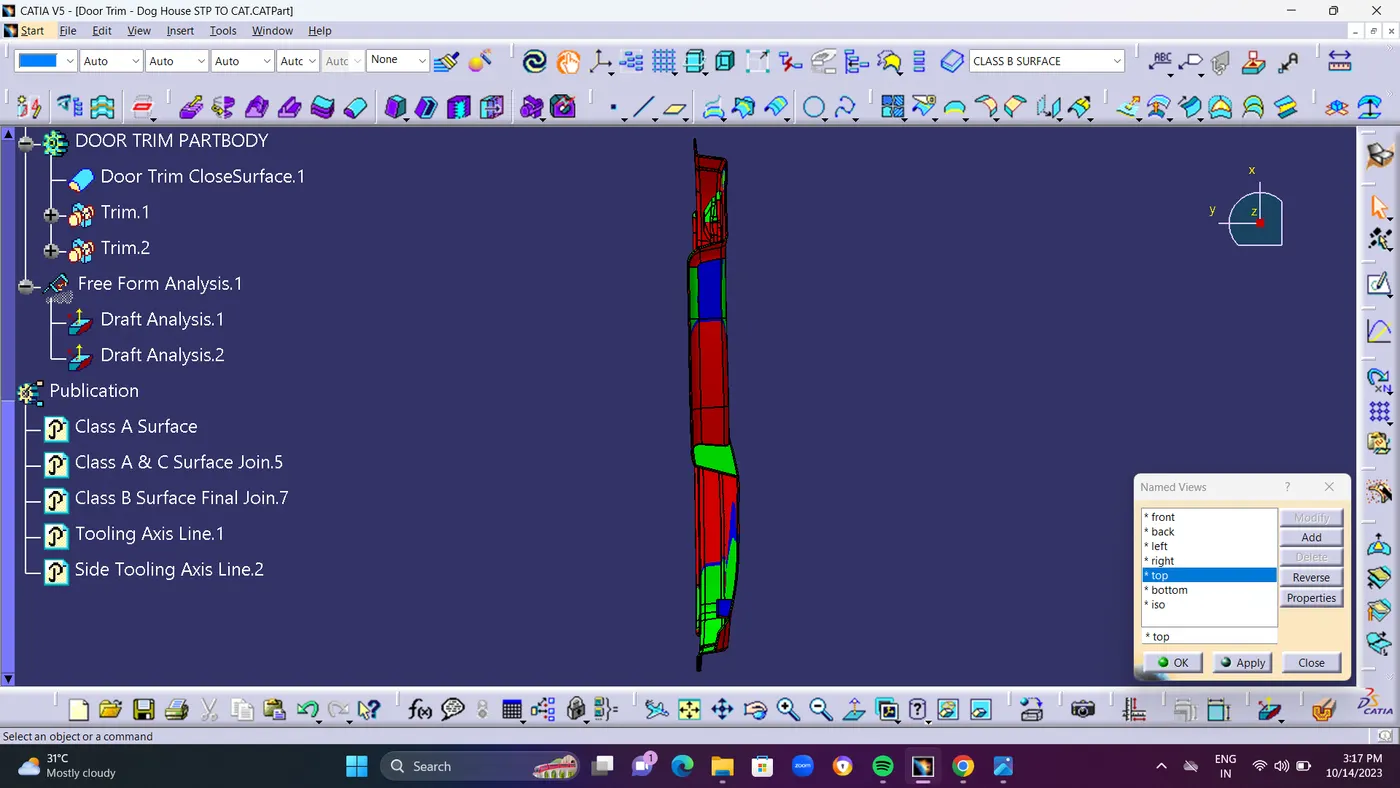
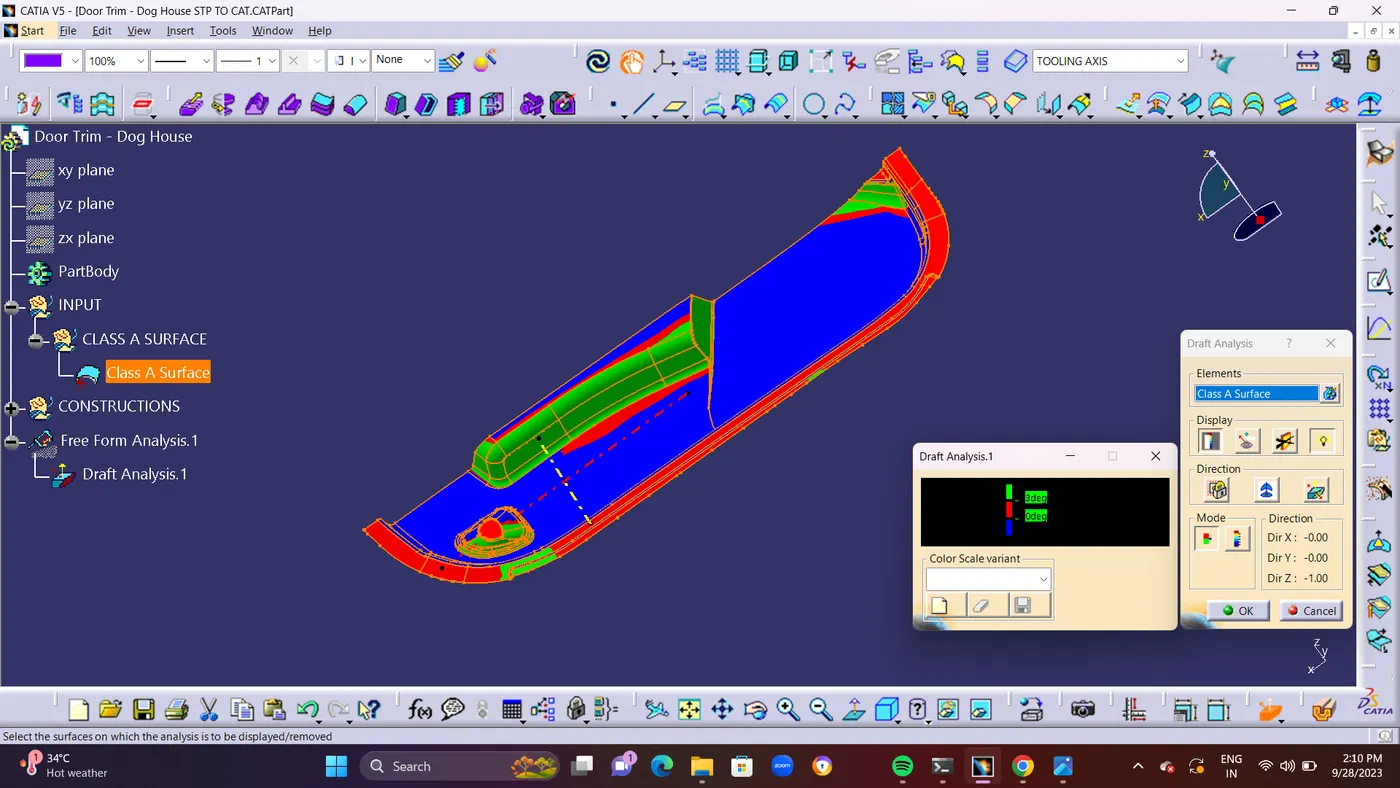
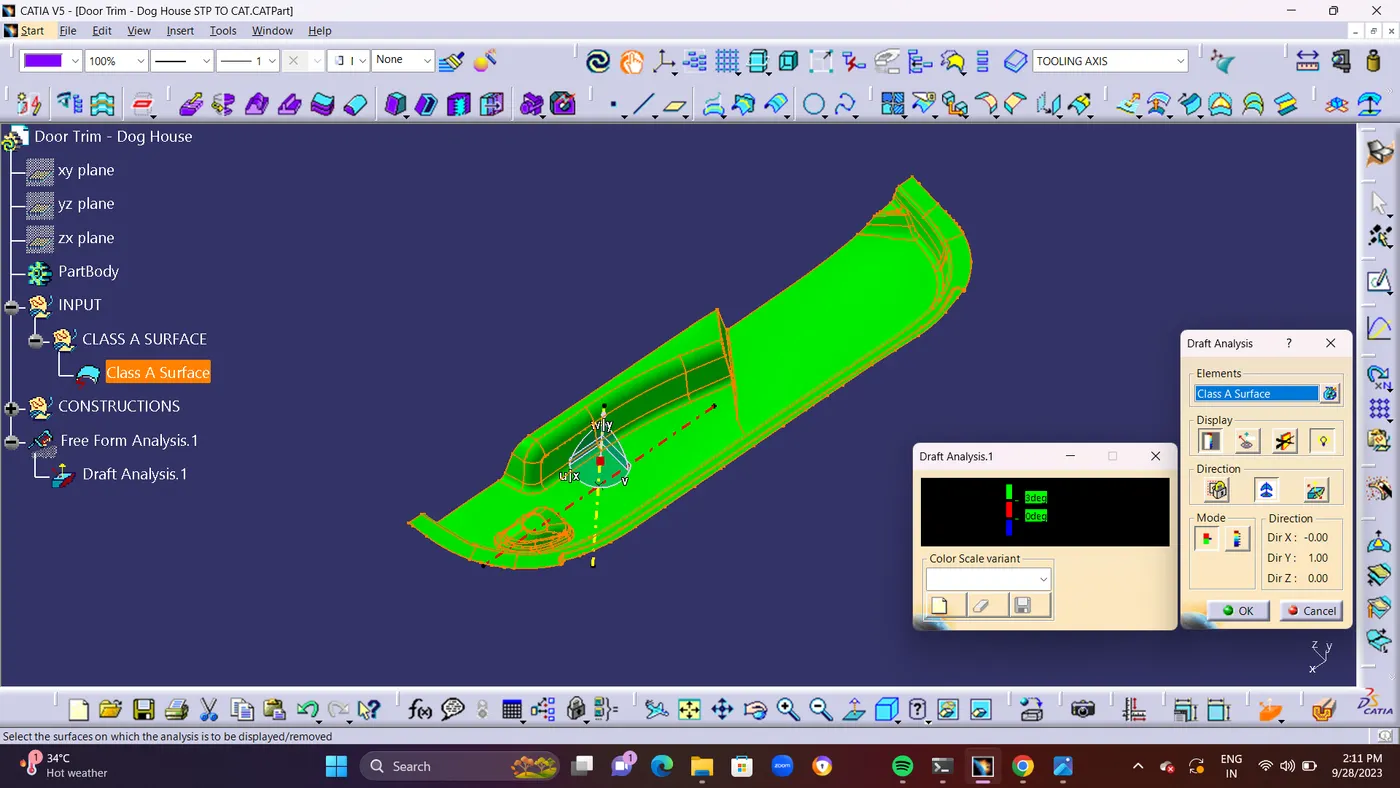
  • CLASS A SURFACE DRAFT ANALYSIS : To find out if the part you drafted will be easy to remove, use the Draft Analysis command. When doing this type of analysis, color-coded zones on the investigated                                                               element are used, which correlate to certain values if there is a departure from the draft direction at any point.
  • Draft analysis is done to determine whether the minimal draft of three degrees is being maintained after selecting the tooling axis.
  • The user may quickly determine the right draft angle of a component by using the Draft Analysis. A draft angle is the degree of taper for cast or molded components that runs perpendicular to the parting line. Draft analysis is appropriate for 3D part models.
  • While testing an draft analysis please ensure whethere it is in a Material Model or not.shown in below screen shots
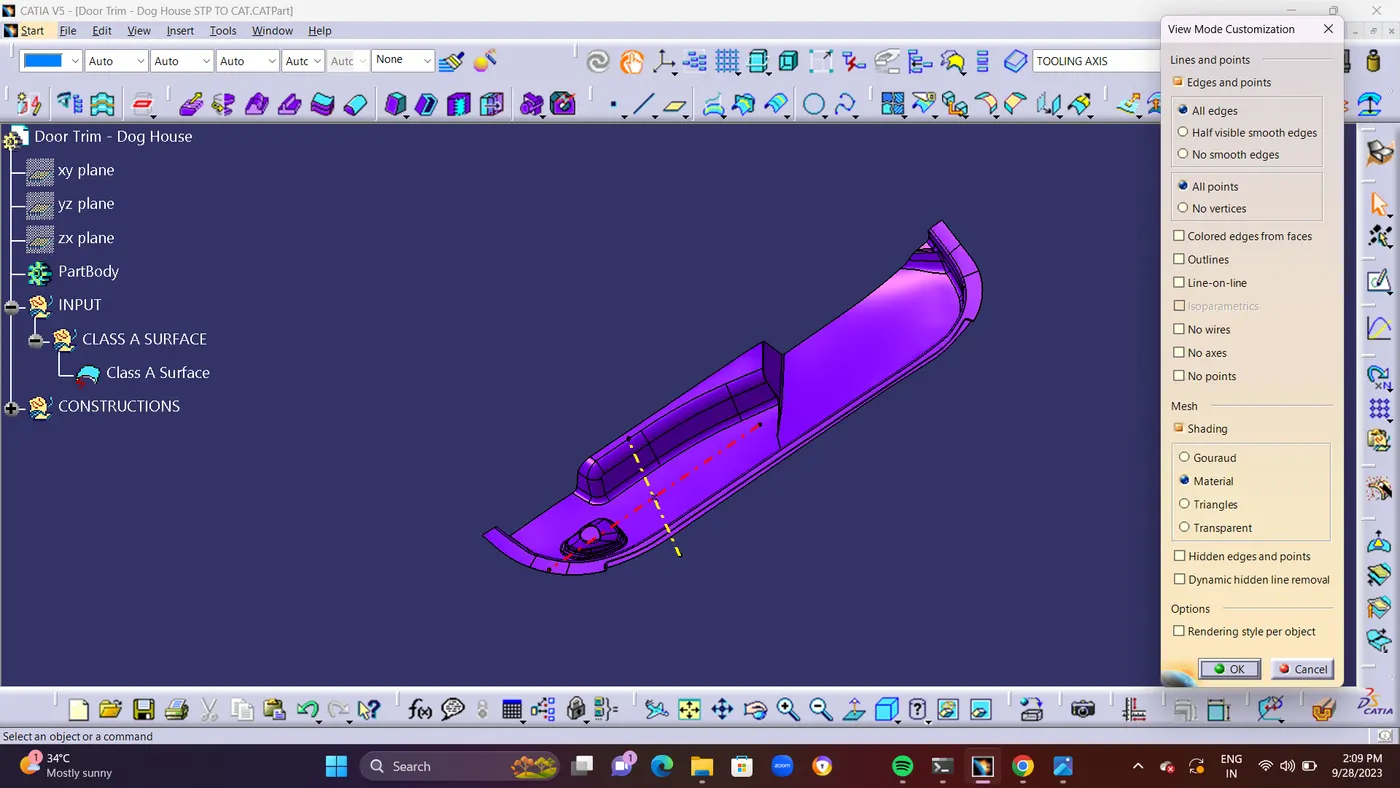


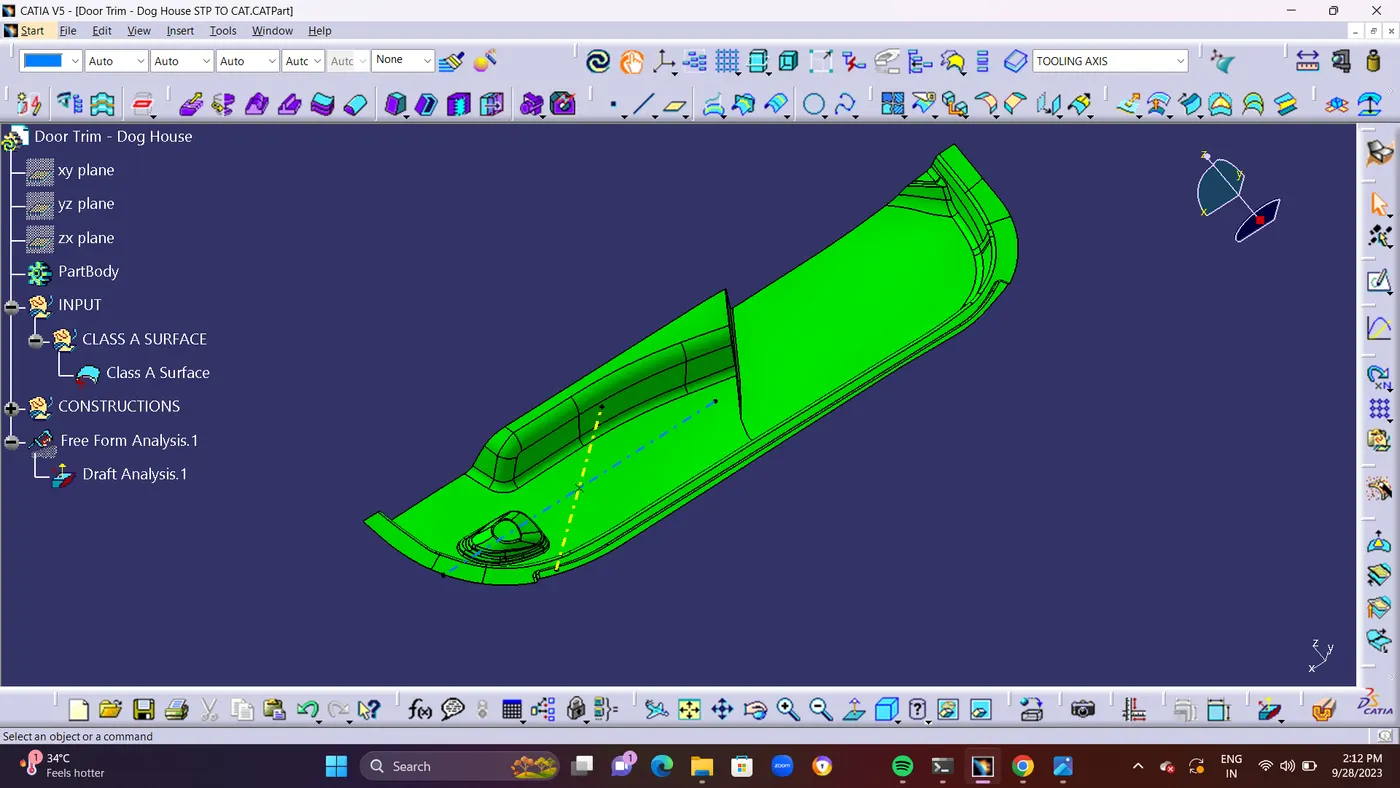
  • STEP 2 : Draft analysis is required to check if a part has required draft or not. Draft is required so that a part can be ejected from its mould easily.Draft will be Maximum 3 Degree.But For me its passing at                  2.9 Deg So i used to make it as 3 Deg  As Maximum Level in Class A surface Draft Analysis Method and it is passing at 3 Deg.Make Sure you are in MATERIAL MODE To Check Draft                              Analysis.Use Compass in Tooling AXIS while Drafting.
  • In Draft Analysis If it shows Green Colour Surface. its Pass in Drafting.Suppose its shows in Blue Colour Surface its Fails in Draft Analysis.its your choice of making Colour code for your convenient.


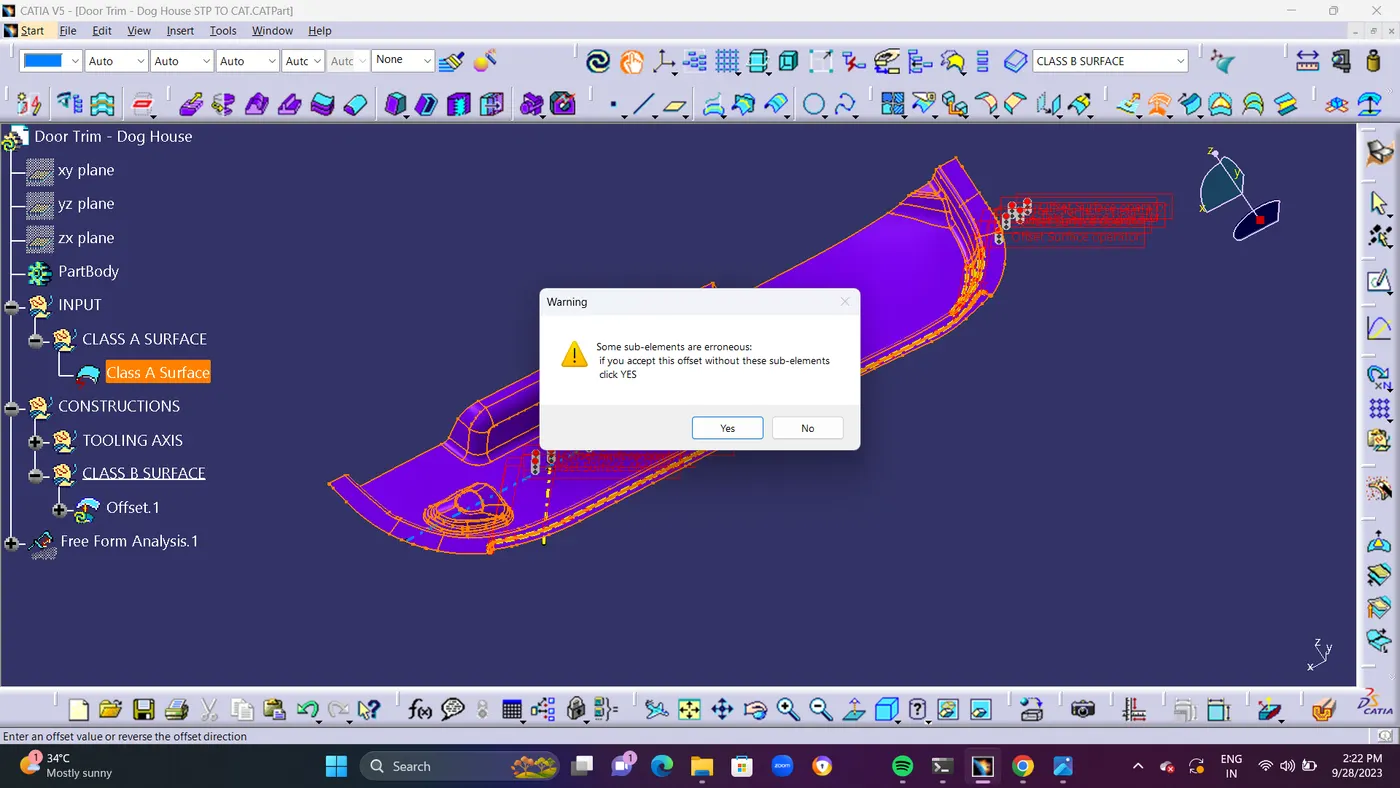
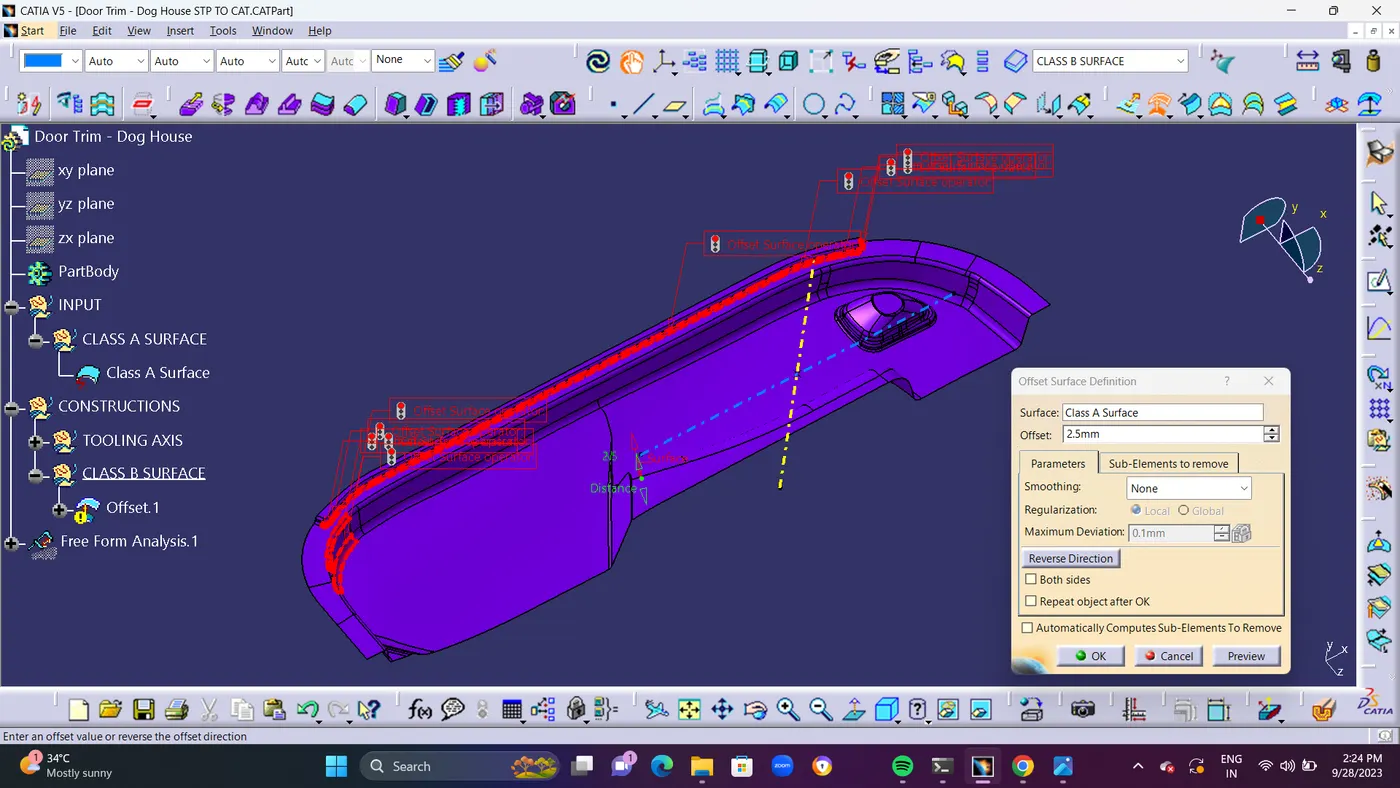
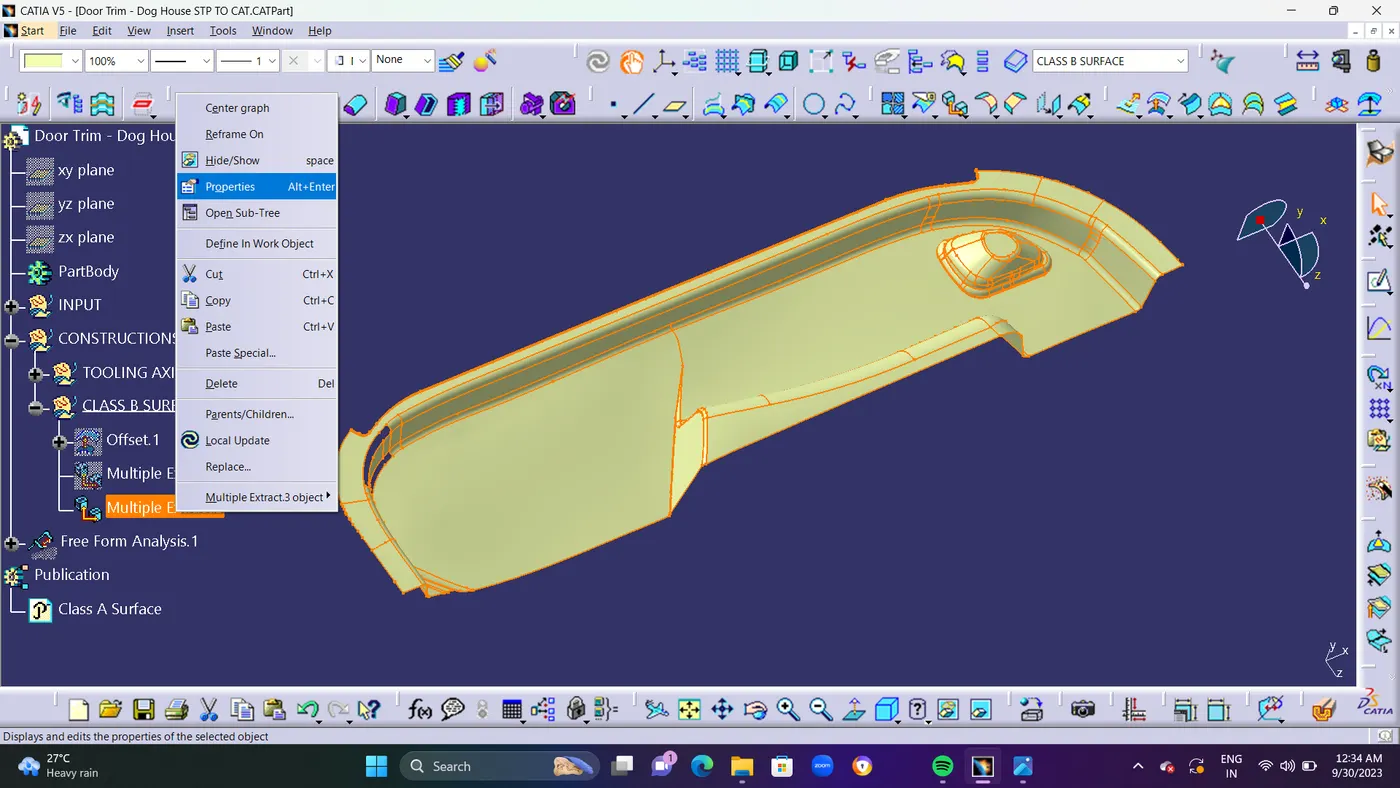
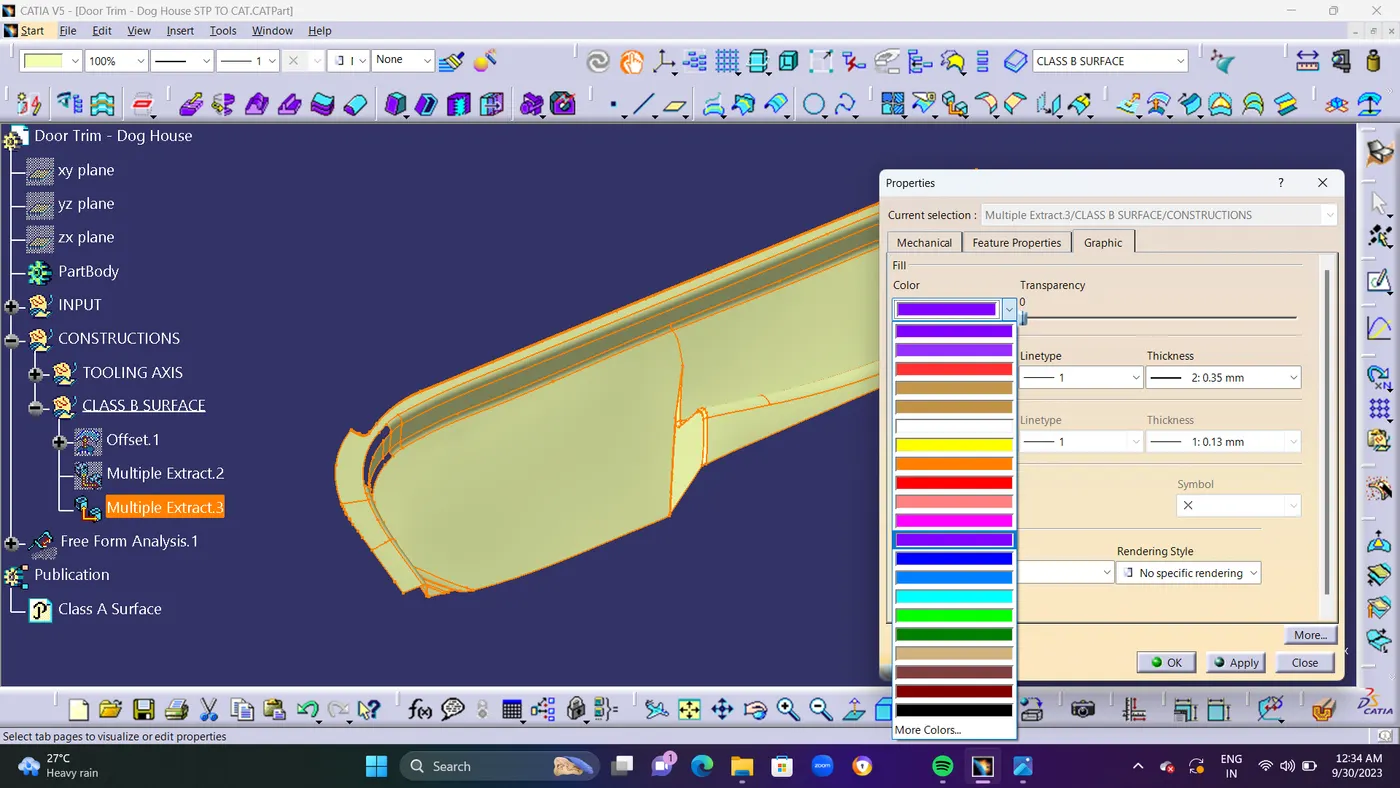
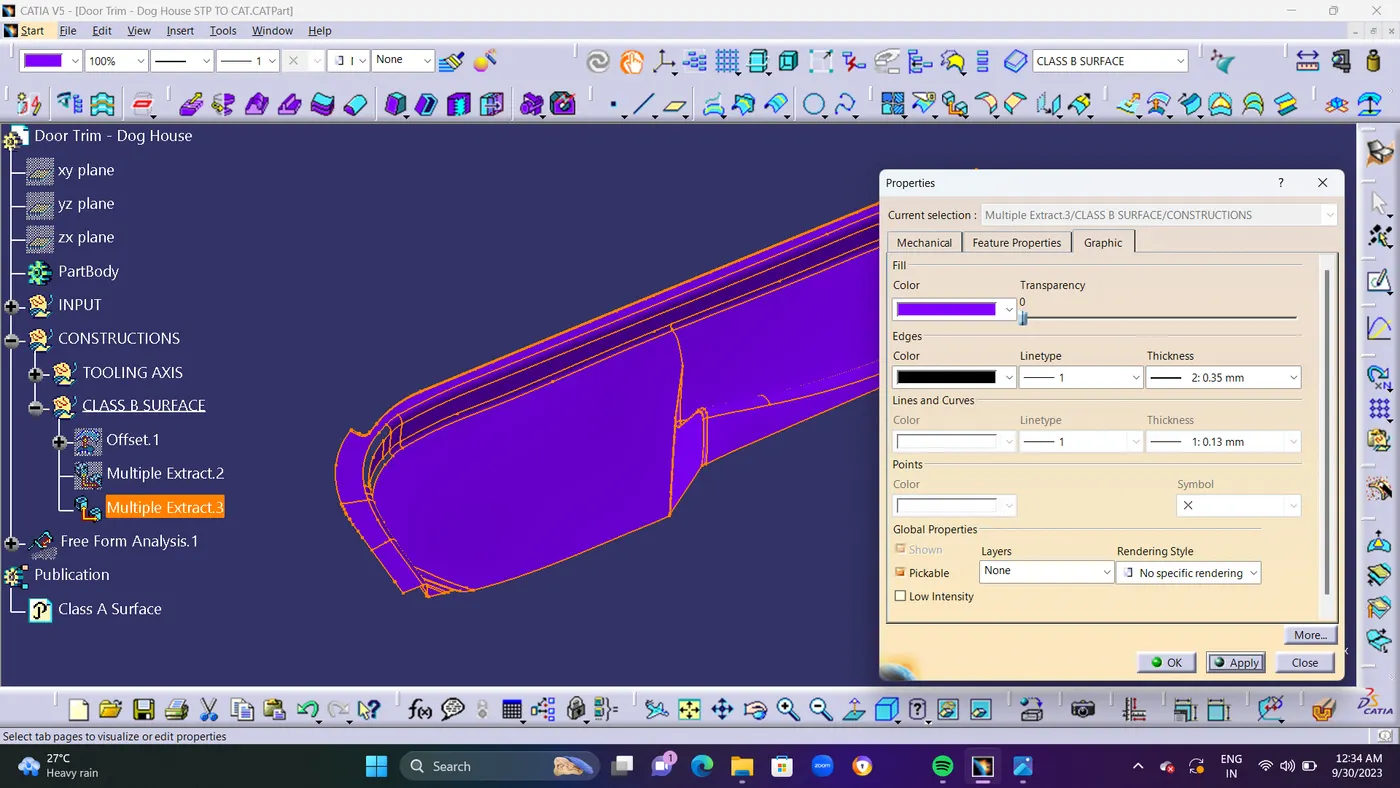
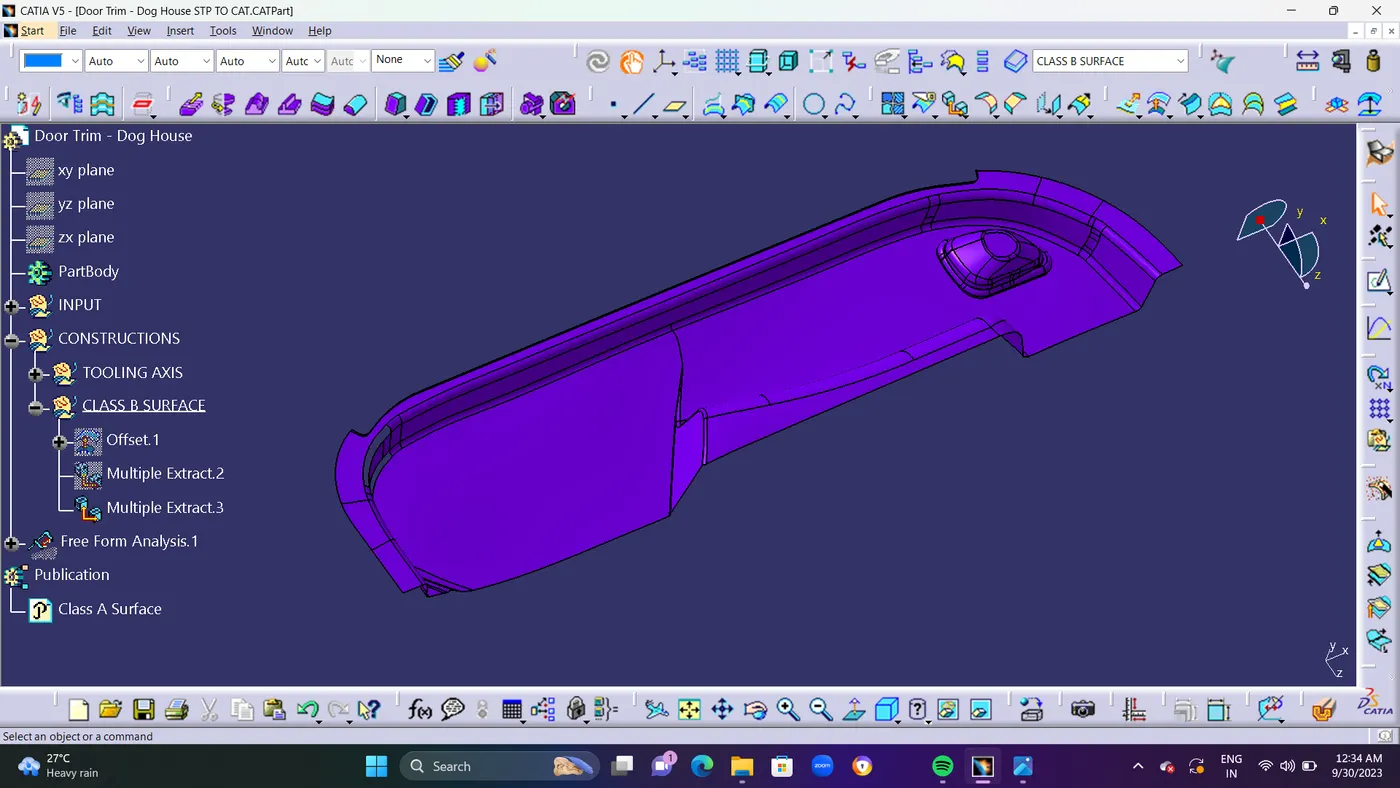
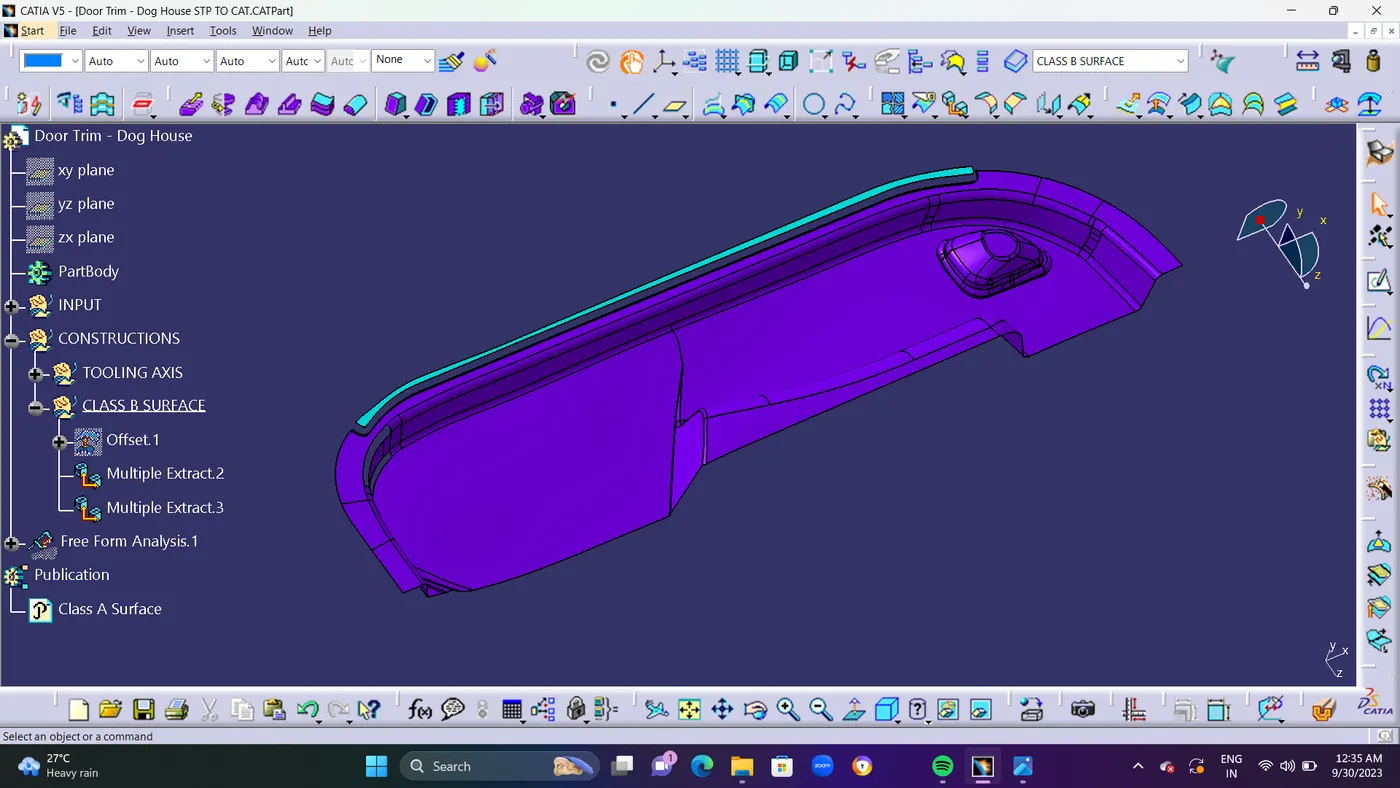
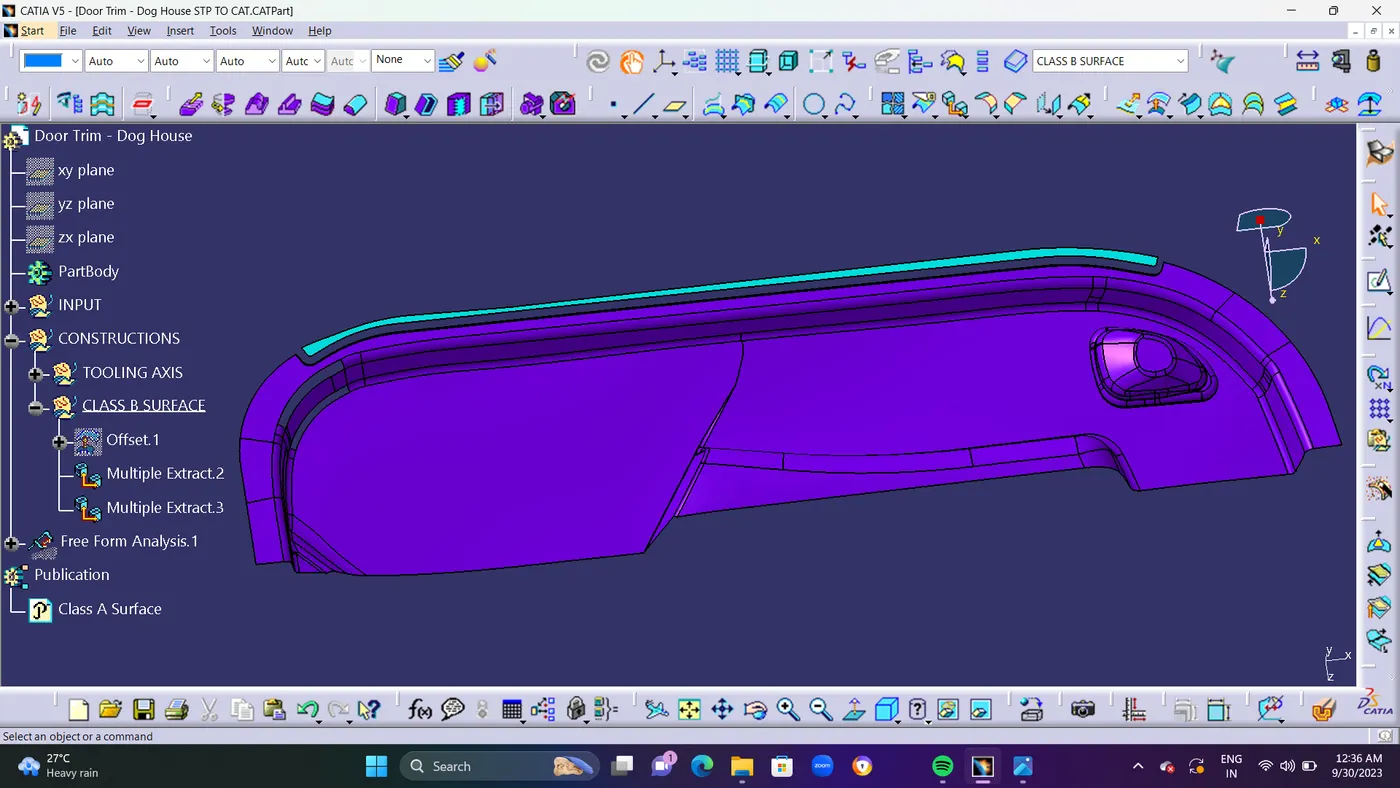
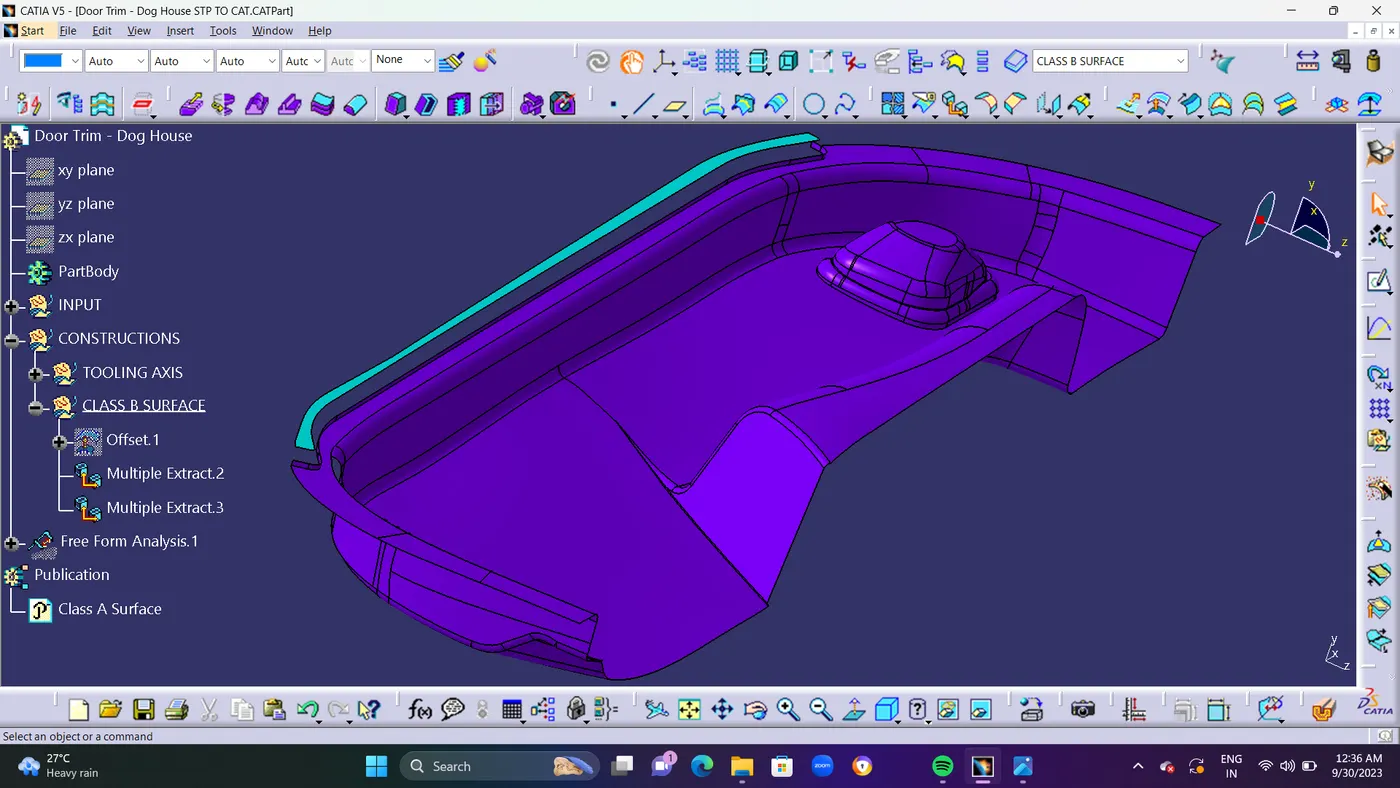
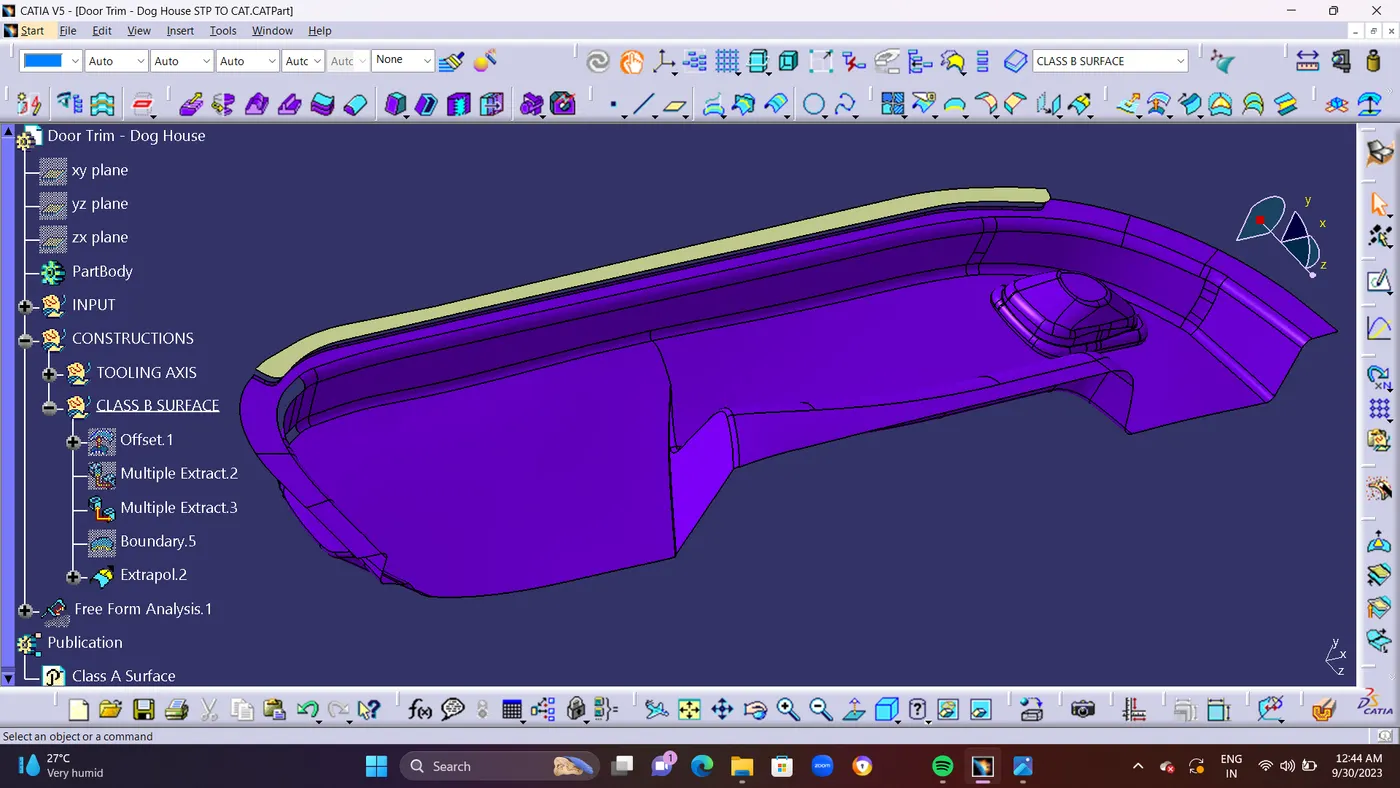
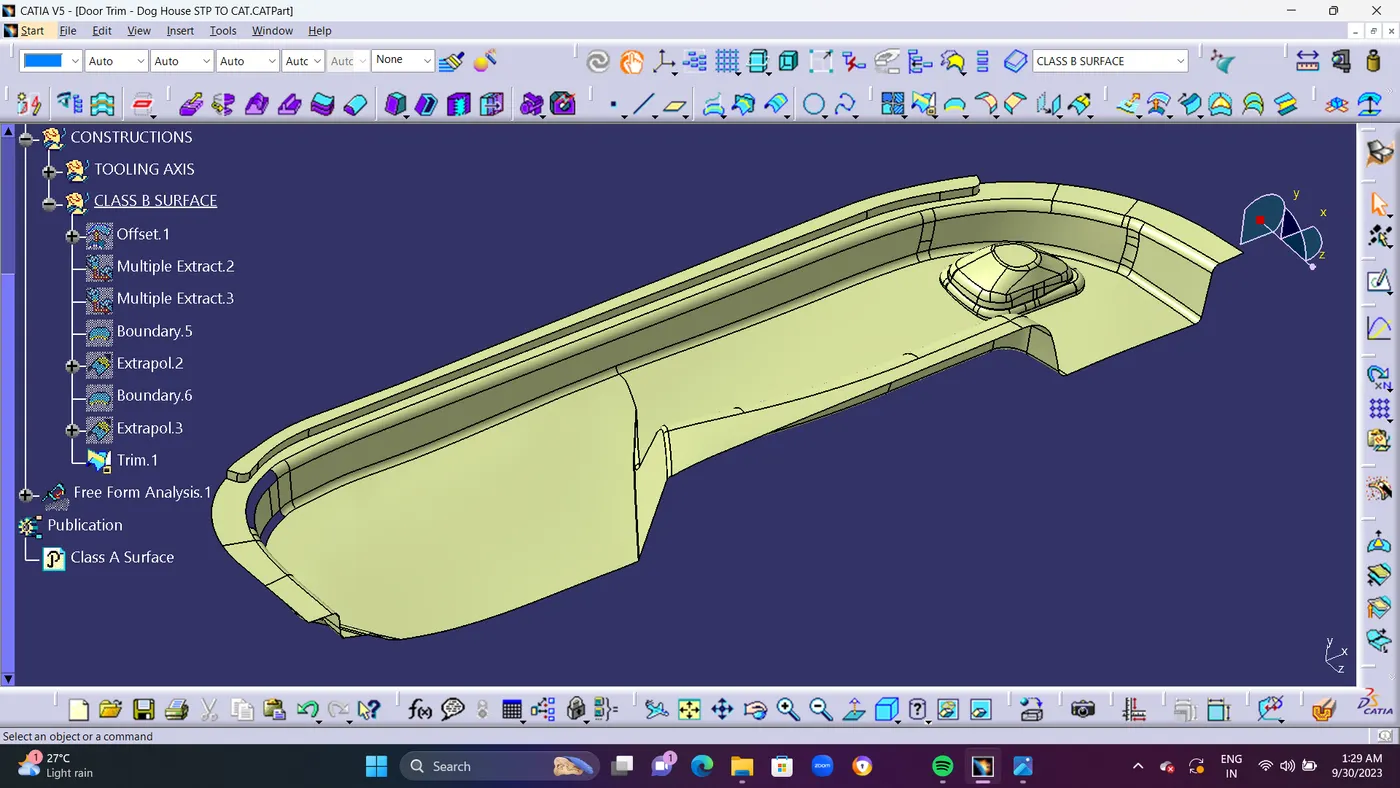
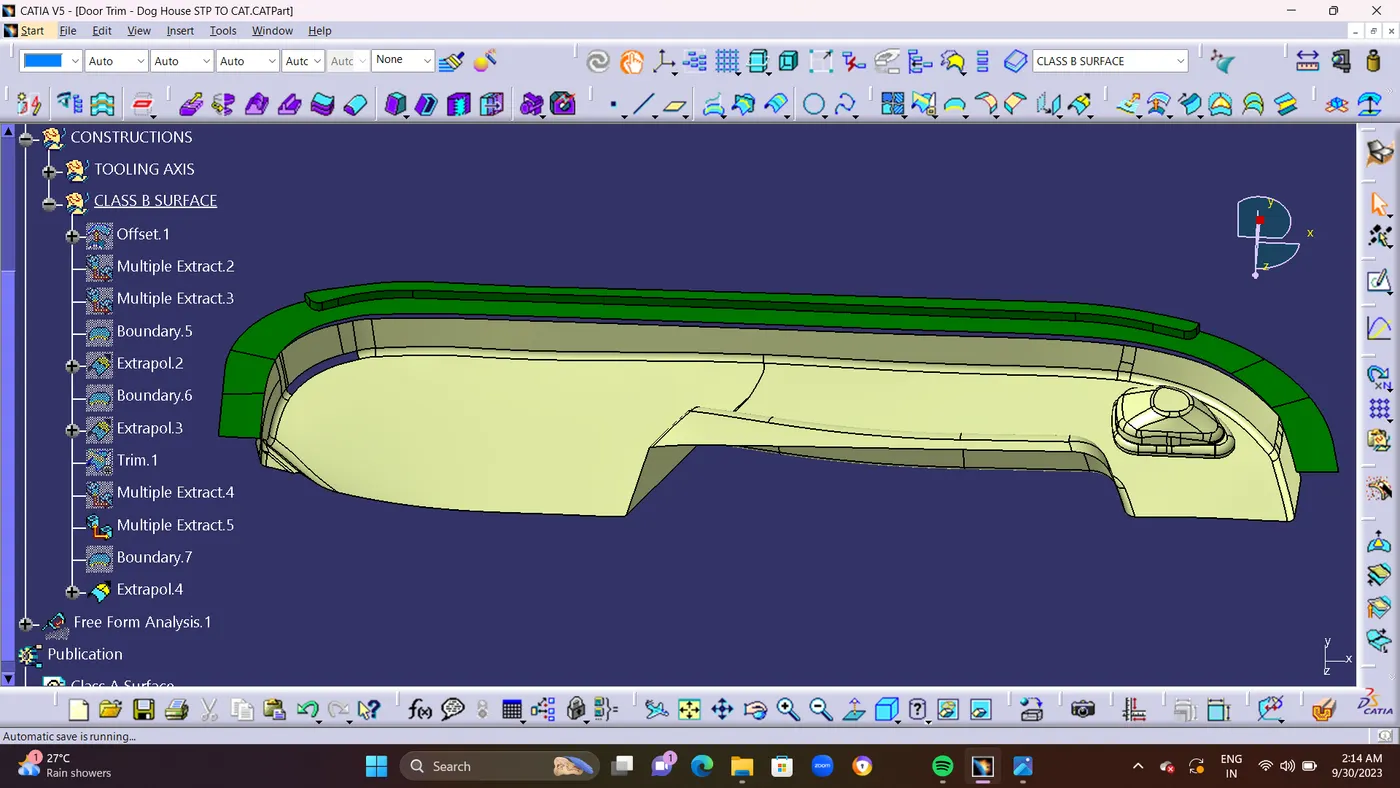
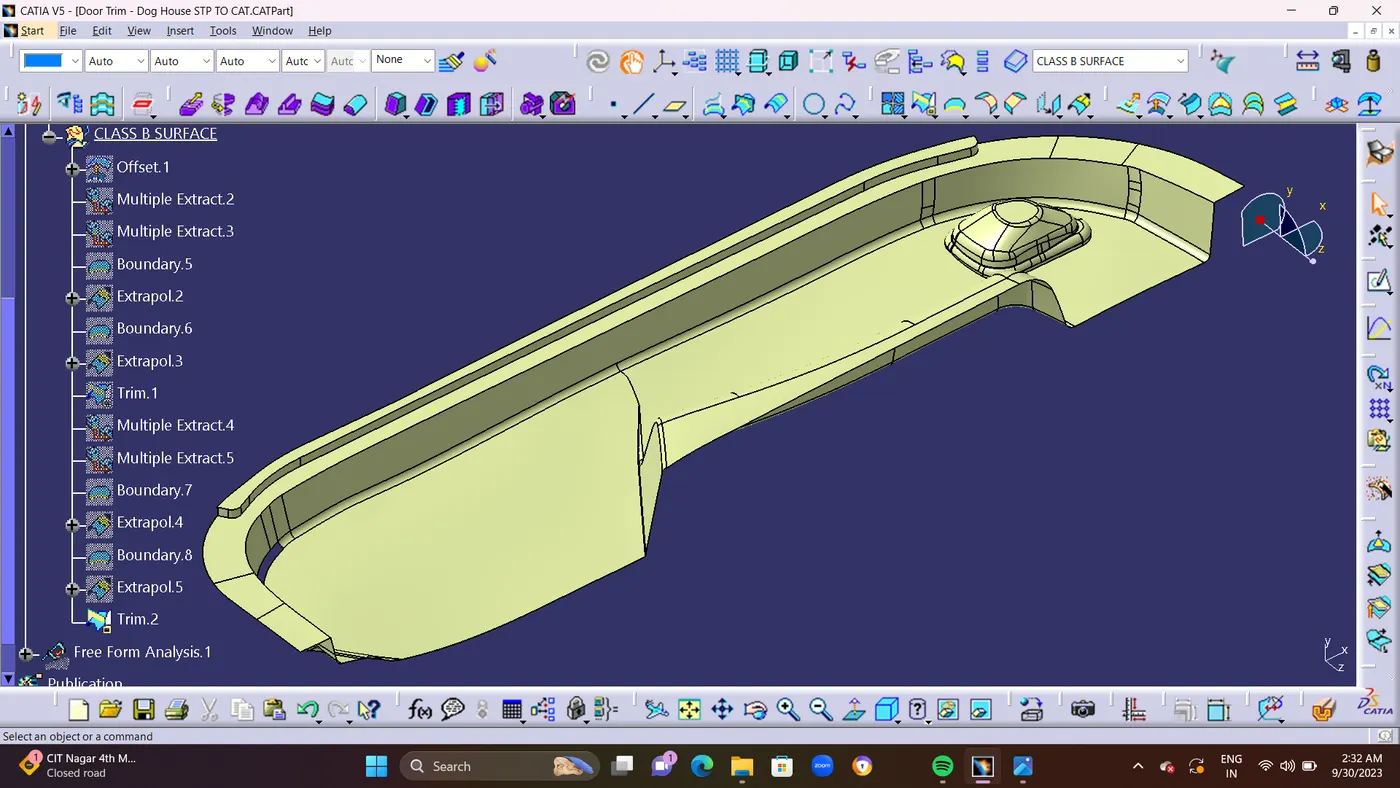
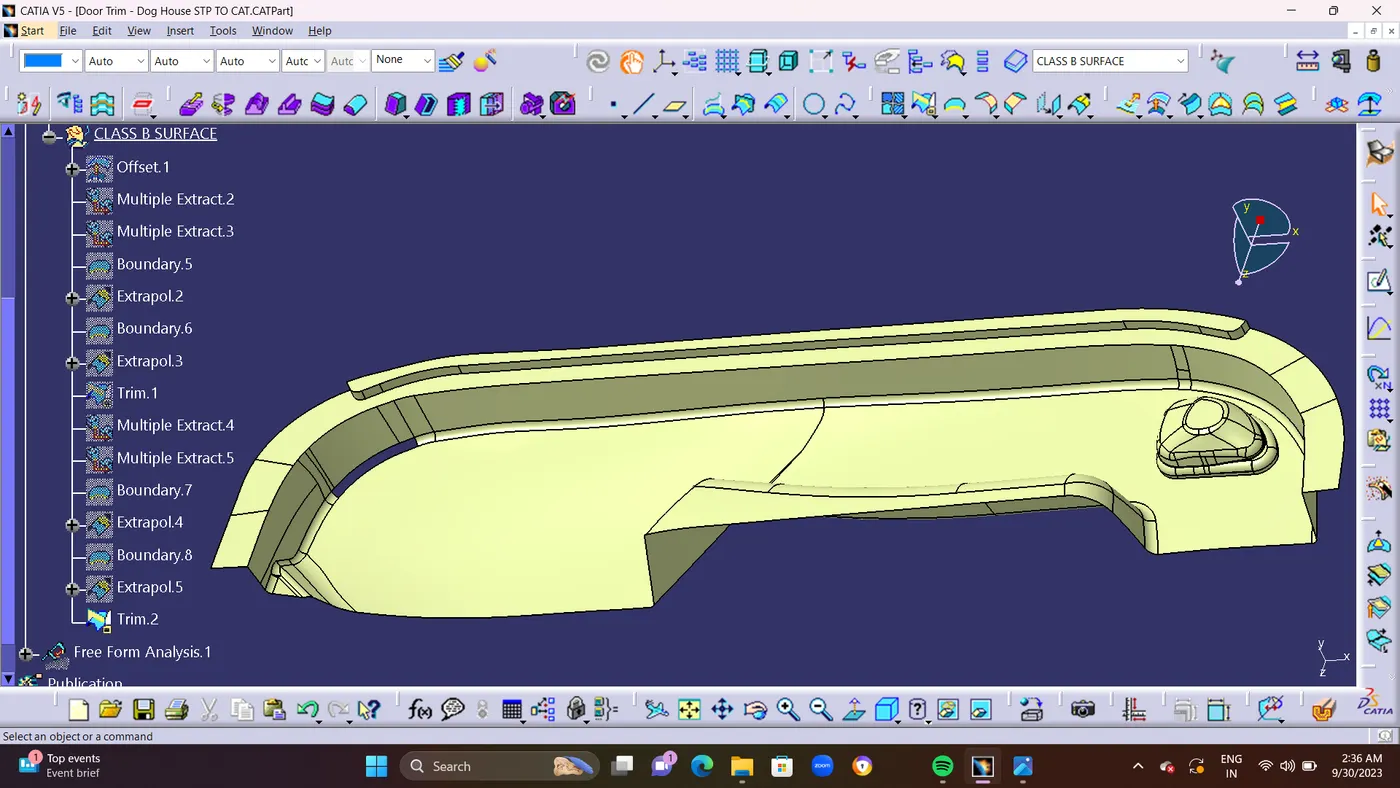
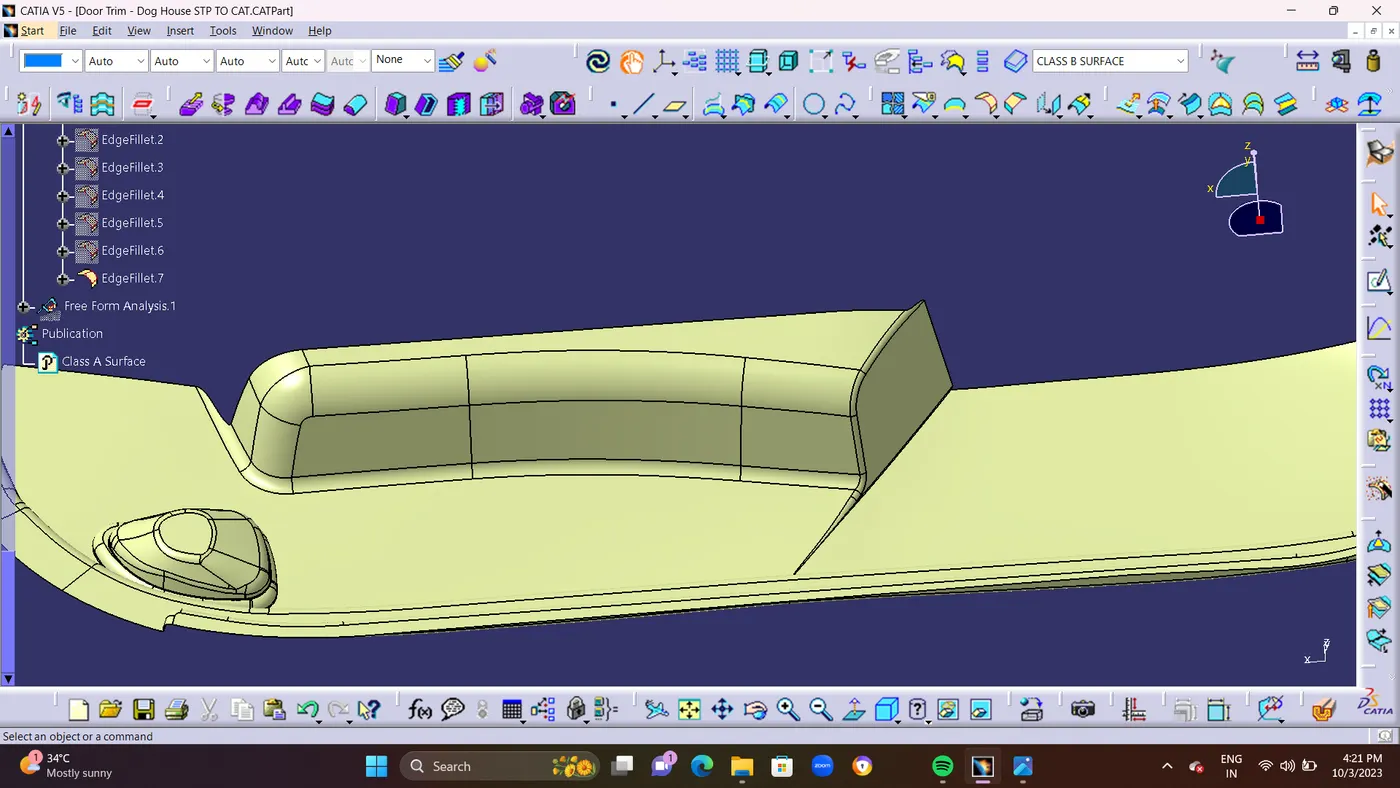
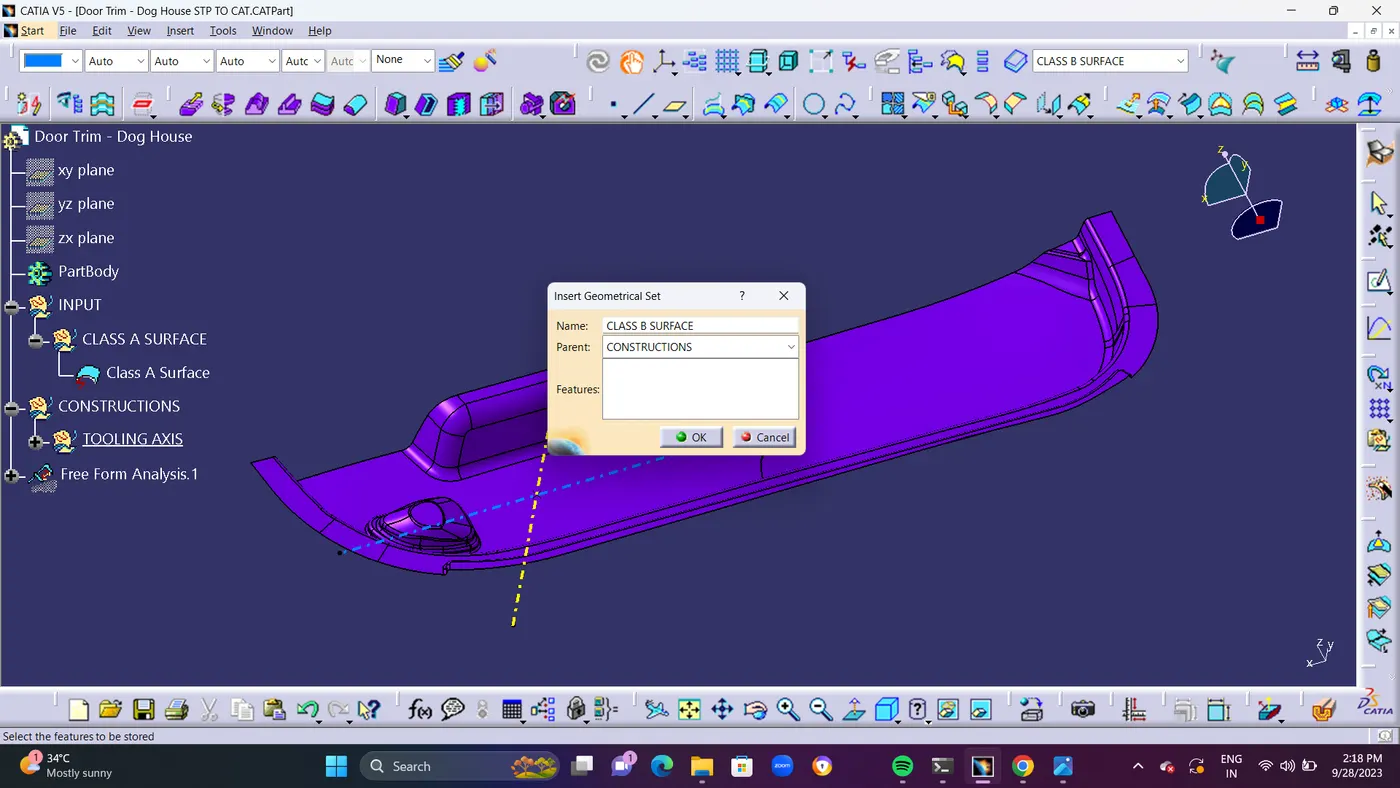
  • CLASS B SURFACE CREATION : Class B is a reference surface that the design engineer creates and which is a replica of class A at a distance equal to the part's thickness. 
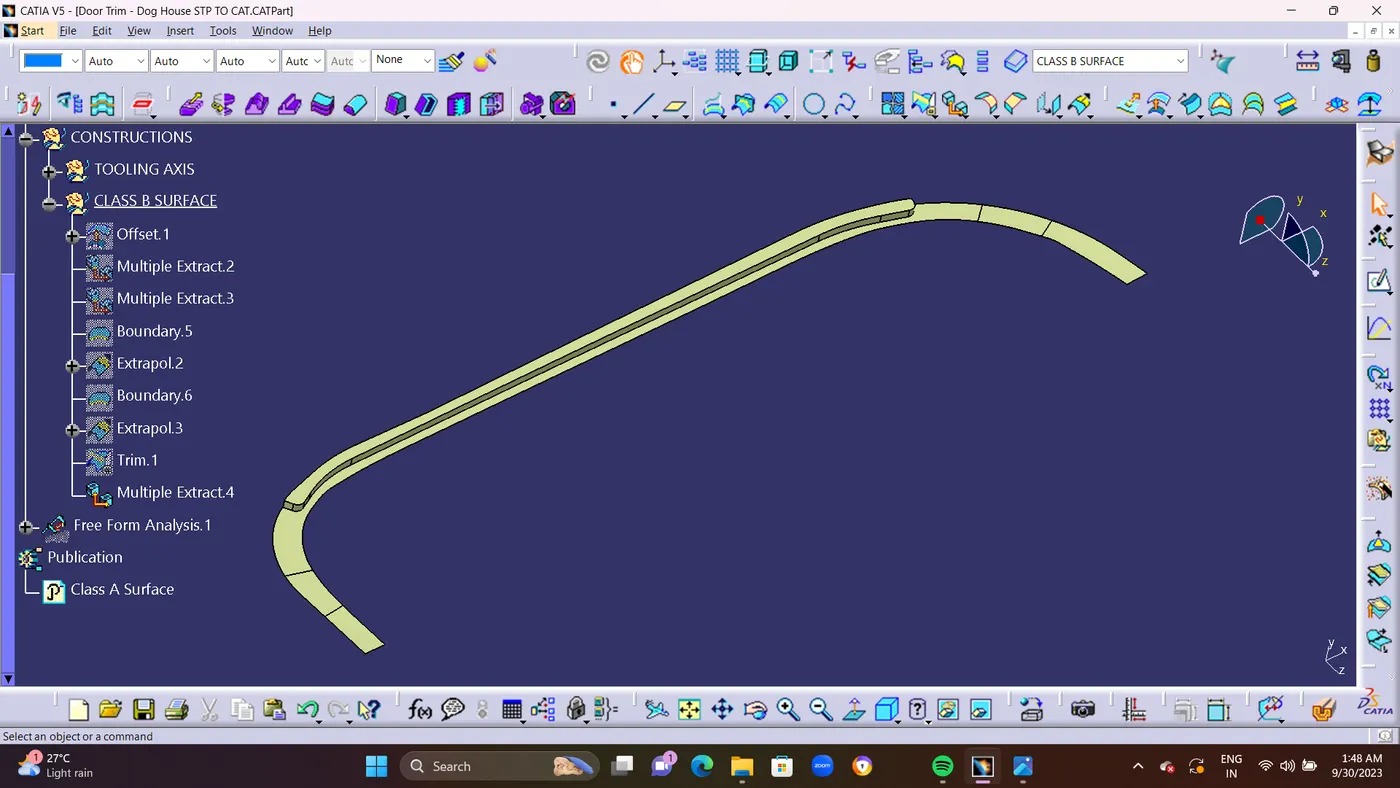
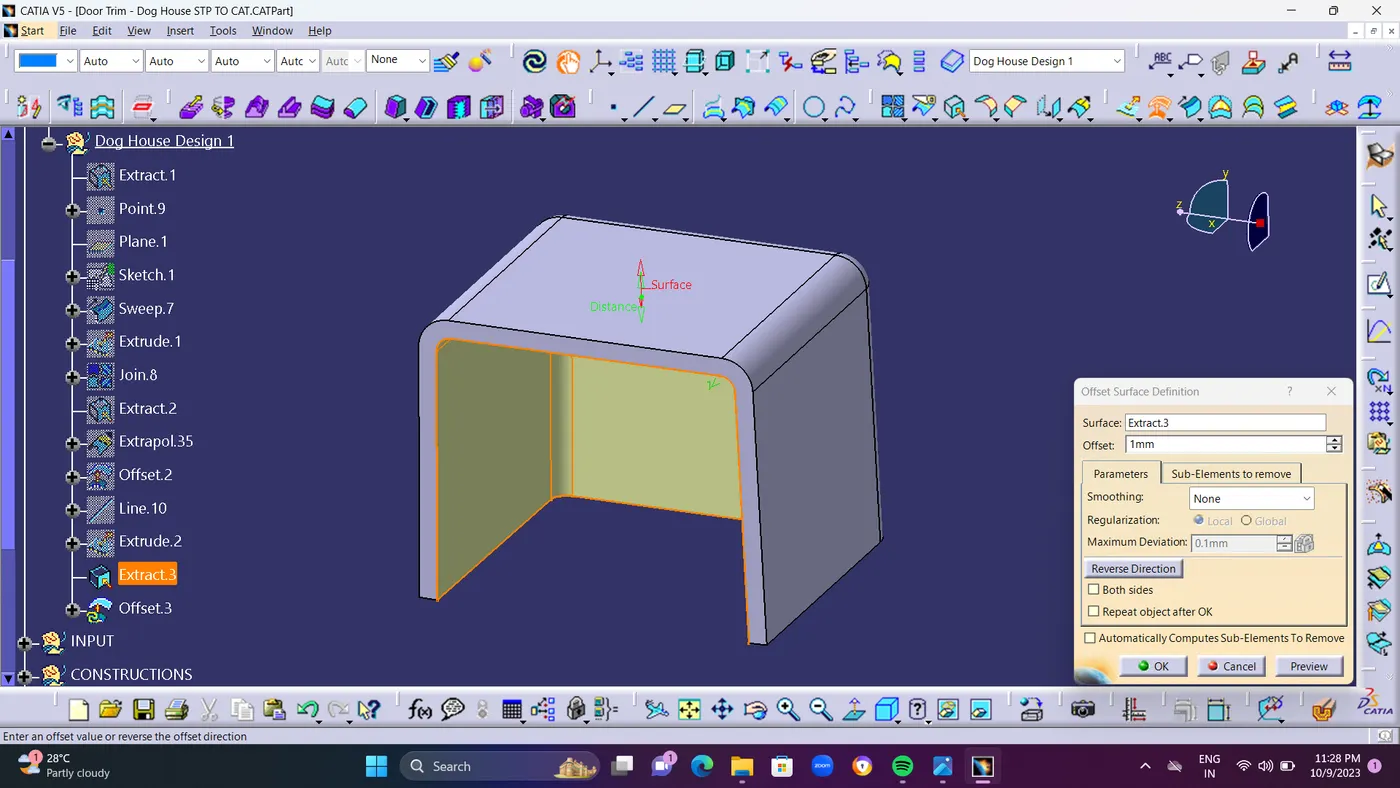
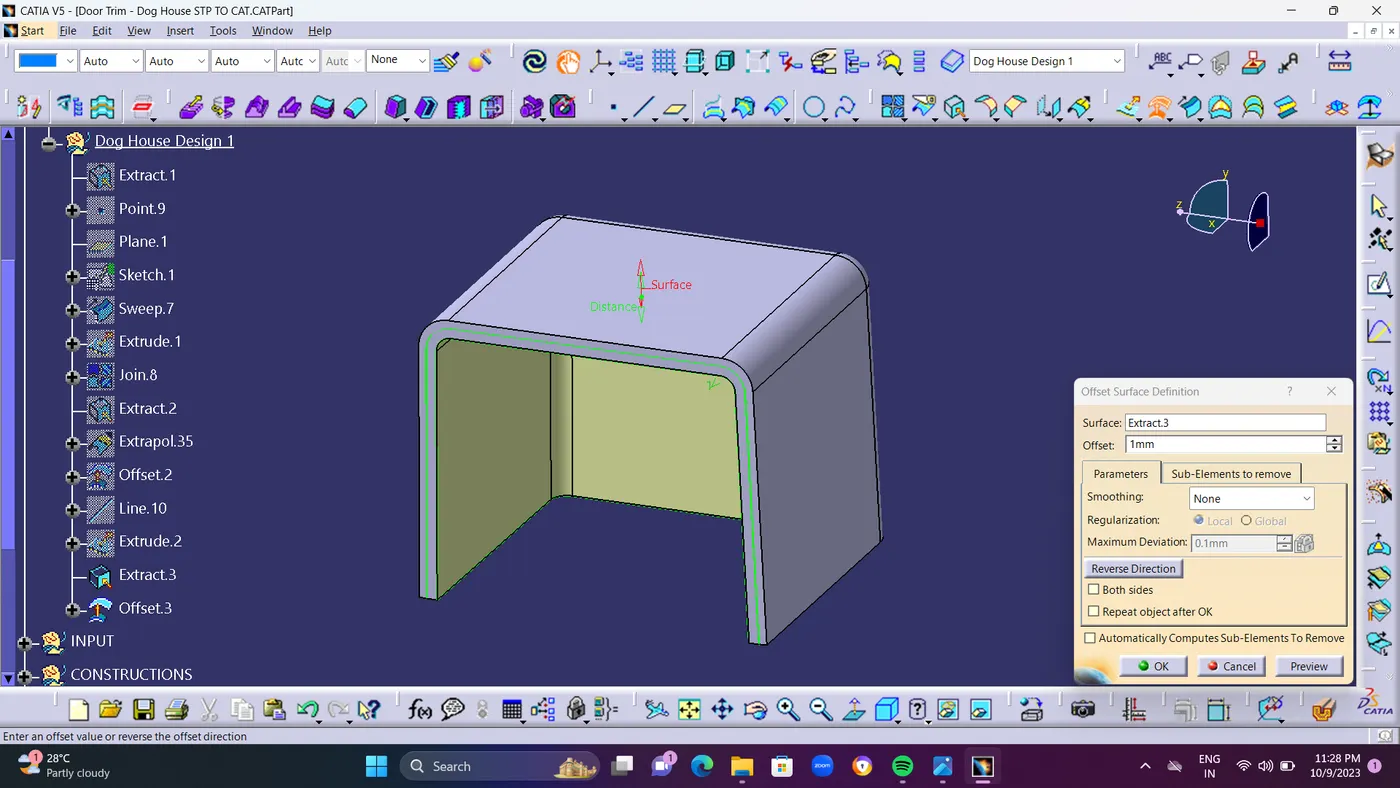
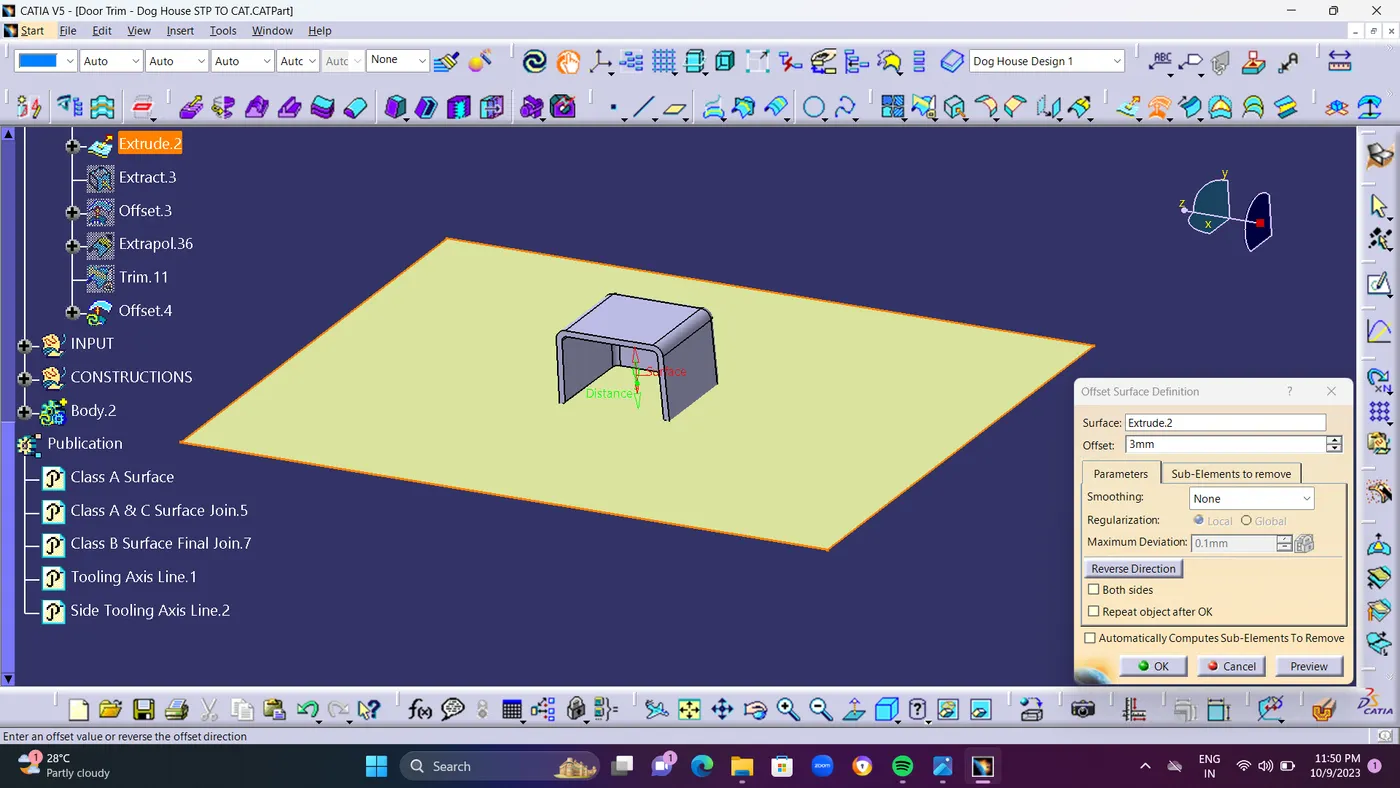
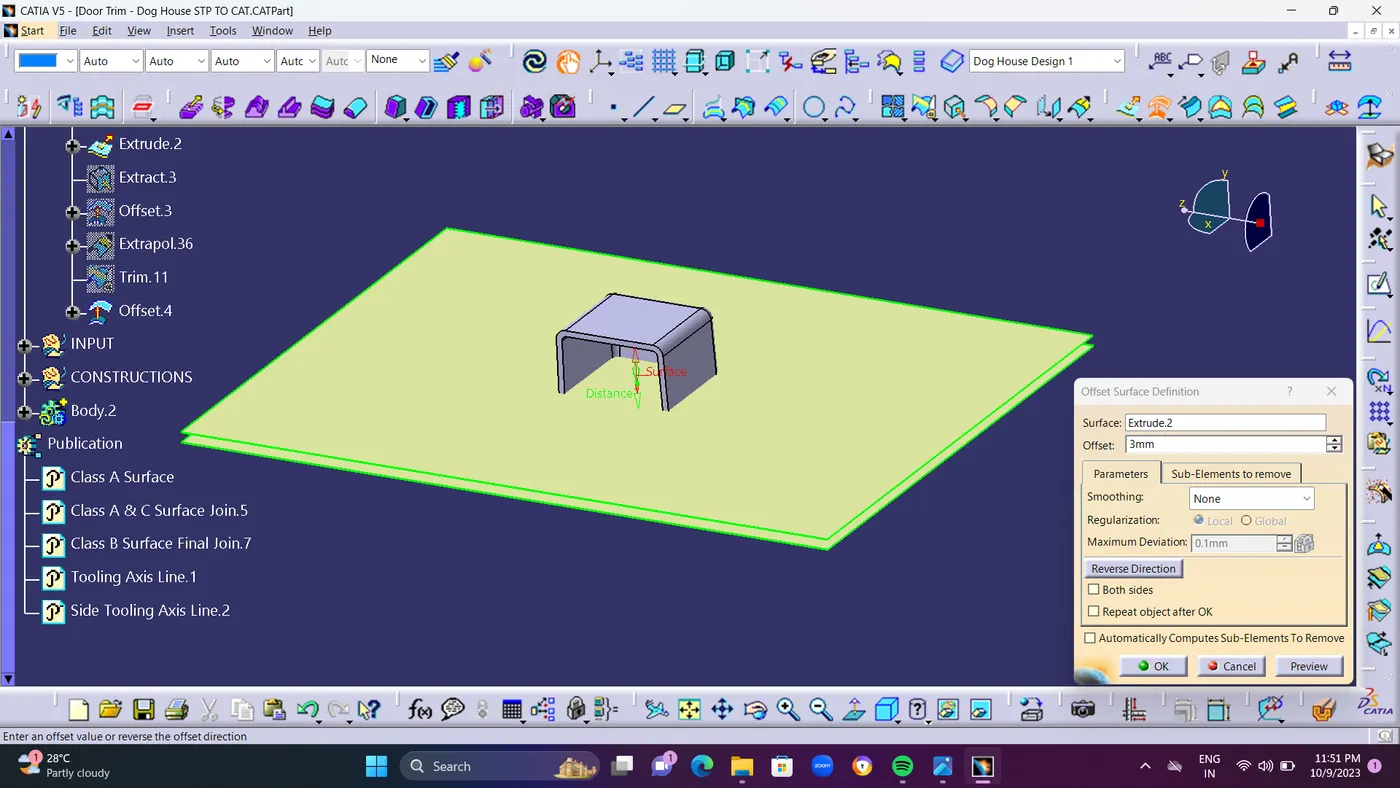
  • STEP 3 : Offset Class A Whole Surface for Creating an Class B Surface. Because of Complicated part can Be Fully Offset to Creat Class b surface From Class A.
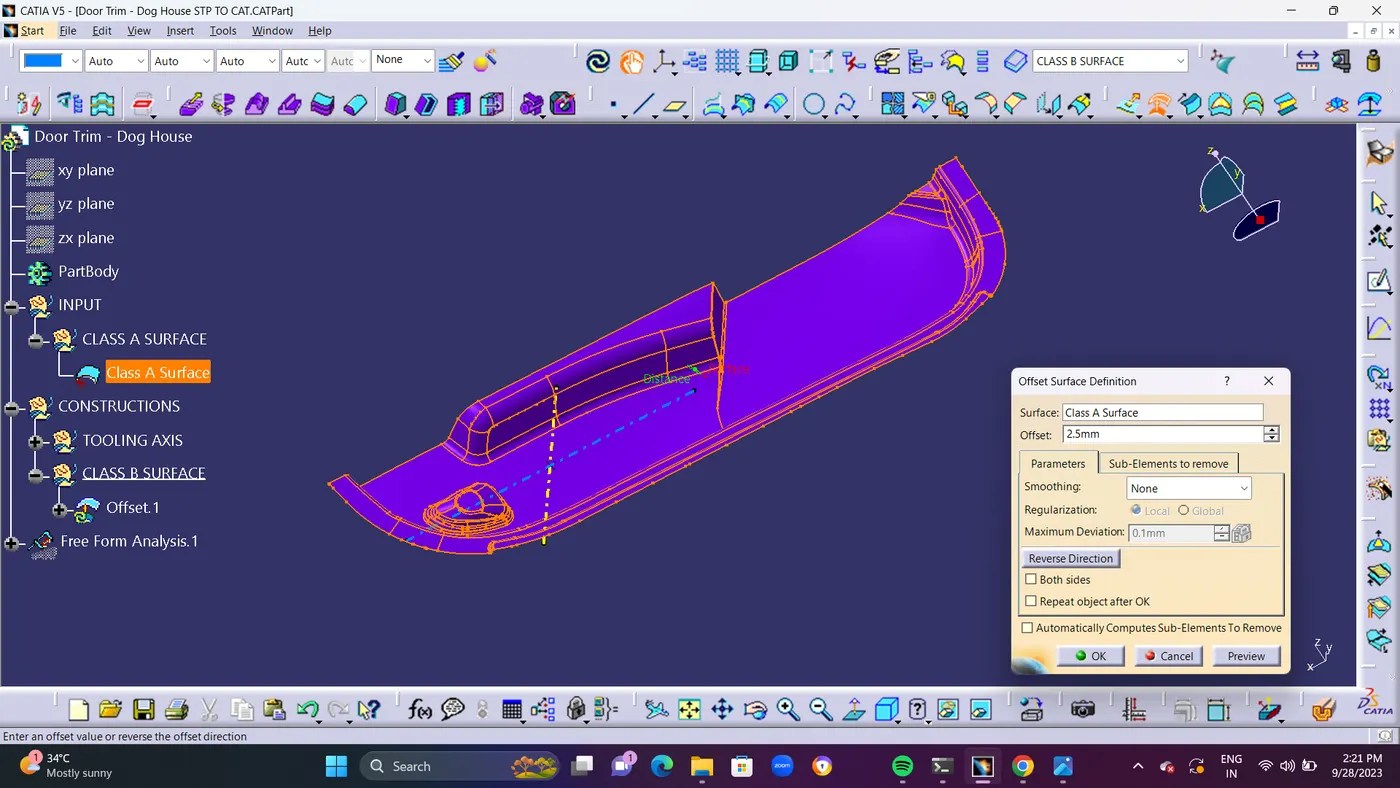


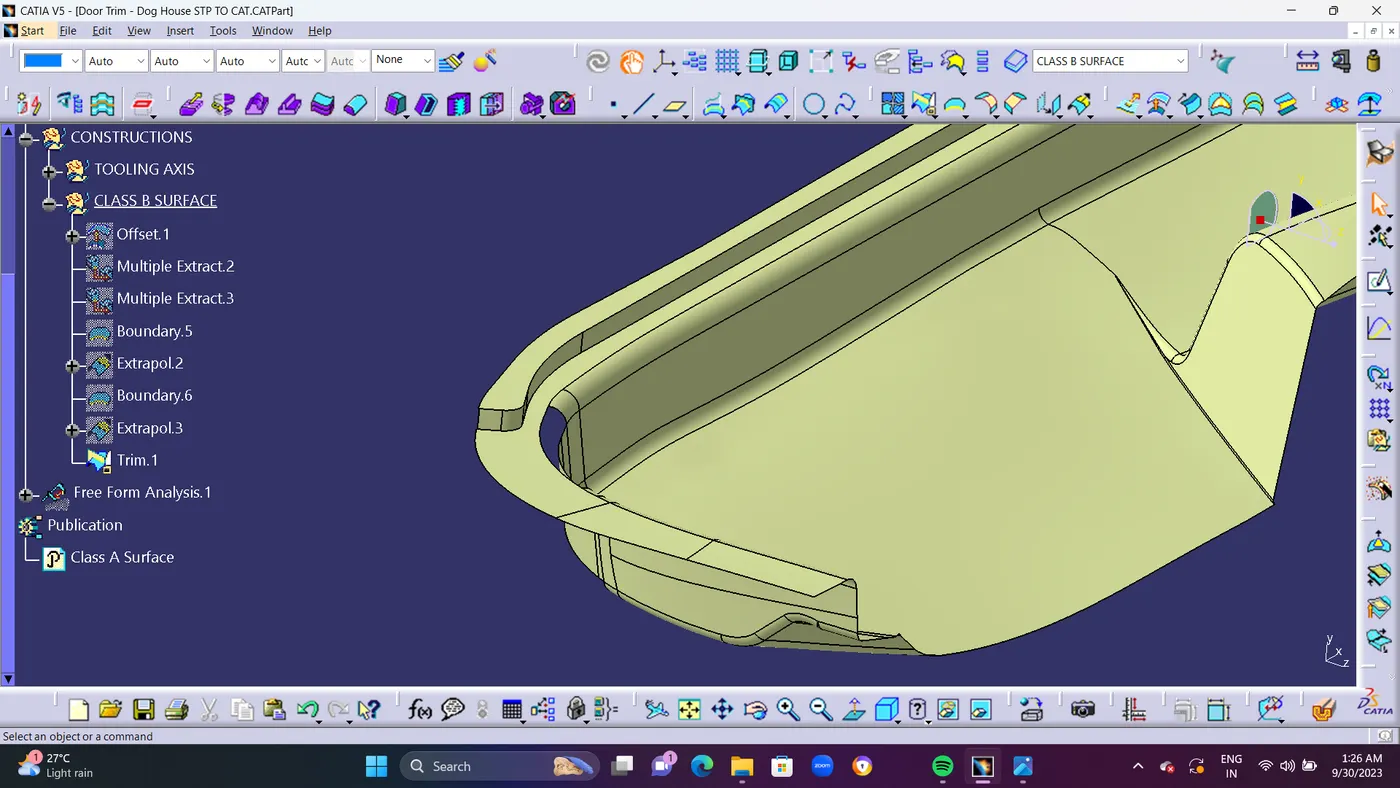
  • There are few patches that we are going to work on it.
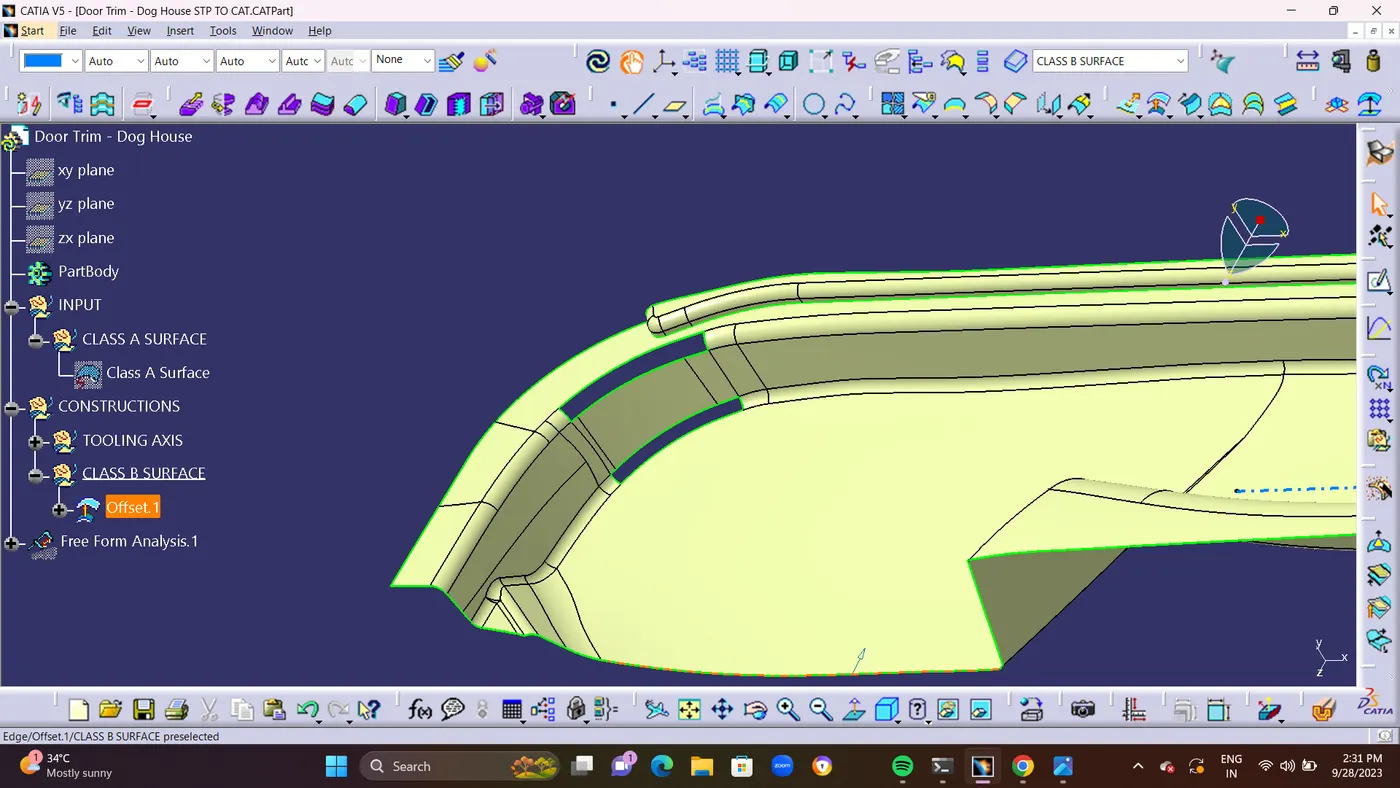


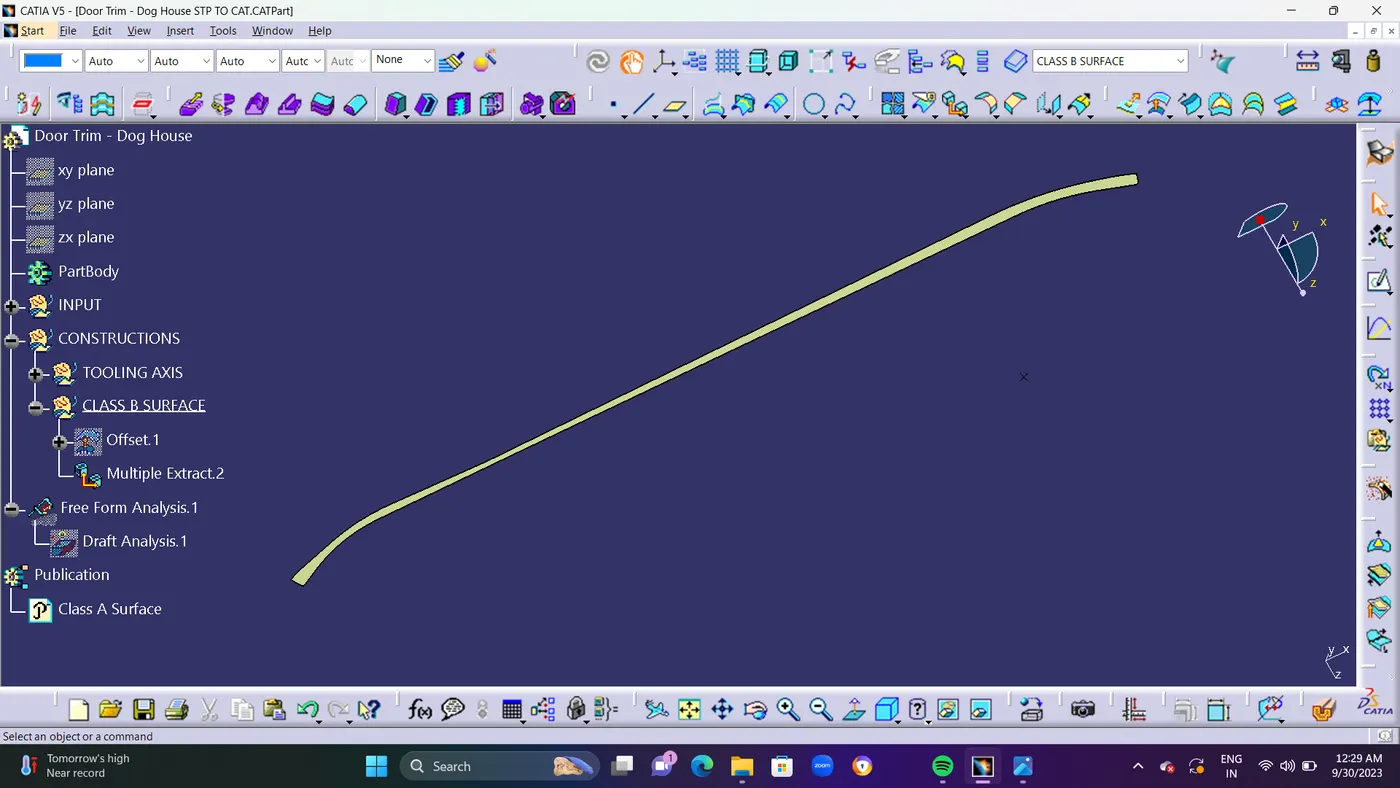
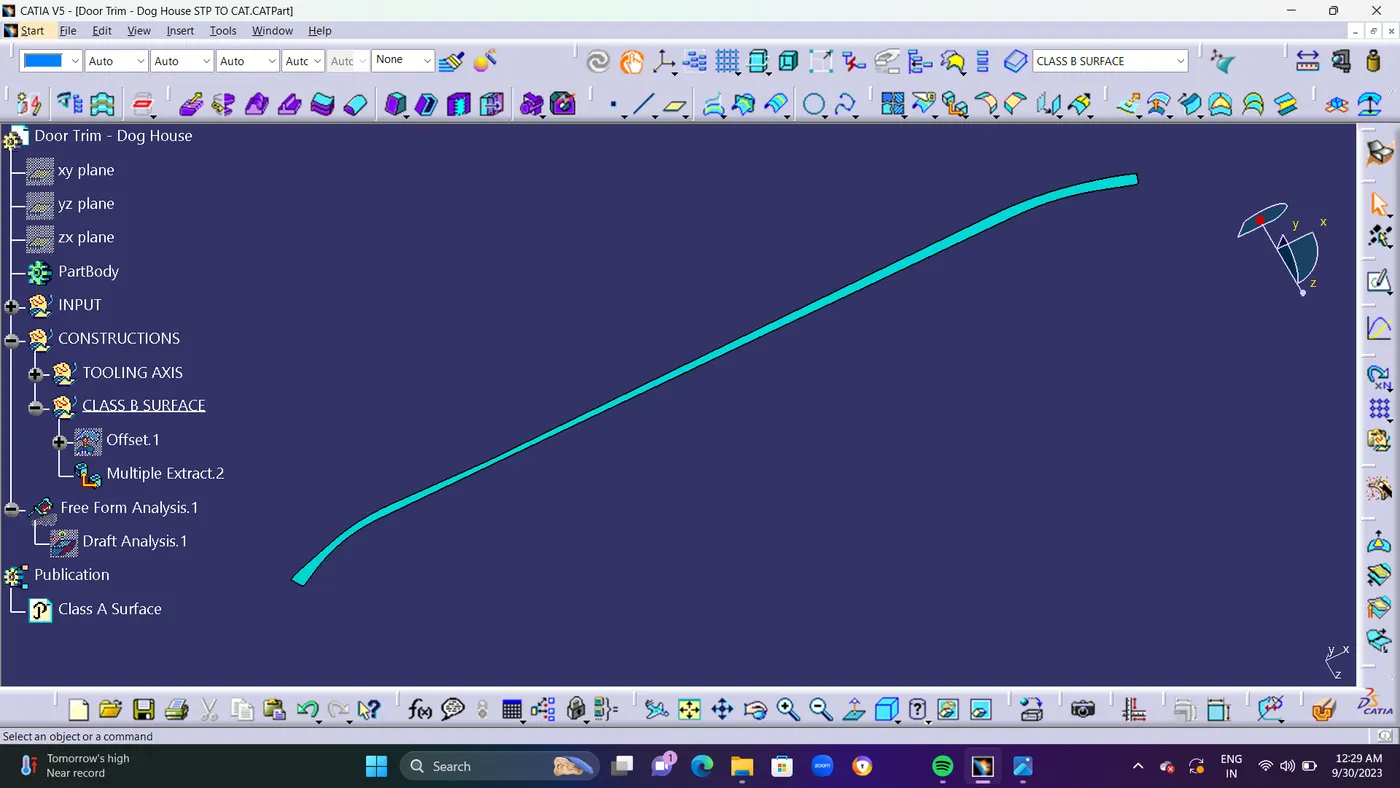
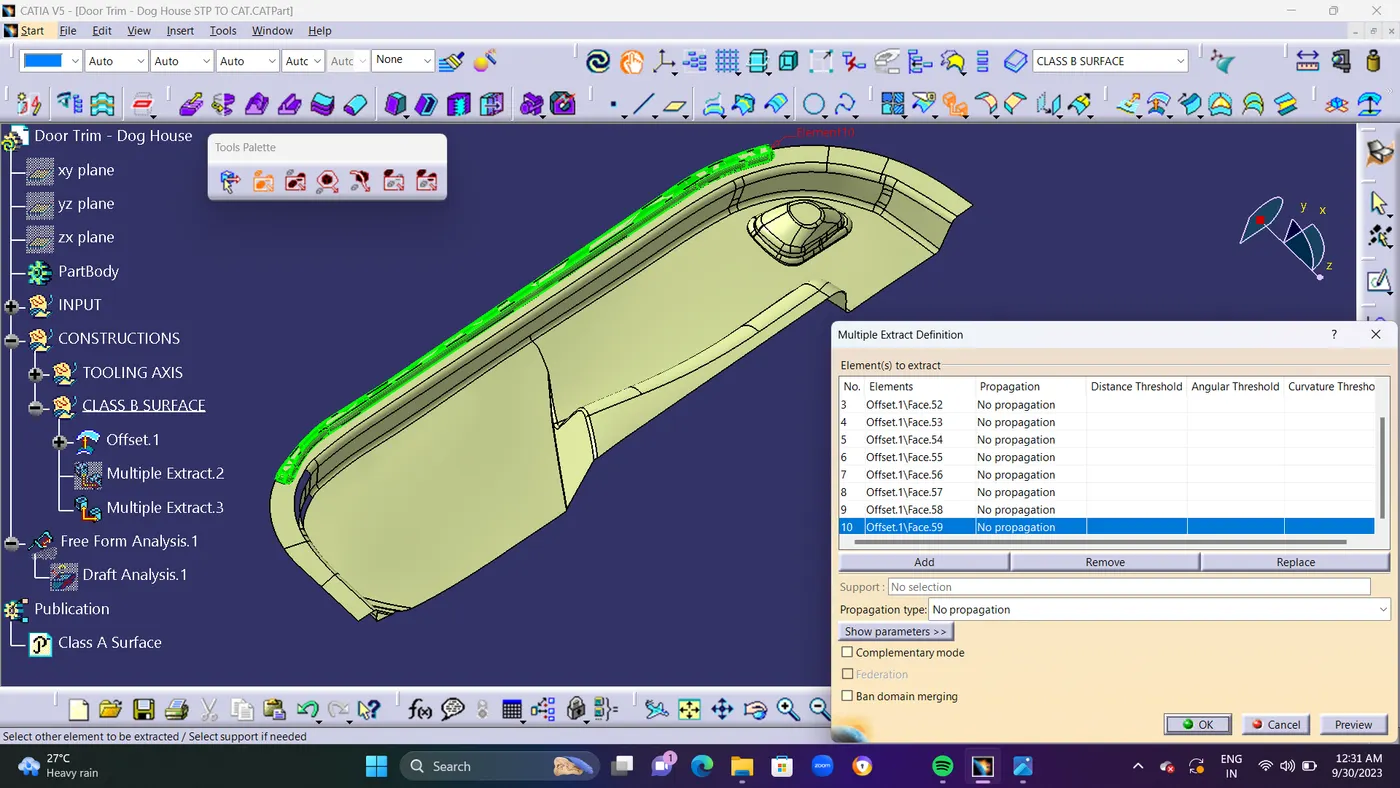
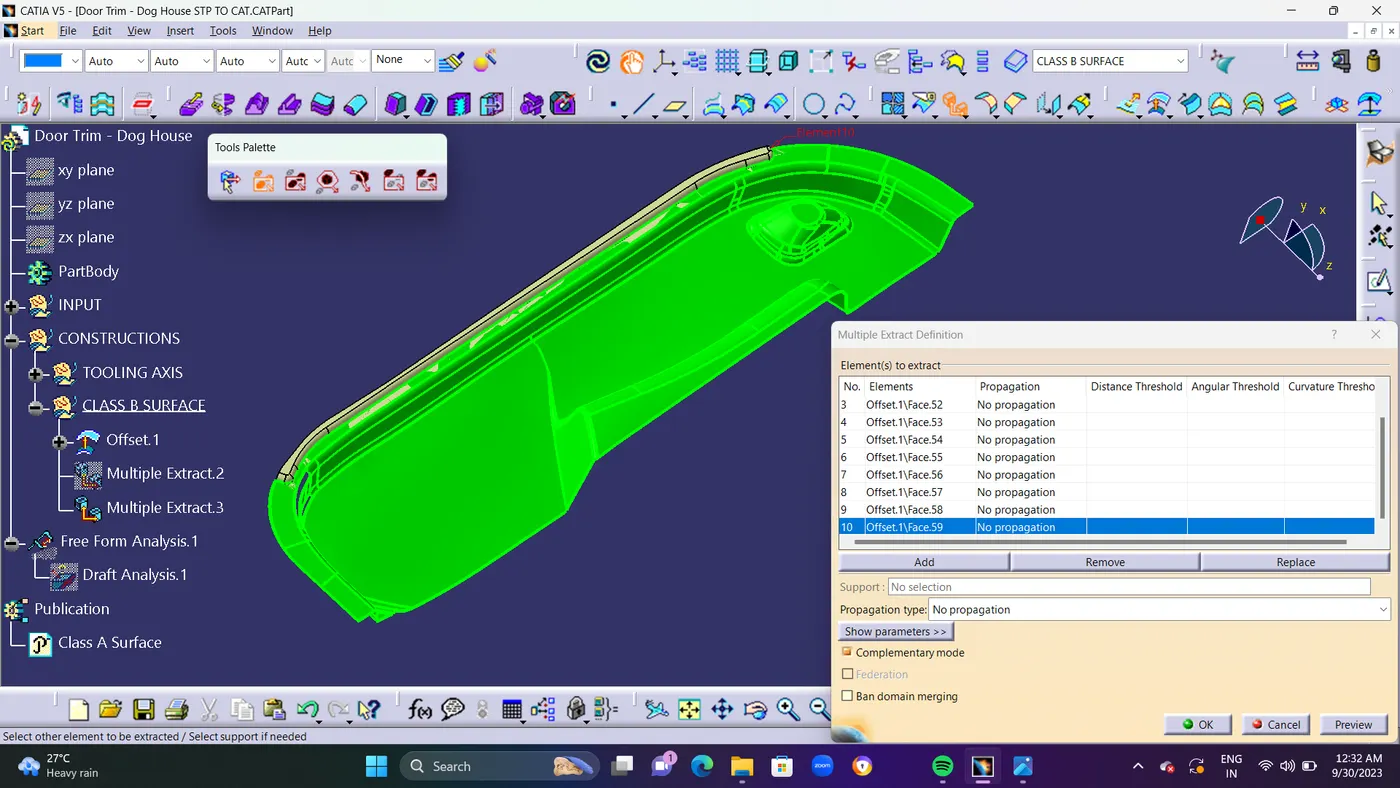
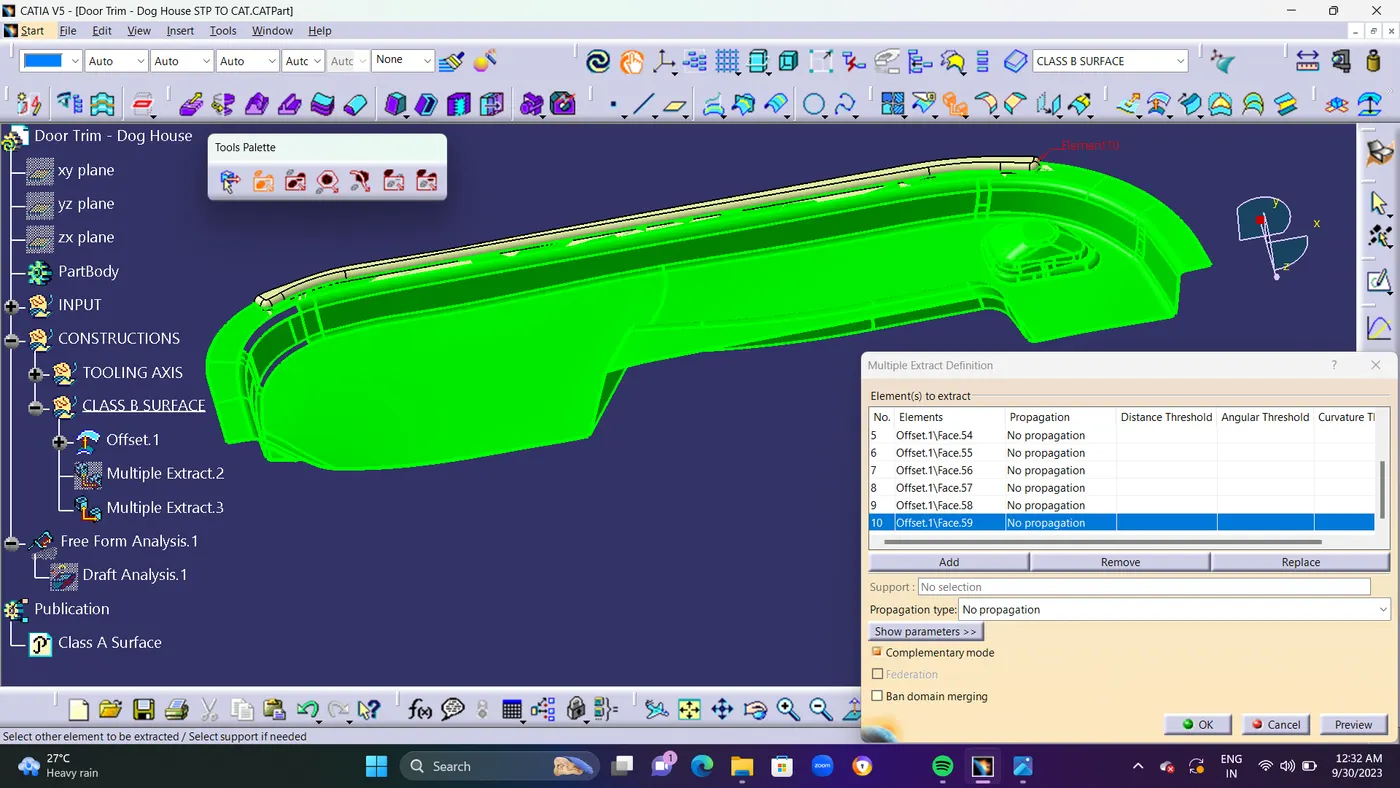
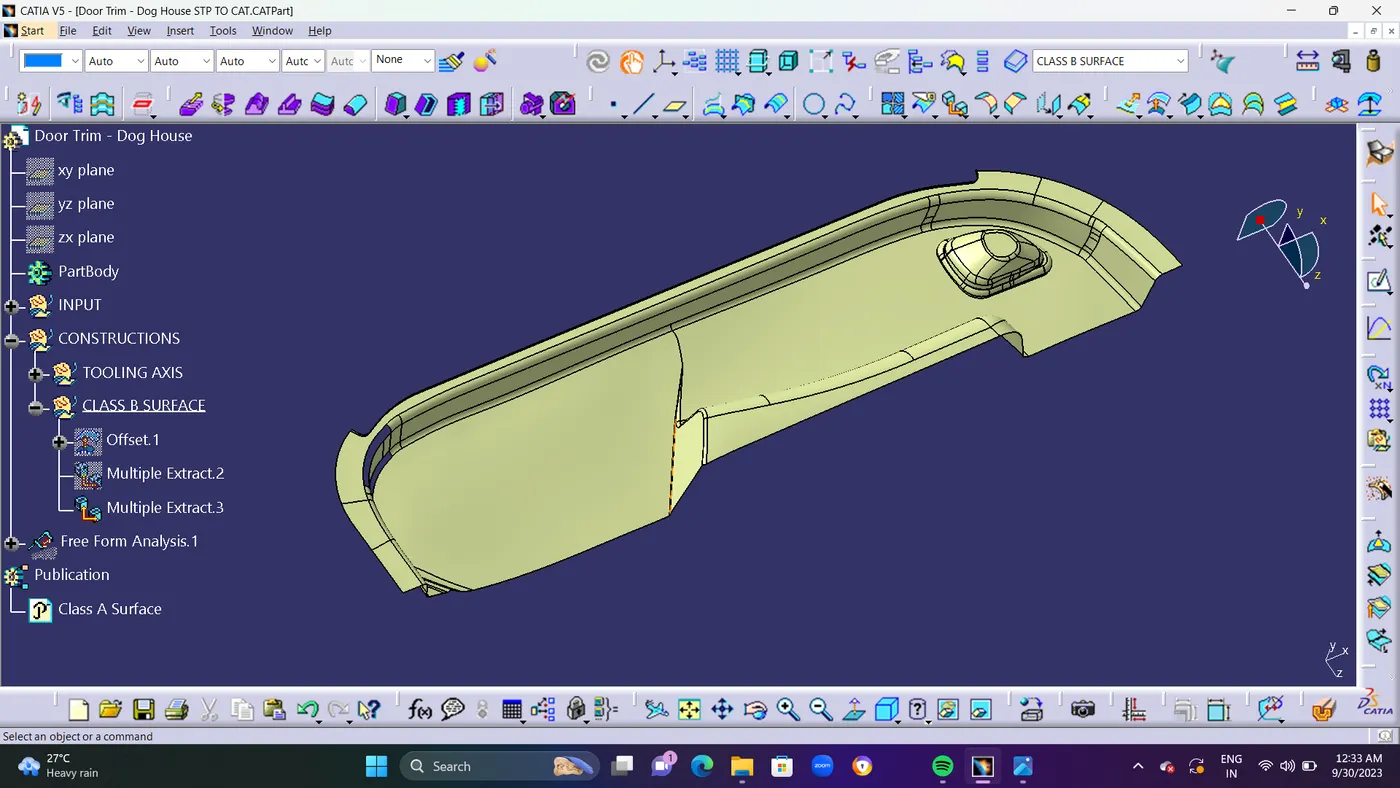
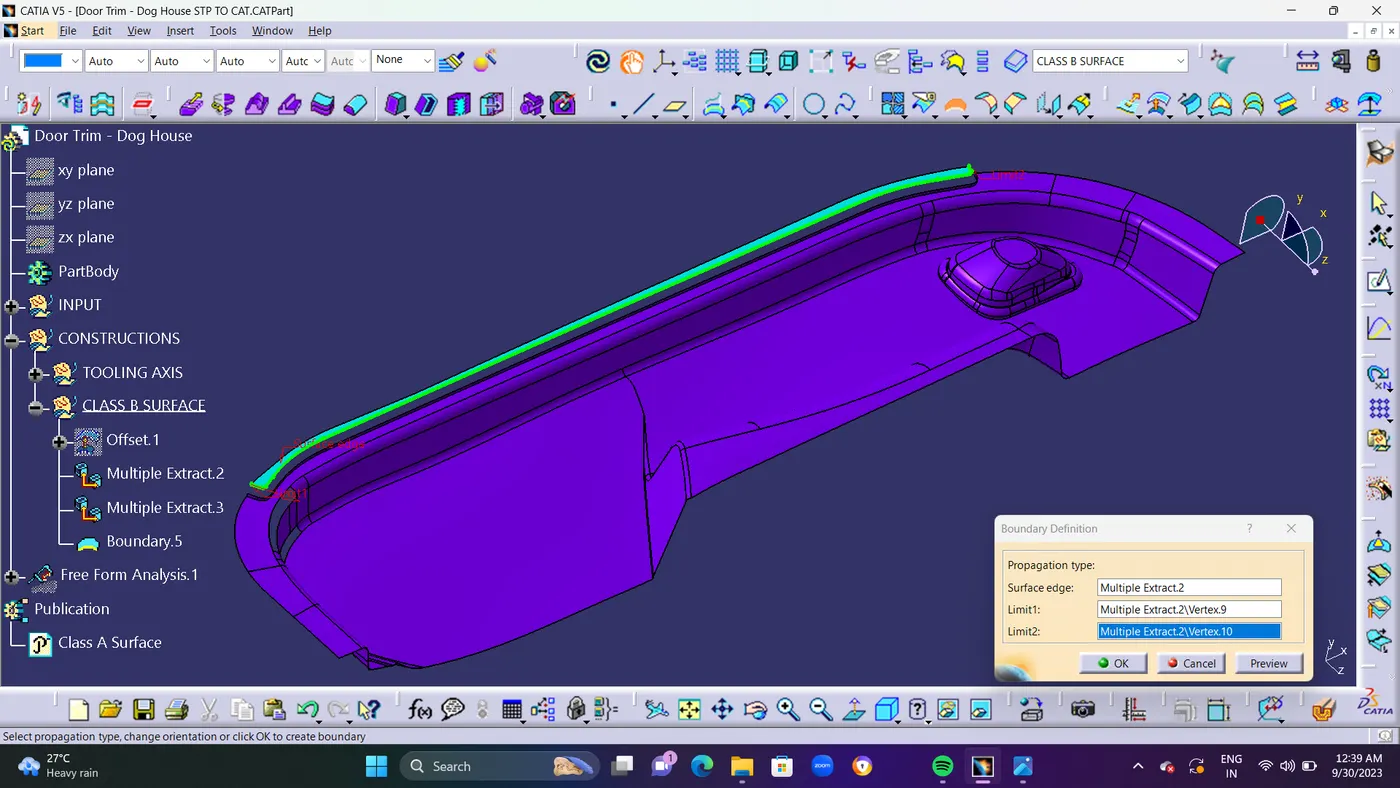
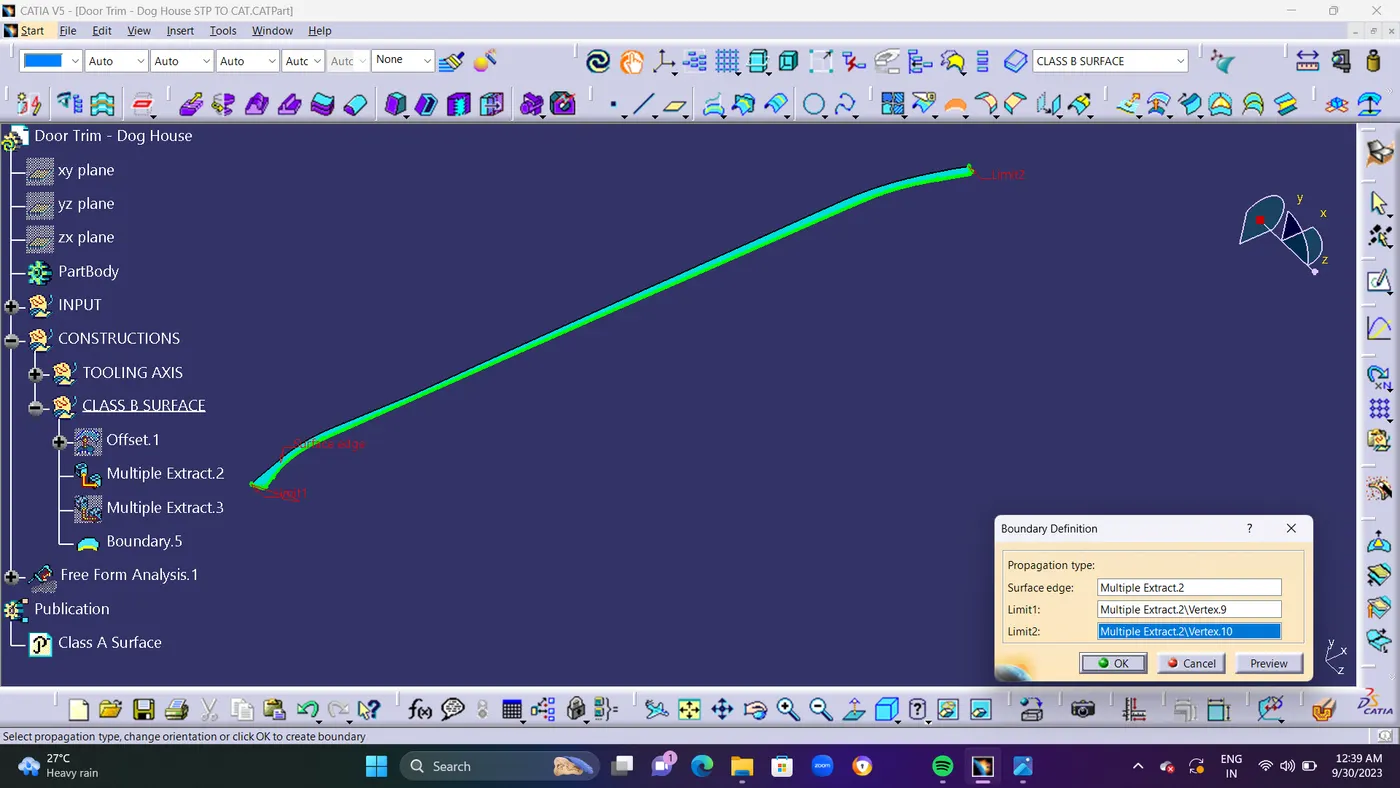
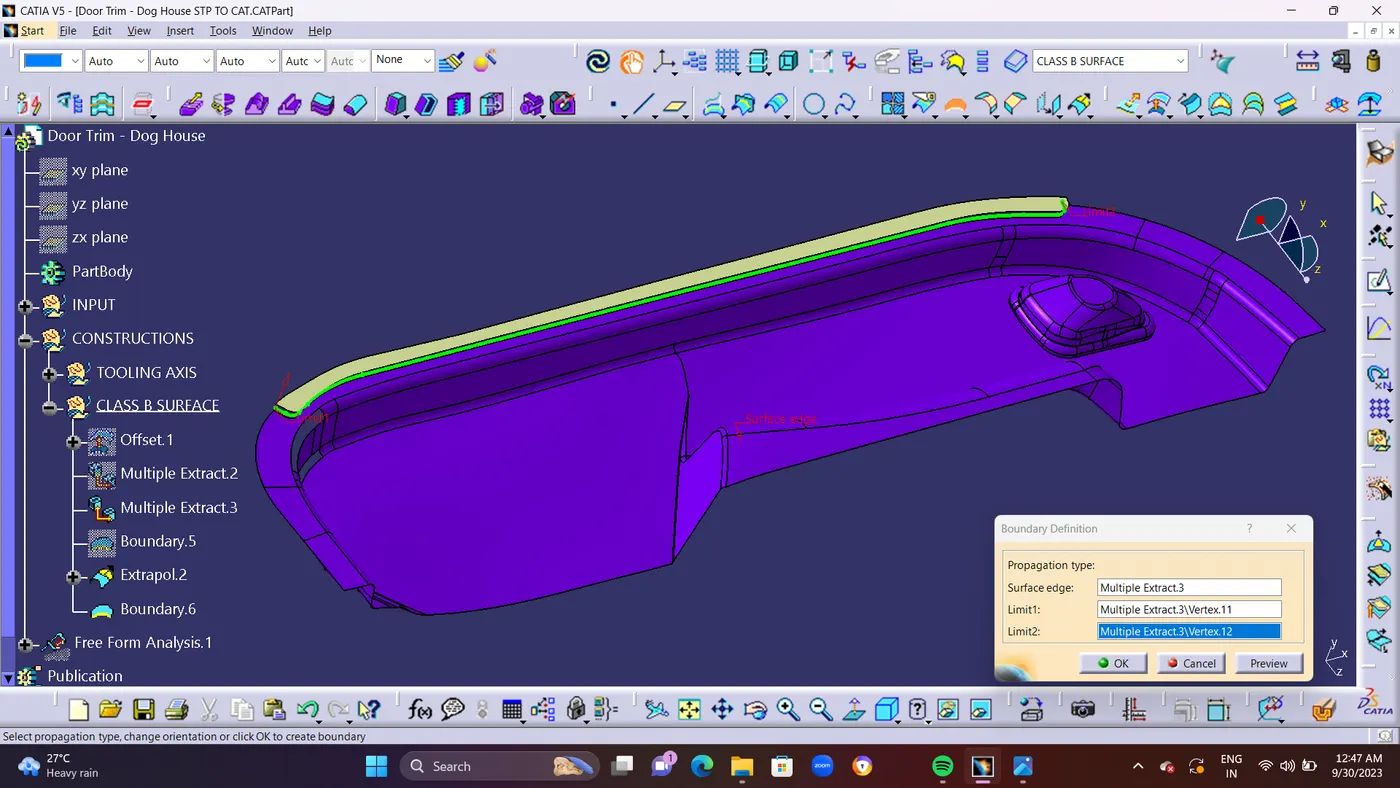
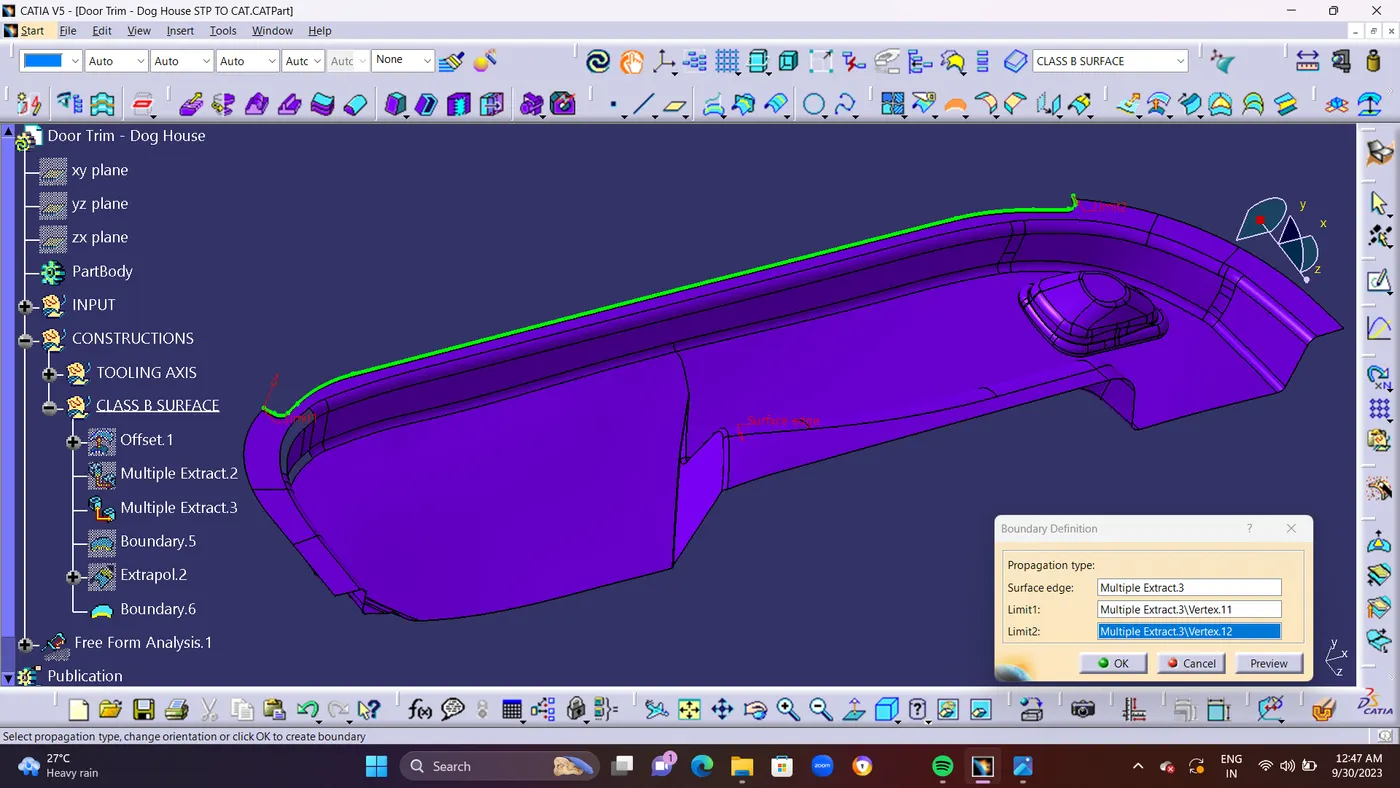
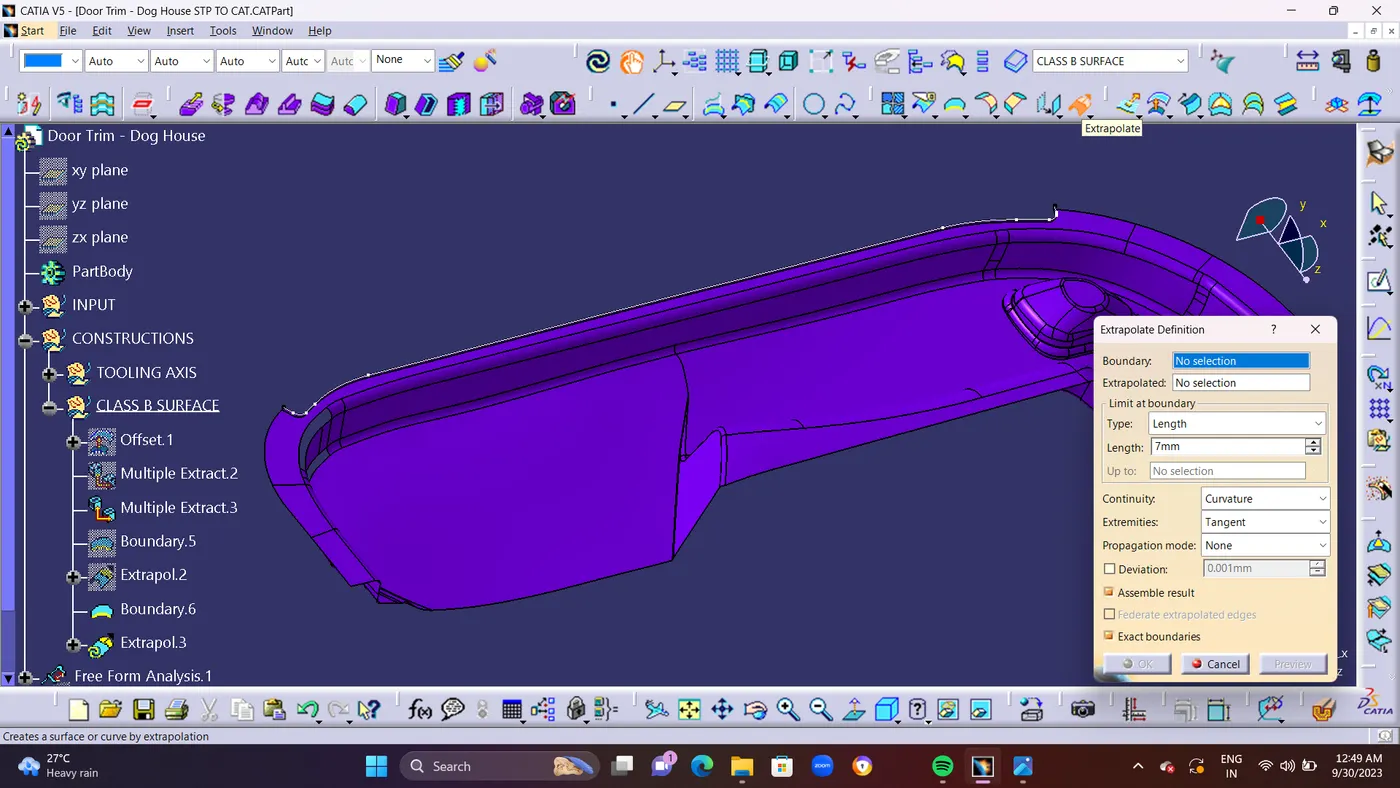
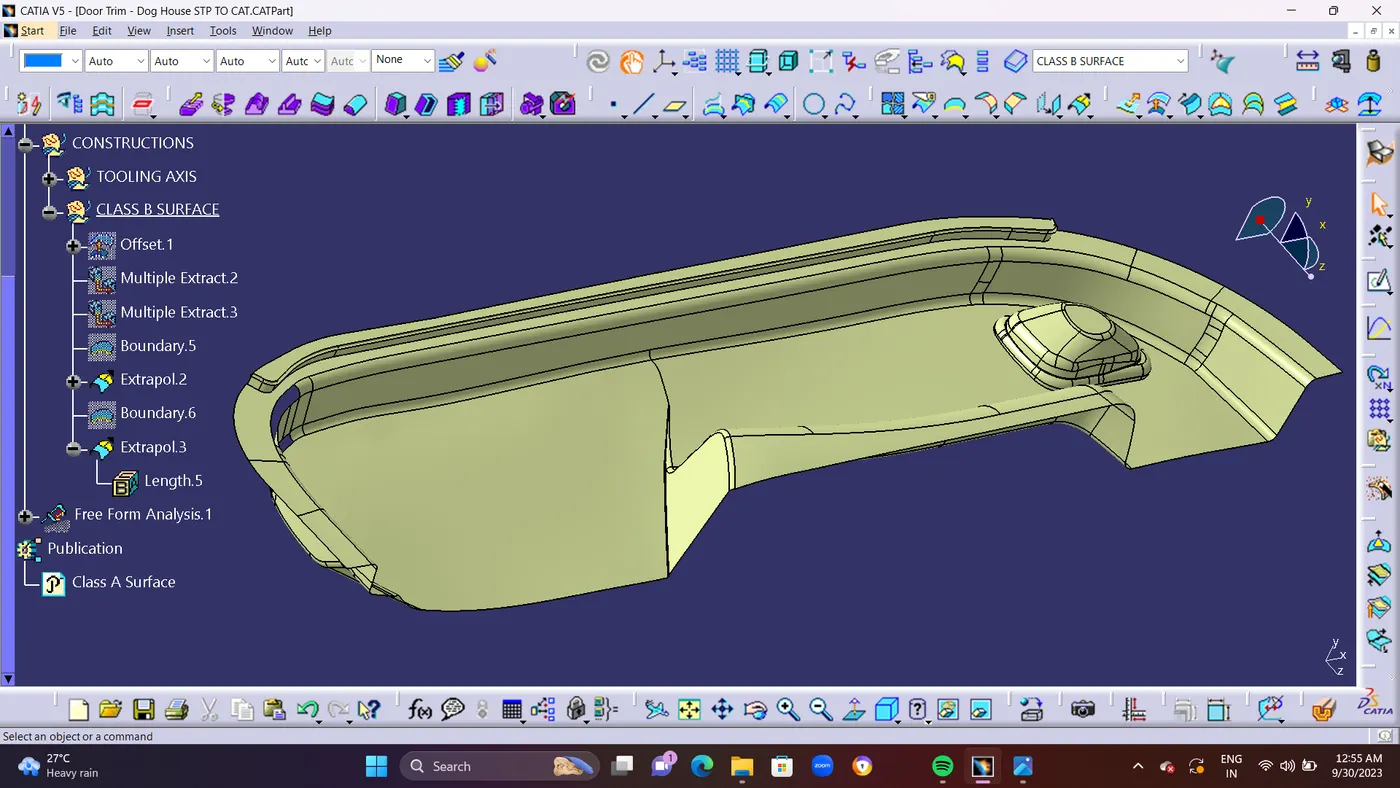
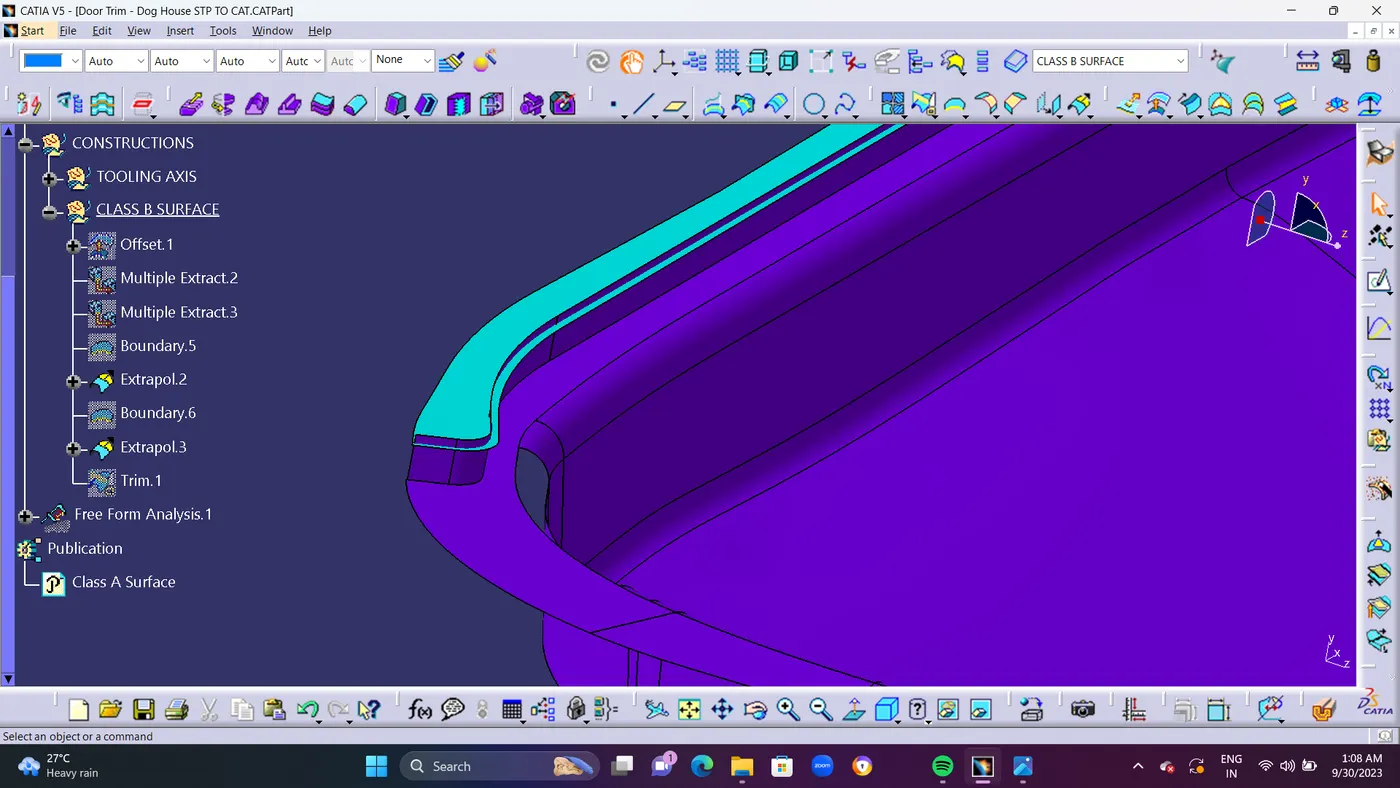
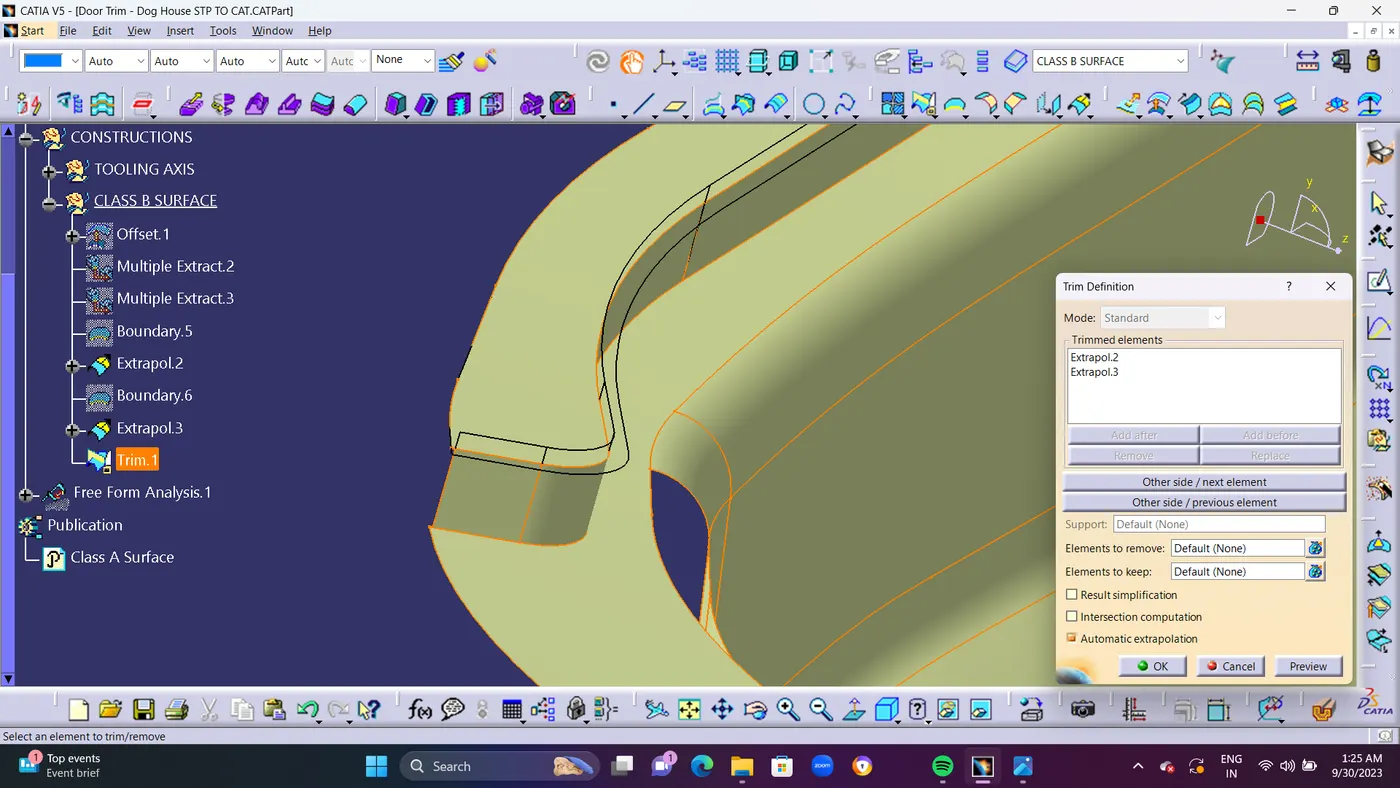
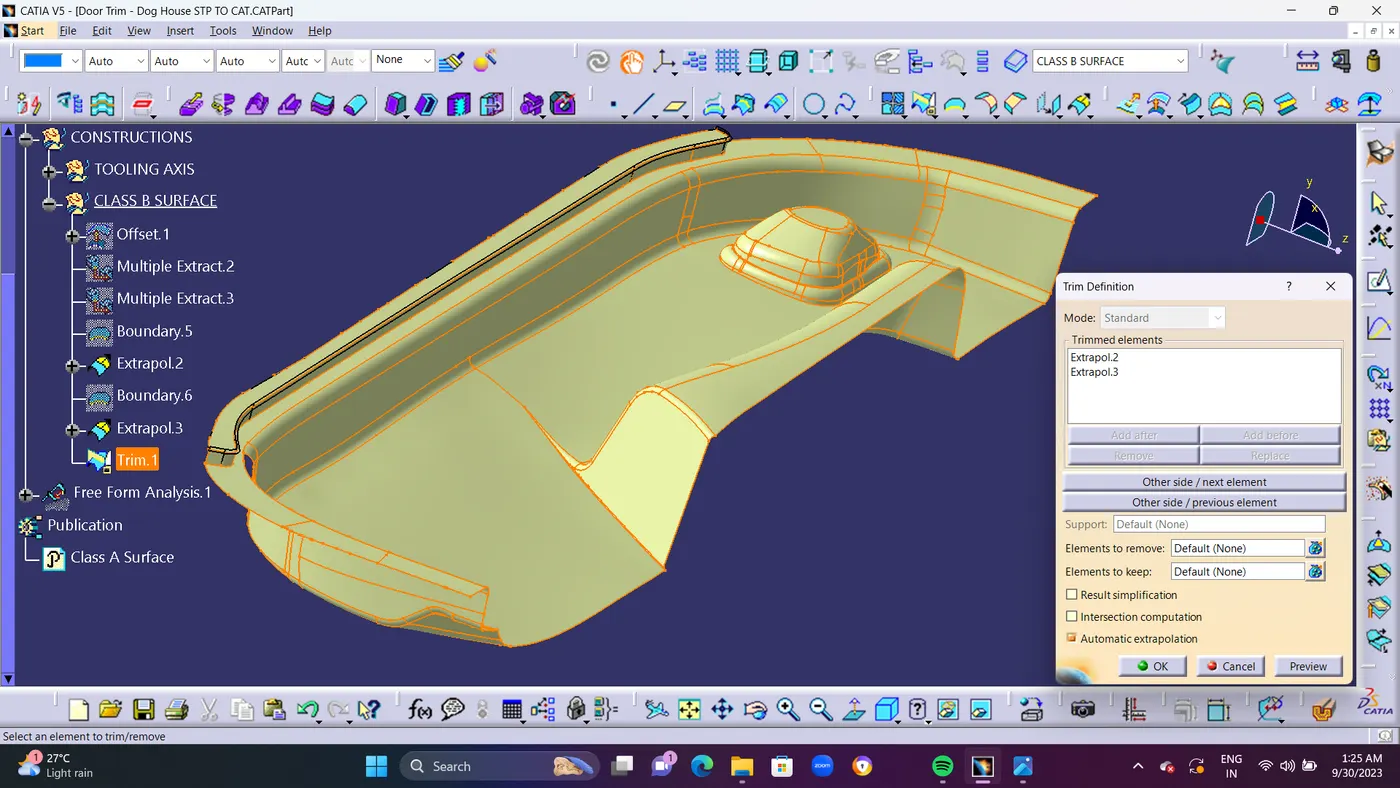
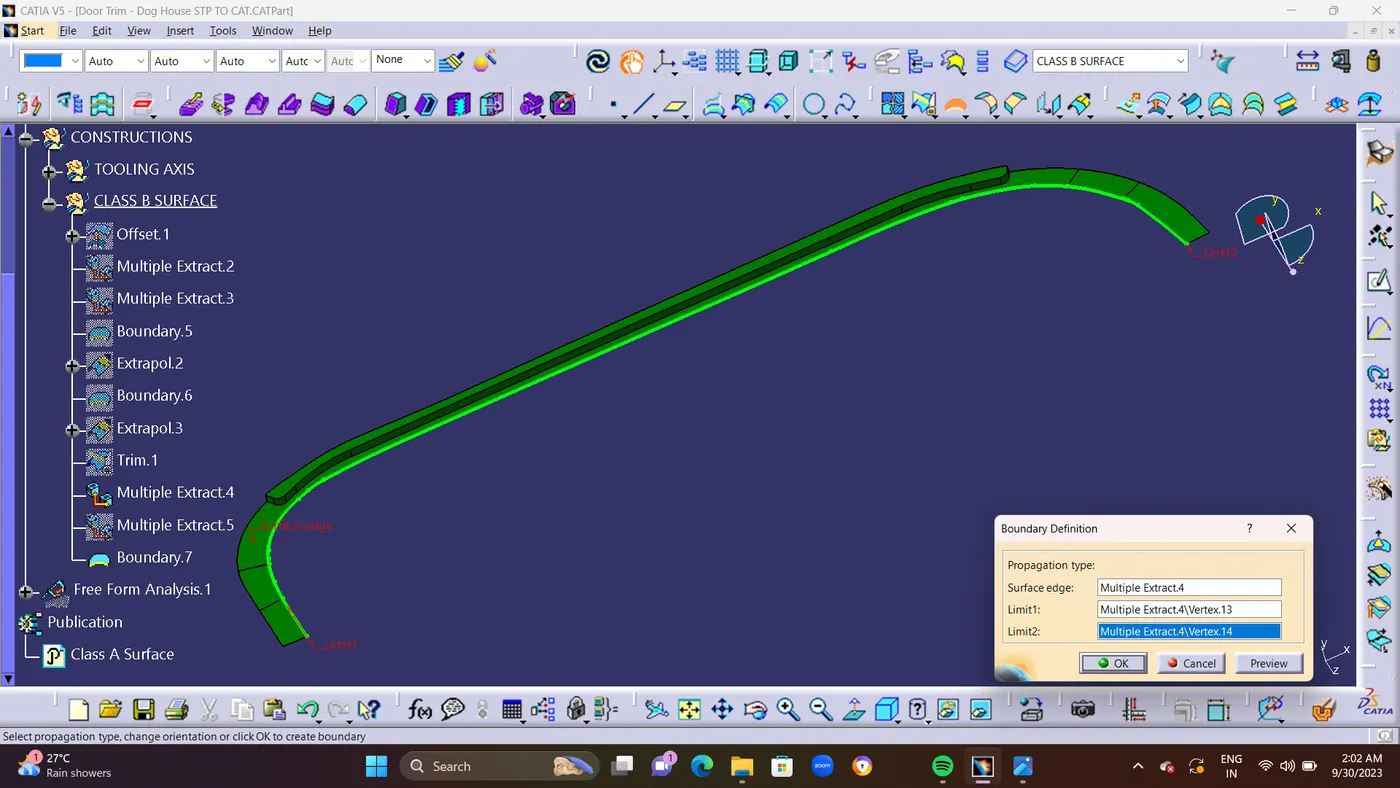
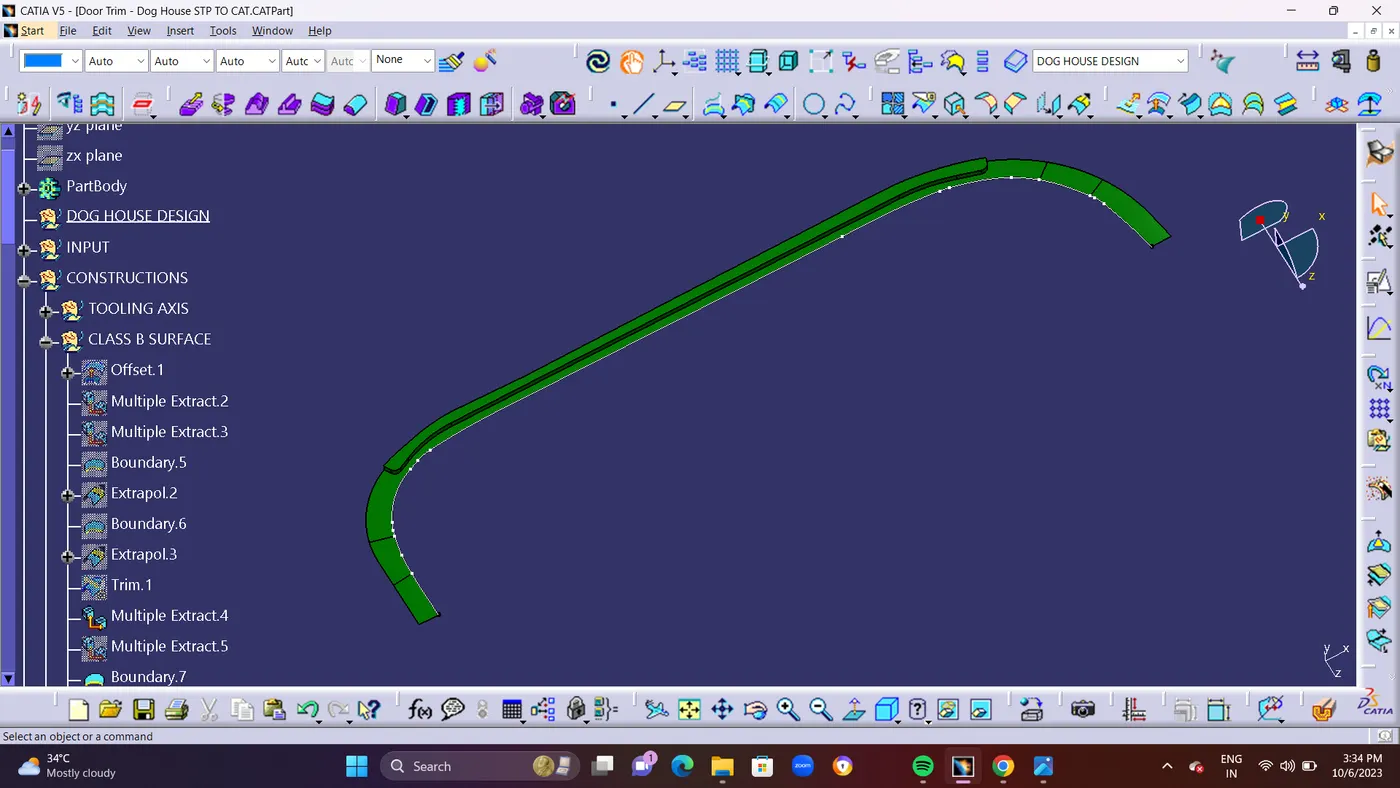
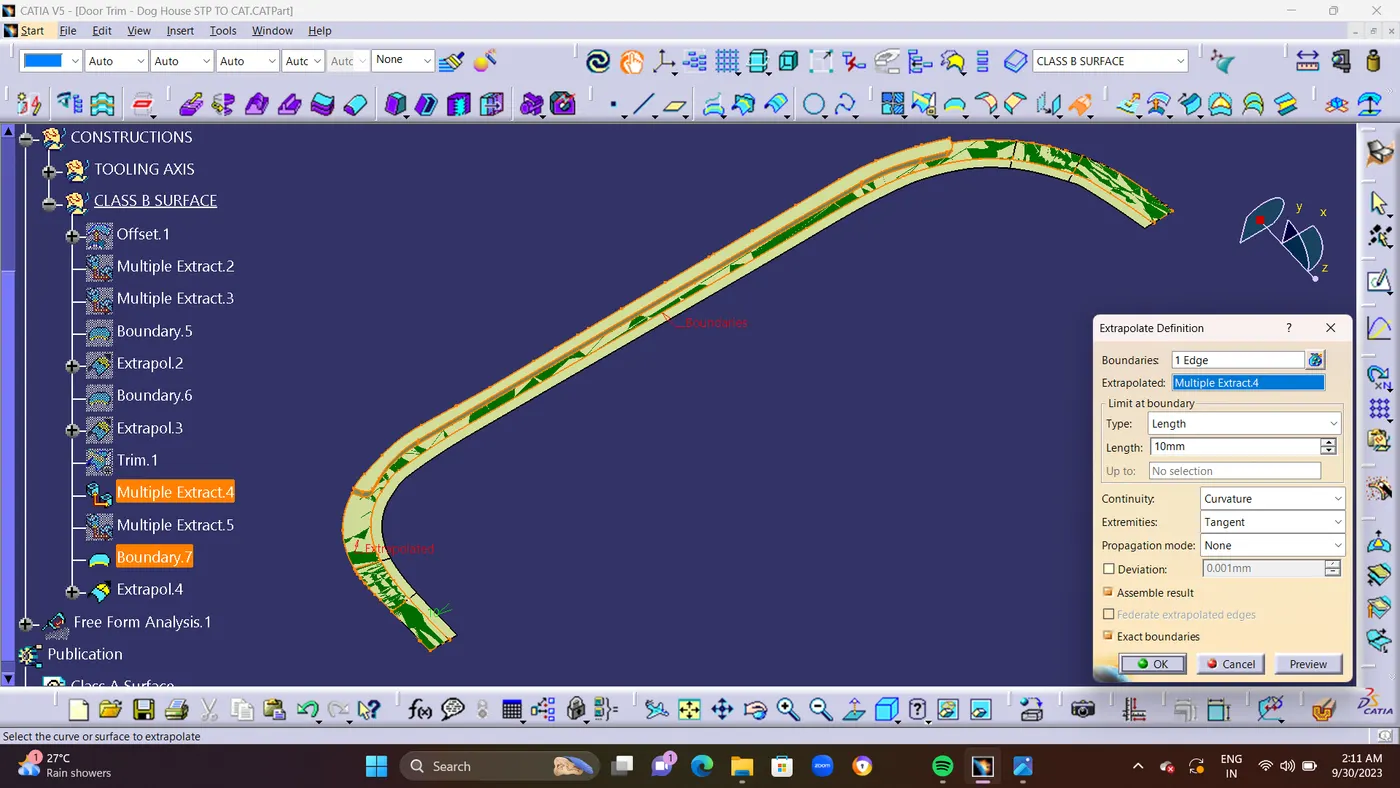
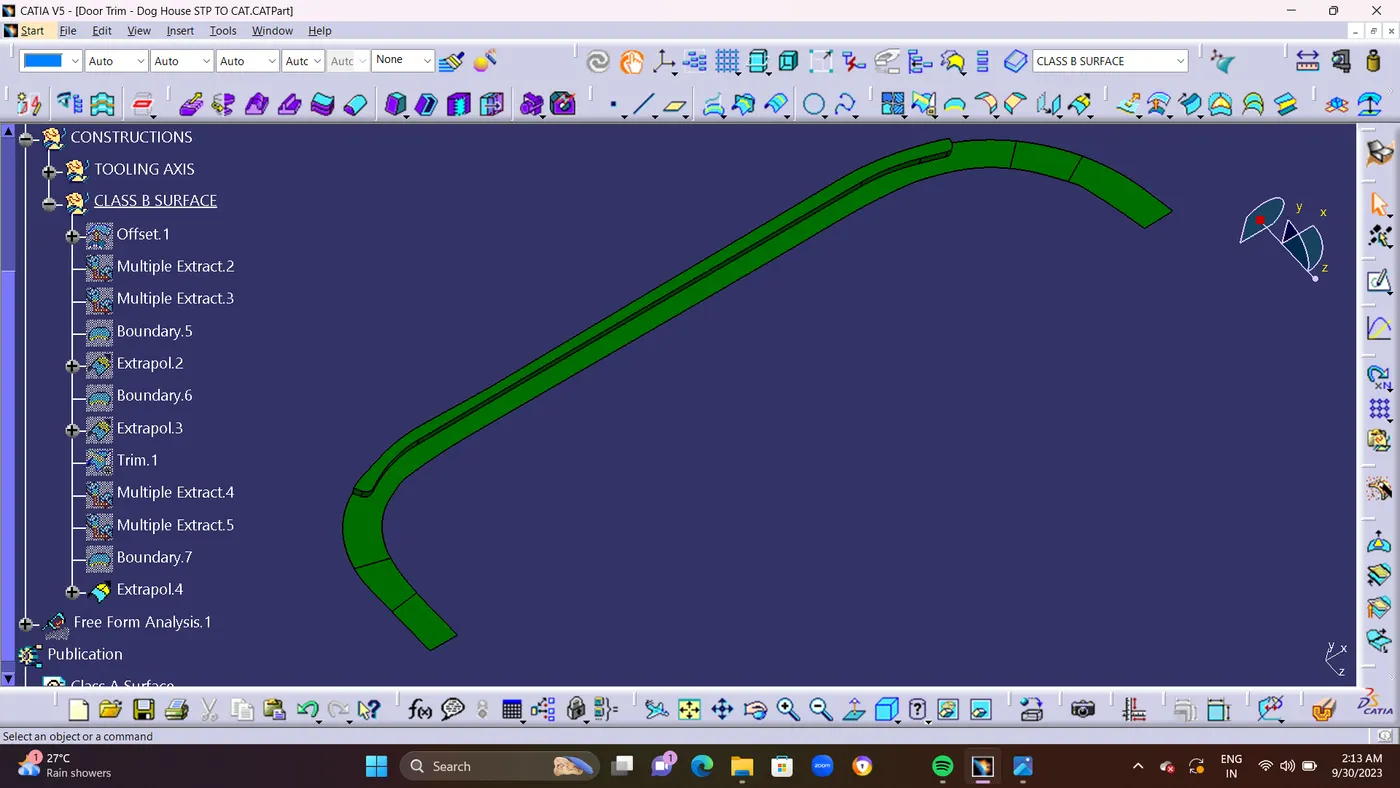
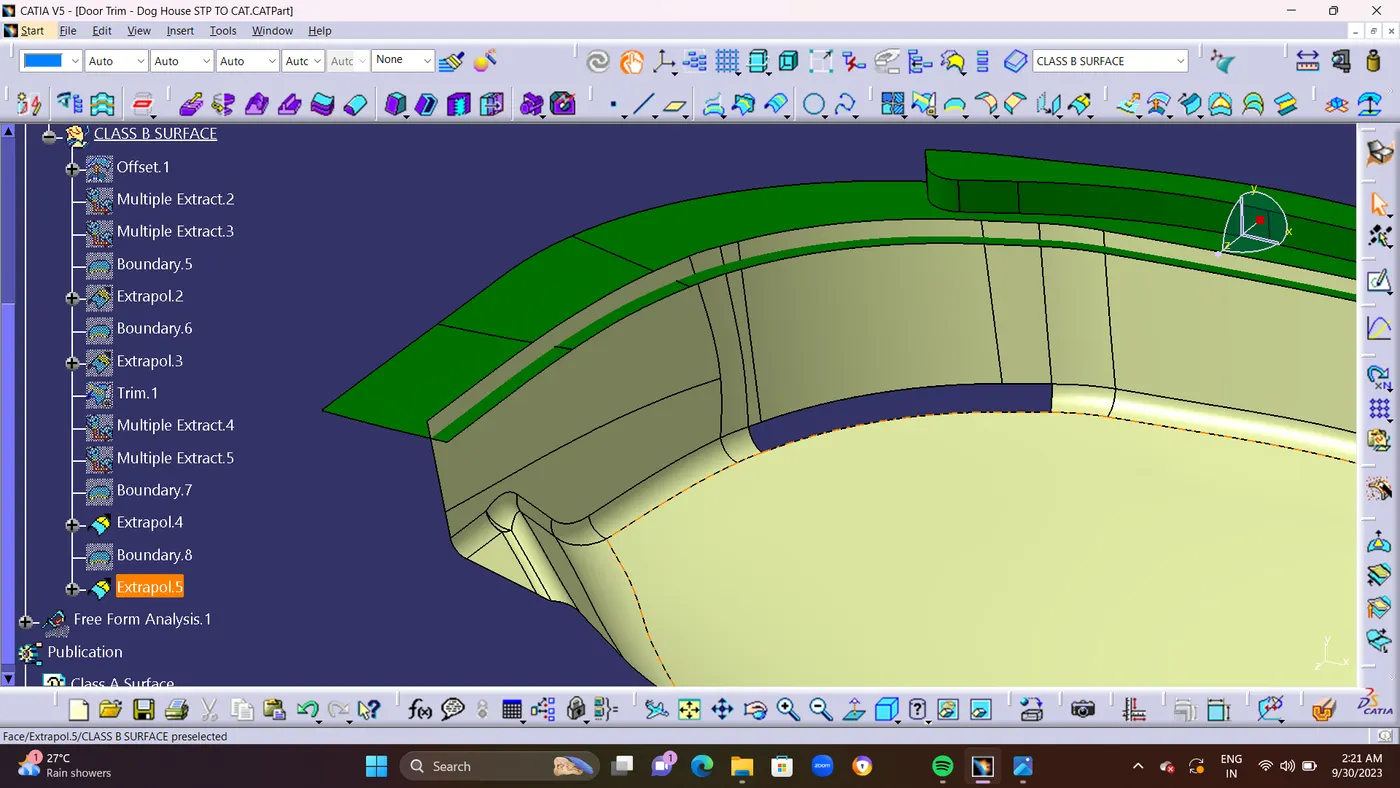
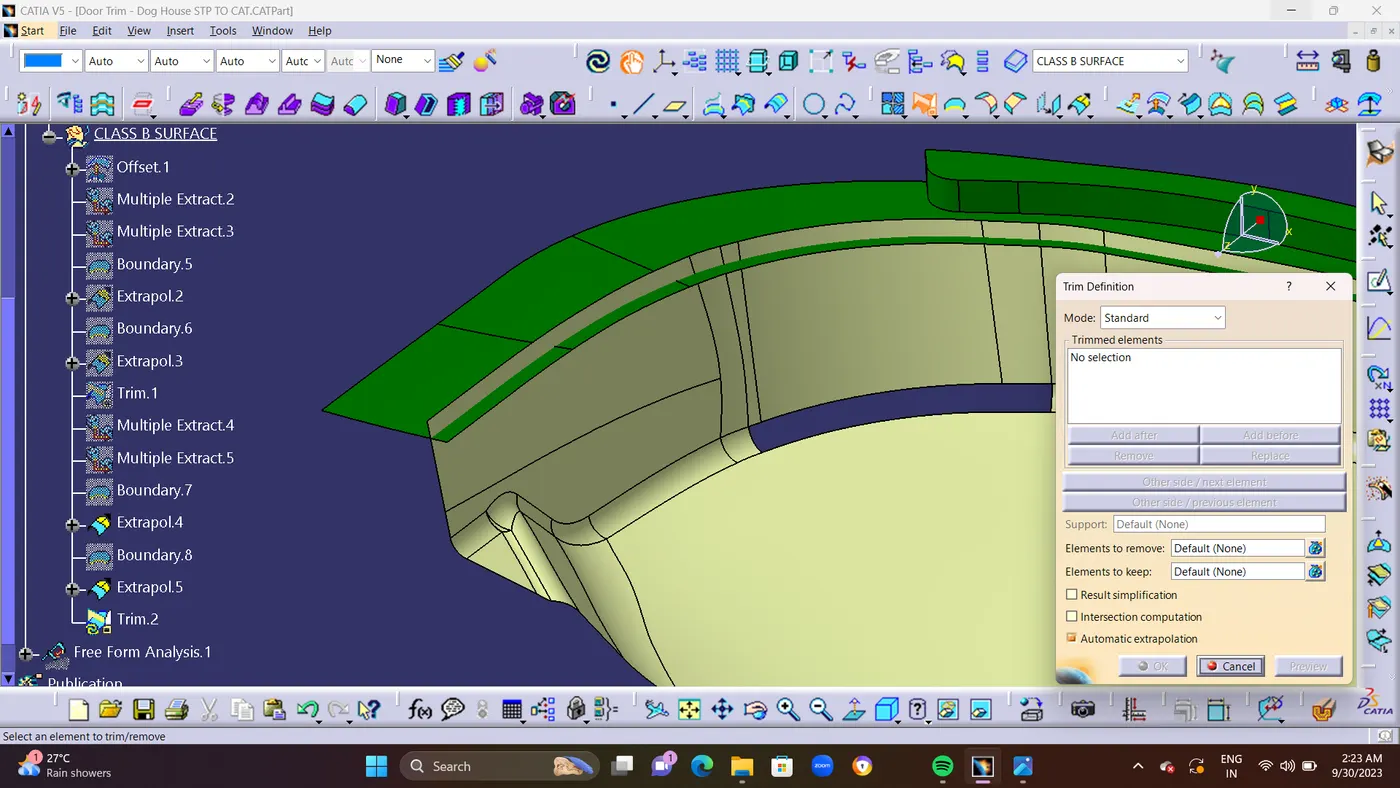
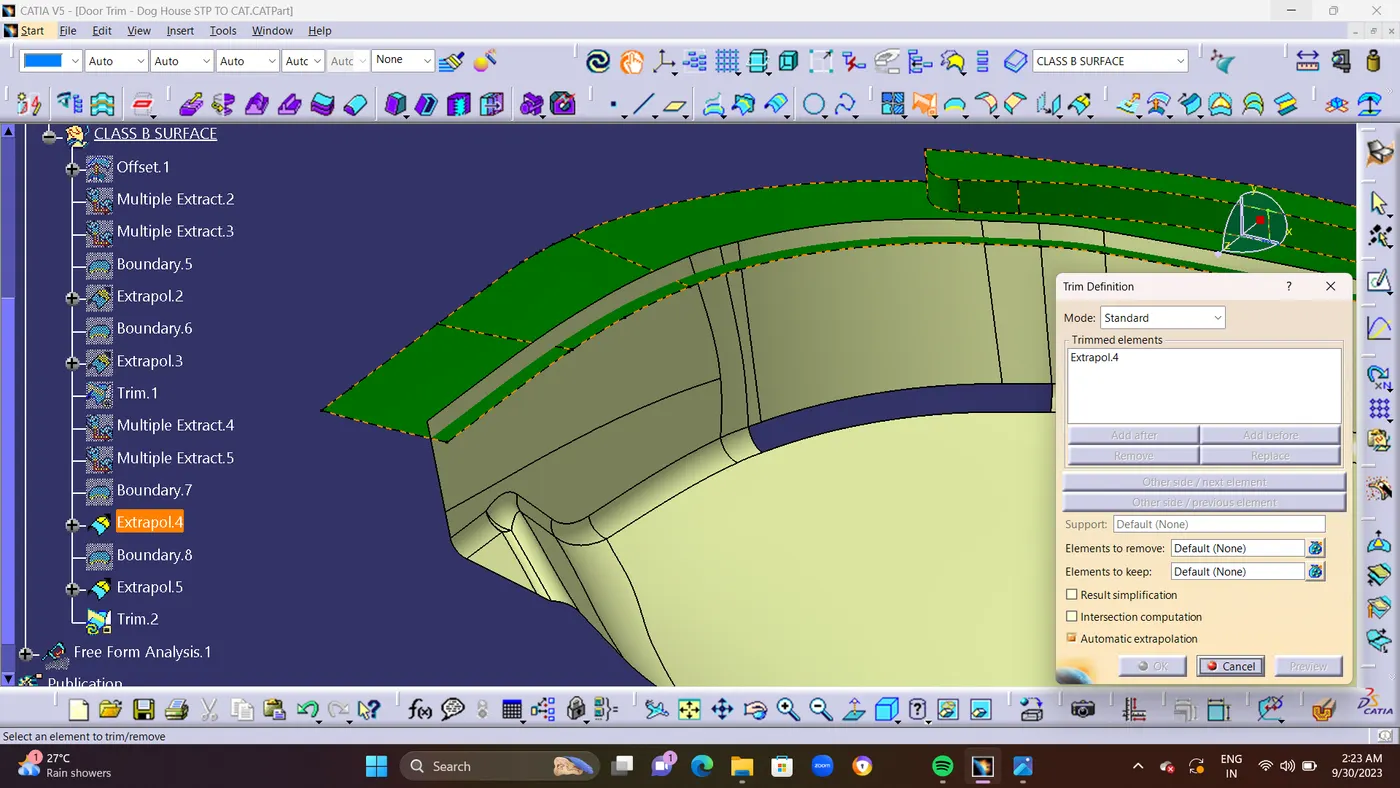
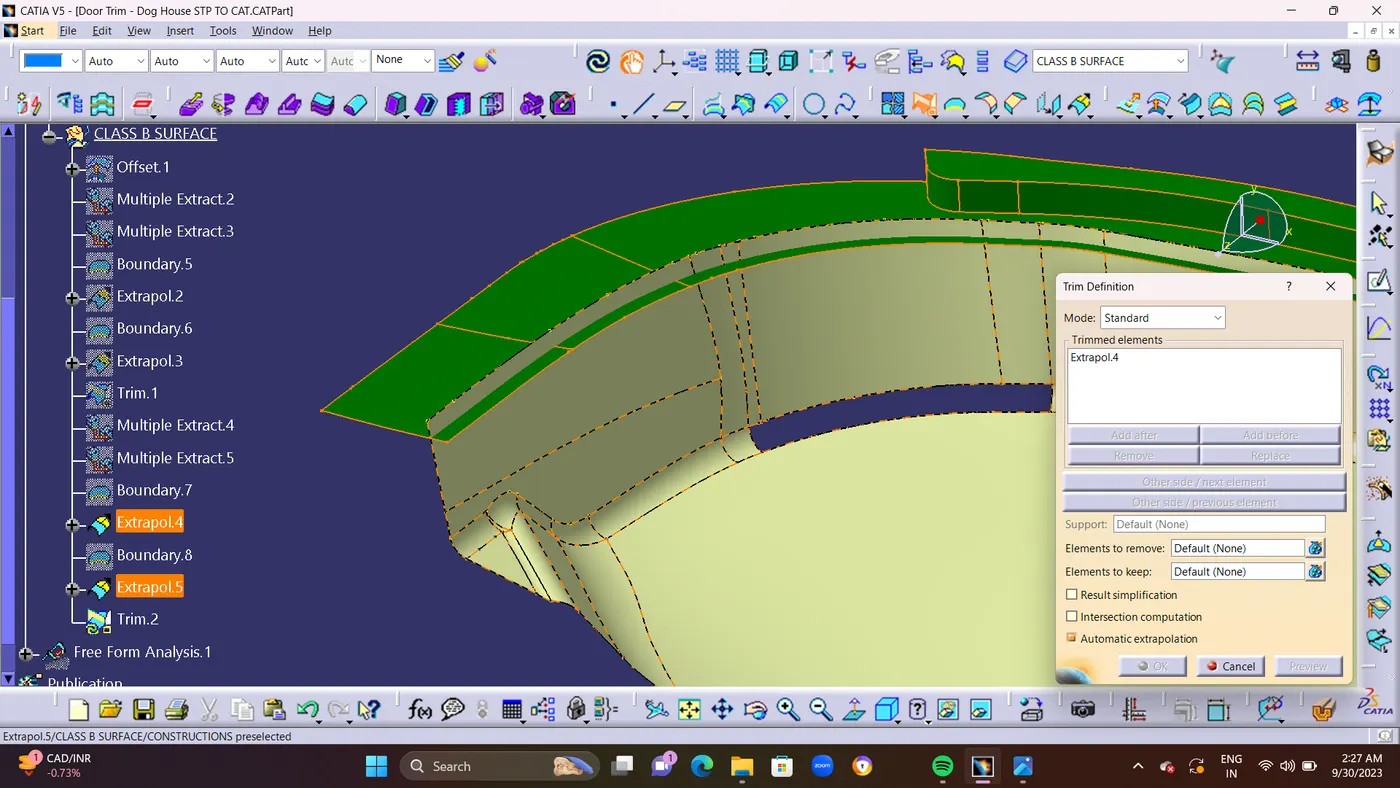
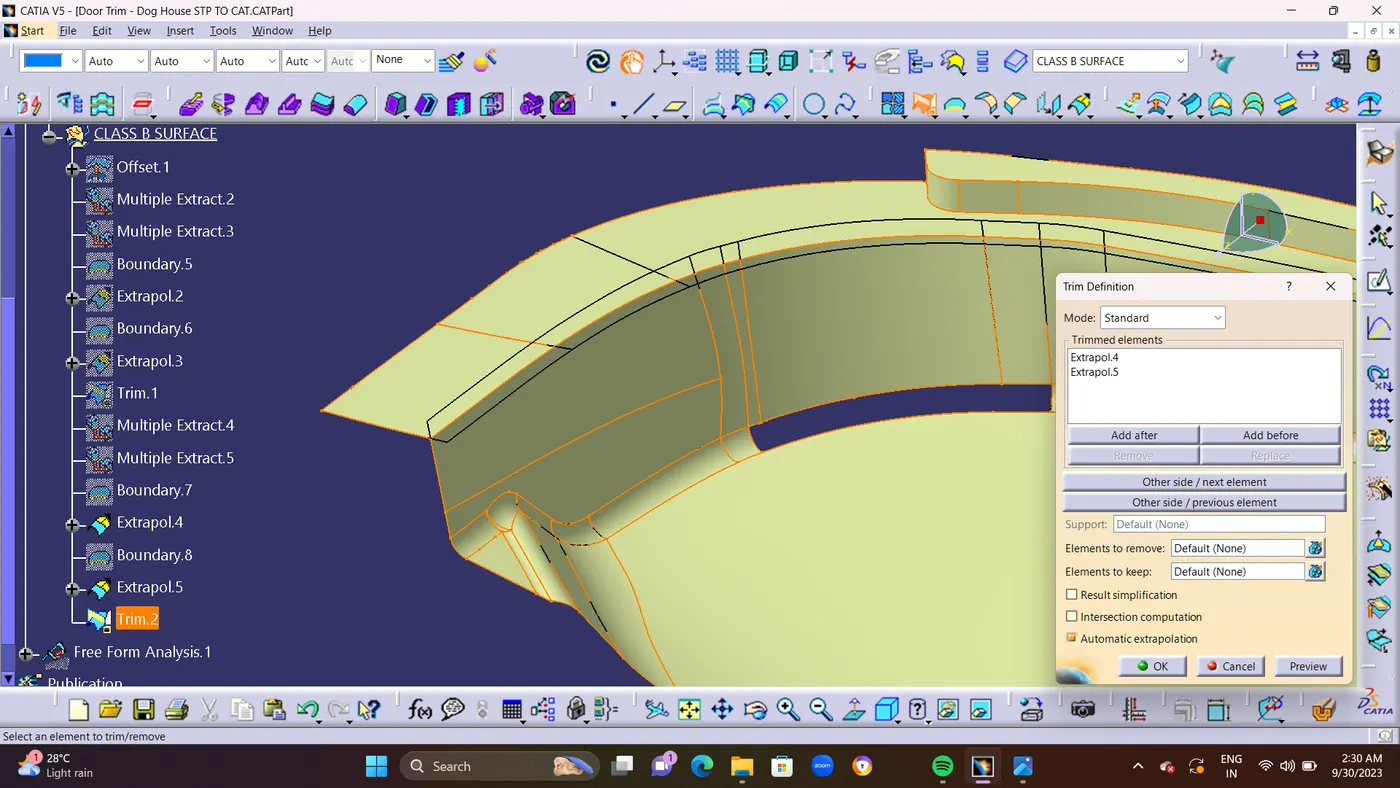
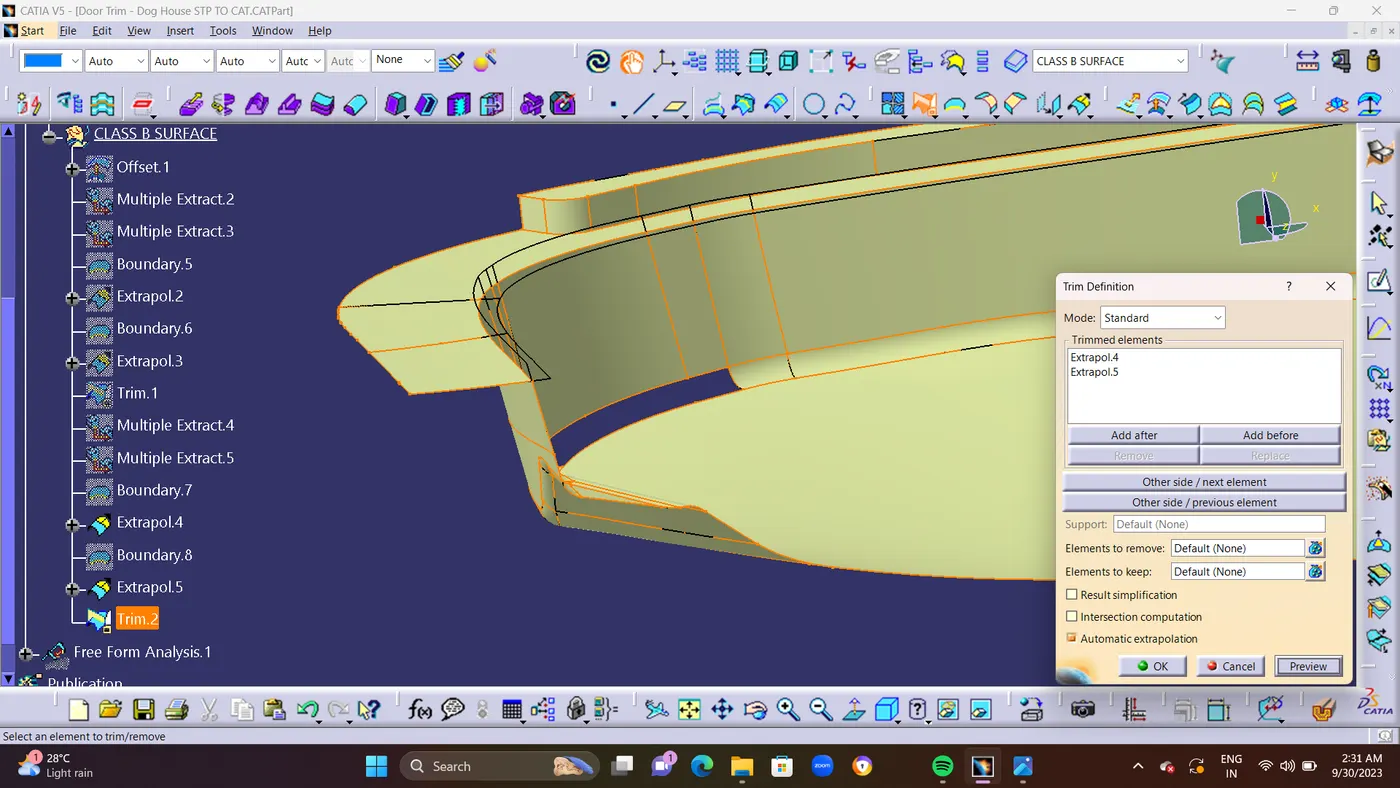
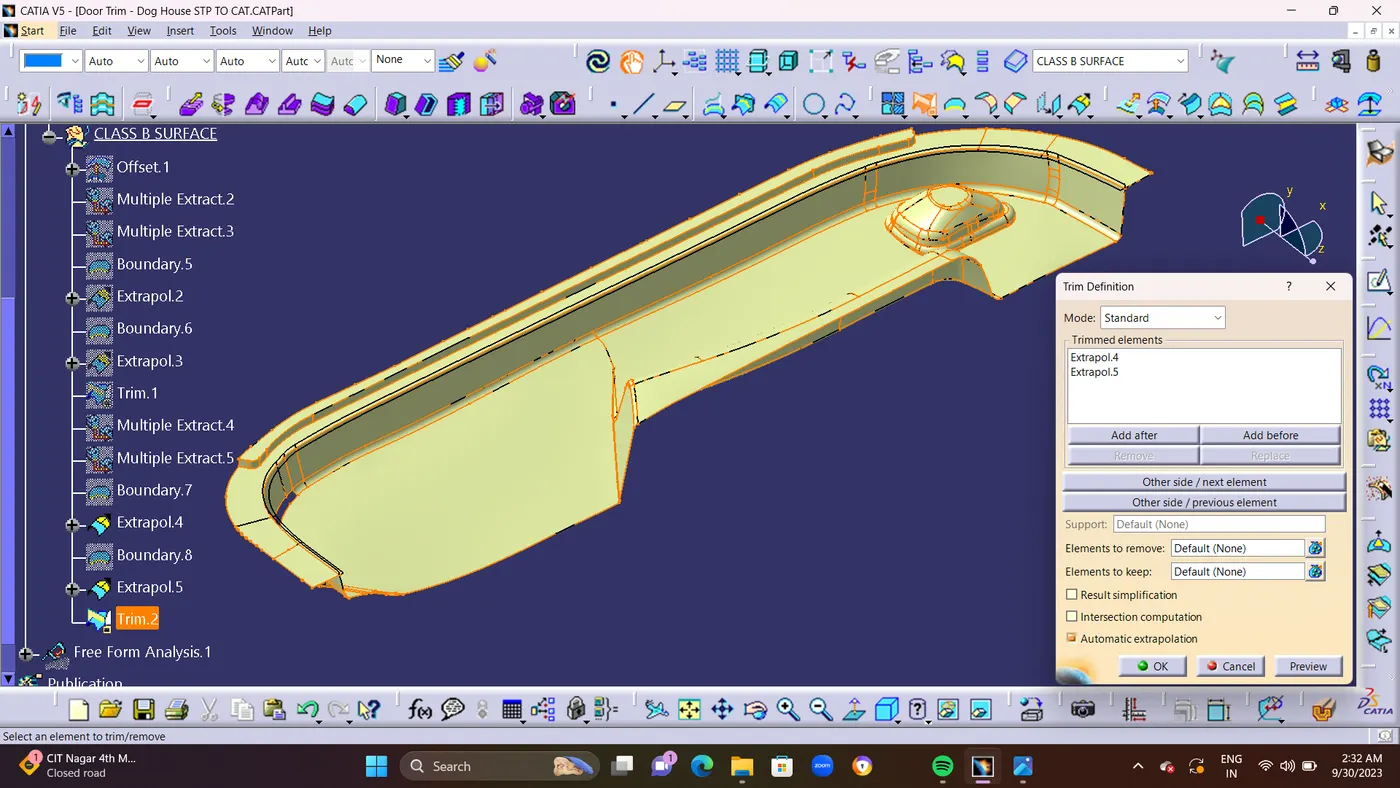
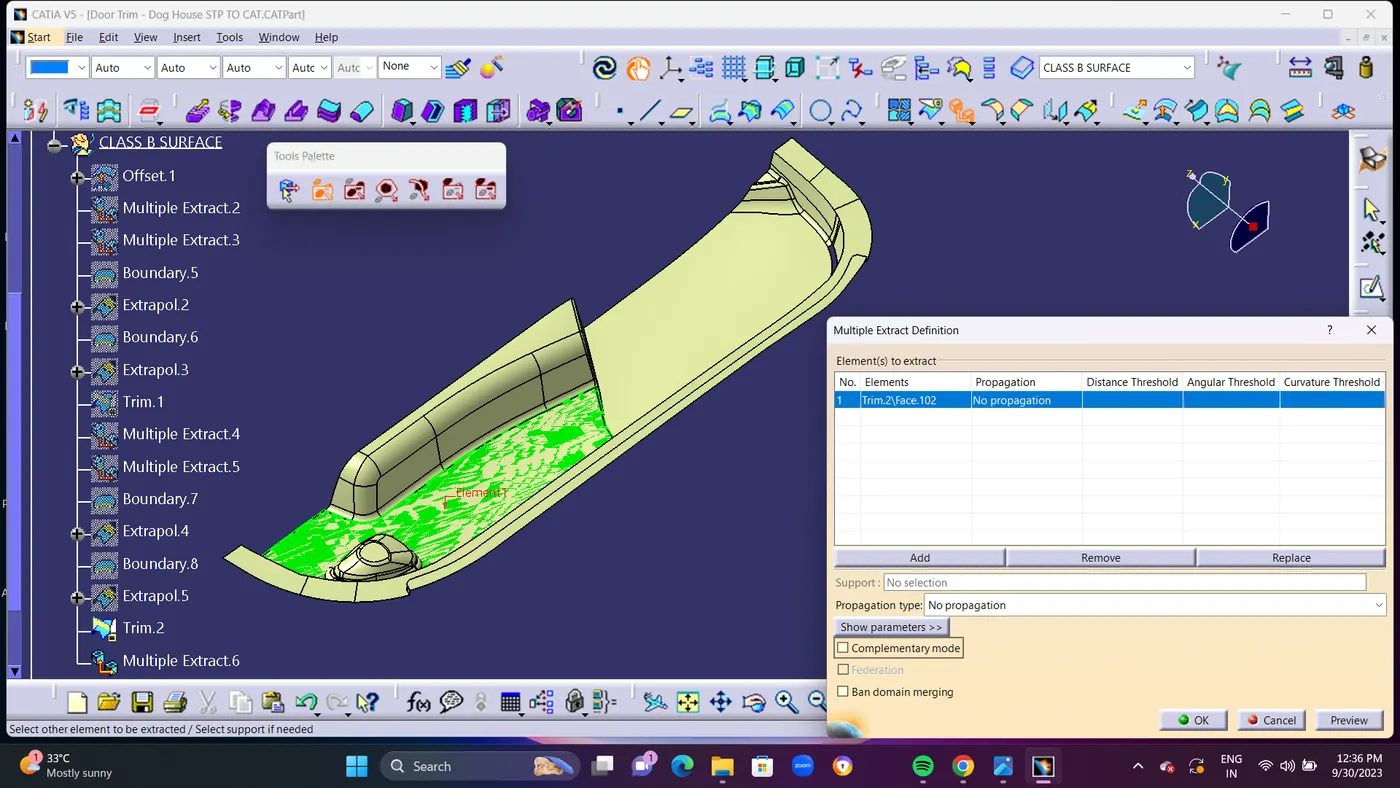
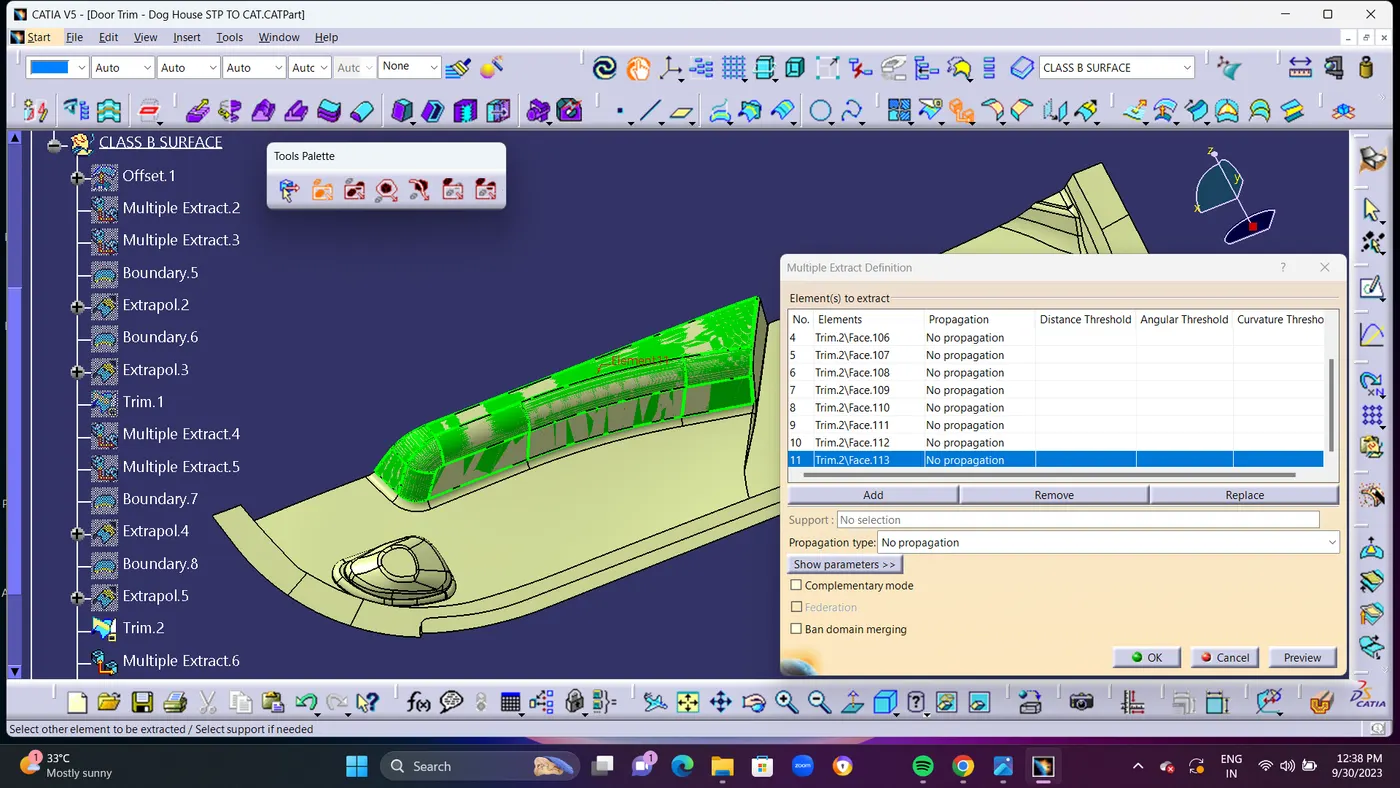
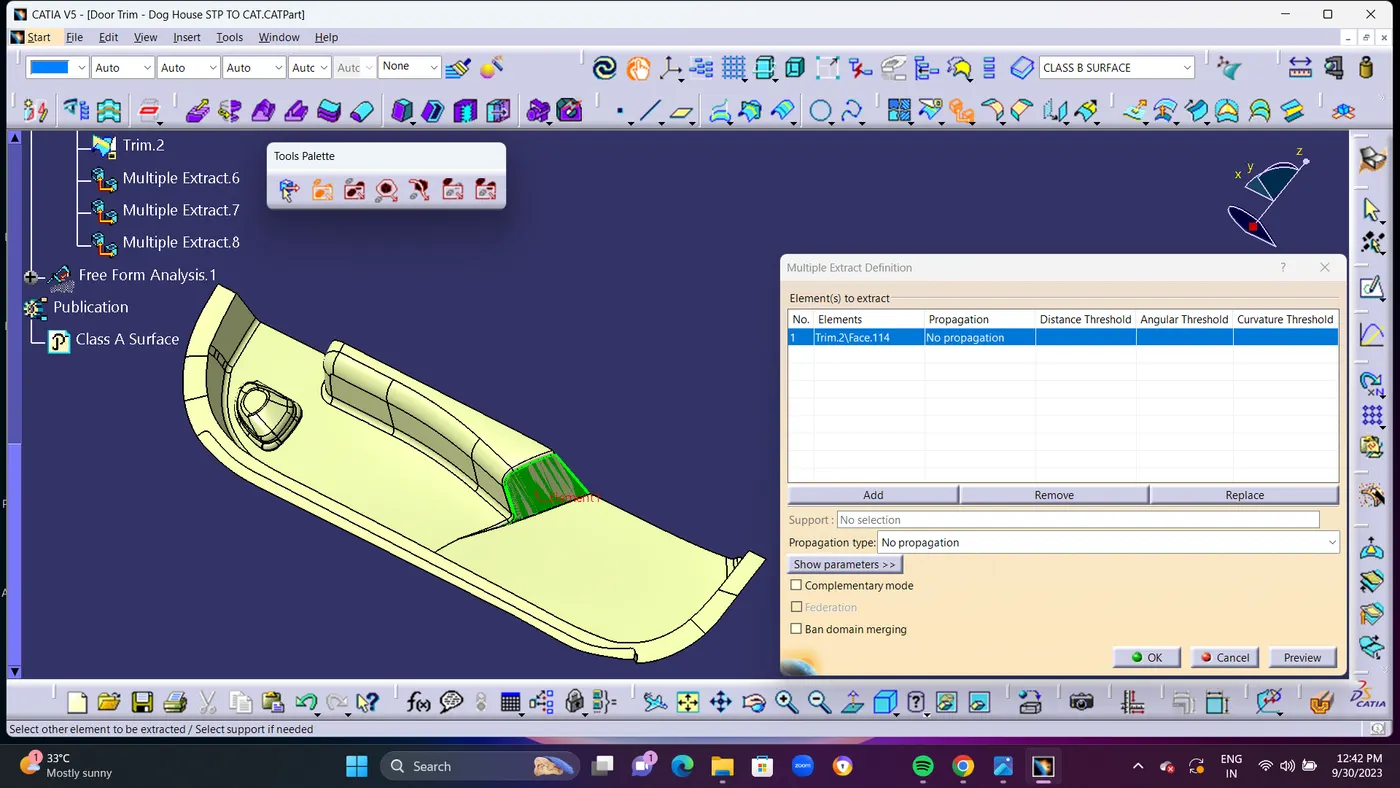
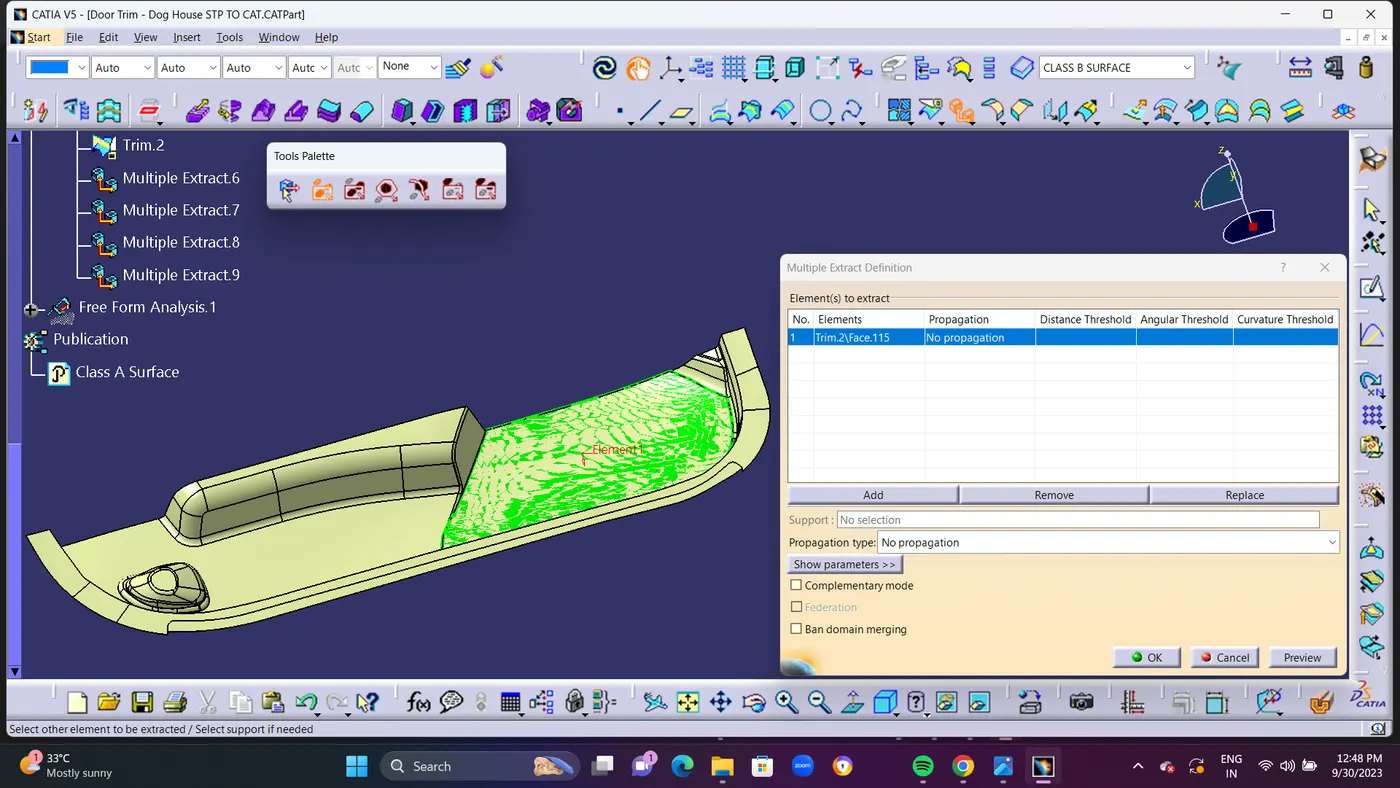
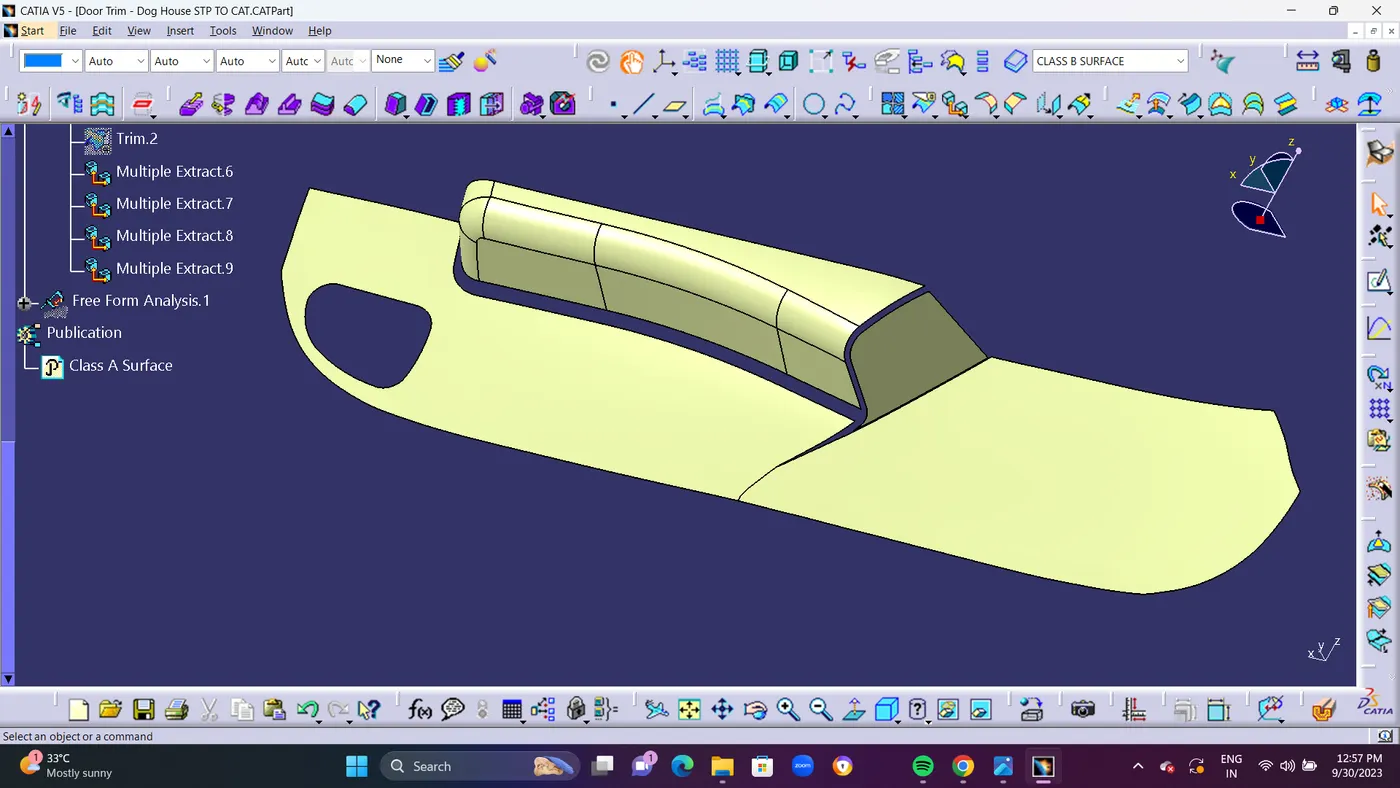
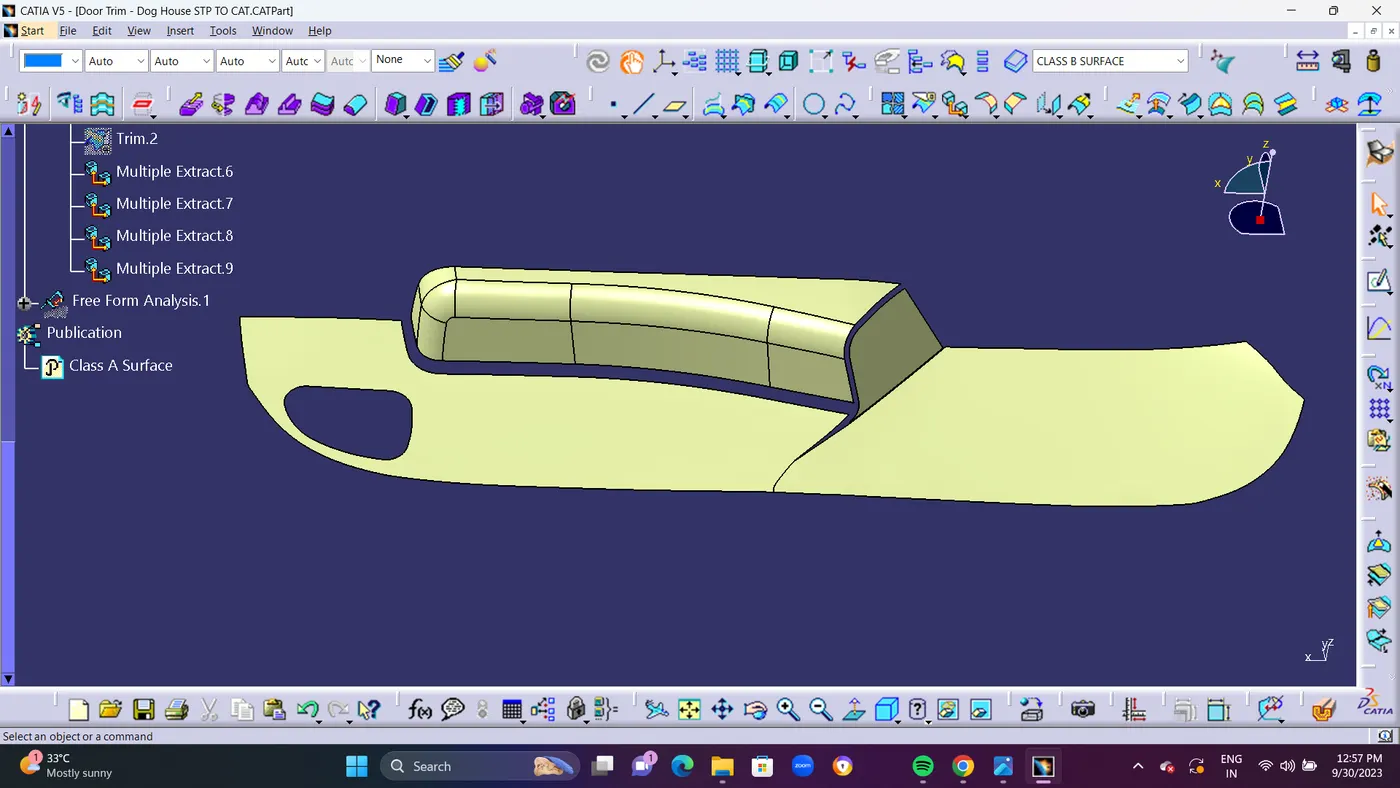
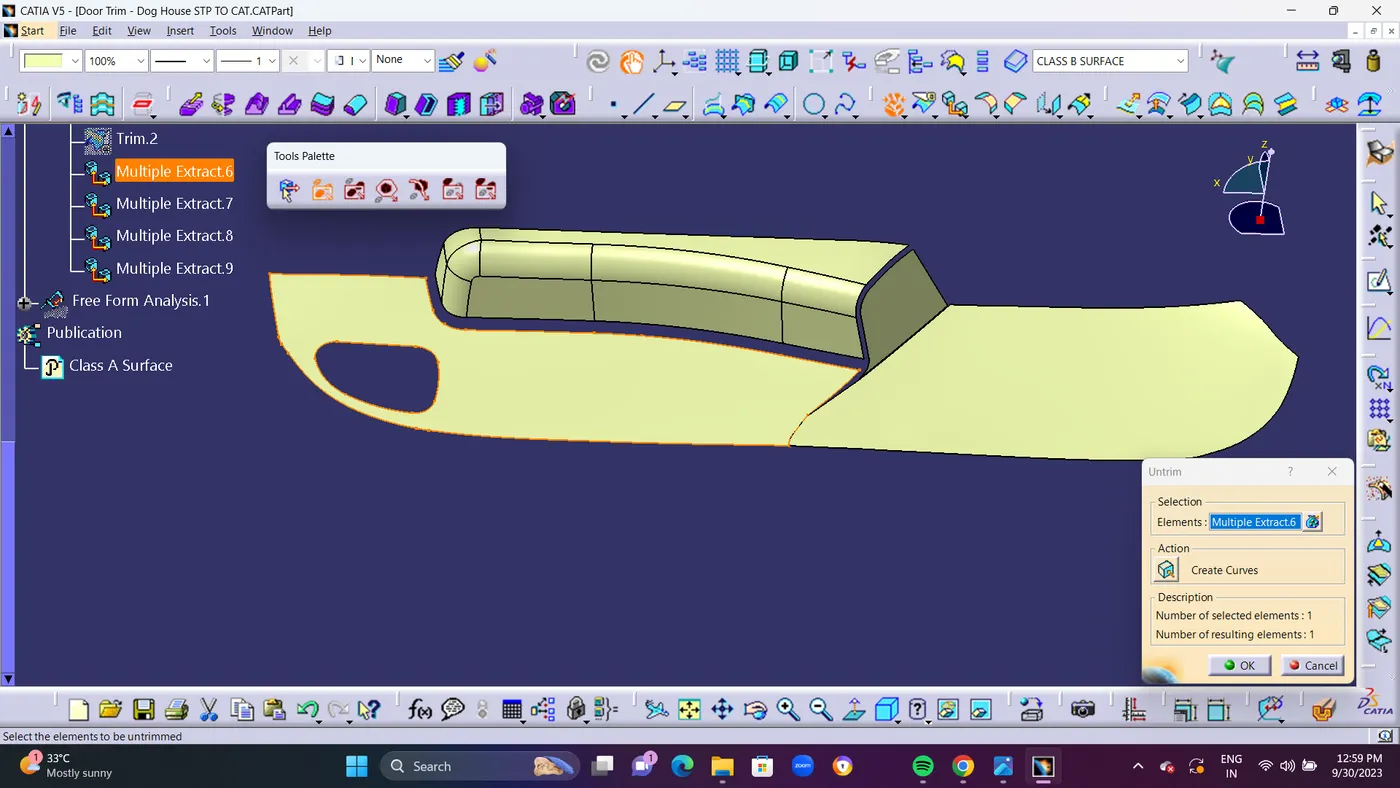
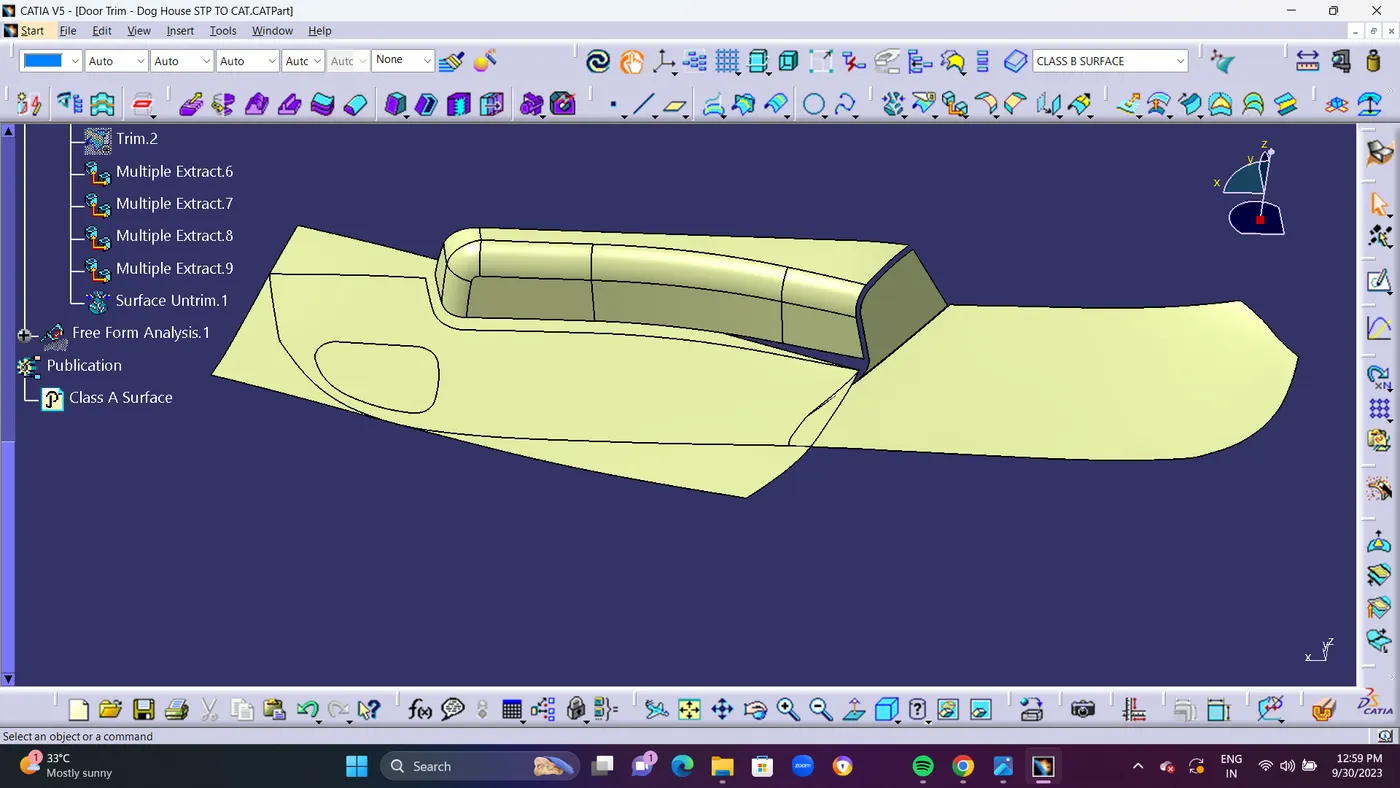
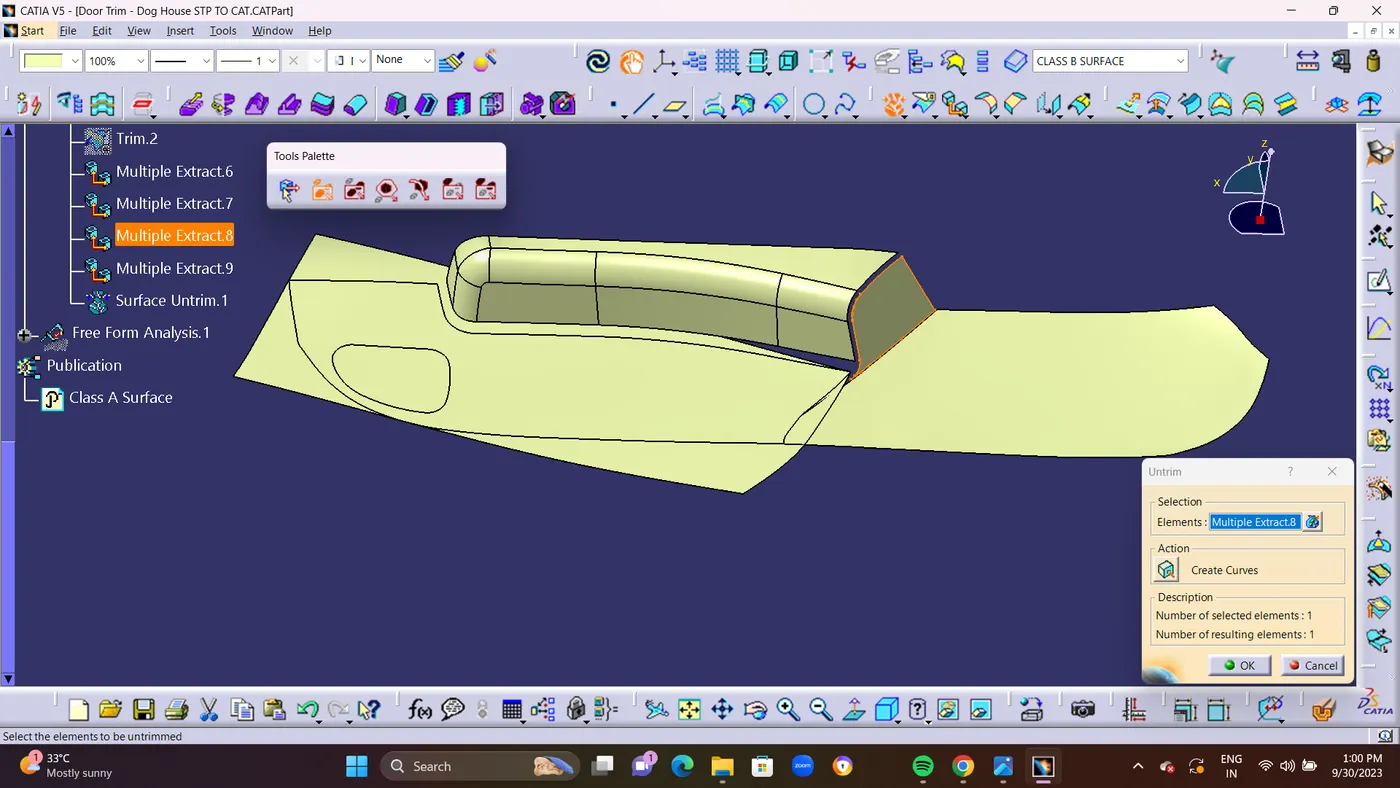
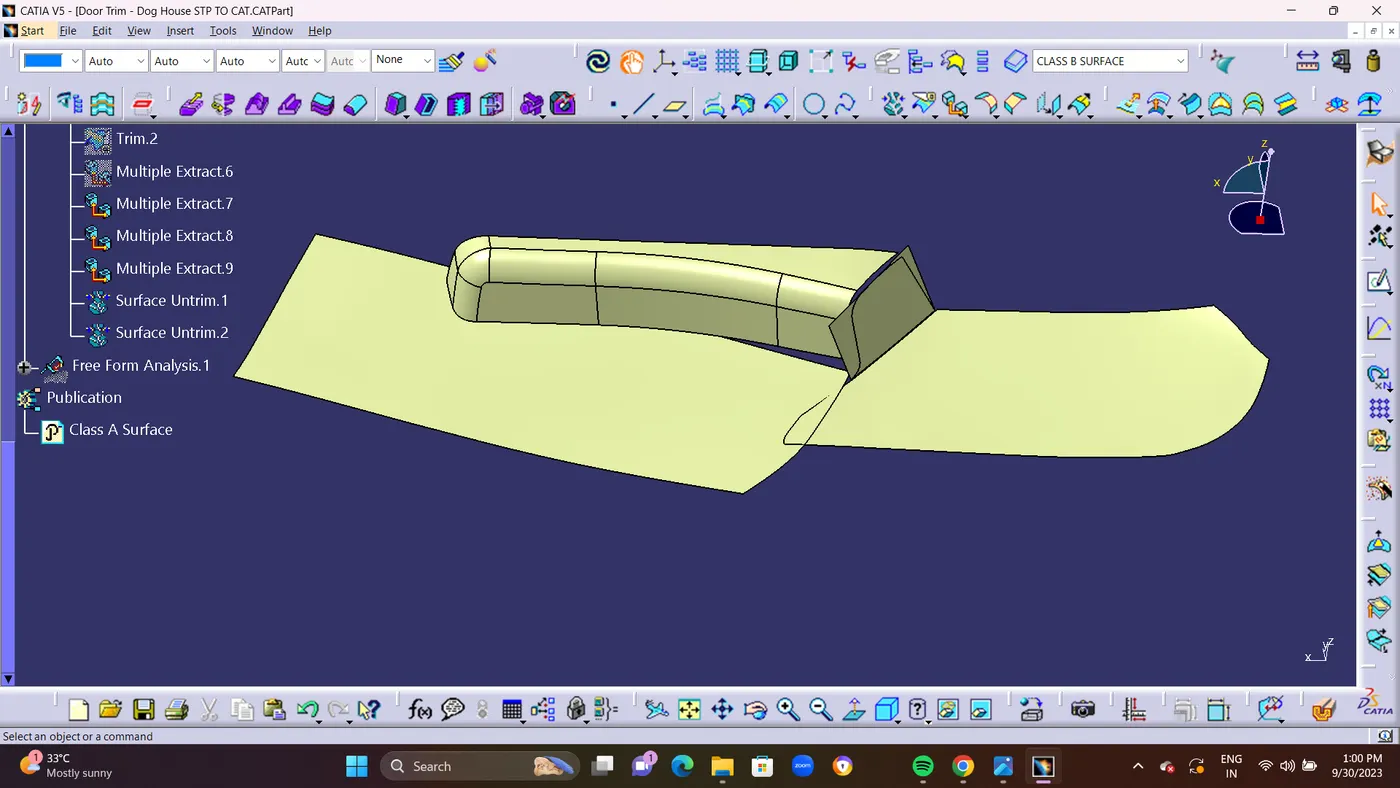
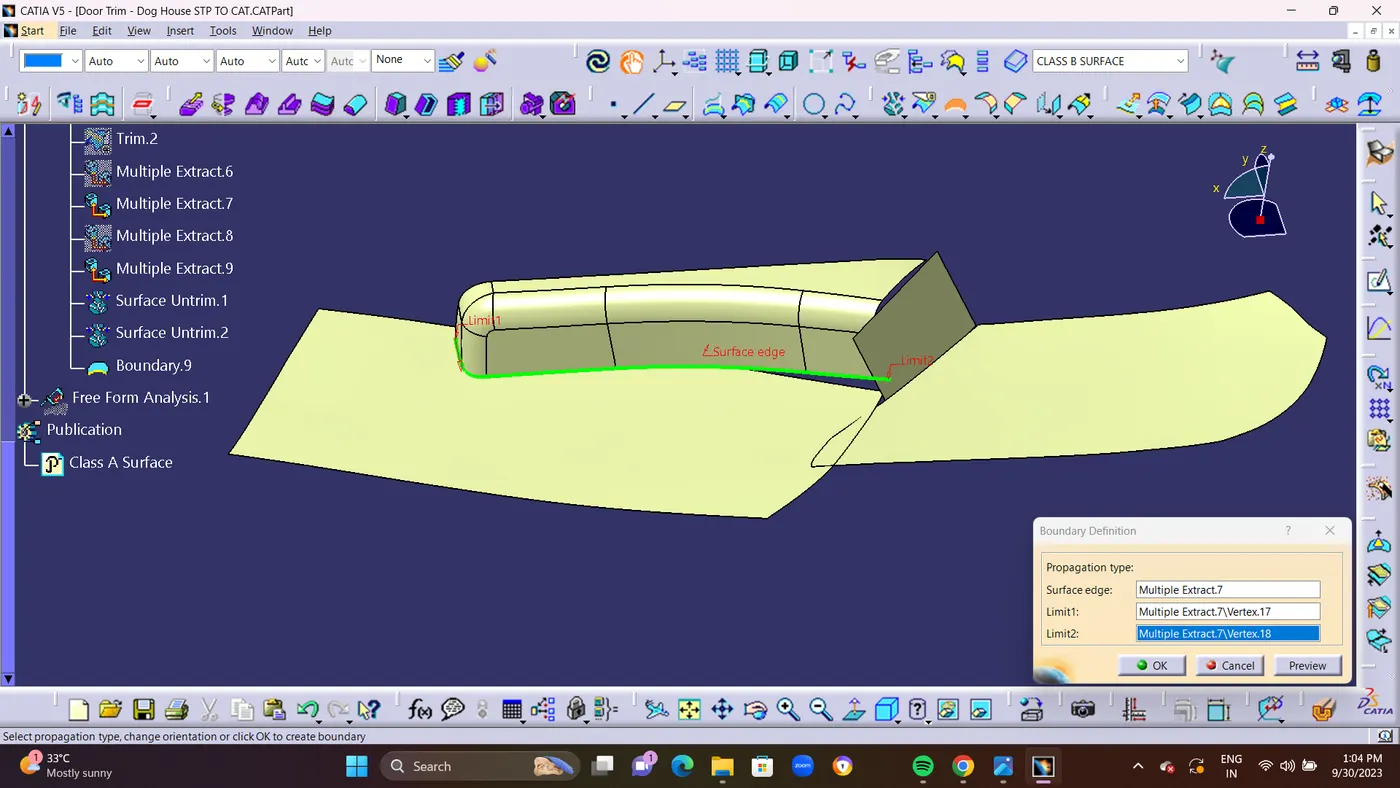
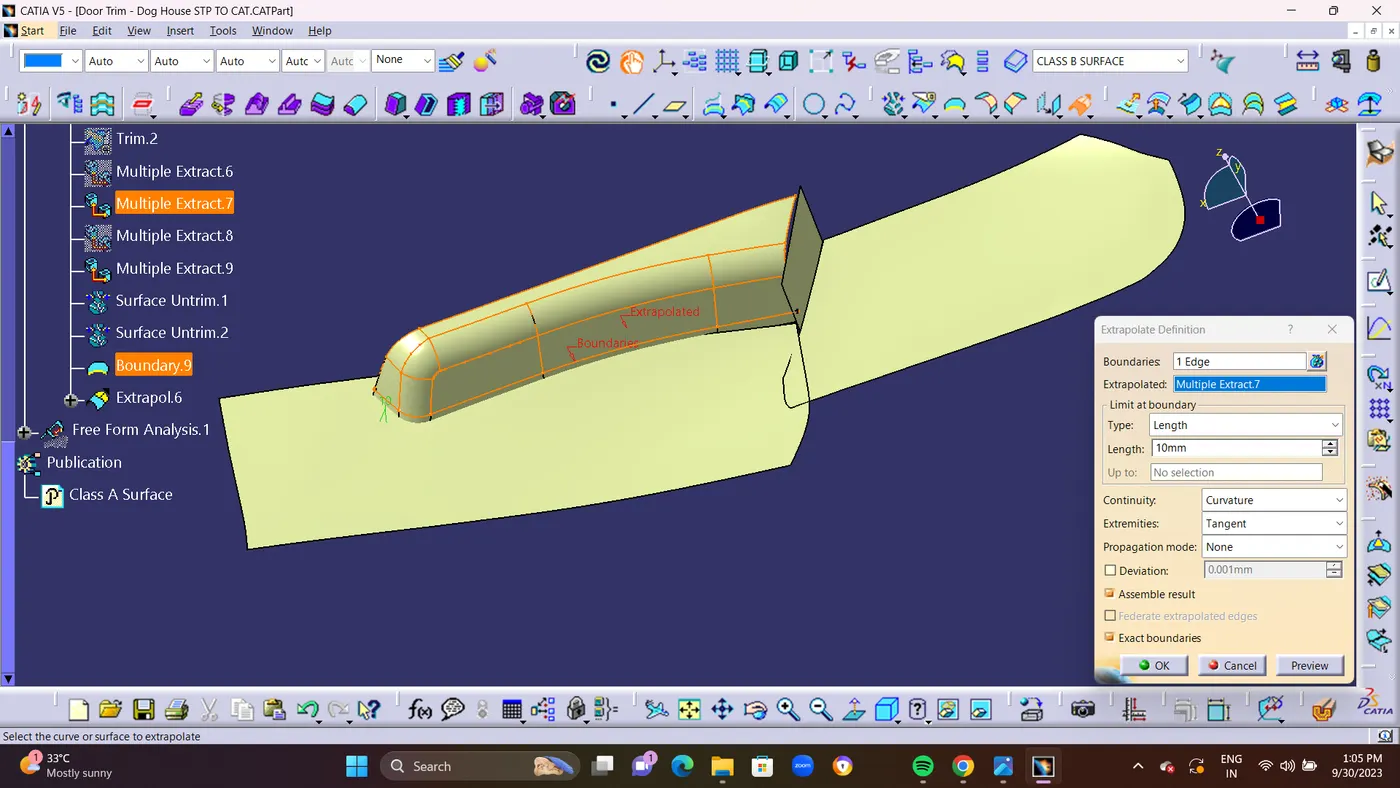
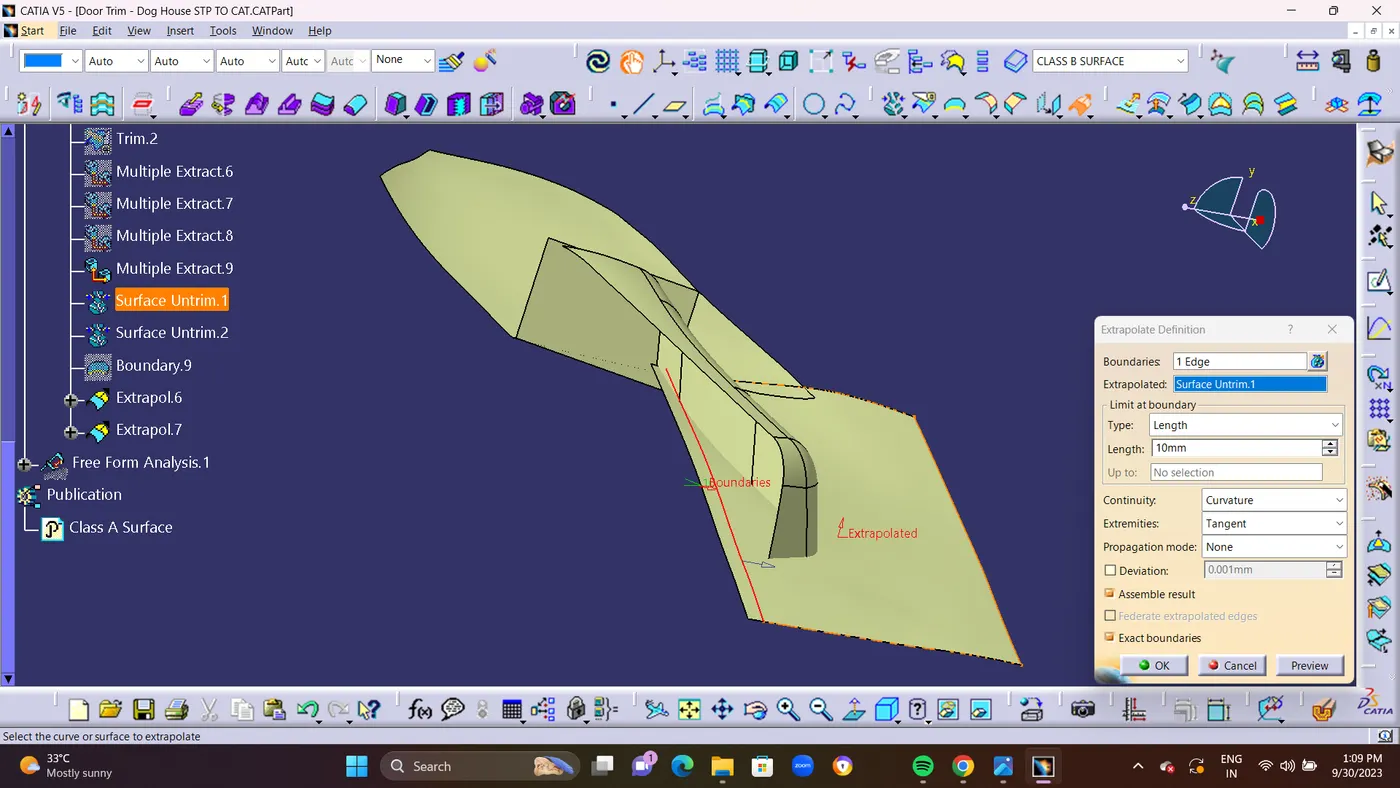
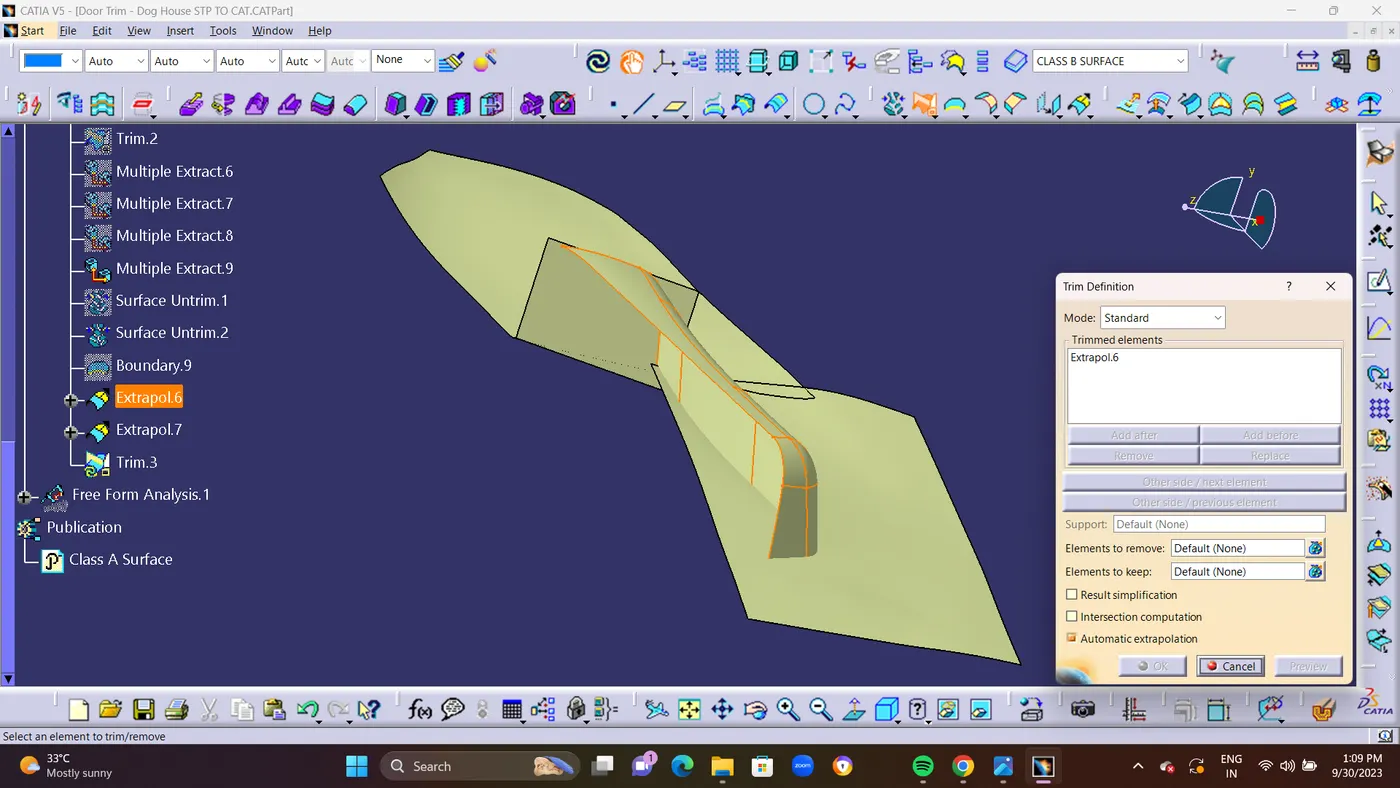
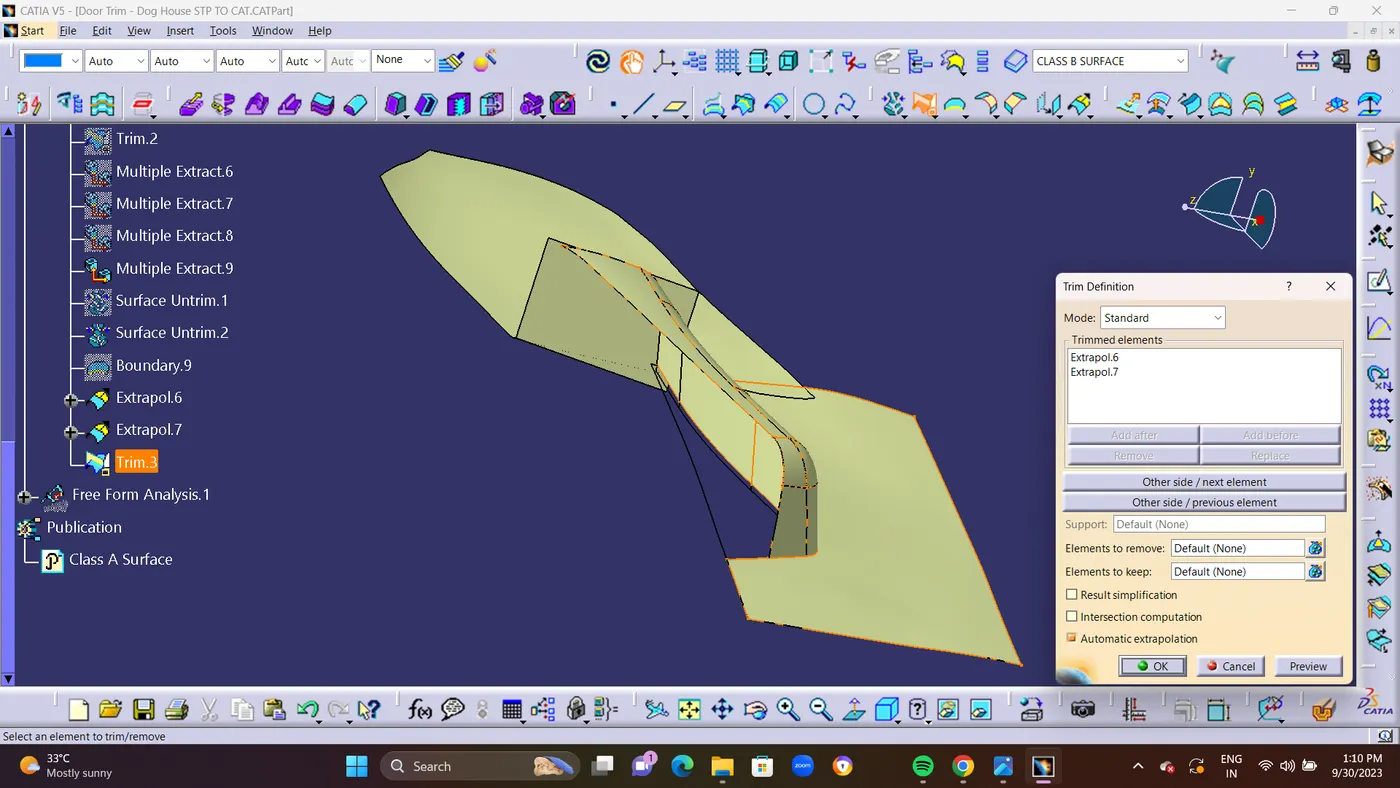
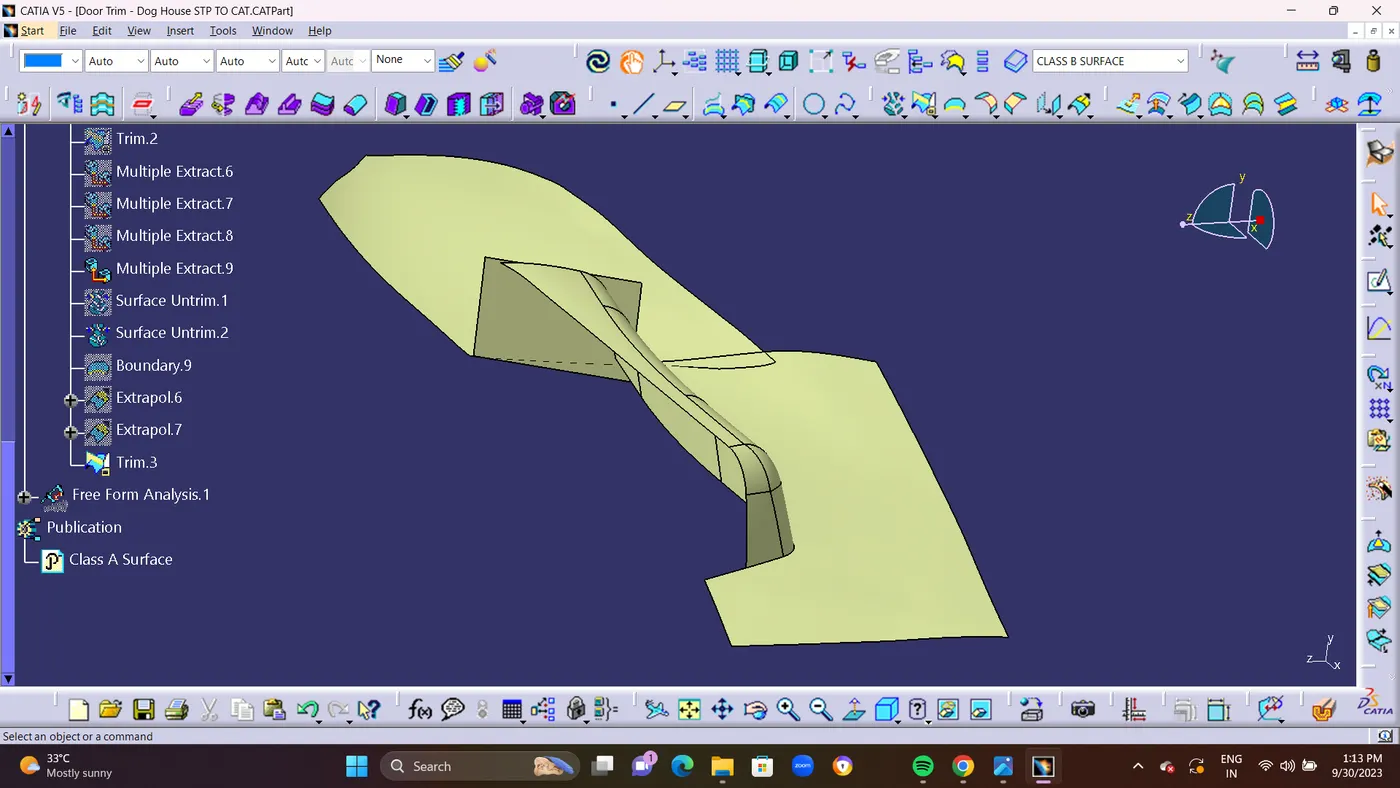
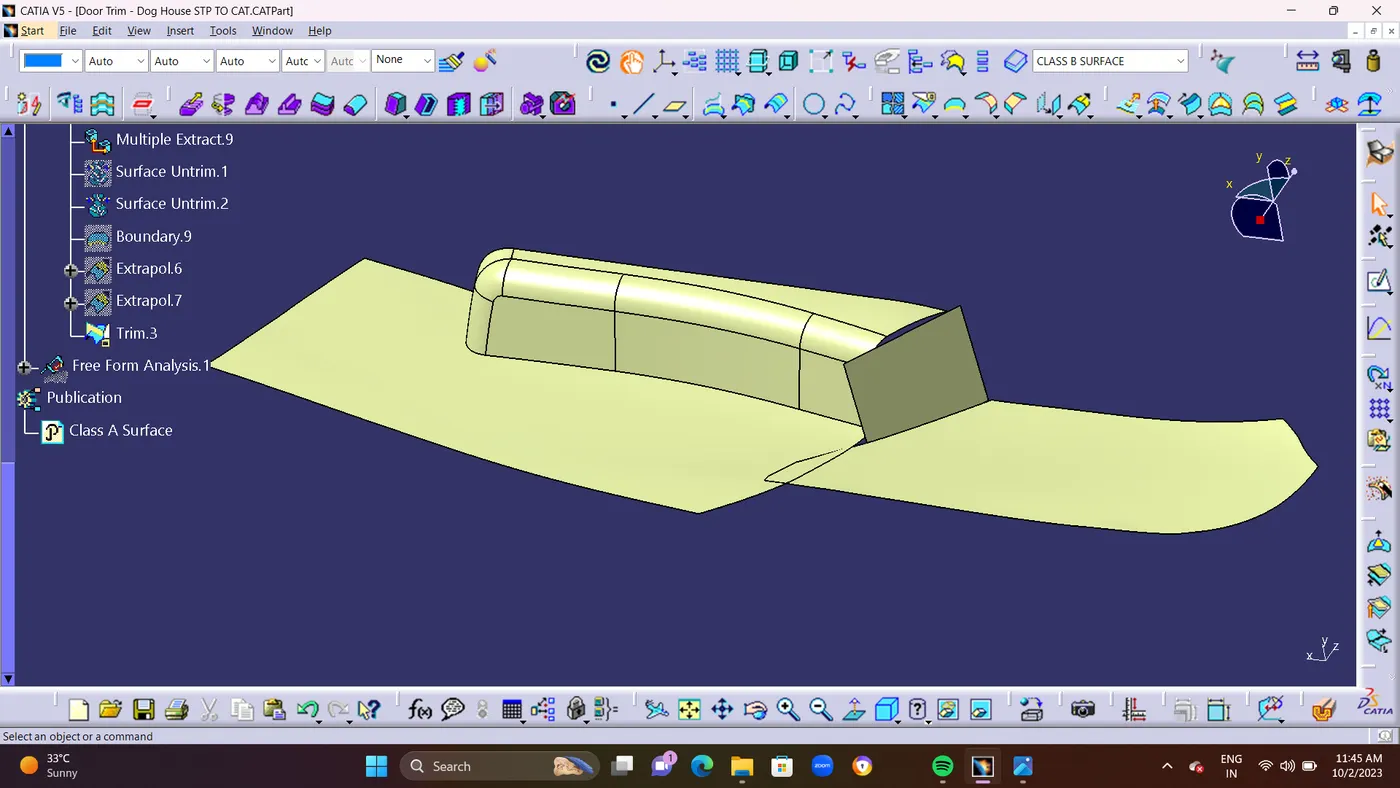
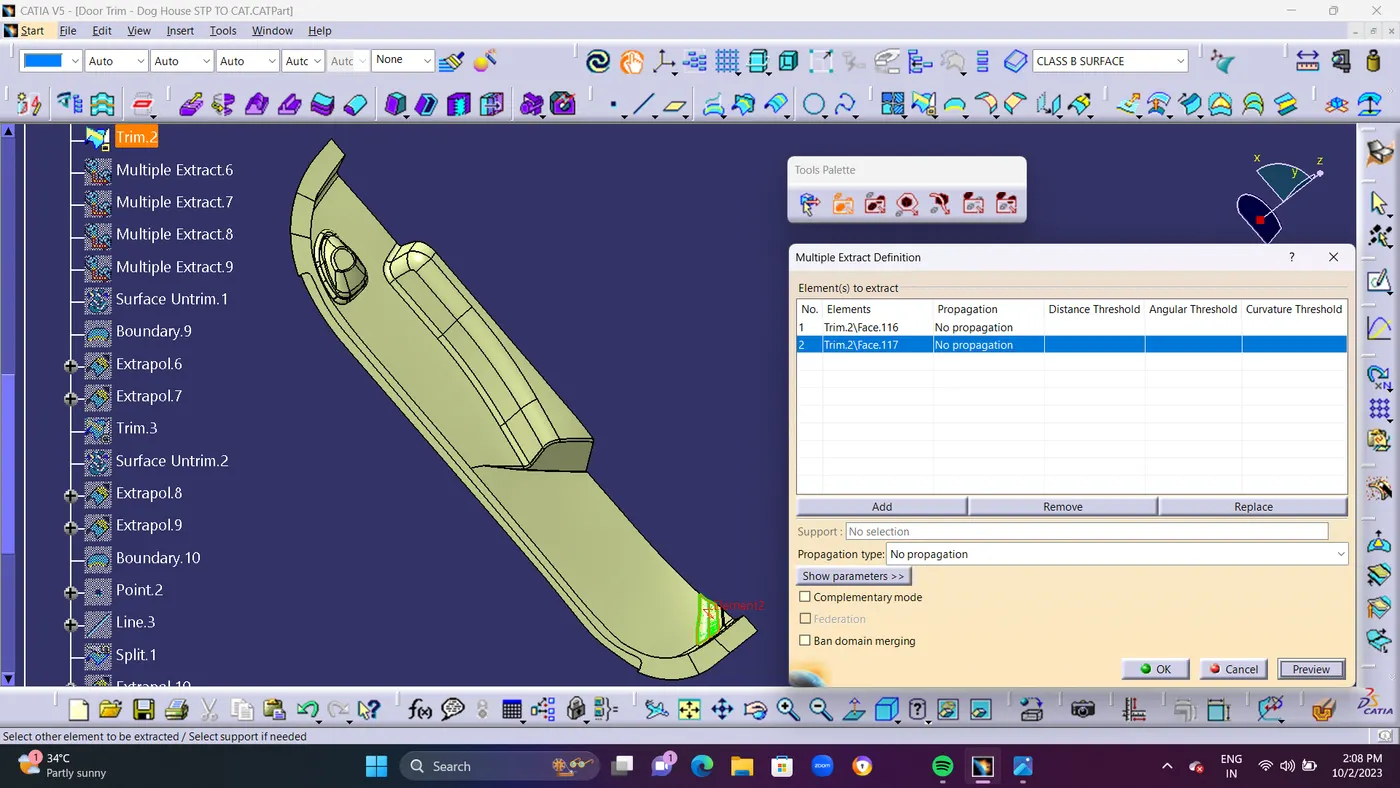
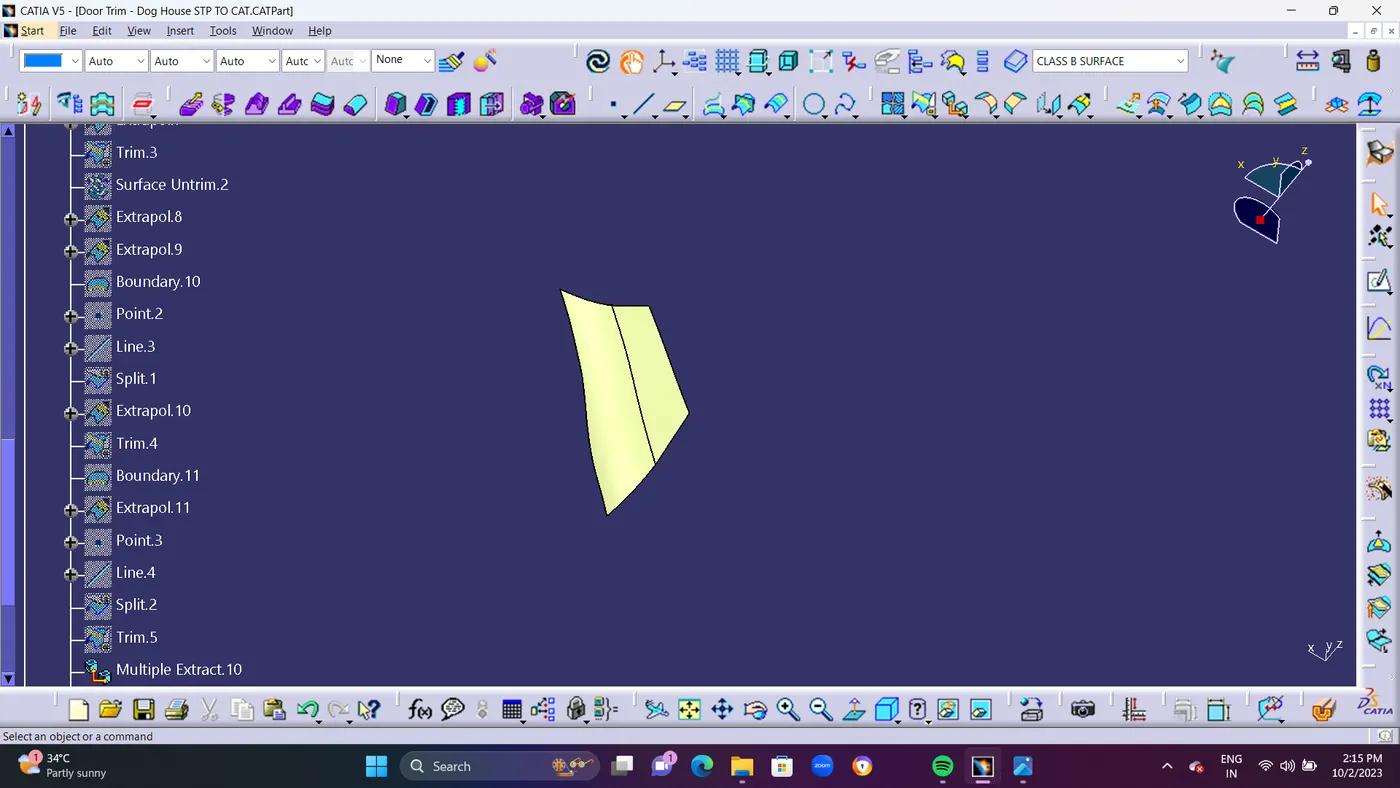
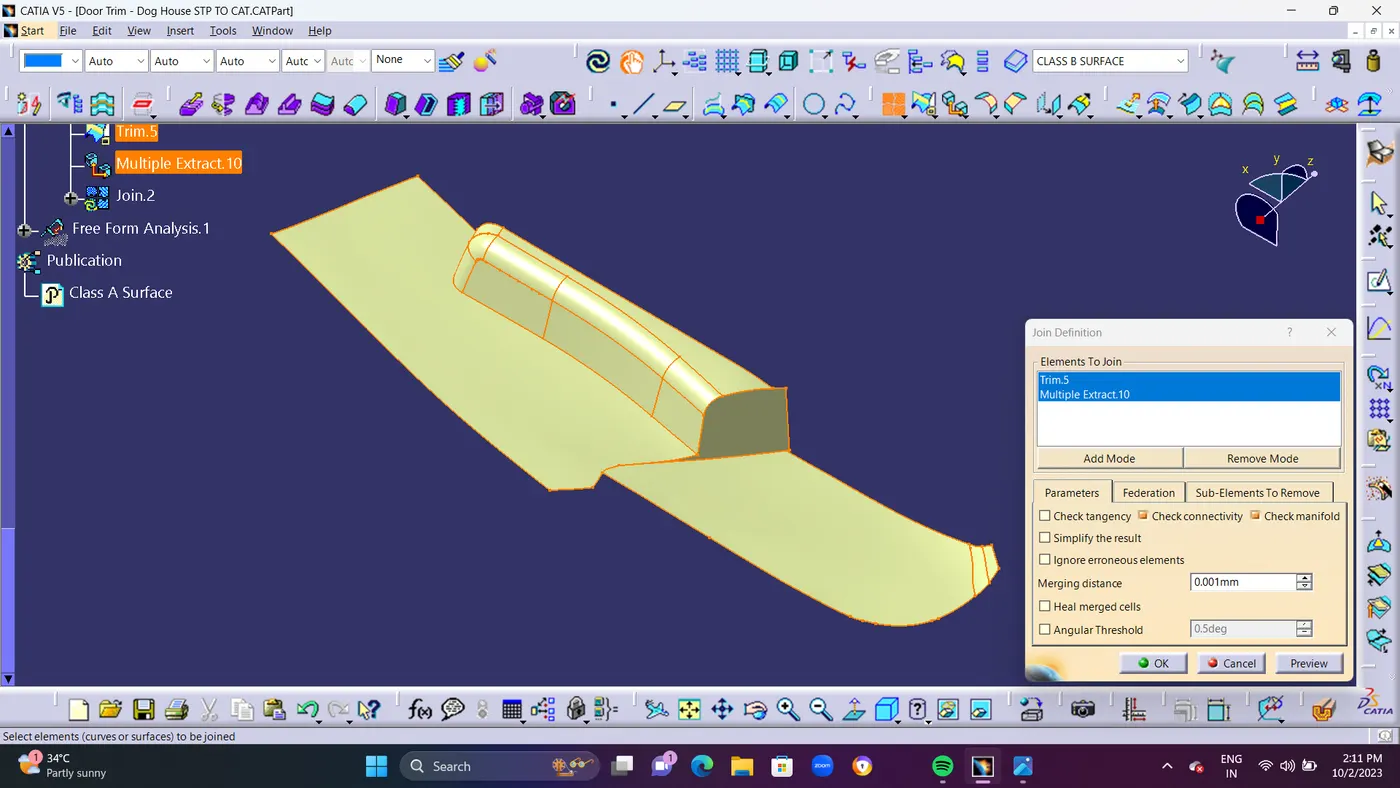
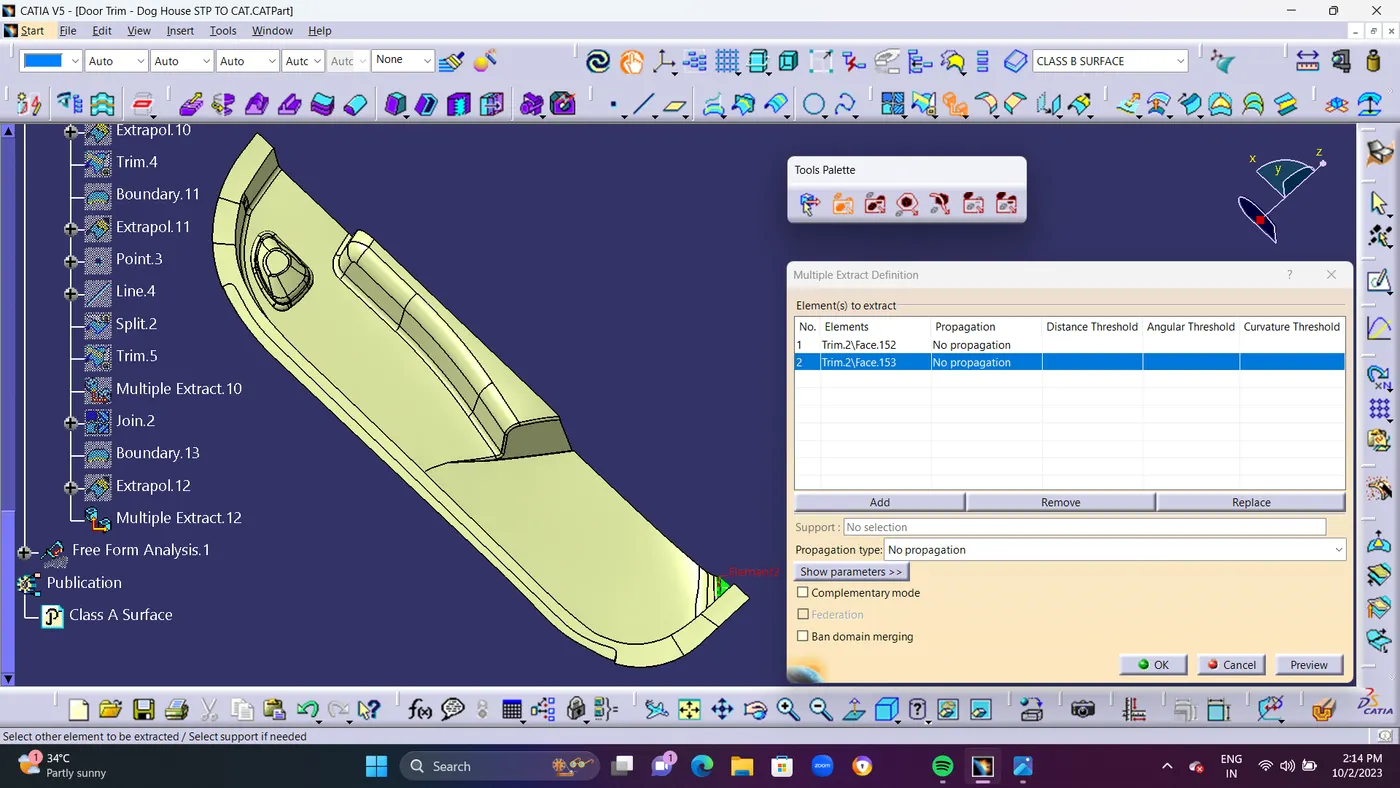
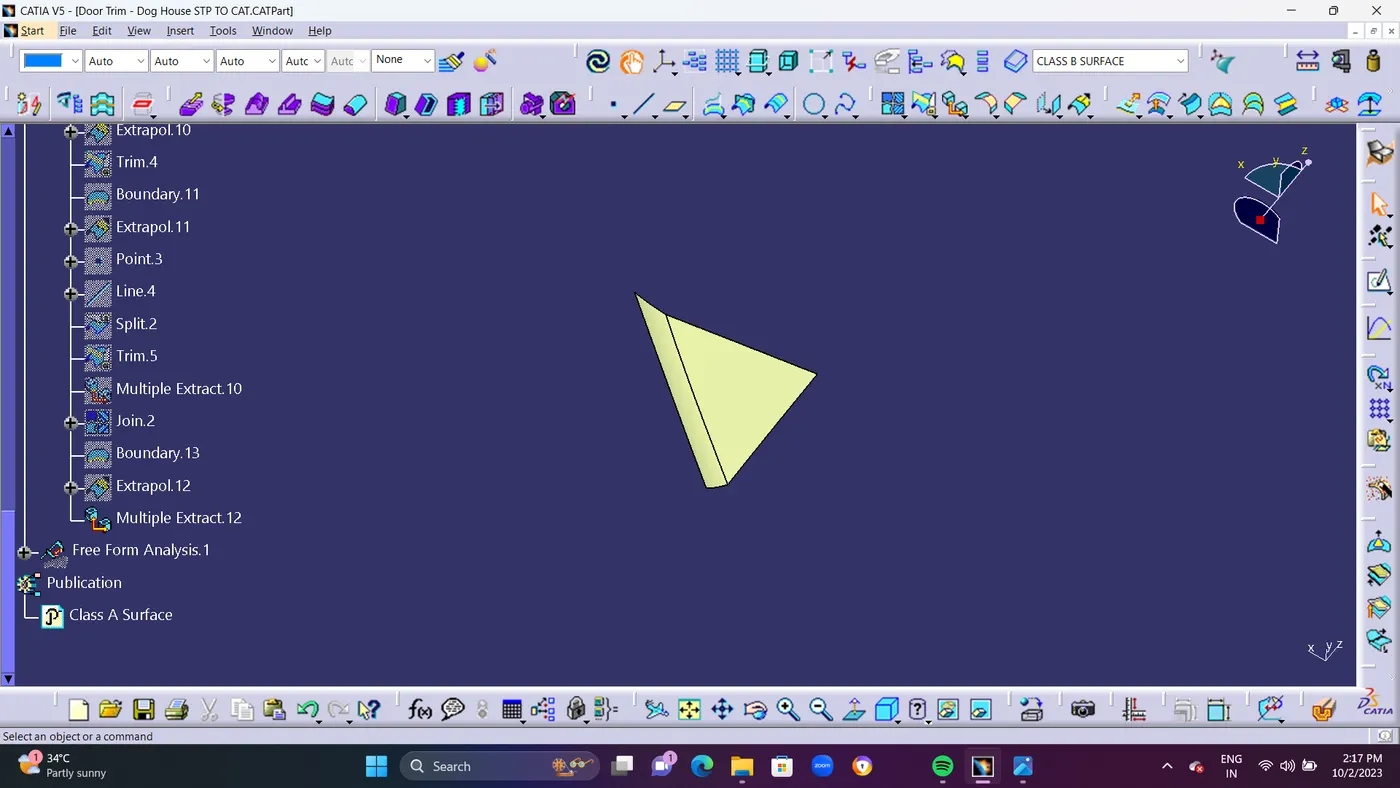
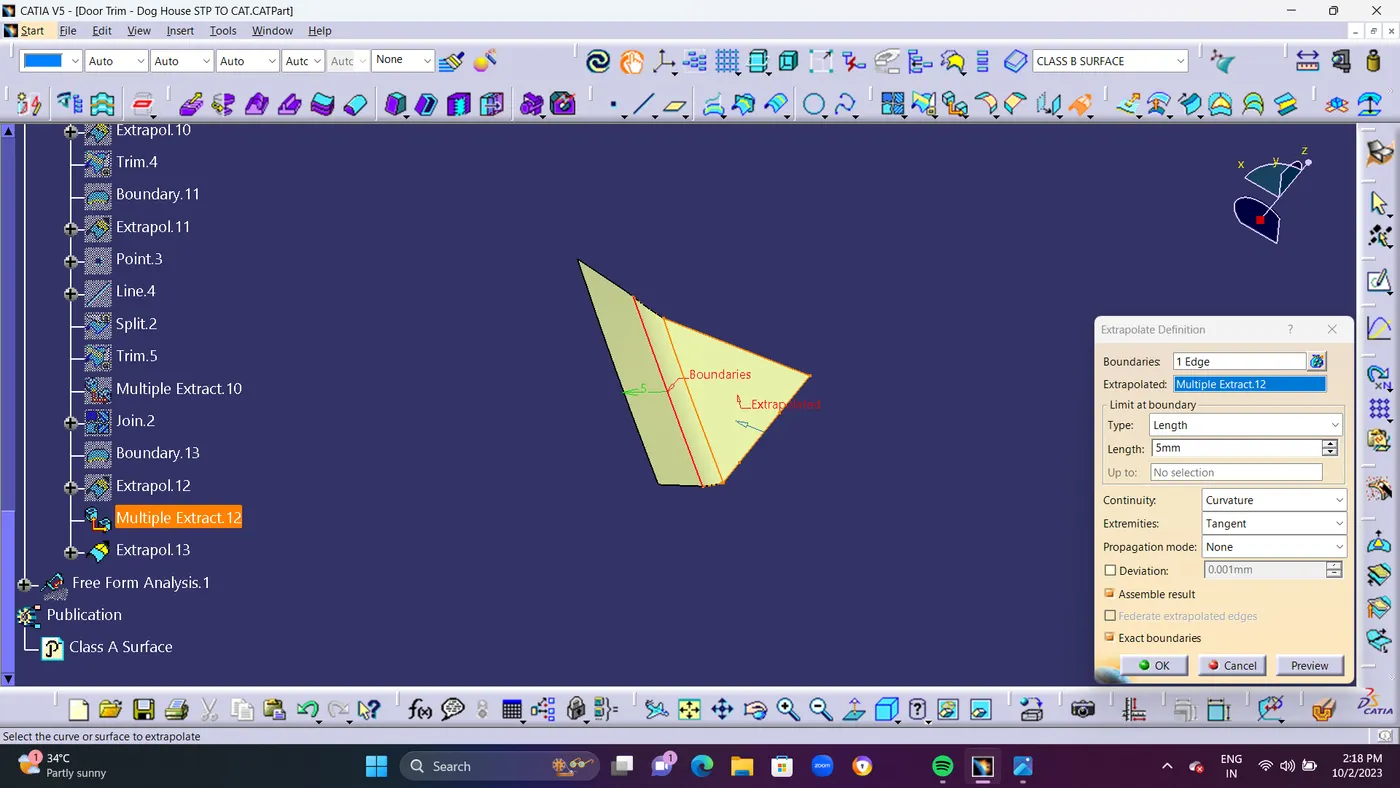
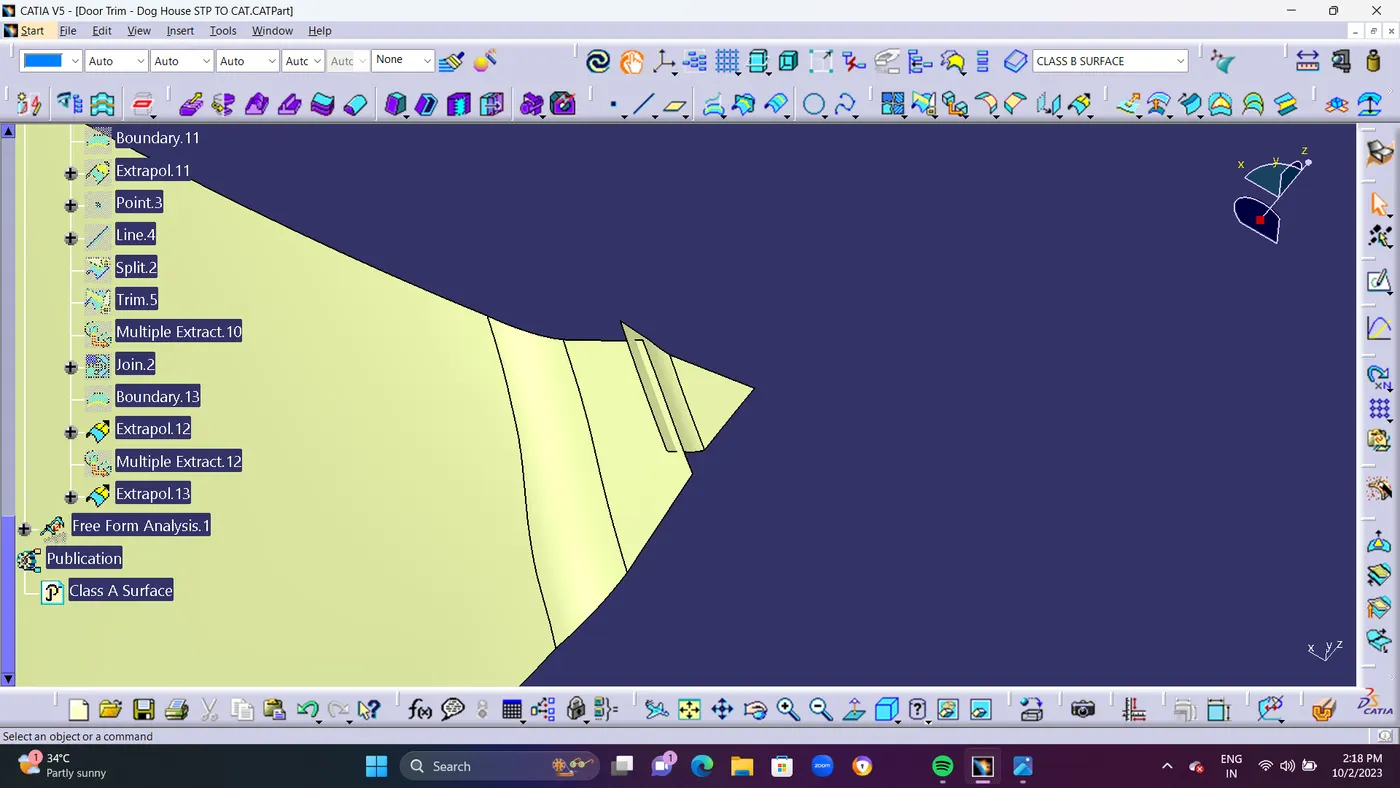
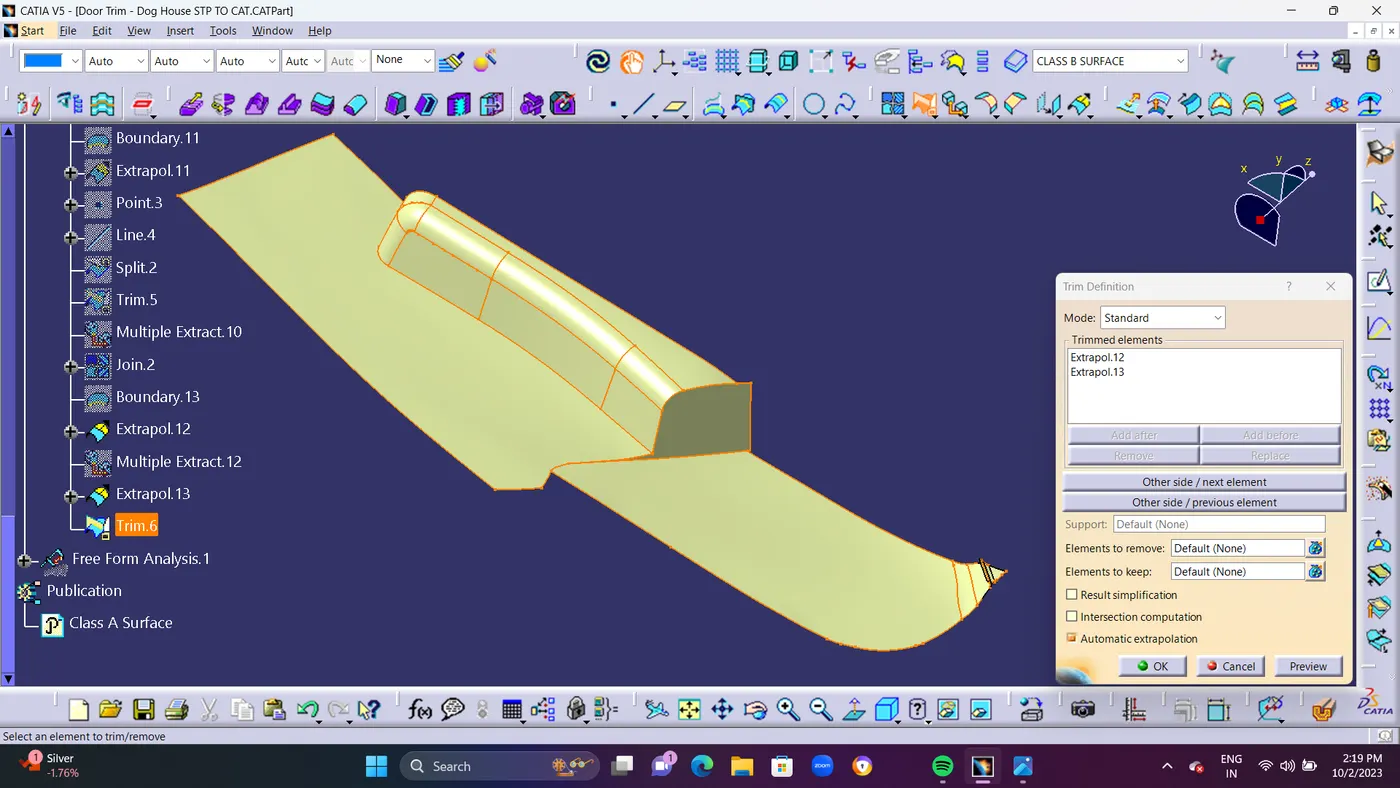
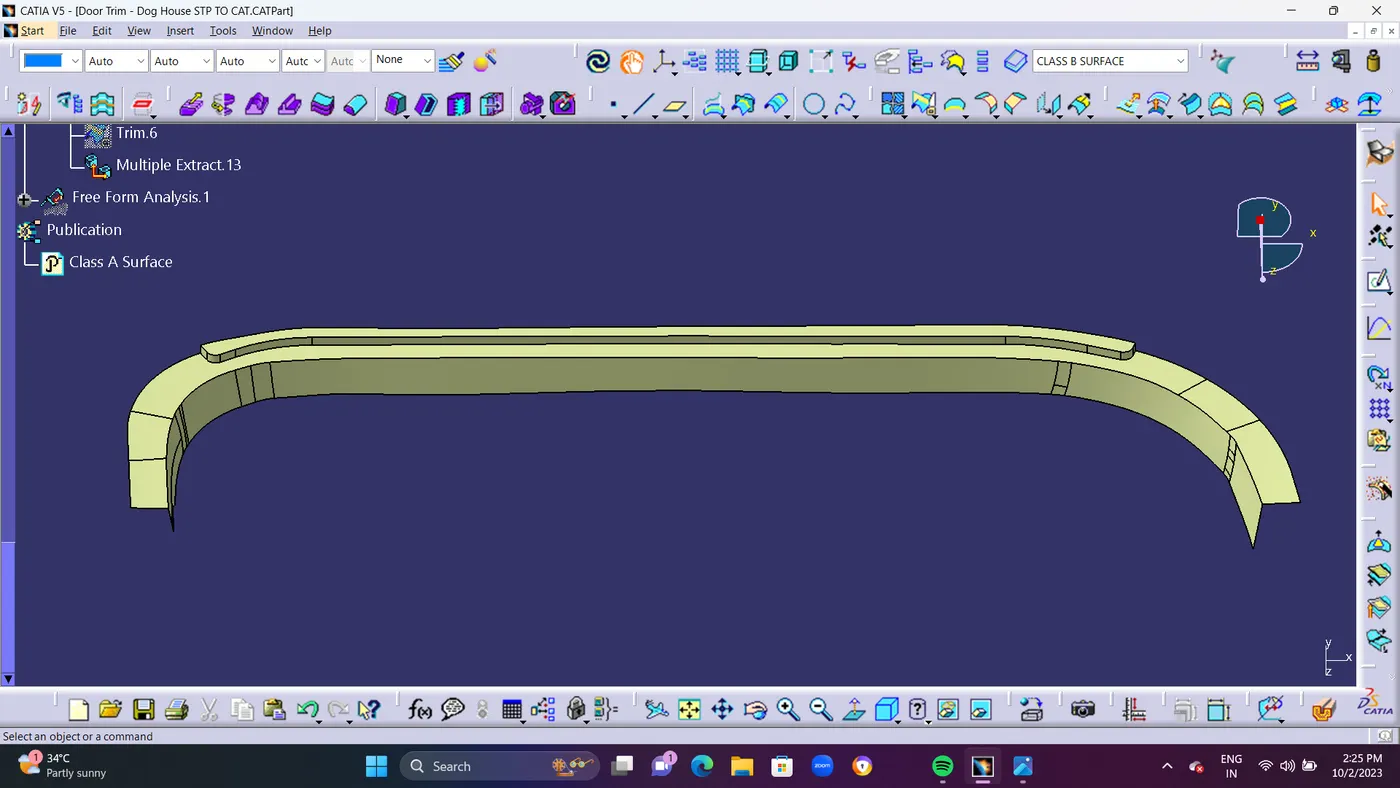
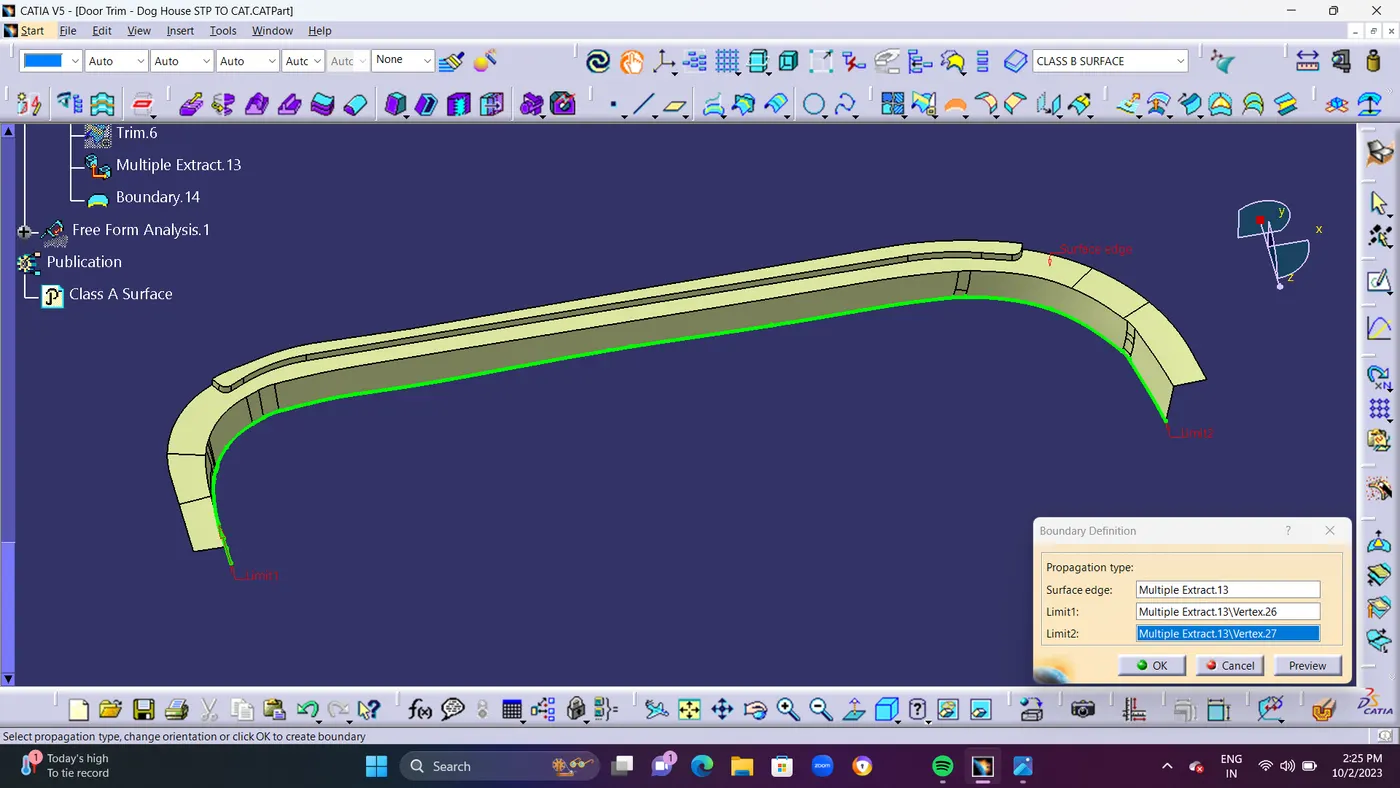
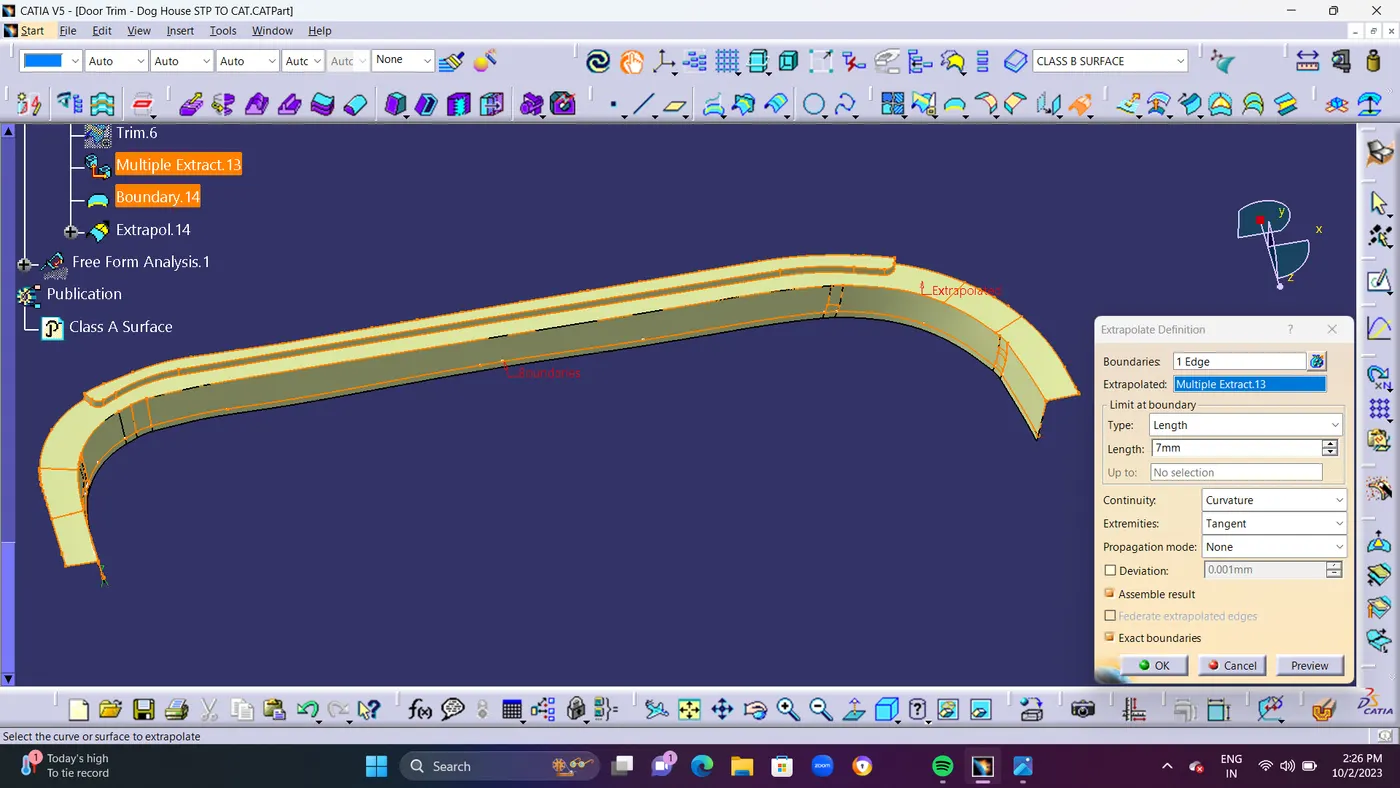
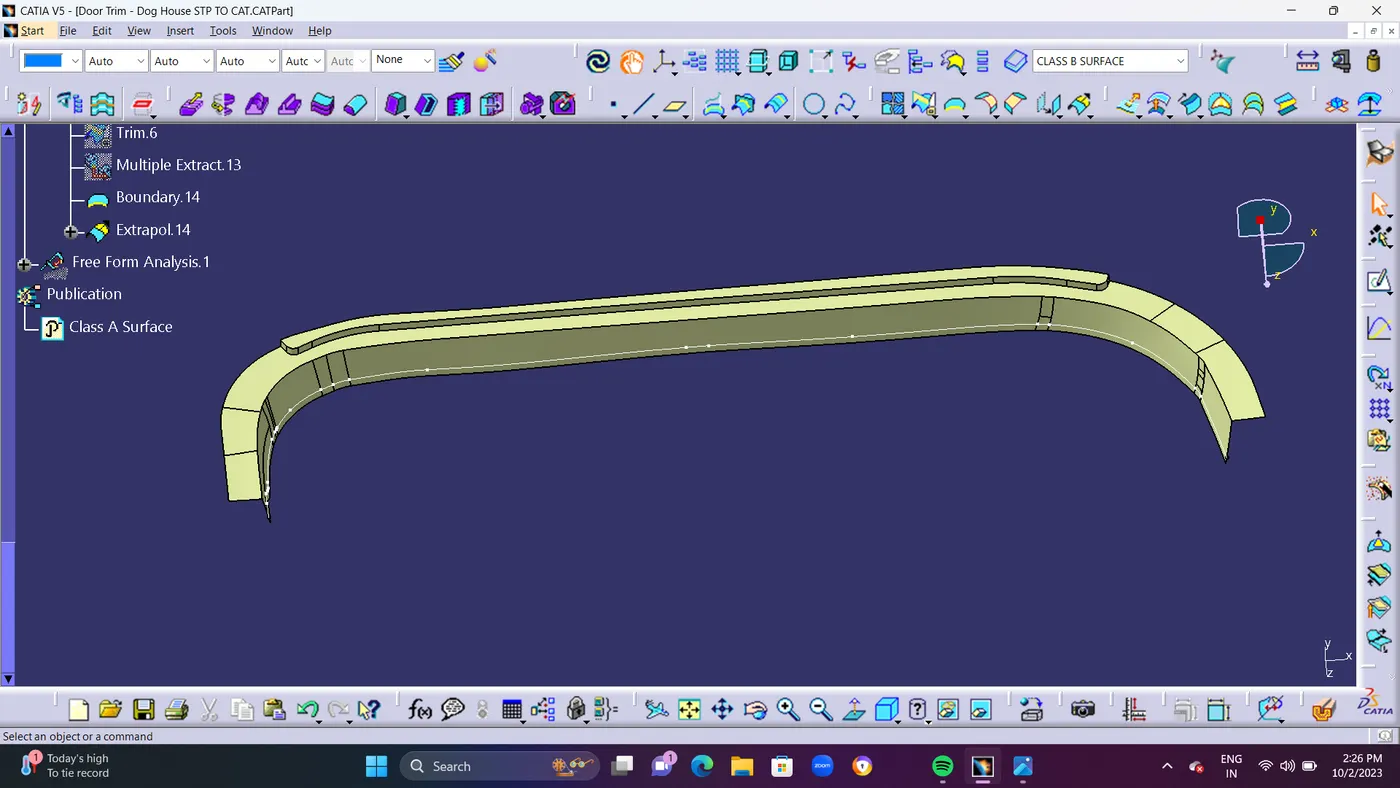
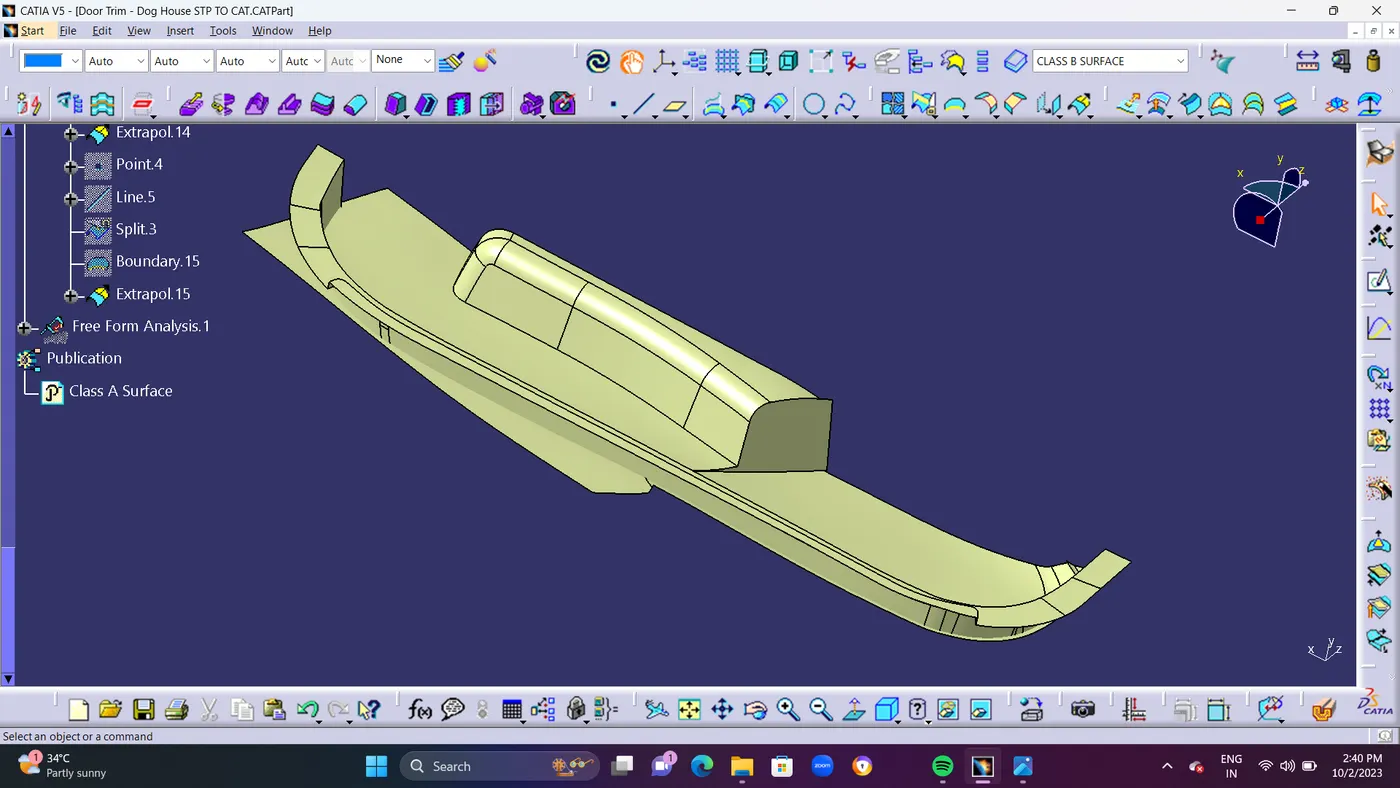
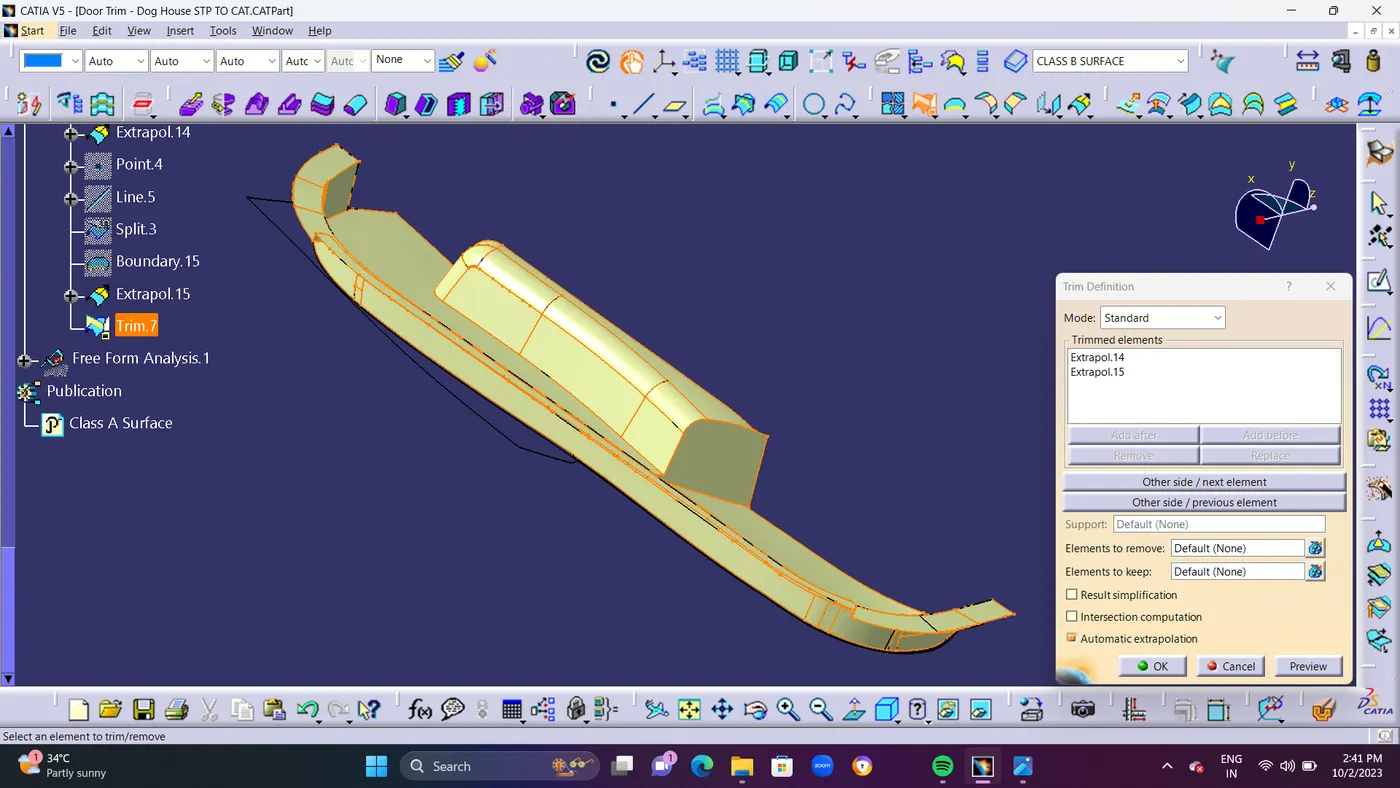
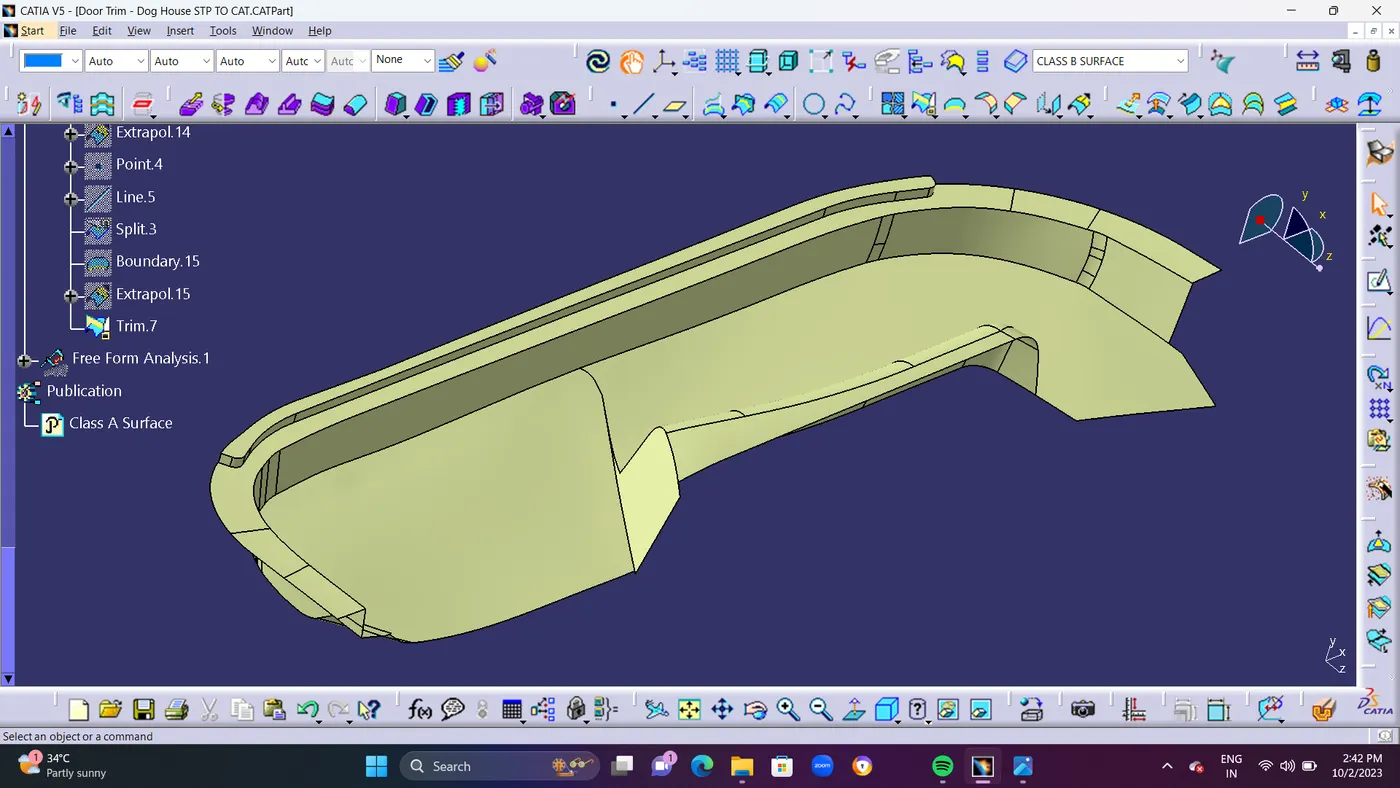
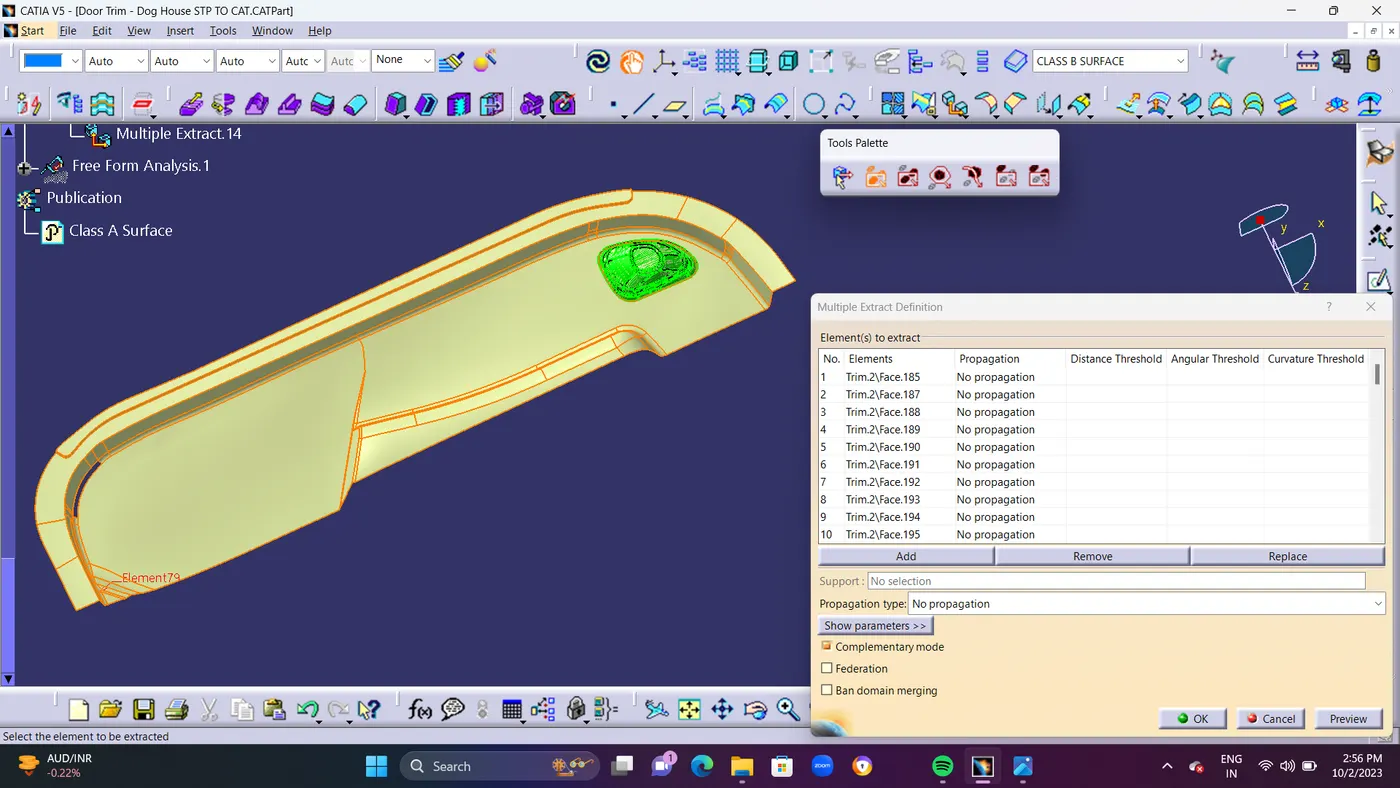
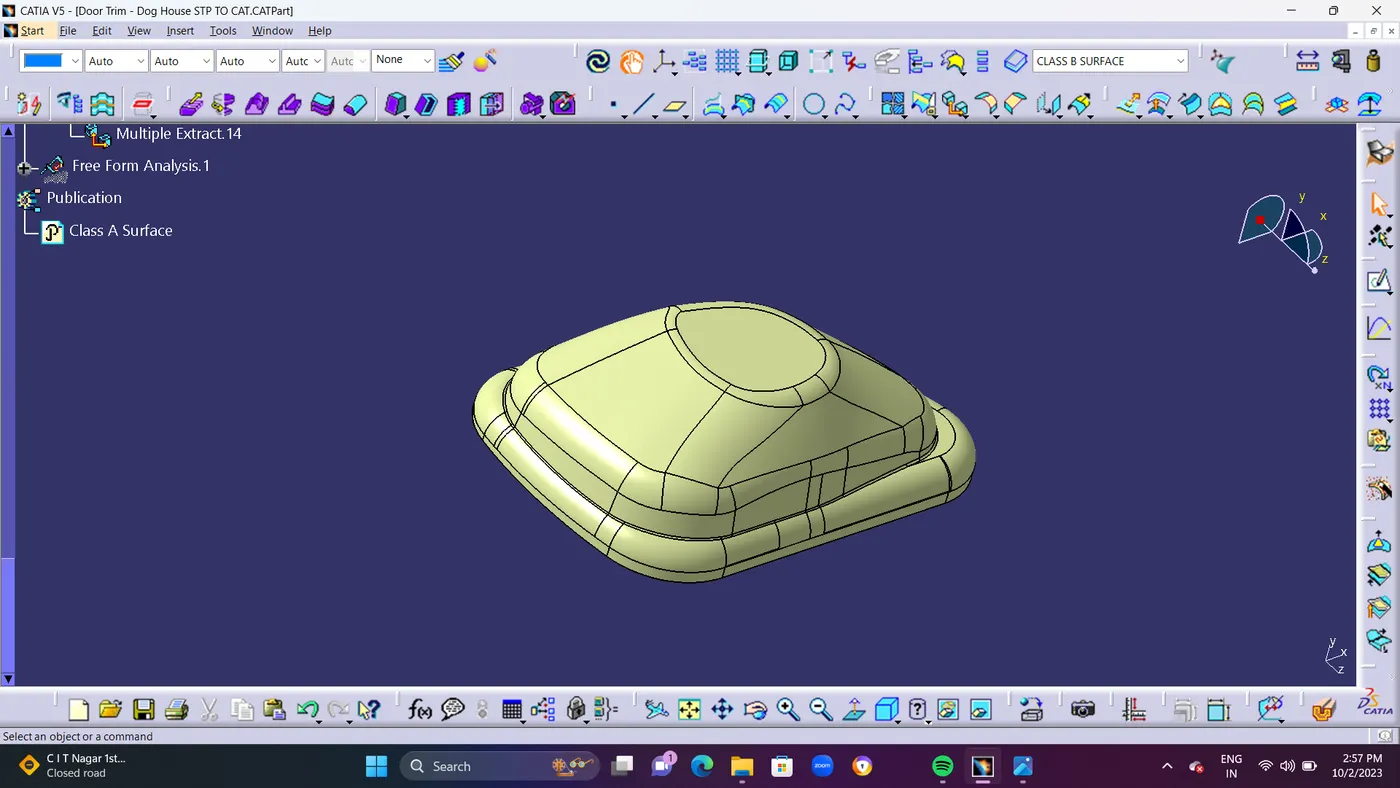
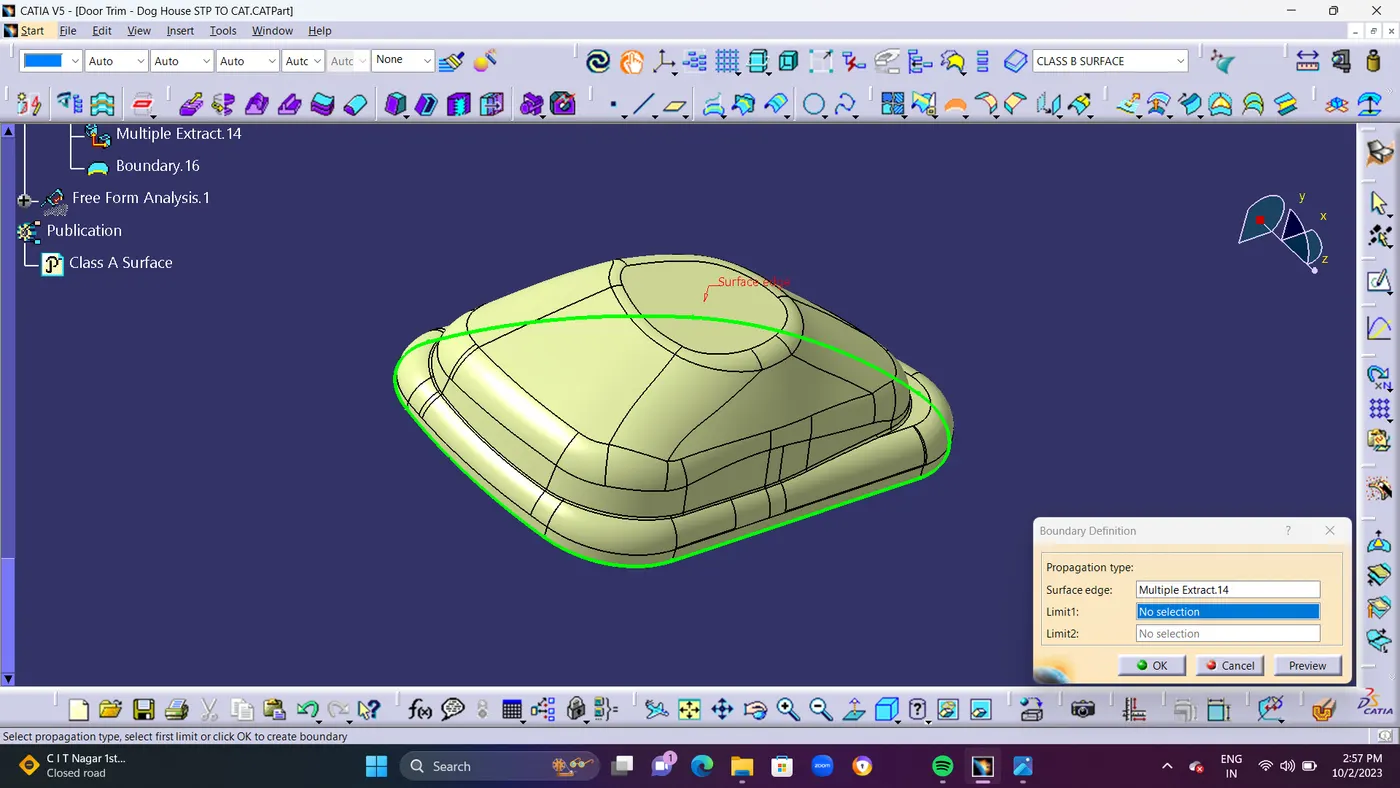
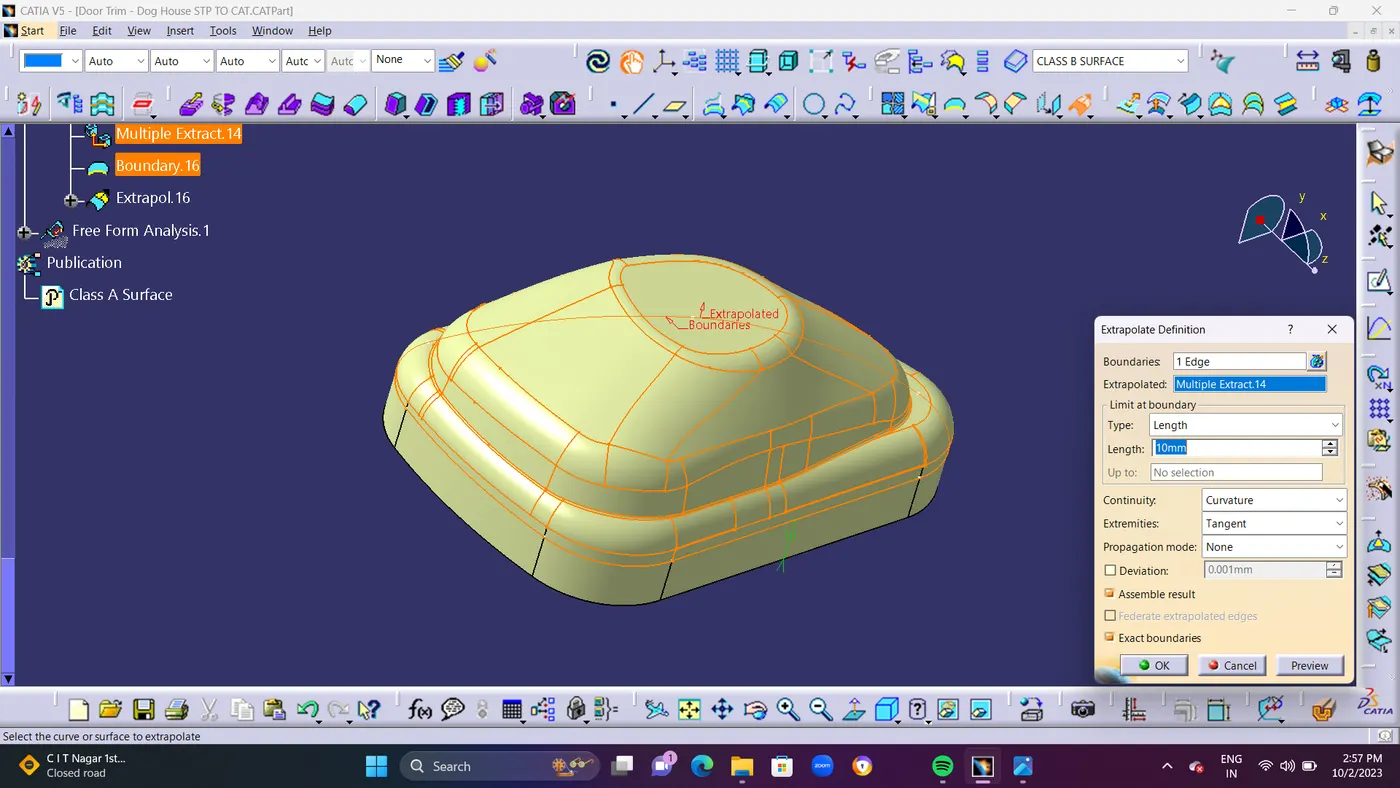
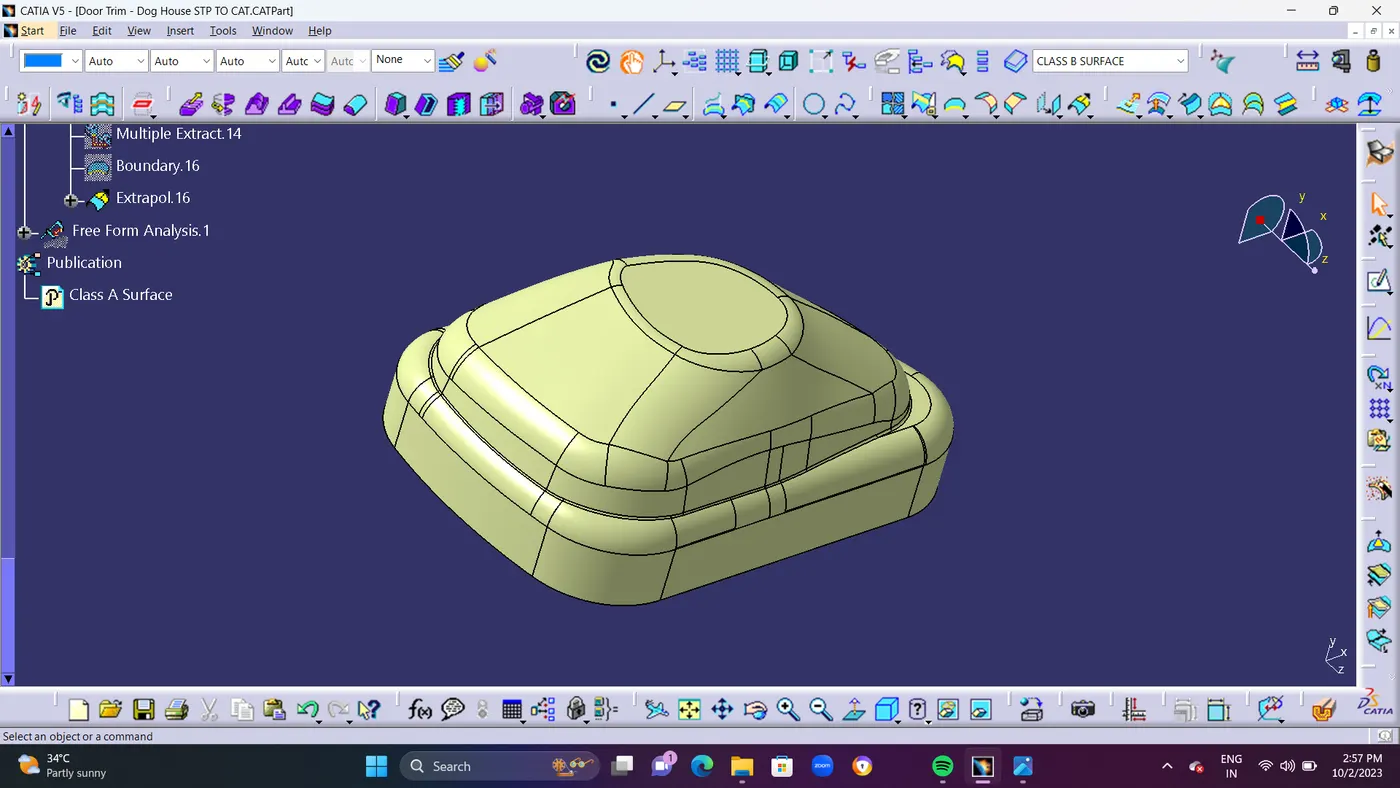
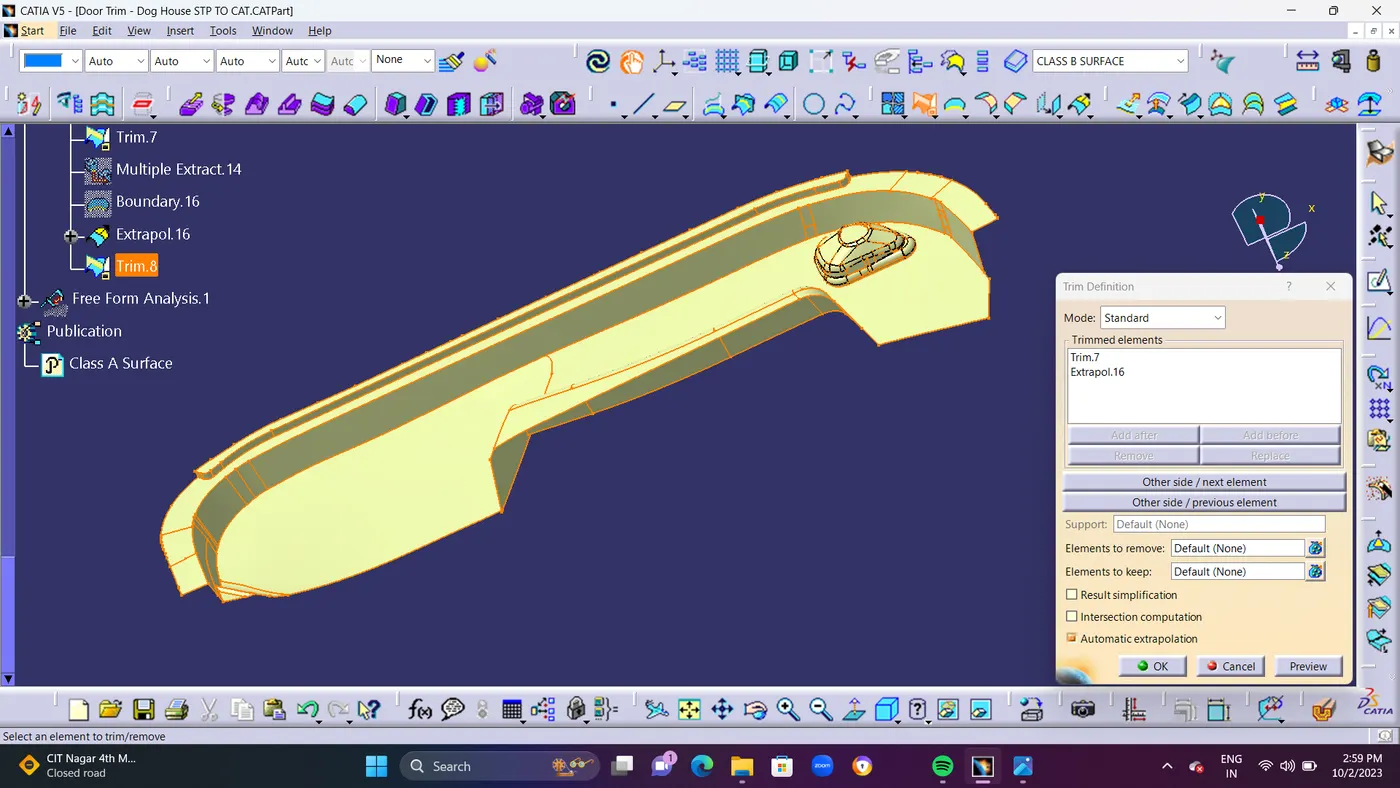
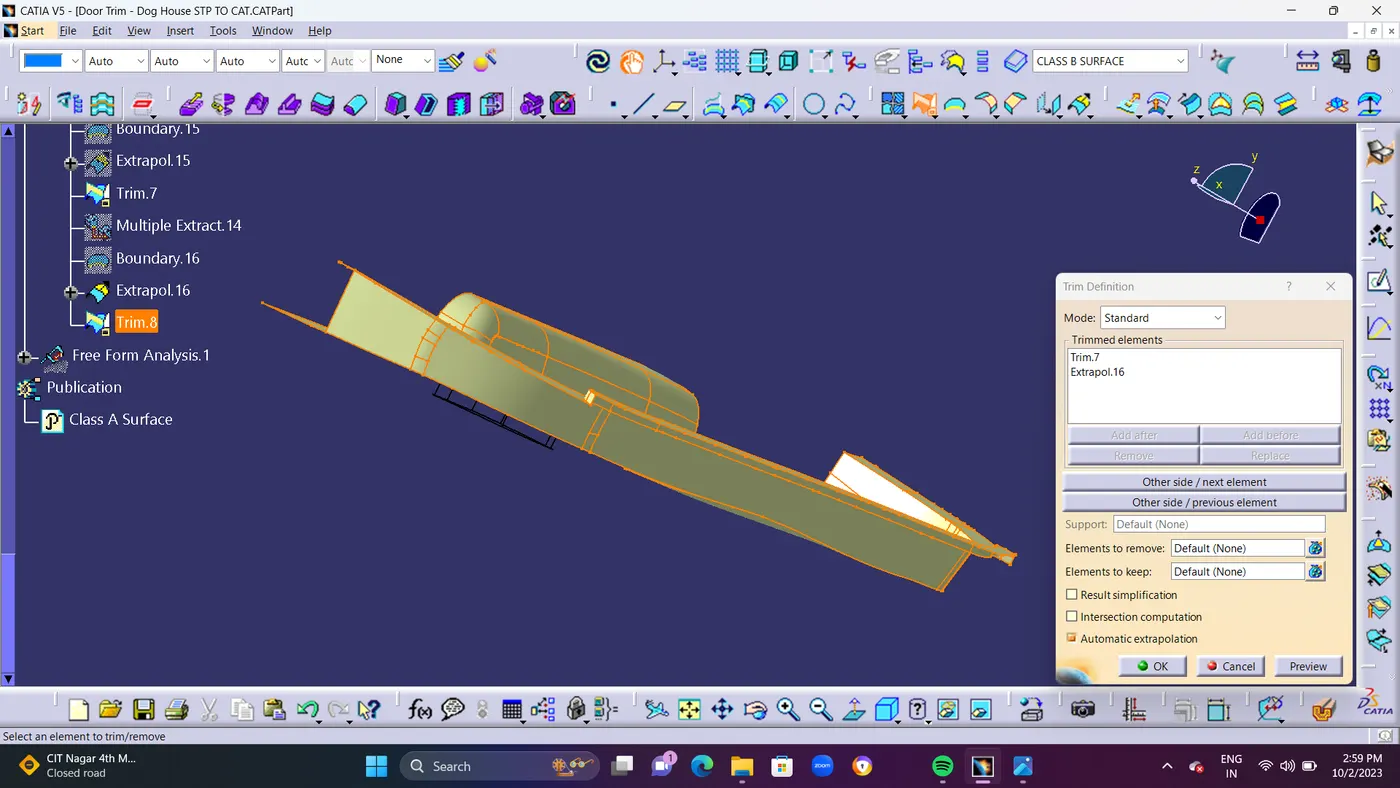
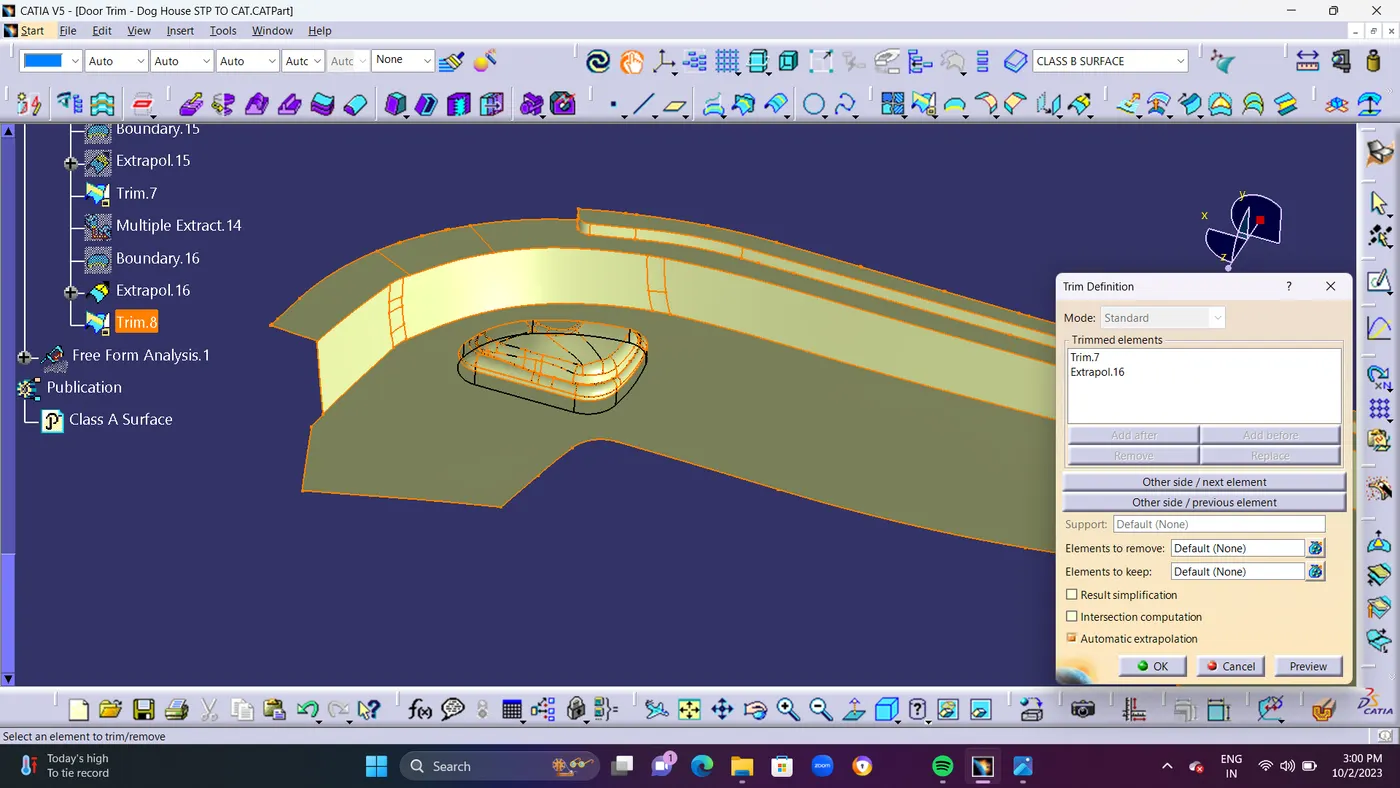
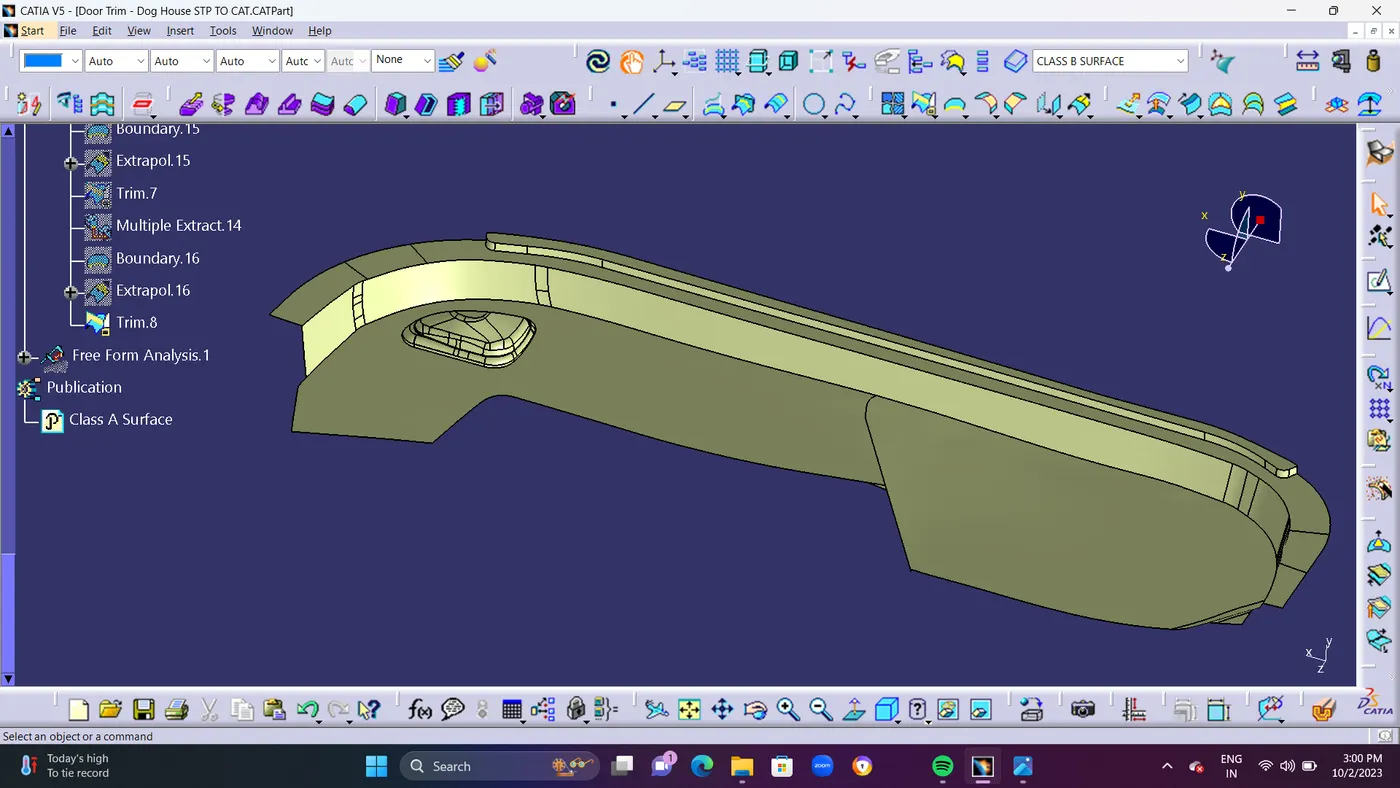
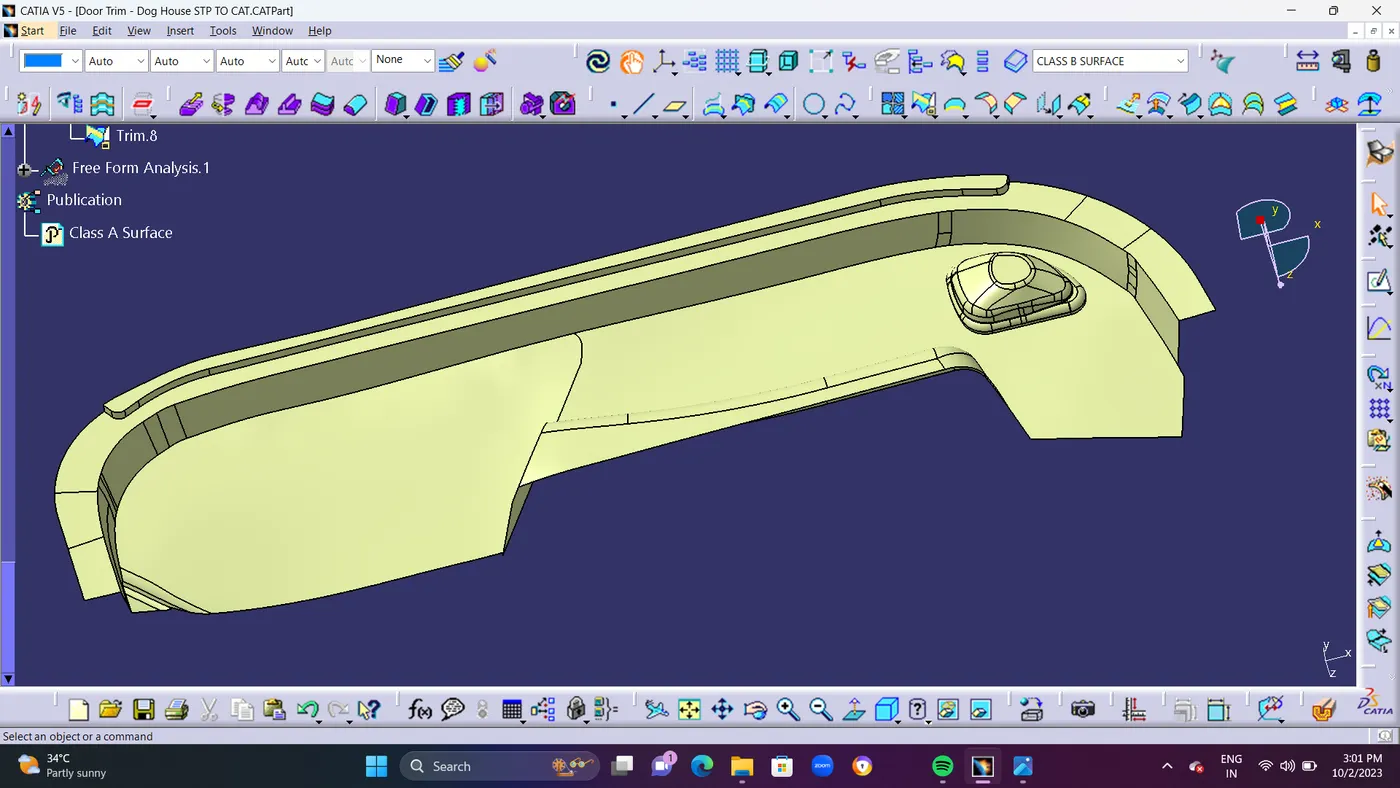
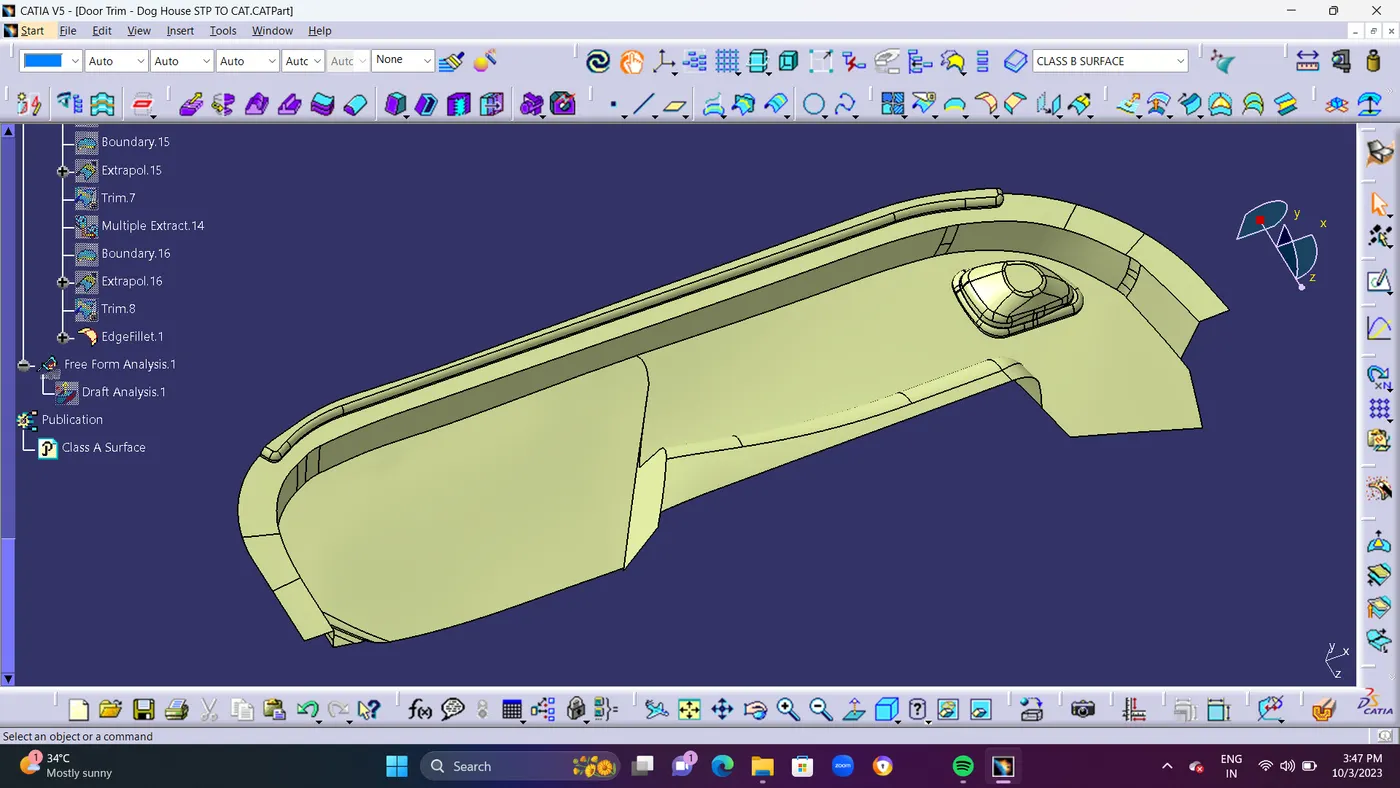
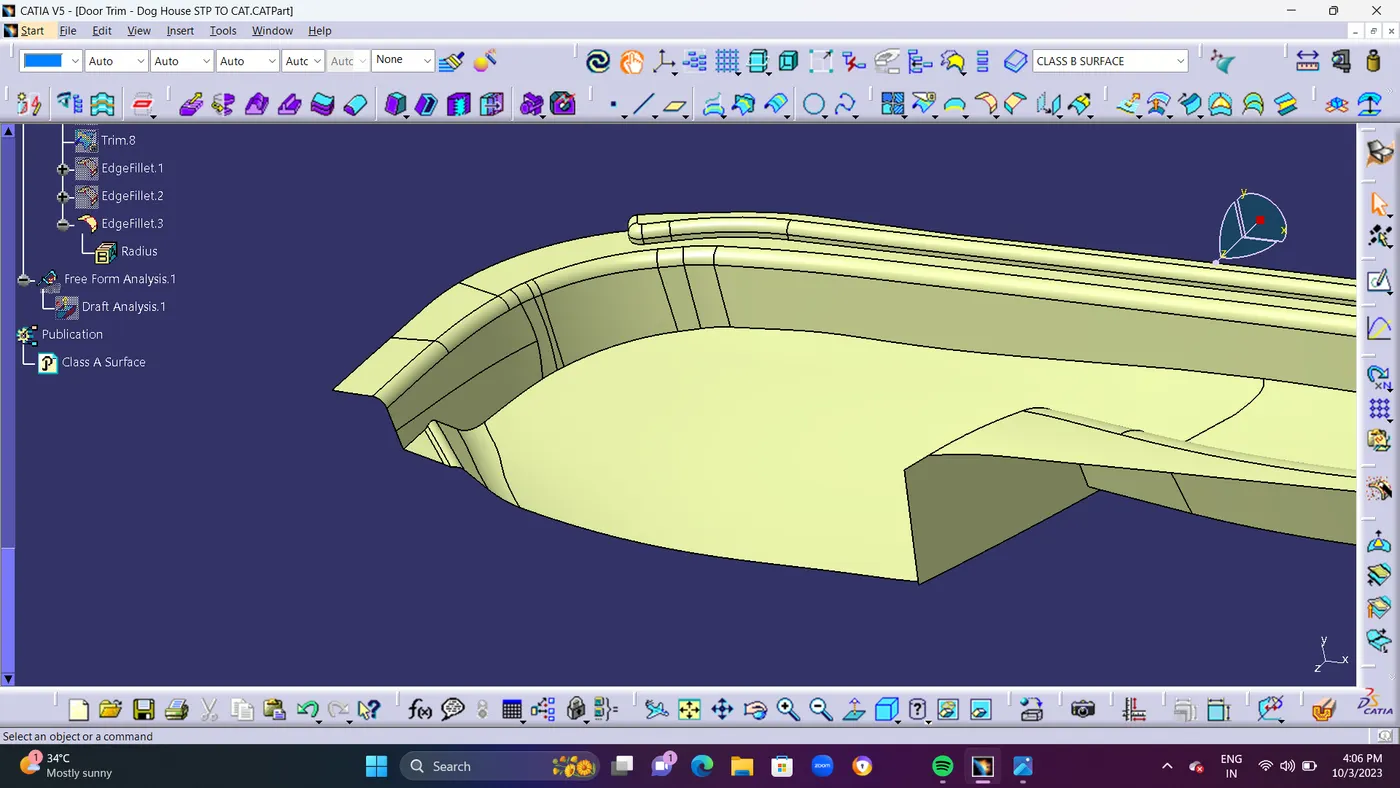
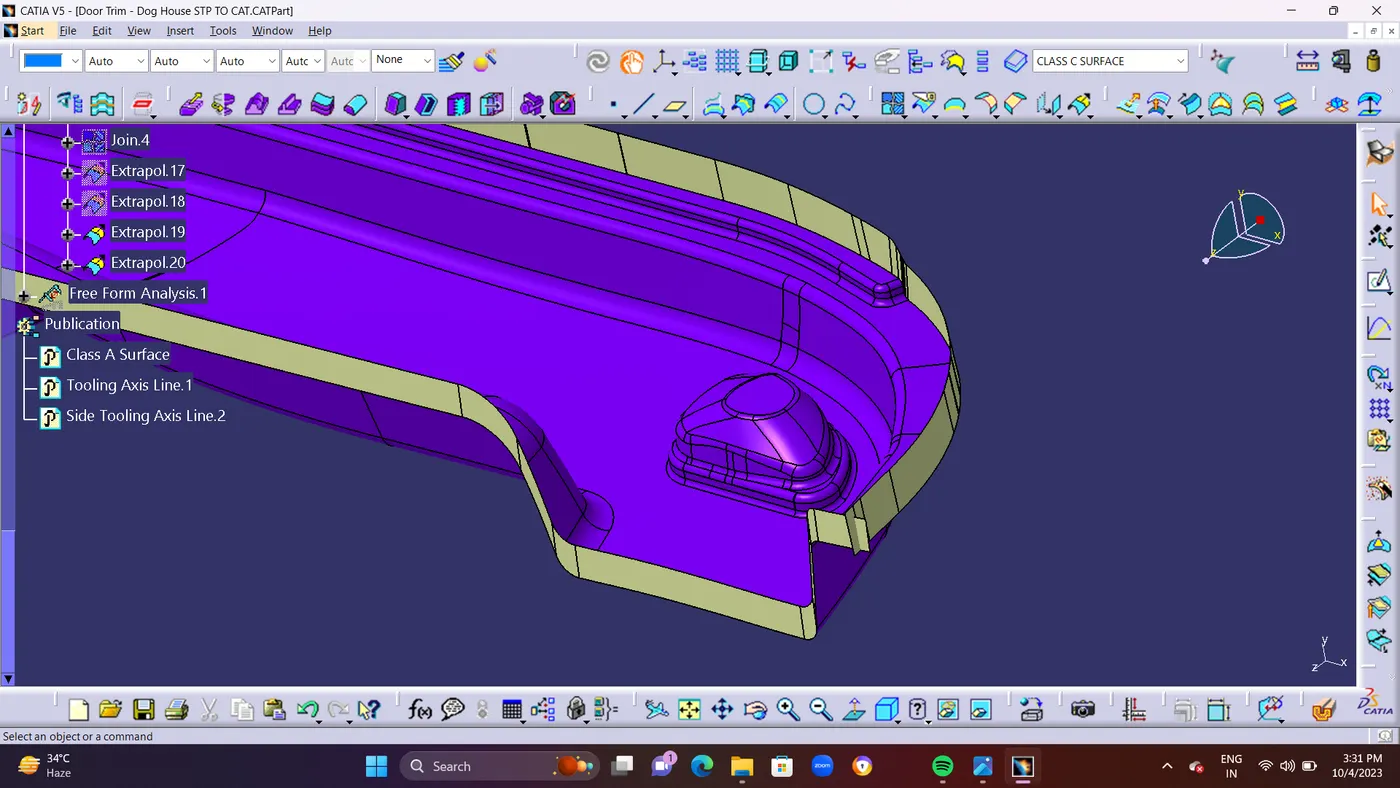
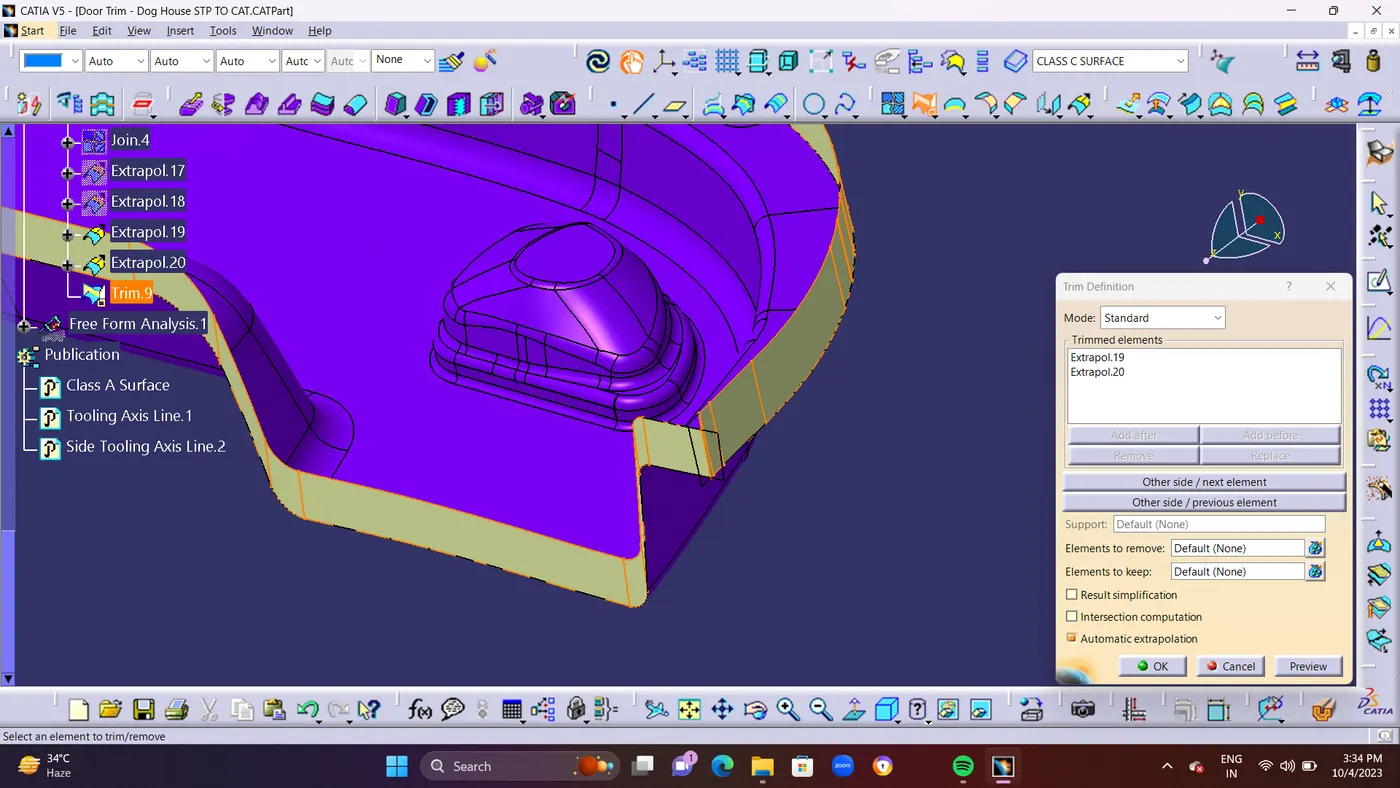
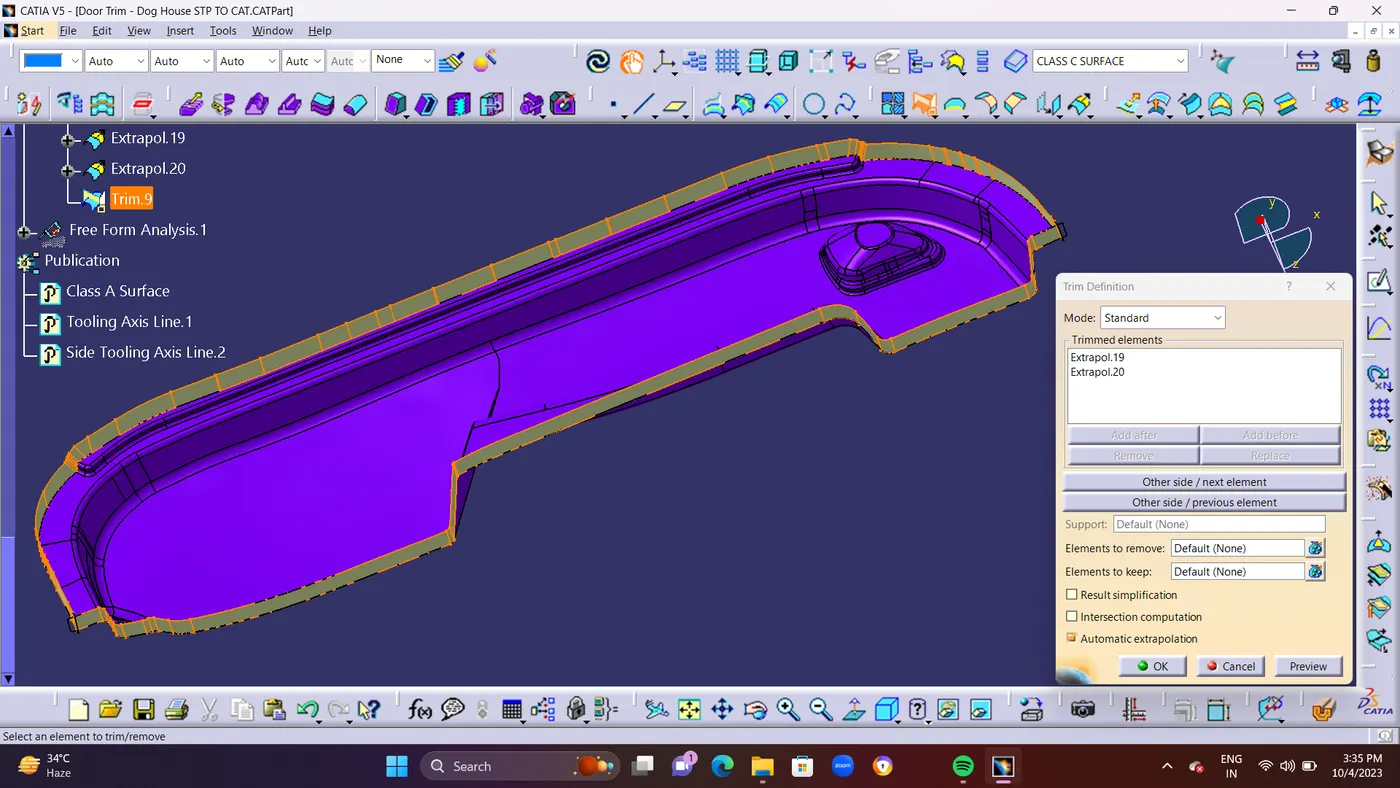
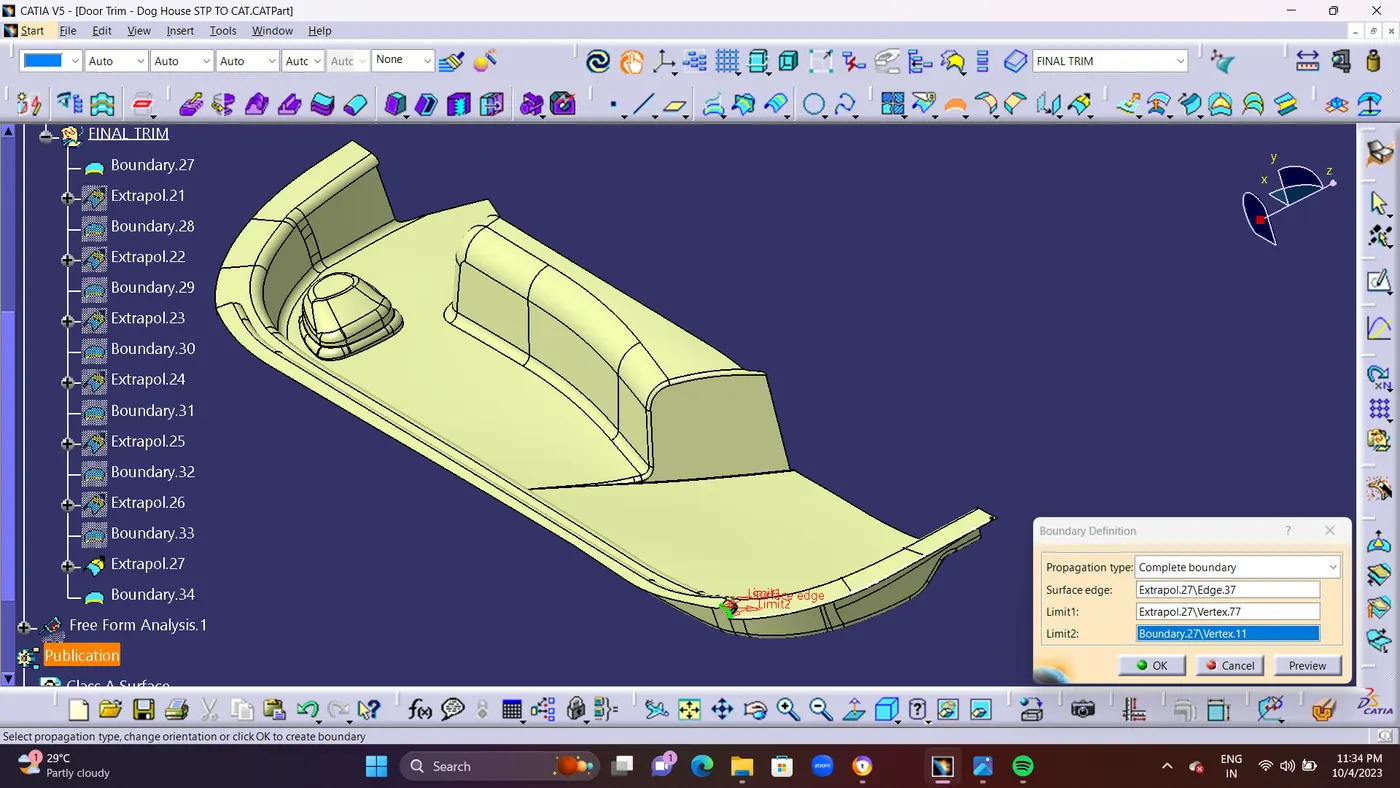
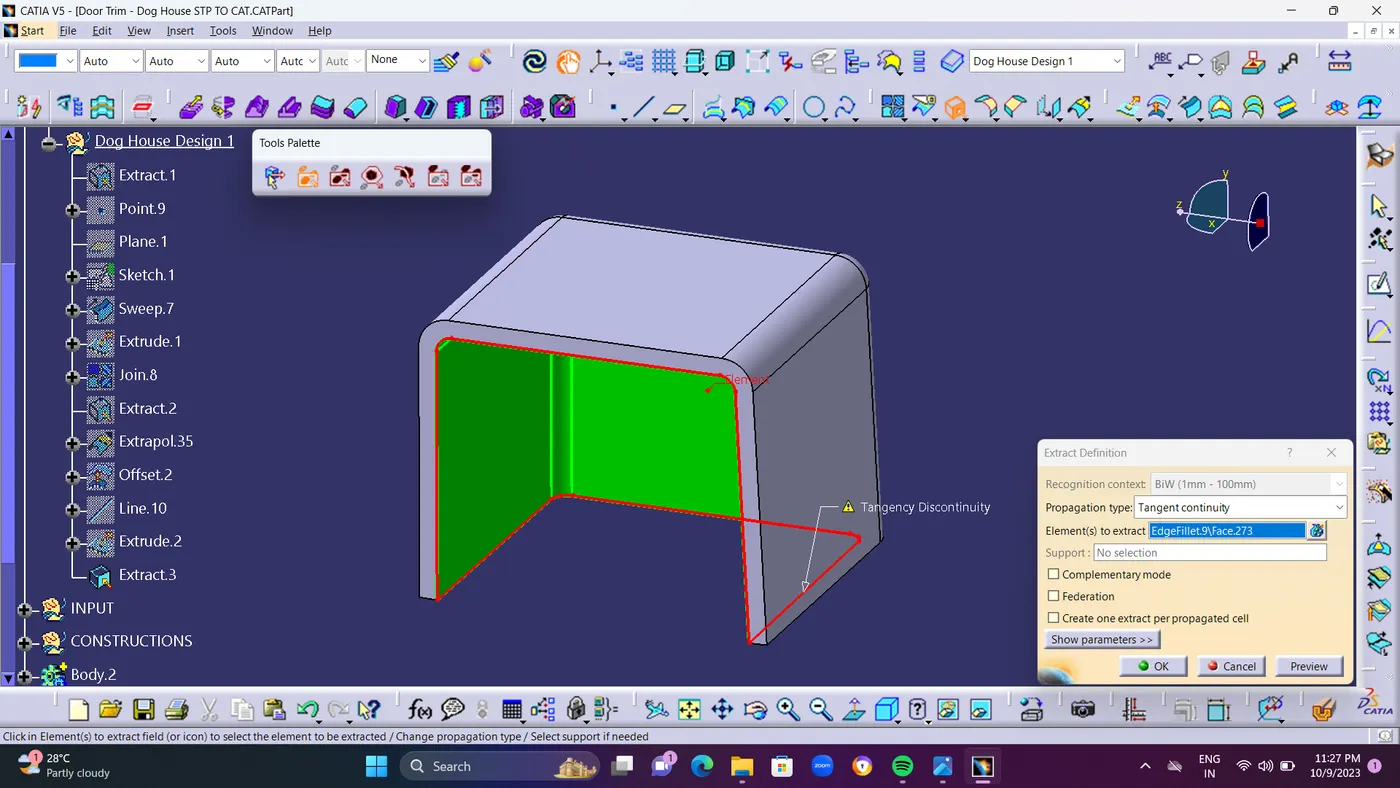
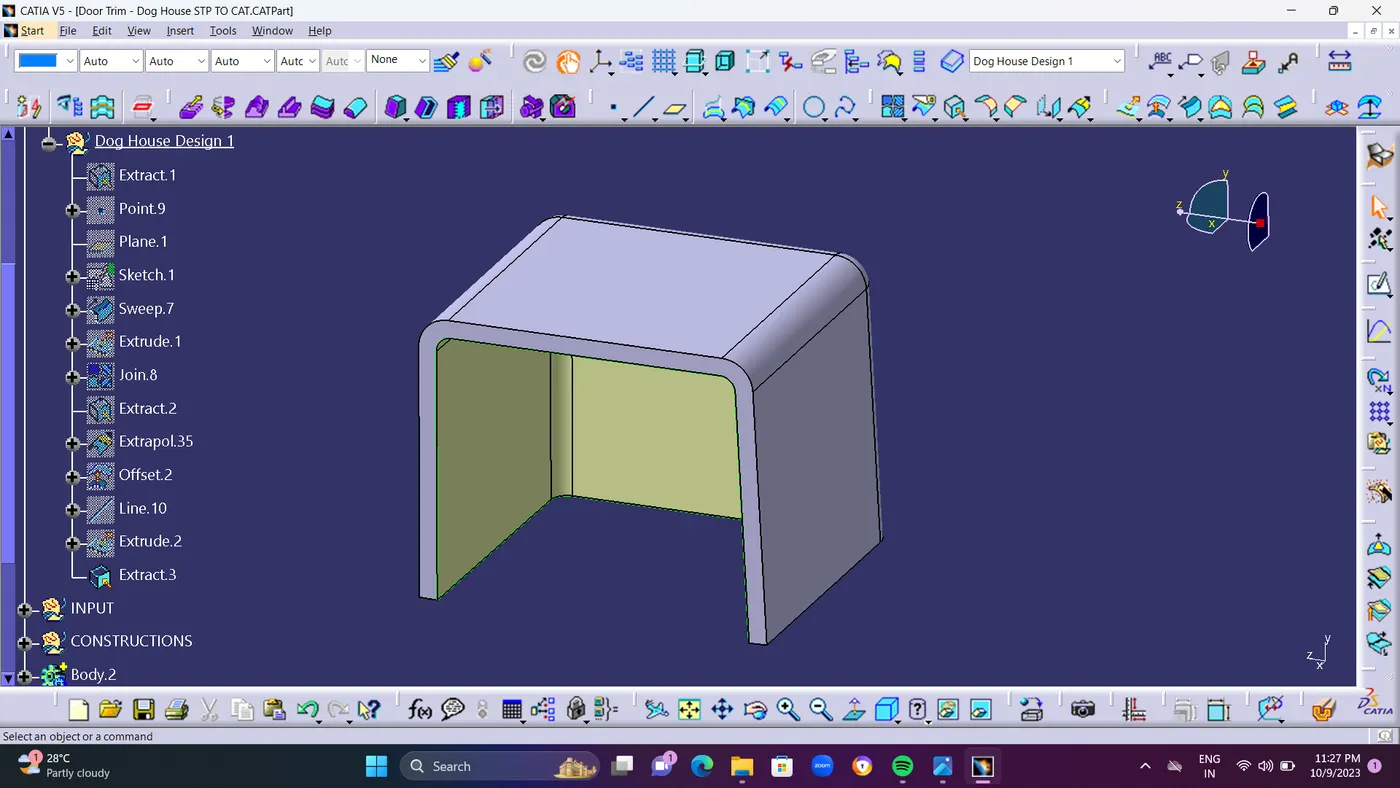
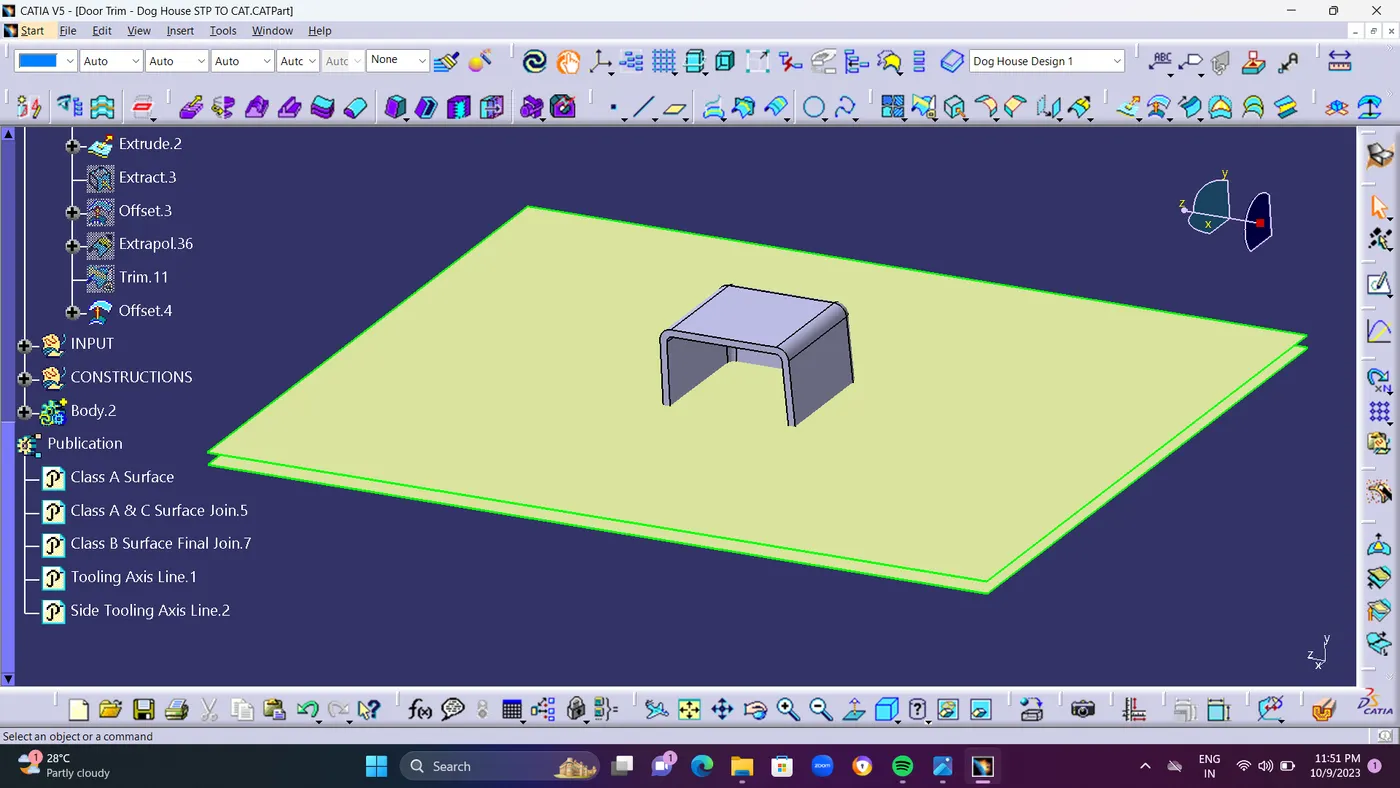
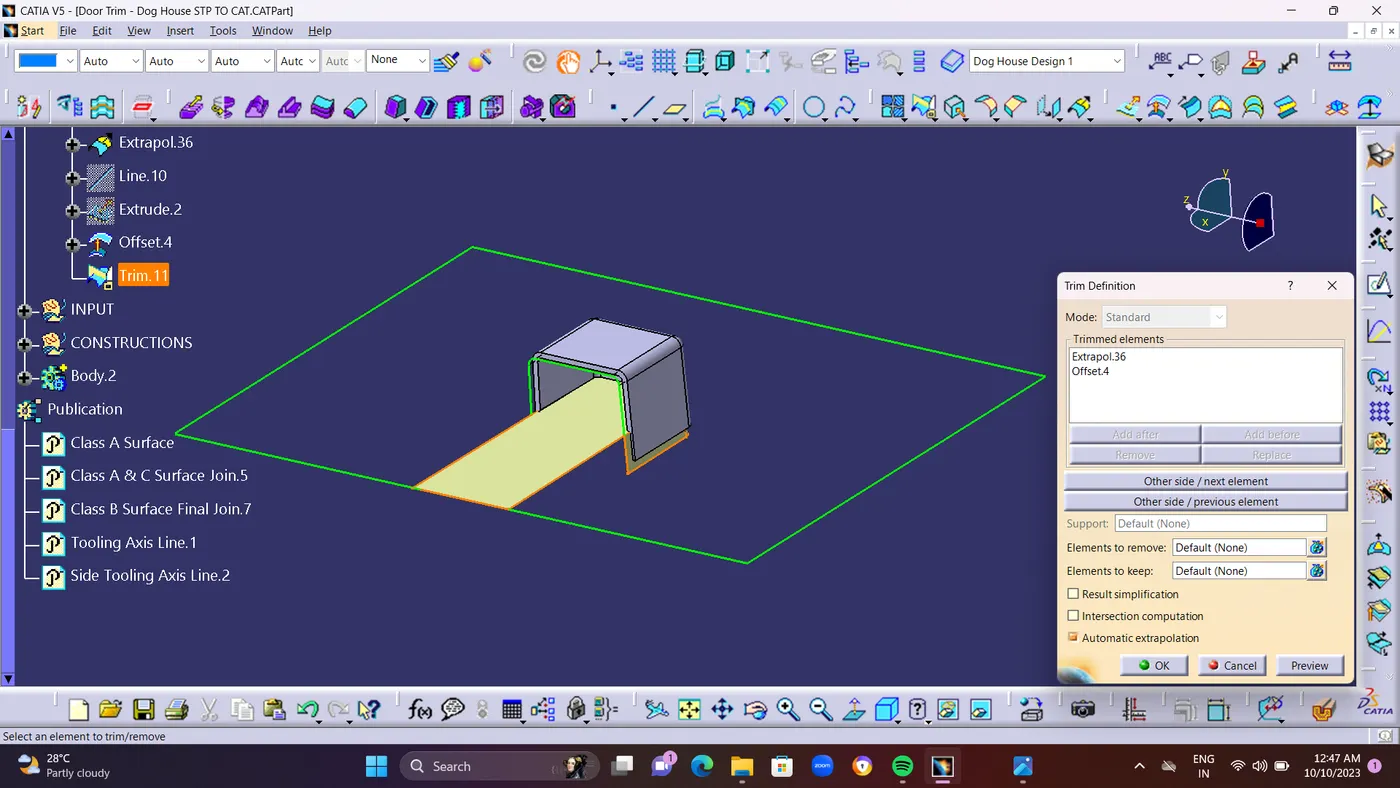
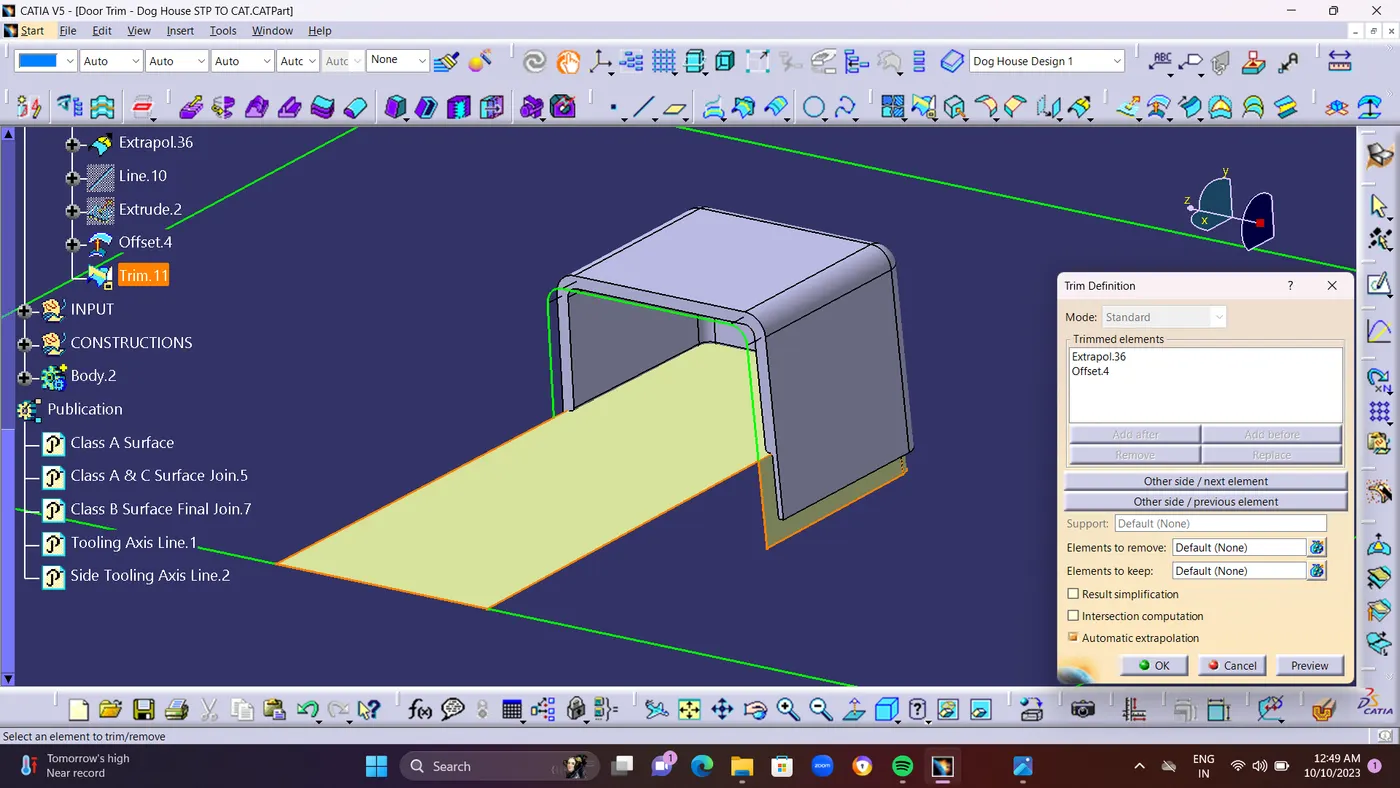
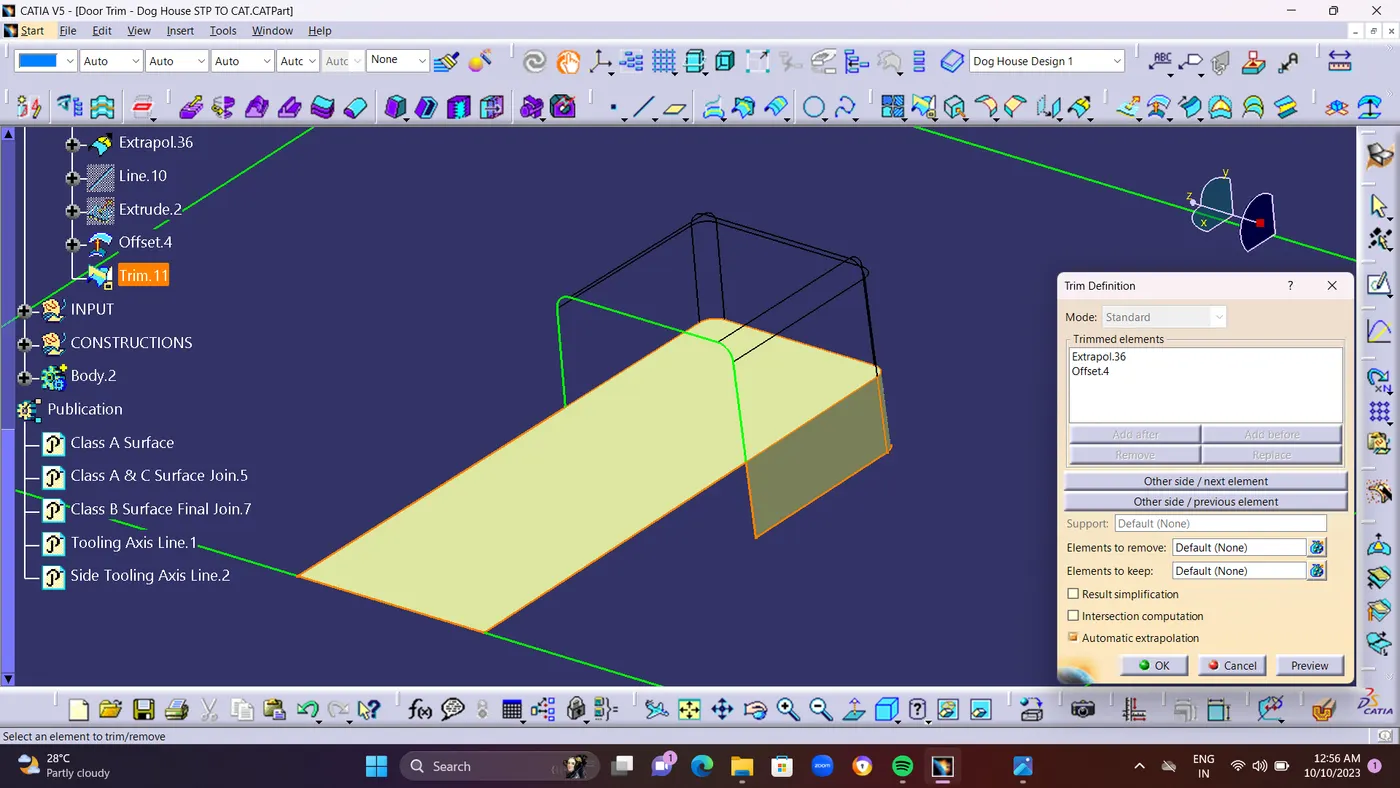
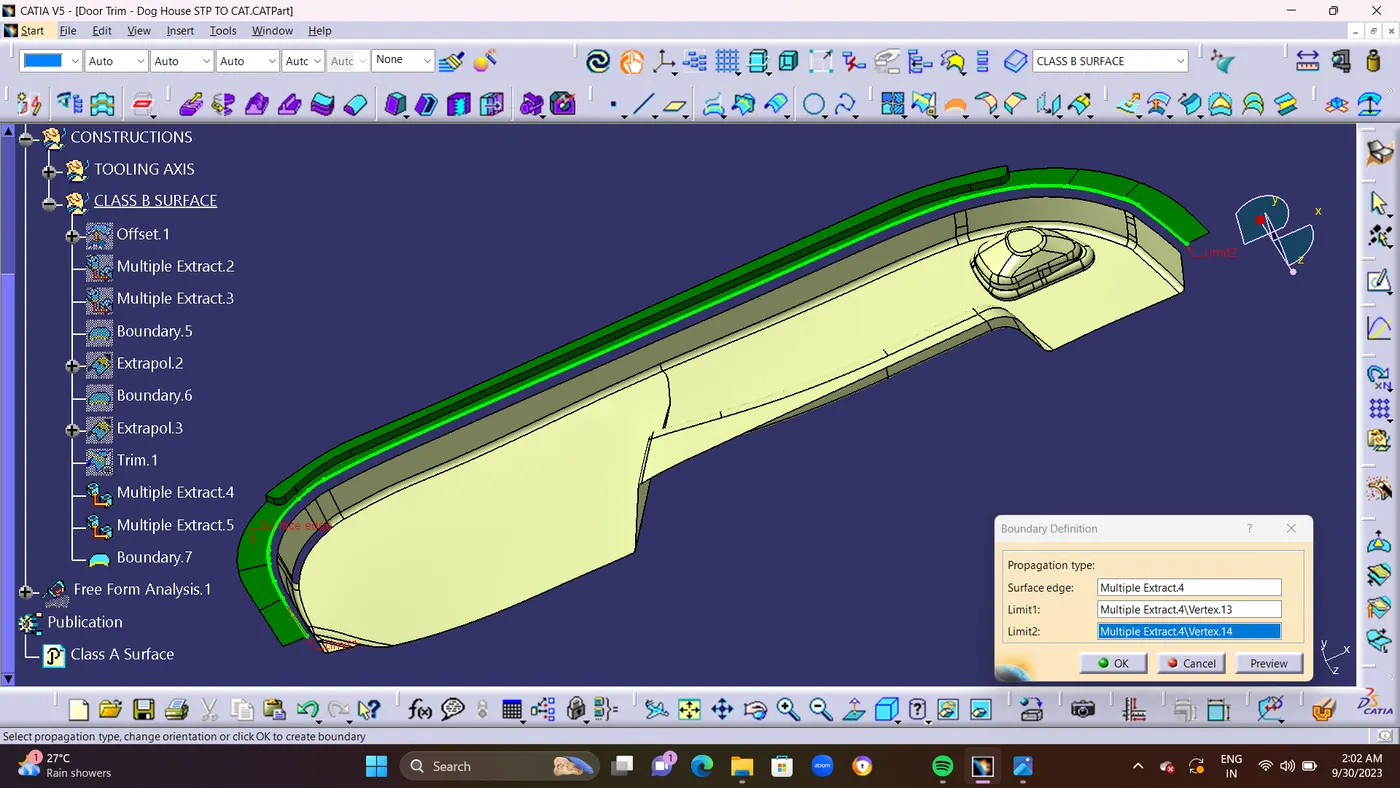
  • STEP 4 : For Solving The Patches using Multiple Extract Command Seperating the pached area surfaces and Create an Boundary Line on the Multiple Extracted Surface.Finally Extapolate It to                              Interconnect the Both surface for Minimum 5mm Maximum how much you want it to intersect both surface.after interconnected it. and Using TRIM Command trim the Both surface.To get Sharp                  edge Surface and Finally use EDGE fillet on it. shown in below screen shots.
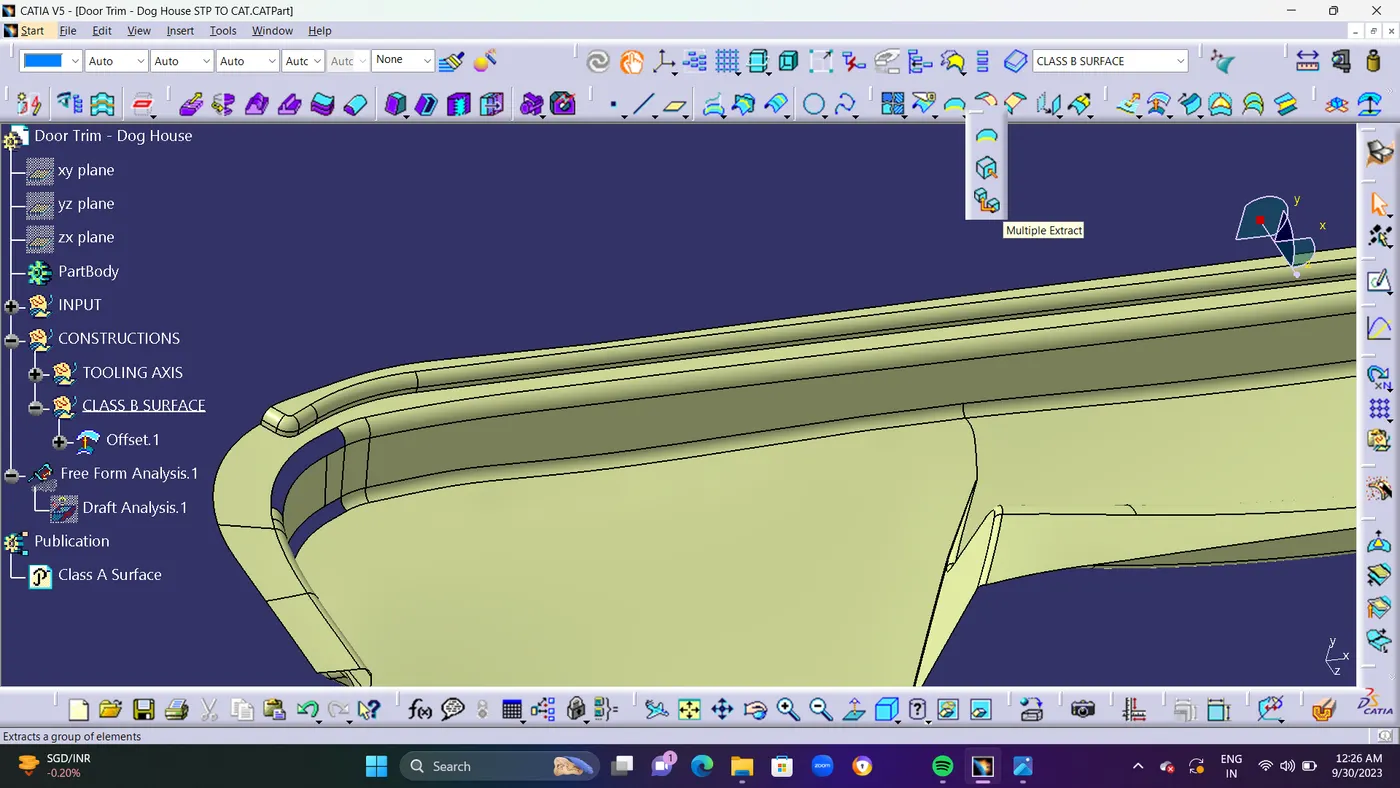


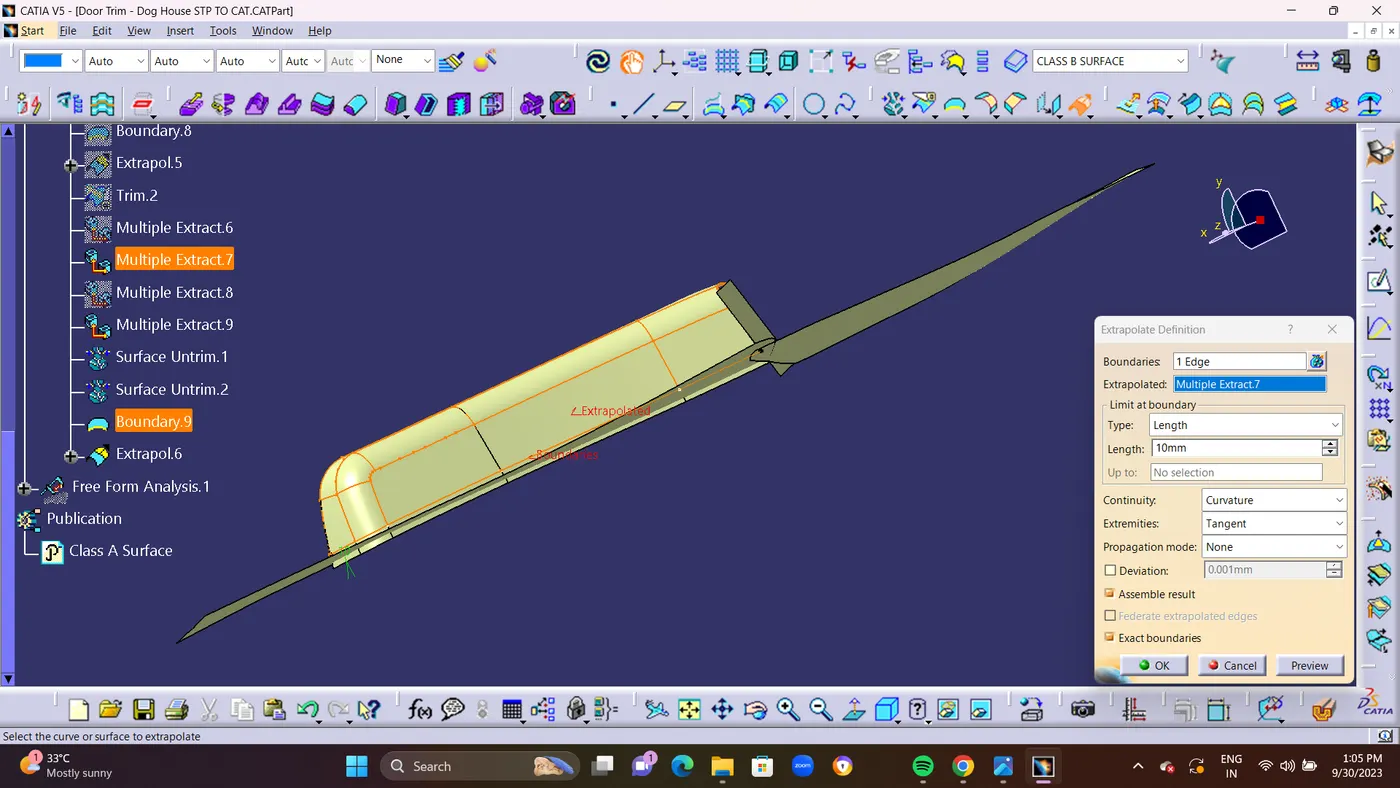
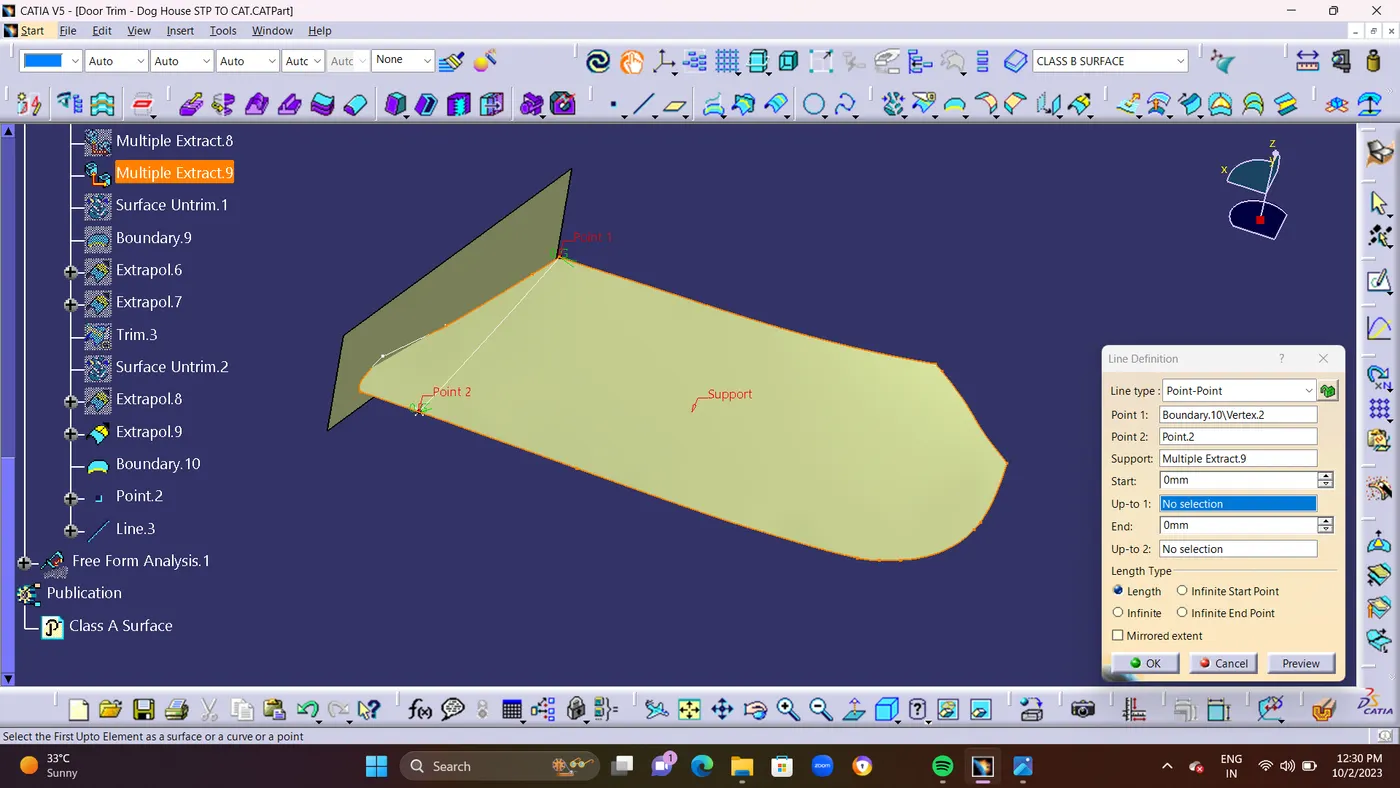
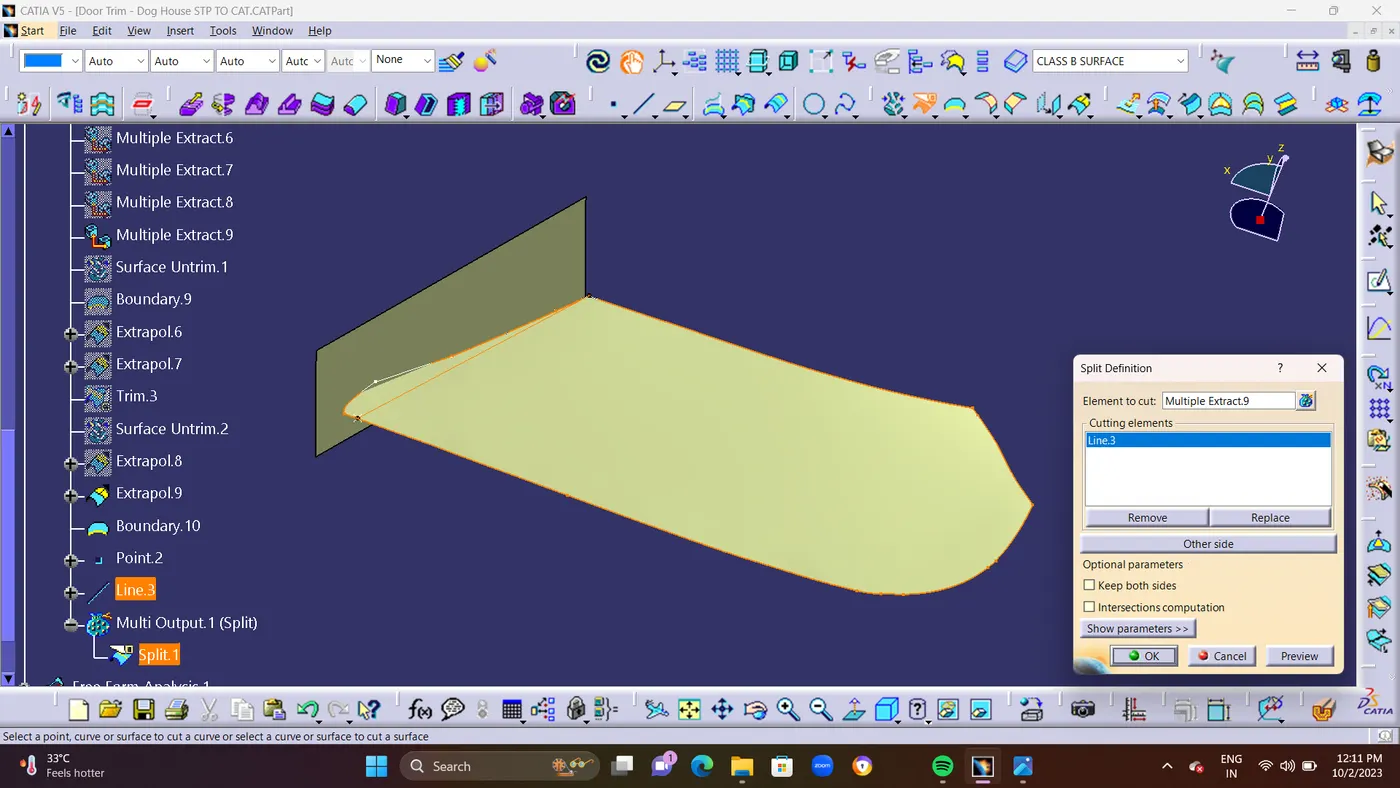
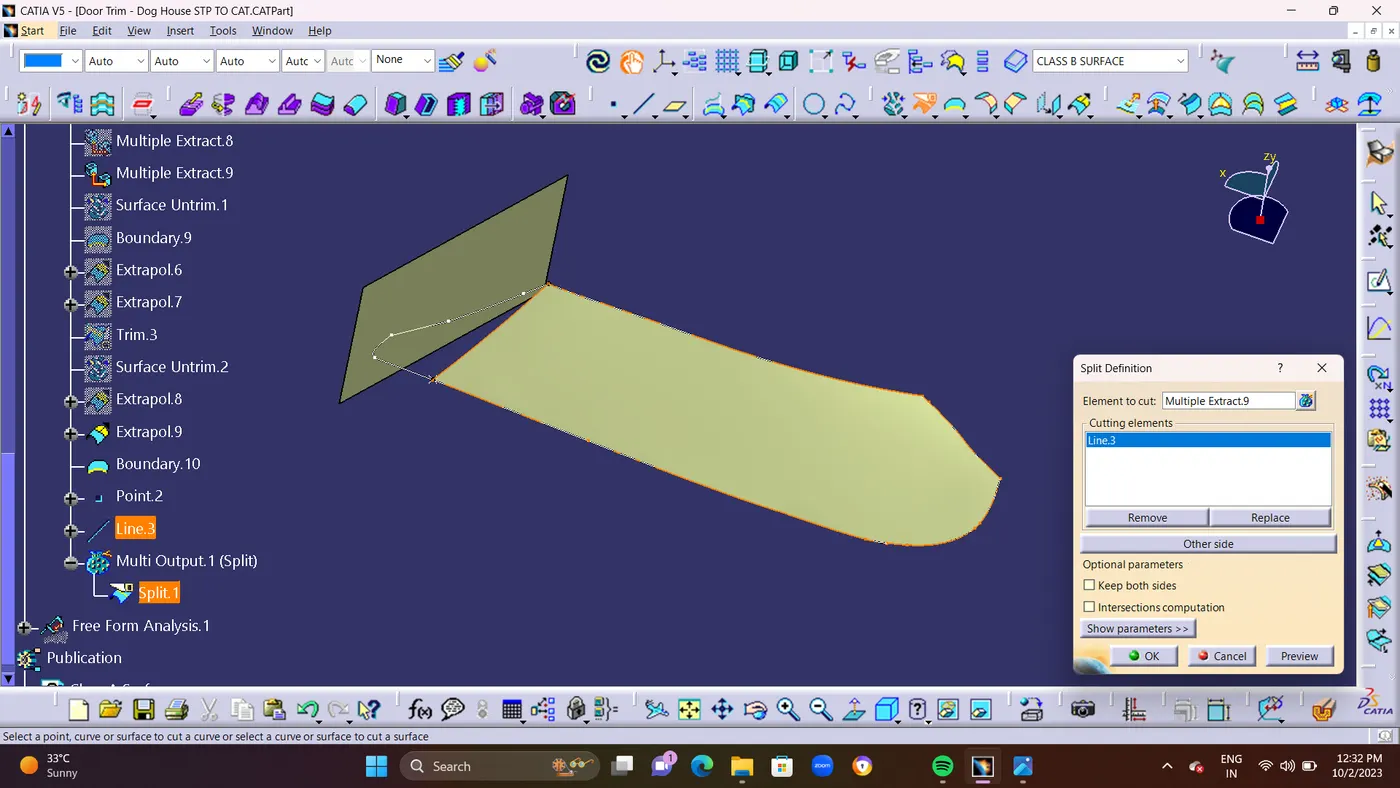
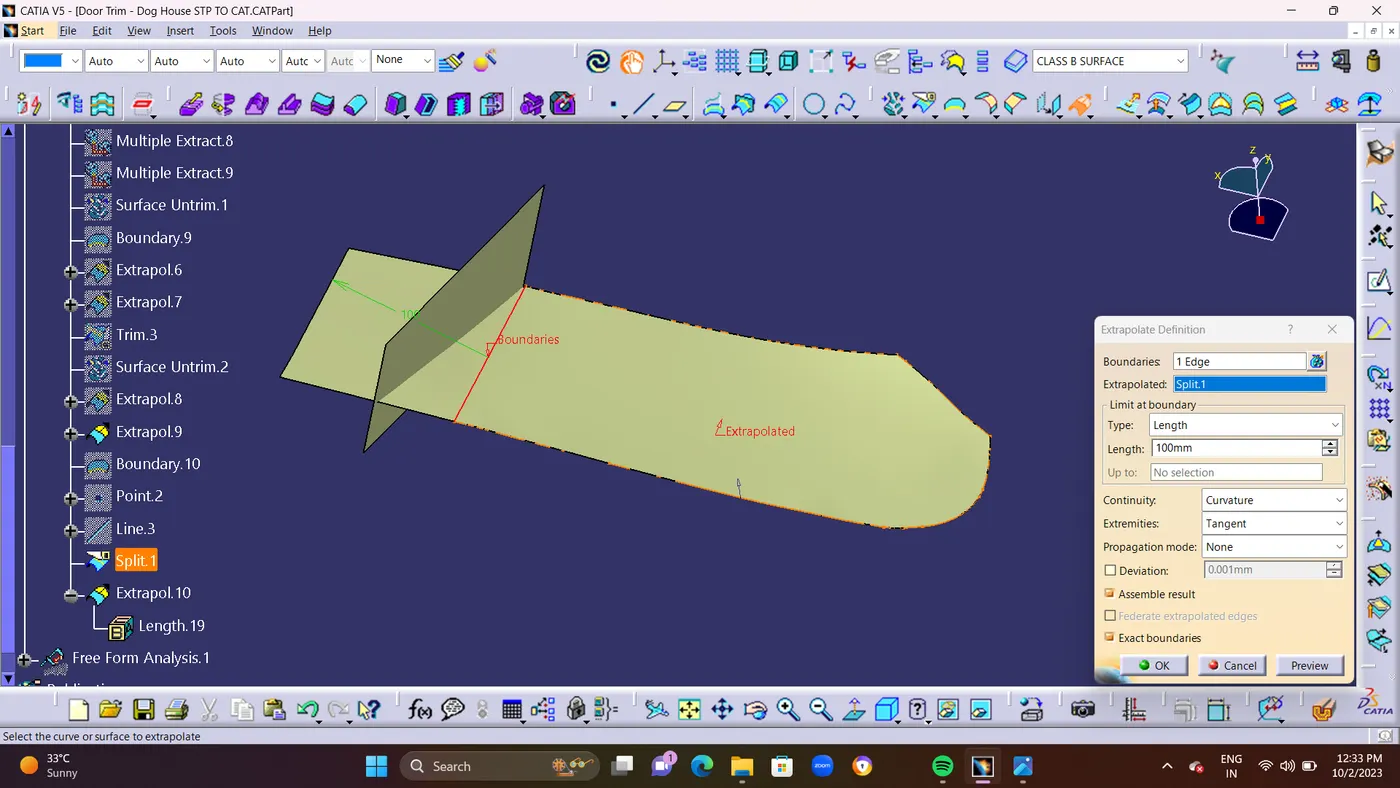
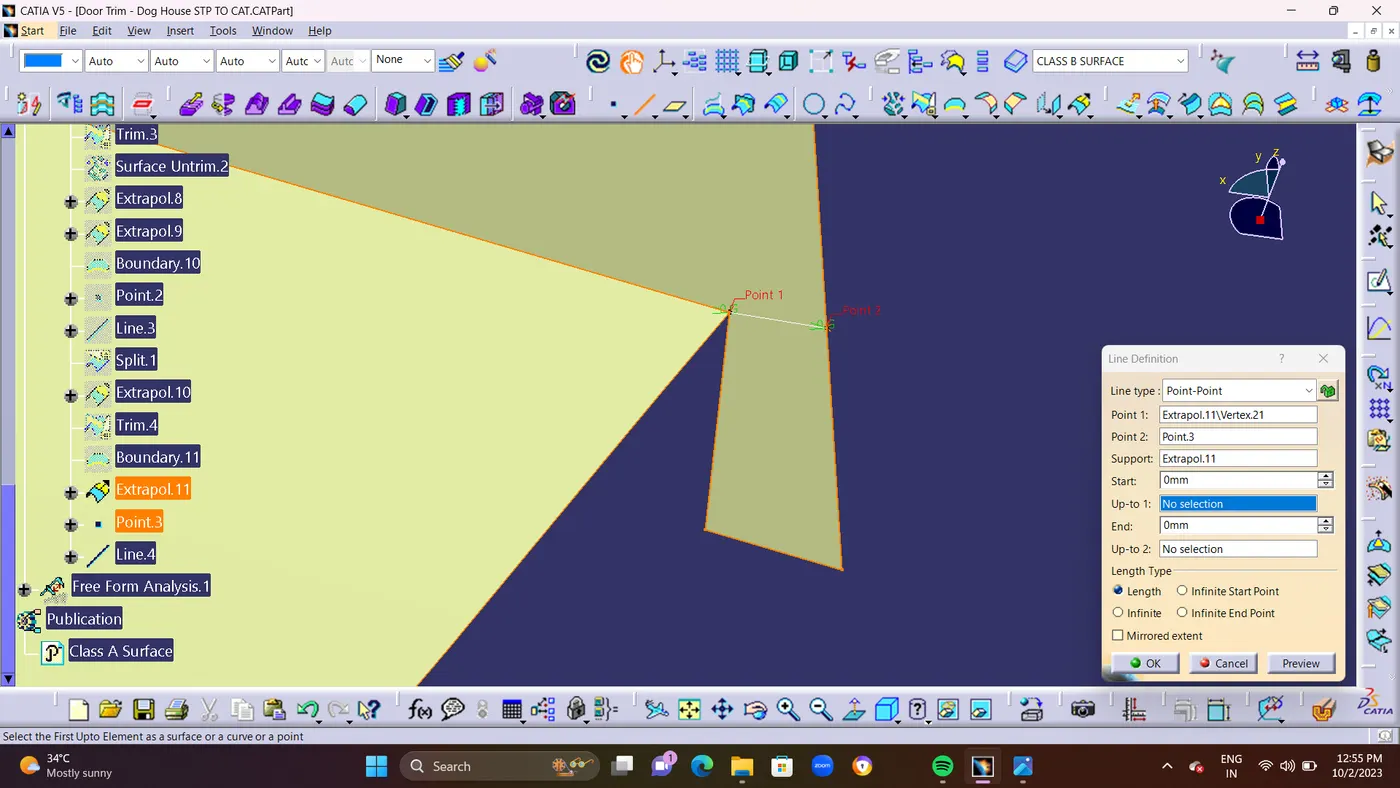
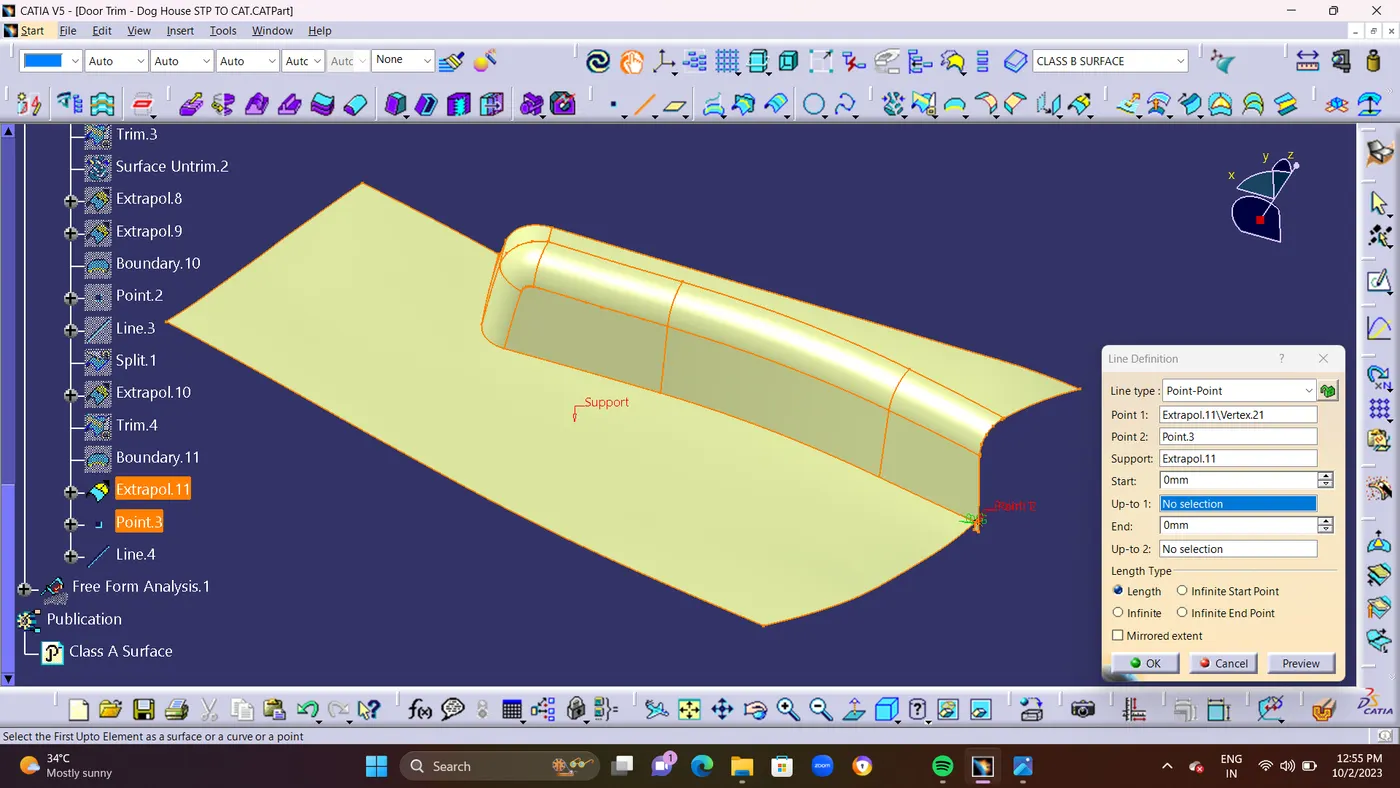
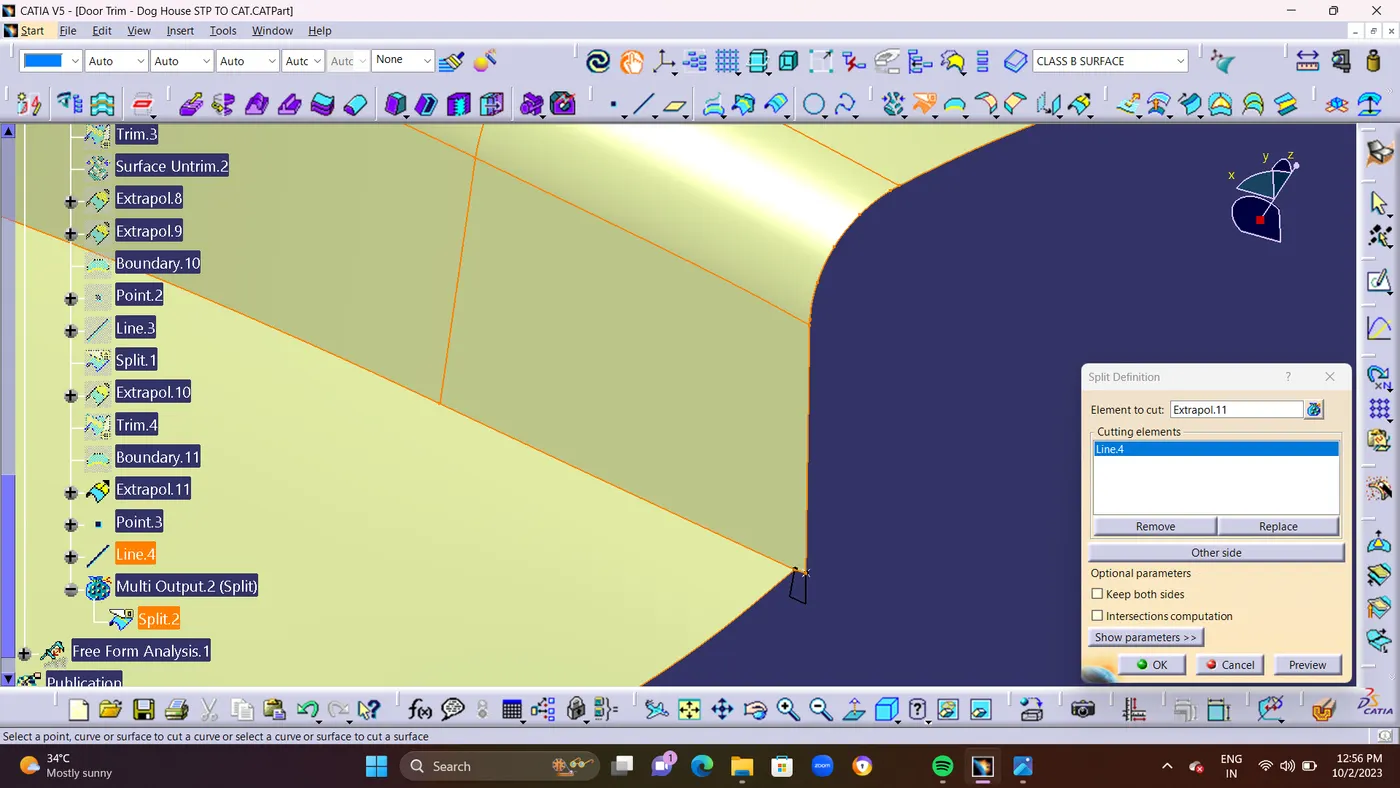
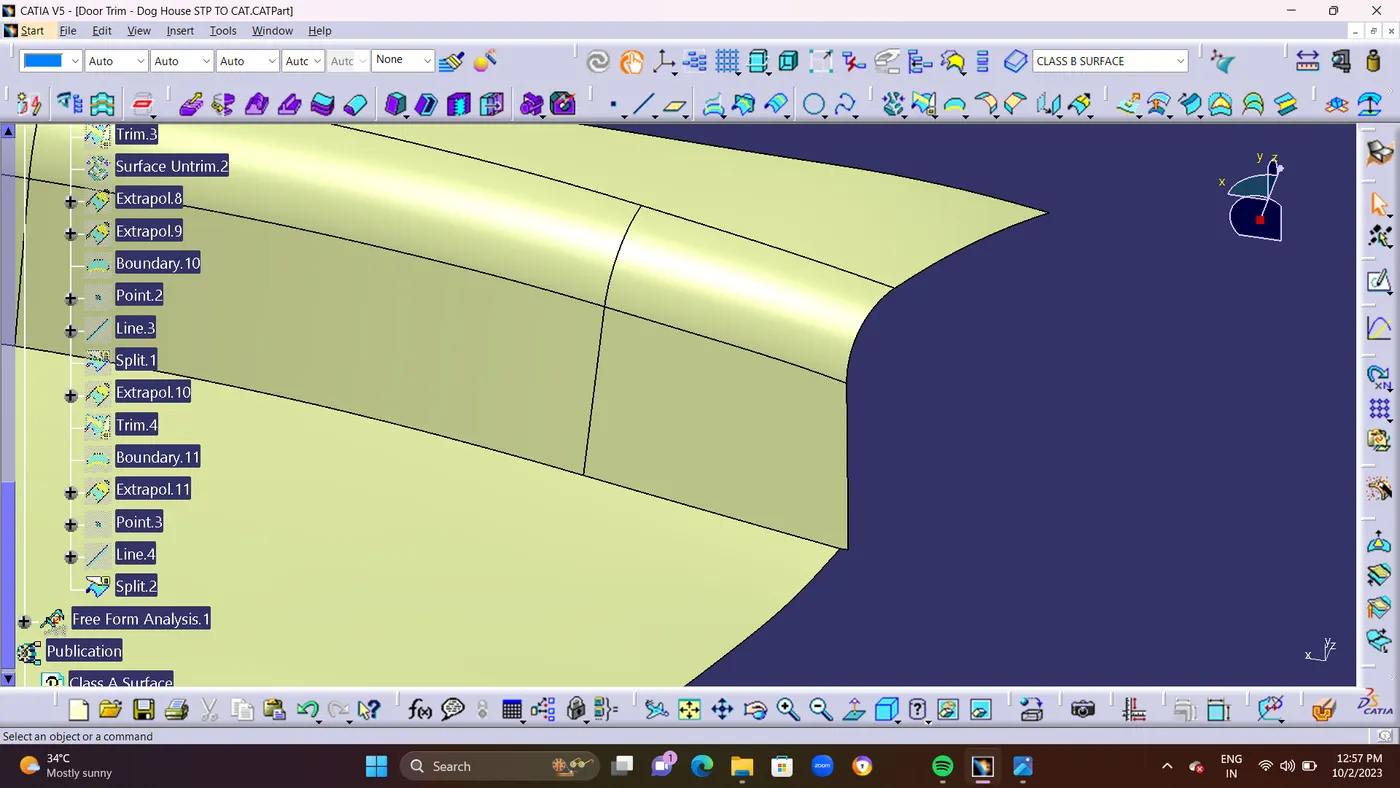
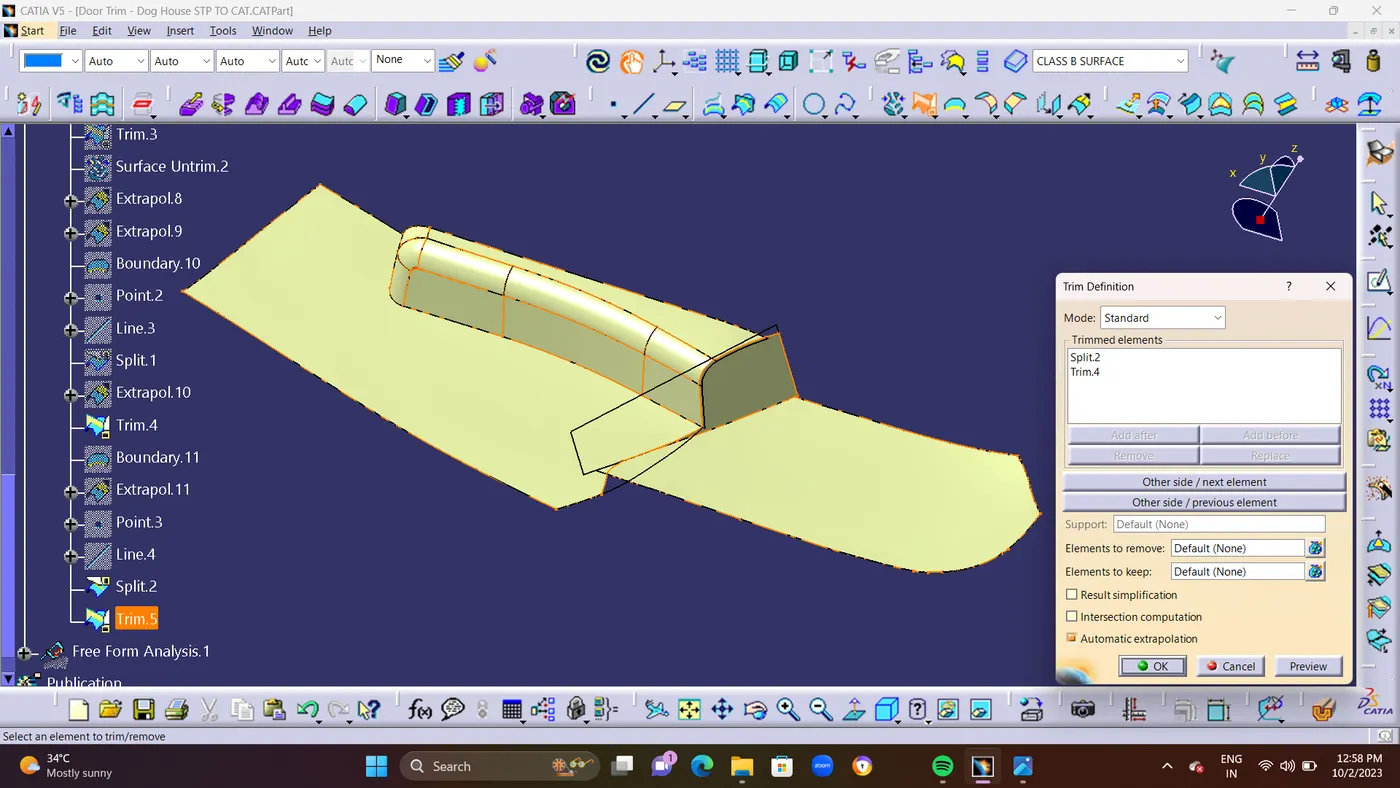
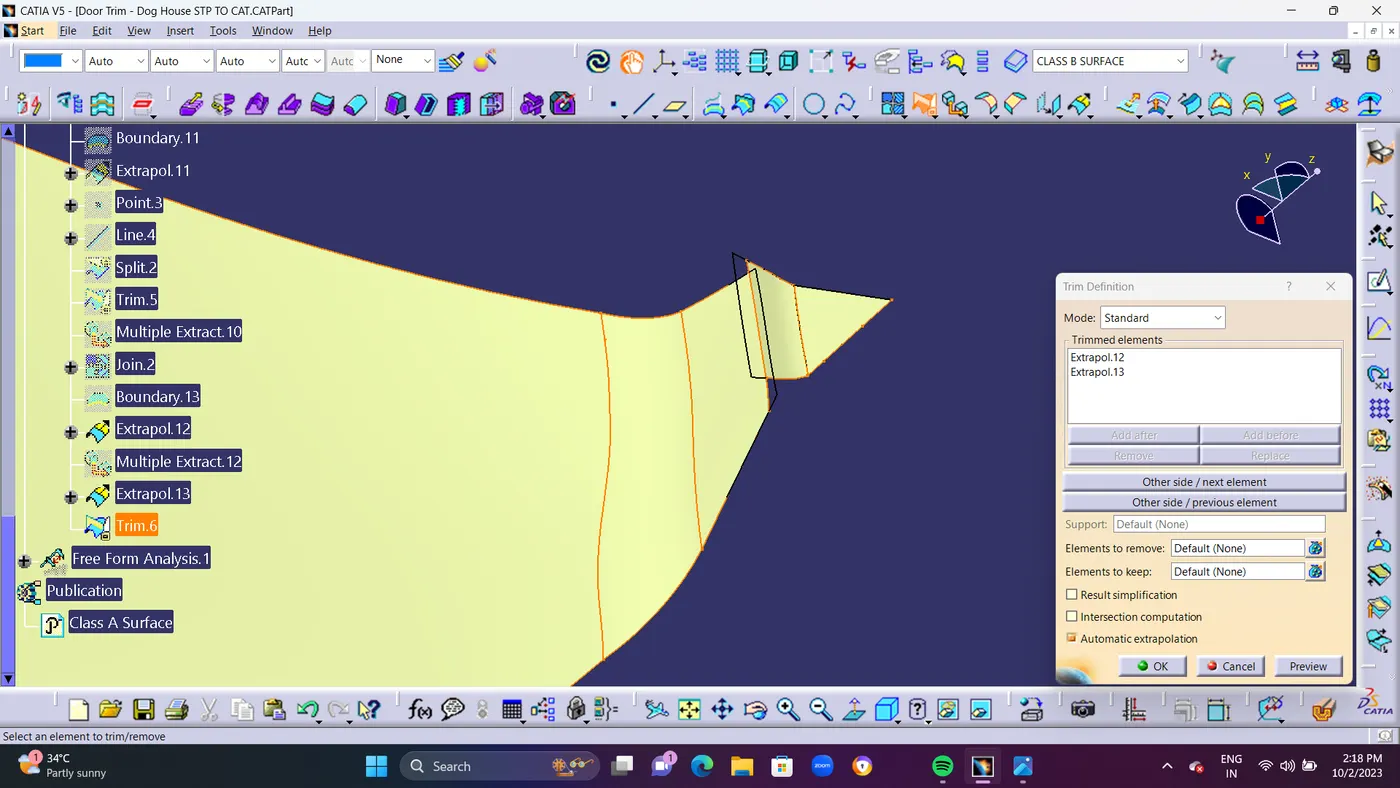
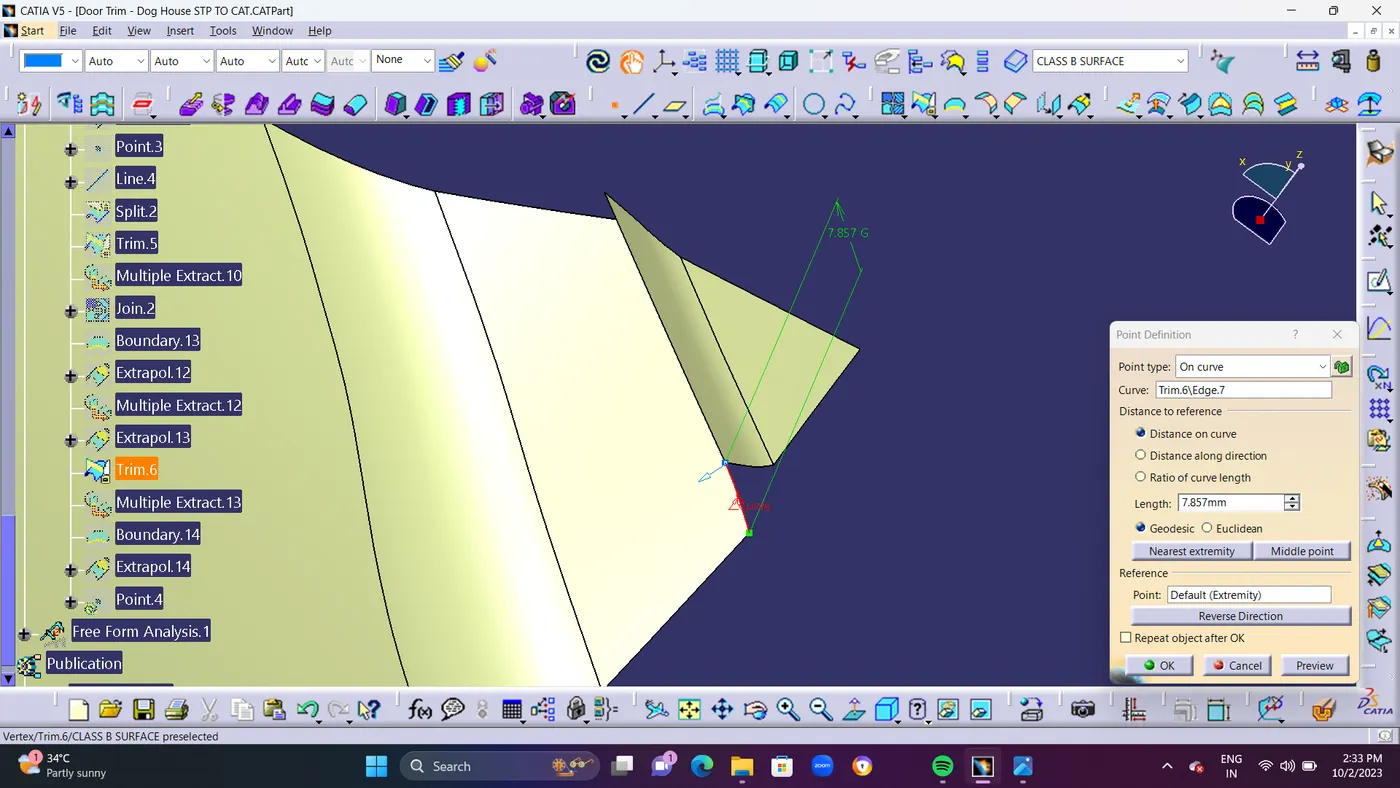
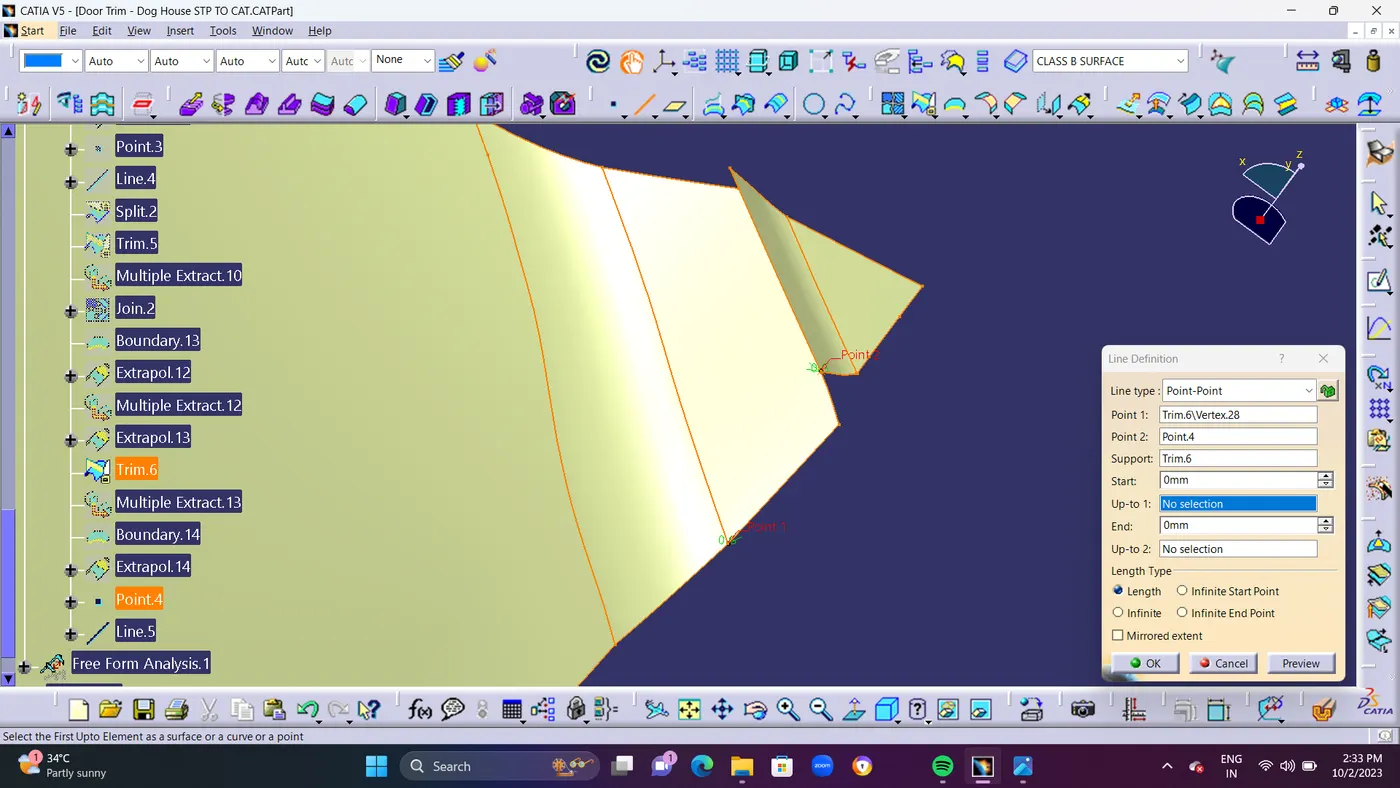
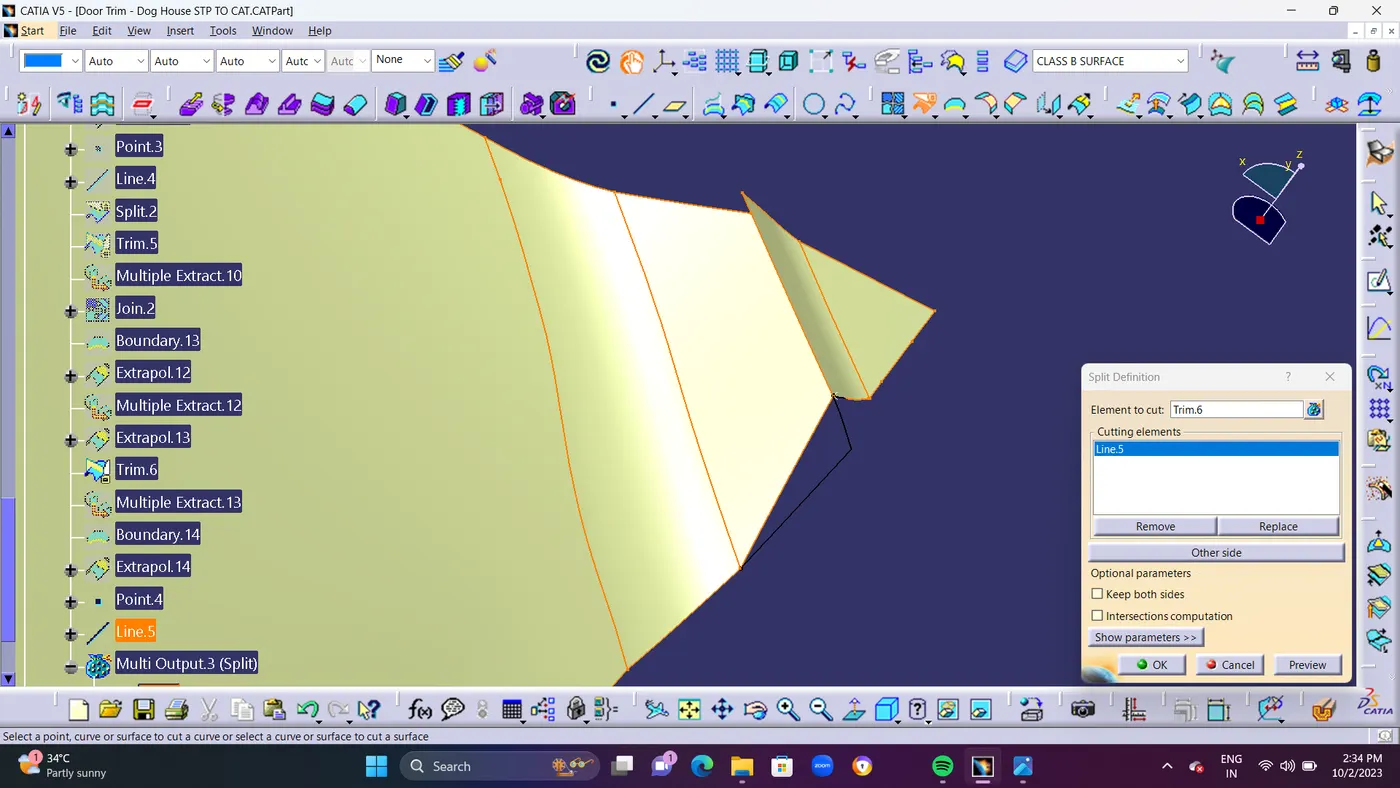
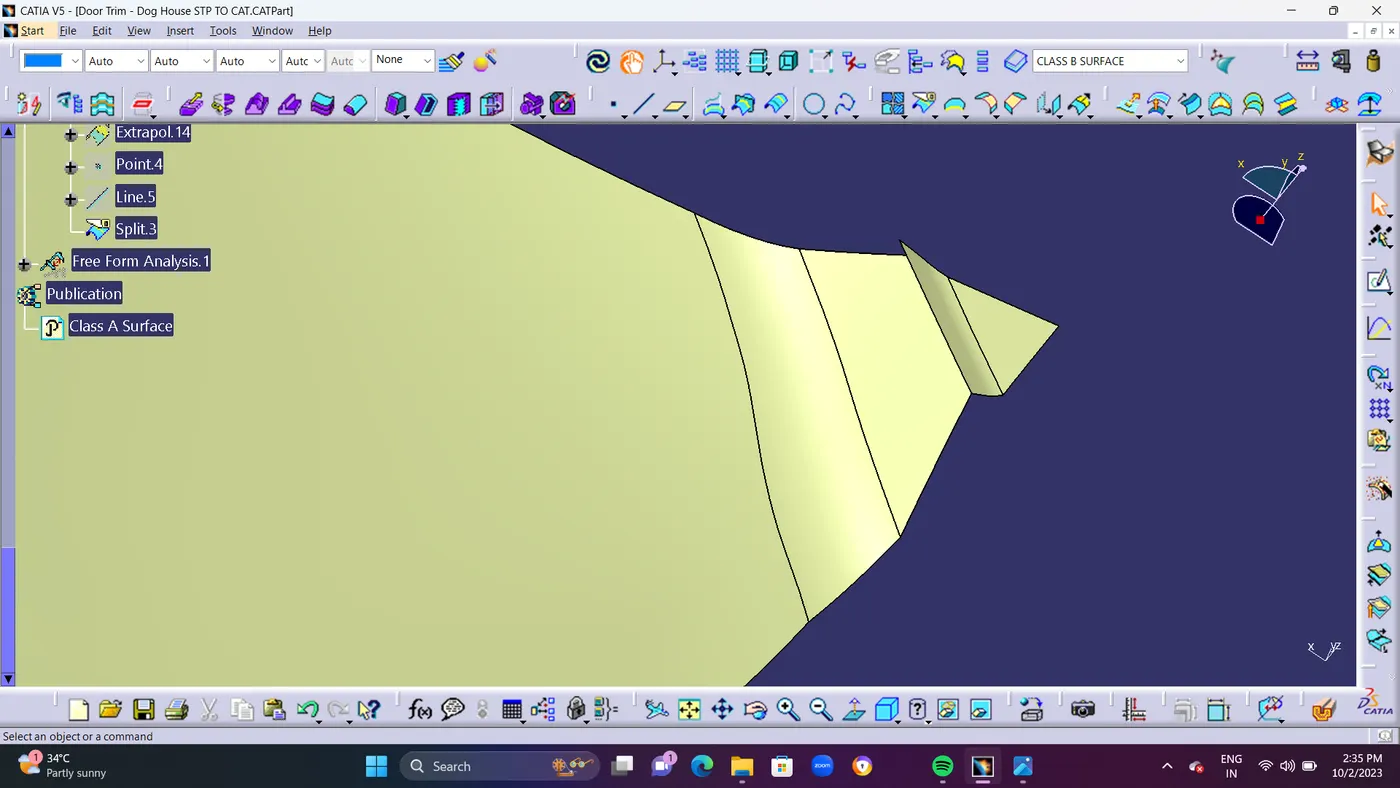
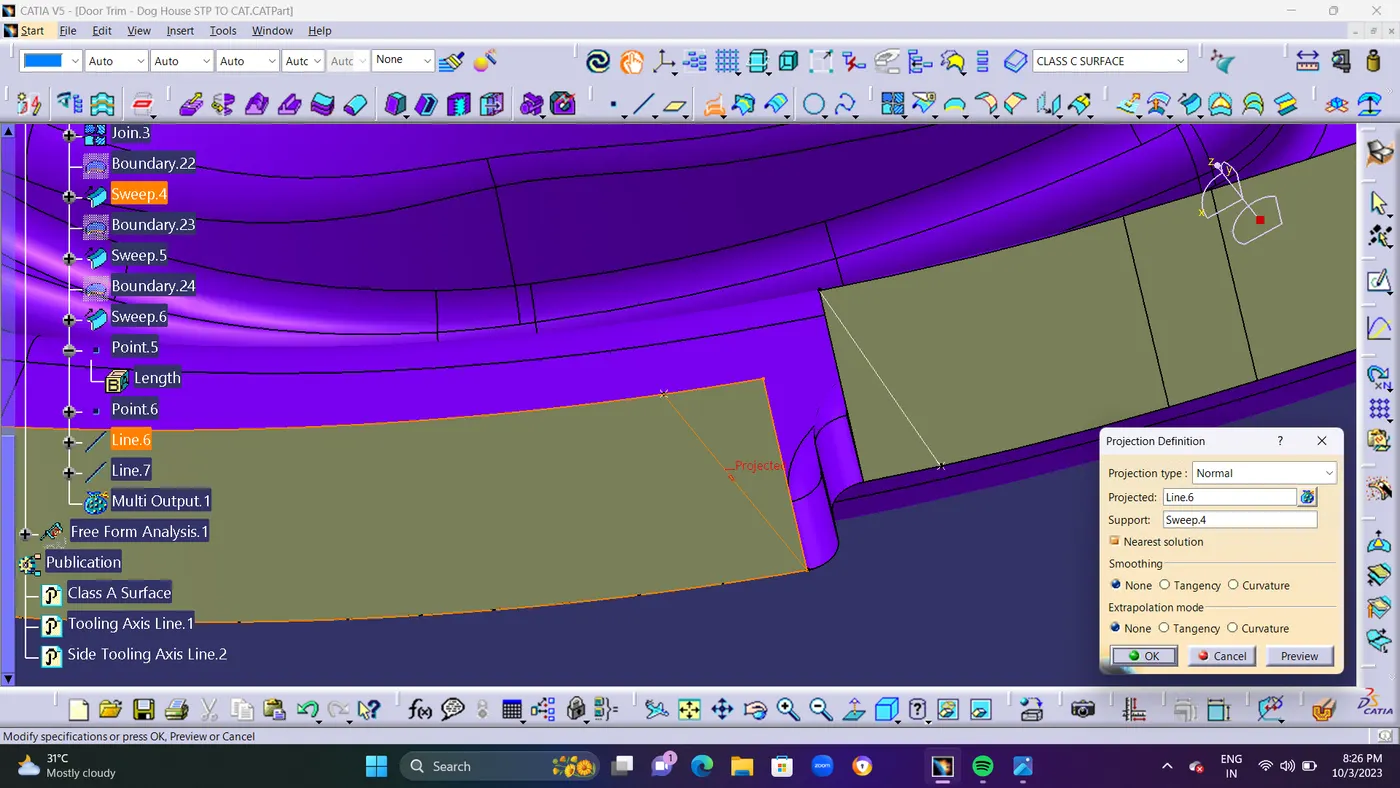
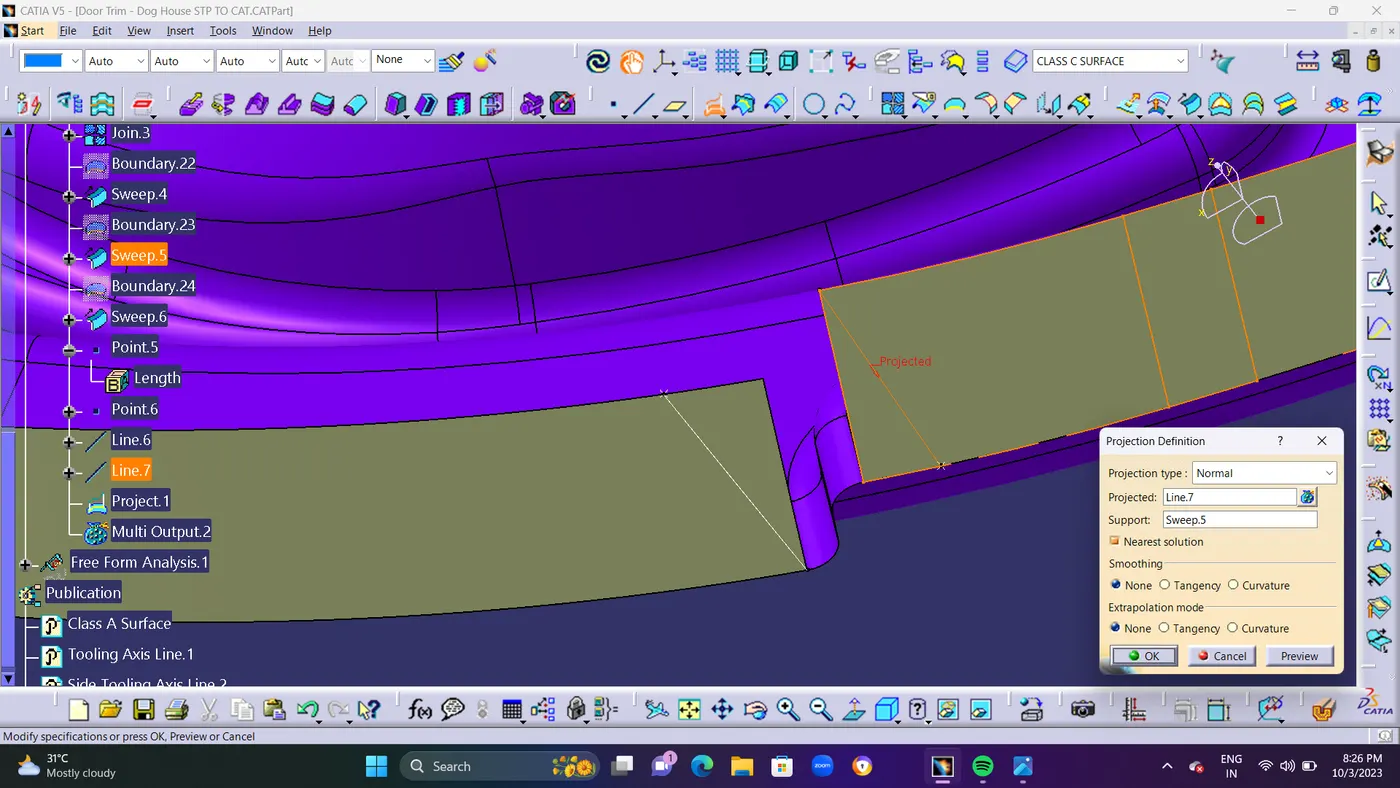
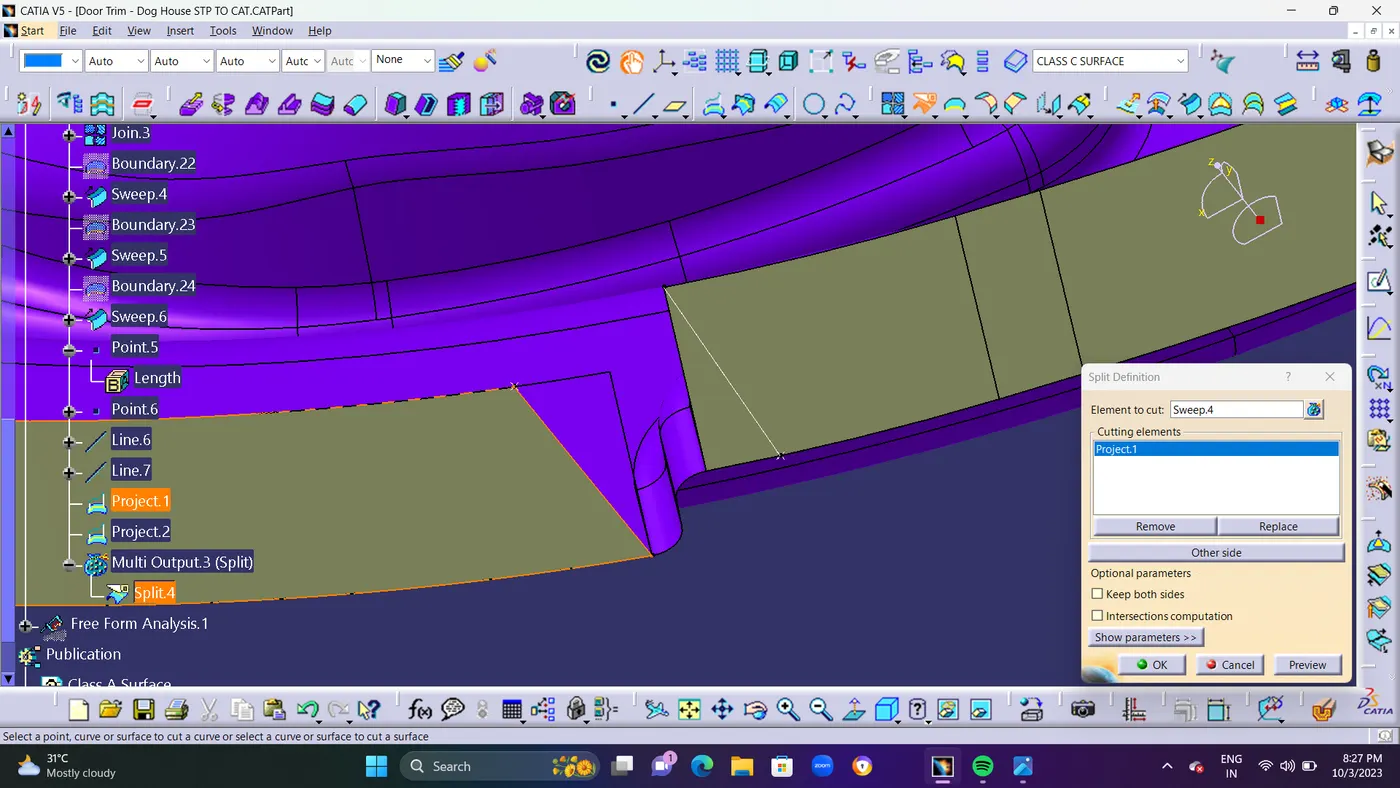
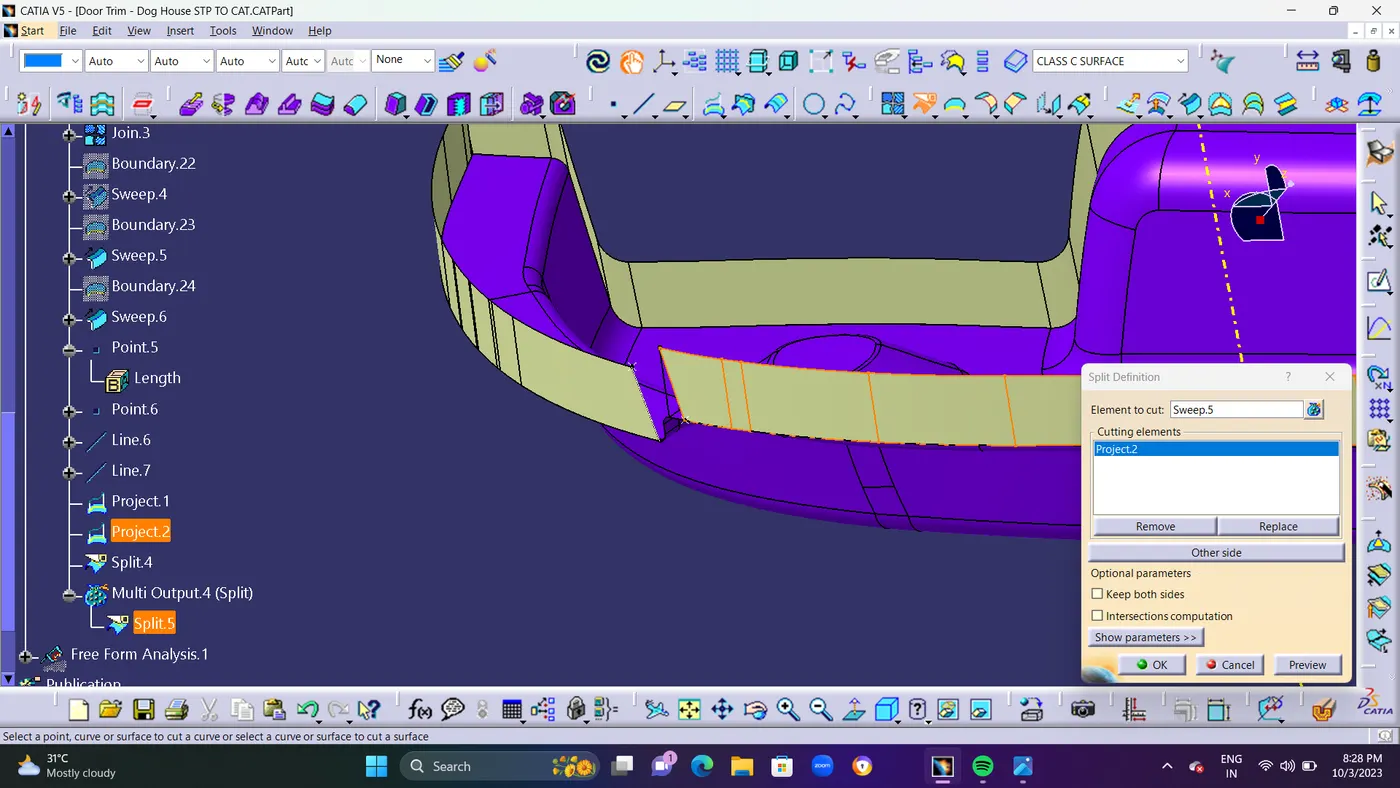
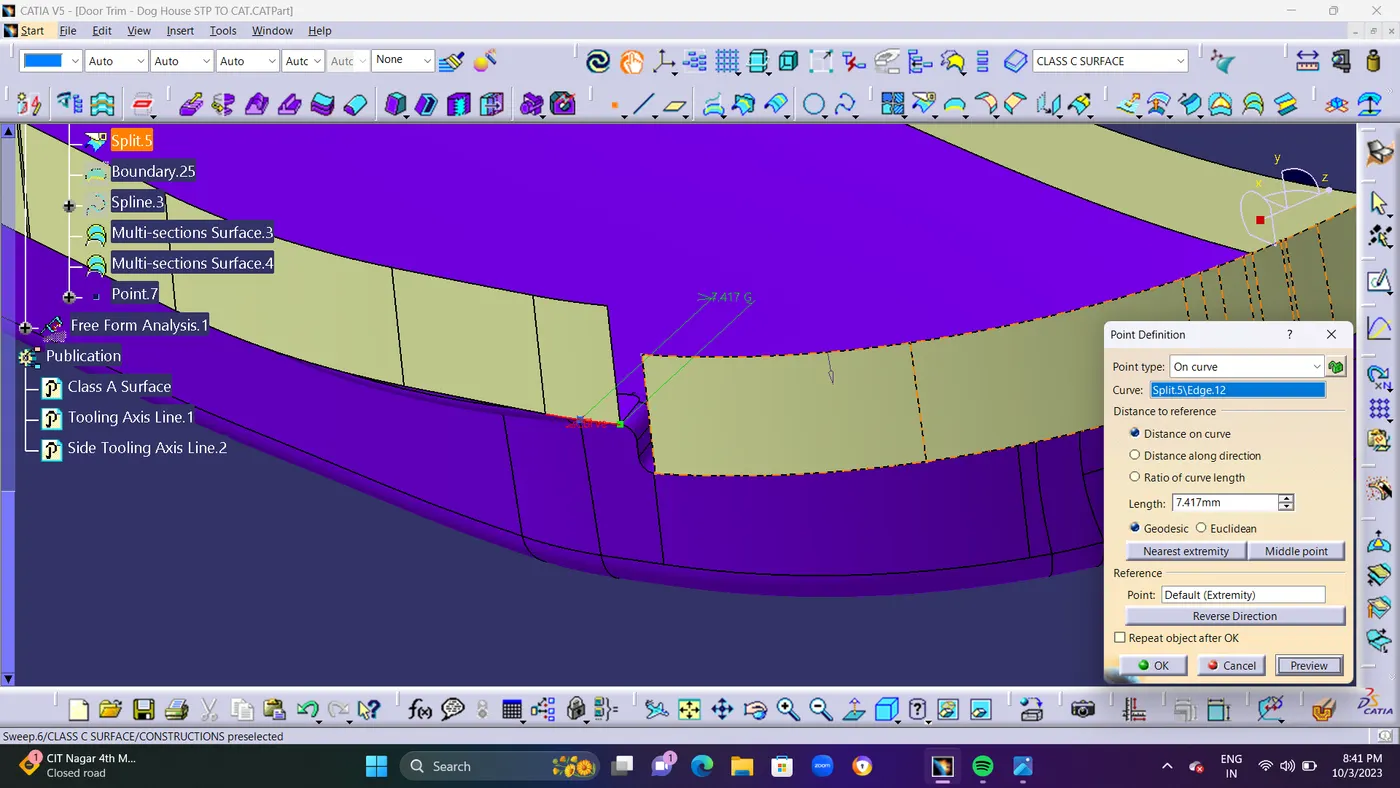
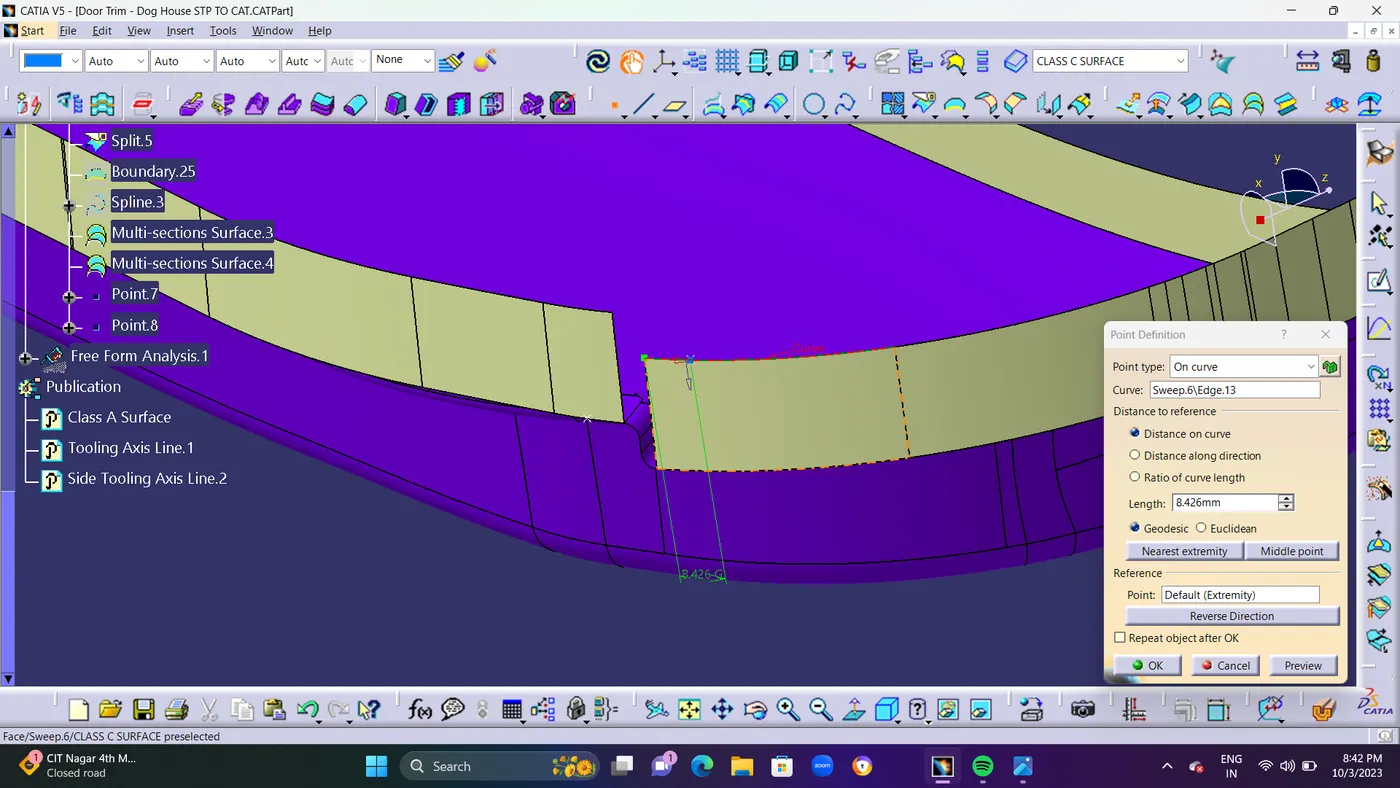
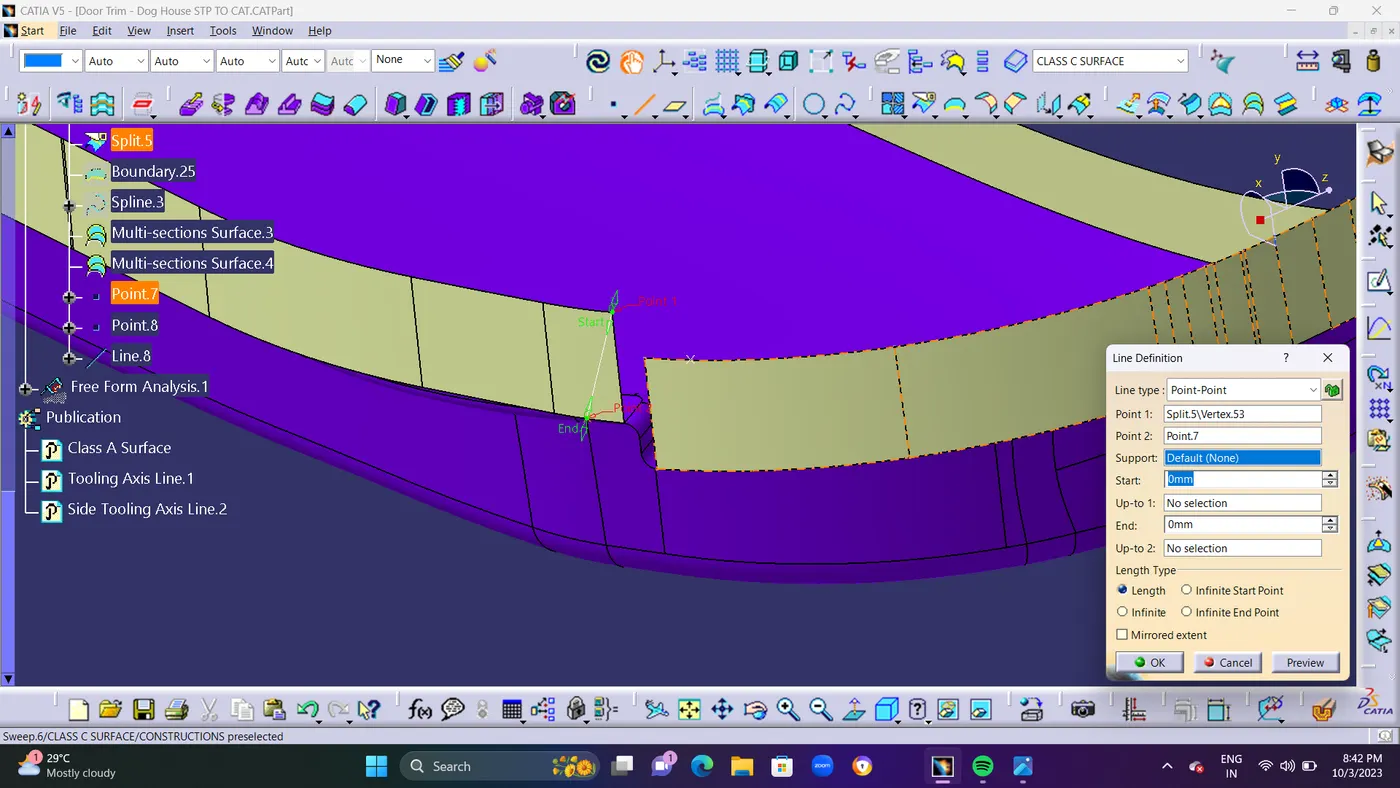
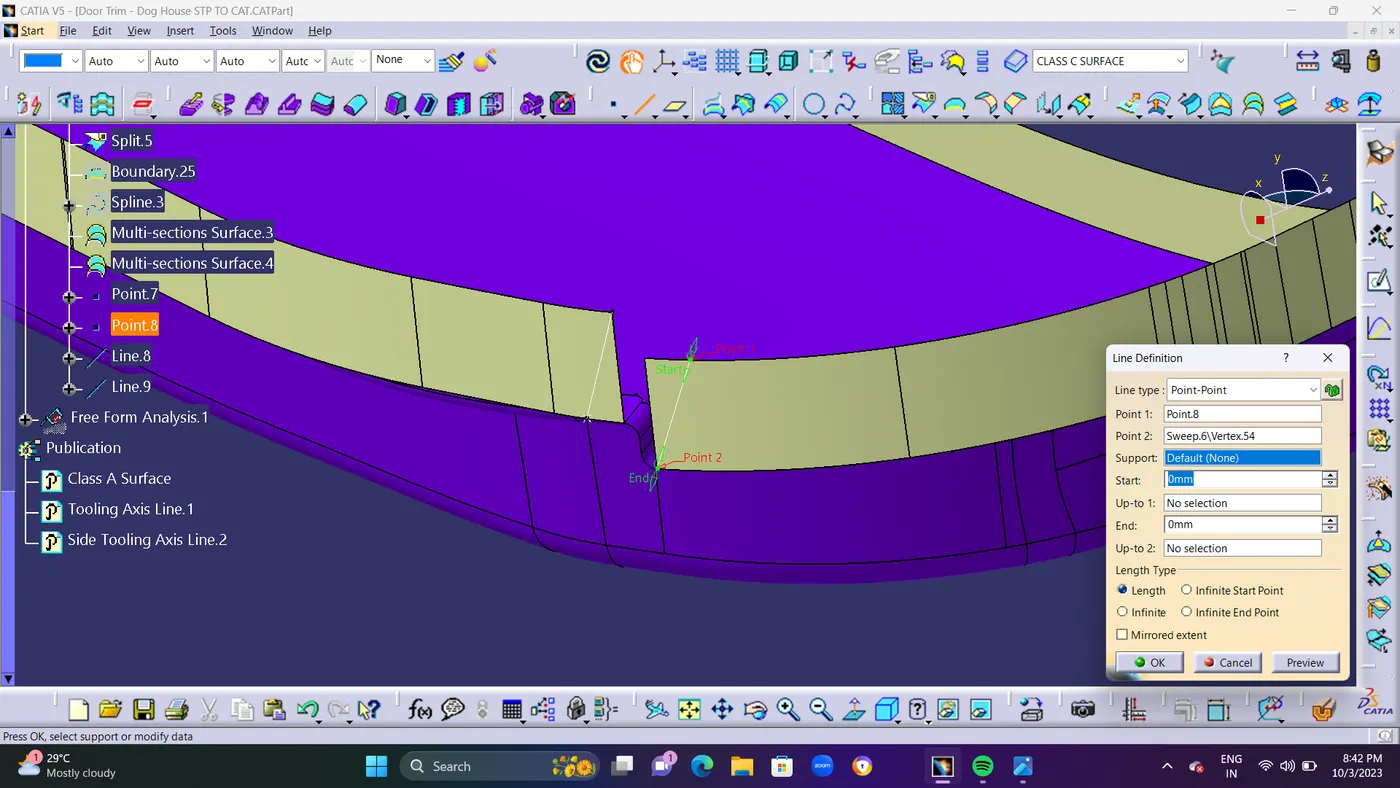
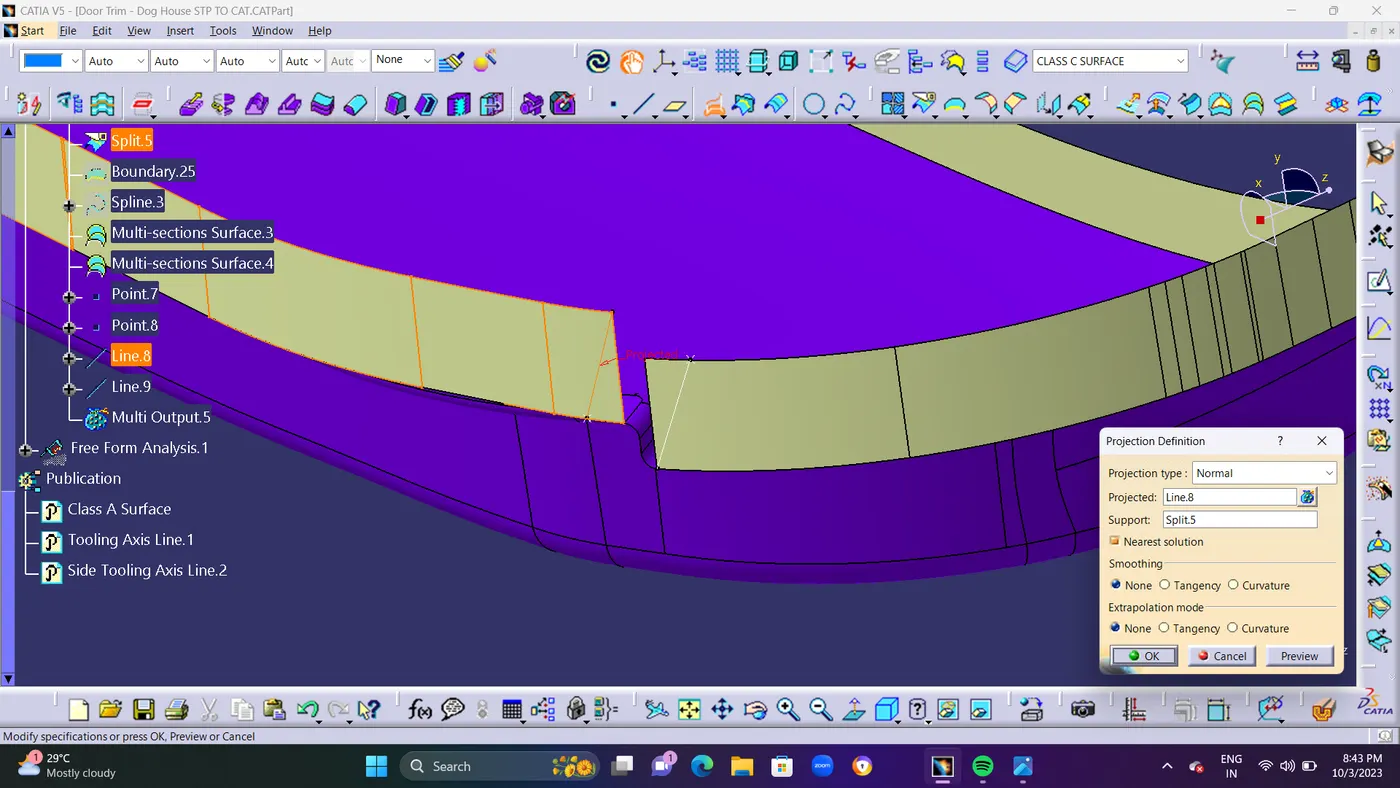
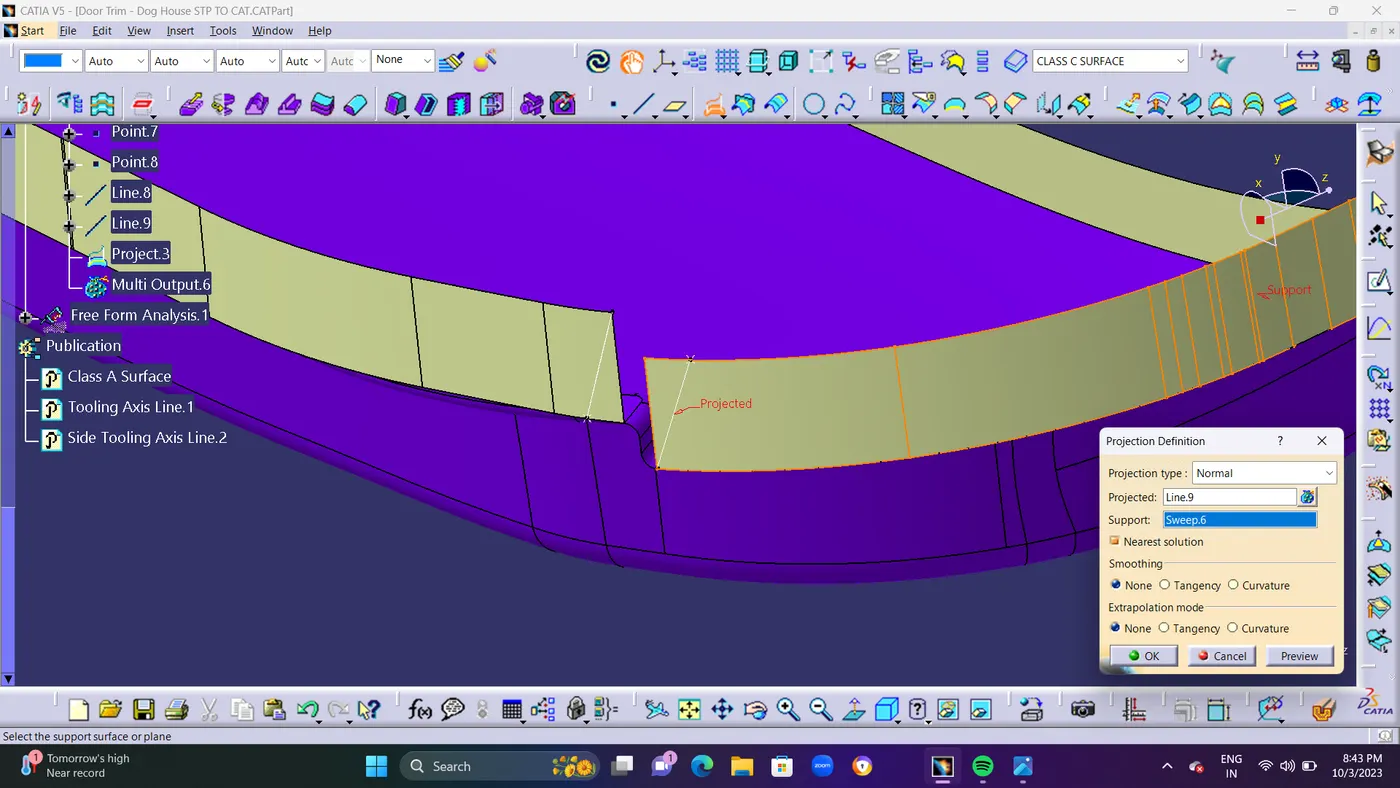
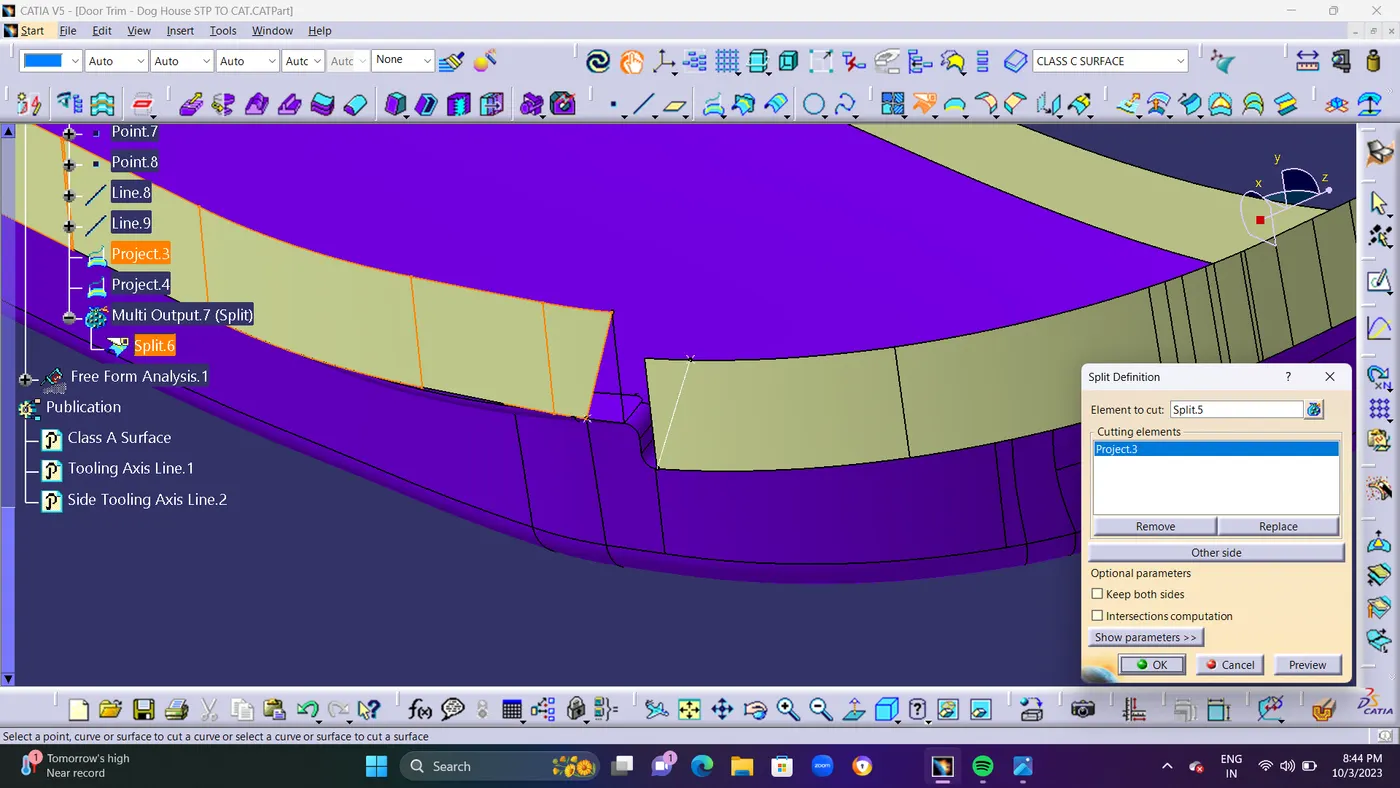
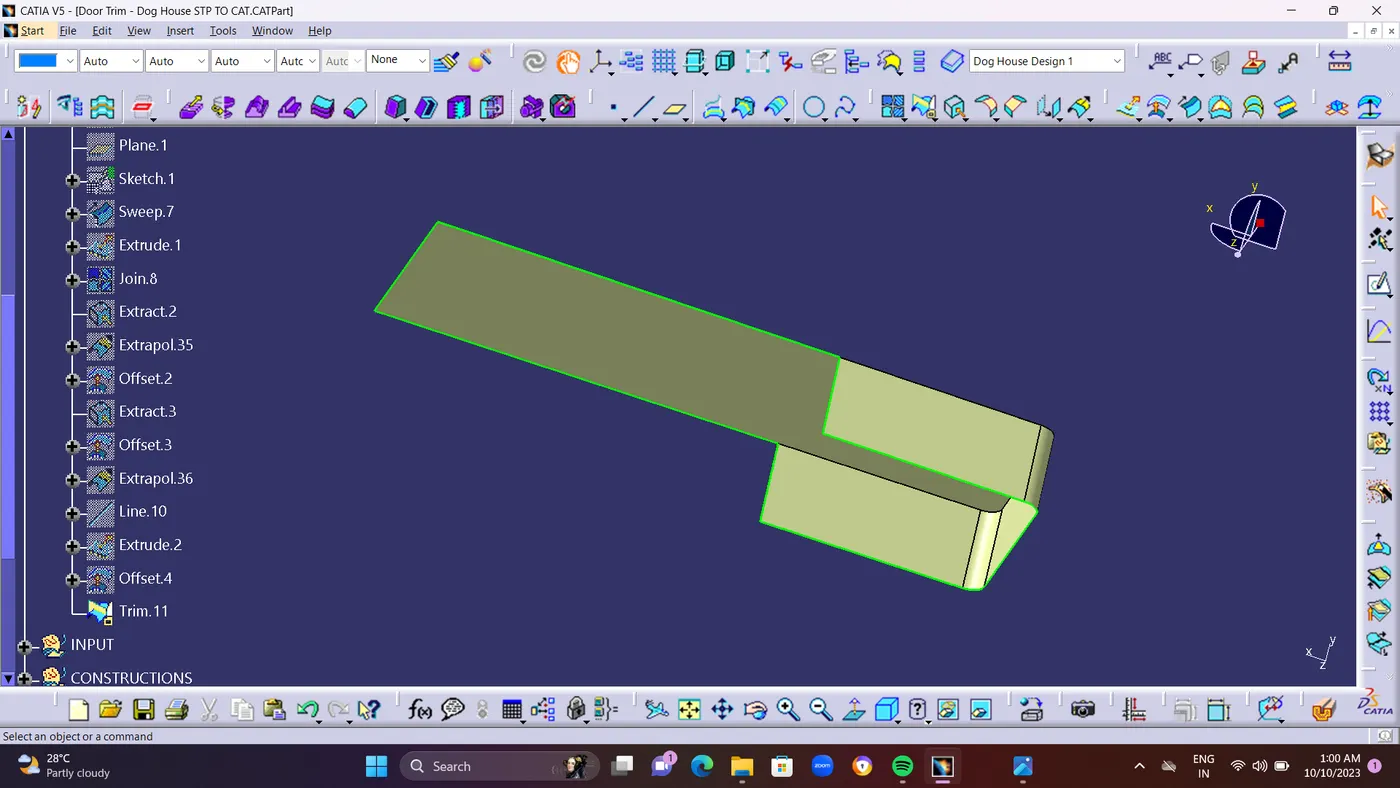
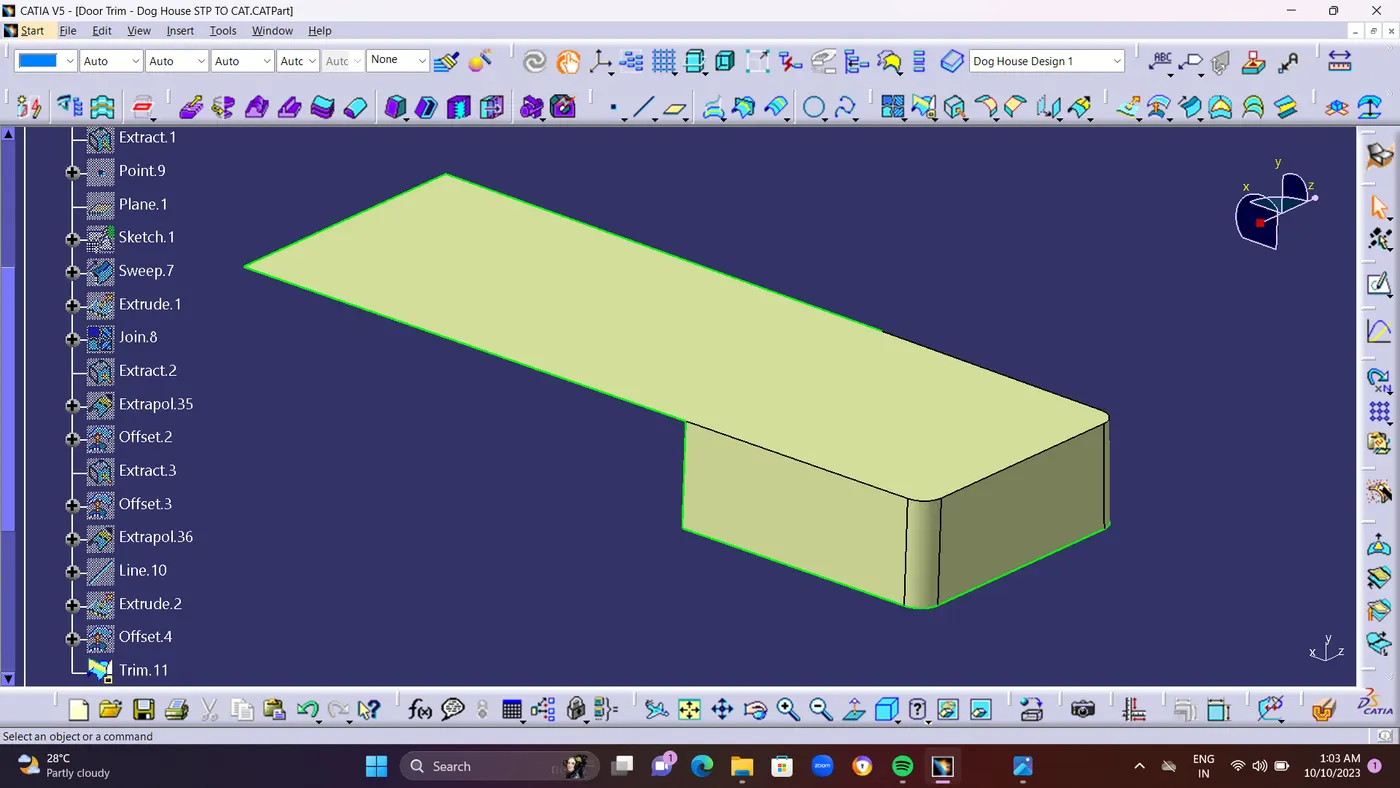
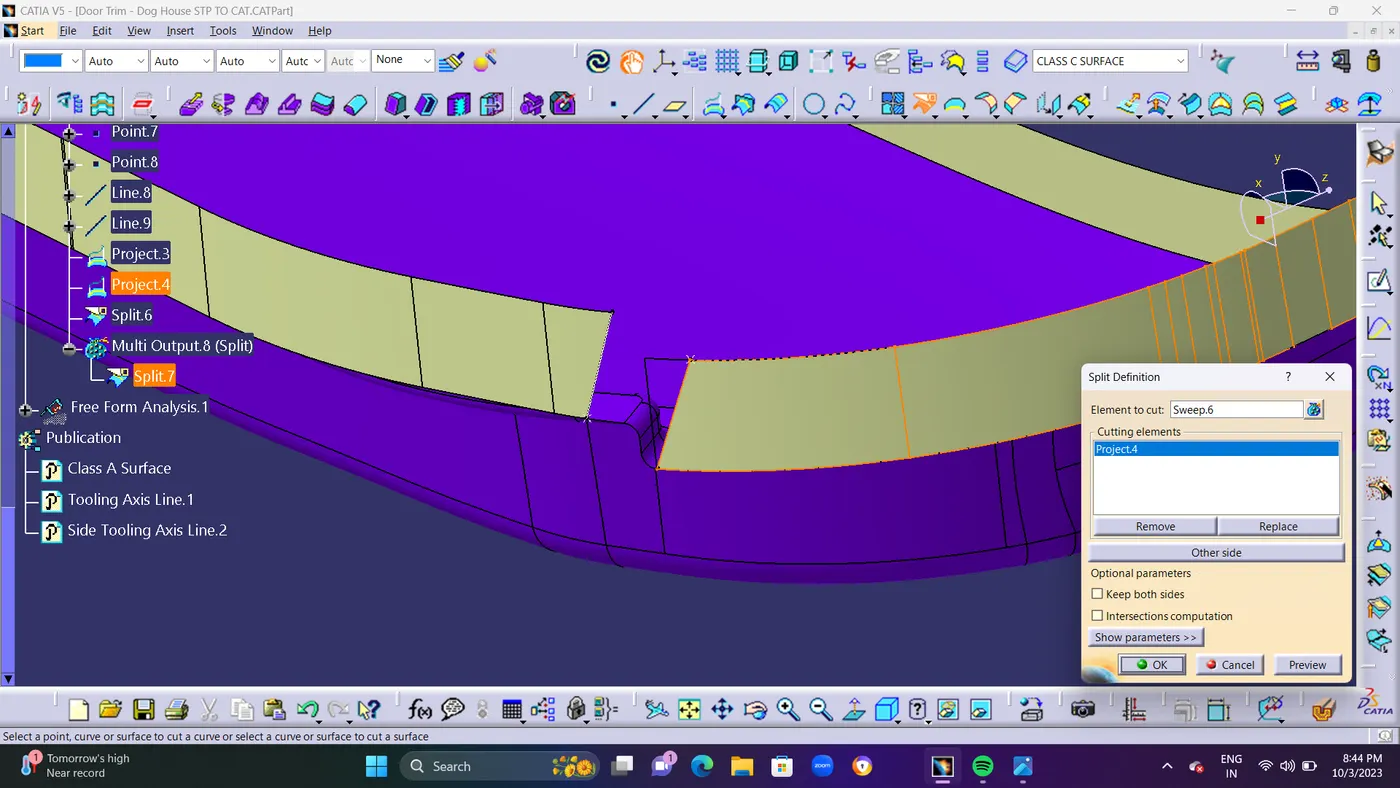
  • STEP 5 : The Bottom surface is not extrapolating its shows error because of curve or bend surface so we create a POINT and LINE Command to SPLIT the surface to make an flat surface without a curve surface and then the EXTRAPOLATION as done and TRIM It. shown in below screen shots.


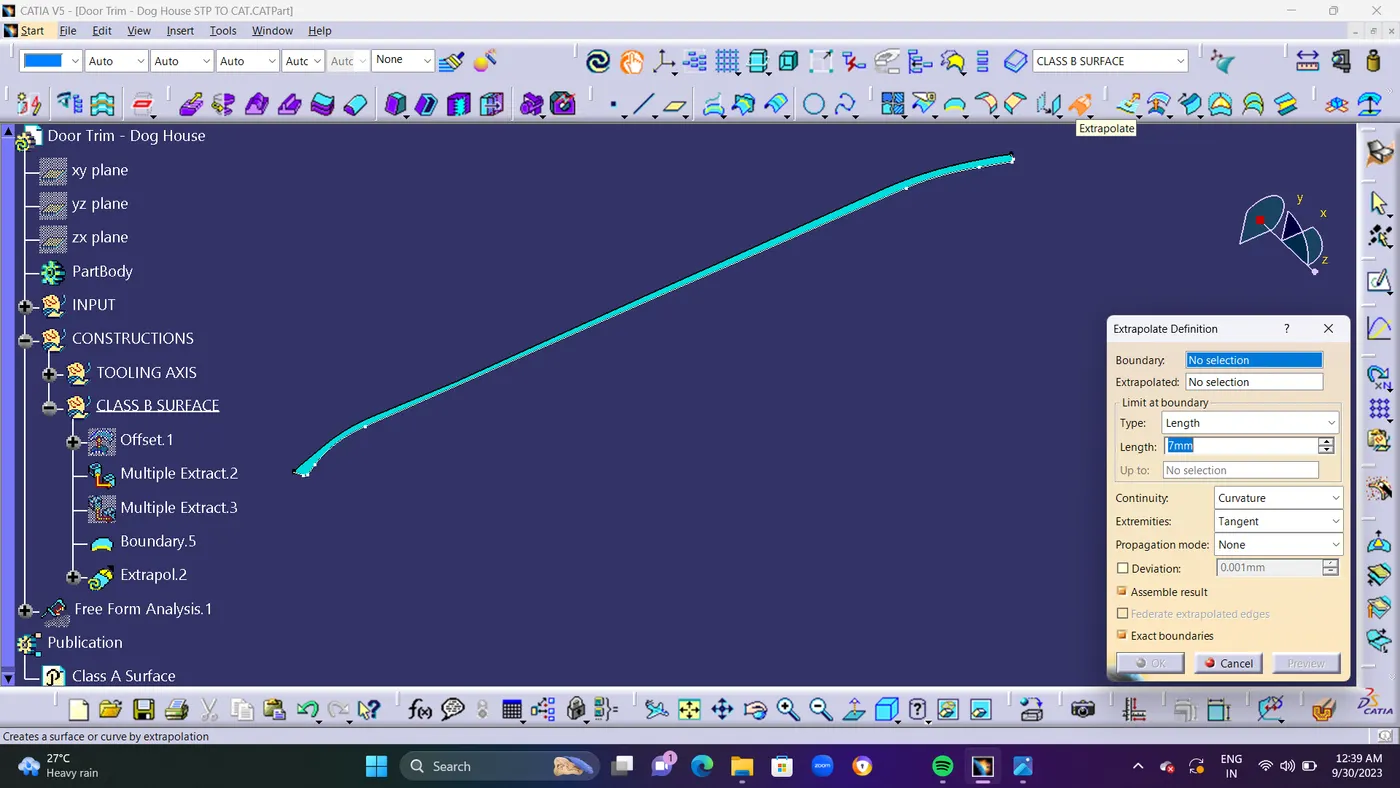
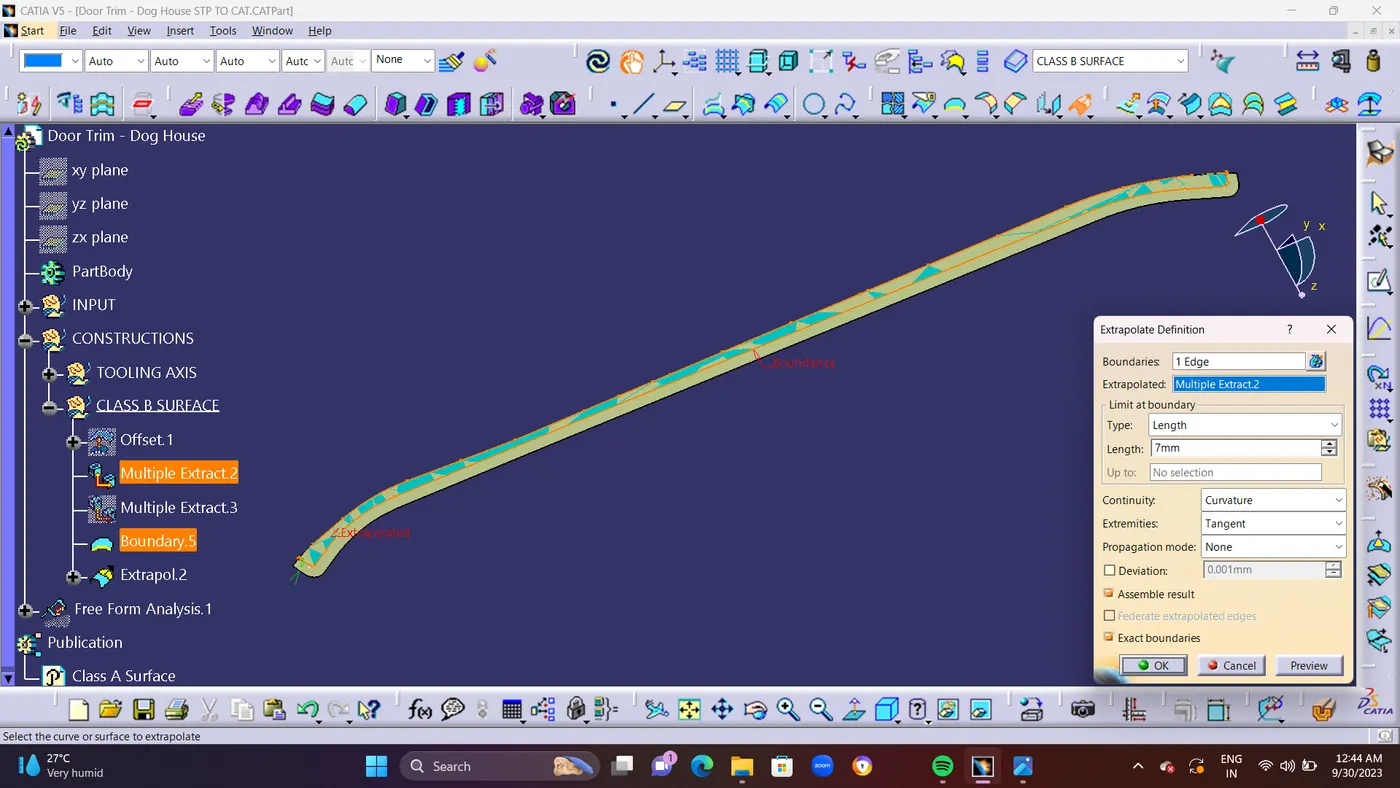
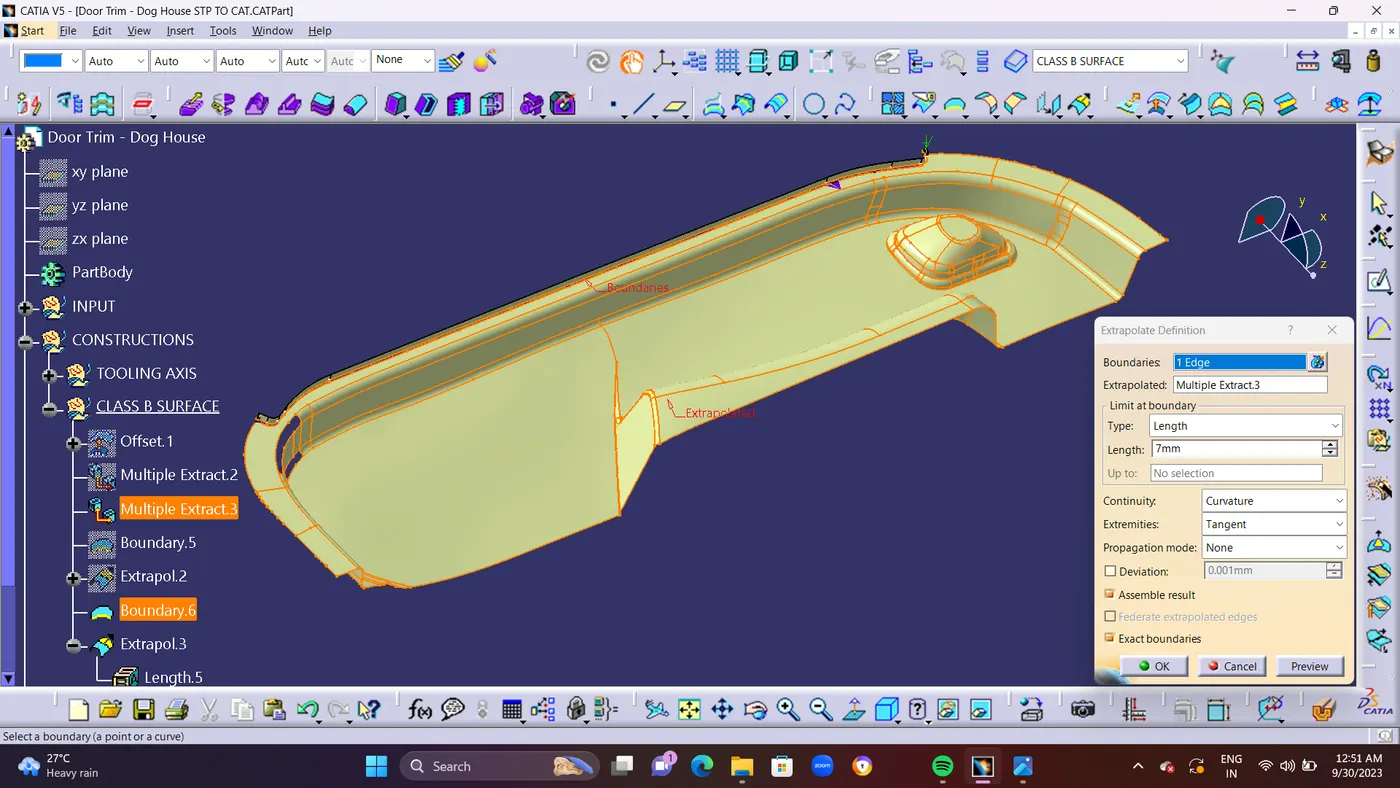
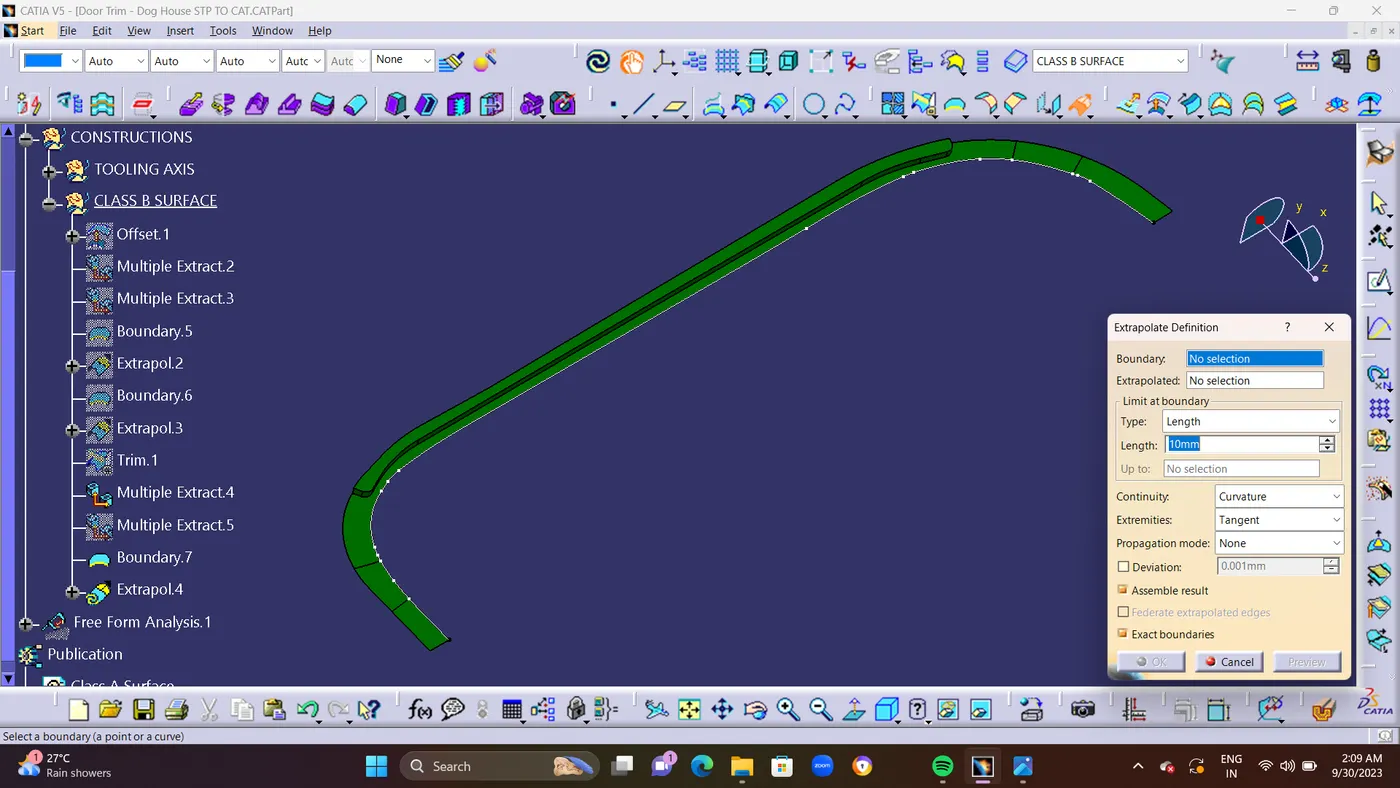
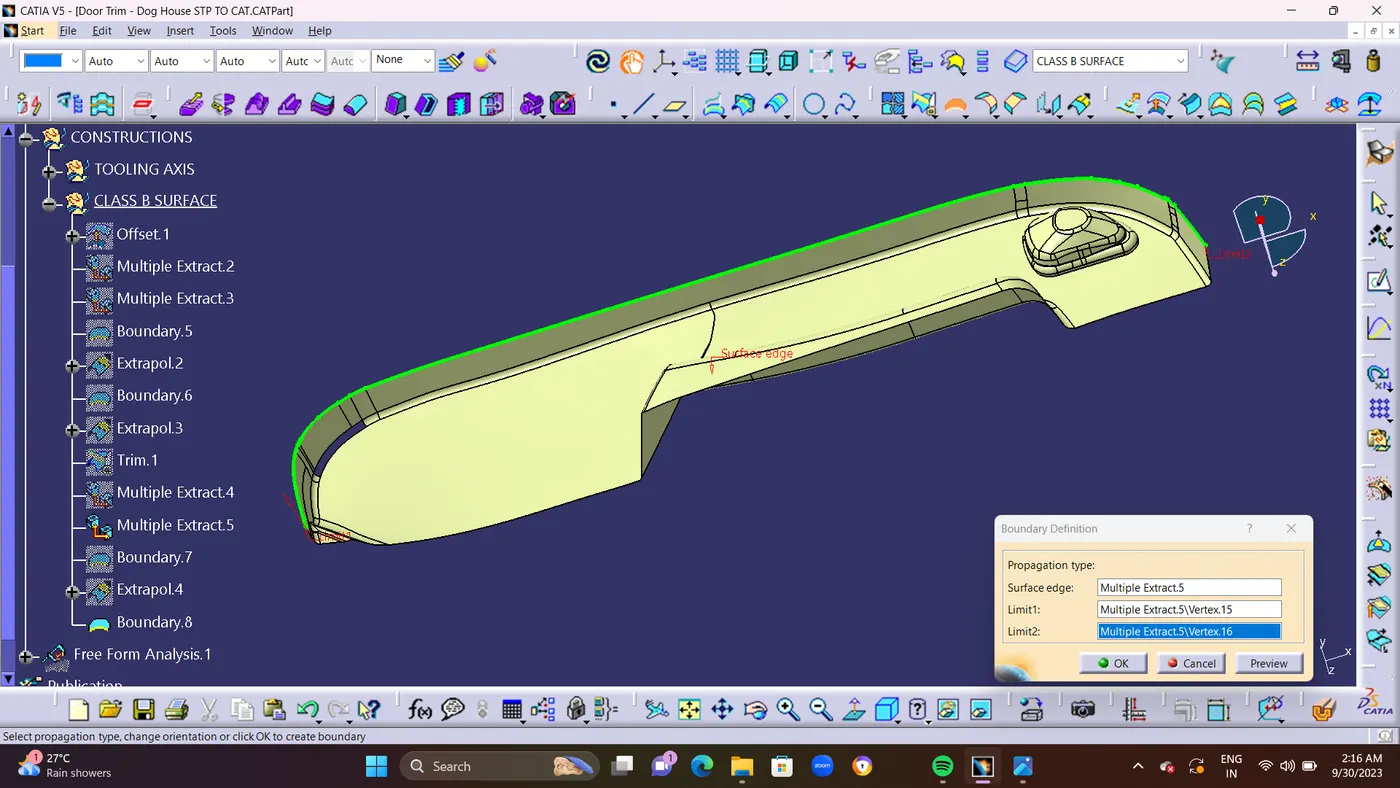
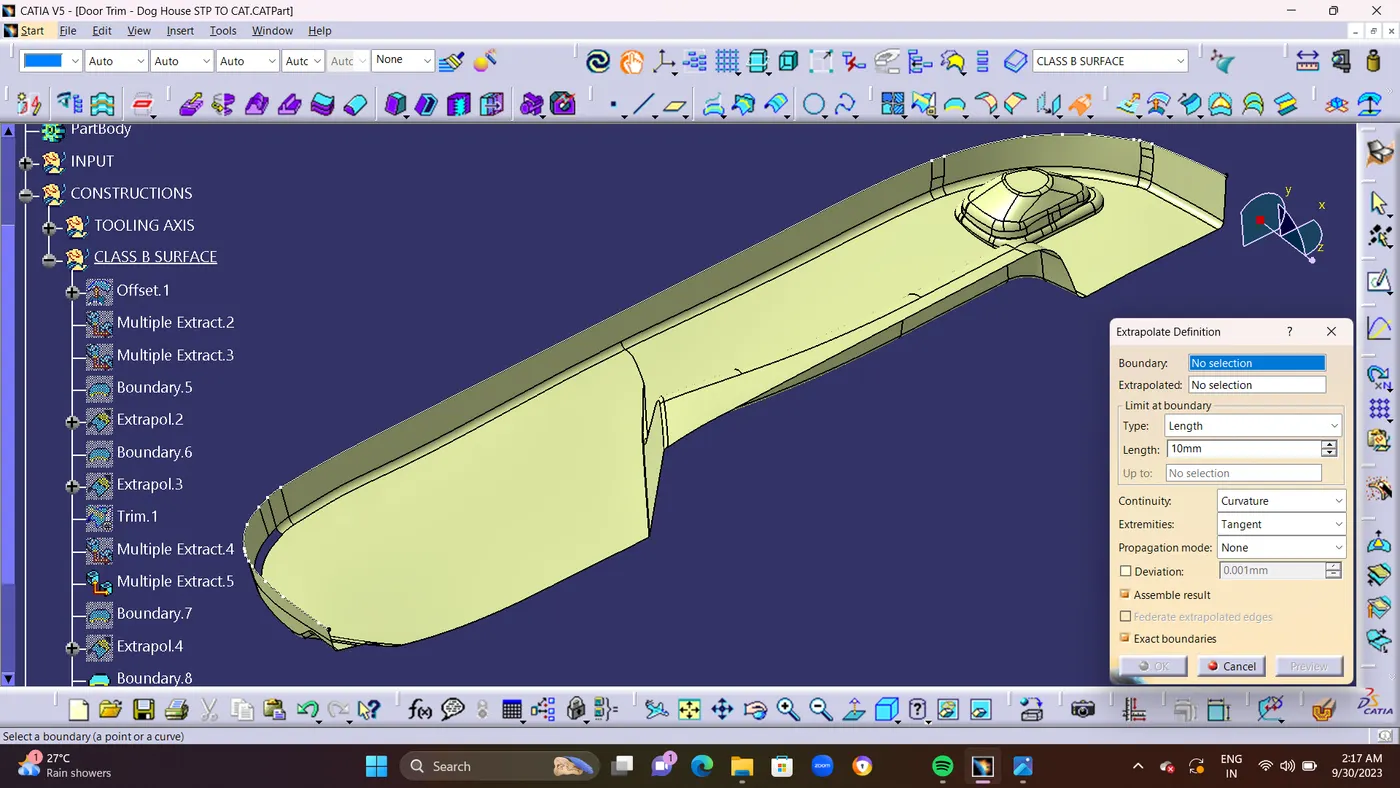
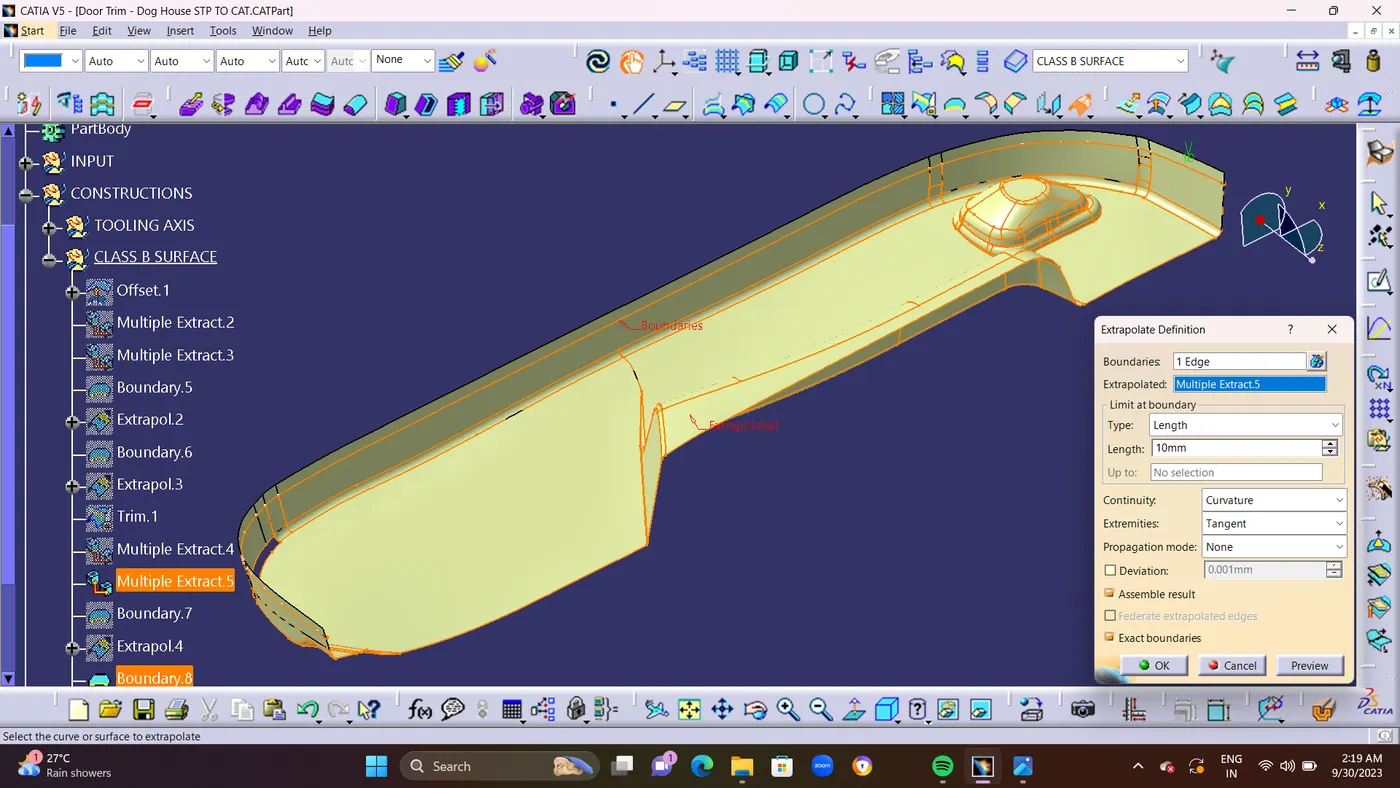
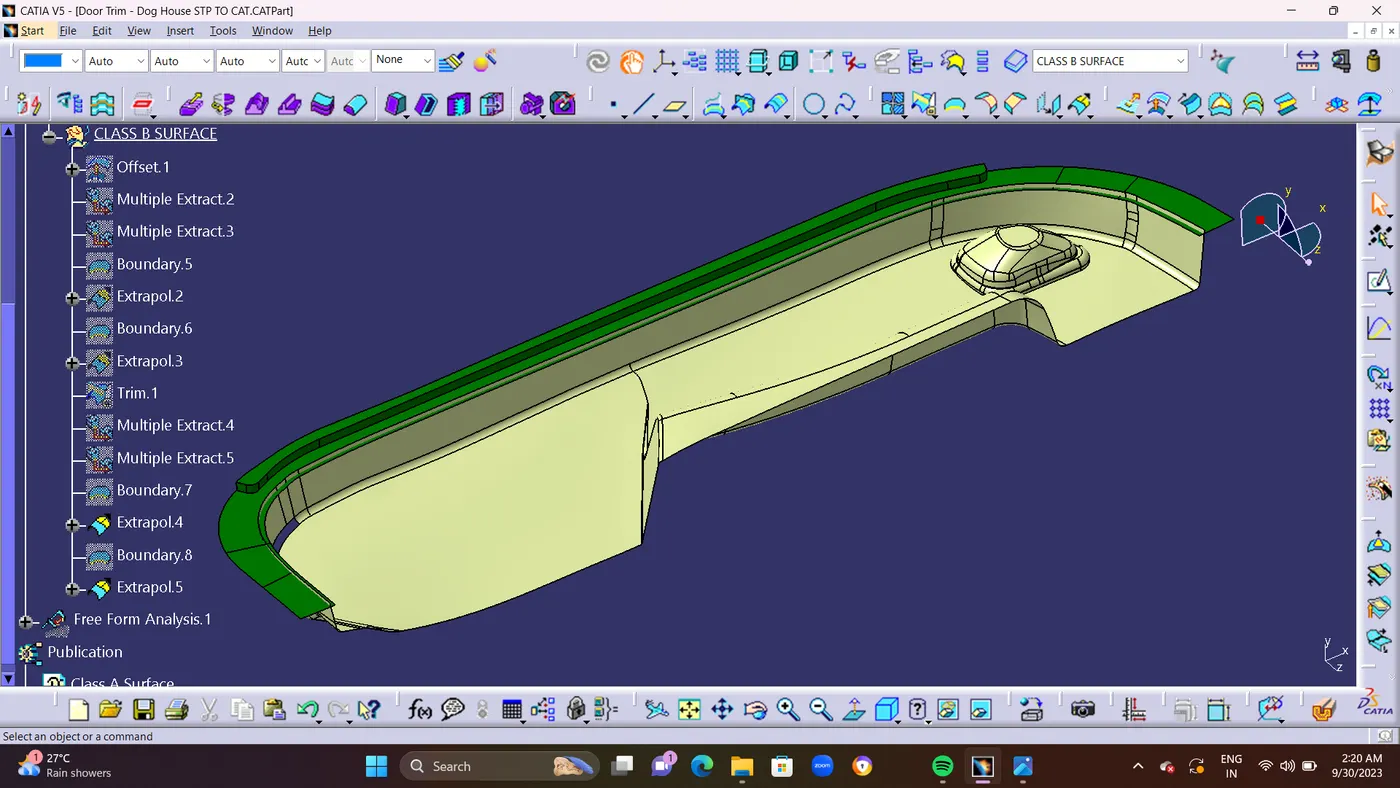
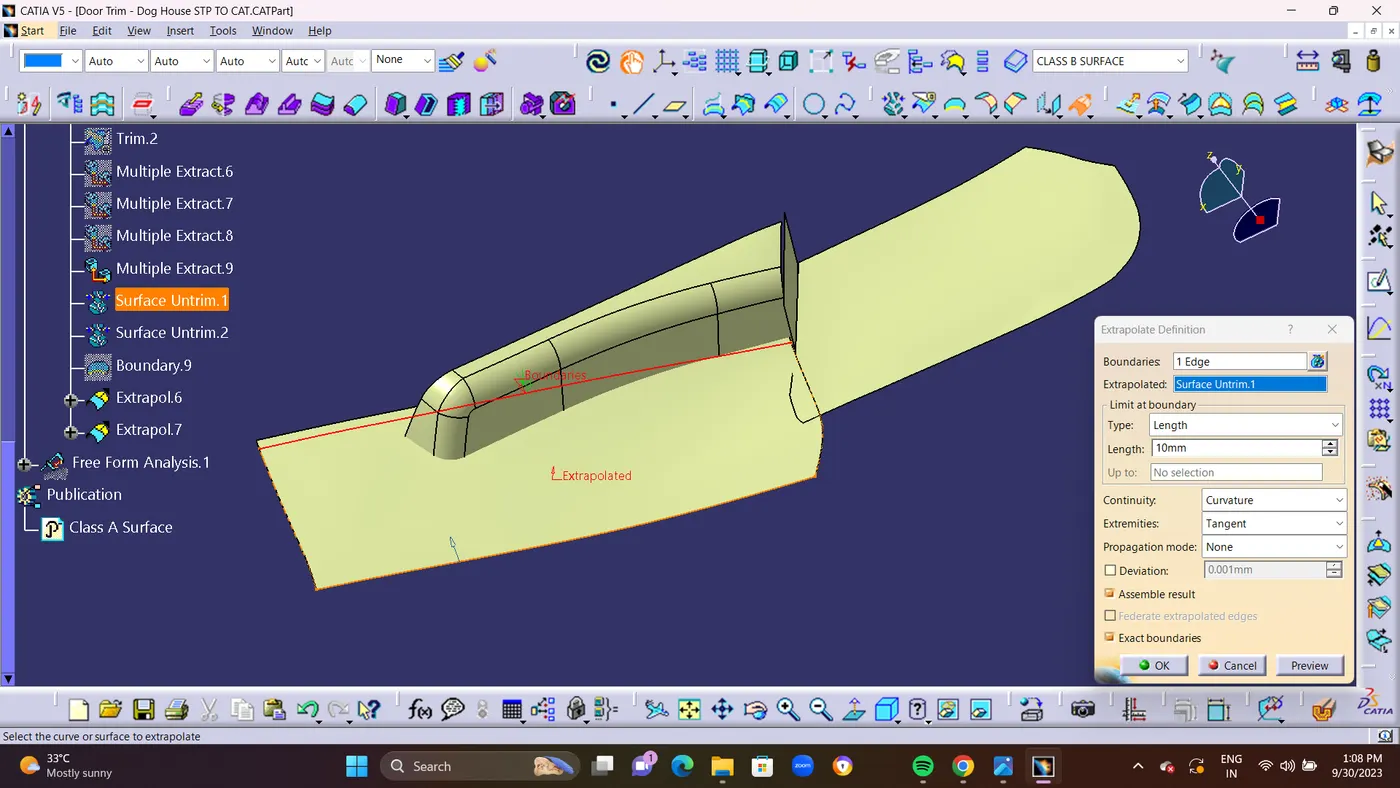
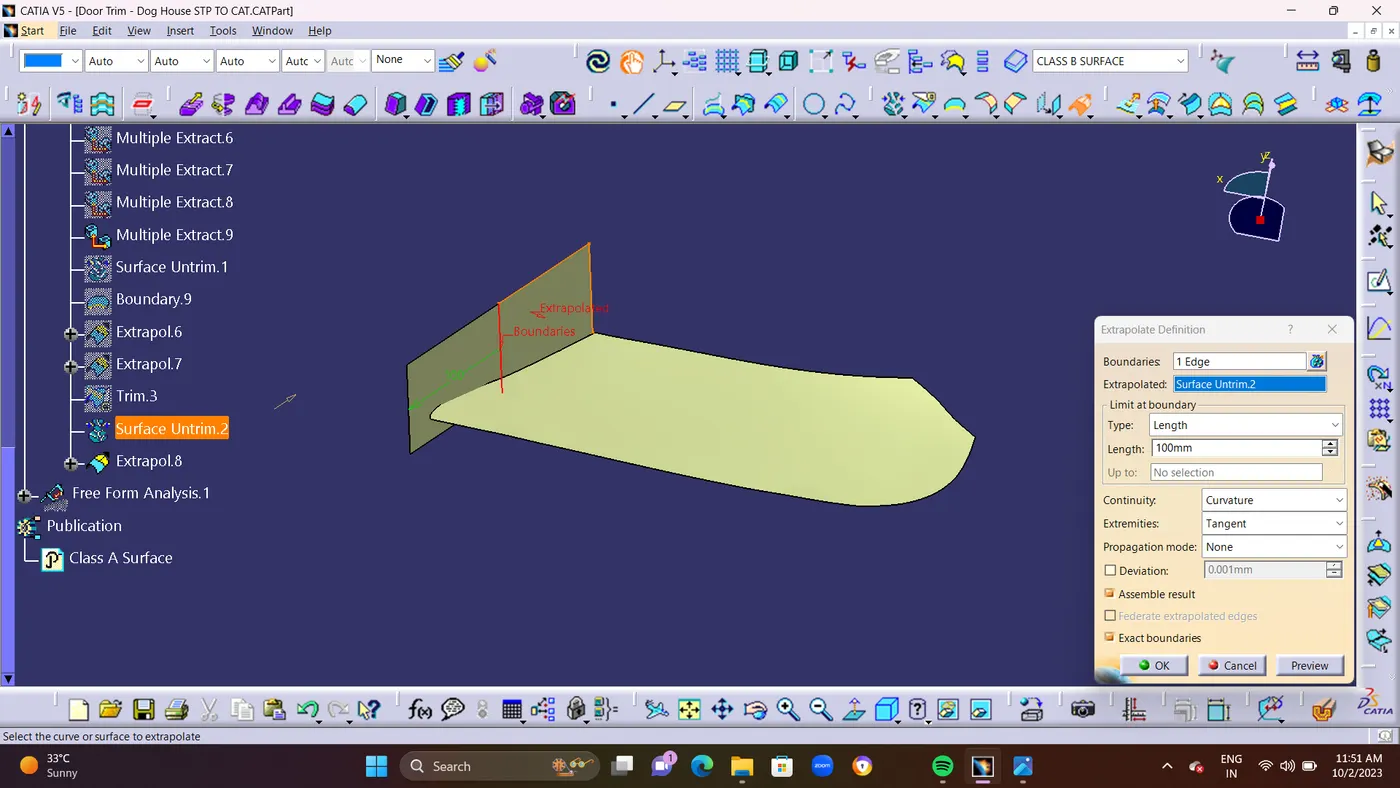
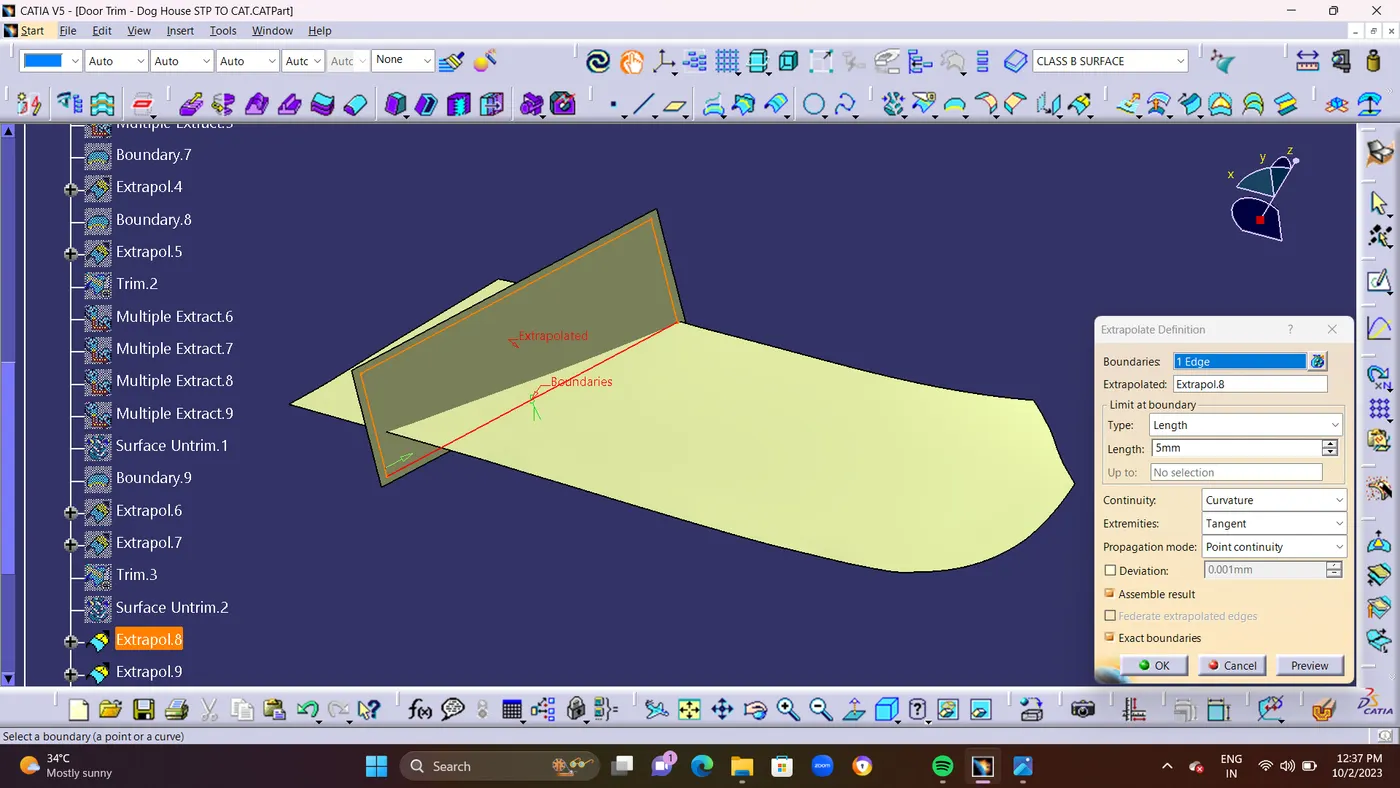
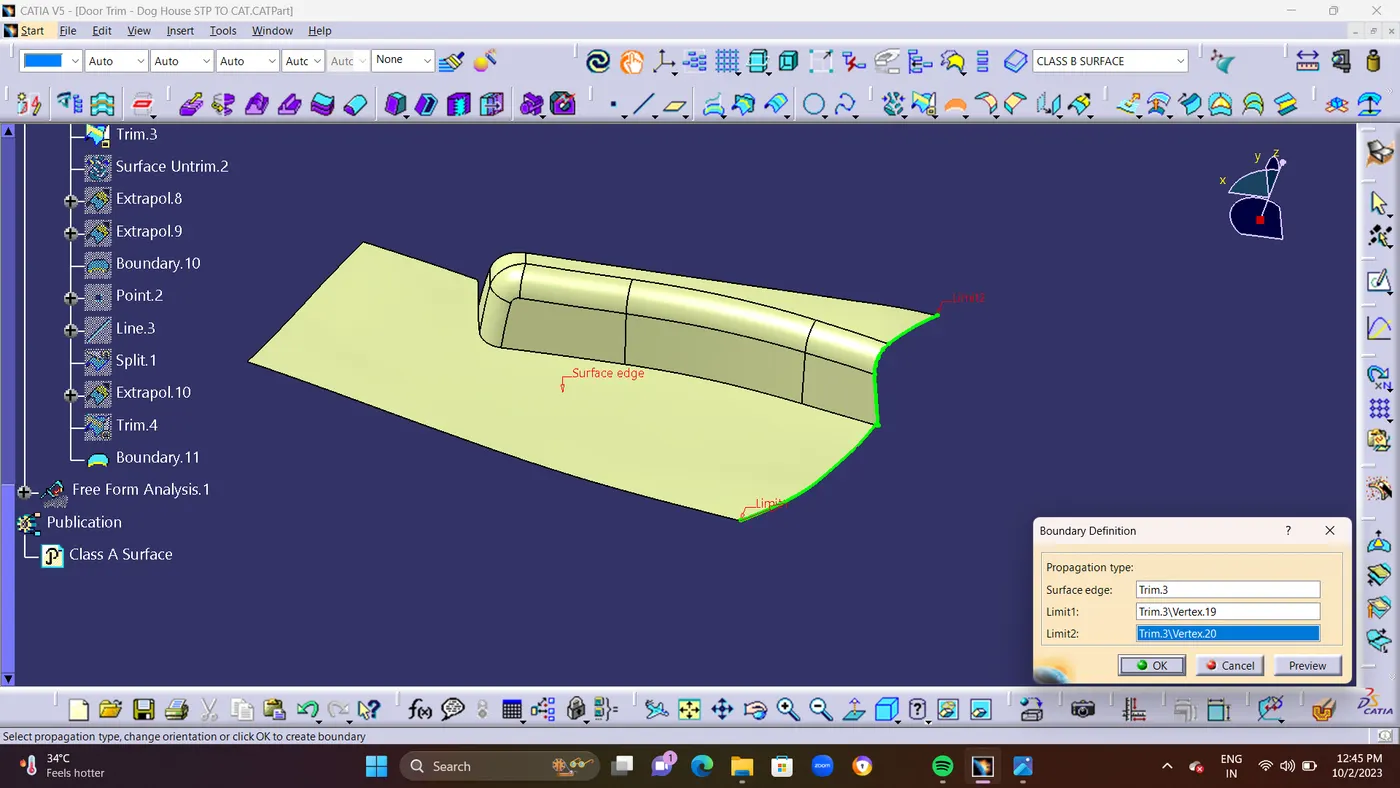
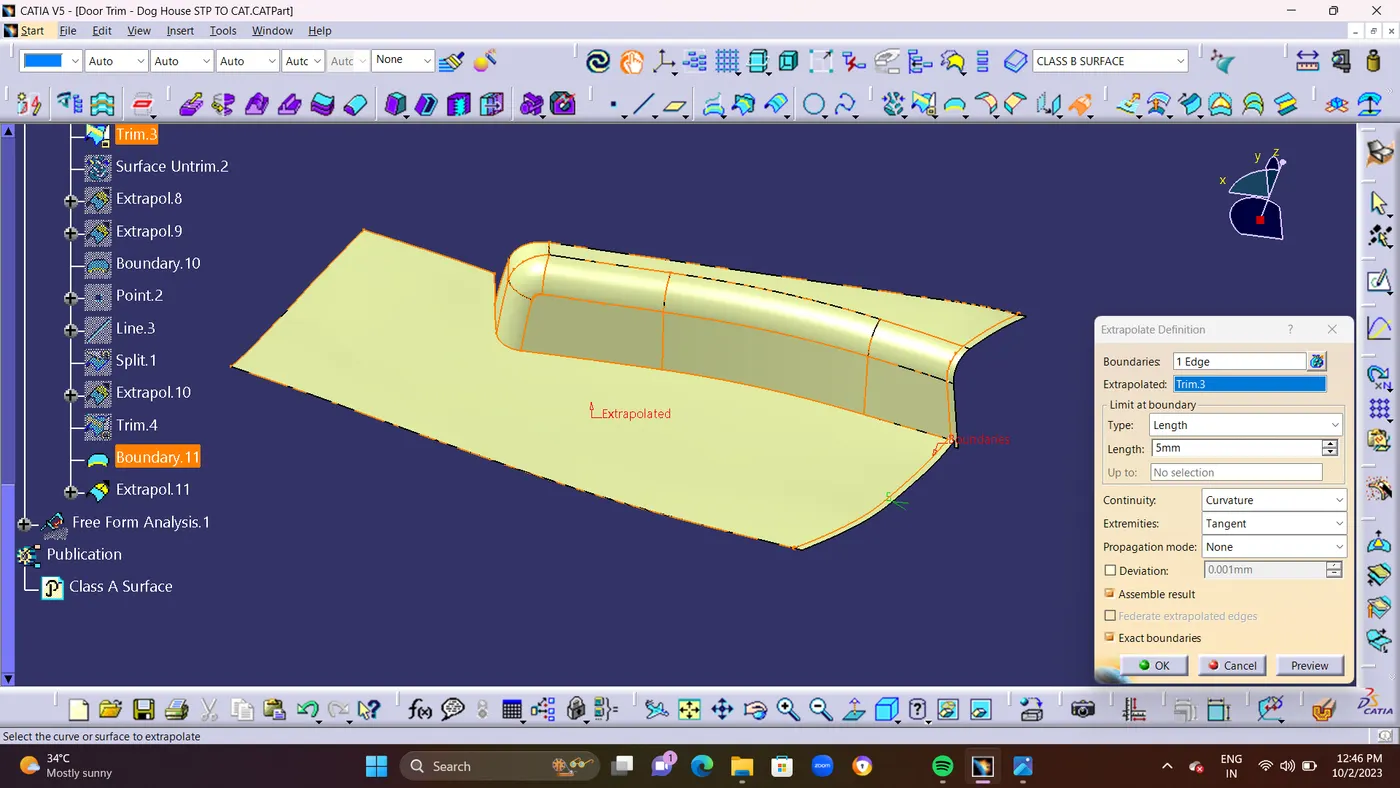
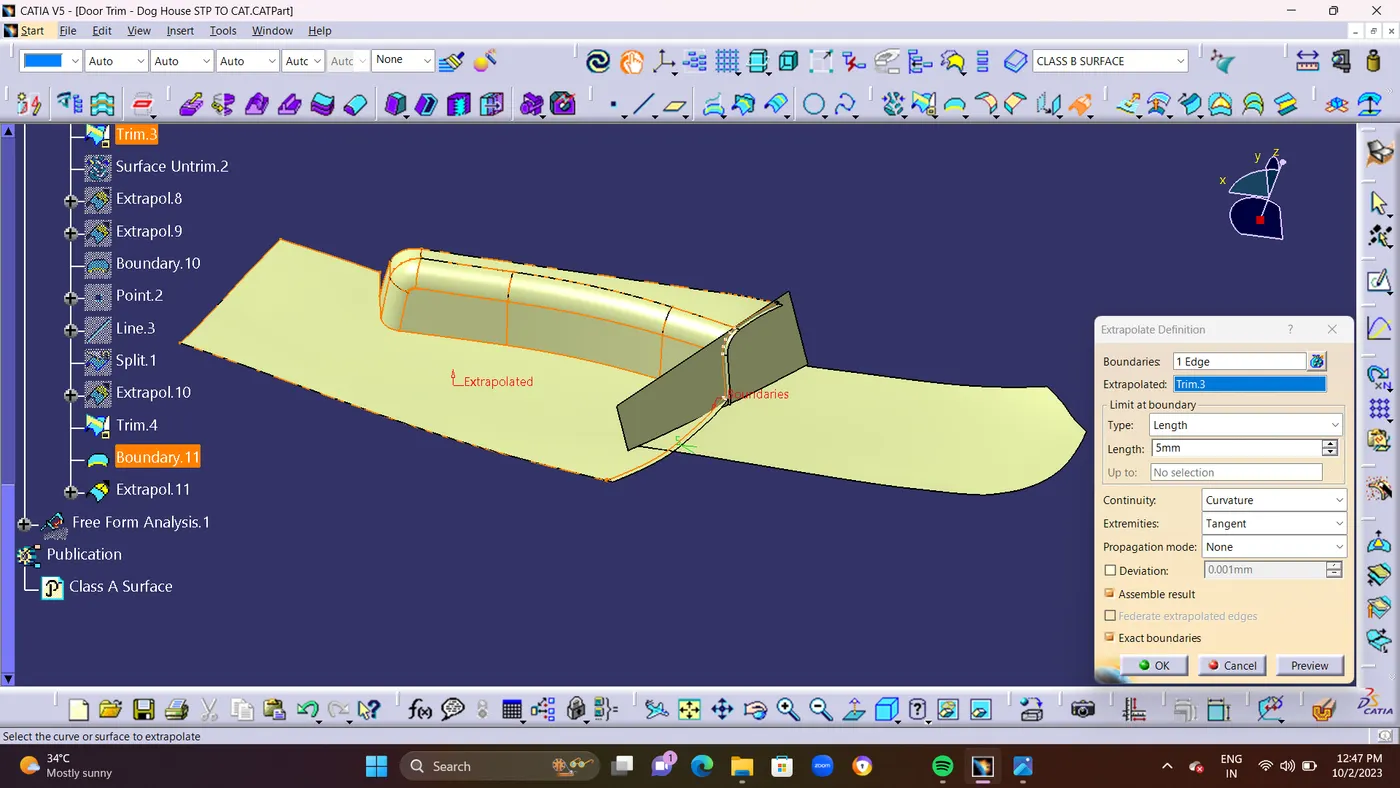
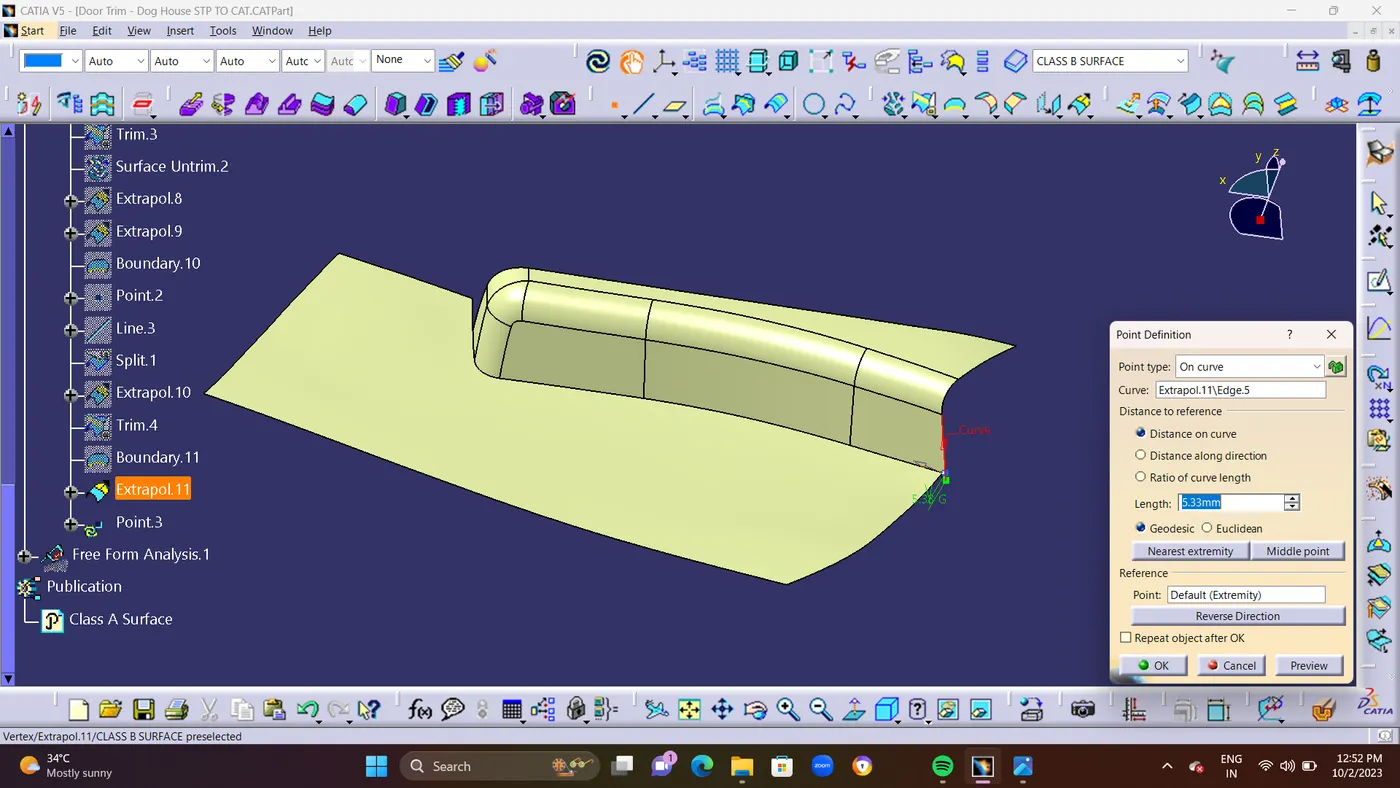
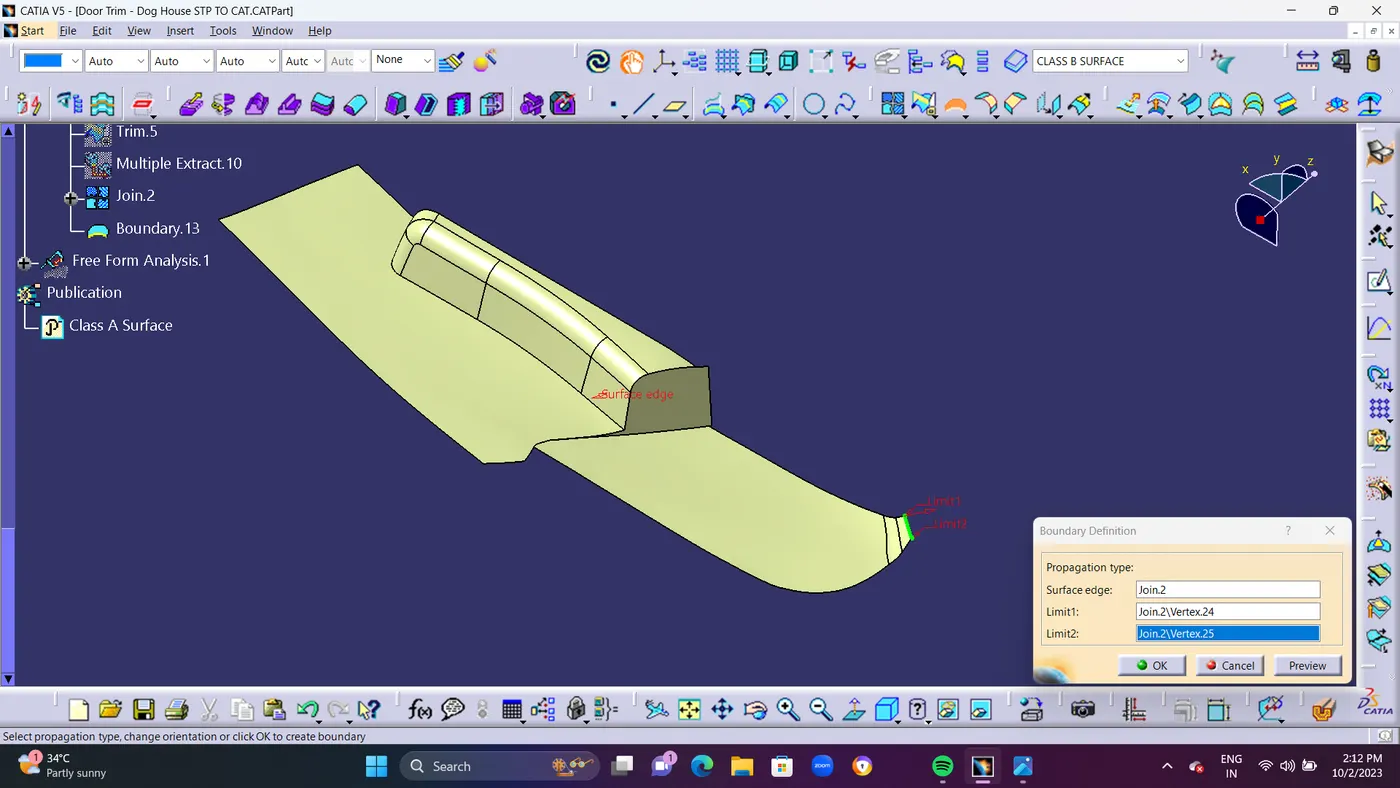
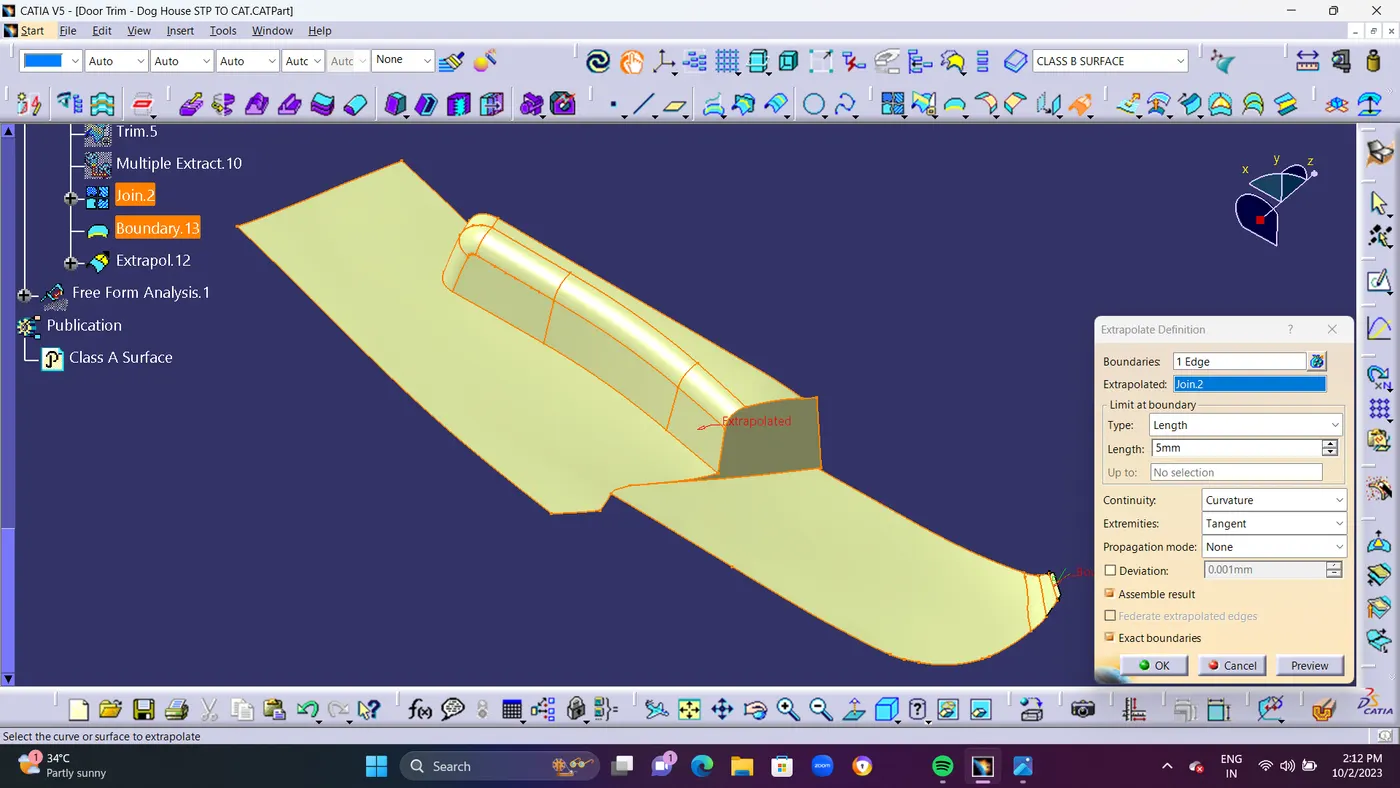
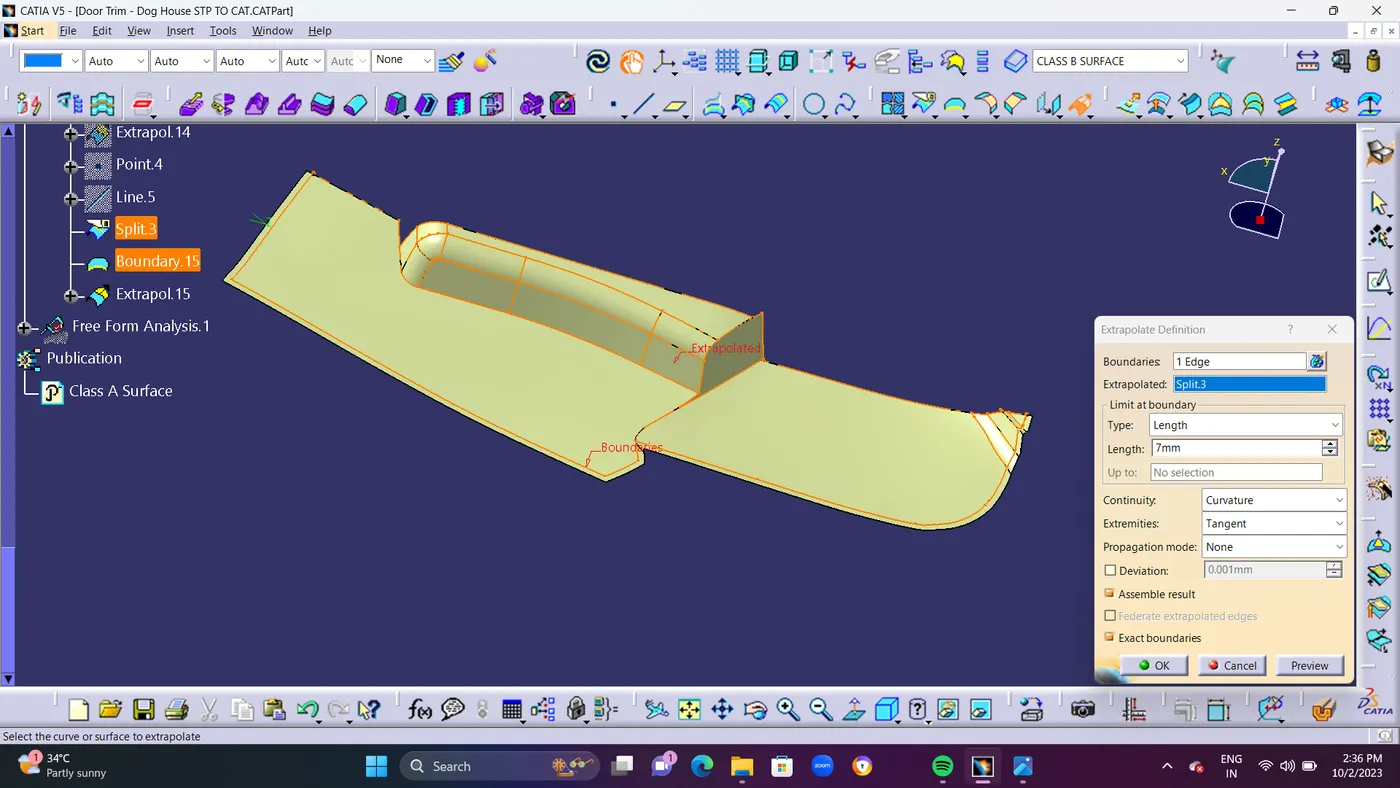
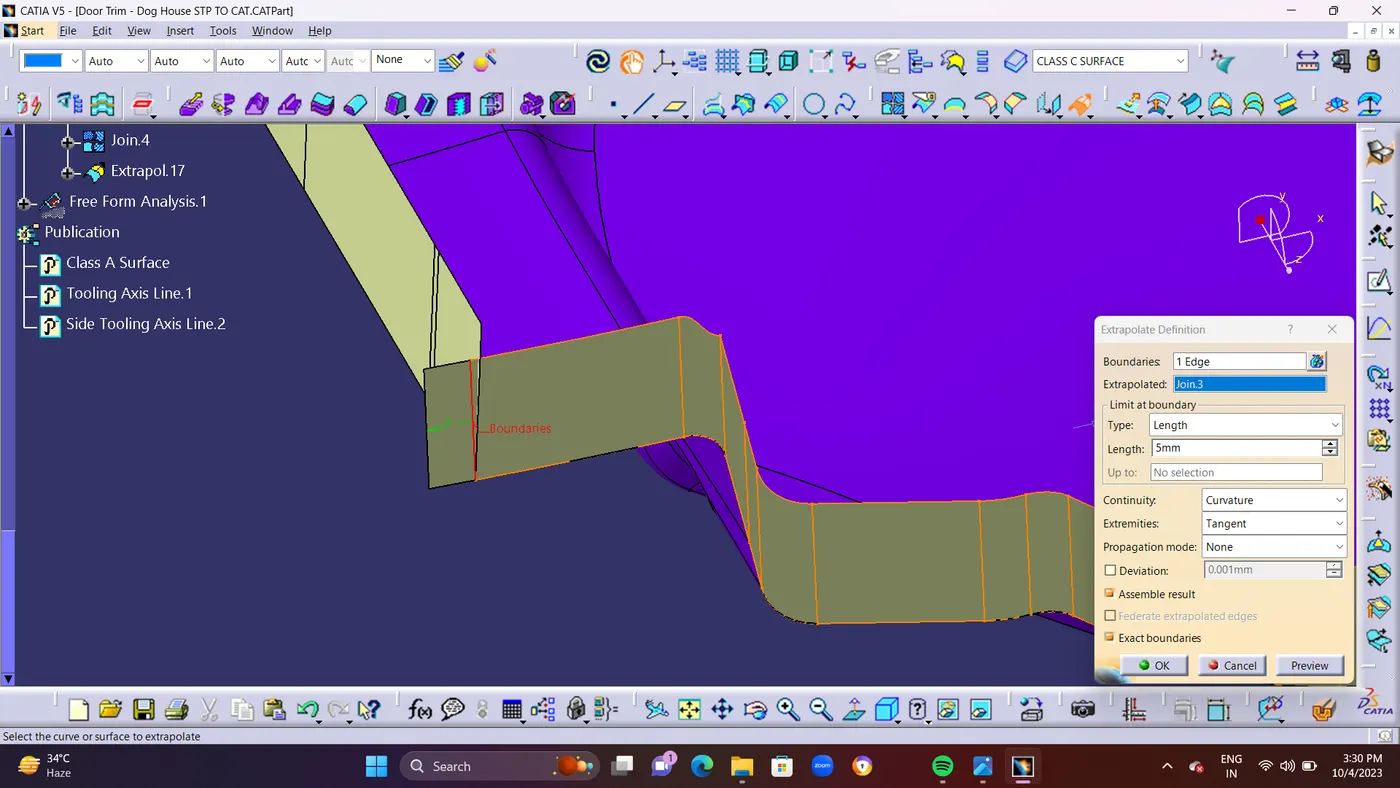
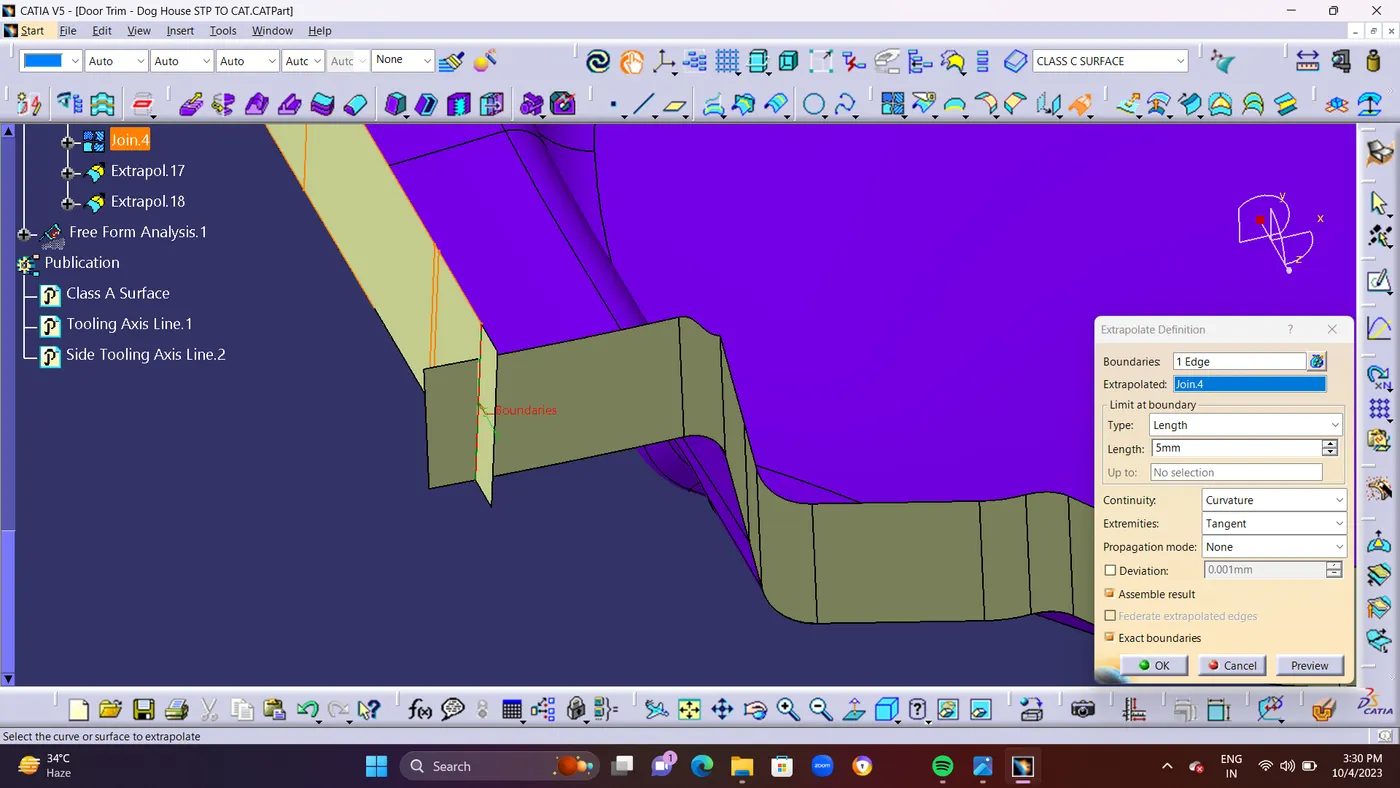
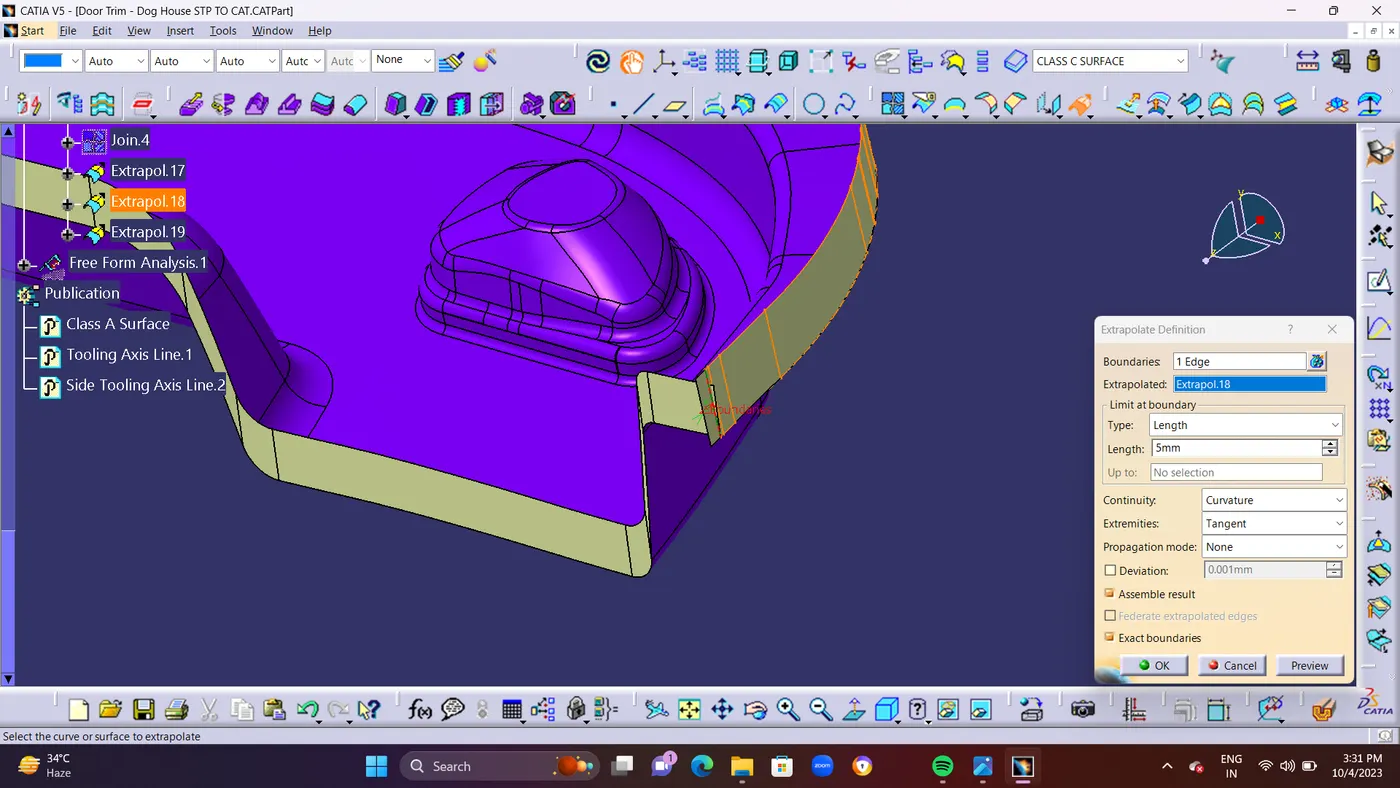
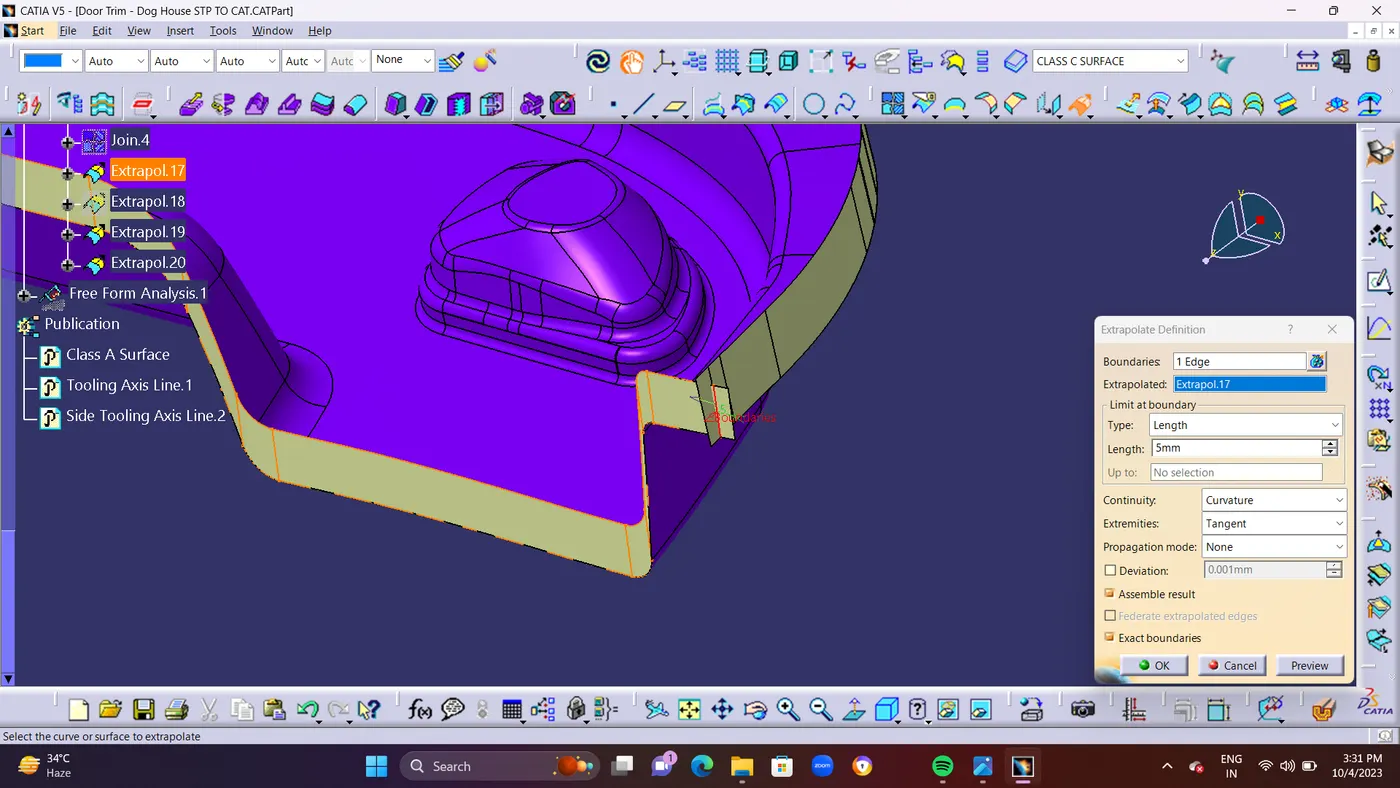
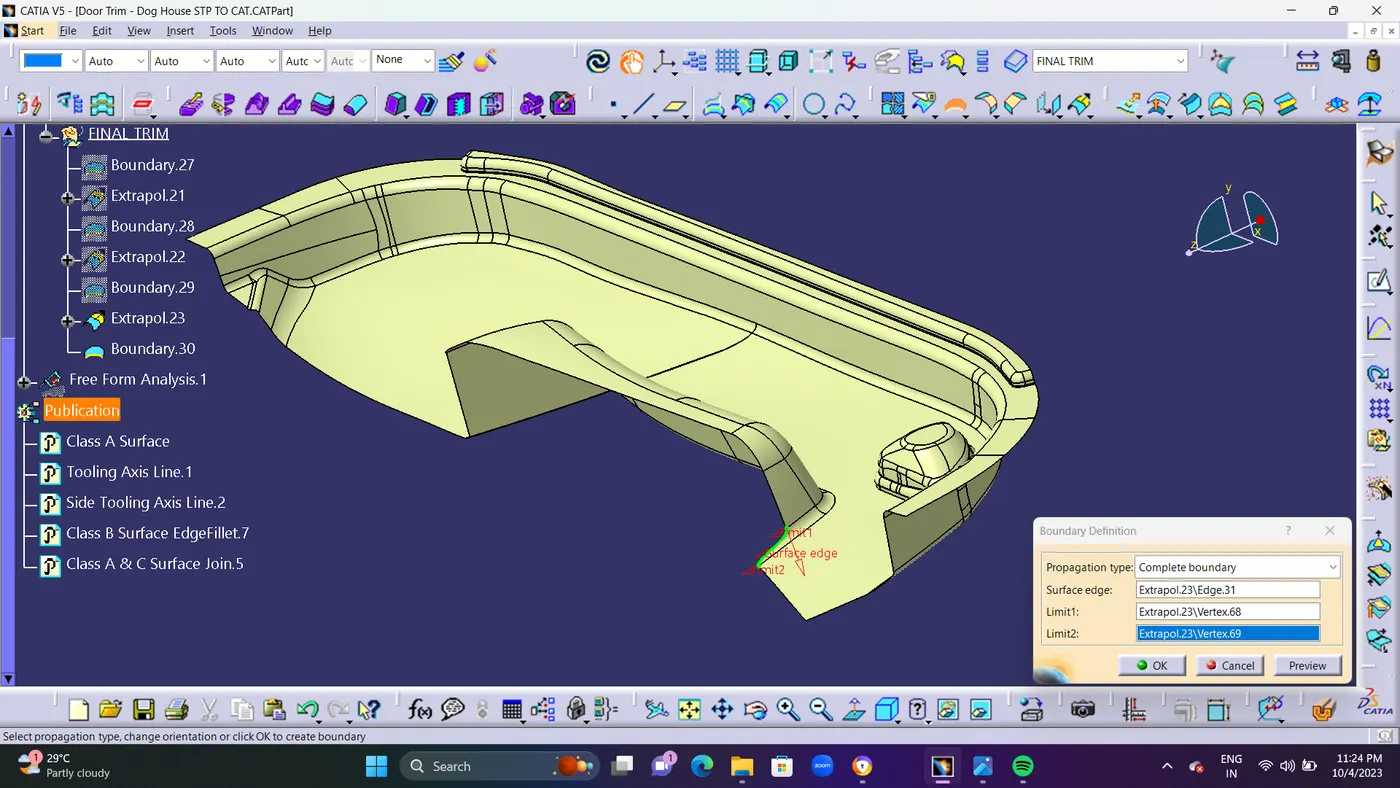
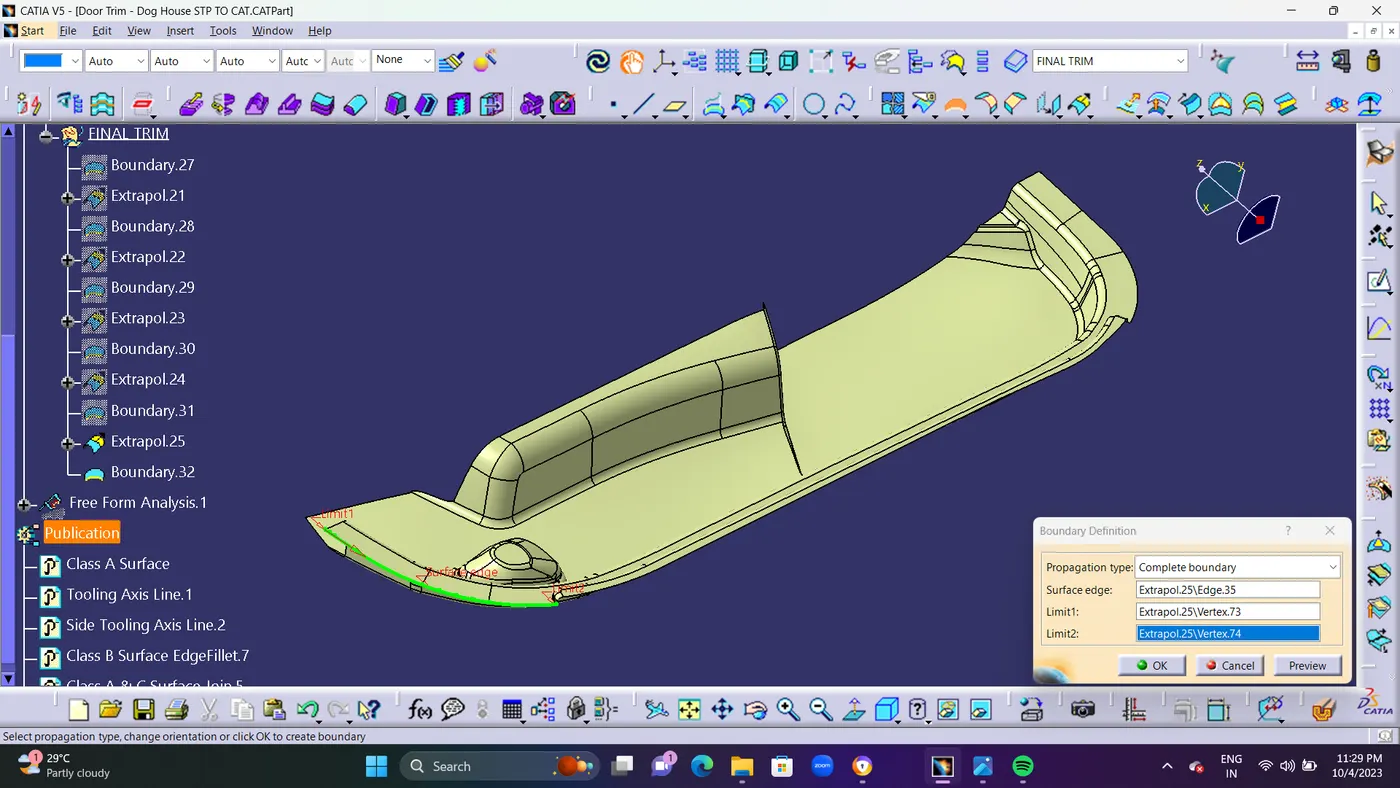
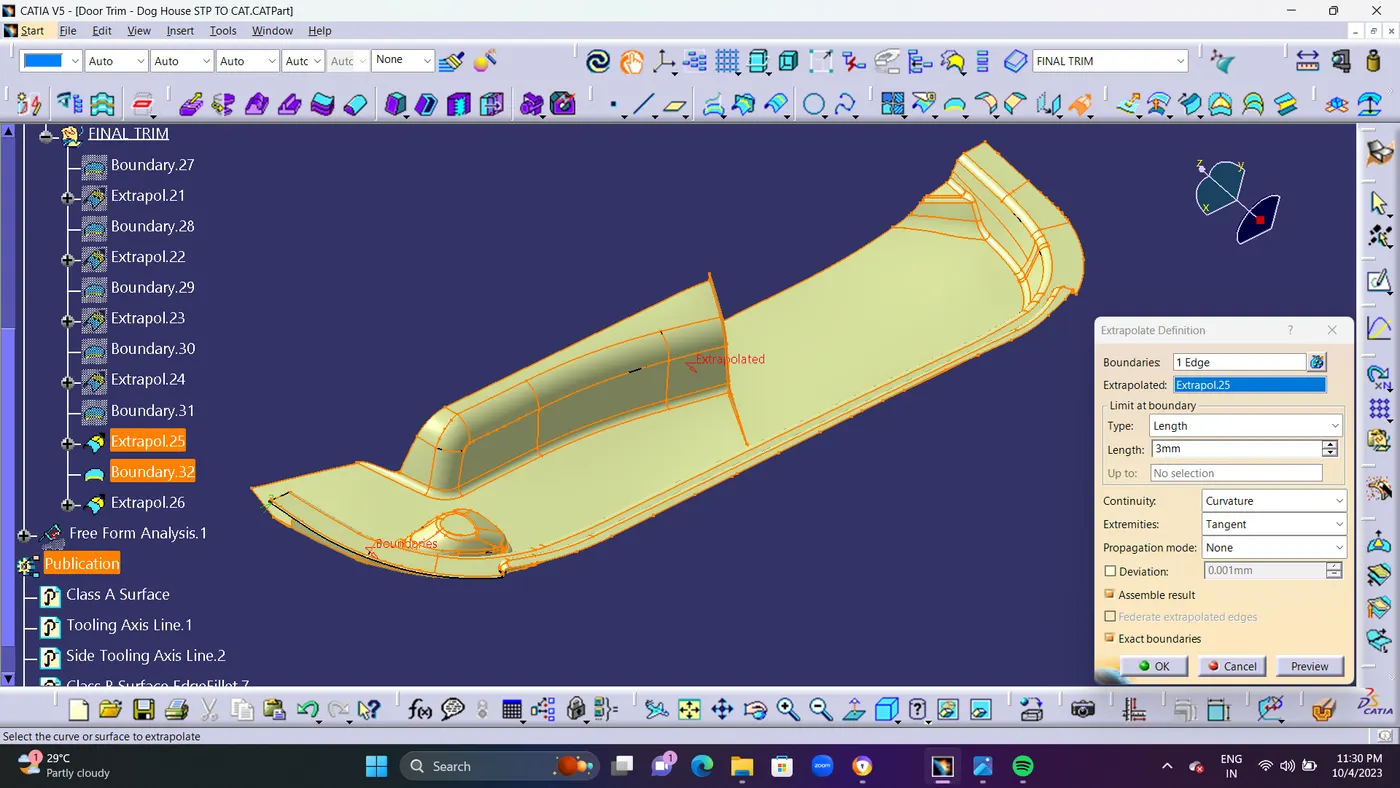
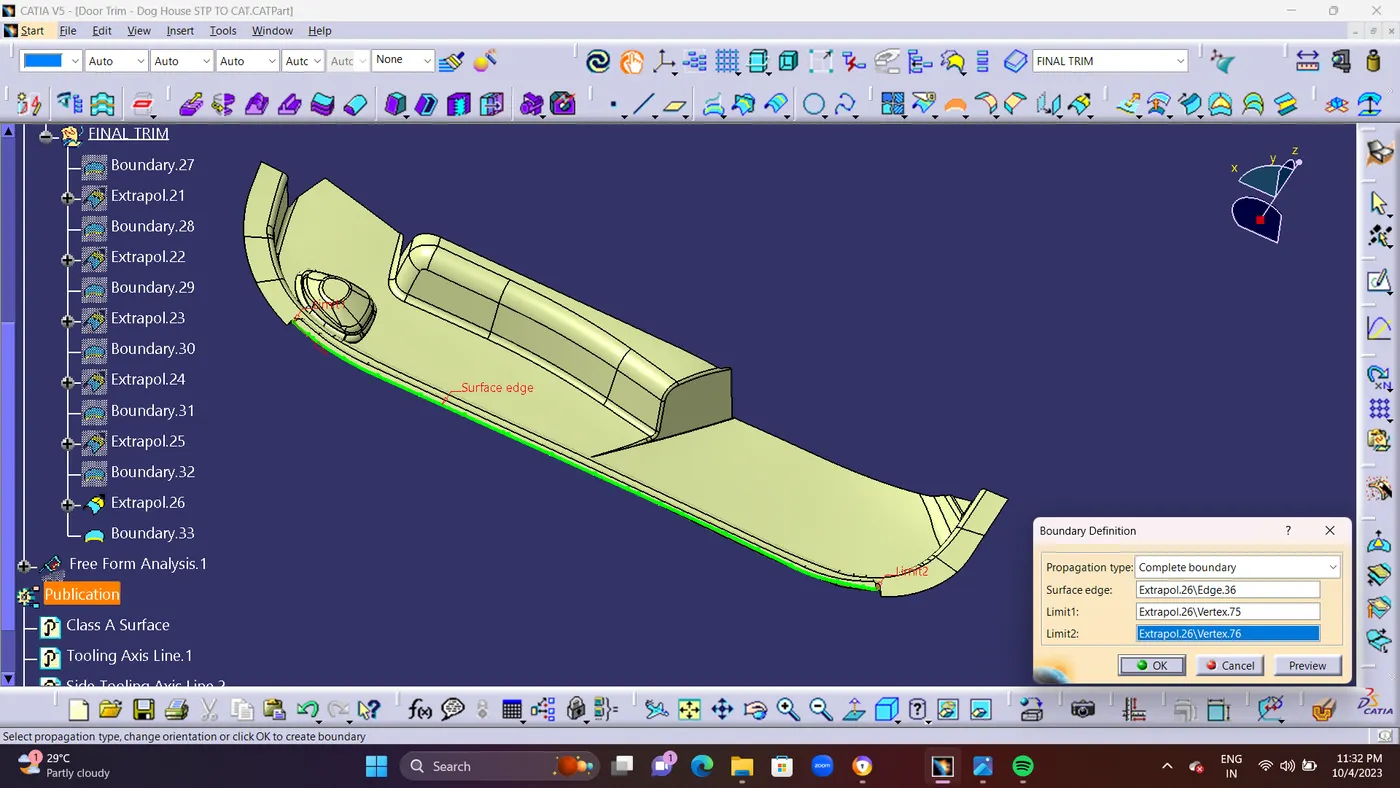
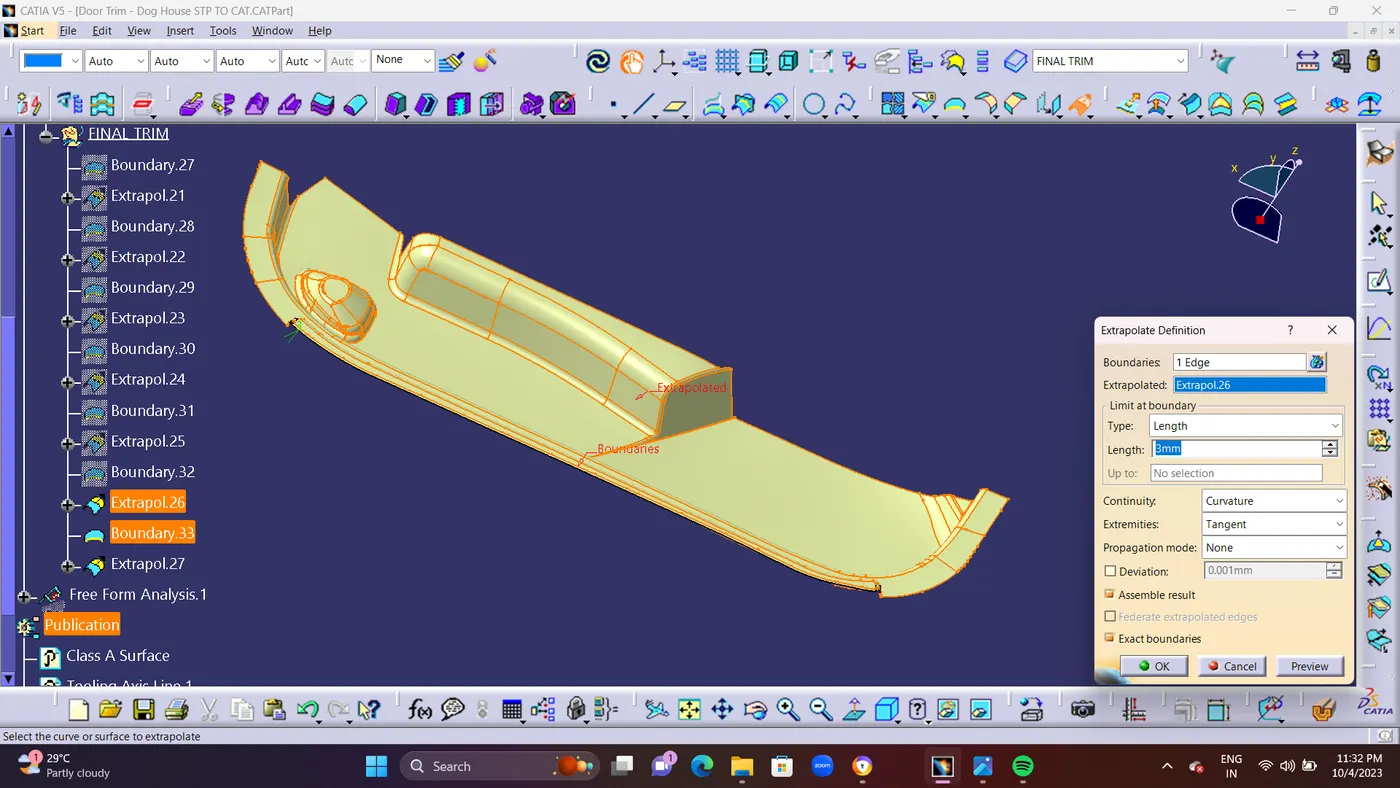
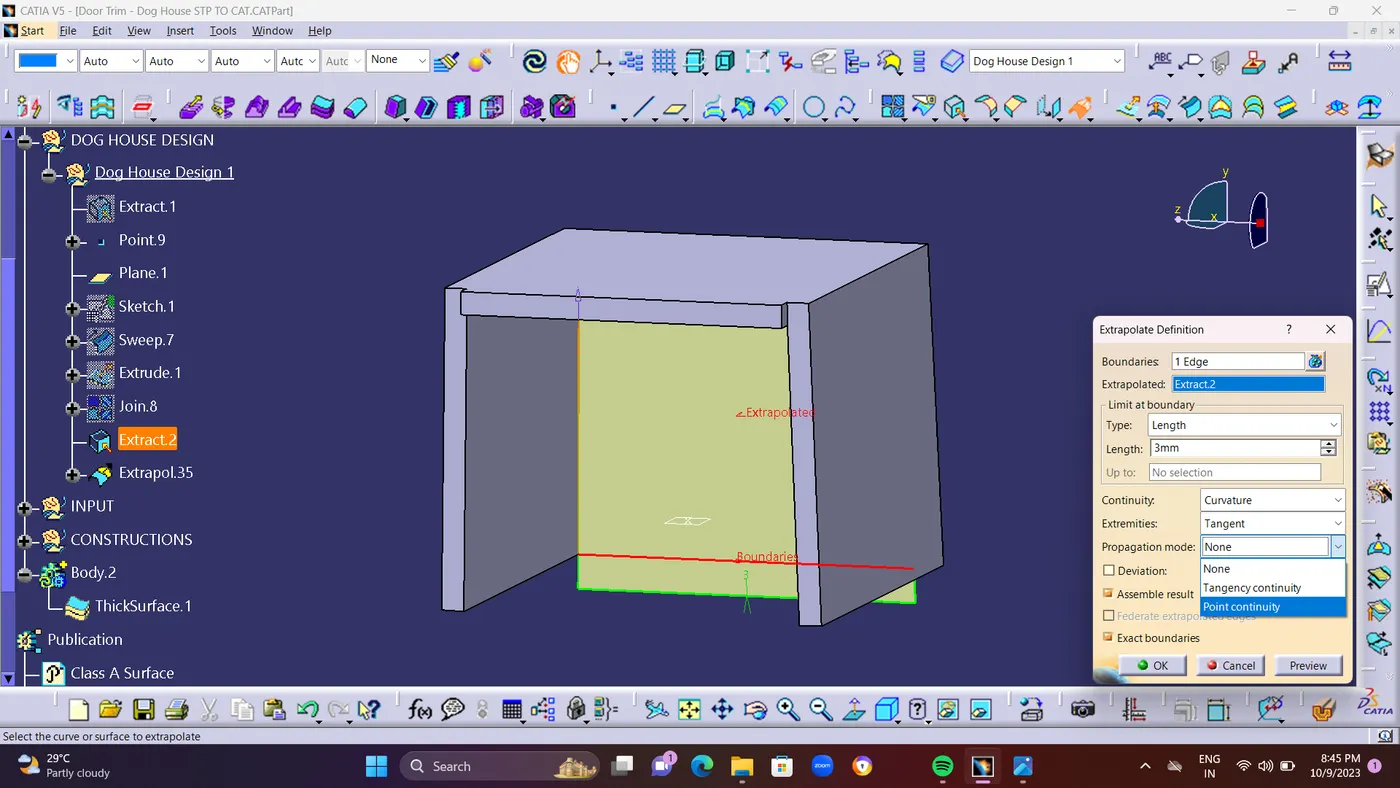
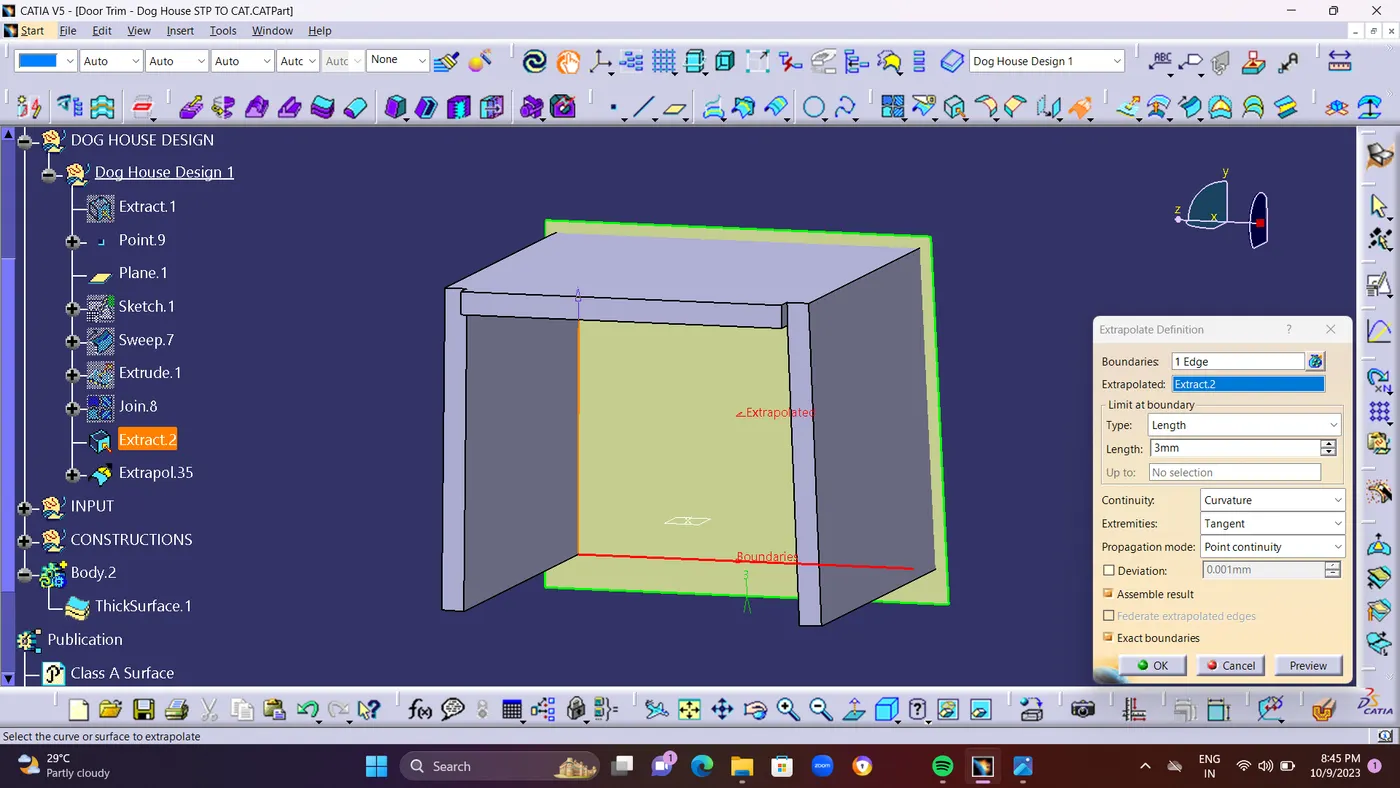
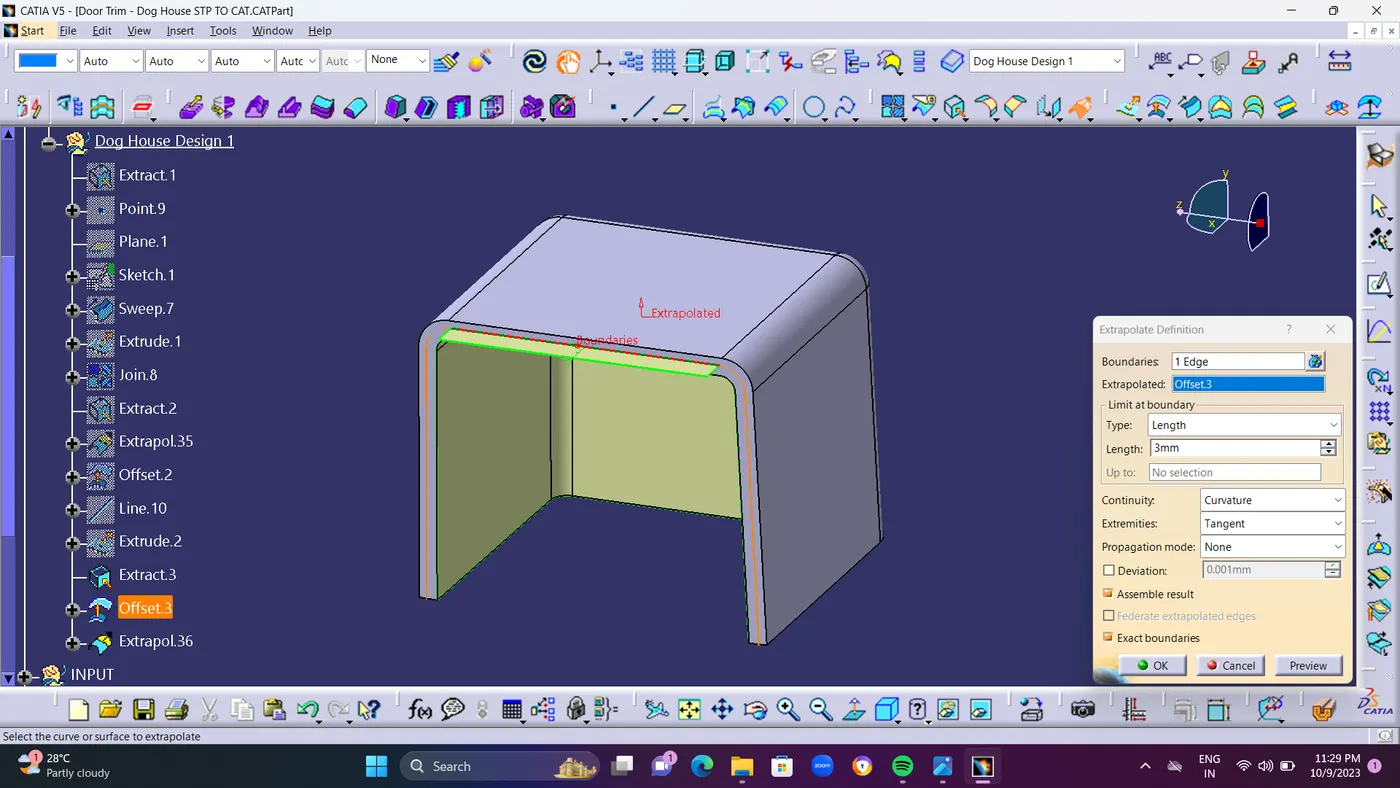
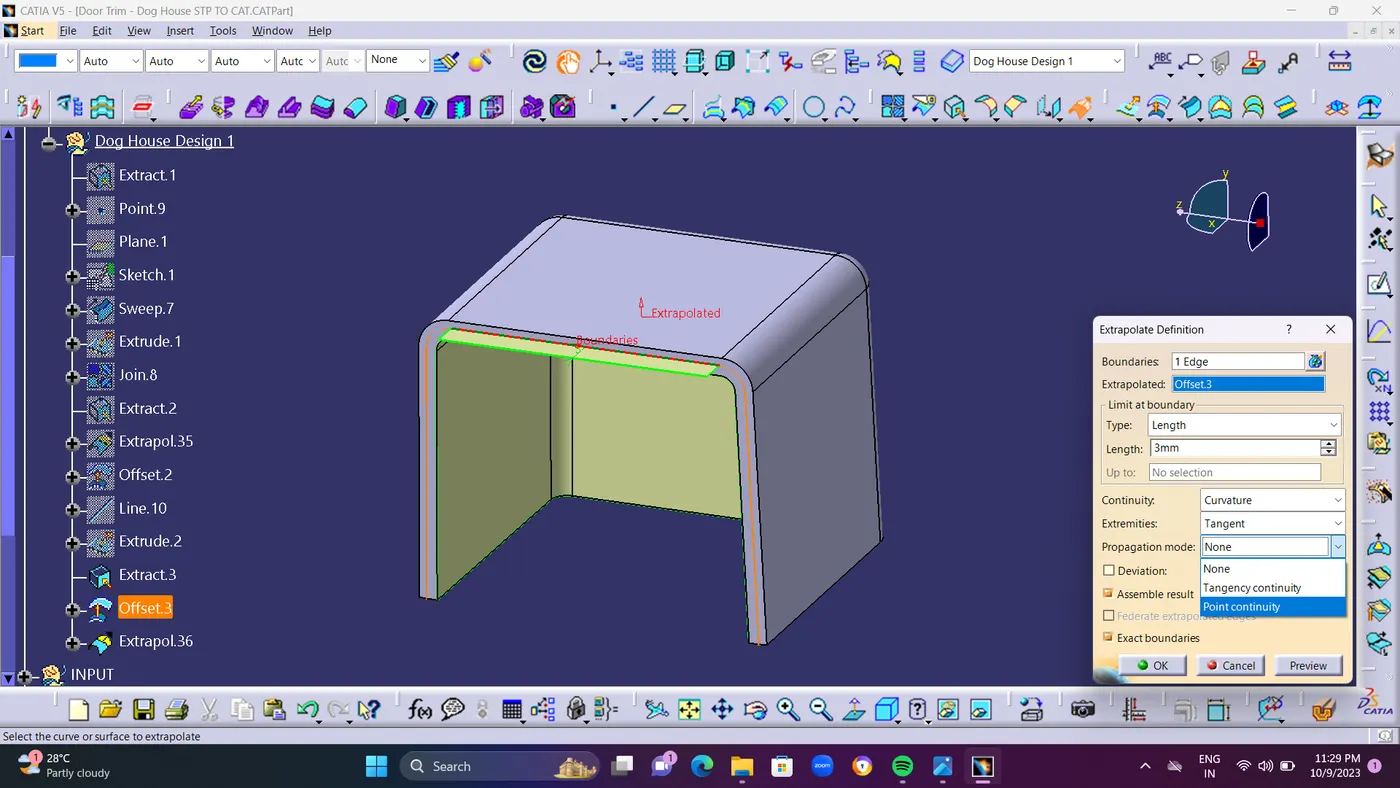
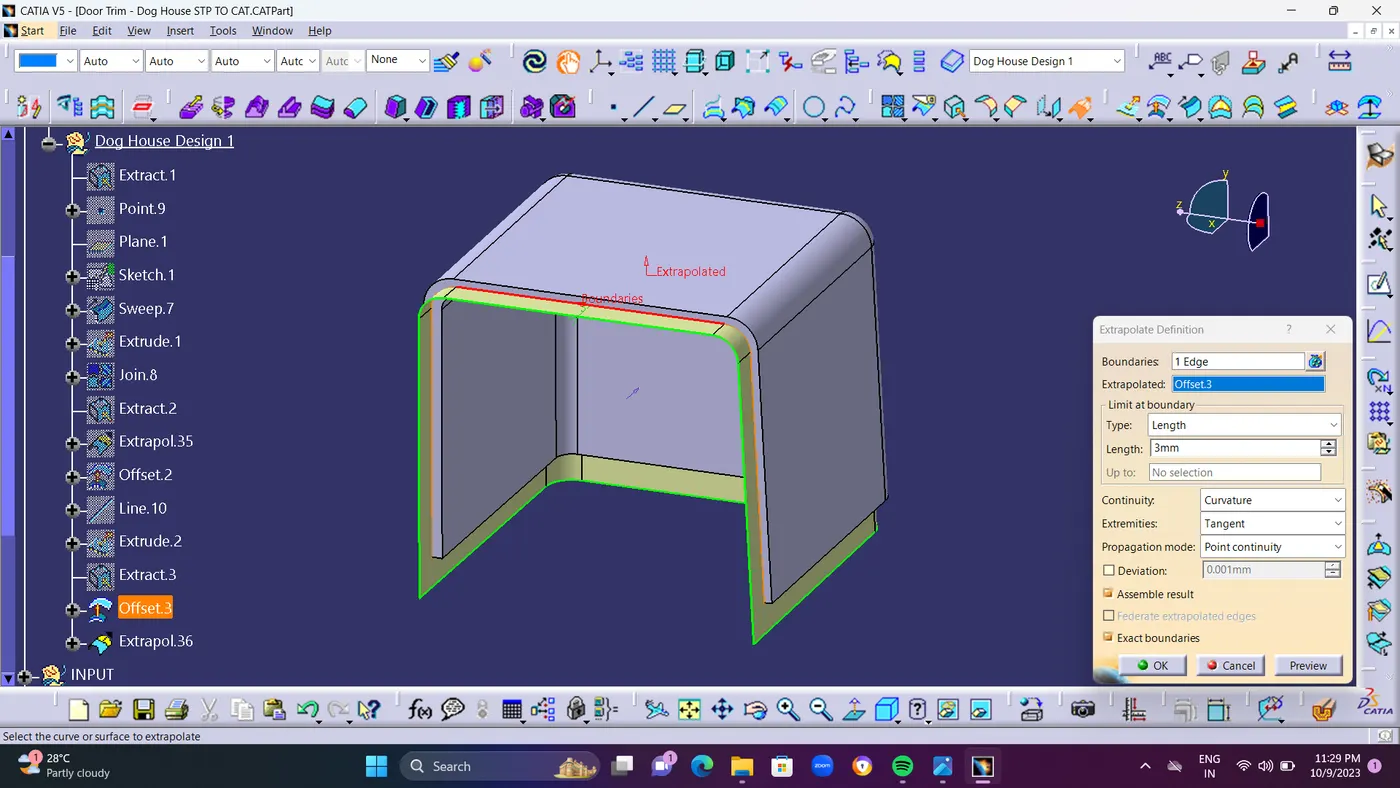
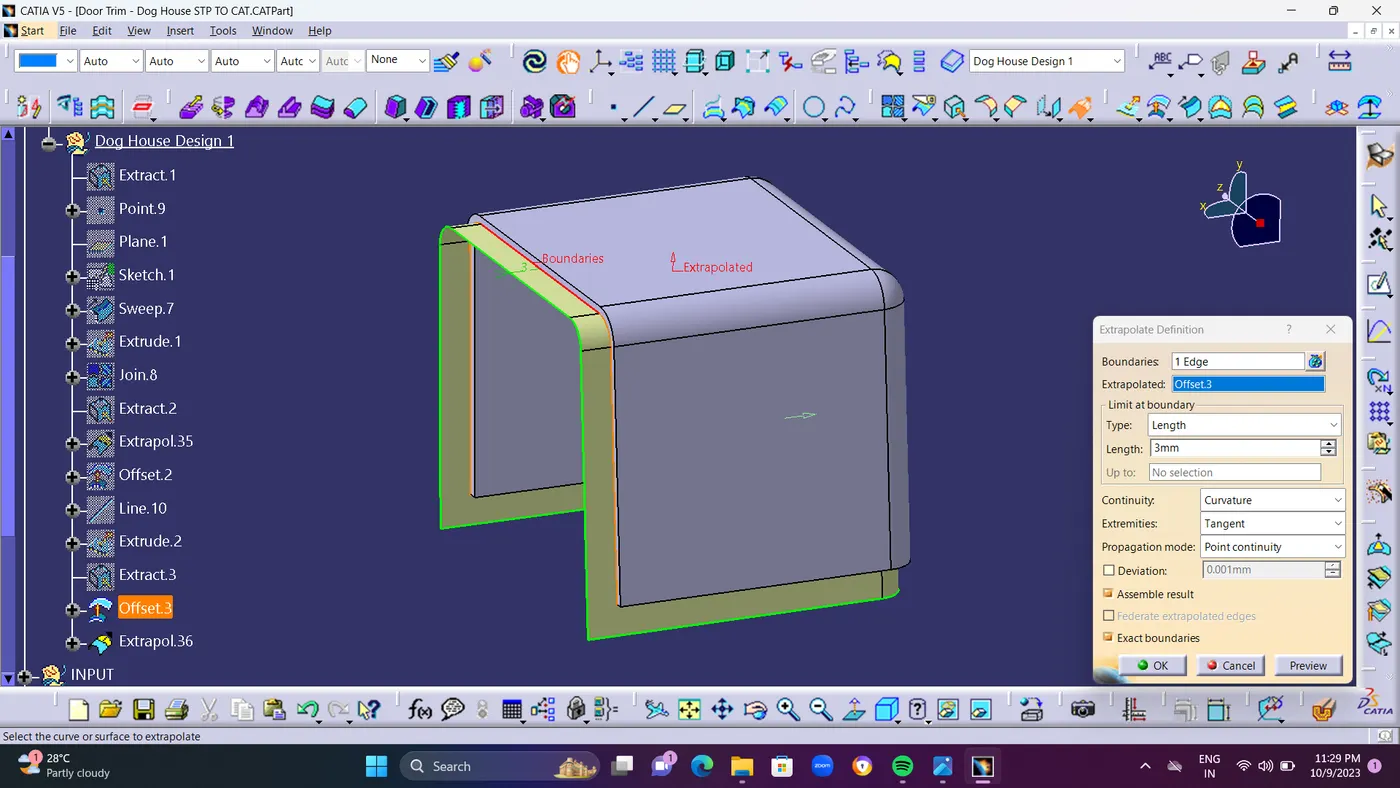
  • STEP 6 : Take an Boundary of edge surface and EXTRAPOLATE it for 5mm. 


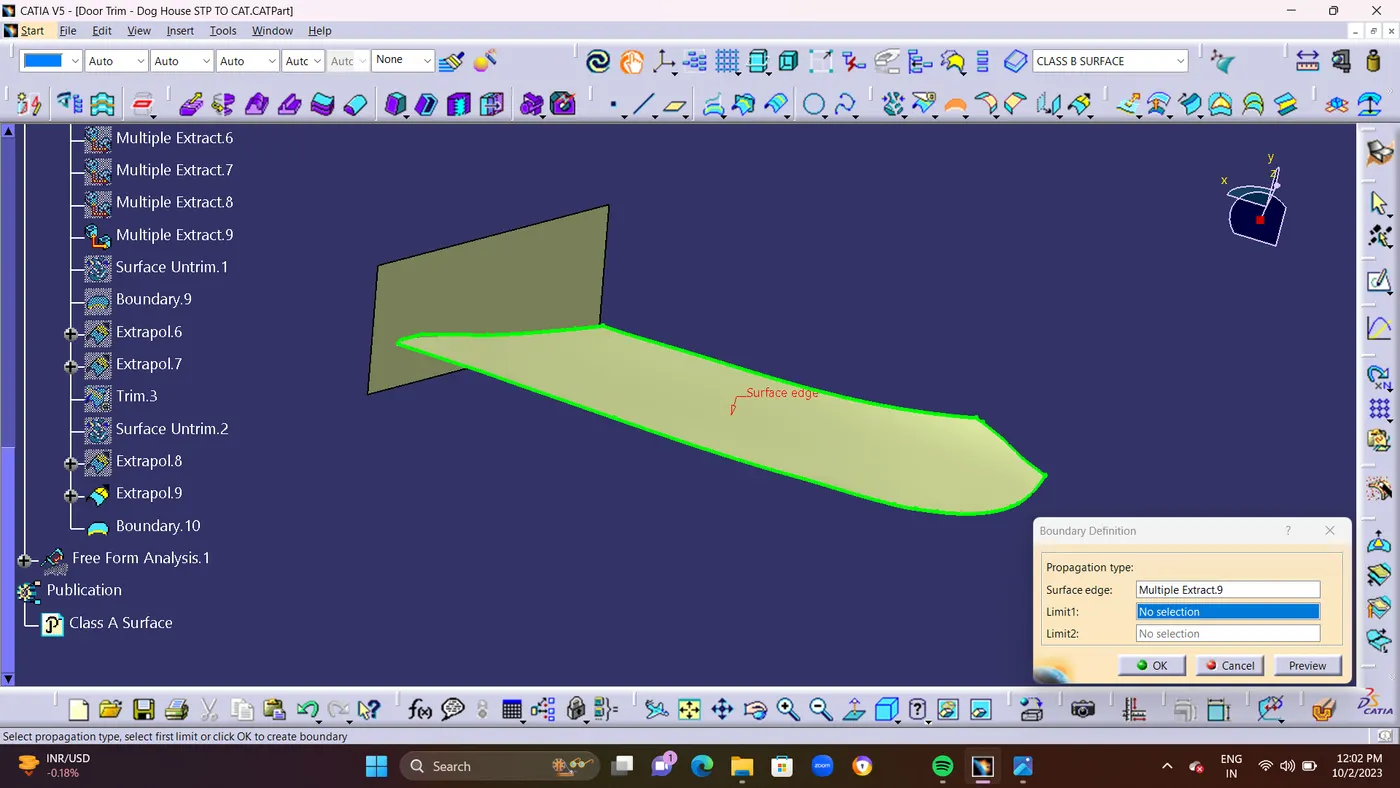
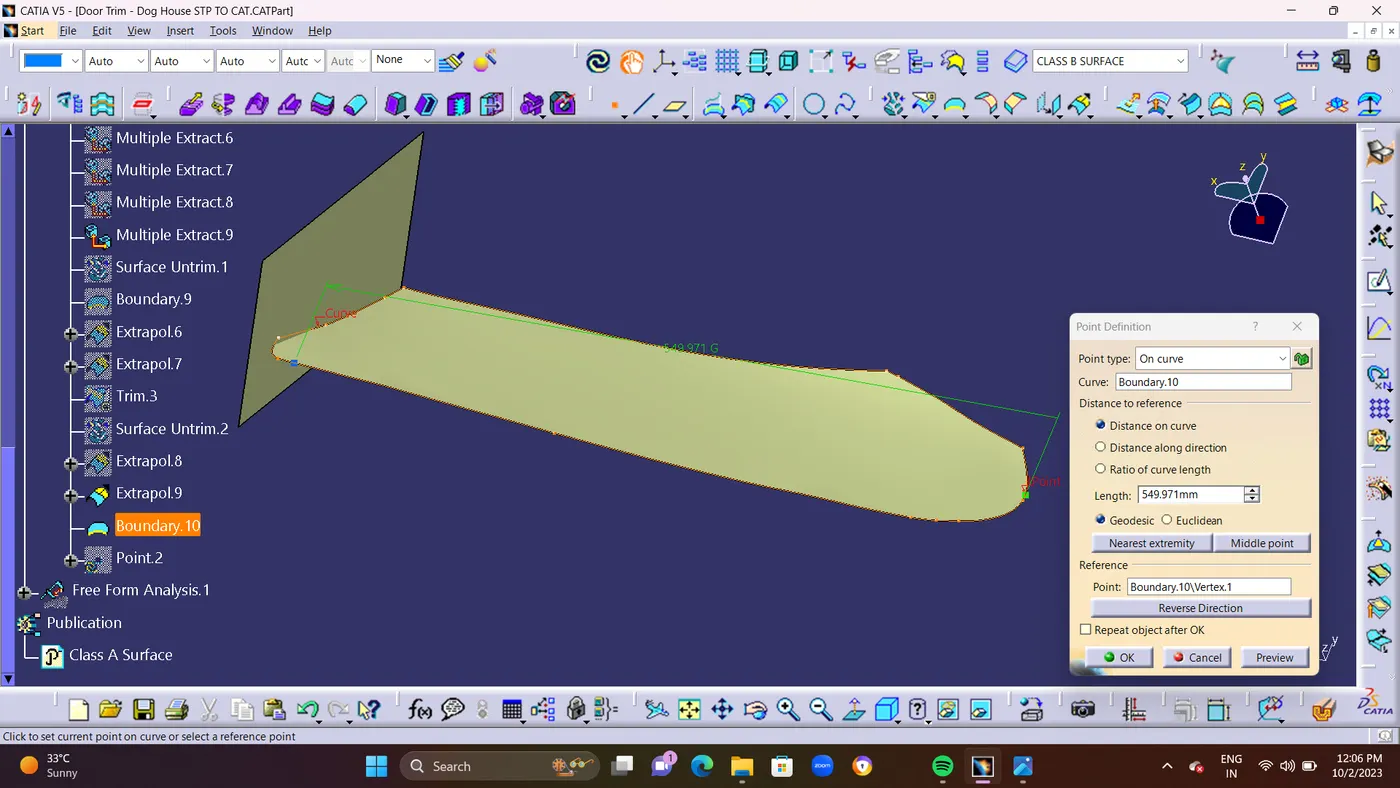
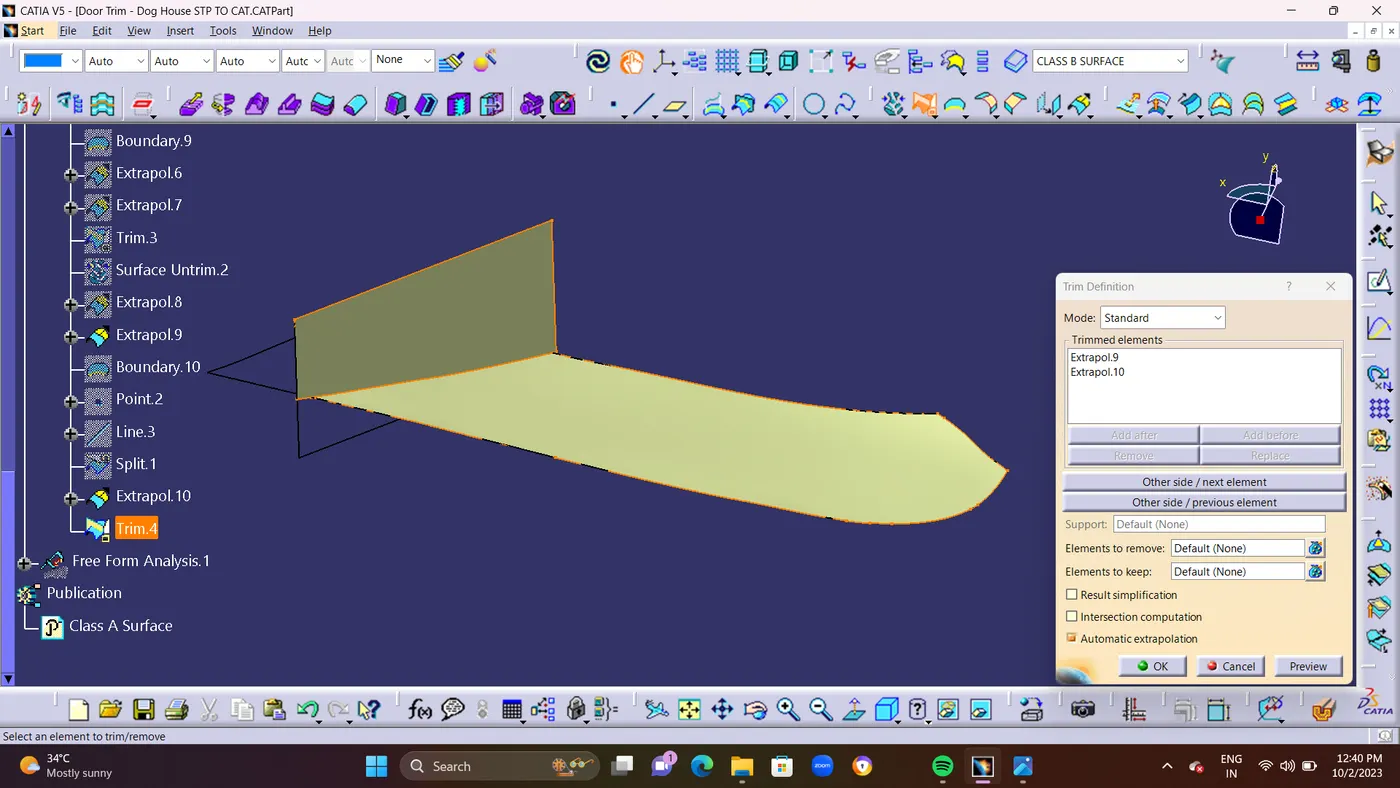
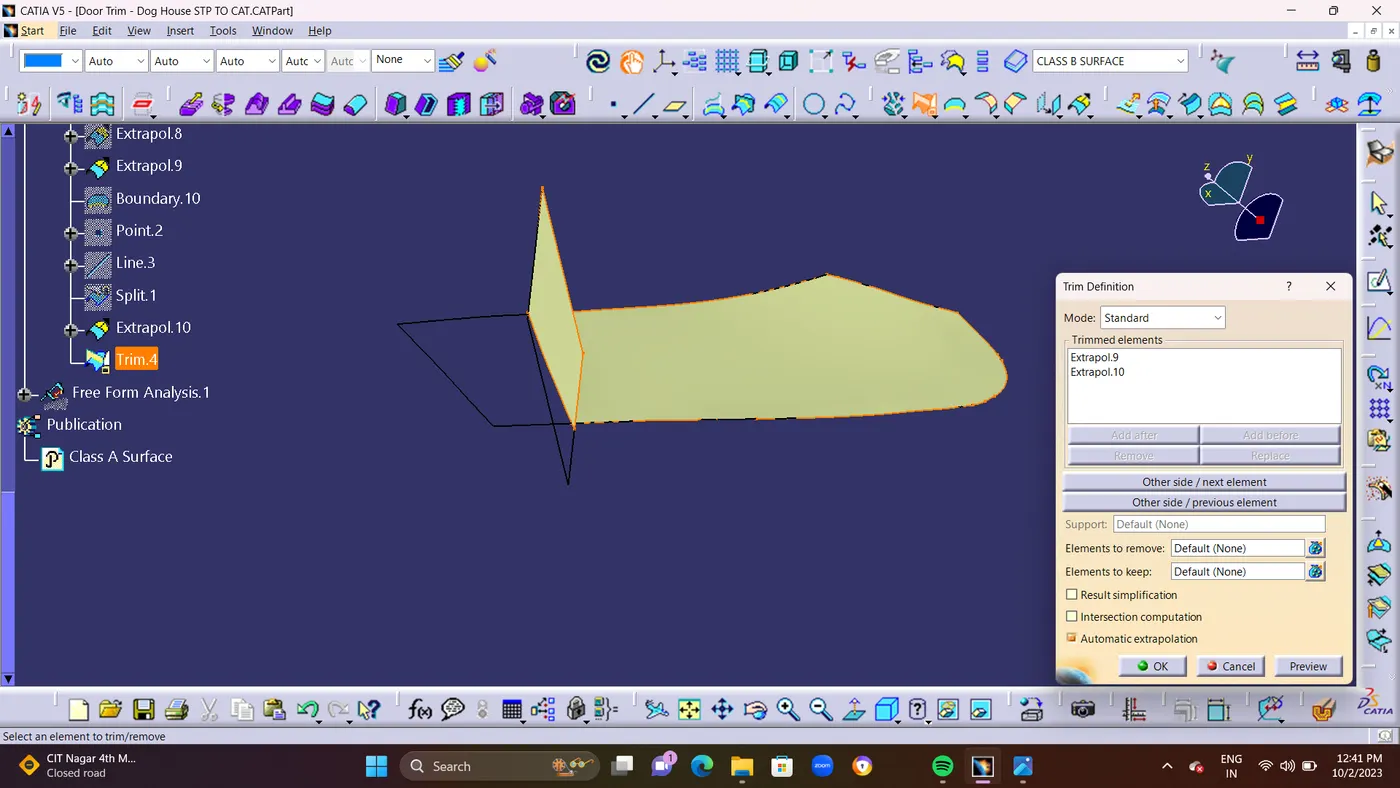
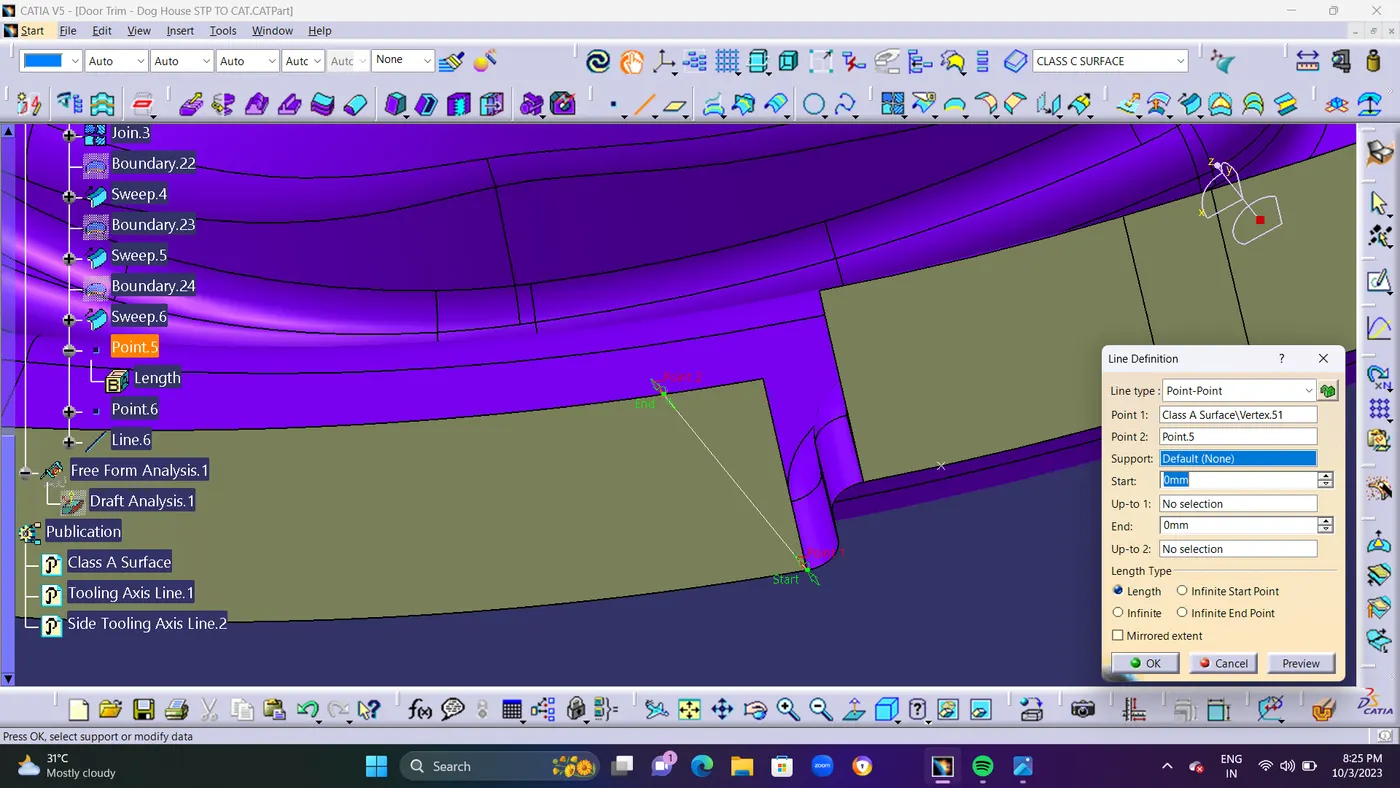
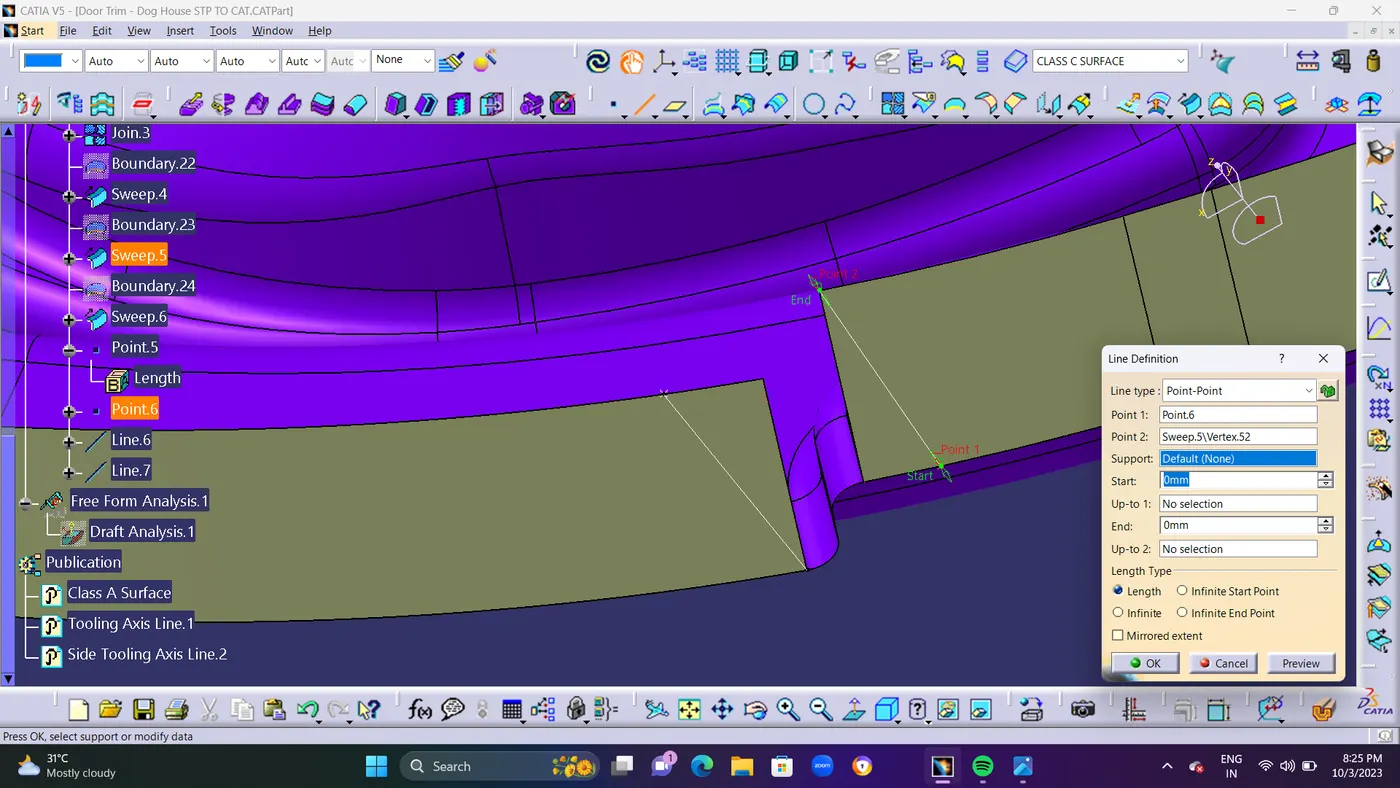
  • Unwanted extra Surface as been removed by creating a POINT and (LINE in POINT 1 & 2) and SPLIT the line and removed the surface by using split command.


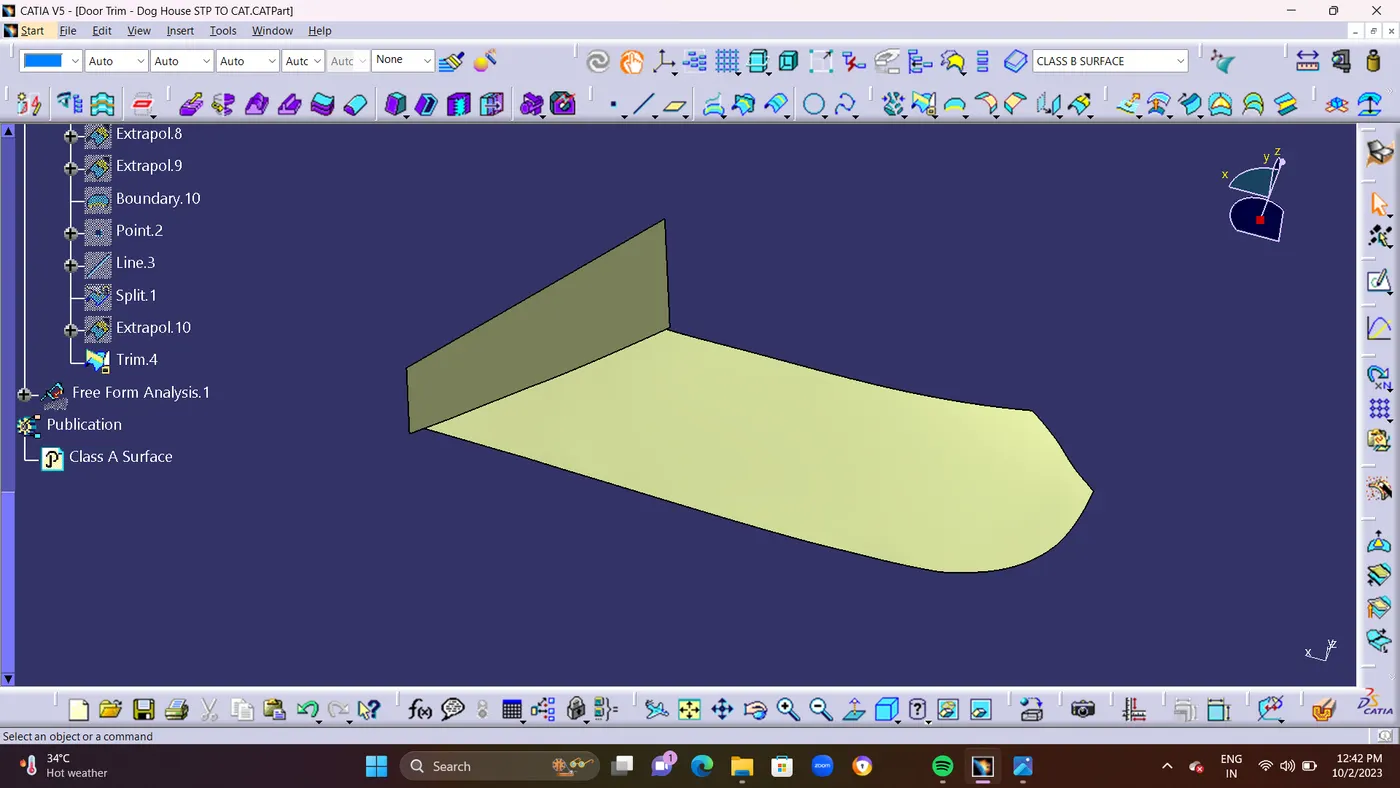
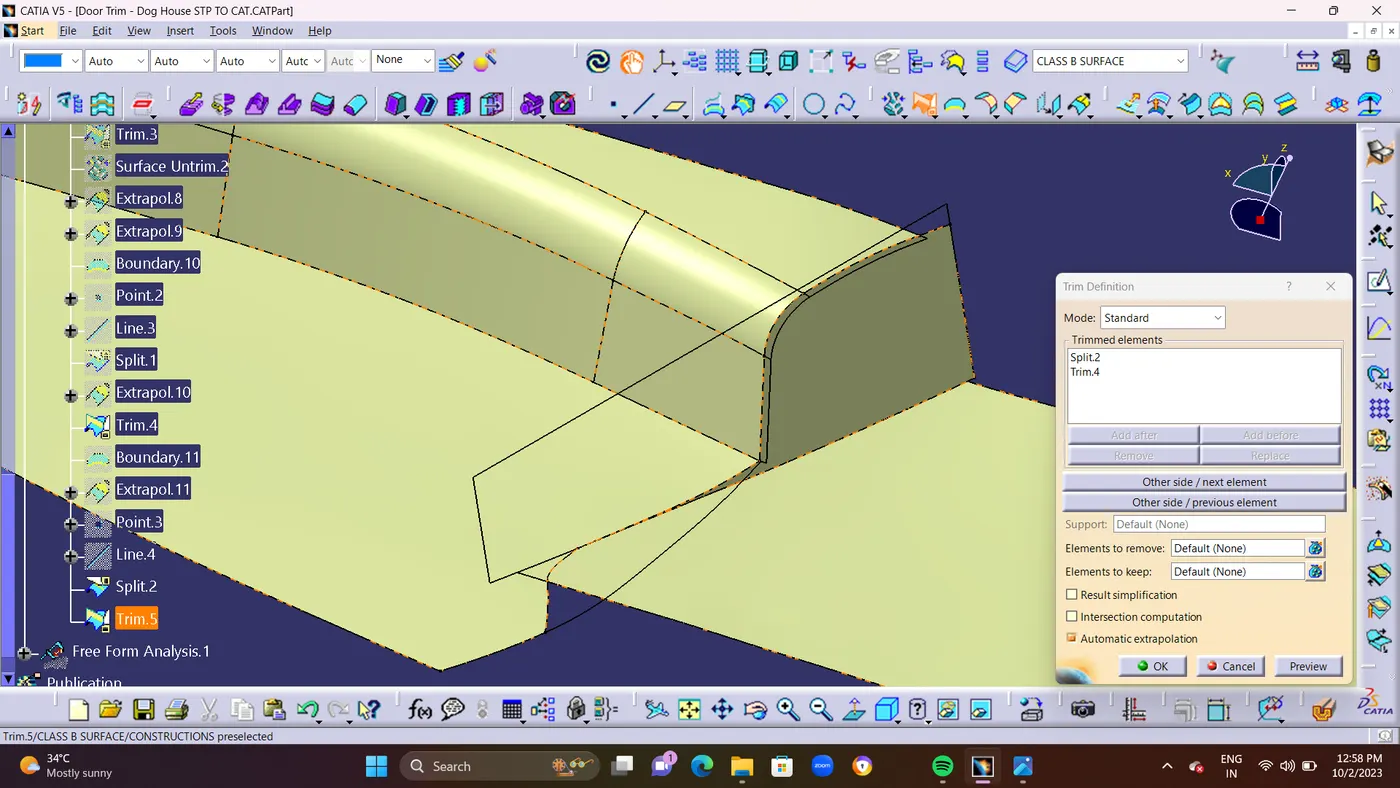
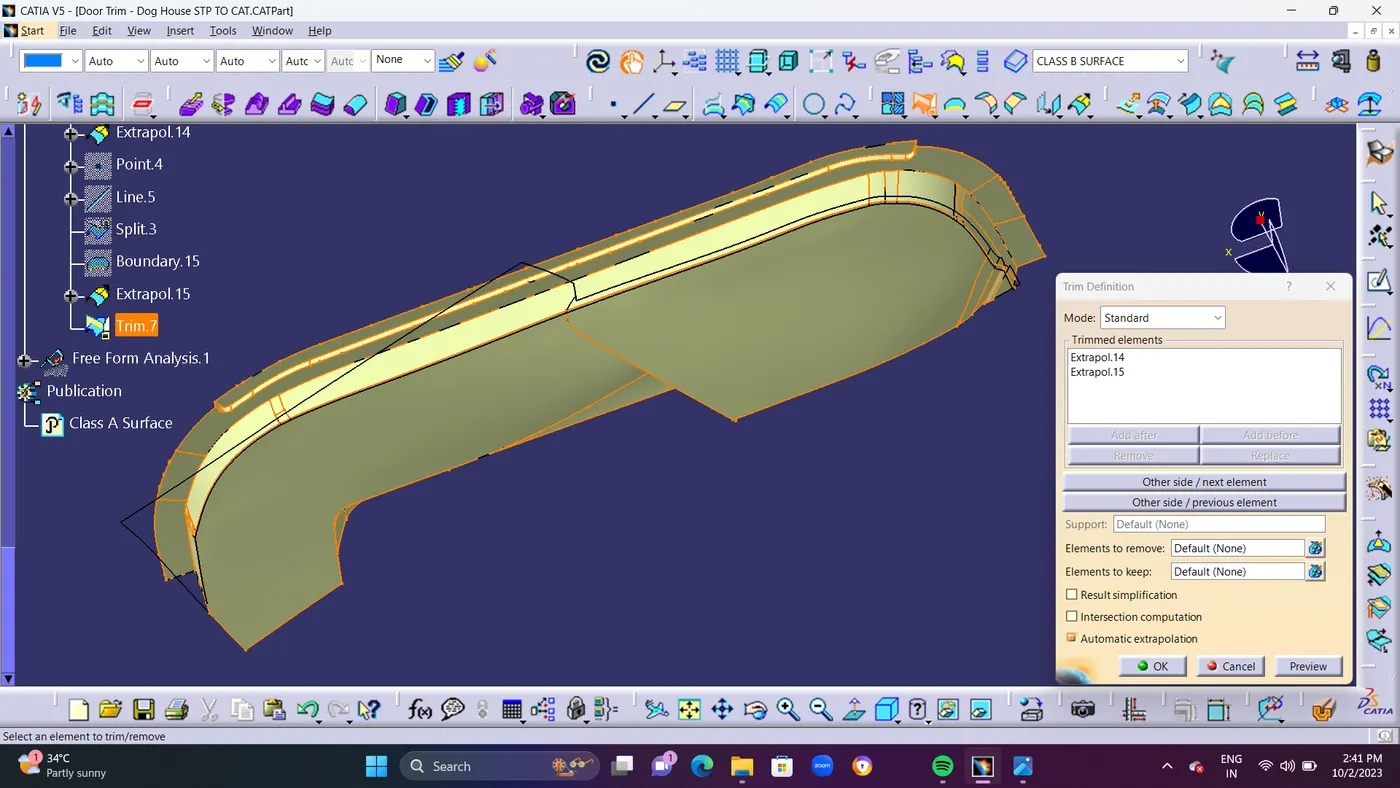
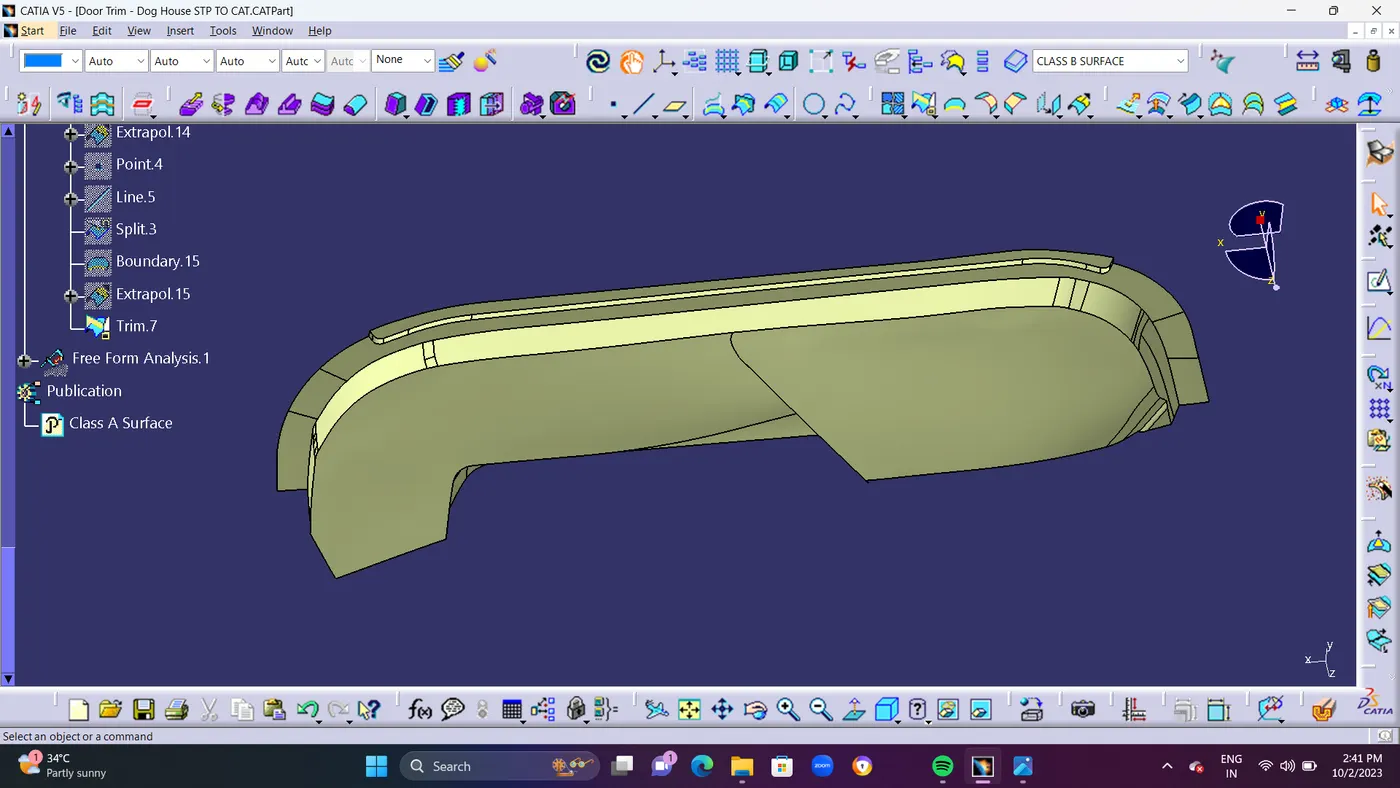
  • Finally TRIM the both surface to make an single output.


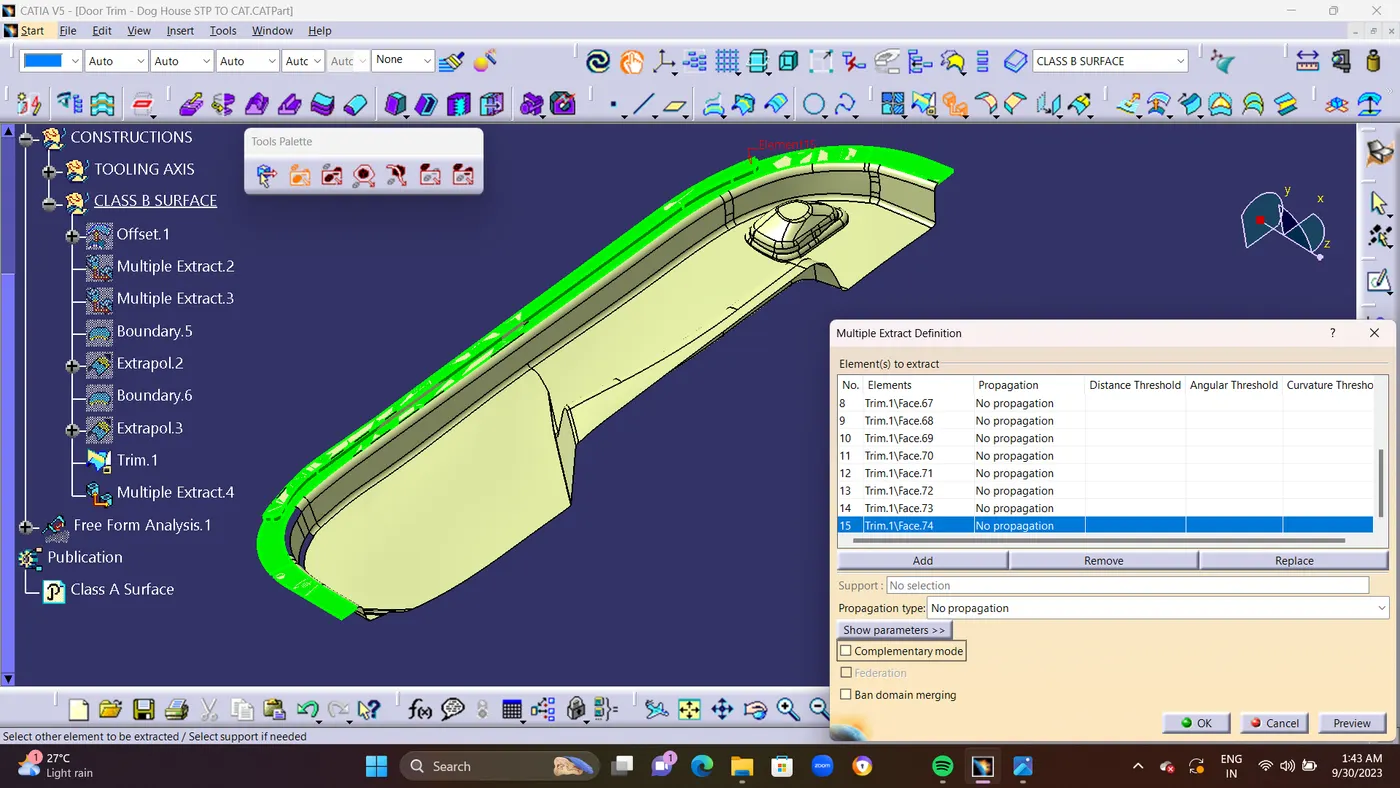
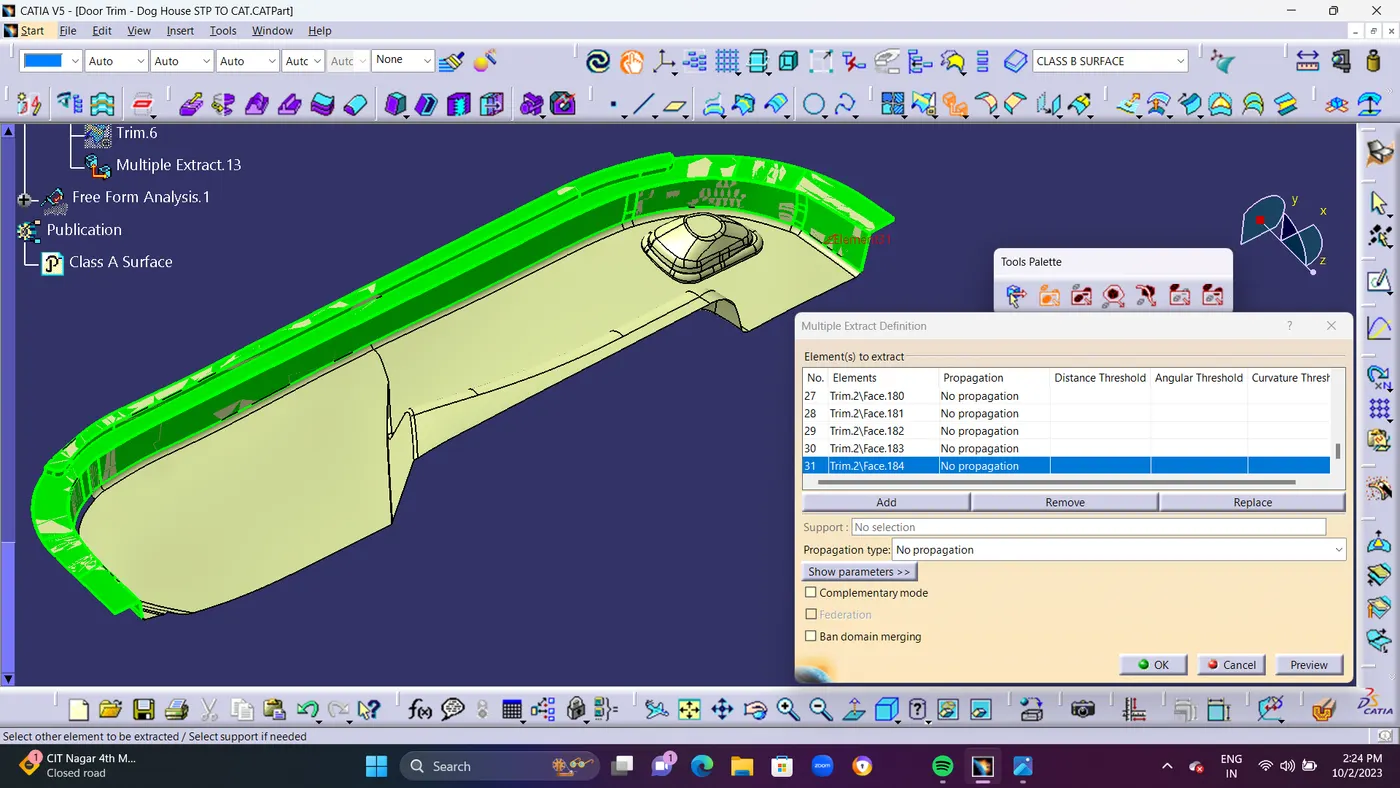
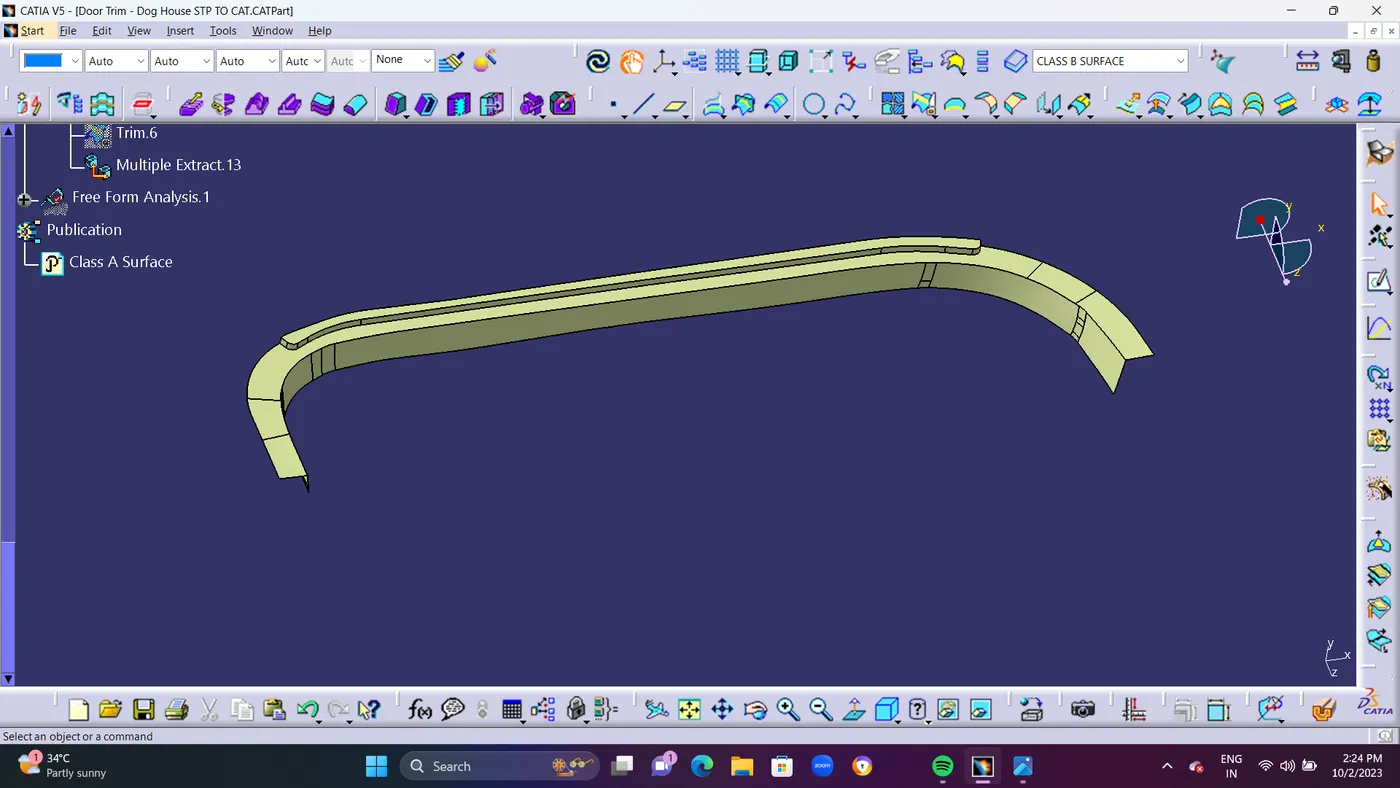
    • STEP 7 : Using MULTIPLE EXTRACT Extract the surface. 
    • Multiple Extract Command Seperating the pached area surfaces and Create an Boundary Line on the Multiple Extracted Surface.Finally Extapolate It to Interconnect the Both surface for Minimum 5mm Maximum how much you want it to intersect both surface.after interconnected it. and Using TRIM Command trim the Both surface.To get Sharp edge Surface and Finally use EDGE fillet on it. shown in below screen shots.
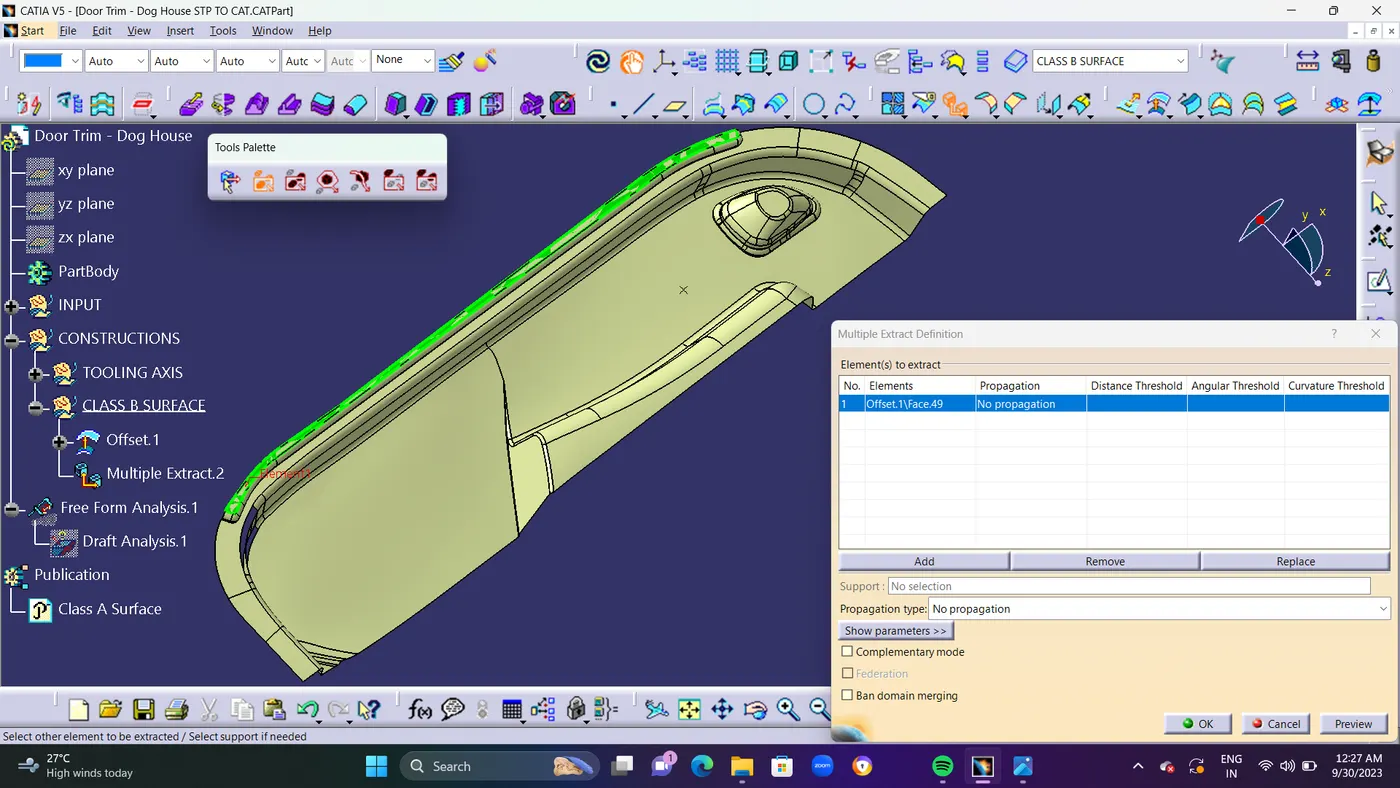


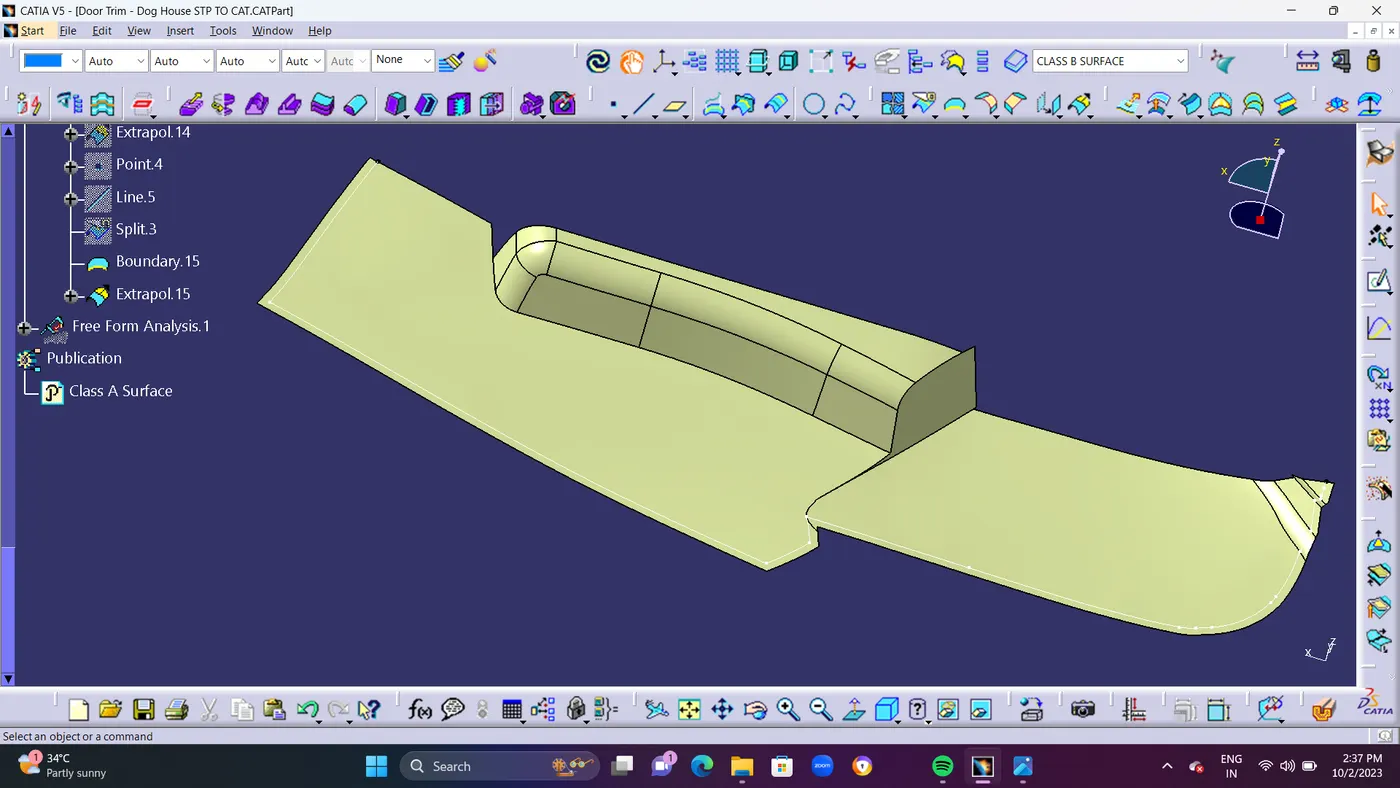
  • STEP 8 : Create a Boundary Line in the edge of the surface and Extrapolate it for 7mm.and trim it with top surface with bottom one as shown in given Screenshots.
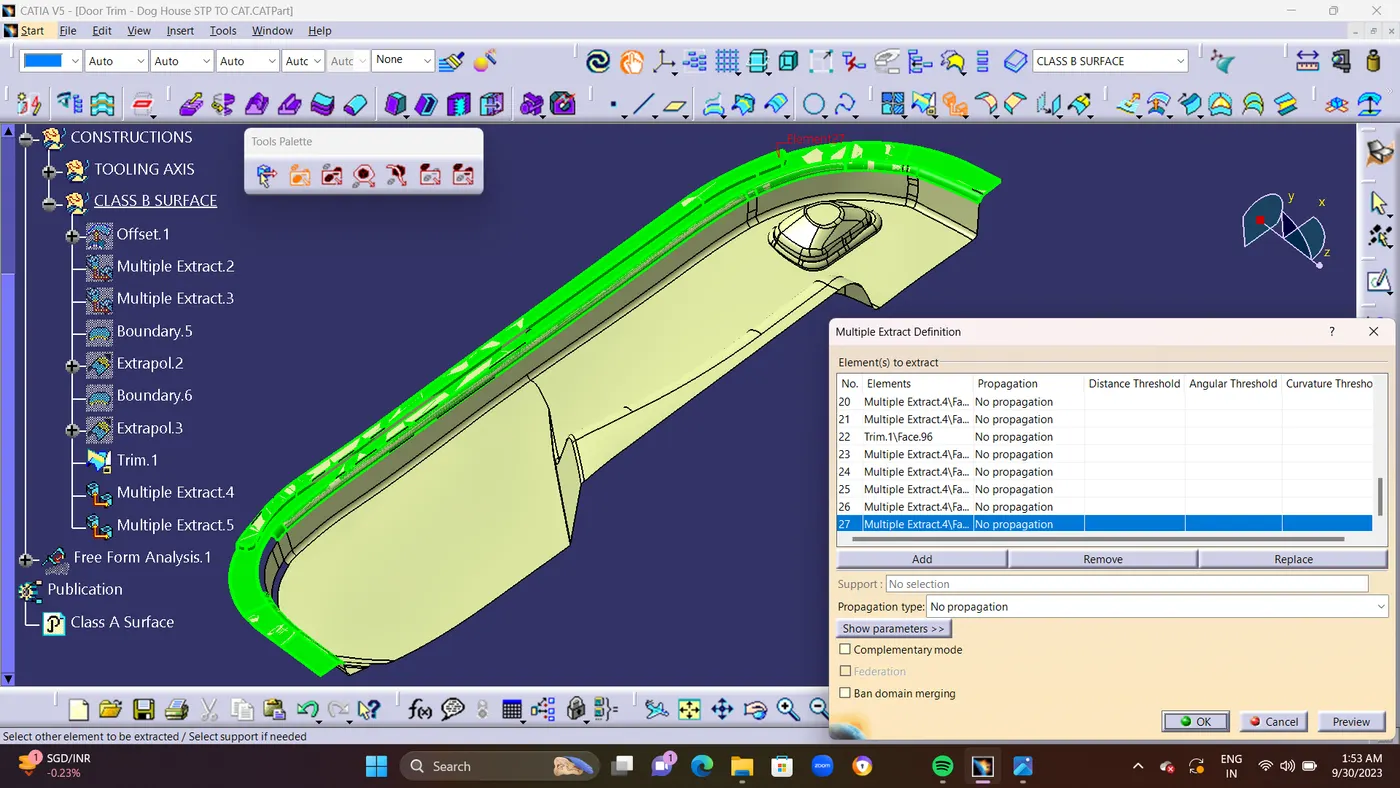


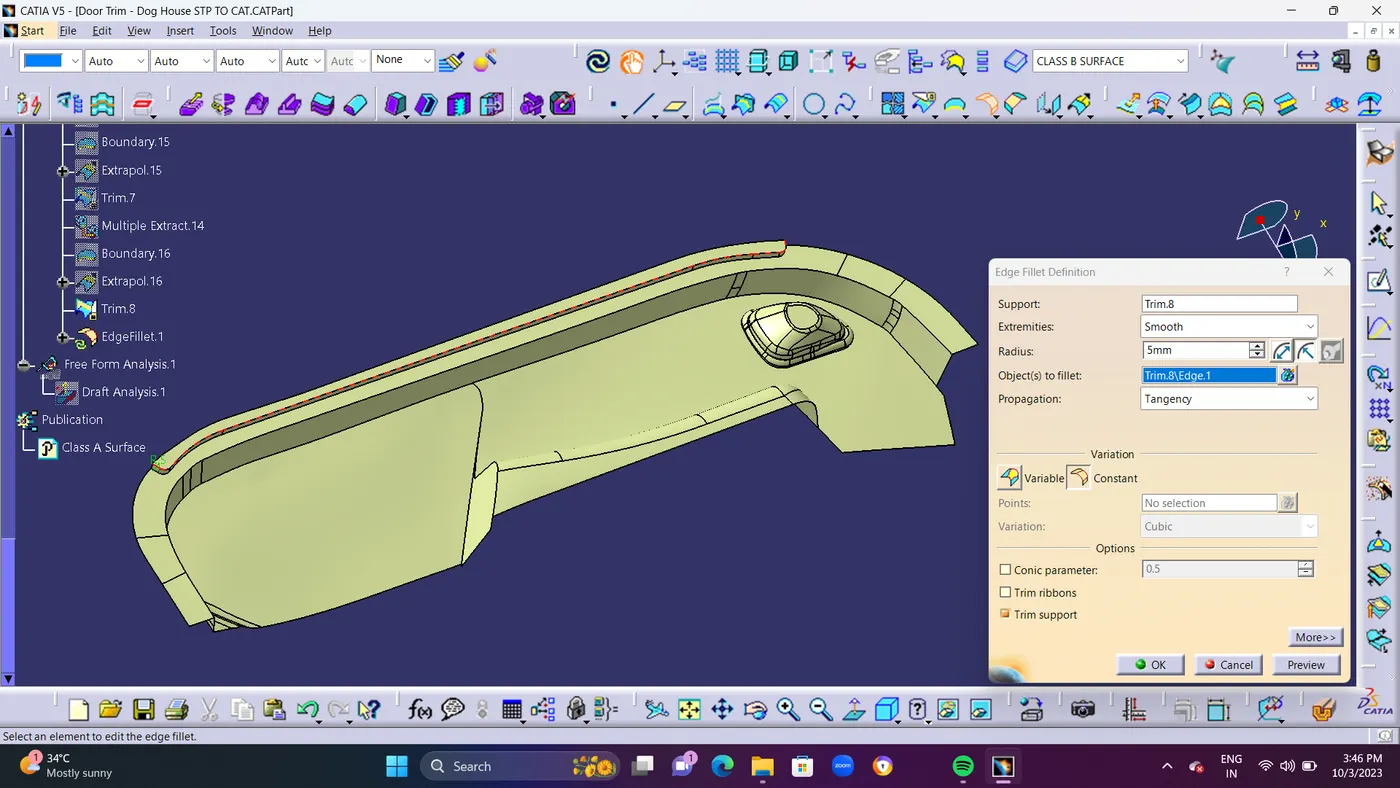
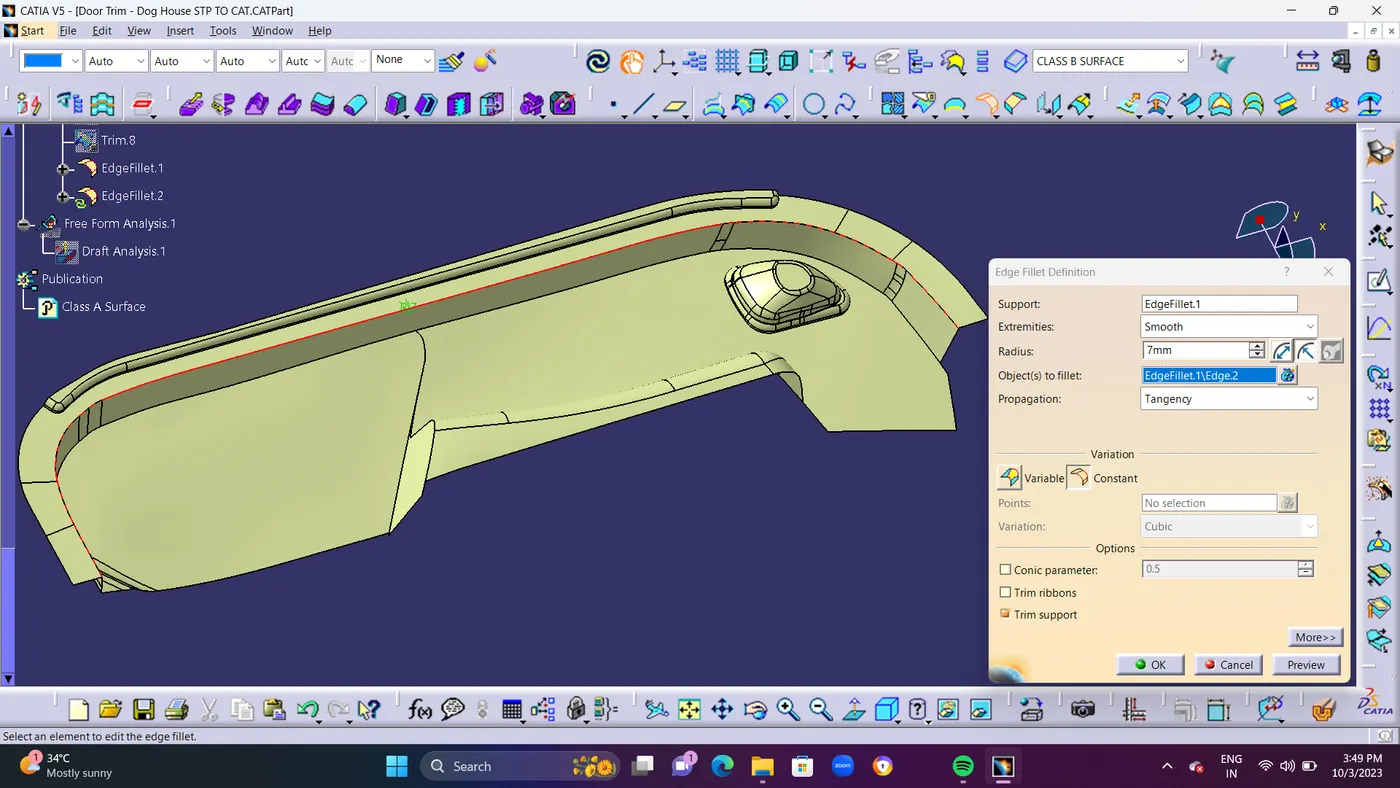
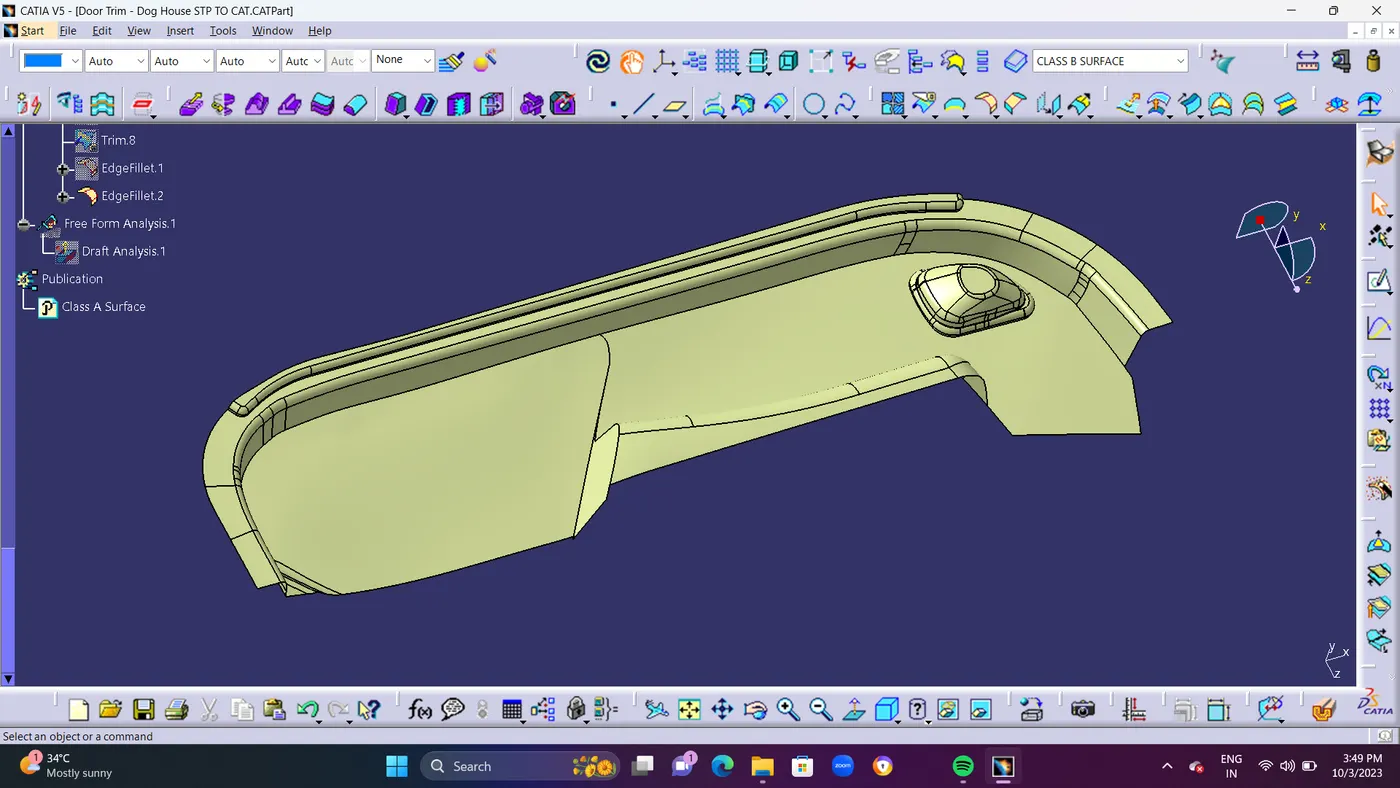
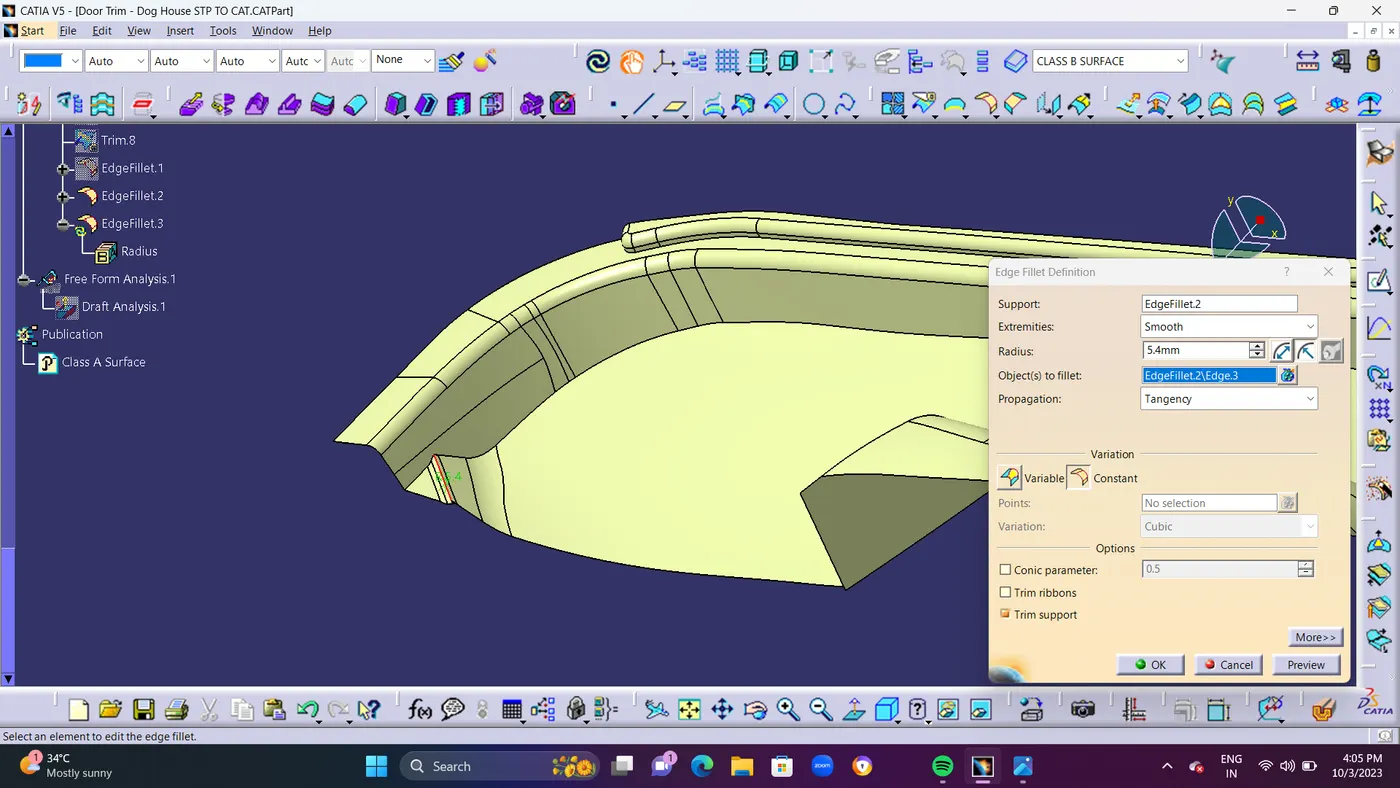
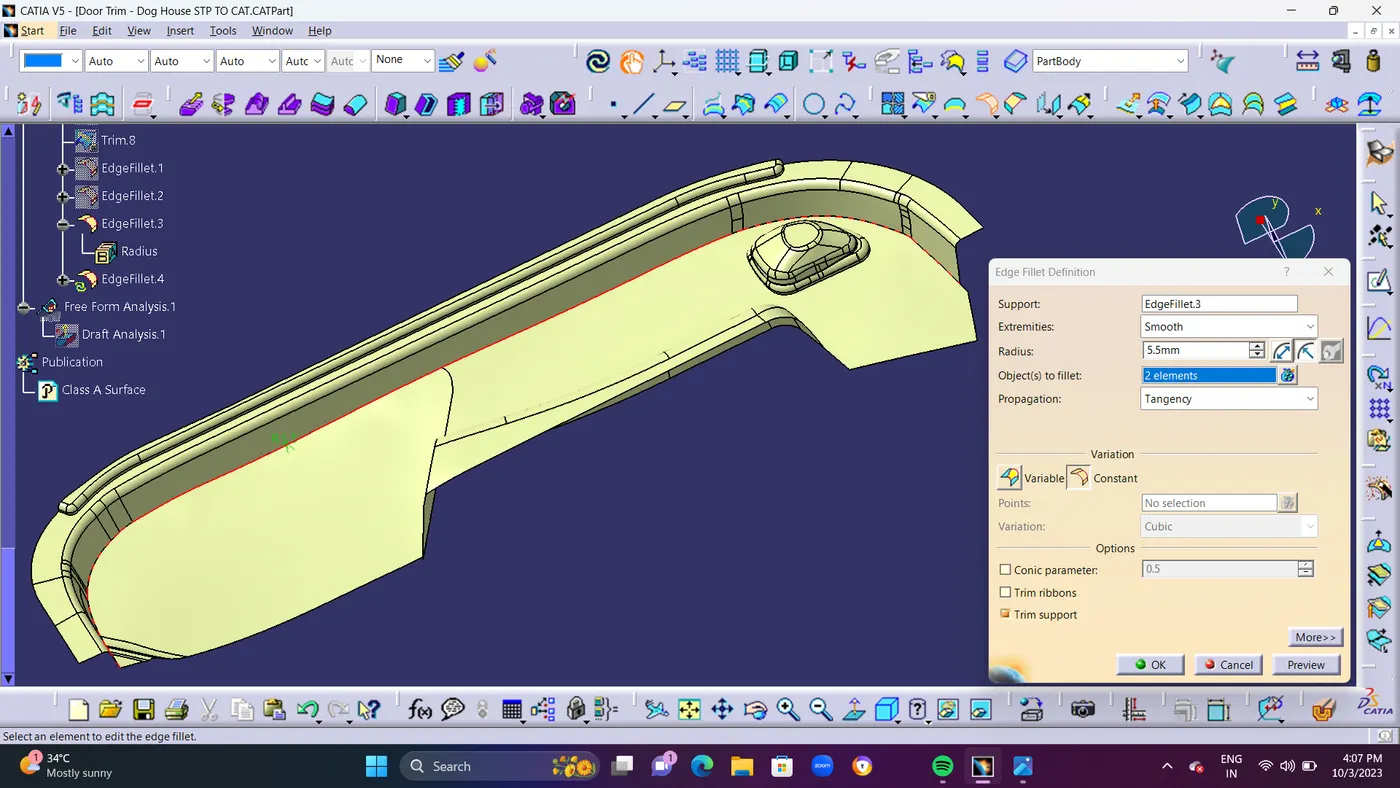
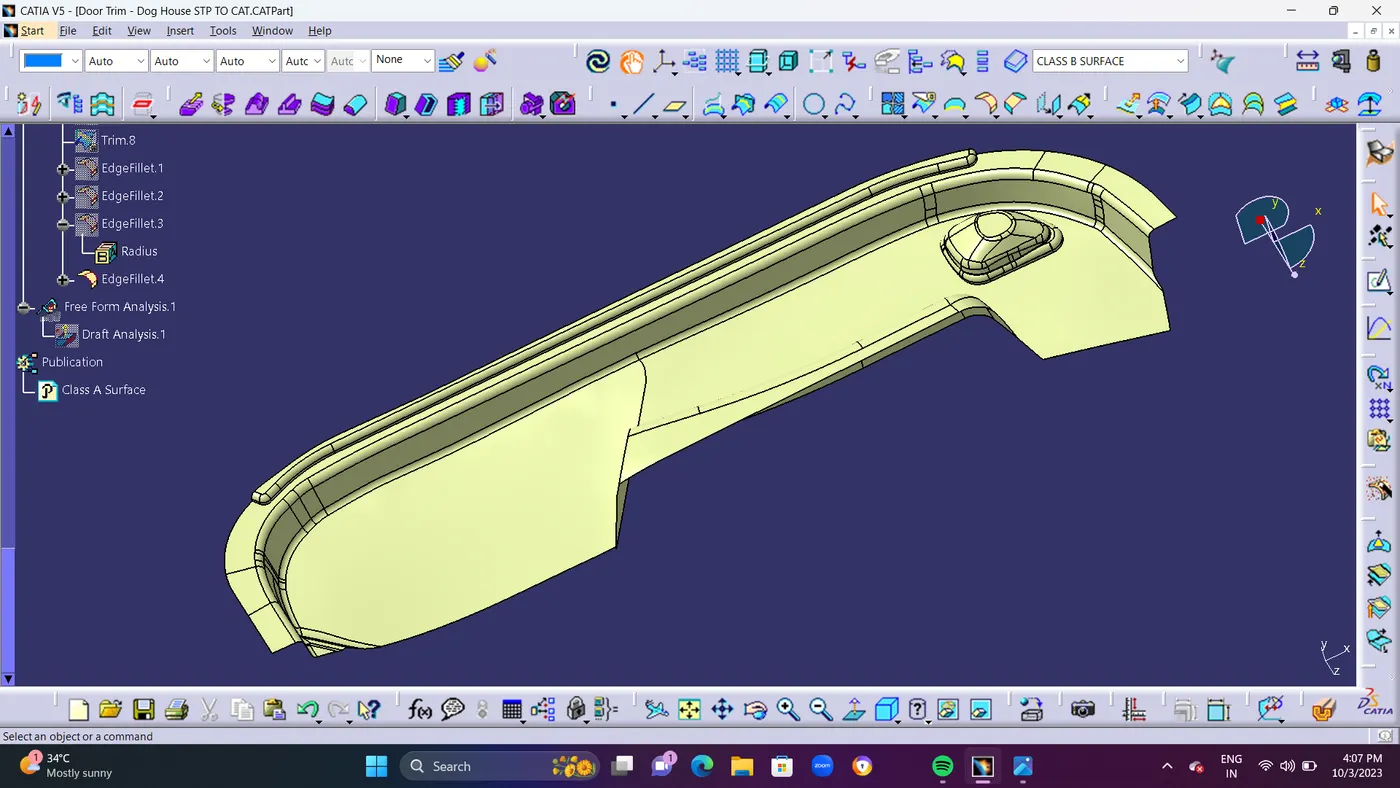
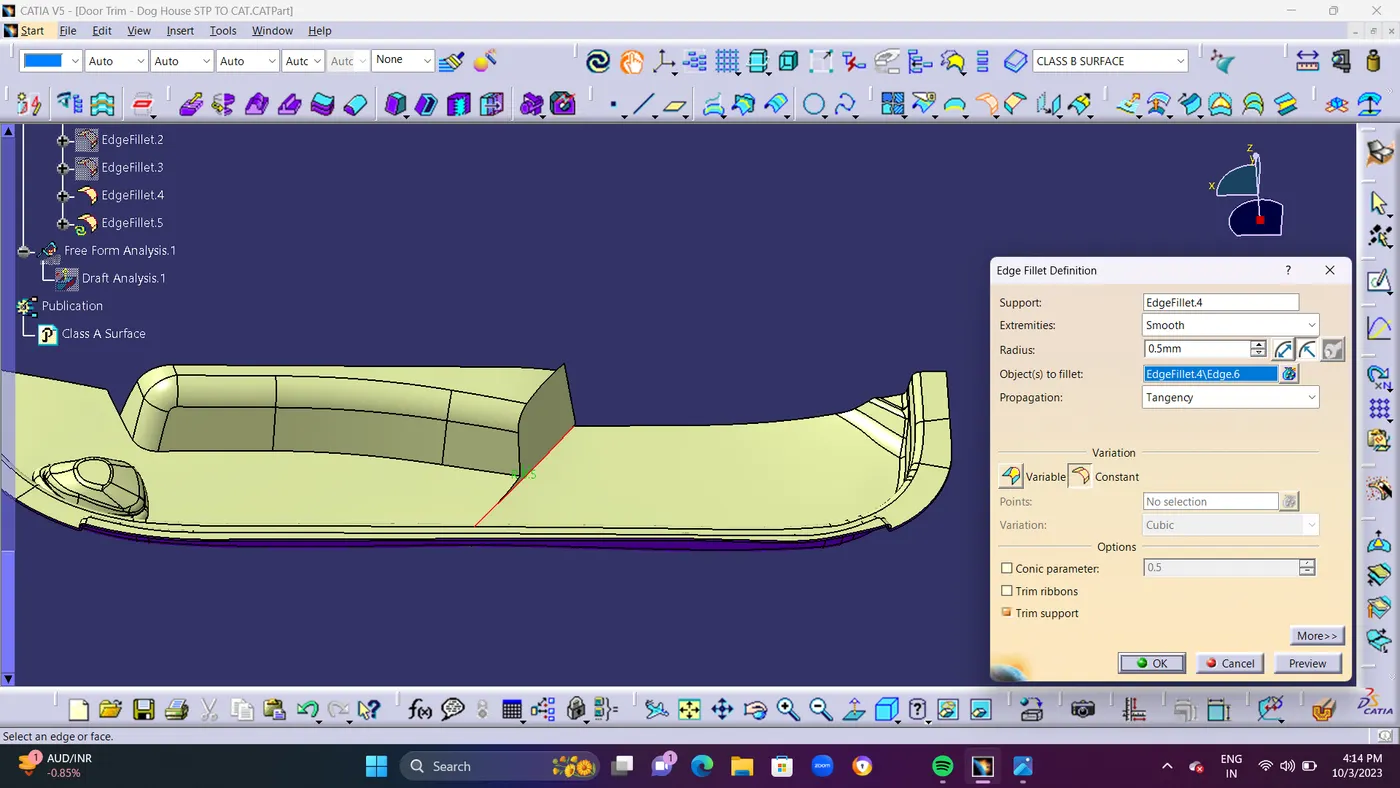
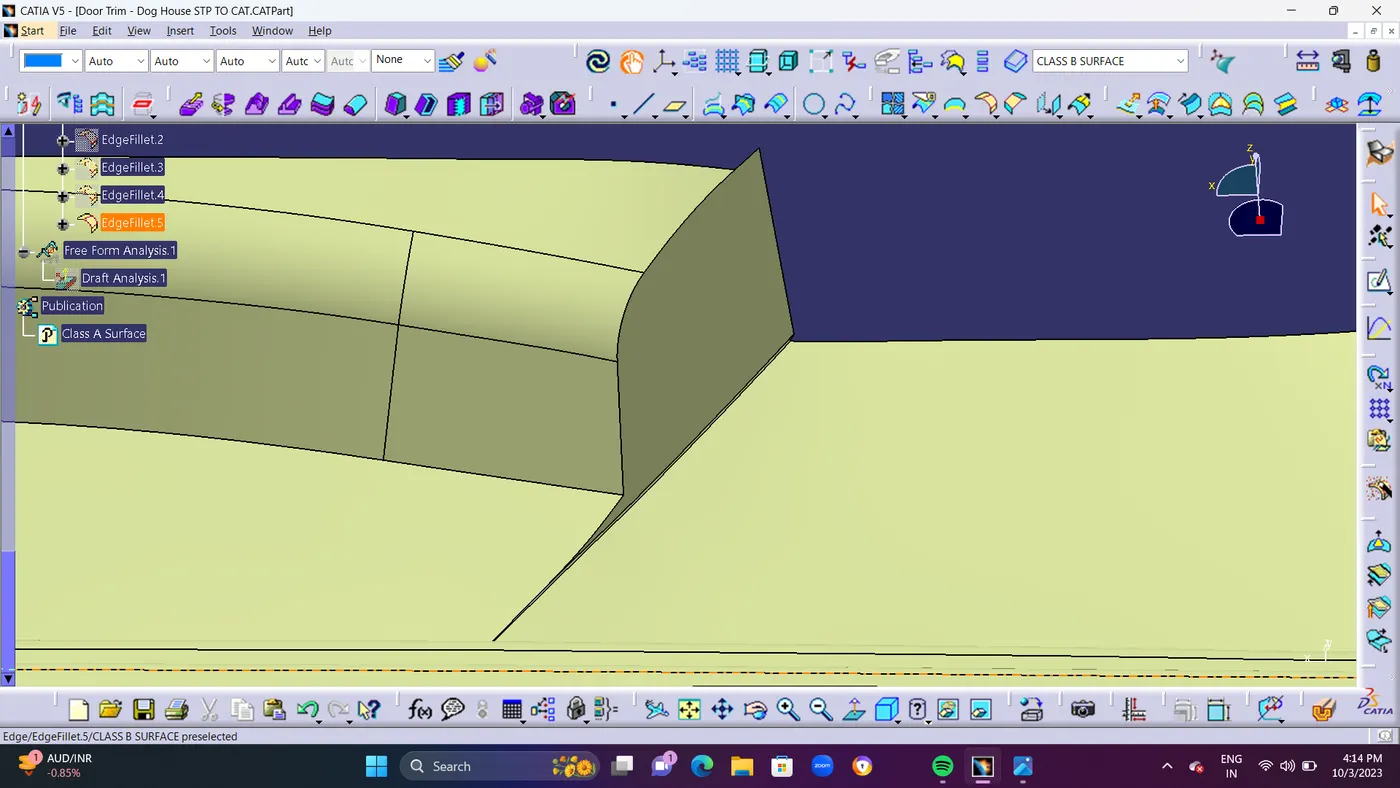
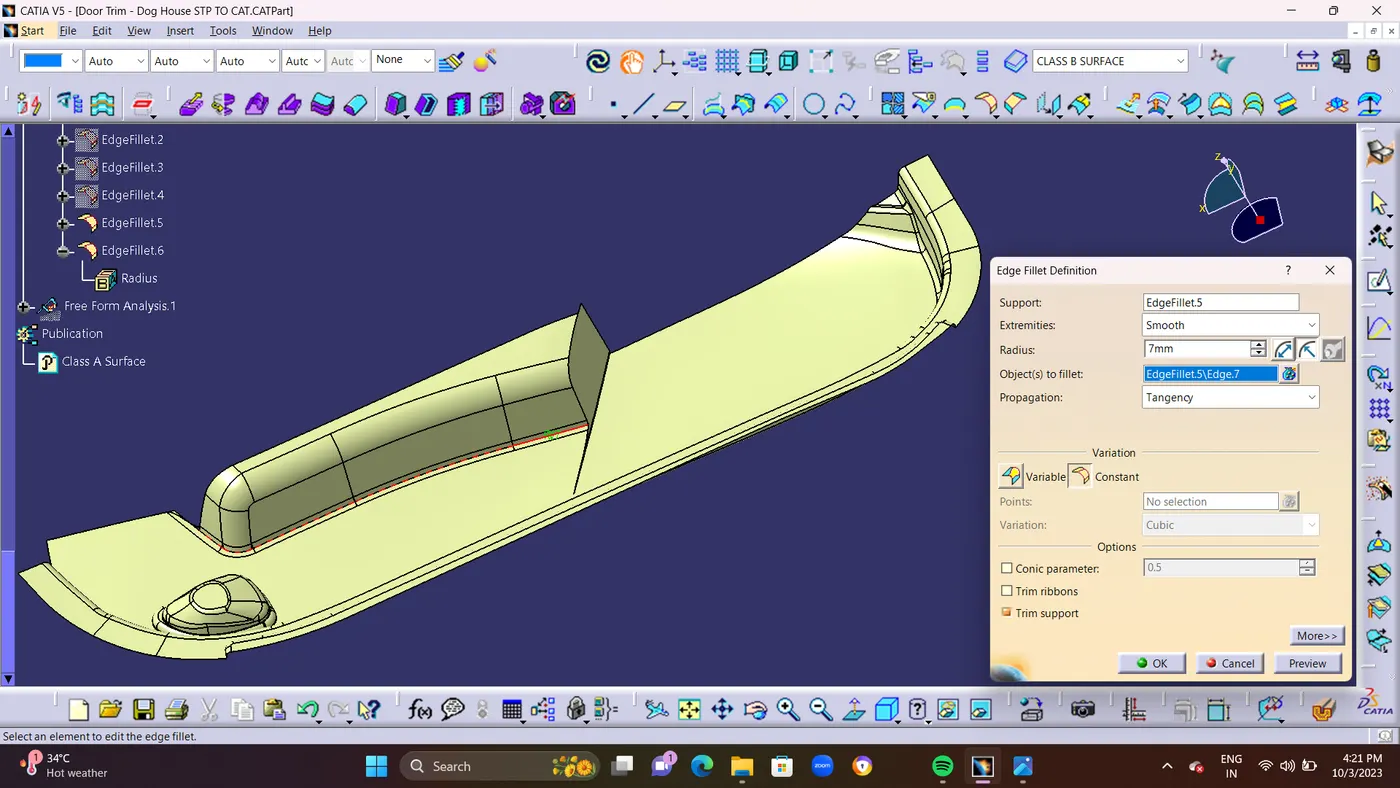
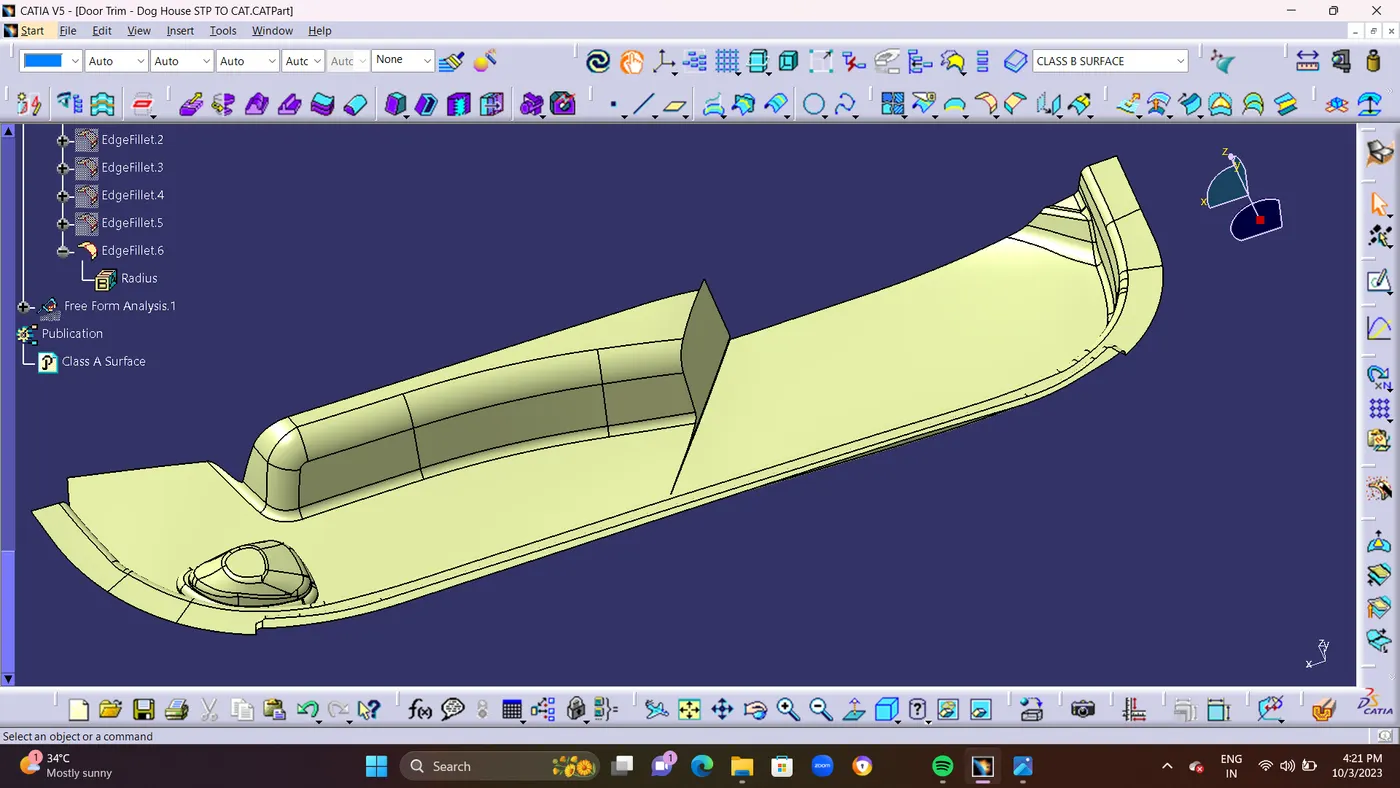
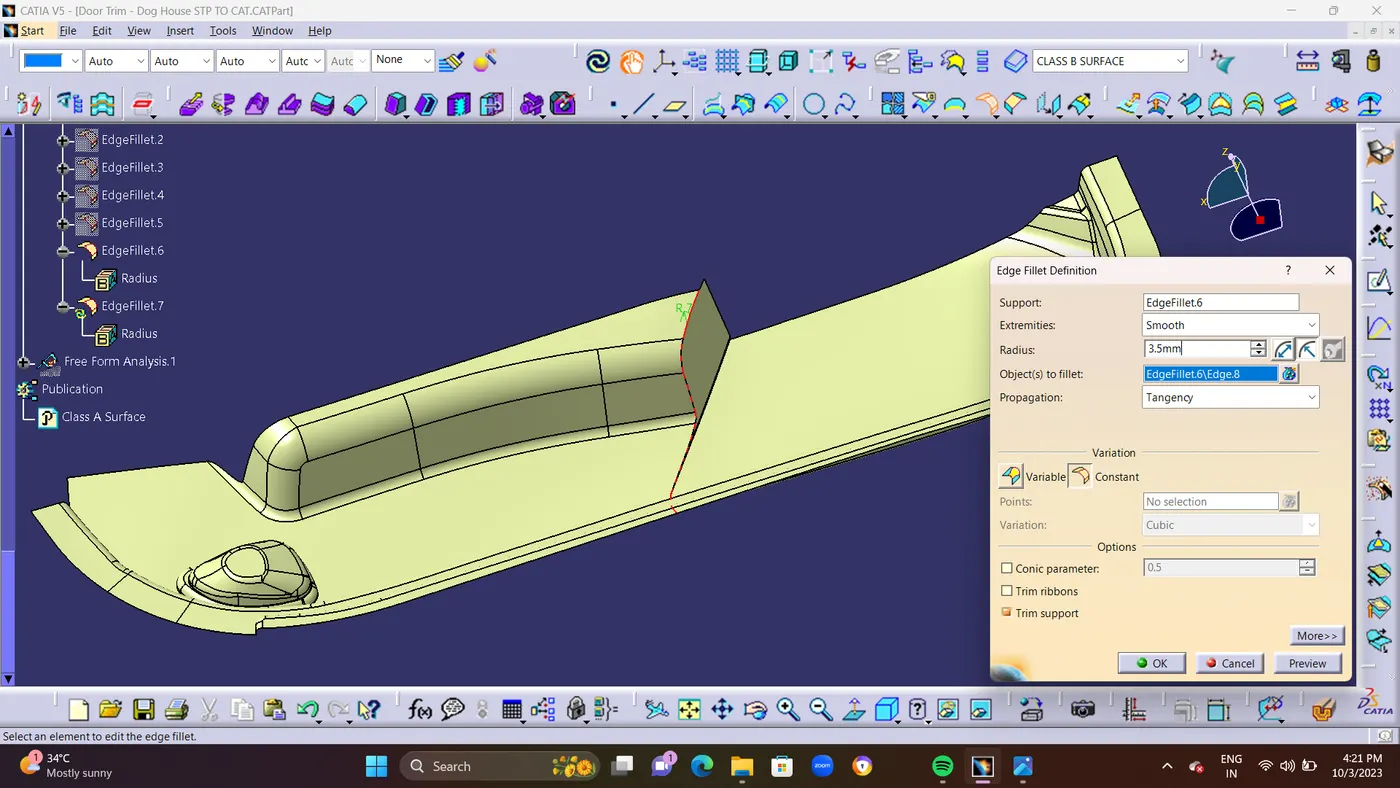
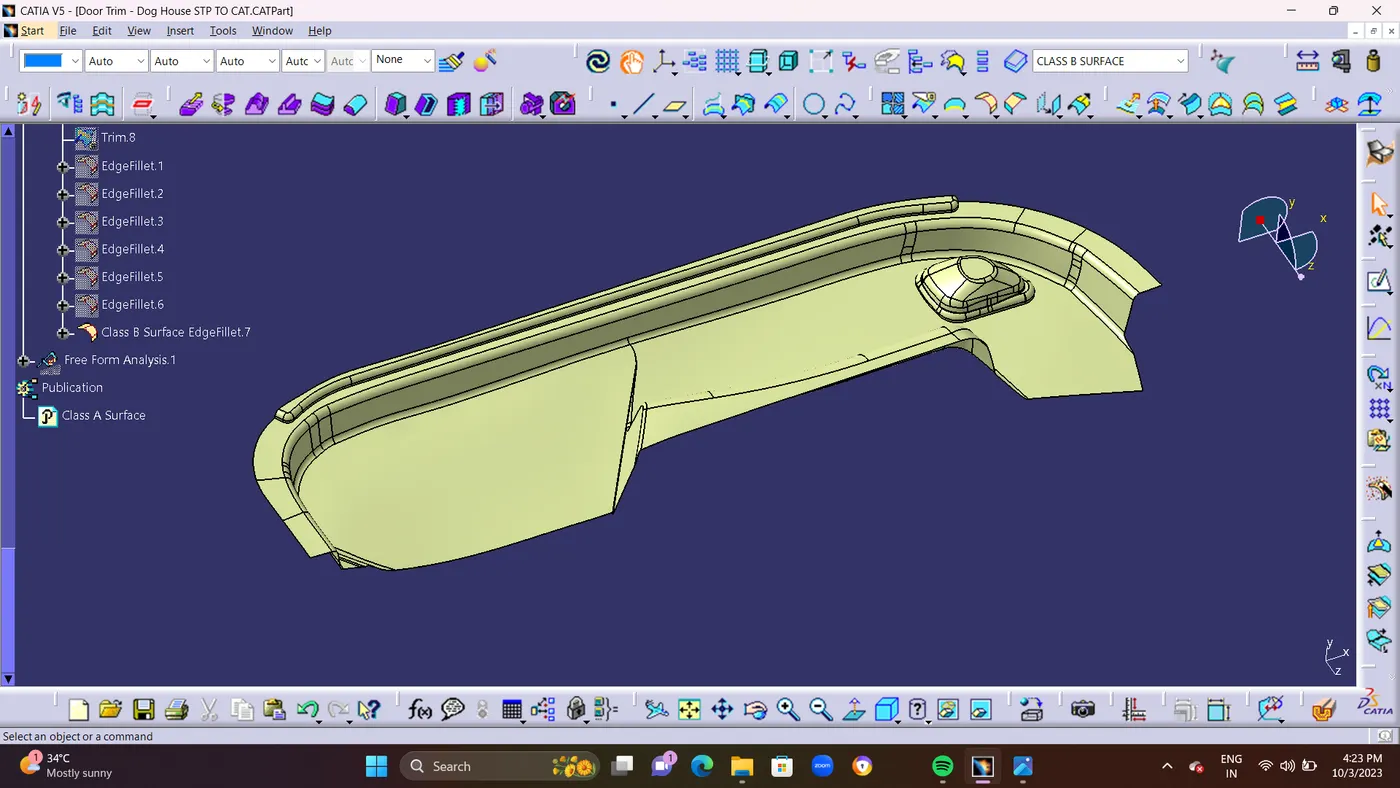
  • STEP 9 : Finally Create an EDGE FILLET for 5mm,7mm,5.4mm,5.5mm,0.5mm,7mm,3.5mm.as Shown in Below Screenshots.
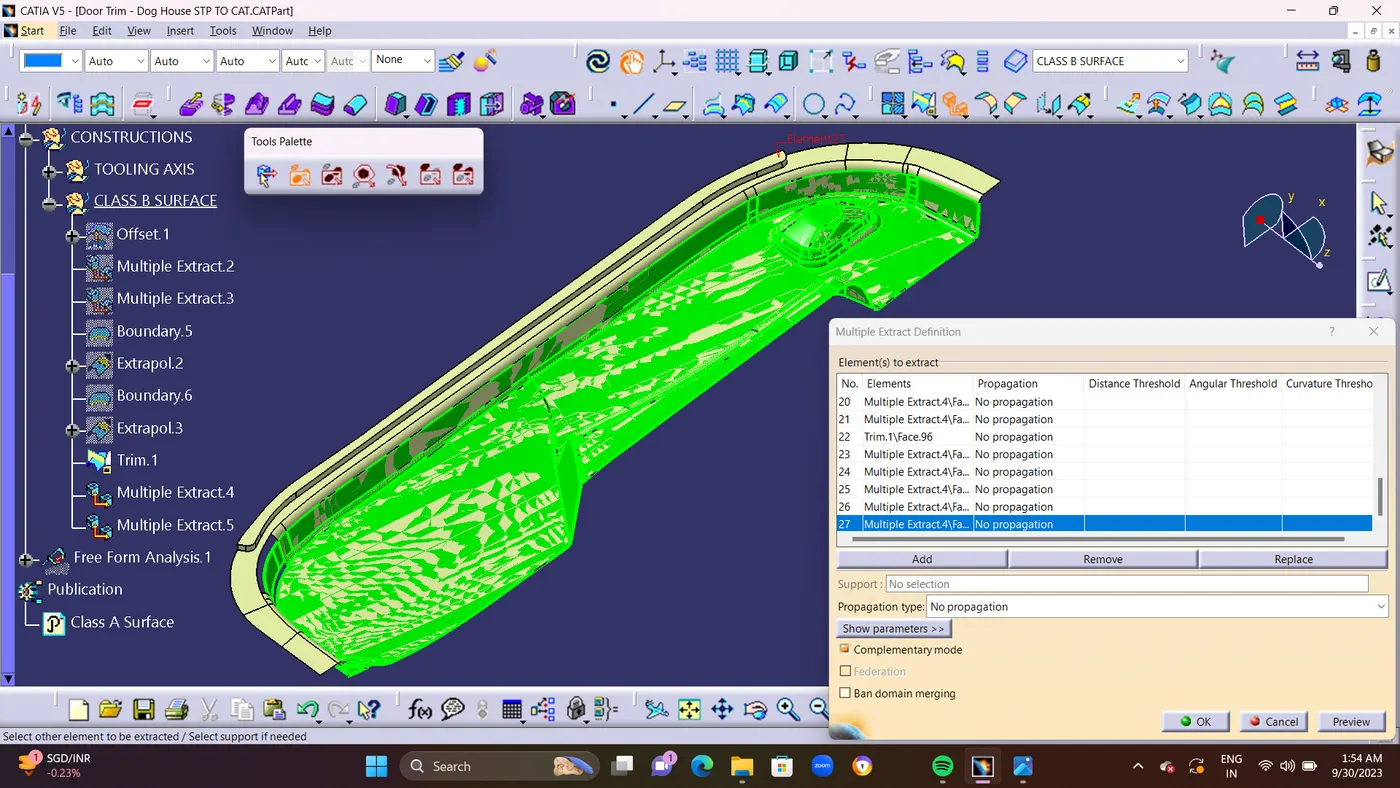


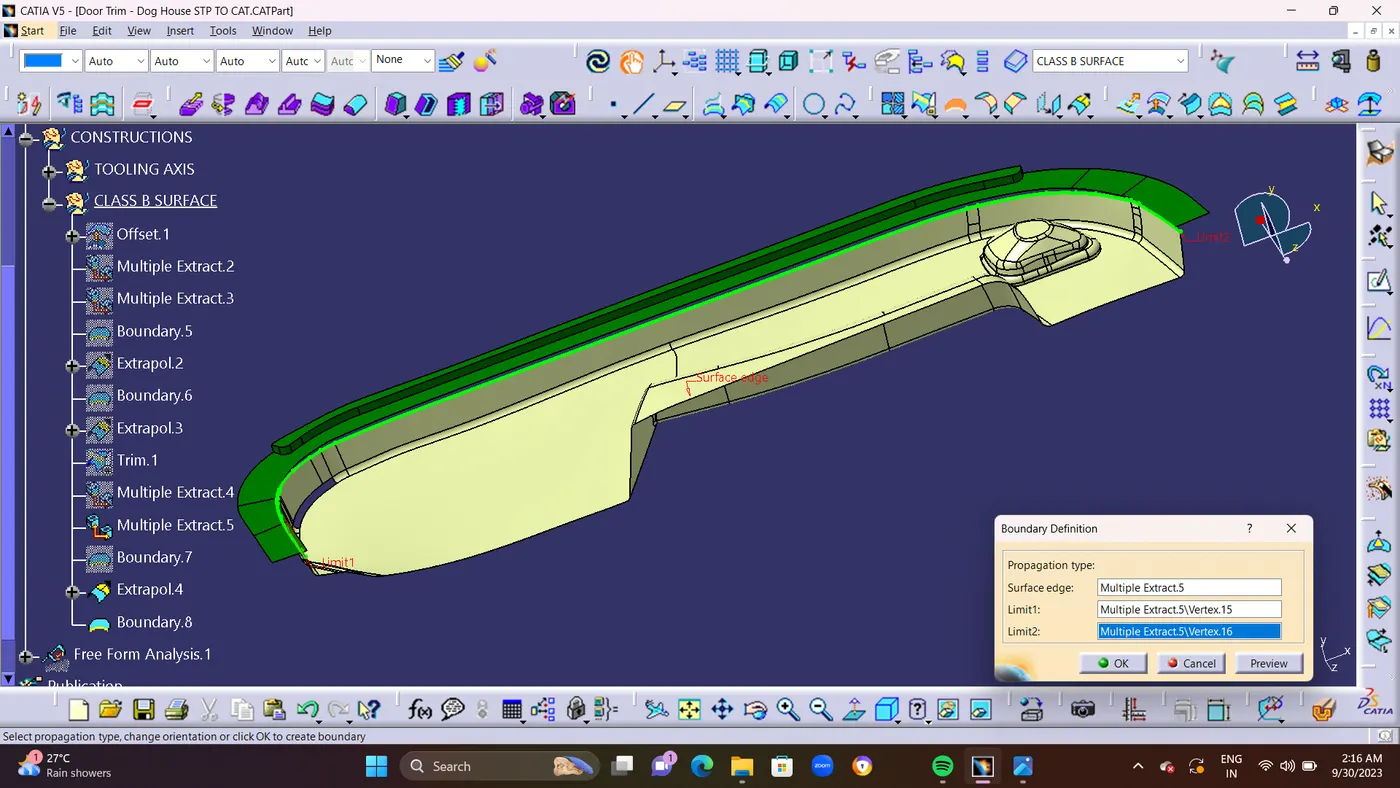
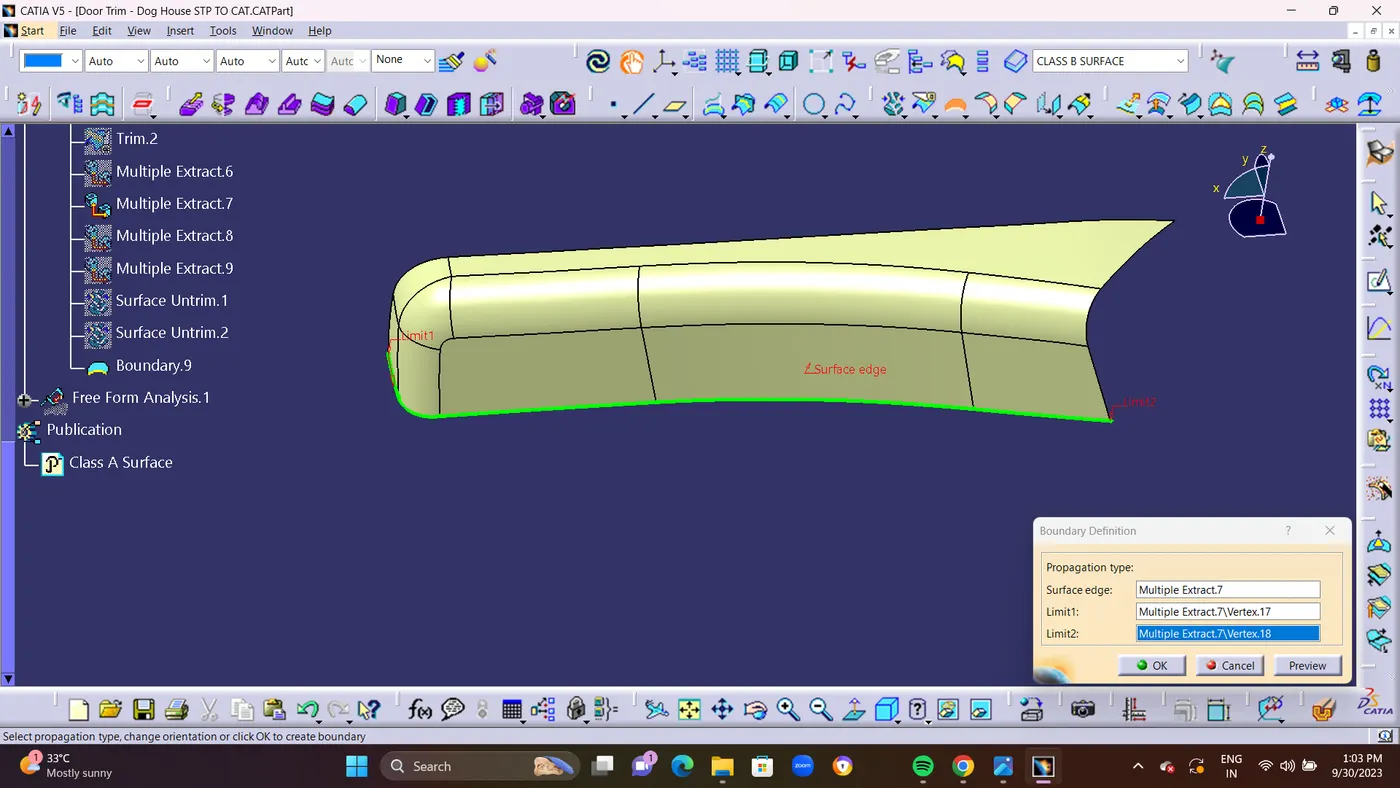
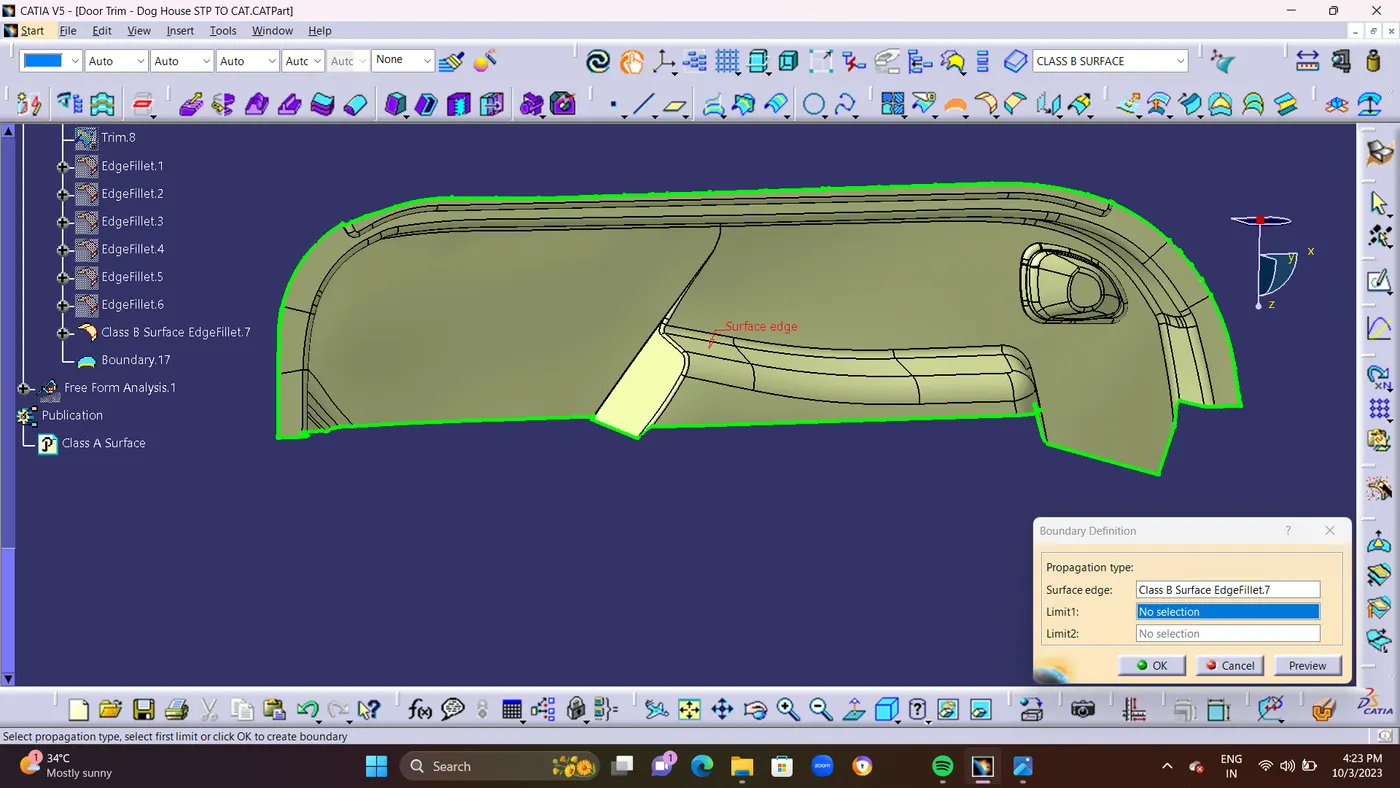
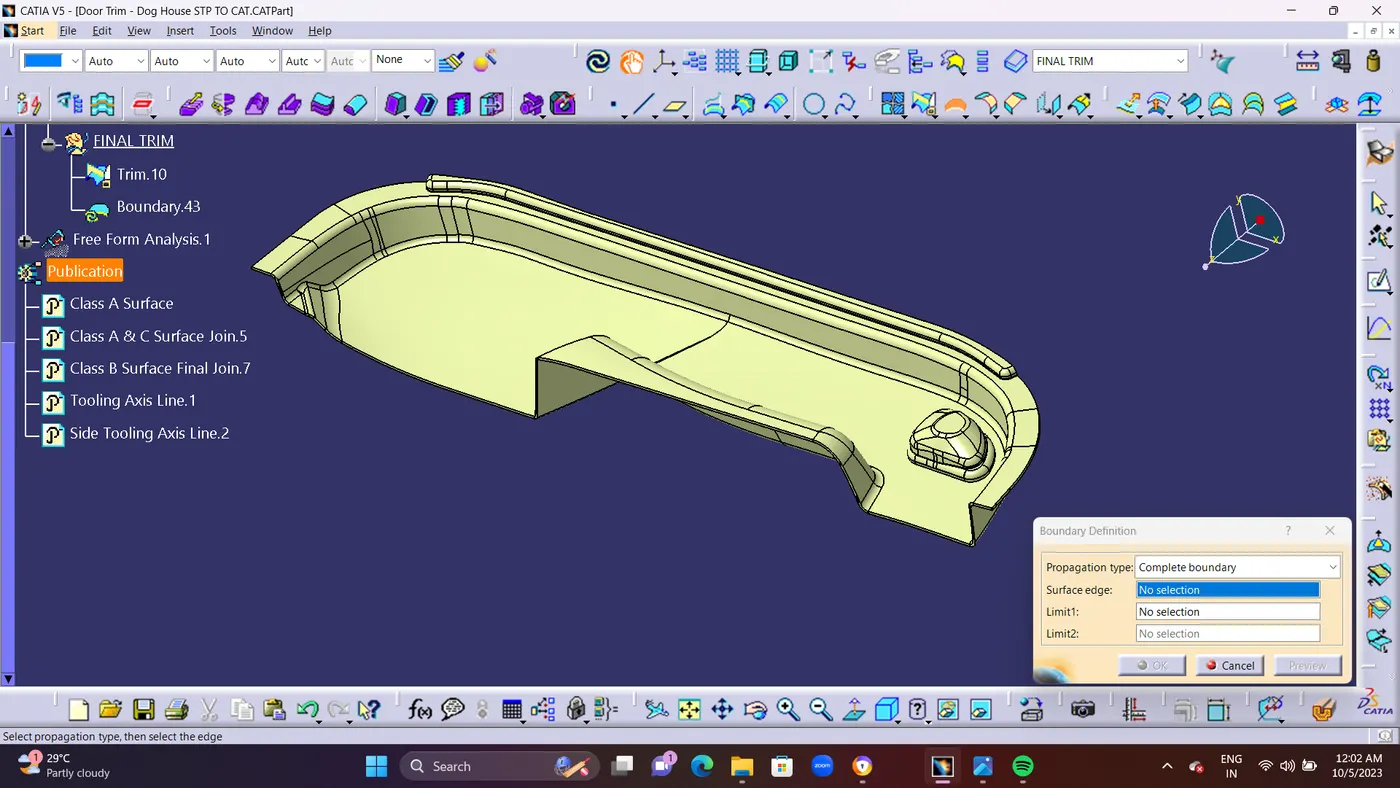
  • STEP 10 : Finally use BOUNDARY COMMAND to check wheather there is a gap in between the surface. if there is an gap In between the surface its shows green colour boundary line.only edges should be                  in Green Colour line.


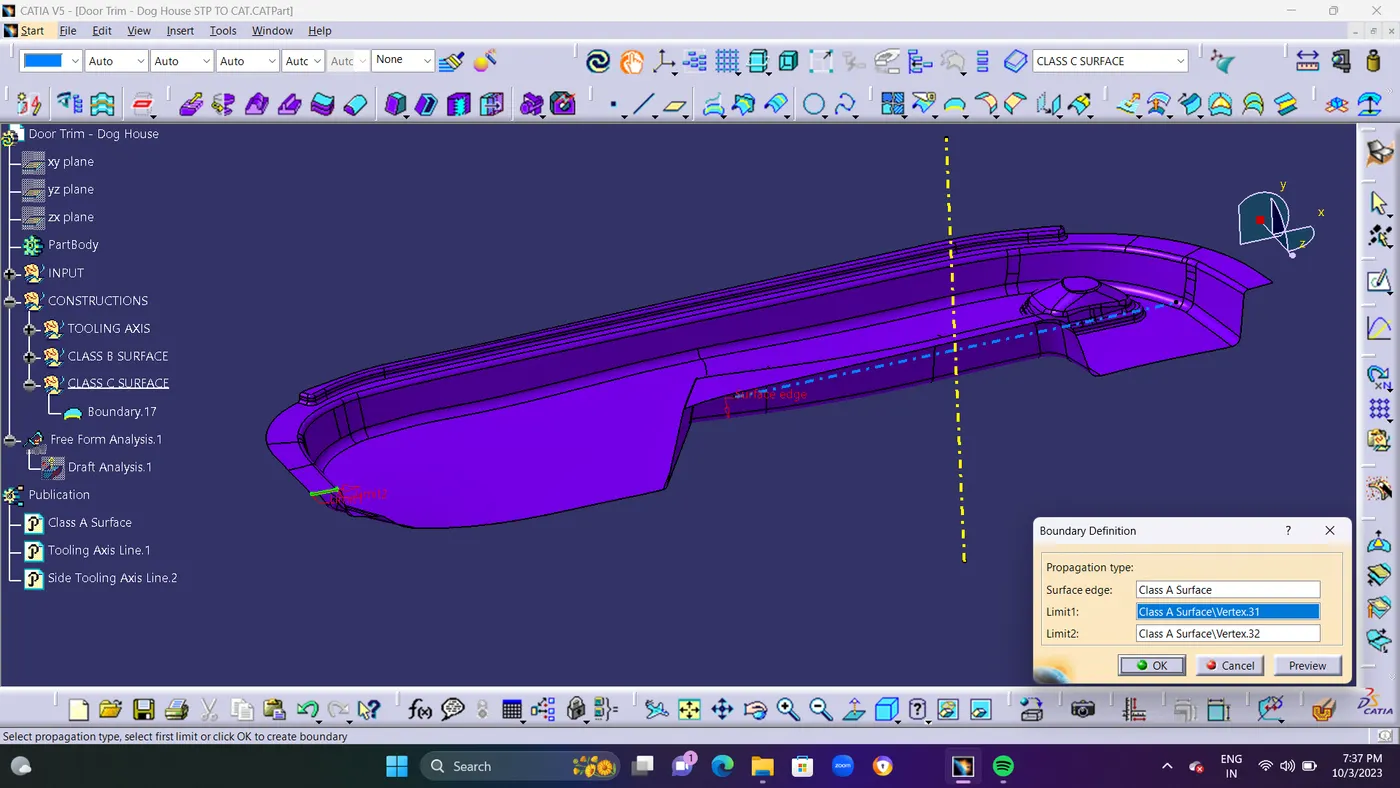
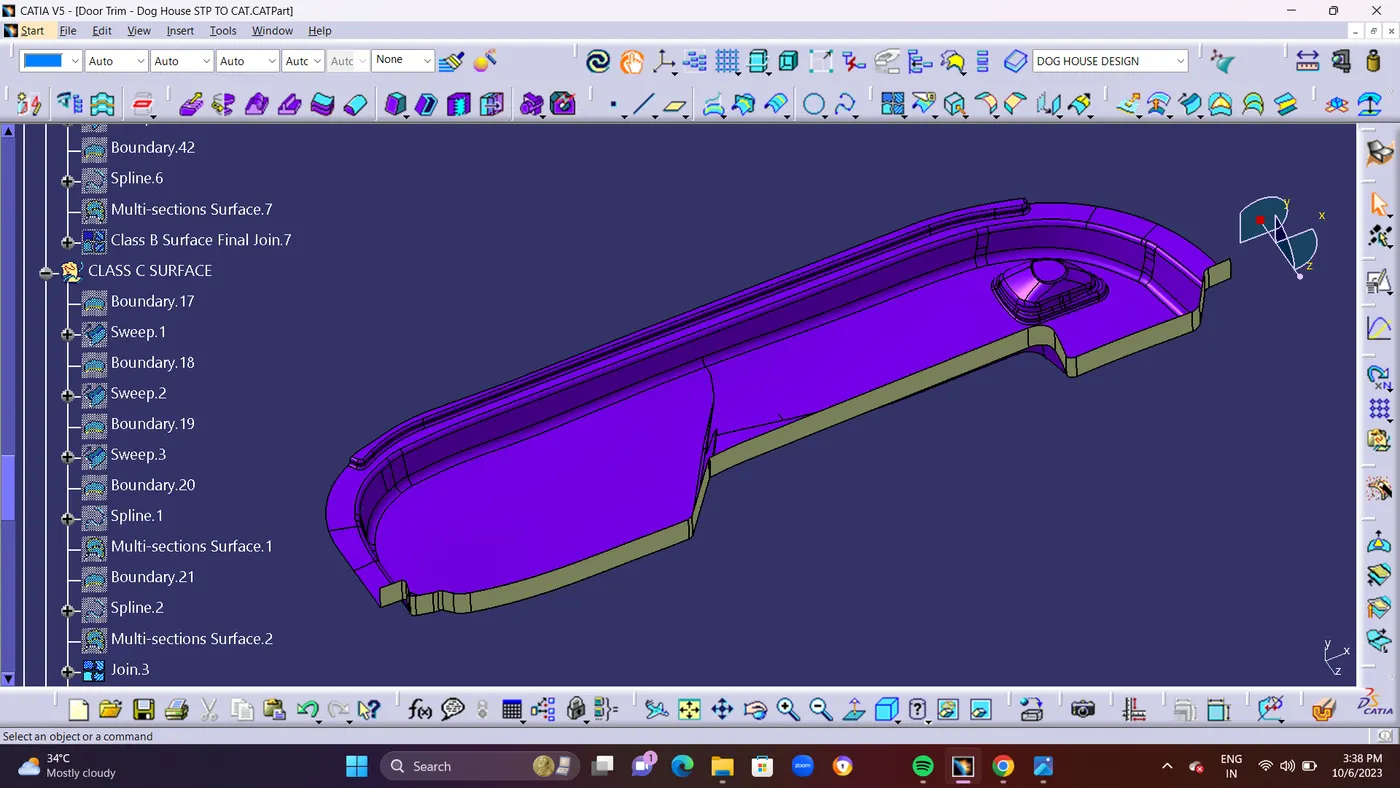
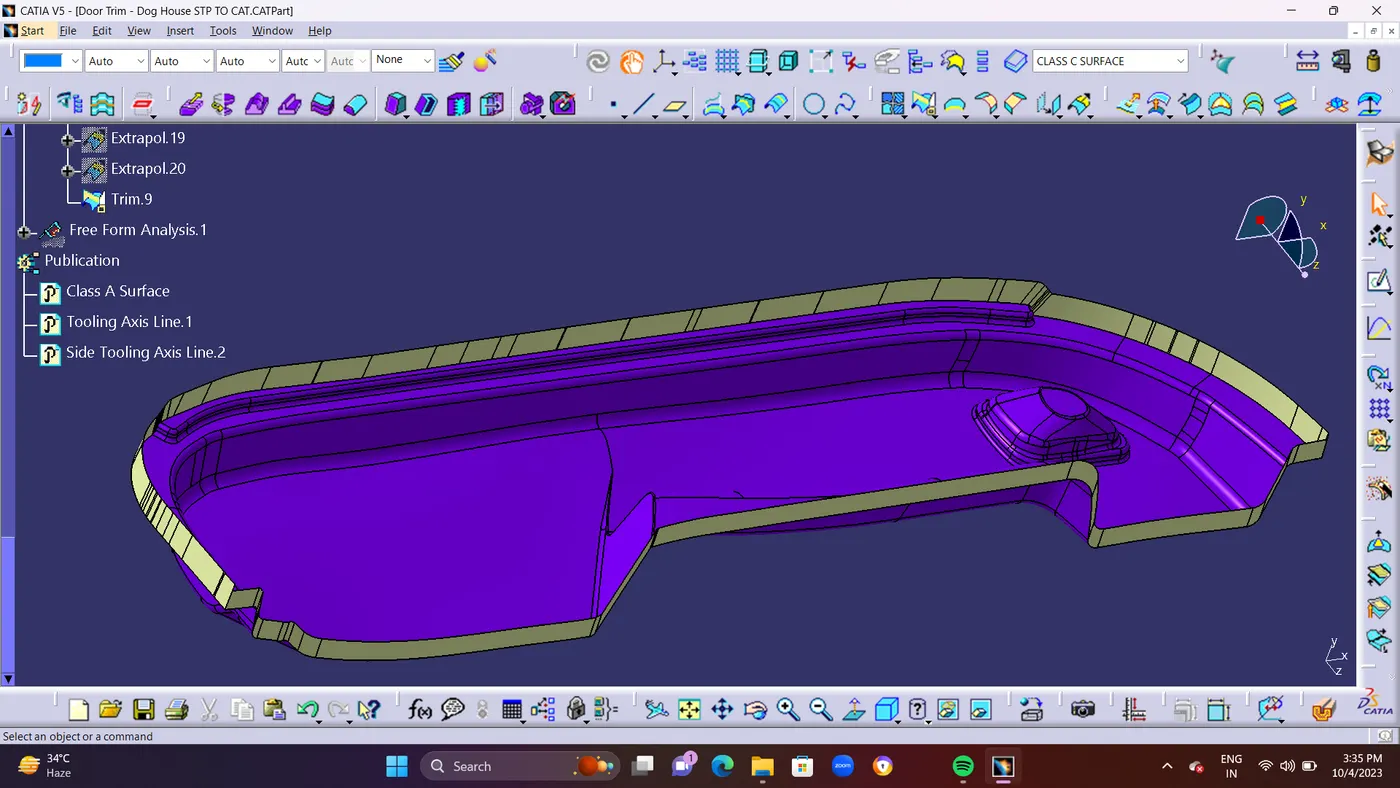
  • CLASS C SURFACE : Class C also known as the side wall of the surface, is a reference surface that the design engineer creates to connect Class A and Class B surfaces.
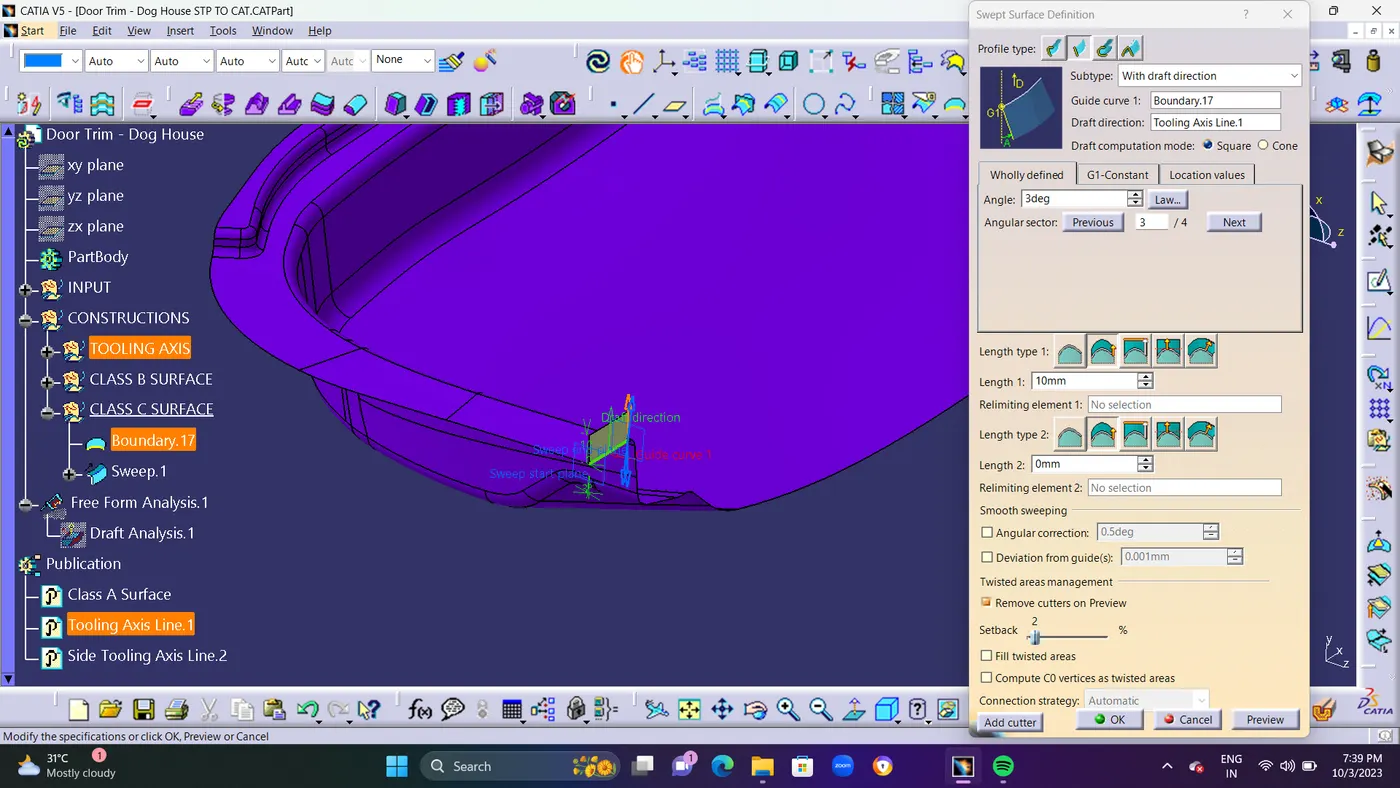
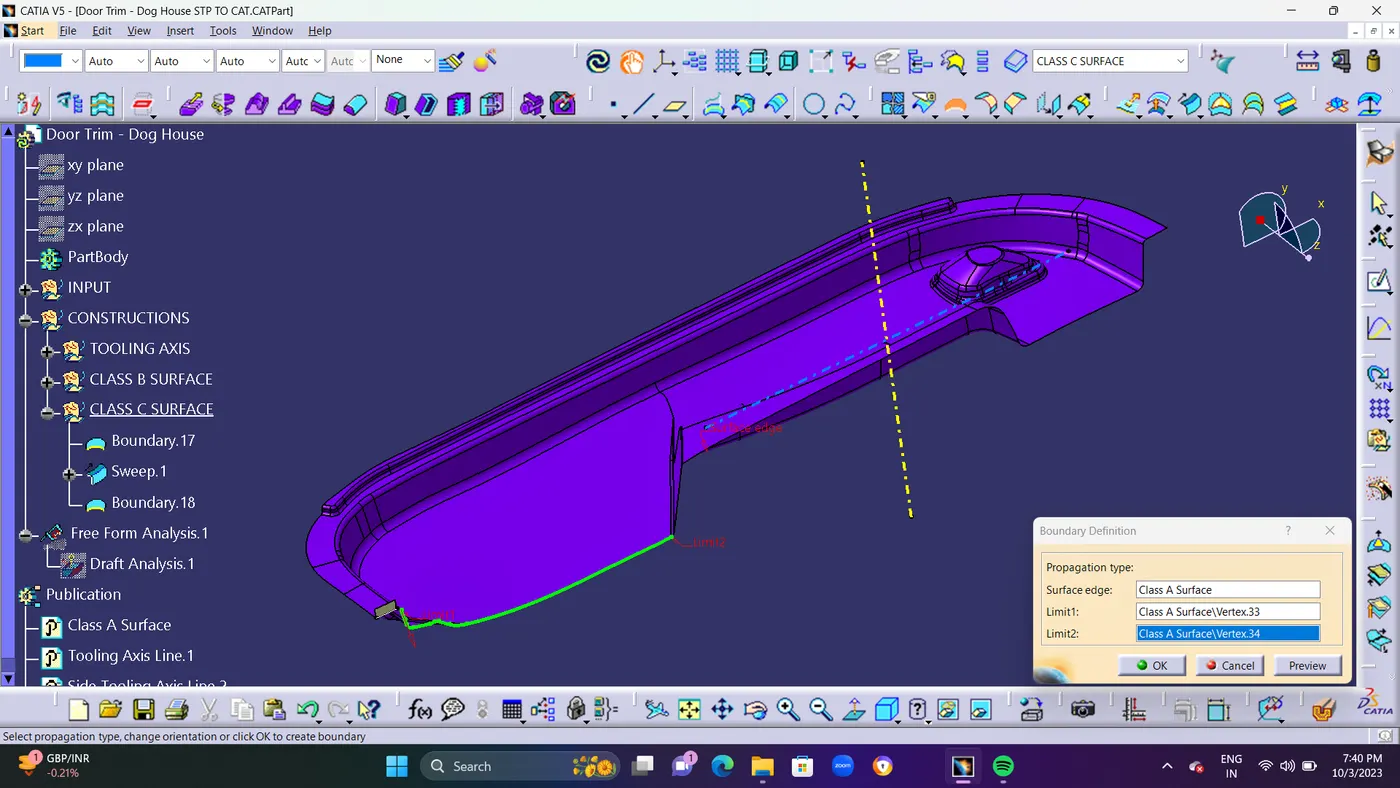
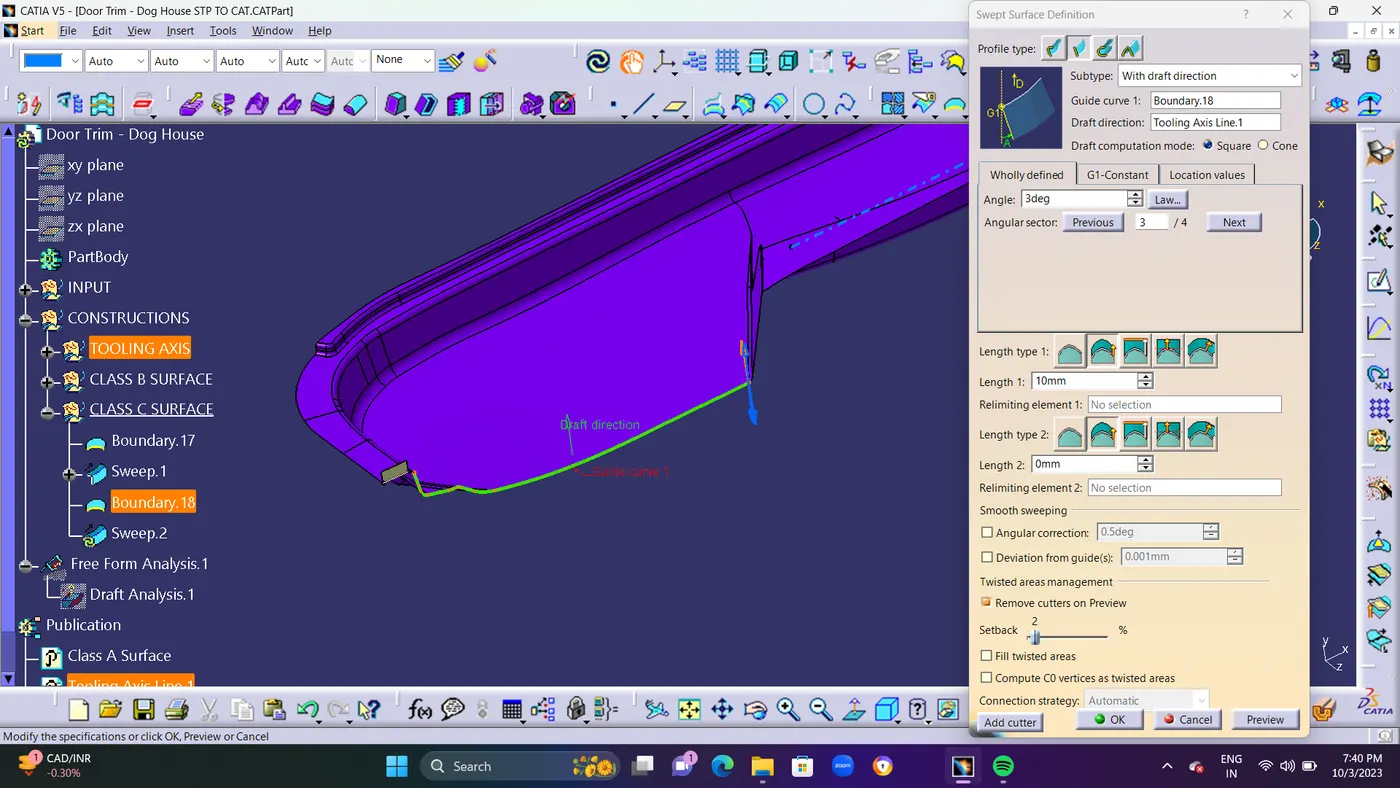
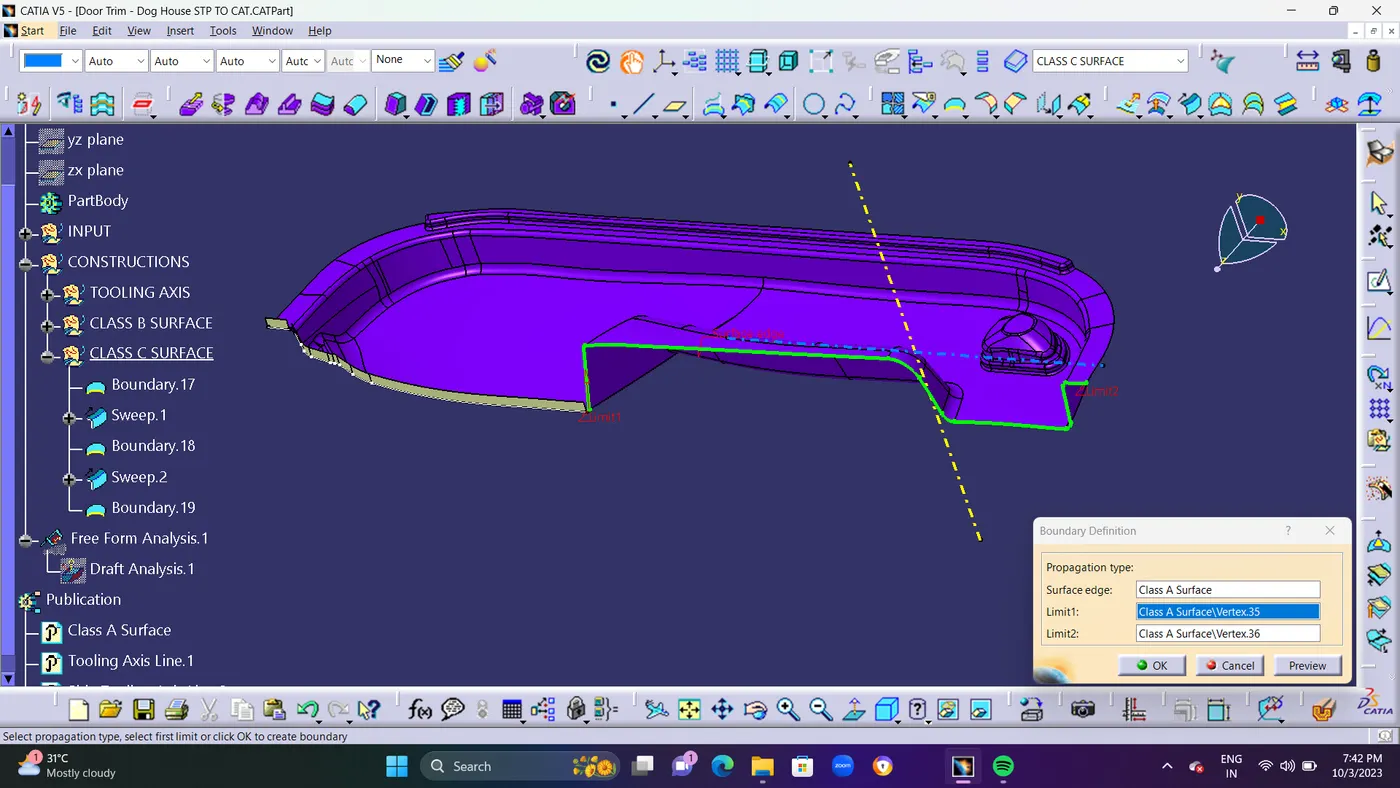
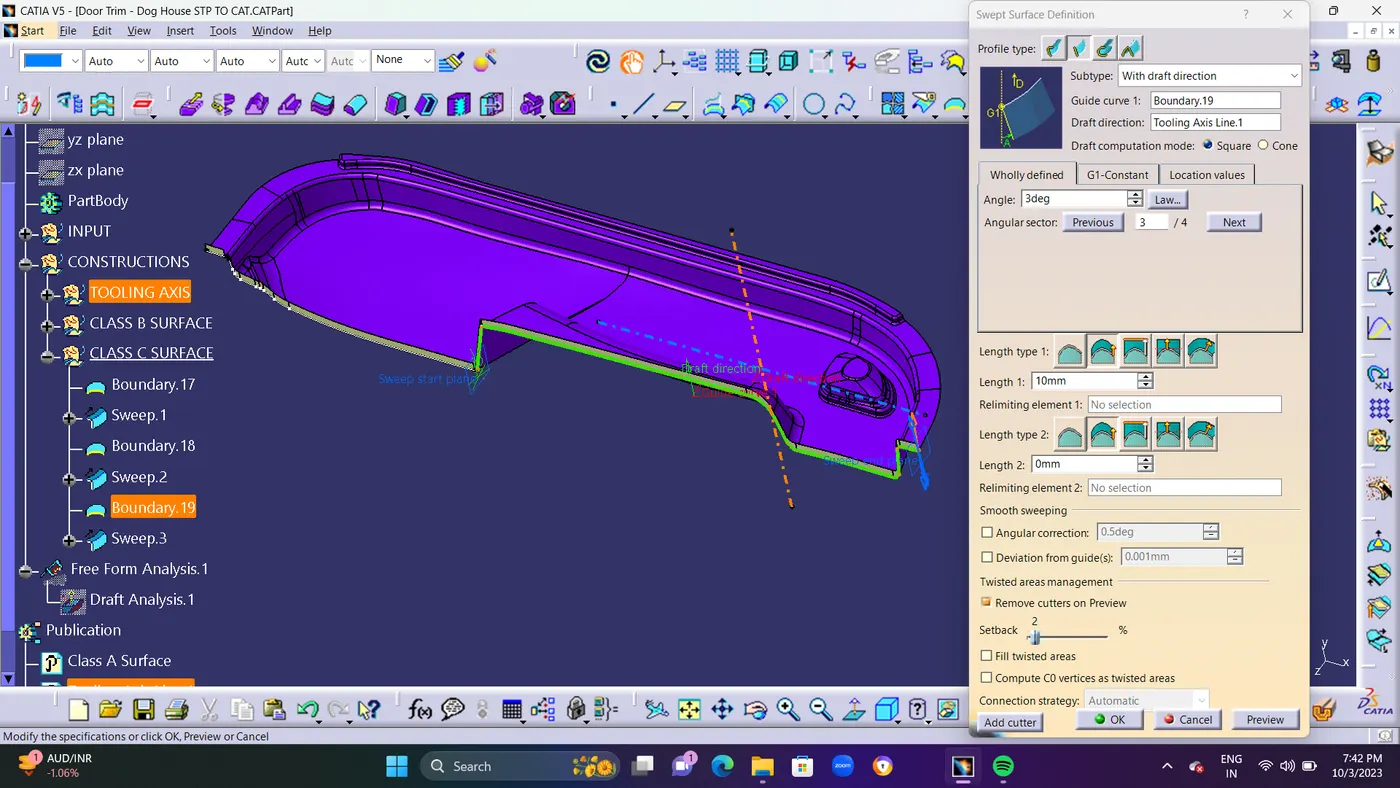
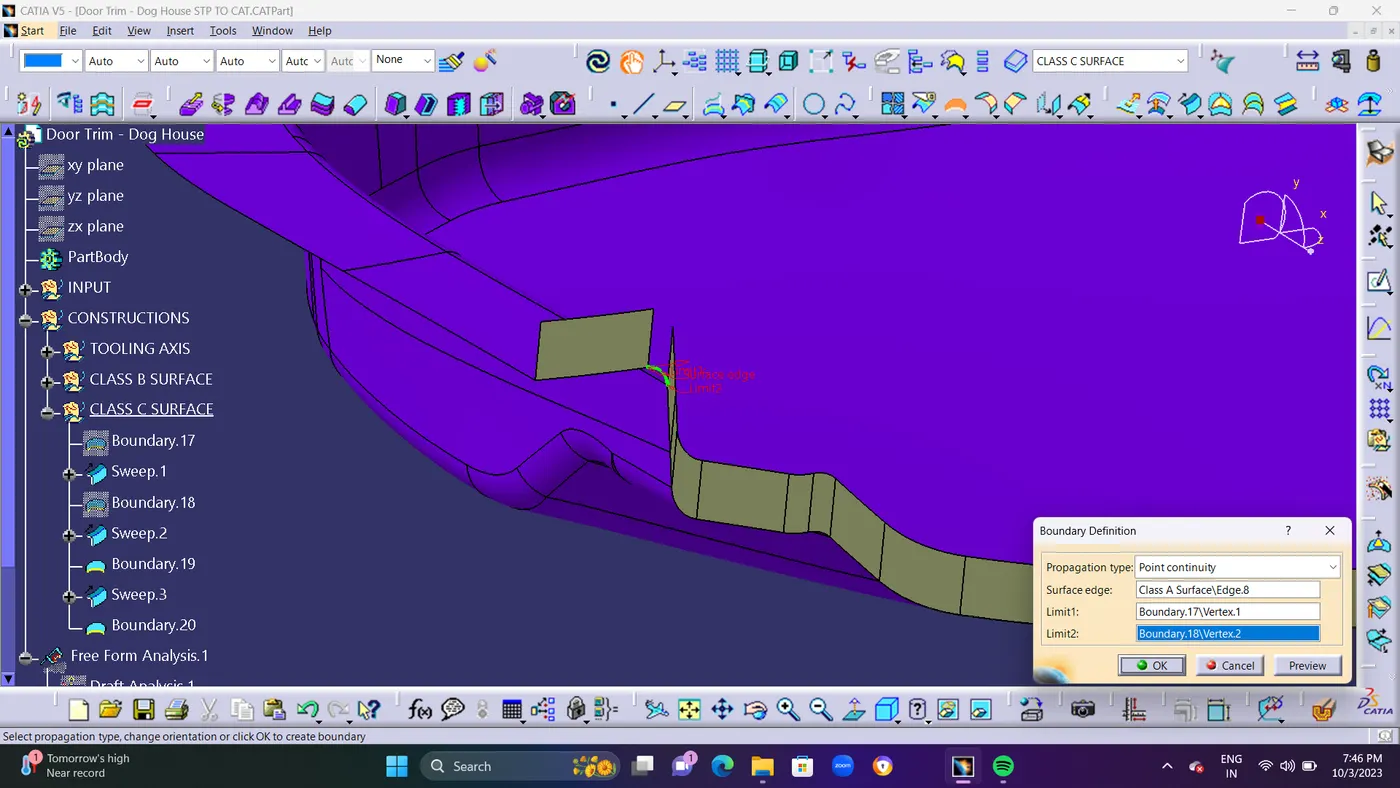
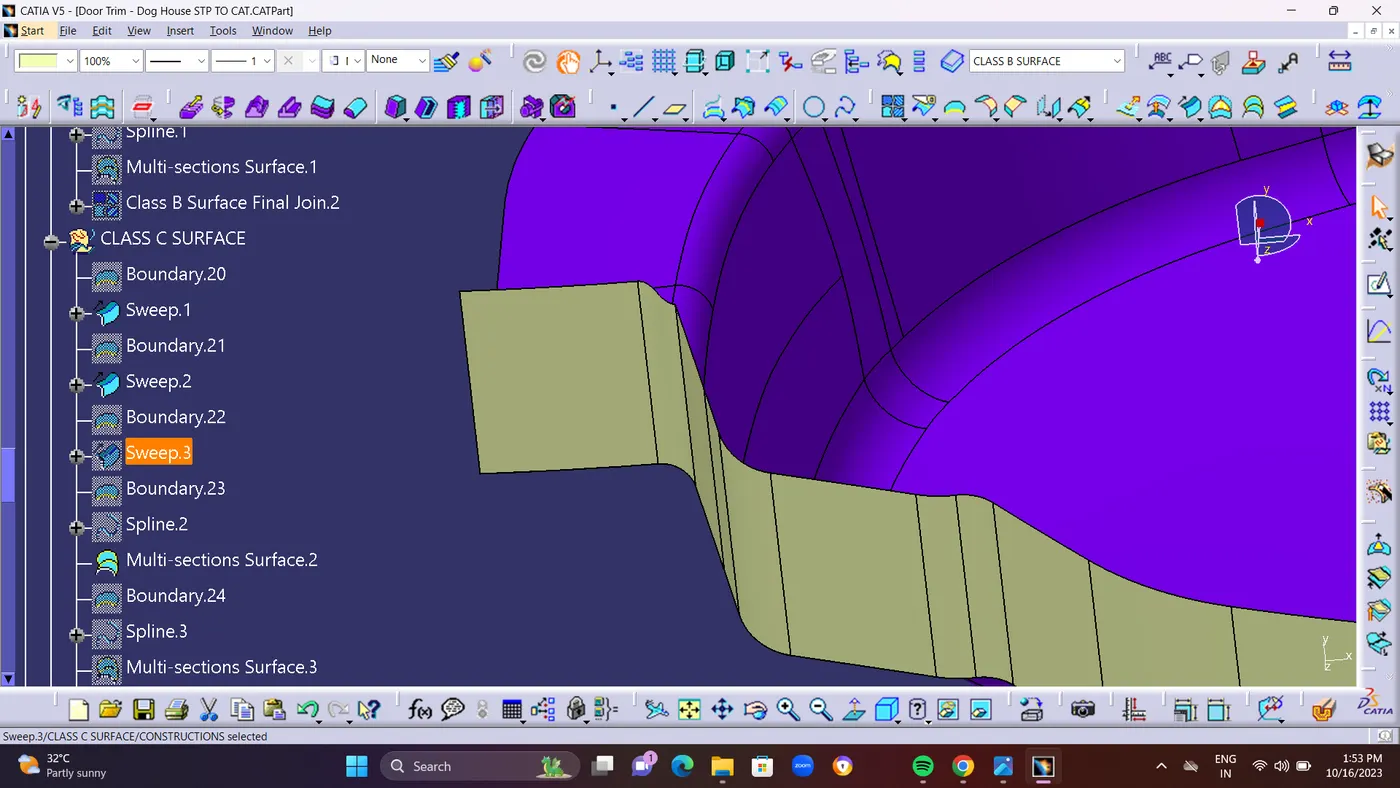
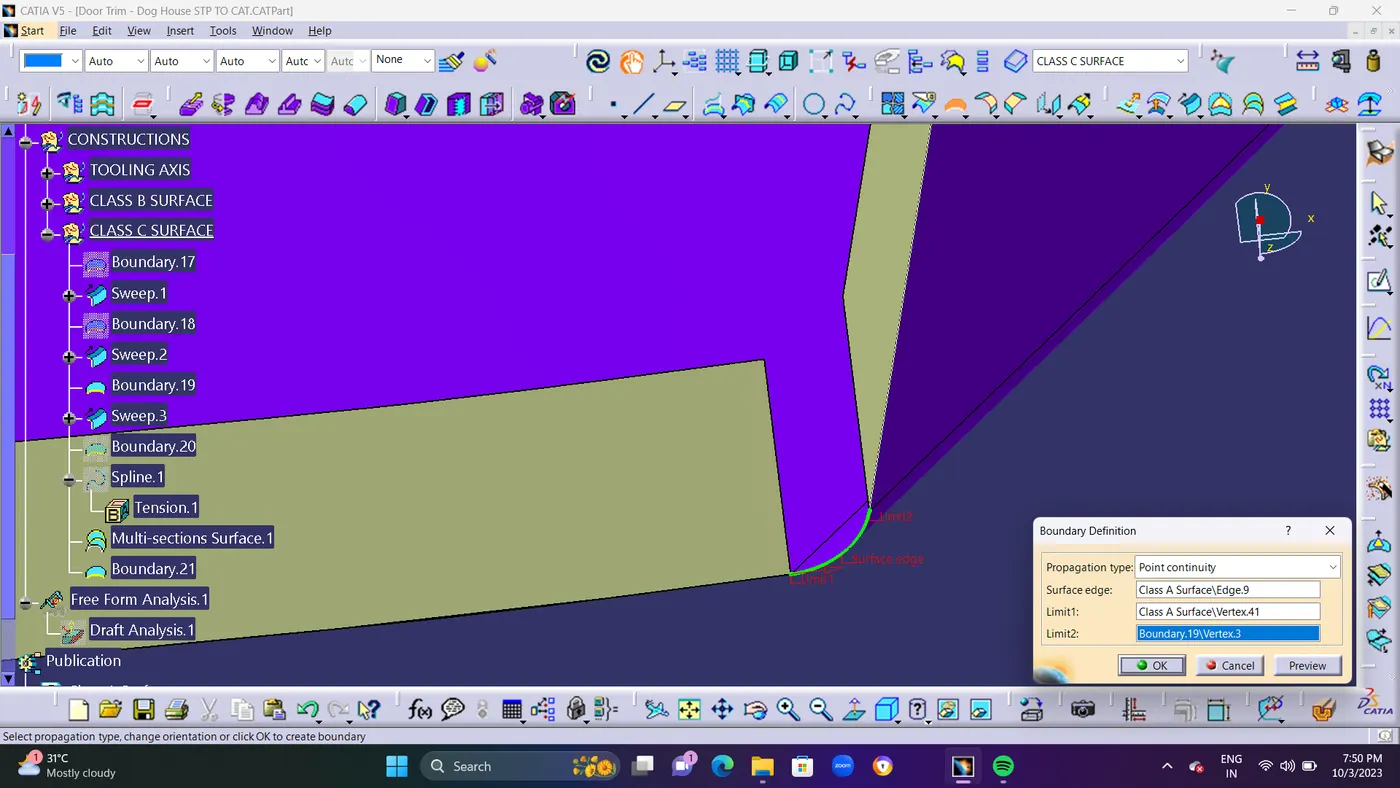
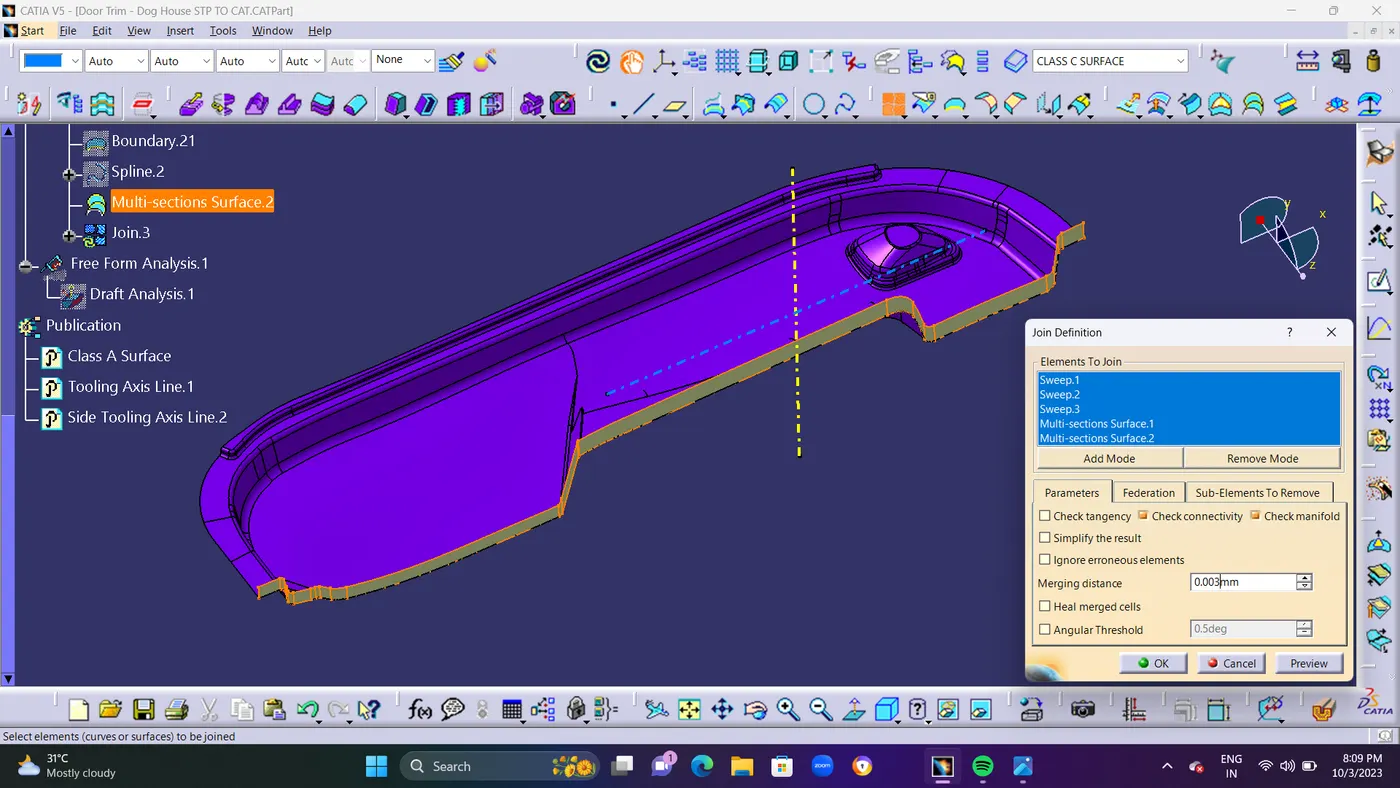
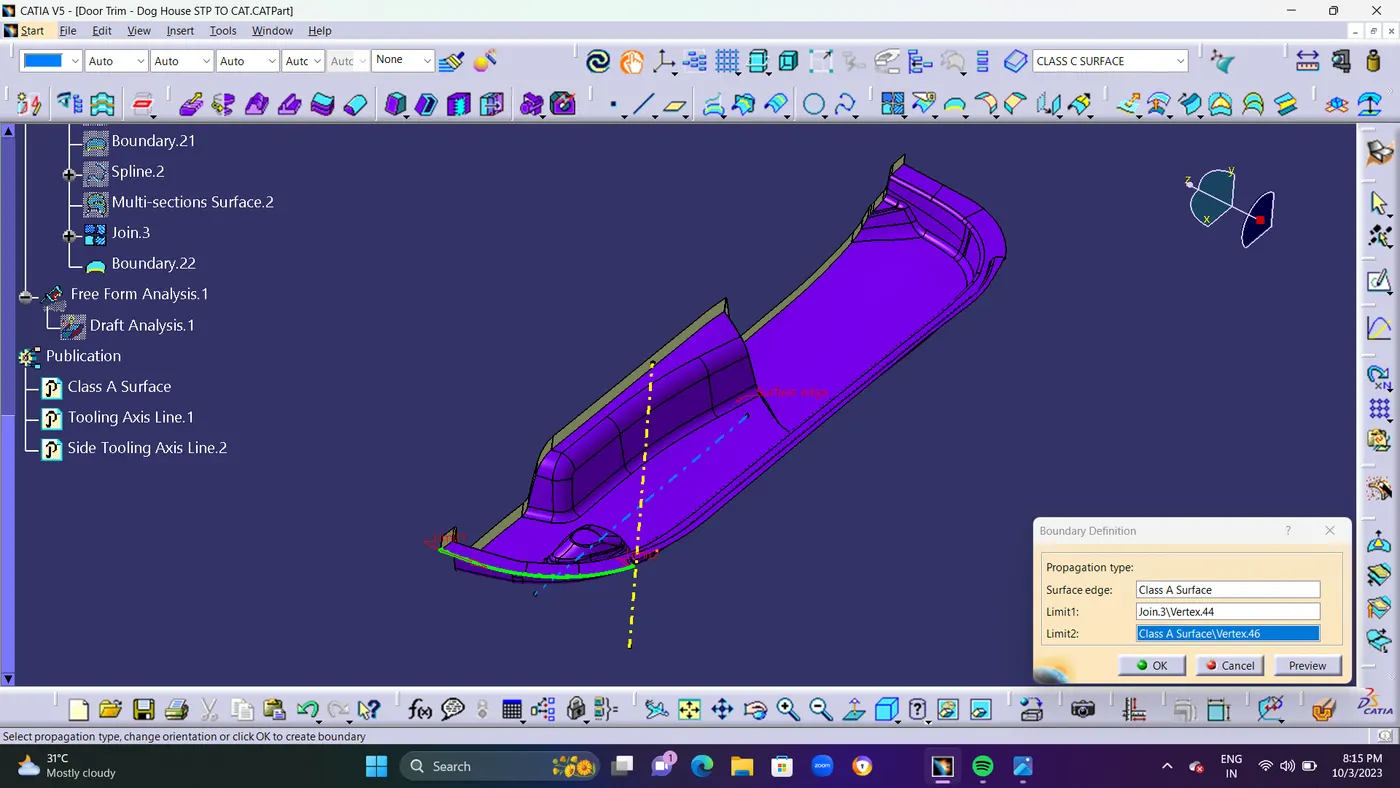
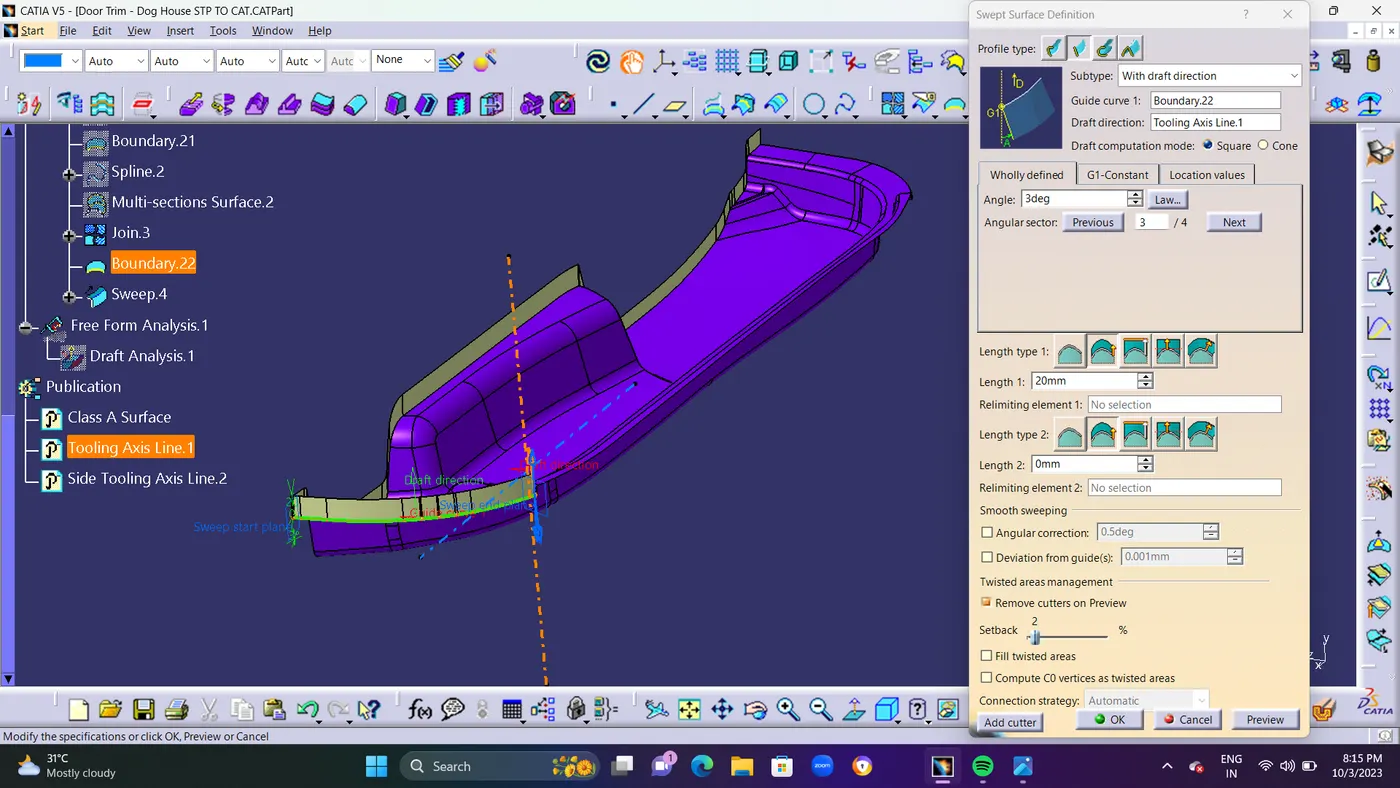
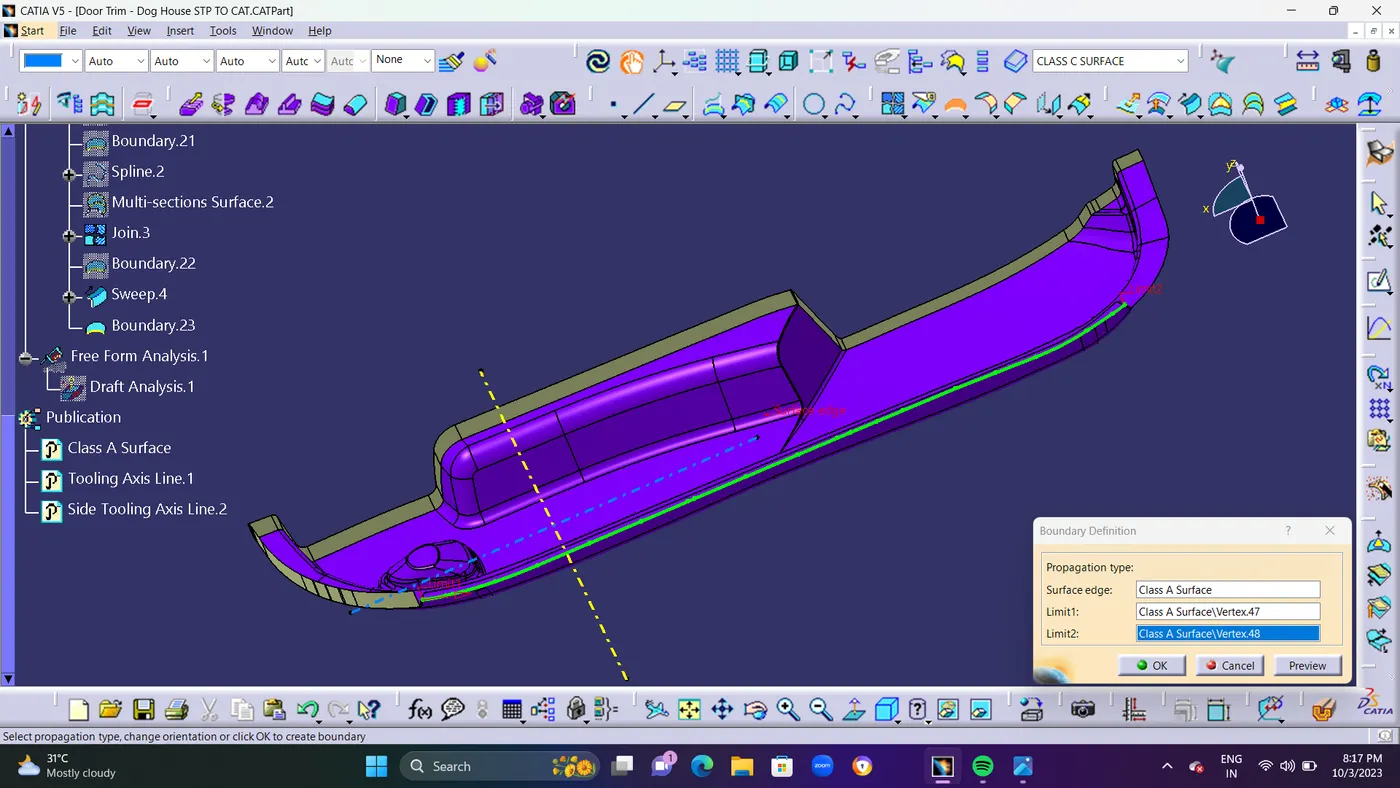
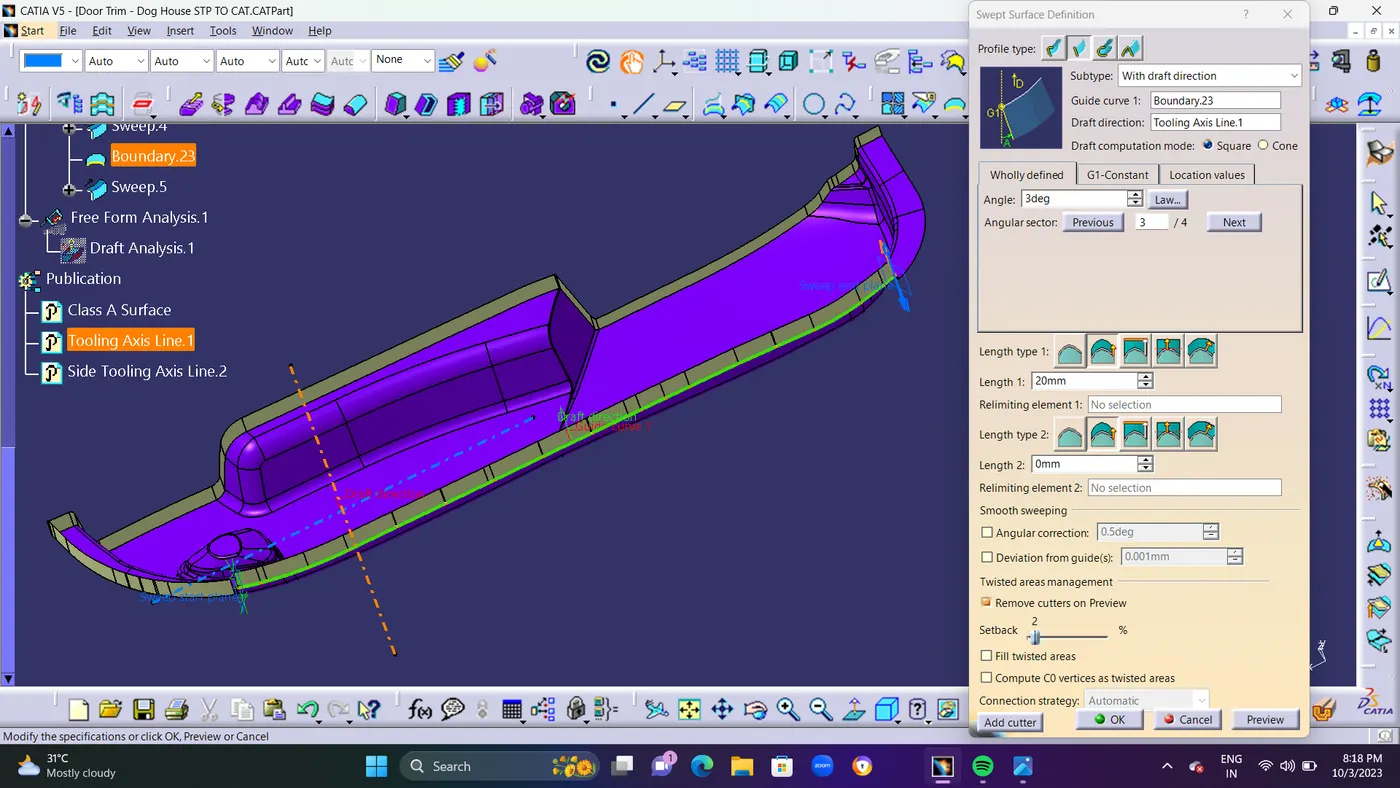
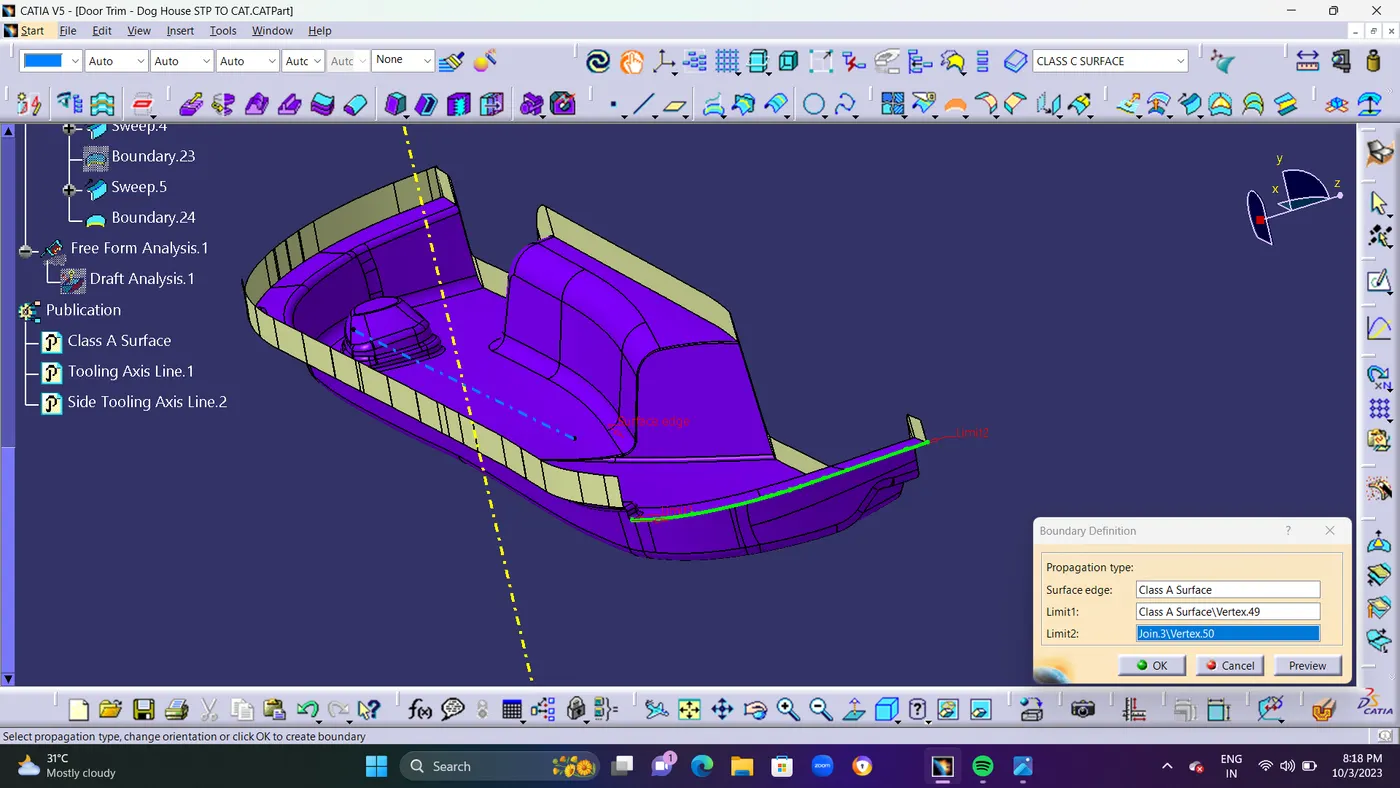
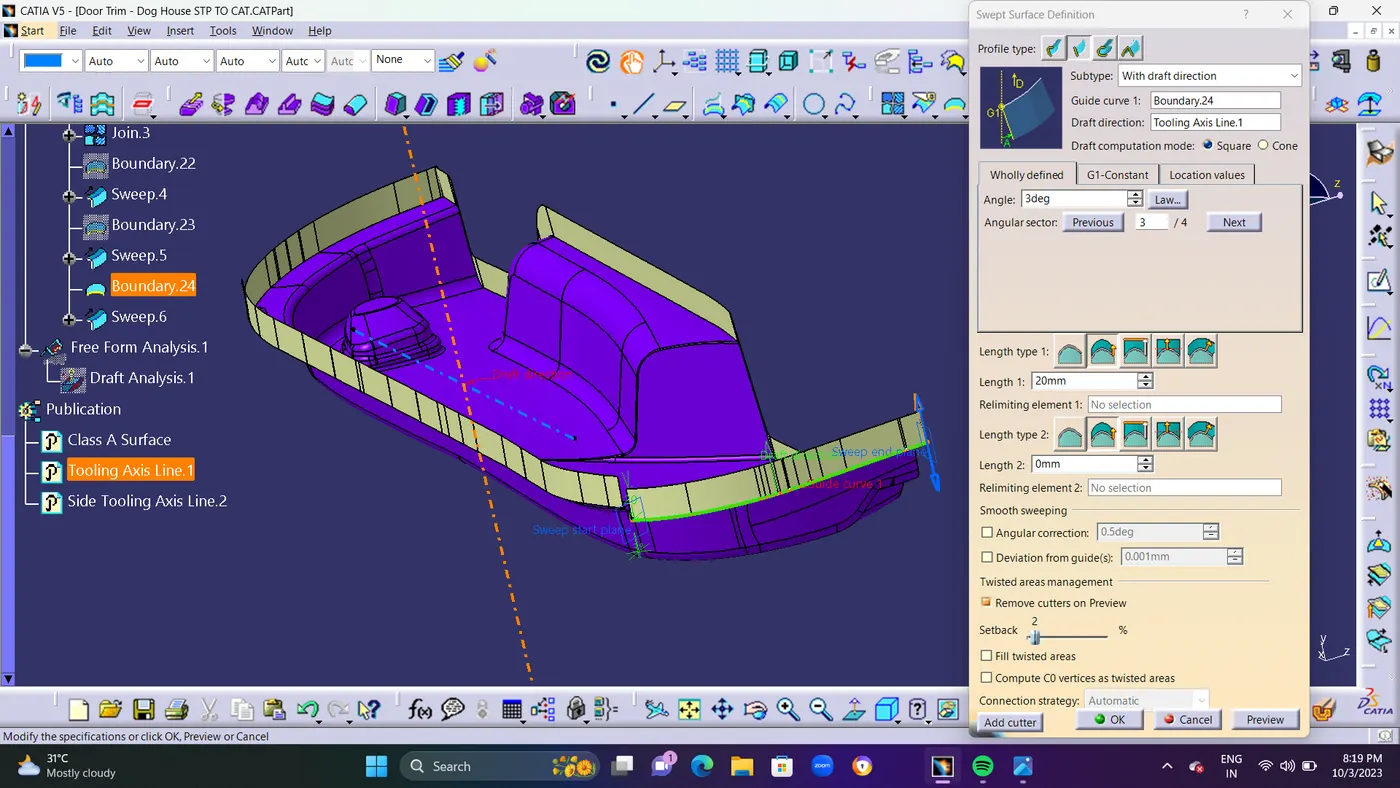
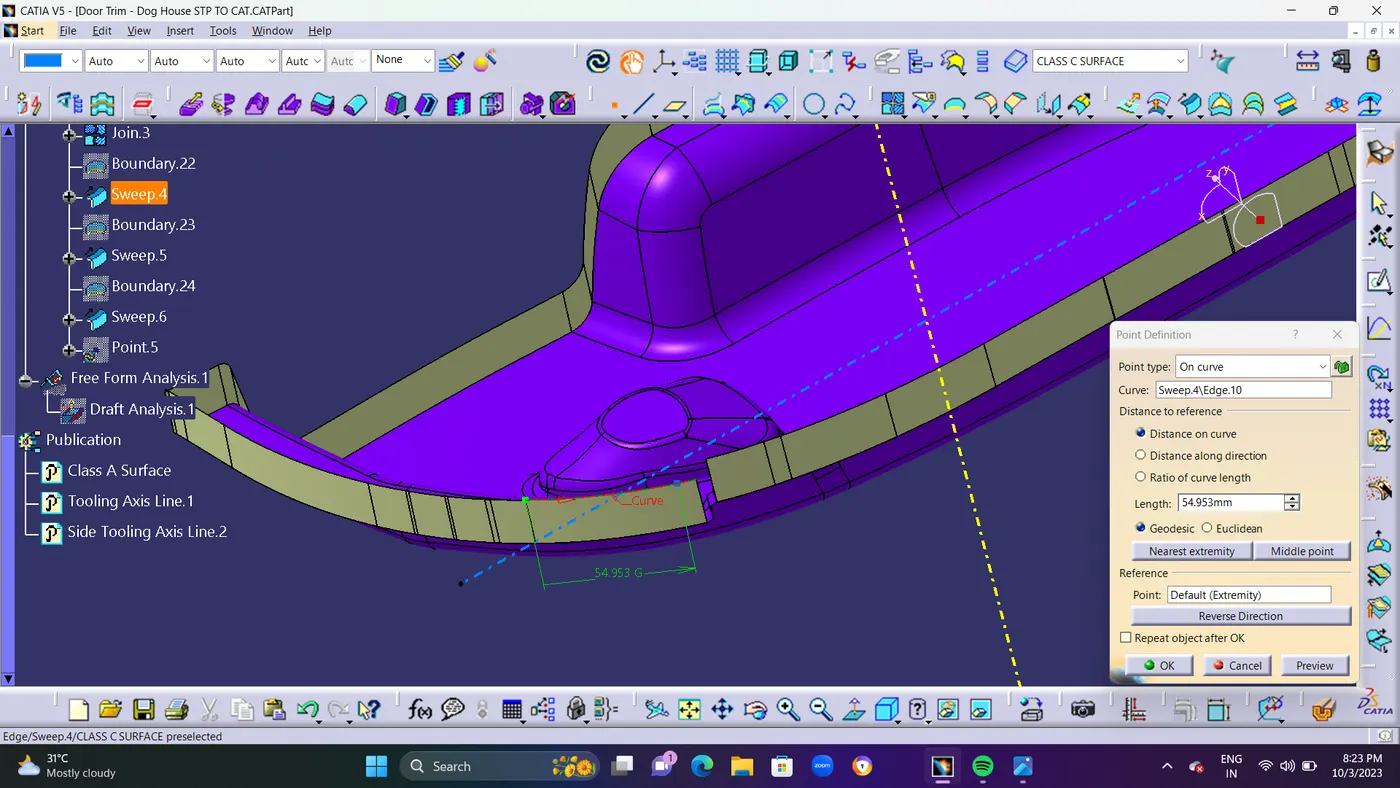
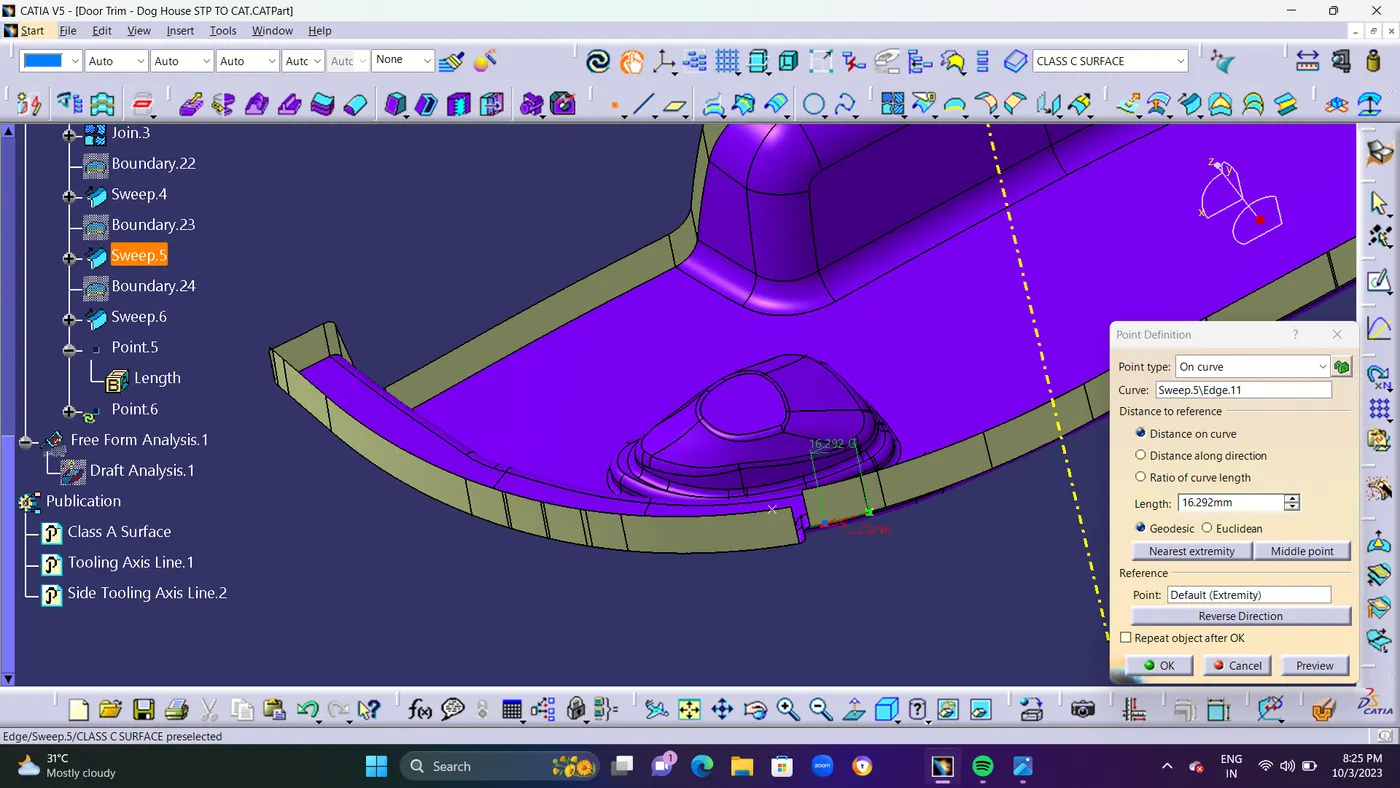
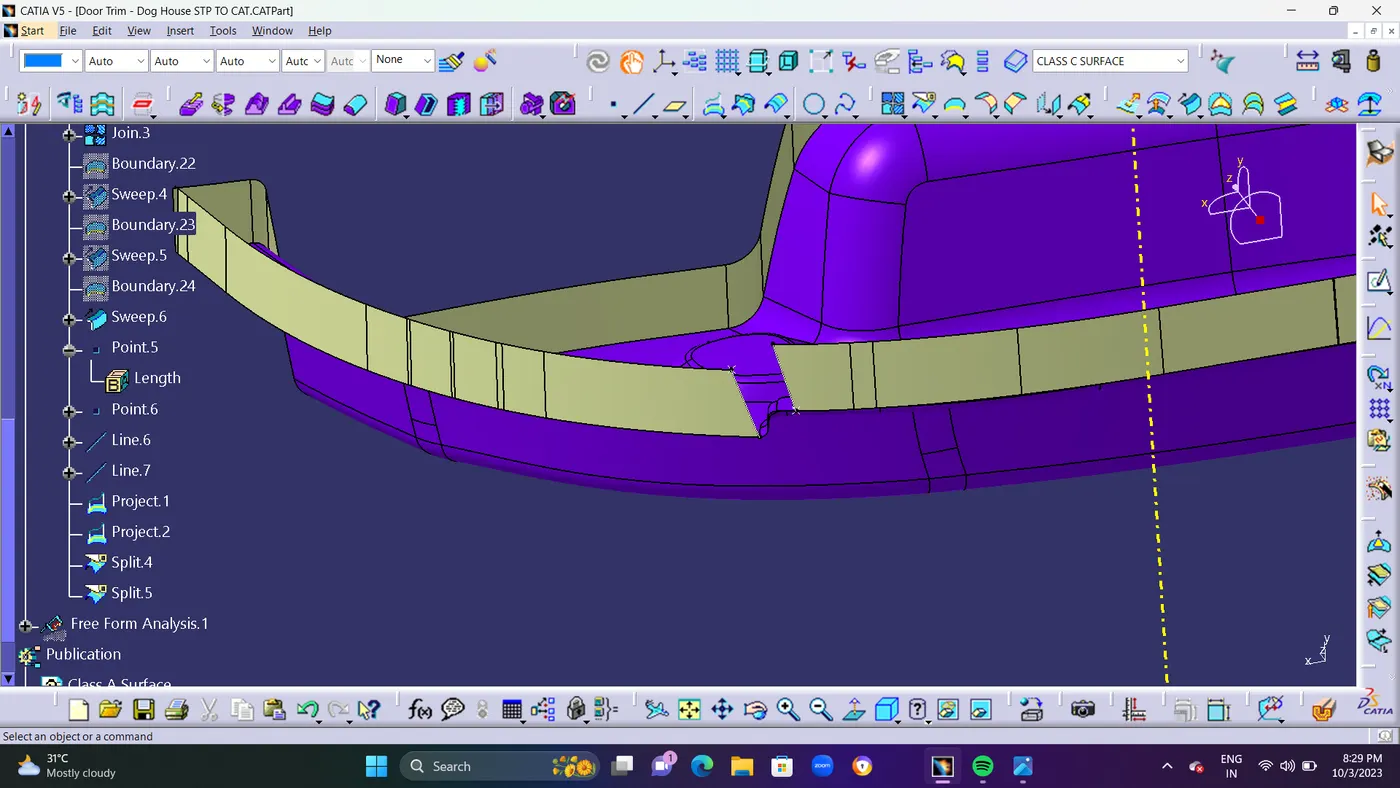
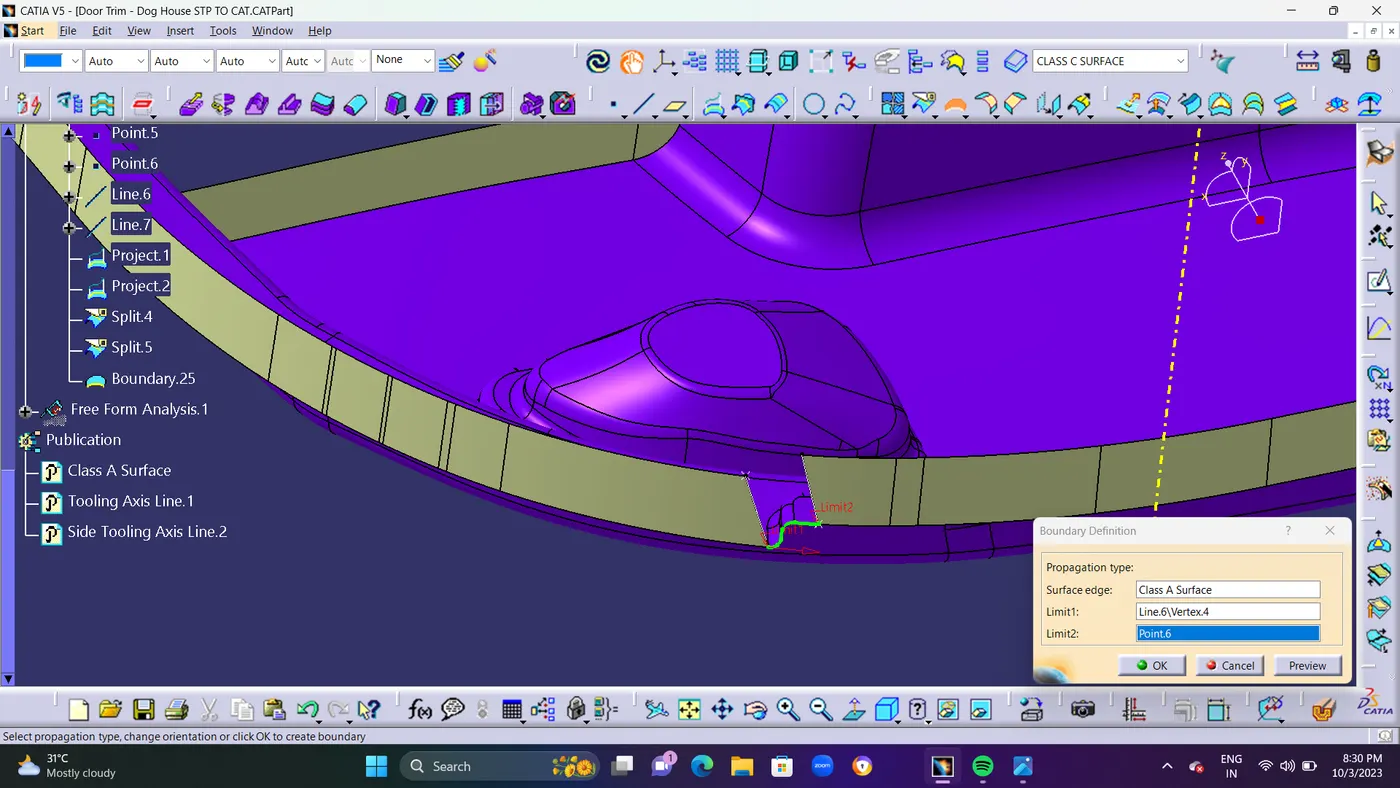
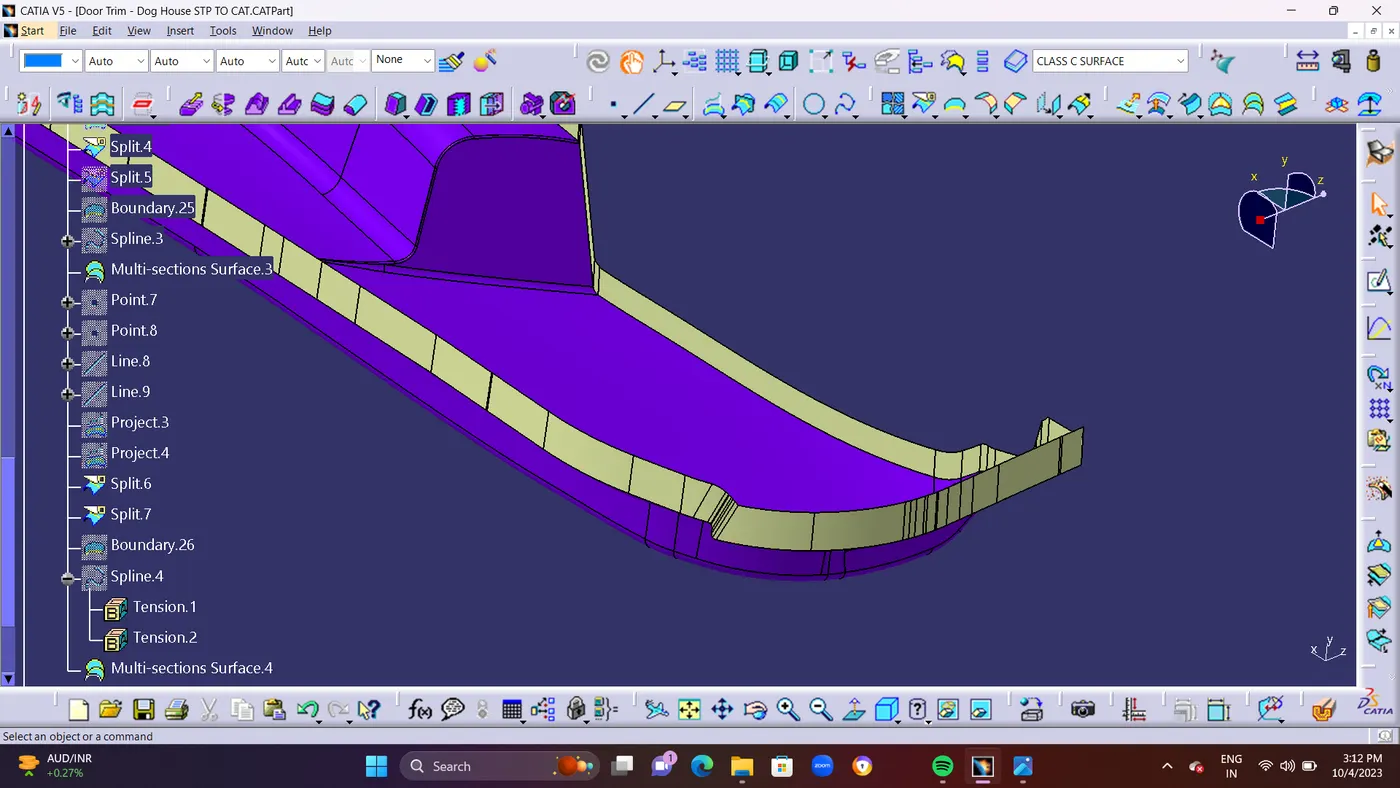
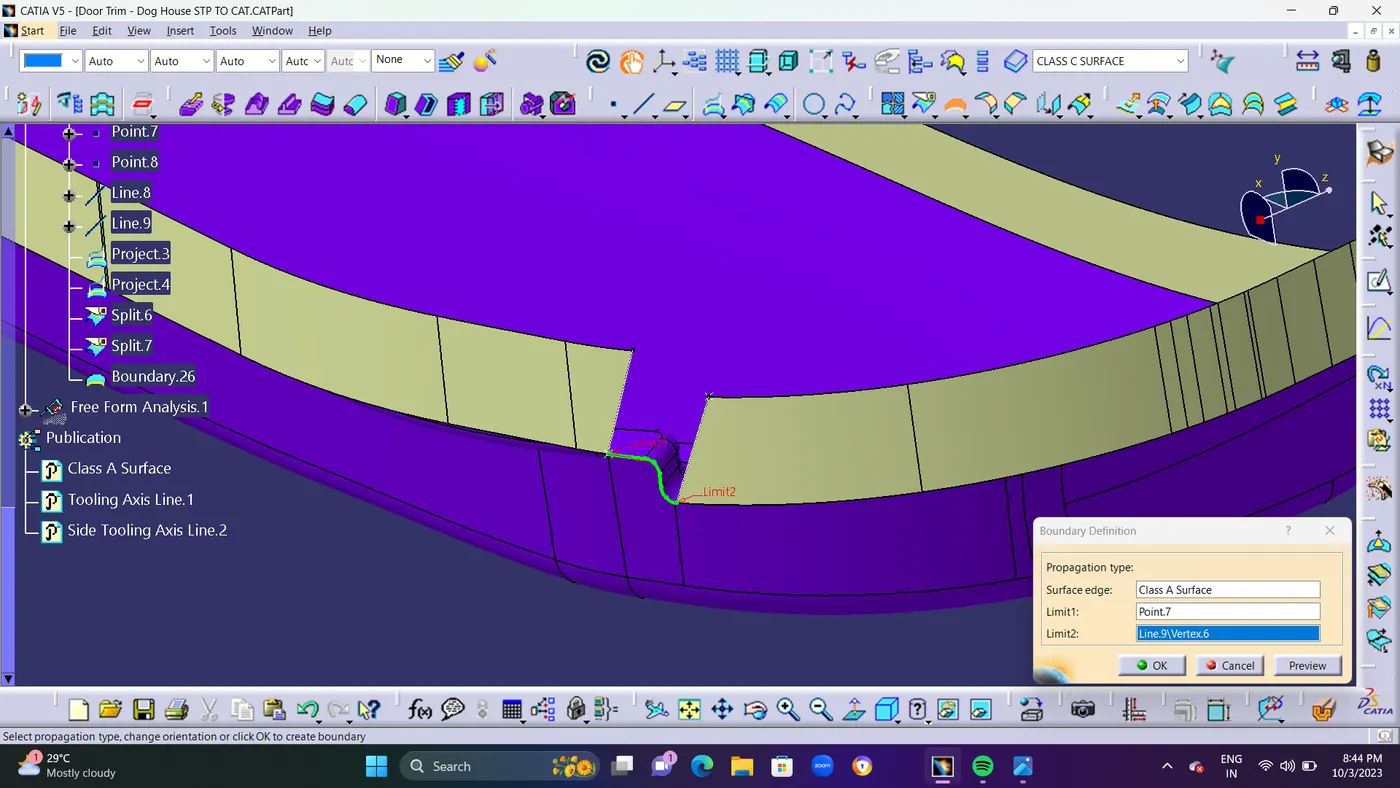
  • STEP 11 : The boundary was developed by taking class A into account.To build a Class C surface, the sweep command was used for 3 DEGREE, and as a point of reference Line, the primary tooling axis and tooling direction were taken into account. Sweep Command is used to Extend the Border of Class A surface to Vertical direction for Creating Class C surface. 

        1.Boundary: pick the boundary for the next operation.

        2.Swept: swept the selected boundary.

        3.Extrapolate: surface can't join properly, so I used to extrapolate those surfaces.

        4.Trim: trim those extrapolate surfaces and get a required surface.

        5.Join: now join those surfaces with each other and form a single surface.


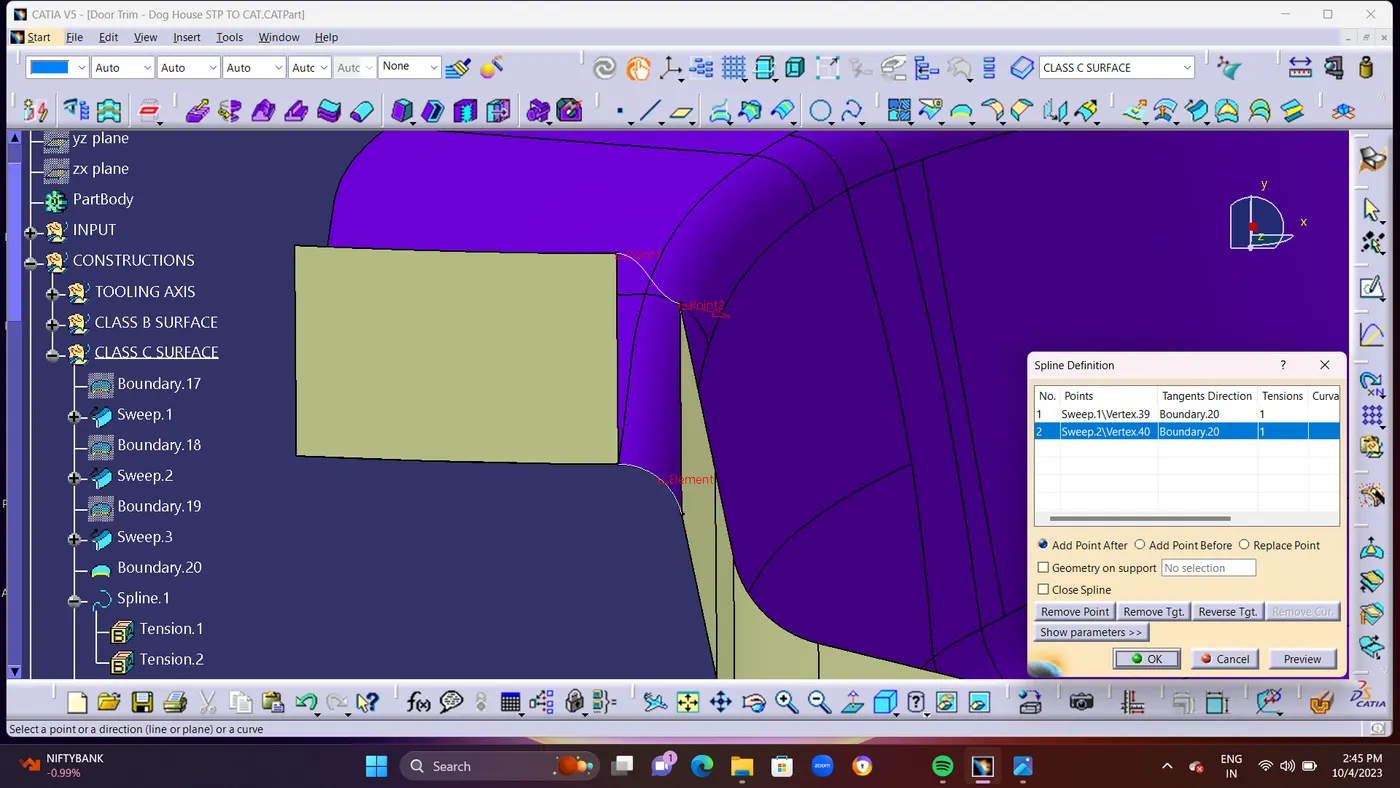
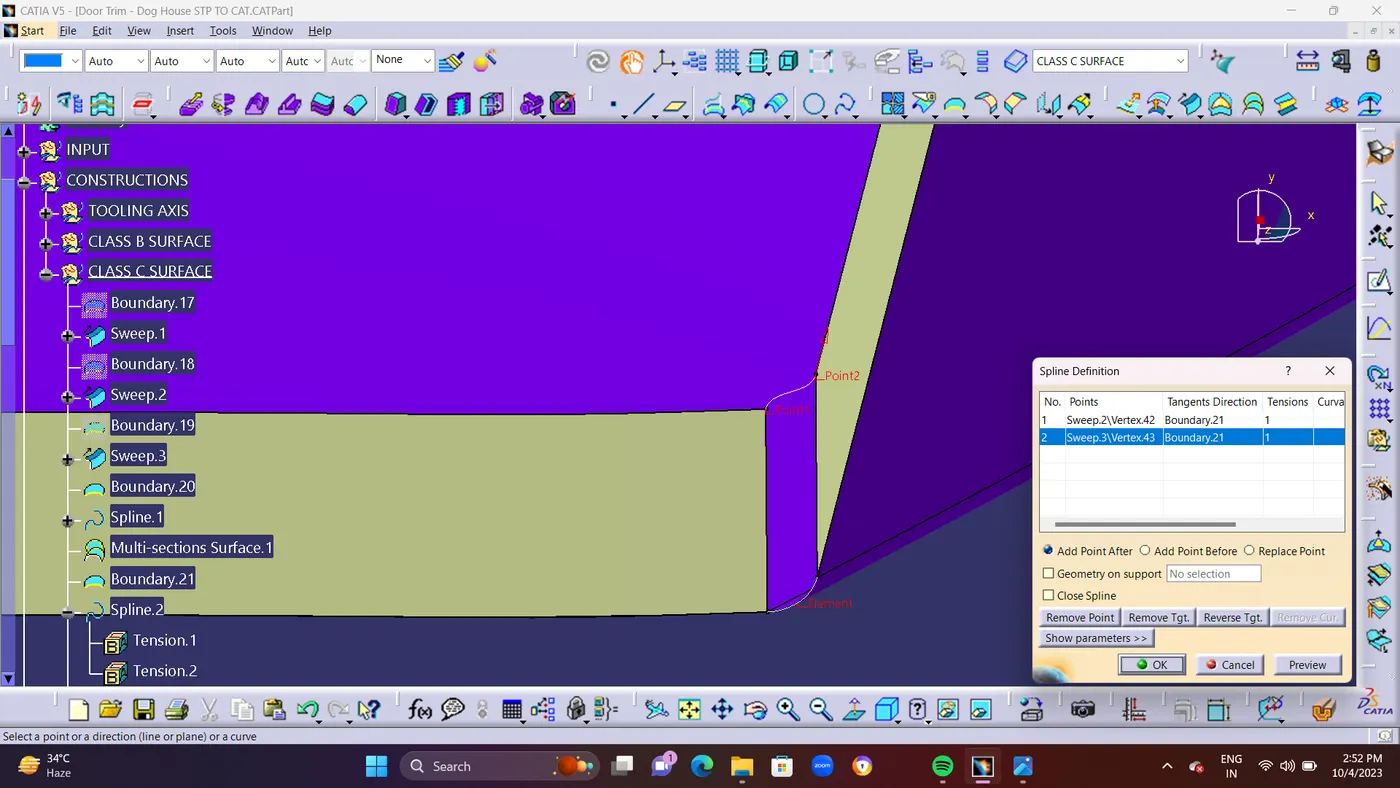
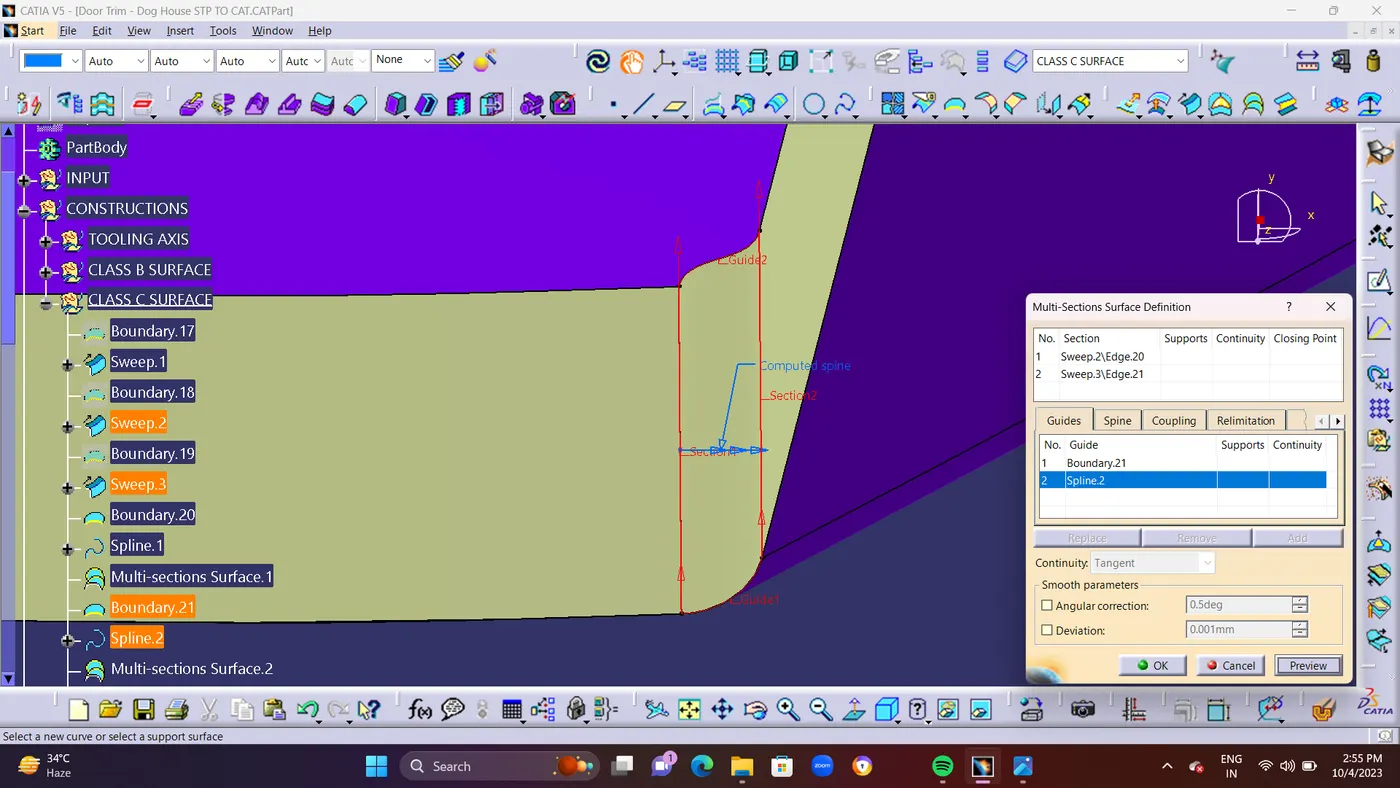
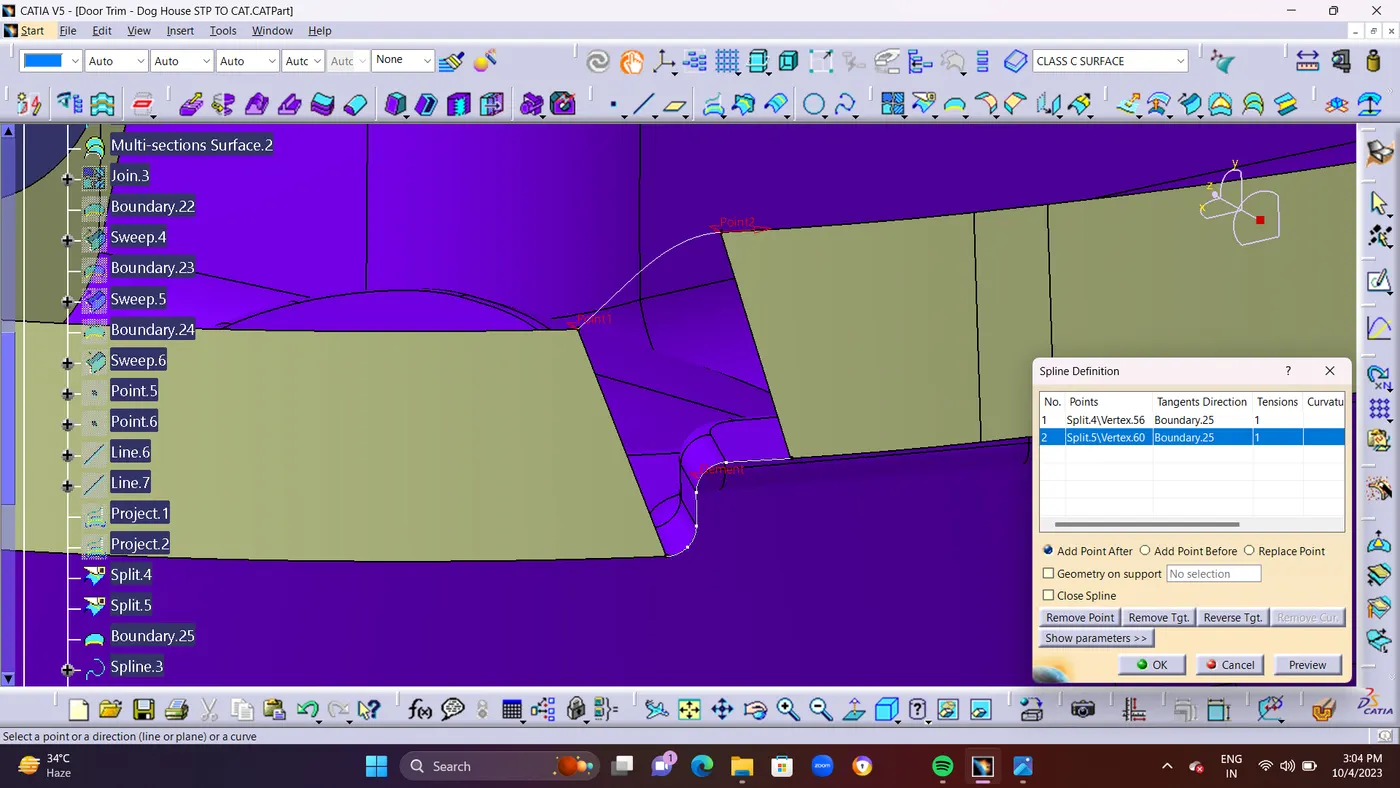
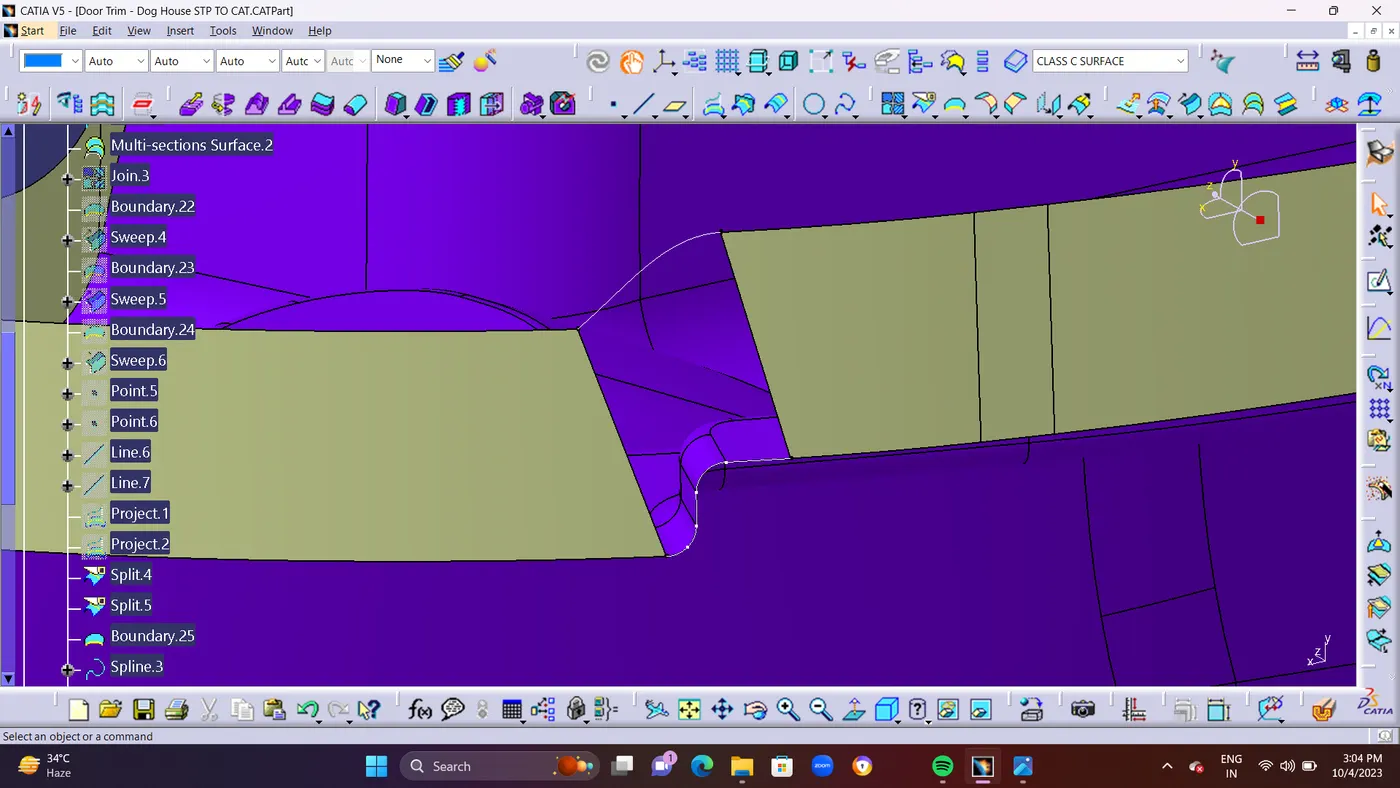
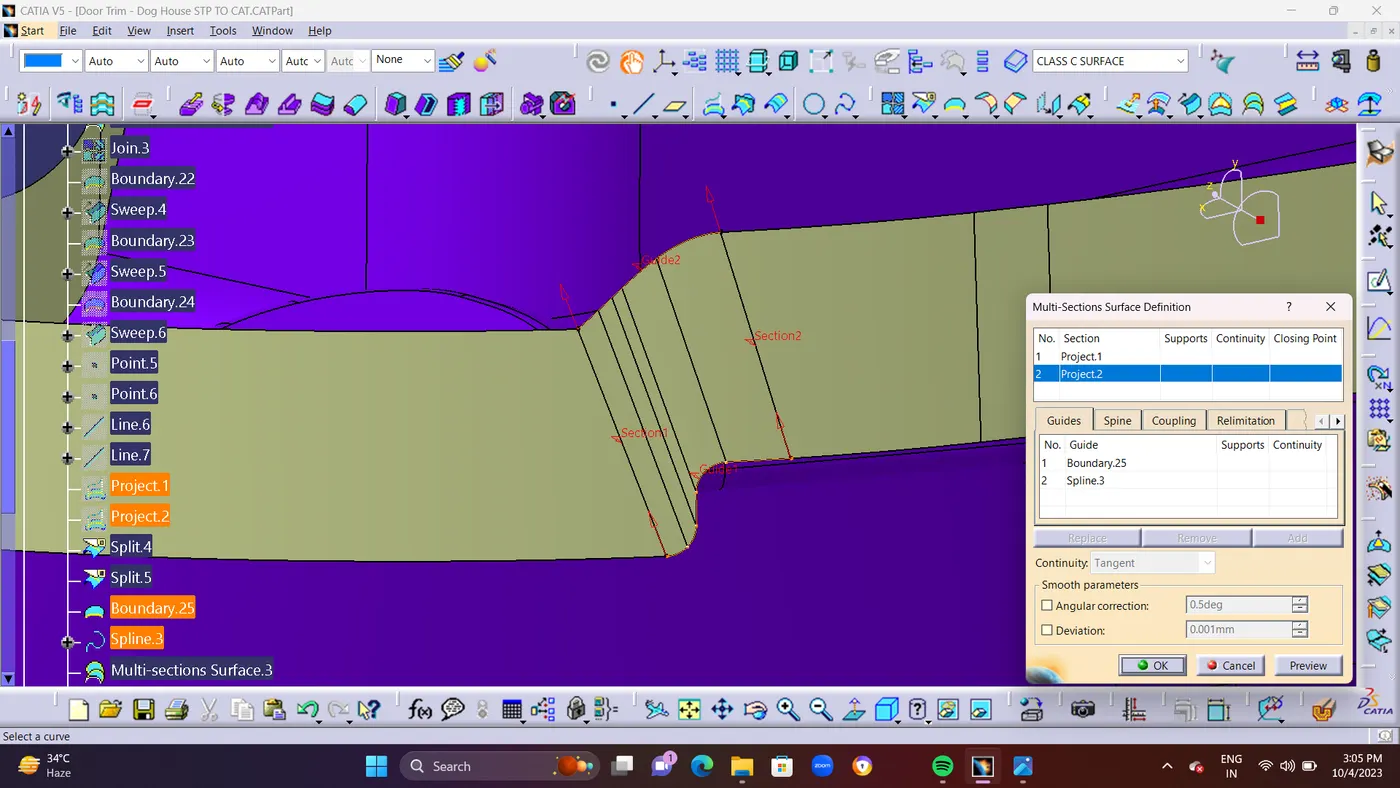
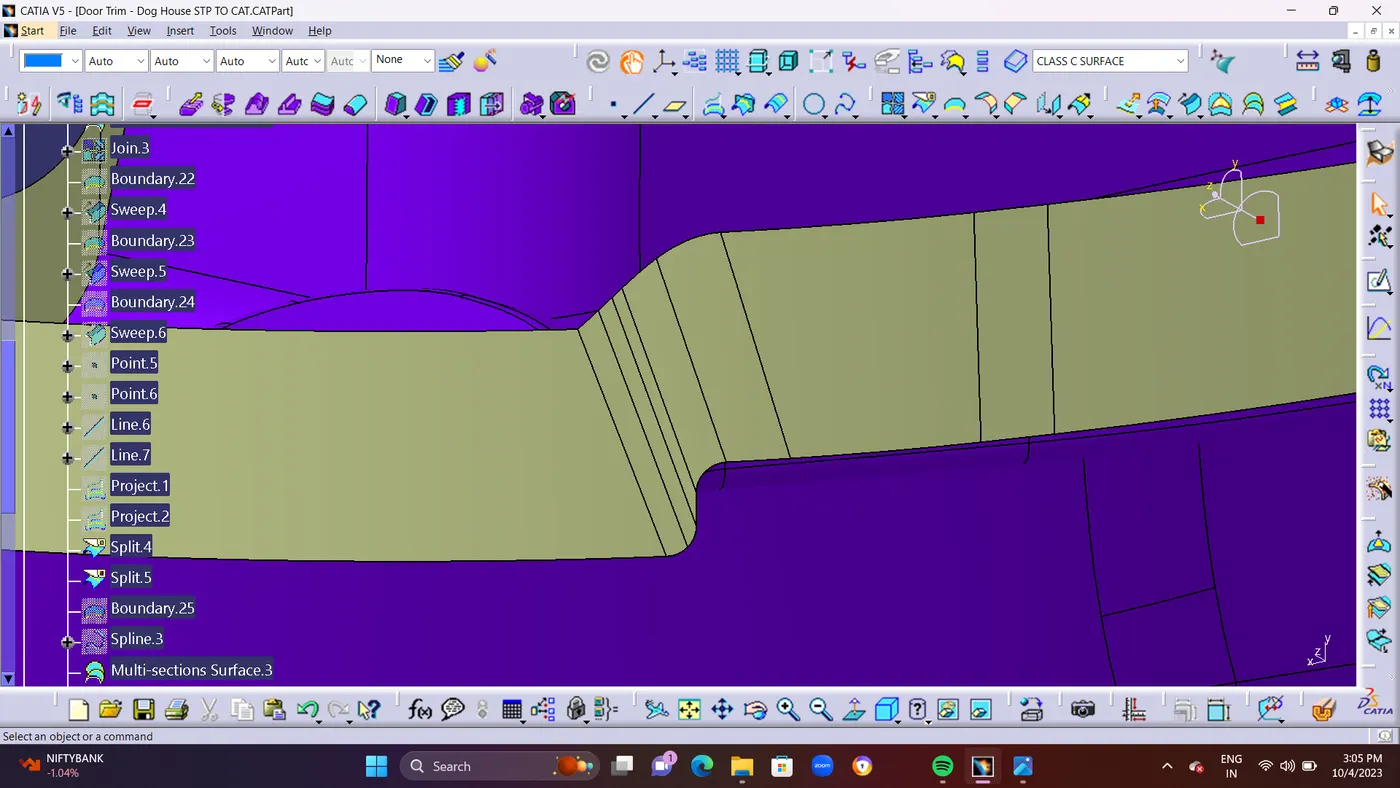
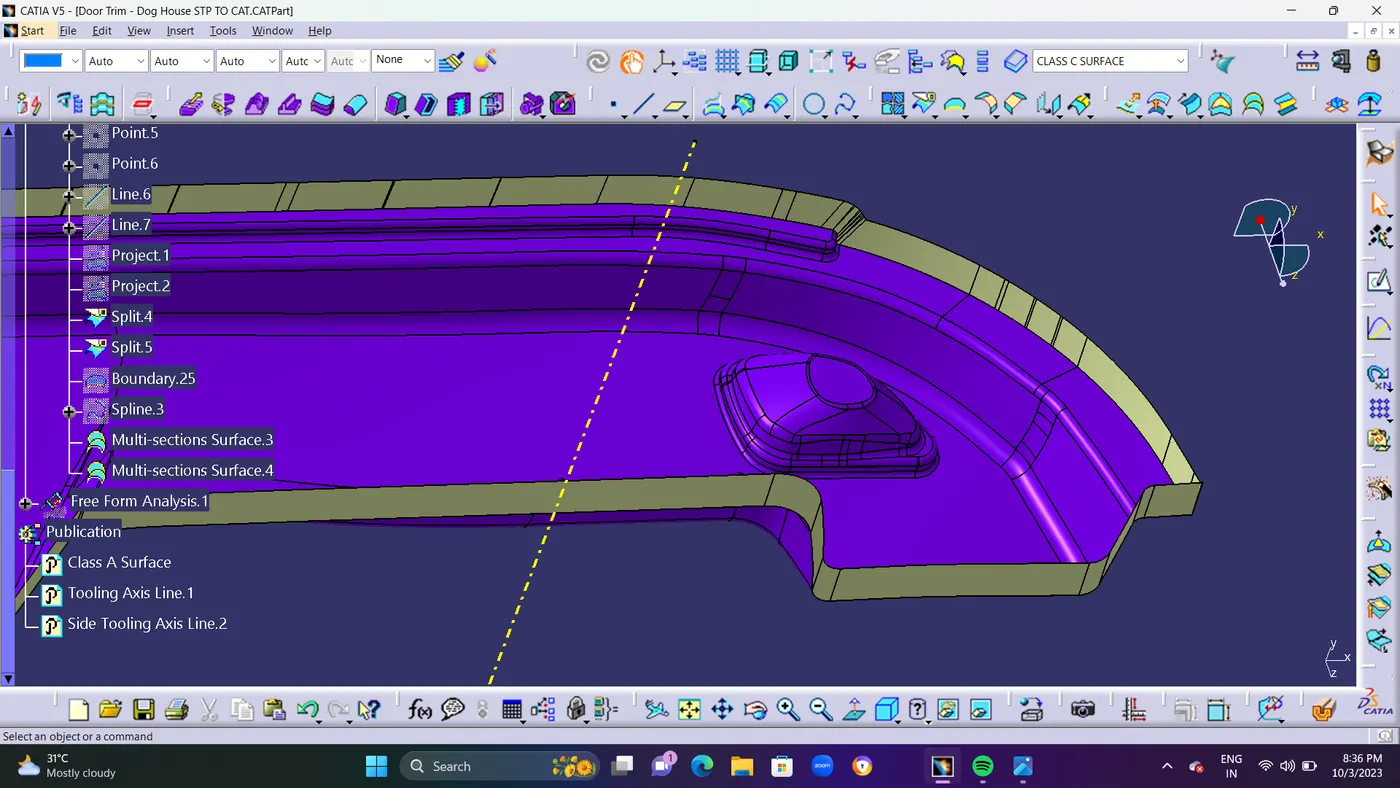
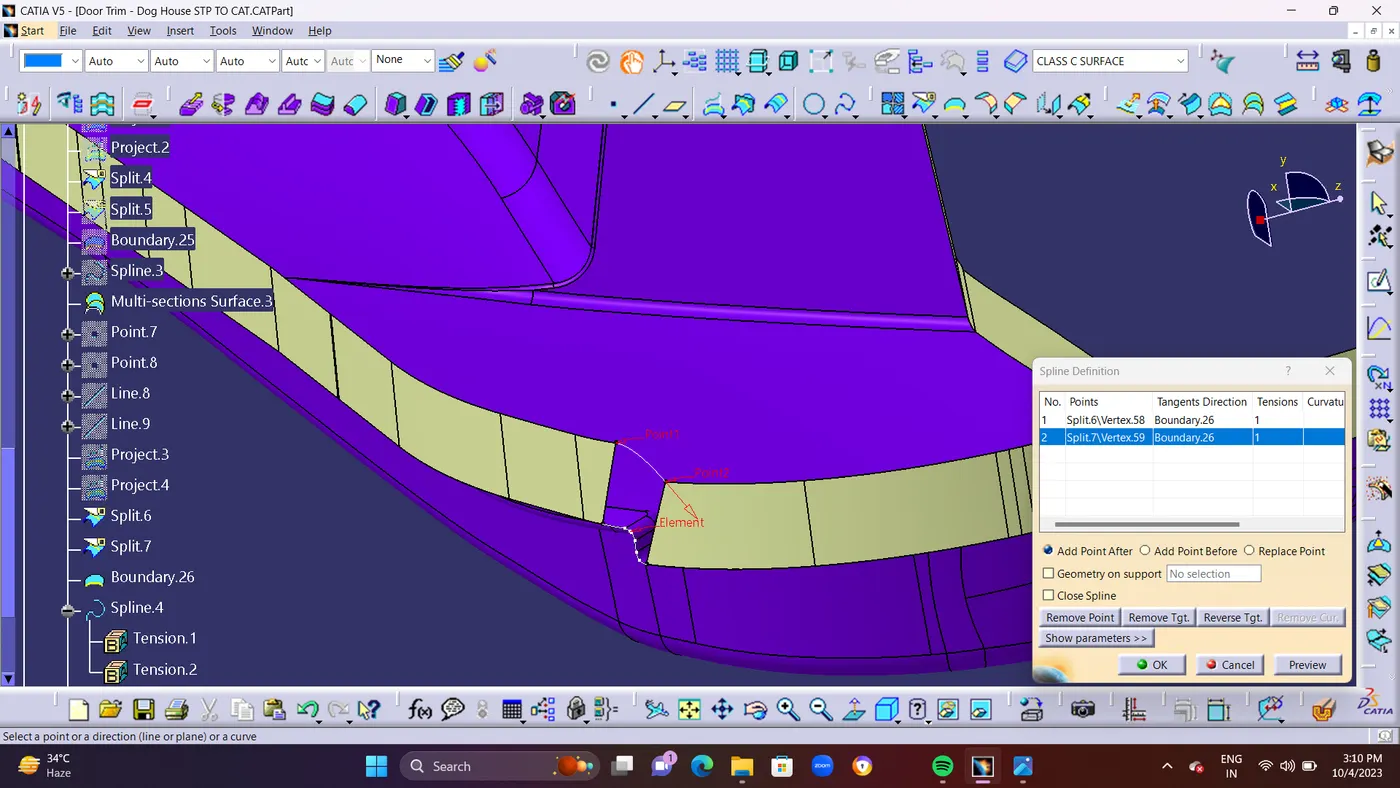
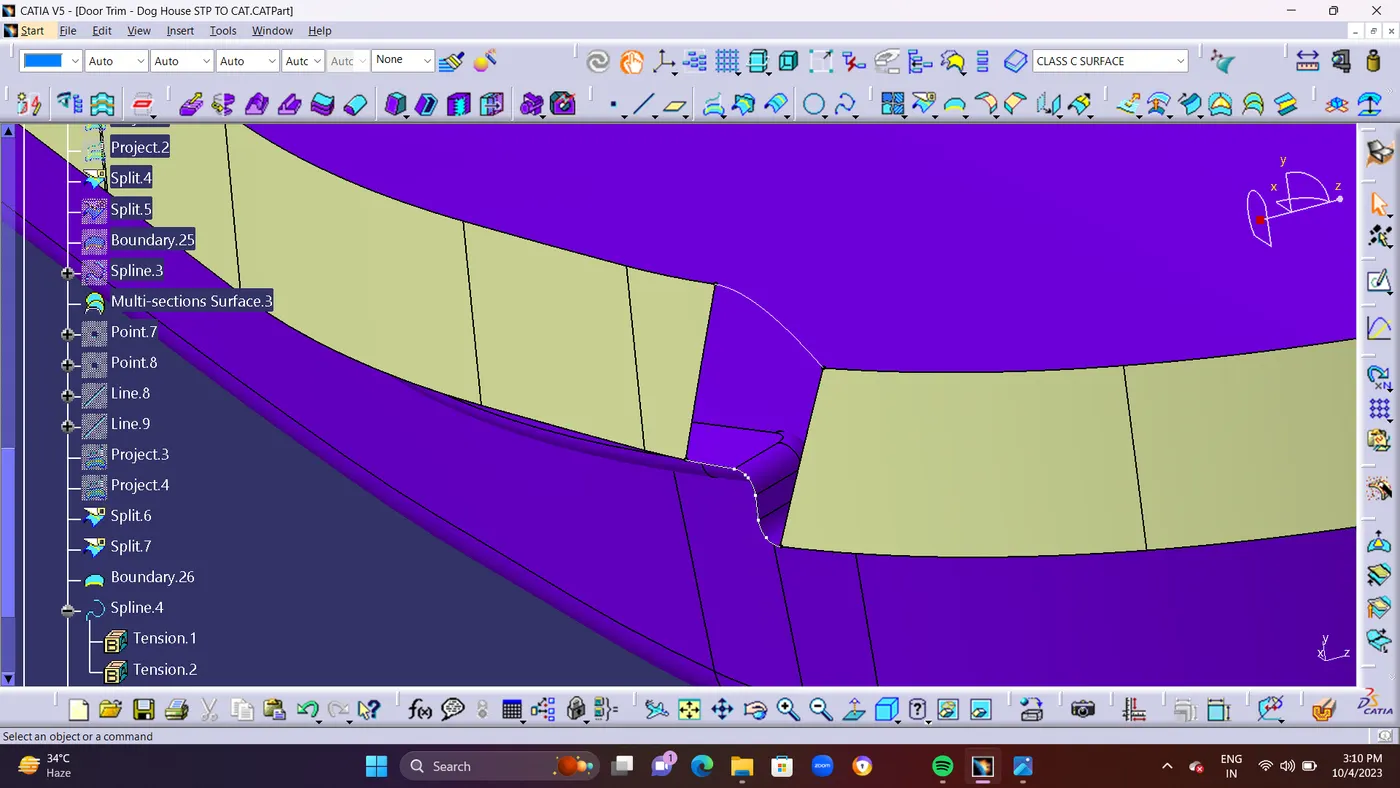
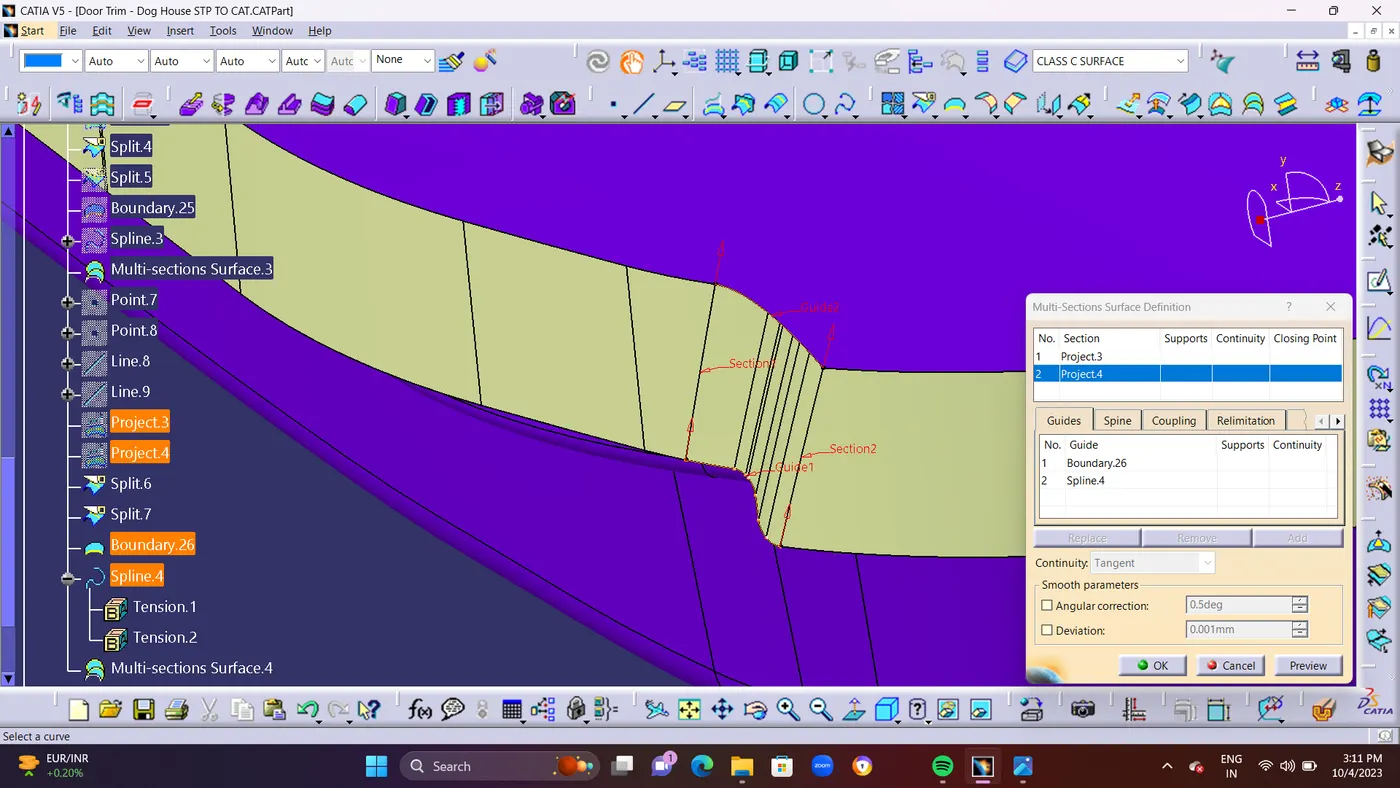
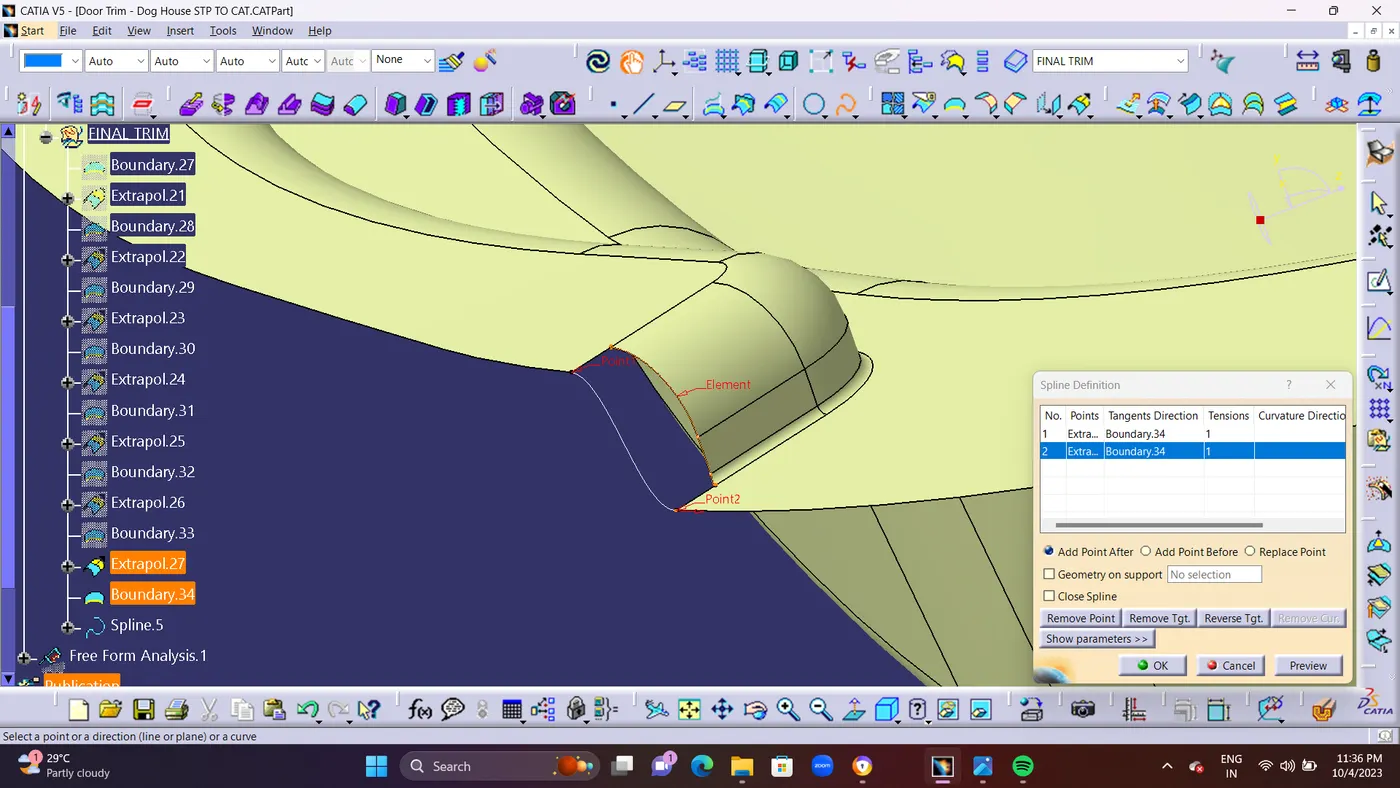
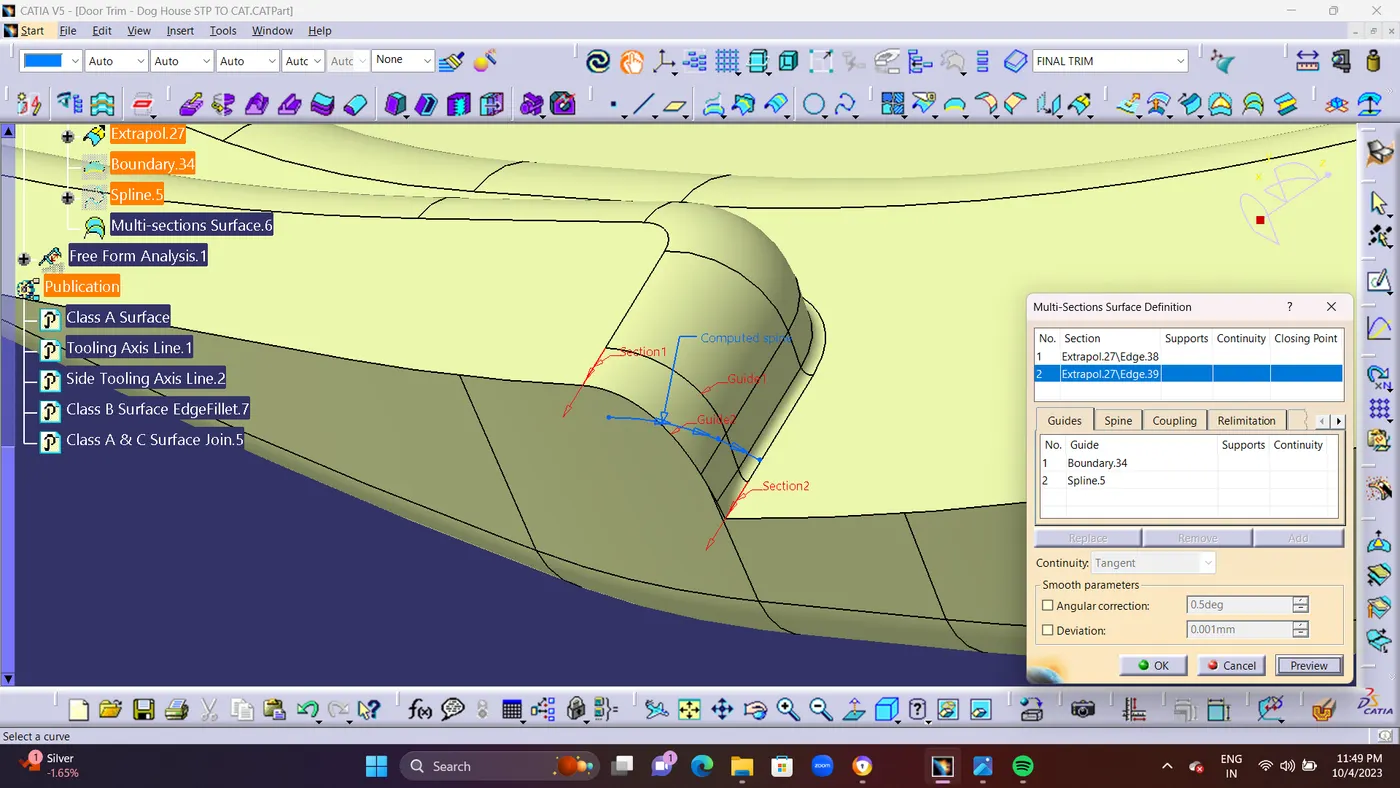
  • STEP 12 : Sweep cant be created perfectly in Fillet and Curve Surface area so we are Creating the Sweep as one by one. in fillet area we are goin to use SPLINE command and create a Smooth Line to                      Connect the sweep edge surface as shown in screenshots.
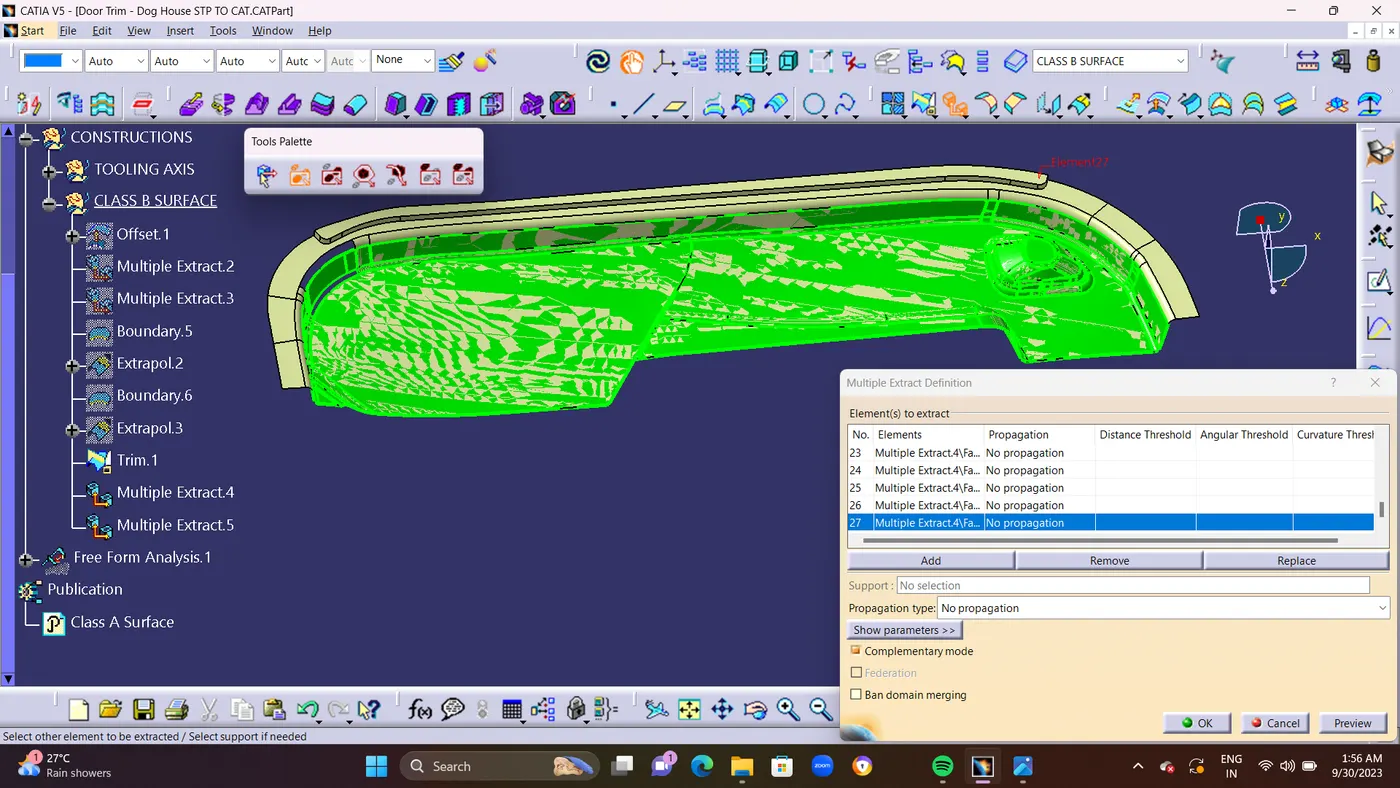
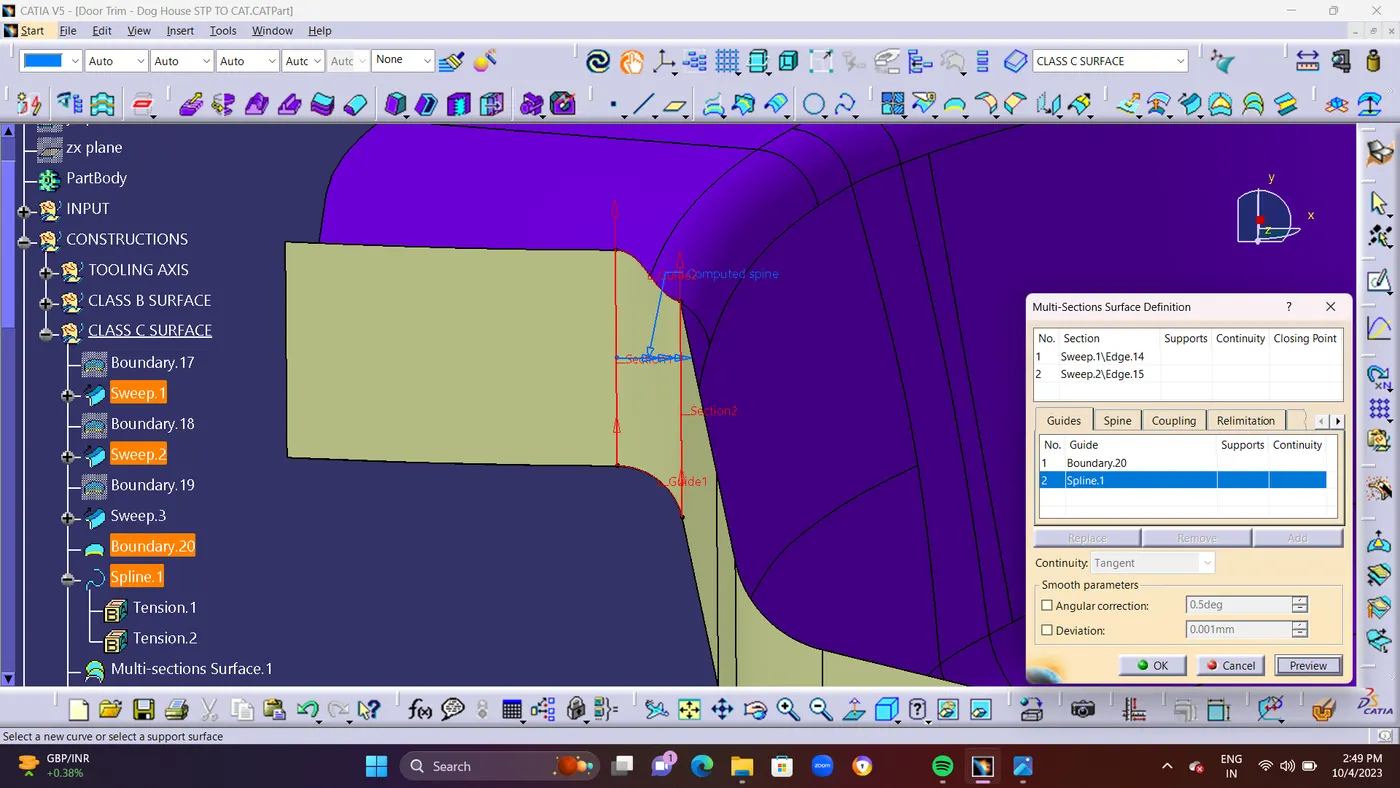
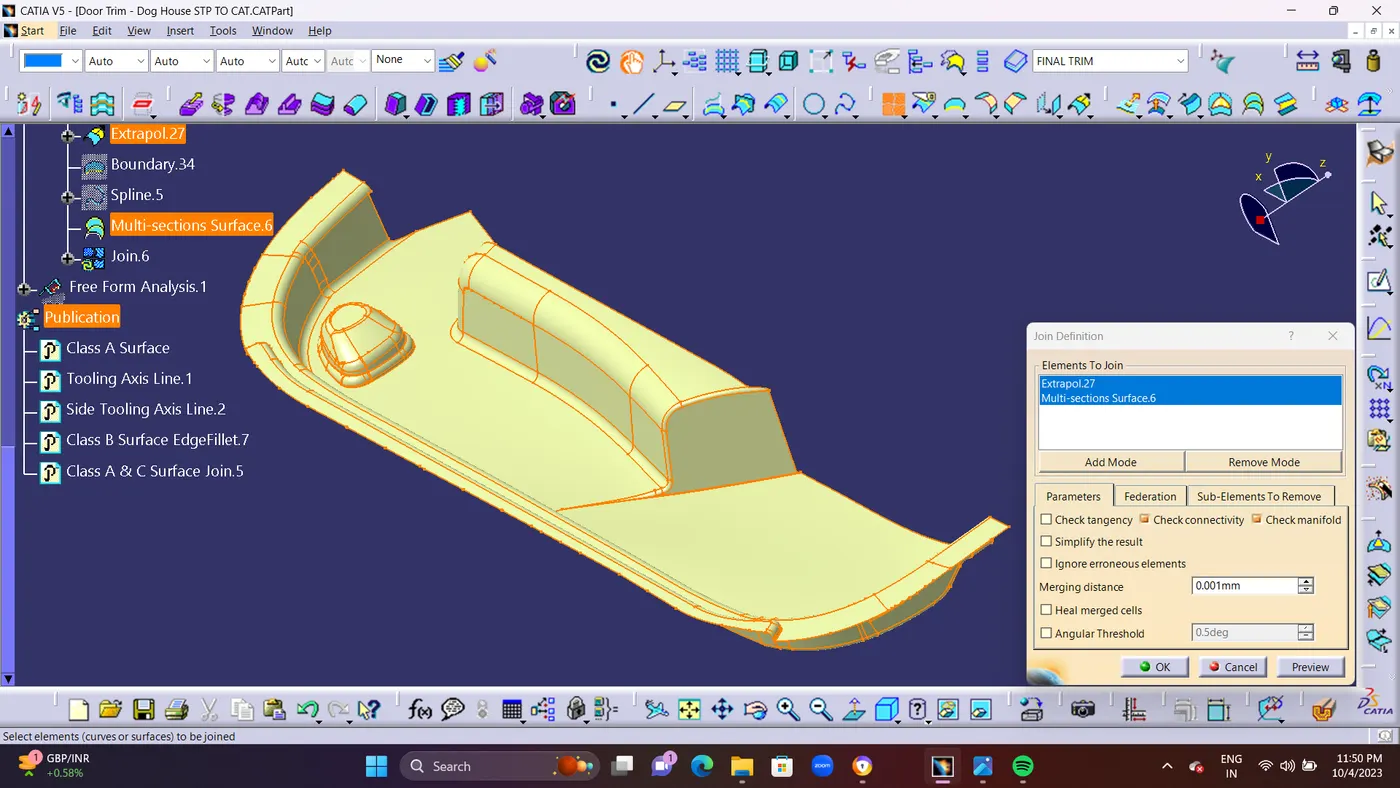
  • and Finally use MULTI-SECTION SURFACE in SPLINE Lines, Sweep and GUID as BOUNDARY and SPLINE LINES.To Create Inbetween Smooth surface and Join it. 


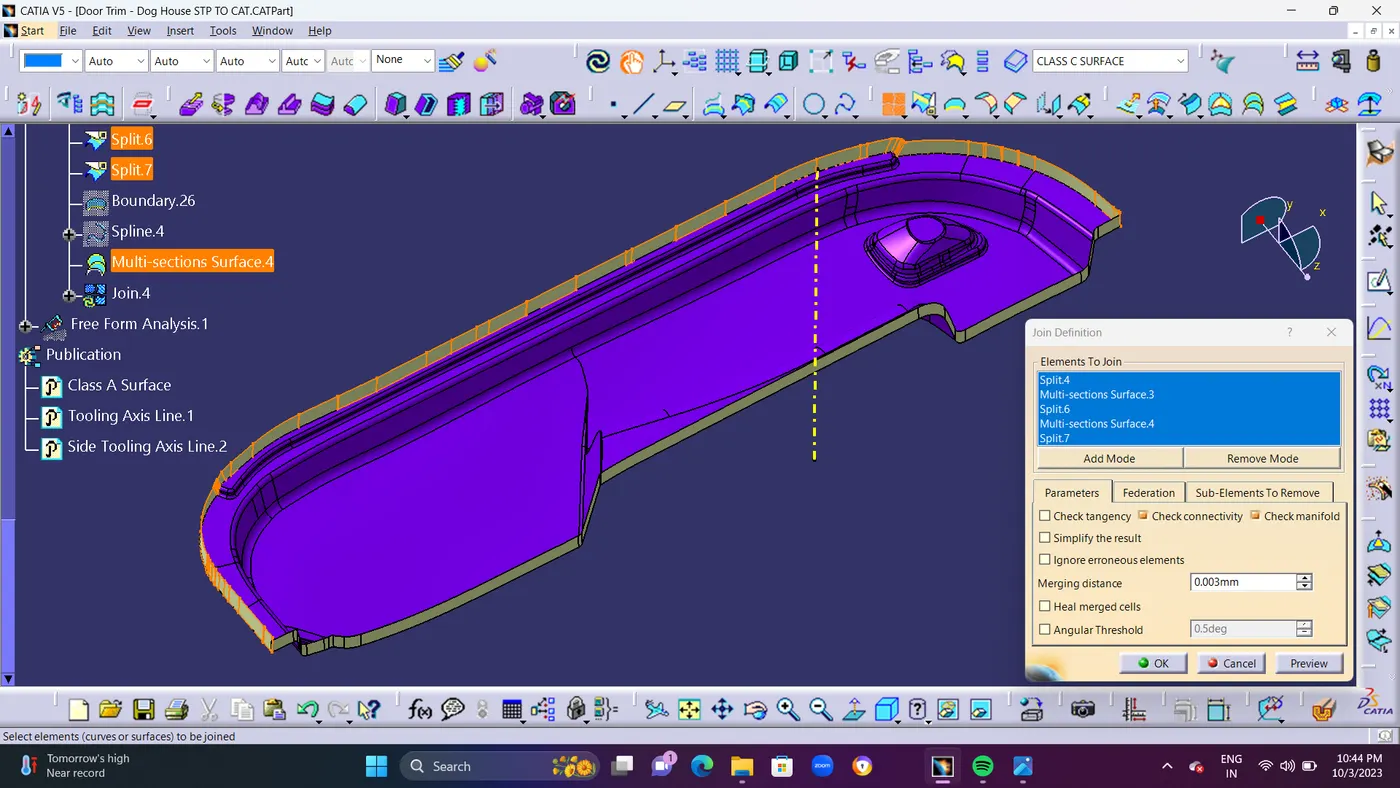
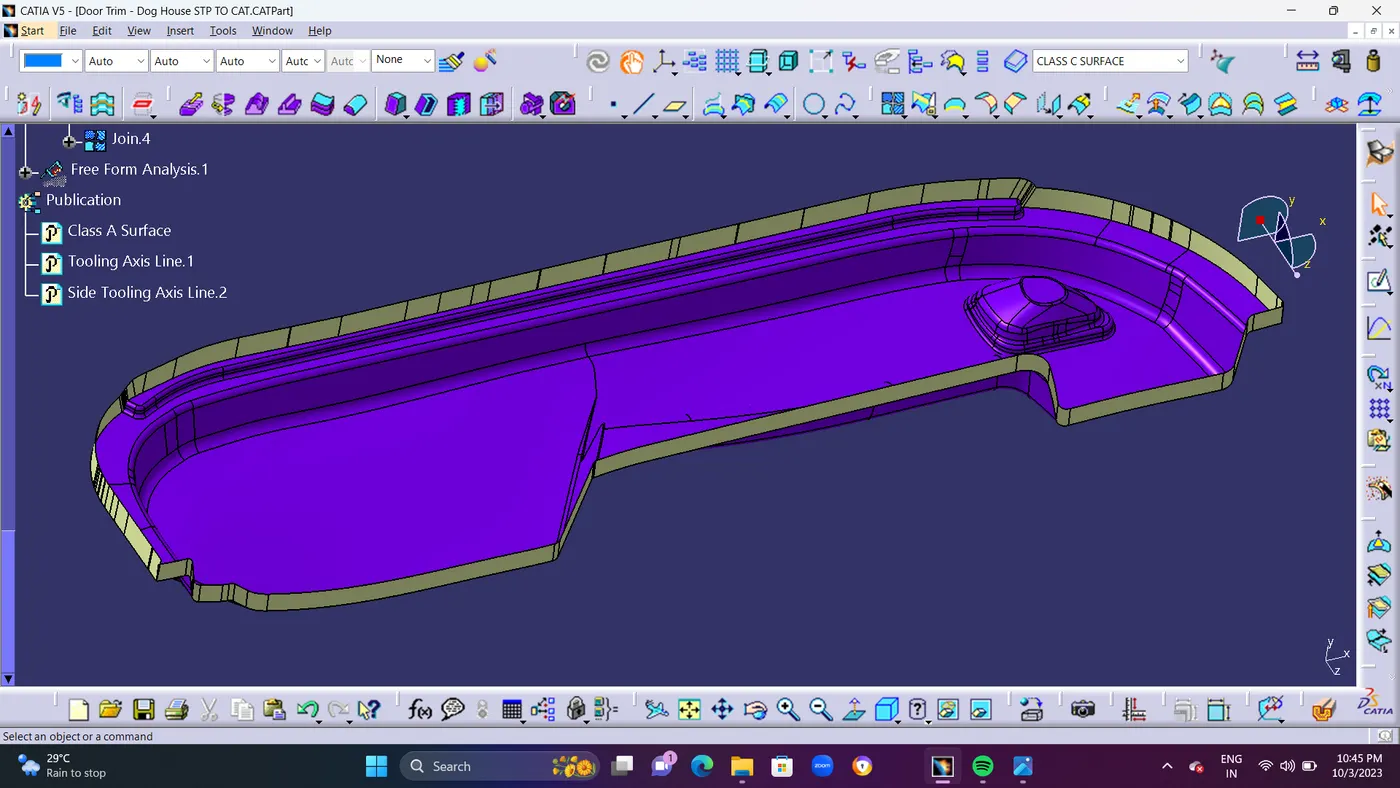
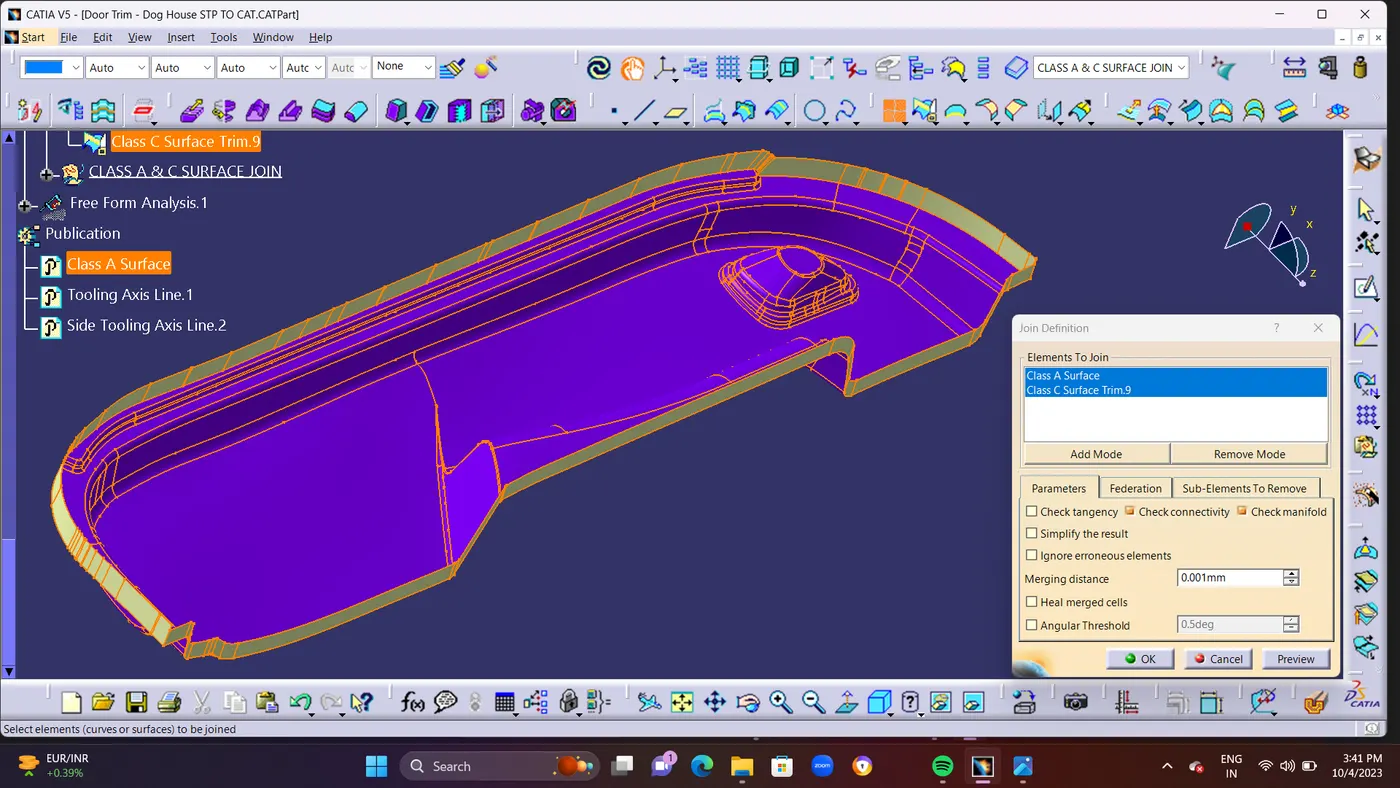
  • STEP 13 : Finally JOIN the CLASS C SURFACE (SWEEP) and Make it as Single SWEEP surface.and Name it as CLASS C SURFACE. 


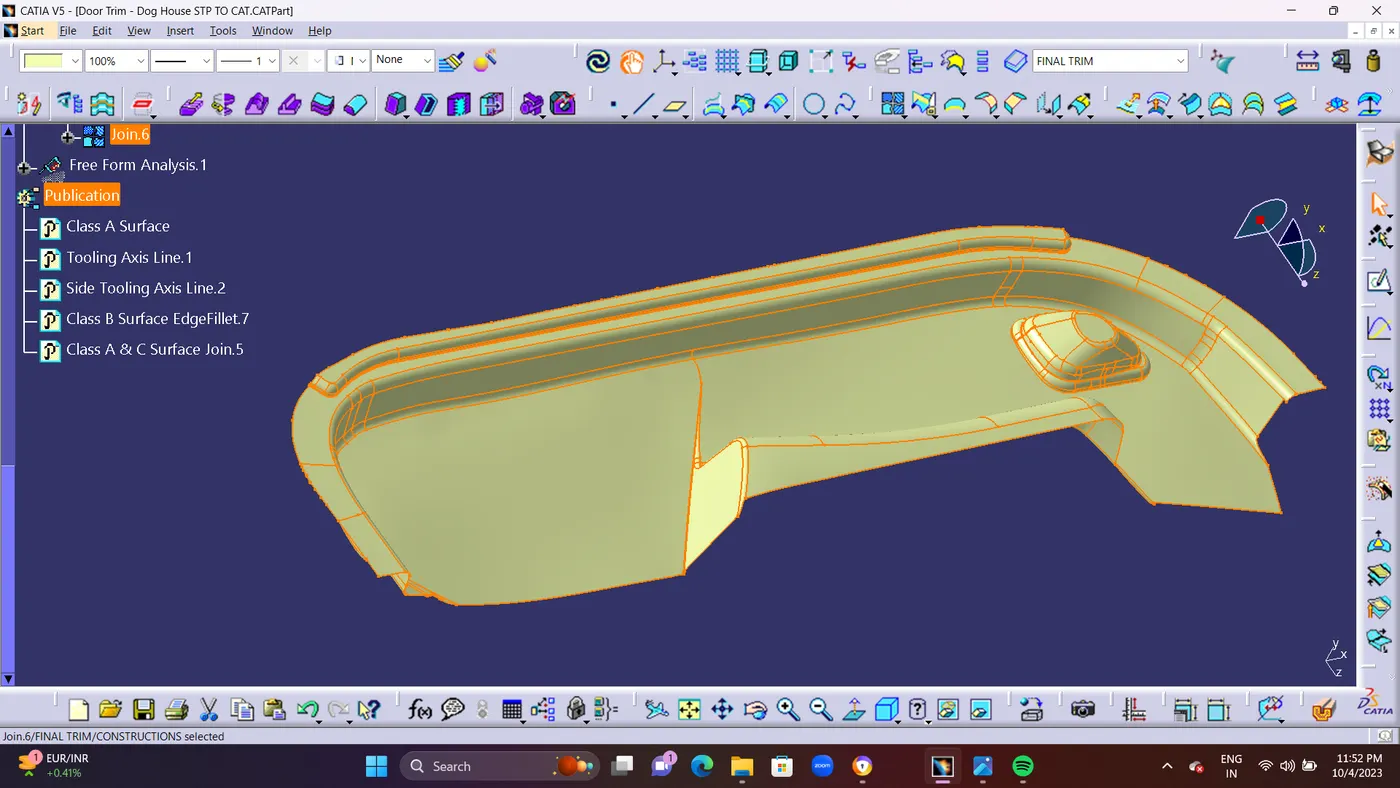
  • EXTRAPOLATE the side EDGE surface and TRIM it as (FINAL TRIM) to Create Class C Surface.


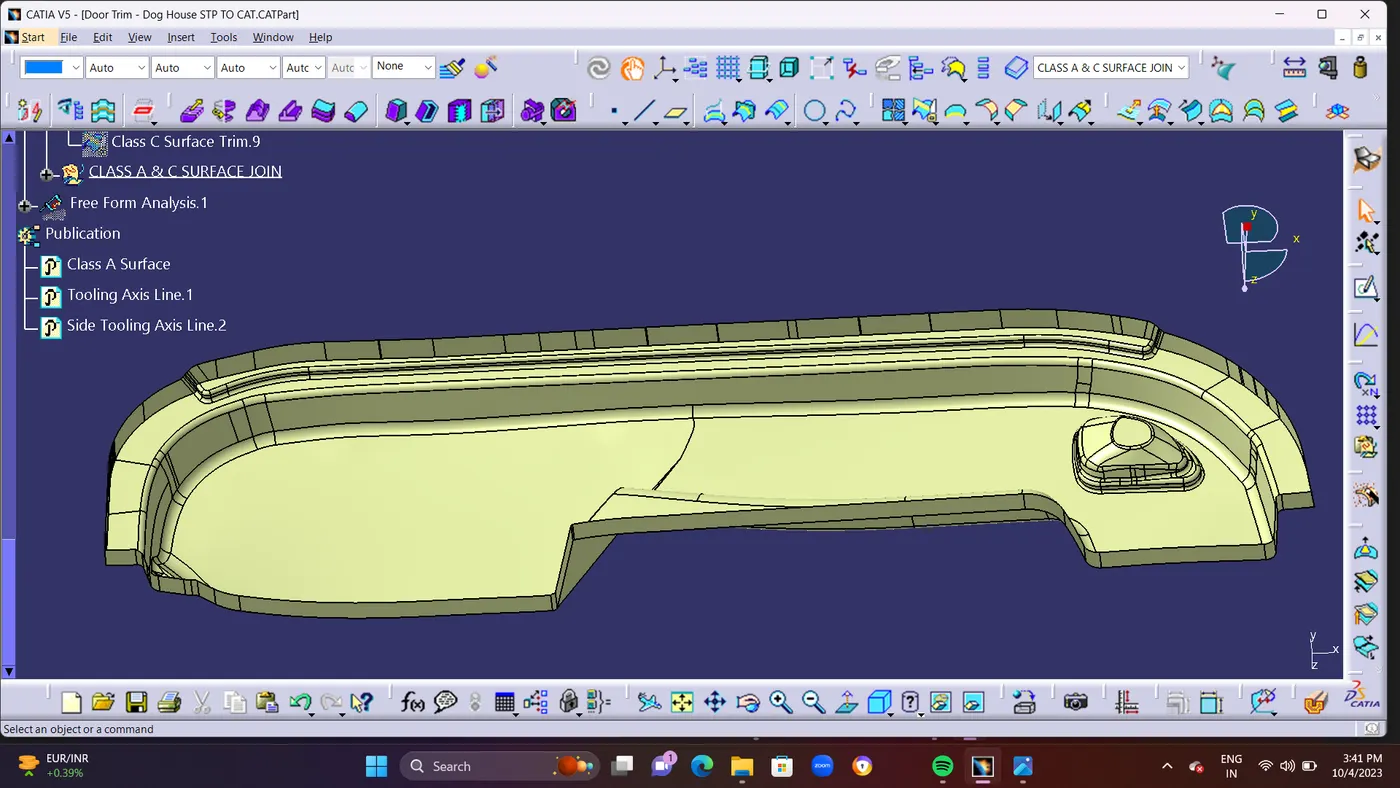
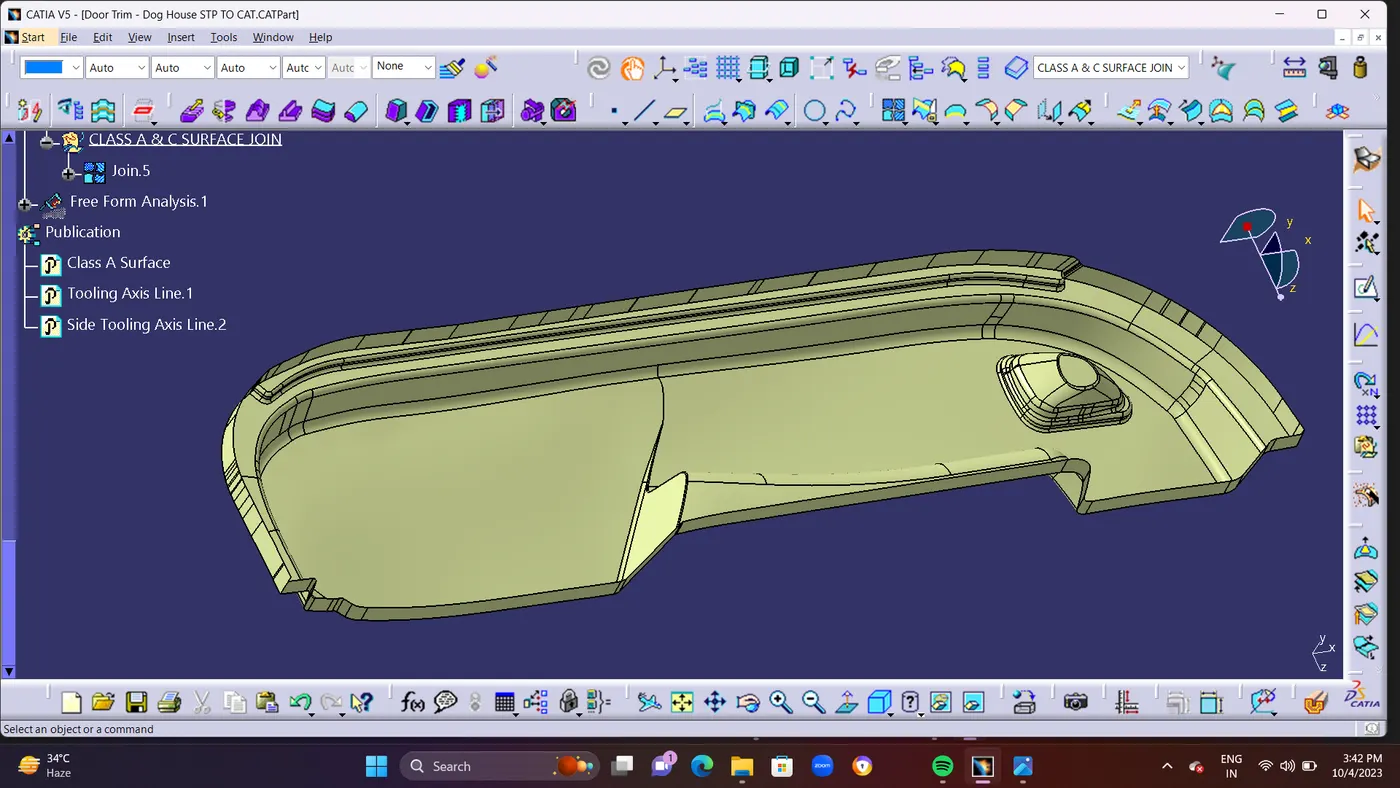
  • STEP 14 : Finally JOIN CLASS A Surface and CLASS C Surface.


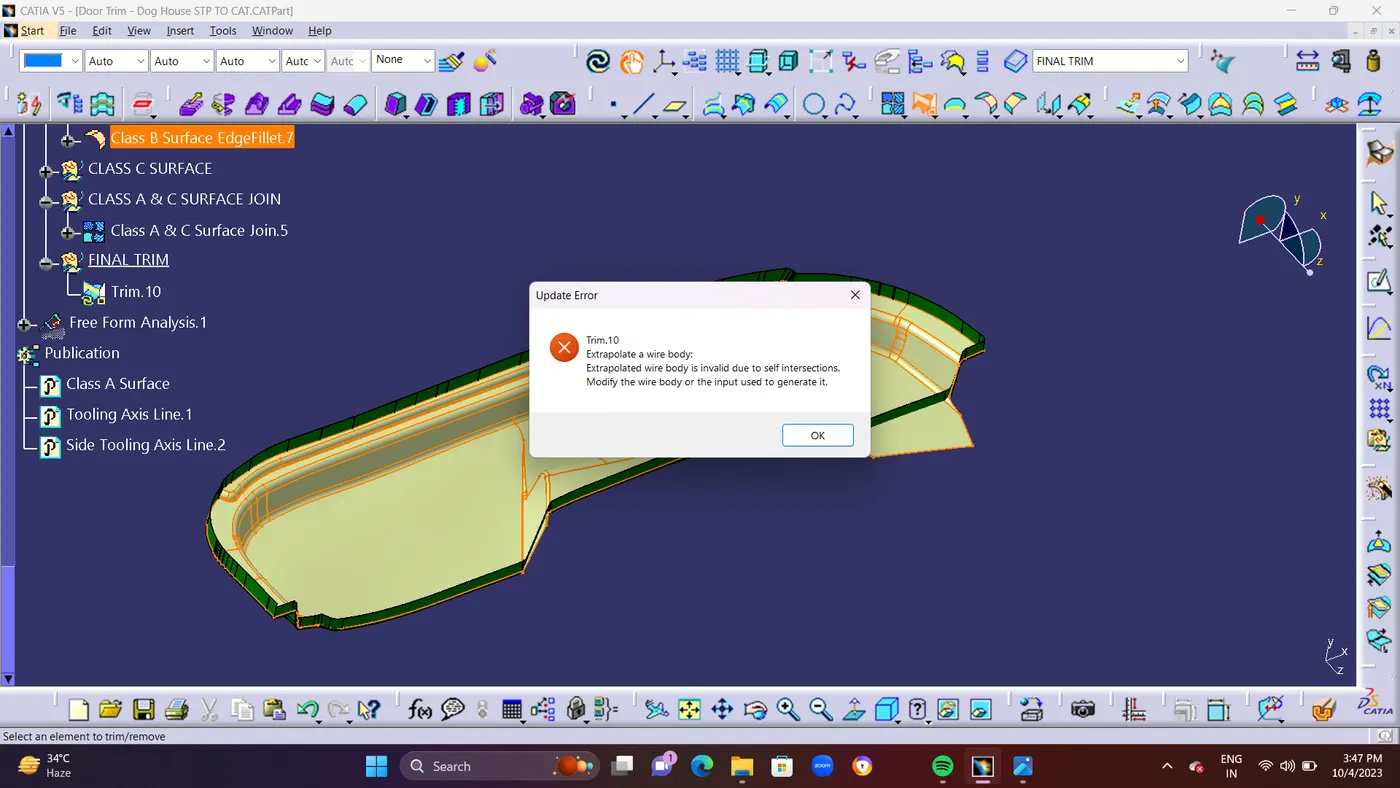
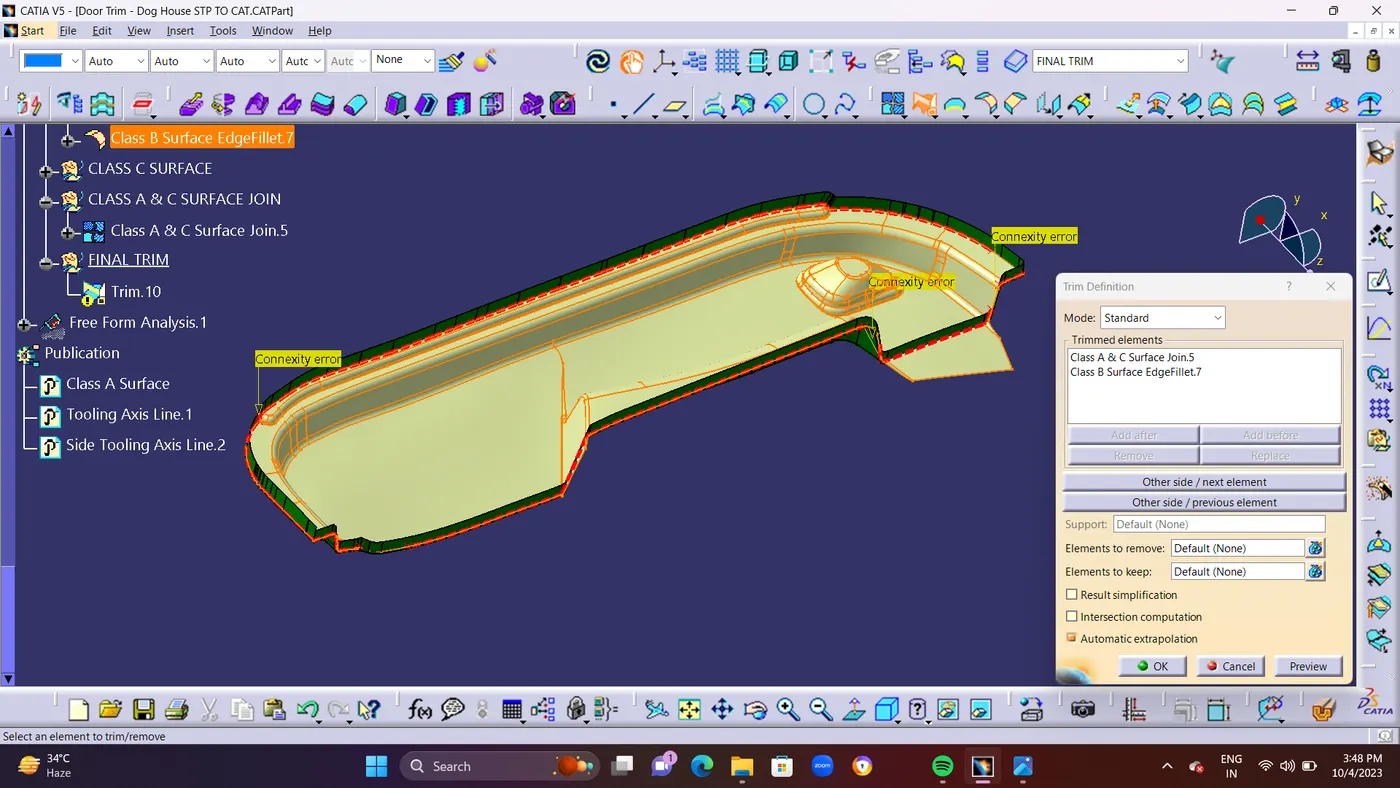
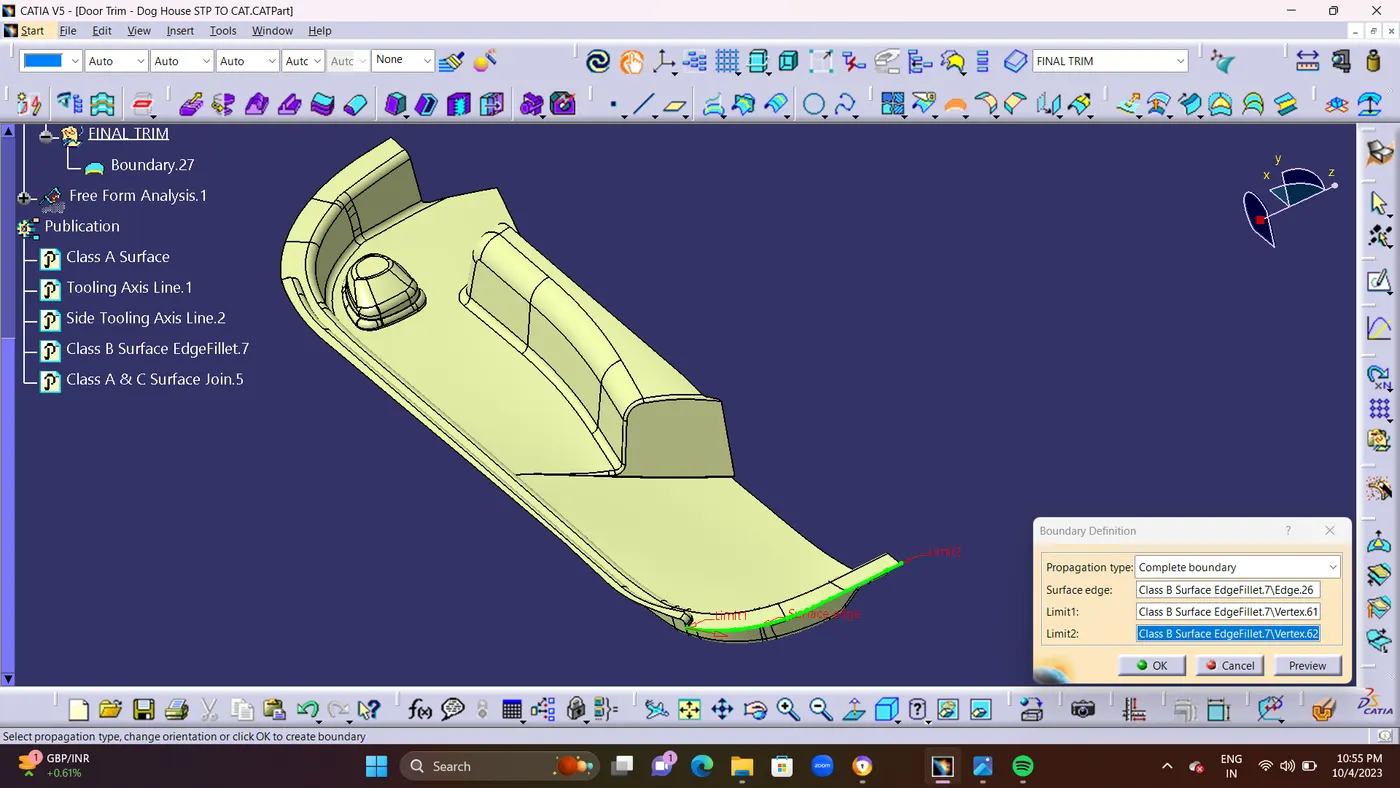
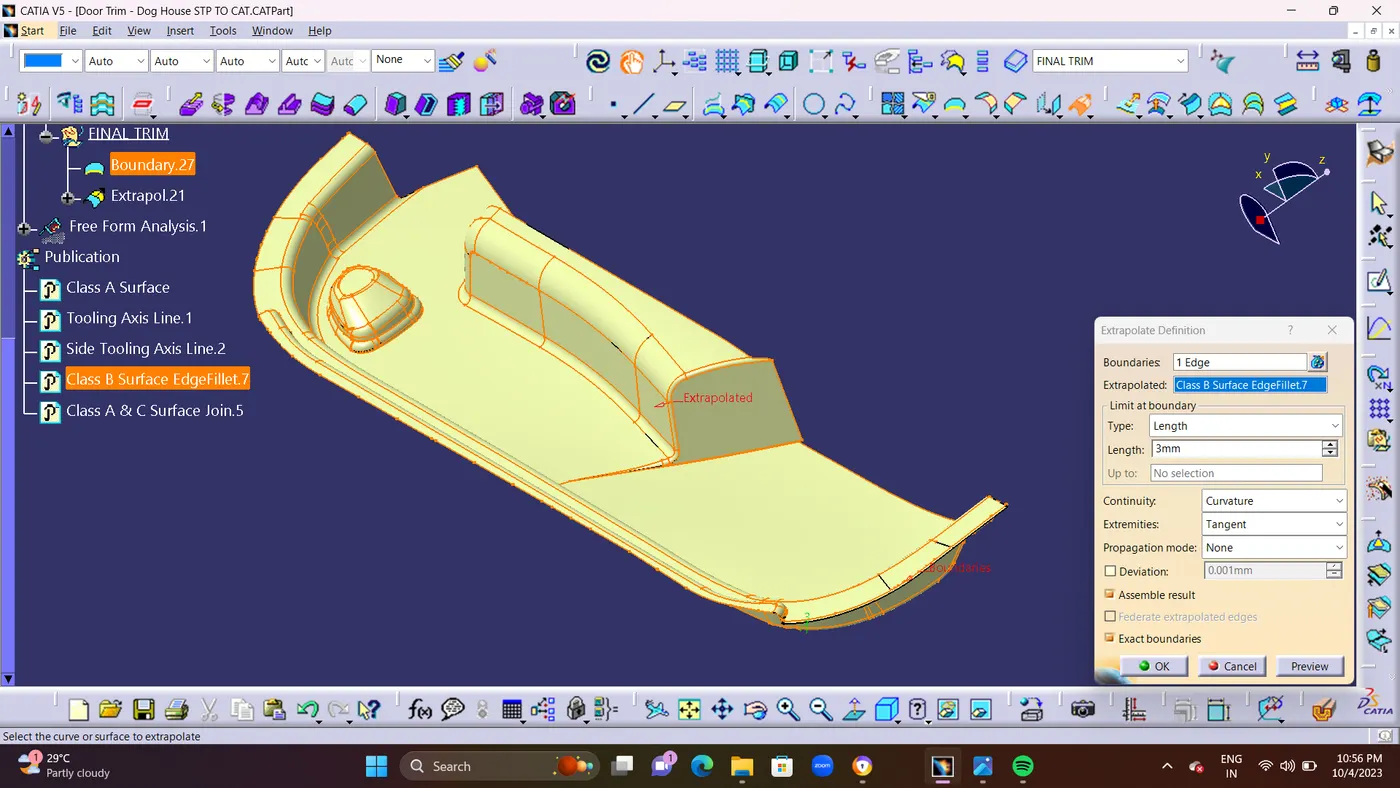
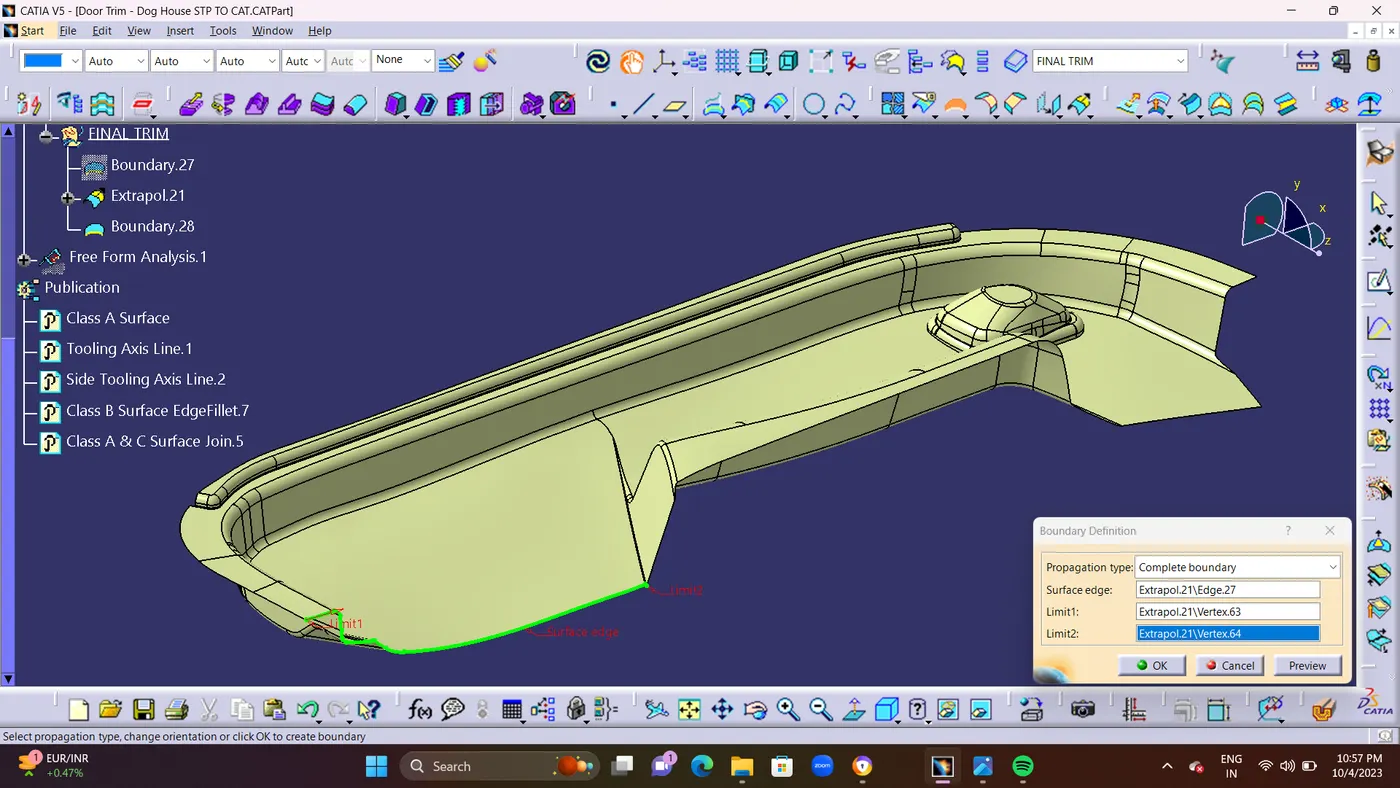
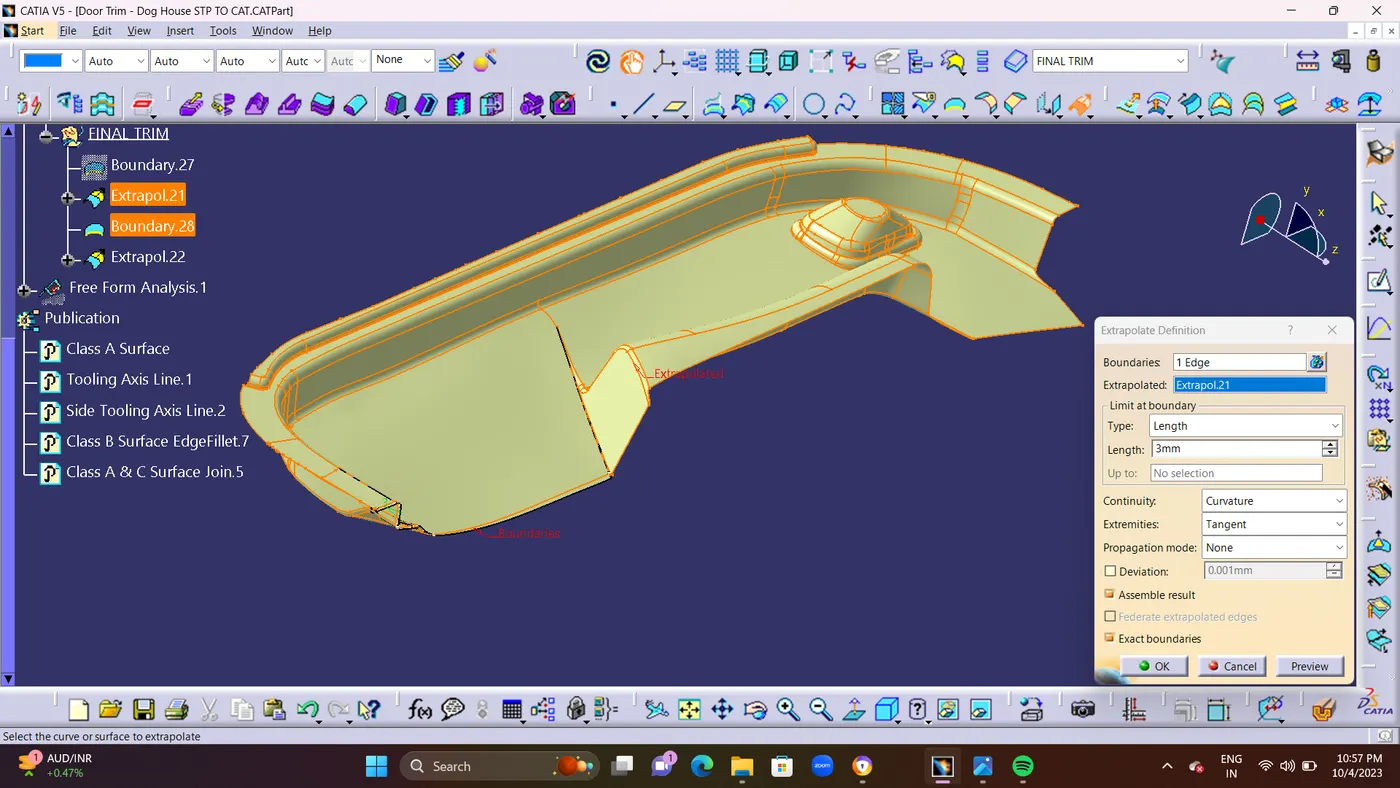
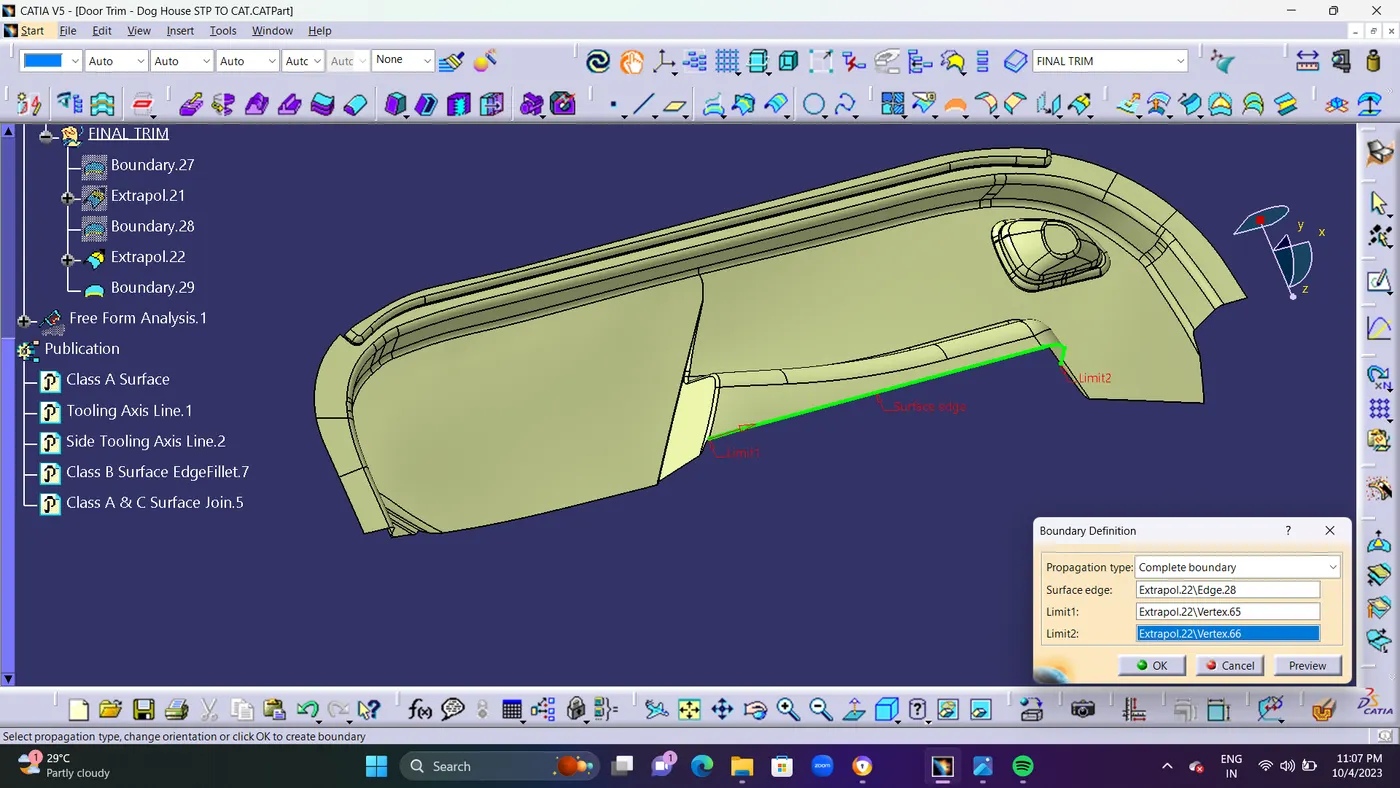
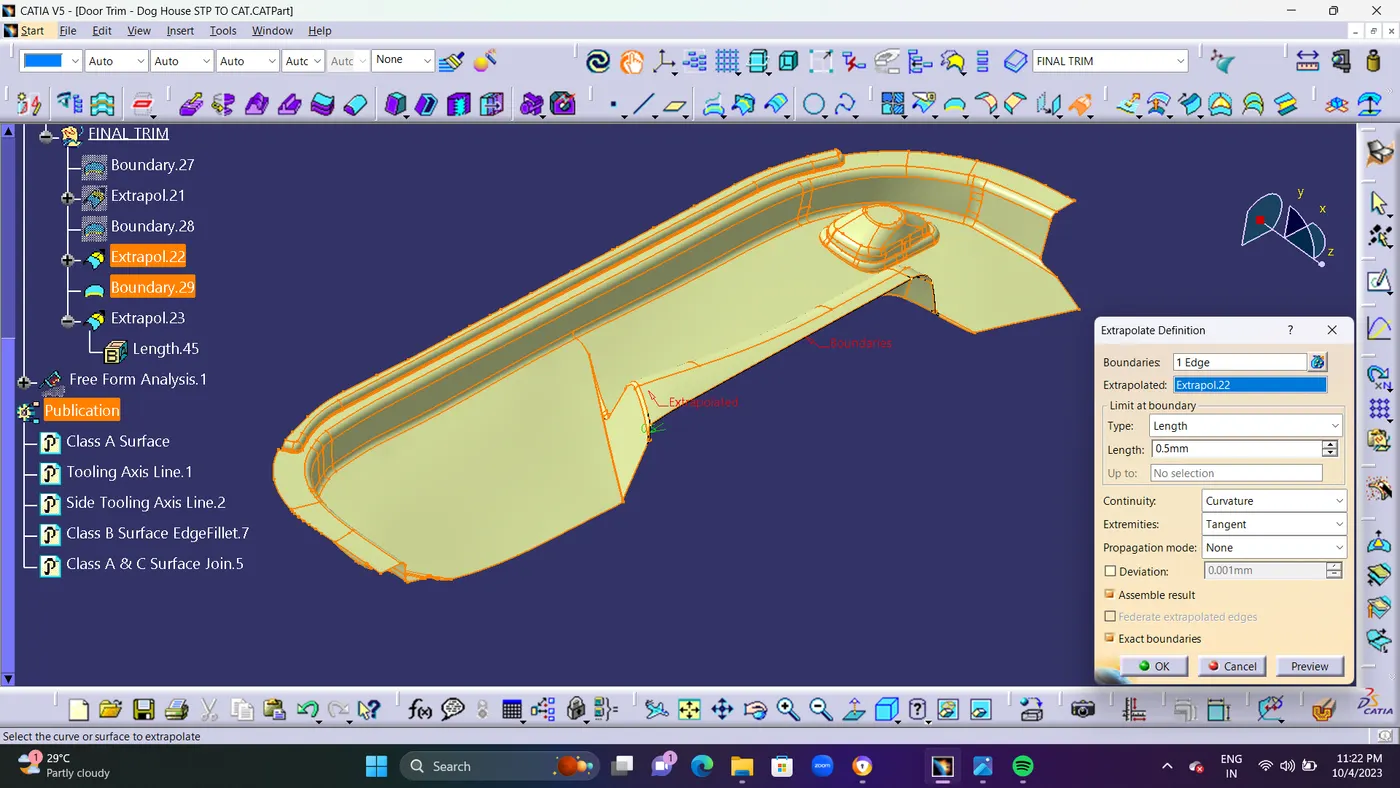
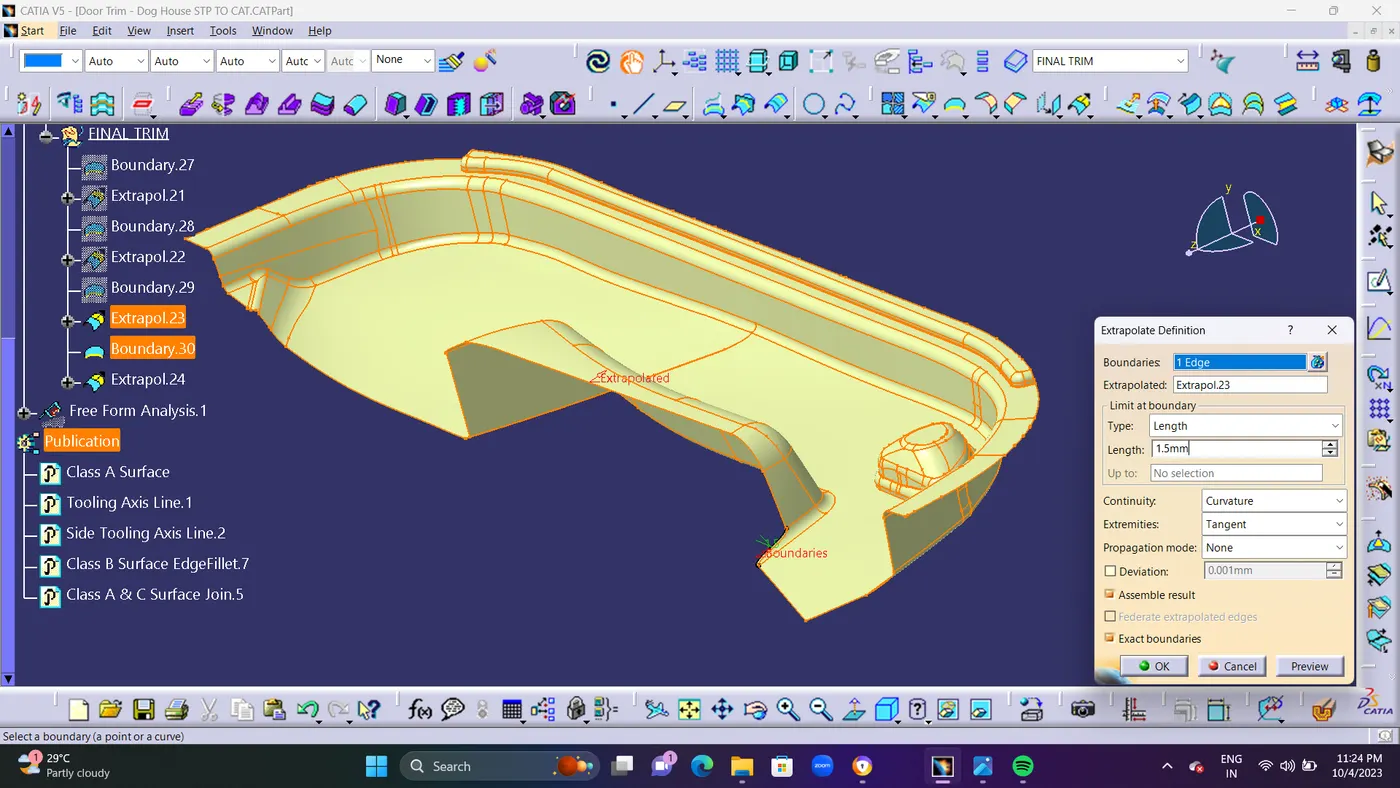
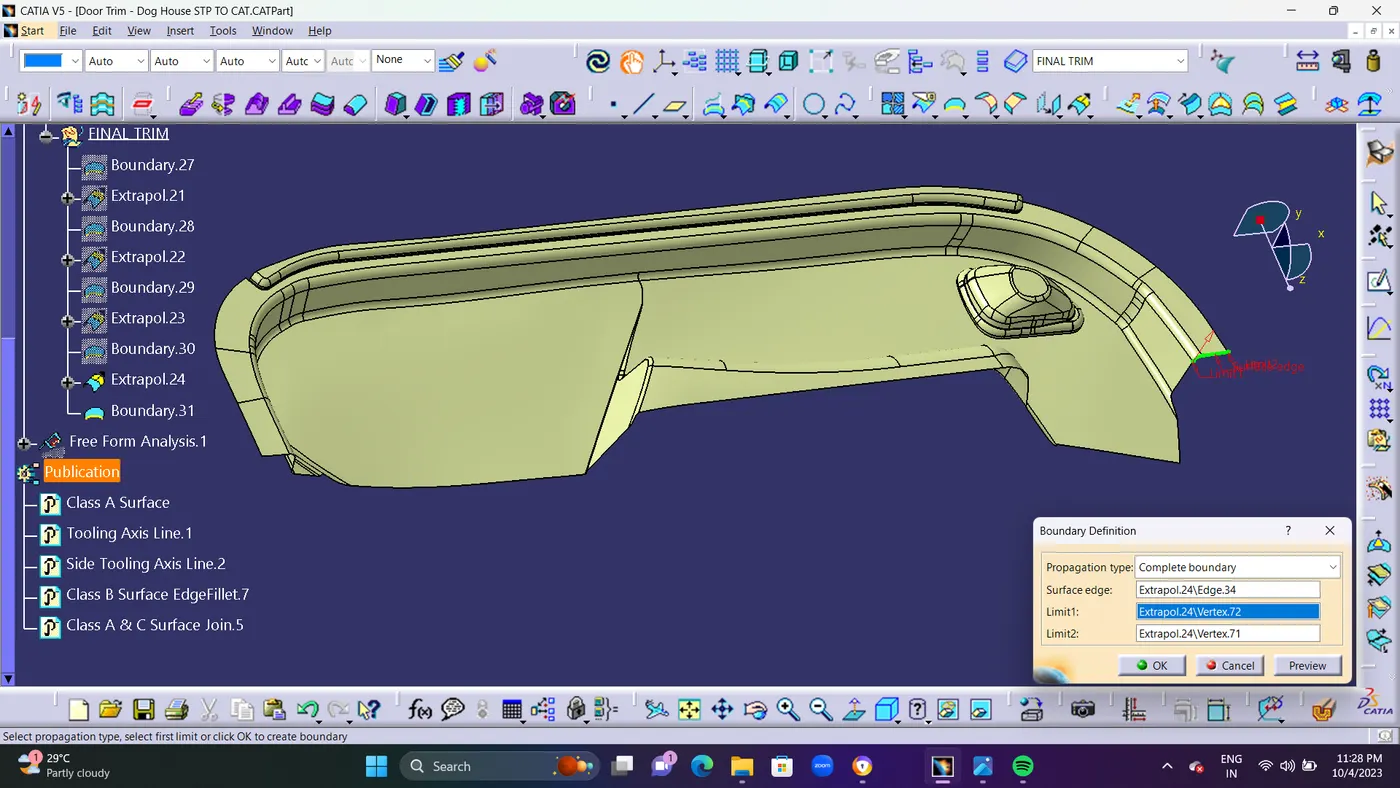
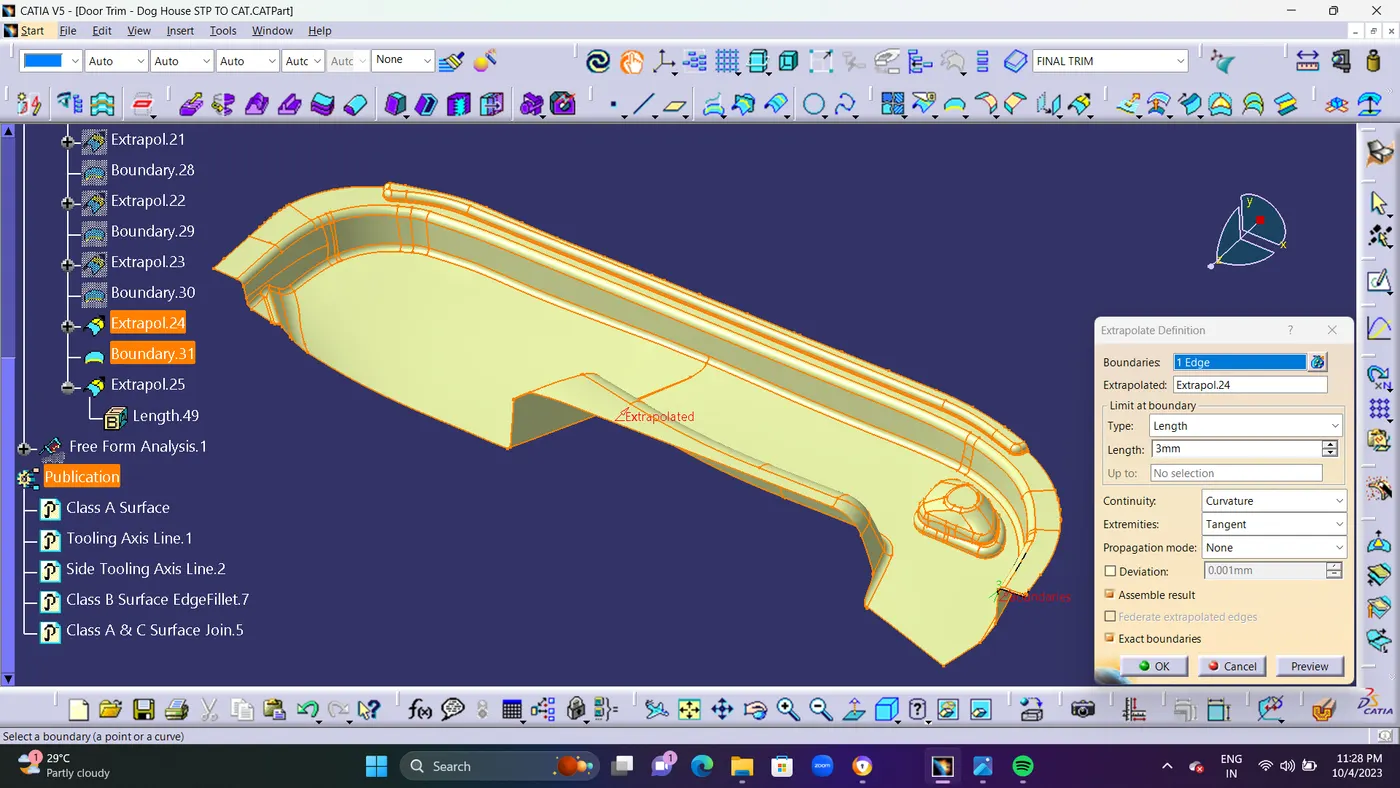
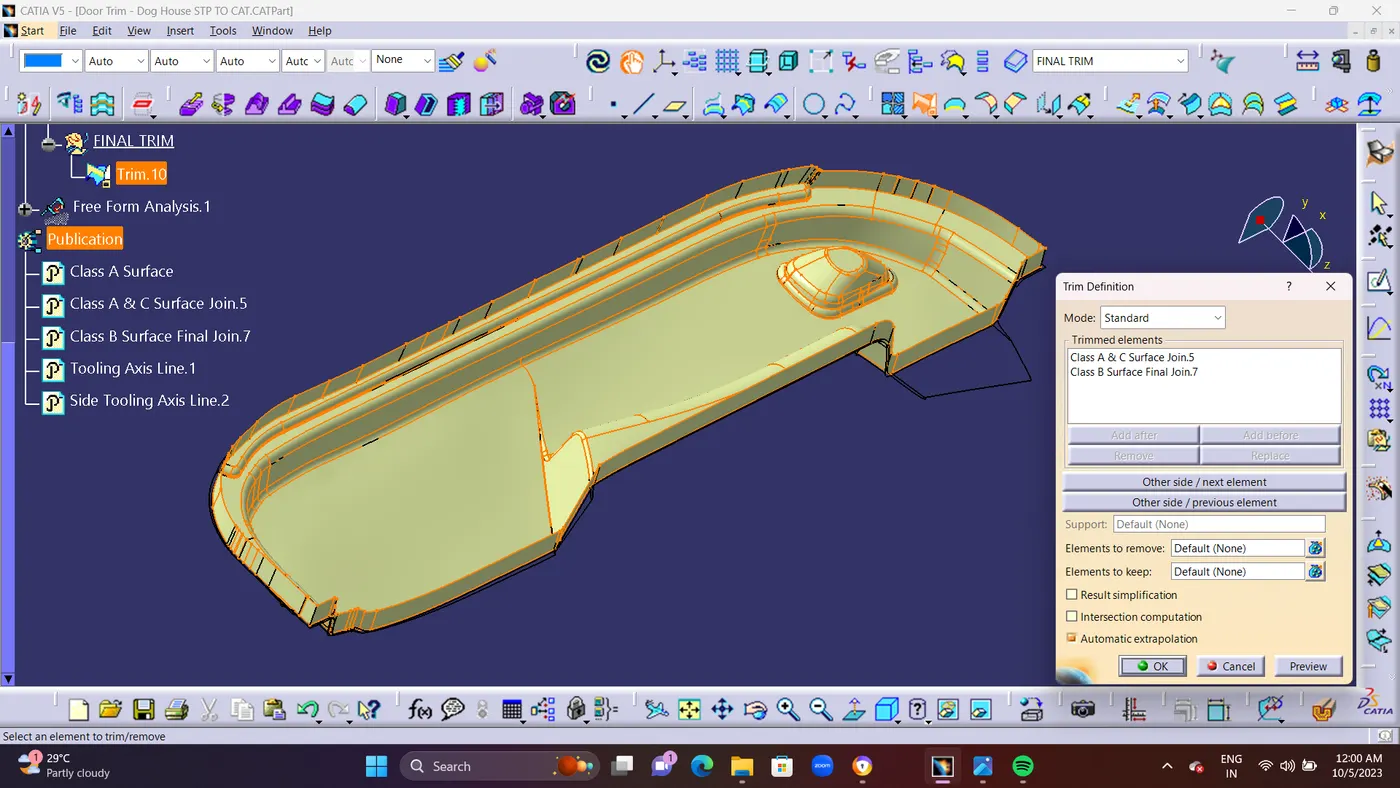
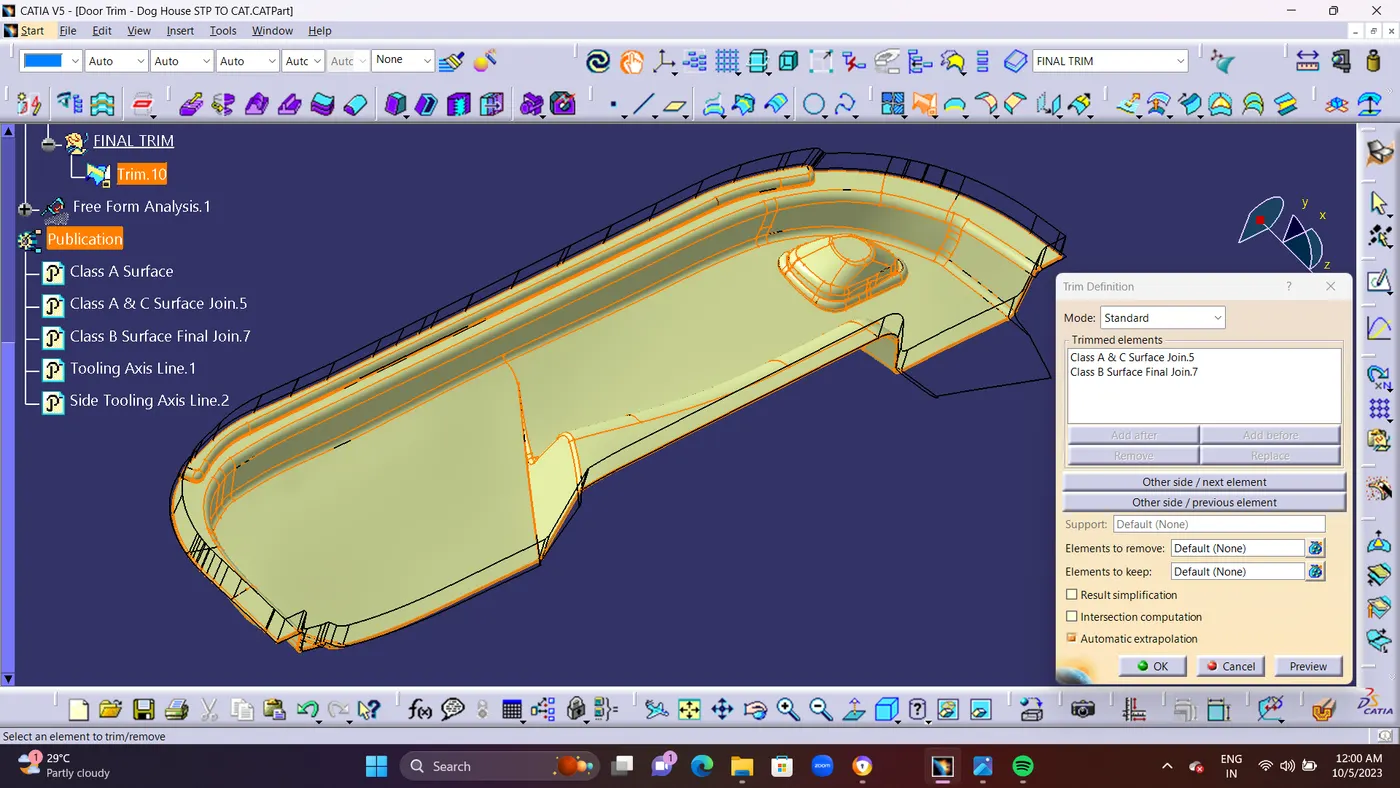
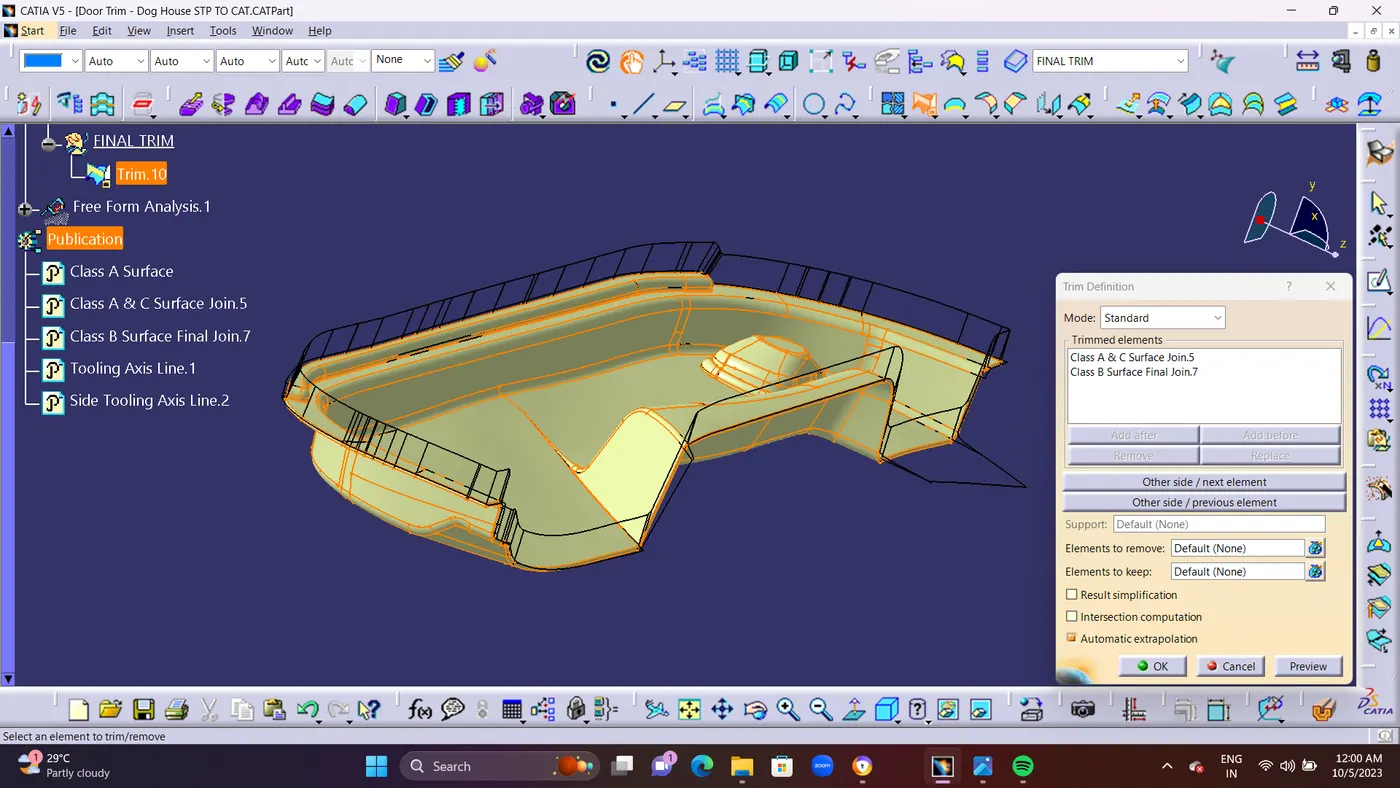
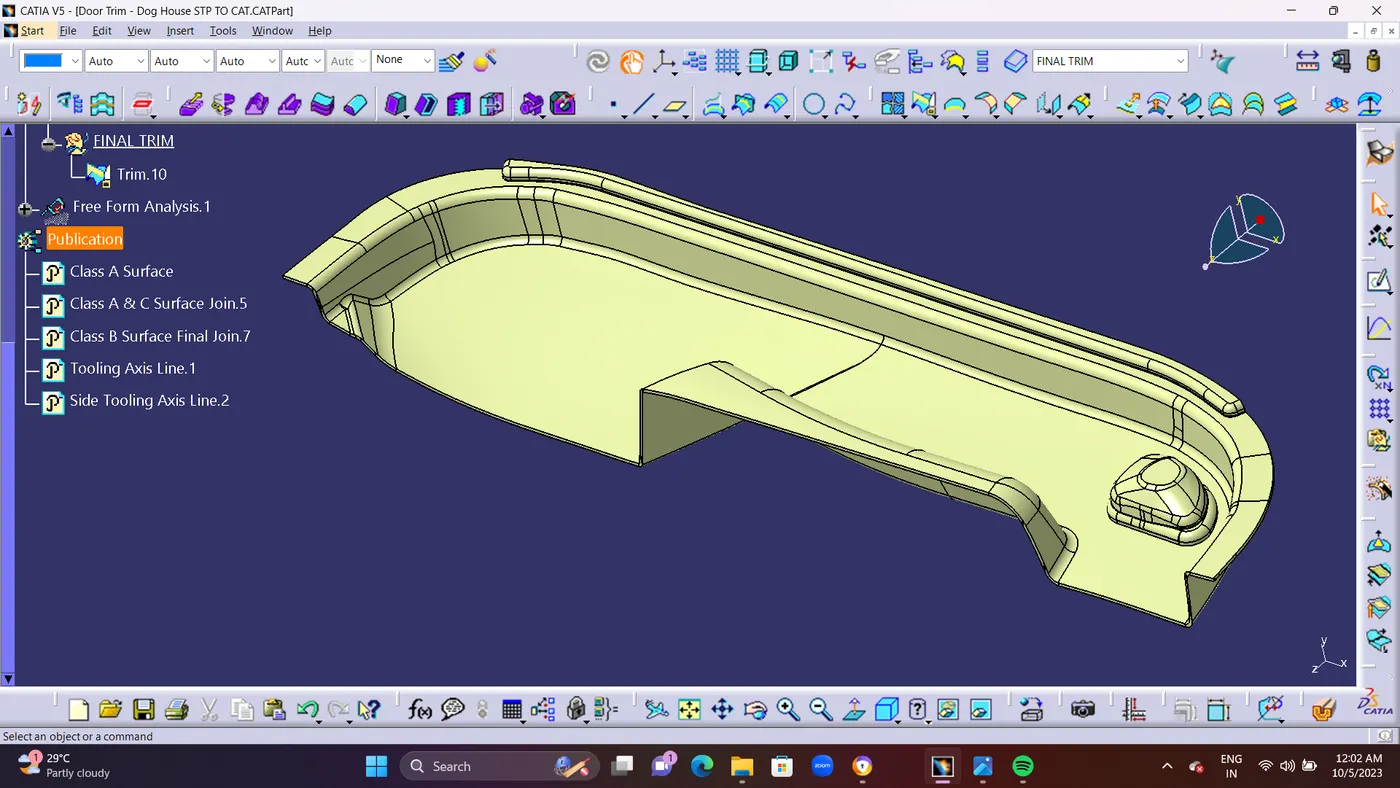
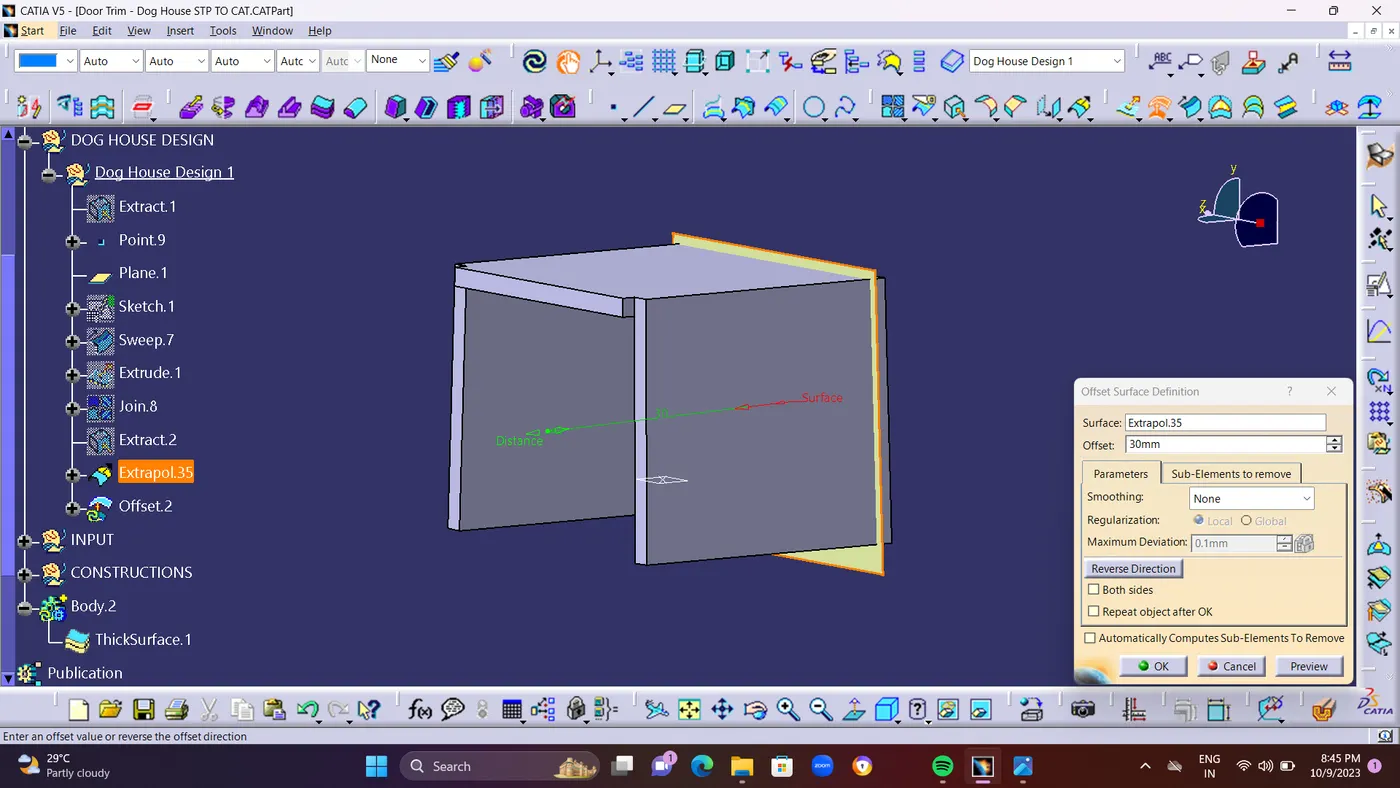
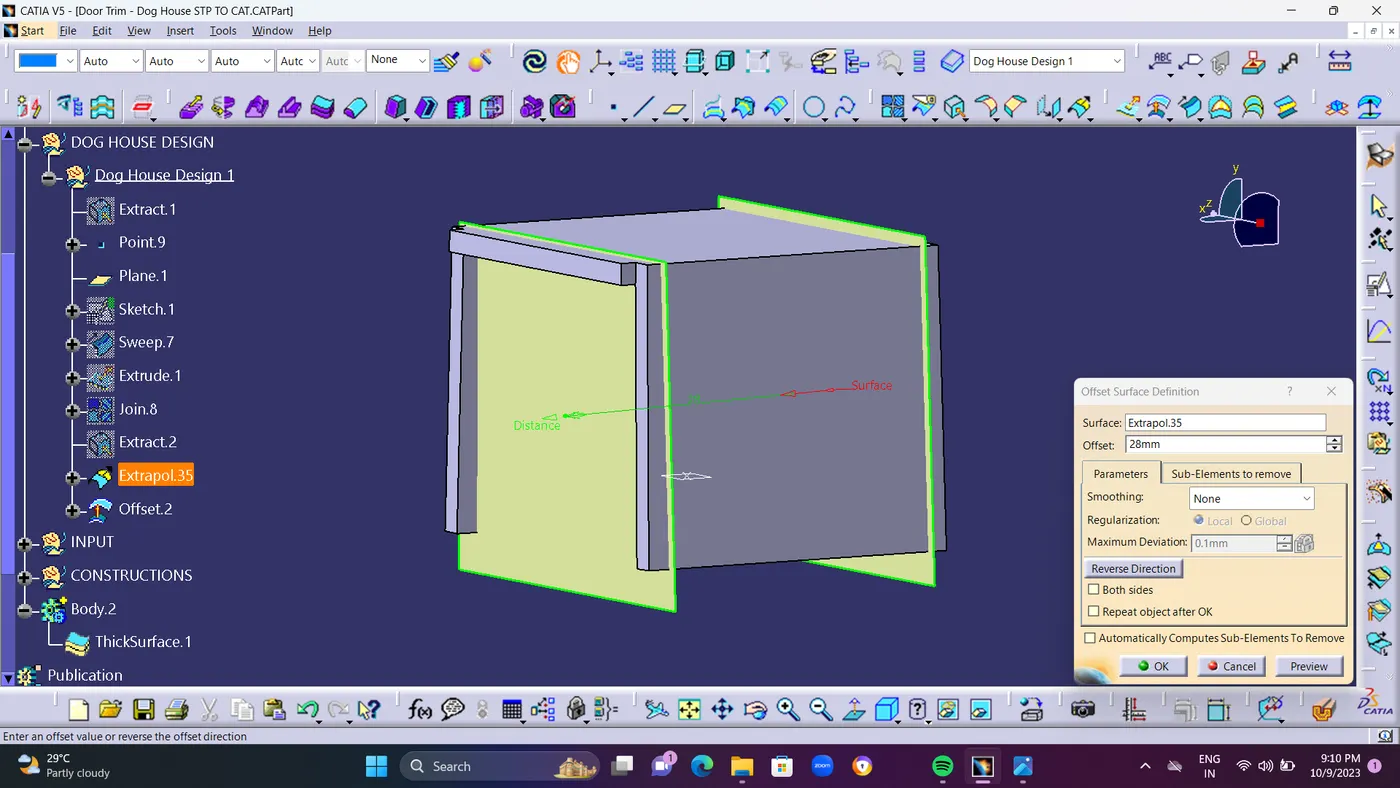
  • when Creating a Final trim by class a and c surface with class b surface. but it shows ERROR.while Trimming Because of Class B surface is not interconnect with Class A & C surface for trimming.so im going to take an Boundary and Extrapolate the surface for 0.5mm to 3mm Maximum. to interconnect Class A & C Surface with Class B Surface for Trimming it.


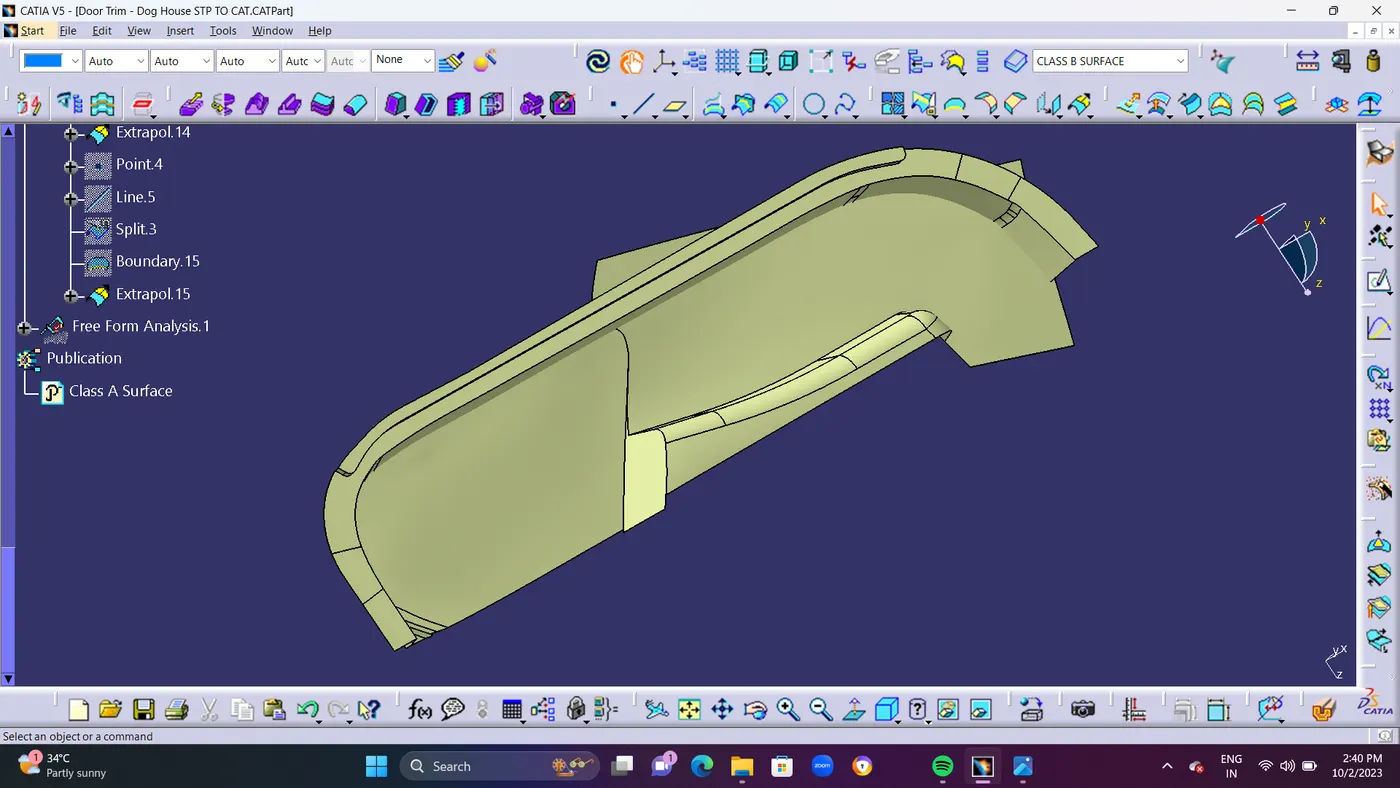
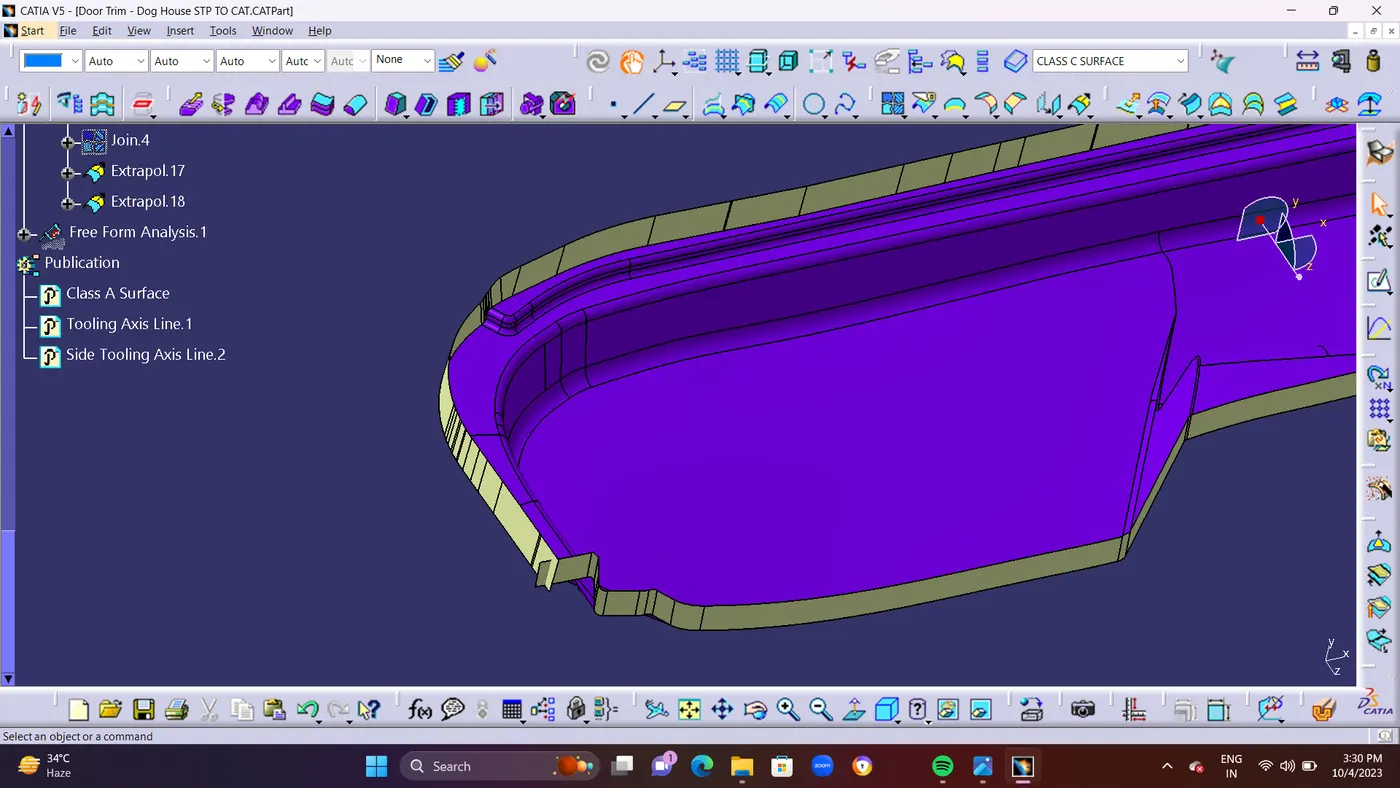
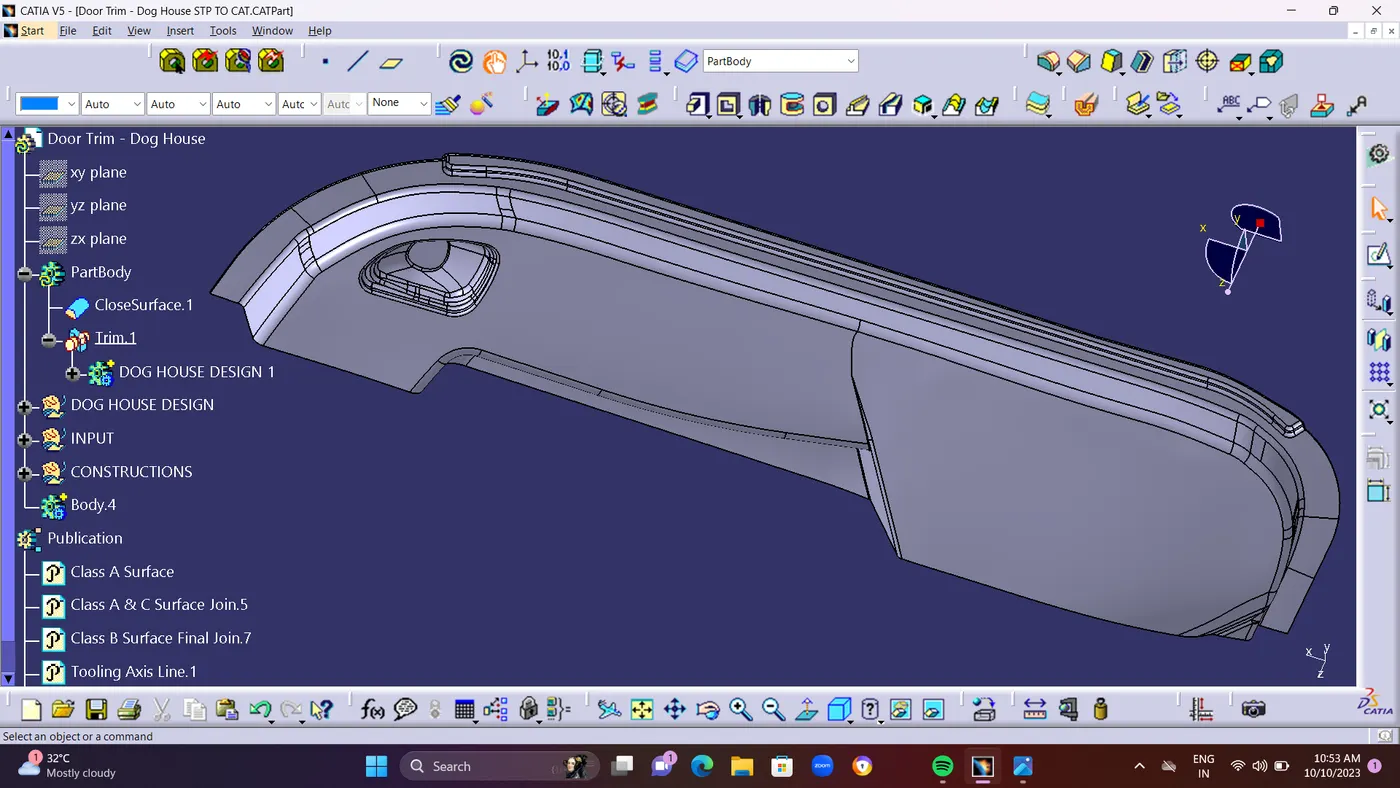
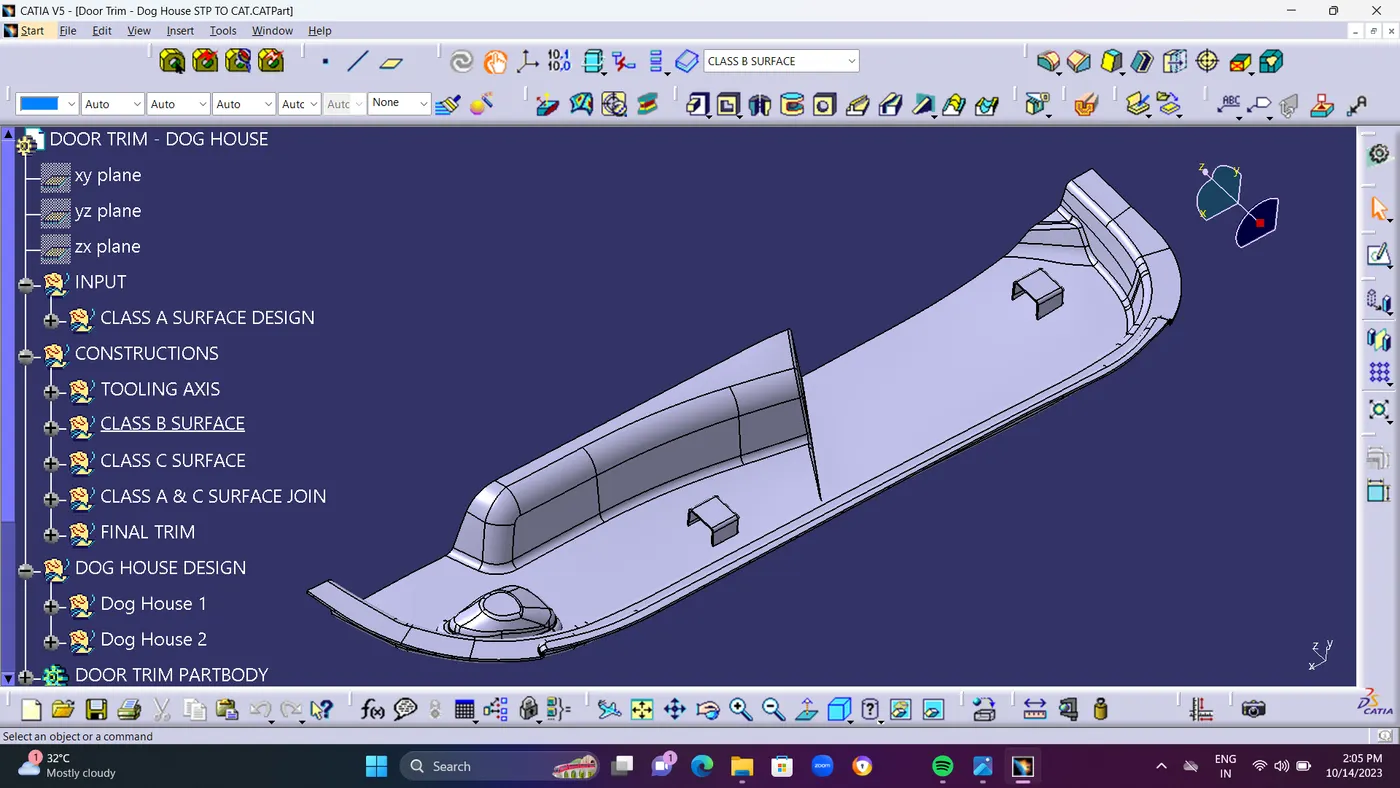
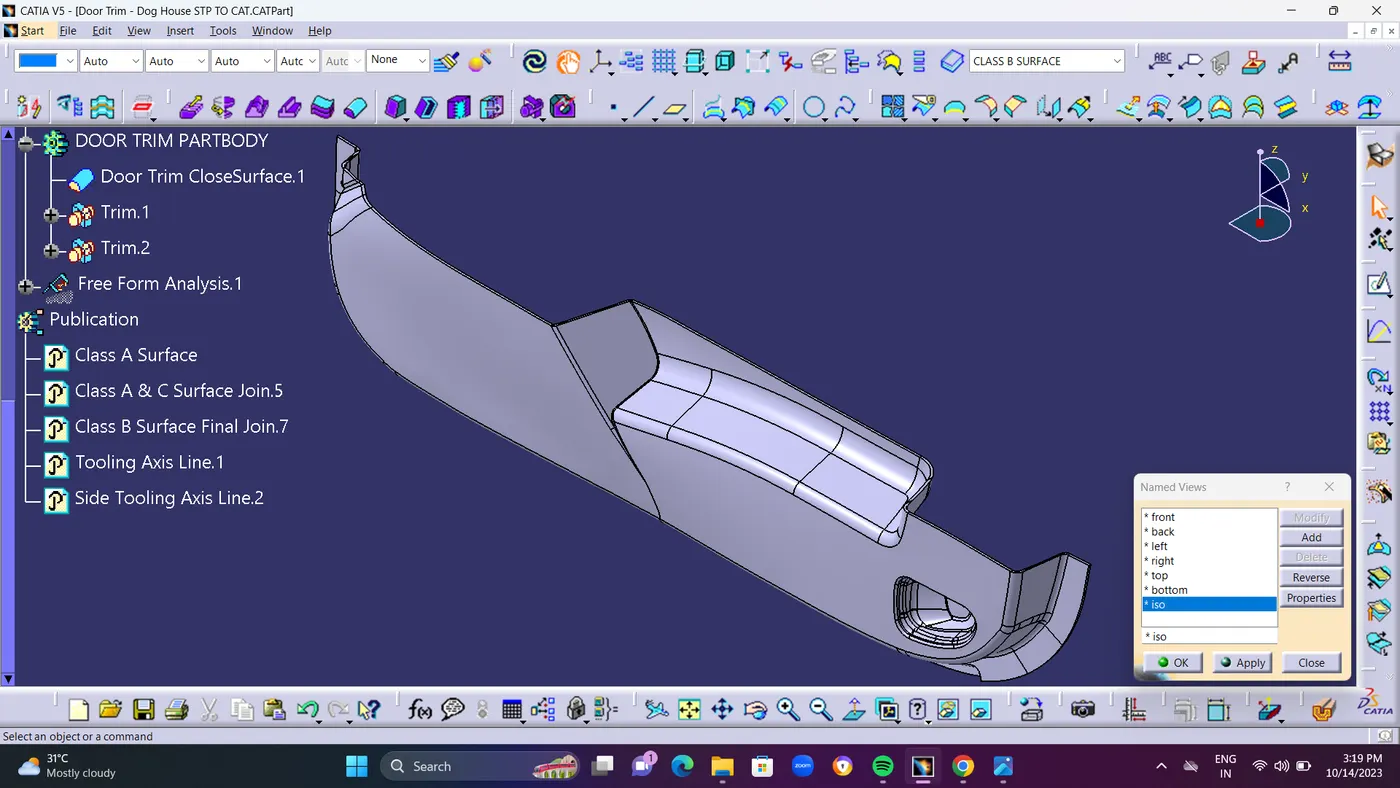
  • STEP 15 : And use Final Trim for Trimming Class A and C Surface With Class B surface. Finally Surface as been created at 2.5mm gap between Class A and Class B Surface.to form an closed surface with hollow of 2.5mm gap.


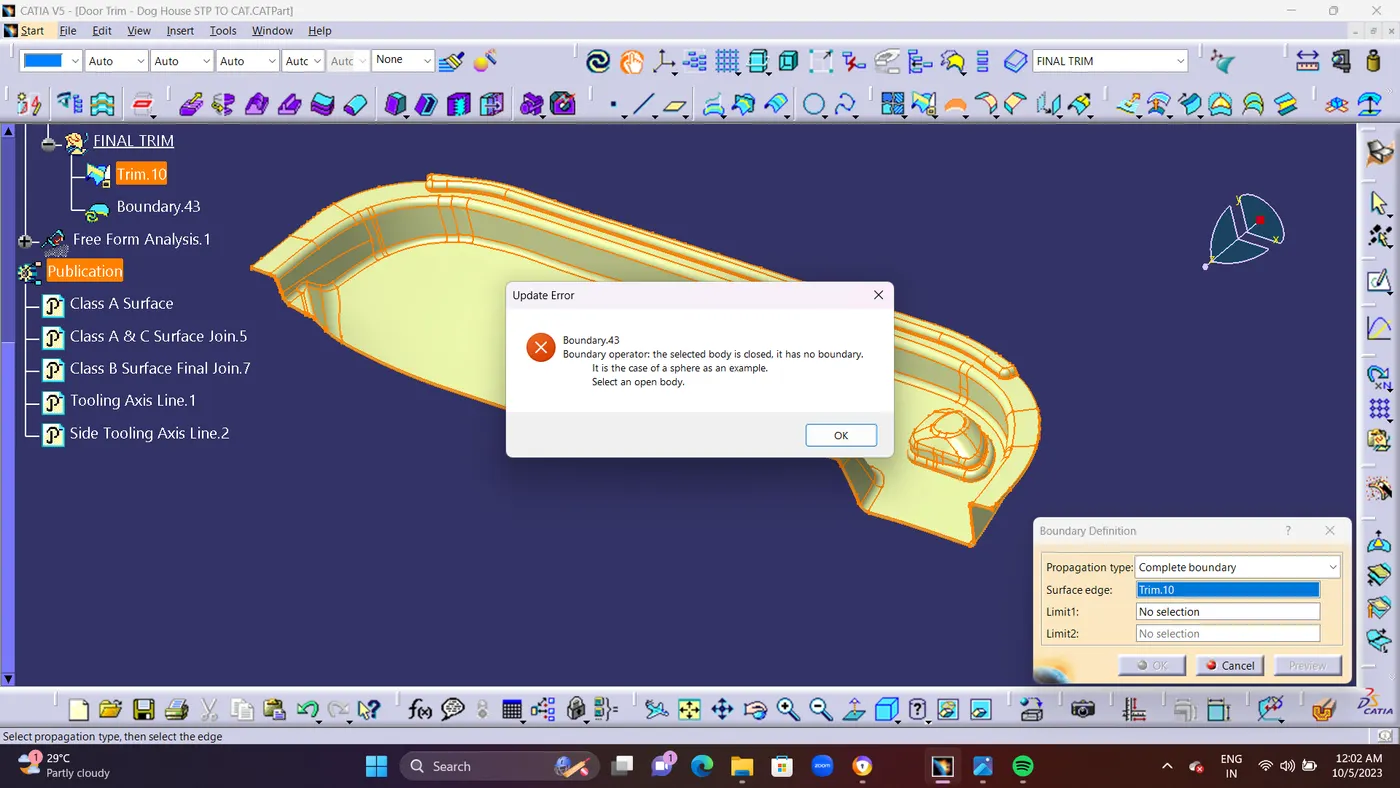
  • STEP 16 : Check Finally There is No any Boundary in the DOOR TRIM DESIGN surface By using BOUNDARY COMMAND.if there is no any boundarys it shows Error and your work is clear and perfect. if                    you find any Boundary line its seems you done ah mistake or wrong surface while joining.so read do it.


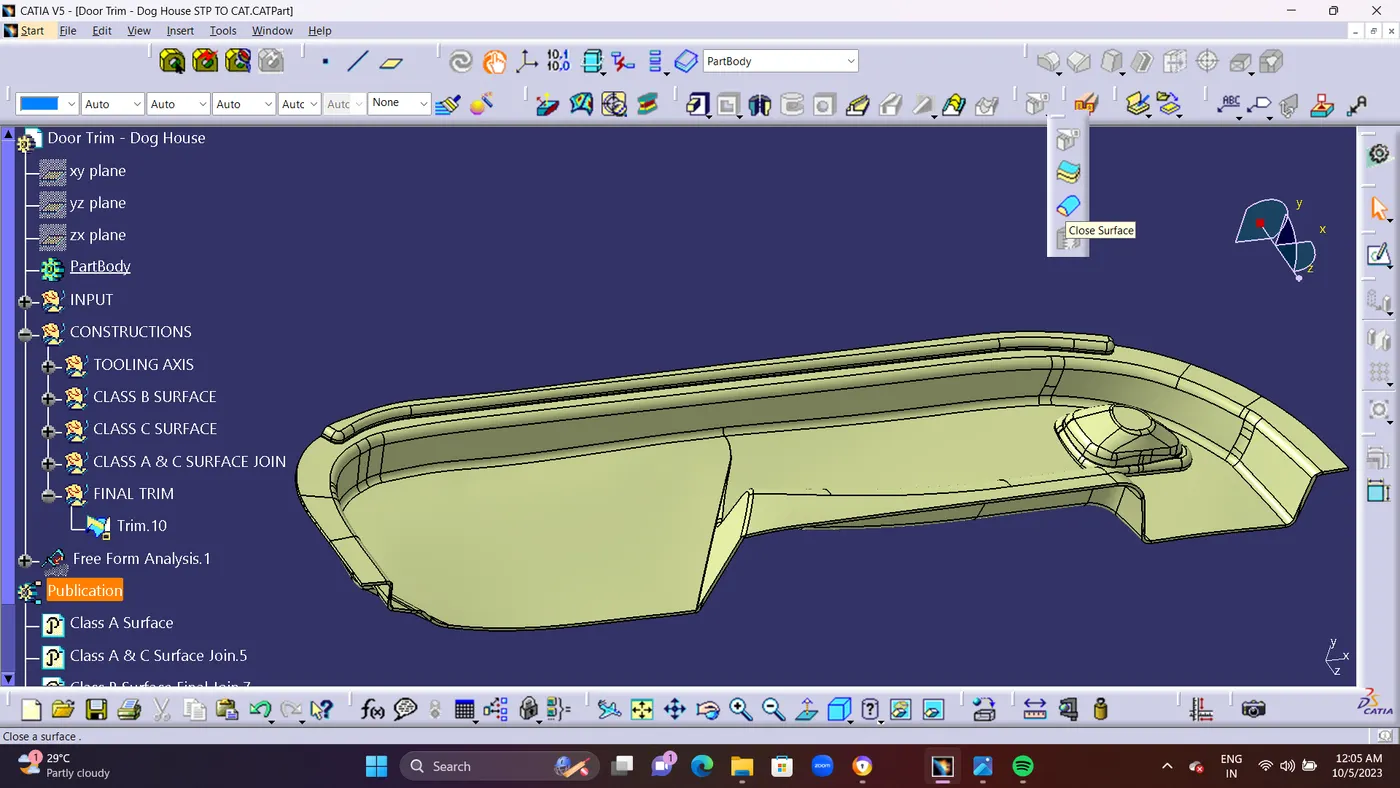
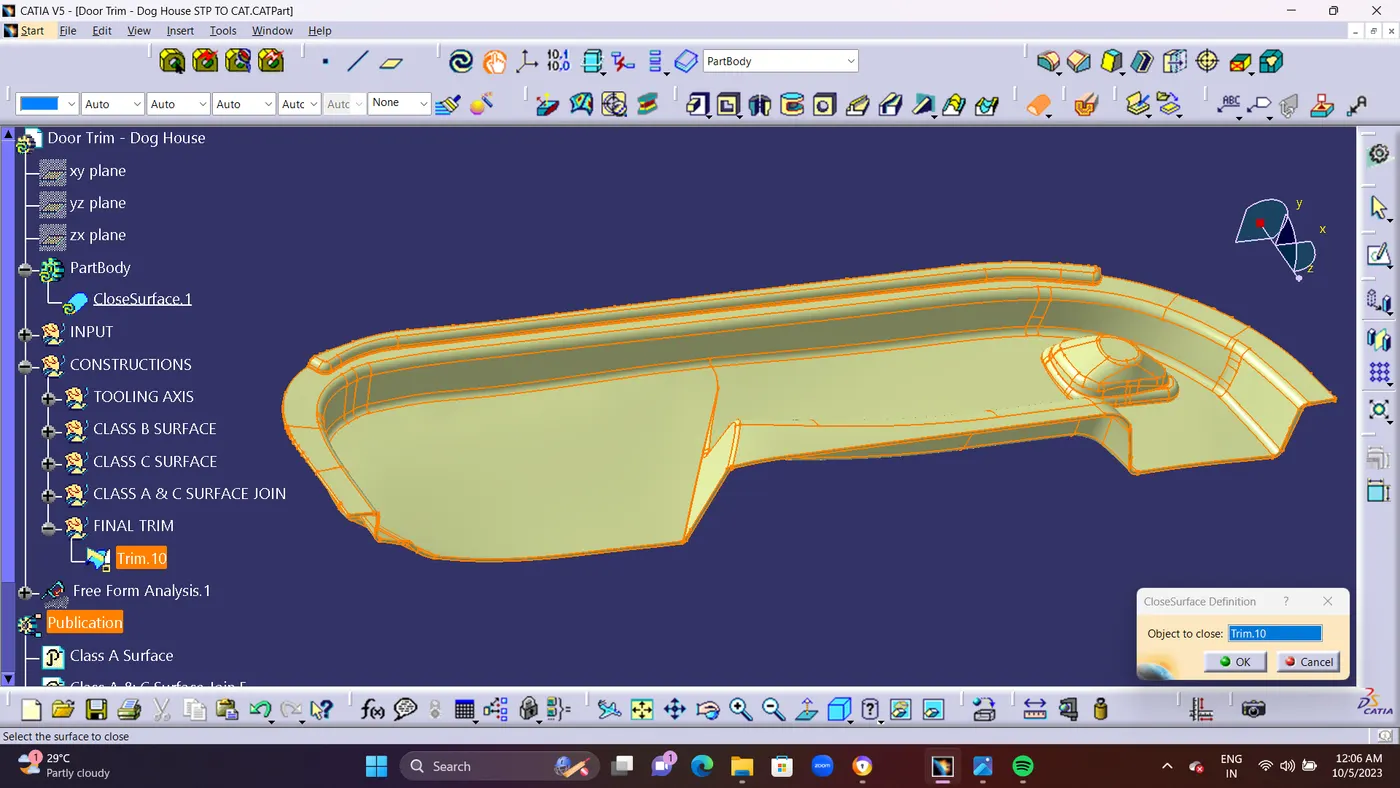
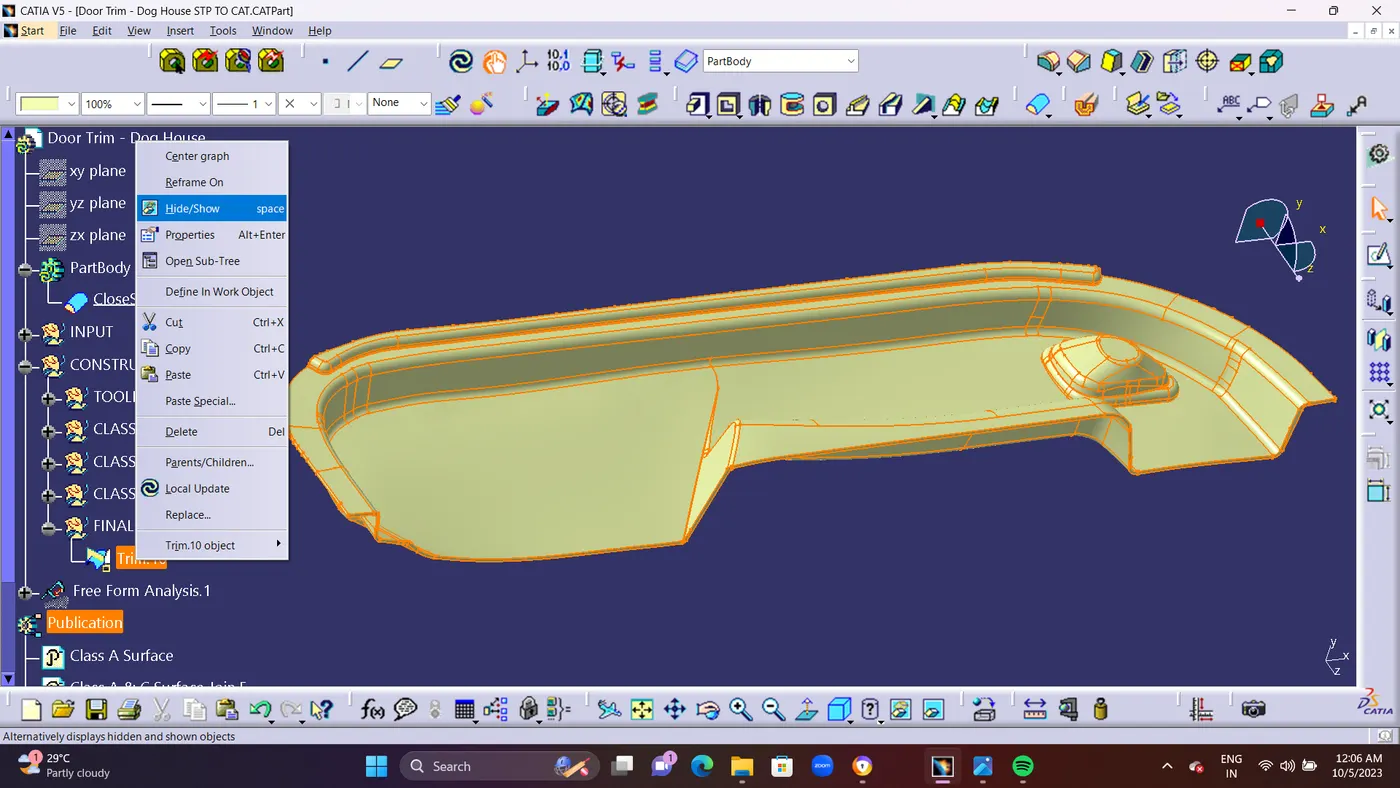
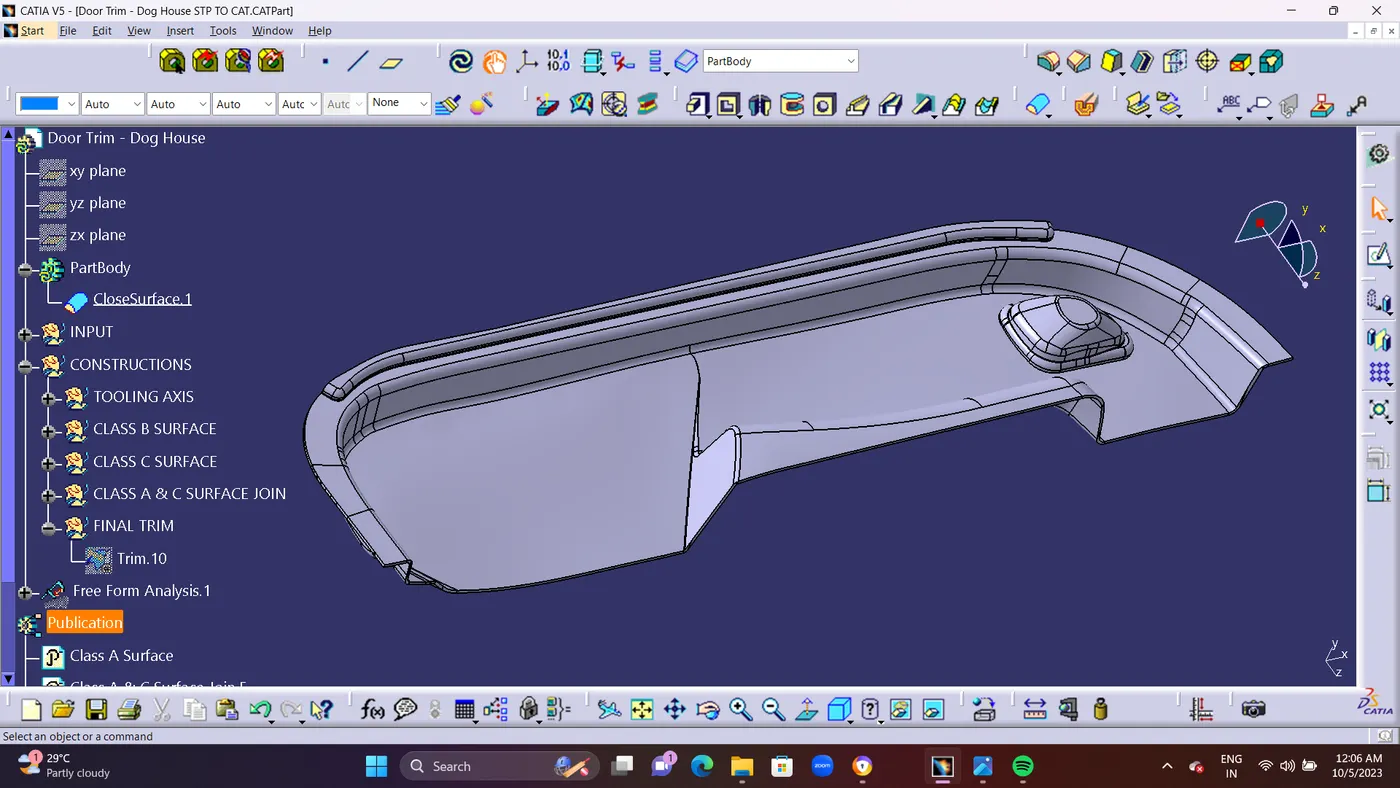
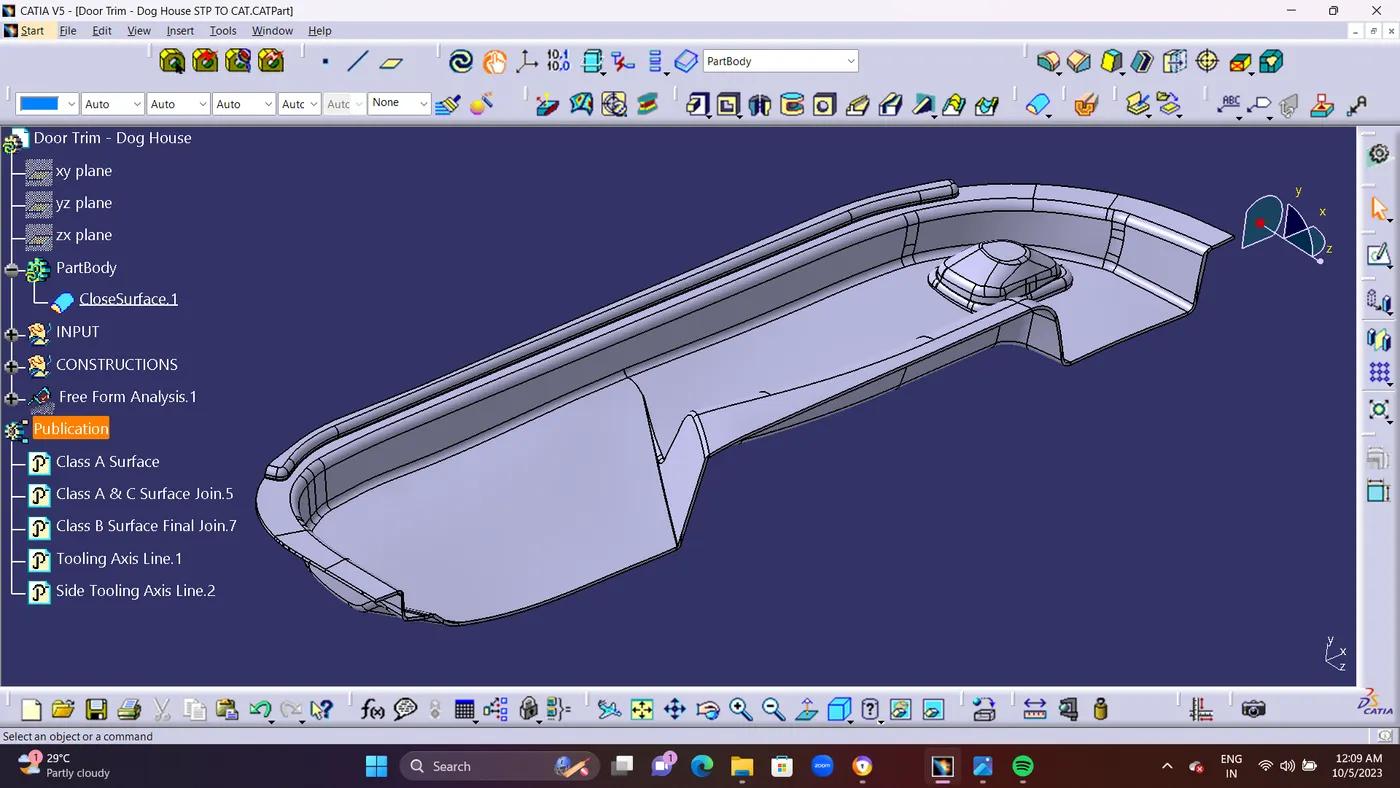
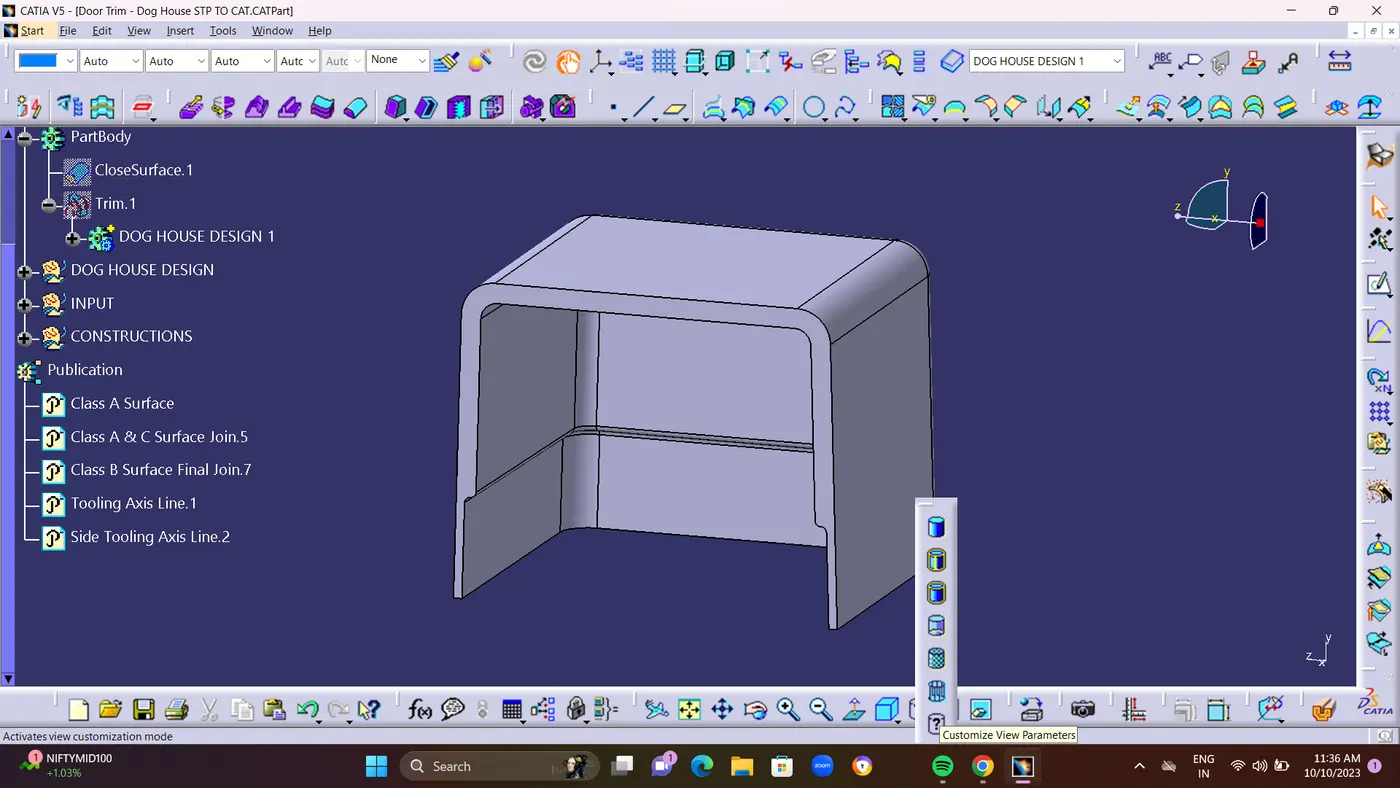
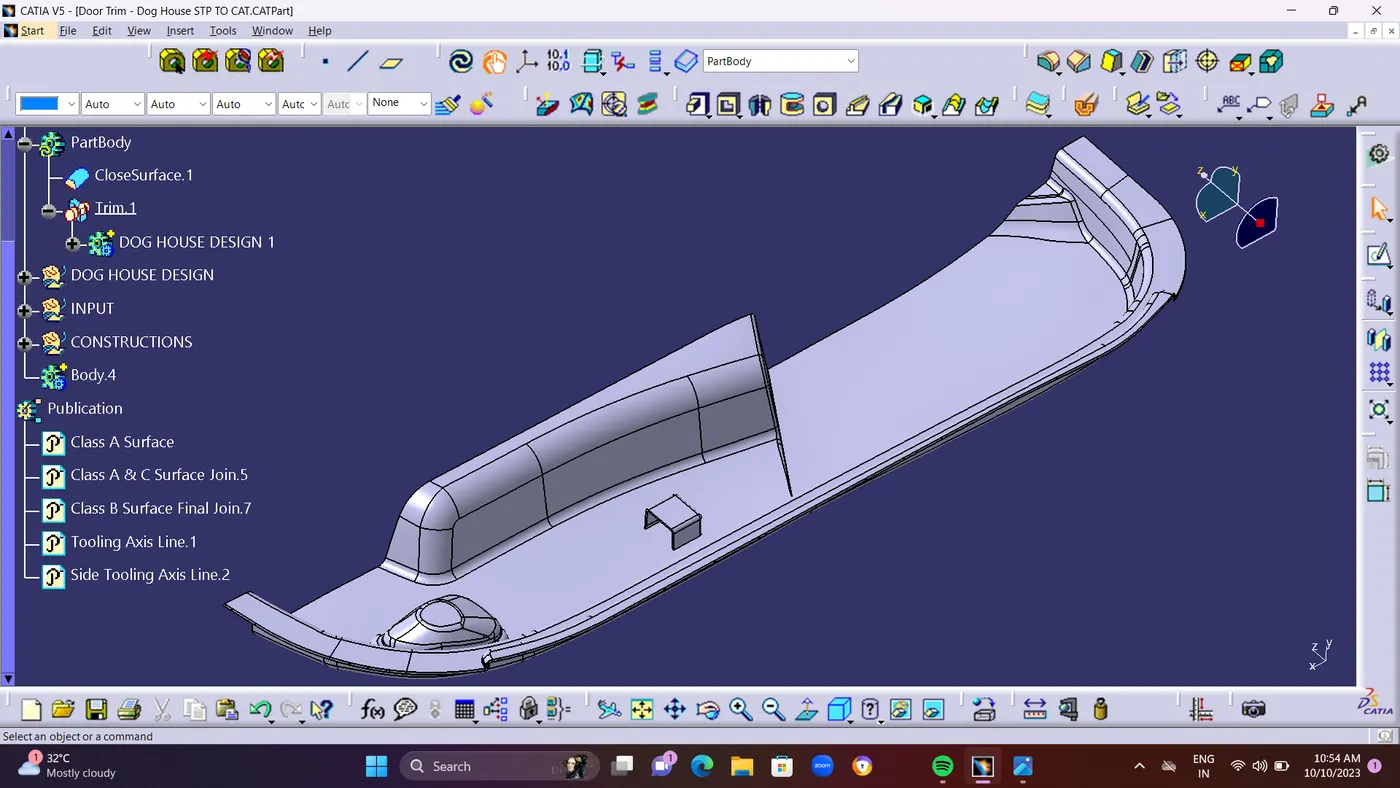
  • STEP 17 : And Finally Created Close Surface in PartBody By Using CLOSE SURFACE METHOD.Using TRIM.10


  •  Creation of Engineering features : 
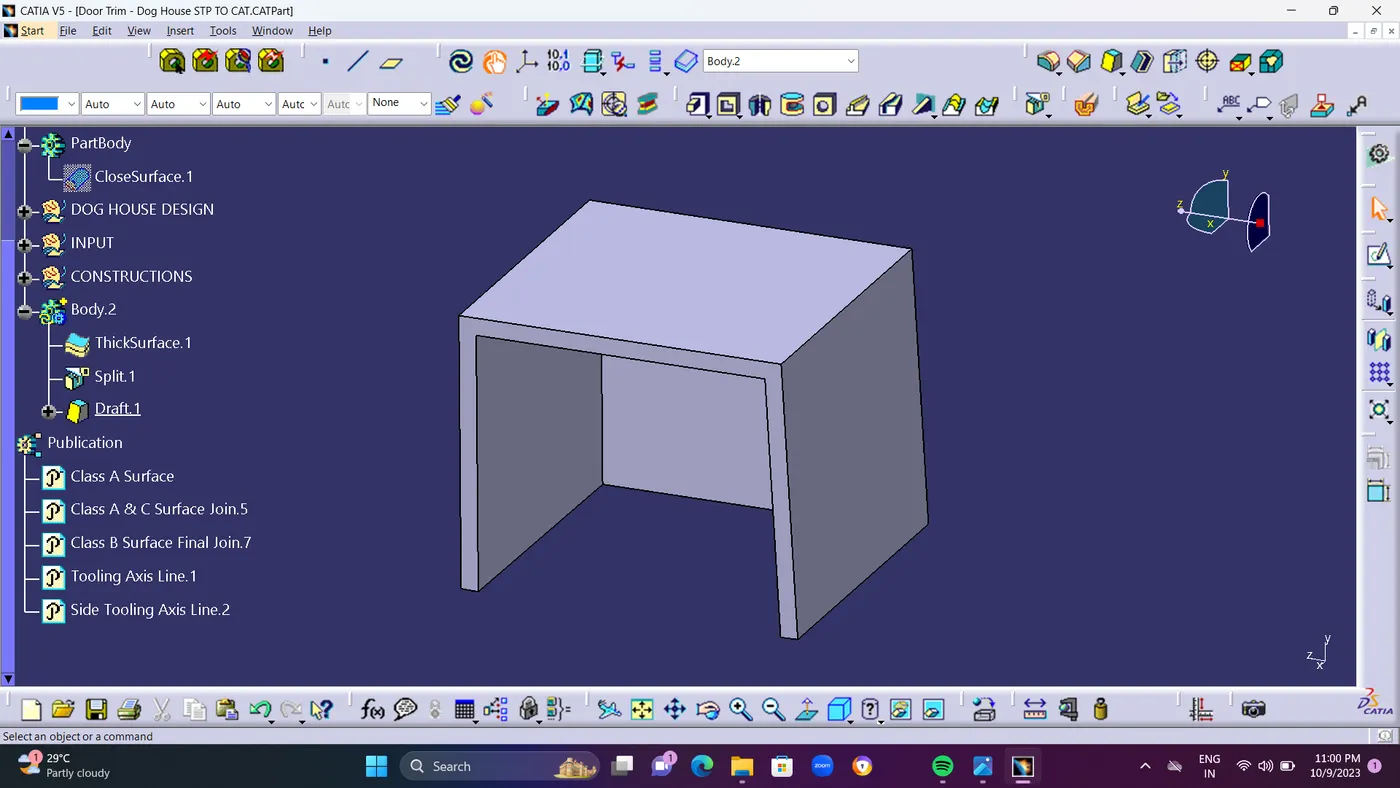
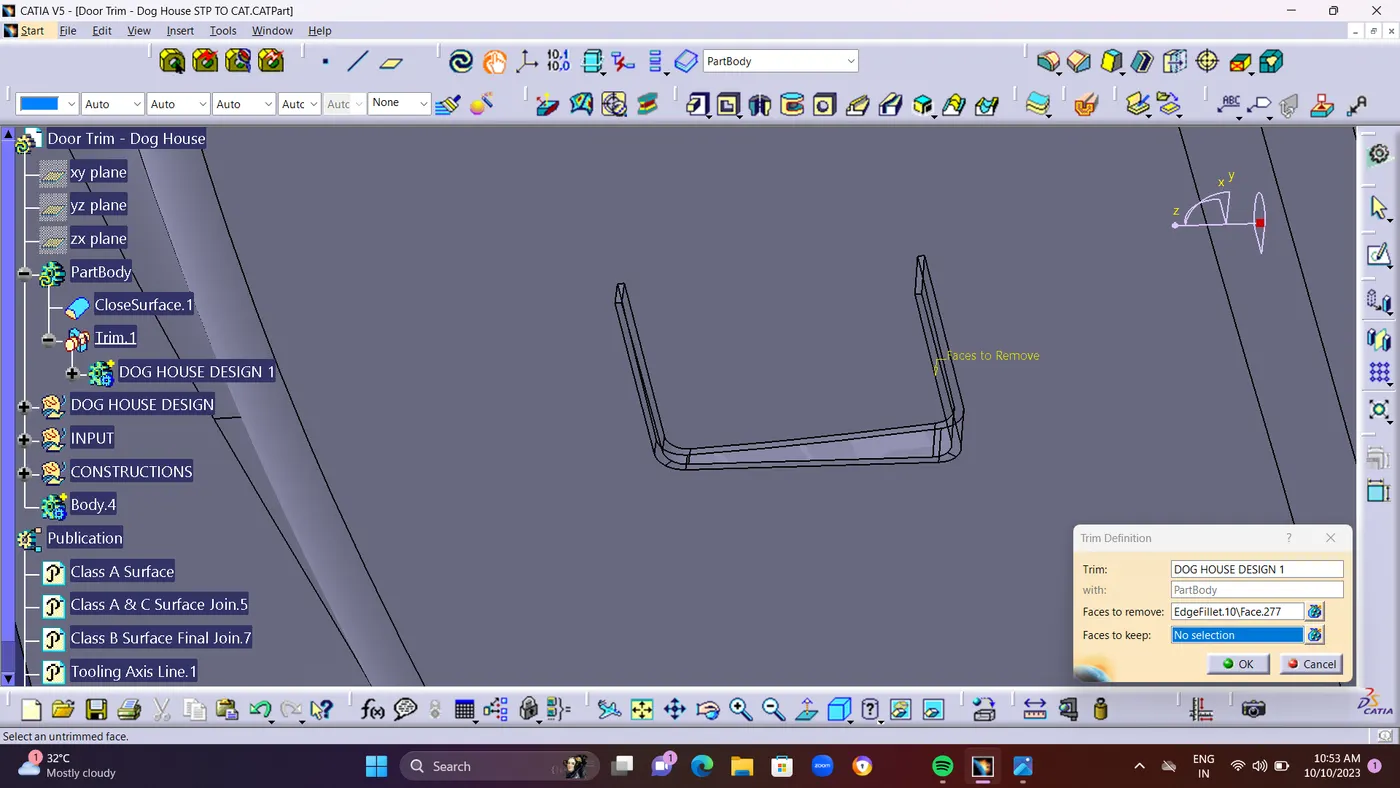
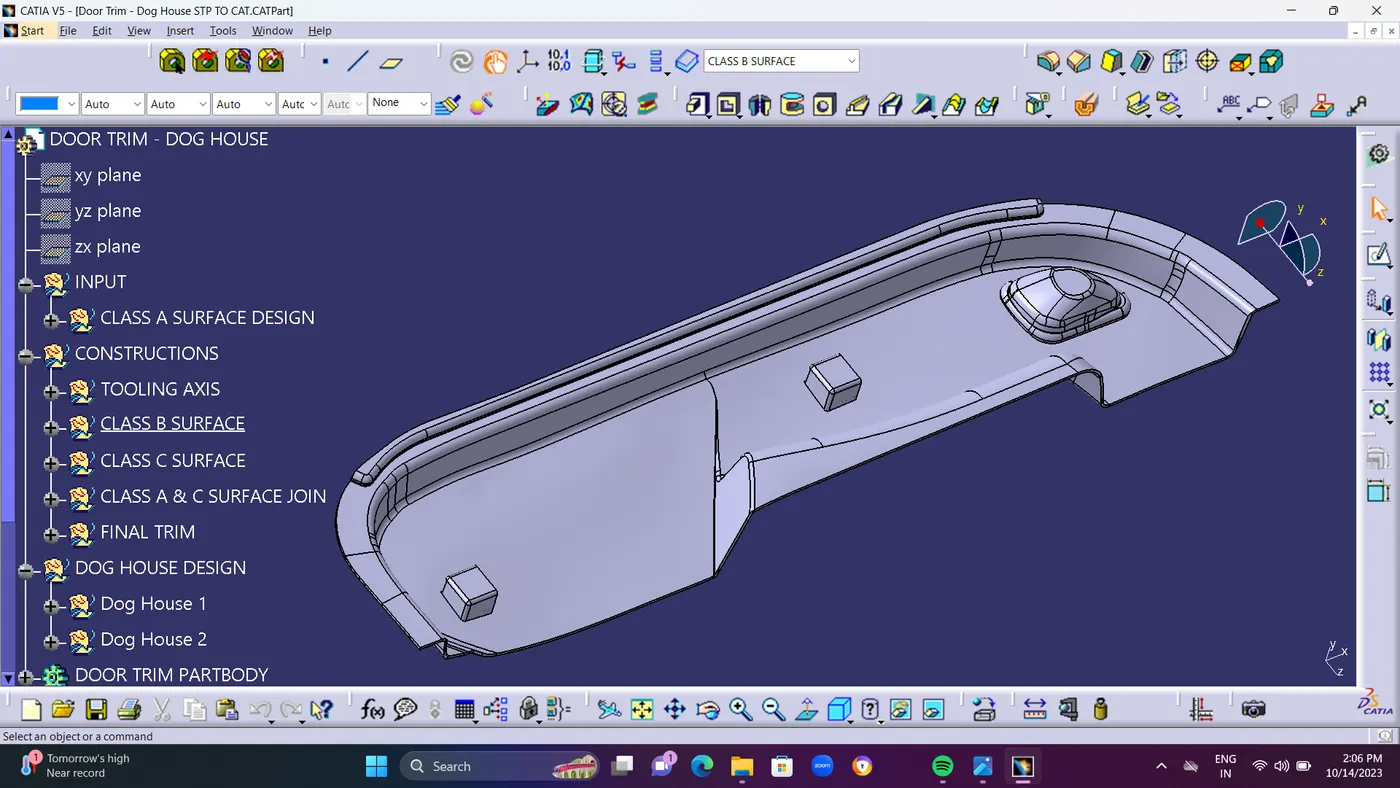
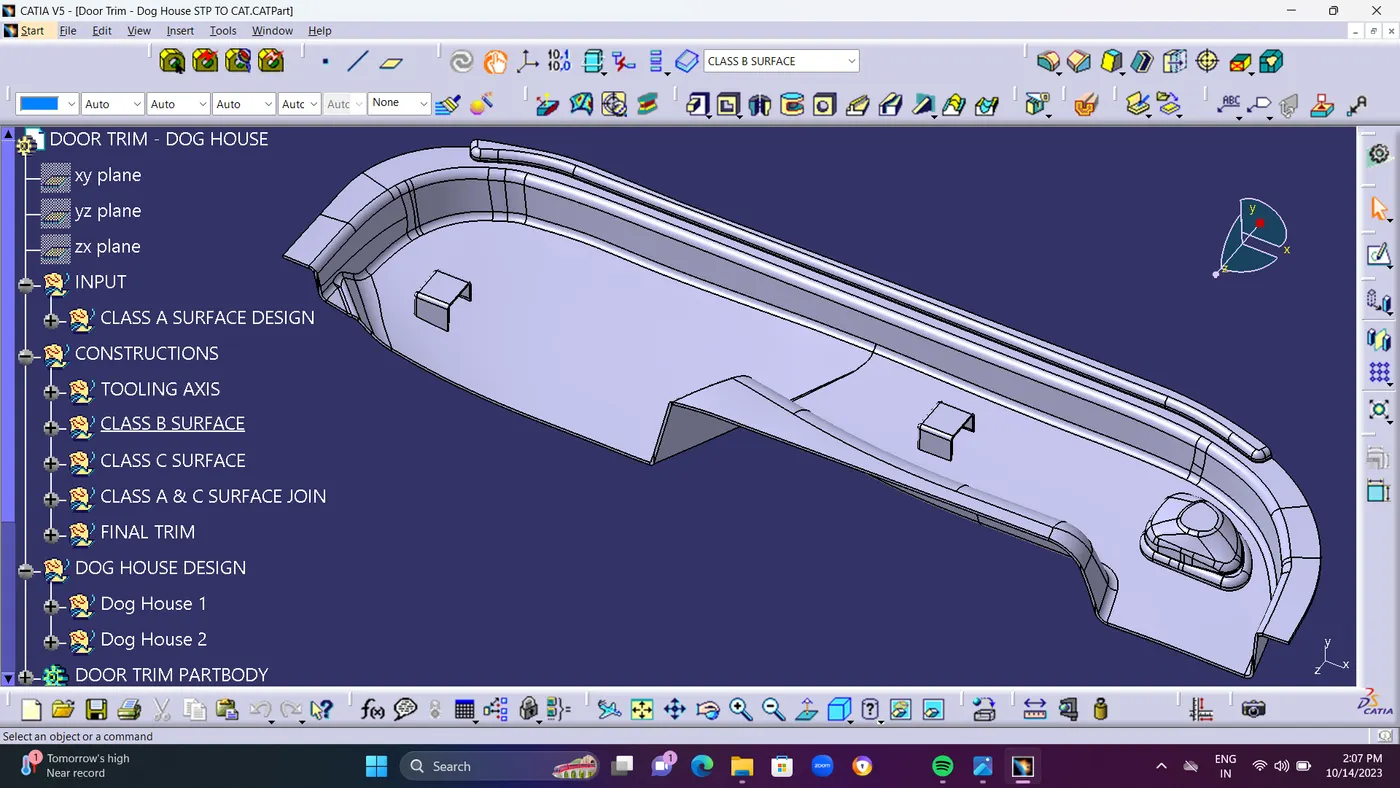
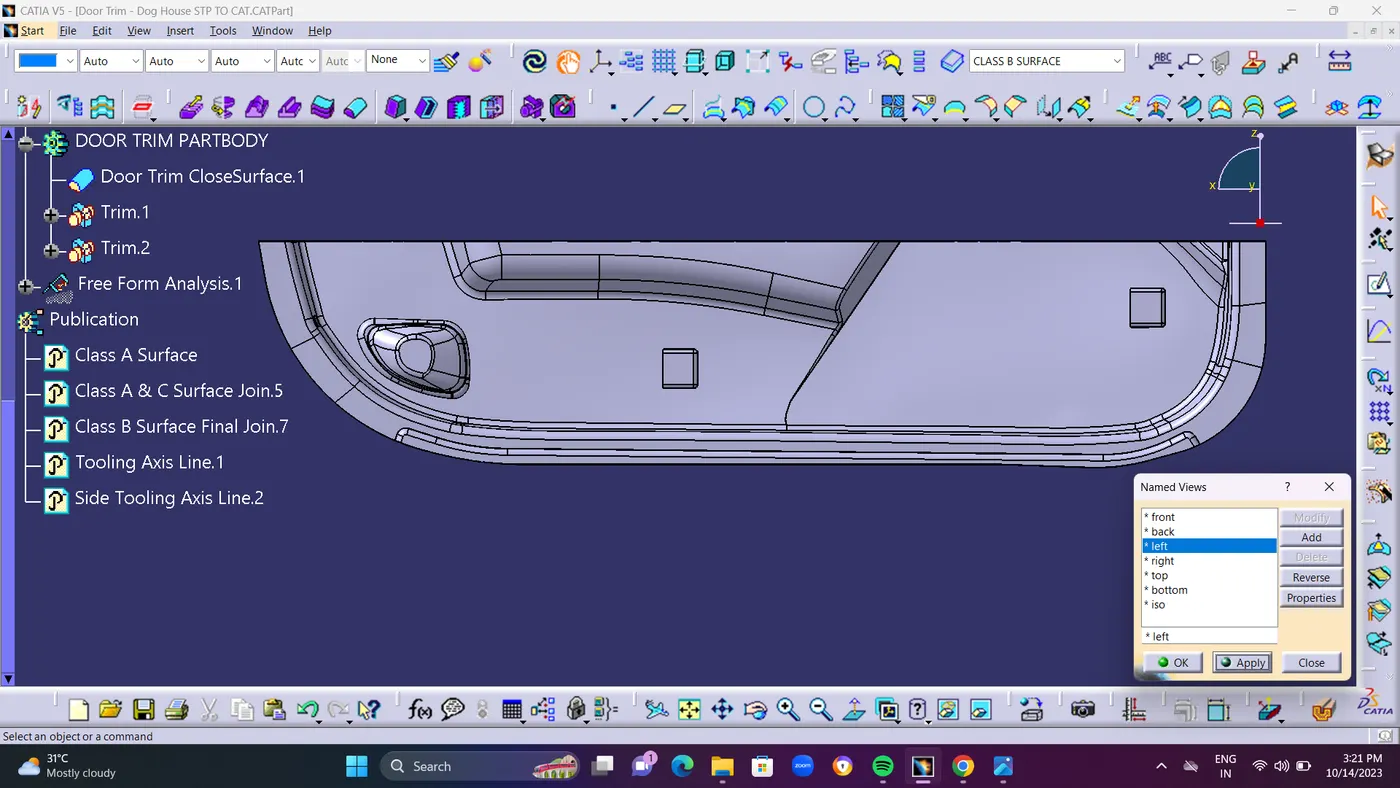
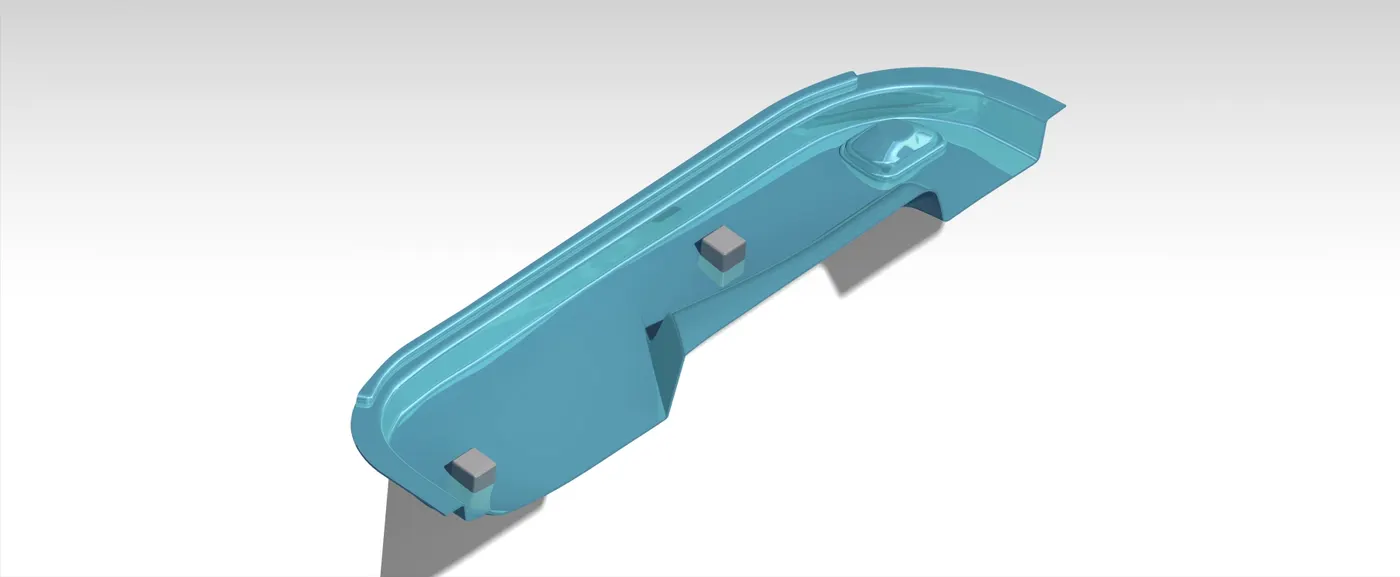
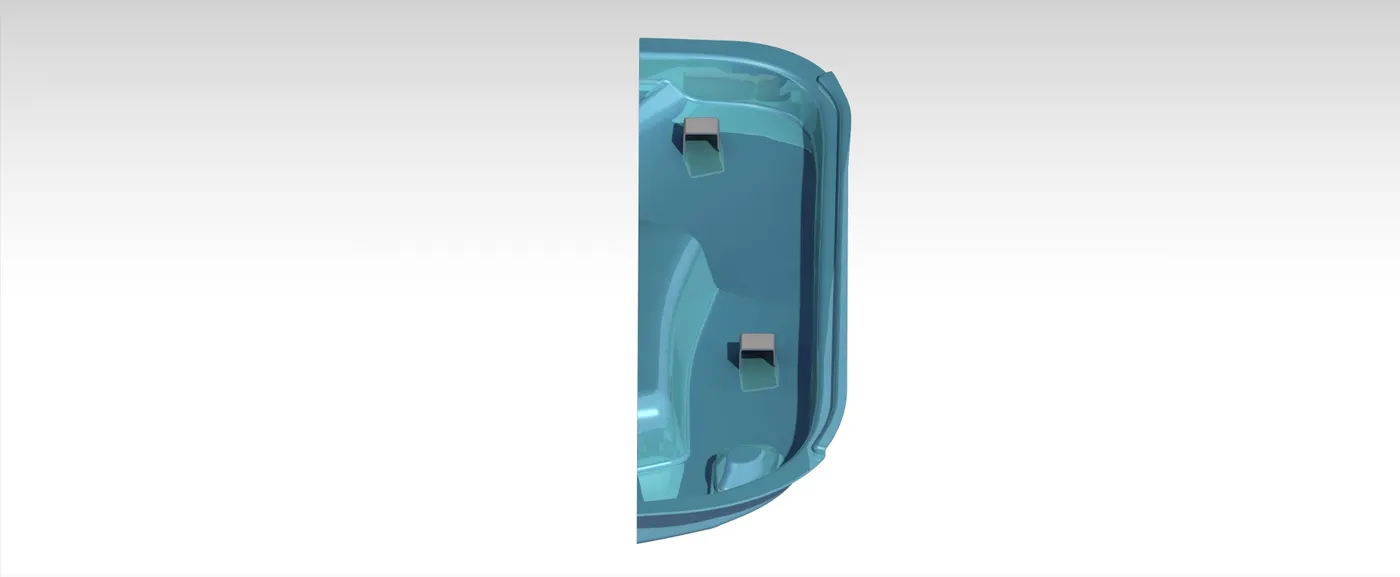
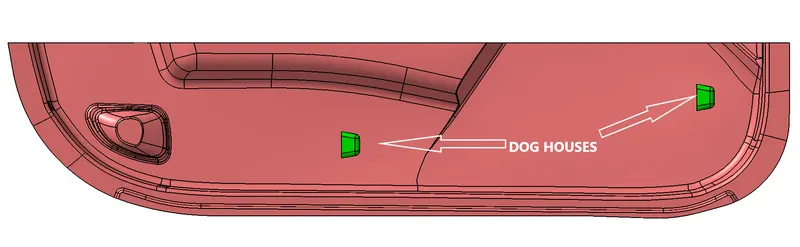
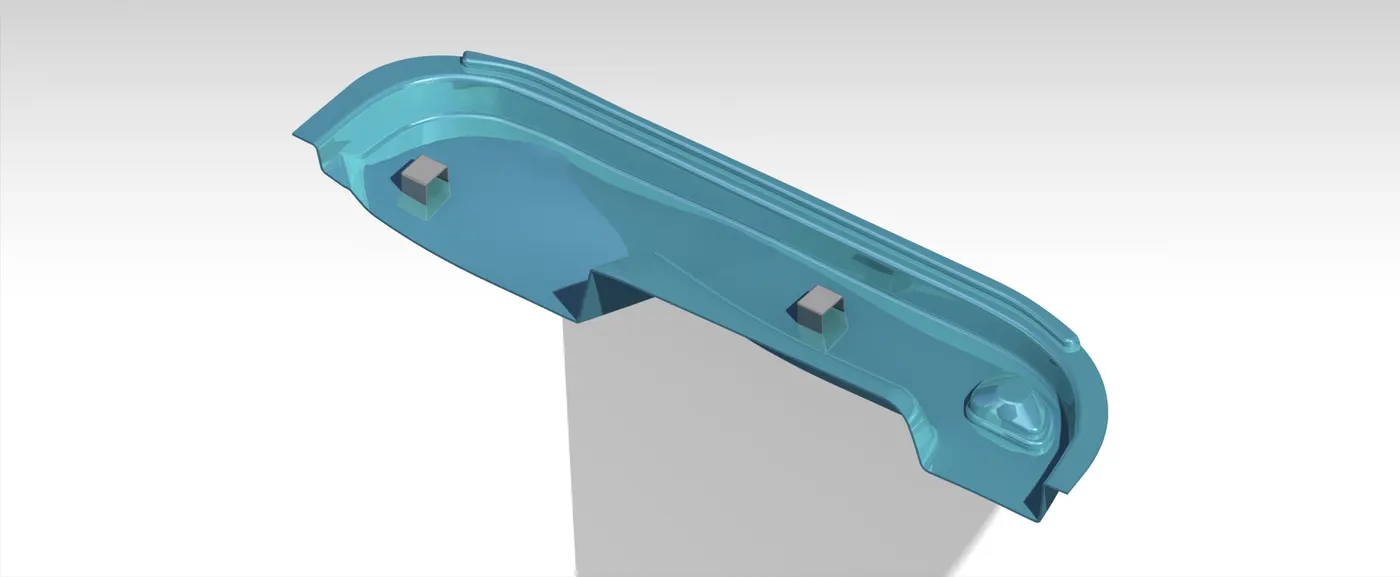
  • DOG HOUSE DESIGN : Doghouse is an engineering element used in the creation of plastic trim. Dog kennels are a supporting element. To increase their strength, other engineering features like snaps,                                         locators, etc.
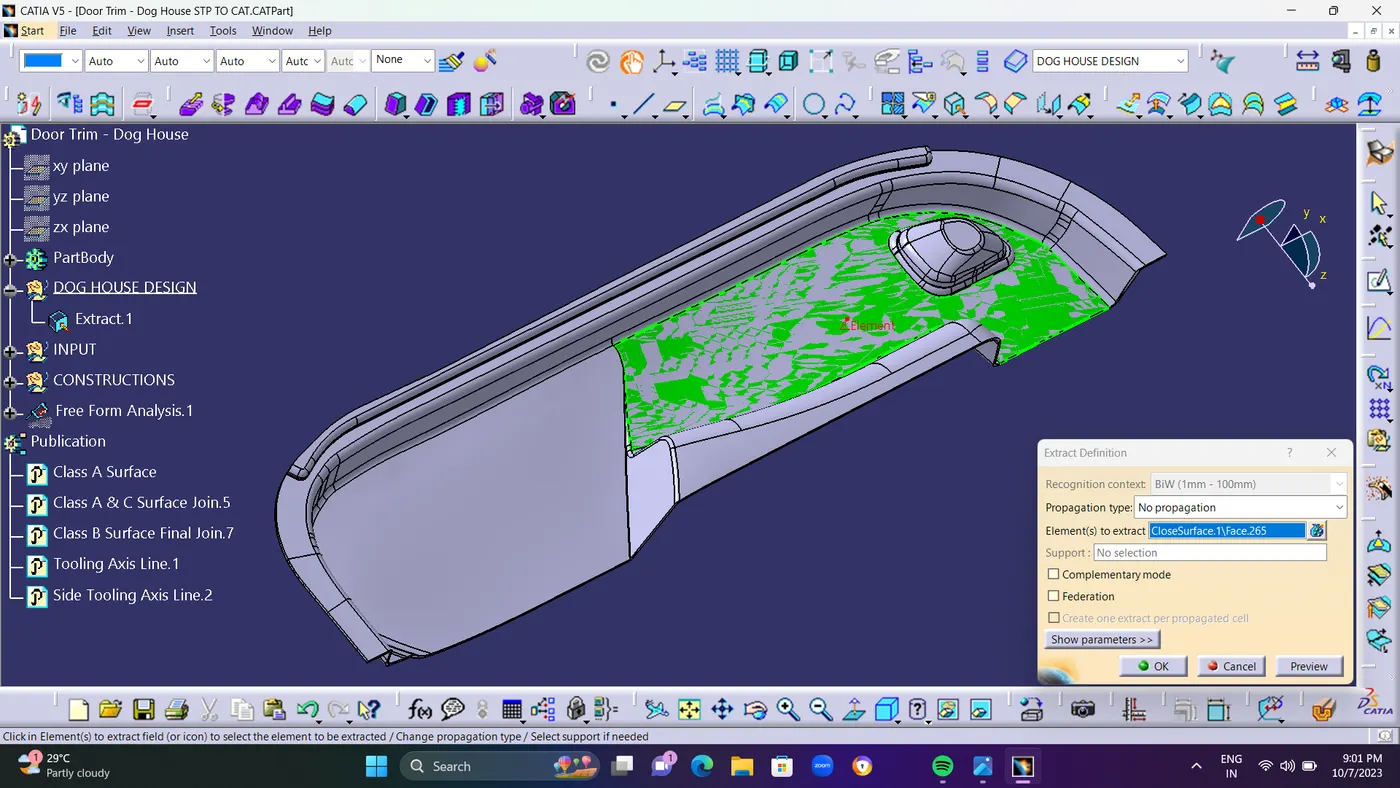
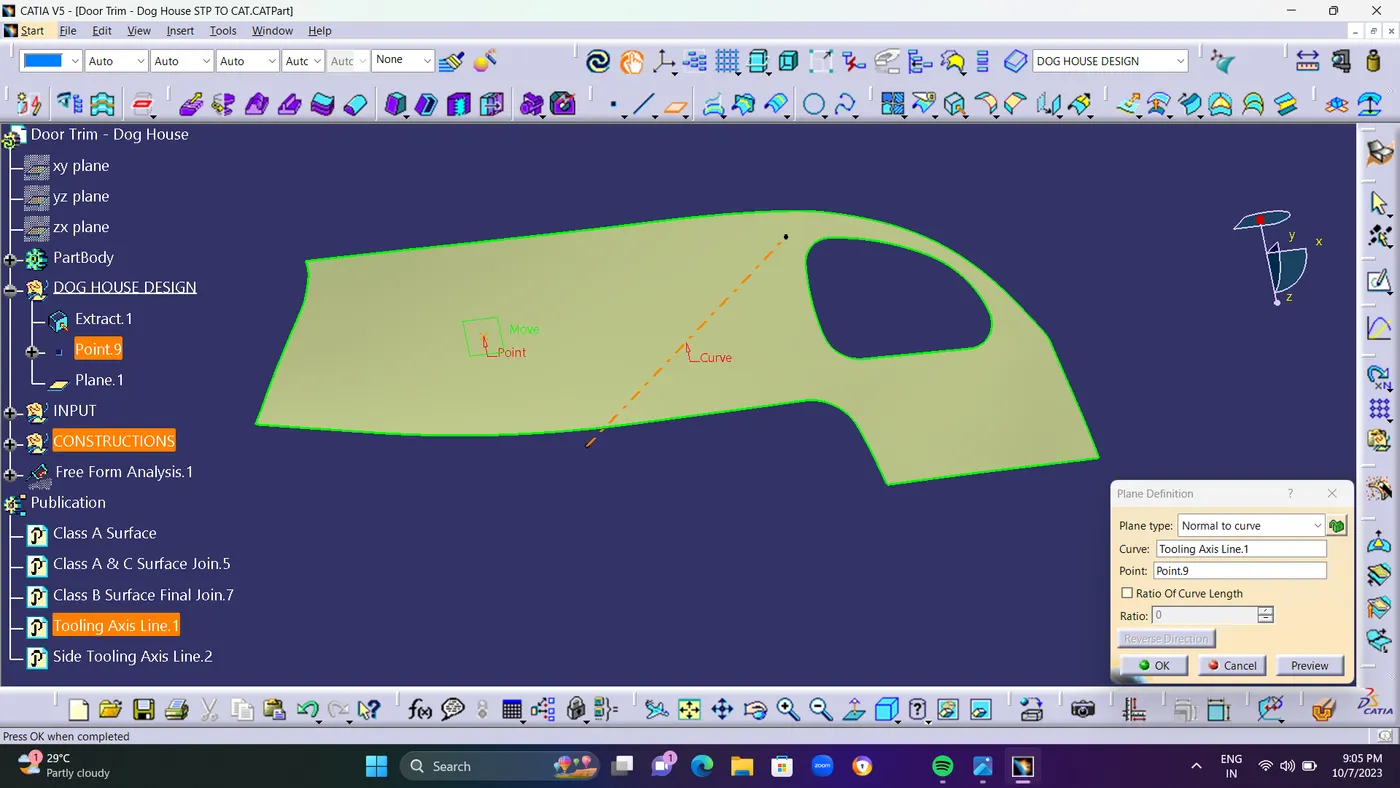
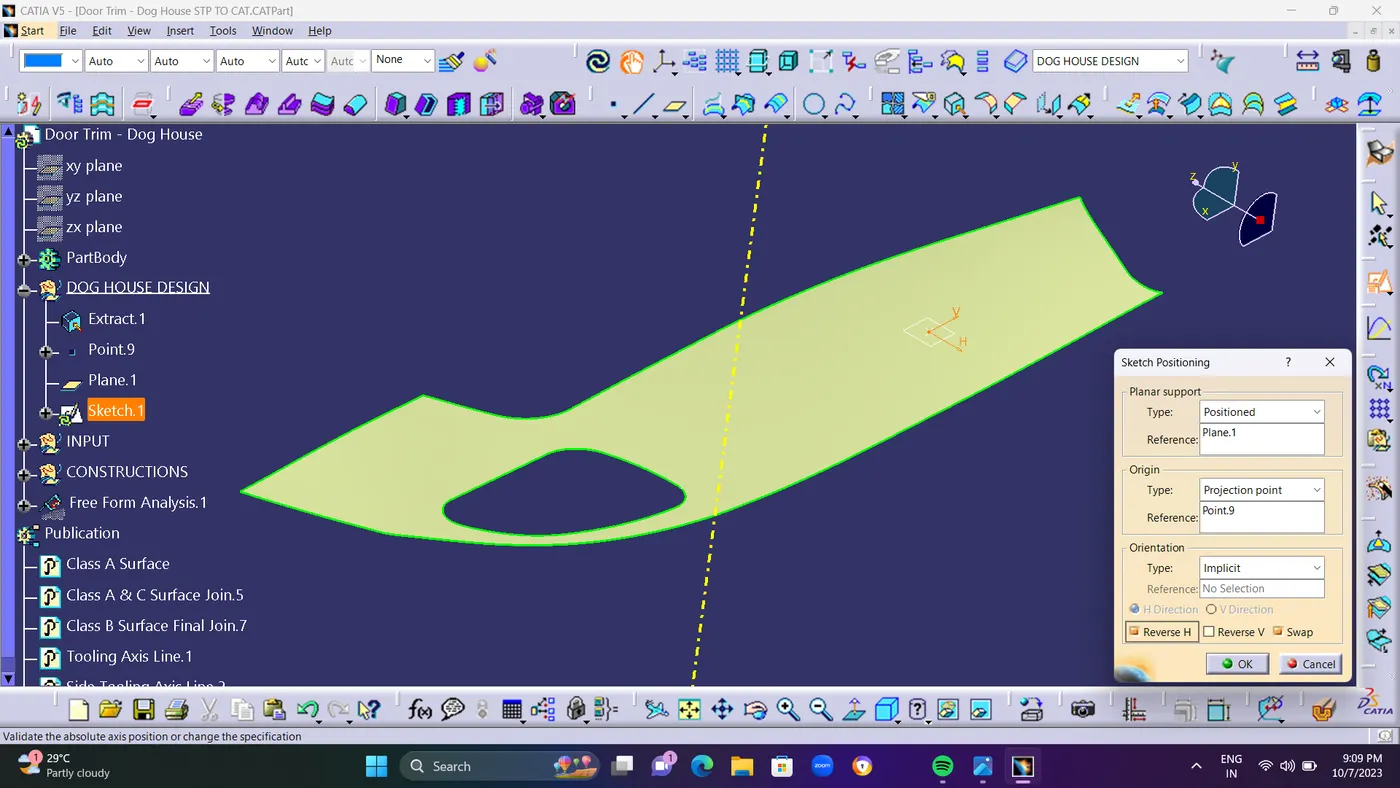
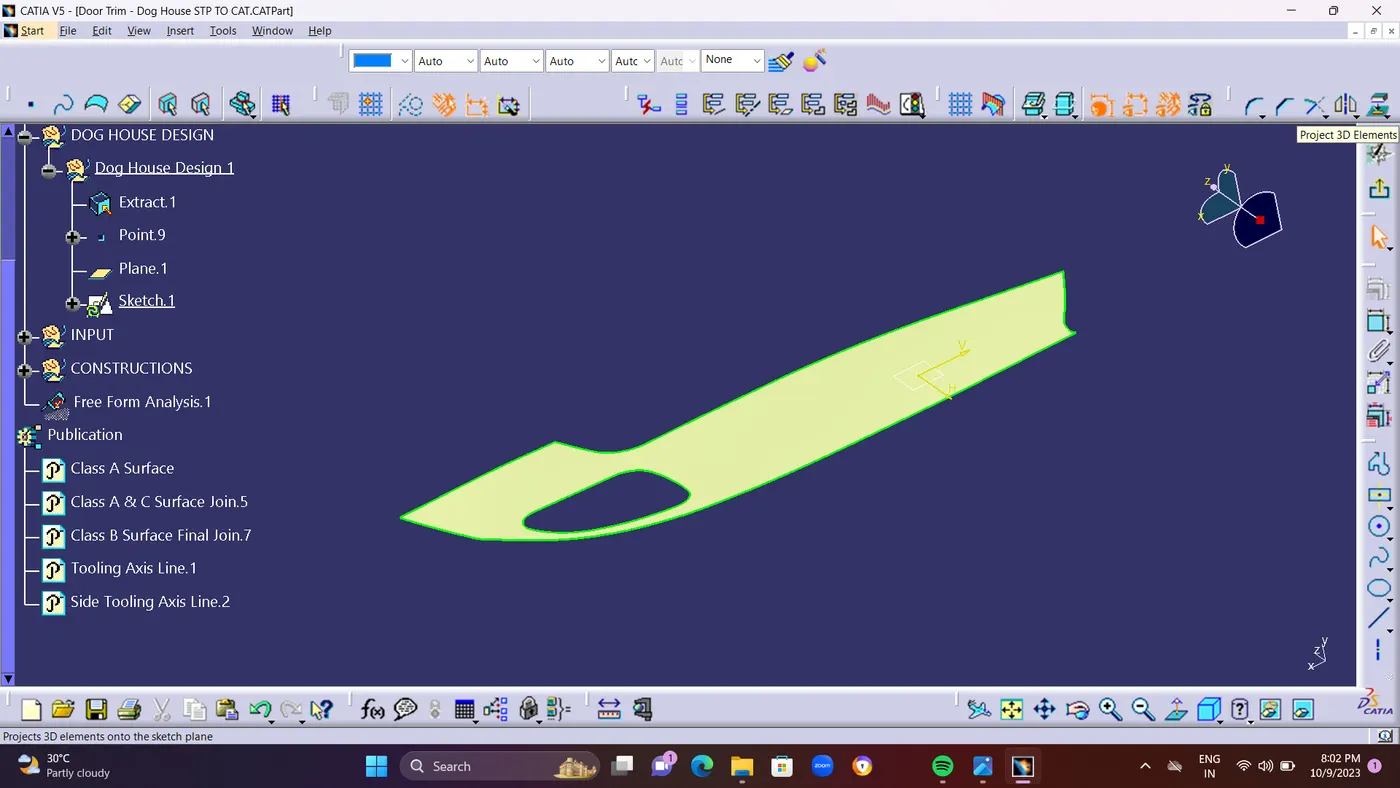
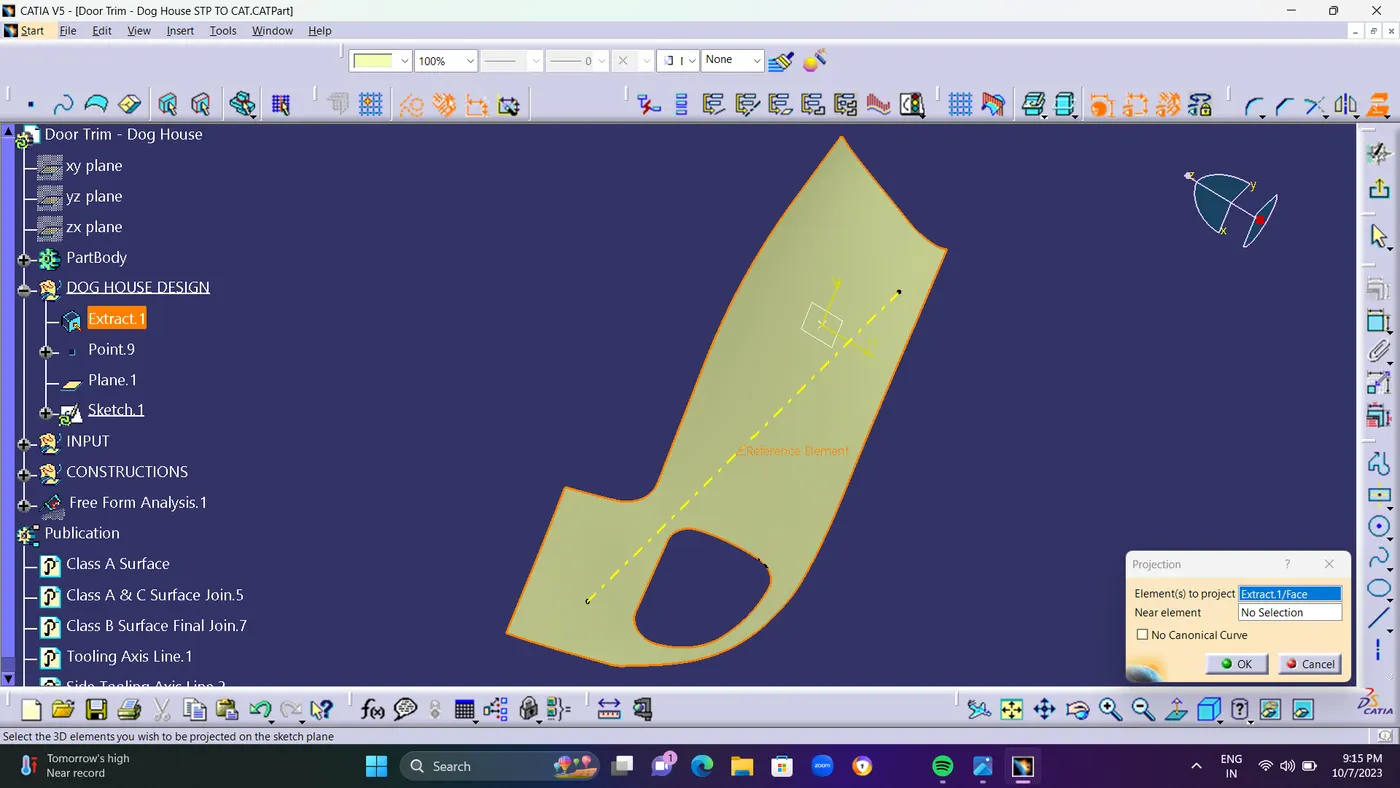
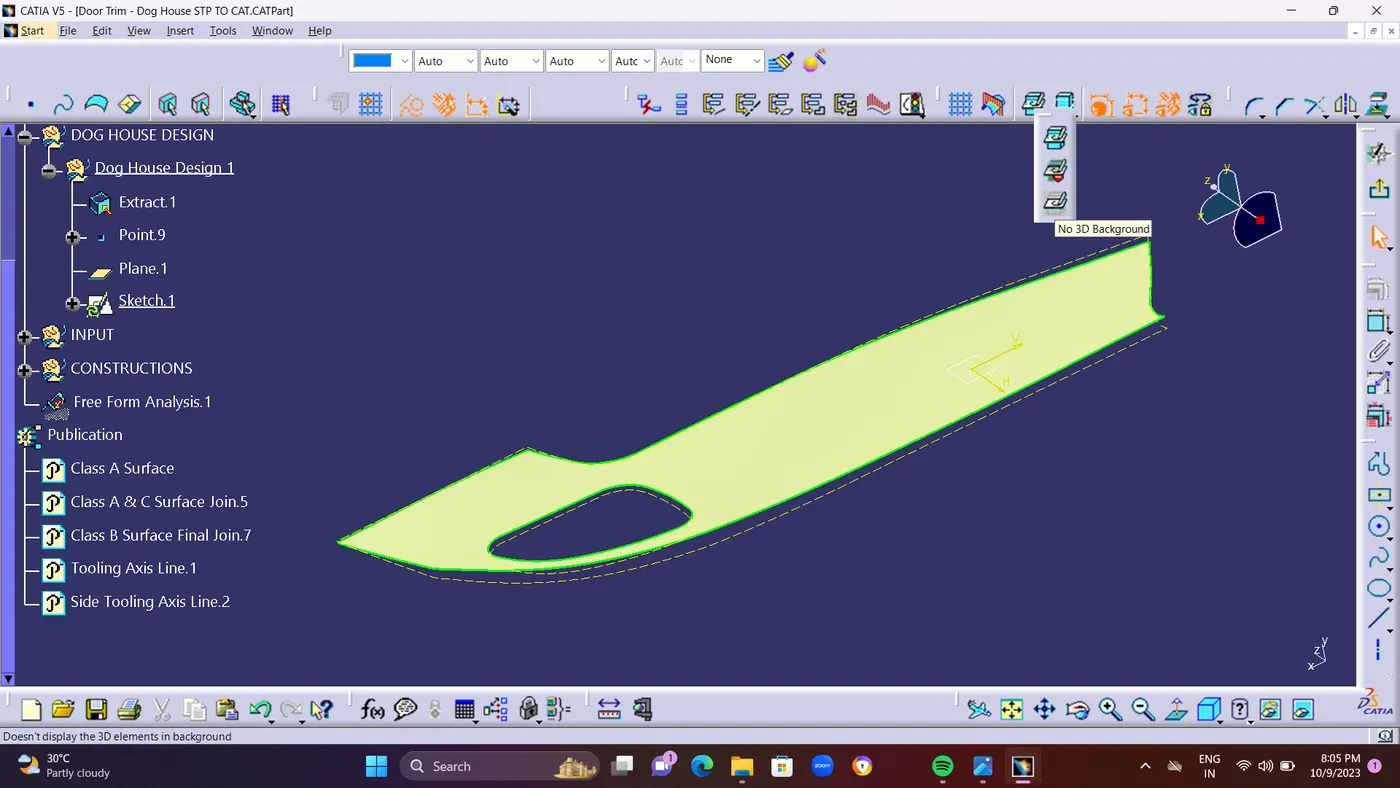
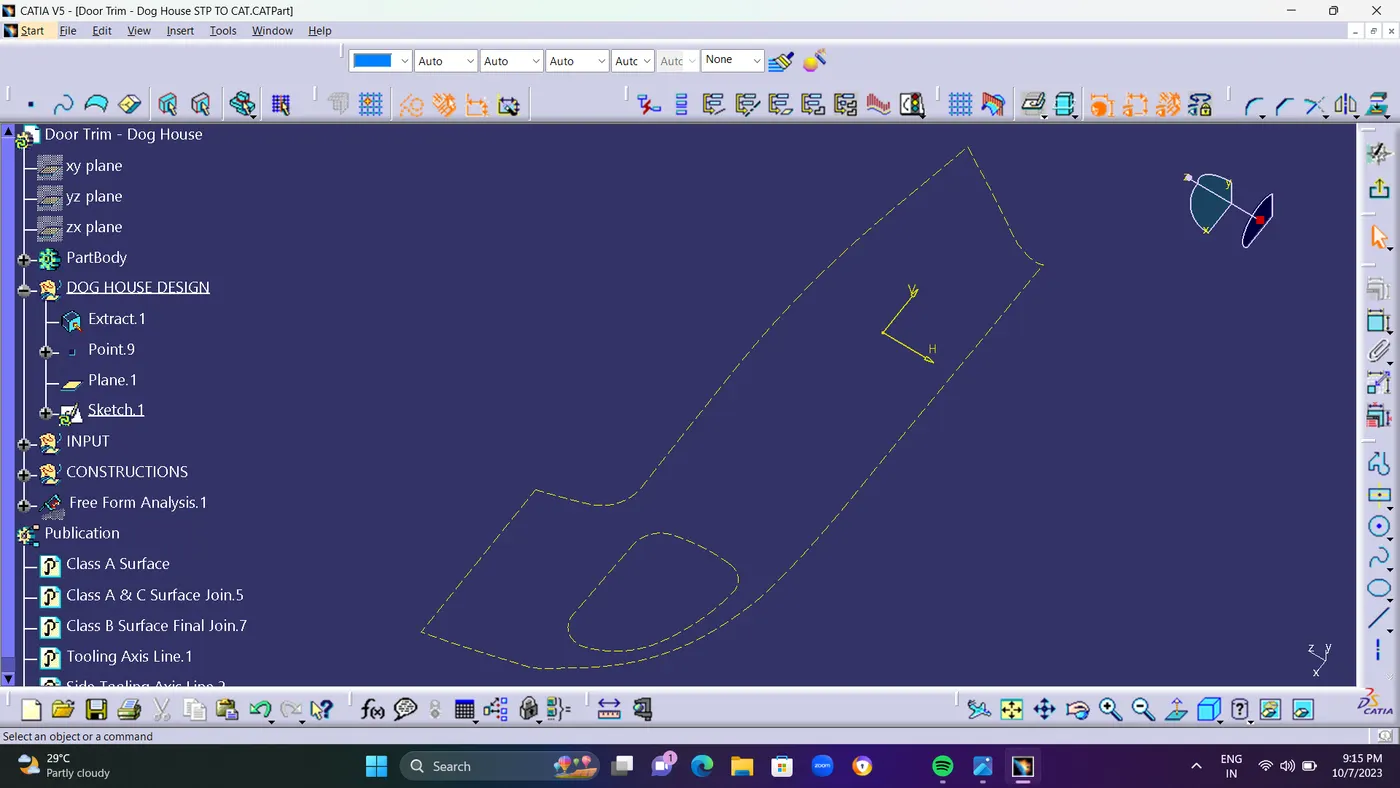
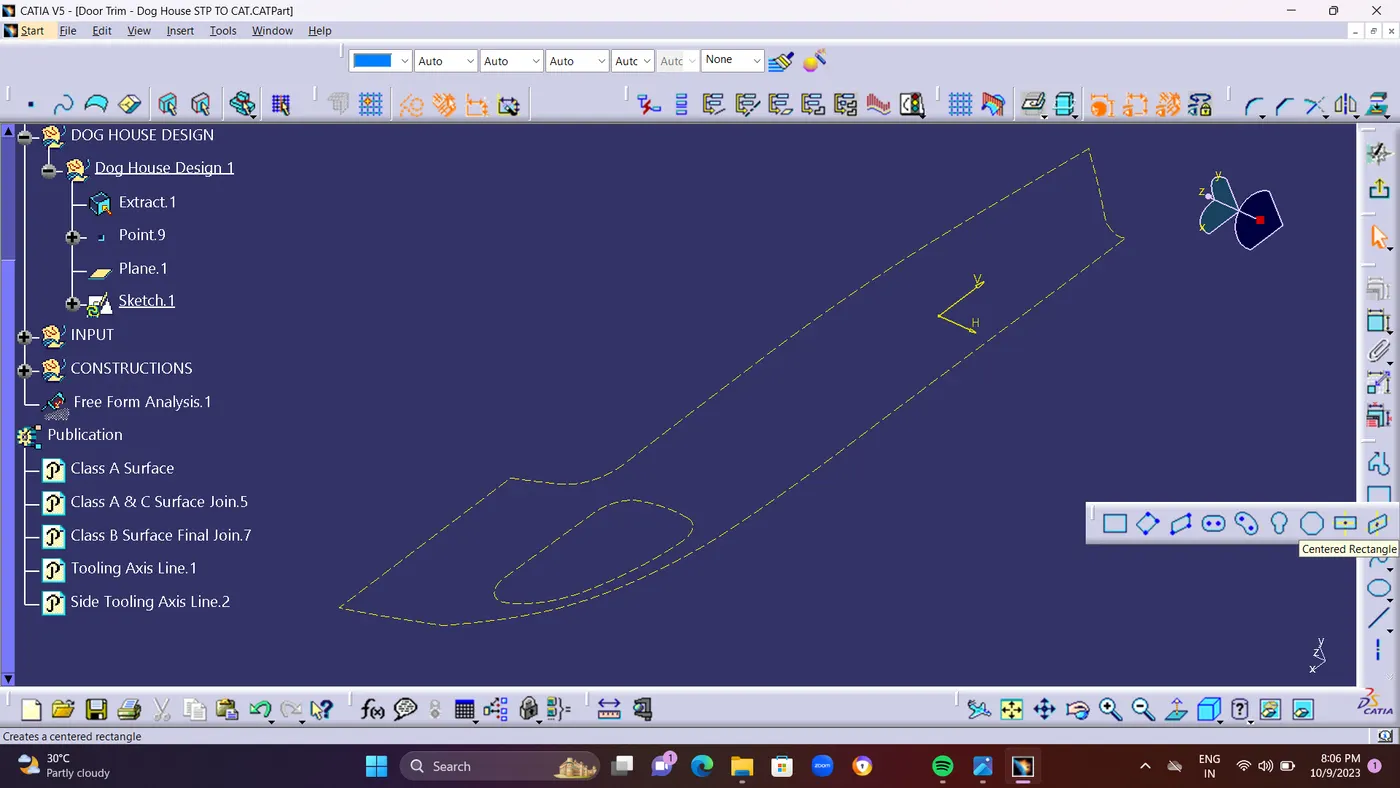
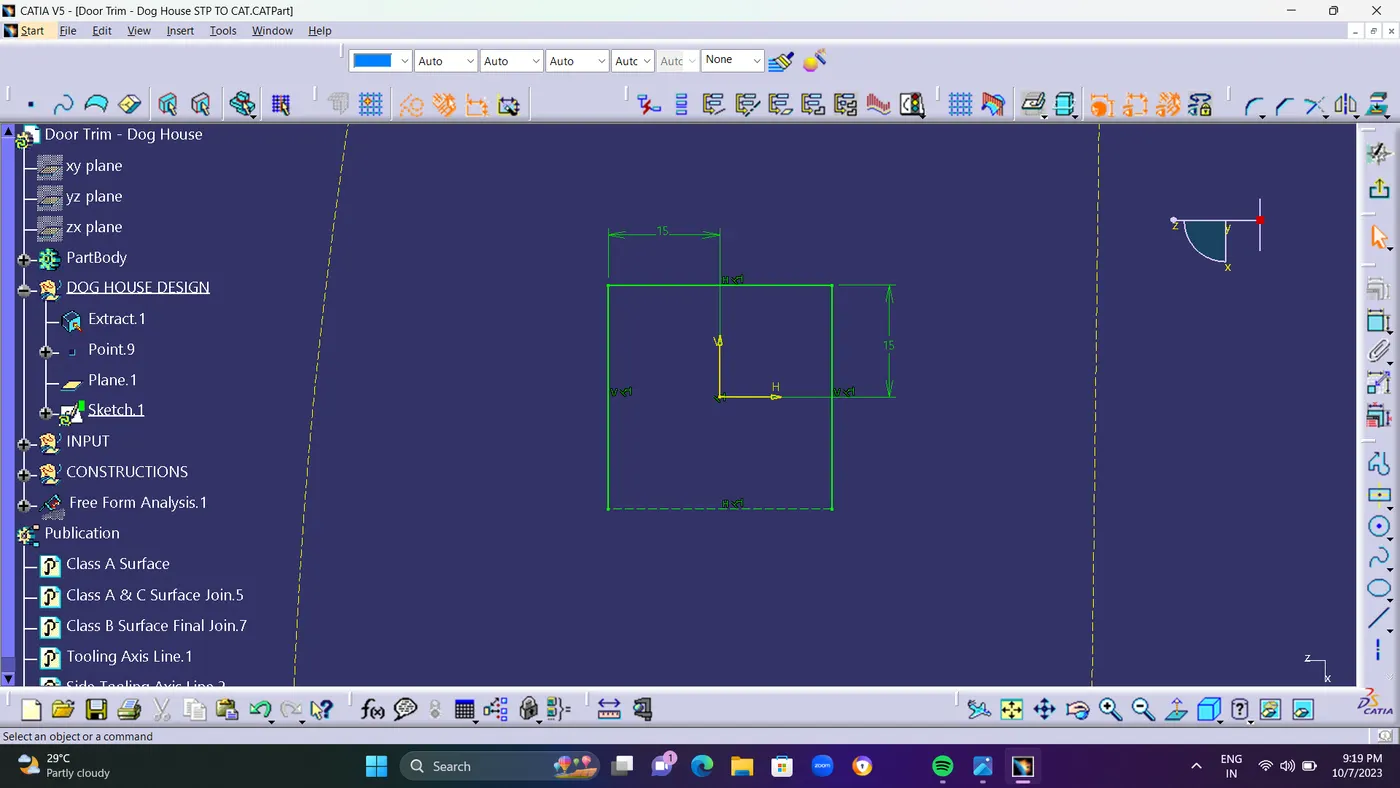
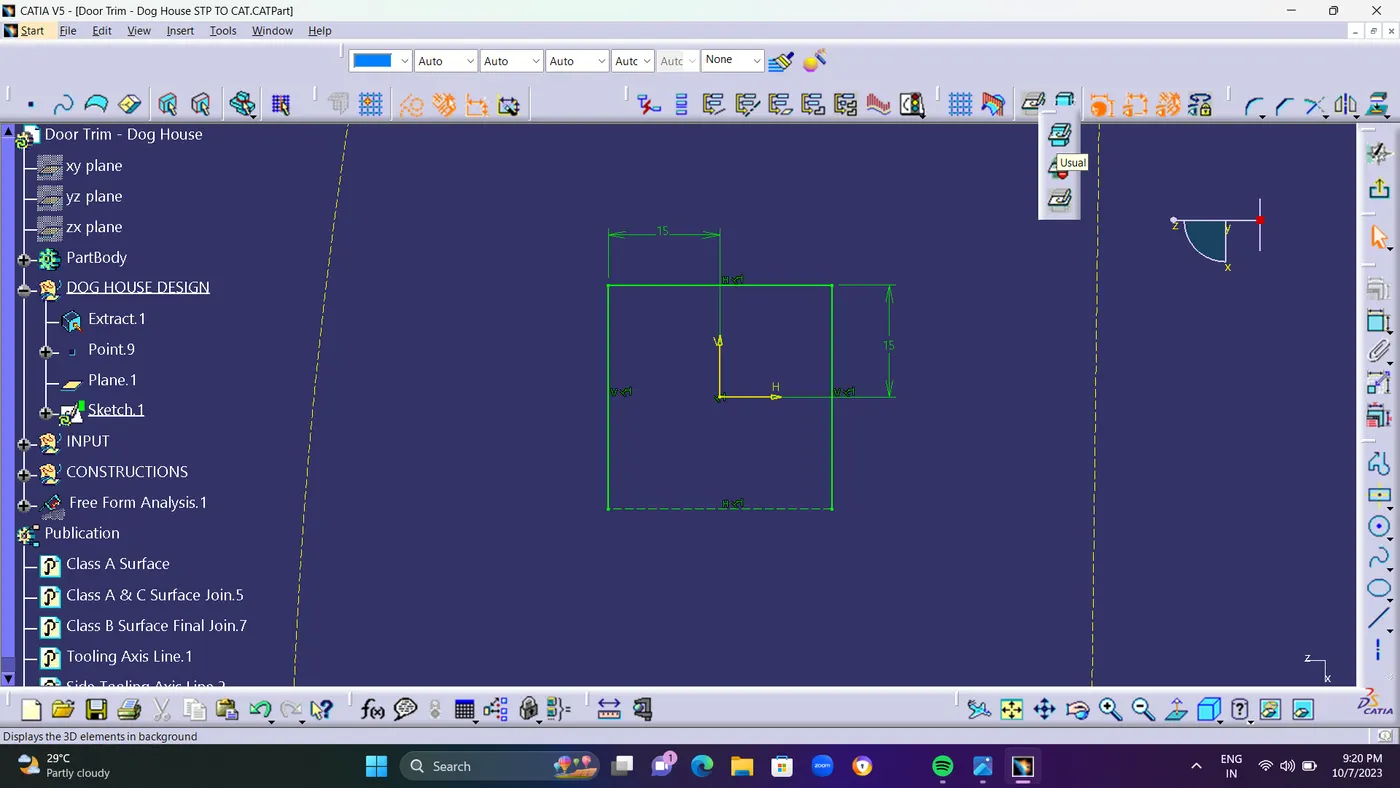
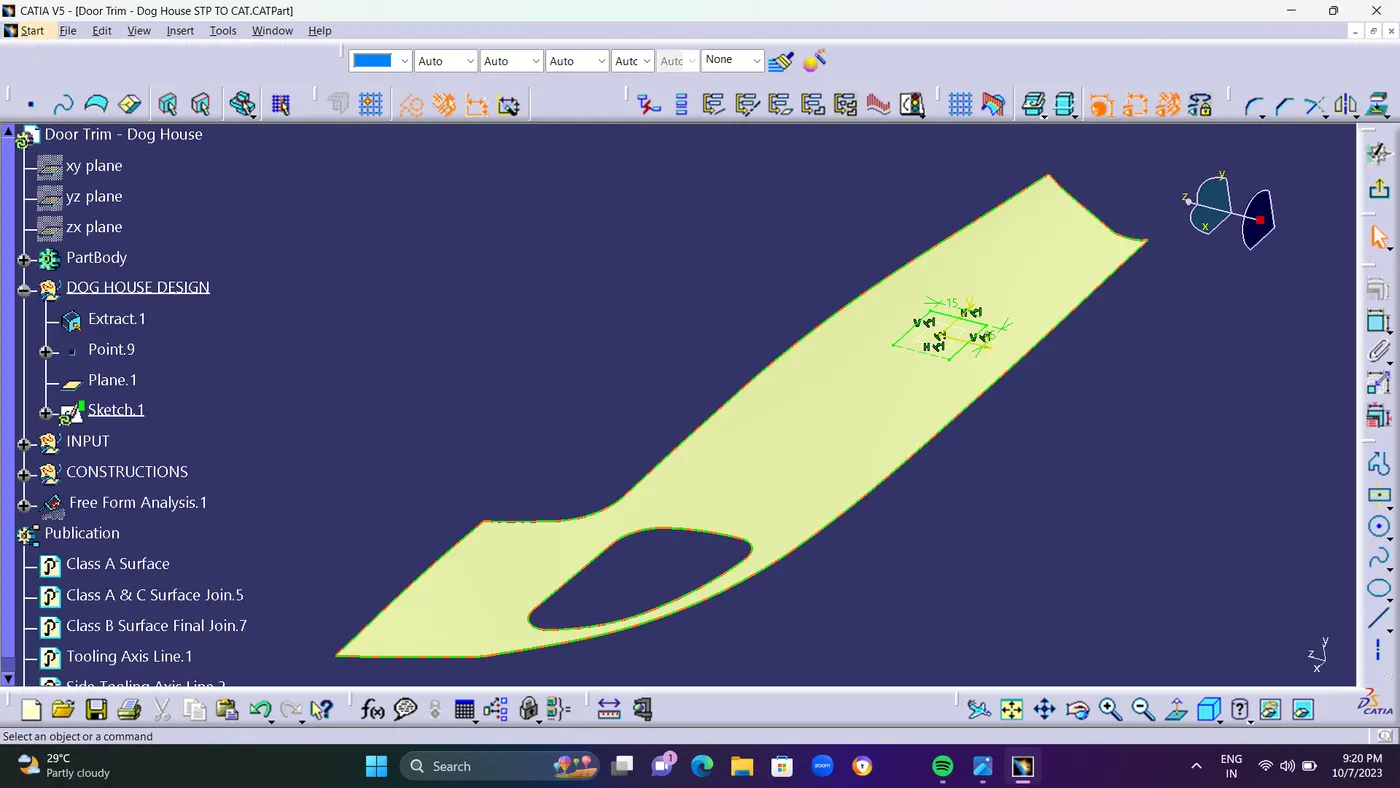
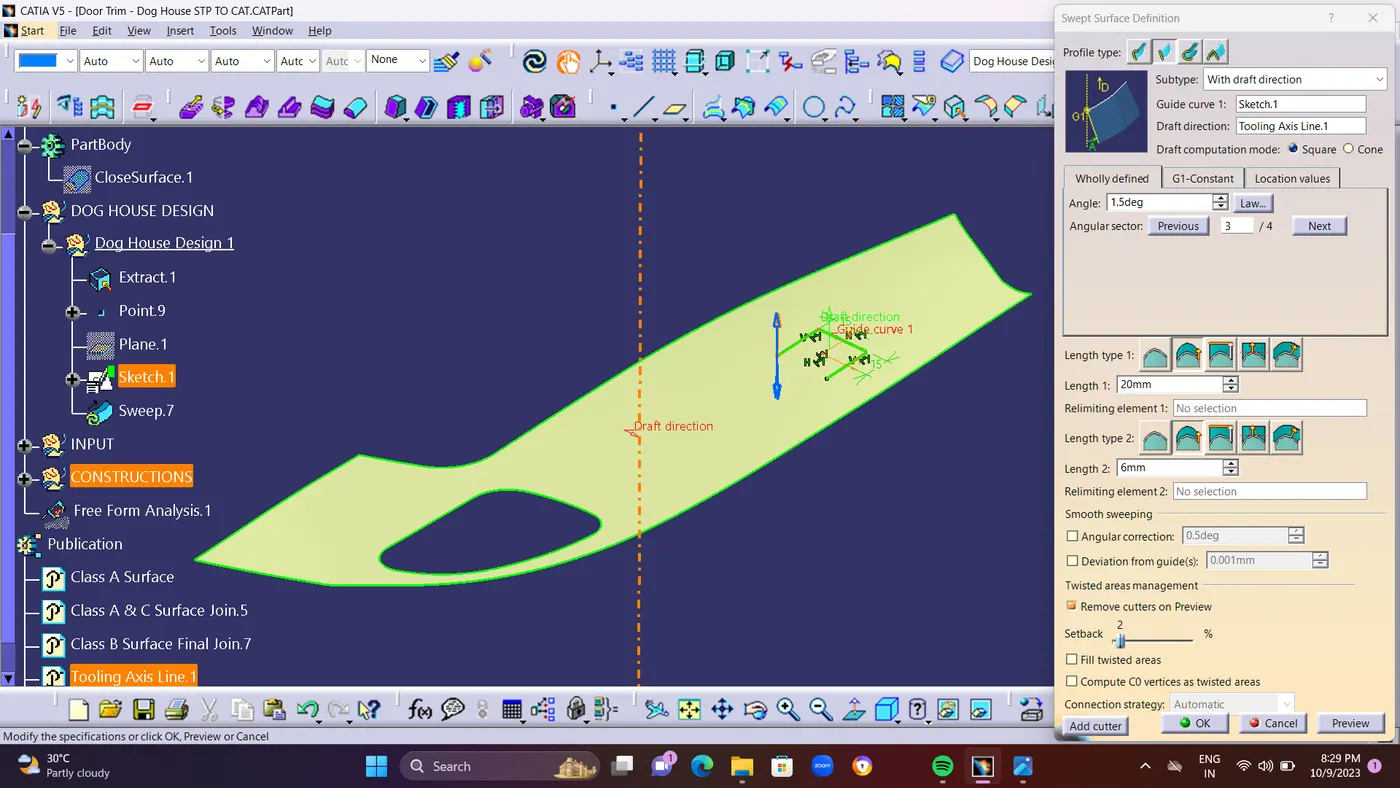
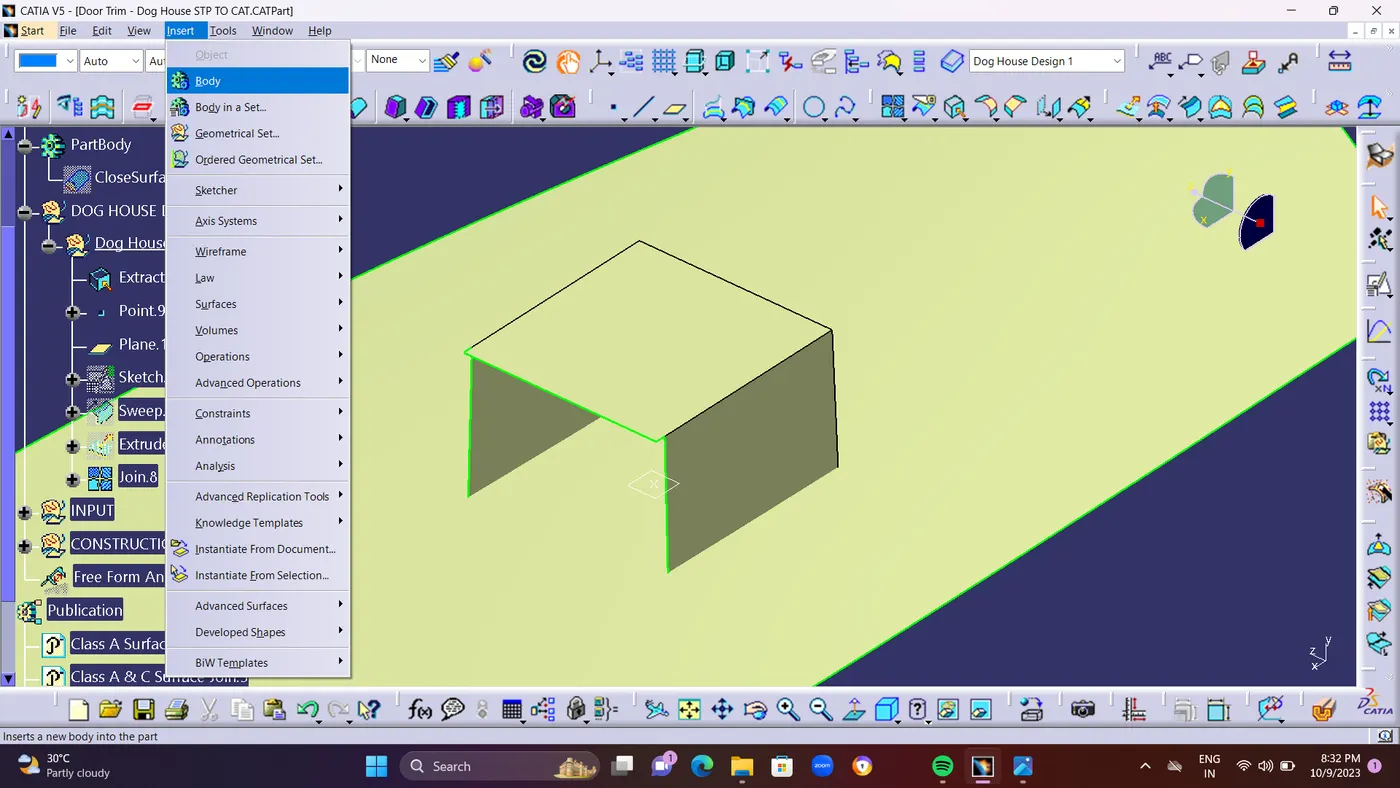
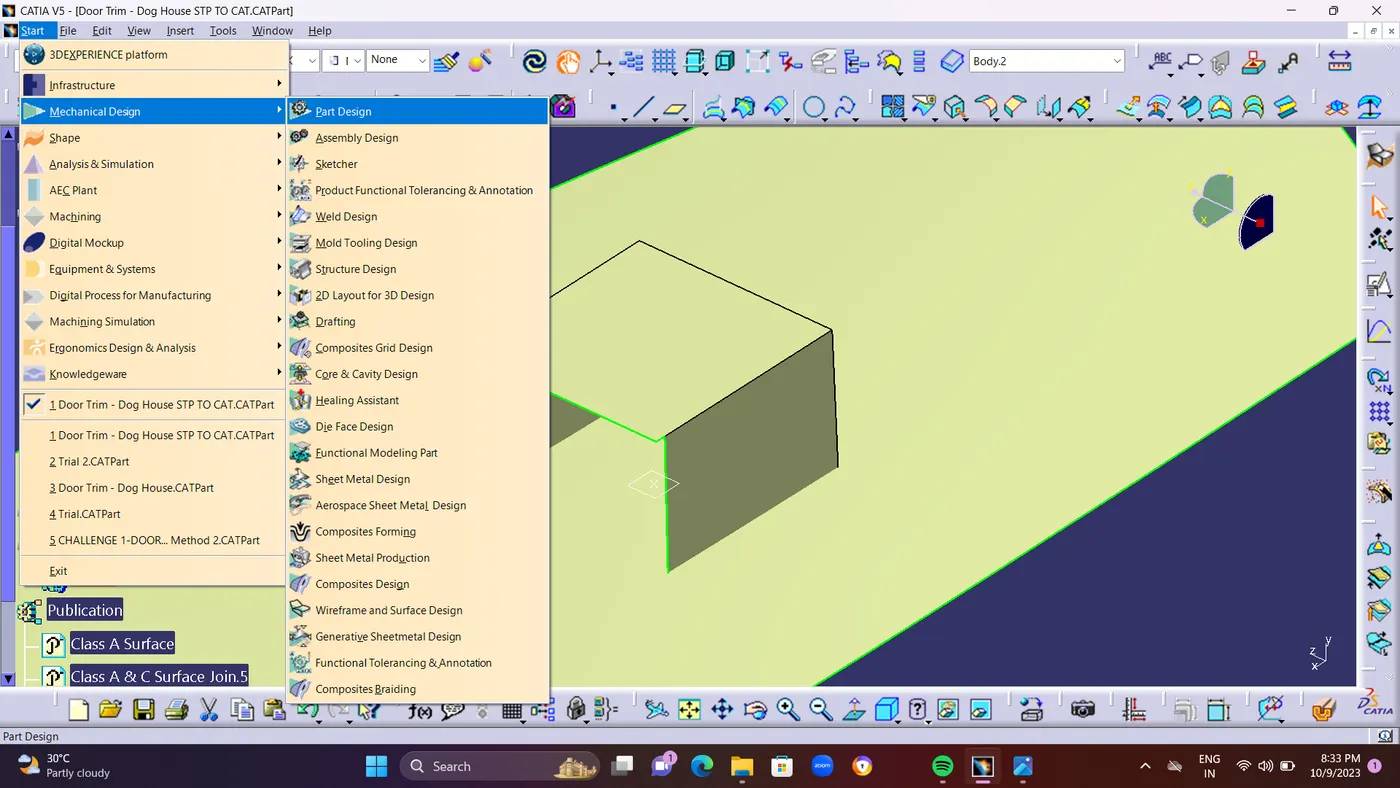
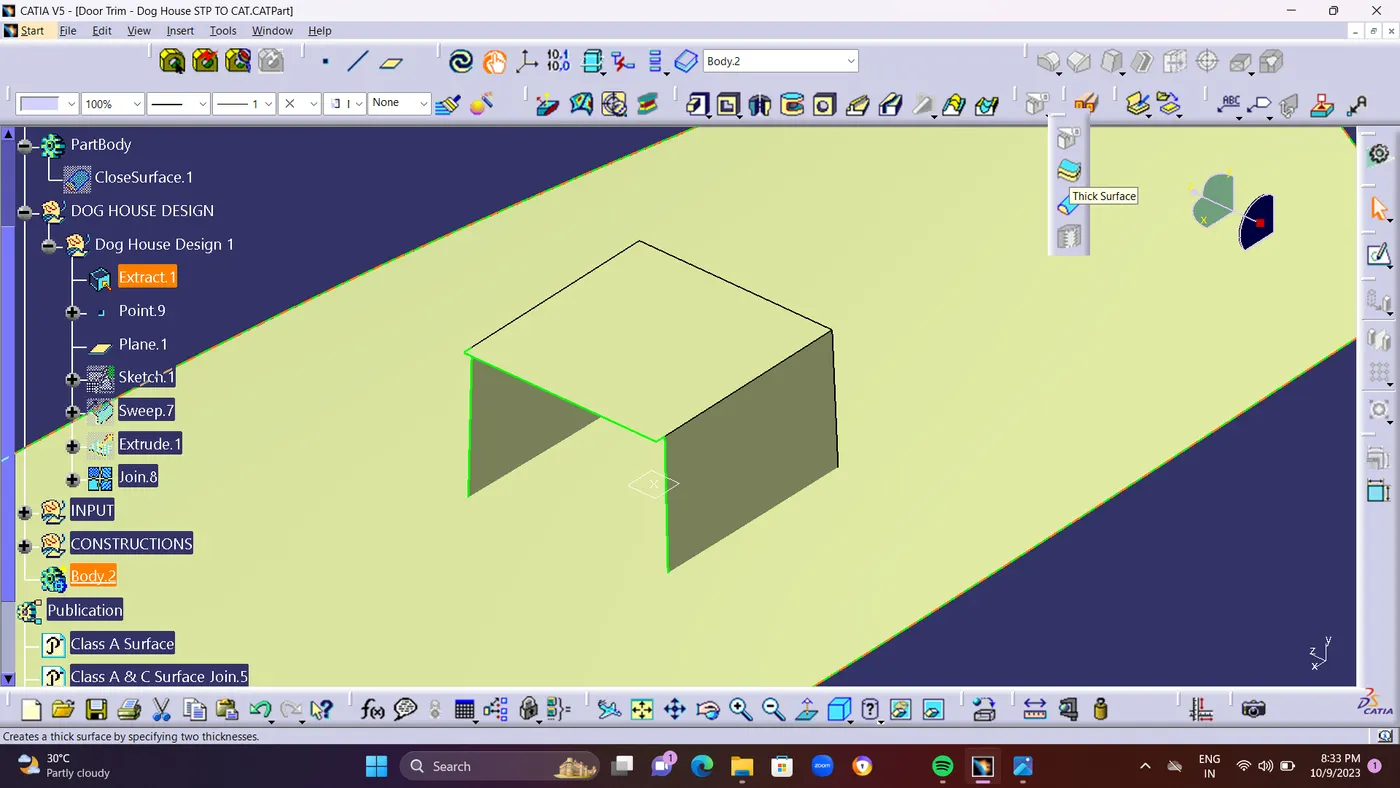
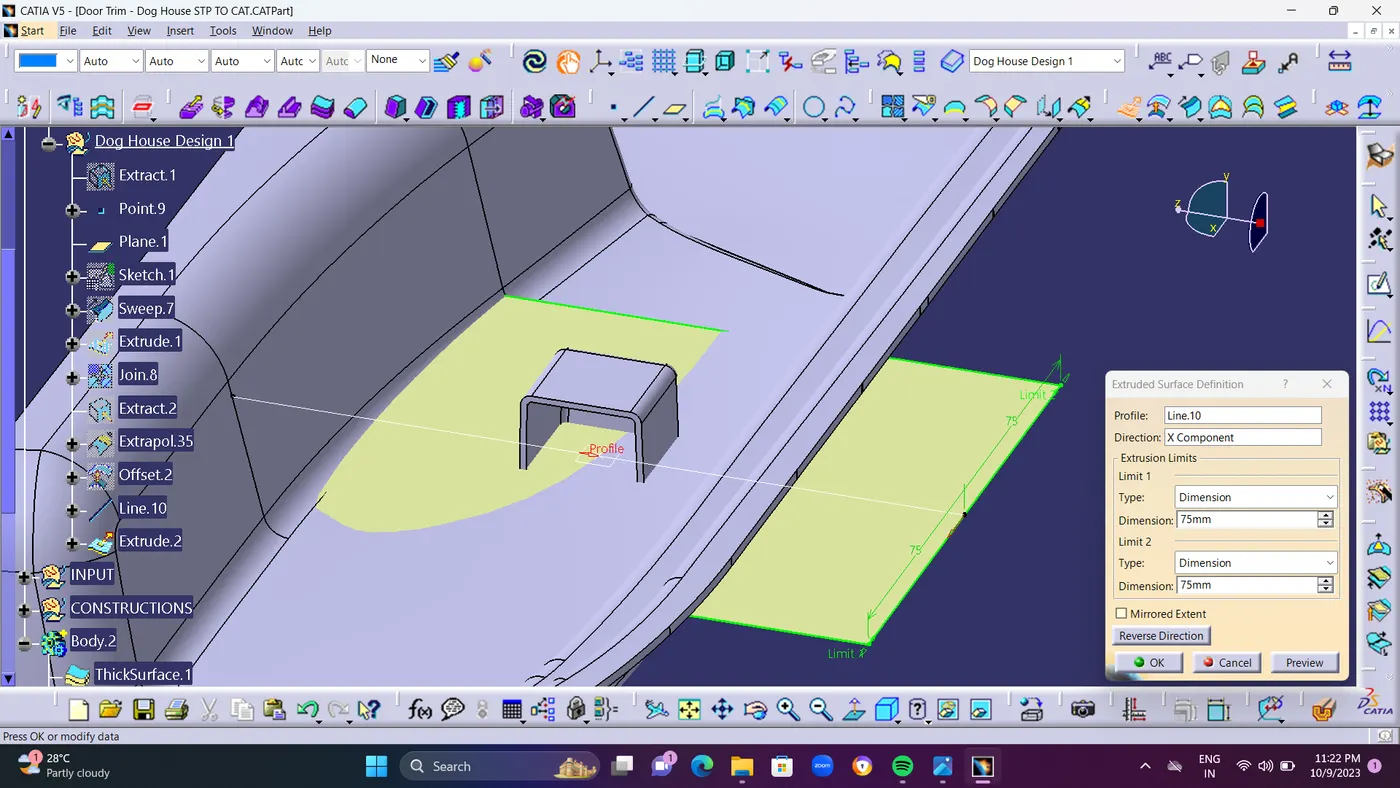
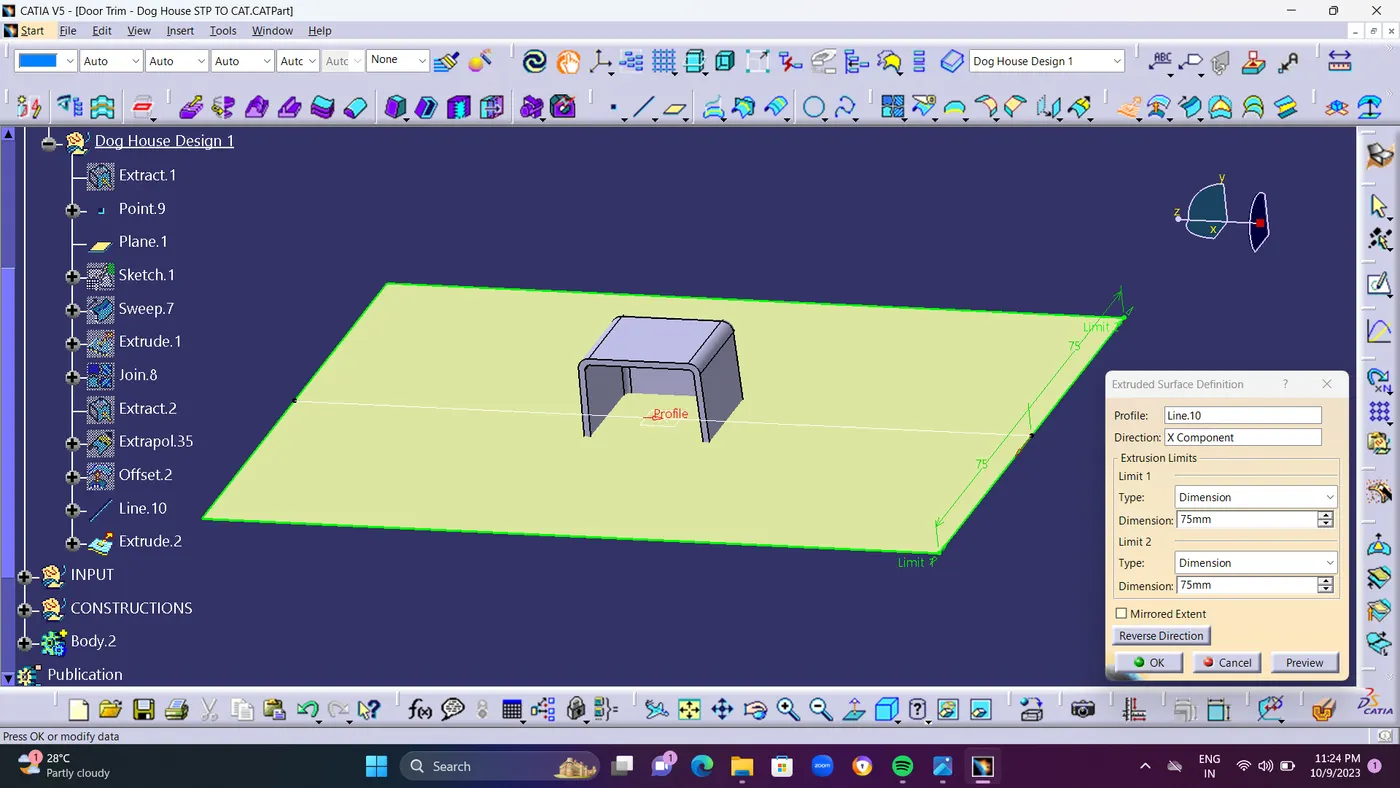
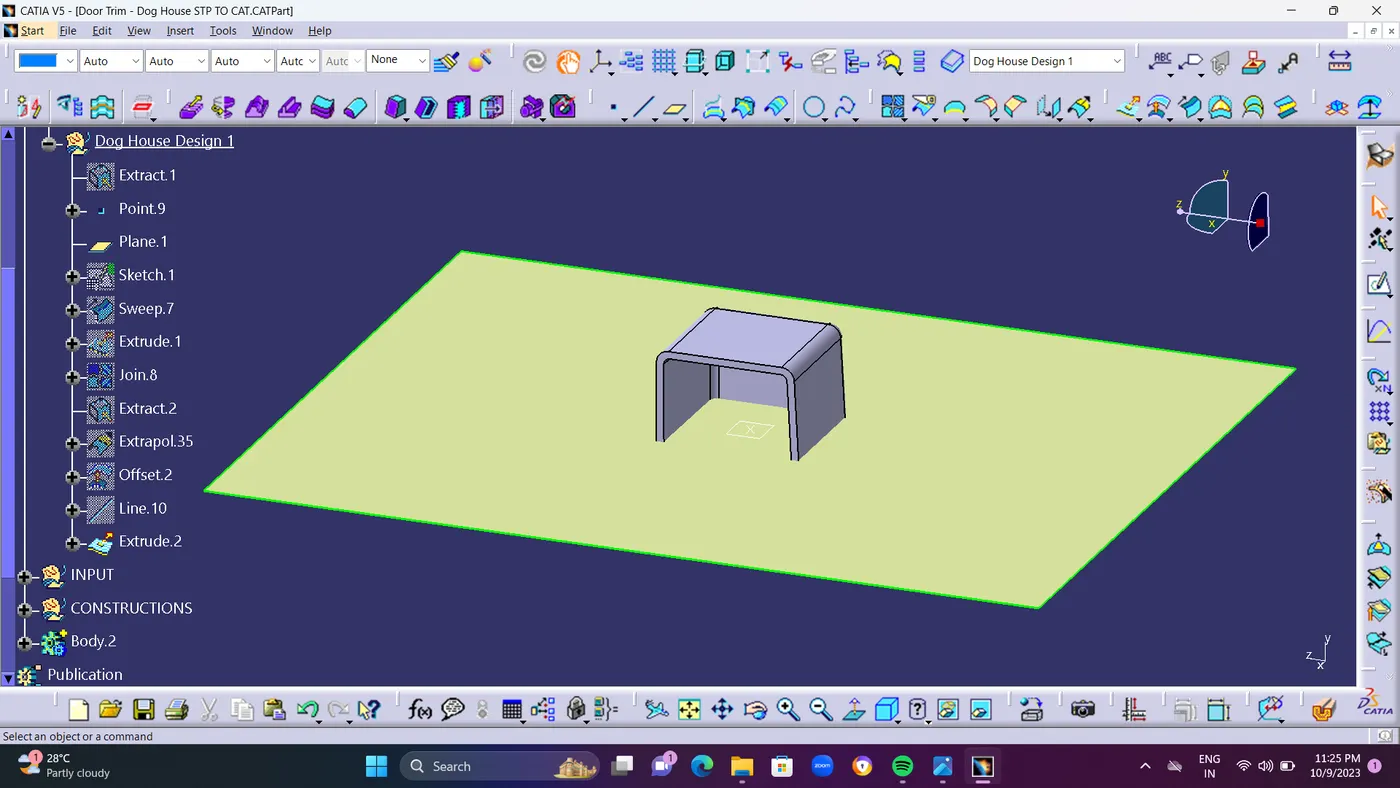
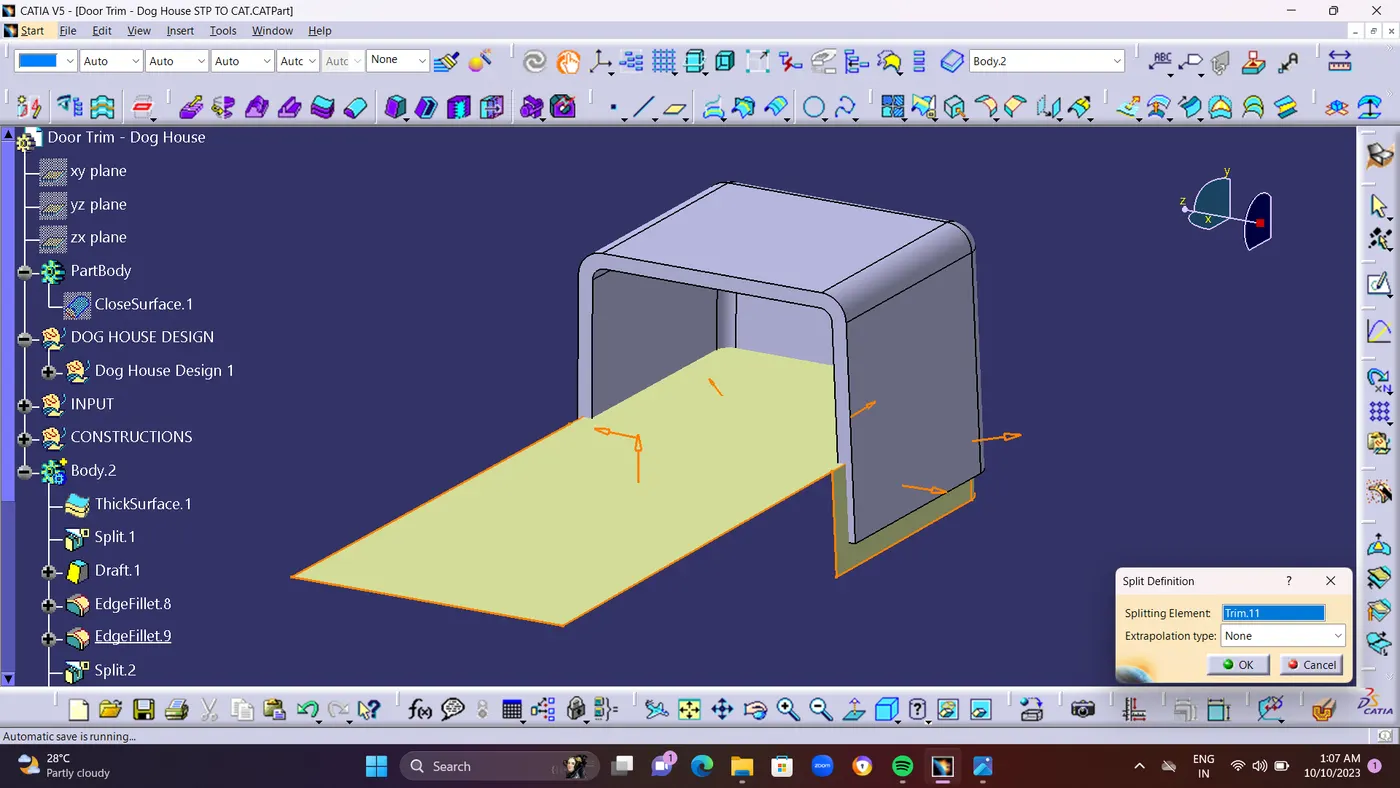
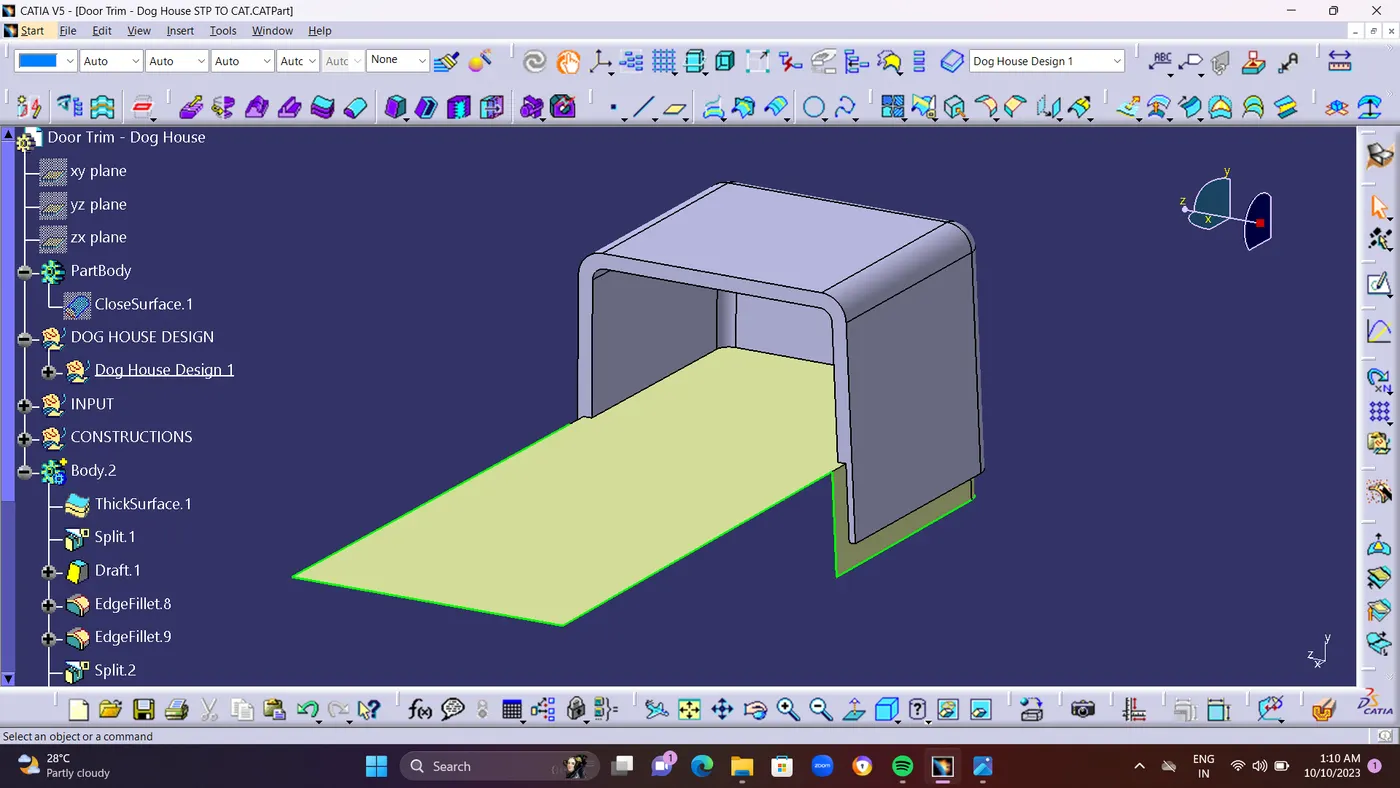
  • STEP 18 : After Creating a Closed Solid Surface.To Creat a DOG HOUSE. EXTRACT the Closed Surface and Create a POINT on it wherever you want to creat Dog House and PLANE.after creating point and                      plane.
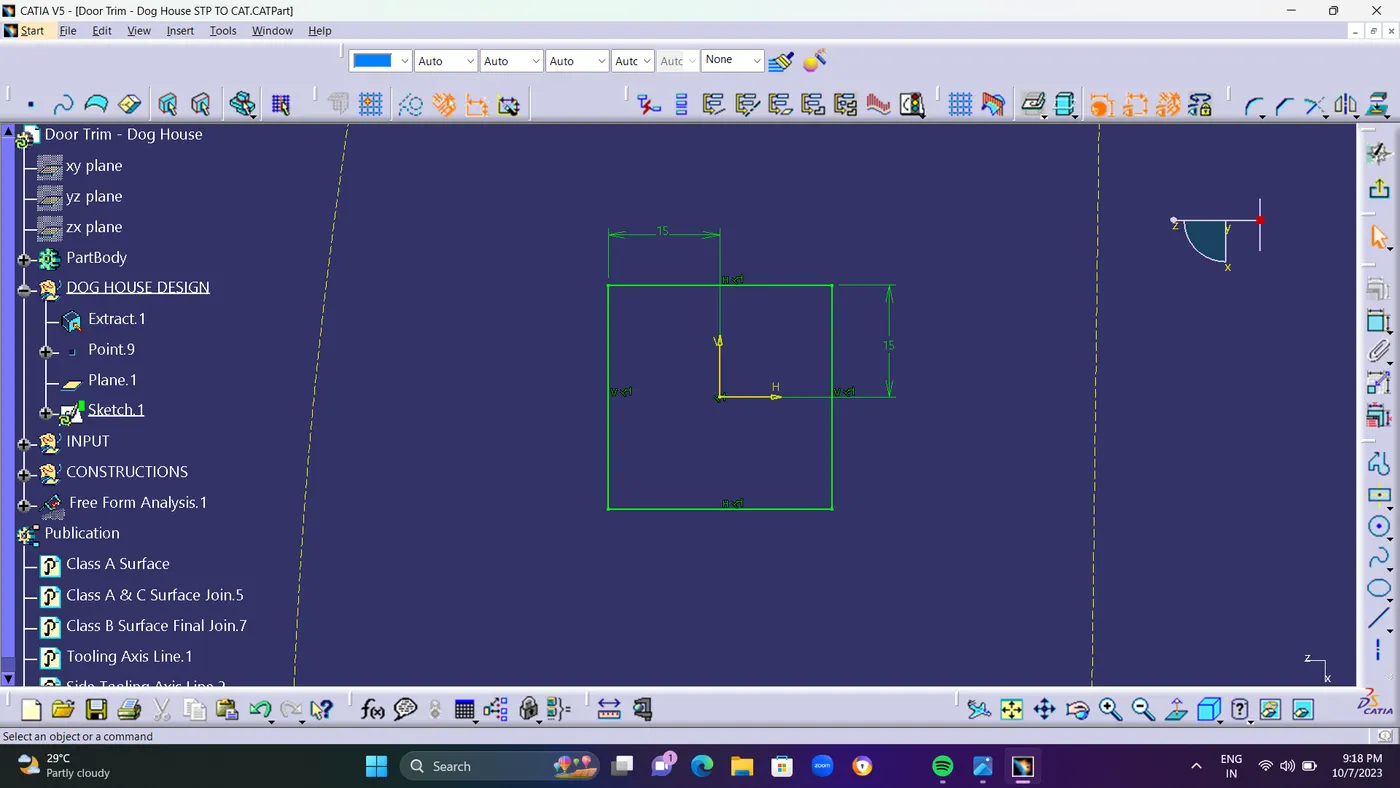
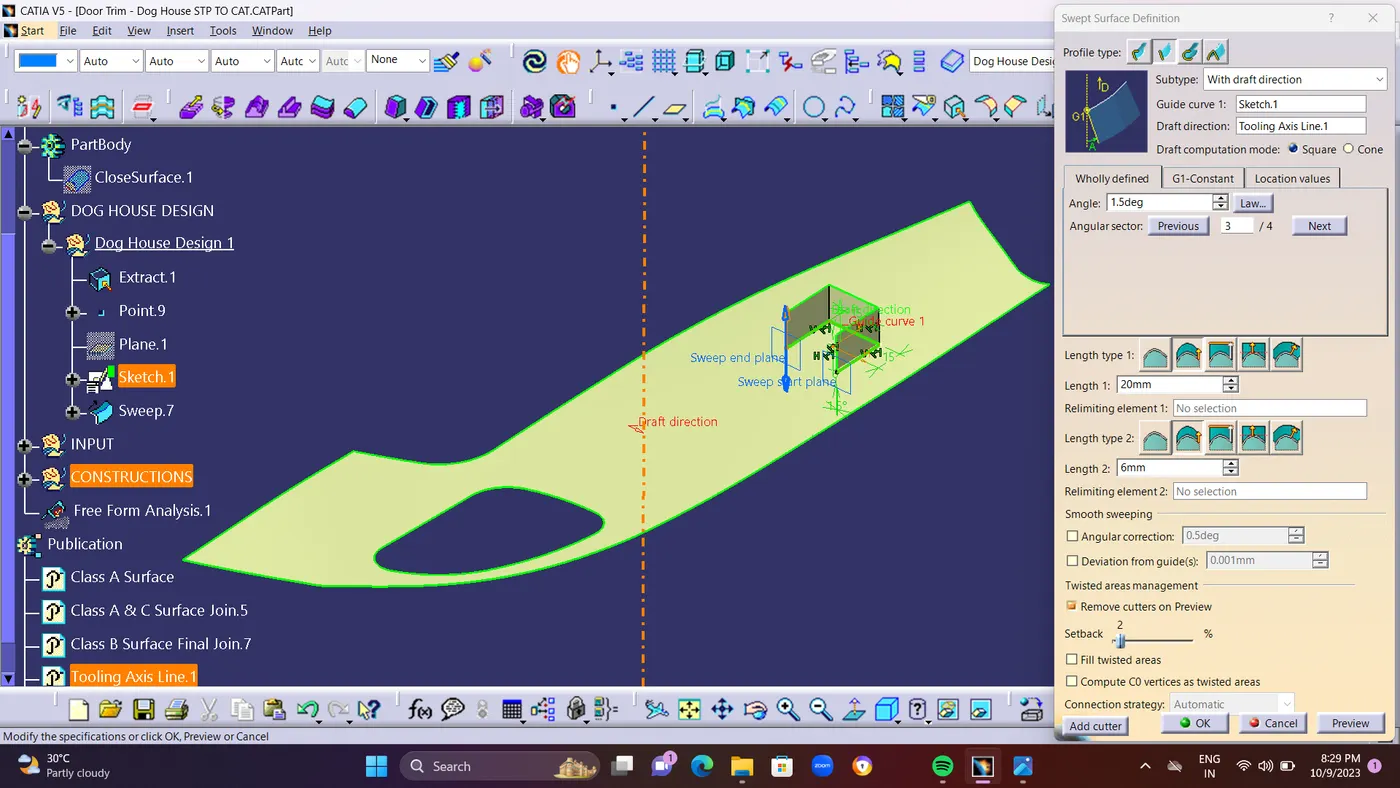
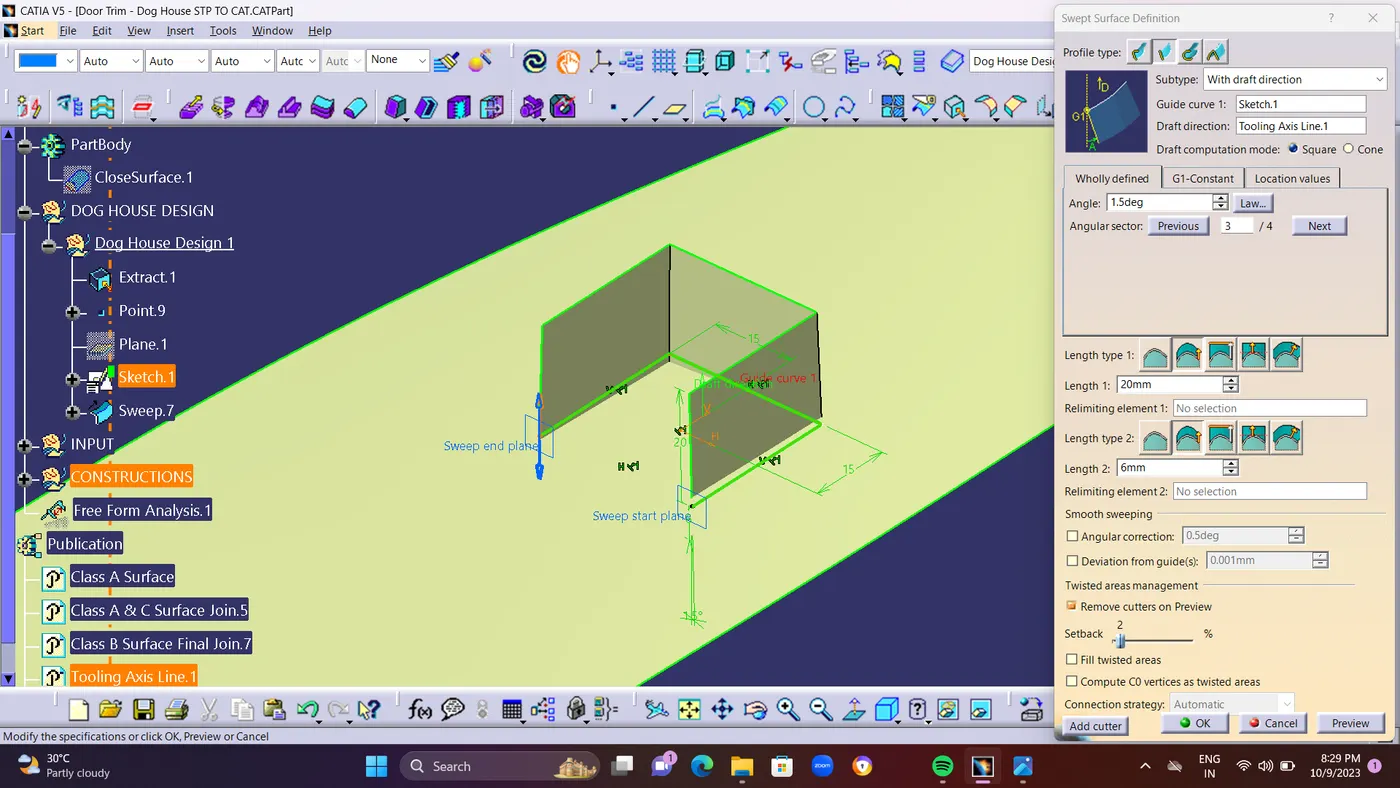
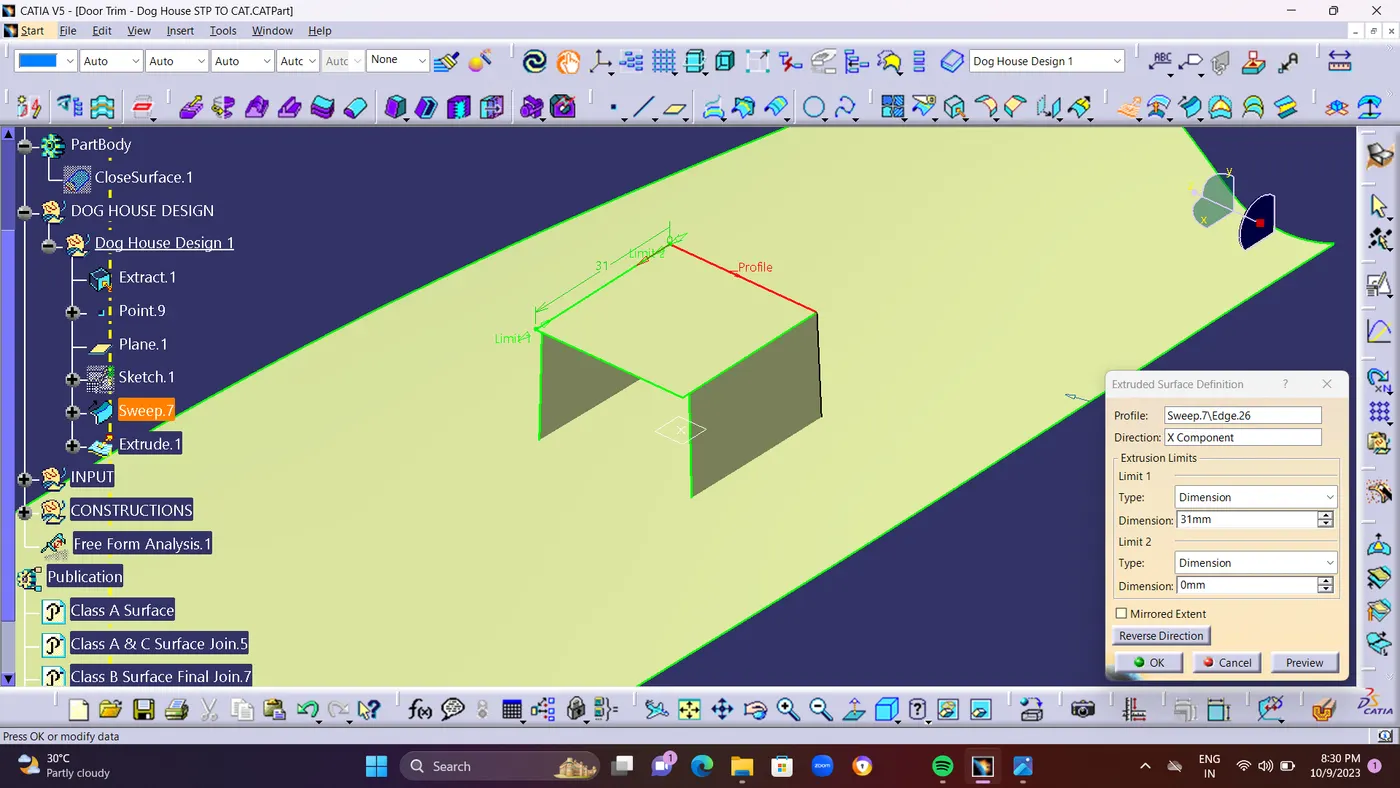
  • Create a SKETCH and Draw a Square line of 30mm length and 30mm Width.
  • and Create a SWEEP command Angle of 1.5mm Degree,and Length of 20mm and Bottom Length of 6mm.
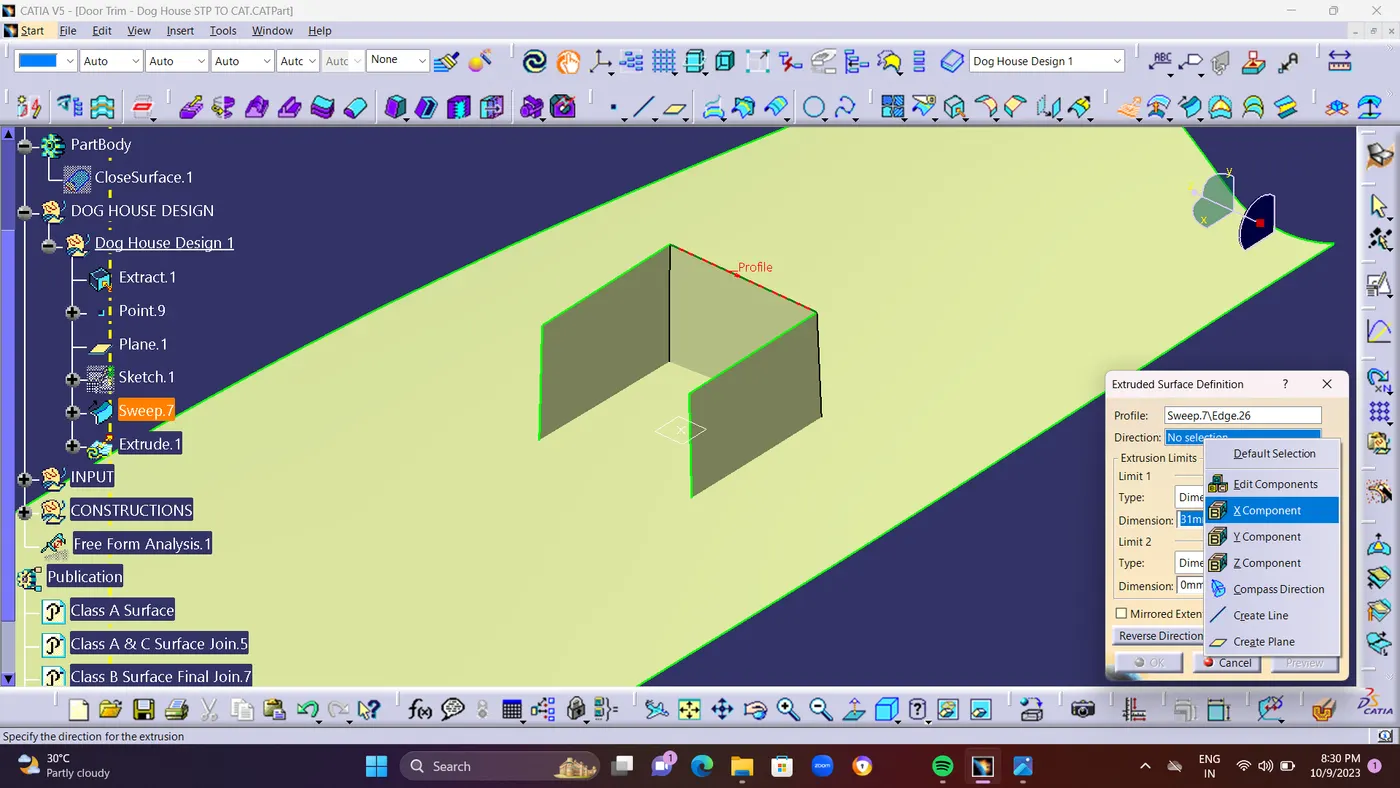
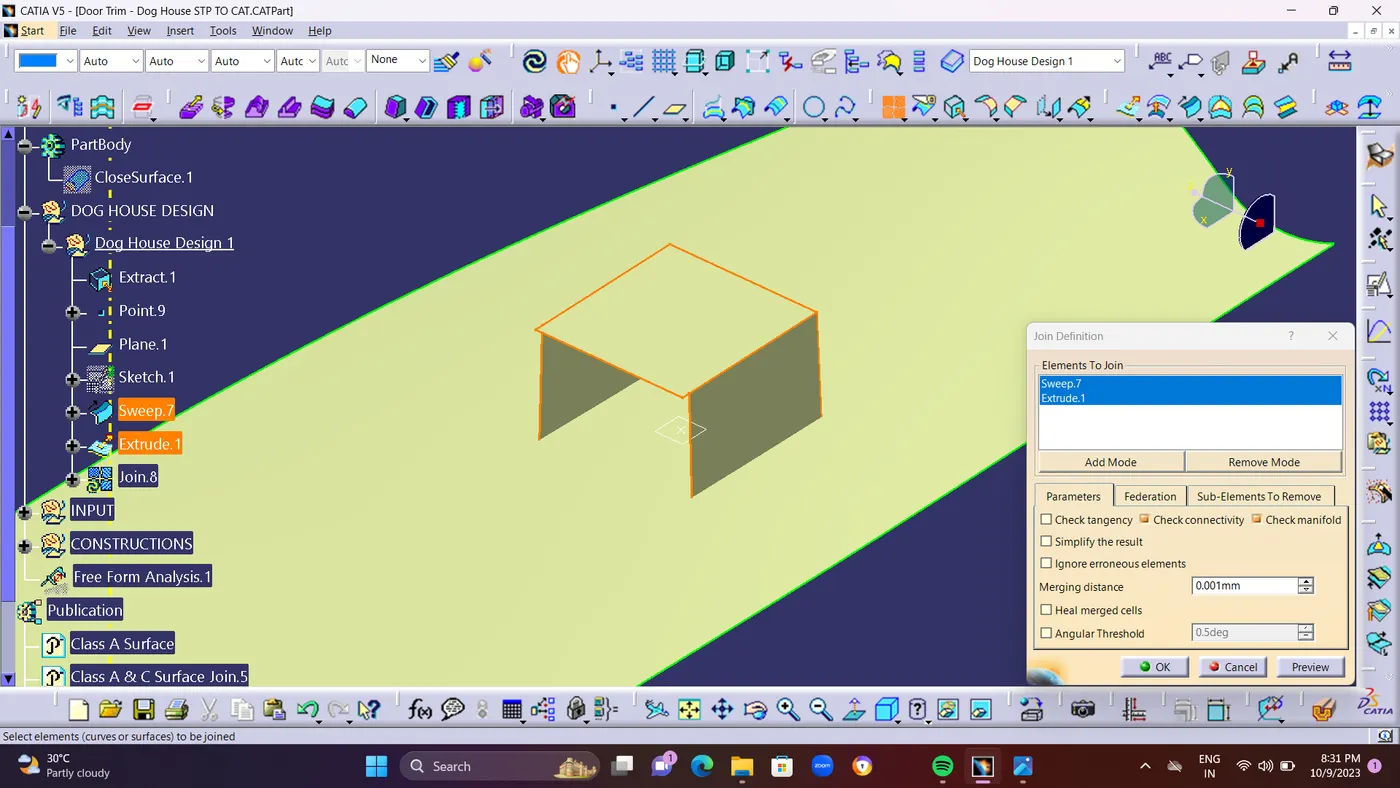
  • Use Extrude Command at Sweep edge surface to Close the top surface for creating a dog house for 31mm.
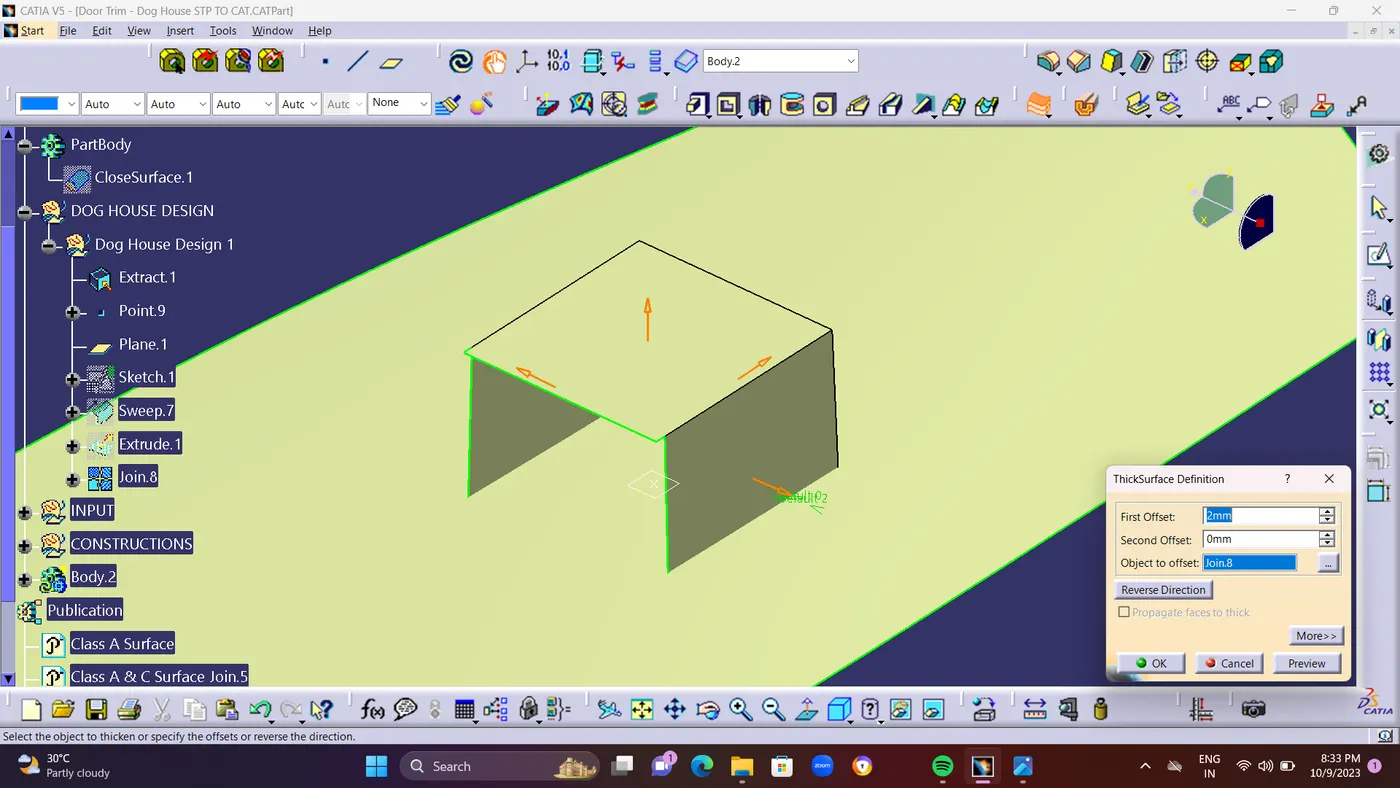
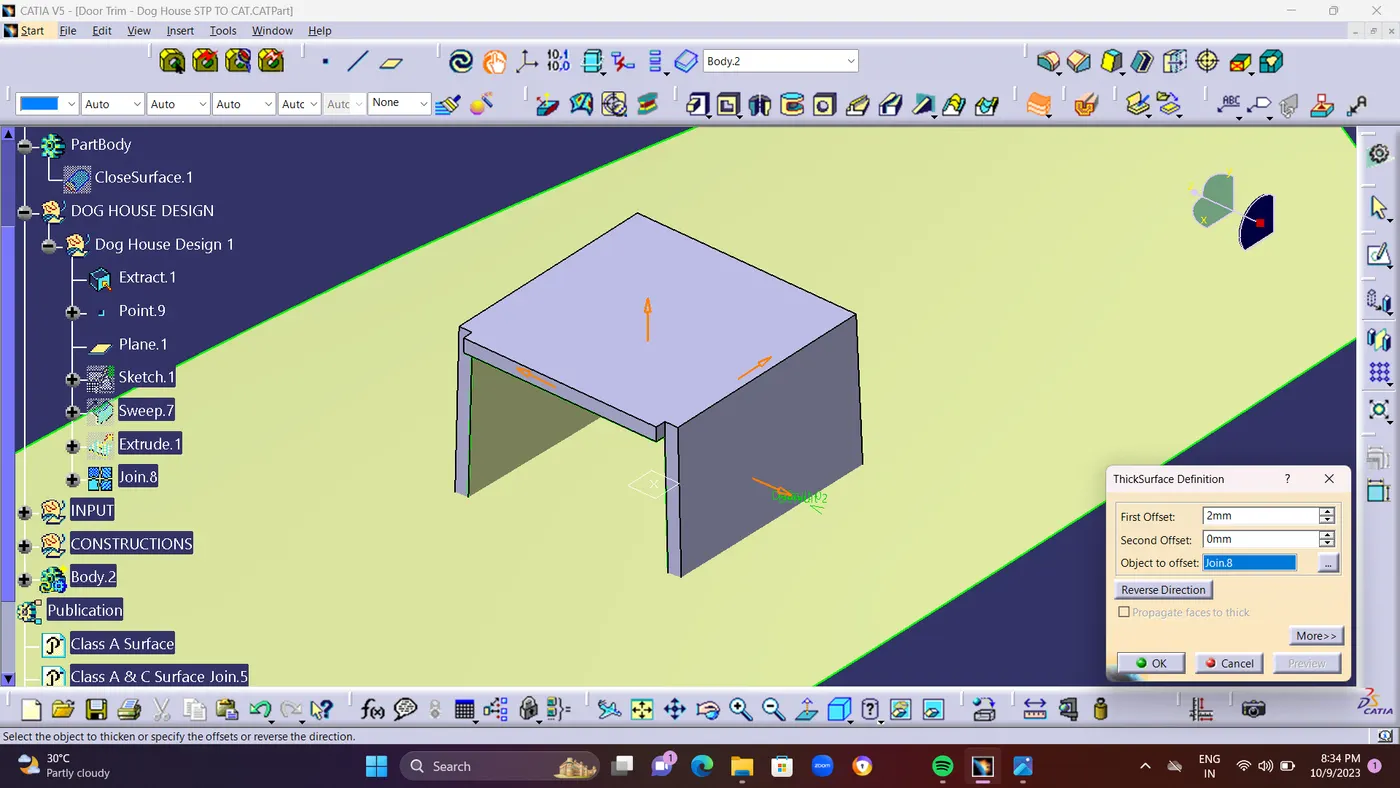
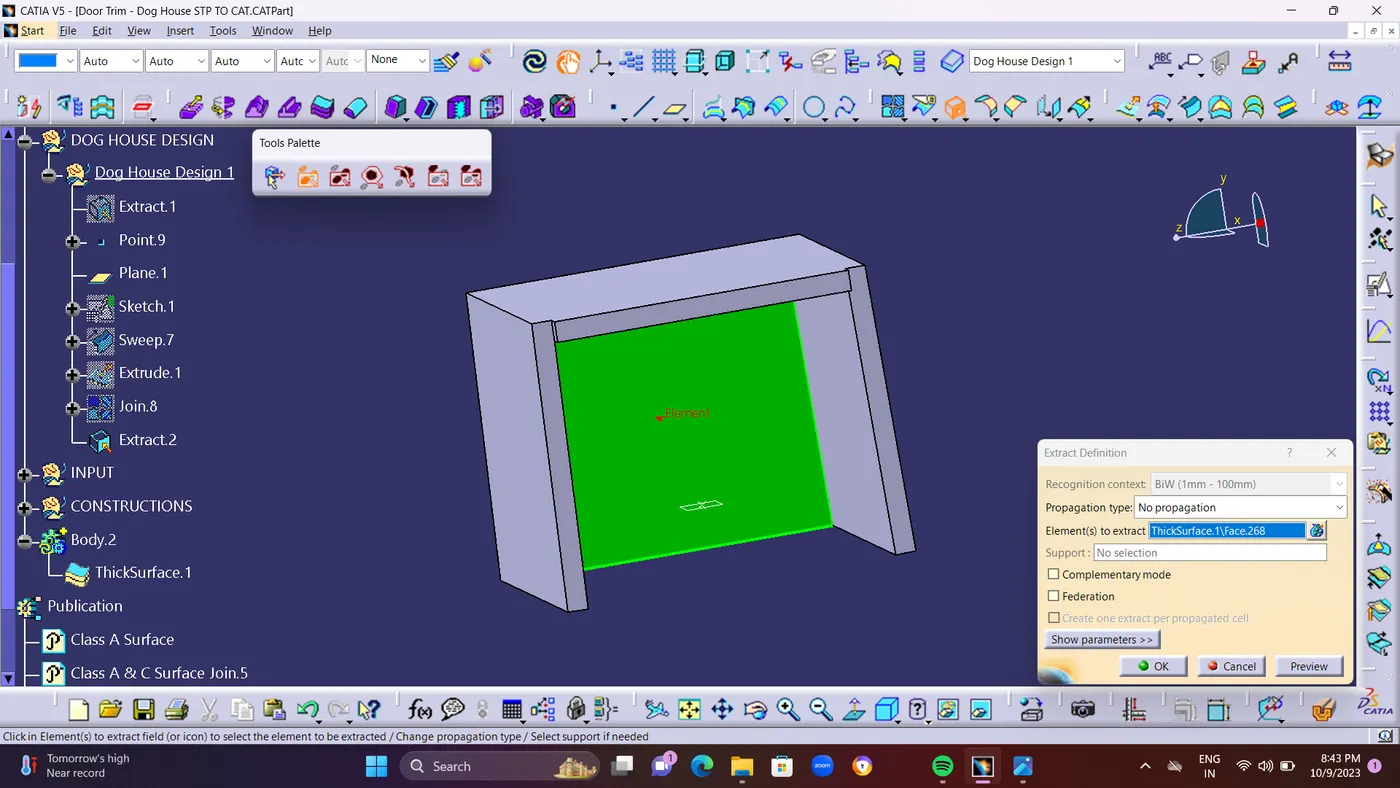
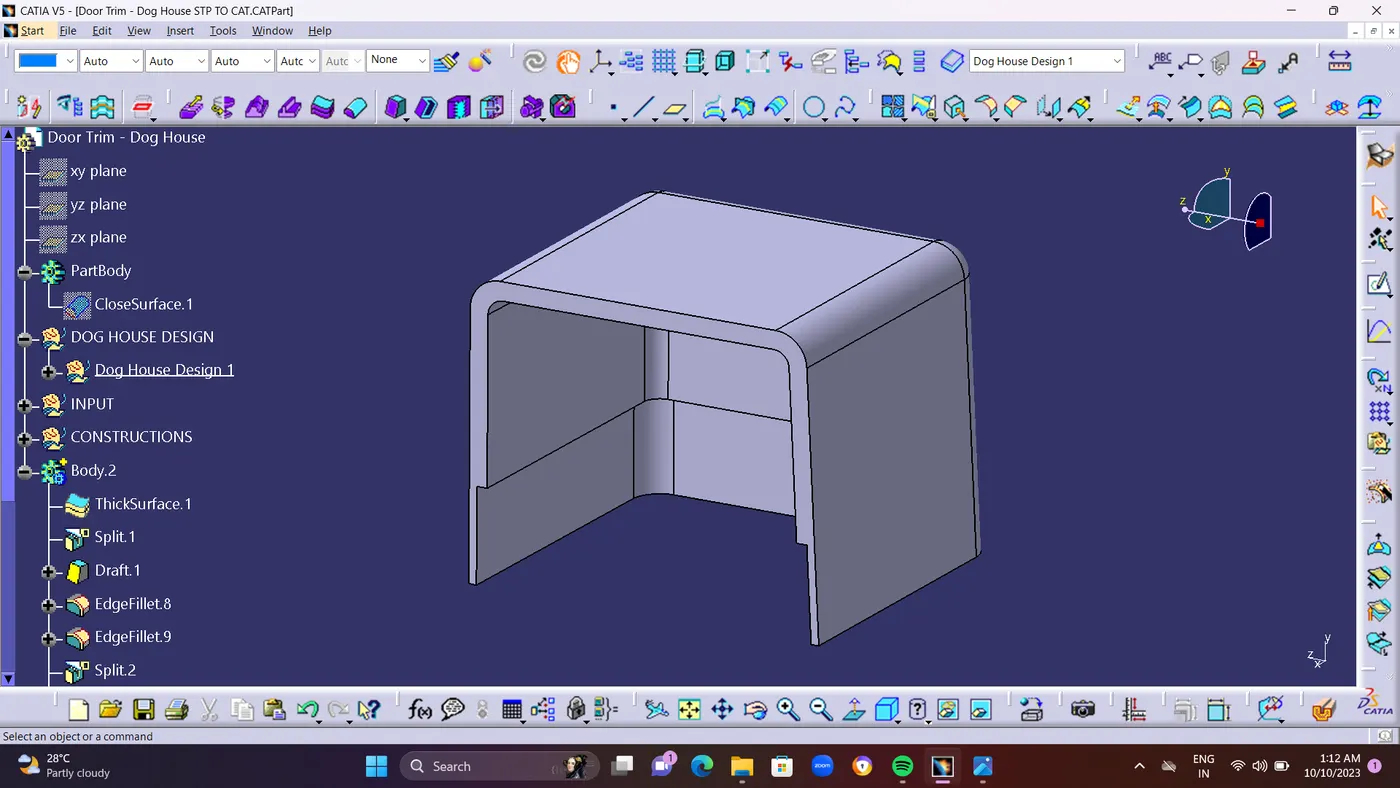
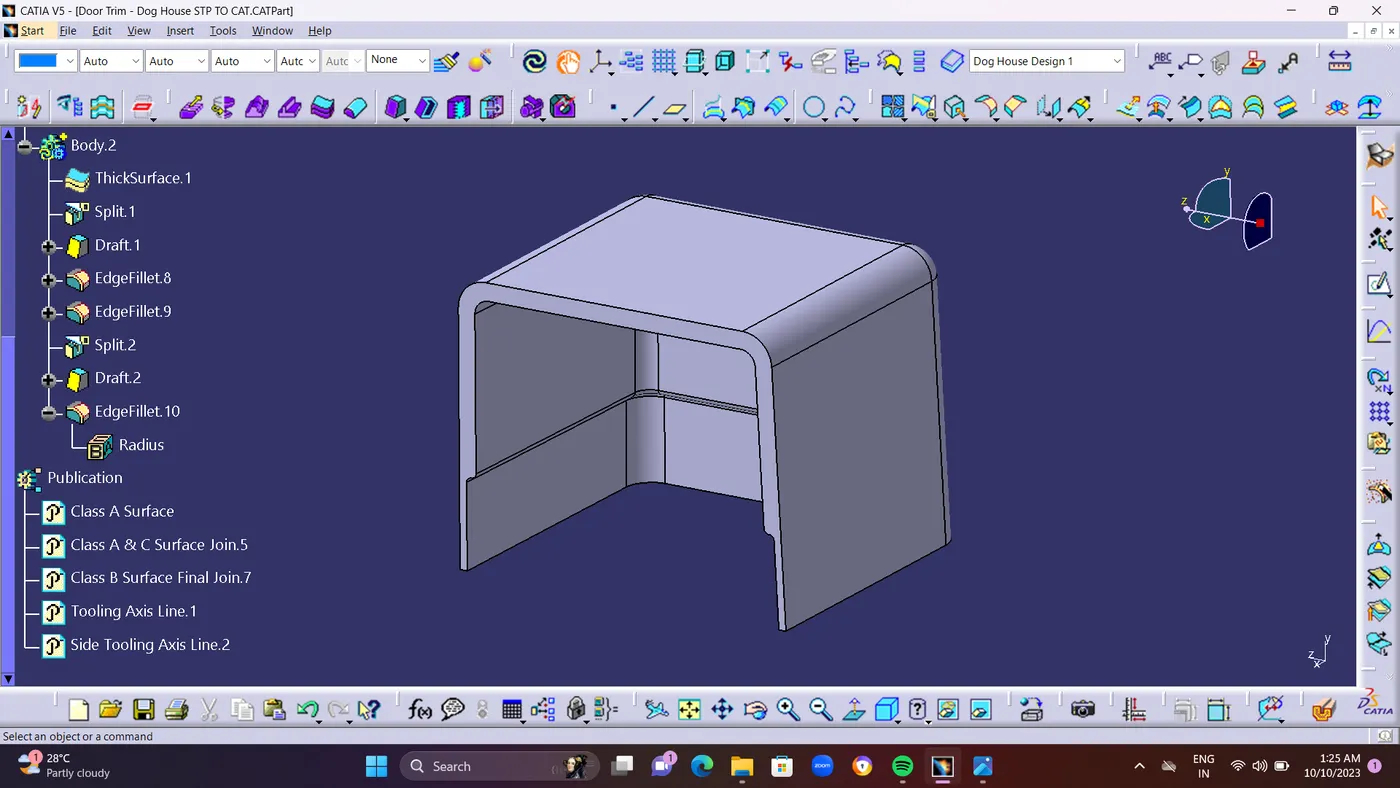
  • and Finally use Thicksurface Command for Creating a Dog house surface into solide part of 2mm Thickness.


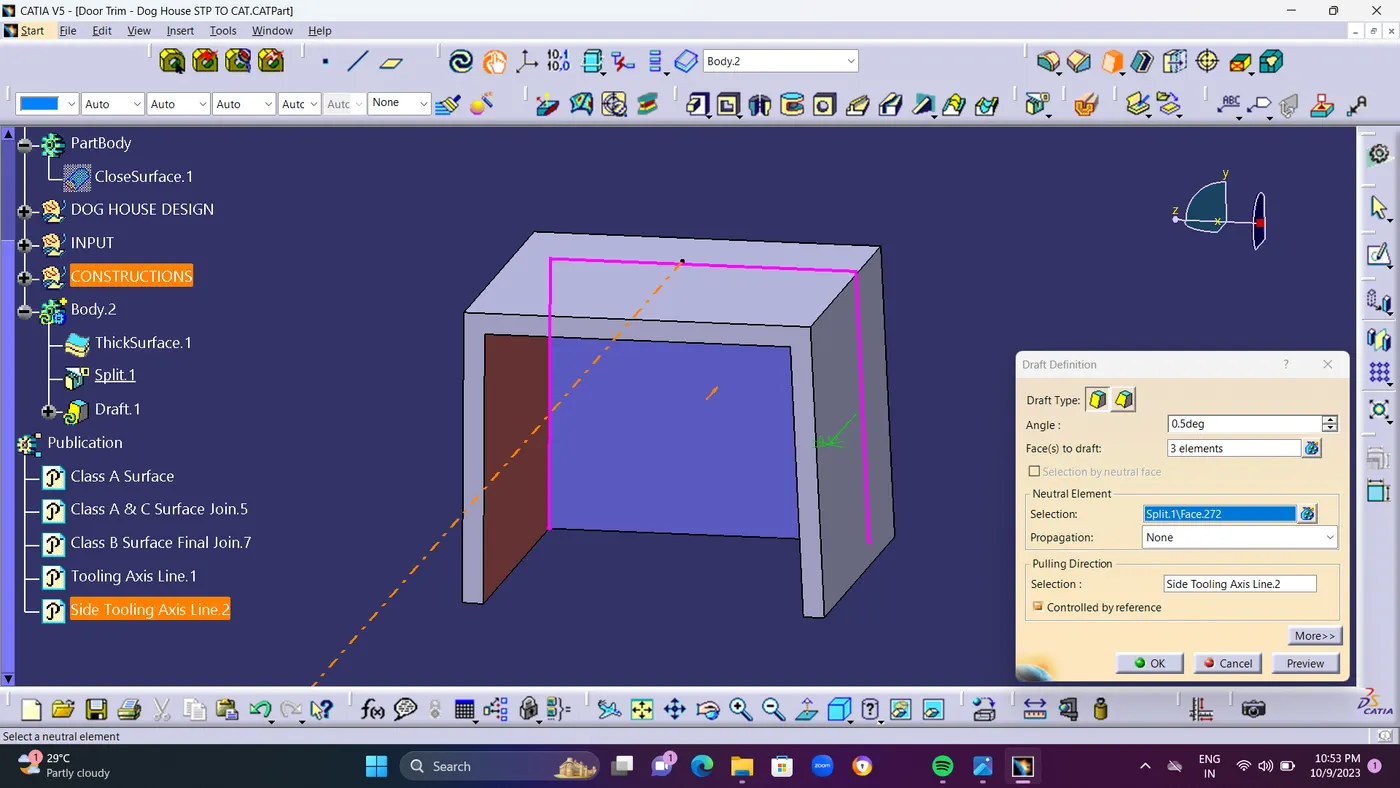
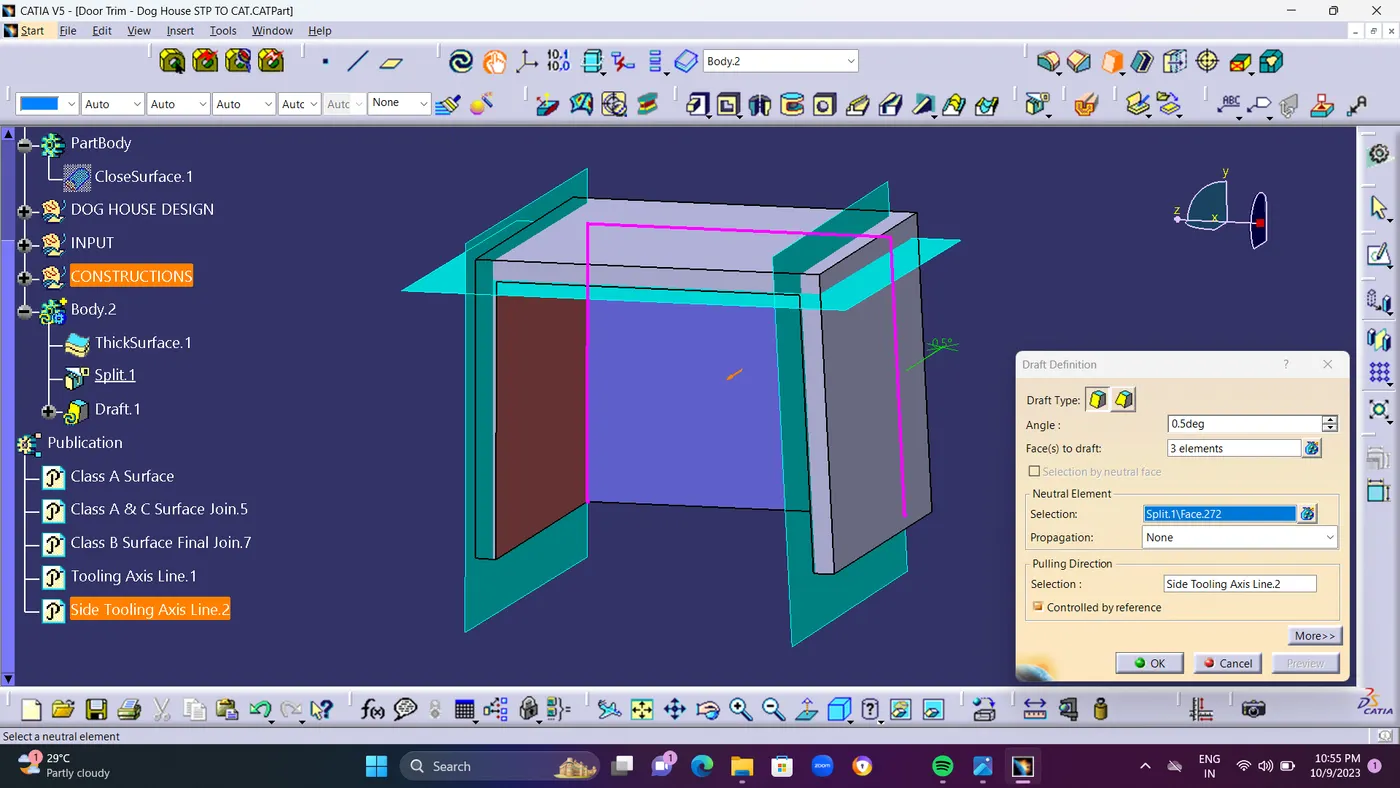
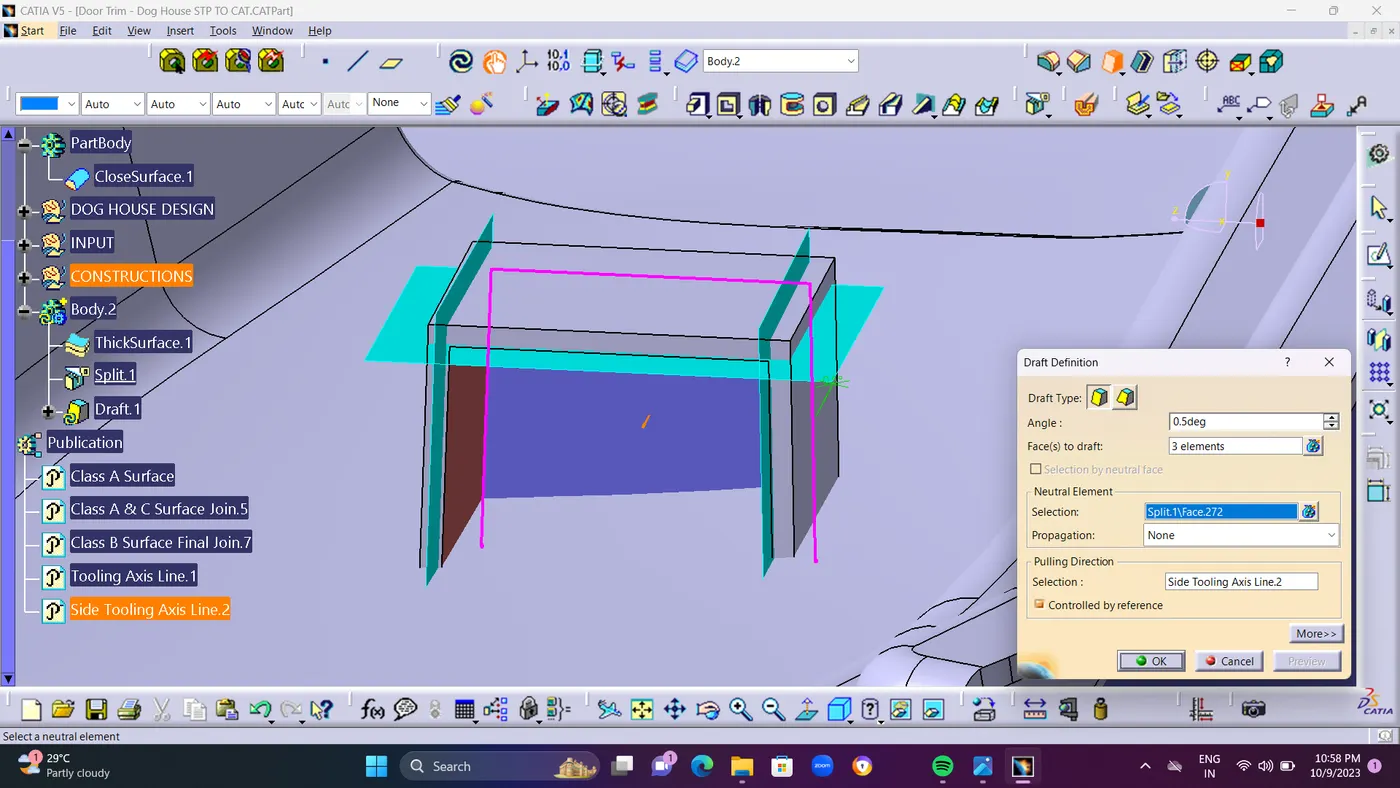
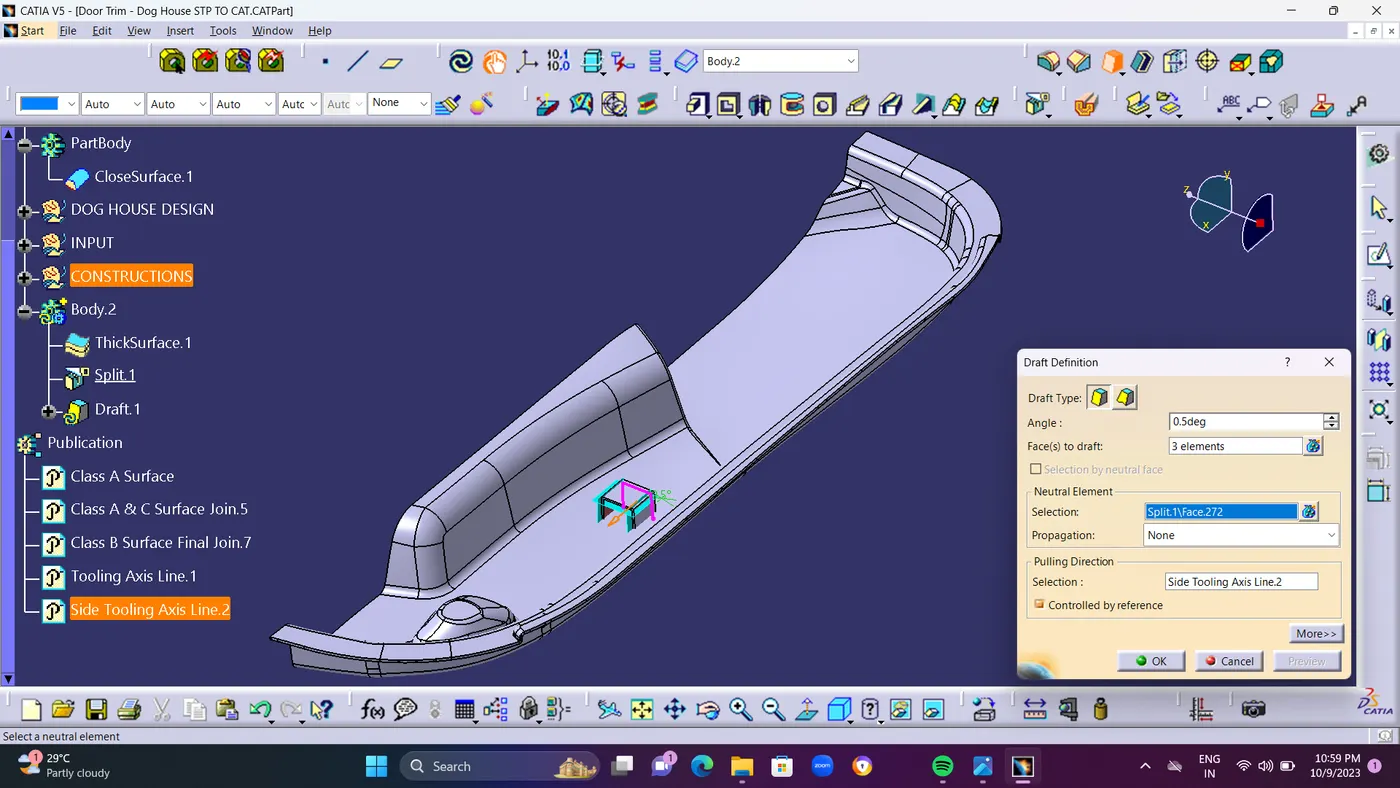
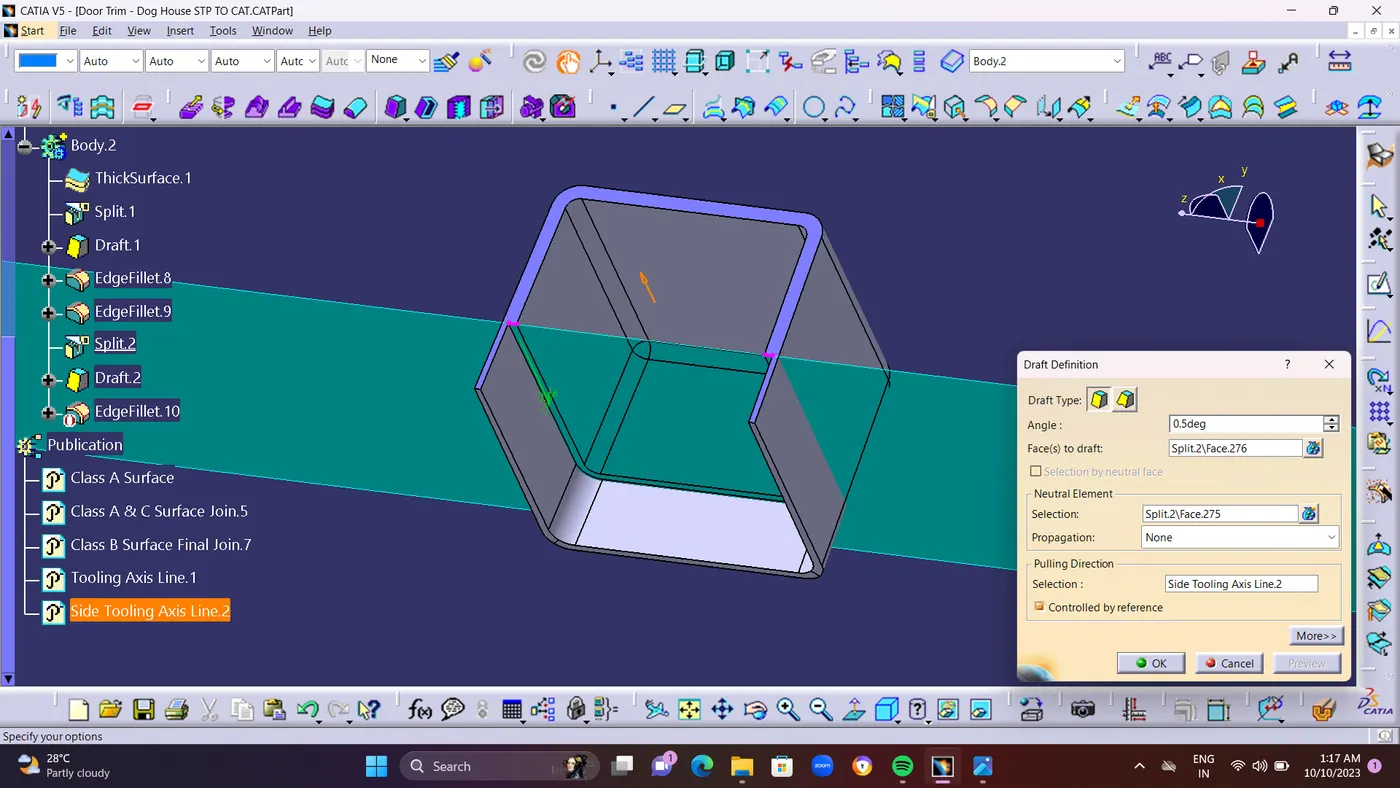
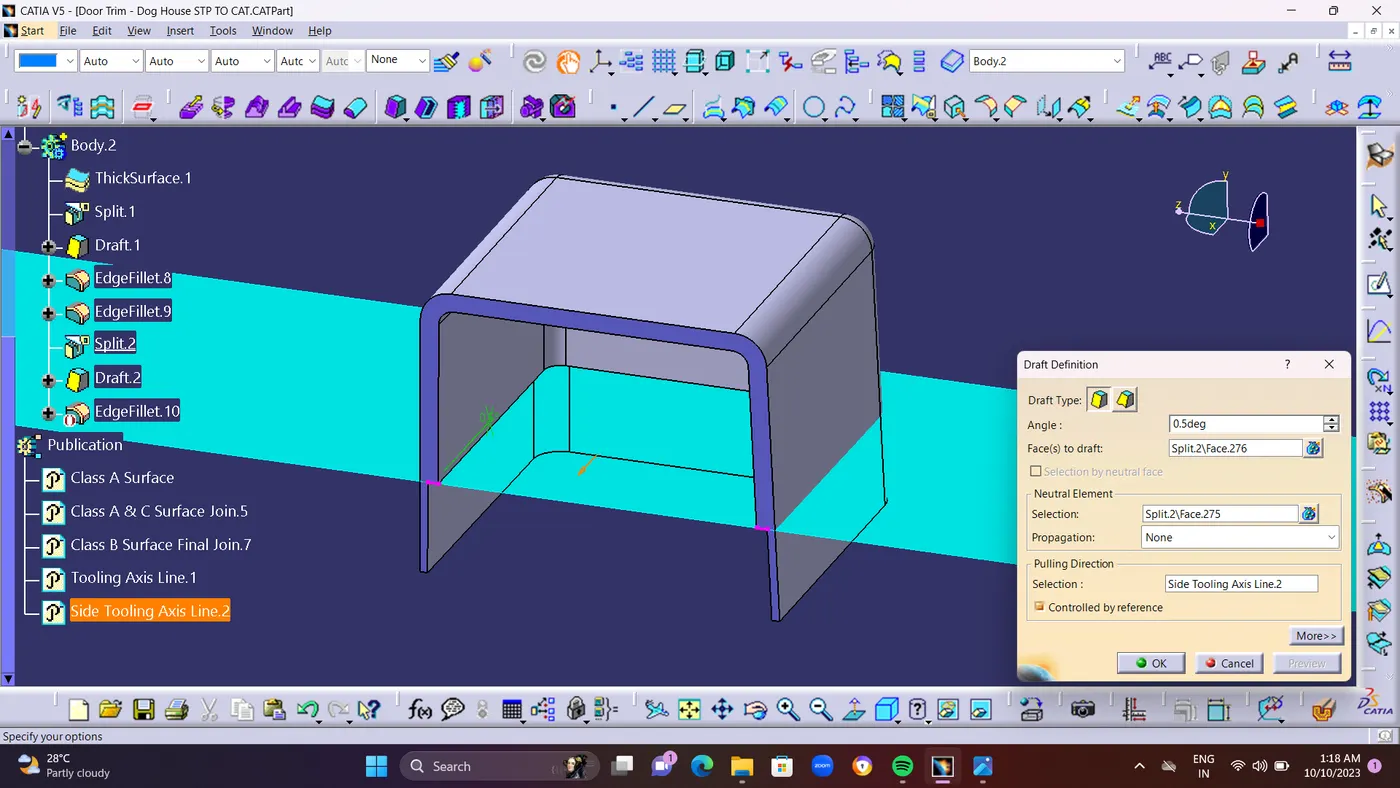
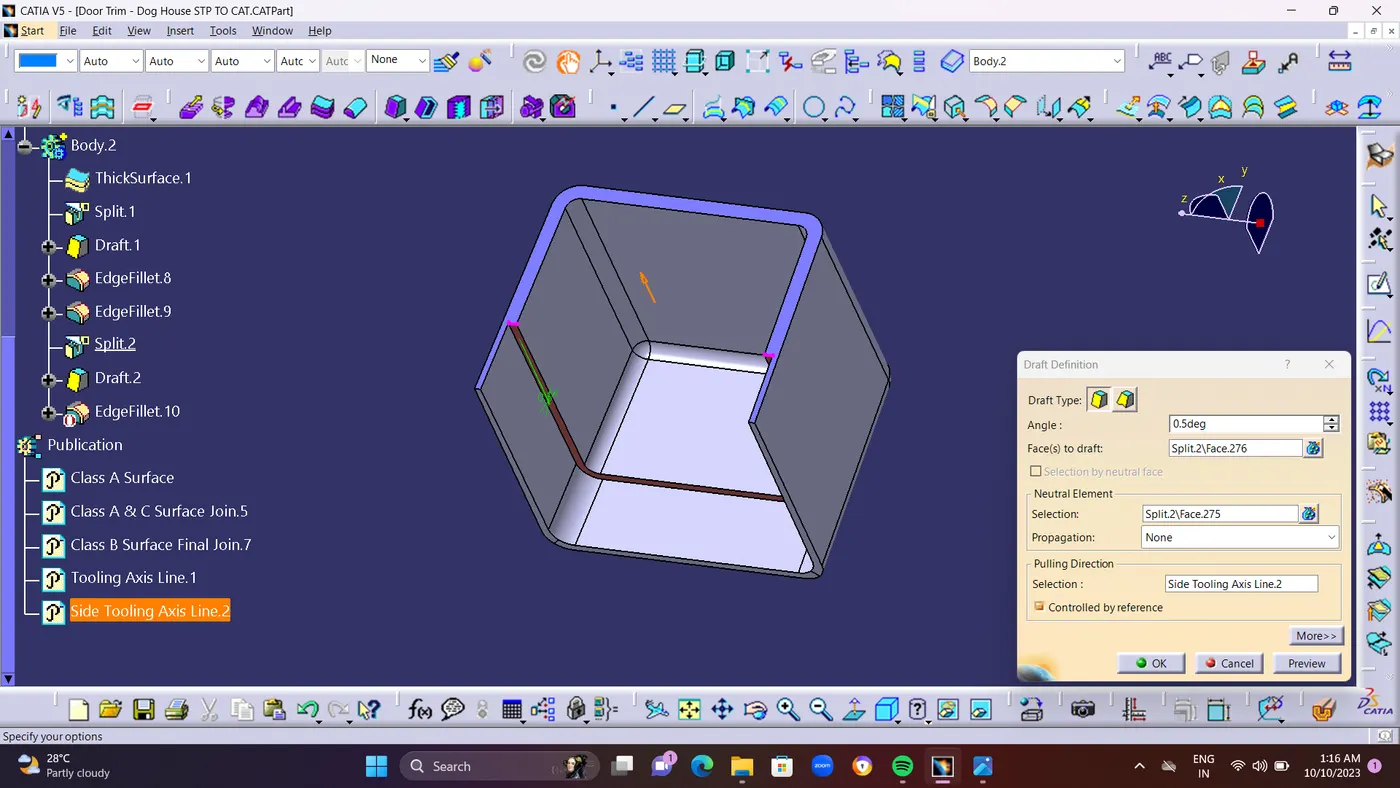
  • STEP 19 : Create a Drafting for Inner surface of 0.5 deg.using SIDECORE TOOING Axis.
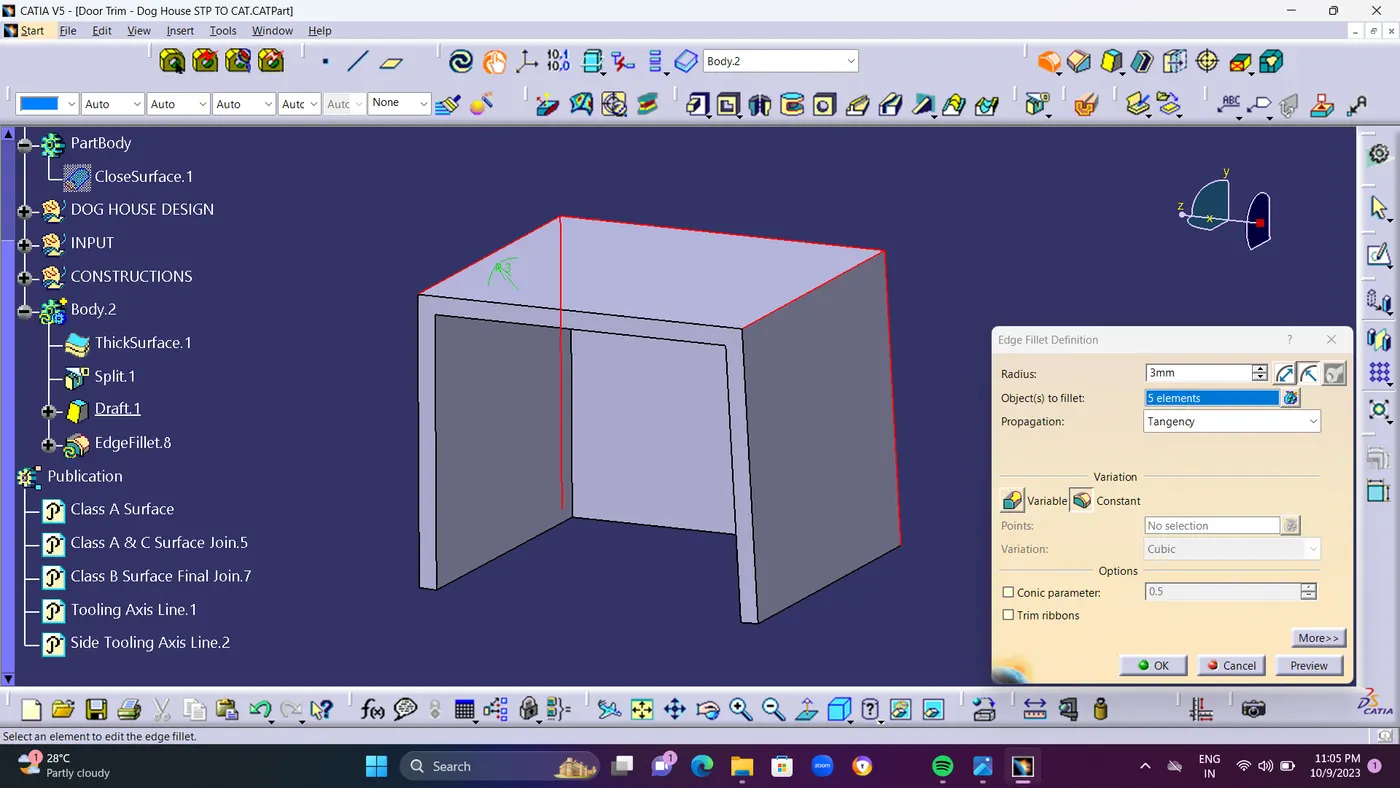
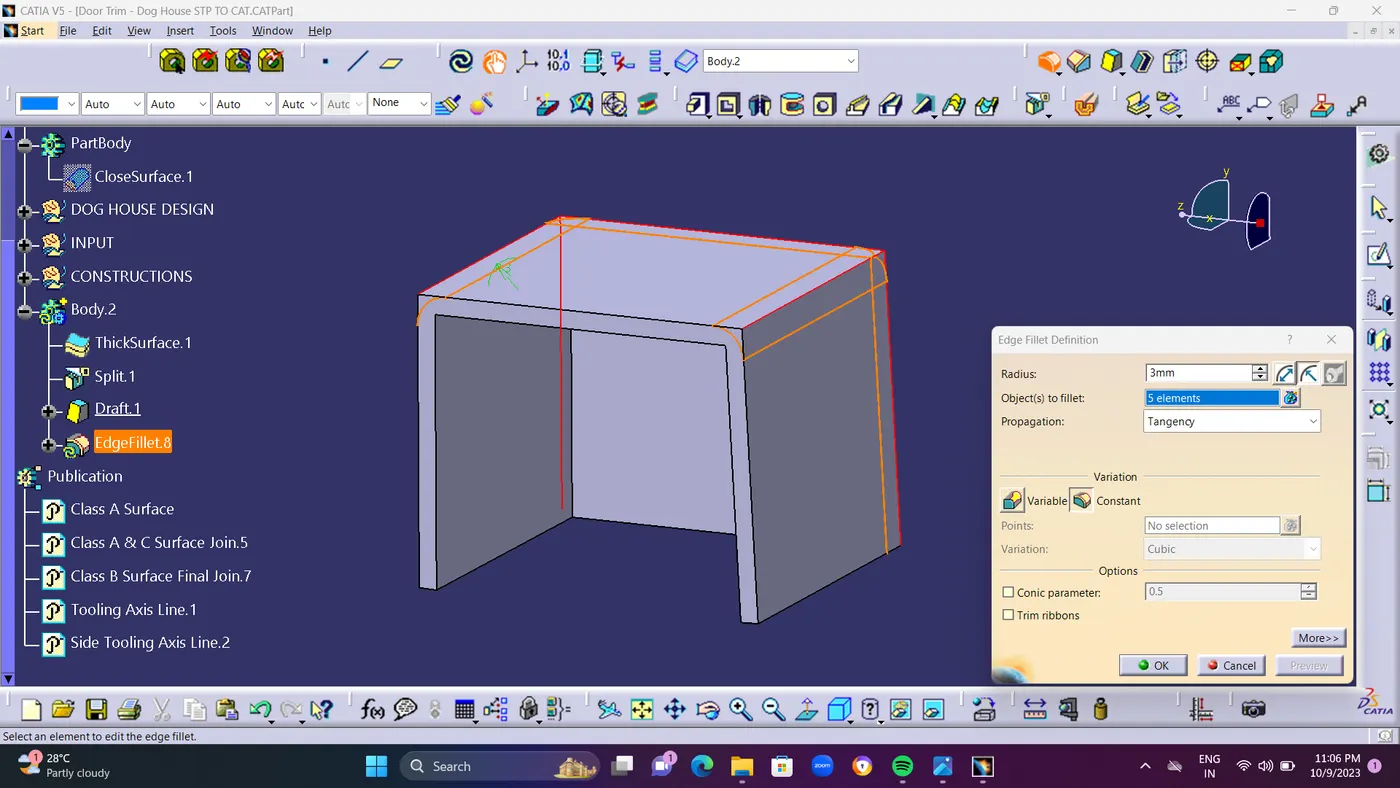
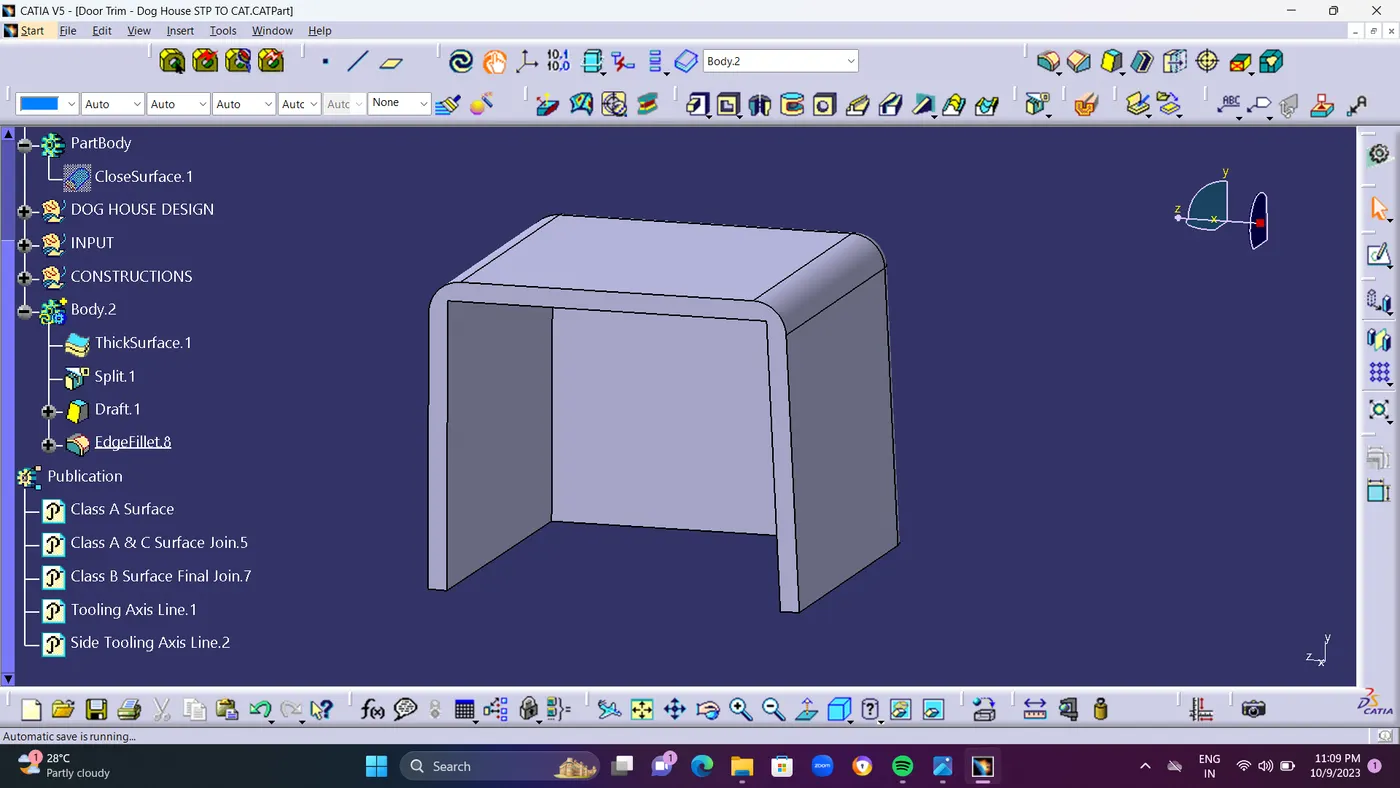
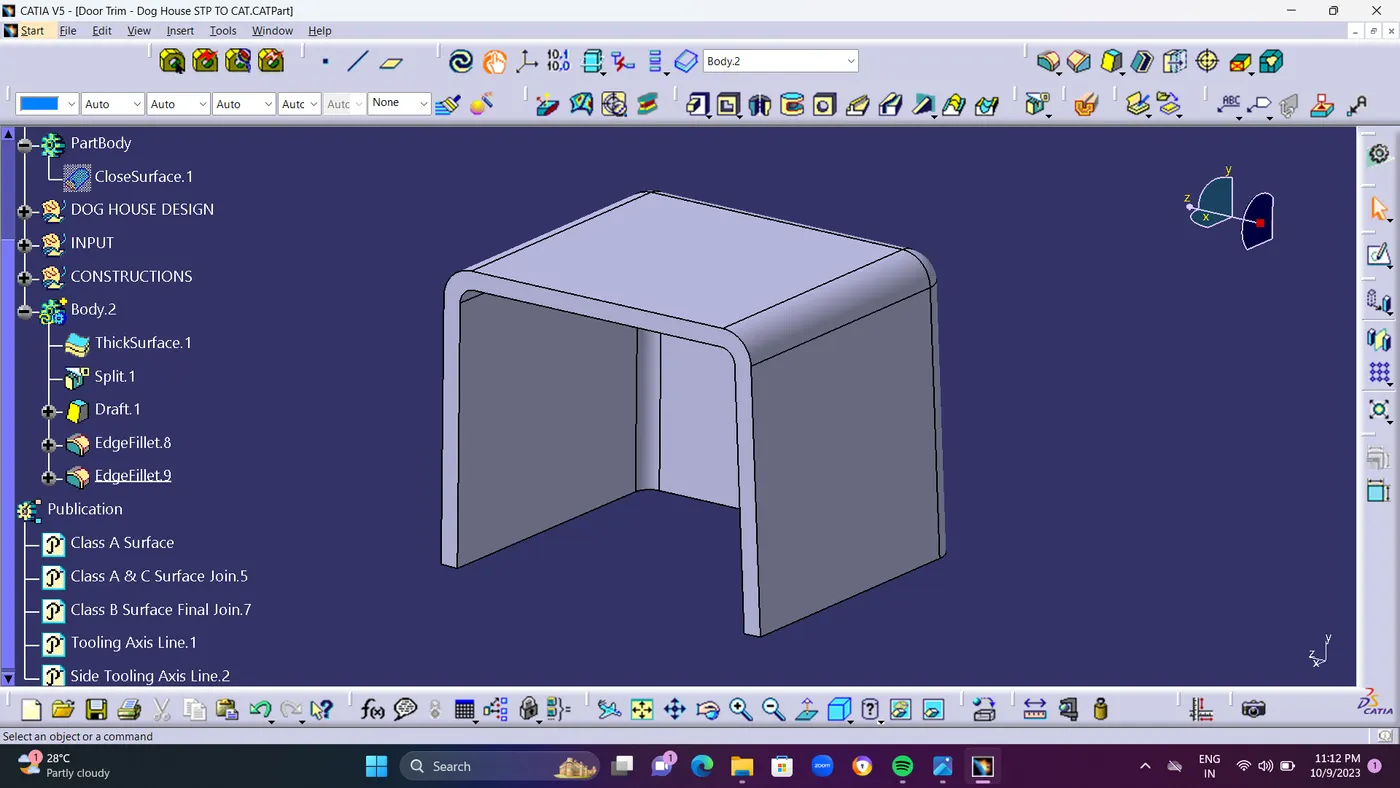
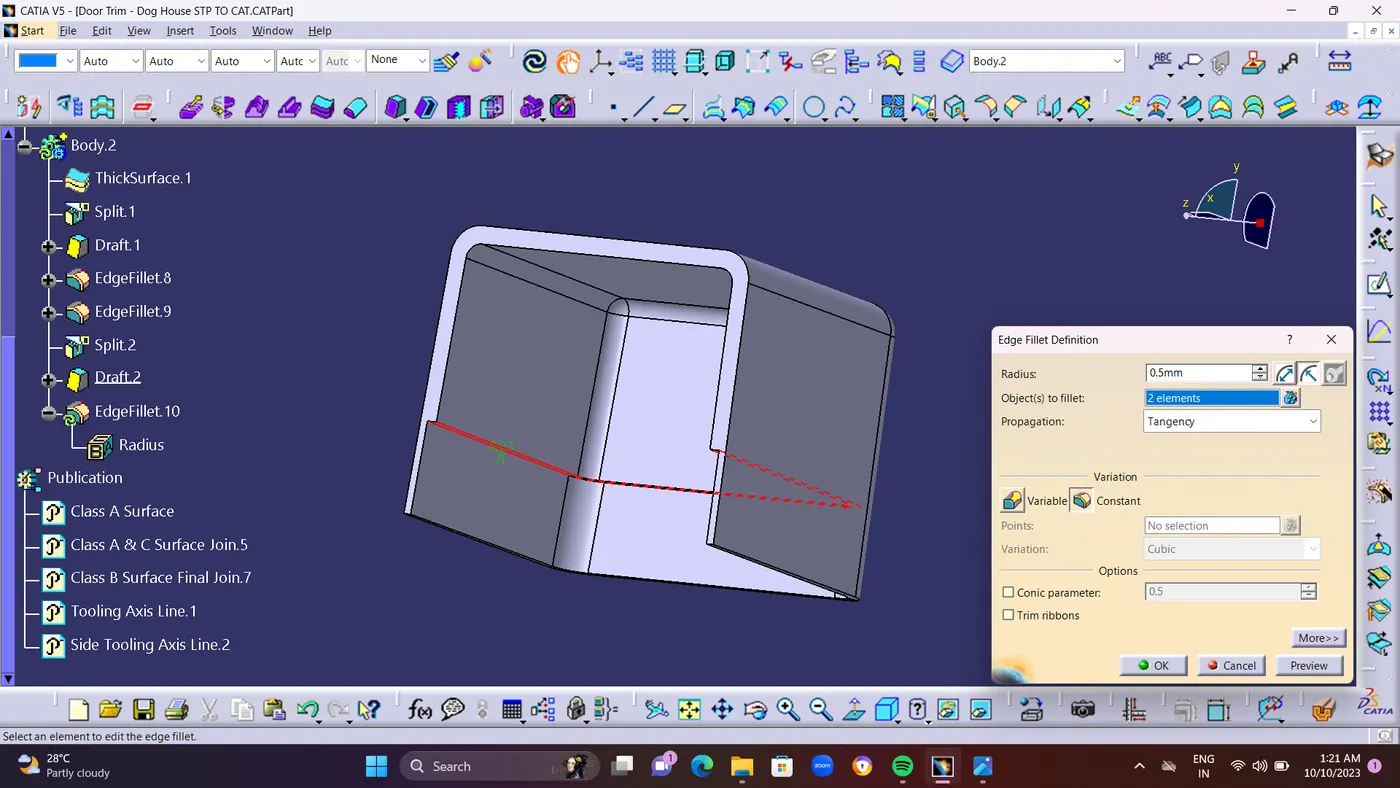
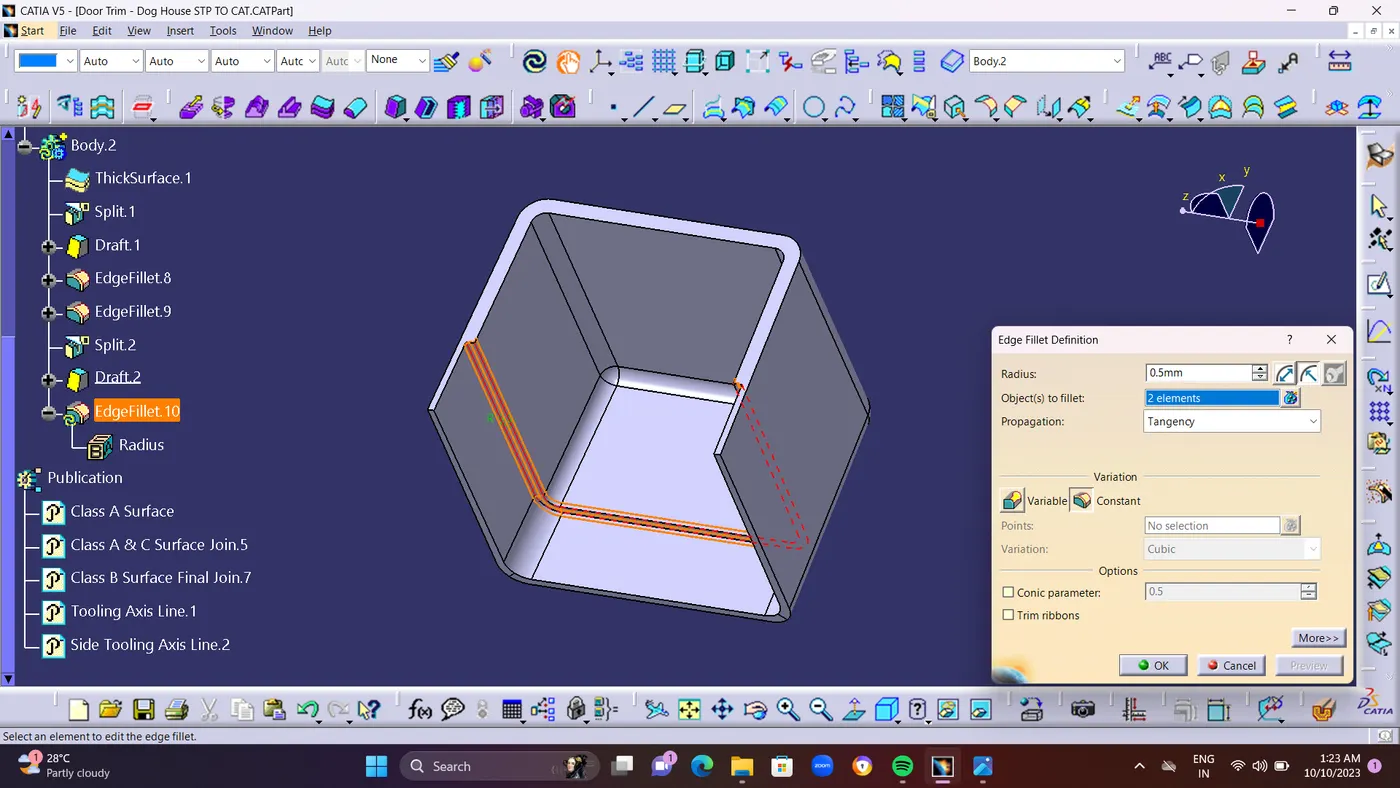
  • Outer Edge Corner As Radius of 3mm FILLET as been Created.
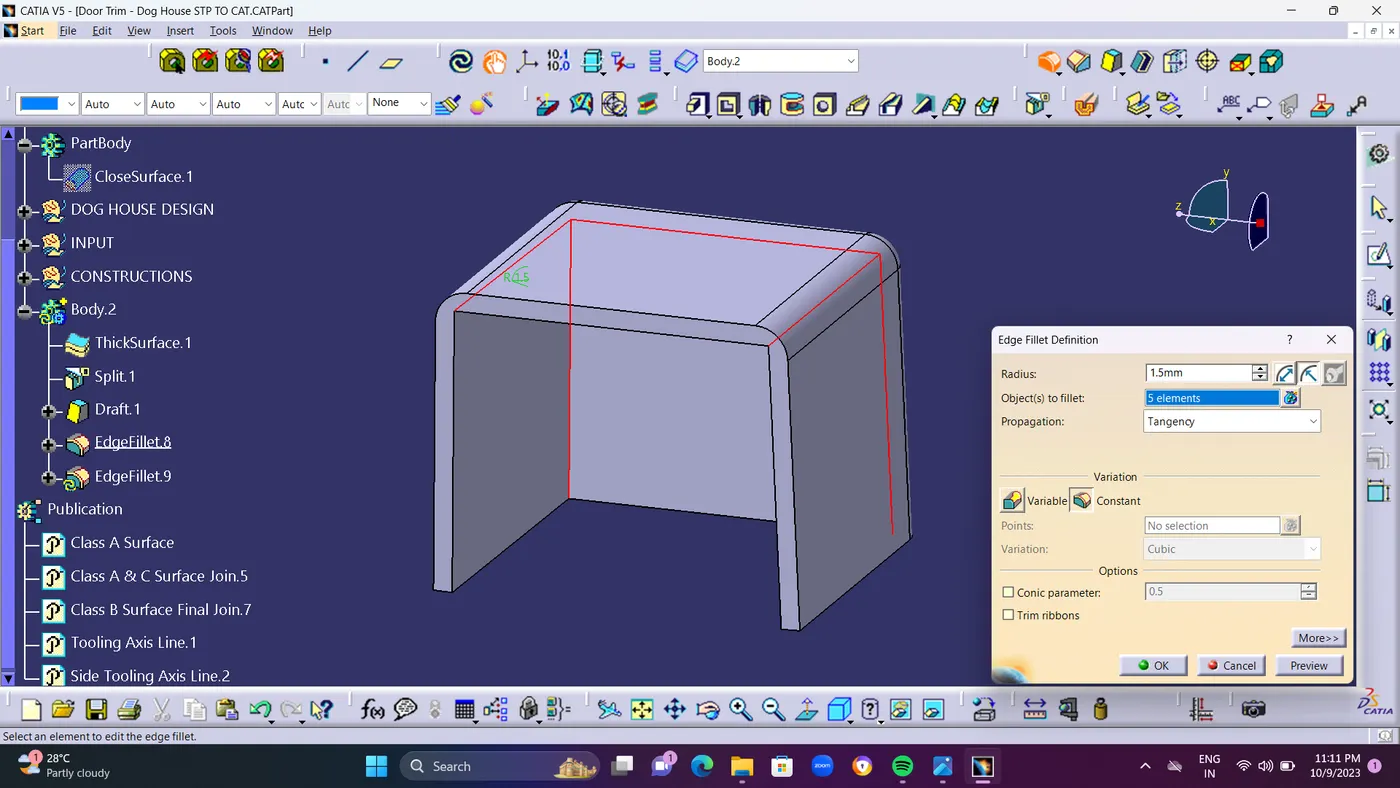
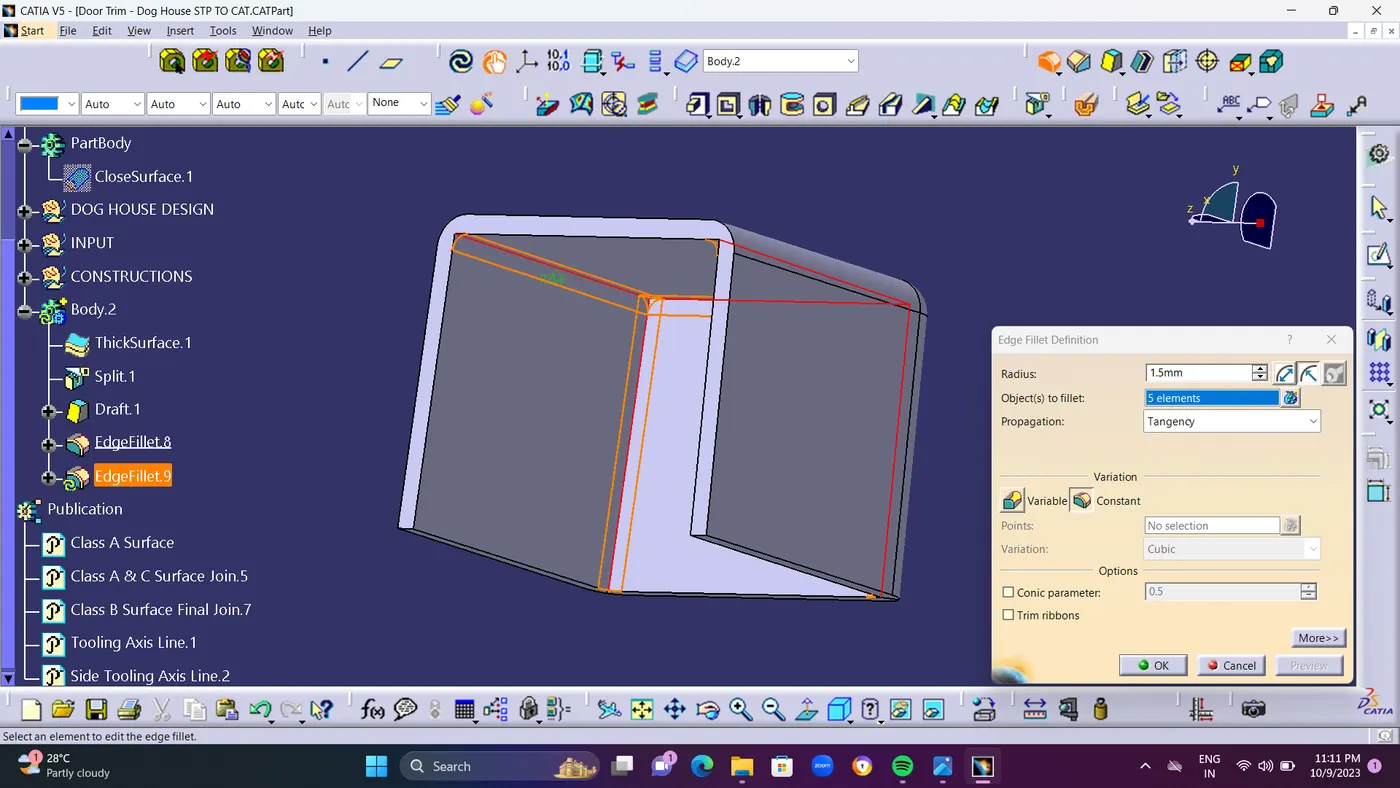
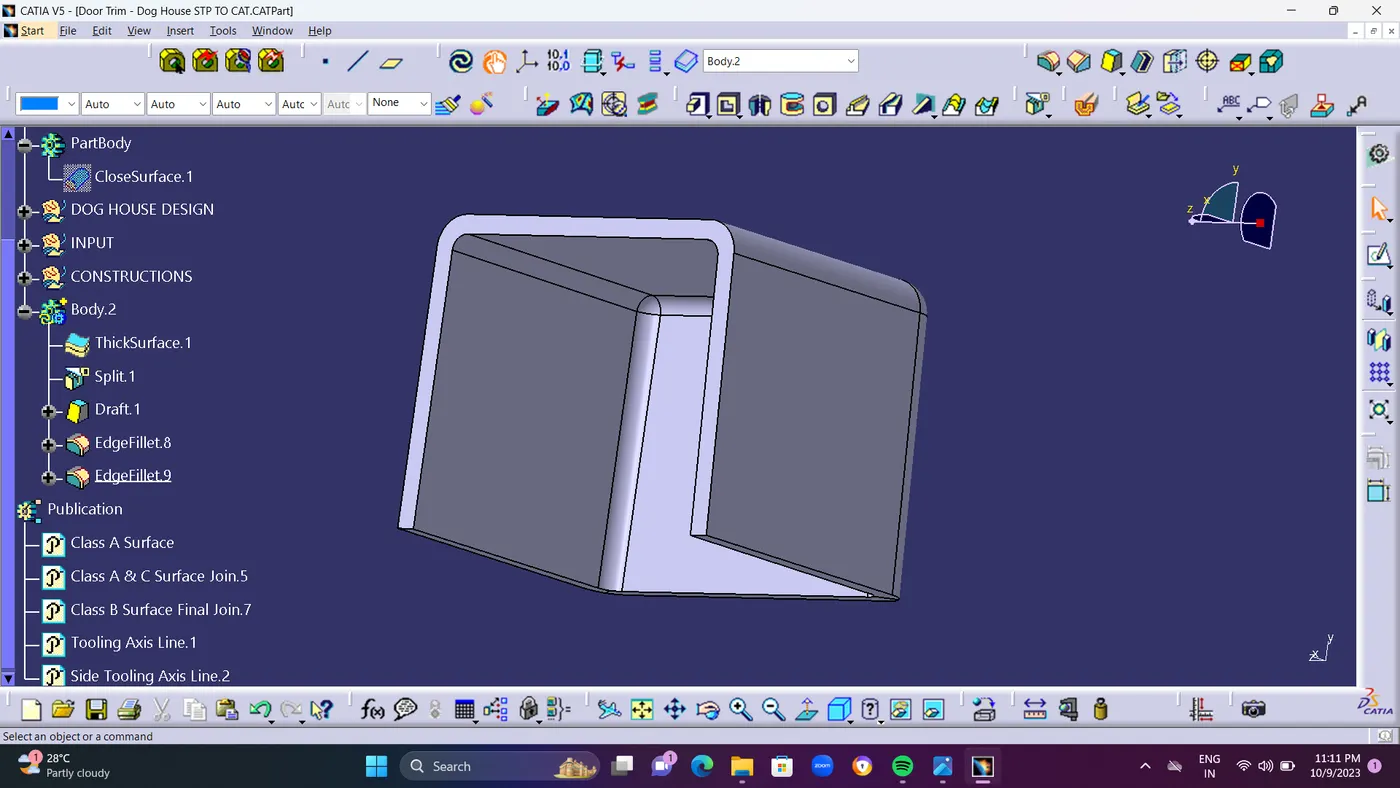
  • and Inner Edge Corner As Radius of 1.5mm FILLET as been Created. Both inner and outer fillet as been created using EDGE FILLET Command. 
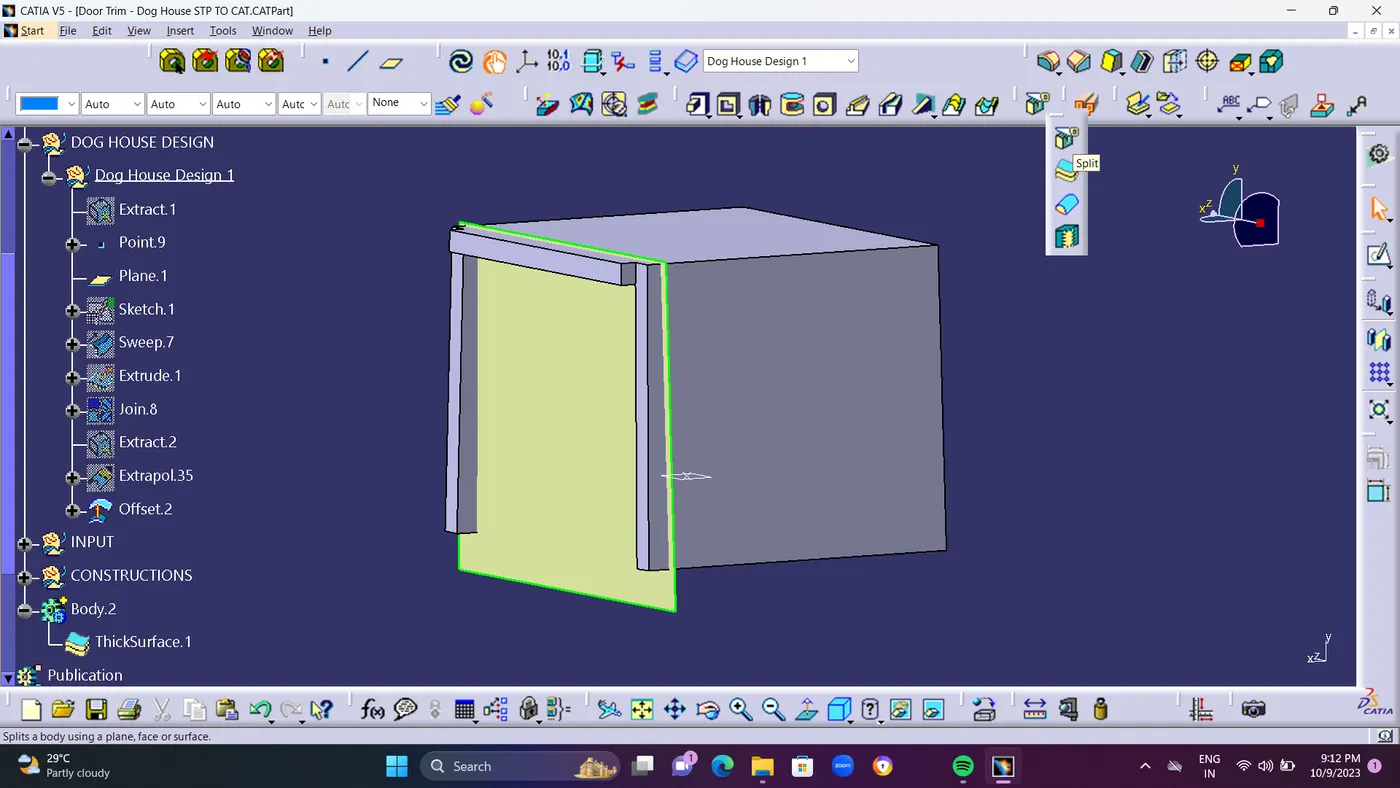
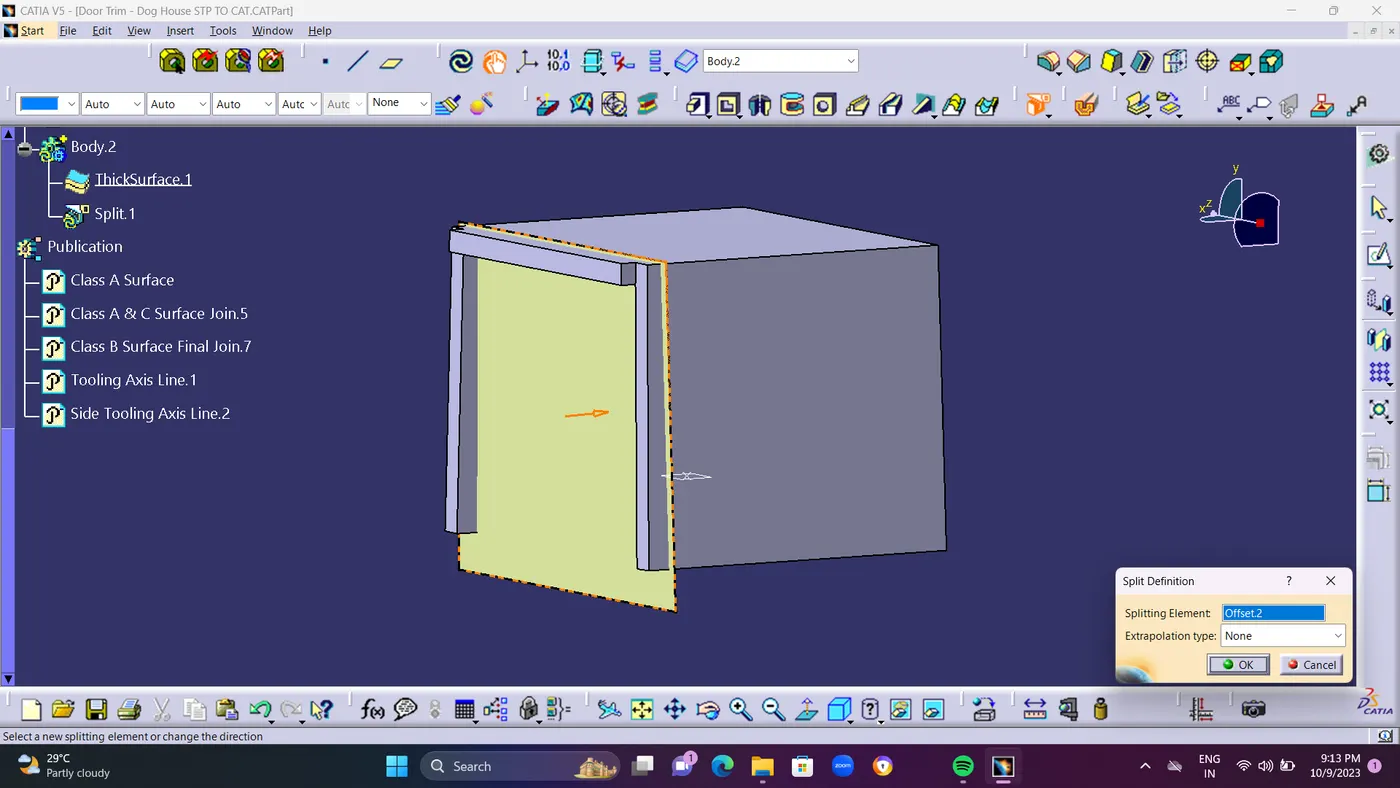
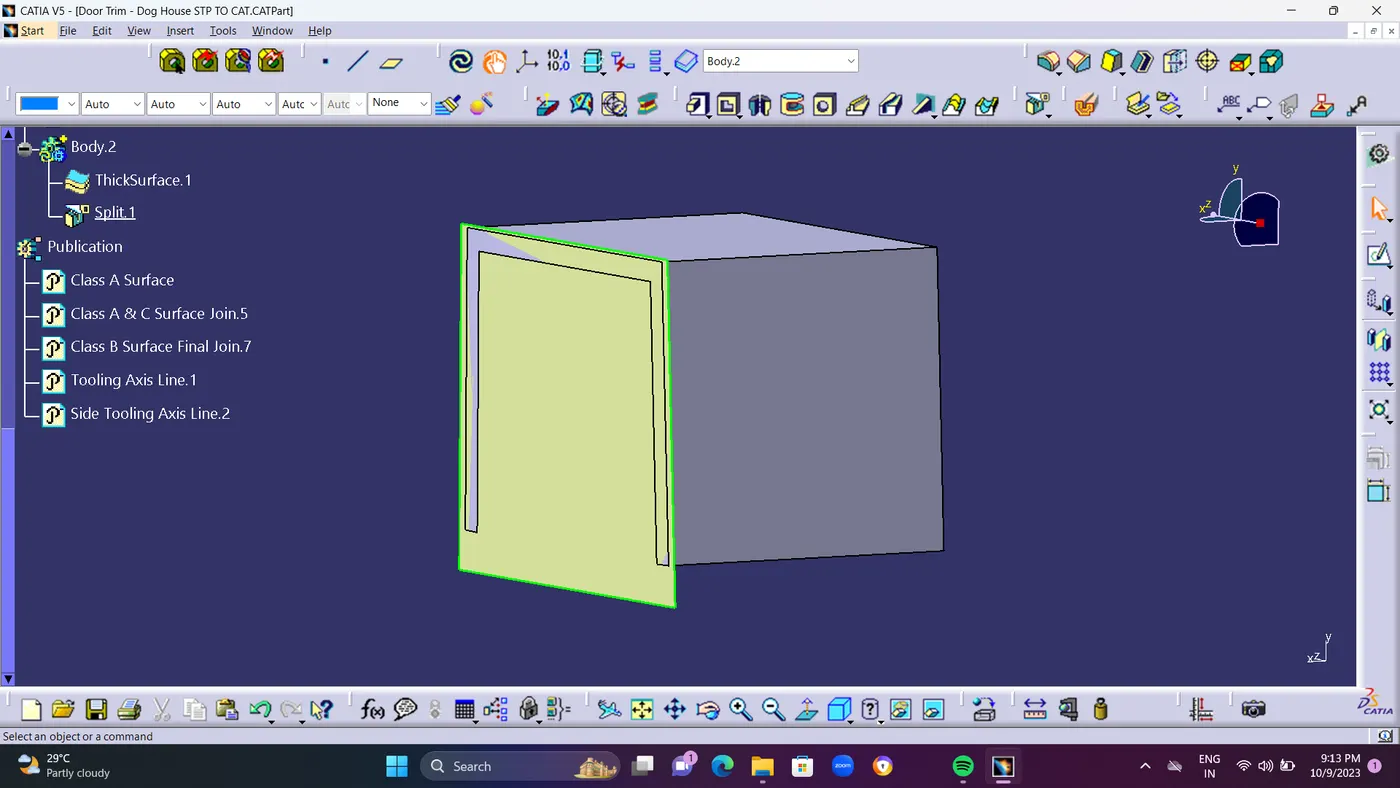
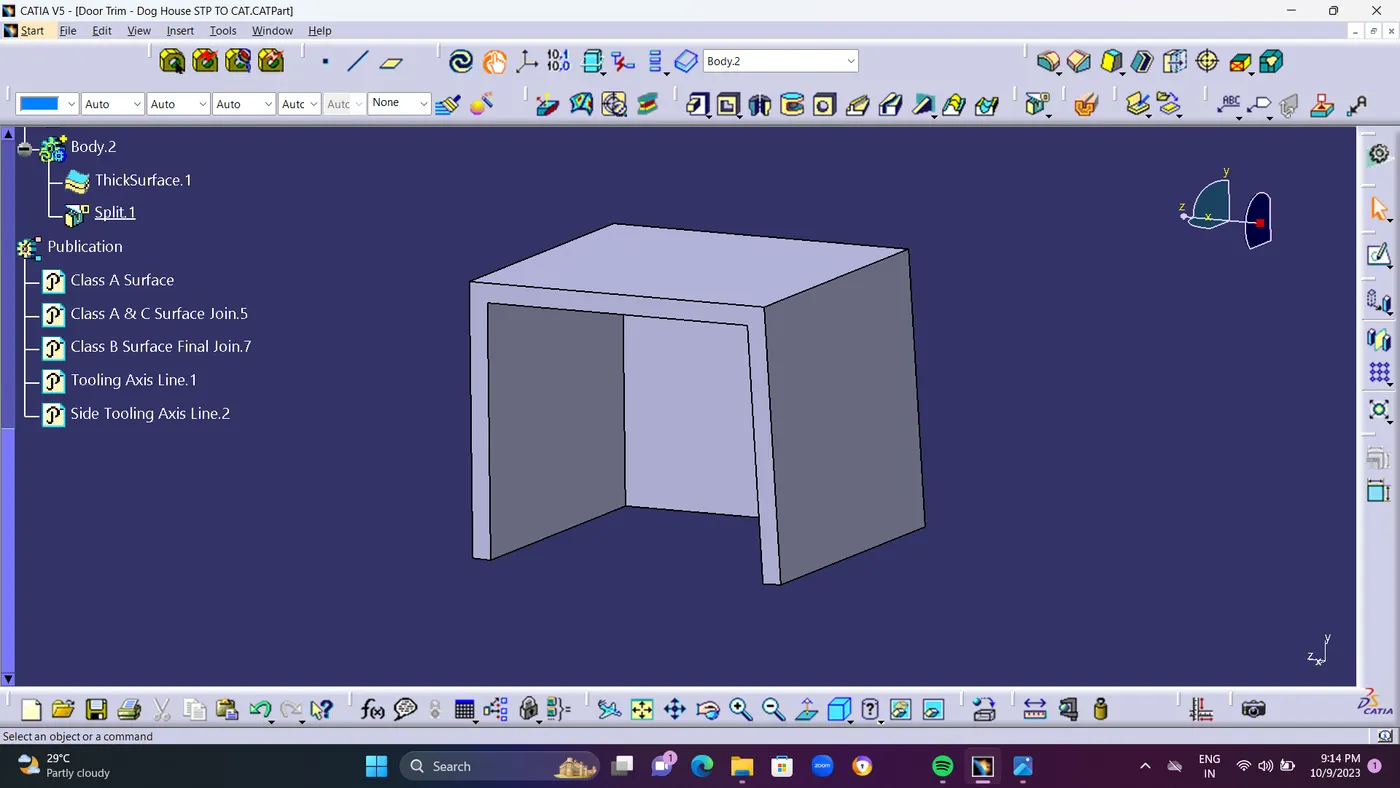
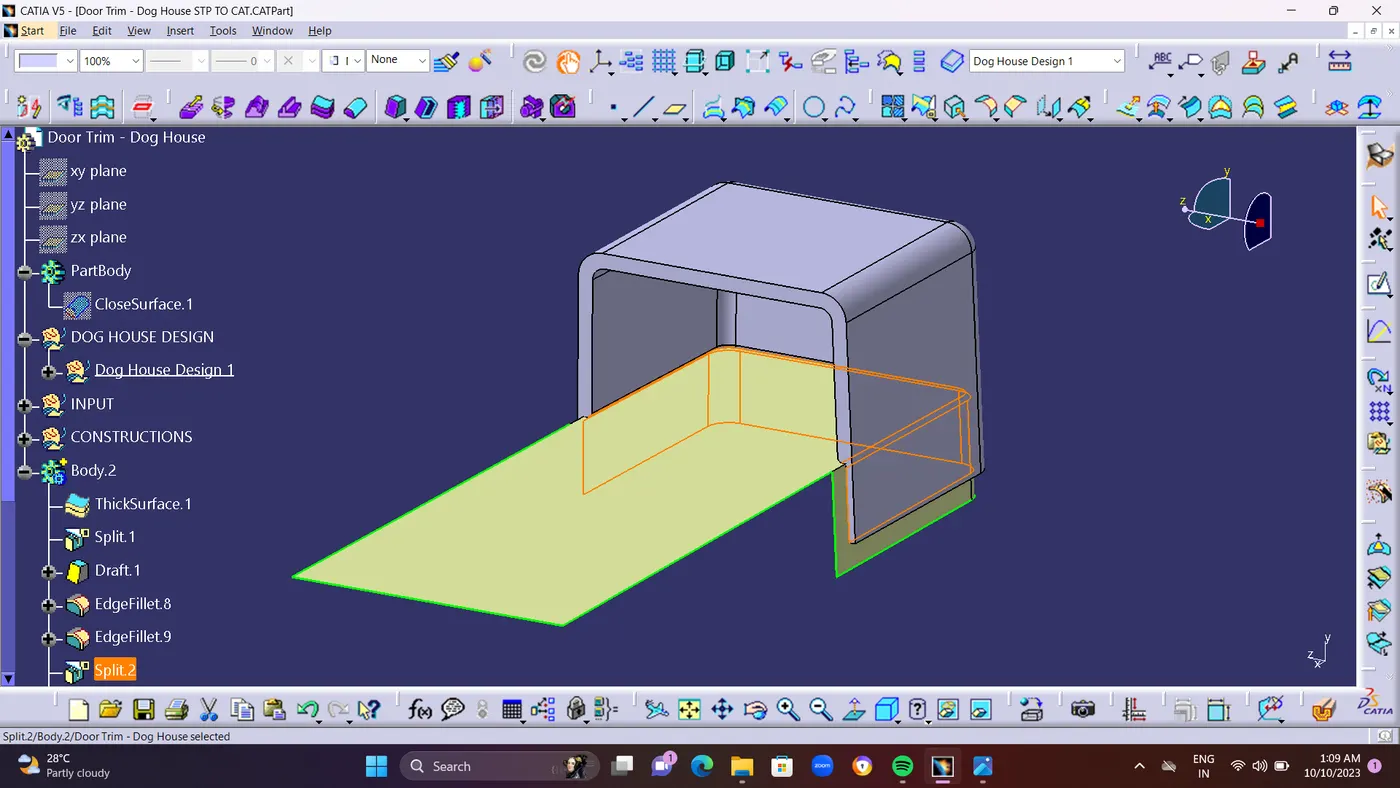
  • after Creating a fillet. In the dog house inner surface has Step cutting and How to Create it.Shown in Below ScreenShots.
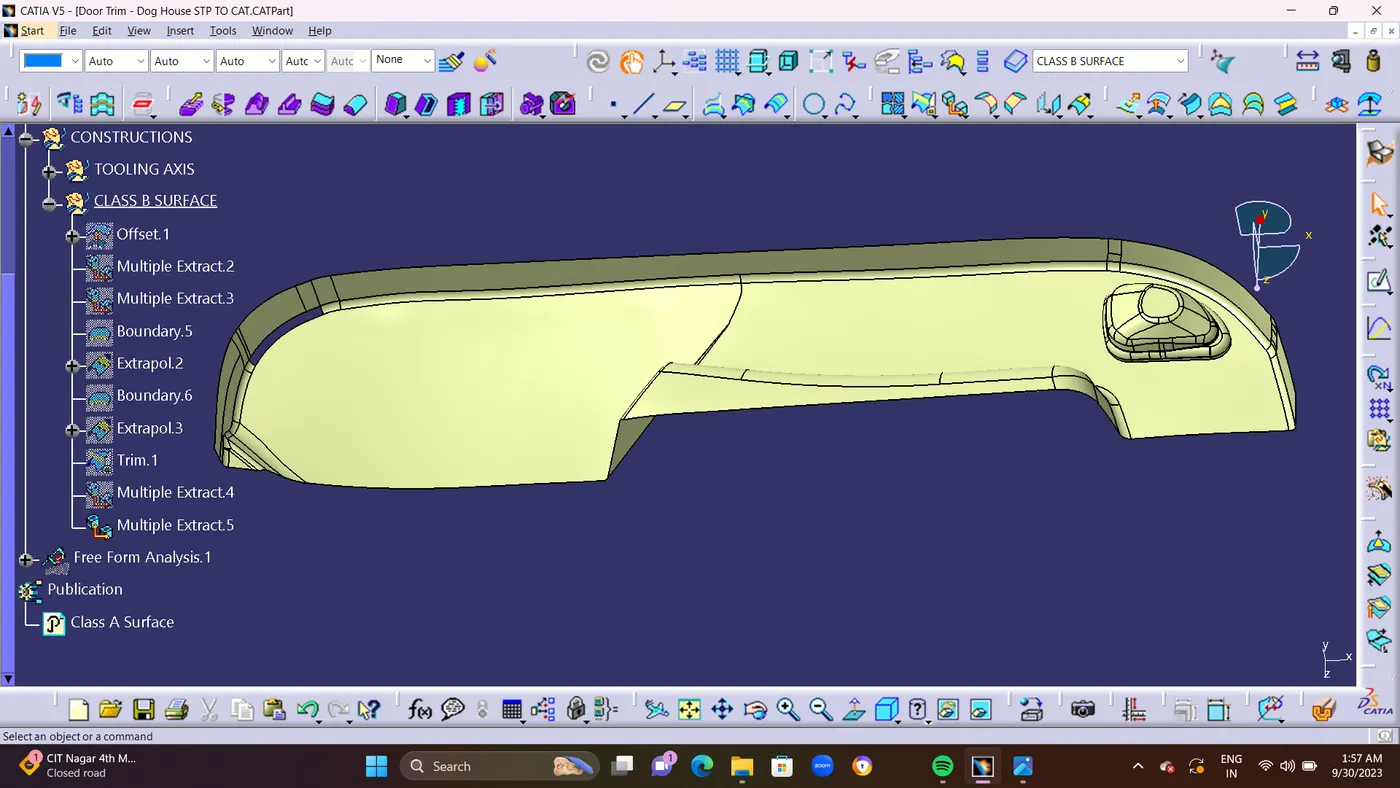


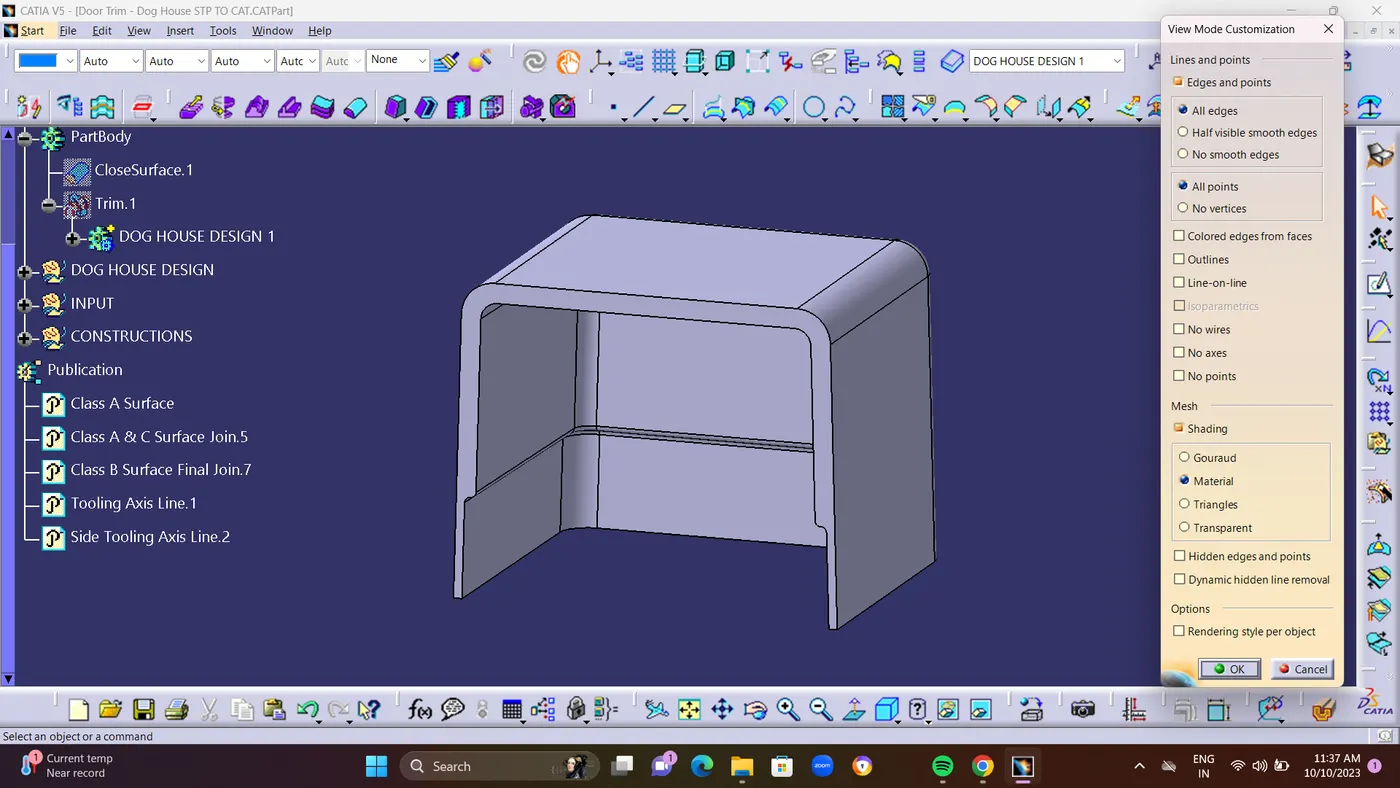
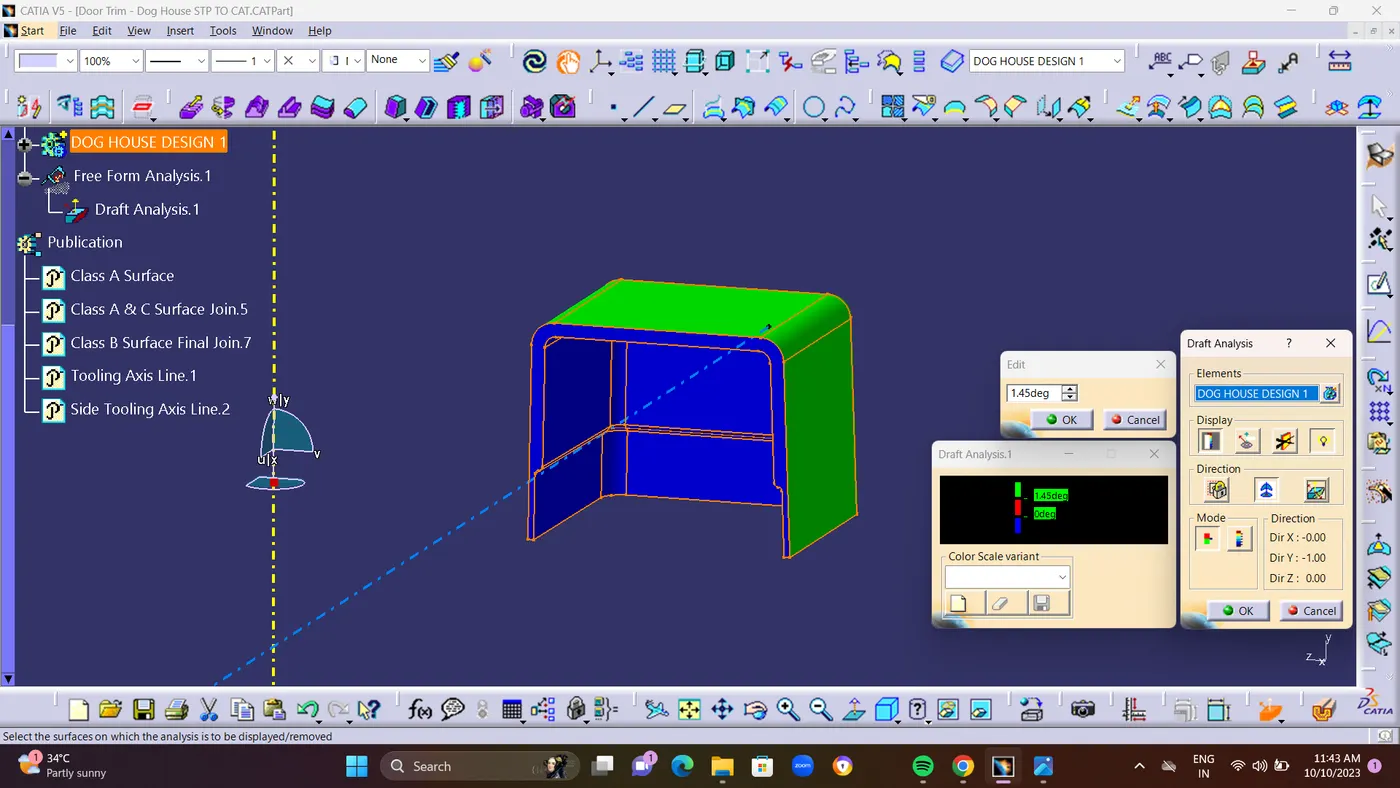
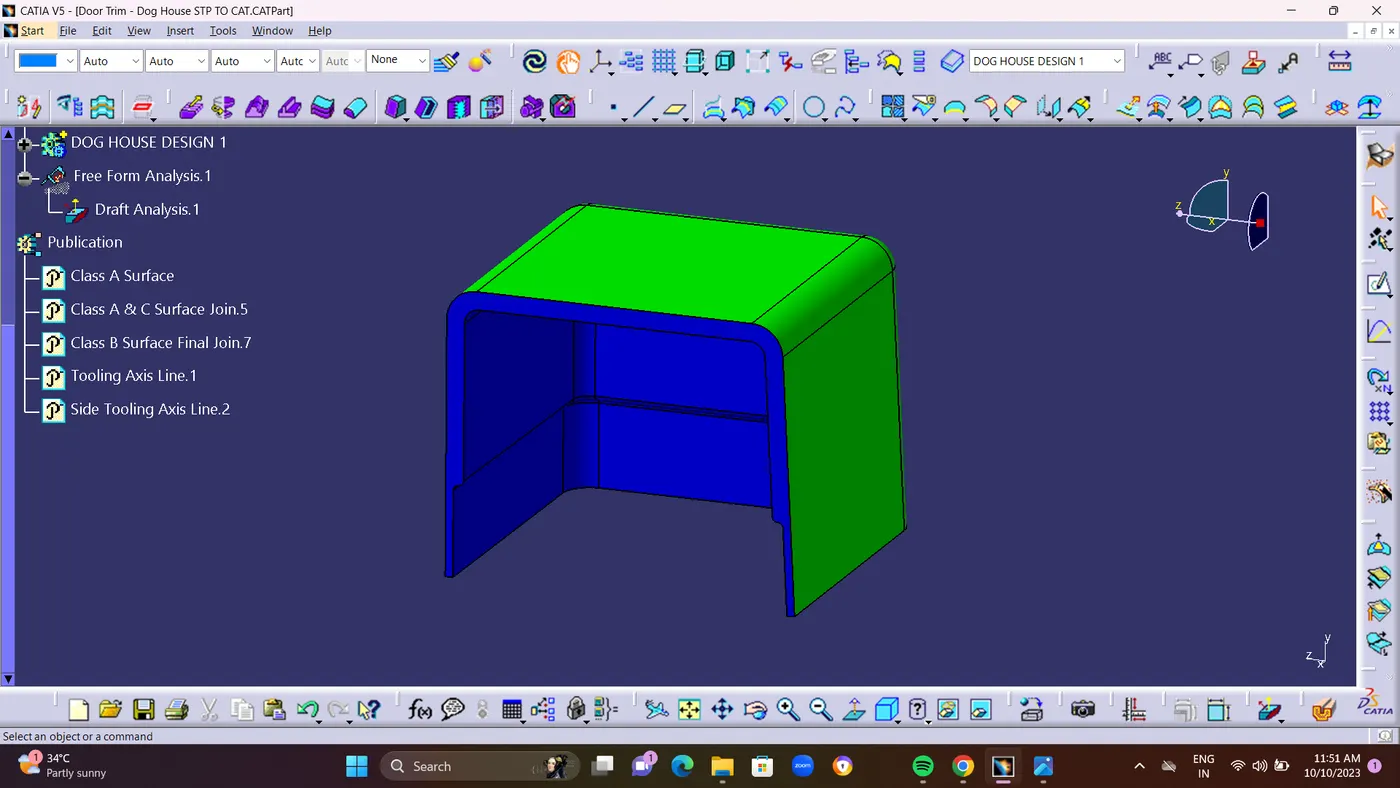
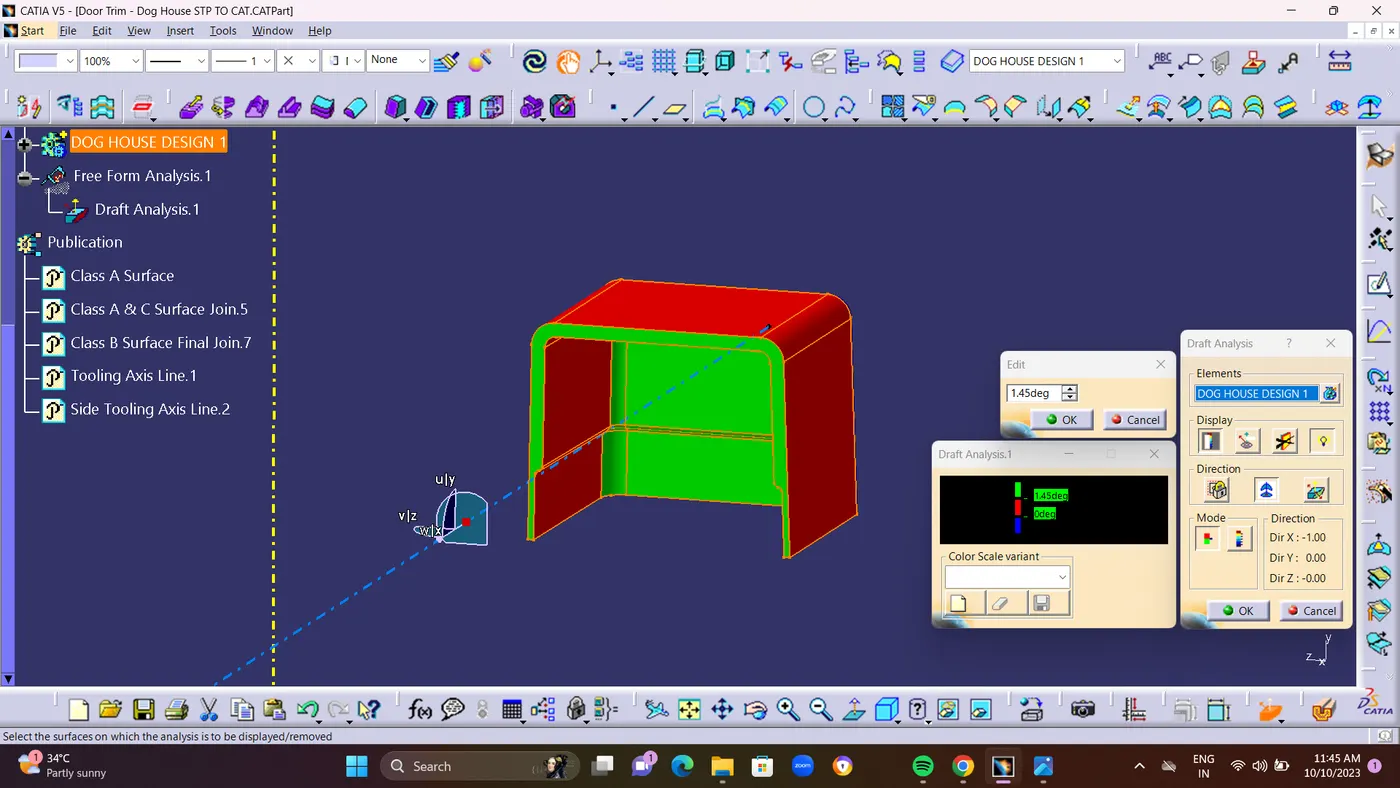
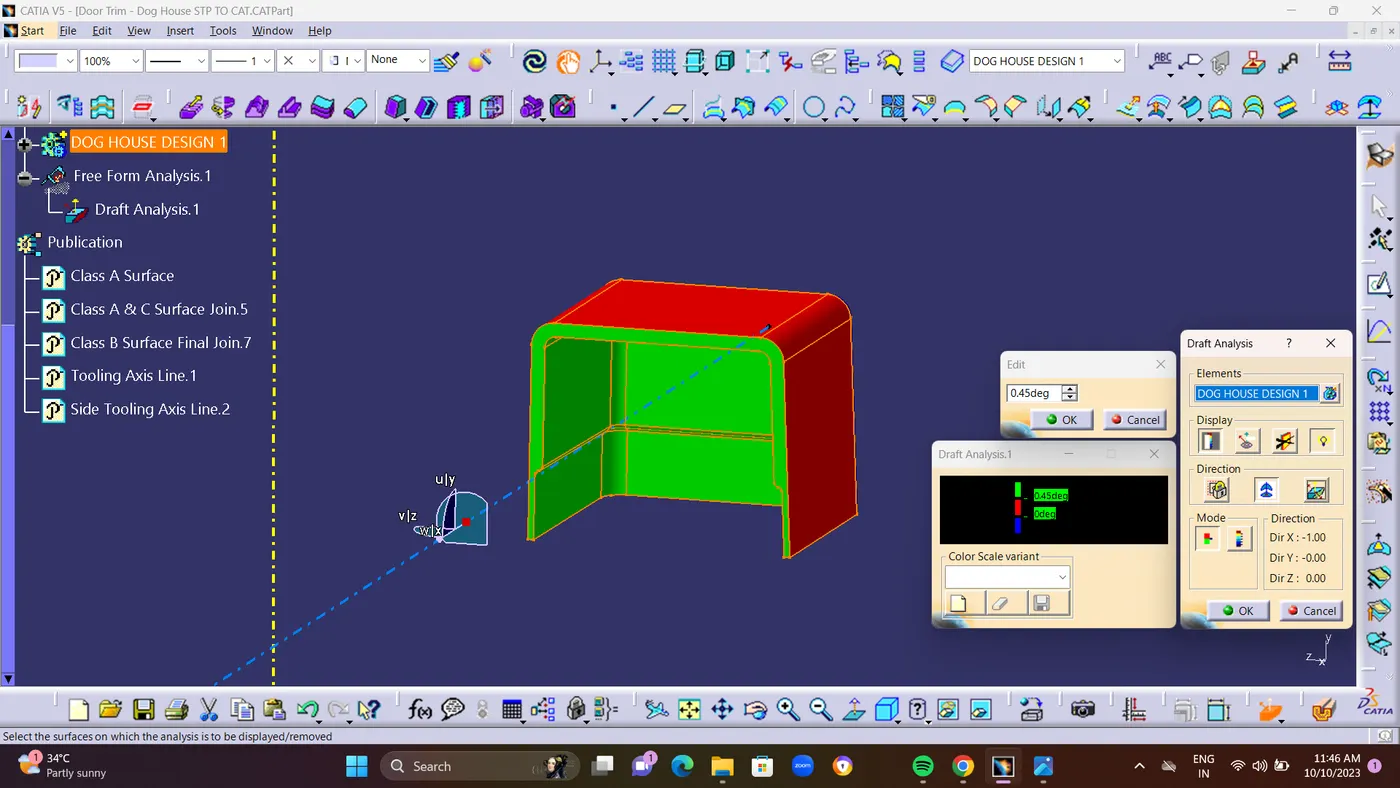
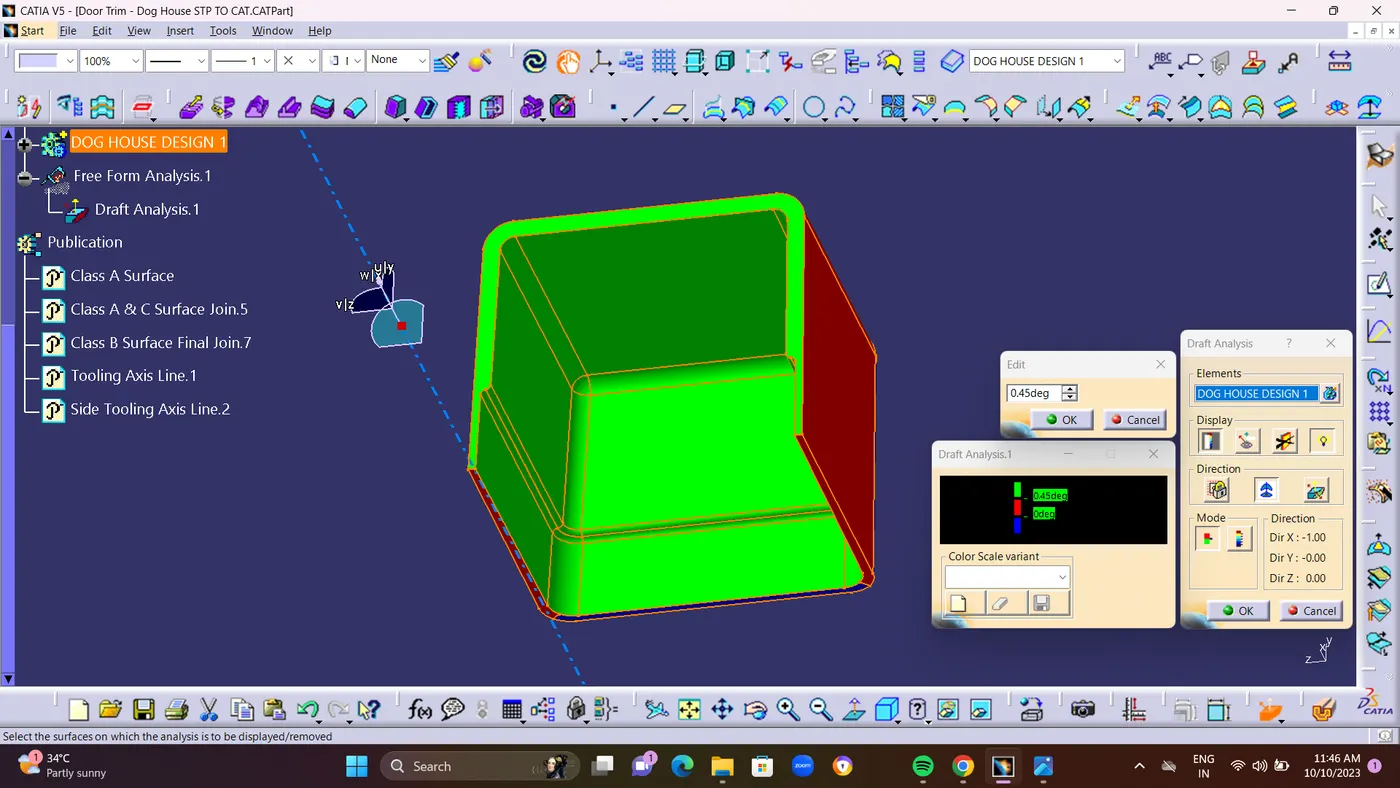
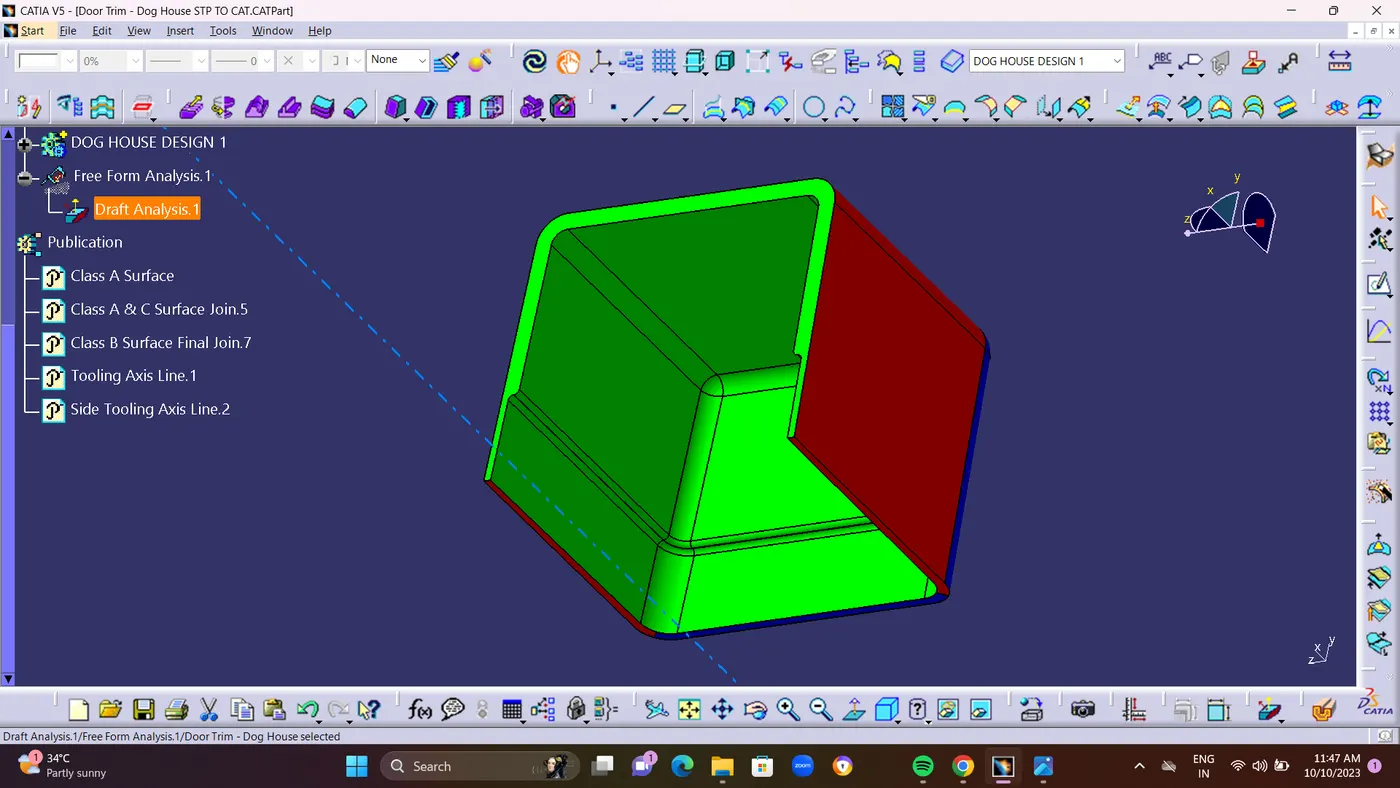
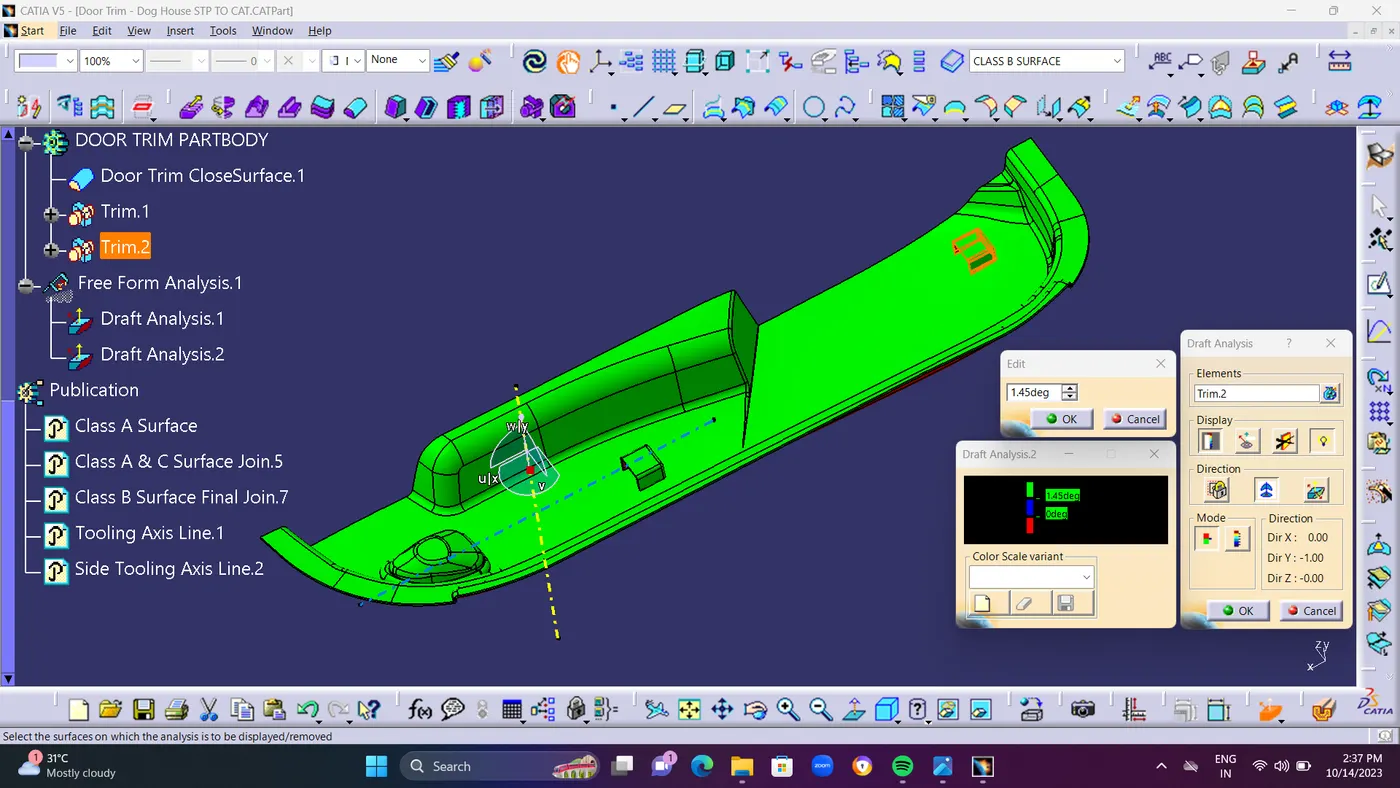
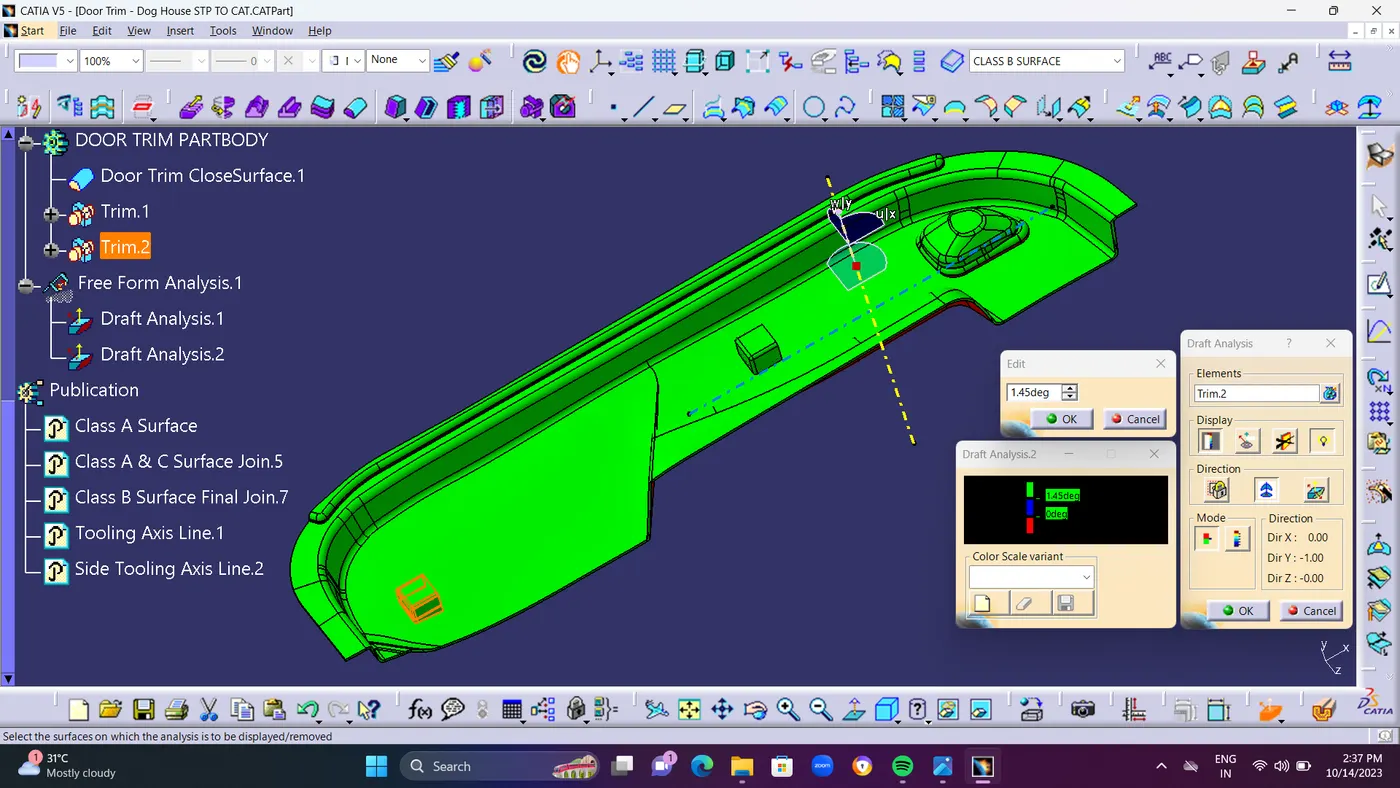
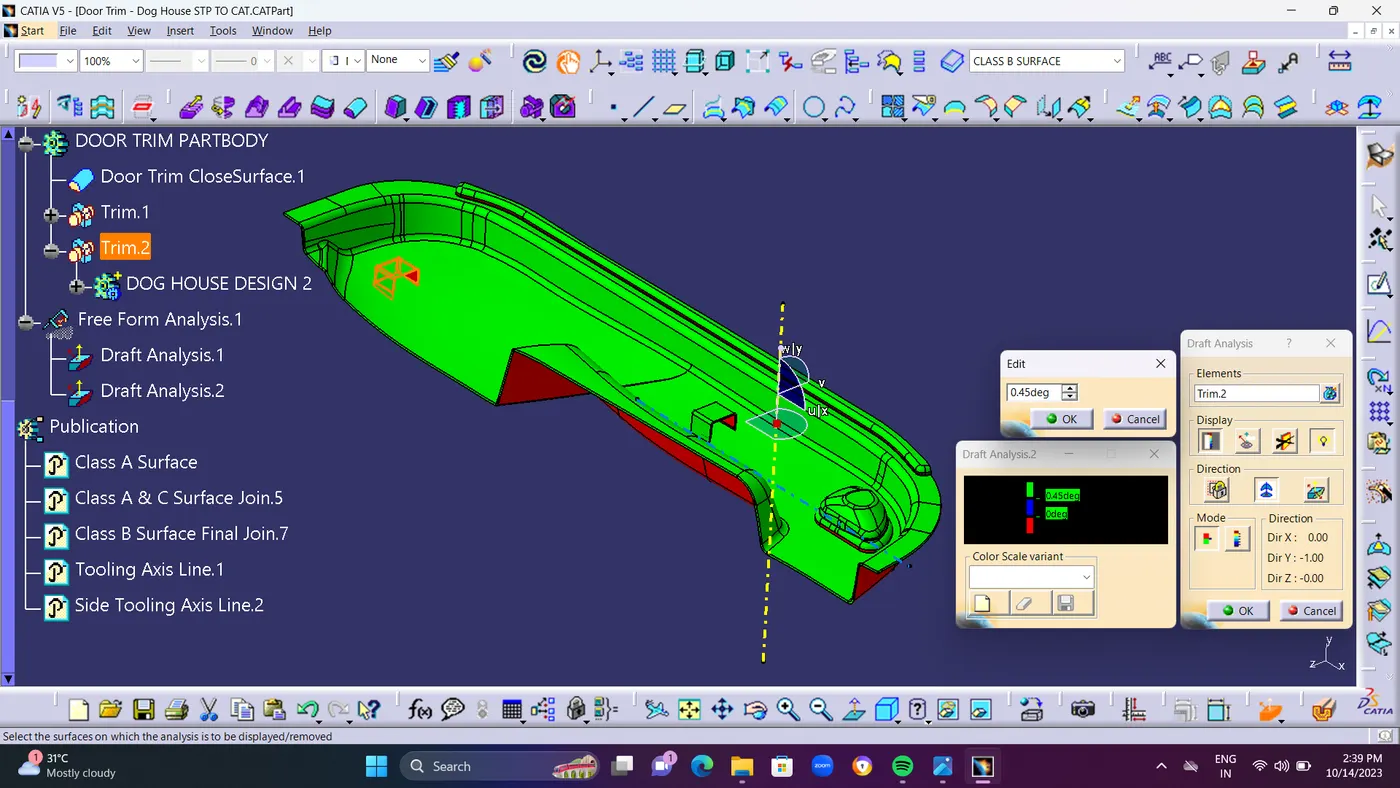
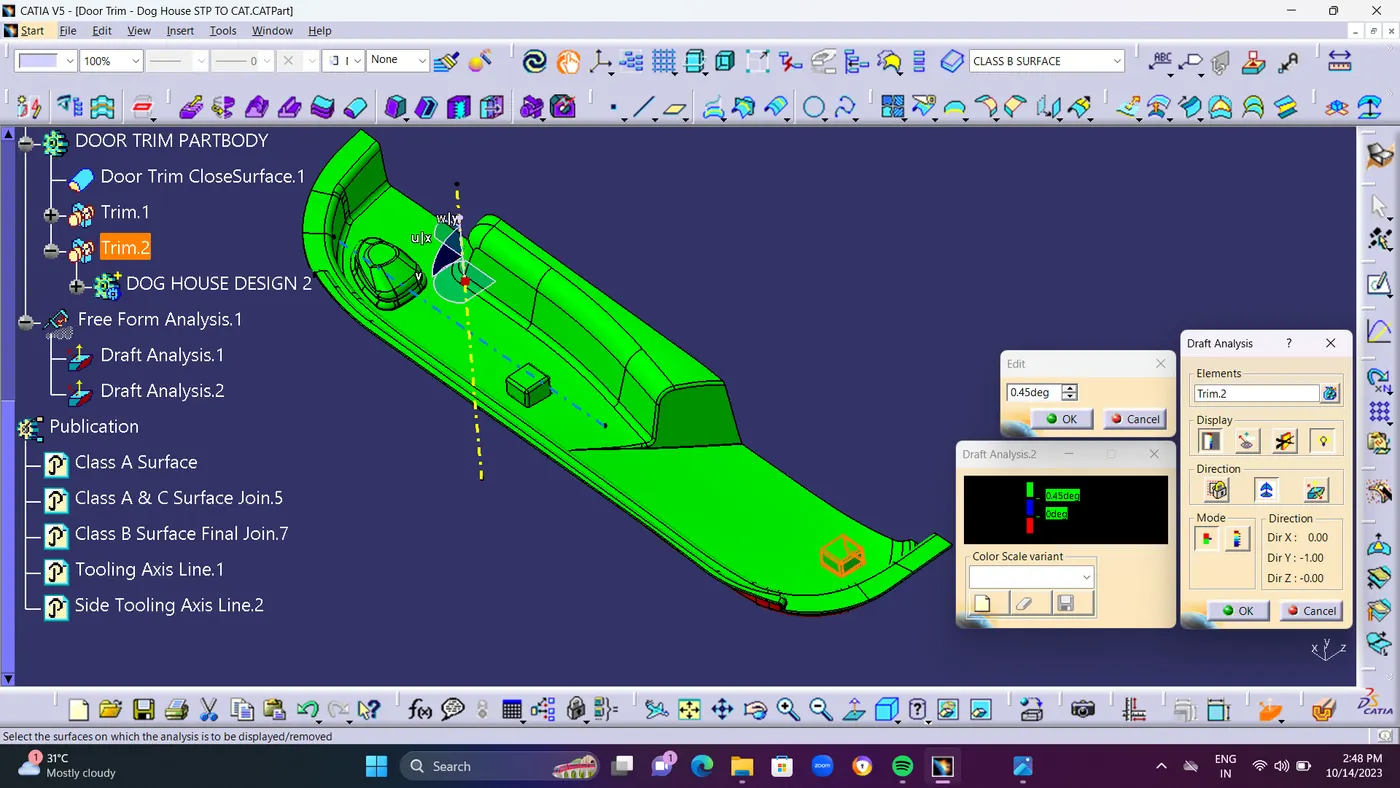
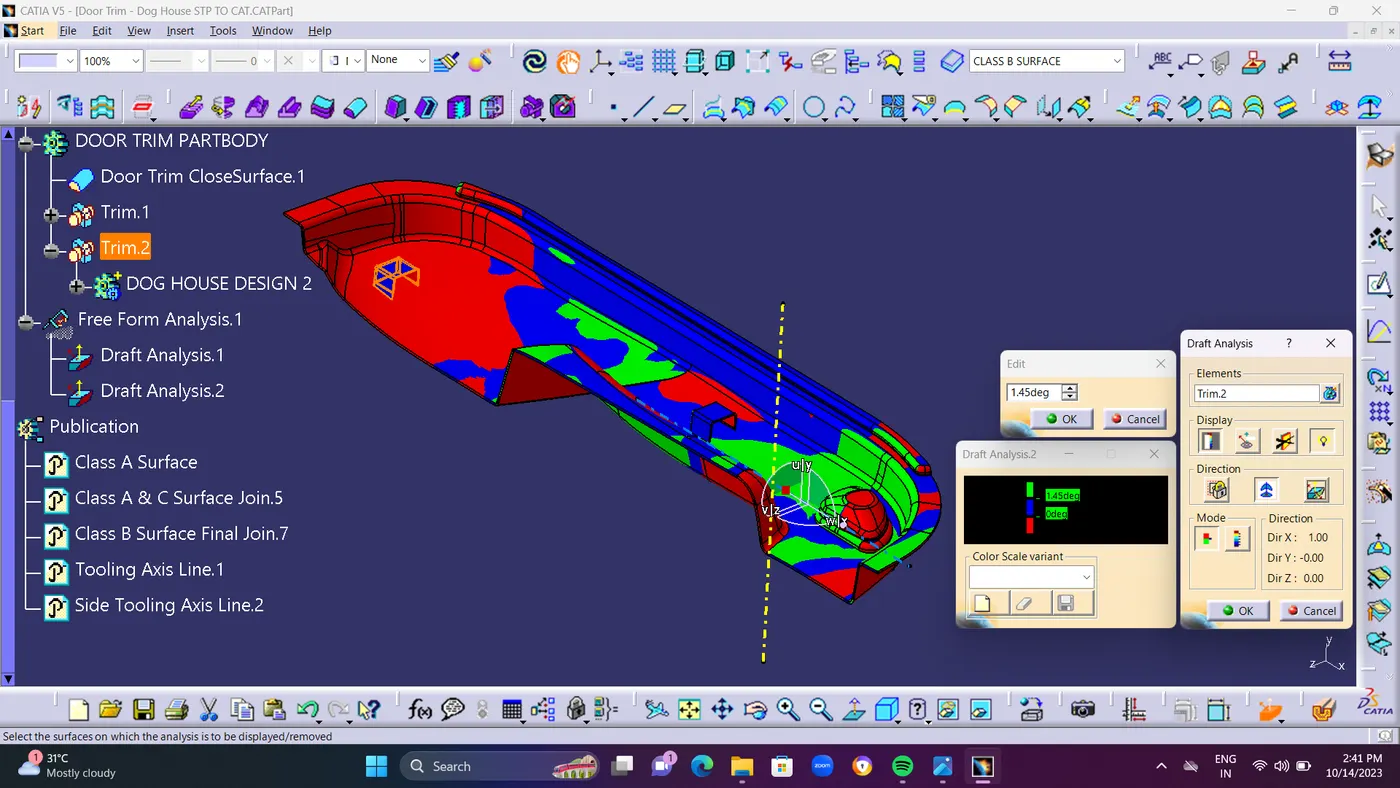
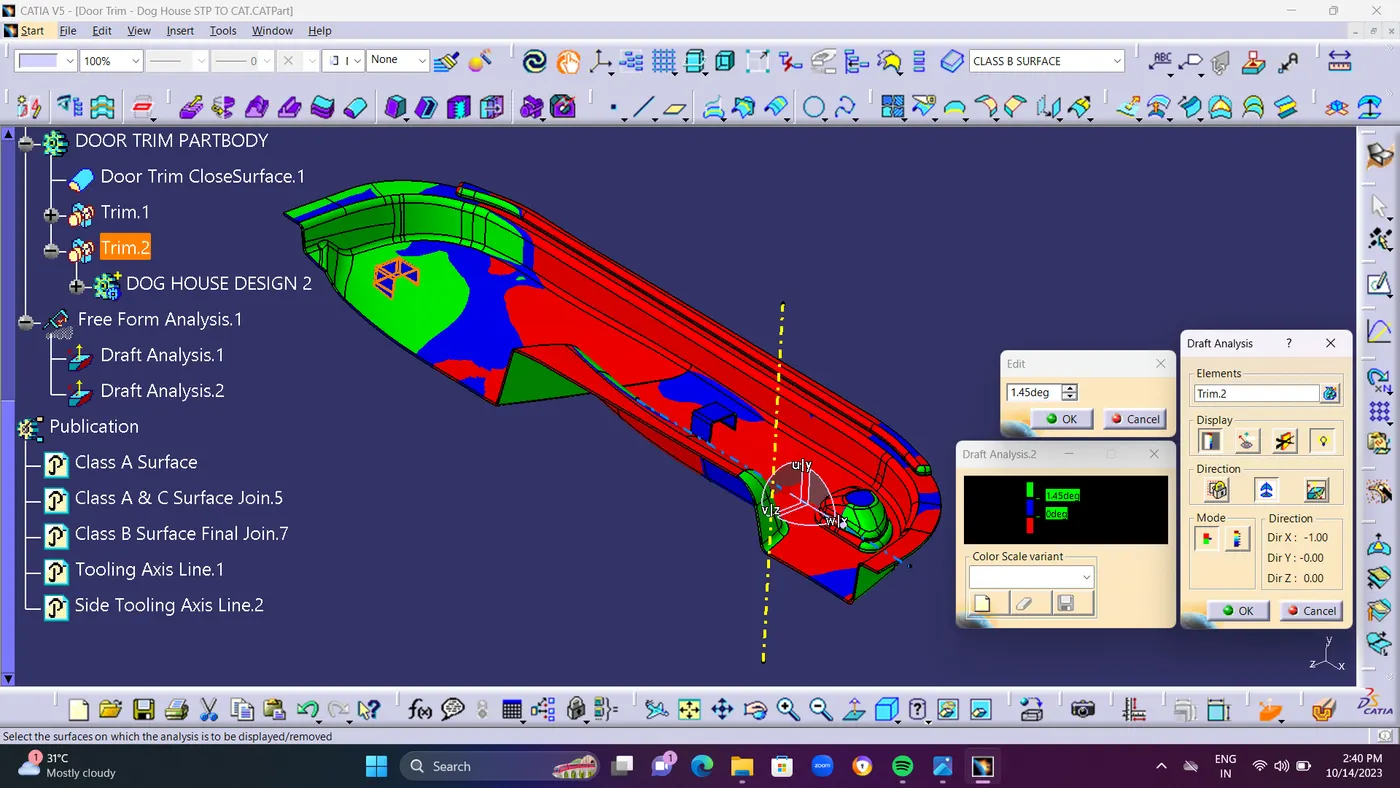
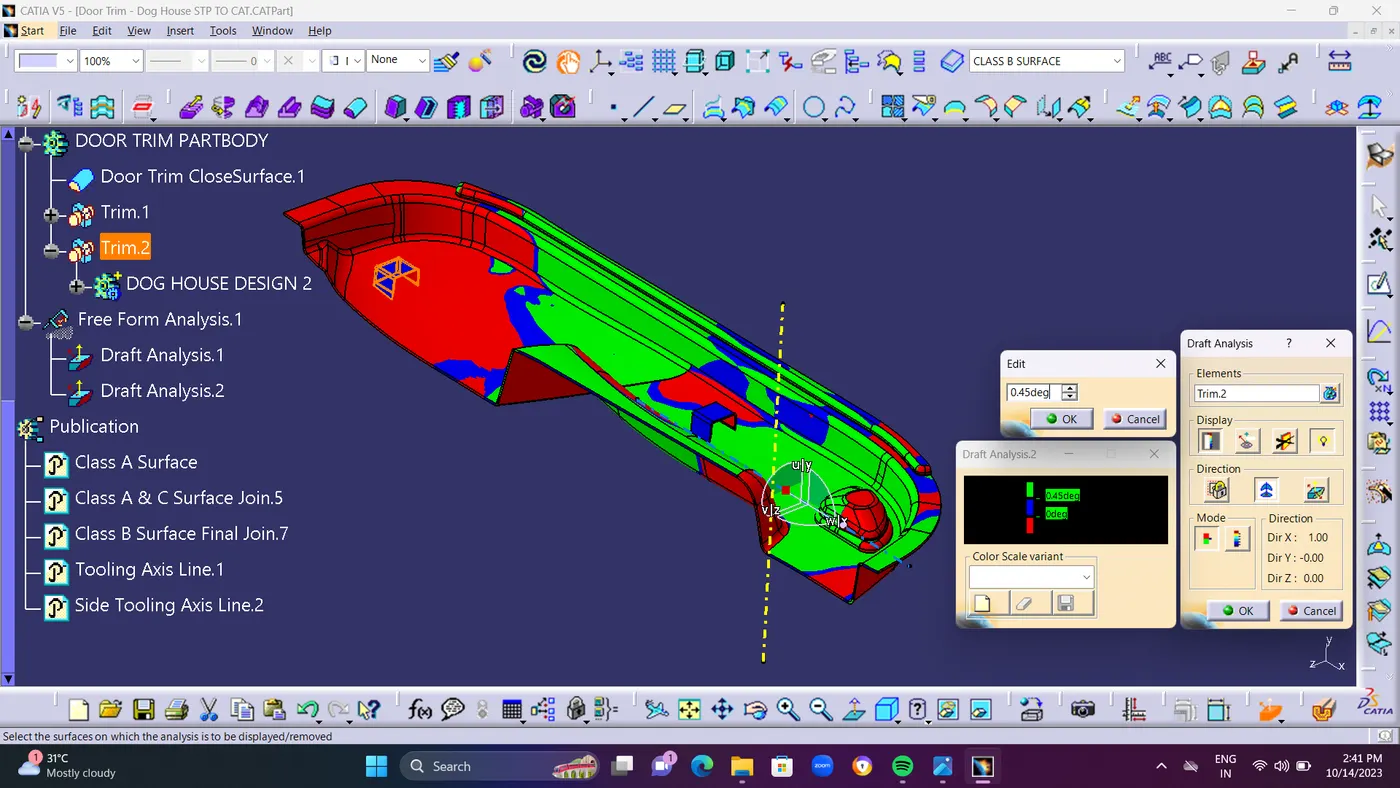
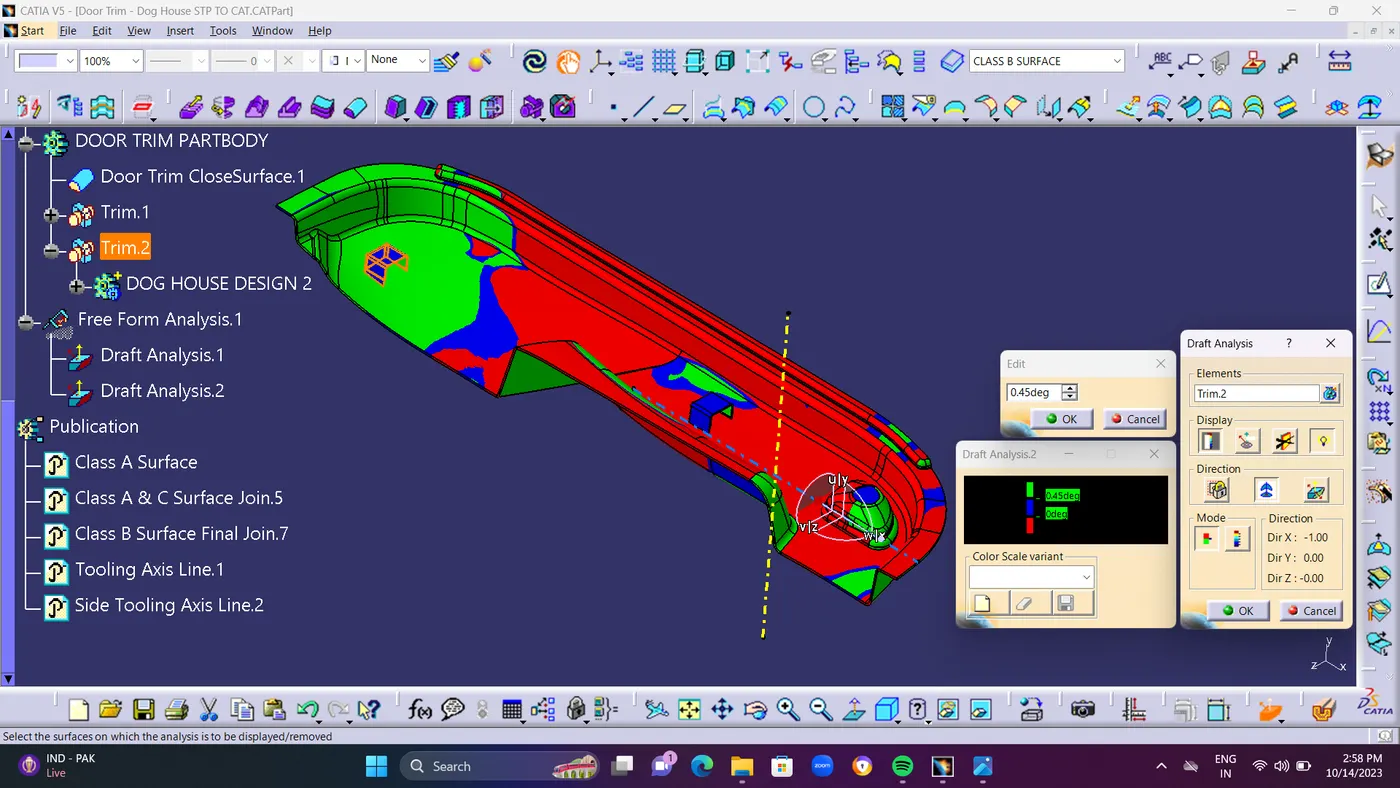
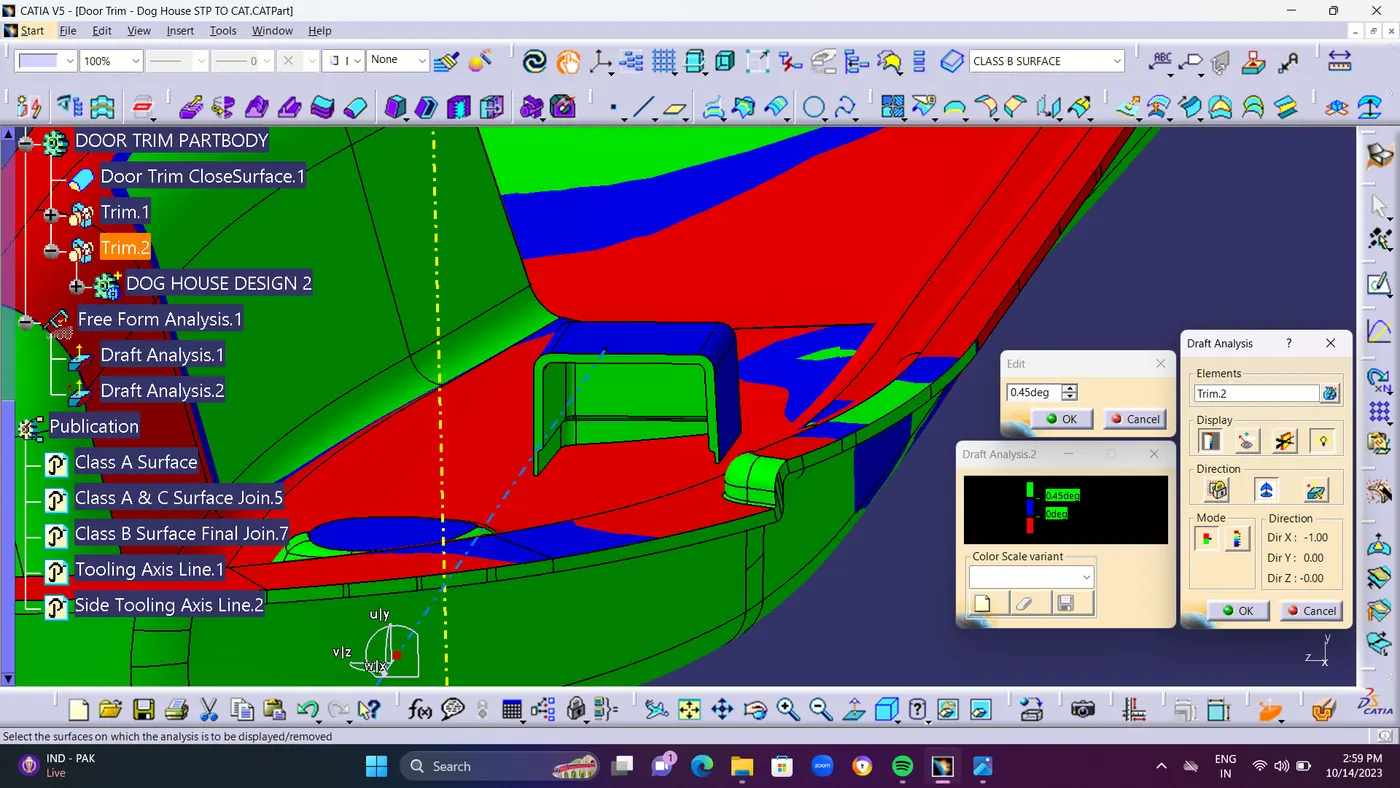
  • STEP 20 : After Creating Dog house DRAFT ANALYSIS METHOD is used for Dog house.Draft analysis is required to check if a part has required draft or not. Draft is required so that a part can be ejected from its mould easily.Draft will be maximum 1.45 degree,minimum of 0.45 degree.For dog house Creation.For outer Draft analysis use Vertical tooling axis.and Inner draft analysis use Horizontal SIDECORE tooling axis.Make Sure you are in MATERIAL MODE To Check Draft Analysis.Use Compass in Tooling AXIS while Drafting.


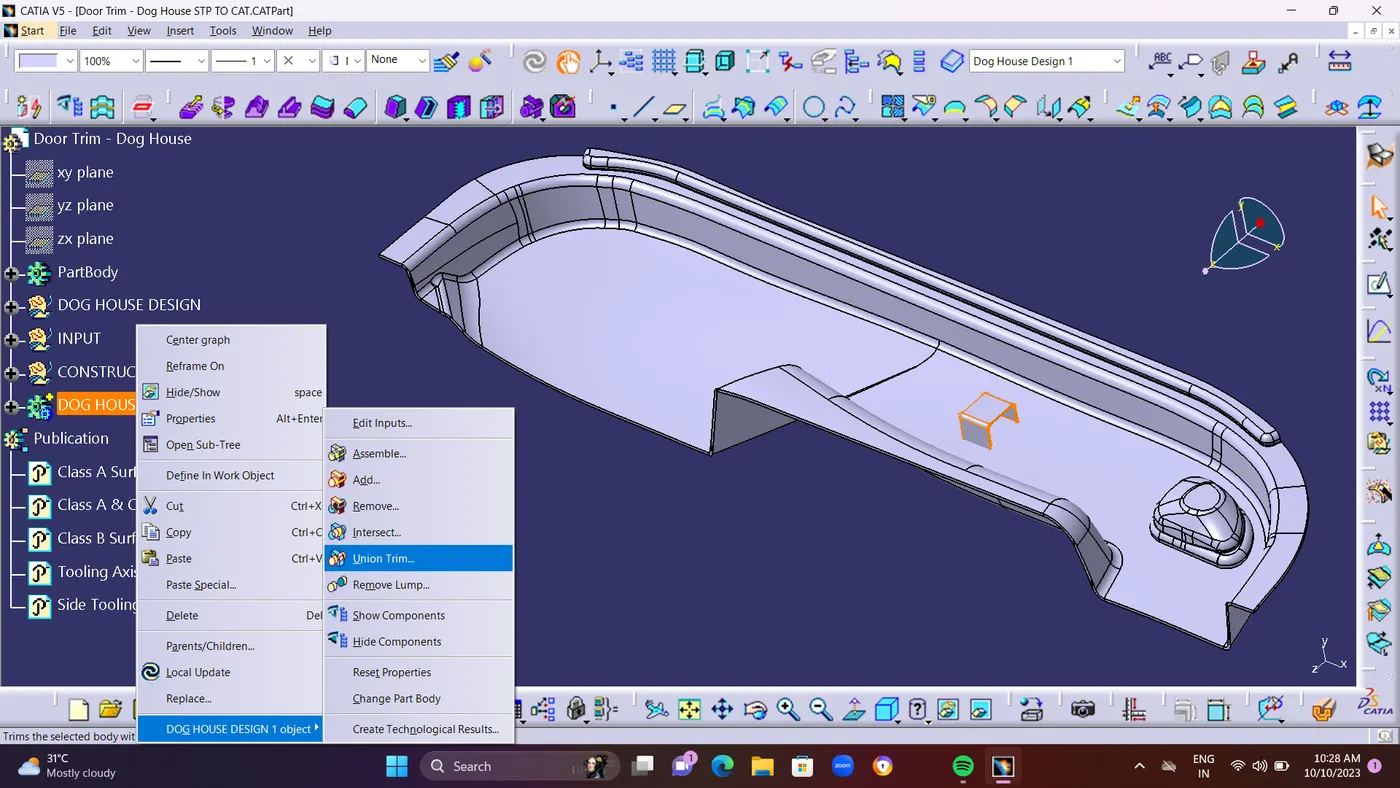
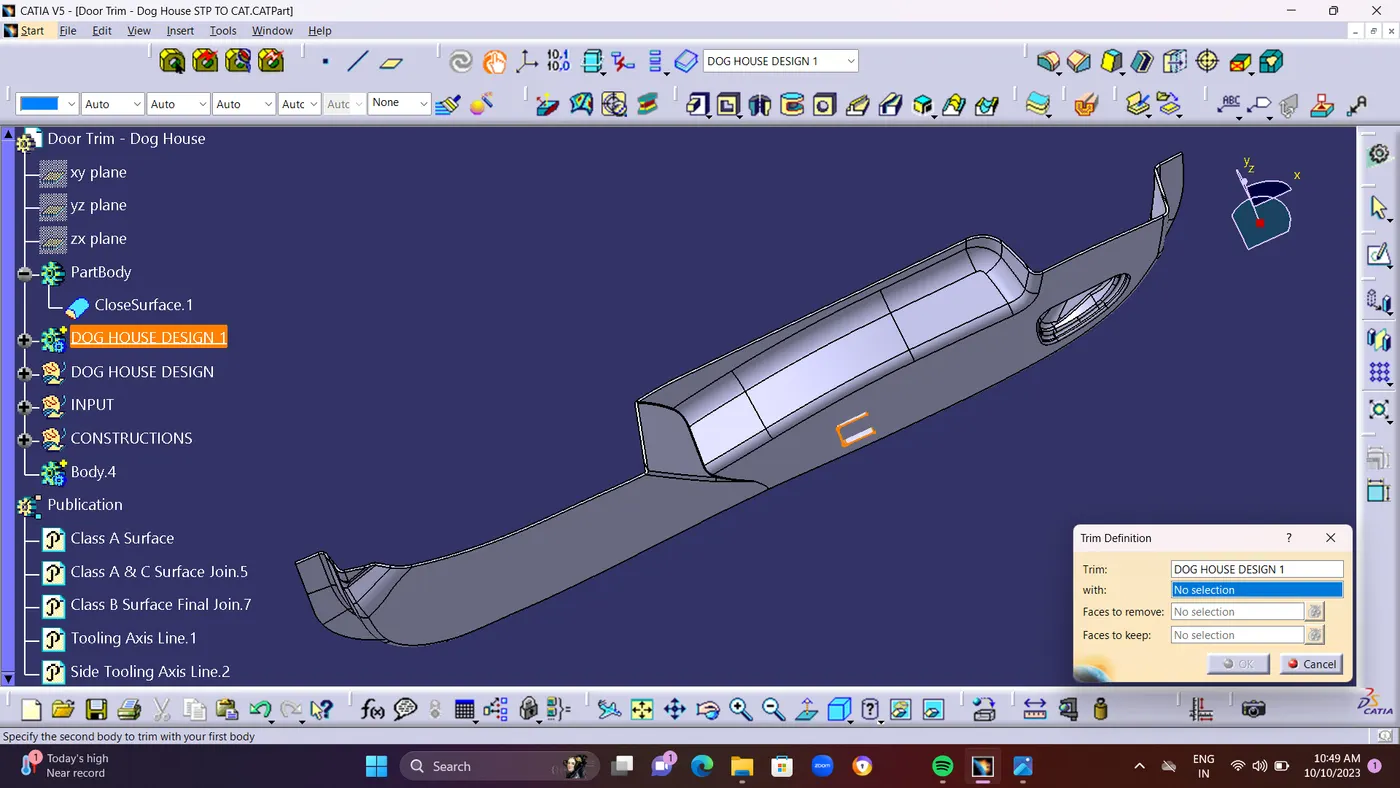
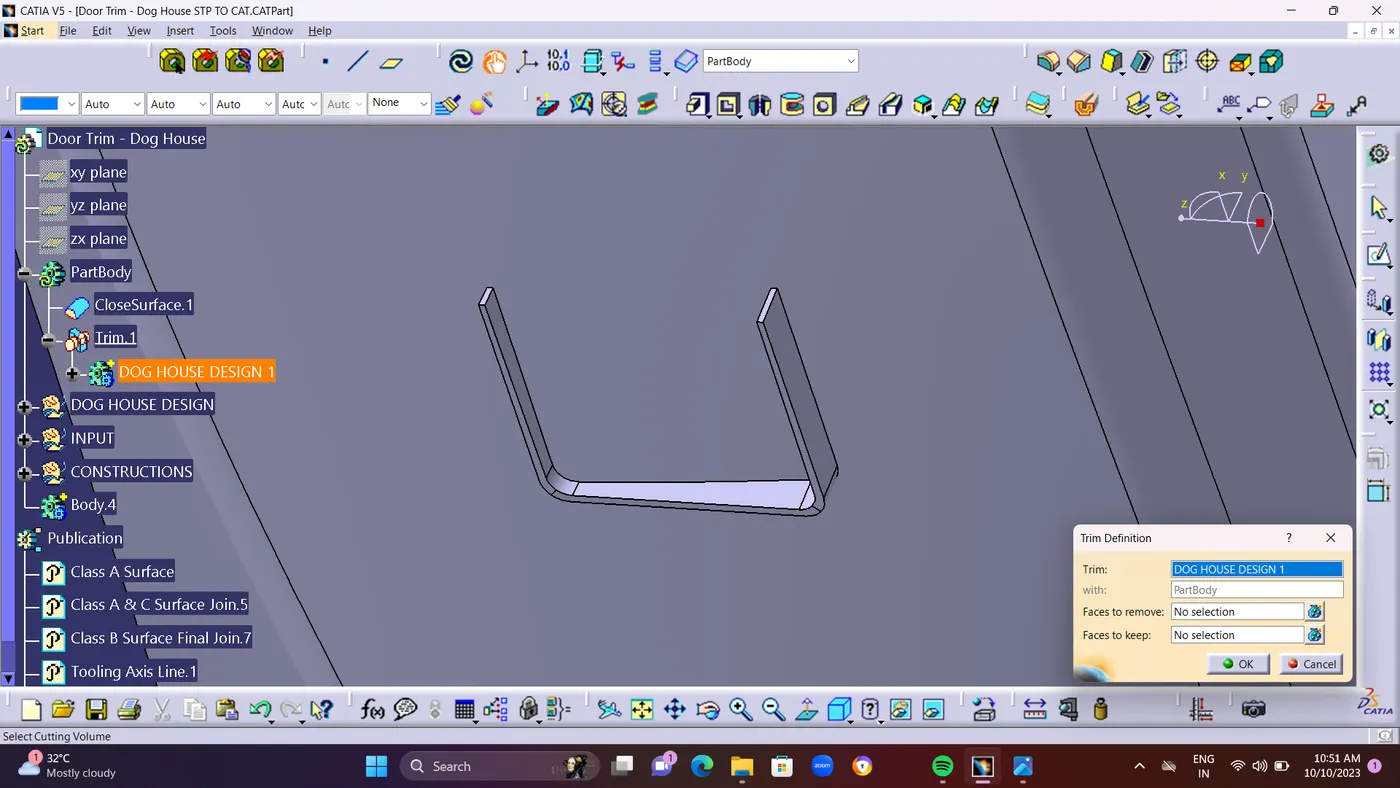
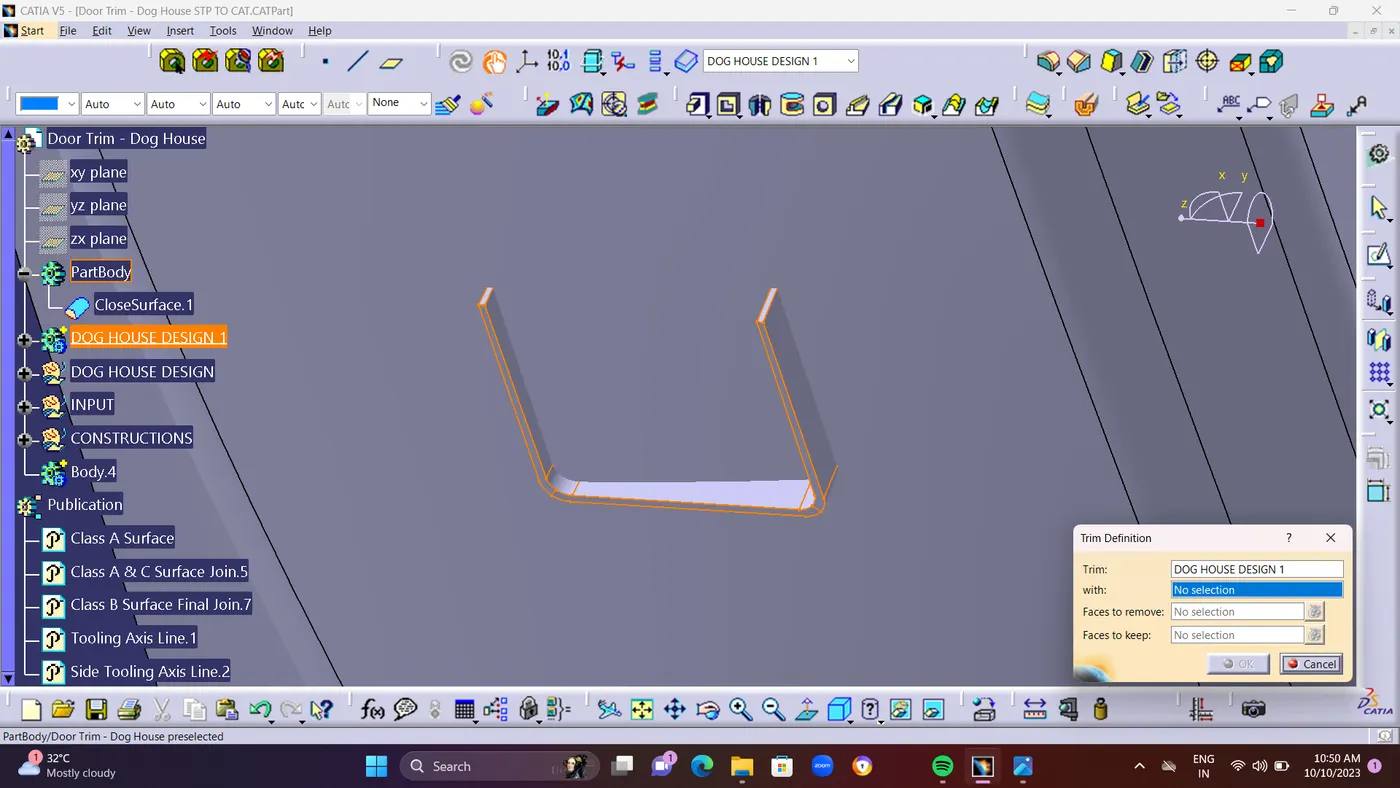
  • Use UNION TRIM for removing unwanted or extra part from Dog house and to make an Single Component.as shown in Below Screenshots.
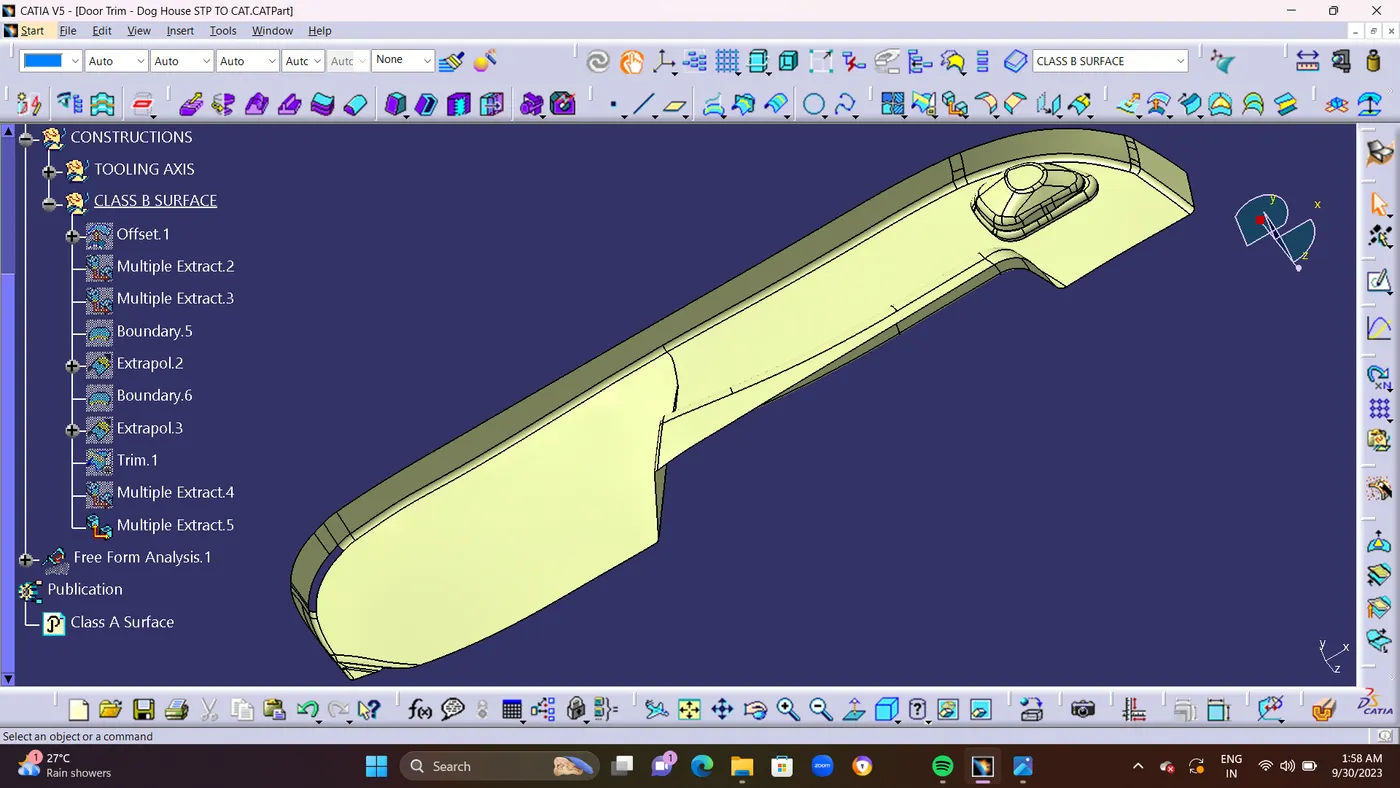


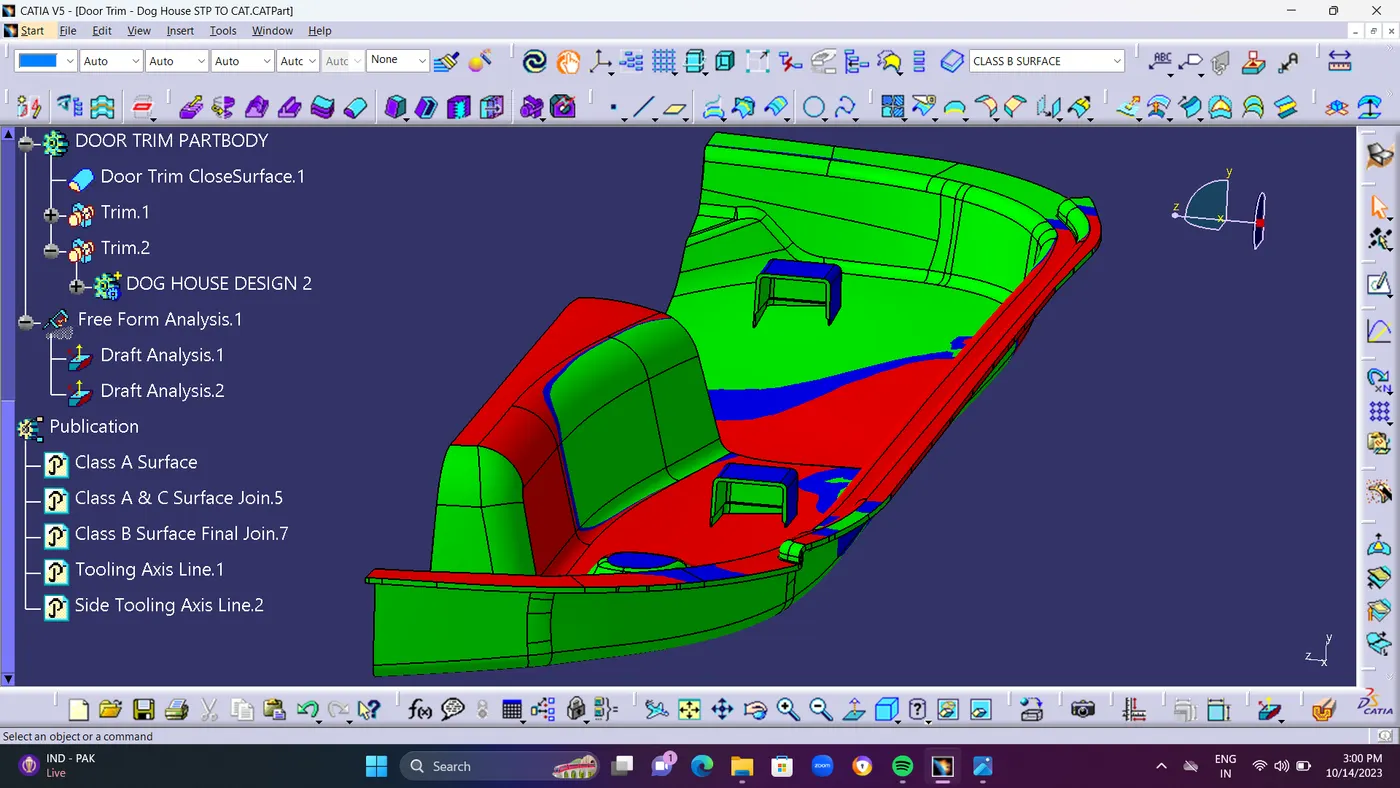
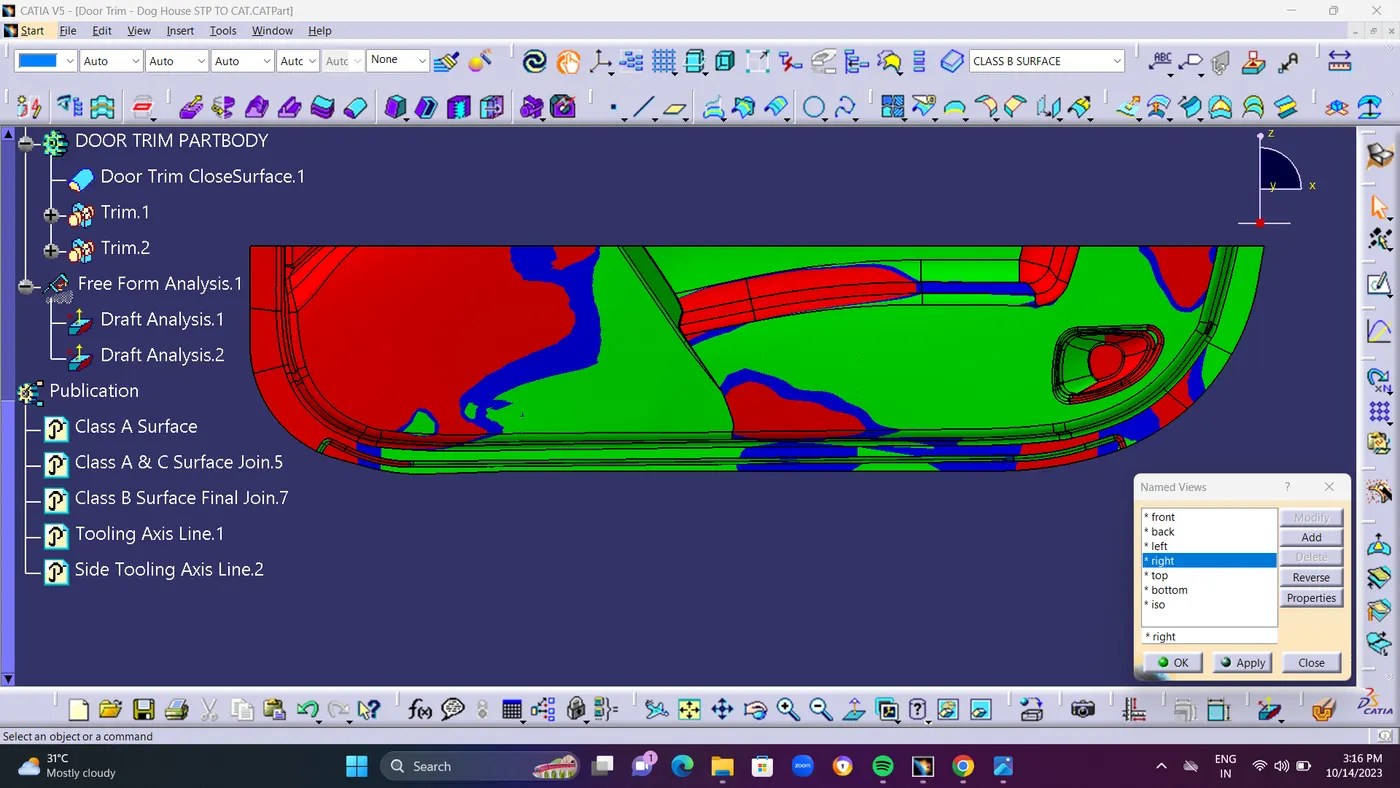
  • after completing Union Trim and Finally Use DRAFT ANALYSIS METHOD for whole Component.shown in given Below Screenshots.
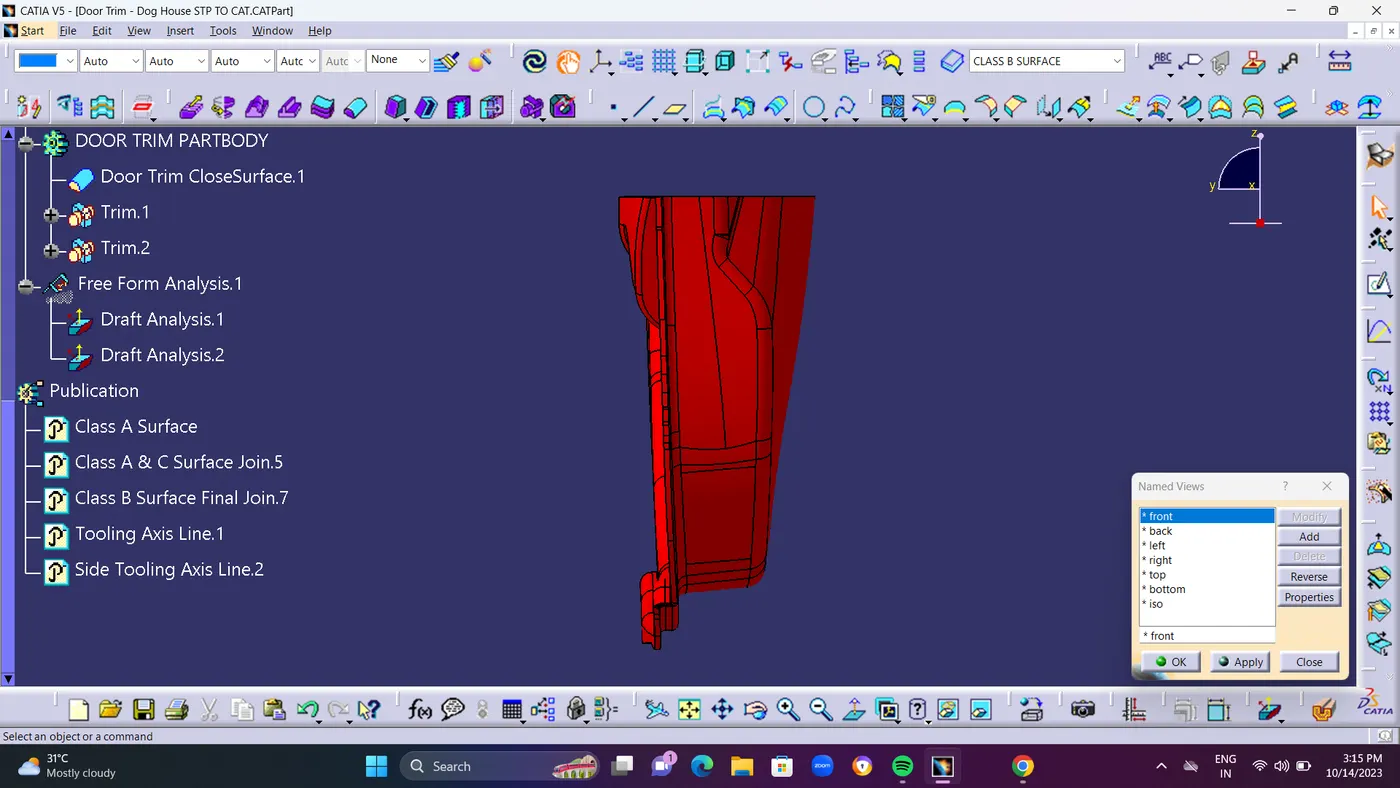
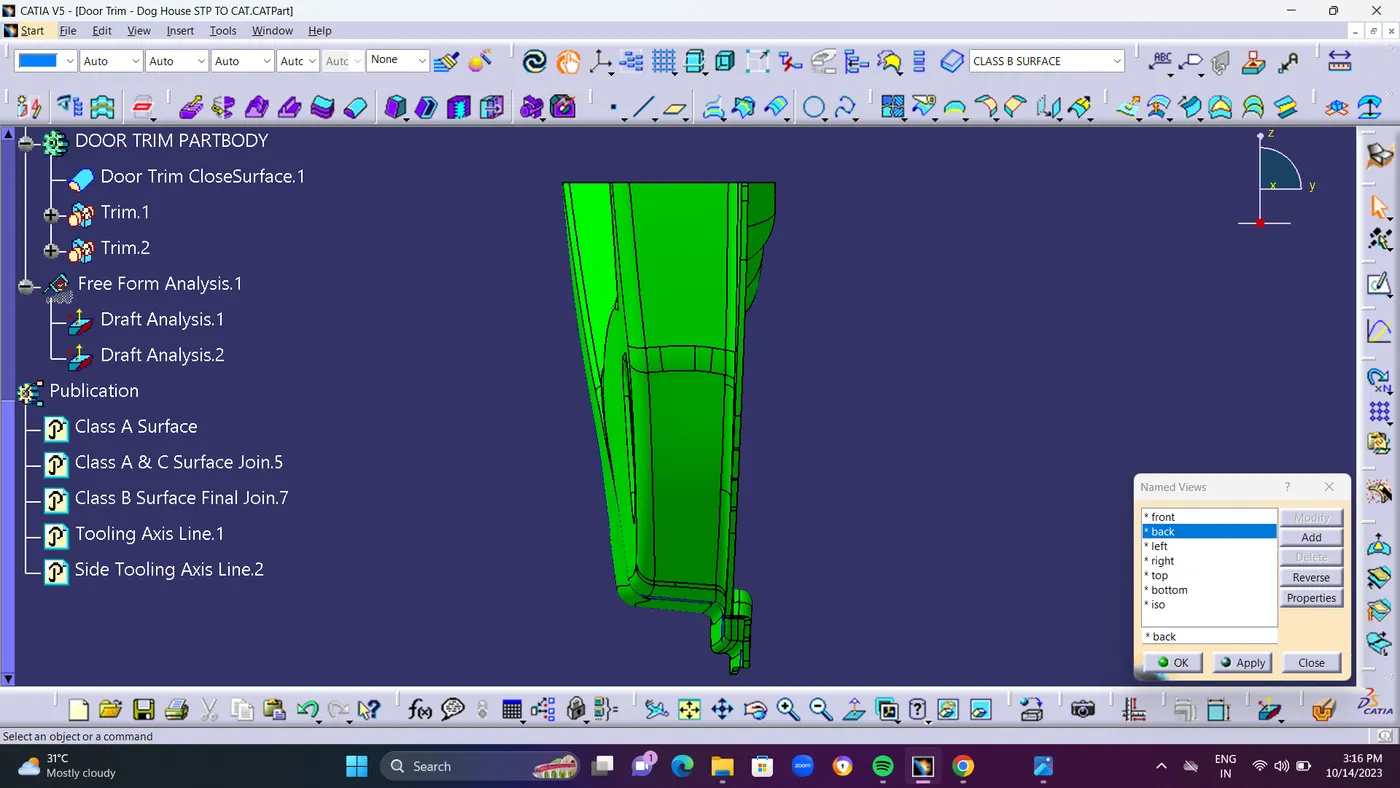
  • In Draft Analysis If it shows Green Colour Surface its Pass in Drafting.Suppose its shows in Red Colour Surface its Fails in Draft Analysis.its your CHOICE which colour you want as pass or fail its depend upon you and your convenient.


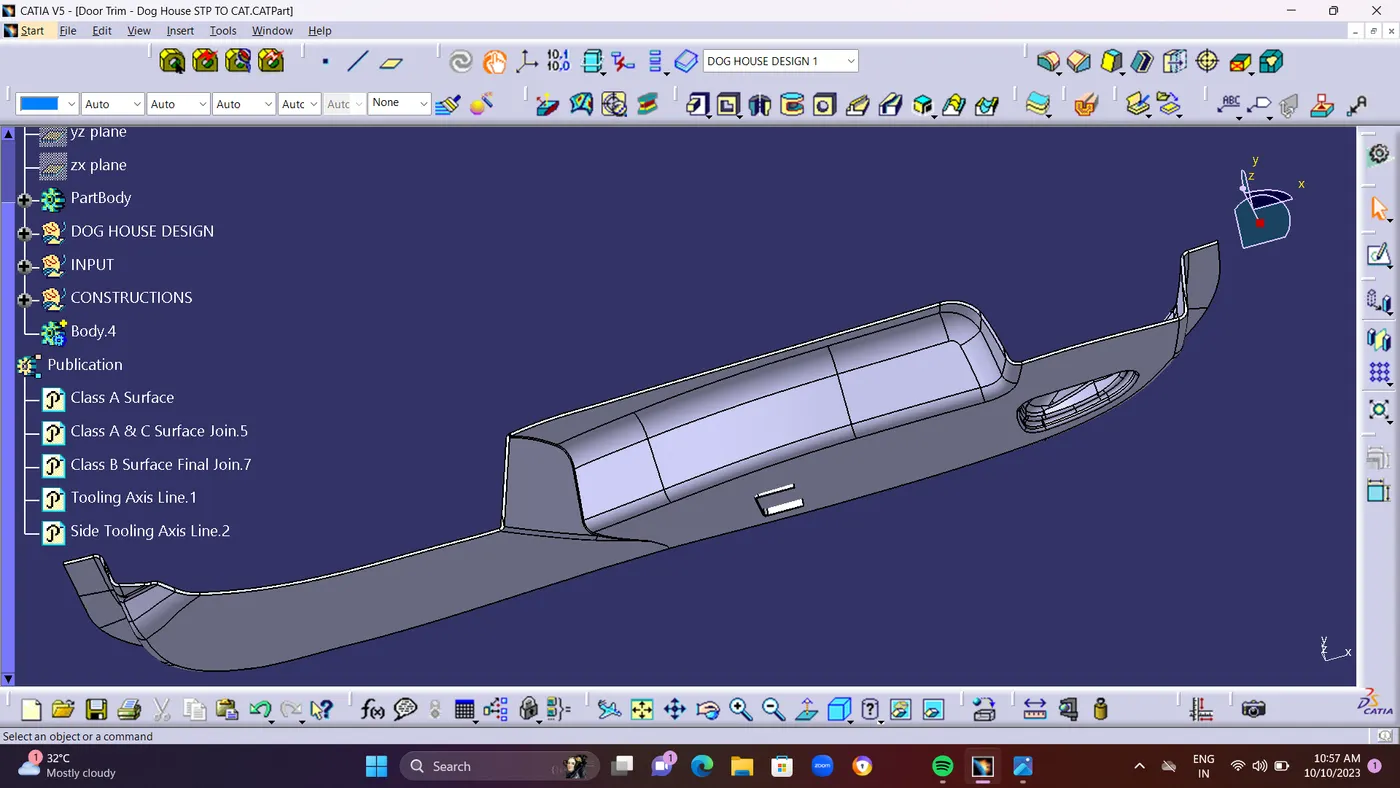
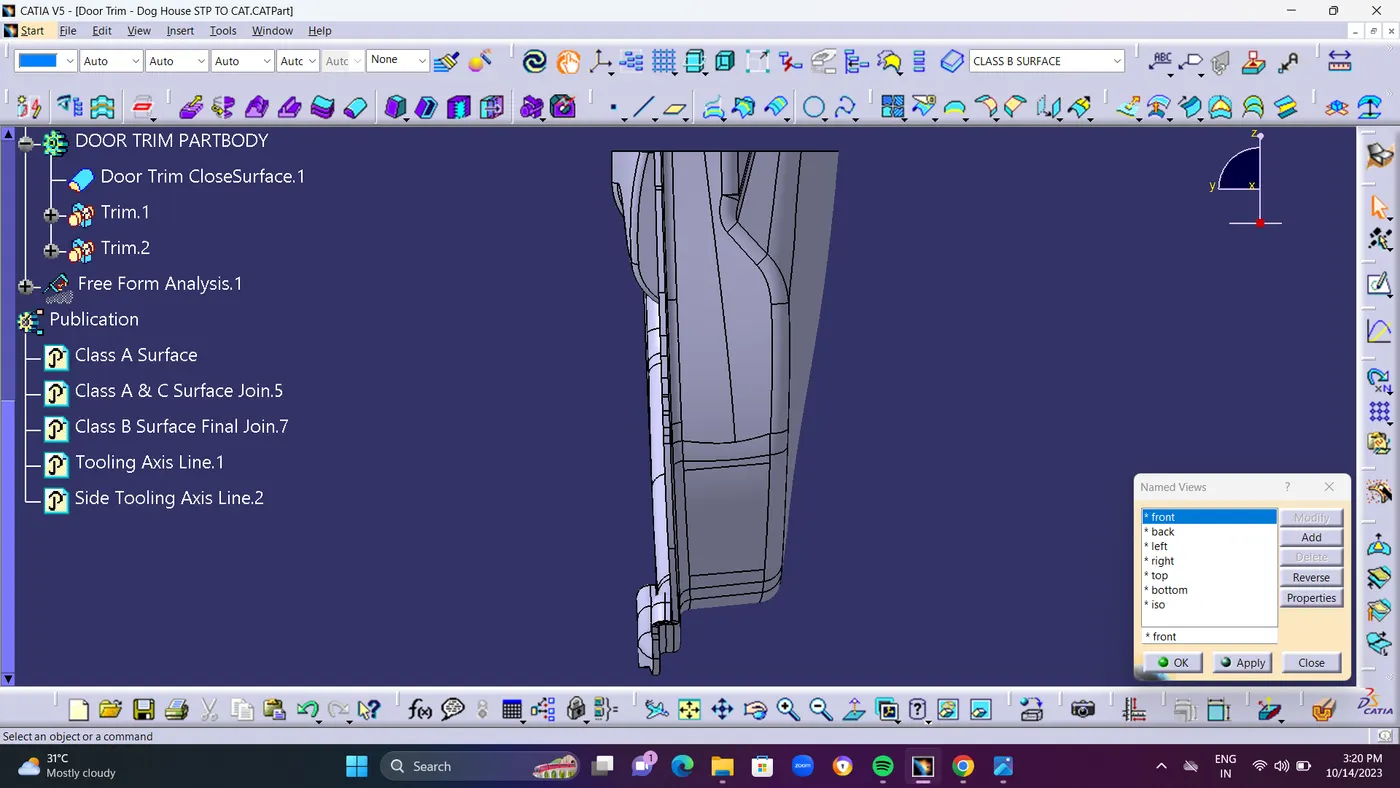
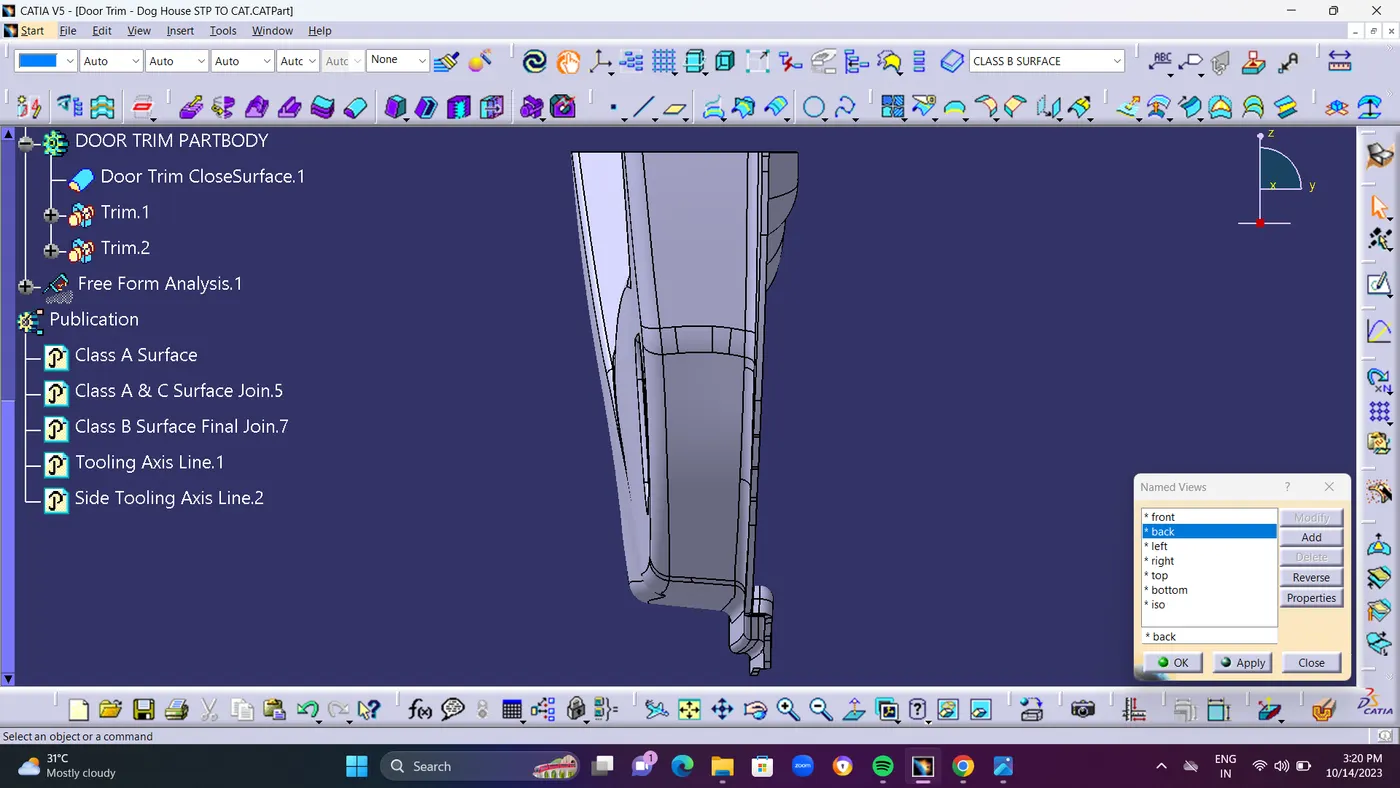
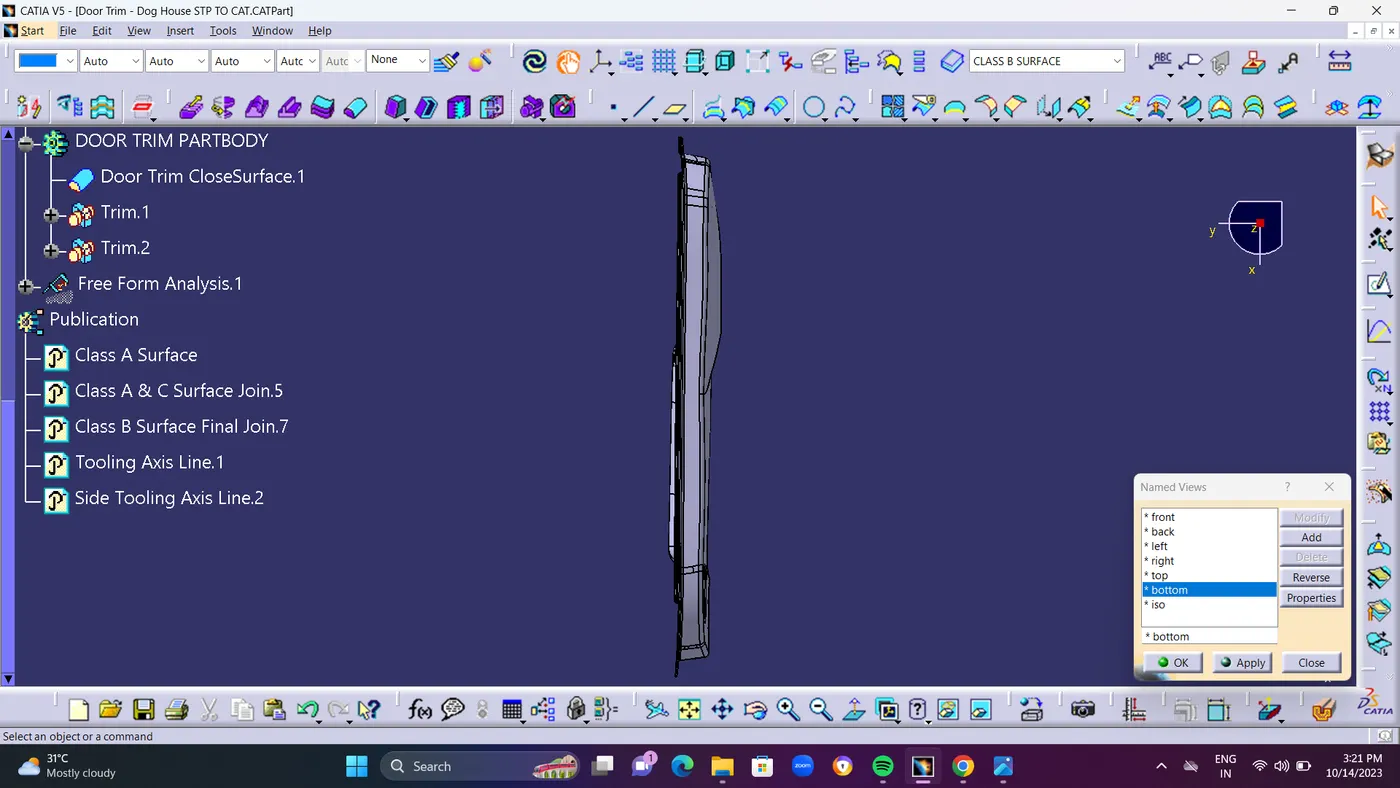
  • STEP 21 :  Finally take an Screen shots of ISO,FRONT,SIDE,&TOP View of Draft Analysis and Part Body in Closed Surface.


Your portfolio, next

Ship work like this
in your own course.
Talk to a career counsellor

Free 20-minute call. We'll map the right course to where you want to work.

By submitting you agree to our Terms and Privacy Policy.