Week 10 - Challenge 2- Attachment Feature Creation (Dog House)
REPORT ON DRAFT ANALYSIS OF CREATION OF CLOSED CLASS A SURFACE -DOOR TRIM
1.Visual Inspection -
- The first step of the draft analysis is to determine whether the given class A surface contains any side core functionality that needs to be achieved in the component.
- This can be done by visually checking/inspecting the class A geometry completley.
- Any basic geometrical features such as chamfer,fillets,holes are assumed to be cleared through the direction of tooling axis that are perpendicular to that of the tooling axis.
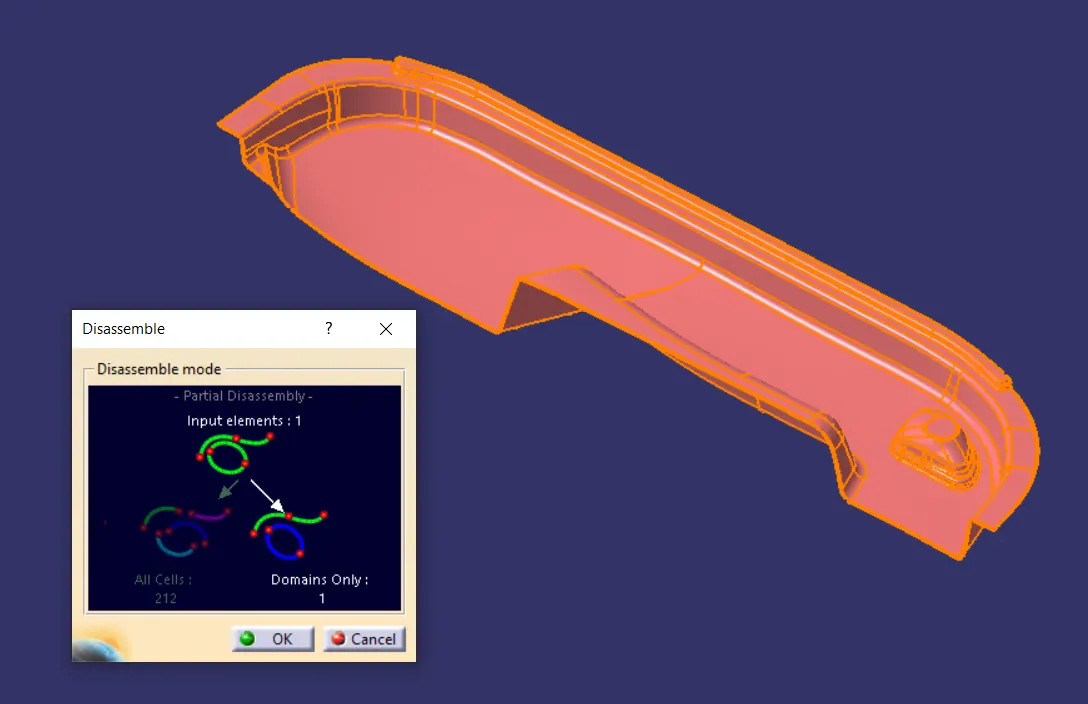
- Use Disassemble, to check the quality of the given class A surface.Domains of value 1 shows that the given class A surface is a whole surface.
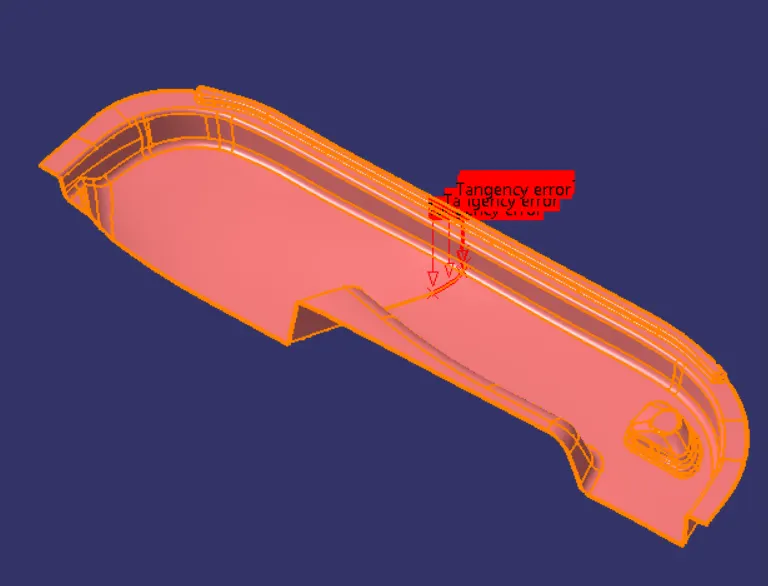
- Use Join,to check if there are two or more surfaces. Also,the tangency continuity of the surface can be checked as well.If there are any discontinuity in the given class A ,then it is recommended to fix the patch surfaces to continue as they are not feasible for manufacturing.
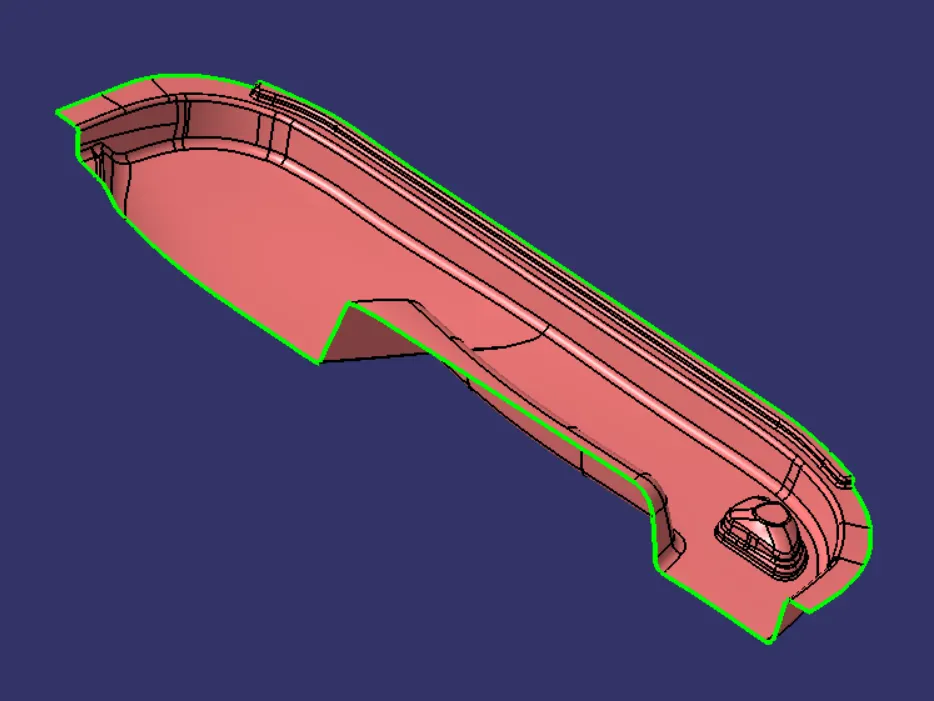
- Use Surface boundaries in Tools-Options also to ensure proper boundary/enclosure of surface.
2.Understanding injection molding process -
- Plastic injection molding process requires core and cavity to form a plastic component.In this process,high pressure & temperature is created in a nozzle to form the plastic components by feeding to a hopper in form of pellets/resins.The direction of movement of the core and cavity where it opens and closes is said to be the tooling axis.
- As general rule of thumb for plastics,apply nominal draft of upto 3 deg on both side i.e.. 1 1/2 deg each side to the surface,according to the design rules for plastic injection moulding component this allows for easier ejection and no surface defects after cooling.
3. Creation of Main Tooling axis -
- After the proccess of visual inspection,we know that for given Class A surface of door trim does not require any side core for plastic component to be produced.As there is no application for a slider/ lifter mechanism needed.
- The next step involves in deciding the tooling axis selection,this can be x,y or z direction.For the given door trim,the tooling axis can be taken from Y-axis as all geometry which are required for manufacturing of door trim is perpendicular to that of tooling axis.
x-axis in yz plane
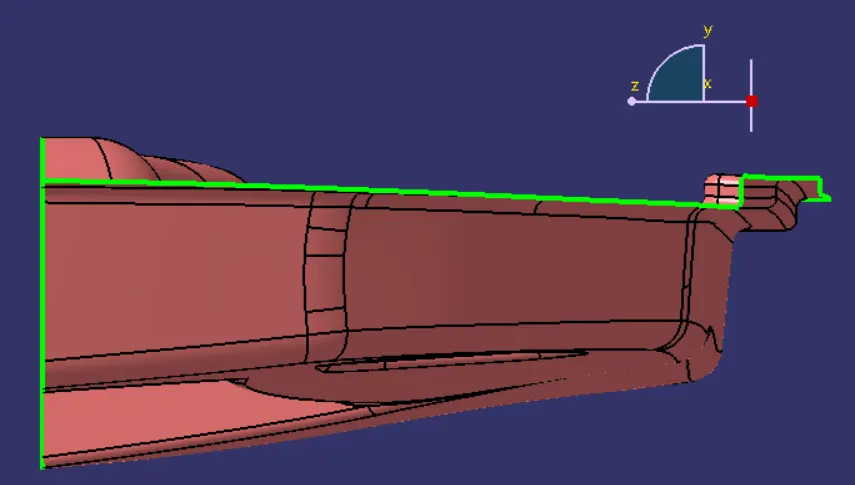
y-axis in zx plane
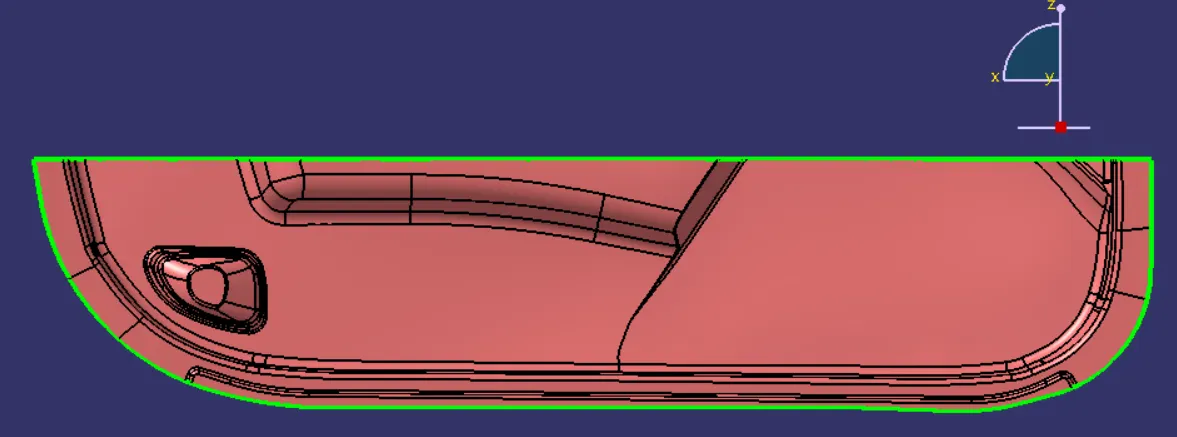
z-axis in zx plane
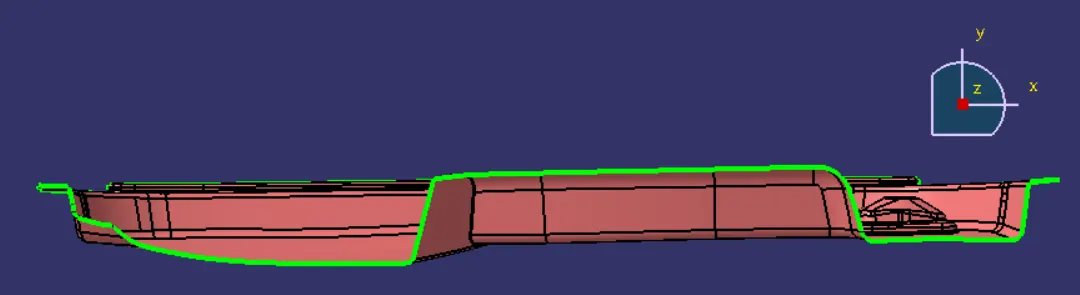
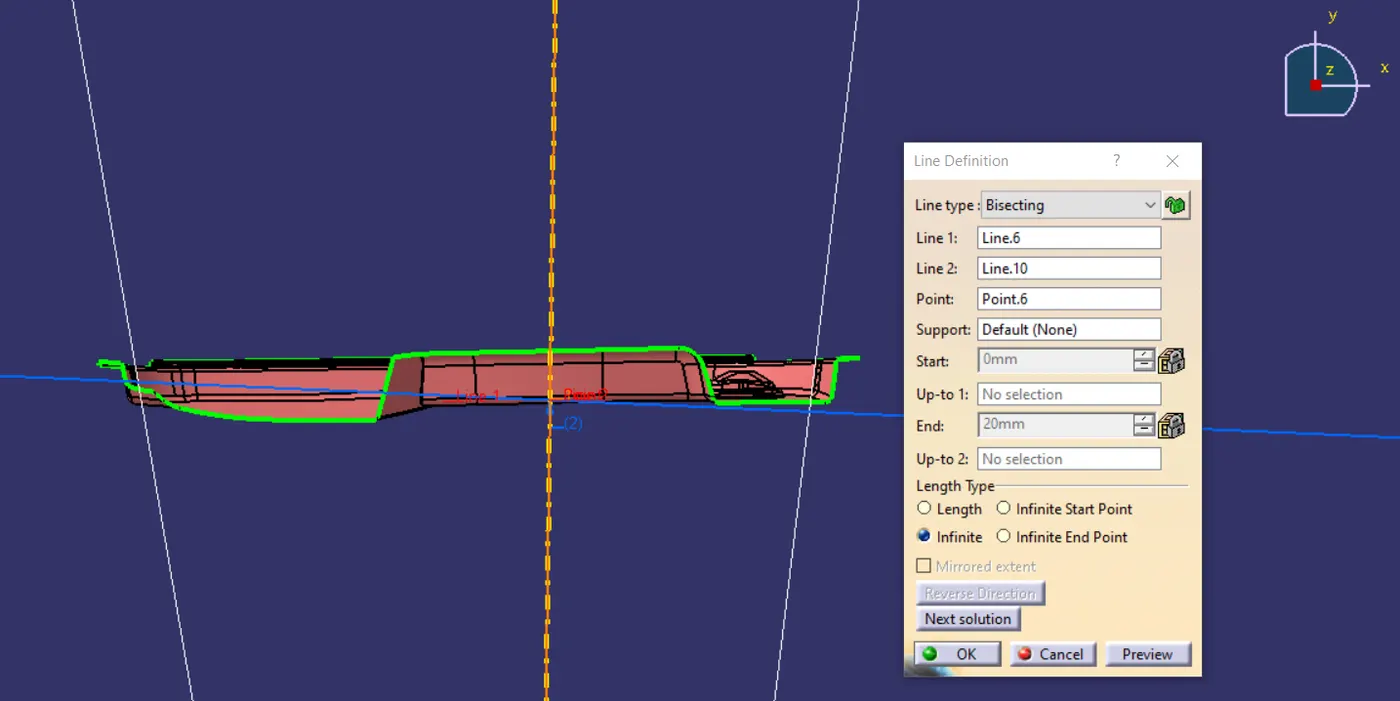
- Bisecting method is used to create a tooling axis by creating reference lines with the existing part flank angle.Here,the left flank and right flank walls are considered by creating line.
- point-to-point as line type,create lines as reference
- Bisecting line as line type,line 1&2 as references
- define point on surface as point
- However, these steps are considered for main tooling axis of the class A surface only.
3. Creation of Side core tooling axis -
- After the creation of main tooling axis,the plastic dog house fixation is created for the assembly of the given class A surface after converting it into a closed body.
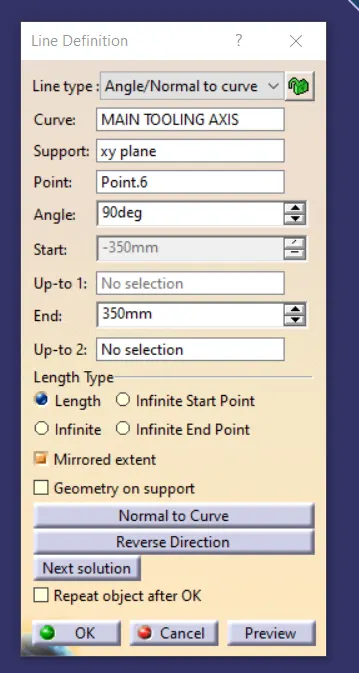
- Generally,the main tooling axis and the side core tooling axis can be irrespective of each other i.e,.. they are not perpendicular to each other.Here,we consider the axes to be perpendicular to each other because.
- Create line using Angle/Normal to curve with support as existing axis system-xy plane as orientation and a point
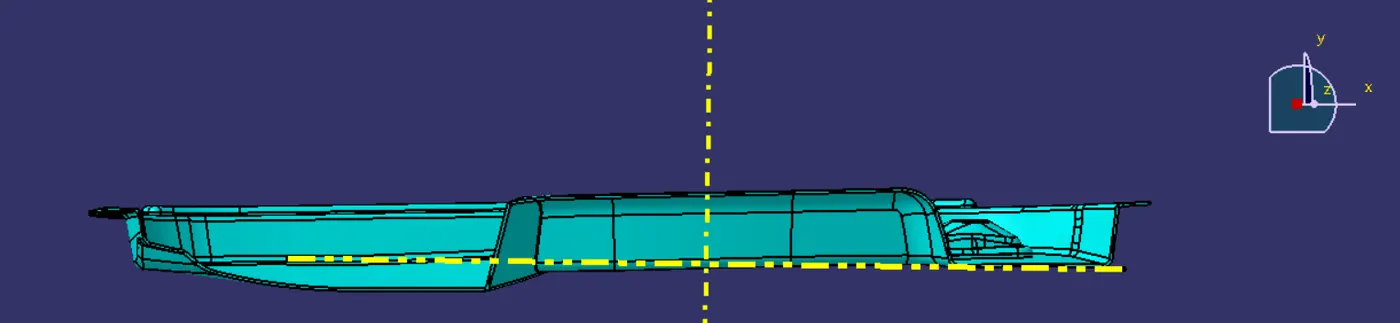
4. Dog house -
- In plastic design and manufacturing, dog house is a feature/element of a plastic part/component. The dog house is a raised/recessed(attached) area on the surface of the plastic part, often surrounded by walls or borders and it serves several purposes.
- The term "dog house" likely originated because the raised or recessed area resembles a small house or enclosure, similar to a dog's house. It's a versatile design feature used in plastic manufacturing to achieve various functional and aesthetic goals, depending on the specific requirements of the product or component.
1. Attachment Point: One common use of a dog house is as an attachment point for fasteners, screws, or clips. These fasteners are used to secure the plastic part to another component/surface.
2. Alignment and Fit: Dog houses can help with the alignment and precise fitting of parts. For example, if you have two plastic parts that need to fit together seamlessly, a dog house on one part can help ensure it aligns correctly with a corresponding feature on the other part.
3. Reinforcement:Dog houses can be designed to add structural reinforcement to a plastic part, making it more robust and durable.The height and width of the dog house tower should complement the functionality.
Design guidelines for creation of Dog house tower -
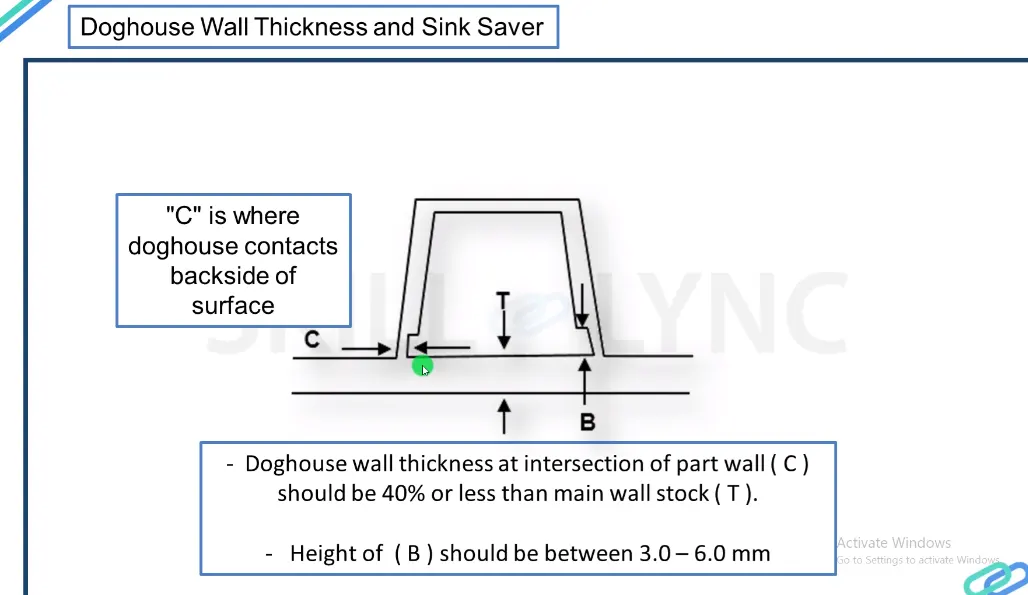
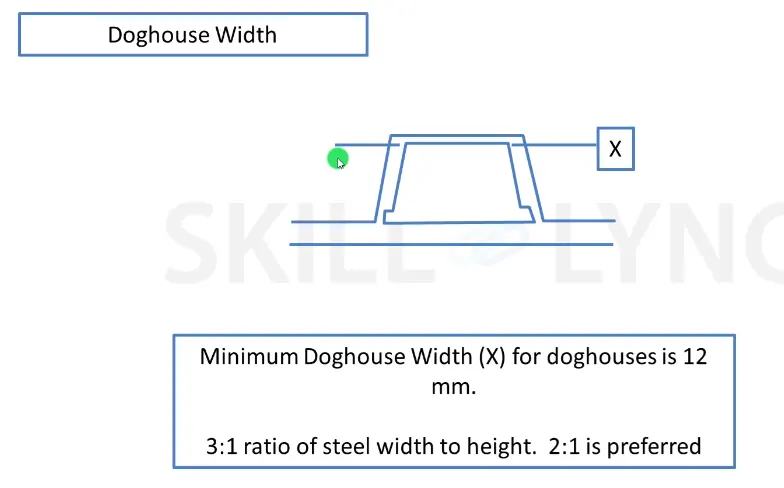
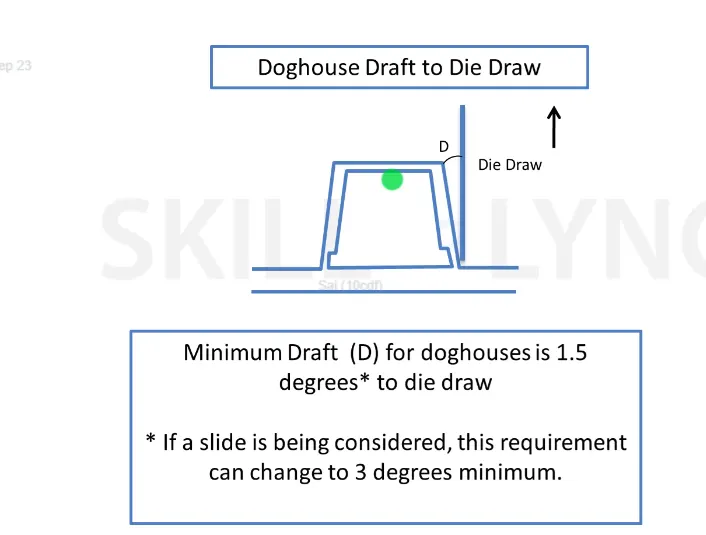
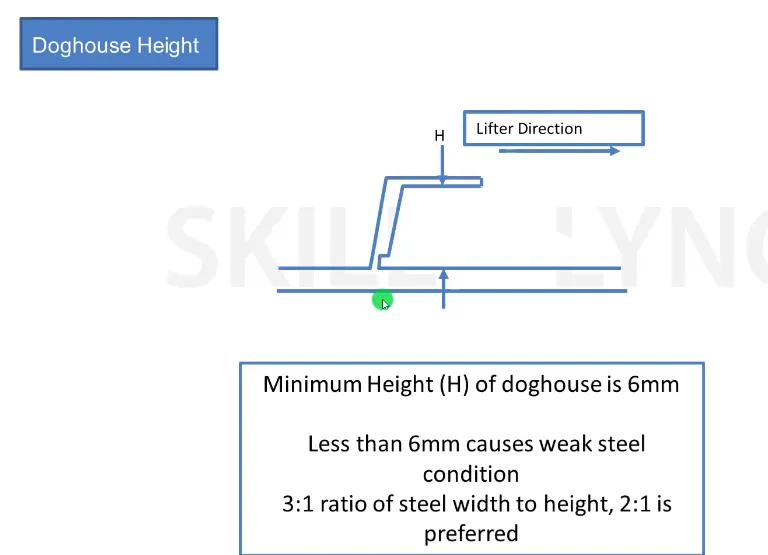
Design methodology for Dog house tower -
Dog house width to height ratio - 3:1 / (2:1)preferred.
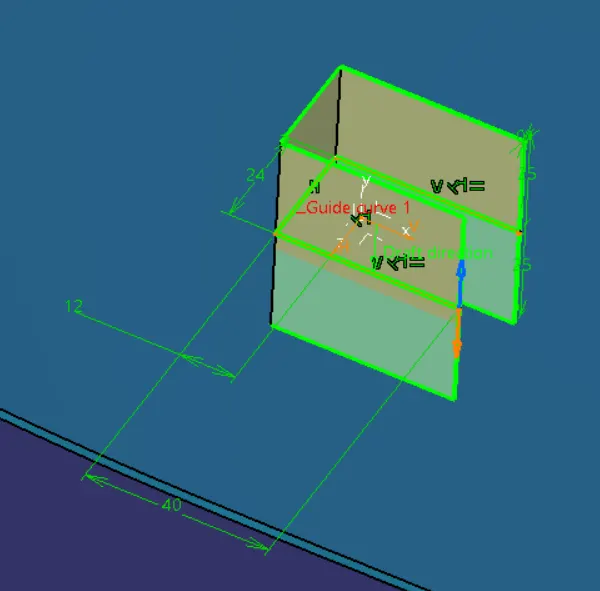
Minimum Width(x) :12 mm
Minimum Height (H) : 6 mm
Minimum Draft angle (D) : 1.5° (die draw) / 3°(slider stroke)
Inner drafte angle : 0.5°
Height of Sink saver (B) :3-6 mm
Thickness of sink saver at intersection of part wall (C) : 0.4 * T (40% of Nominal wall thickness)
Wall thickness of Dog house tower (t) : 0.7 * T (Nominal wall thickness of the part) / equal to T
Coring radius (r) : 0.25 * T (Nominal wall thickness)
Outer radius (R) : 1.25 * T (Nominal wall thickness)
Assumptions -
Dog house width to height ratio - 2:1
Minimum Width(x) : 24mm
Minimum Height (H) : 12 mm
Minimum Draft angle (D) : 1.5°(die draw)
Inner draft angle : 0.5°
Height of Sink saver (B) : 4 mm
Thickness of sink saver at intersection of part wall (C) : 0.4 * 2.5 = 1 (minimum)
Wall thickness of Dog house tower (t) : 2.5 mm
Coring radius (r) : 0.25 * 2.5 = 0.625 mm
Outer radius (R) : 1.25 * 2.5 = 3.125
5.Creation of CAD-
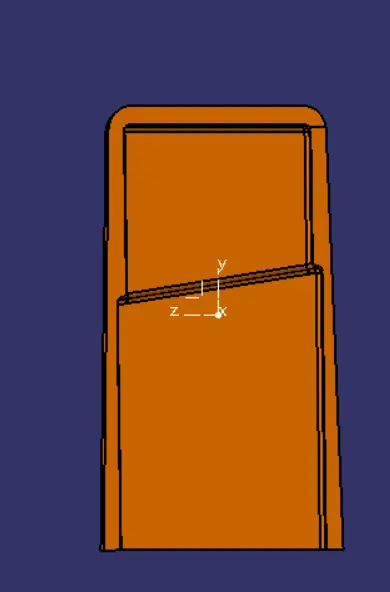
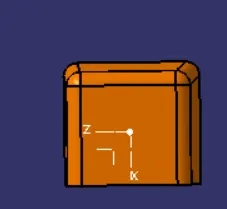
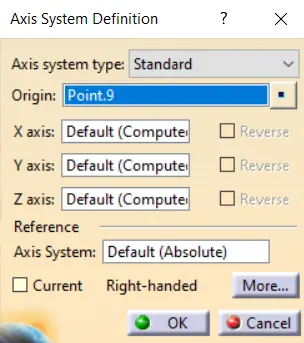
Axis system
- create point as origin
Sketch
- draw the dimensions in a positioned sketch with projected point as reference
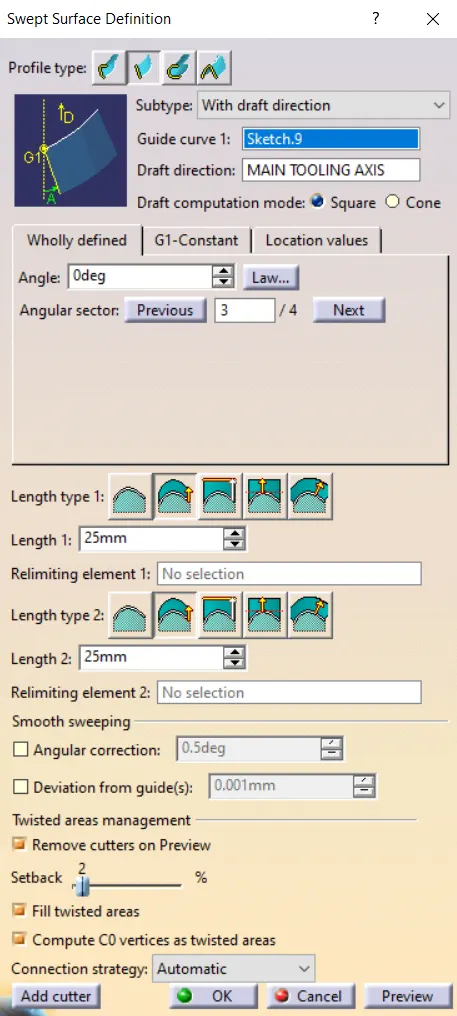
Sweep
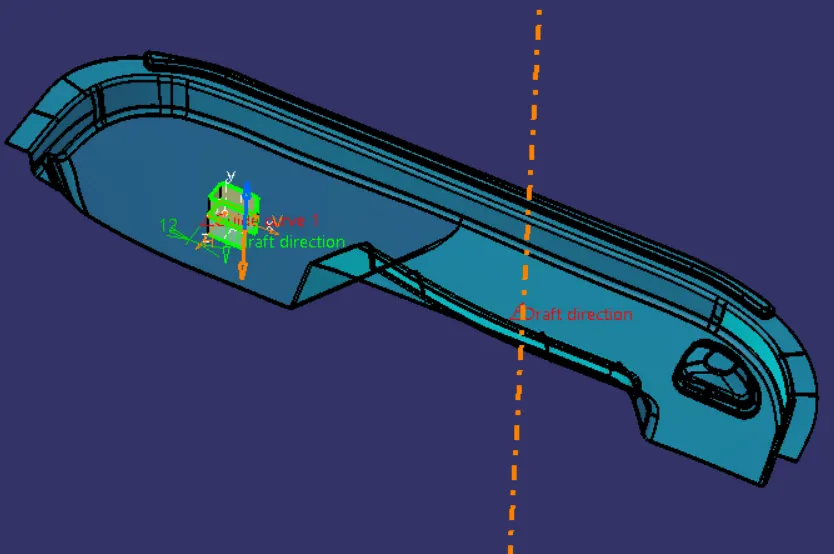
- Guide curve as Sketch
- Sub type as With draft direction
- Draft direction as Y component (90° Deg needs to be created)
- keep angle as 0° and length to 30 mm
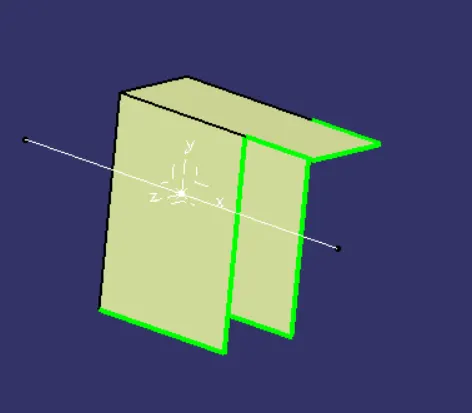
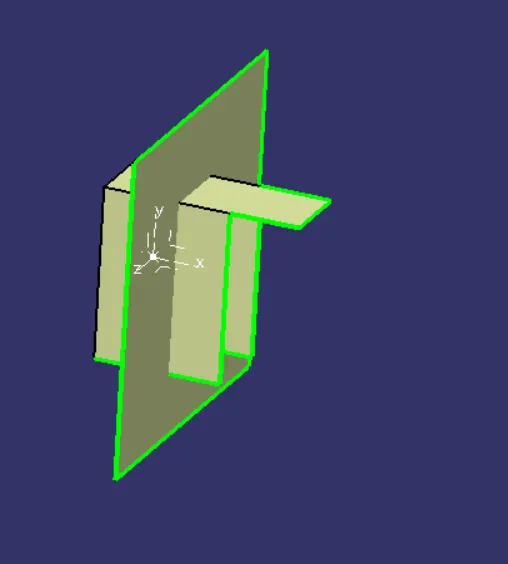
Line & Offset-
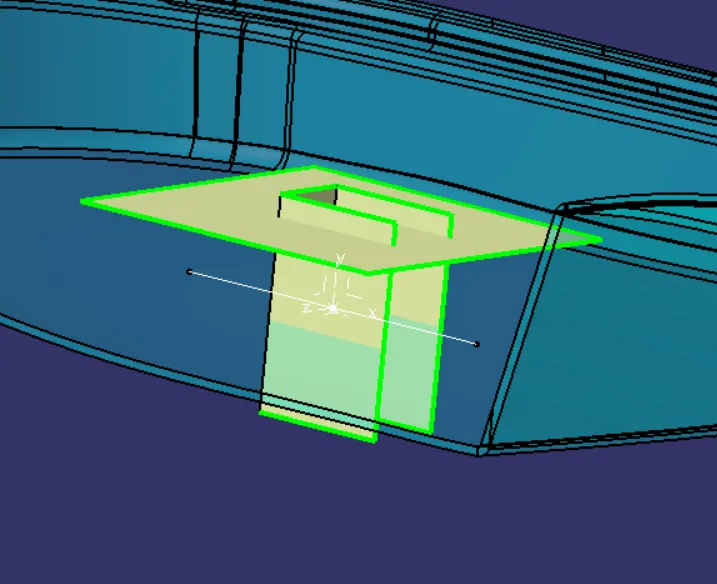
- create Line with Point-direction with point as origin
- extrude that line with length more than sweep in both sides in x direction.
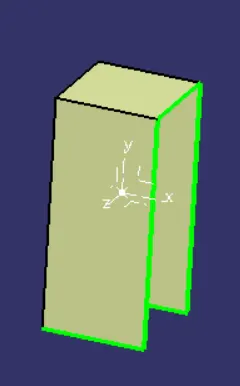
- offset to height of 24 mm (H)
- trim such that one side is open for moldability.
- Then, use offset surface to required length- 24 mm & split surface.
Thicken body -
- switch to part workbench, Insert- surface-based feature - thicken surface to create dog house (outside direction) for 2.5 mm (T)
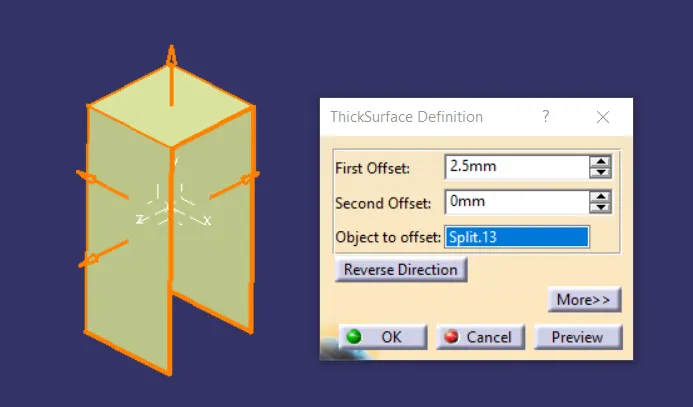
- Now, we must design sink saver with height - 4 mm (B) and min thickness- 1 mm(C)
- Multiple extract the existing part surface and offset - 4 mm.
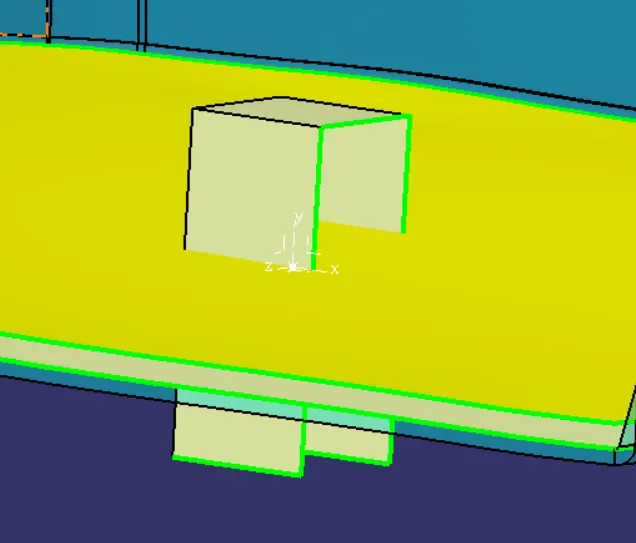
- Multiple extract already split surface of the dog house and offset- 1.2 mm (outside).
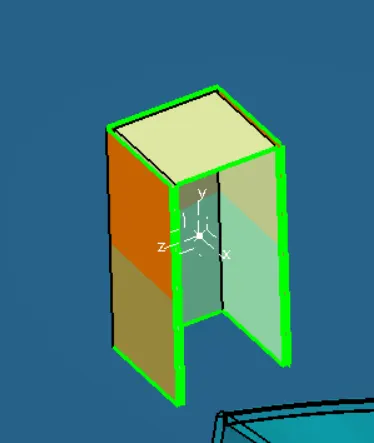
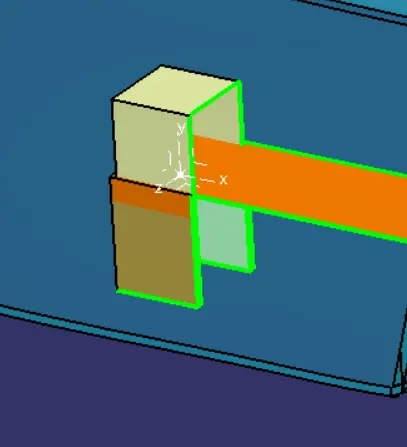
- Trim such that the material is removed
- switch to part workbench, Insert- surface-based feature - split with the thickened surface.
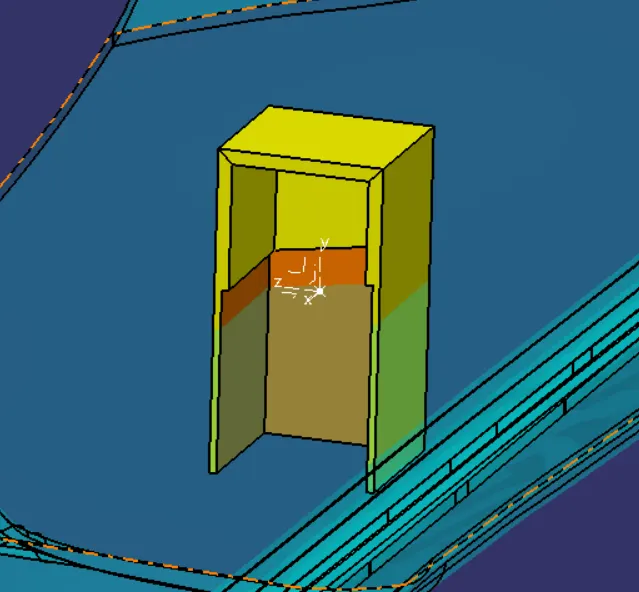
- Insert- dress-up features - draft , the outer surfaces for main tolling axis.Here,the draft angle is 1.5°
- select facesto draft, and always select neutral element connecting the faces to draft
- usually normal surface (90°)of faces you need to draft.
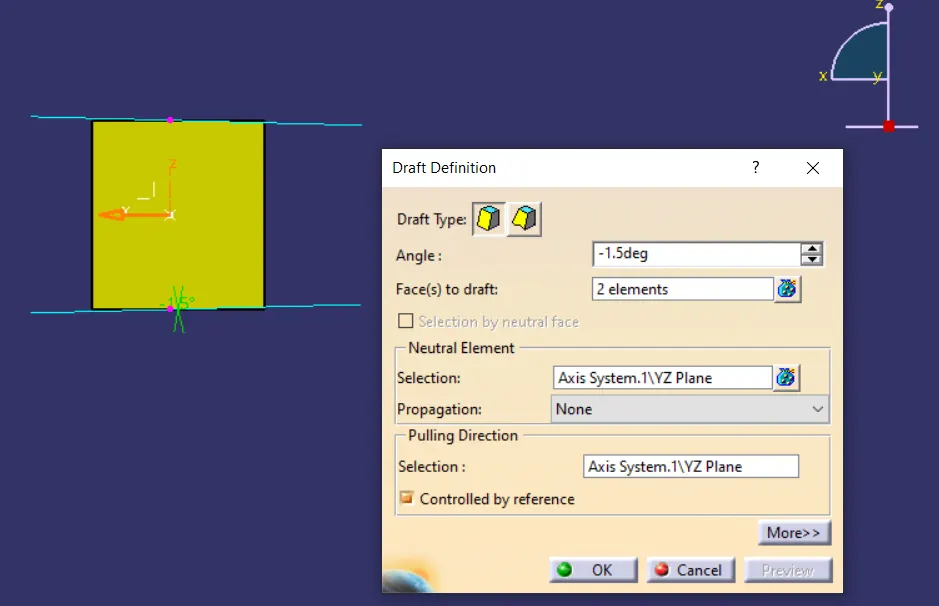
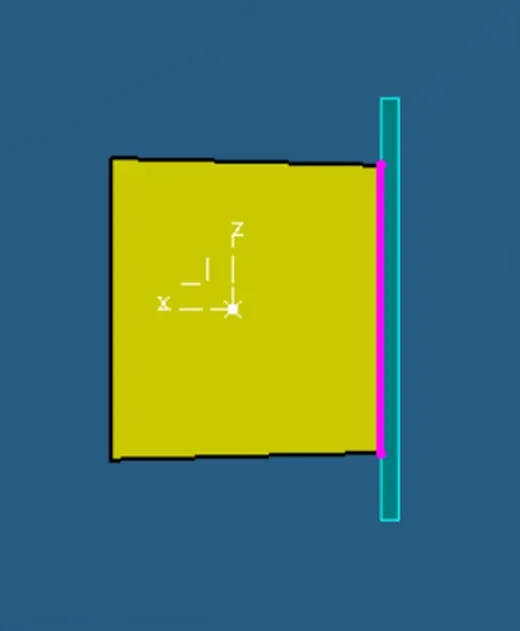
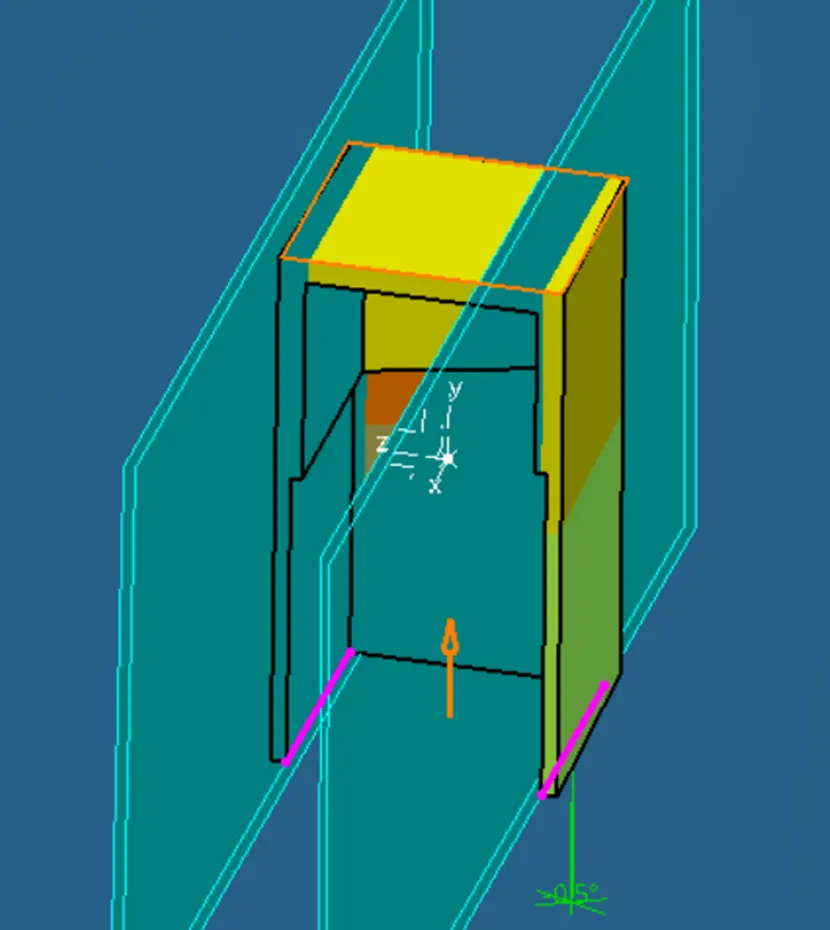
- Insert- dress-up features - draft , the coring surfaces for side core tooling axis.Here,the draft angle is 0.5°
- Then fillet all outer edges as 3.125 mm.
- Fillet all the coring edges as 0.625 mm
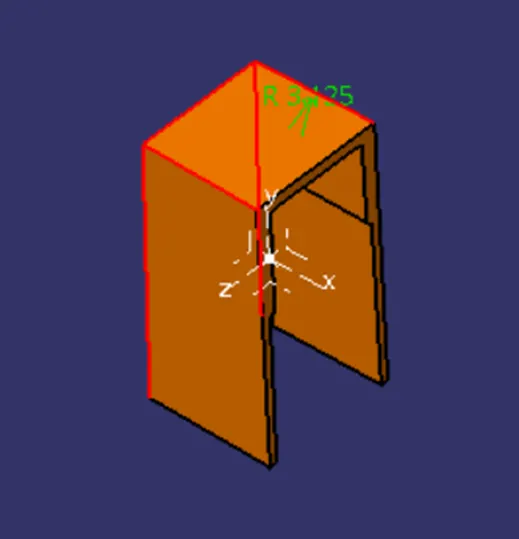
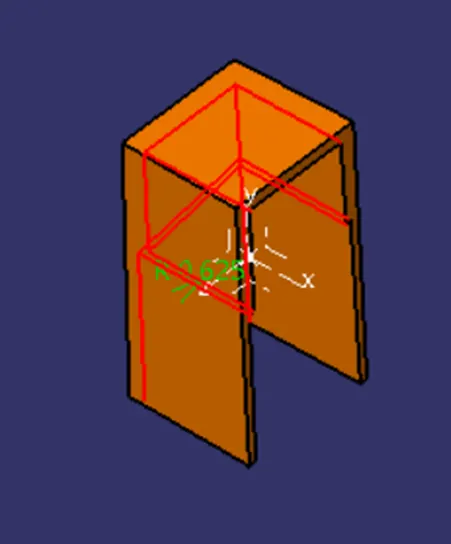
- Union trim the dog house to the thickened part
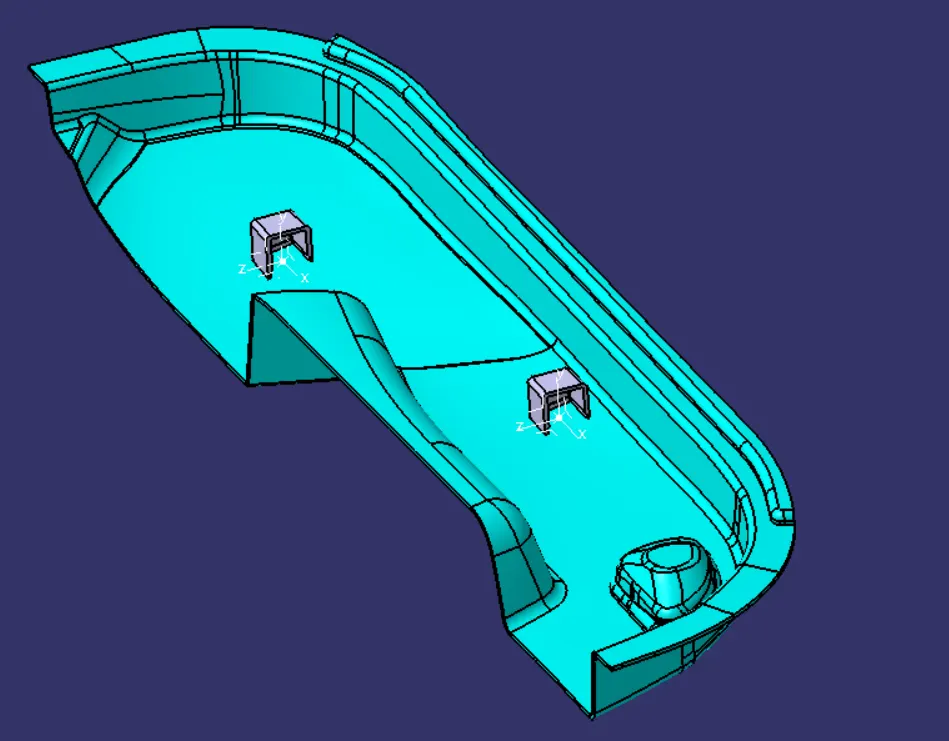
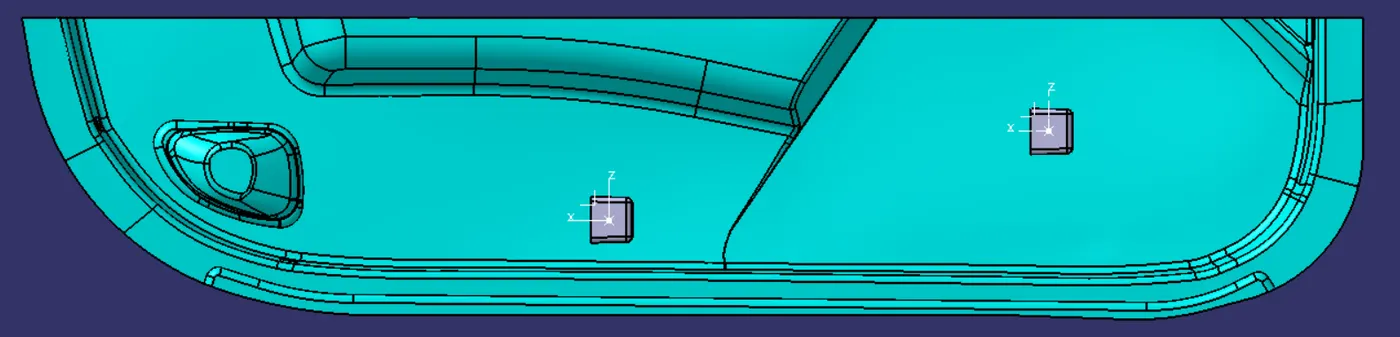
6. Draft analysis of given CLASS A surface & Thickend body-
- perform draft analysis from Insert-Analysis-Feature Draft analysis
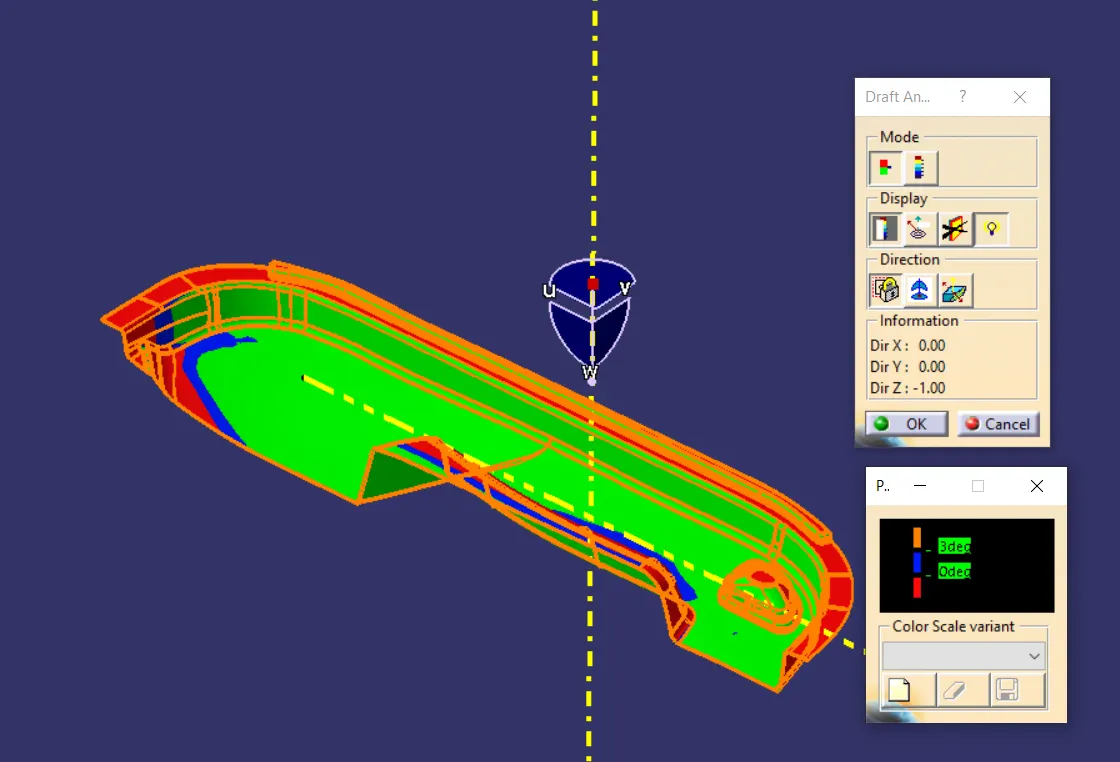
- enter 3 deg of color scale variant to control the nominal draft angle under which the surface needs to be formed.This color scale can be changed by double-click to color scale mode and the analyis type from quick analysis to full analysis mode.Use compass  to click and drag to place it on main tooling axis & use lock
  to snap its position.
- to identify the angle of the surface, the angle running point can be used.By using the feature draft analyis method, we are able to able to identify that the surfaces given are not feasible for manufacturing.
Draft analysis of the dog house with respect to main tooling axis-
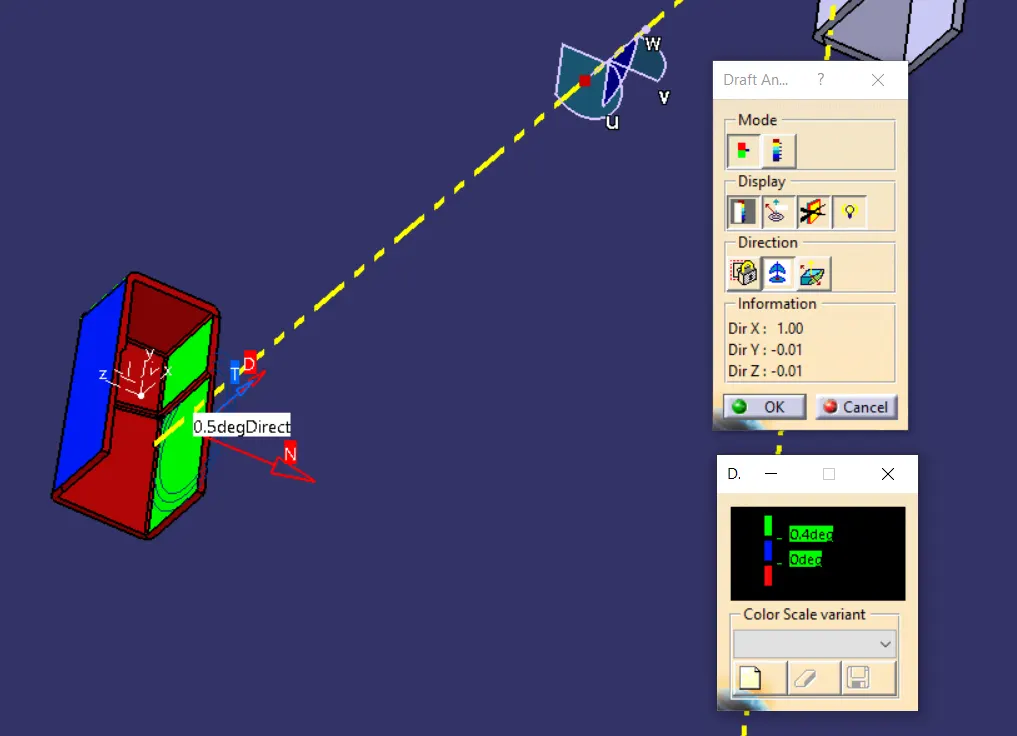
- The Dog house requires two tooling axes to be manufactured,..main tooling axis and side core tooling axis.
- The main tooling axis includes the formation of the outer surface of the dog house.The die draw direction requires 1.5° for the surfaces to be ejected
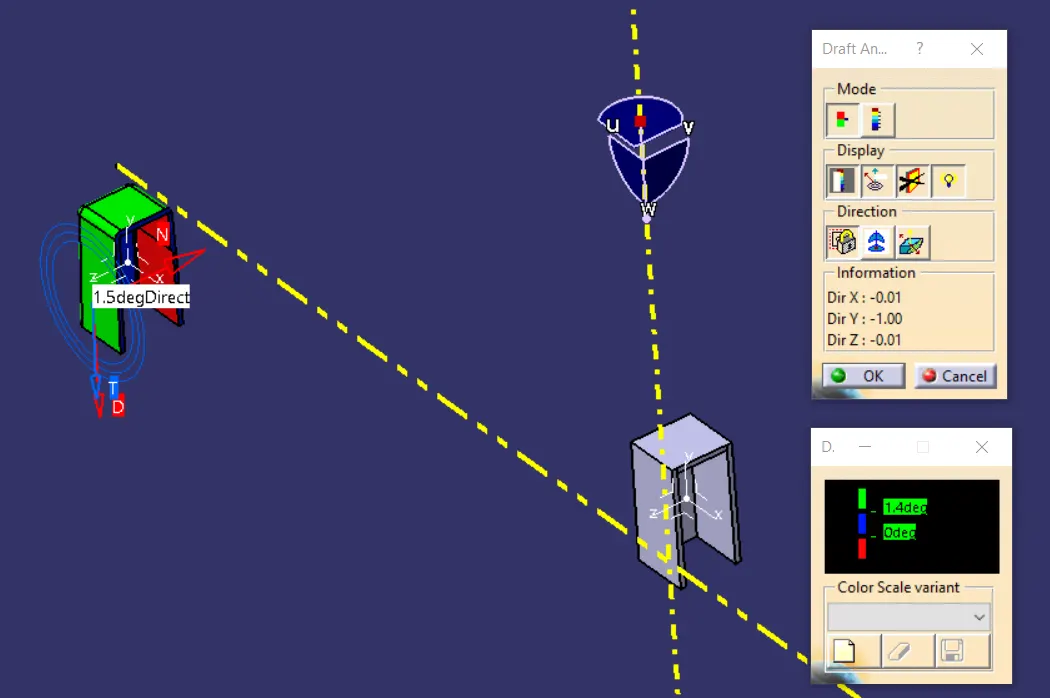
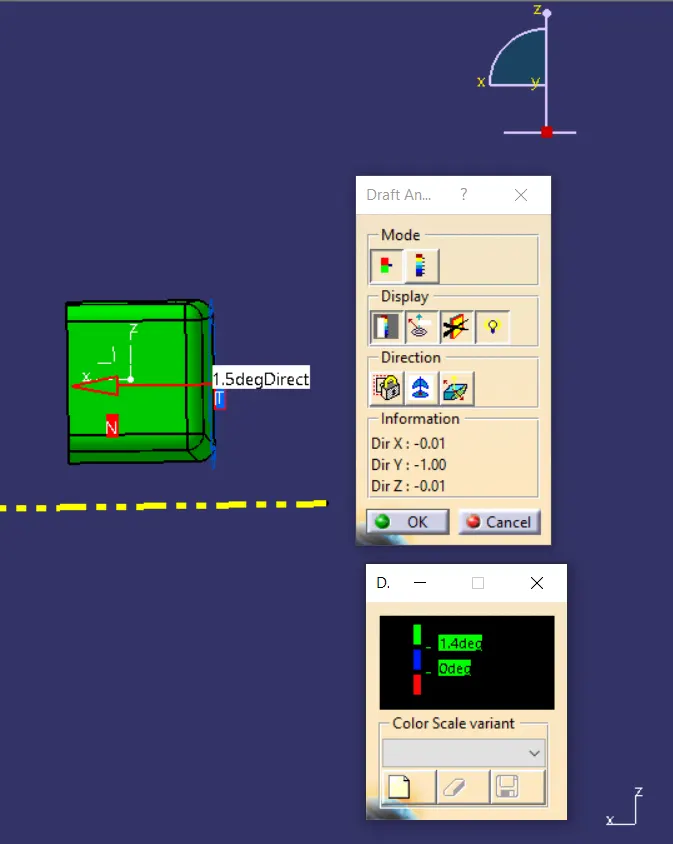
Draft analysis of the dog house with respect to side core tooling axis-
- The side core tooling axis includes the formation of the inner surfaces and sink saver of the dog house.The die draw direction requires 0.5° for the surfaces to be ejected.
Conclusion & Results-
- Create features in the direction of the tooling axis,i.e,...the side core tooling axis is perpendicular to the main tooling axis in this model,so that when the side core axis projected in 2D in zx plane the axis is at 0.847 deg angle to y-axis.This means that the dog house wall need to be created at 0.847 angle or parallel to the side core axis to be feasible for manufacturing.
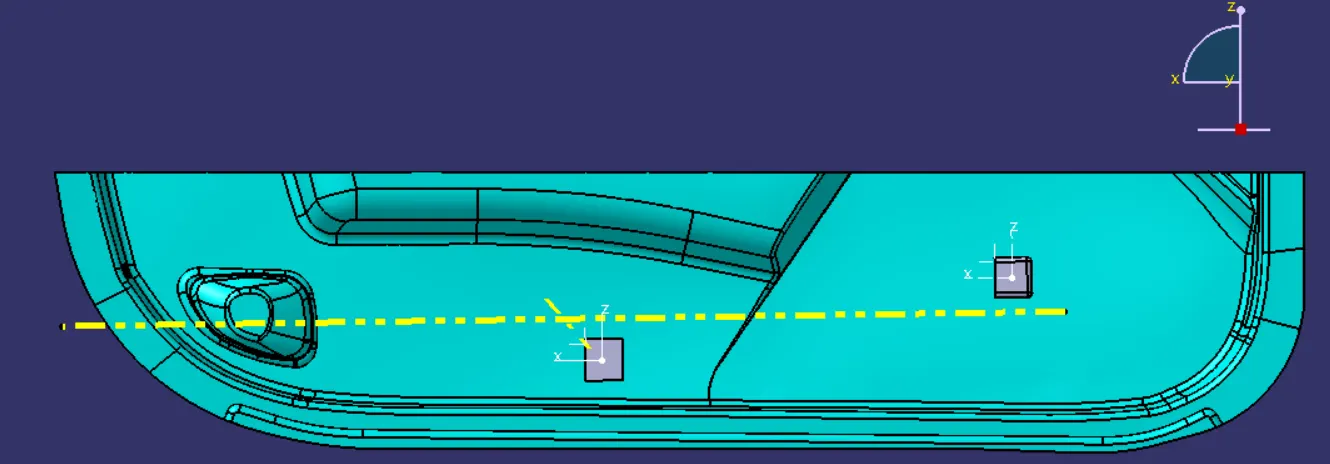
- Perform draft analysis before adding to the part body to analyze the created body.
- Always select the partbody to be analyzed instead of the surface this helps in analyzing all the features of that partbody.The highlight
 helps in showing the selected features.
 - Use draft pulling direction in that respective tooling direction and keep the neutral element in normal plane to that of the selected axis.Make sure the draft removes material in the orientation needed.It can be changed with direction arrow.
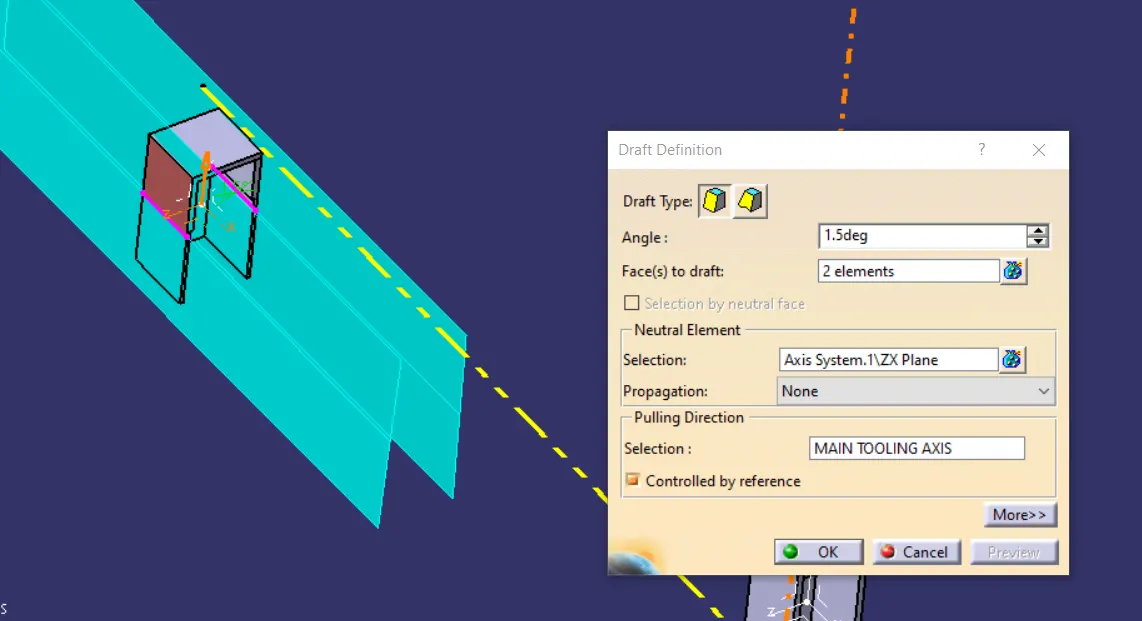
- Keep the min value of sink saver which needs to be maintained on all surfaces,here it is 1 mm which needs to be inspected after the draft command.
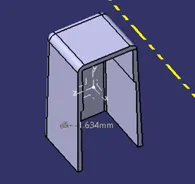
- Always add draft command first and then fillet the edges in order to avoid update cycle error.
- These observations conclude the creation of attachment feature dog house & draft analysis of the dog house.