Week 10:- 2D Detailing Challenge
AIM
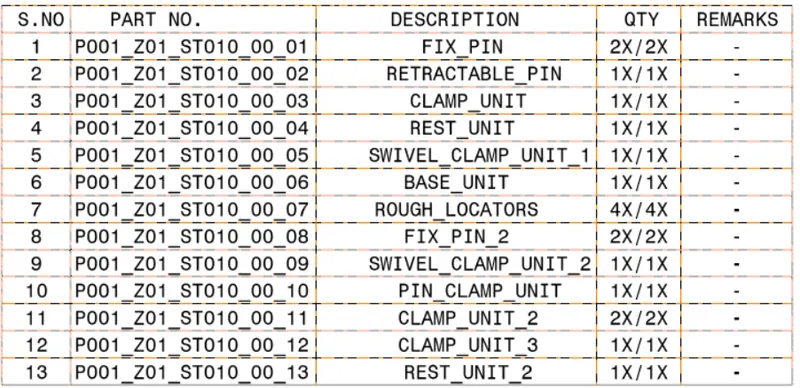
To Draft a Key Sheet for the Complete Fixture assembly and Draft a Base Unit and the Fix Pin Unit drawings with all child parts for the complete Fixture assembly from challenge 8.
INTRODUCTION
The fixture design after the 3D finishing process has to be done with 2D finishing before it is sent for manufacturing. All the dimensions of the fixture units and their child parts have to clearly mentioned in the drawing sheets. The detailing can be changed as per the requirement of the customer and company standards. GD&T must be used in order to reduce the cost of manufacturing.
All the views must be clearly visible and provided with dimensions in the drawing sheets.
Key sheet for complete fixture Assembly
It is saved as P001_Z01_ST010_00_00.CATDrawing
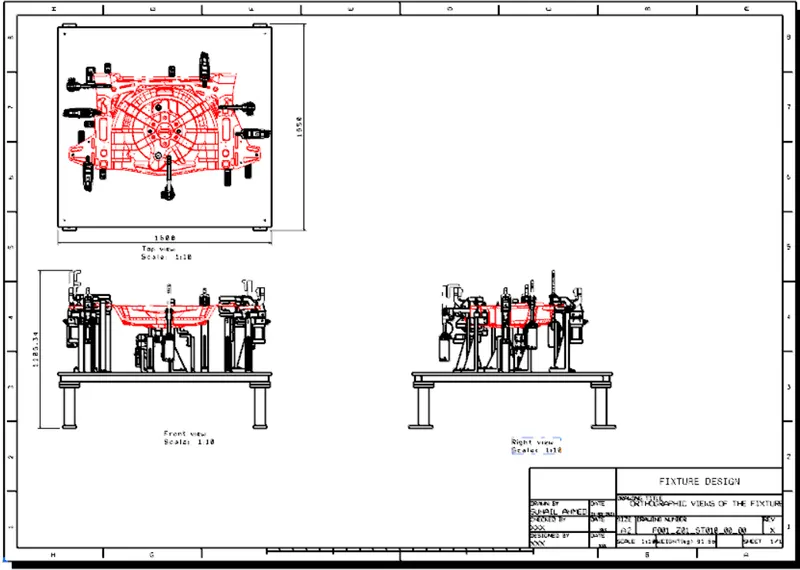
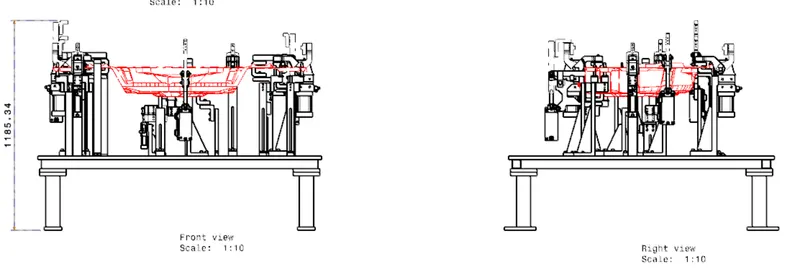
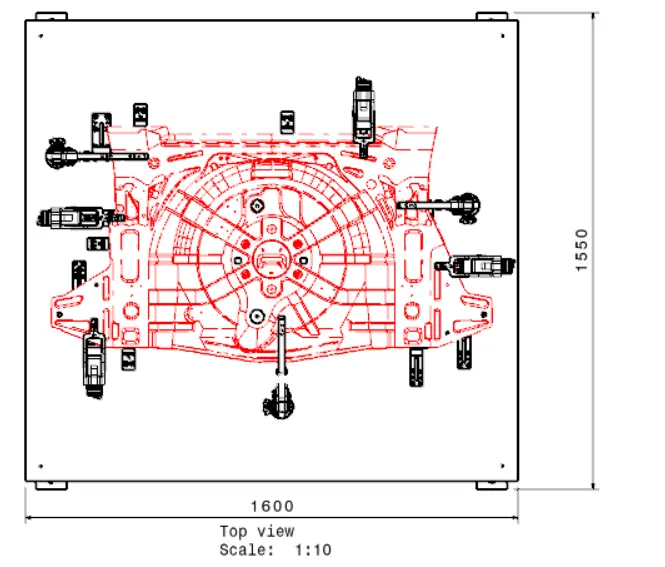
The front view, top view, and right side view are shown for the complete fixture assembly. The overall dimensions are provided and the open positions are represented with dotted lines.
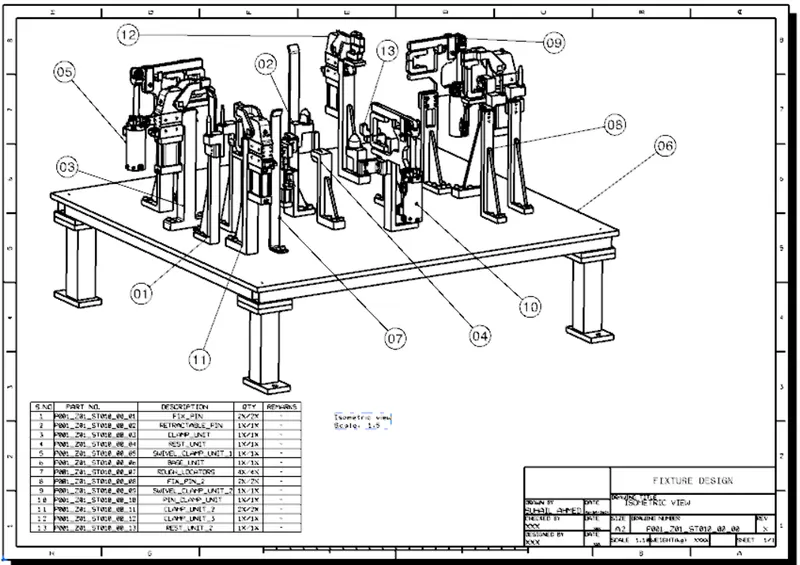
Isometric View of the complete fixture assembly with all the units marked.
2D Detailing of the base unit.
It is saved as P001_Z01_ST010_11_00_BASE_UNIT.CATDrawing
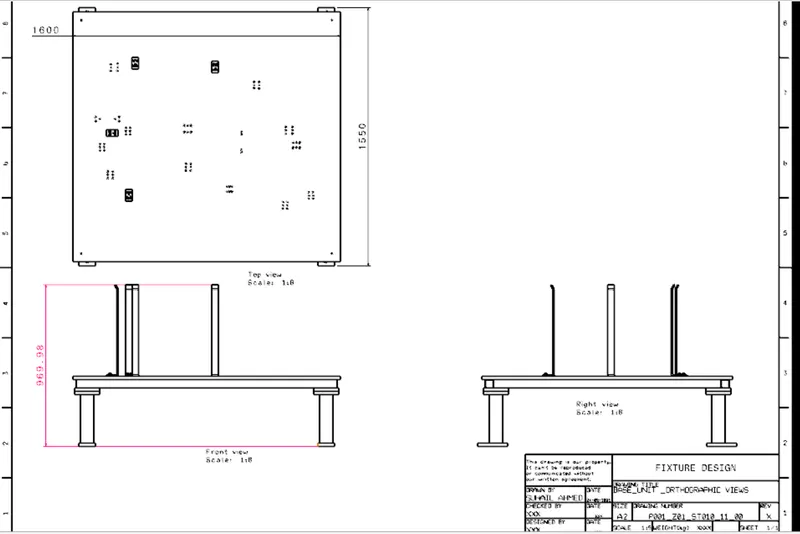
The front view, top view, and right side view are shown for the base unit. The overall dimensions are provided.
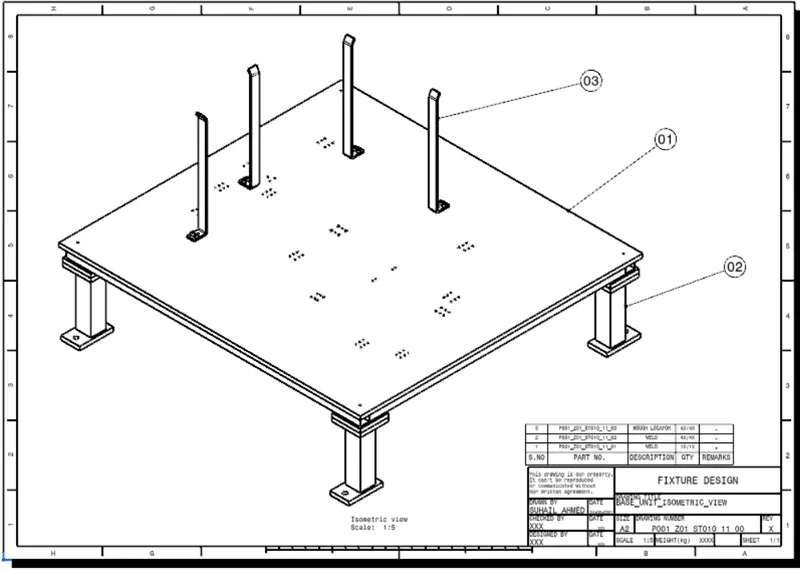
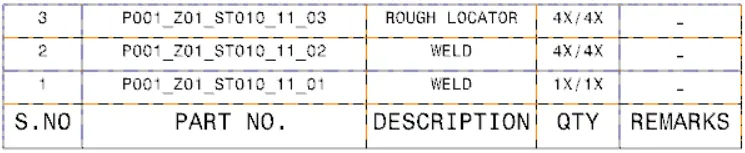
Isometric View of the Base units with all the child parts marked.
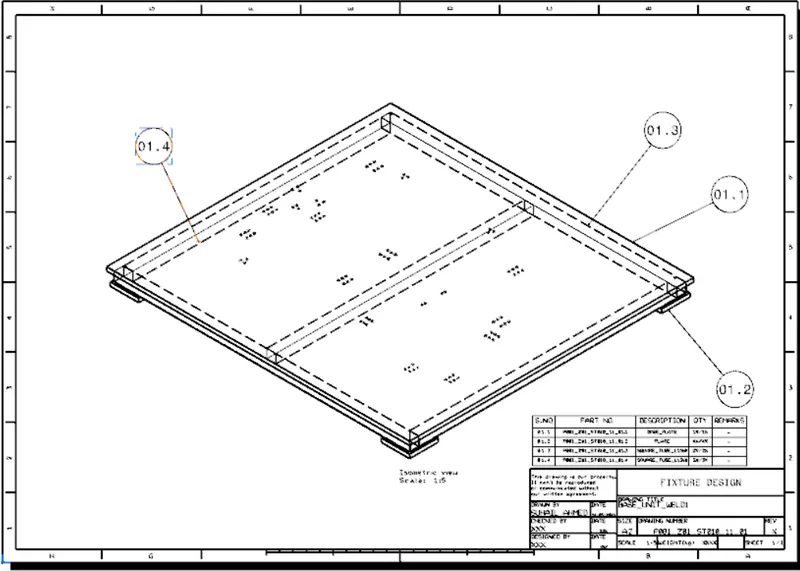
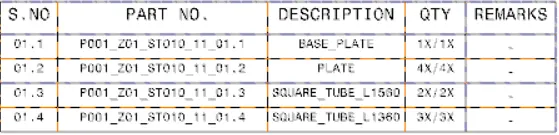
Isometric view of the Baseplate with all the subparts marked.
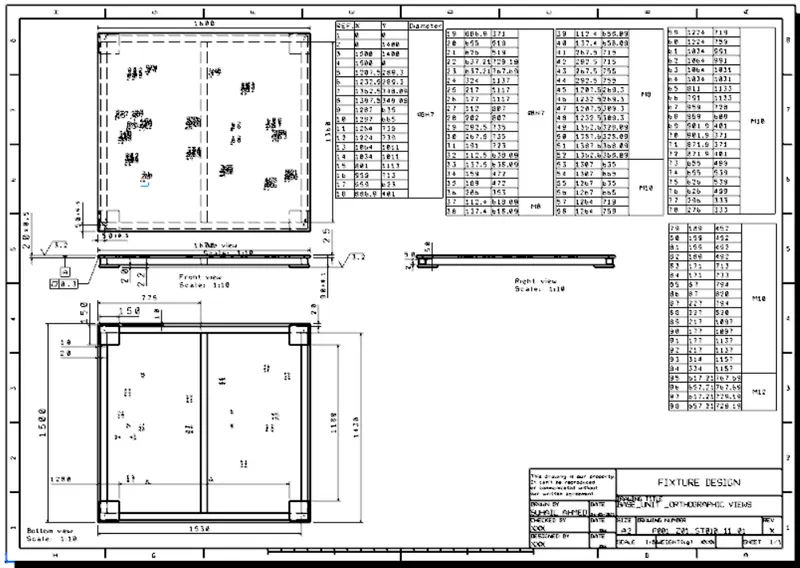
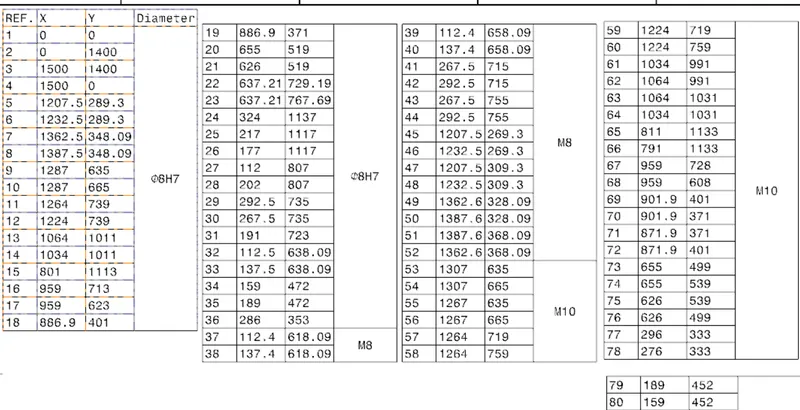
The front view, top view, and right side view are shown for the base plate unit. The overall dimensions are provided and the hole data is given for machining.
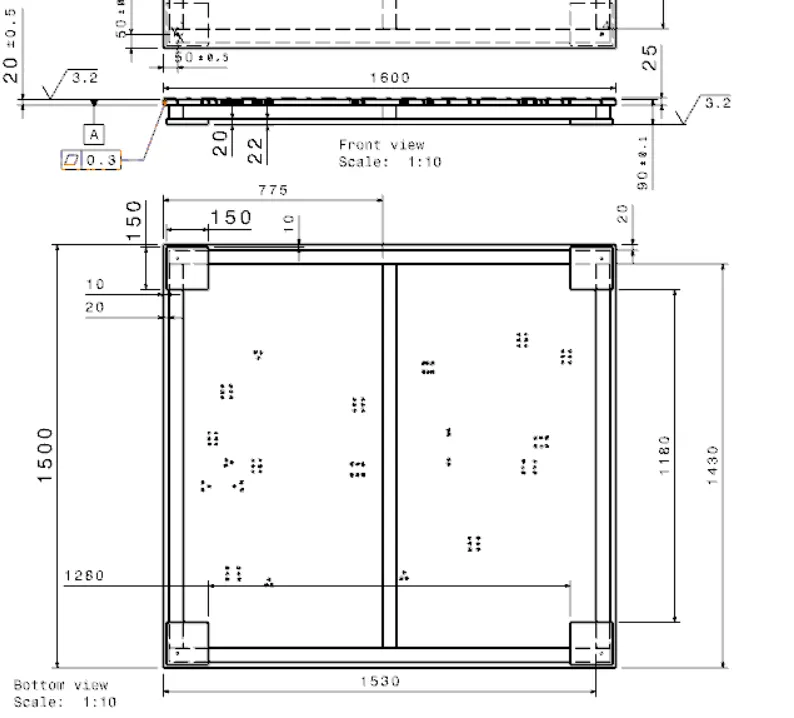
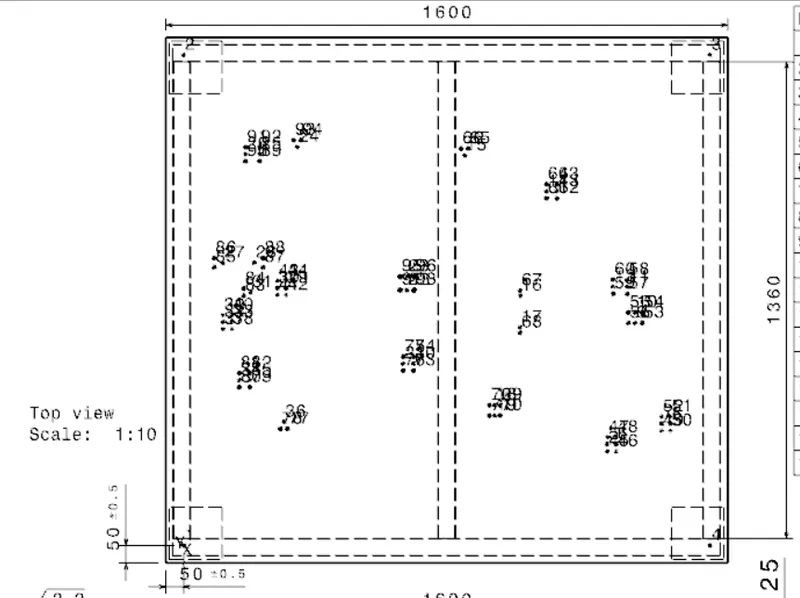
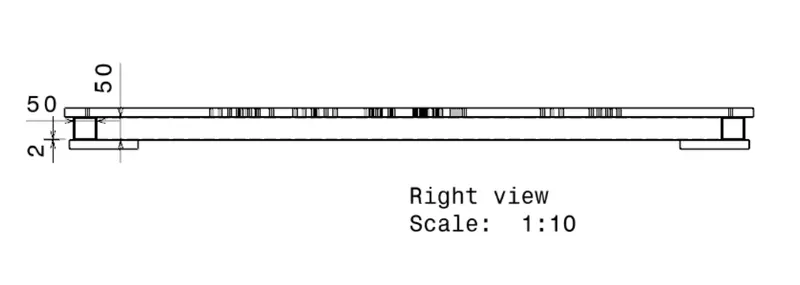
- The surface that has to be machined is provided with a surface roughness value of 3.2.
- The extra raw material is shown in the dimension on the machining surface.
- The hole data provided is with respect to the tooling hole as a reference.
- All the holes must have a nominal dimension. It is advised to do manual drilling if the holes are not nominal at some places due to design consideration.
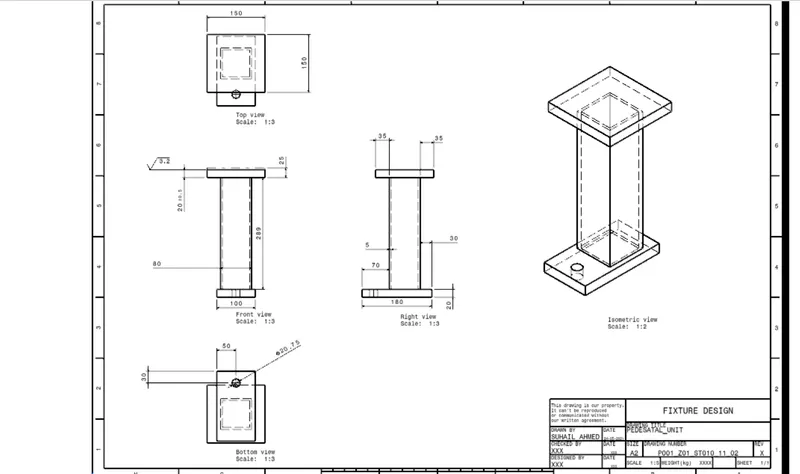
2D detailing of the Pedestal.
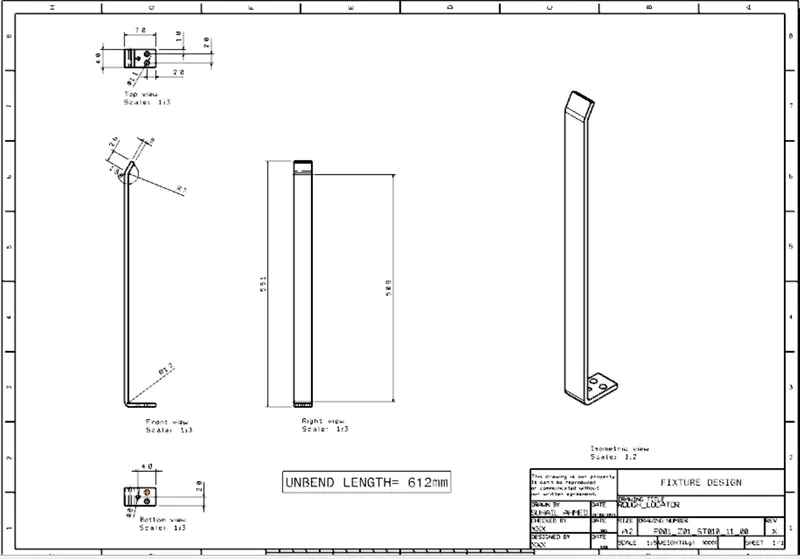
2D detailing of the Rough locator.
2D Detailing of the Fix Pin Unit 1
The quantity of this fix pin unit is 2, i.e it is used in two places in the fixture assembly, and below is the detailing.
It is saved as P001_Z01_ST010_01_00_FIX_PIN.CATDrawing.
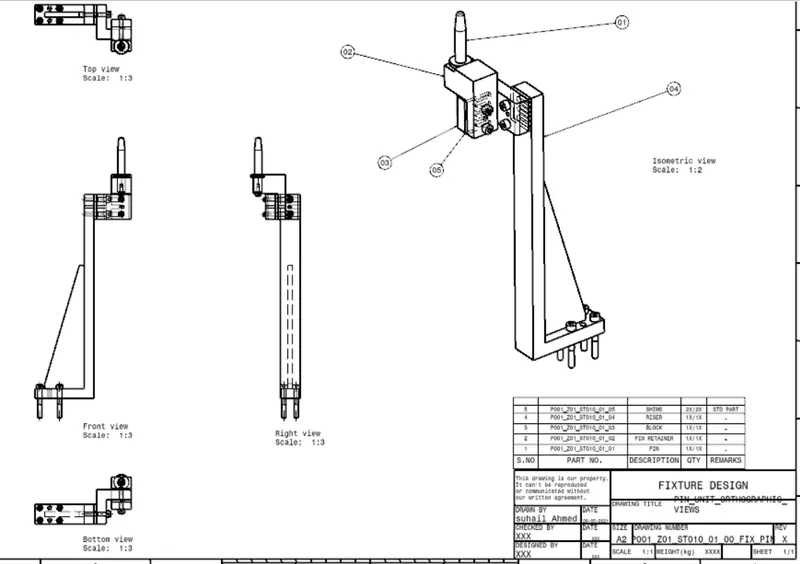
Isometric view of the Fix pin Unit with all the subparts marked.
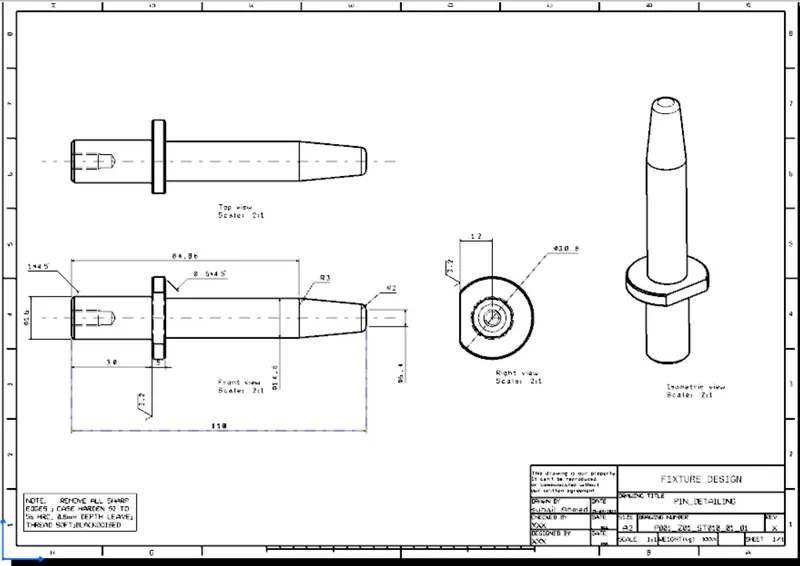
Detailing of the Pin.
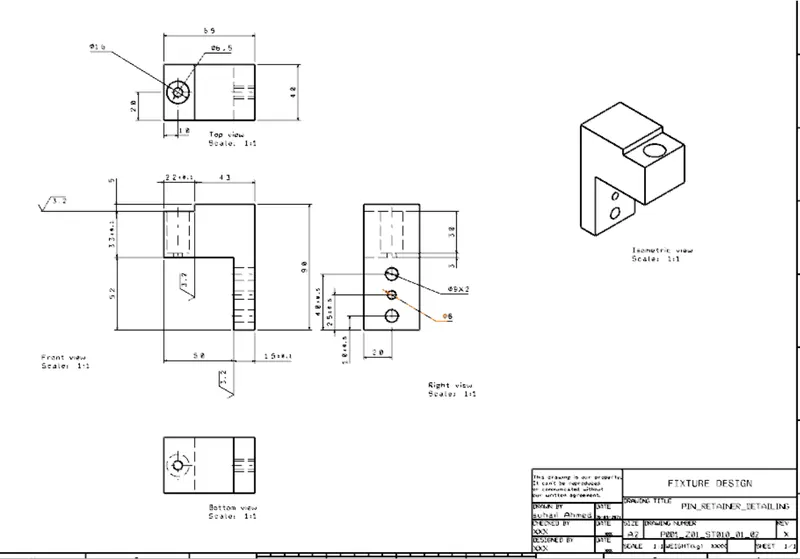
Detailing of the Pin Retainer.
Note: This Pin retainer with the same dimensions is also used in fix pin unit 2. The quantity of this unit is 2.
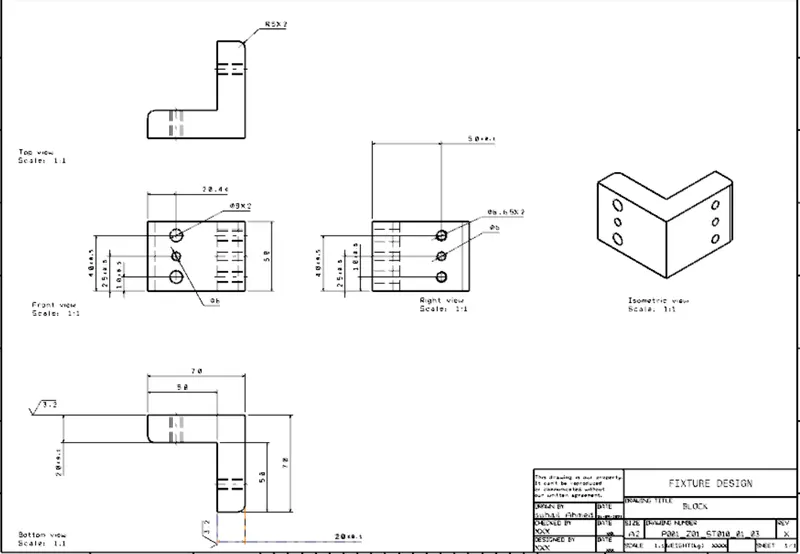
Detailing of the Block.
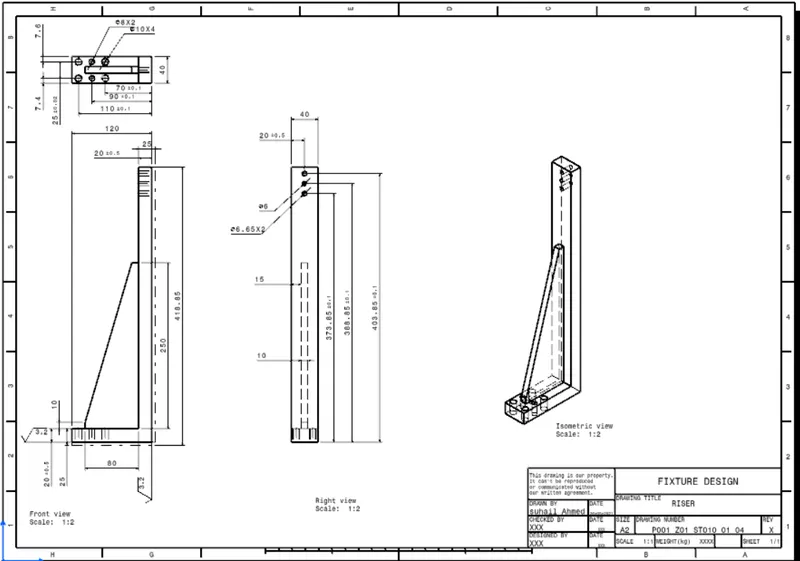
Detailing of the Riser.
Note: This riser with the same dimensions is also used in fix pin unit 2. The quantity of this unit is 2.
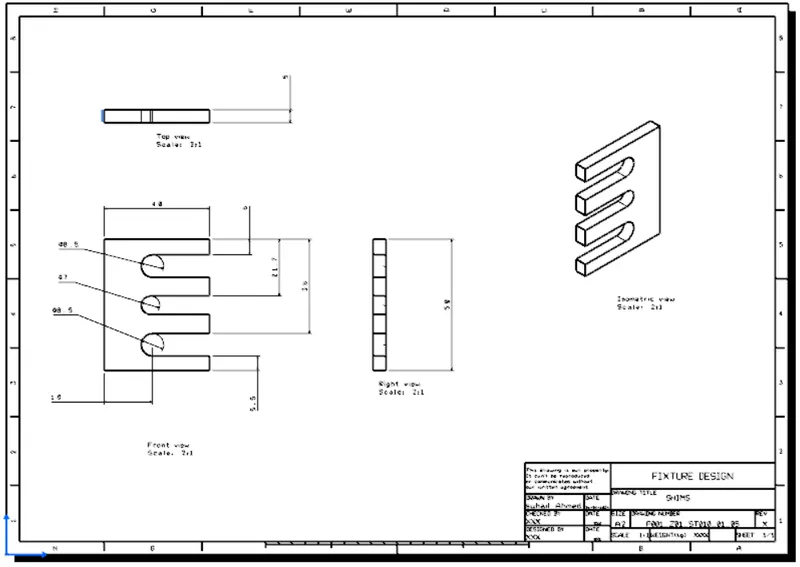
Detailing of shims.
Note: The same shims are used in two places in this unit and it is also used in two places in fix pin unit 2. The quantity of this unit is 4.
2D Detailing of the Fix Pin Unit 2
The quantity of this fix pin unit is 2, i.e it is used in two places in the fixture assembly, and below is the detailing.
It is saved as P001_Z01_ST010_13_00_FIX_PIN2.CATDrawing.
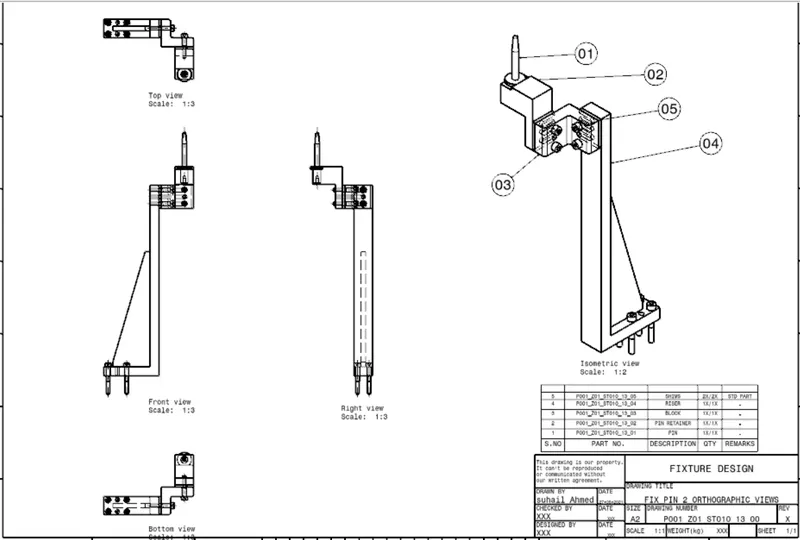
Isometric view of the Fix pin Unit 2 with all the subparts marked.
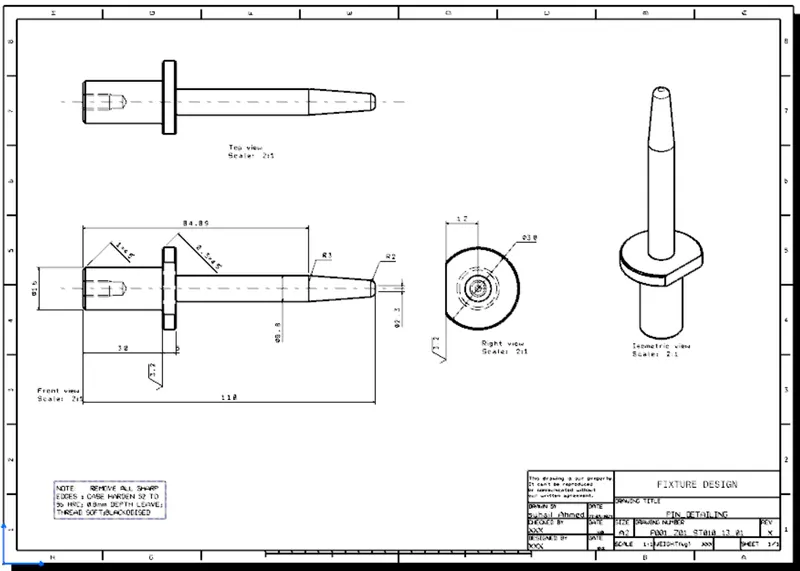
Detailing of the Pin.
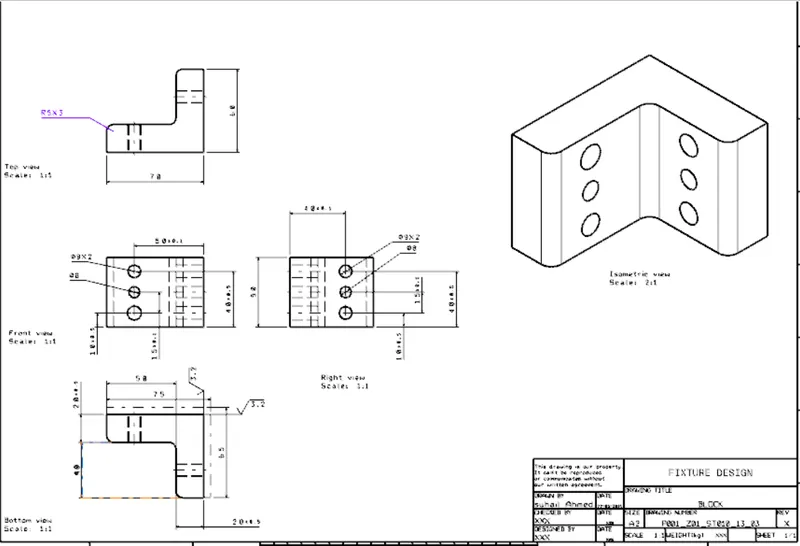
Detailing of the Block.
The pin retainer ,riser and the shims used are same as above Fix pin unit 1.
CONCLUSION
Hence, The Drafting of Key Sheet for the Complete Fixture assembly and a Base Unit and the Fix Pin Unit drawings with all child parts for the complete Fixture assembly was completed.