REVIT_Introduction to REVIT_Week1
1. AIM: To create a new project and name the project from the file menu.
TOOLS/COMMANDS USED:
Mouse wheel
Properties Palette
File menu
Open
PROCEDURE:
Step-1: Go to home tab.
Step-2: Select the file option at the top left corner.
Step-3: Now choose the new option.
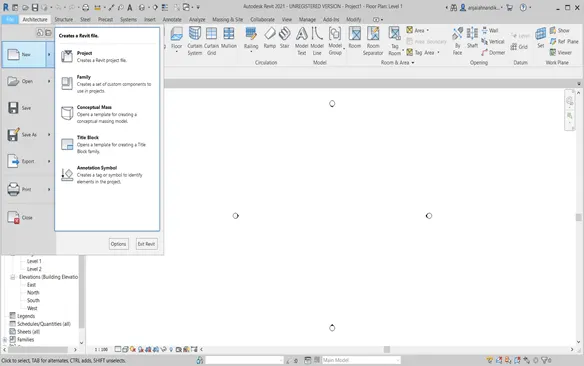
Step-4: Now select the project.
Step-5: A dialog box of new project appears. Click the drop box under the template file and select the template required.
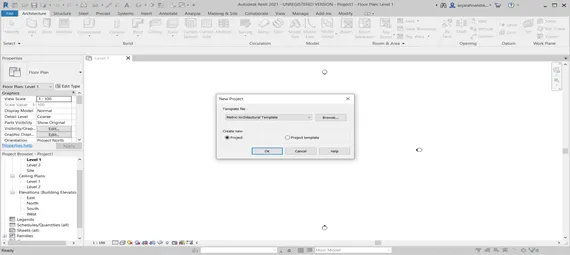
Step-6: Click OK.
Step-7: Now a new project file is created.
Step-8: Now go to the properties palatte for the view, under identity data go to view name. And name the project as project-1.ex and click APPLY.
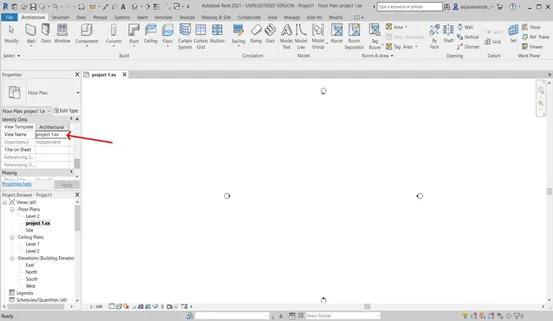
Step-9: Now the file is named as project-1.ex.
RESULT:
The new project(structural/architectural/ constructiotemplate) is created successfully via file menu by using architectural template and named as project-1.ex through the view name in the properties palette.
2. AIM: To save the file, close the file and open the file.
TOOLS/COMMANDS USED:
Mouse wheel
File Menu.
PROCEDURE:
Step-1: Go the file tool at the top left corner.
Step-2: Select the save option.
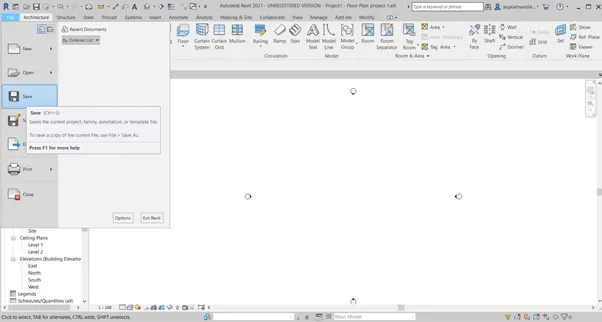
Step-3: Save the file as project1 and click the SAVE button.
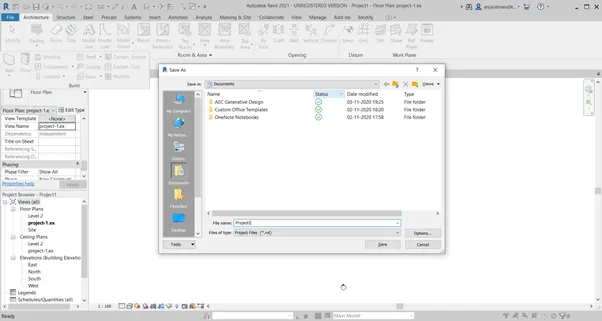
Step-4: Now the new project is saved to the computer.
Step-5: Now go to the file tab again and choose open, then select the project.
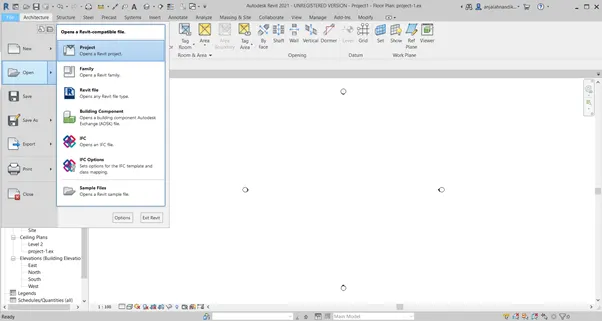
Step-6: Select the required file and open the file.
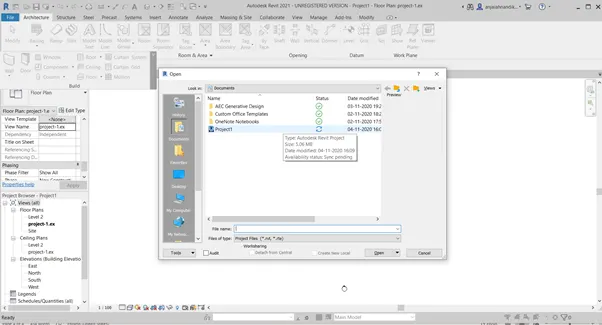
Step-7: Now close the file.
RESULT:
The new project file is successfully saved into the computer documents through the file tool and it is closed and opened from the file manager as required.
3. AIM: To create a rectangular layout of walls.
TOOLS/COMMANDS USED:
Architecture
Wall
PROCEDURE:
Step-1: Choose the wall icon and select the wall architectural.
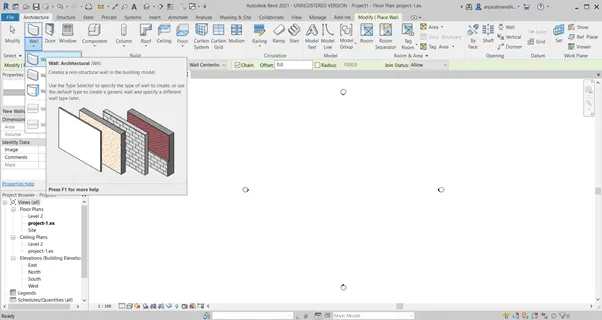
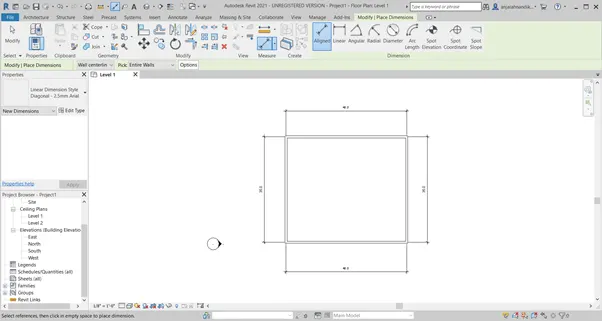
Step-2: After selecting the architectural wall draw a rectangular format of walls of dimensions 40’-0” X 35’-0”.
RESULT:
A rectangular layout of dimensions 40’-0” X 35’-0” is successfully created.
4. AIM: To add dimensions to the layout using aligned option.
TOOLS/COMMANDS USED:
Annotate tool bar.
PROCEDURE:
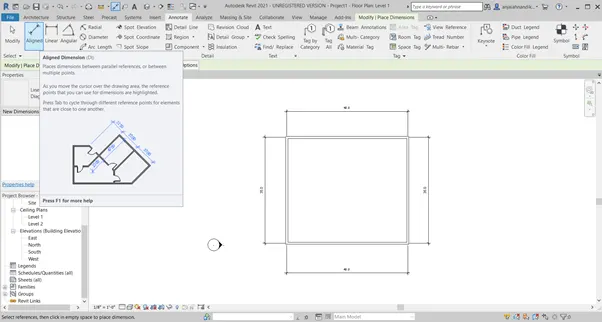
Step-1: Select annotate tool bar.
Step-2: Choose align option.
Step-3: Measure the length of walls.
RESULT:
Dimensions are added successfully to the layout by using aligned option in annotate tool bar.
5) AIM: To change the wall types using properties browser.
TOOLS/COMMANDS USED:
Project browser
Properties palatte
PROCEDURE:
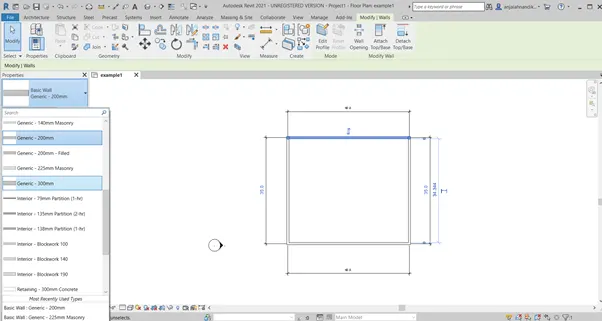
Step-1: Select a wall.
Step-2: Go to project browser.
Step-3: Select the wall type in properties palatte and select the required type of wall.
RESULT:
The wall type is successfully changed using properties browser.
6) AIM: To obtain the 3D view of the layout.
TOOLS/COMMANDS USED:
View tool bar
PROCEDURE:
Step-1: Select the view tool bar.
Step-2: Choose the 3D view and select the default 3D view option.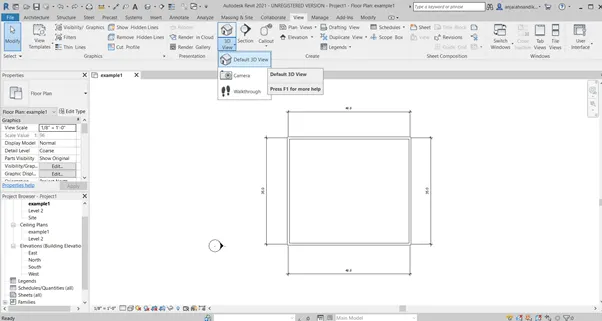
Step-3: The required 3D view is obtained.
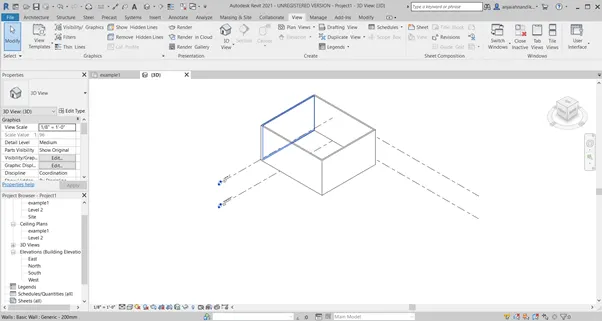
Step-4: Select the view name in the properties palette and name the view as 3D view walk through.
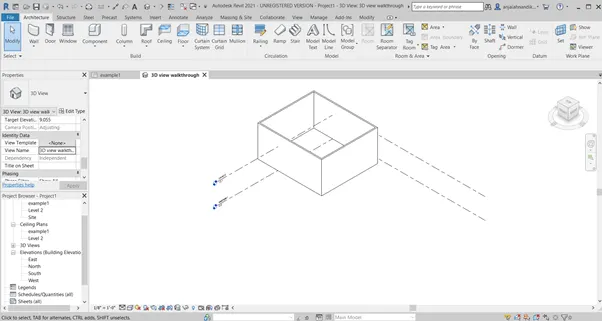
RESULT:
The required 3D view of the layout is successfully obtained and named.
7)AIM: To Navigate through the 3D view.
TOOLS/COMMANDS USED:
View
PROCEDURE:
Step-1: Go to view tool bar.
Step-2: Select 3D view option and choose the default 3D view.
Step-3: Now view cube appears at the top right corner.
Step-4: Click on the view cube and select the view.
Step-5: Now pan/orbit through different sides(Pan is used to rotate the diagram and orbit is used to change the pivot point.
RESULT:
Navigation of the selected layout is done successfully through view cube.
8)AIM: To switch the model to shaded, realistic and hidden line options.
TOOLS/COMMANDS USED:
Graphics design tool/visibility setting options
PROCEDURE:
Step-1: Create a model.
Step-2: Go to the graphics display option at the bottom.
Step-3: Choose the required option to change design of the model.
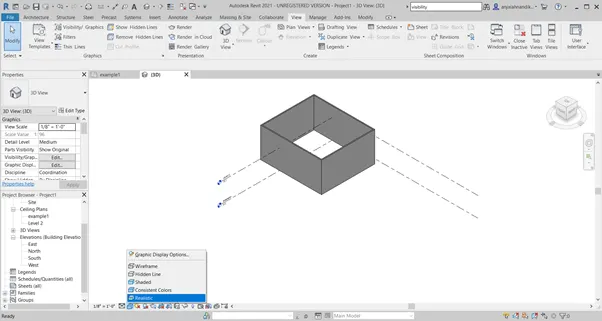
RESULT:
The model is successfully changed to realistic through visibility setting option.
9)AIM: To turn the sunlight on and off to view the shadings.
TOOLS/COMMANDS USED:
Sun path
Manage tab
PRIOCEDURE:
Step-1: Create a model.
Step-2: Go to sun path option at the bottom and choose sun path on.
Step-3: Now go to manage tab and select the additional settings panel.
Step-4: In additional settings panel select sun light and a dialog box opens up.
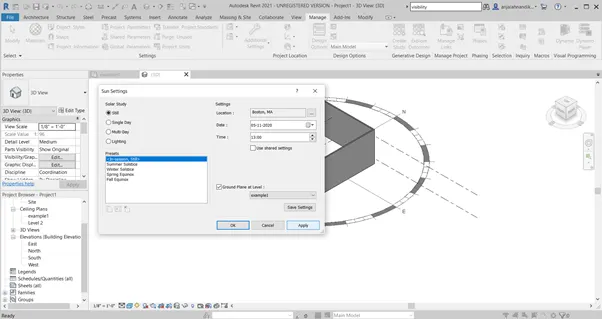
Step-5: Select the required settings and click on APPLY and then click on OK.
RESULT:
The sun light is turned on and off to view the shadings of the model.
10)AIM: To enter the project name, settings and issue date for a model.
TOOLS/COMMANDS USED:
Manage tool bar
Project information
PROCEDURE:
Step-1: Create a model.
Step-2: Select the manage tool.
Step-3: Now select the project information panel so that a dialog box appears.
Step-4: Fill in the details of the project in the dialog box.
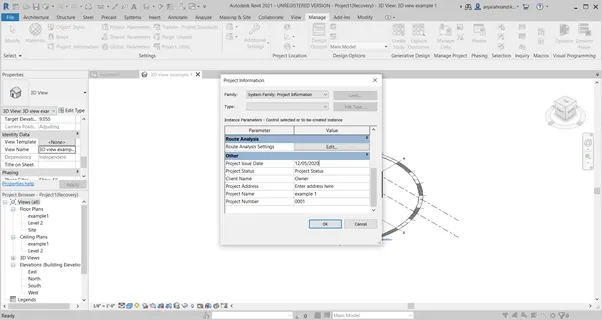
Step-5: Click OK.
RESULT:
project name, settings and issue date are successfully entered for the model through the manage tool bar.
11)Analyse tool bar helps to combine the different loads in the structure, load combination, boundary conditions, etc.
USES:
It is used to analyse the structure with all the different loads applied in the object which gives the analysis report as the result.
It helps to detect the load failure in the structure.

The above picture shows the options included in the analyse tool bar.
12)Links that are supported by Revit software are,
Link Revit
Link Topography
Link IFC
Link CAD
13)Collaborate in Revit is a cloud based service that allows any Revit users inside and outside the network to collaborate on the Revit model so that many users can work under the same plan or drawing which makes more efficient and the productivity is more as many people are able to work under the same project and the efficiency of the work can be increased so that the project takes less time to complete.