Usage of Navigation tool , Timeliner and Clash Detection test using Naviswork
1) Use the Architecture/ Structure Project file developed by you in Week 6 to 8. Export the Revit architecture and structure model to Navisworks Cache file following the export settings discussed in class.
AIM: To Exporting the Revit architecture and structure model to the Navisworks Cache file as discussed in the video.
Tools Used:
- File.
- Export .
- NWC.
- Navisworks.
- View.
- Default 3D view
Procedure:
Step-1: Install Navisworks manage:
- Go to the Autodesk website i.e." autodesk.com"
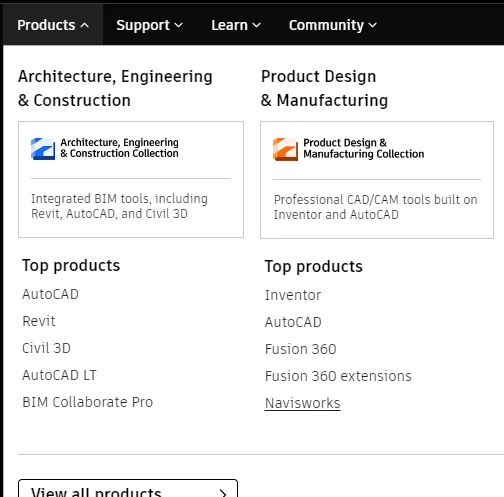
- Click on product - select Navisworks
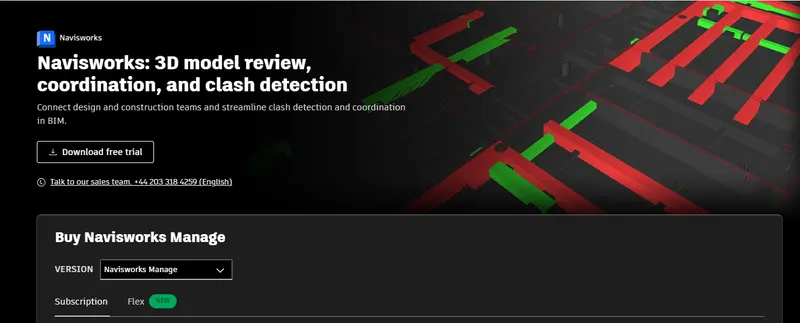
- Select navisworks manage - Download 2023 version
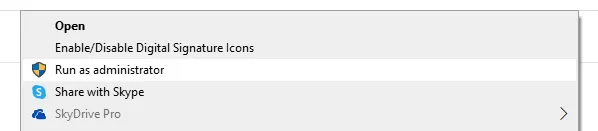
- Open download folder then select and right click on it- Run as administator
- After that finish process click on start
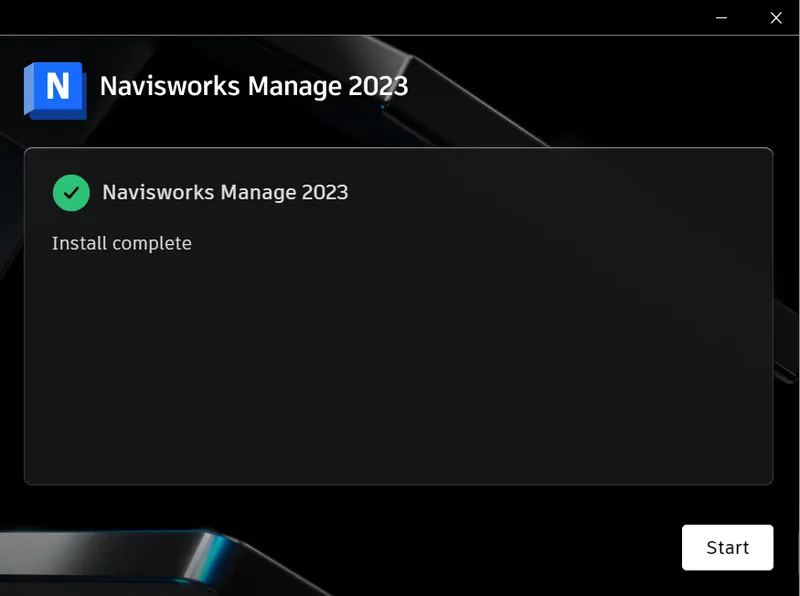
- Install it
Step-2: Install Navisworks 3D viewer:
- Go on browser - put in search bar "Navis3d view free download"
- Select autodesk website
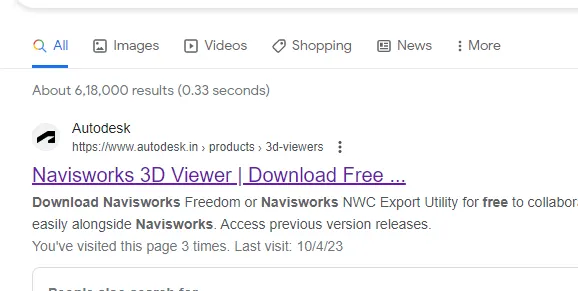
- Click on dwonward arrow

- Go in down in section of Navisworks NWC Export utility
- Select link according to your Navisworks version . Here i am choosing 2023 version
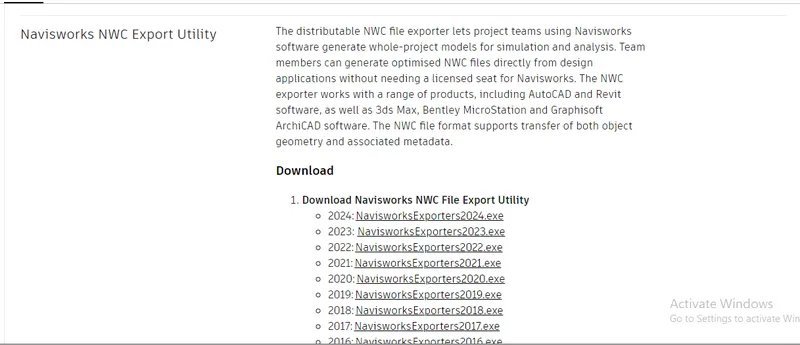
Step-3: Export the Revit architecture model to Navisworks Cache
a) Open revit file:
- Open the revit software 2023 and click on open option - select office building file which is a challange number 7 - it is show on model
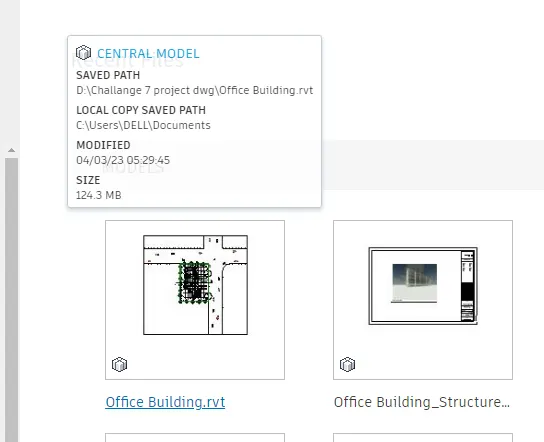
b) Export Revit architecture model to Navisworks Cache:
- After revit file is open click on a 3d view symbol
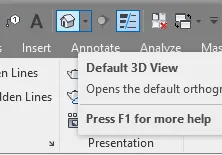
- Go on a file - select export choose NWC
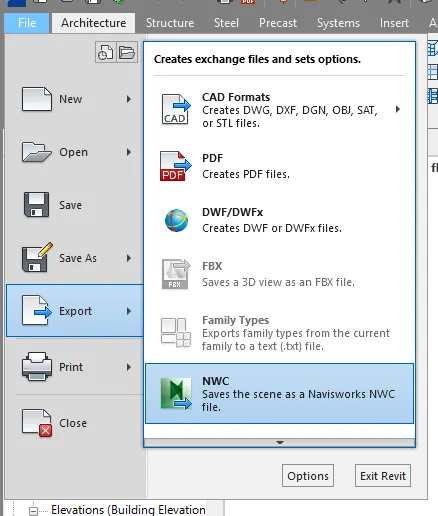
-Choose the appropriate location- Give the file name as a "Office building structure bhairavigajare1997" - click on save
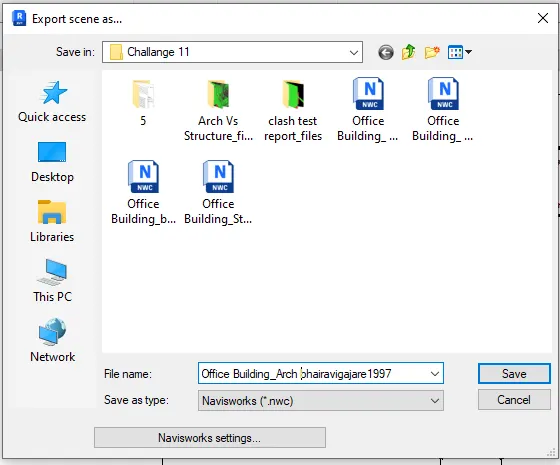
c) Open export Revit architecture model in Naviswoks:
- Open Navisworks which we are install - Navisworks work sapce is open
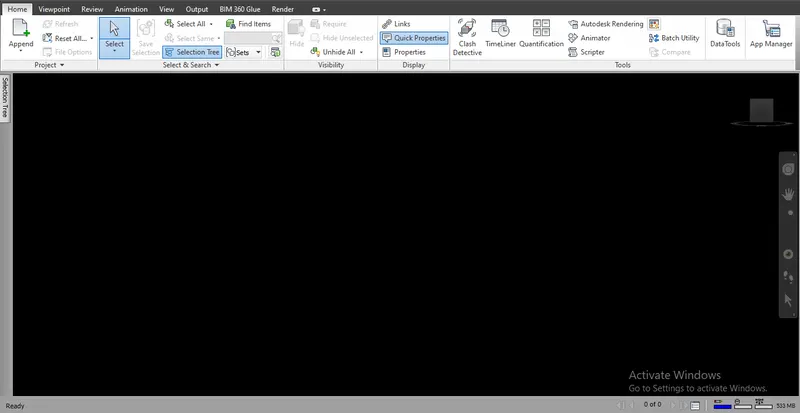
- Click the File menu and choose Open
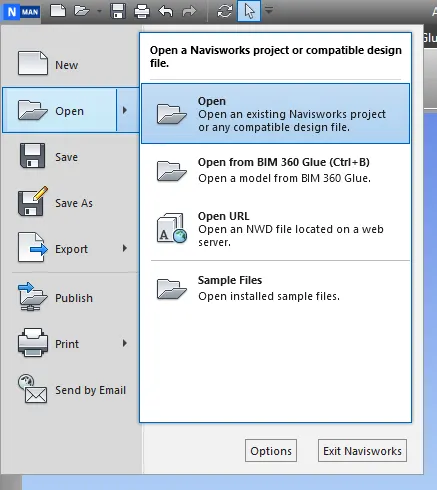
- Open a file that we saved from the Revit application
- Select file type as a naviswork cache
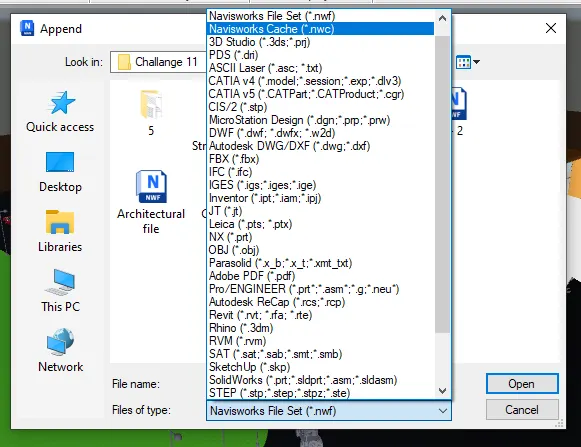
- Choose export Revit architectural file - click on open
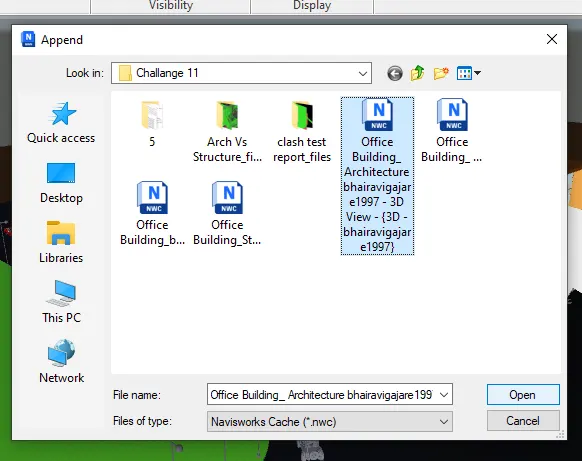
- The Revit architectural file is export to Navisworks cache
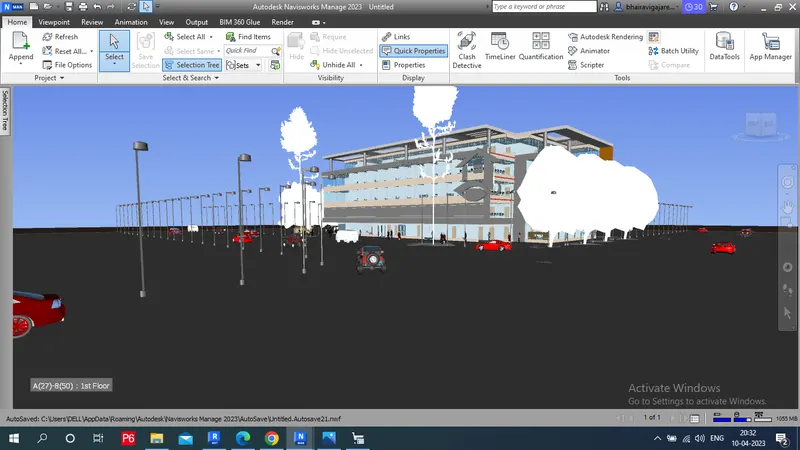
Step-4: Export the Revit structure model to Navisworks Cache:
a) Open revit file:
- Open the revit software 2023 and click on open option - select office building structural file which is save in appropriate location.
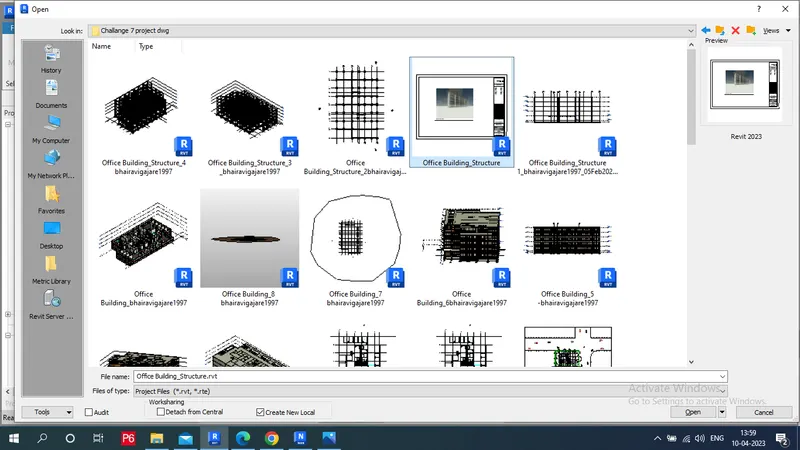
b) Export Revit structure model to Navisworks Cache:
-
- After revit file is open click on a 3d view symbol
- Go on a file - select export choose NWC
-Choose the appropriate location- Give the file name as a "Office building_arch bhairavigajare1997" - click on save
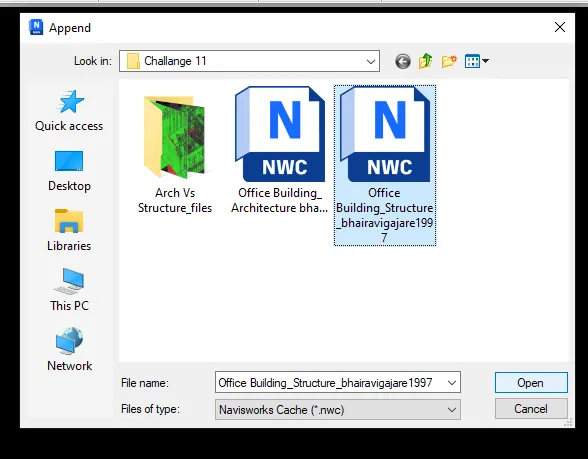
c) Open export Revit architecture model in Naviswoks:
- Open Navisworks manage which we are install - Navisworks work sapce is open
- Click the File menu and choose Open
- Open a file that we saved from the Revit application
- Select file type as a naviswork cahe
- Choose export Revit architectural file - click on open
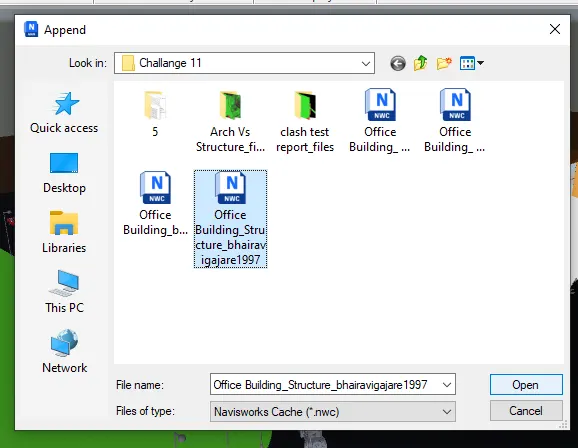
- The Revit structural file is export to Navisworks cache
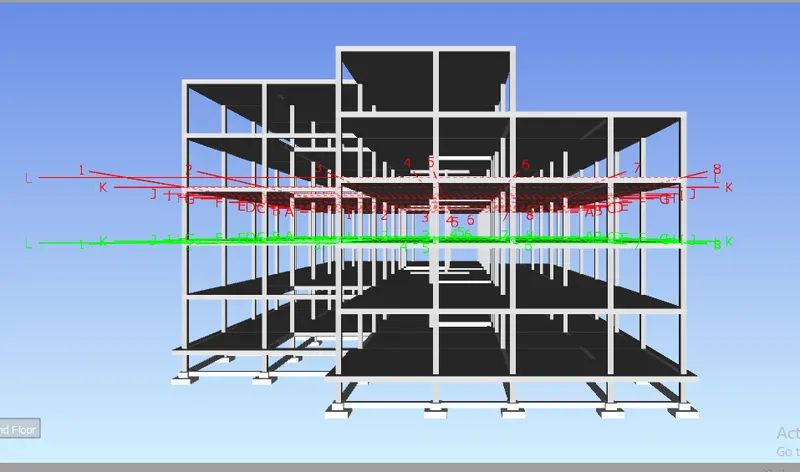
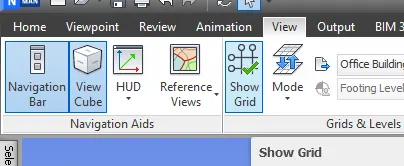
- If you want to hide this grides the go in view tab - select show grid
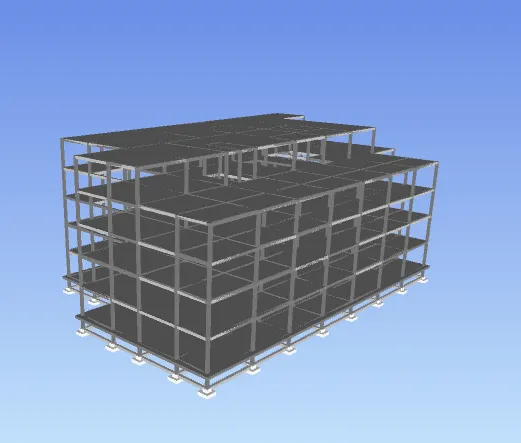
Result: To Exporting the Revit architecture and structure model to the Navisworks Cache file as discussed in the video.
Archietectural model
Structural model
2) Use Navigate Tool to walk around the model and walk through the rooms created and record your moving as animation in your Navisworks file
AIM : Use the navigate tool to walk around the model and walk through the rooms cheated and record the moving as animation in the navisworks file.
TOOLS USED :
- Navisworks.
- View point.
- save view point.
- Walk.
- Record.
- Stop.
- Arrow keys for movement.
- Pan.
- Look arround.
PROCEDURE :
STEP-1: Open Navisworks:
- Start the naviswork manage 2023 software
- Then homepage of naviswork is open .
STEP-2: Open architectural file in Navisworks :
- Click the File menu and choose Open
- Open a file that we saved from the Revit application
- Select file type as a naviswork cahe
- Choose export Revit architectural file - click on open
STEP-3: Create walk with animation and viewpoint:
a) set a walking start point:
- Go on a right side of screen or viewpoint tab in navigate section.


- Then click on walk i.e. foot symbol I get a following result
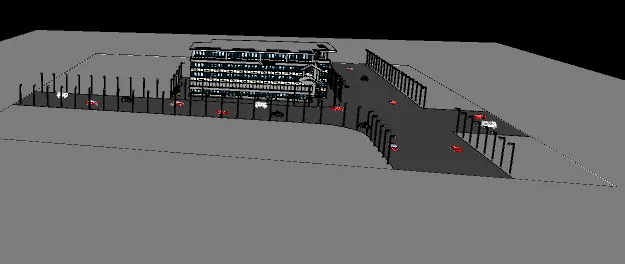
- If object getting to small then go on right side off screen - the click on zoom
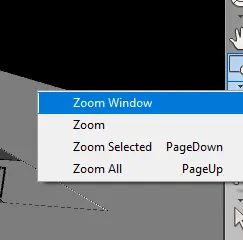
- And select a section and zoom out it as required.
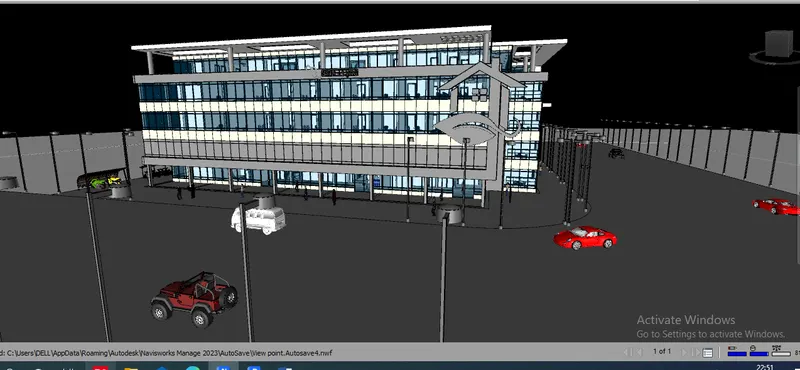
- Then adust 3d cube and getting a entrance of buliding - Click on walking
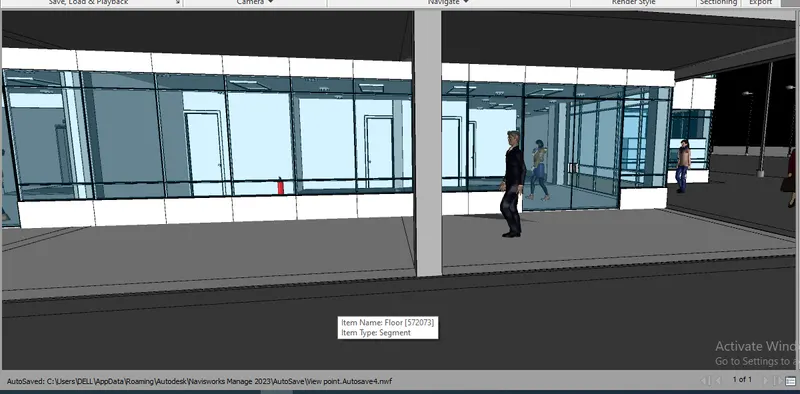
- We getting a starting point of walking
b) Start create animation:
- Now after that Click on viewpoint tab - select save view point - choose record
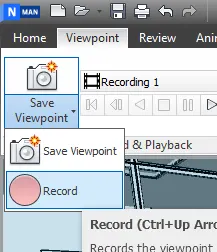
c) Start wallking:
- Click on walk then click on strating poingt of walking
- Press upper direction arrow key for move forward
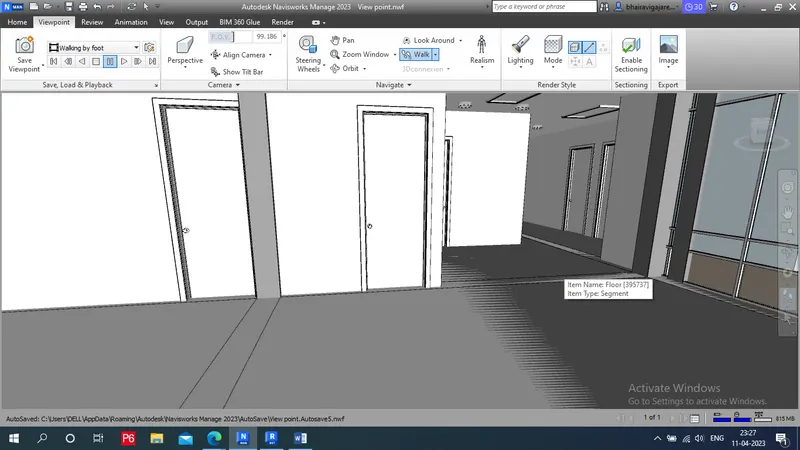
- Control the movement by arrow keys
- Here i want to go through passage not want to go in office room
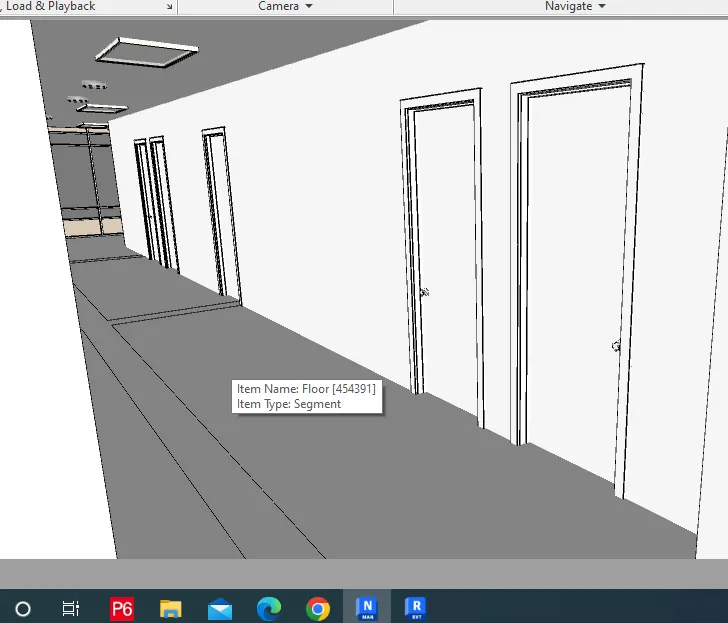
- So make walk straight - go on right side of window - click on look arround - by uisng mouse movement control this arrow and set a required position
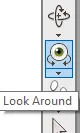
- We get a following result
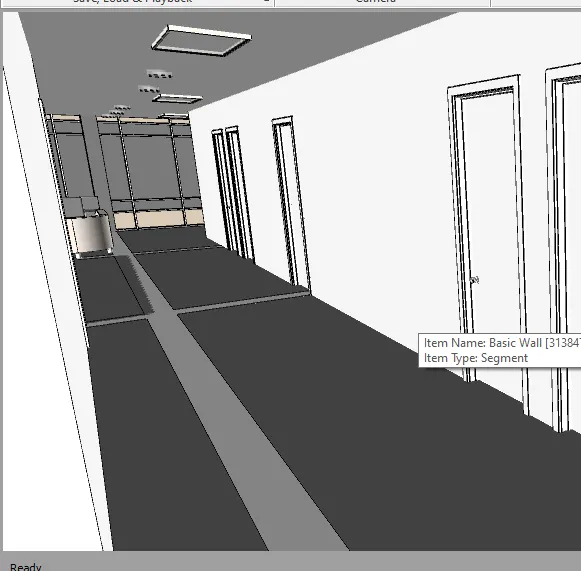
- Agian go to right side screen click on pan - by using pan set a proepr position for walk
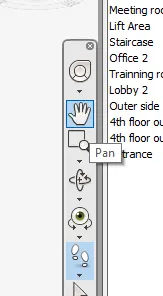
- Get the proper required position for walk in passage
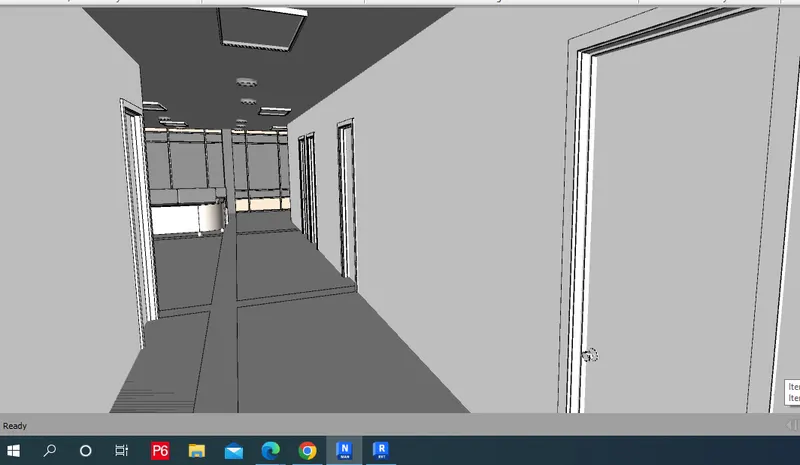
- For getting perfect animation used these tools
- Now with the help of walk tool we can move to the desired position where we wish and change the design according to our wish.
d) Save view point:
- If we want to start recording form the other points for next time that time you need to save view point
- For save viewpoint pause video by clicking on
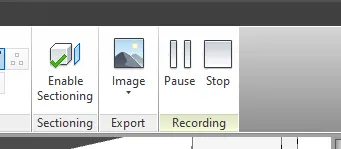
- go to viewpoint tab - select save view point
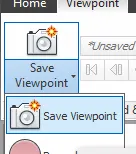
- Give as a name entrance of a building
- Create other viewpoint also during walking whch are shown in save viewpoint tree tab
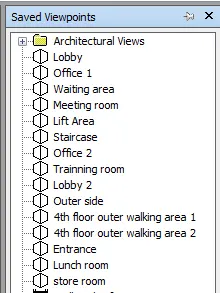
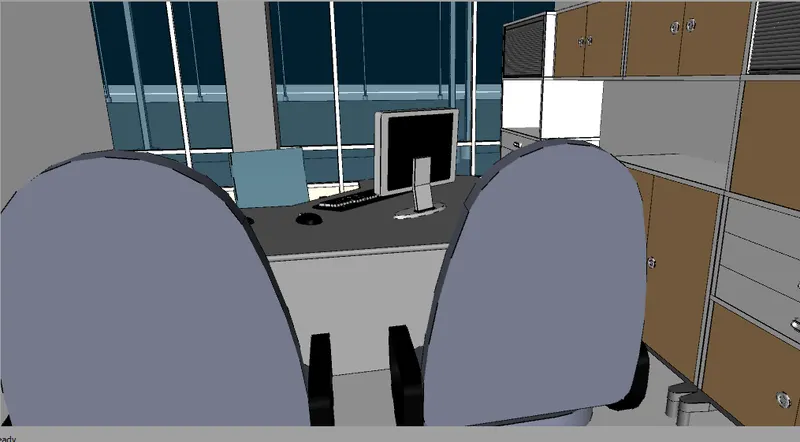
Office 1
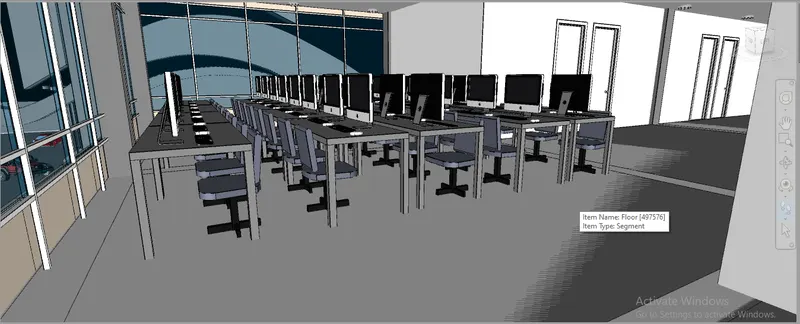
office 2
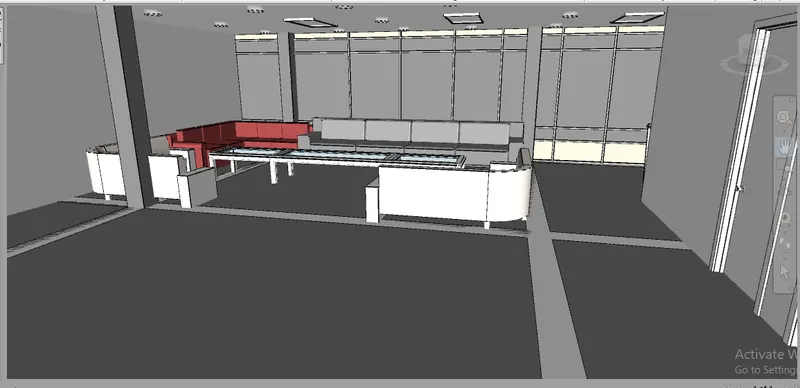
Waiting area
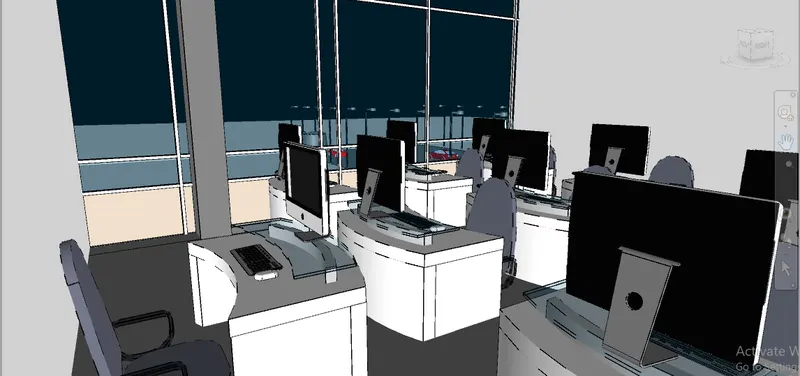
Training room
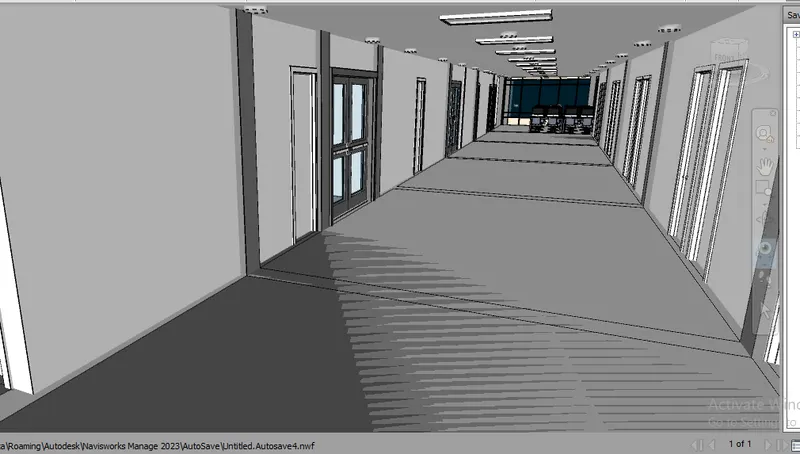
Lobby 2
e) Finish recording:
- After finishing of walk recording click on stop
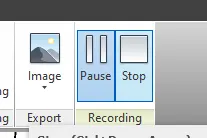
- Stop the recording and the saved files will automatically appear in the save veiwpoint tree
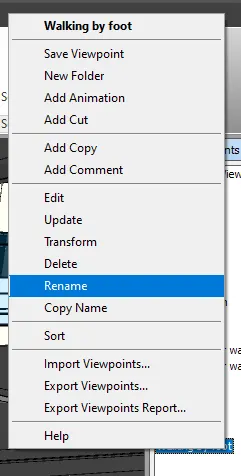
- As a name "Animation 1" - select and righ click on - rename - "walking by foot"
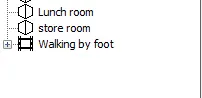
- The pictures will be saved as frames - click on + this symbol we get list of picture
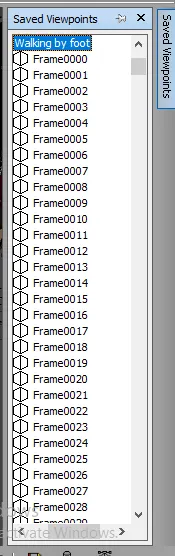
Result: Thus the recording of Walkthrough our model using the navigation tool has been done successfully.
3) Use Navigate tool to use Realism feature to walk through the model and record your moving as animation in Navisworks file.
AIM : To use navigate tool to use realistic feature to walk through the model and record our movings as animation in navisworks file.
TOOLS USED :
- Navisworks.
- View point.
- save view point.
- Realism.
- Record.
- Stop.
- Arrow keys for movement.
- Pan.
- Look arround.
PROCEDURE:
STEP-1: Open Navisworks:
- Start the naviswork manage 2023 software
- Then homepage of naviswork is open .
STEP-2: Open architectural file in Navisworks :
- Click the File menu and choose Open
- Open a file that we saved from the Revit application
- Select file type as a naviswork cahe
- Choose export Revit architectural file - click on open
STEP-3:Create animation:
a) set a realism start point:
- By using zoom - Zoom out the screen for get required start
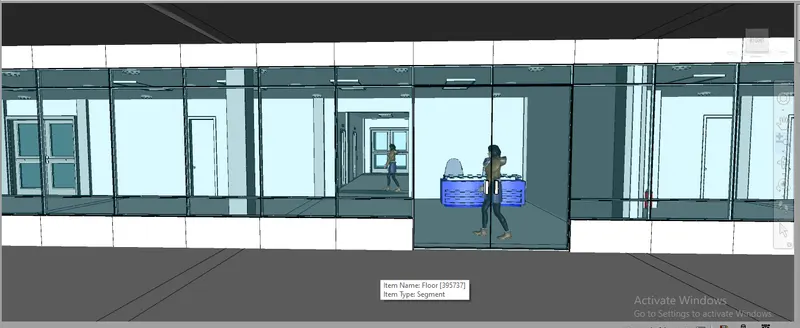
- Then Go on a right side of screen or viewpoint tab in navigate section.
- Click on walk symbol and select 3rd person or in viewpoint tab select realism - choose third person
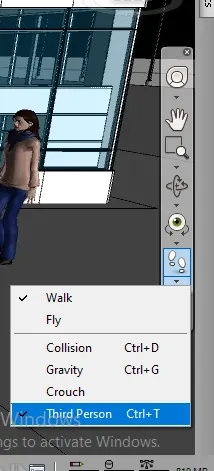
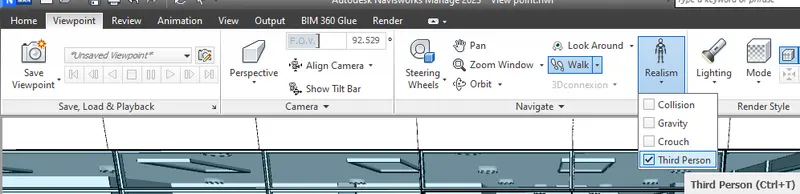
- A human model will appear on the screen
- From this human model we can easily walk through and seeing the plan more realistically.
- Then place this human model at required place by
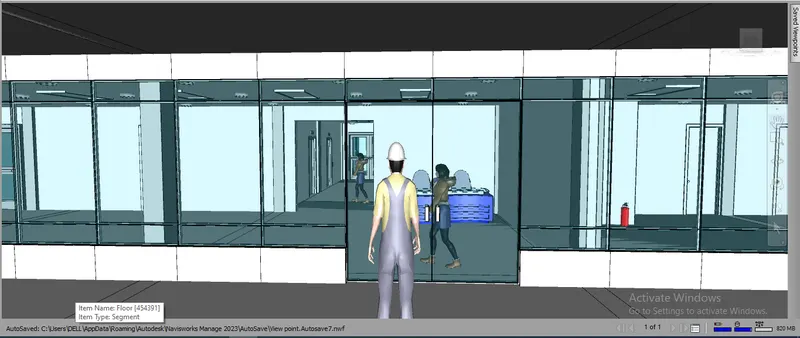
b) Start create animation:
- Now after that Click on viewpoint tab - select save view point - choose record
c) Start wallking through human model:
- Click on walk then click on strating point of walking
- Press upper direction arrow key for move forward
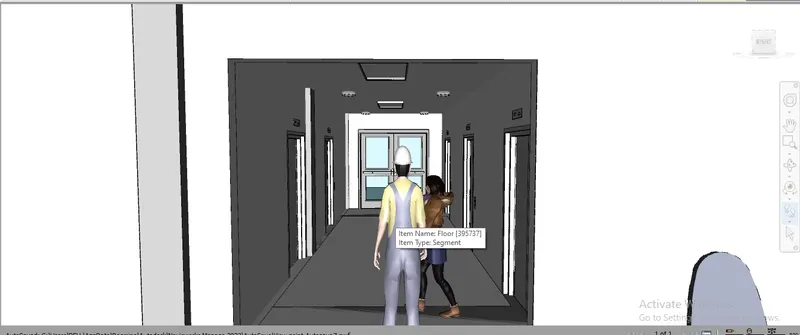
- Control the movement by arrow keys i.e. for come backward used downward direction key , go left - right side used left - right side direction key
- Walk into the all rooms
d) Finish recording:
- Then stop recording after - After finishing of walk in the all rooms by click on stop
- Stop the recording and the saved files will automatically appear in the save veiwpoint tree
- As a name "Animation 1" - select and righ click on - rename - "Realism walking "
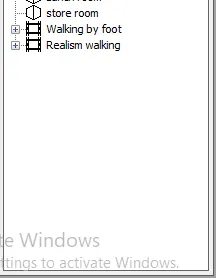
- The pictures will be saved as frames - click on + this symbol we get list of picture
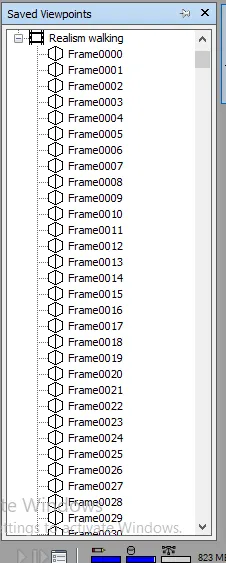
- If you click on fames we get following result:
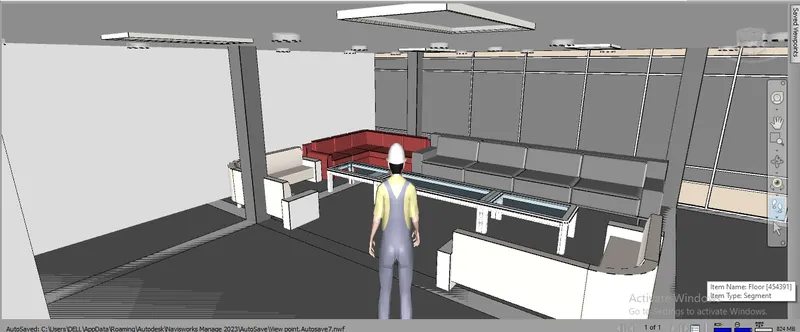
waiting area
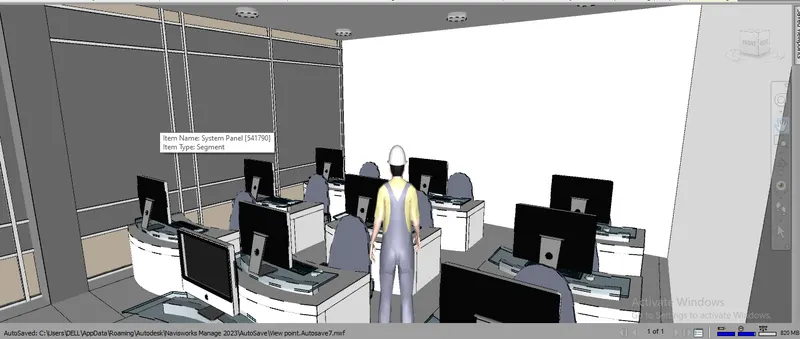
Training room
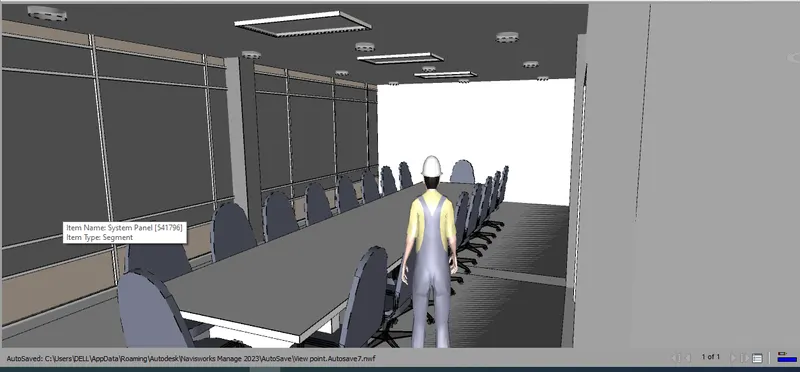
Meeting room
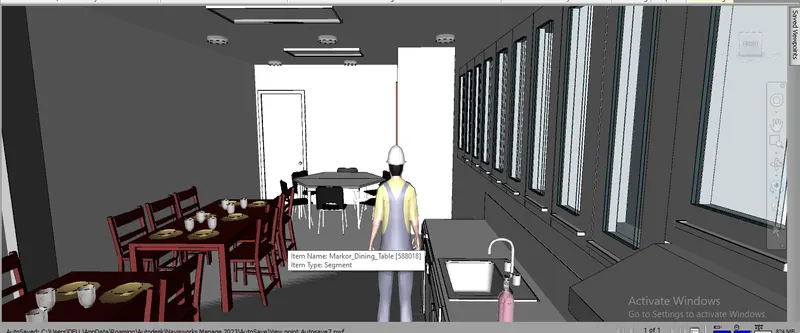
Lunch room
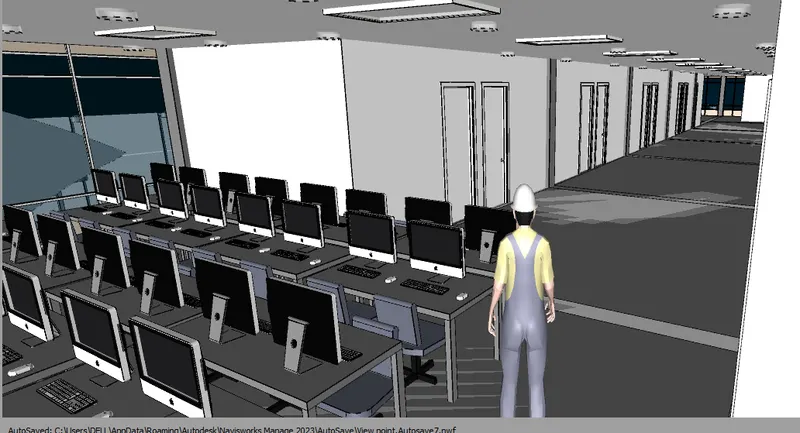
Office 2 + lobby 2
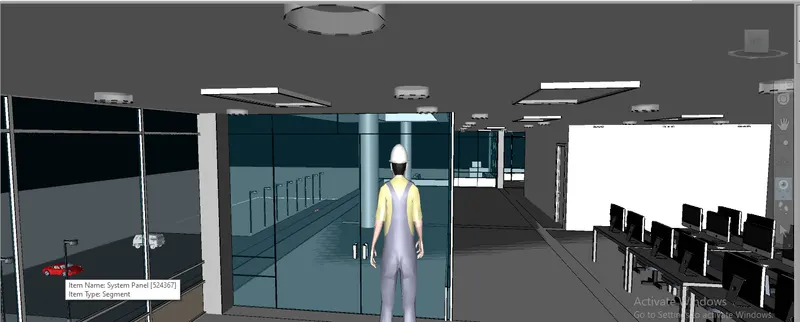
4th floor outer walking area 1
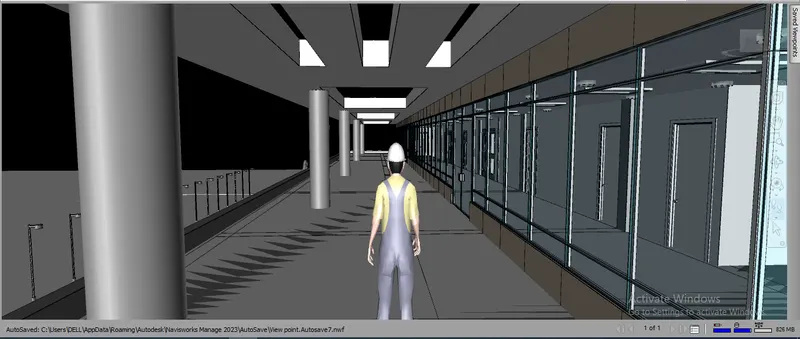
4th floor outer walking area 2
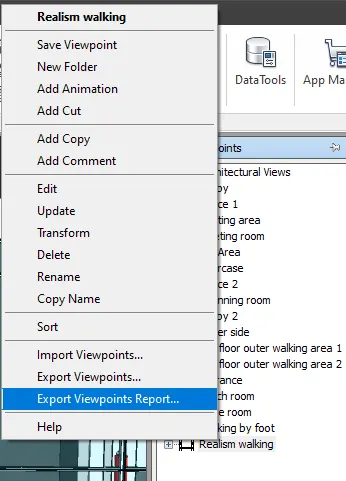
- If you want to export this animation video in picture format then select - right click - Select export viewpoint report
- It will be get in desired folder which you provide the location for save the navisworks file
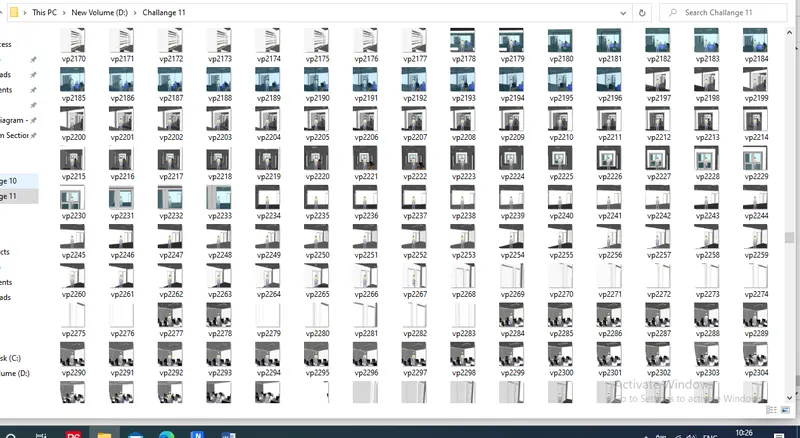
Result: Thus the recording of Walkthrough by using realism in our model using the navigation tool an export it into picture format has been done successfully.
4) Embed both architecture and structure *.nwc file to your Navisworks file. Create a clash detection test between the two models
a. Run the Clash Detection Test
b. Study the clashes between the two models
c. List which of the clashes could be approved
d. List which of the clashes could be neglected ( will be taken care later)
e. List which of the clashes can be resolved
f. Save the results after color coding the clashes to the Navisworks file
g. In case of resolution annotate the clash and save the view to defined views in Navisworks
AIM:To create a clash detection test between the architecturaland structural model.
- Home.
- Open.
- Append.
- Clash detection.
- Run test.
PROCEDURE :
STEP-1: Open Navisworks:
- Start the naviswork manage 2023 software
- Then homepage of naviswork is open .
STEP-2: Open architectural and structural file in Navisworks :
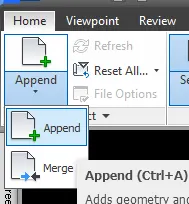
- Click on append - choose append (because we need a join two files)
-Select the folder where you save it - Choose a file type as a "Navisworks Cache"
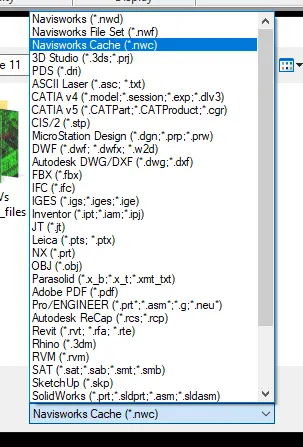
- Select architetural file - click on open
- Smilarly again click on append - choose file type
- Select a structural file - open
- Open both files in navisworks
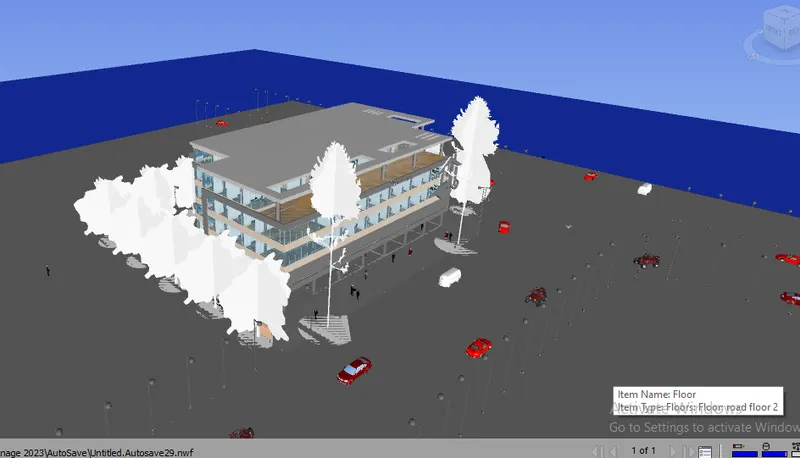
STEP-3: Clash detective test:
a) Start clash detective test:
- For Start clash detective test go in a tool section - Click on a "Clash detective" from home tab

- Click on Add test
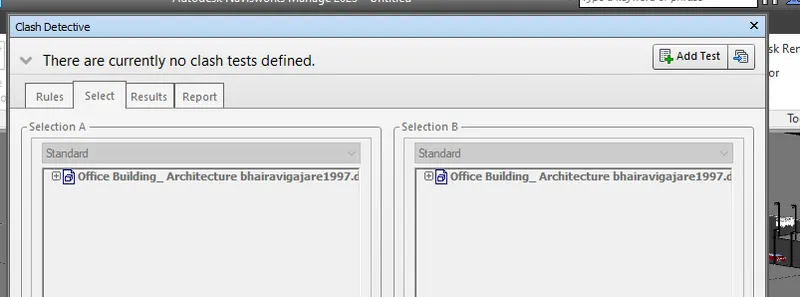
b) Select folders/create stes (Study the clashes between the two models):
- click on rules - check boxes which you need of Review rules for clash ignoring.
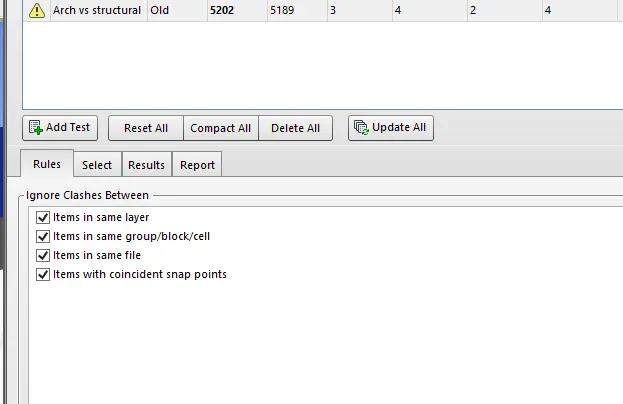
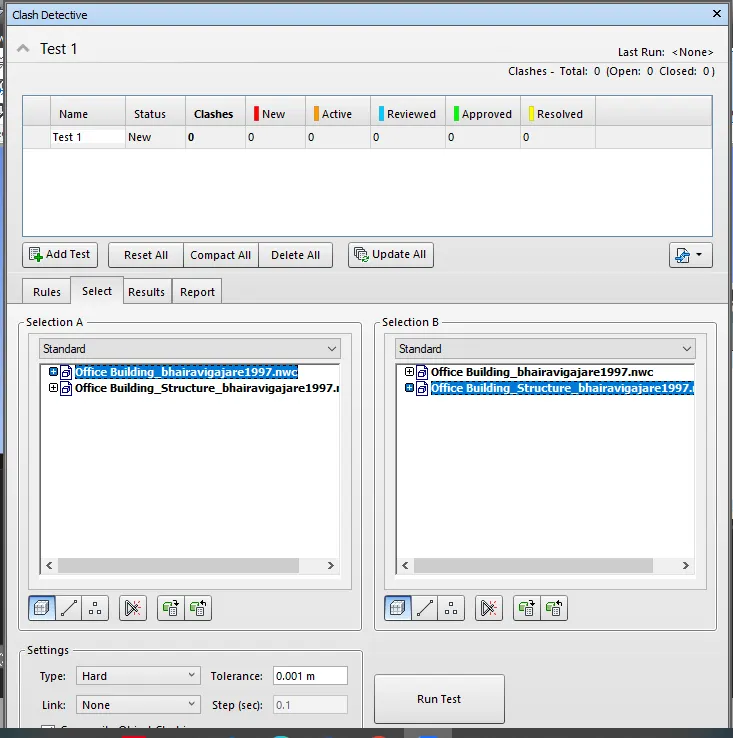
- Go in select panel - Open Clash Detective panel, Selection Tree and Sets.
- Sets are “folders” that contain a selection set based on what we want to analyze. For example COL (columns) FRA (structural framing) or FON (foundations).
-Choose which are the elements you want to test - Here i am choosing both models i.e. office building in section A and office building Structural in section B
c) Run the Clash Detection Test:
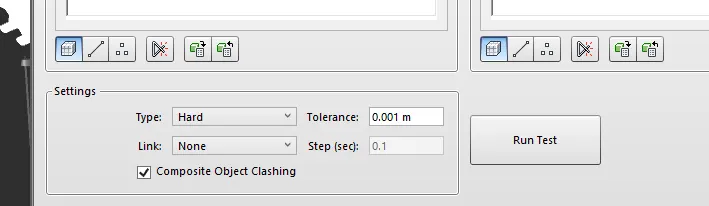
- Here i want to find the clash between in 3D object henece select only 3d cube
- Then select its type - set tolerance
- Hard if you want to test penetrations. Clearance if you want to ensure space for elements. i.e A hard clash occurs when two components of a building intersect or pass through each other.
- Tolerance will dismiss overlaps smaller than the number (HARD) or larger than it (CLEARANCE)
- Click on Run Test
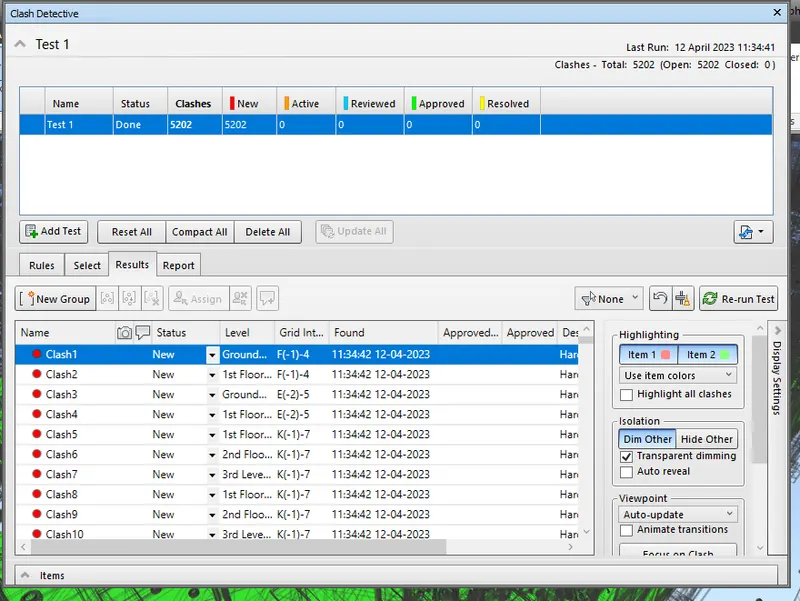
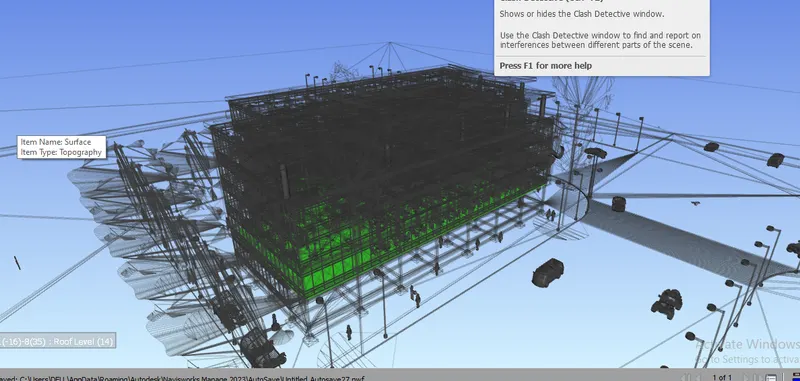
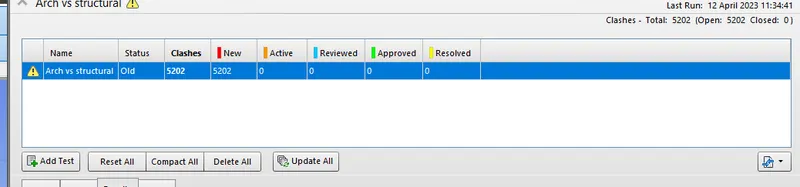
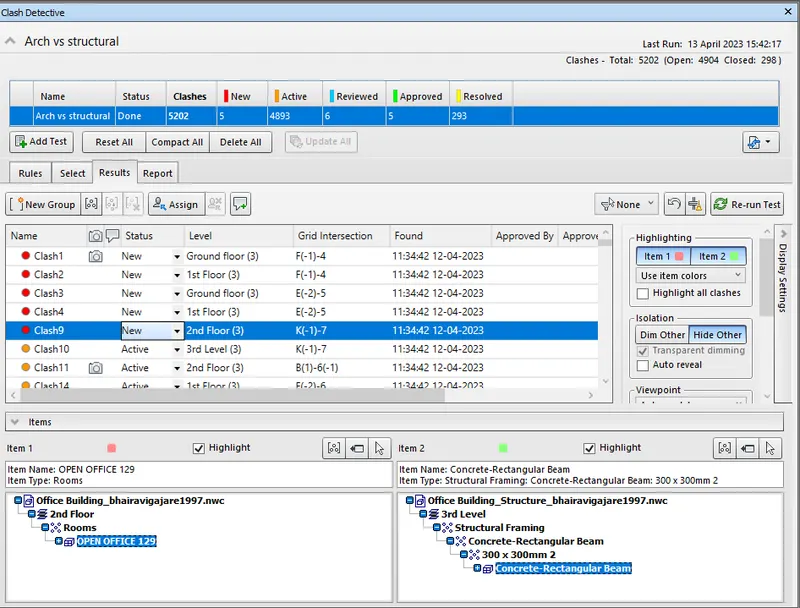
- Pick in the RESULTS tab. We get a following result
- New clashes will appear in red.
e) Rename the test:
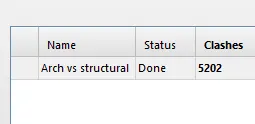
- Make a new test with an enough descriptive name.
- Provide the name as "Arch vs Structral"
f) Display setting:
- Select clash - click om display seeting tab - open dsiplay seeting panel
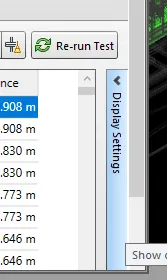
- If you click on dim others you get following result
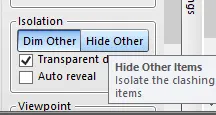
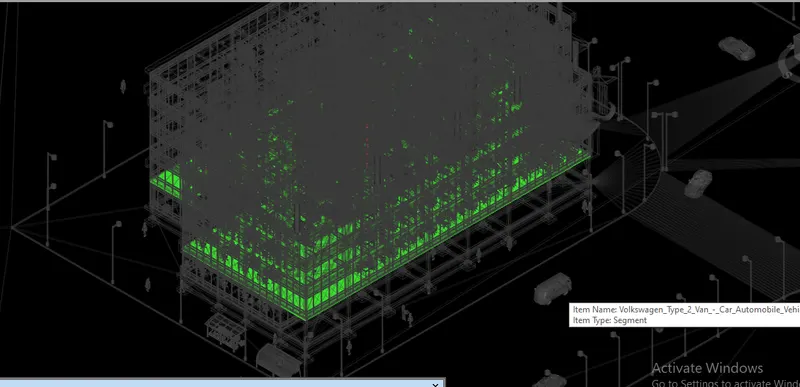
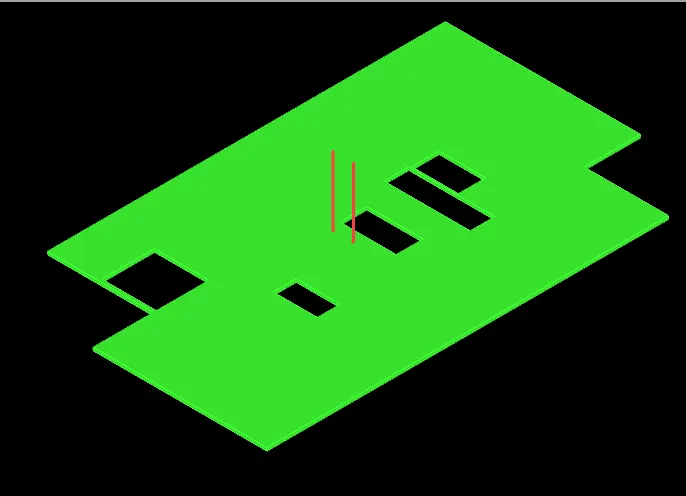
- I wan to see clash 1 - select clash one - go display setting - click on hide other i.e. Hide Other will isolate your selection
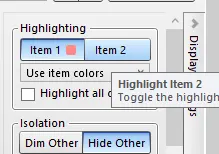
- If you want to unselect one item between both of them -select item 1 or item 2
- We get a foolowing result.
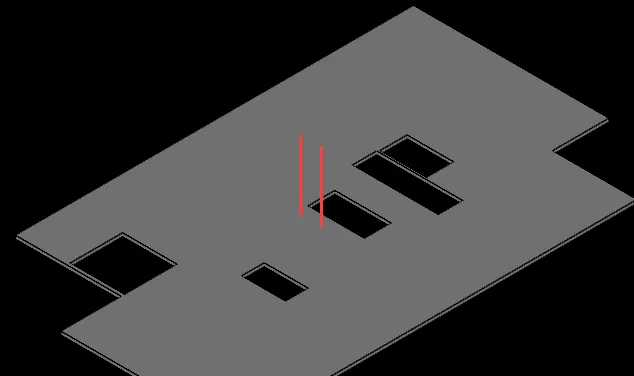
- The above display seeting is done.
f) Check the collision list (Clashesh categorized):
- You can assign or comment clashes
- Use the NONE / EXCLUSIVE / INCLUSIVE filter to show only clashes within selected elements
- You can group clashes and make them appear as just one item in the report
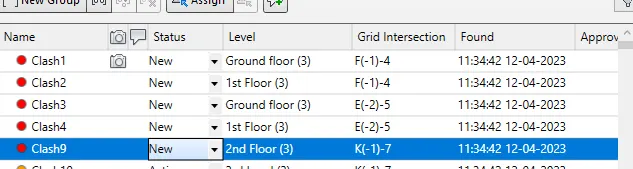
1) List which of the clashes could be New:
- 'New’ means It has been discovered by the users recently in a clash test.
2) List which of the clashes could be active:
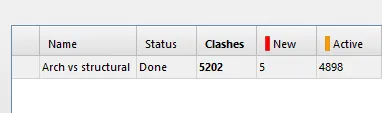
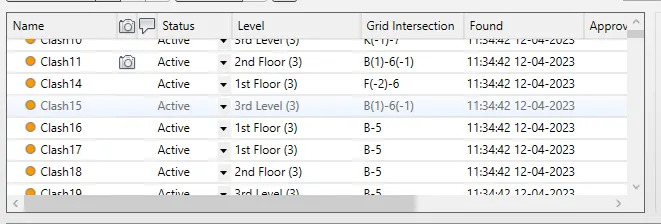
- Active it means that it has been discovered in the previous clash test but is still active that means no solution has been provided to it so far.
- If you re - run the test we get thw following result
3) List which of the clashes could be approved:
- When a clash that is found in the previous clash test has been approved by Navisworks users then it is shown as Approved.


4) List which of the clashes could be neglected/Review ( will be taken care later):
- When a clash that has been found by the users in the previous test, has been reviewed by them then it is shown as Reviewed.
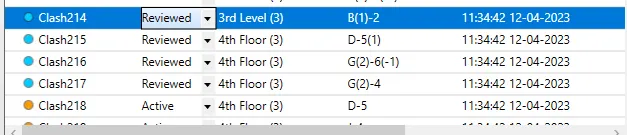
5) List which of the clashes can be resolved:
- When a clash identified by the users in the previous test has been resolved by the users then it is leabled as Resolved within the status column.
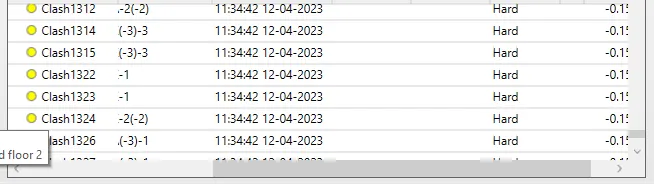

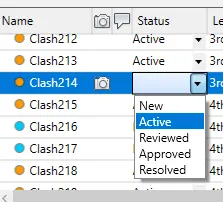
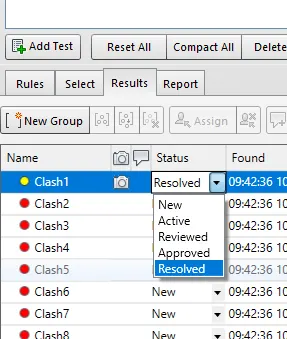
- You can change status of clash from satatus coloumn - select clash - click on drop down arrow - choose its status
g) Solve the clashes in revit file i.e Review and Solve:
1) Find clash id:
- Select clash 1 from clash in the RESULTS tab.
- Go in display - select hide other
- select clash object here select lift rods
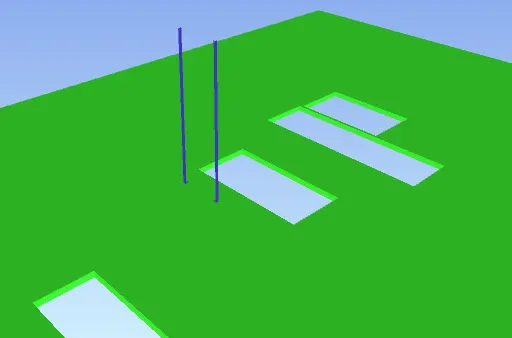
- Click on properties from display section in home tab

- we get a property palette broswer
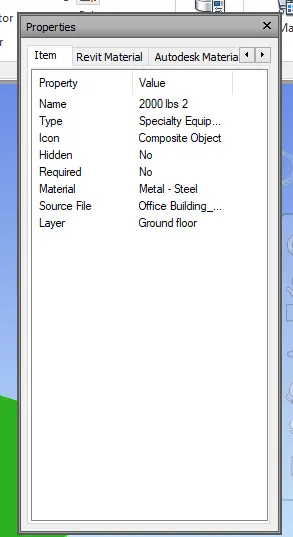
- Click on right direction arow
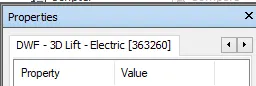
- We get a Dwf section
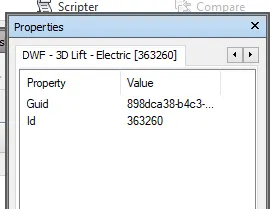
- We know the ID of the element that clashes 1 and minimize it
2) Open revit file:
- Open the revit software 2023 and click on open option - select office building file which is a challange number 7 - it is show on model
3) solve clash in revit :
- Go in a manage tab and select "Select by id" in
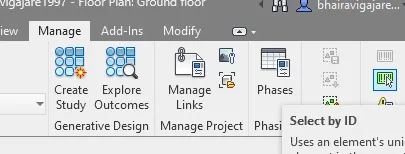
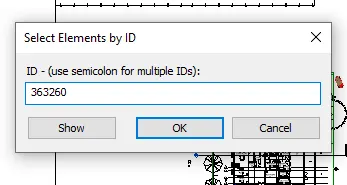
- Then insert the ID of the element which we are get in Navisworks
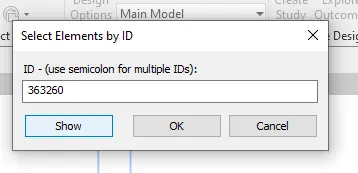
- Click on show
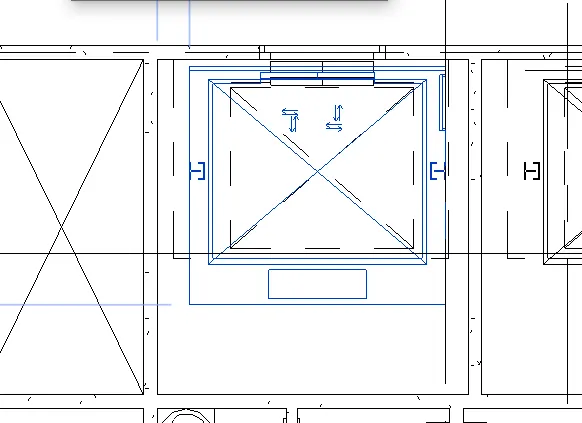
- After that click on ok
- Solve it or fixed it
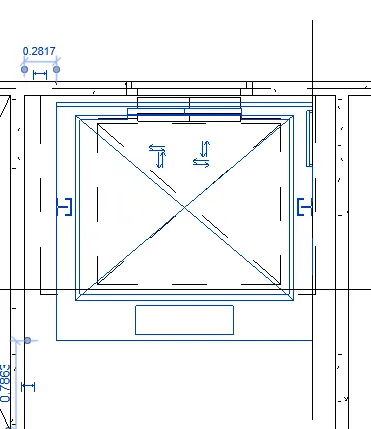
- Then open Navisworks and change the satstus of clash 1 as resolved
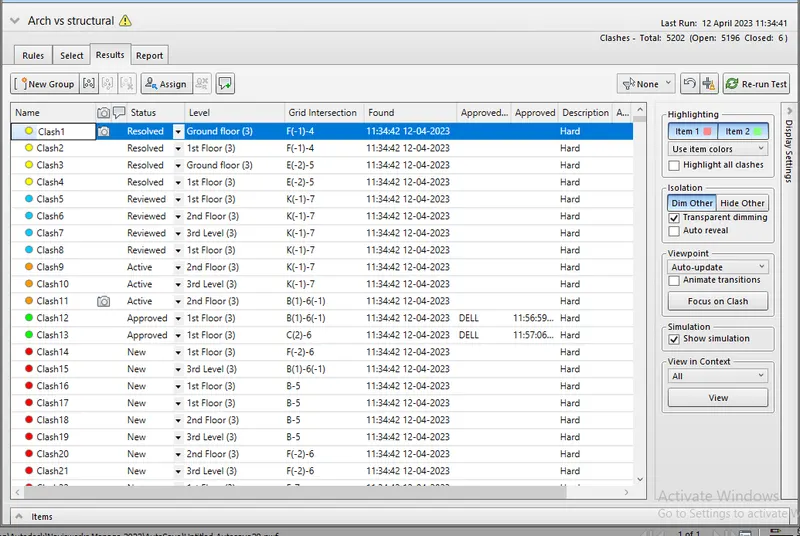
- All clashes get solved.
- Once solved all the interferences in the Revit file you have to export it again, with the same name and in the same folder, overwriting the previous one. Doing it, when you reload the cache on the NWF, resolved clashes will appear in yellow in the Resolved section. If new collisions emerge, they are classified in red as New.
- This is the Save the results after color coding the clashes to the Navisworks file
h) Report:
- In the report tab appears several properties of the elements that can be exported within the report.
- Go in report tab Choose content ands and include these statuses
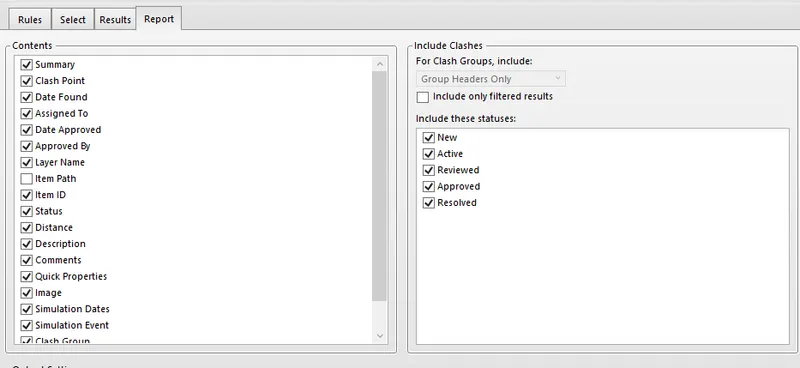
- Select report type and report format
- Click on write report

- Get a file in HTML(Tubuler) format.
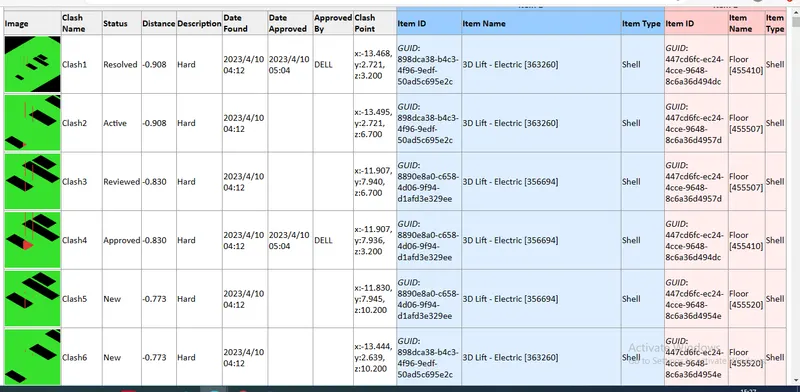
Result: To run the clash test and writes its report and fix the clashes in revit file.
5) Using the Timeliner feature in Navisworks prepare a schedule for the project developed in week 6 to 8 by adding reasonable assumptions for task start date and end date and simulate the task completion as a visual simulation. Record it and save the timeline simulation to Navisworks file
AIM : using the Timeliner feature in navisworks we can prepare a schedule for the project by adding reasonal assumptions like taks start and end date and simulate the task.
TOOLS USED :
- Home.
- Timeliner.
- Add task.
- Selection tree.
- Simulate.
PROCEDURE :
STEP-1: Open Navisworks:
- Start the naviswork manage 2023 software
- Then homepage of naviswork is open .
STEP-2: Open architectural and structural file in Navisworks :
- Click on append - choose append (because we need a join two files)
-Select the folder where you save it - Choose a file type as a "Navisworks Cache"
- Select architetural file - click on open
- Smilarly again click on append - choose file type
- Select a structural file - open
- Open both files in navisworks
STEP-3: Prepare a schedule for the project:
a) Open timeline platte and selection tree:
- Go in a home tab click on timeliner from tool section
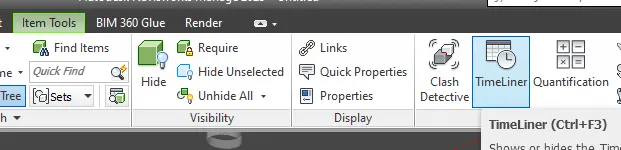
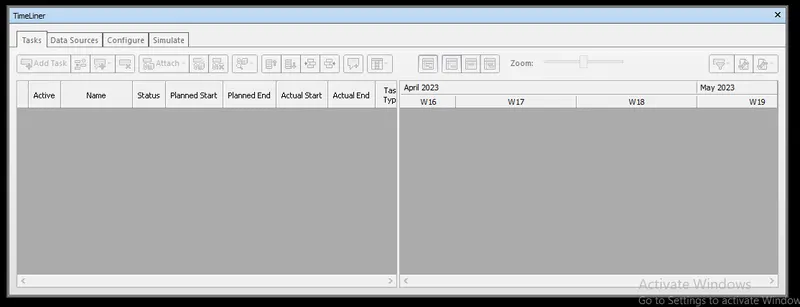
- Now timeliner dialog box appears.
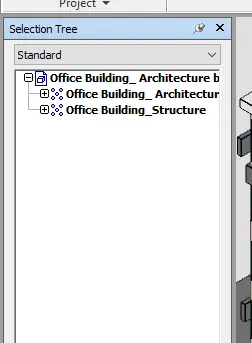
- Now click on Selection tree from select & search section in home tab
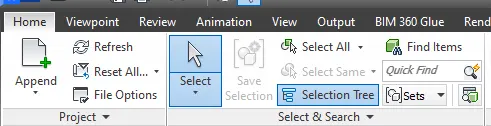
- Selection tree dialog box appears.
b) Define Data sources:
- Open and dock the Timelines palete.
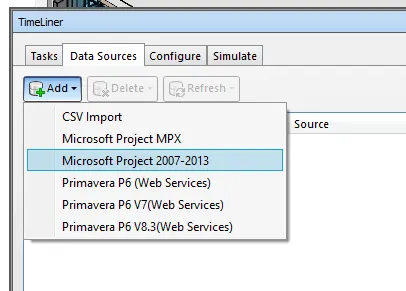
- Go to Data Sources tab, click Add, select MS Project 2007-2013.
- Select your MPP file.
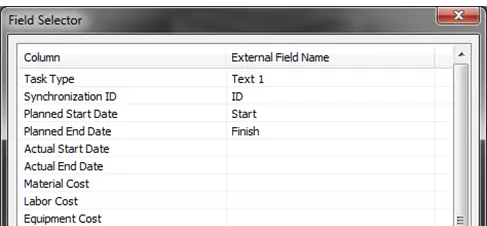
- Map (at least) each of the following parameters to the corresponding MPP column.
* Task type -> Text 1
* Synchronization ID -> ID
* Planned Start Date -> Start
* Planned End Date -> Finish
- Press OK and rename your data source.
- Right click and select Rebuild Task Hierarchy.
- Check everything went well and the Schedule has been imported
c) Select objects and Append to Tasks:
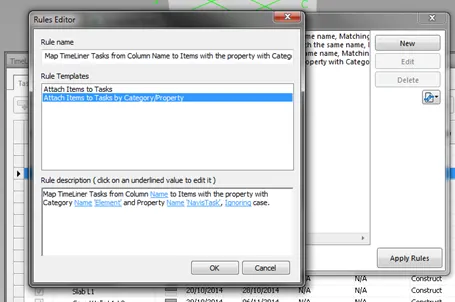
- Click on Auto Attach using rules.
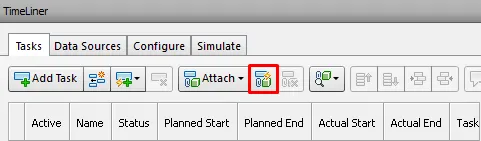
- Add a new rule, select Attach Items to Tasks by Category/Property and fix the expression changing ‘<category>’ to ‘Element’ and ‘<property>’ to ‘NavisTask’.
d) Add real data:
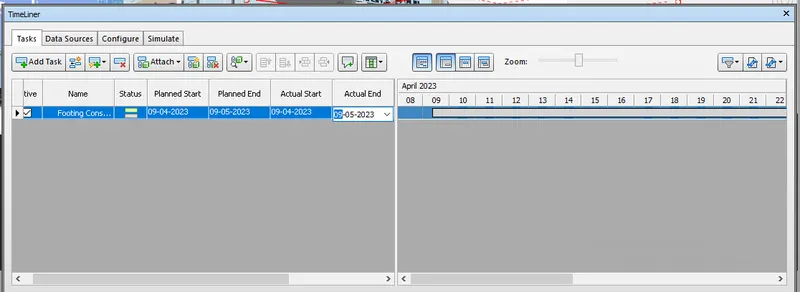
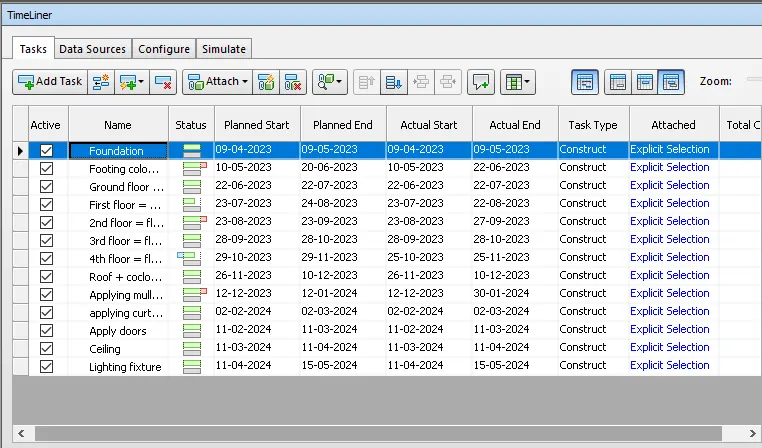
1) Add task:
- Go in task menu - Click on add task to add the first work in the project.
- Task is added then remane it as a Footing construction
2) Add actal and planned dates:
- Give its planned start - 09/04/2023 and palnned end - 09/05/2023
- Also give Actual start - 09/04/2023 and actual end - 09/05/2023
3) Attach model geometry to task:
- Then go on the Selection tree - select footing type in structure file
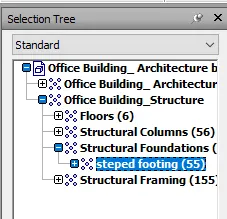
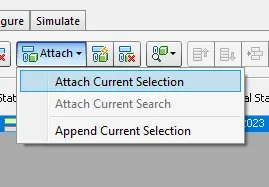
- Then cliCk on 'attach current selection'
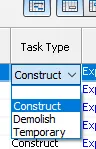
4) Add task type:
- After attch elements provide a task type- click on task type section - panel is open select its type - "Construction"
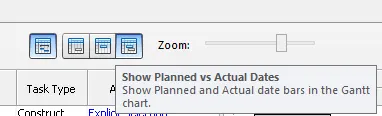
5) Set Bar chart type:
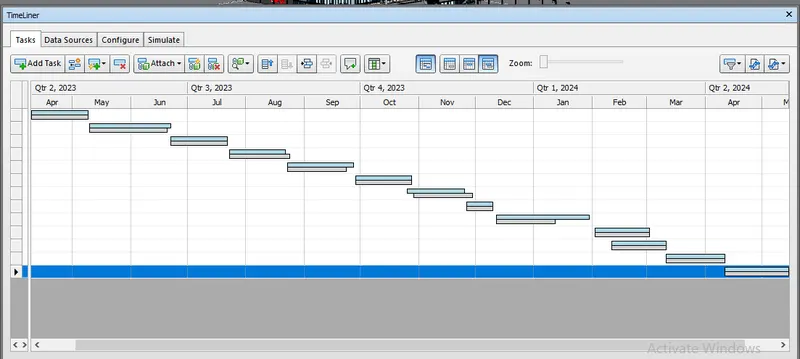
- Choose a bar chart type here i am using "show planned vs actual dates "
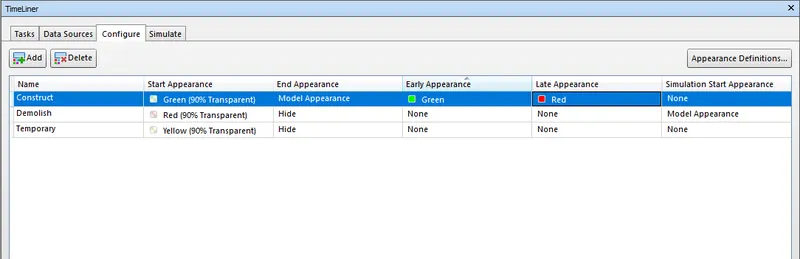
6) Set configure:
- Set the appearance to differentiate what has been executed in time, before or after planned.
- Click on early appearnace - Select none and choose green for it and late appearnace - Select none and choose red for it in construt task type
7) Add set simulation
- Set the simulation to show the actual dates with planned dates.
- Go in simulate section - click on seeting
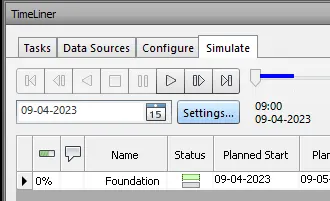
- Do required setting - choose view as "planned against actual" - press ok
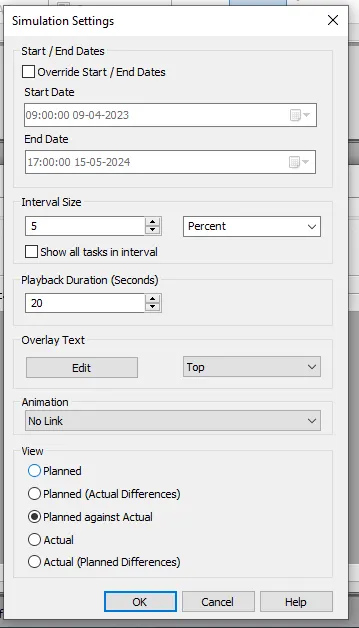
- After done this setting add all task - attach thier elements -provide thier planned and actual dates for start and end.
e) Configure playback:
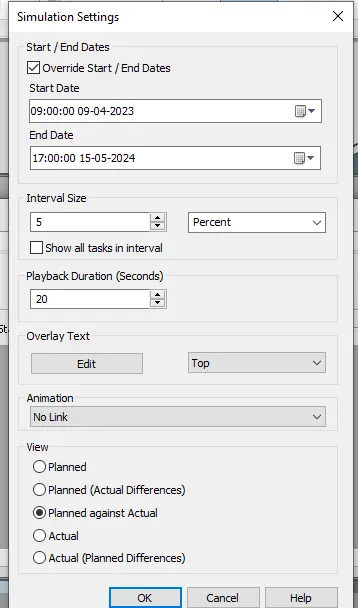
- Go in simulate section - click on seeting
- Do required setting
- Set the interval size to choose which tasks will be considered.
- Playback duration must be specified as a whole.
- You can connect your playback with a predefined camera/object animation.
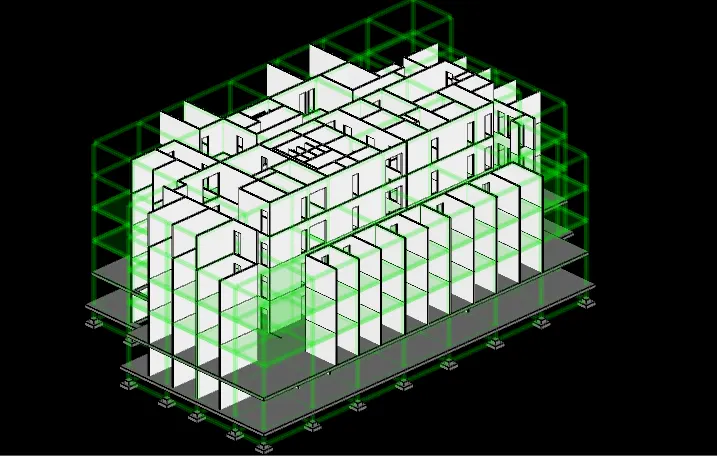
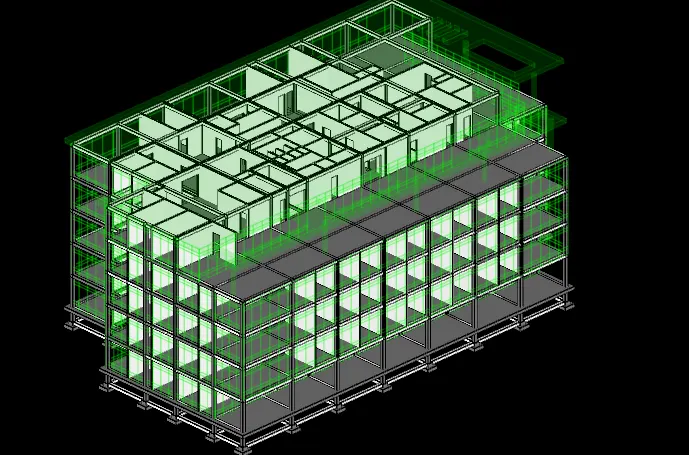
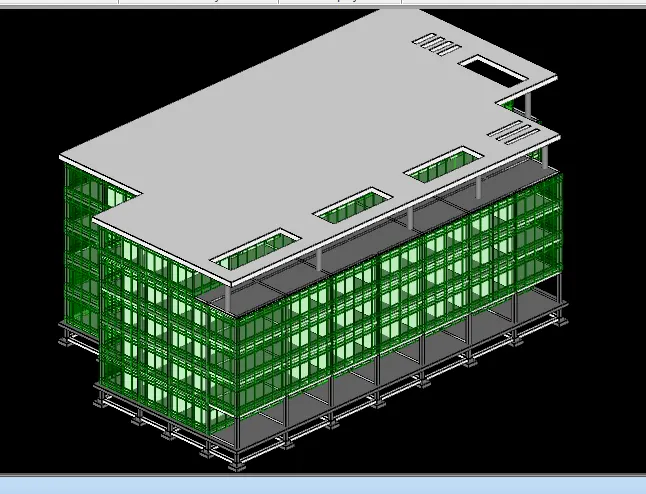
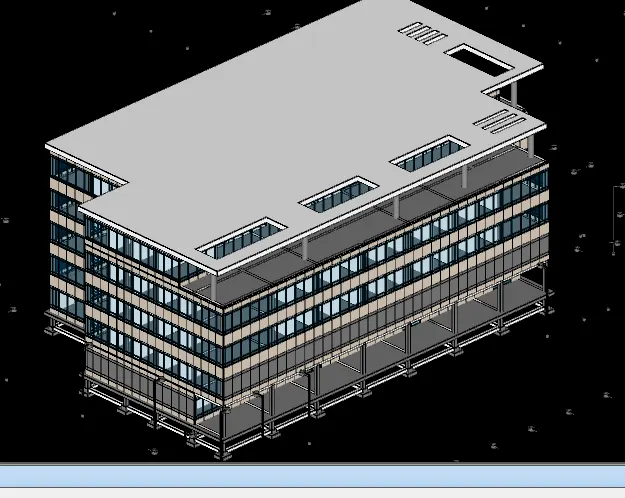
- After doned all settings click on play button we can pause, stop, play backword ,play forward i.e. we can handle video from this panel
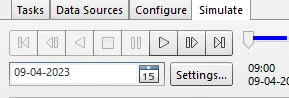
- we get a following results:
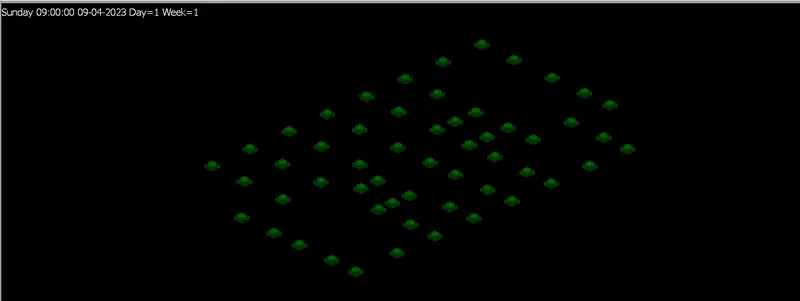
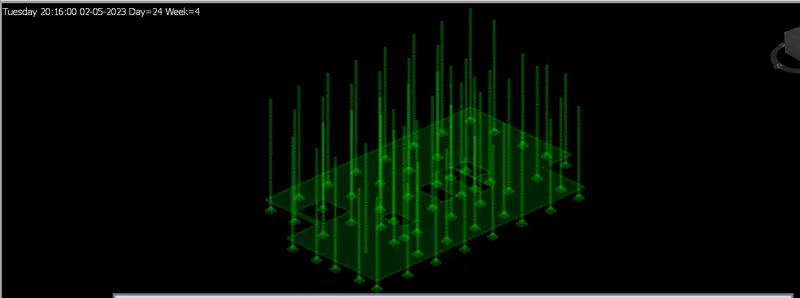
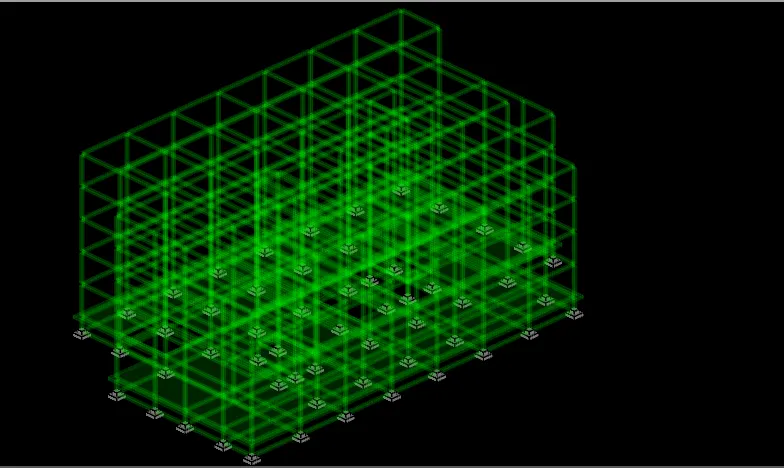
f) Export Configure playback:
- After compeletion of configure play back click on exprot annimation
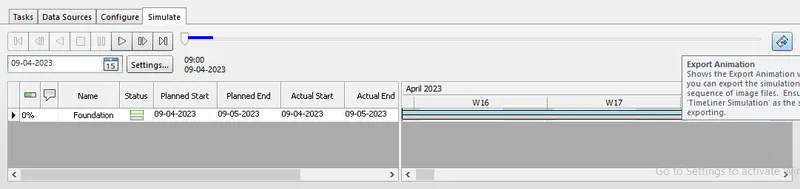
- Animation export dialogue box is open
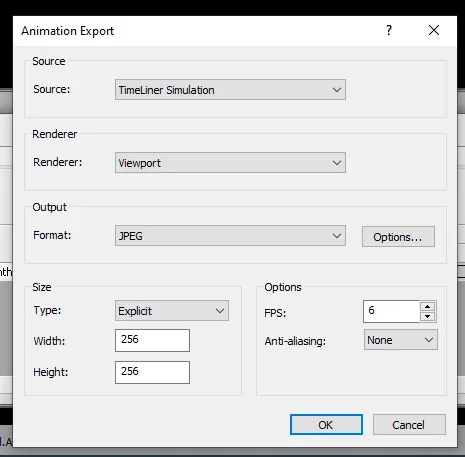
- Click ok we get a aniamtion video in image format
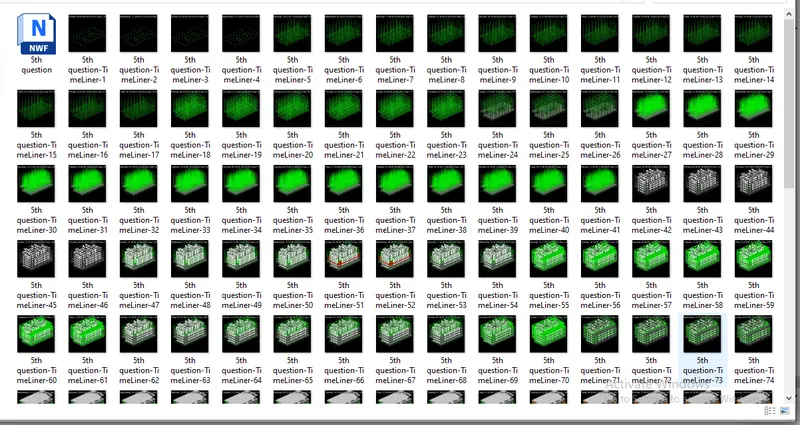
Result: With the above steps we can use the timeliner feature to prepare a schedule for the project and add dates to our project and complete a visual simulation and export it.