Usage of Navigation tool , Timeliner and Clash Detection test using Naviswork
Answer to the Question No.1
Question:1
1) Use the Architecture/ Structure Project file developed by you in Week 6 to 8. Export the Revit architecture and structure model to Navisworks Cache file following the export settings discussed in class.
Answer:
Aim: Use the Architecture/ Structure Project file developed by you in Week 6 to 8. Export the Revit architecture and structure model to Navisworks Cache file following the export settings discussed in class
Introduction: in this question we have to use arechitectural and structural file and Export the revit Arechitectural and structural model to Navisworks cach file following the export setting discussed in class.
Procedure: TO COMPLETE THE ANSWER TO THE QUESTION WE FOLLOW THE FOLLOWING STEPS:
Step-1
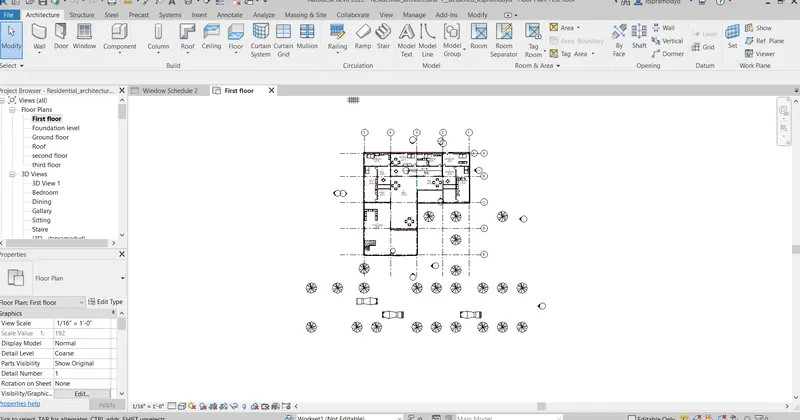
- First open thee Revit Software.
- And Open the Architectural File We created weak 6 to 8.
Step-2
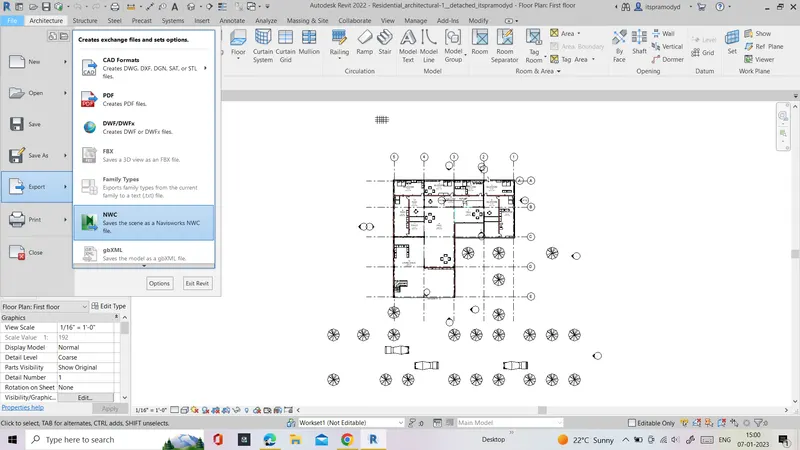
- First we have to export the File Architectural or structural into the Navisworks Model.
- Go to File option
- Then click export and Click to the NWC option.
- Wait for the exporting of the file.
Step-3
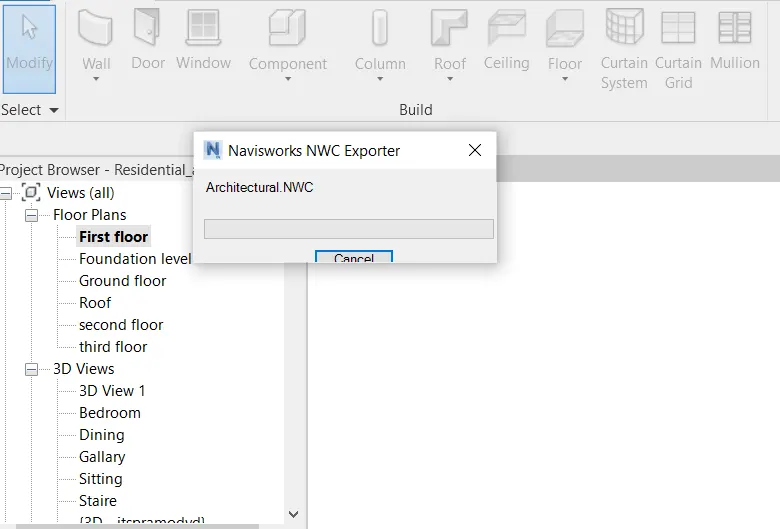
- Now We can See the file is Exporting
Step-4
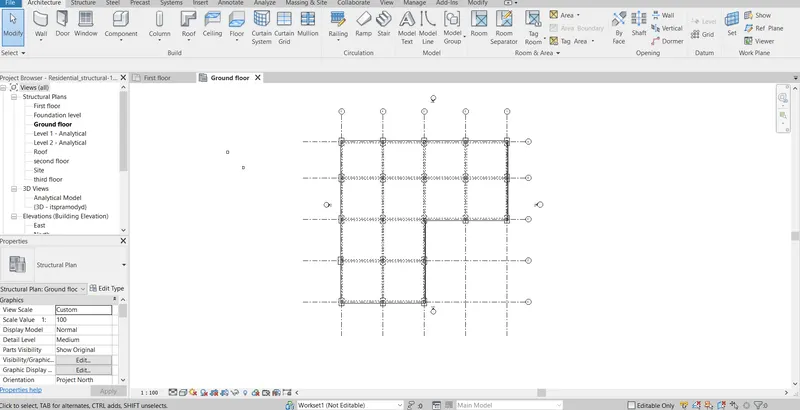
- Now Open the Structural File And Again Open the File-> Export--> NVC
- Now Also Export the Structural File to the NVC.
- Now I have Export the Architectural and Structural File.
Step-5
- Now Also Export the Structural File to the NVC.
- Now I have Export the Architectural and Structural File.
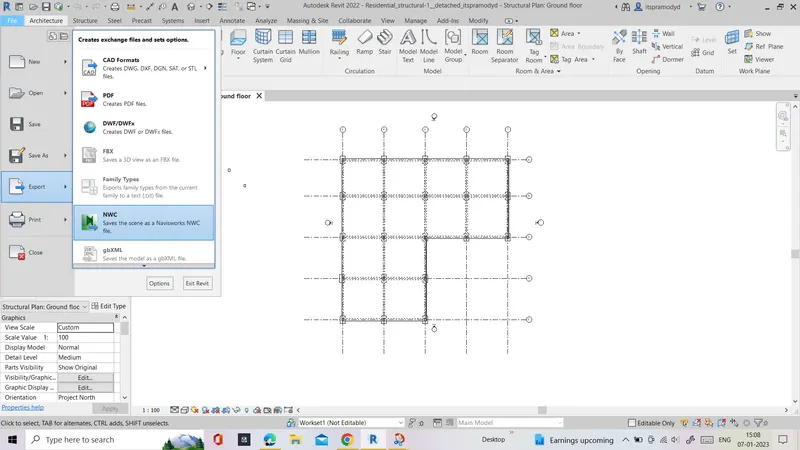
Result:we completed the architecture/ Structure Project file developed by we in Week 6 to 8. we Exported the Revit architecture and structure model to Navisworks Cache file following the export settings discussed in class. we use the navisworks Manage in this question.
Answer to the Question No.2
Question:2
2) Use Navigate Tool to walk around the model and walk through the rooms created and record your moving as animation in your Navisworks file
Answer:
Aim: Aim to the Question is use Navigate Tool to walk around the model and walk through the rooms created and record your moving as animation in your Navisworks file
Introduction:In this Question we have to use Navigate tool to walk around the model. also created and record our moving as animation in Navisworks file.
Procedure:TO COMPLETE THE ANSWER TO THE QUESTION WE FOLLOW THE FOLLOWING STEPS:
Step-1
- For this Question we have to import the file to the Navisworks and after this we have
- First open the Navisworks Software.
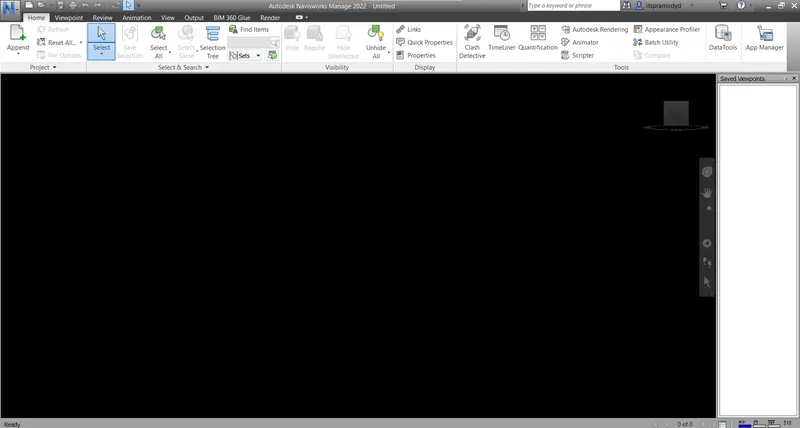
Step-2
- Now open the File tab in Navisworks and open the architectural file we exported to the model.
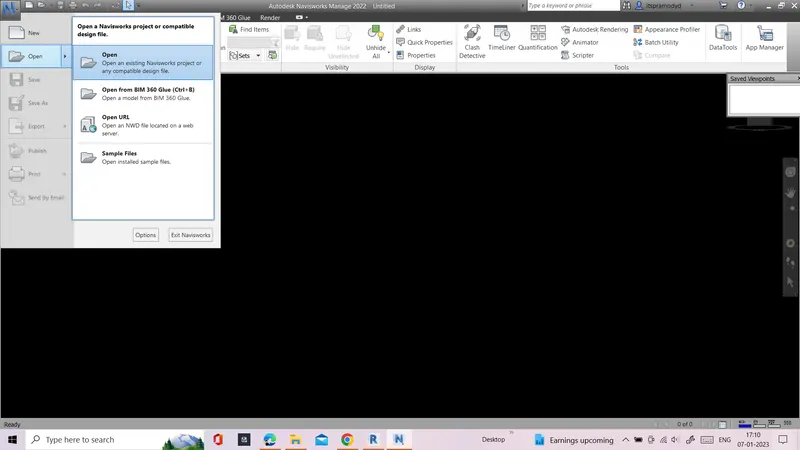
Step-3
- choose the file and export to the model.
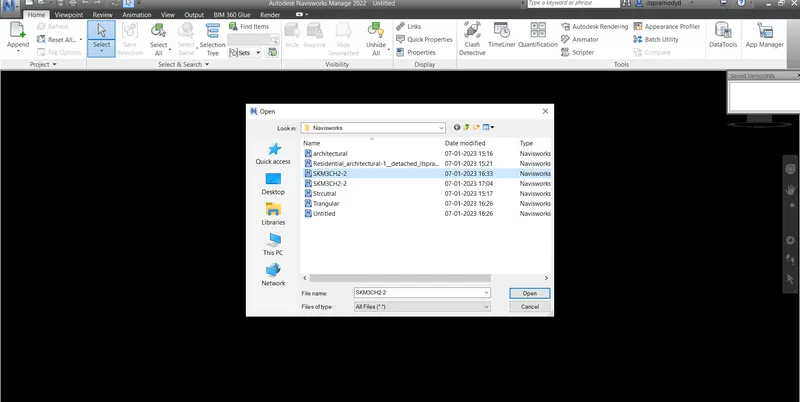
Step-4
- Now we can see our file is open to the Navisworks manage window.
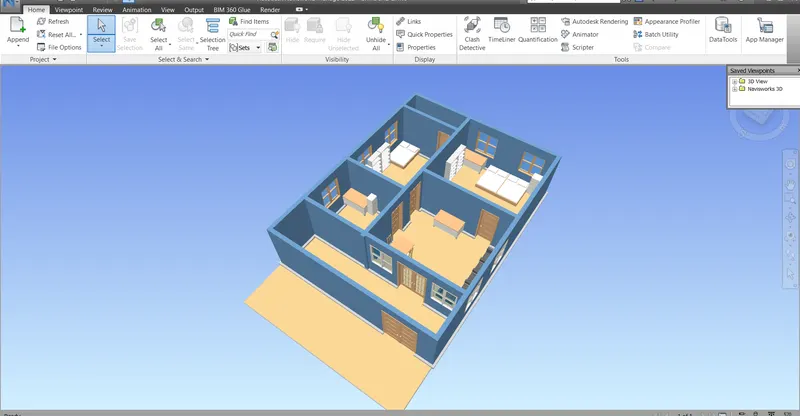
Step-5
- Now We start the walk through and create a animation video.
- First go to he room by the mouse.
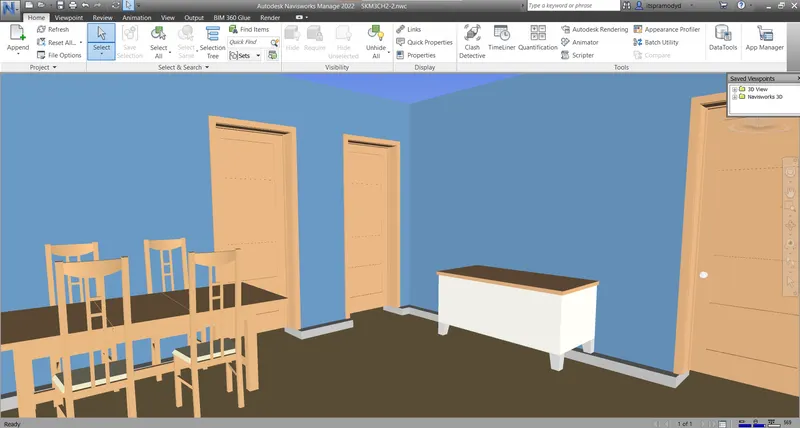
Step-6
- Now click to the Viewpoint tab
- Now find the walk option and choose the walk through footprint.
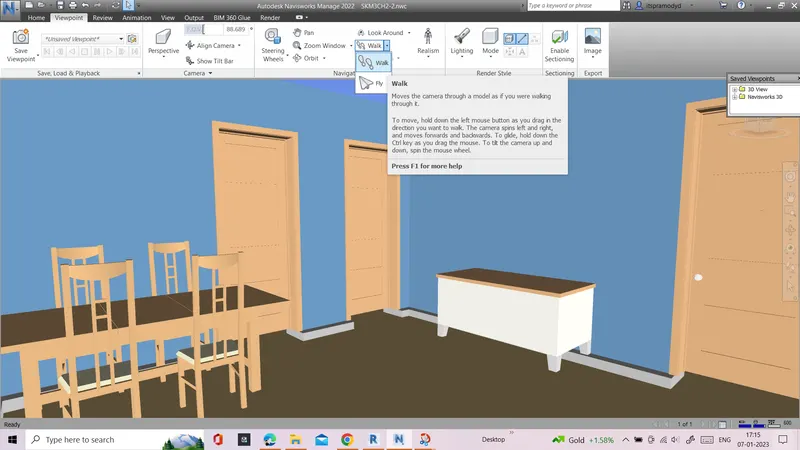
Step-7
- Click to the Save view point option and go to the walk through option and click then
- After this If we want to save the animation as a video .
- We can record the videos by clicking save the view
- and after walking stop the video by the stop option.
- save the view with name by clicking the save view option.
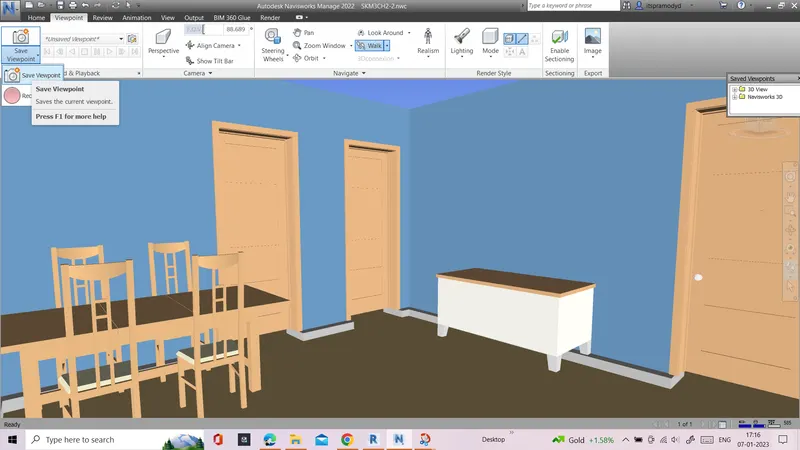
Step-8
- We have to created different view and vidios by the Saved View point.
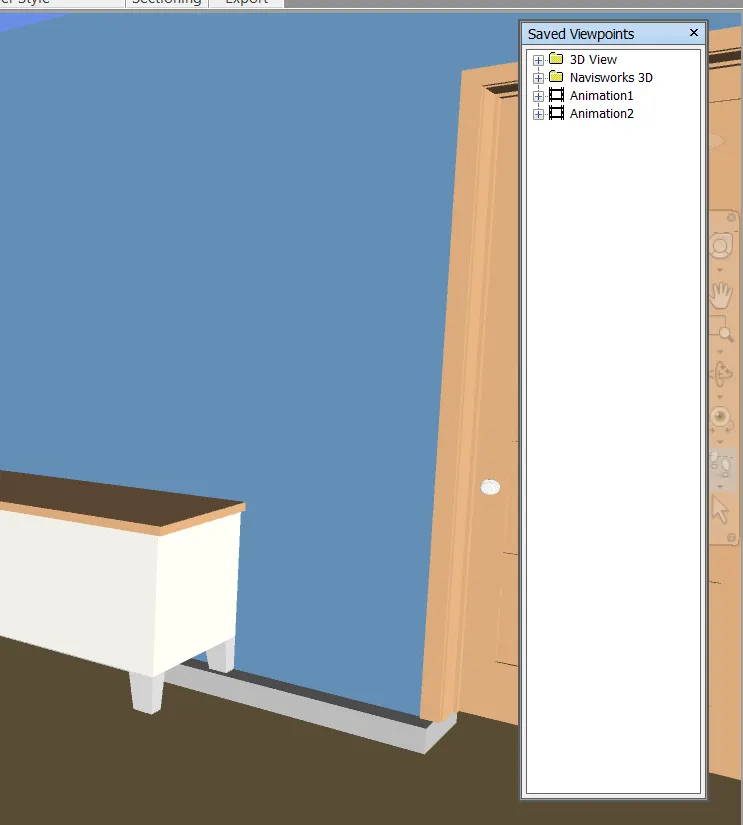
Step-9
- We can see different to walk through
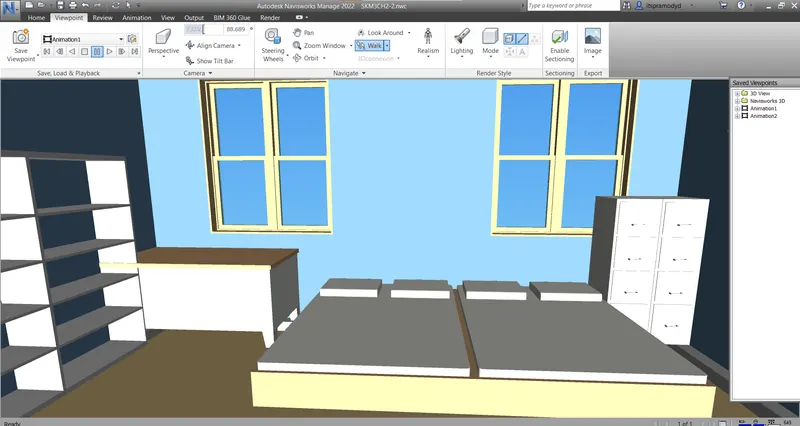
Result: In this question we use the walk by footprint tool. in this question we walk one room to another and also created diffrent types of view with the help of view point option and also creted animated video. this walkthought we done in the revit Navisworks manage software.
Answer to the Question No.3
Question:3
3) Use Navigate tool to use Realism feature to walk through the model and record your moving as animation in Navisworks file
Answer:
Aim: Aim to the question is to with the help of Navigate tool to use Realism feature to walk through the model and record your moving as animation in Navisworks file
Introduction: we have to use the navigate tool to walk throgou and also use the realism tool. in this question .after wall-through we have to record the animated video .
Procedure:TO COMPLETE THE ANSWER TO THE QUESTION WE FOLLOW THE FOLLOWING STEPS:
Step-1
- In this question we have to first open the Navisworks software.
- and open the exported model. in the software.
Step-2
- To this go to the View point tab.
- Find the option Realism and click
- And click the third person option we can see the
- Third person appear in the model.
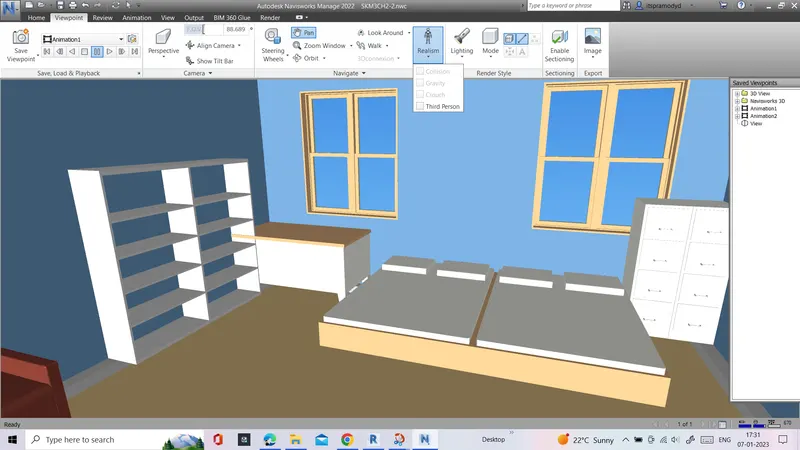
Step-3
- After clicking realism and third person we can see the third person are showing to front of use.
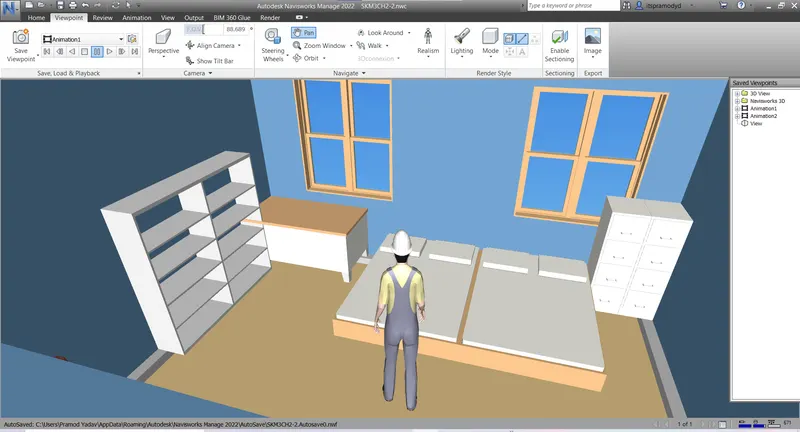
Step-4
- just click the save option by clicking the Save view point. and rename hte view.
- and click the walk option and walk in the room
- also use pan tool
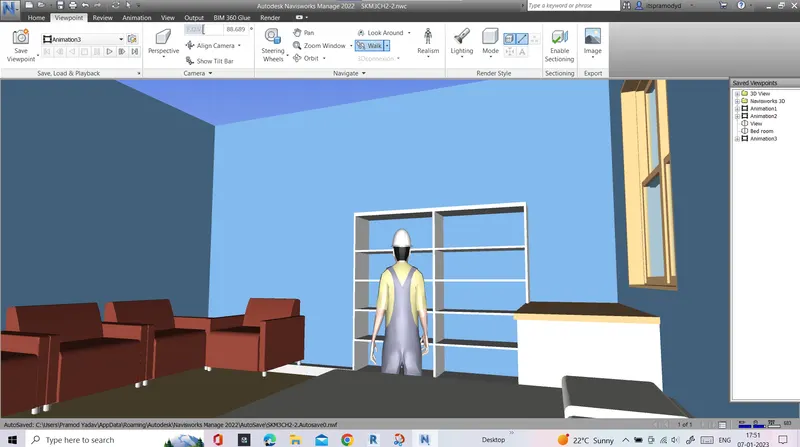
Step-5
- Go to the one room to the another room by clicking the walk button and with the help of realism third person and mouse.
- Walk through model using realism feature.
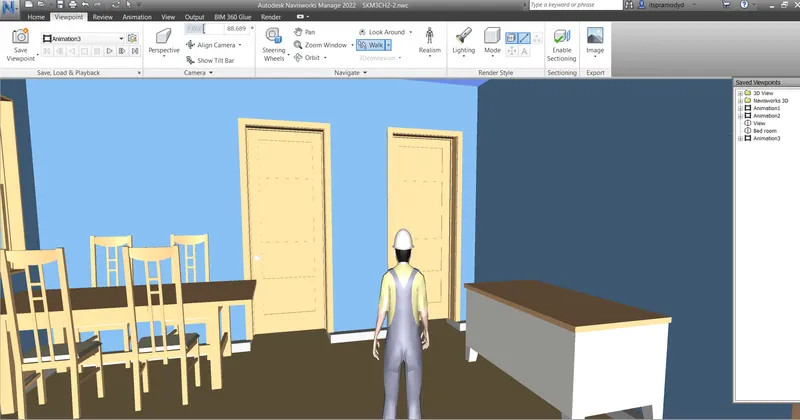
Result: In this question we use the Realism tool the with the help of reslism third person tool we walk room to to and also created diffrent types of view with the help of view point option and also creted animated video. we use the Navisworks manage software in this question.
Answer to the Question No.4
Questio: 4
4) Embed both architecture and structure *.nwc file to your Navisworks file. Create a clash detection test between the two models
a. Run the Clash Detection Test
b. Study the clashes between the two models
c. List which of the clashes could be approved
d. List which of the clashes could be neglected ( will be taken care later)
e. List which of the clashes can be resolved
f. Save the results after color coding the clashes to the Navisworks file
g. In case of resolution annotate the clash and save the view to defined views in Navisworks
Answer:
Aim: Aim to the question is embed both architecture and structure *.nwc file to your Navisworks file. Create a clash detection test between the two models
Introduction: we have to after export the architectural and structural file we have to do the clash detection test. betwenn the two models.
Procedure:TO COMPLETE THE ANSWER TO THE QUESTION WE FOLLOW THE FOLLOWING STEPS:
Step-1
- Just open the Navisworks. first we imported the architectural nwc File to the Navisworks manage.
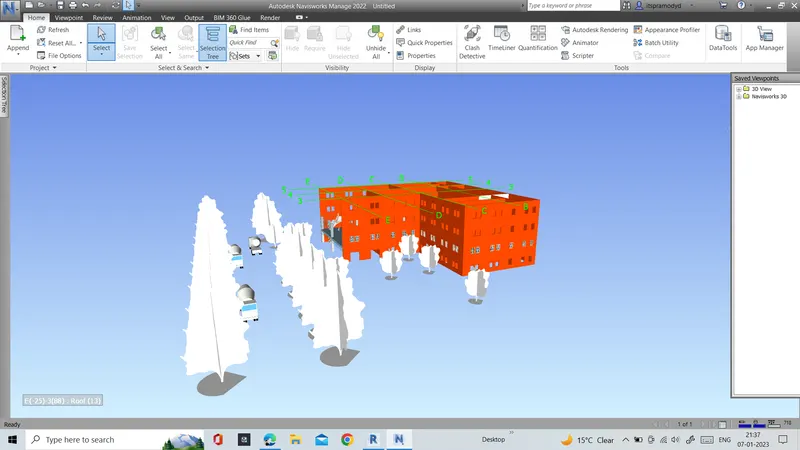
Step-2
- After adding the architectural file Next add the Structural file.
- For this go to Home tab chooose the append tool.
- using one more structural file importe Navisworks.
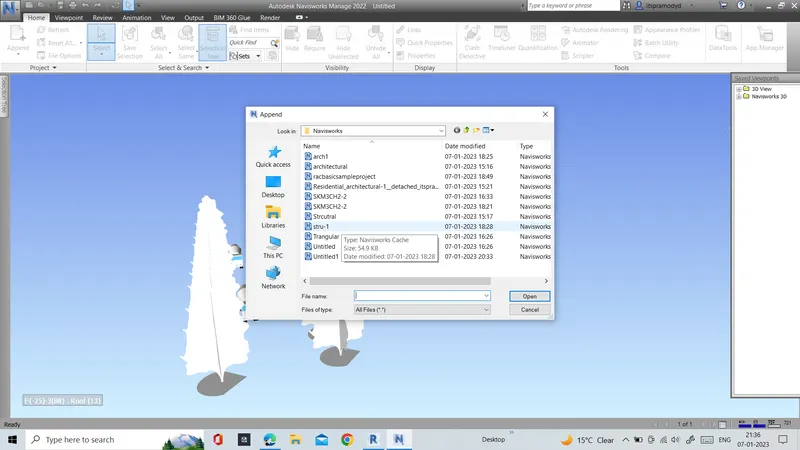
Step-3
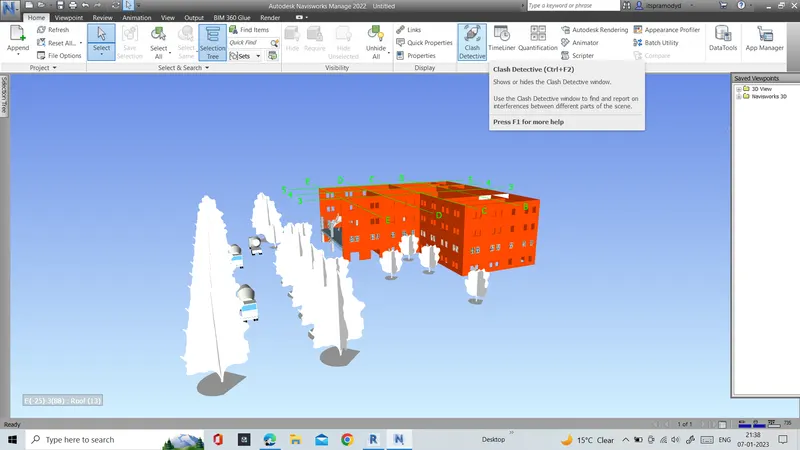
- After this we have to run the class detection test
- For the go to the Home tab
Step-4
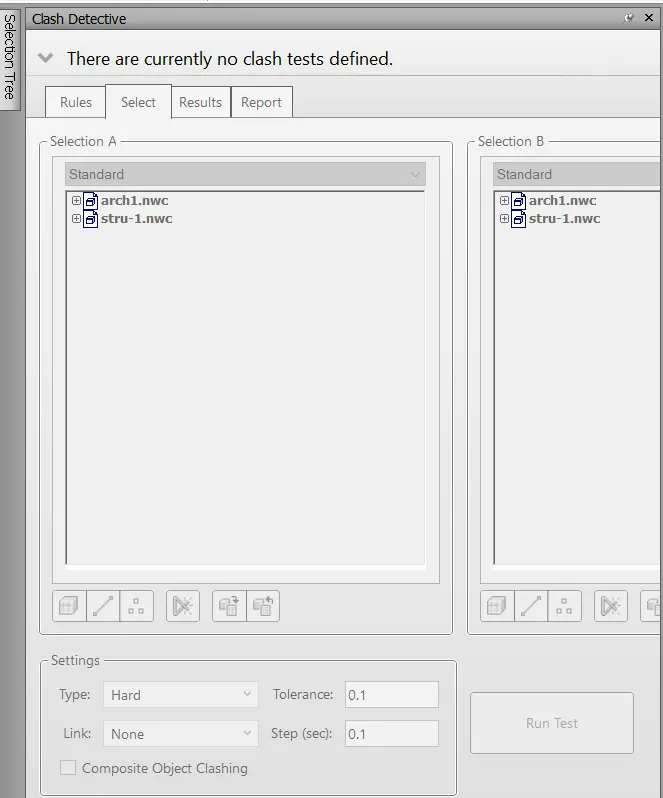
- Choose the option Class detective.
- And dialog box will we appear.
Step-4
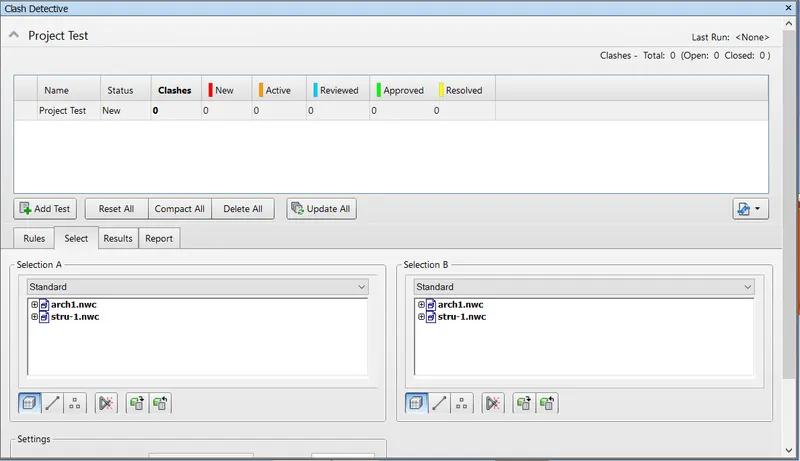
- lick the add test option
- than select the selection of A and B
- Put the Name as Demo Test.
Step-5
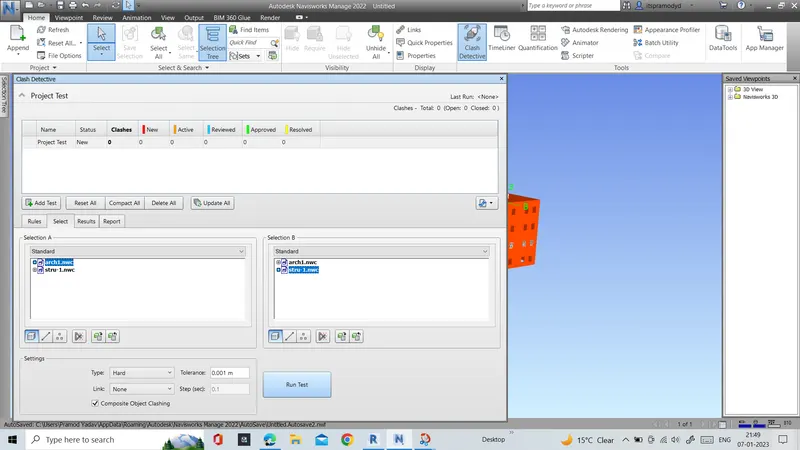
- we conduct the class detection between architectural and structural
- select the A As architectural and B as structural.
Step-6
- After this click to the Run Test .
- Various no. of clashes are find and show the screen dialog box.
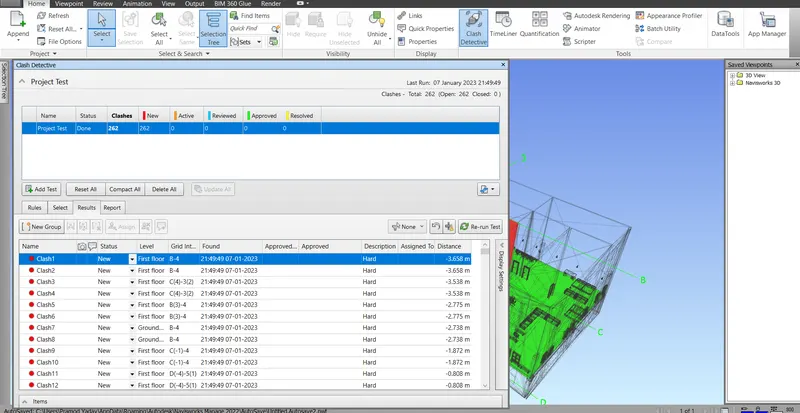
Step-7
- To change the status of the any clash click tithe status and
- under the status column various option are showing like active, received., Approved Resolved.
- We can change the status of the activity.
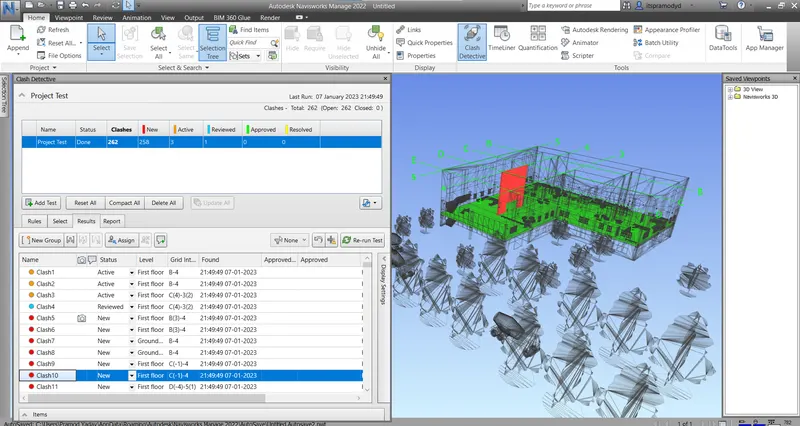
Step-8
- In the Dialog box full details about the clashase.
- we can see the total clashes, active, clashes , resolved, clashes , and approed clashes.
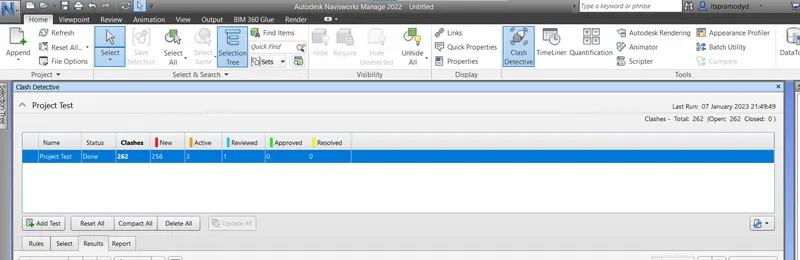
Step-9
Result: we completed the clash detection test in the question. we use use hte archiectural and structural model and export to the Navisworks manage. after exporting the model we wend to the clash detection test. and execute the clash detection test. we find the the different types of clash in the feature in Navisworks melinerbuilding.
Answer to the Question No.5
Question:5
5) Using the Timeliner feature in Navisworks prepare a schedule for the project developed in week 6 to 8 by adding reasonable assumptions for task start date and end date and simulate the task completion as a visual simulation. Record it and save the timeline simulation to Navisworks file
Answer:
Aim: Aim to the Question is to uing the Timeliner feature in Navisworks prepare a schedule for the project developed in week 6 to 8 by adding reasonable assumptions for task start date and end date and simulate the task completion as a visual simulation. Record it and save the timeline simulation to Navisworks file
Introduction: in this question we have to use the timeliner feature to prepare the schedule the project we developed in the weak 6 to 8.
Procedure:TO COMPLETE THE ANSWER TO THE QUESTION WE FOLLOW THE FOLLOWING STEPS:
Step-1
- Open the model. and import the architectural model to the Navisworks.
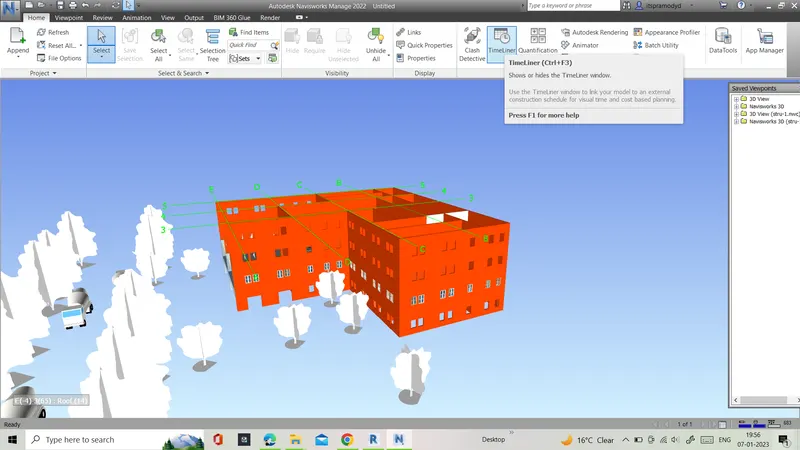
Step-2
- Click to the home tab and find the option timliner.
- After clicking the timeliner option we can see the new dialog box are open to the Navisworks.
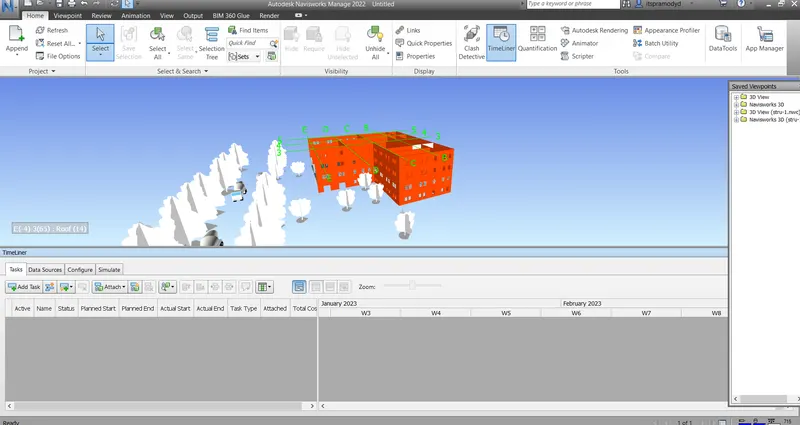
Step-3
- Go to the selection tab and select the option we want to assign.
- After this go to the add task baar option rename the task.
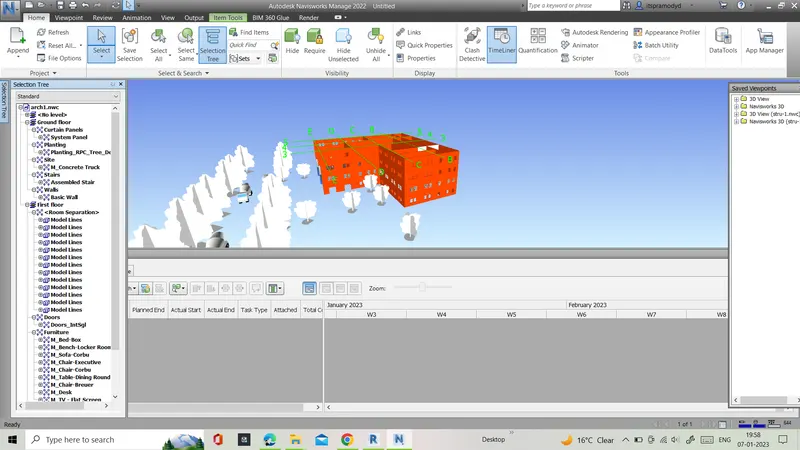
Step-4
- Put the planned start and end planed date.
- Put the actual start and actual end date Task type
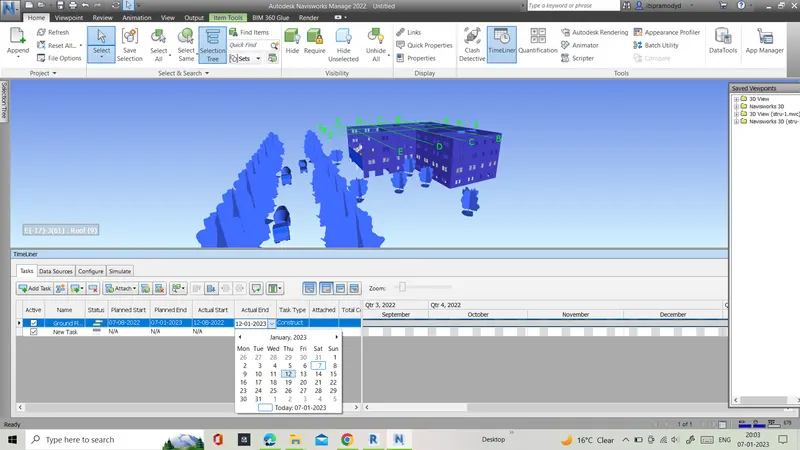
Step-5
- similarly add second task and rename the column
- Put the planned start and end planed date.
- Put the actual start and actual end date Task type
- We add the Other activities with random date.
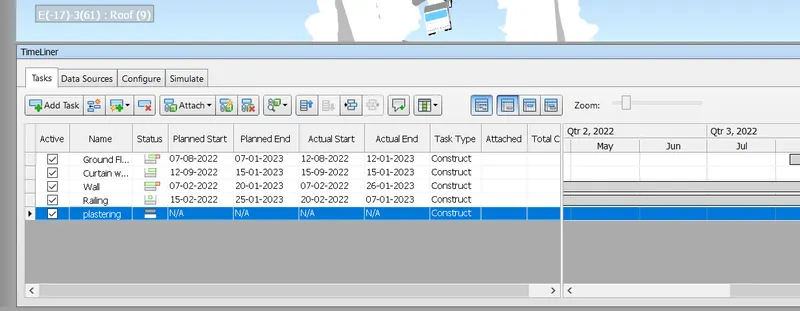
Step-6
- Now we have to attach the activity to the timlener.
- Click to the Selection bar and choose the element then chose the timeline same element and click to the attach fine option a component are attached.
- every component attechd.
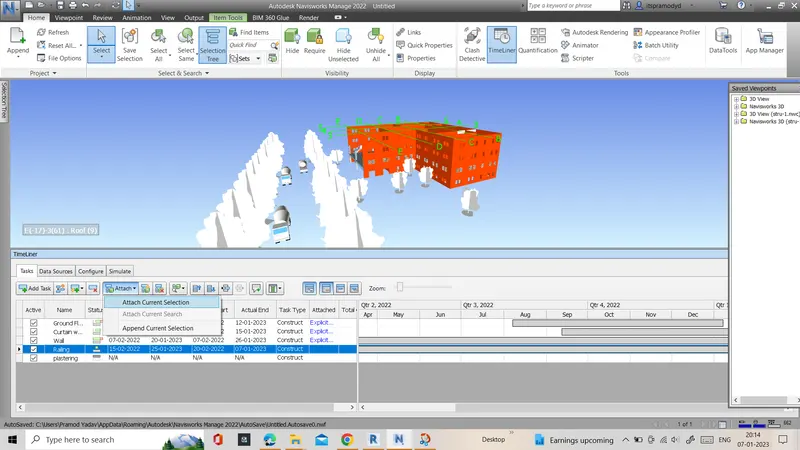
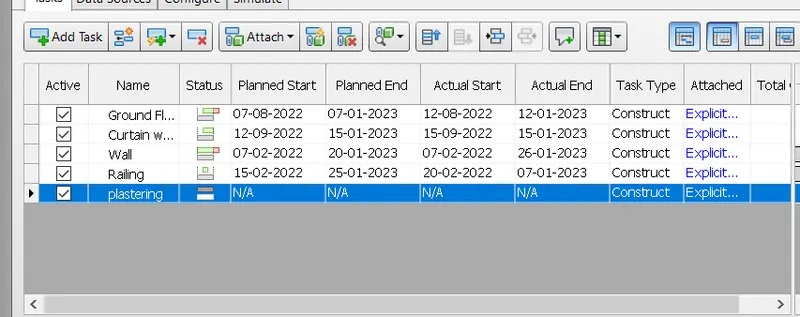
Step-7
- After this go the Add all the activity the timeliner tab and assign this to the timliner.
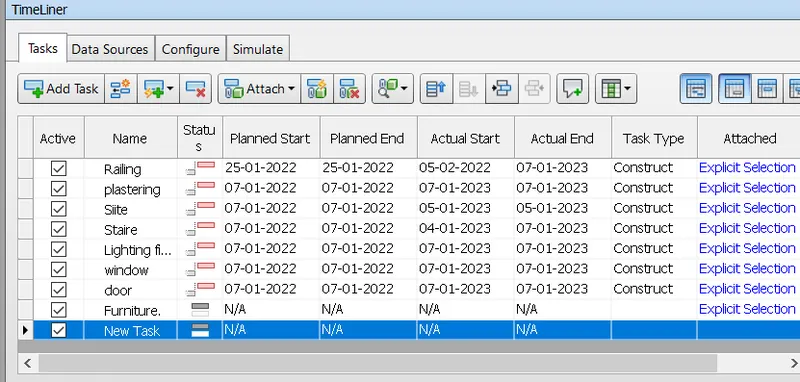
Step-8
- Now go to the Smulated option and and play the animated video
- it is created by the date we mentioned in the model.
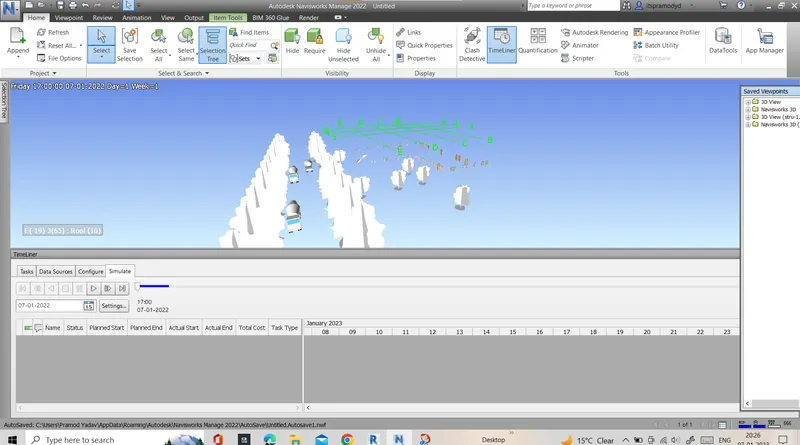
view Durinng playing the video:
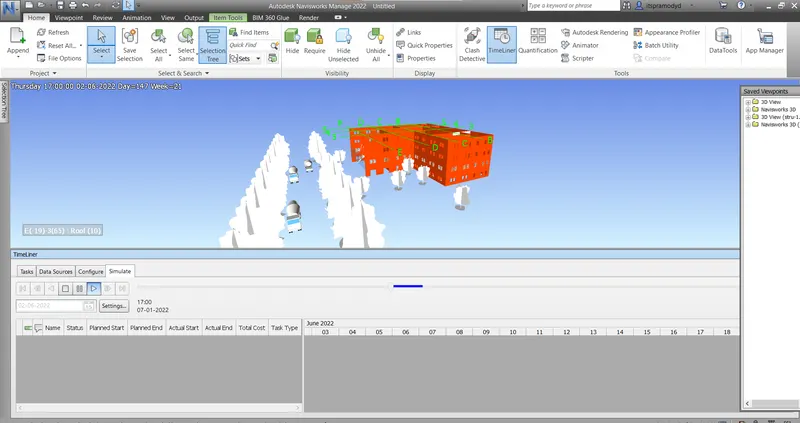
Result: we completed the answer to the question and we prepare the schedule with the help of timeliner feature. we add some features add activity we add starting date end date actual start date, actual end date and type of work etc. after this we created the animated video.