Usage of Navigation tool , Timeliner and Clash Detection test using Naviswork
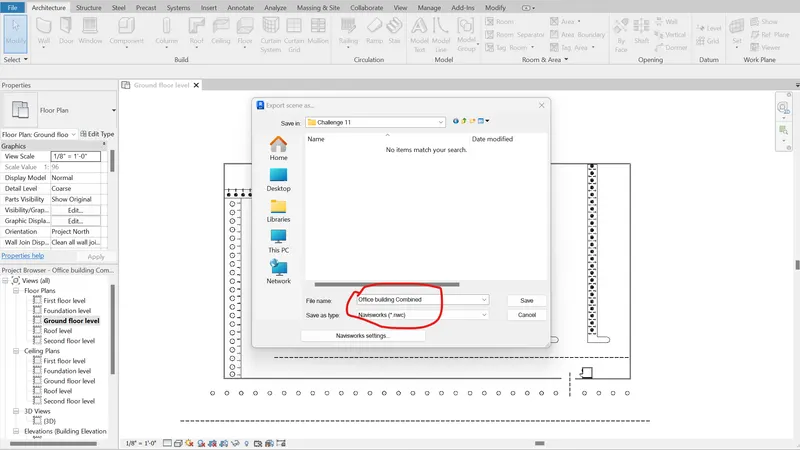
1) Use the Architecture/ Structure Project file developed by you in Week 6 to 8. Export the Revit architecture and structure model to Navisworks Cache file following the export settings discussed in class
Aim: To export the project created from revit to navisworks format.
Introduction: Navisworks software is used for the purpose of review the project created using revit. In order to have the project created in revit to be in navisworks it has to be exported to the navisworks format.
Steps:
- Initially Navisworks manage software and navisworks exporter utility are downloaded from the autodesk website
- Then the softwares are installed
- Then the created project file is opened in revit and using the export option in the file command the required Navisworks format is selected and exported
- The exported file is saved in the required folder.
Results: The created project is exported to the navisworks format sucessfully.
2) Use Navigate Tool to walk around the model and walk through the rooms created and record your moving as animation in your Navisworks file
Aim: To walk around the models and the rooms using the navigate tool and to record the animation video.
Introduction: Navisworks software main purpose is to review the model created and to present the review to the non-technical people. The main intention of the review of the project is to present the model in the realistic way as like the building in real life and to provide a more clear view of the model.
Steps:
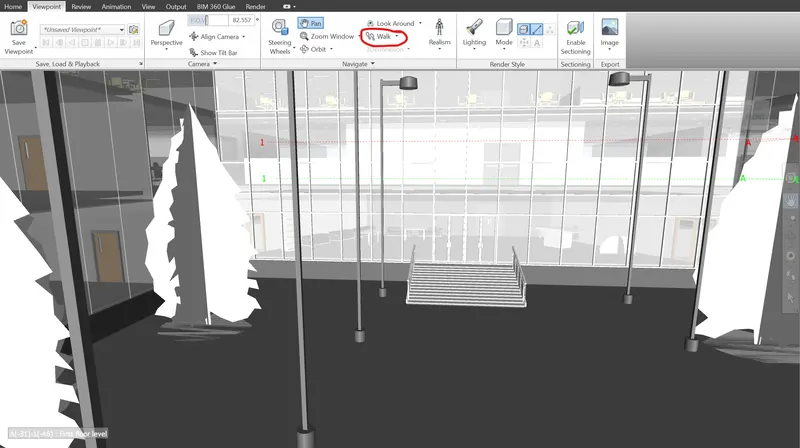
- Initially after opening the model walk option is selected from the viewpoint tab of the ribbon
- The walk through can be started from anywhere in the model as per requirement or also from any one of the 3D views which is already created and saved in the revit file.
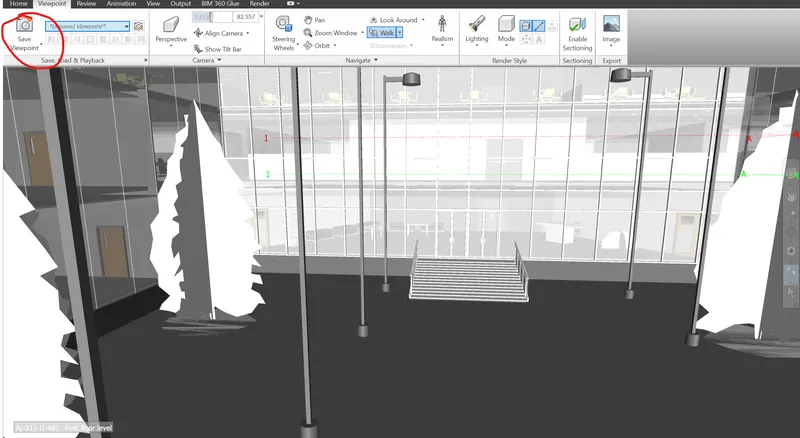
- After the starting point of the walk record option is selected from the save viewpoint command of the same viewpoint tab and the video recording starts
- To walk through the model either toggling of mouse with left click or the arrow keys in the keyboard is used and navigate tools like pan and look around can also be used for changing direction or views in the walk through
- Then after finishing the walkthrough stop option is used from the ribbon to finish the video recording
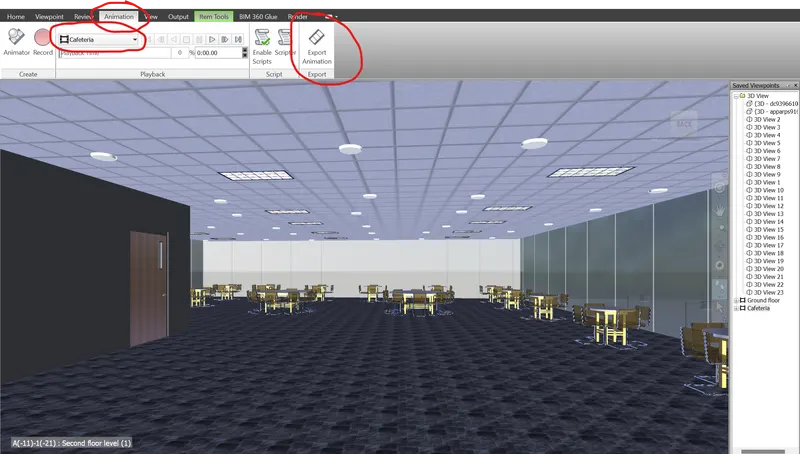
- Then from the animation tab of the ribbon the created animated video can be seen,renamed and using the export animation option the video can be saved in the local folder of the computer for sharing and viewing purpose and the video is inserted.
Results: Thus a animated video of walk through the model is created sucessfully.
3) Use Navigate tool to use Realism feature to walk through the model and record your moving as animation in Navisworks file
Aim: To use Navigate tool and realism feature to walk through the model and to record the moving as animation in Navisworks file
Introduction: Navisworks software is mostly used for providing a more clear view of the model created and realism feature provides like a more clear view like a virtual man walking through the building created and a video can be created with using the navigate tool.
Steps:
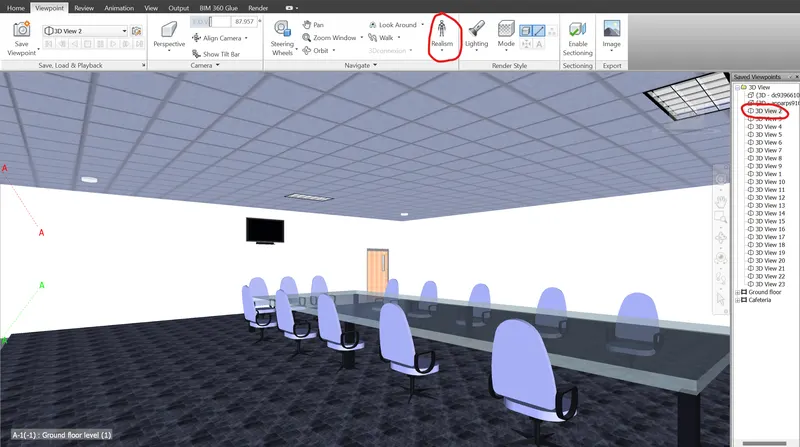
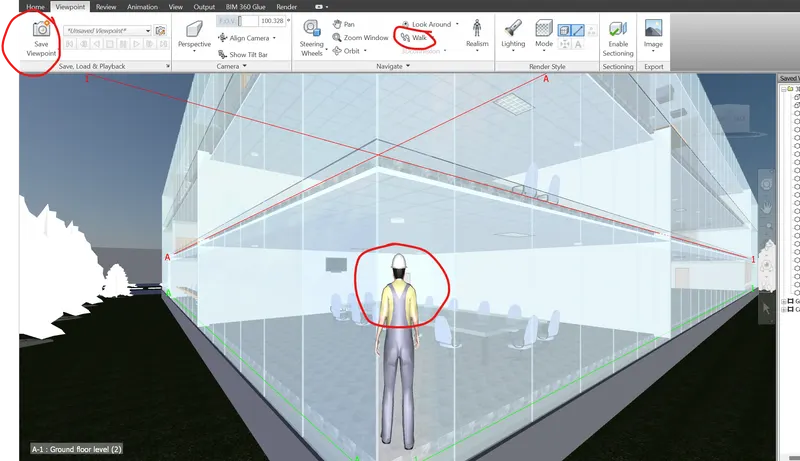
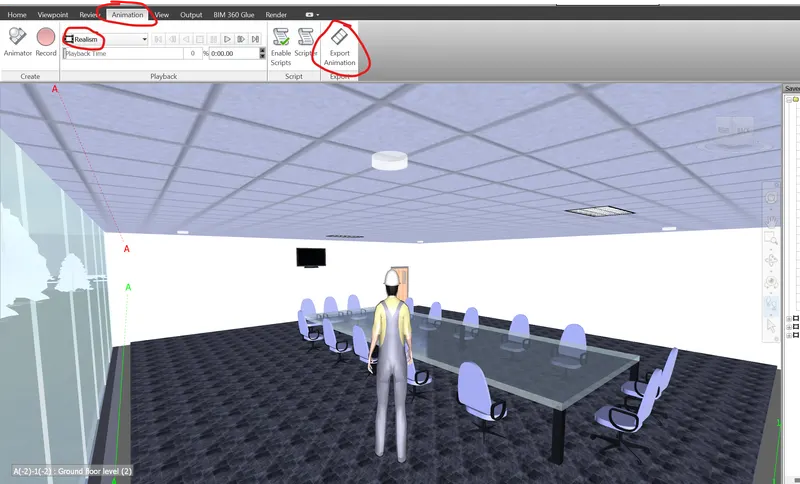
- The starting point of the walk through is fixed from the 3d views created and realism option is selected from the viewpoint tab
- Followed by record option from the save viewpoint option of the viewpoint tab and the video recording is started
- Furthermore, by toggling the mouse the walk through of the model is done with the virtual man
- After finishing the walk through stop option is selected from the ribbon to finish the recording of the video.
- Then using the export animation option in the animation tab of the ribbon the created video is saved and inserted in the challenge.
Results: Thus a walk through animation video is created sucessfully using navigate tool with the realism feature.
4) Embed both architecture and structure *.nwc file to your Navisworks file. Create a clash detection test between the two models
a. Run the Clash Detection Test
b. Study the clashes between the two models
c. List which of the clashes could be approved
d. List which of the clashes could be neglected ( will be taken care later)
e. List which of the clashes can be resolved
f. Save the results after color coding the clashes to the Navisworks file
g. In case of resolution annotate the clash and save the view to defined views in Navisworks
Aim: To run clash detection between the two models of the project created and to detect the clashes in the combined model.
Introduction: In any building model creation two major model are created namely architectural and structural model. The architectural model includes the aethectic parts of the building and a finished view of the structure whereas, structural model contains the skeleton of the structure like columns,beams etc., which forms the base of the structure and chances of clash between the model elements of the model is unavoidable. Navisworks is not only used for review purpose but also for clash detection of the model elements of the struture.
Steps:
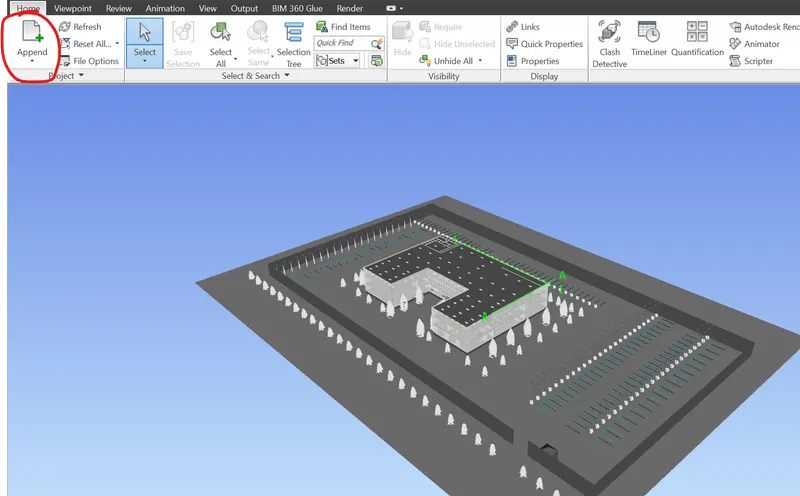
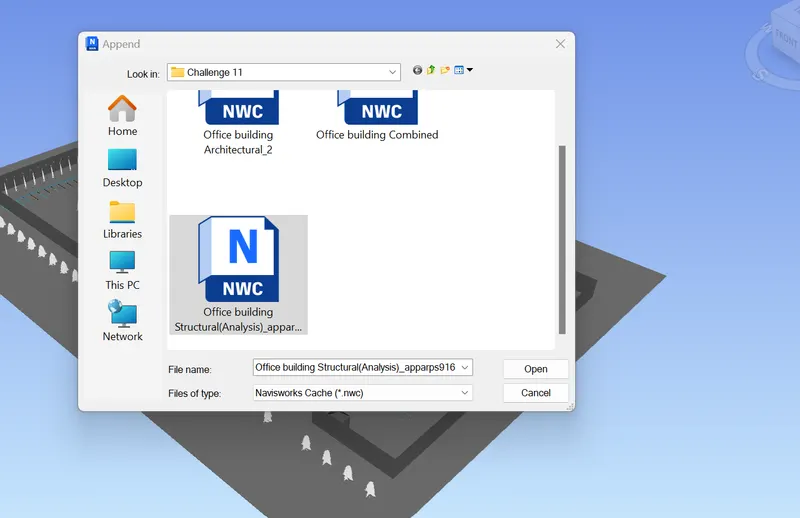
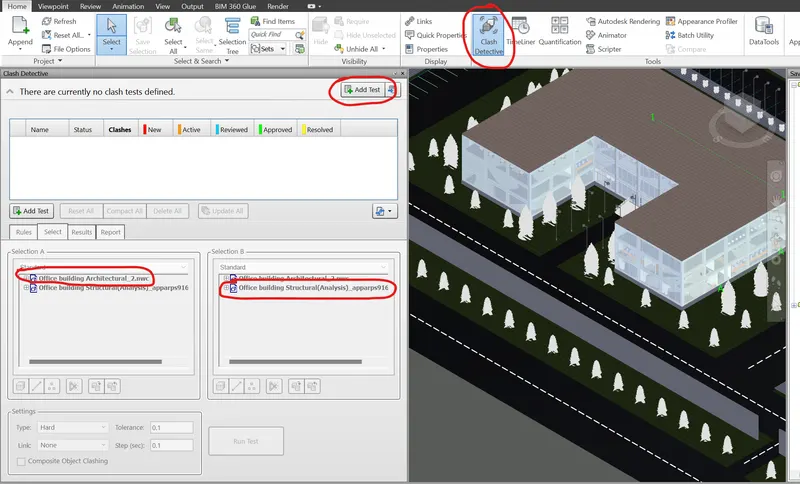
- Initially the two model needed to be merged for running the test and to merge, append option from home tab of the ribbon is selected and the stuctural model created is selected from the local folder and merged with the architectural model
- Then clash detective option is selcted from the home tab
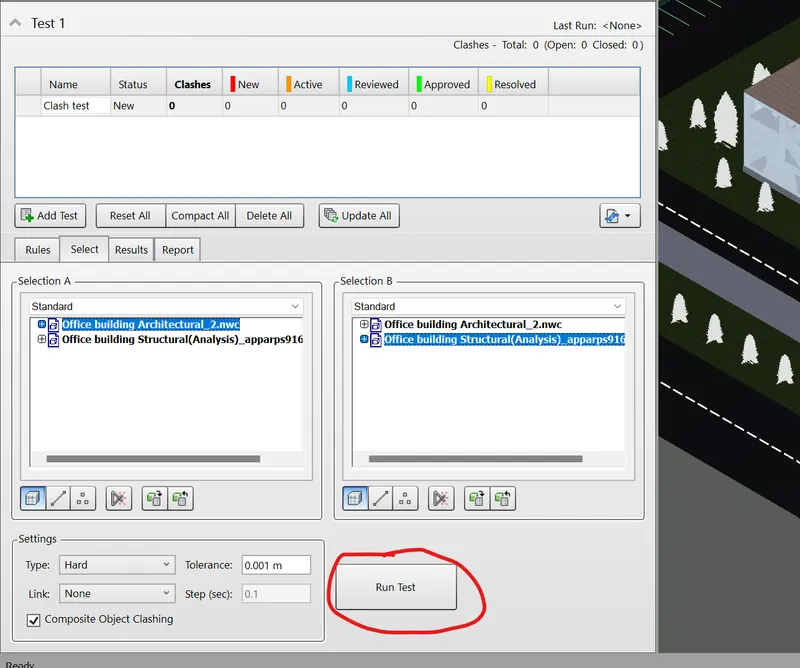
- After that a tab opens and add test option is selected followed by selecting the two links of the model
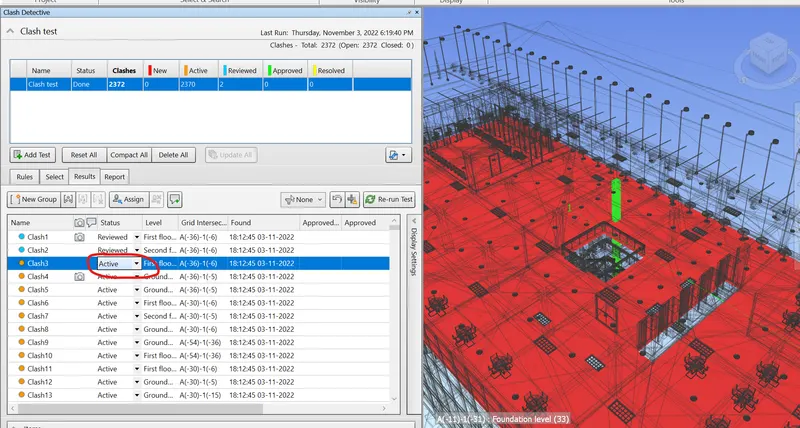
- Then run test option is selected and the clash detection results are obtained
- Then the results of the clash can be selected and viewed seperately in the model and the stauts of the clash can be changed as approved,resolved etc., based on the review and discussions
- The clash results of this model is mostly based on the clash between the architectural elements like furniture,floor and columns of the structural model
- This is because the columns are simply created on all grid intersection points
- The resolving of this clash can be done removing the column from unwanted positions of the model and to design the floor accurately based on the positions of the columns and no other major clashes detected.
Results: Thus a clash detection test between the architectural and structural models were done sucessfully.
5) Using the Timeliner feature in Navisworks prepare a schedule for the project developed in week 6 to 8 by adding reasonable assumptions for task start date and end date and simulate the task completion as a visual simulation. Record it and save the timeline simulation to Navisworks file
Aim: To prepare a schedule for the project using the timeliner feature in Navisworks.
Introduction: Navisworks software a software which can also be used for construction management of the project by preparing a schedule of construction of the elements of the structure. The schedule contains the time period of each elements of the structure to be constructed and also a simulation video can be created based on the schedule.
Steps:
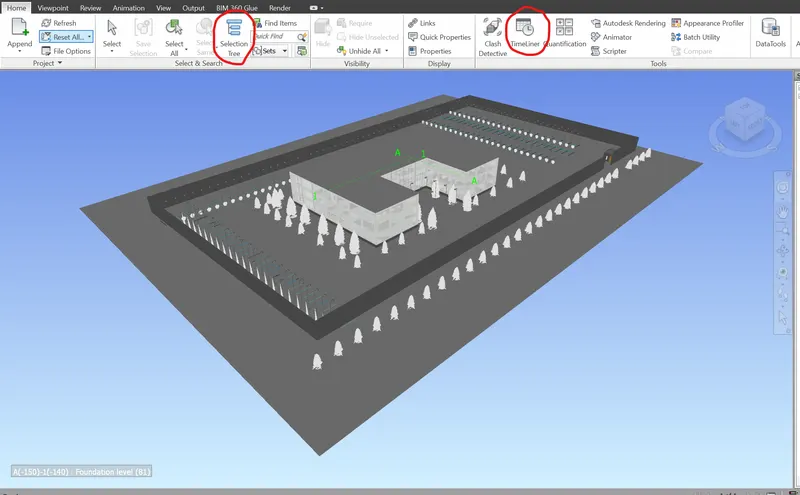
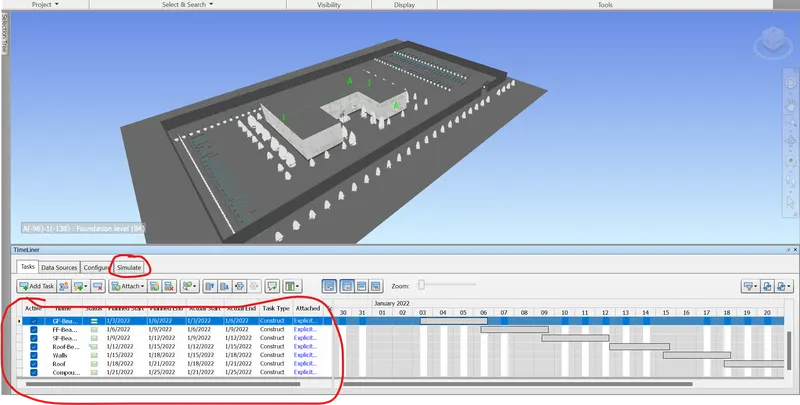
- Initially timeliner option from the home tab of the is selected which open a tab for preparing schedule
- Then selection tile option is selected for selecting the model elements which open a seperate tab on left of the screen
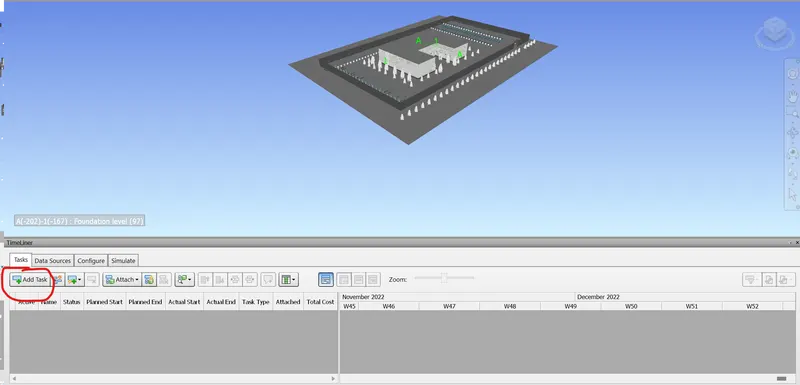
- Then in the schedule tab add task option is selected which creates a task on the schedule
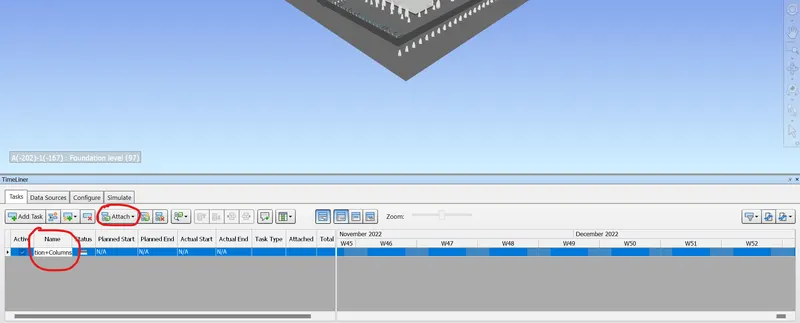
- Then in the task bar options like start date and end date are available which are entered and the task is renmaed based on the model element to be created
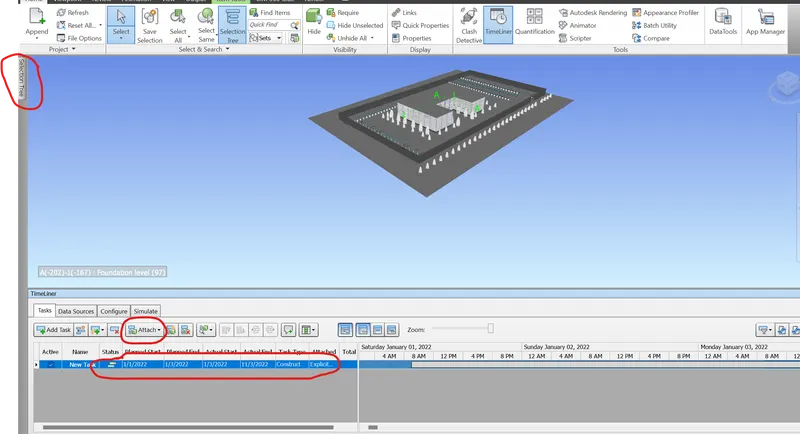
- Then from the selection model element is selected and are included in the task bar of the schedule using the attach option in the tab
- Similarly all the tasks are created using the add task option and respective dates are given and the respective models are added to the specific task bar by selecting from the selection bar
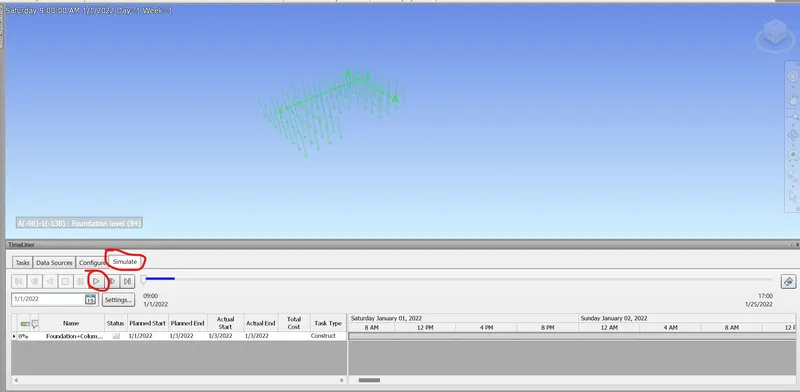
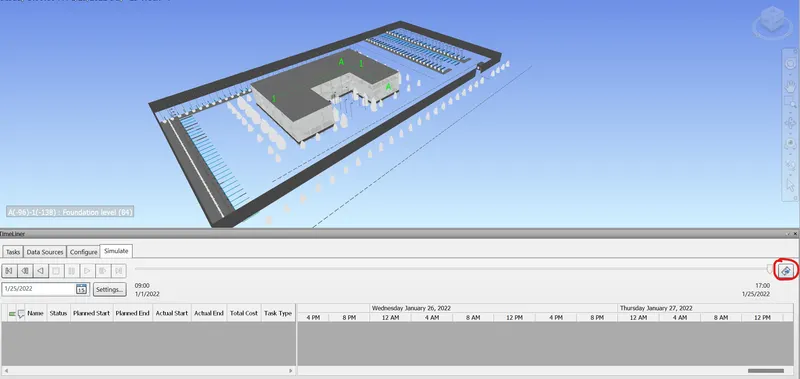
- After assigning all the tasks simulate option is selected from the schedule tab and a video of constrcution of the model elements can be which is already created by the navisworks based on the tasks given
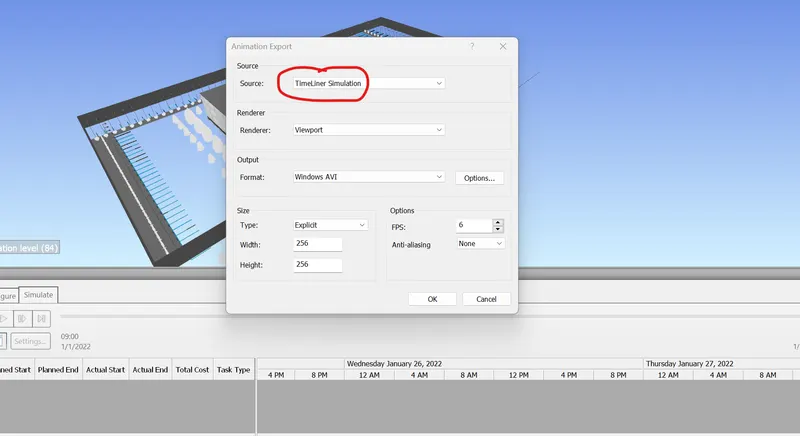
- Then using the export option the simulated video is saved to the local file and it is inserted to the challenge
Results: Thus a schedule of model elements is created sucessfully and a simulation video of the same.