Usage of Navigation tool , Timeliner and Clash Detection test using Naviswork
INTRODUCTION TO AUTODESK NAVISWORK -
- Autodesk Navisworks Manage software (commonly referred to as Navis) offers design and construction professionals a comprehensive project review solution, providing advanced tools for interference analysis, 5D analysis and spatial coordination.
- Autodesk Navisworks Manage software is a comprehensive project review solution that supports coordination, analysis, and communication of design intent and constructability.
- Multidisciplinary design data created in a broad range of Building Information Modelling (BIM), digital prototype, and process plant design applications can be combined into a single integrated project model. Interference management tools help design and construction professionals anticipate and minimise potential problems before construction begins, helping to reduce expensive delays and rework.
FUNCTIONS OF NAVISWORK -
- Clash detection and interference checking
- Clash and interference management
- Model file and data integration
- NWD and DWF publishing
- 5D project scheduling
- Photorealistic model rendering
- BIM coordination with AutoCAD
- BIM 360 integration
- Model aggregation
- Integrated model takeoff
- 2D sheet takeoff
1. Use the Architecture/ Structure Project file developed by you in Week 6 to 8. Export the Revit architecture and structure model to Navisworks.
ANS.
EXPORTING FILE TO NAVISWORK -
- Go to the Autodesk Website and search for Autodesk Naviswork 3D viewer.
- Install the file and extract it and save the file to the file.
- Open the revit file which we want to Export to Naviswork.
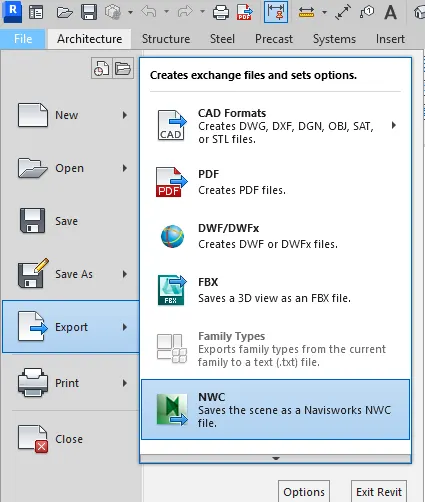
- Go to file and select Export to then the click on the naviswork option.
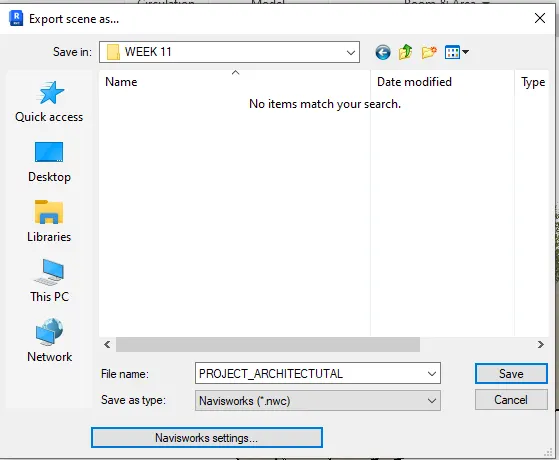
- In the Export Scene as... dialog box, click on the Navisworks Settings...button to open the Navisworks Options Editor – Revit.
- In the Navisworks Options Editor - Revit dialog box expand and click on settings.
- Then change the Export > Change this to Entire Project
- OPENING FILE TAB AND SELECT EXPORT
- SAVING NAVISWORK FILE TO DESIRED LOCATION
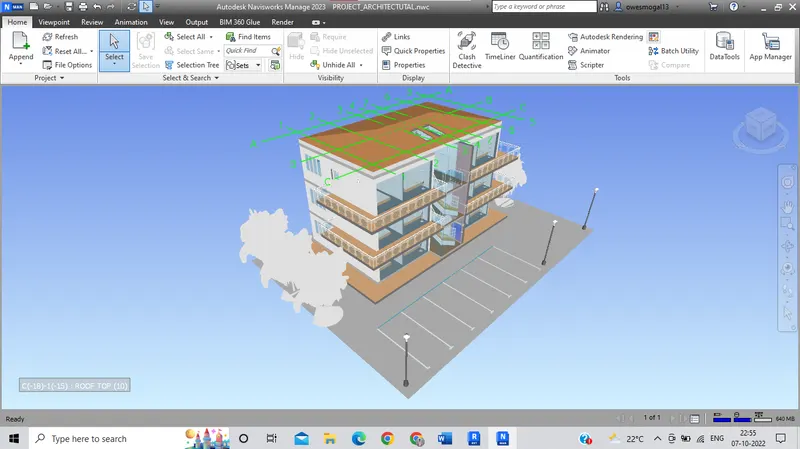
- EXPORTING ARCHITECTURAL PROJECT TO NAVISWORK
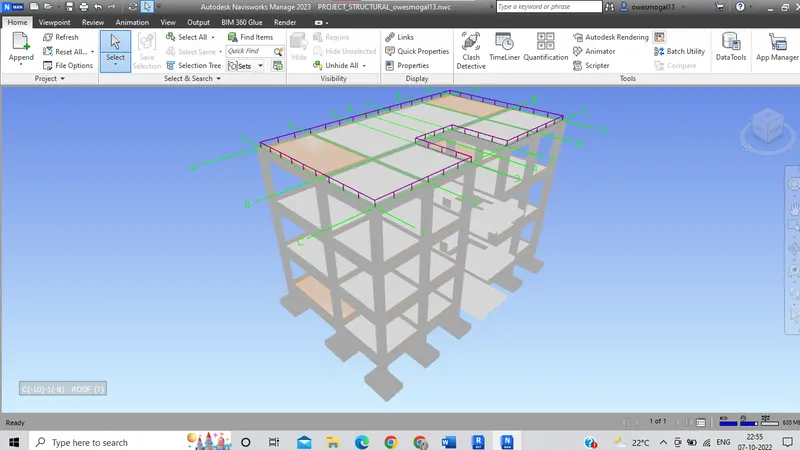
- EXPORTING STRUCTURAL PROJECT TO NAVISWORK
-------------------------------------------------------------------------------------------------------------------------------
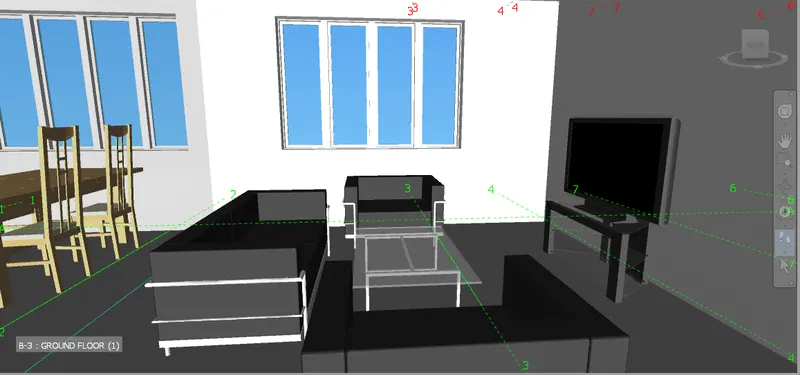
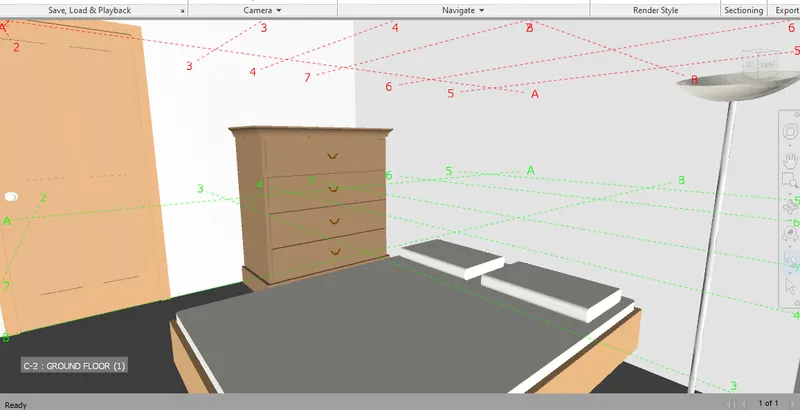
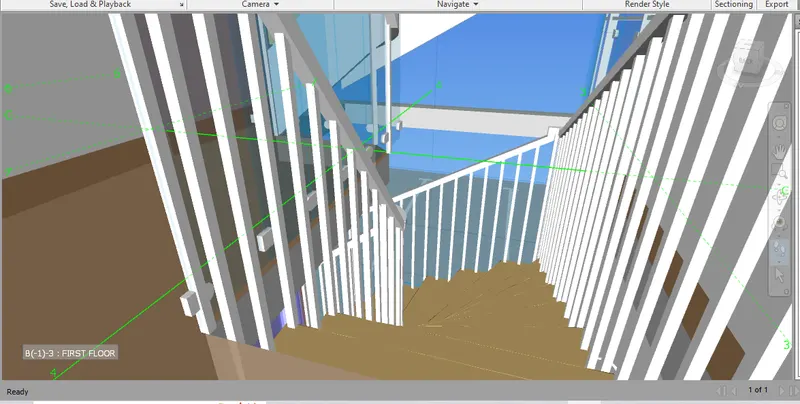
2. Use Navigate Tool to walk around the model and walk through the rooms created and record your moving as animation in your Navisworks file.
ANS.
- Open the Architectural model which is already exported to the Naviswork manage file.
- Select the appropriate 3D view which we want to Walkthrough in the model.
- Select the viewpoint tab and click on walk option.
- The walkthrough will be displayed on the screen.
- Use the arrow keys to move back and front and side to control the walk.
- Record the moving and create the different Previews.
-------------------------------------------------------------------------------------------------------------------------------
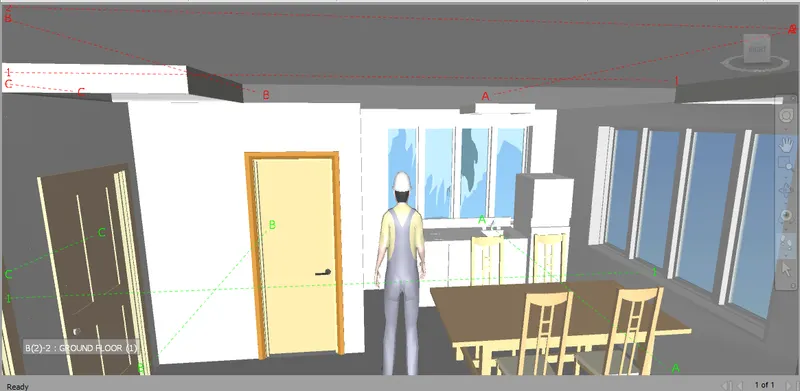
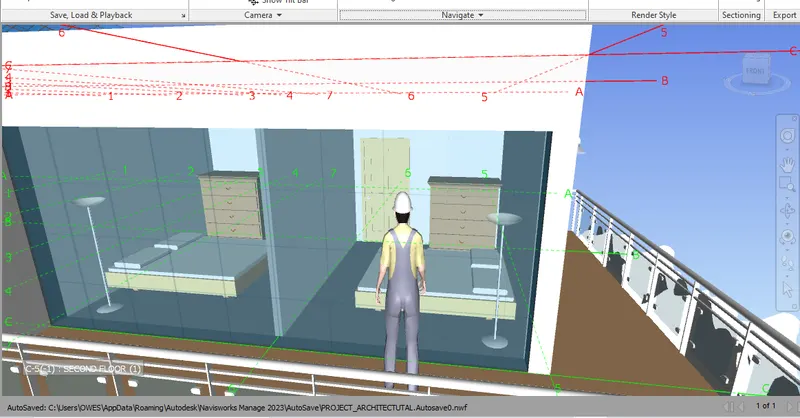
3. Use Navigate tool to use Realism feature to walk through the model and record your moving as animation in Navisworks file.
ANS.
- Open the Architectural model which is already exported to the Naviswork manage file.
- Select the appropriate 3D view which we want to Walk in the model.
- Select the viewpoint tab and click on Realism and in that option select 3rd person.
- The walkthrough will be displayed on the screen.
- Use the arrow keys to move back and front and side to control the walk.
- Record the moving and create the different Previews.
-------------------------------------------------------------------------------------------------------------------------------
4. Embed both architecture and structure *.nwc file to your Navisworks file. Create a clash detection test between the two model.
ANS.
- CLASH DETECTION
- Clash detection is the method of identifying and inspecting the various building design interferences which frequently occur during the BIM coordination or Construction Gatekeeping process.
- Clash detection is like a review process that ensures all building components, assemblies, and trades are in ready-to-be-installed conditions generating no conflicts with other building trades.
- Clash detection will only come into the picture when all the building design trades (Architectural, Structural, Mechanical, Electrical, Plumbing, Fire Protection, and others) are integrated into the BIM model.
- RUNNING CLASH DETECTION TEST
- Open the Architectural model already created in Naviswork.
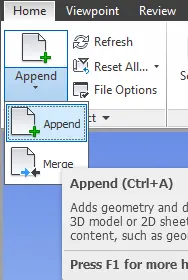
- Select append on home tab and append the structural model to the Architectural model.
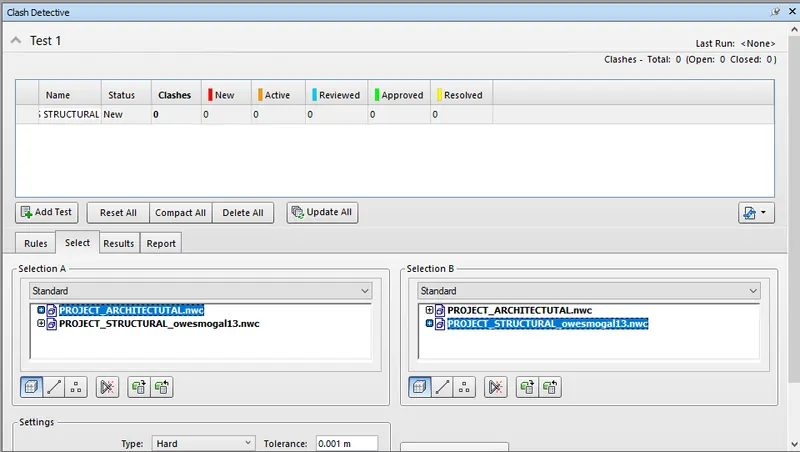
- Run the clash detection select.
- Select add test in the window of clash detection and select Architectural in Standard A and structural in Standard B.
- Click on start test.
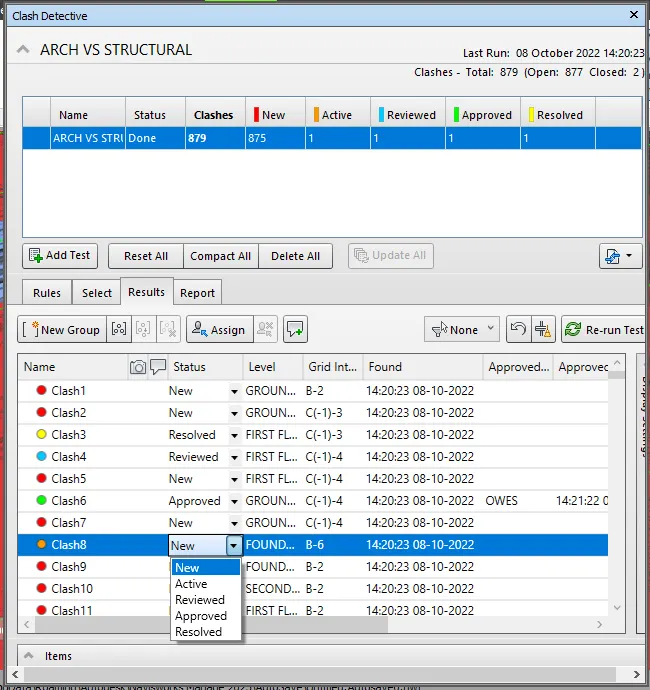
- Number of clash will be shown on the tab.
- Allocate the clash as active, reviewed and resolved by studying and making the necessary changes in the model.
- Based on the preference the colour coding will be changed as green to approved, red to new clash, yellow to resolved.
- APPEND OPTION ON HOME TAB
- CLASH DETECTIVE WINDOW
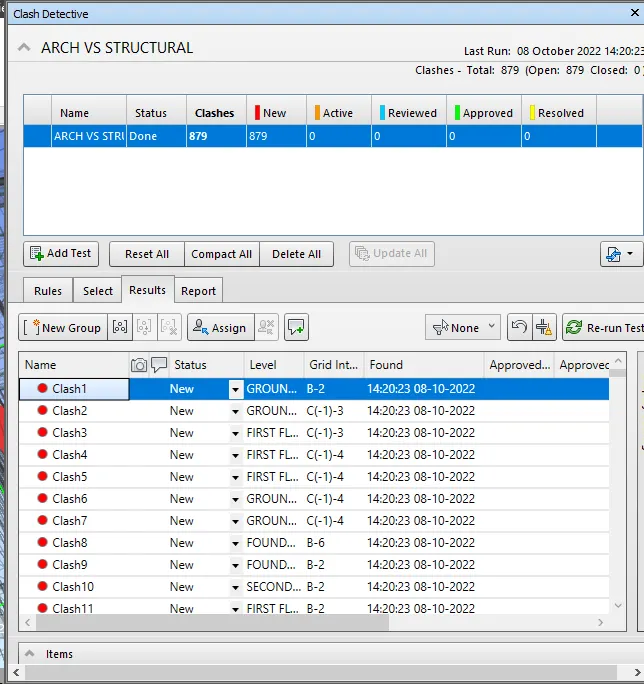
- ASSIGNING THE STATUS OF CLASHES
-------------------------------------------------------------------------------------------------------------------------------
5. Using the Timeliner feature in Navisworks prepare a schedule for the project developed in week 6 to 8 by adding reasonable assumptions for task start date and end date and simulate the task completion as a visual simulation.
ANS.
- PREPARING SCHEDULE IN NAVISWORK MANAGE
- Load a model into Autodesk Navisworks in the usual way (see Open Files for more information), and then click Home tab Tools panel Time Liner.
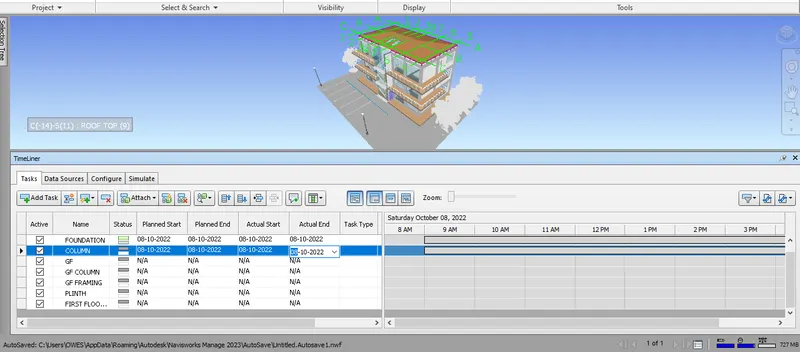
- Create some tasks, each having a name, start and end date and a task type. You can add tasks manually. Alternatively, click Auto-Add Tasks on the Tasks tab, or right-click within the Tasks area, and create an initial set of tasks based on layer, item, or selection set names.
- Attach objects in the model to tasks.
- Simulate your schedule. You can visualize your model at any date in your schedule with the currently active tasks highlighted. Run through the entire schedule using familiar VCR controls.
- Keep up to date with changes in your project. Save your project as a Autodesk Navisworks NWF file. Open the NWF and Synchronize Tasks with Project Changes.
- SCHEDULING THE WORK
-------------------------------------------------------------------------------------------------------------------------------