Usage of Navigation tool , Timeliner and Clash Detection test using Naviswork
CHALLENGE WEEK - 11
REVIT
Question no. 1: Use the Architecture/ Structure Project file developed by you in Week 6 to 8. Export the Revit architecture and structure model to Navisworks Cache file following the export settings discussed in class
- AIM:
- To export the architecctural and structural drawing to anviswork cachefile.
- Procedure:
- Initially open the revit software.
- Then open the architectural drawing that was created in week 6 which was used for project 1.
- Then using the architecture building.
- We have already downloaded the naviswork eporting tool Naviswork NWC.
- Now go to file tab in the left corner of the revit interface.
- Then in that go to export option.
- In export option we will find a naviswork logo with NWC text.
- Now clicking on it.
- It will start to export.
- And this will ask for a location to save the exported file.
- We can choose the required space in the computer.
- In the same way,
- Open the structural drawing that was created in week 6 which was used for project 1.
- Then using the file
- Now go to file tab in the left corner of the revit interface.
- Then in that go to export option.
- In export option we will find a naviswork logo with NWC text.
- Now clicking on it.
- It will start to export.
- And this will ask for a location to save the exported file.
- We can choose the required space in the computer.
- And this is how exporting the revit file to Naviswork format works.
- Result
- Thus the architectural and structural drawing from week 6 to 8 was successfully exported to Naviswork format.
Question no. 2: Use Navigate Tool to walk around the model and walk through the rooms created and record your moving as animation in your Navisworks file
- AIM:
- To use navigate tool to navigate around the model
- Procedure:
- Initially open the naviswork software.
- Now open the cache file that was exported from the revit software.
- Which contains the architectural drawing.
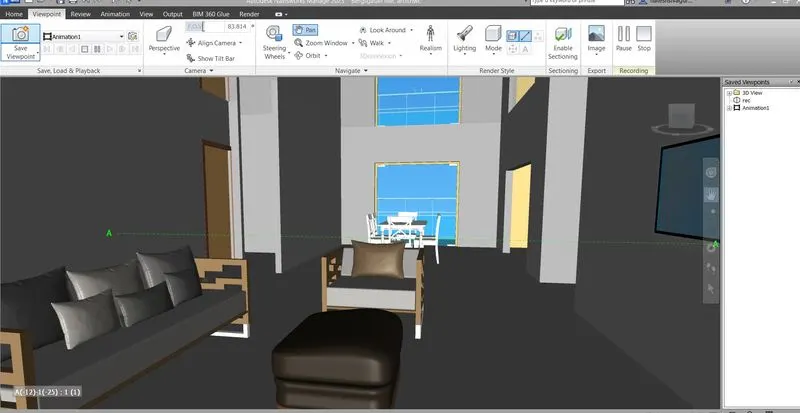
- Then in the tool tab go to the viewpoint menu.
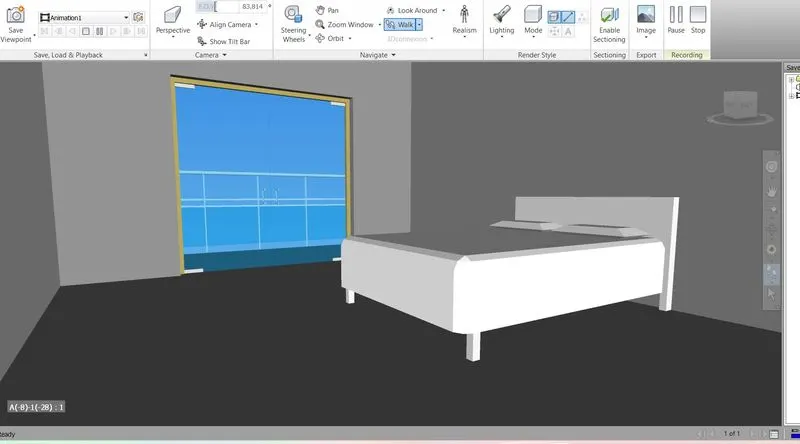
- In the viewpoint select the walk option.
- After selecting it.
- It takes to the workplane in which you can pan to enter to the model.
- And select the walk option and move teh mouse to walk through the model.
- On the left corner there is a option called save viewpoint.
- Selecting that we get a dropdown panel.
- In which there is an option called recode.
- Select the option and name the recording.
- And start recordinga dn move through the model to recod the walkthrough.
- And the recoding can be paused and resumed.
- And finally teh recording is saved in the file.
- Result
- Thus the walkthrough was created and was navigated through the model.
Question no. 3: Use Navigate tool to use Realism feature to walk through the model and record your moving as animation in Navisworks file
- AIM:
- To use navigate tool to use realism feature to walthrough the model.
- Procedure:
- Initially open the naviswork software.
- Now open the cache file that was exported from the revit software.
- Which contains the architectural drawing.
- Then in the tool tab go to the viewpoint menu.
- In the viewpoint select the realism option.
- After selecting it.
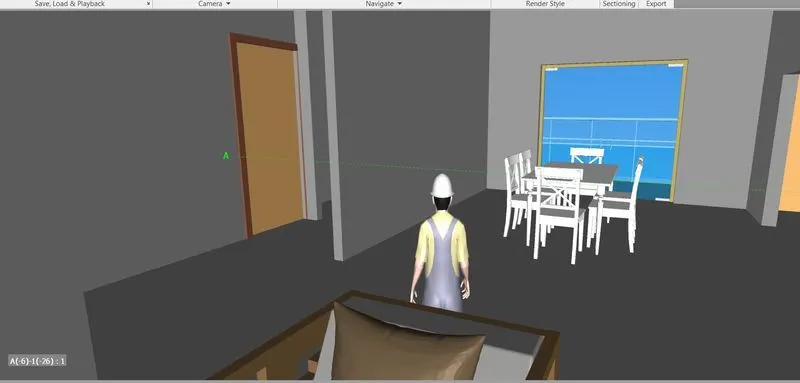
- In the realism dropdown you can check the third person option.
- Then after selecting it you will see a graphics showing a man walking ahead.
- Then same as the walkthrough option.
- You can scroll the mouse to walkaround the model.
- Sameway as said before you can record the walkthrough
- Result
- Thus the walkthrough with realism was created and was navigated through the model.
Question no. 4: Embed both architecture and structure *.nwc file to your Navisworks file. Create a clash detection test between the two models
a. Run the Clash Detection Test
b. Study the clashes between the two models
c. List which of the clashes could be approved
d. List which of the clashes could be neglected ( will be taken care later)
e. List which of the clashes can be resolved
f. Save the results after color coding the clashes to the Navisworks file
g. In case of resolution annotate the clash and save the view to defined views in Navisworks
- AIM:
- To create teh clash detection test
- Procedure:
- Initially open the naviswork software.
- Now open the cache file that was exported from the revit software.
- And then go to home tab.
- In home tab you can find an option called append.
- Using append you can insert the structural model that was created beforew for the architectural model that wasn inserted earlier.
- After appending.
- you can see the structural image attached to the architectural model.
- For exact insertion the base point of both architectural and the structural model should be same.
- Then after this process.
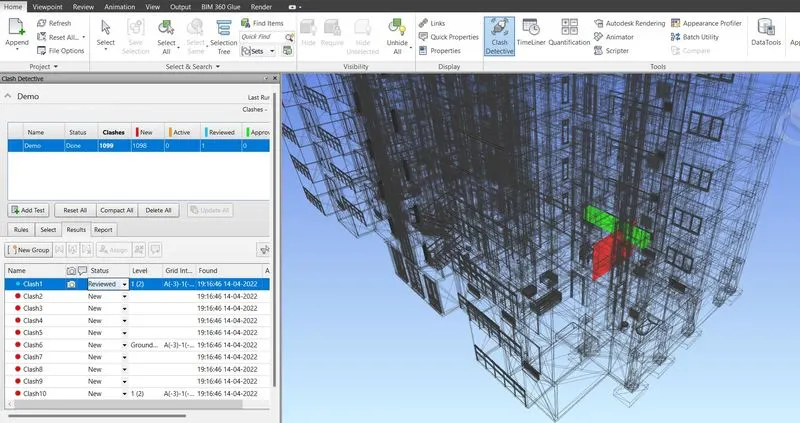
- In the same home tab you can find an option called clash detective.
- Now select that
- After selecting it you will find a panel opened.
- In teh panel there are option for conducting the test.
- Now create a name for the test.
- And then select the required file to be tested for clashes.
- After givin start test.
- The test beig compleetd, we can find teh clashes occureds in teh model .
- No.of clashes occured in teh model is shown.
- And the places of the clash is shown.
- By selcting each clash you will be directed to the spot of clash.
- Now youc an review, resolve, neglect the clashes according to teh type of teh clash occured.
- Result
- Hence teh clasdetection on teh model was created.
Question no. 5: Using the Timeliner feature in Navisworks prepare a schedule for the project developed in week 6 to 8 by adding reasonable assumptions for task start date and end date and simulate the task completion as a visual simulation. Record it and save the timeline simulation to Navisworks file
- AIM:
- To prepare a schedule using timeliner option in naviswork.
- Procedure:
- Initially open the naviswork software.
- Now open the cache file that was exported from the revit software.
- And then go to home tab.
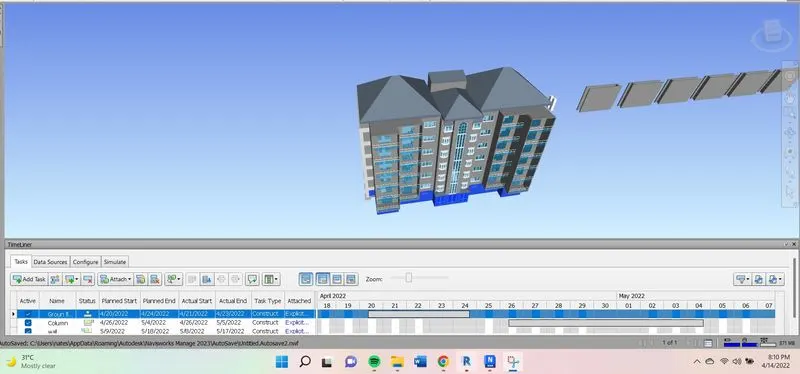
- In home tab you can find an option called timeliner.
- After selecting the timeliner.
- On the left side of teh screen there is an option called selection tree.
- Or if it is not available on the workplane it can also be found in home tab.
- After selecting it.
- You can view the catagories present in the model.
- Now in the timeliner select teh addtask.
- After selecting add task, name the tasks accordingly.
- these tasks are nothing but the schedules to be created for specific works from initiation of teh project.
- And afetr entering the task there is planned start and end date, and actual start and end date.
- You can enter the dates according the work date schedules.
- Then after entering the dates select the task type as per the requireements.
- Then attch teh required data such as if creating casework for the paln is the first task then need to attach the elements categories from teh selection tree.
- Like this we need to create various tasks and attach the categories to the attachments.
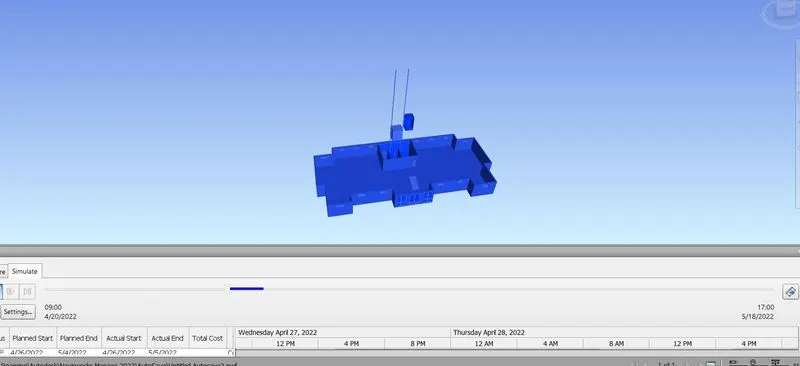
- After these creation of tasks we can select the stimulation option.
- And select the play button.
- After which you see the creation of teh model as per the input you have given.
- According to teh time and date entered.
- Result
- Thus the schedules were created using the timeliner option.