Usage of Collaborate tool in REVIT
1. Setting project base points and shared coordinates:
Aim: Setting of shared coordinates and project basepoints in architetcural template
Procedure:
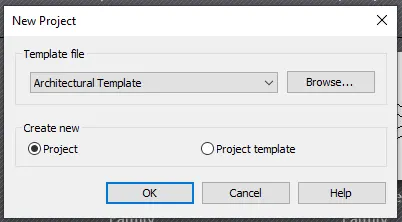
Step 1 : Open rivet, click on new project.
Step 2: In the drop down list of template file click on architectural template and click ok.
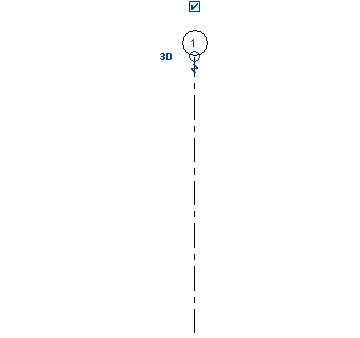
Step 3: Click on architectural tab and on grids, and draw the grids ,click from bottom to top for the vertical grid and name it as 1.
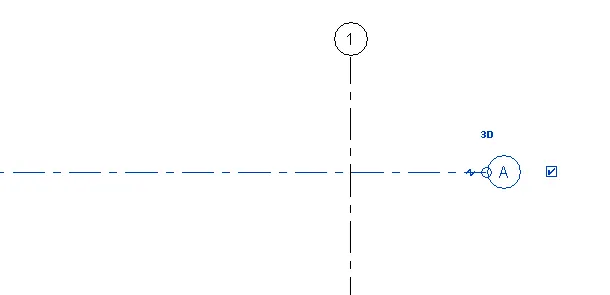
Step 4: For horizontal grids, draw from left to right and name as A .
Step 5 : Now go to manage tab and click coordinated from the project location tab and from drop down list click on specify coordinates at a point.
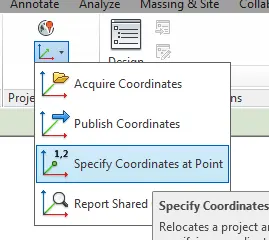
Step 6 : Click on the intersectio of grid 1 and 2 , now a dialogue box apperas and put the value as 0, 0 for East /West and click ok. Now the grid one coordinates is set to 0.
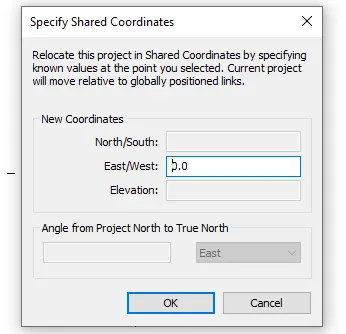
Now the coordinates is set as 0,0 so that we can use this as the common coordinates when working in structural template.
Step 7 : For the base point, type "VG"visibility / graphics dialouge box appears ,click on site and expand the options.
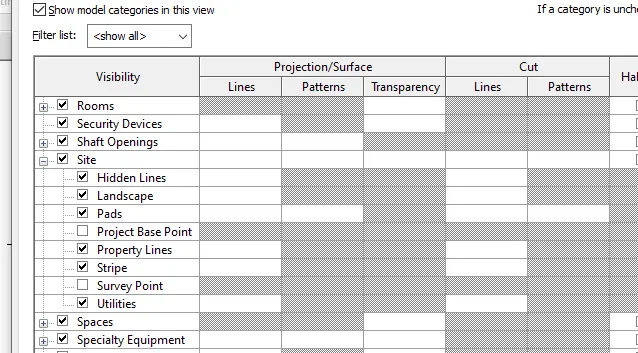
Step 8 : Tick the project base point , click on apply ok so that it appears on the Rivet screen.
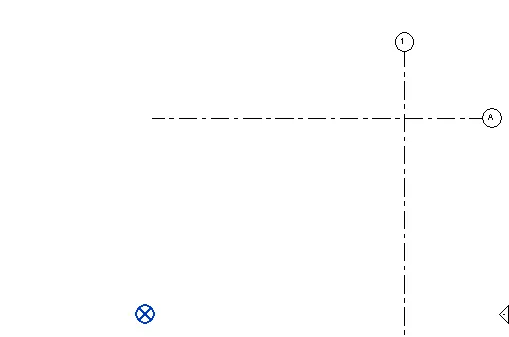
If we double click on the base point , the coordinates of the particular point apperas.
Step 9 : Drag and place the base point on the intersection of the grids and double click it. We can see that the coordinates are 0,0 for North/ south and East/ West.
Result : The shared coordinates and project bse points is set.
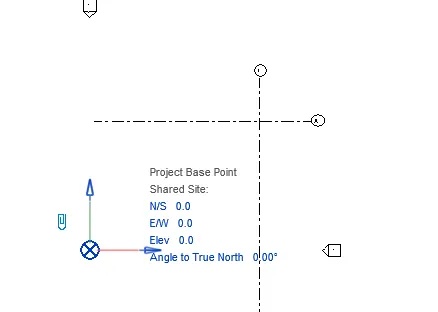
2. Creating project basepoint and shared cooridantes in structural template
Aim : To create project basepoint and shared coordinates in structural template
Procedure:
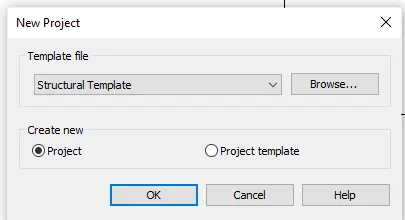
Step1 : Create a new file , click on structural template.
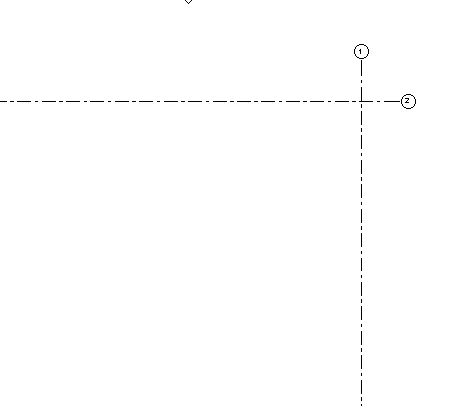
Step 2: Draw grids in the structural template1 and A.
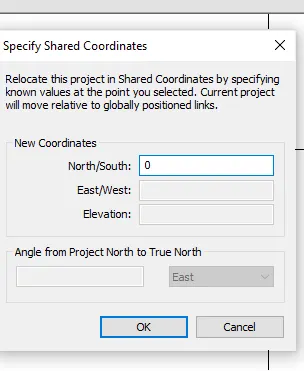
Step 3: Go to manage tab , click on secify coordinates at a point , click on the intersection of the grids and give the value as 0.
Step 4: To set project base point, type VG command ,and tick the project base point.
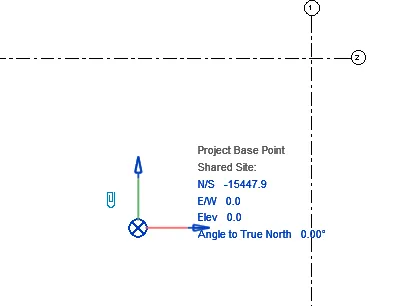
Step 5 : Put 0 value for all points in the base point.
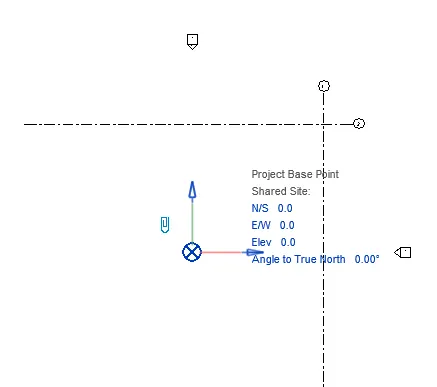
Result: Now the shared coordinates and base point is created in the structural template.
3. Making architectural model as a central model file using collaborate option
Aim : To create architectural model as a central model file using collaborate option.
Procedure:
Step 1: Re-open the architectal model, by clicking on file- open.
Step 2: Go to collabortae tab , click on collaborate .
Step3 : Save the file and collaborate dialogue box appears.
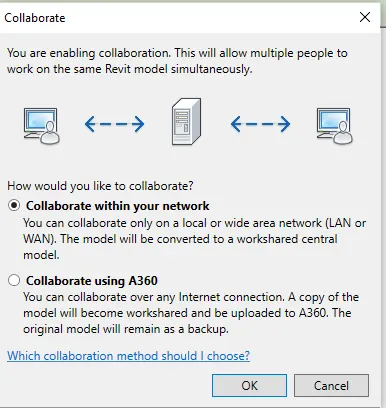
Step 4 : Click on collaborate within your network and click ok.
Step 5: Click on save button, then dialouge box will appear.
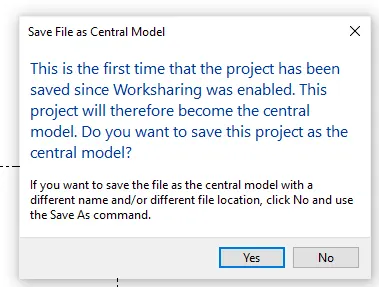
Step 6 : Click yes to save this as the central model.Now the file is saved as central model file.
Result : The collaborate tool is used to save the file as central model file.
4. Creating grids in longitudinal and transversal direction
Aim : To create grids in longitudinal and transverse direction.
Procedure:
Step 1: Open the same architectural model.
Step 2: Click on grids under the architectural tab and create more grids.
Step3 :Click on lines and draw the grids with a specific distance to left for the vertical grids, here 9000 distance is taken.
Step4 : Similarly draw from top to bottom for the horizonal grids,here 8000 is the given distance
Step5 : Rename the grids as 1to 5 for the vertical and Ato D for the horizontal.
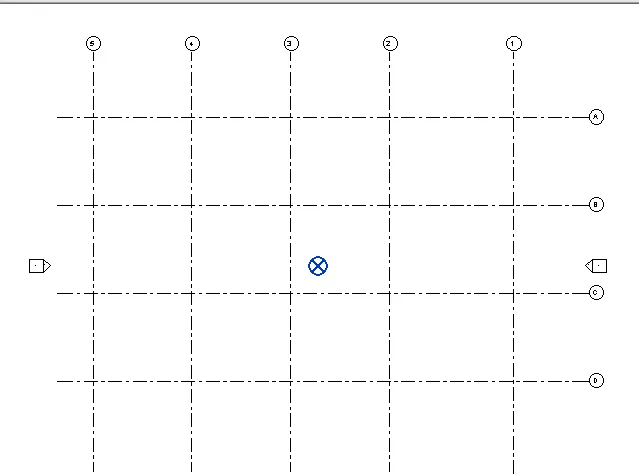
Result: Horizontal and transverse grids are created.
5. Synchronising changes on local copy to central file
Aim : To synchronise changes on the local copy to the central file.
Procedure :
Step 1: Open the architectural model.
Step 2 : Click on collabortae tab and click on synchronise with central.
Step3 : From drop down list , click on synchronise now.
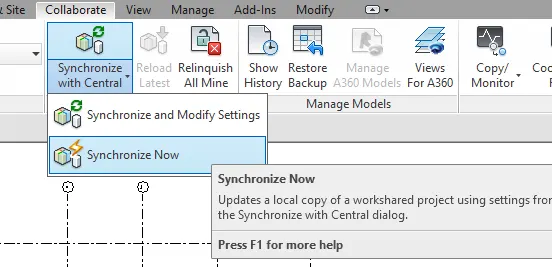
Step 4: Now it will synchronise with the central file, which is the architectural model.
Step 5: In synchronize and modify settings we can define the path of the central file and tick the compact central model.
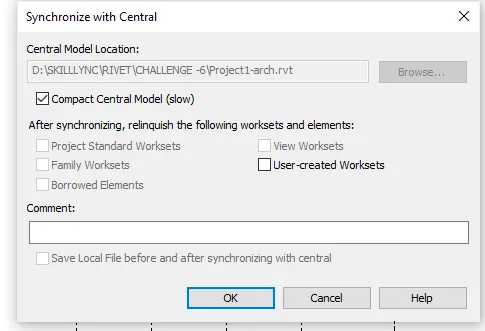
Result : Now the local file is synchronized with the central file.
6. To save the structural model as central file.
Aim : To save the structural model as a central file.
Procedure:
Step 1 : Open the structural model .
Step 2 : Click on collaborate tab and click on collaborate.
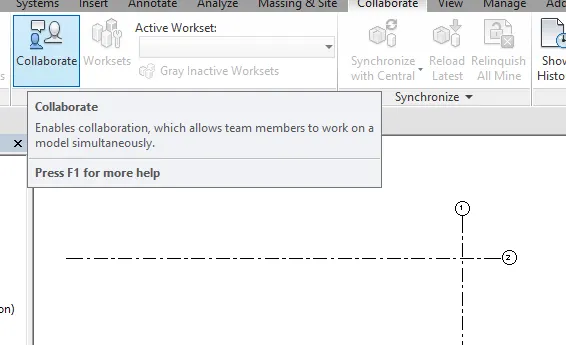
Step 3: Click on collaborate within your network.
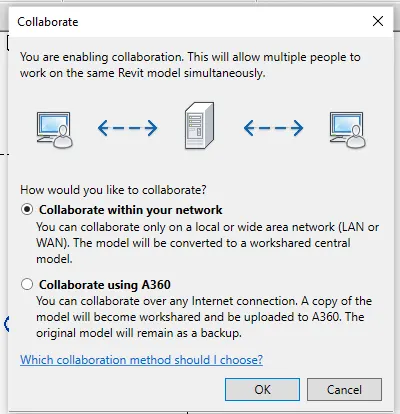
Step 4: Then click on save button.
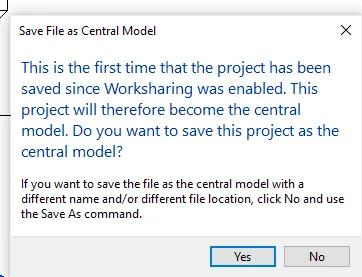
Step 5 : Click yes to save as central file.
Result : The structural model is saved as central model file.
7. Use of copy monitor tool
Aim : Using copy monitor tool copy the grids in architectural model to structural model.
Procedure :
Step 1: Open the structural model.
Step 2: Click on insert tab , and click on link rivet.
Step 3: Select the architectural file from the dialogue box.
Step 4: Now the architectural grids will appear on structural model.
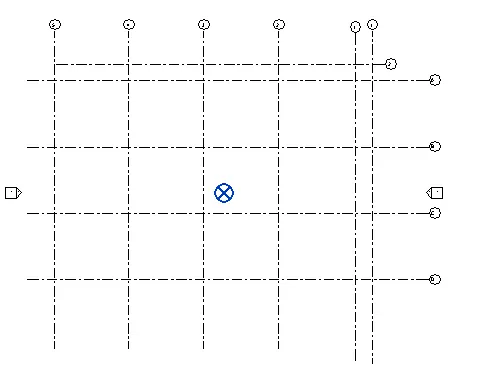
Step 5 : Go to collabrotae tab, click on copy/ monitor
Step 6 : From drop down list , click on select link.
Step 7 : Then select the architectural link loaded into the structural model.
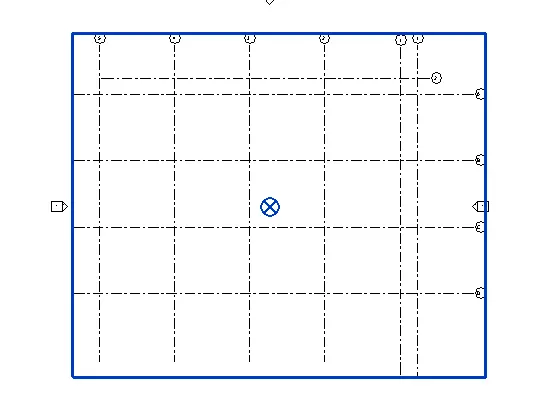
Step 8 : Click on copy , tick multiple option
Step 9 : Select all the grids from the architetcural model
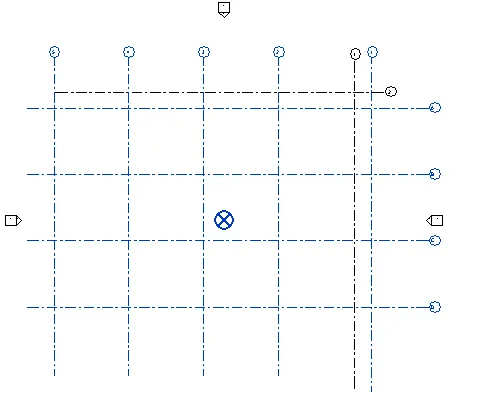
Step 10 : Click on finish and tick the finish button on the top.
Step 11: To check if it is copied type VG command , go to rivet link tab.
Step 12 : Uncheck the box for architectural model.
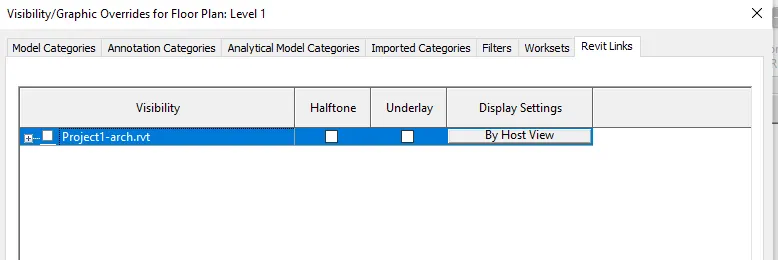
Step 11 : Click apply and OK, we can see that the architetcural grid is visible as it is copied tothe structural model.
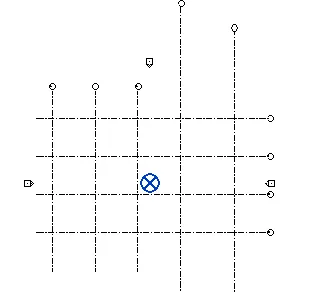
Result : Using copy monitor tool the architectural grids are copied to the structural model.
8. Creating new construction template, making it as central file , then linking the architectural and structural model created earlier.
Aim : To create constrcution template making it as central file , then linking the archutetcural and structural model
Procedure:
Step 1: Open a new rivet file, click on construction template.
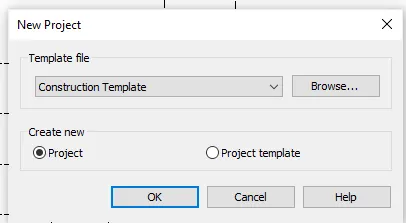
Step 2: Click on collaborate and save it as a central model file.
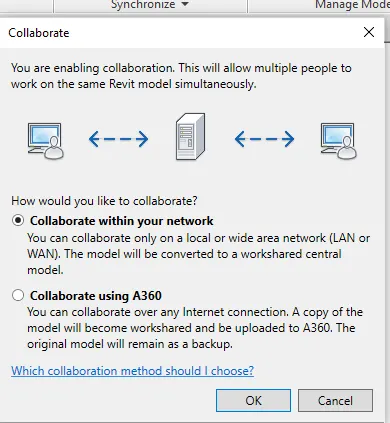
Step 3 : Click on collaborate within your network and click ok,
Step 4: Click on save button , click ok for the dialgoue box , now the file is saved as central model file.
Step 5: To link the architectural and structural model to the new model, click on insert and rivet link
Step 6 : Link the architetcural model first .
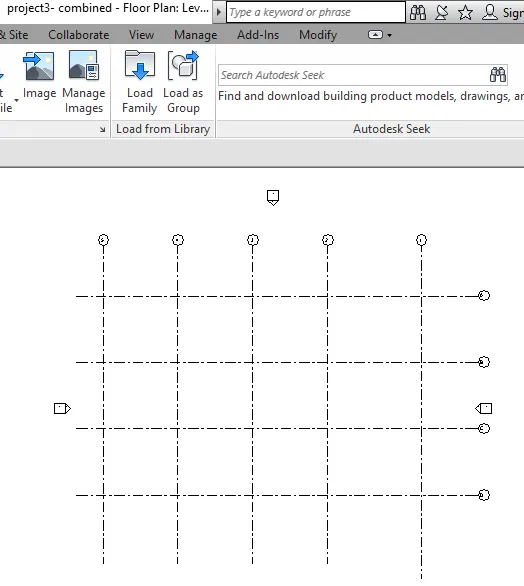
Step 7 : Select the structural model in the rivet link, now the structural model is also uploaded in the new model.
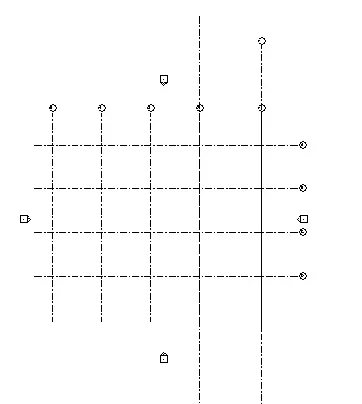
Result : The architetcural and structural model is linked to the combined model.
9. Checking the grids form the architetcural and structural model match in construction template
Aim : To check the grids from the architetcural and structural model matched in the construction template
Procedure:
Step 1: Check the grids in the above question.
Step 2 : We can see that the architectural grid and the structural grid are in same line in the combined model.
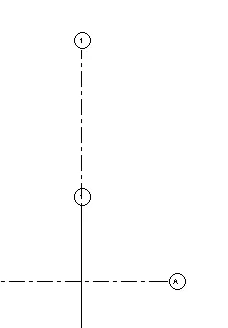
Step 3: If it is not on the same line , go to shared coordinates and make the grid on the same line.
Result : The architectural and structural model grids are in teh same line.
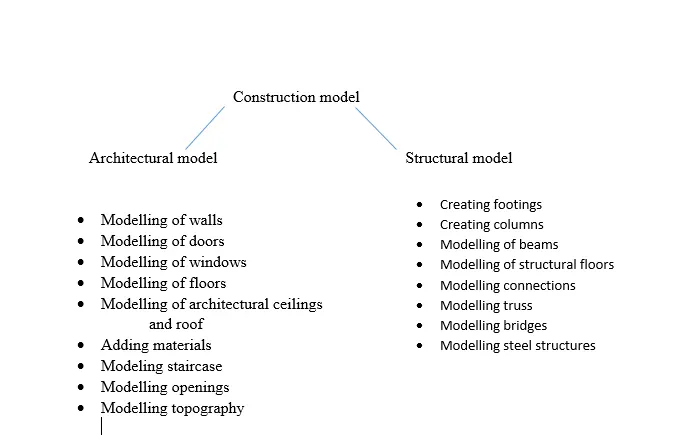
10. Flow chart in terms of construction model, architectural model and stuctural model
Under constrcution model, two types of modelling comes- architetcural and structural modelling.
In architetcural modelling, the aesthetic beauty of the building is the main concern and in structural modelling it develops the framework of the structure and strength of the building .
Below is the project tree set up in terms of constrcution model, architetcural and structural model.
The number of person's working on a project depents on how large the project is, there is no limitation for number of persons working on a single project.
They can use rivet links to link the local files to the central one.
Eg: The architetcural, structural, Electrical, Mechanical teams can work on seperate models at their own pace and finally link to the central model to get the overall output.
It can save time and if any corrections is there they can seperately edit the chages in the local file and link to central .