Usage of Collaborate tool in REVIT
CHALLENGE WEEK - 6
REVIT
Question no. 1: Open an architectural template. Using the Manage tab set project base point and project shared coordinates for the project
- Aim:
- To create architectural project.
- To manage project base point and project shared coordinates.
- Procedure:
- To create a architectural project template.
- First open the revit software
- And then select new project and select architectural project template/.
- Then save it sas architectural project.
- Then go to the manage tab .
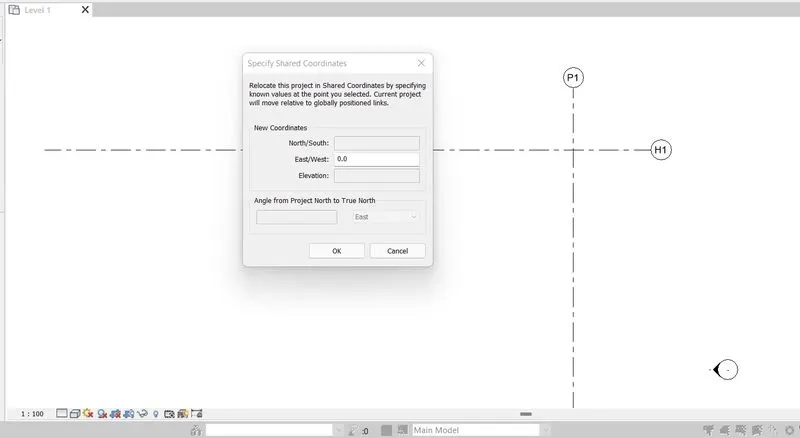
- Then select the project coordinates.
- Set the project coordinates to required values.
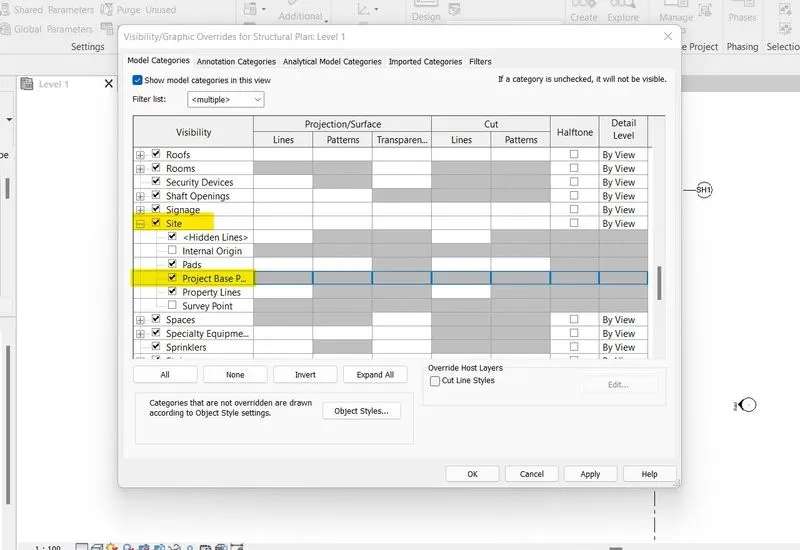
- Then select the Visual graphics setting.
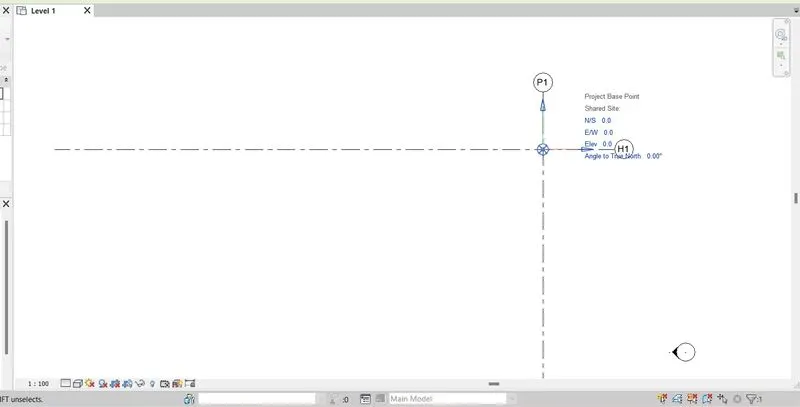
- And go to site and expand site and check the project base point.
- And set the project base point to required position.
- Result:
- Thus the architectural template was opened.
- Project coordinates and the project abse point was set.
- The done procedures were shown as clips.
Question no. 2: Open another new file but with a structural template. Using the manage tab set project parameters the same as the architectural model. Copy the parameters from the architectural model to the structural template or enter the parameters manually into the structural model
- Aim:
- To create structural project.
- To manage project base point and project shared coordinates.
- Procedure:
- To create a structural project template.
- First open the revit software
- And then select new project and select structural project template.
- Then save it sas structural project.
- Then go to the manage tab .
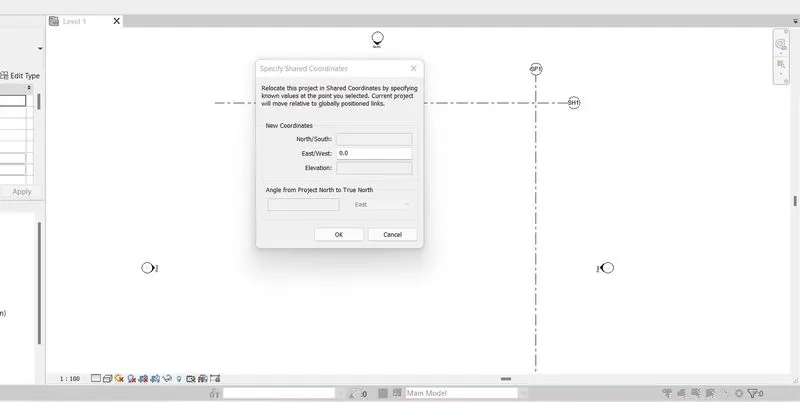
- Then select the project coordinates.
- Set the project coordinates to required values.
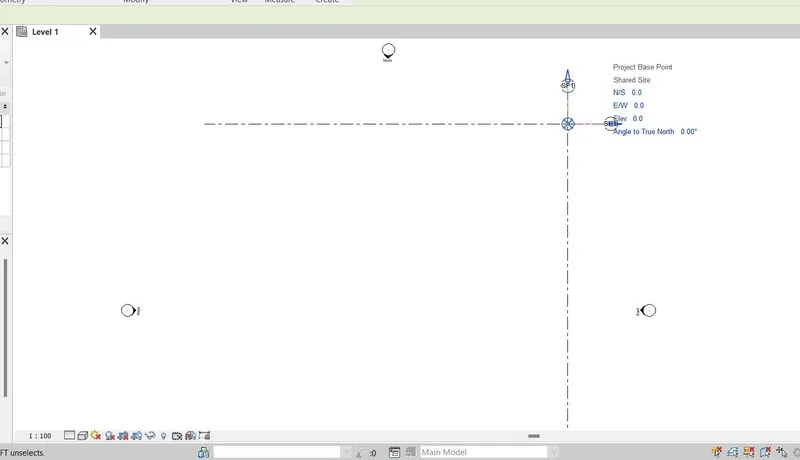
- Then select the Visual graphics setting.
- And go to site and expand site and check the project base point.
- And set the project base point to required position.
- Result:
- Thus the structural template was opened.
- Project coordinates and the project abse point was set.
- The done procedures were shown as clips.
Question no. 3: Re-open the architectural model. Using the tools under the Collaborate tab make the architectural model a central model (enabling simultaneous working on the model)
- Aim:
- To reopen the architectural project.
- To save the mmodel as central model.
- Procedure:
- First reopen the architectural file
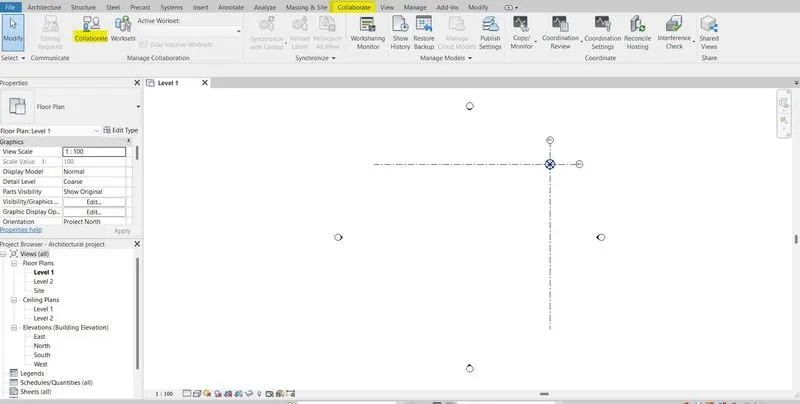
- And then select the collabrate option.
- Then go the collabrate.
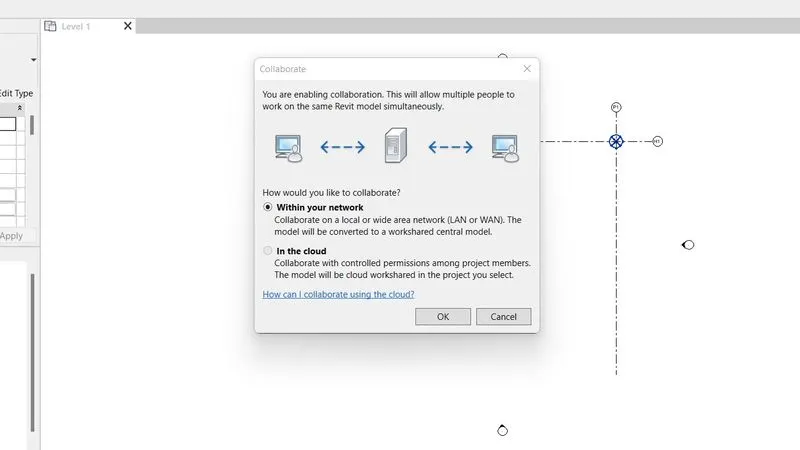
- Then it asks for saving it in your network or in the cloud.
- Choose as per your need.
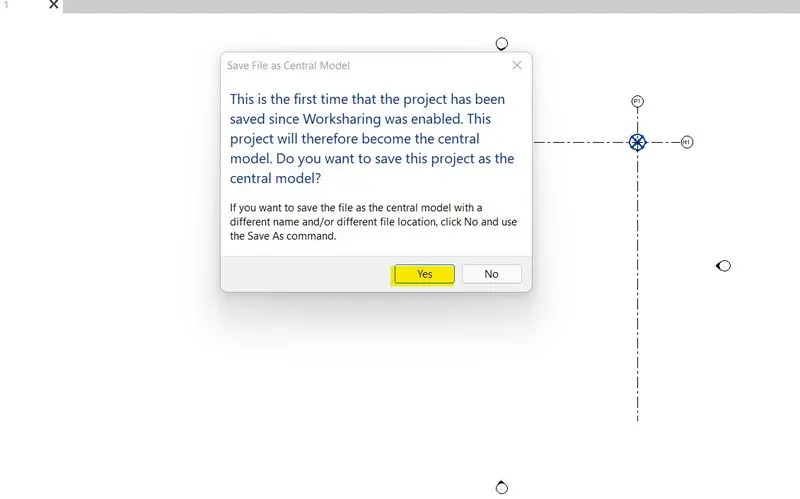
- Then save the file
- And it says it is saved as the central file.
- Result:
- Thus the file was save as the central file.
Question no. 4: Create the Grids Longitudinal and Transverse pattern for the project similar to the task done in Week 2
- Aim:
- To create grids longitudinal and transverse pattern
- Procedure:
- First reopen the architectural file
- And then go to the grids creation option.
- Like the process in week 2.
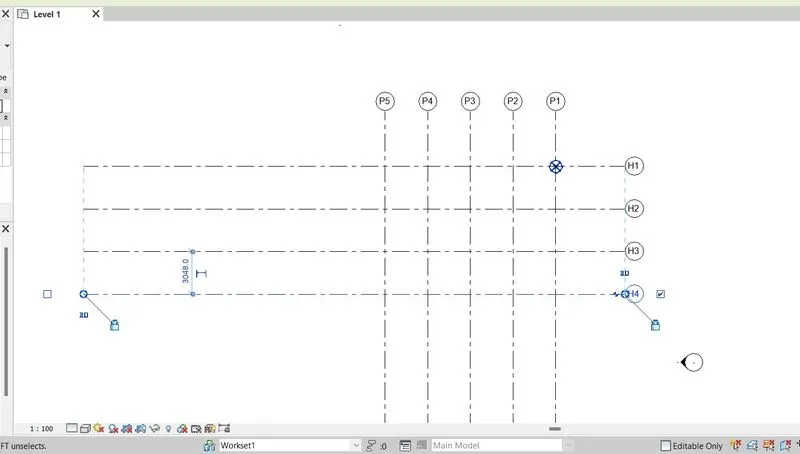
- Create the grids both longitudinally and transverse.
- And thus the required grids are drawn.
- Result:
- Grids were created both longitudinally and transverse.
Question no. 5: Synchronize the changes from the local copy to the central file of the architectural model.
- Aim:
- To synchronize the changes to teh central file from the local copy of the architectural model.
- Procedure:
- After opening the architectural file.
- The file has new updates.
- Thus sychronize to the main model.
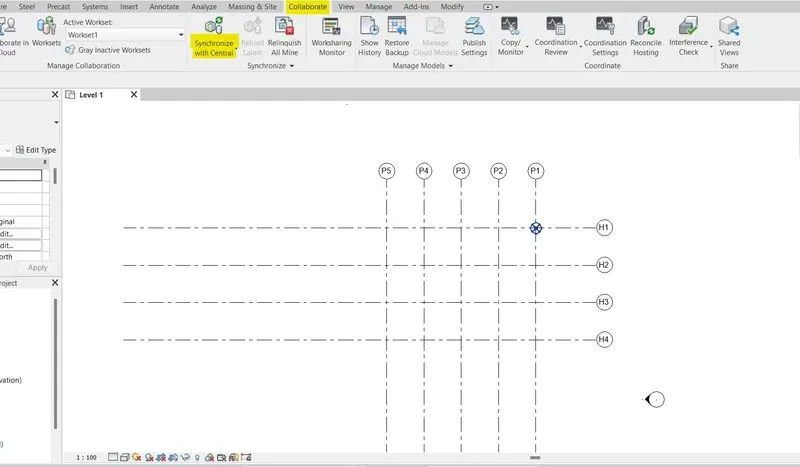
- Go to the collabrate tool.
- then in collabrate option.
- Choose the sychronize option.
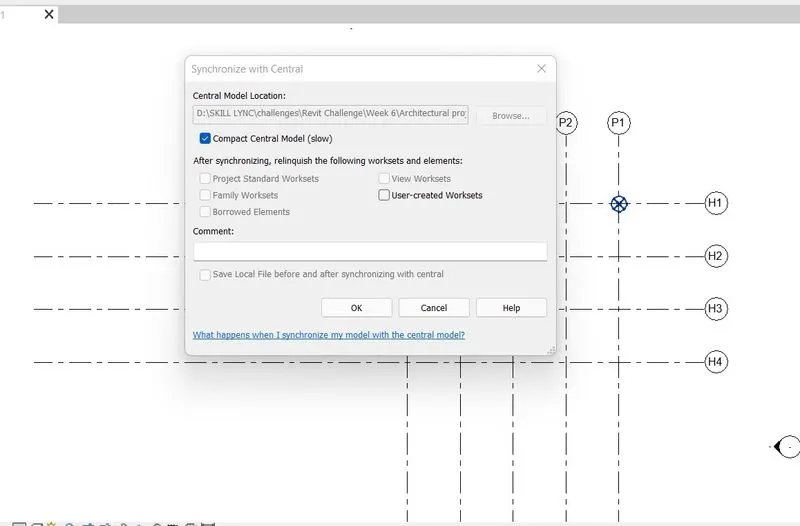
- Select the synchronize with the central.
- And thus the new updates were linked to the central file and saved.
- Result:
- Thus the new updates were linked to the central file and saved.
Question no. 6: Open the structural model and use the collaborate tools to save the model as a central file.
- Aim:
- To reopen the structural project.
- To save the model as central model.
- Procedure:
- First reopen the structural file
- And then select the collabrate option.
- Then go the collabrate.
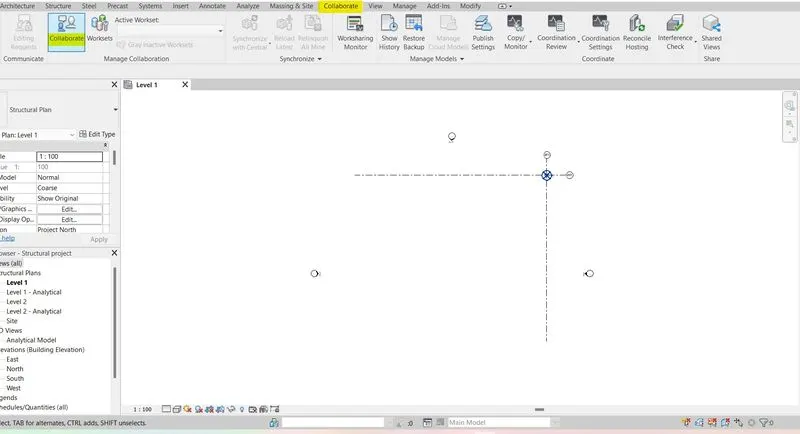
- Then it asks for saving it in your network or in the cloud.
- Choose as per your need.
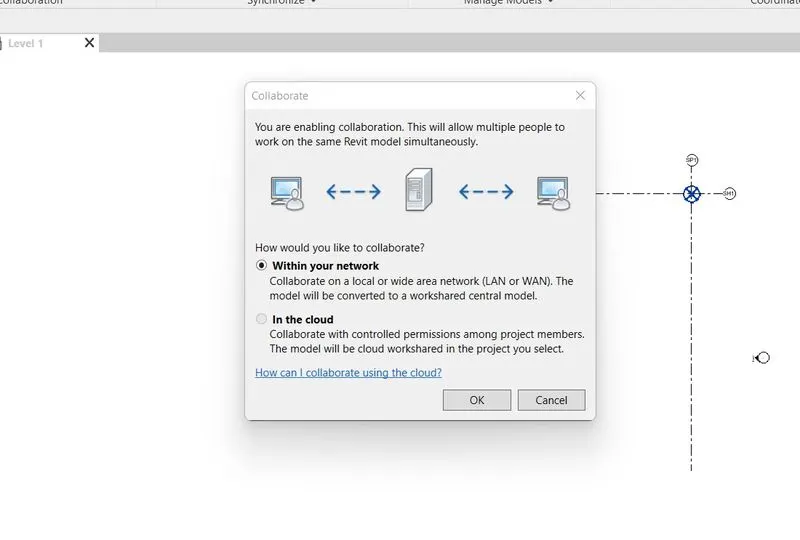
- Then save the file
- And it says it is saved as the central file.
- Result:
- Thus the file was save as the central file.
Question no. 7: Under the Collaborate tab, select the grids and levels from the architectural model, and using Copy Monitor try to copy the grids to the structural model. See what happens when the copy monitored grid is moved around in the structural model
- Aim:
- To copy the grids to the structural model.
- To link the architectural to structural model.
- Procedure:
- First open the structural file
- And then select the insert option.
- Then go the link.
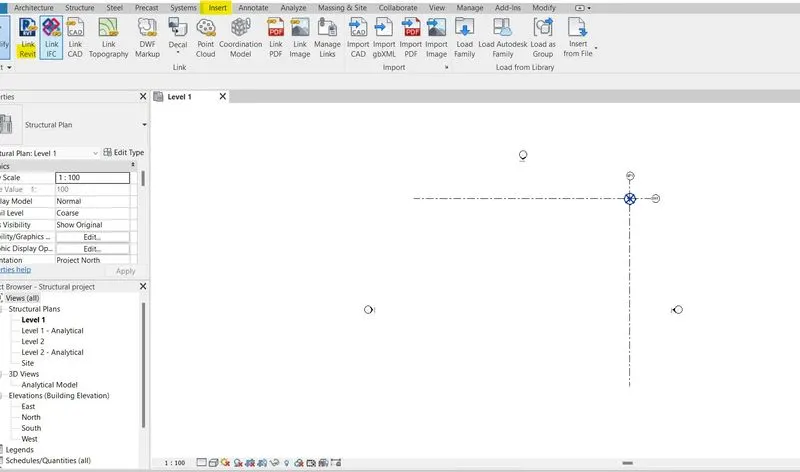
- Then link the revit file which has the archhitectural project.
- Then the grids are linked to teh structural project but not copied.
- So go to the collabrate option.
- And then select teh copy/monitor.
- Then in that again select copy and select the obeject needed to be copied.
- And then select finish to paste it to teh structural model.
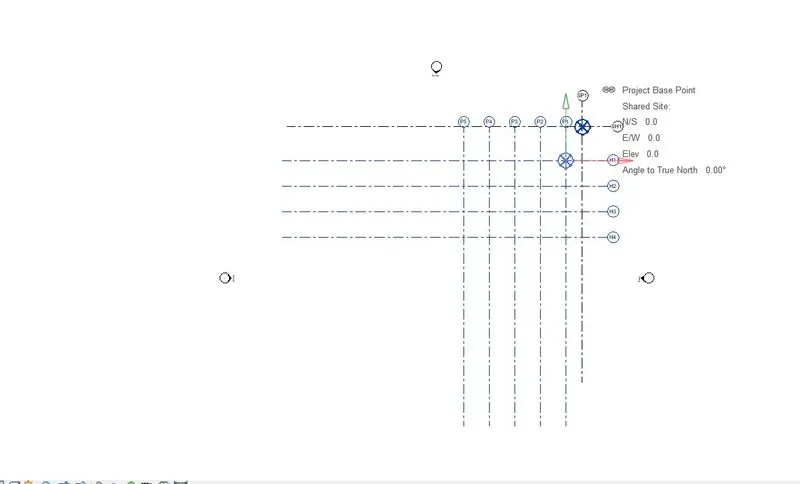
- Then the grids are moved to single point by adjusting the project coordinates.
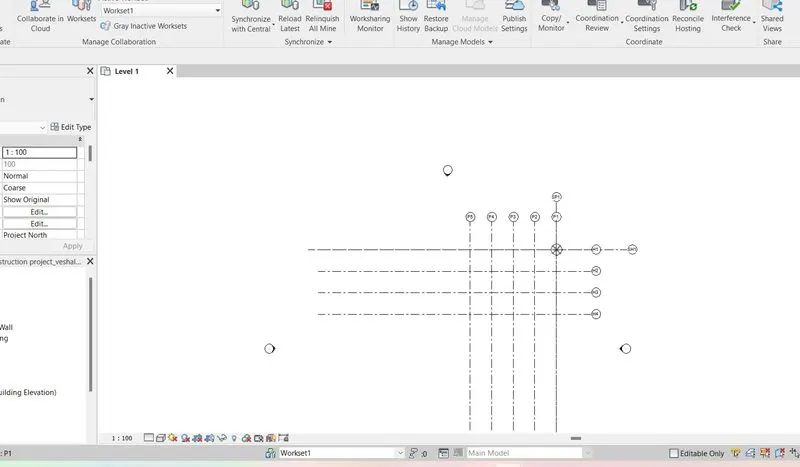
- Result:
- Thus the grids are copied and set in teh strctural file from the architectural file.
Question no. 8: Create another new file with a construction template. Save the new file as a central model. This file will include both architectural and structural model. Under the manage tab, Click manage links to link both architectural and structural files. Save the file and close all the files.
- Aim:
- To create construction project.
- To include both the architectural and structural template.\
- To link the files.
- Procedure:
- To create a construction project template.
- First open the revit software
- And then select new project and select construction project template.
- Then save it sas construction project.
- The creation and saving the file is as same as the process seen before.
- Then to include the files both architectural and structural files into the construction project.
- To include.
- Link the file from the link option as seen before.
- Then save them to teh central model.
- Result:
- Thus the construction template was opened.
- The architectural and structural files were included.
Question no. 9: Are the grids from structural and architectural model matching in the construction template created? If yes the model is set up for project 2. If not work on the shared parameters and linking options under Manage links
( Hint: origin to origin, by shared coordinates or by project base point to base point ) to link the models in an appropriate manner
- Aim:
- To check wheather teh grids from the architectural and structural template are set in the construtuion template.
- Procedure:
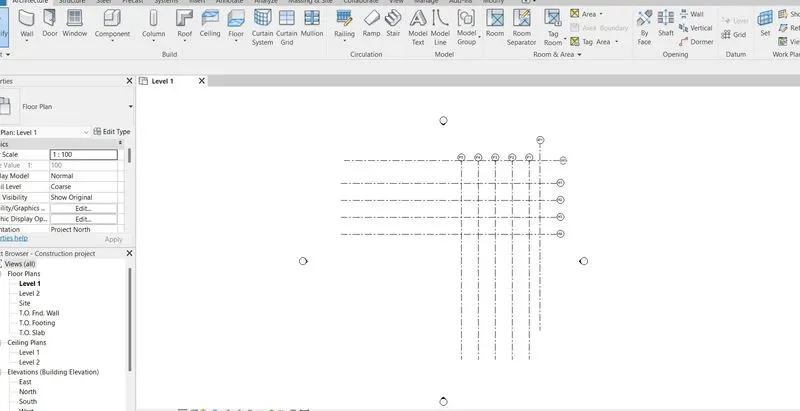
- The copied grids from the structural and architectural files were not properly set.
- hence by applying project coordinates using the manage tool.
- And the the grids were merged and set accordingly.
- Result:
- Thus the grids were set in the constrution template.
- Then theproject was saved such that it is used for project 2.
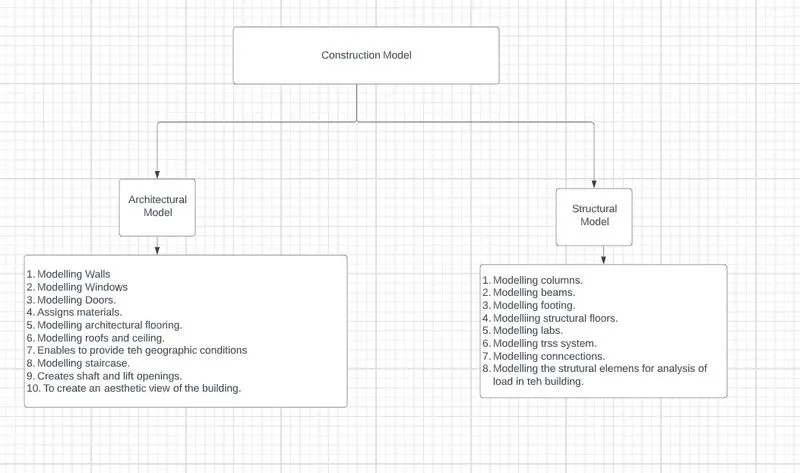
Question no. 10 : List a flow chart of a project tree set up in terms of Construction model, Architecture & Structure model, in this exercise and understand how many people can work on the same project using Revit simultaneously.
- Aim:
- To a flow chart of a project tree.set up in terms of architectural and structural model.
- To understand the amount of people can work on the project.
- Procedure:
- To create a flow chart.
- the required details are filled adn the flow chart was created.
- The amount of peeple taht can work simultaniously in a project depends on the project.
- There lot of user taht can access directly such as
- Architects, Structural engineers, MEP designers etc.
- Hence it is based on the project.
- Result:
- Thus flowchart was created.