REVIT_Usage of Elements & Properties_Week 3
1)
Aim: To arrange the floor for the layout and align grids to it.
Tools used:
- file
- open
- architectural tab
- floor
- grids
Procedure:
- Firstly open the layout file
- And then from the architectural tab select floor icon .
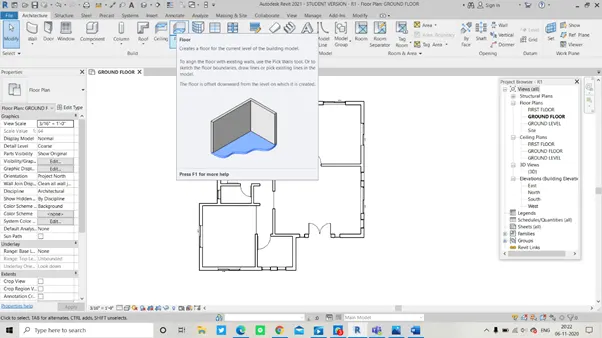
- Using this floor property to all the boundary walls of the layout we can create a floor bottom to the layout.
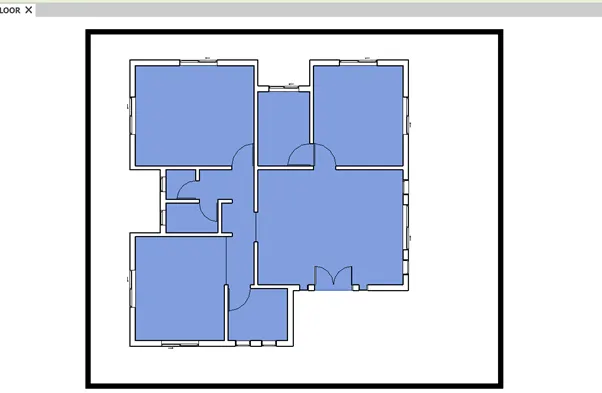
- after that from the same architectural tab select grids property and arrange transverse,longitudinal grids to the layout.
Result: Lauout drawn initially is properly fixed with floor and also grids are placed accordingly
2)
Aim: to select the thickness and material of the wall and also to veirfy whether the top and bottom of the wall is constrained exactly.
Tools used:
- file
- open
- wall
- select
- edit type
- offset
- 3d view
Procedure:
- firstly we have to open the file which consists of the layout.
- select the boundary walls from the layout .
- then from the properties browser we need to select the edit type window for the thickness as well as the material of the wall.
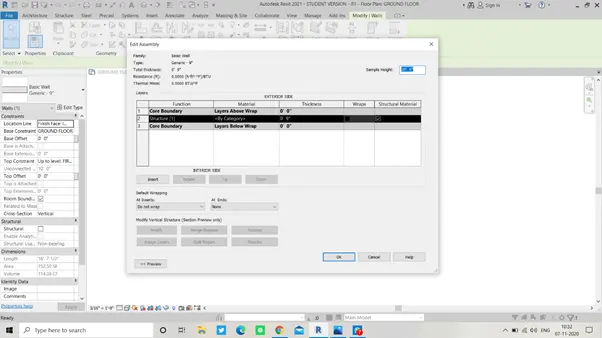
- and then do the specifications as required.
- to see whether the wall are properly constrained to the top and bottom (levels) we have two mehods.
- initially while drawing any layout we have to set the wall height to the next level so that it fits perfectly to the top beginning from the bottom.
- Or for an alternative we can go to 3d view and we have to select a wall and by using arrows on keyboard we have to adjust the wall exactly to the top and bottom.
Result: The boundary walls are selected with required thickness and also constarined accordinly to the top and bottom levels perfectly.
3)
Aim: To copy the model elements of the ground floor to the first floor with align property.
Tools used:
- file
- open
- modify
- copy
- paste with aligned levels
Procedure:
- open the drawn revit file from file bar .
- then select the whole ground floor layout along with floor and ceiling if drawn.
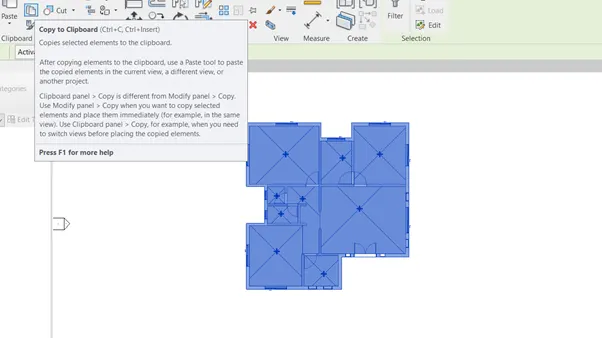
- then from the project browser open floor plans and select first floor plan
- then from the modify panel select the copy icon and select the whole ground floor plan
- and from the same modify panel select the paste with aligned levels property
- place the copied ground floor exactly aligned to the first floor.
Result: The ground floor plan is clearly imposed onto the first floor
4)
Aim: To use interior partition walls and create seperate rooms.
Tools used:
- file
- open
- wall
- edit type
- interior walls
Procedure:
- open the drawn revit file .
- Then rom the architectural tab select the wall command
- from the properties pannel choose edit type and selct the wall type of interior walls.
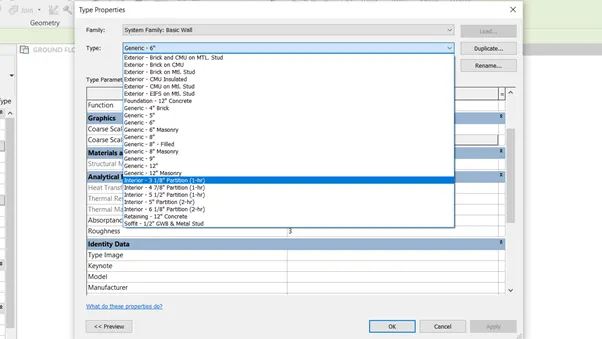
- from the interior walls select the selective size of walls which suits the layout and rooms.
- check the project units from the manage tool bar
- select the imperial units i.e., feet and inches.
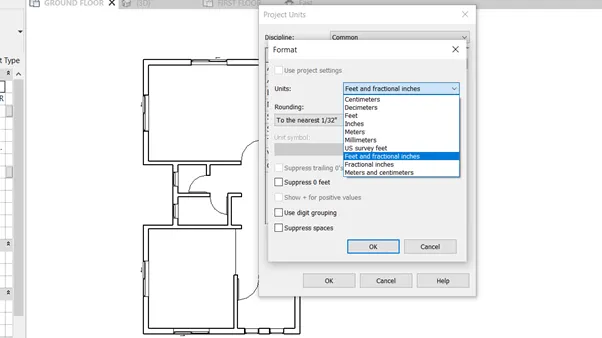
Result: Using the interior wall type of walls the layout is seperated into different rooms with imperial units successfully.
5)
Aim: To place different components to various rooms divided accordingly to the usage
Tools used:
- file
- open
- insert
- load family
- place a component(component)
Procedure:
- from the file tab open the file which is already present with seperated rooms
- choose the insert option from the quick access tool bar
- select the laod family tool and then load components from different libraries.
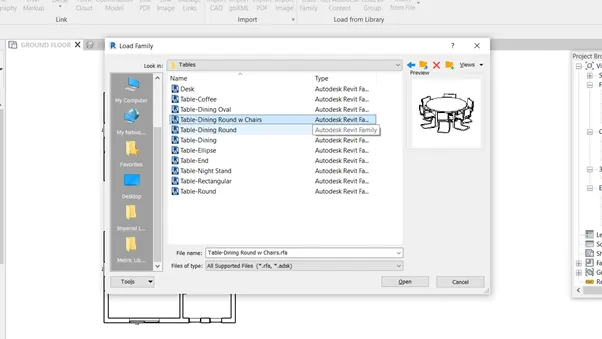
- you will find the loaded elements/components in the components tool available in architecture menu.
- choose place a componenta and choosing appropriate components for different rooms place the components accurately in the figure.
Result: different components are placed in different rooms accordingly to the usage.