REVIT_Dynamo Project- 3
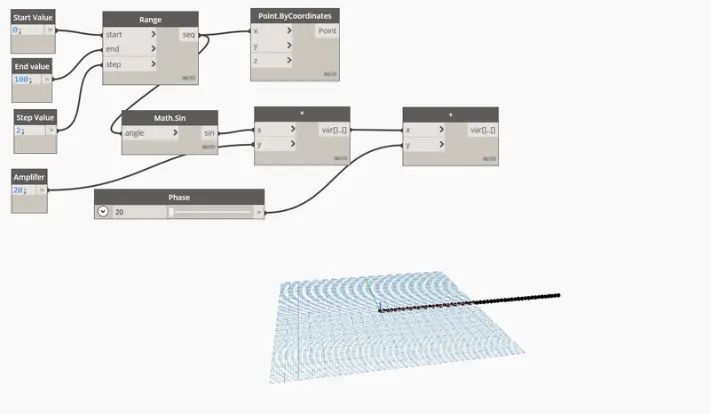
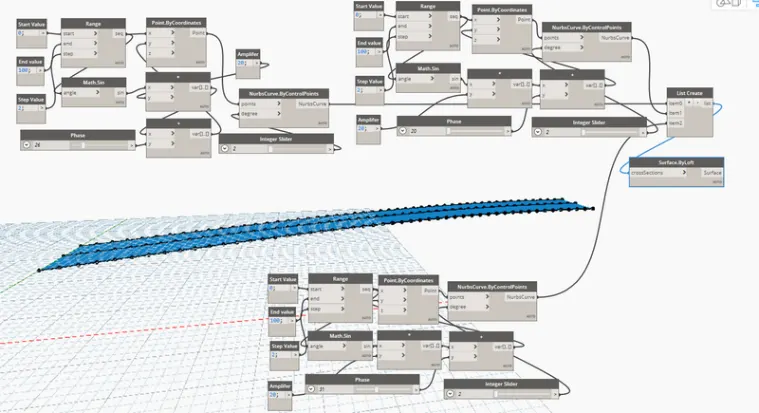
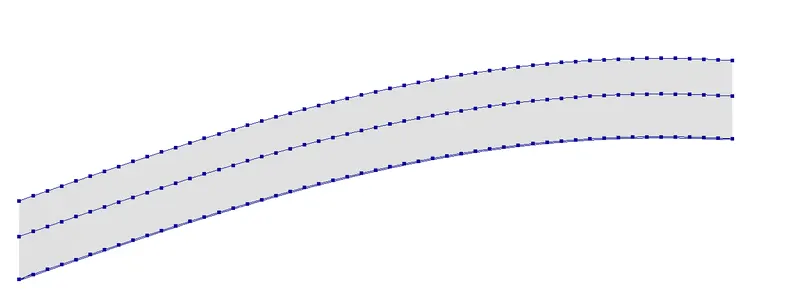
1) Using Dynamo create a set of sinusoidal points and create a curve and create a surface out of the curve.
ans)
Aim: To create a set of sinusoidal points and create a curve and create a surface out of the curve by using Dynamo
Tools Used:
- code block
- list
- line by star and end pint
- product
- add
- sine
- number slider
- point by coordinate
Procedure:
1)by using code block, range, and sine commands create a curve
2) amplify the curve using the product and add commands
3)create more similar curves by copy and paste the same commands
4)list all these notes and by using surface by loft create a surface on the curves combined.
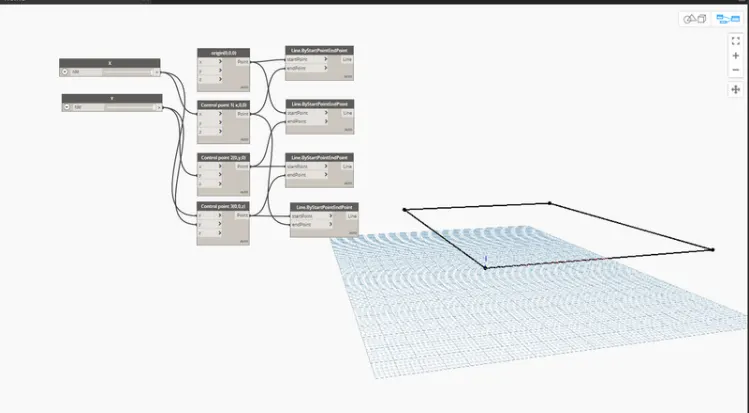
2) Create a conceptual layout of the floor plan in dynamo. Using the tools available in dynamo link the lines to appropriate model elements in Revit by choosing the wall types and wall parameters. Make use of the sliders to slide through the height of the wall and length of the wall.
ans)
Aim: To create a conceptual layout of the floor plan in dynamo. Using the tools available in dynamo link the lines to appropriate model elements in Revit by choosing the wall types and wall parameters. Make use of the sliders to slide through the height of the wall and length of the wall.
Tools used:
- number slider
- point by coordinate
- line by start and endpoint
- wall type
- wall by curve and height
- level
Procedure:
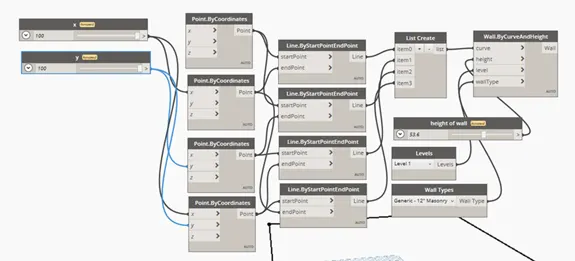
1)by using number slider and [pint by coordinate place 4 points as shown in the image
2)by connecting the 4 points make line by using line by start and endpoint
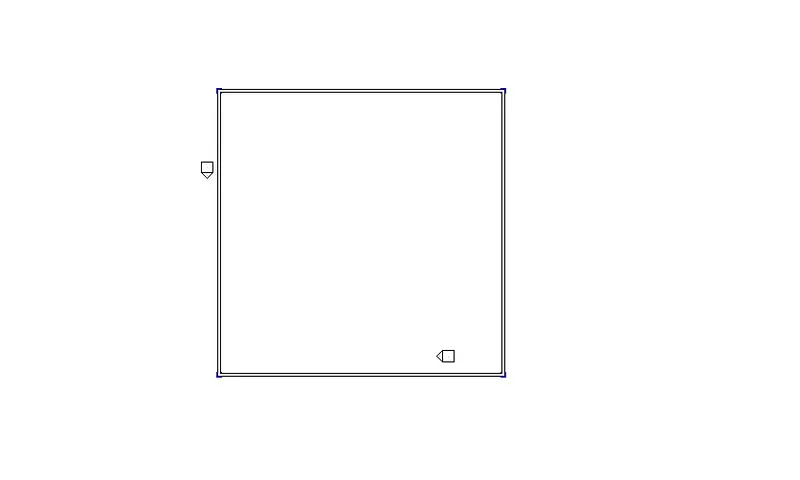
3)add all line to the list and use a wall by curve and height command to make a wall
4) to change the height or distance between walls use x and height of wall sliders
3) Create an array of model elements in Revit. Use dynamo to vary the properties of model elements by using the slider or code block
ans)
Aim: To create an array of model elements in Revit. Use dynamo to vary the properties of model elements by using the slider or code block
Tools Used:
- model elements
- number slider
- family instance set rotation
procedure:
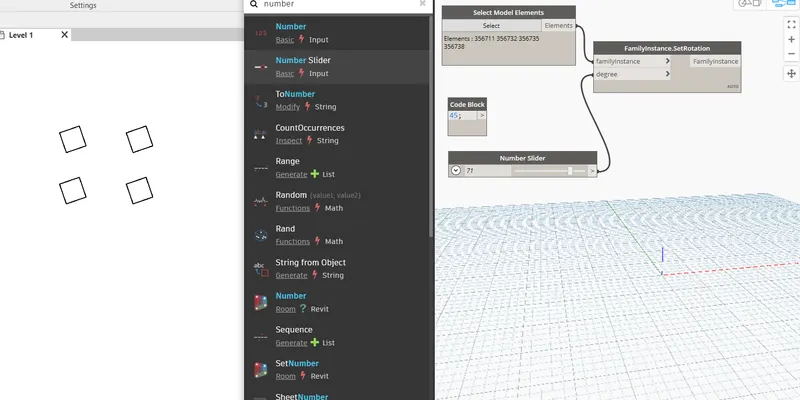
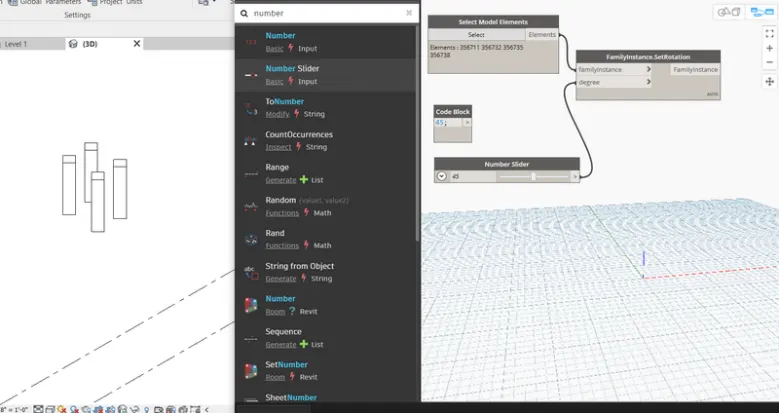
1) create an array of model elements in Revit
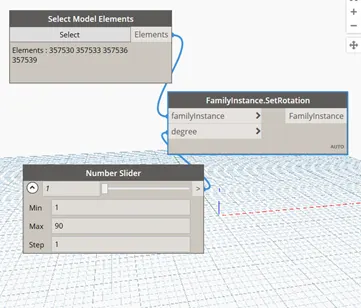
2) open dynamo and insert model elements command, number slider, and family instance set rotation
3)in dynamo in model elements there is an option select click on that and select the elements on the Revit file
4)now align as shown in image
5) now move the number slider to rotate the elements
4) Create a conceptual mass in Revit and develop a parametric column by dividing the surfaces and apply the concepts similar to those used in parametric walkway modeling. Use triangular bent or square-shaped panels to add a finish to the parametric column
ans)
Aim: To create a conceptual mass in Revit and develop a parametric column by dividing the surfaces and apply the concepts similar to used in parametric walkway modeling. Use triangular bent or square-shaped panels to add a finish to the parametric column
Tools Used:
- conceptional mass
- line
- create form
- divide surface
Procedure:
1)open new family of conceptional mass
2) go to north elevation and draw a line and specify points on the line
3)on the points draw polygons
4) select all items and use create form tool
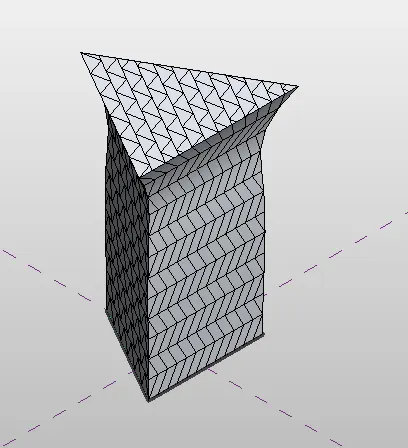
5) select the created mass and click divide surface
6)from properties slect triangle bent
7) parametric column is created
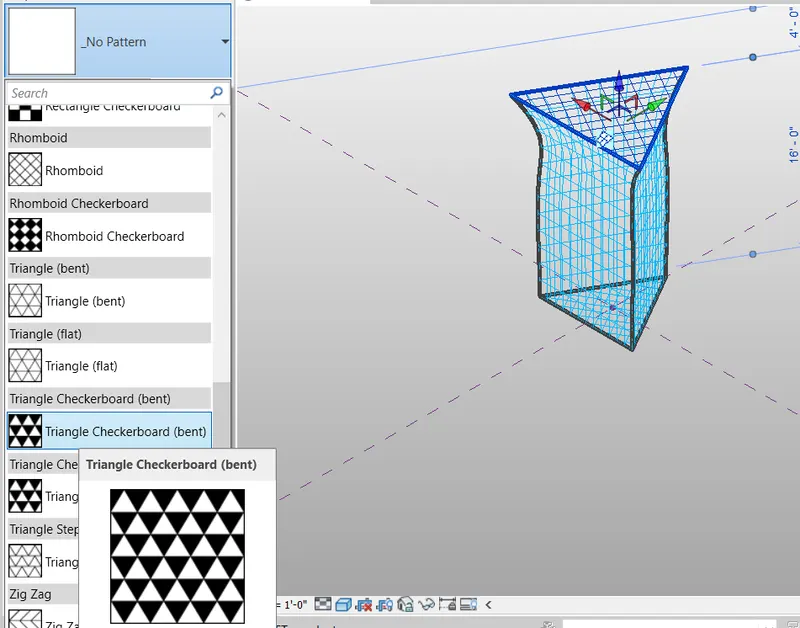
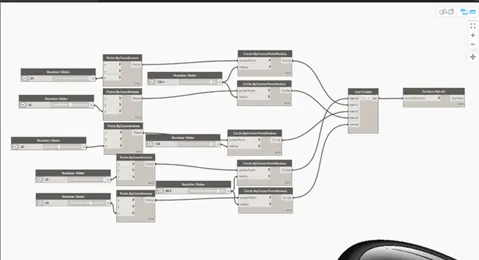
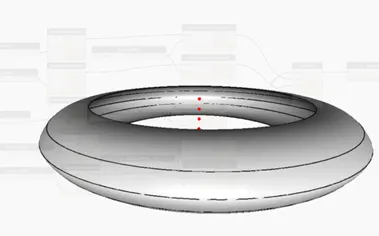
5) Use Dynamo to work on developing a Parametric Stadium. List your parameters and use the visual programming approach to complete the modelling, You can use the concepts discussed in parametric high rise tower in class for reference.
ans)
Aim: To use Dynamo to work on developing a Parametric Stadium. List your parameters and use the visual programming approach to complete the modeling, You can use the concepts discussed in parametric high rise tower in class for reference.
Tools Used:
- number slider
- point by coordinate
- circle by center point radius
- list create
- surface by loft
Procedure:
1)open number sliders and point by coordinates
2)with proper heights make the points on the z-axis
3)by using circle by point radius join the points apply the radius as mentioned in the image
4) increase or decrease the radius by using the number sliders
5) required stadium is made