Week 2 Challenge
1)
BIM stands for building information modeling.BIM is used in presenting 3D models.BIM is flexible in usage, in BIM when we make a change in one view all other views automatically change which is not the scenario in 2D CAD .
2)
Aim:To use insert Tab and choose a category, Pick a family and element and Understand the instances and insert it to Revit model
Tools:
- Insert tab
- Load family
- Component
- Property browser
Procedure:
- Go to insert from tool bar
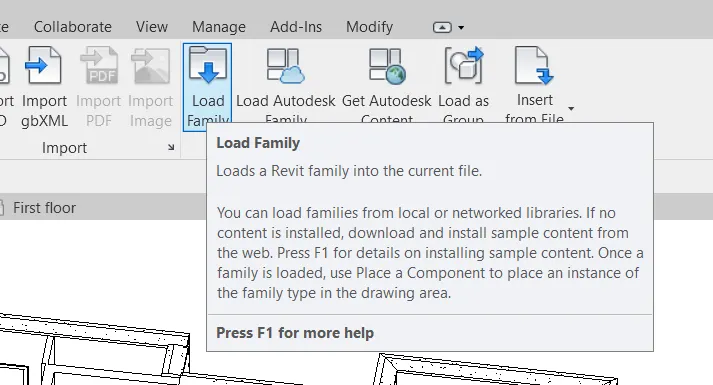
- Click on load family from import section
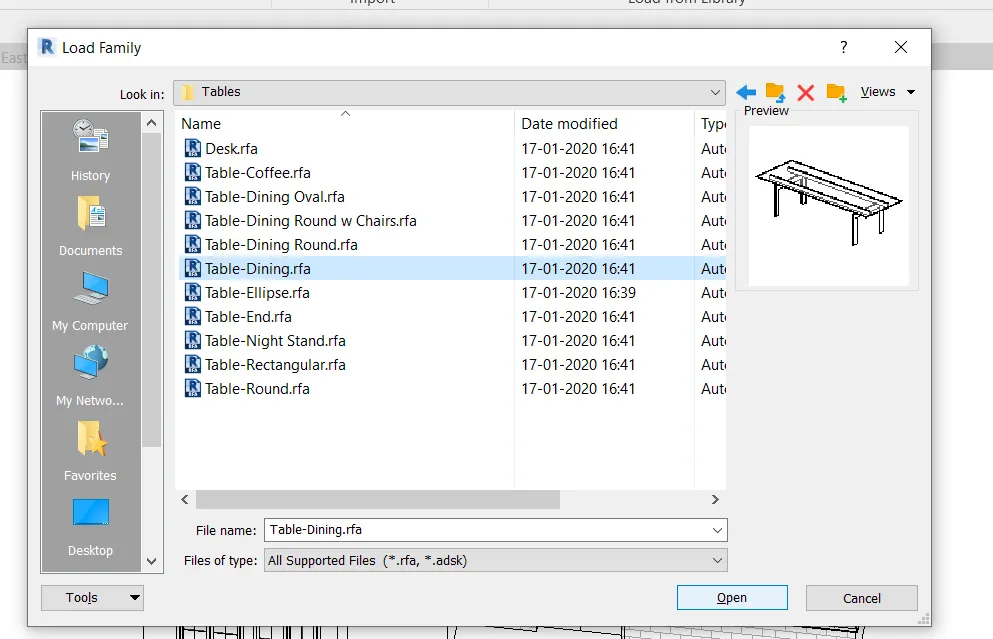
- From the dialog box select the requiered family to be loaded
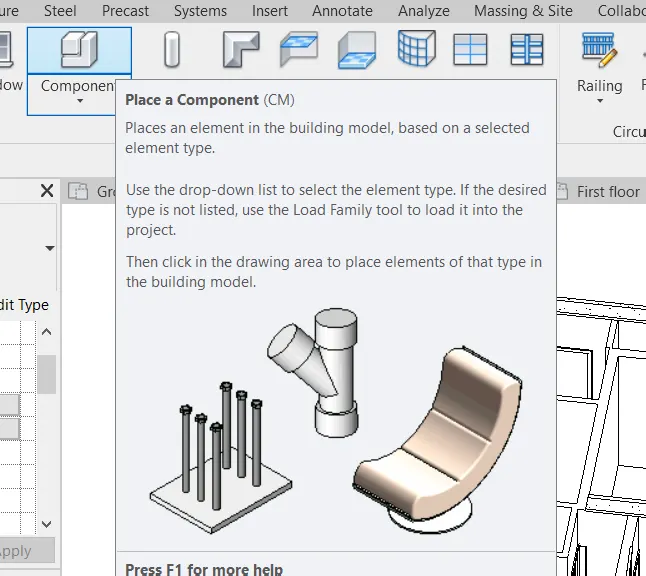
- From Architectural menu click component to use the model elements selected from insert
3)
Aim: To open a project file with an architectural template. To save the file with an appropriate name. To set up the project units to Imperial / Metric based on your convenience of modeling and complete the project information under the Manage tab. At last set up the maximum backups for the project file to 3.
Tools:
- File
- Manage tab
- Project information
- Project units
Procedure:
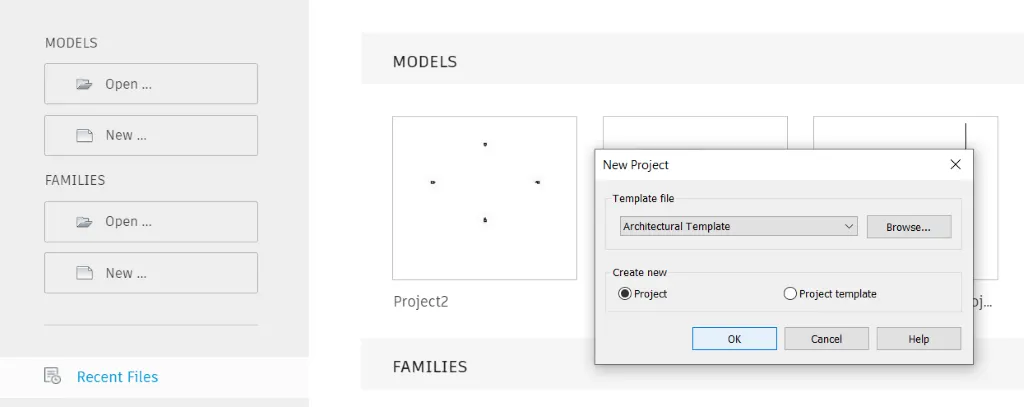
a) To open a project file with an architectural template and to save the file with the appropriate name.
- Click on new and in the dialogue box select architectural template
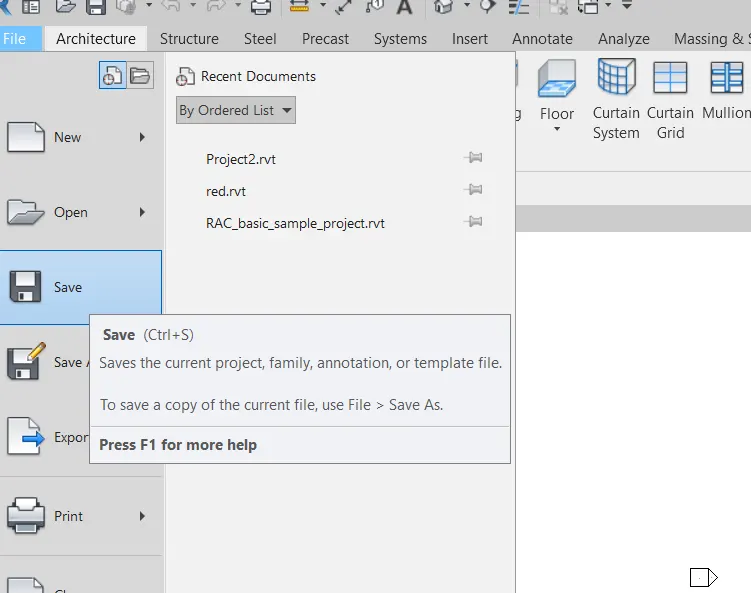
- Click on the file and then click on save. Name the project and select the location of the project to be saved.
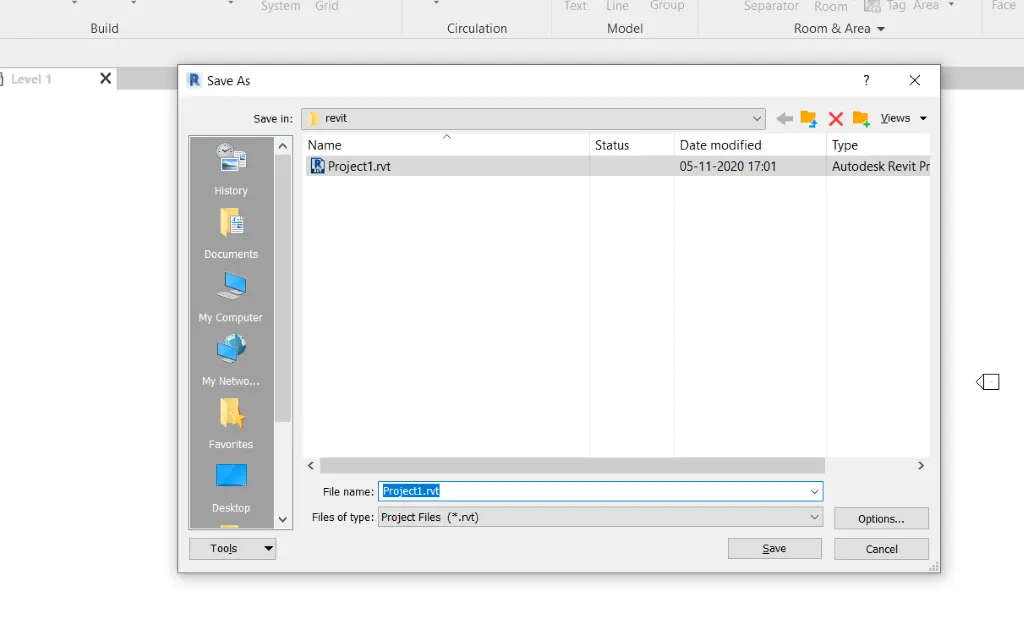
b)To set up the project units to Imperial / Metric based on your convenience of modeling and complete the project information under the Manage tab.
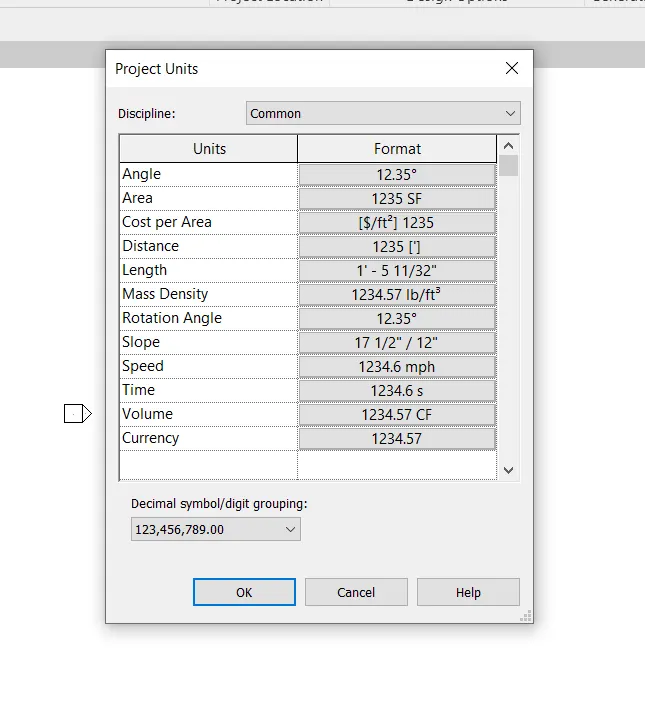
- Go to manage and click on project units.
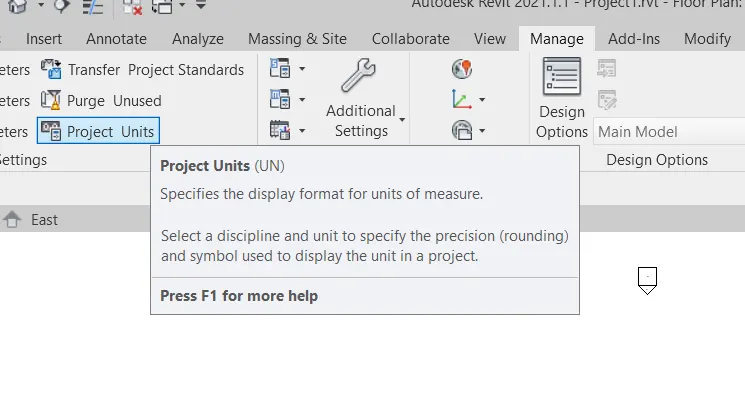
- A dialog box opens up. Change the units as desired.
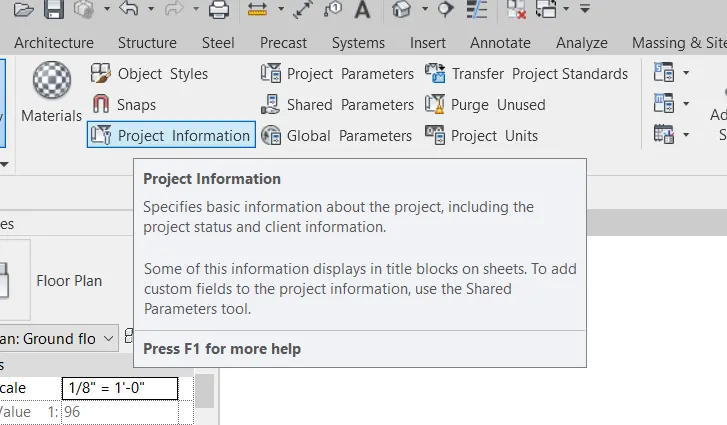
- Click on project information in the manage toolbar.
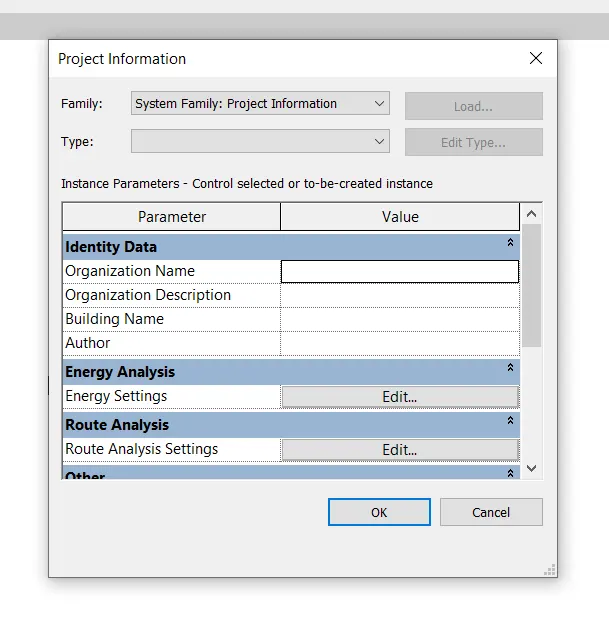
- Fill in the information and click ok
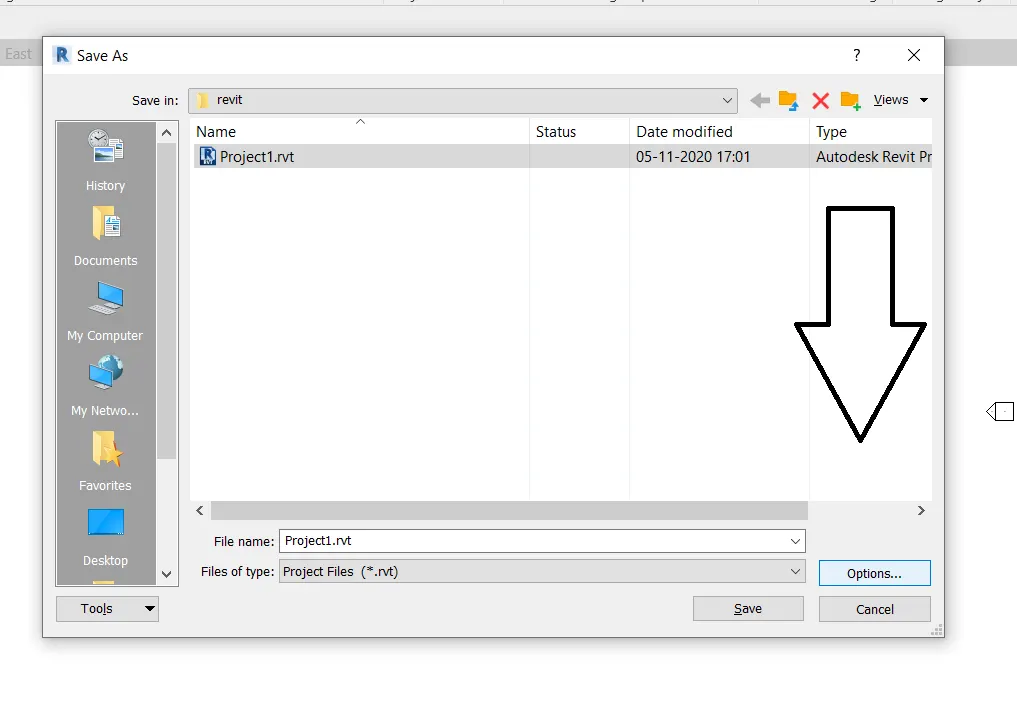
c)To last set up the maximum backups for the project file to 3.
- In file go to save as and click in prject.
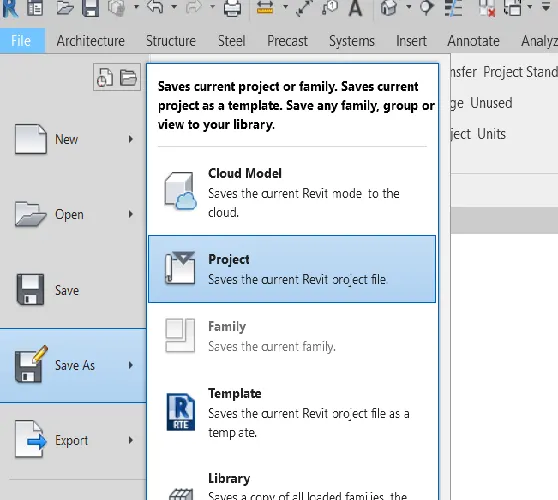
- In the dialog box opened click on options.
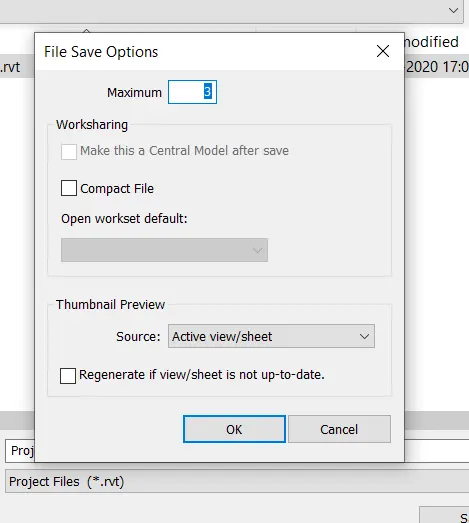
- In file save options enter the maximum backups for the project file as 3.
4)
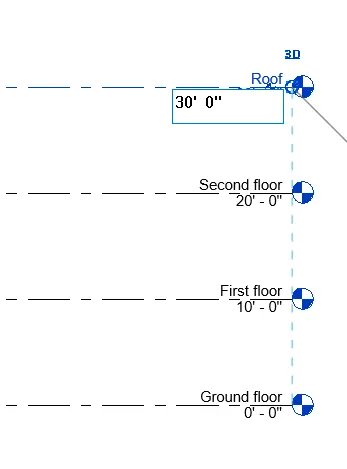
Aim:To understand the concept of Levels and Grids and create the following Levels: ( Convert to metric equivalents if metric is your units)
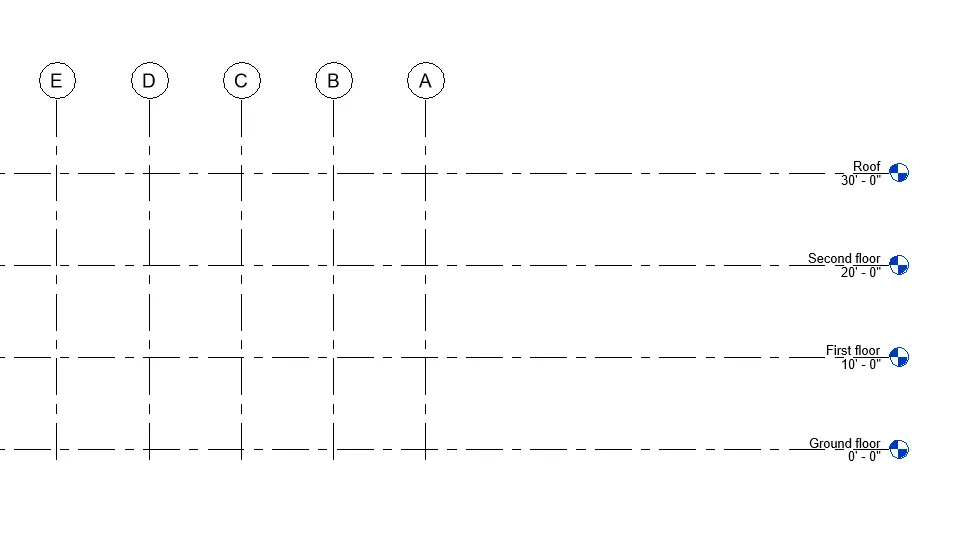
Ground Floor @ 0’
First Floor @ 10’
Second Floor @ 20’
Roof @ 30’
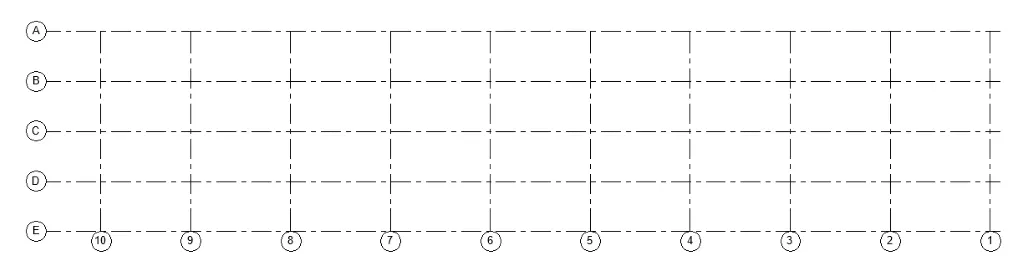
Grids Transverse Grids A, B,C,D, E @ 10’ spacing
Longitudinal Grids from 1 to 10 @ 20’ spacing
Tools:
- level
- Grid
Procedure:
A)Levels task
- From the architecture menu in the datum section click on a level to ad levels
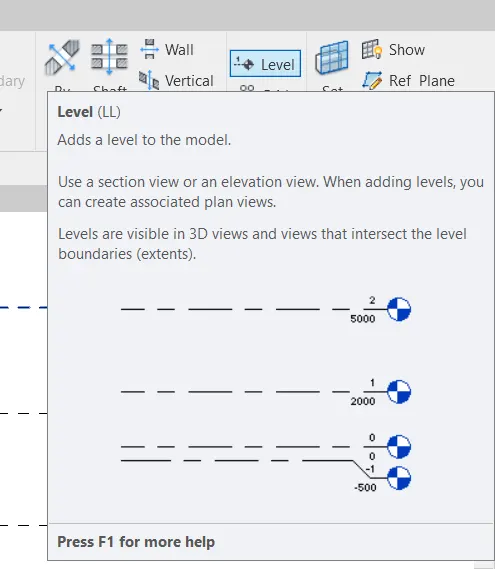
- To add levels one must open an elevation view
- Enter the desired distance below the label where the distance between levels is shown to change the distance
B)Grid task
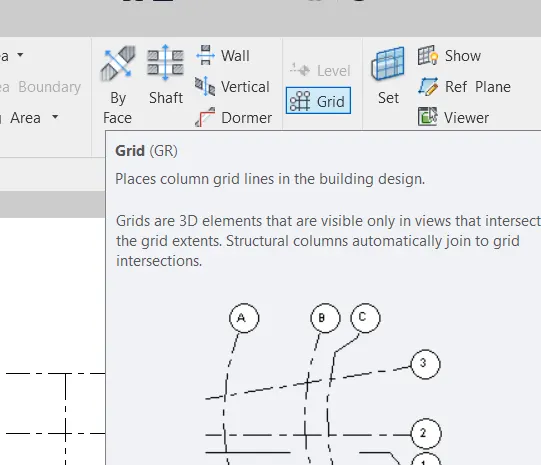
- From the architecture menu in the datum section click on the grid to ad grids
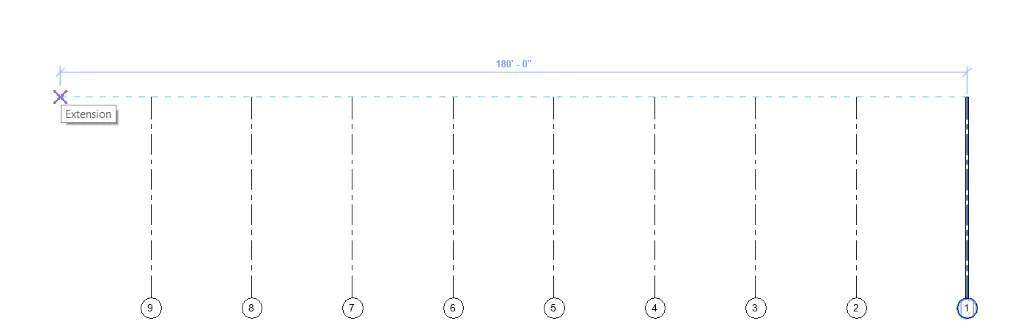
- Horizontal grids are tagged with alphabets and vertical with numerical
5)
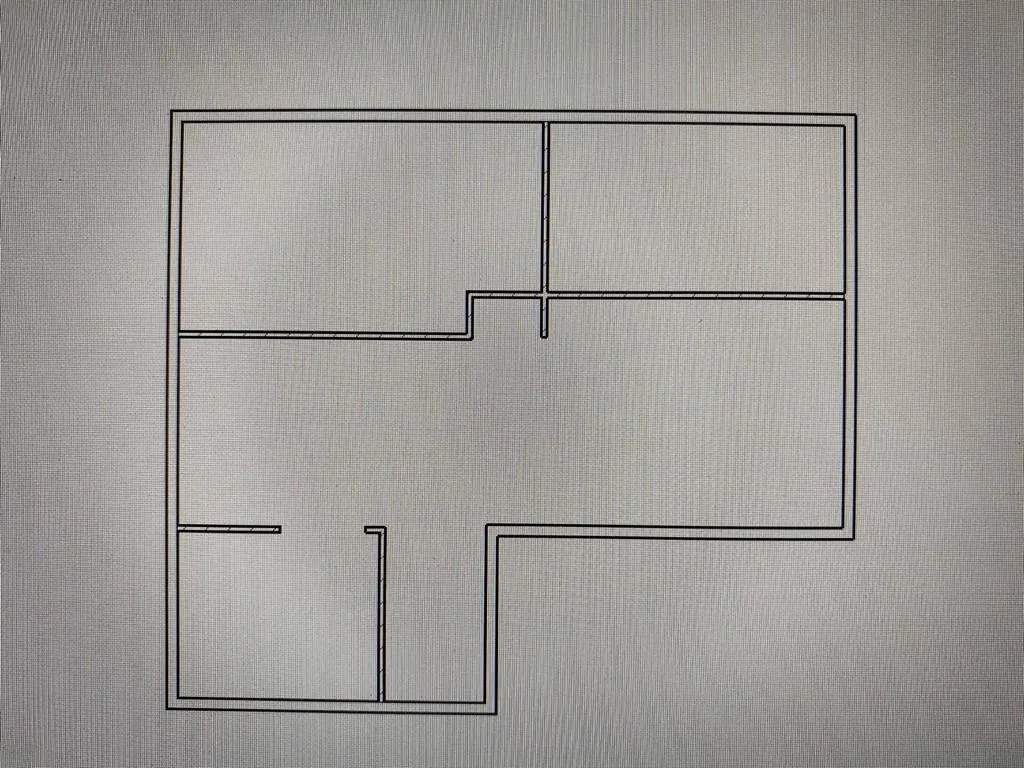
Aim: To create a 3D modeling of the residential unit layout.
Tools:
- wall tool
- properties browser
- Room
Procedure:
- From the architectural toolbar select walls
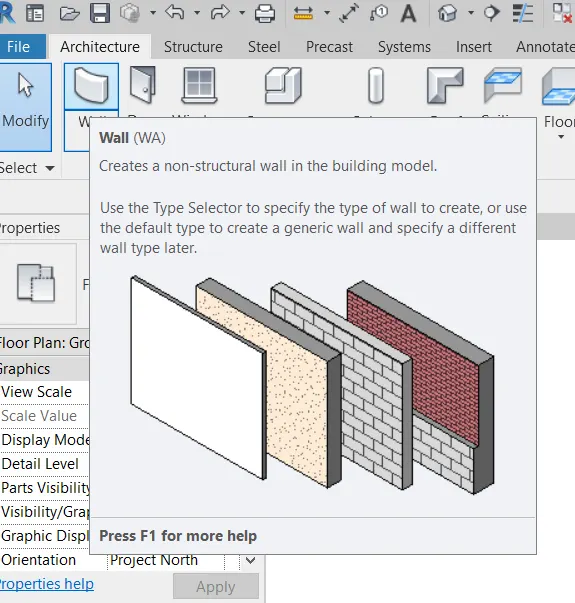
- Draw the desired wall layout
6)
Aim: In the layout created draft the level of details you are planning to include – Dimensions of room, components you plan to add in the residential unit.
Tools:
- Walls
Procedure:
a)Adding interior walls
- select walls, from properties browser change wall to interior wall.
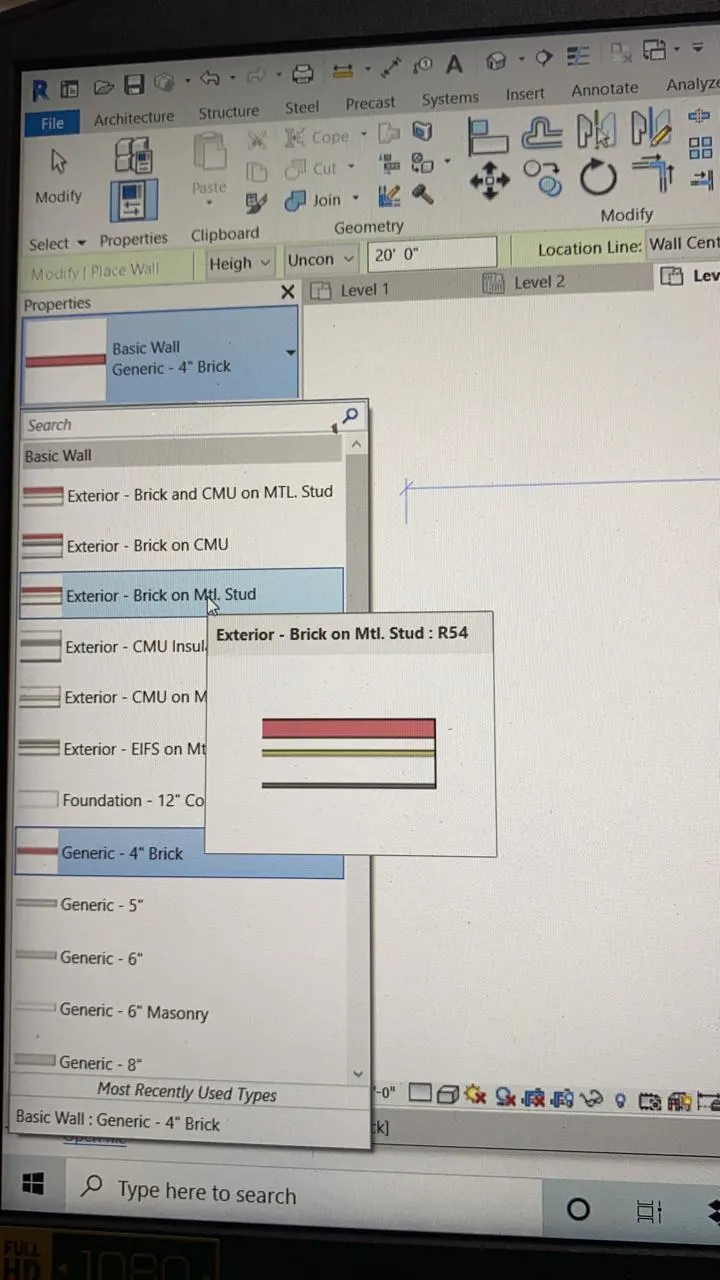
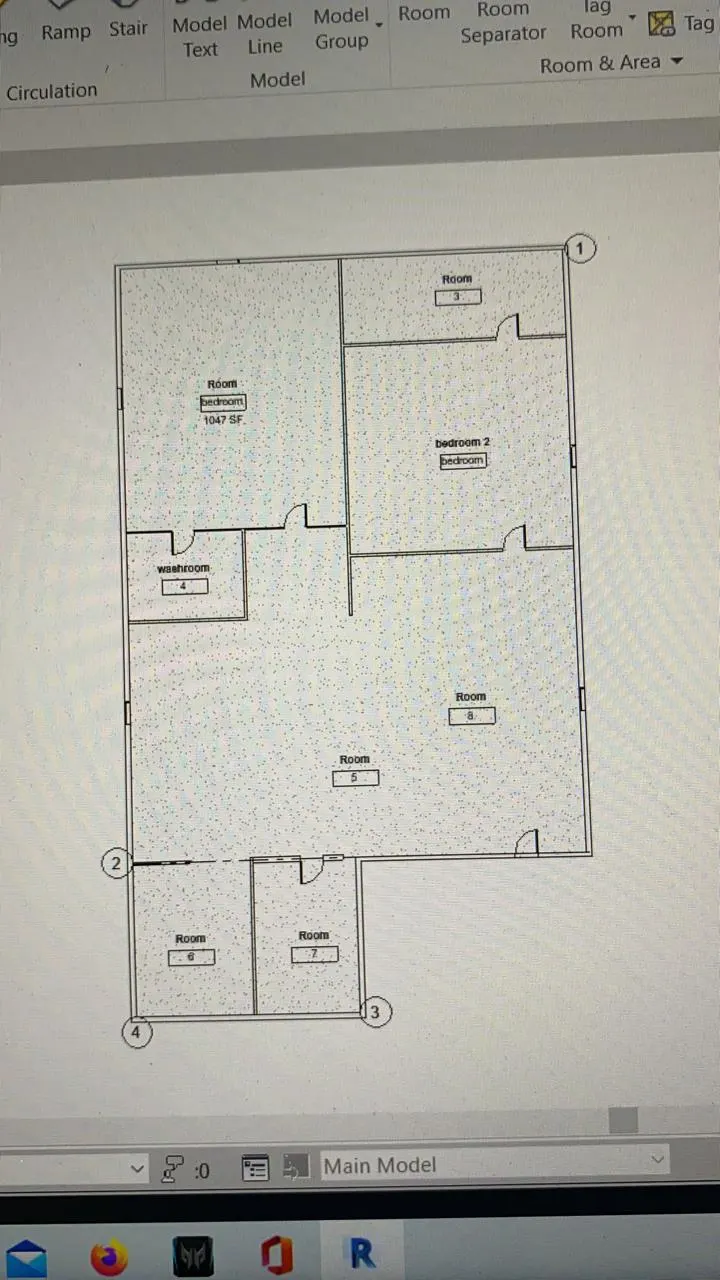
- mark the walls as desired and make rooms
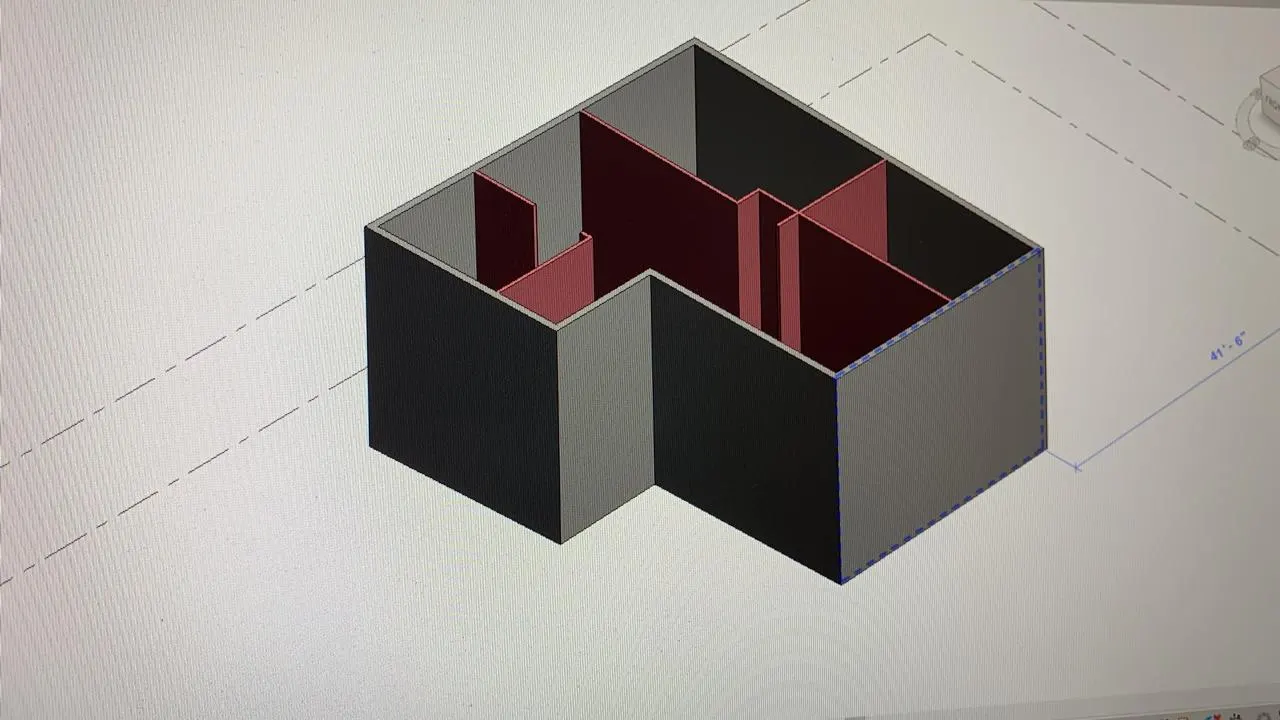
b) Naming rooms
- From the architecture menu in from room and area section select room
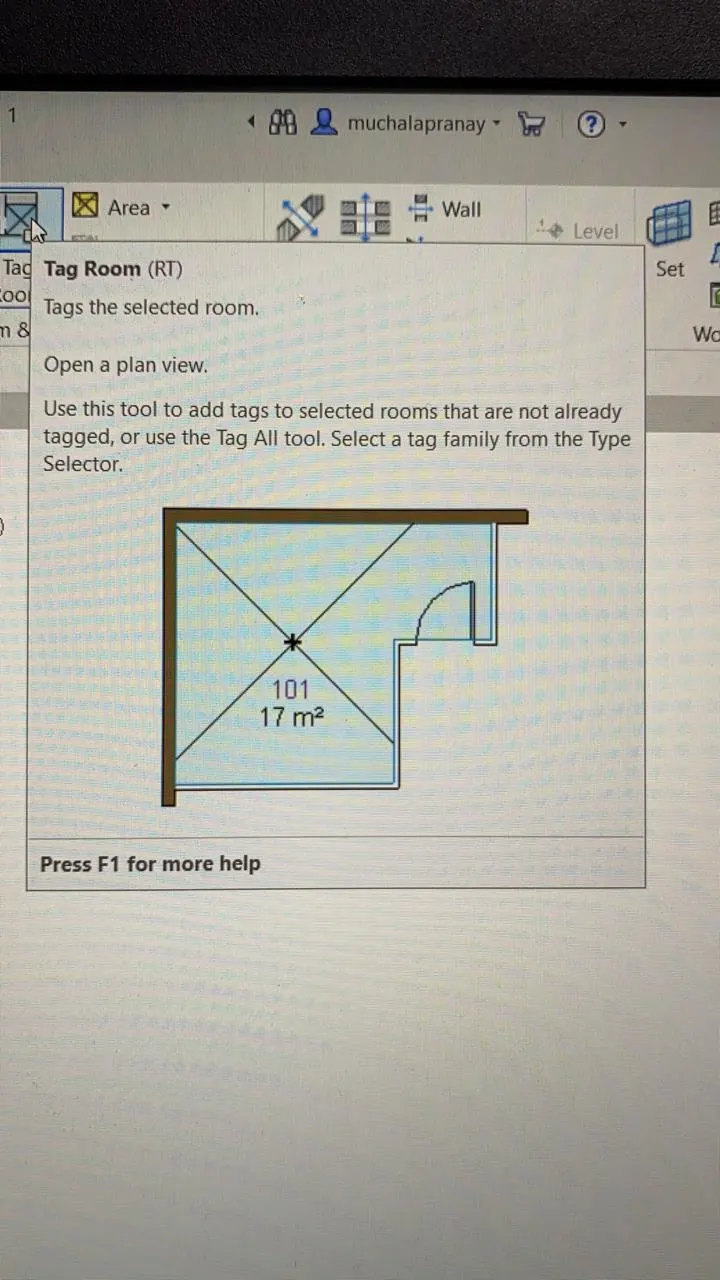
- Click on closed interior spaces to name them
7)
Aim: To identify the residential model elements such as Door, Windows, Tables, Chair, Couch, Bed, Lamps from the library and insert them to the model
Tools:
- insert
- load family
- component
- properties browser
Procedure:
- Go to insert from tool bar
- Click on load family from import section
- From the dialog box select the requiered family to be loaded
- From architactural menu click component to use the model elements selected from insert
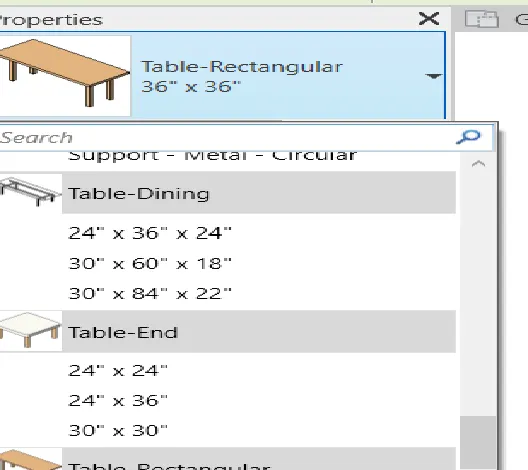
- From the properties browser we can change the size of the elements
xxxxxxxxxxxxxxxxxxxxxxxxxxxxxxxxx THANK YOU xxxxxxxxxxxxxxxxxxxxxxxxxxxxxxxxxxxx