Project 2_Creating a 3D rendered model for a Residential Building in AutoCad
AIM: To create a 3D rendered model for a Residential Building in AutoCAD
INTRODUCTION:
The main objective of this project is to understand about to create a Plan in 2D, then convert it into 3D using AutoCAD 3D, applying materials and rendering.
AutoCAD is primarily used for generating 2D sketches. While it is possible to create 3D objects, AutoCAD is built around a flat, sketch-based interface. There is a wide range of pre-defined 3D objects in AutoCAD. These objects are cylinders, spheres and wedges and many more. But then users use 2D objects and modify them using the 3D commands accordingly. So, AutoCAD 3D commands like Extrude, Sweep, Revolve, and Union are used by the users.
2D tools:
Line: The line object is the most basic and common object in AutoCAD drawings of any discipline. Each segment is a line object that can be edited separately, assigning properties such as layer, line type, and line weight.
Construction Lines: Construction lines (also known as xlines) are temporary line work entities that can be used as references when creating and positioning other objects or line work. Construction lines are either circles or straight lines that extend to infinity in both directions
Polygon: Creates an equilateral closed polyline. We can specify the number of sides of the polygon and whether it is inscribed or circumscribed.
Rectangle: When using the RECTANGLE command, absolute or relative coordinate values are used to define the size of the rectangle. Actual dimension values are preferred to create the length and width of the rectangle.
Copy: Copies objects a specified distance in a specified direction. With the COPYMODE system variable, you can control whether multiple copies are created automatically.
Trim: Trims objects to meet the edges of other objects. Command used: TR
Offset: Creates concentric circles, parallel lines, and parallel curves. Command used: OFFSET.
Extend: Extends objects to meet the edges of other objects. To extend objects, first select the boundaries. Then press Enter and select the objects that you want to extend. To use all objects as boundaries, press Enter at the first Select Objects prompt.
3D tools:
Revolve
Draw> Modelling> Revolve
Extrude
Draw > Modeling > Extrude
This AutoCAD 3D Extrude command allows the user to create a 3D object by extruding a 2D face along a line or path. For example, A cylinder can be created by selecting a 2D circle and extruding it along with a path.
Sweep
Draw > Modeling > Sweep
This command helps the user to extrude the 2D objects without the 2D face being orthogonal to the beginning of the path.
Union
Modify > Solids Editing > Union
This AutoCAD 3D command allows the user to combine two objects converting them into one single object.
Subtract
Modify > Solids Editing > Subtract
This command is opposite to the union command; this command works when there is a common area in both the objects. Then this command subtracts the object A from the object B.
Solidedit
This command is help in extruding face of area bound by sides of a solid.
RENDERING
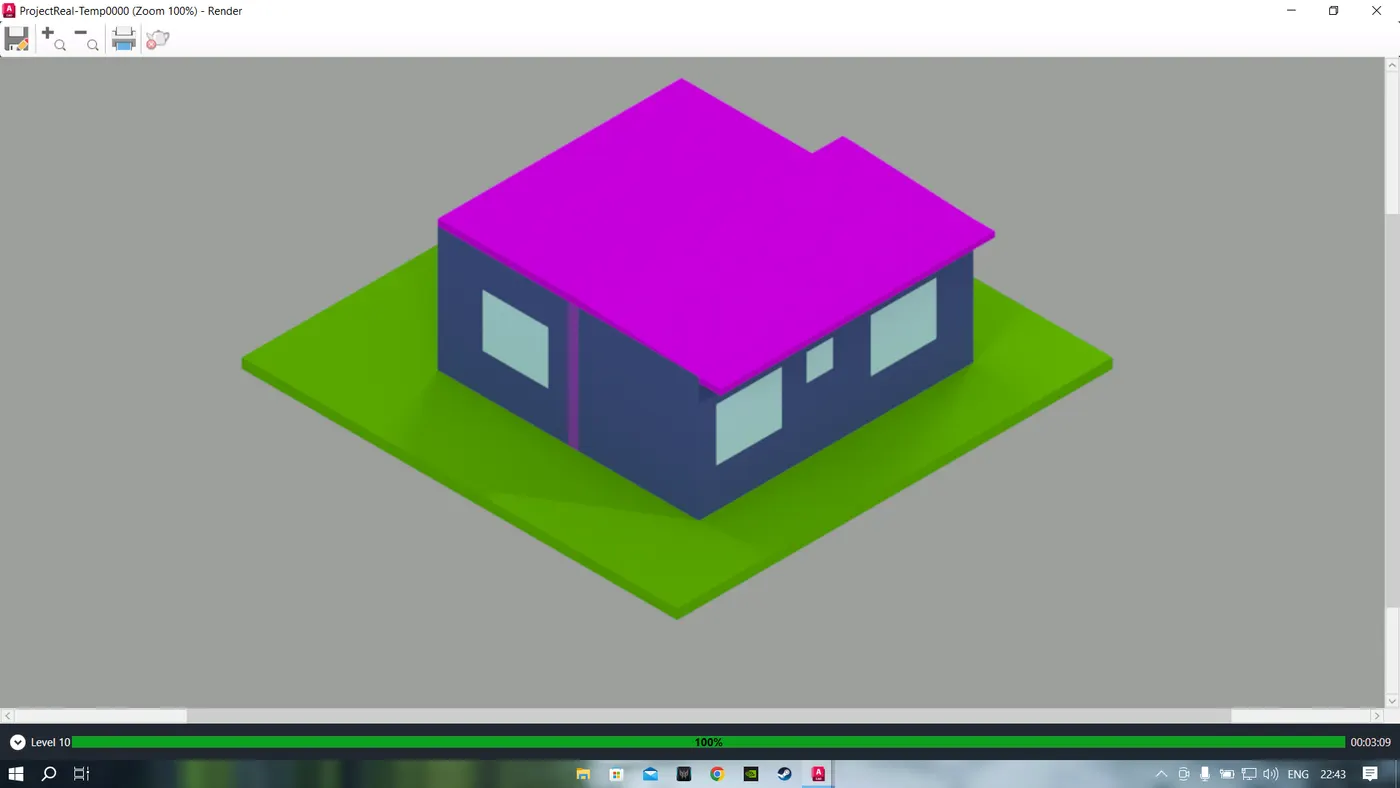
Rendering is the process of creating a raster image based on the 3D objects in a scene. A renderer is used to calculate the appearance of the materials attached to the objects in a scene, and how lighting and shadows are calculated based on the lights placed in a scene. Environmental and exposure settings of the renderer can be adjusted to control the final rendered image.
OBJECTIVE:
The main objective of this project is to review and refresh almost most of the tools which will be used by a Professional engineer while drafting a 3D drawing. This will start from the initial drafting in 2D using lines and rectangles to rendering in 3D. The entire project can be completed in 14 steps and are as follows.
- To draw the plan using AutoCAD 2D.
- To project walls to convert the plan from AutoCAD 2d to AutoCAD 3D.
-
STEPS FOR CREATING A PLAN-
- Open Auto Cad.
- In the right left corner click on the settings icon that is the icon of workspace.
- Select 3d modelling.
- Enter UN (Units ) command in the command box and change the type as decimal and select precision as 0.0
- Now enter Dim style in command box and modify the settings and select primary units as decimal and give precision as 0.0
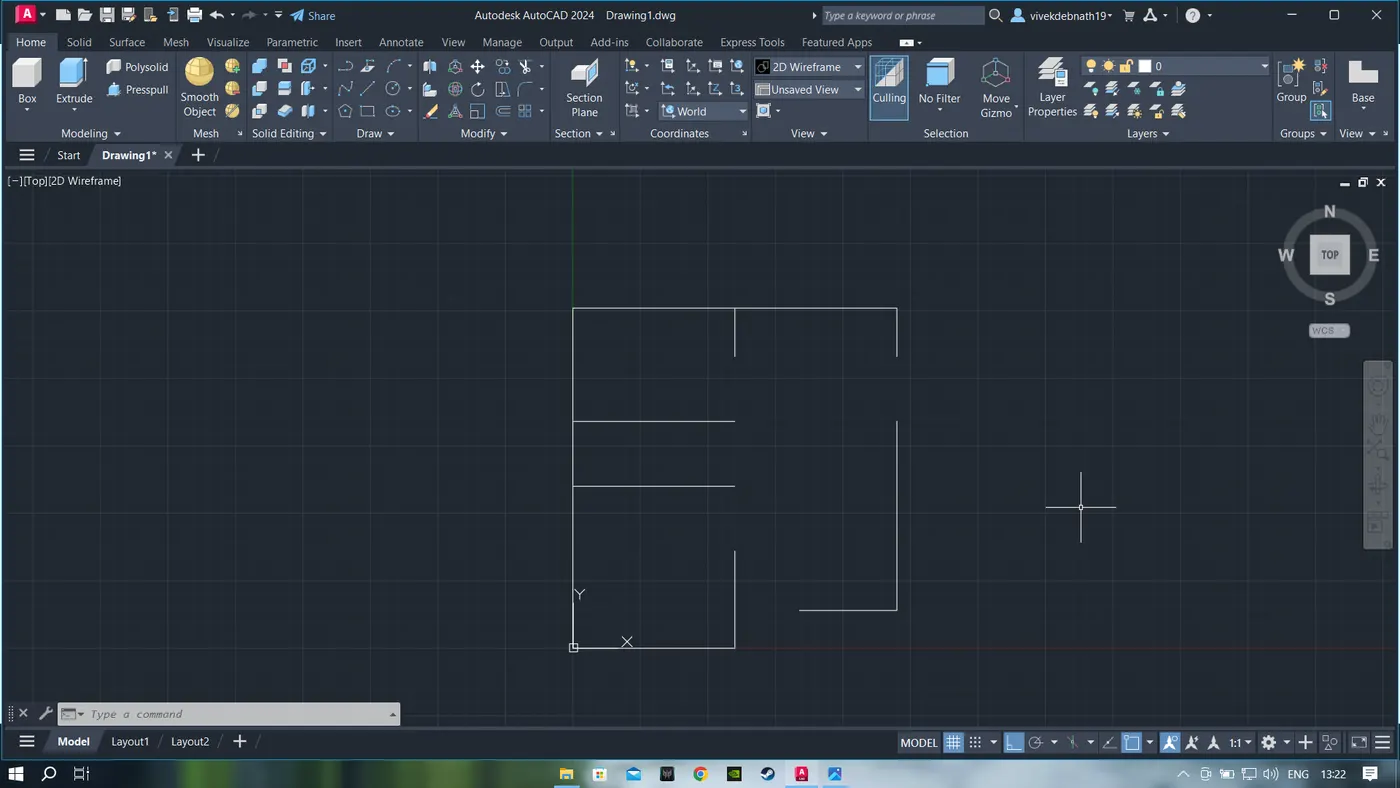
- Select line command and draw in top or 2D mode.
- Line command is used to draw the plan.
- Command X line and draw line in X Direction as well as in Y direction.
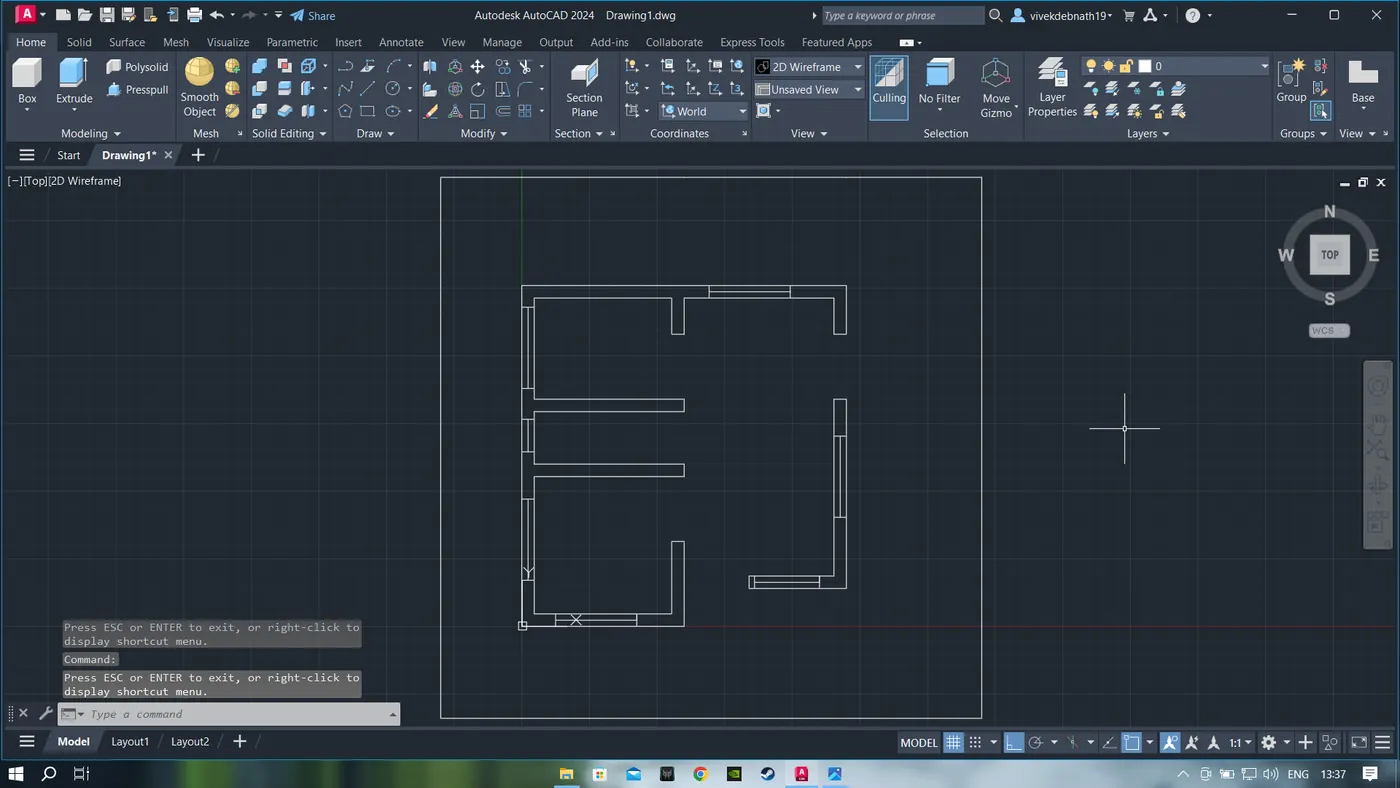
- Trim the unwanted corner lines.
- Offset 230 for wall.
-
STEPS FOR CREATING THE 3D PLAN.
- In the right left corner click on the settings icon that is the icon of workspace.
- Select 3d modelling.
- Command boundary and in that select region.
- Create boundaries as well as regions of the plan.
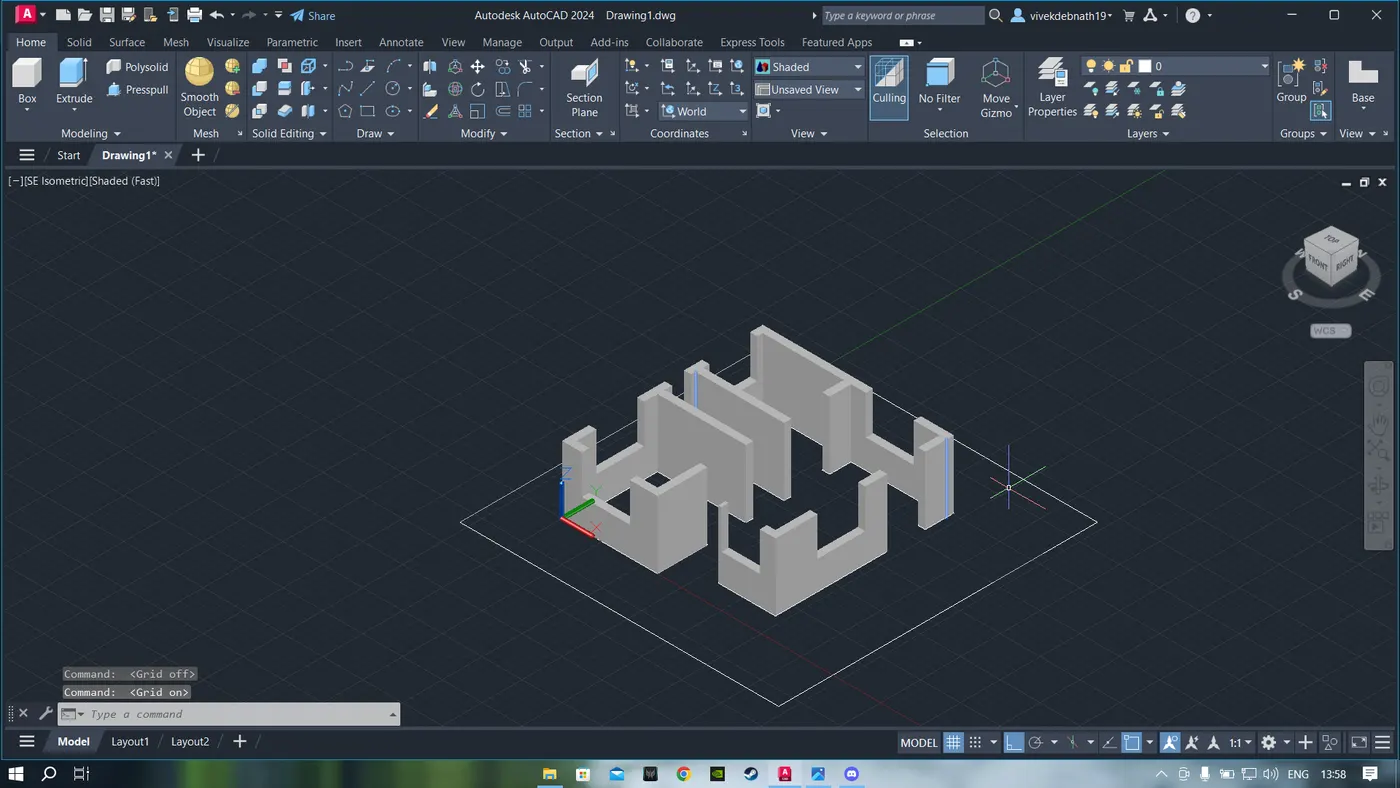
- Extrude the regions that are the walls to the height of 3000 from bottom.
- Floor to floor height of the building is 3000.
- Create different type of layers using layer properties like 3D walls, window frames, slab, window glass etc as desired.
- Assign colors to each layer separately
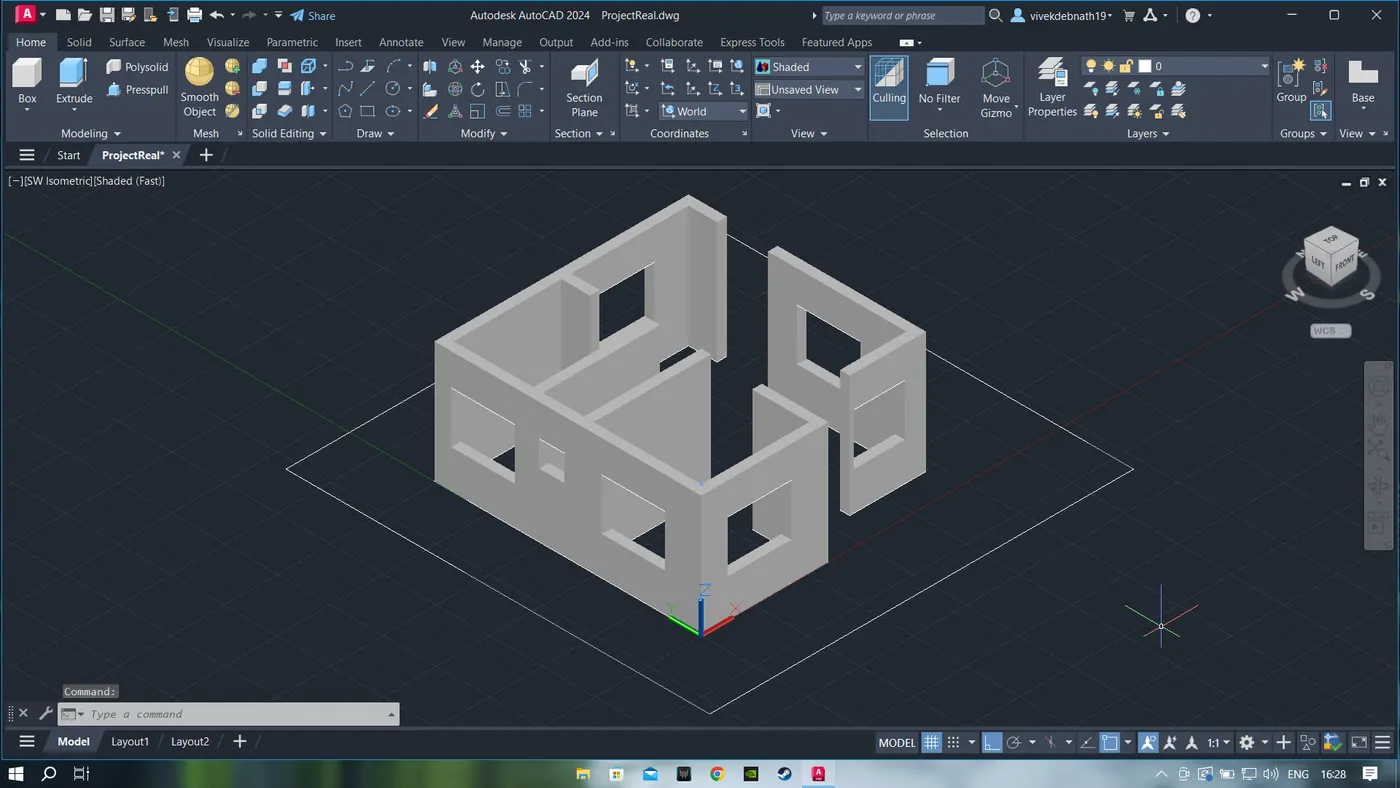
- Line command is used to draw the windows and doors.
- Extrude the windows and doors to the suitable depth.
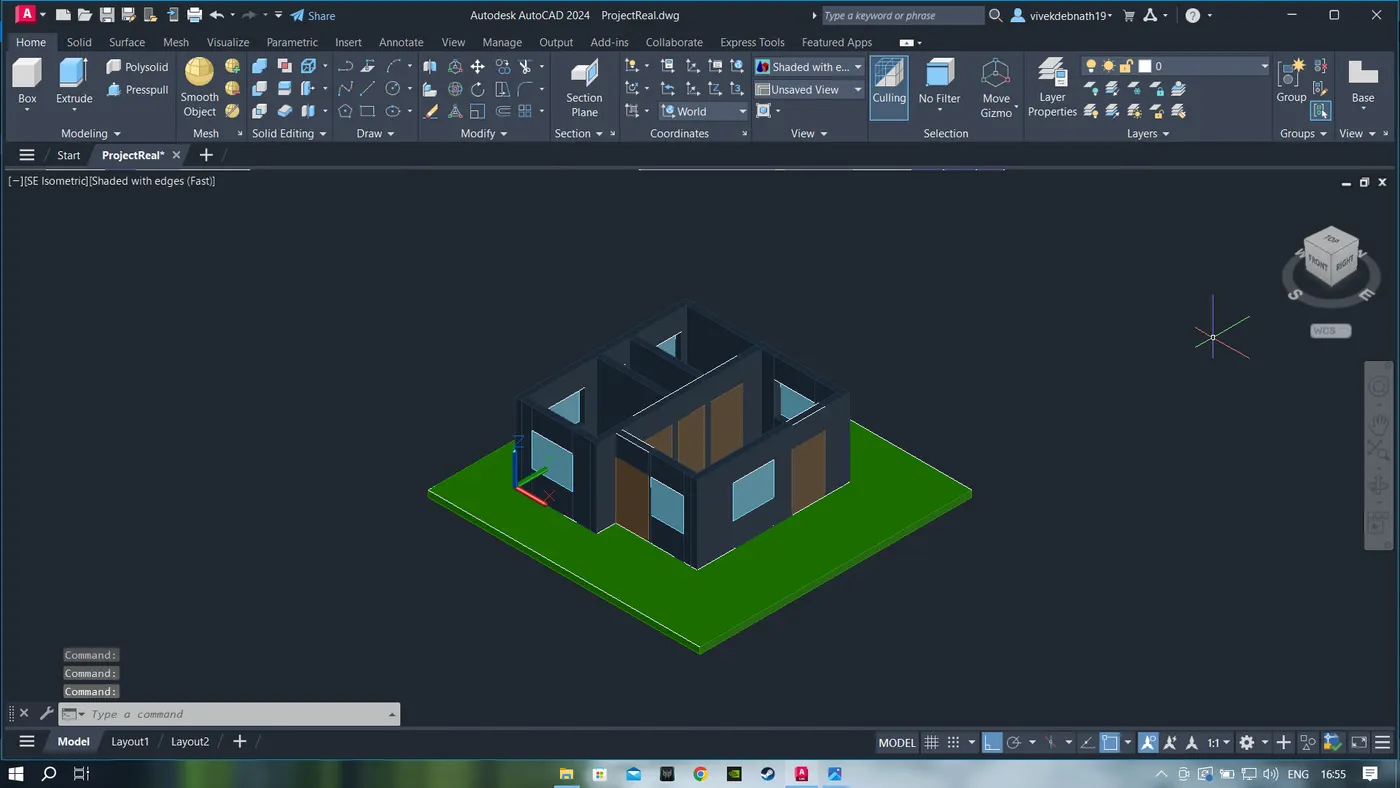
- Rotated 3D is used to rotate the objects as in windows and doors.
- Move and copy command is used to move the windows to their desired locations.
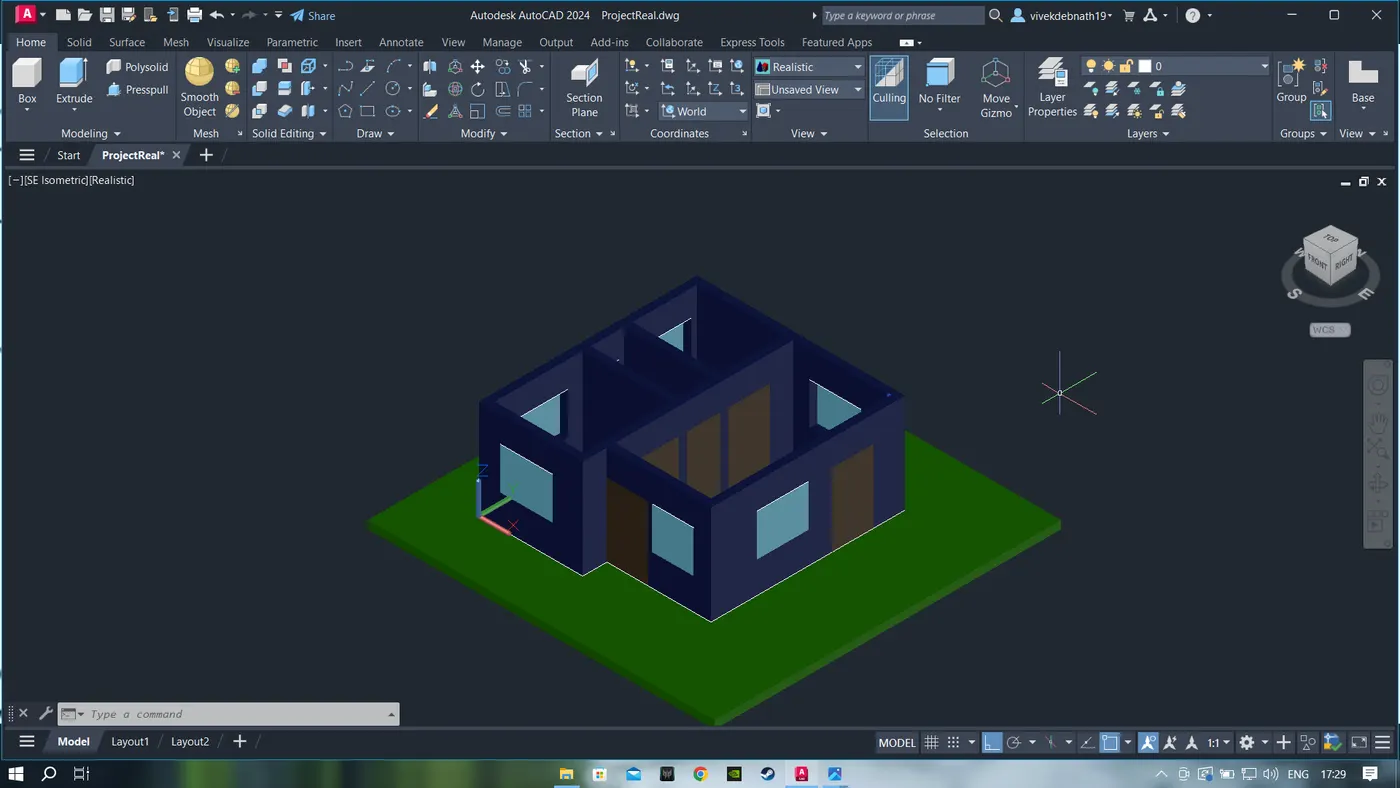
- Result:
-