Project 2_Creating a 3D rendered model for a Residential Building in AutoCad
Title:
Creating a 3D Model of a Residential Building with Rendered View using AutoCAD
Aim:
The aim of this project is to utilize AutoCAD software to create a 3-dimensional model of a residential building and generate a rendered view. The objective is to provide stakeholders with a realistic visualization of the building's design and layout, facilitating better understanding and informed decision-making.
Introduction:
AutoCAD is a powerful software widely used in the architecture and construction industry for 2D and 3D design and drafting. In this project, we will leverage AutoCAD's capabilities to construct a comprehensive 3D model of a residential building. By incorporating architectural elements such as walls, windows, doors, roofs, and other features, we can create an accurate representation of the structure. Furthermore, rendering techniques will be applied to generate a lifelike view of the building, enhancing the visualization experience.
Procedure:
-
Project Setup: To initiate the project, launch AutoCAD and begin a new drawing, selecting a suitable template that supports 3D modeling and rendering. Ensure that the drawing units and precision are set according to the project requirements.
-
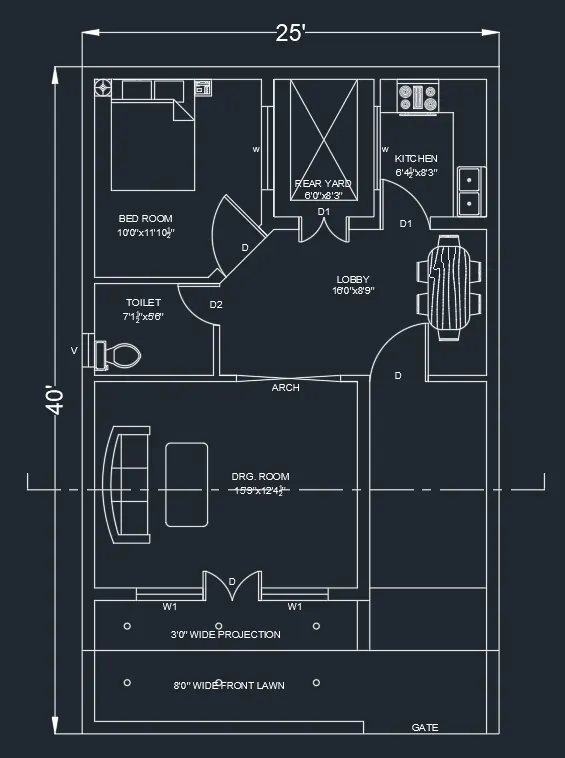
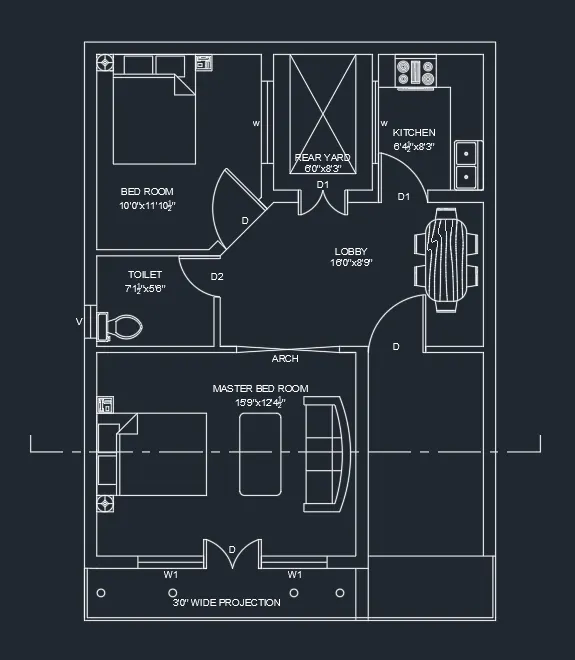
Basic Layout: Start by creating a 2D layout of the residential building on the XY plane, representing the ground level. Utilize AutoCAD's architectural drawing commands such as lines, rectangles, circles, and arcs to construct the fundamental features of the building, including rooms, walls, doors, windows, and stairs.
-
Extrusion and Elevation: Utilize the "EXTRUDE" command to add height to the 2D layout elements, transforming them into 3D objects that represent the walls, slabs, and other structural components of the building. Apply the extrusion technique to generate the floors and ceilings, extruding the respective 2D shapes accordingly.
-
Roof Design: Create the roof design by outlining its shape using 2D elements. Then, utilize AutoCAD's extrusion or lofting tools to convert the 2D outlines into a 3D roof structure. Adjust the height and slope of the roof based on the specific design requirements.
-
Windows and Doors: Insert 3D window and door components into the model. This can be achieved by utilizing the "INSERT" command or creating custom blocks for accurate representation. Ensure precise placement of these elements on the walls, guaranteeing proper alignment with the building's design.
-
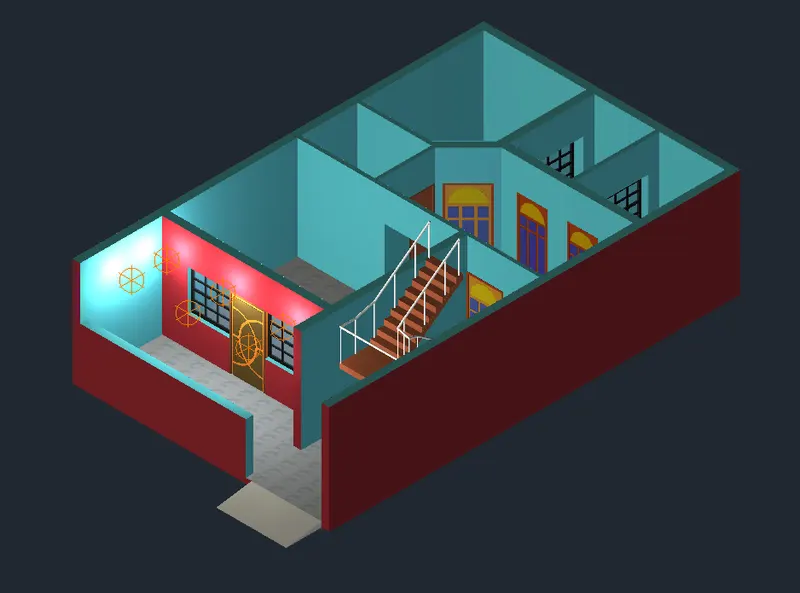
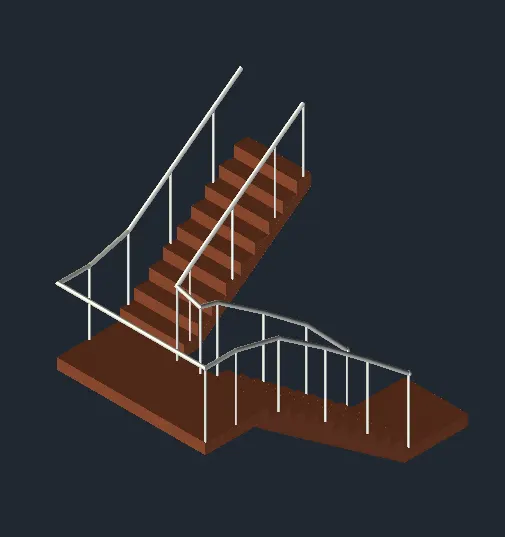
Stairs and Railings: Model the stairs by initially creating 2D shapes and subsequently extruding them to form the staircase structure. Incorporate 3D railings for the stairs and balconies, aligning them appropriately for a realistic representation.
-
Interior Design (Optional): To enhance the visual appeal of the model, include interior elements such as furniture, fixtures, and fittings. Implement blocks or custom components to accurately depict these interior elements within the residential building model.
-
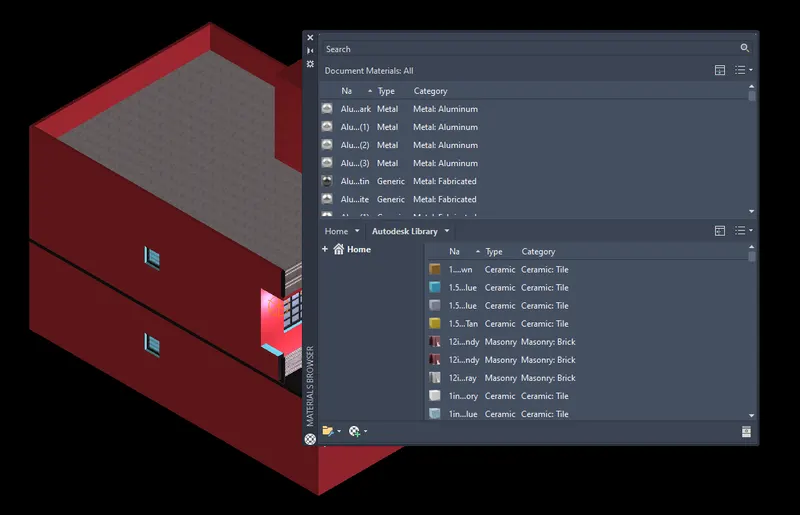
Materials and Textures: Assign suitable materials and textures to the 3D objects within the model to enhance realism. Utilize the "MATERIALS" command to access the material library and apply appropriate materials to different surfaces, ensuring accurate representation of the building's components.
-
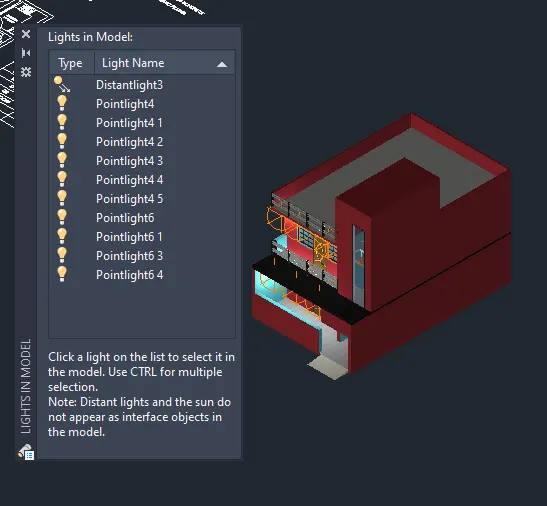
Lighting Setup: Establish a lighting setup to simulate natural or artificial light sources. Utilize the "LIGHT" command to insert light sources such as spotlights and ambient lights, creating a balanced and visually appealing environment.
-
Camera Placement: Position the camera to achieve the desired perspective of the building. Utilize the "UCS" command to define the camera view, and use the "VIEW" command to adjust the view settings, including zoom, pan, and orbit, to ensure optimal visualization.
-
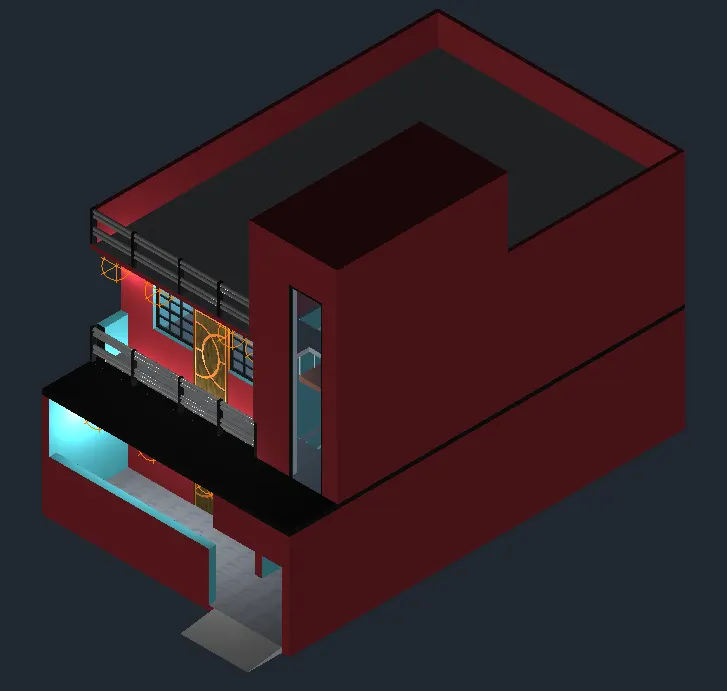
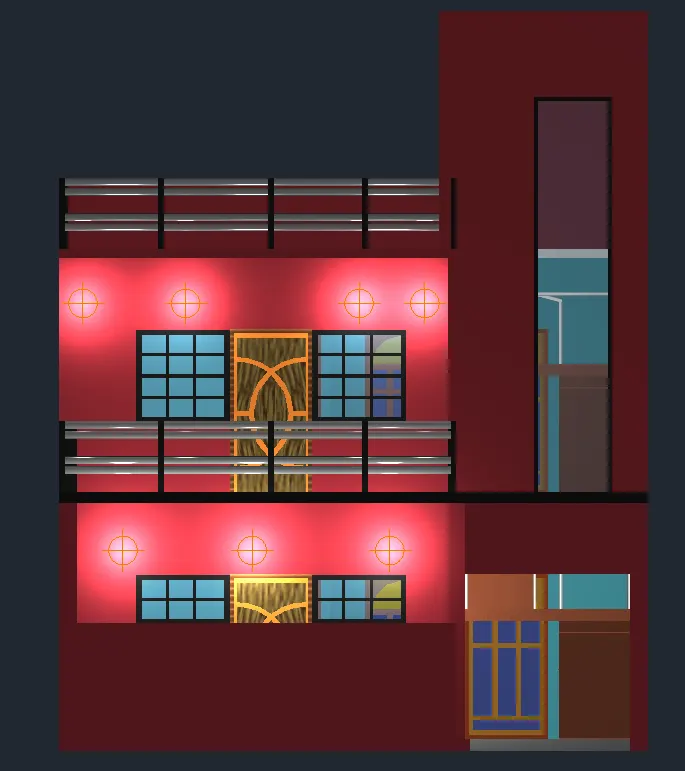
Rendering: Access the rendering settings using the "RENDER" command. Adjust various parameters, including quality, lighting, and materials, to attain a realistic render. Execute the rendering process to generate a photorealistic image of the 3D model.
Drawings:
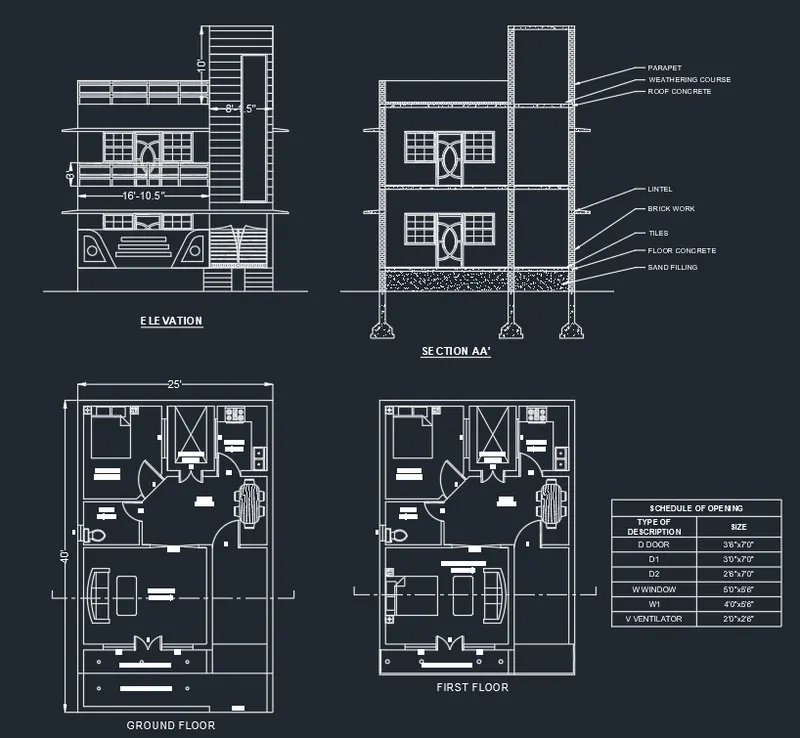
- GROUND FLOOR PLAN
- FIRST FLOOR
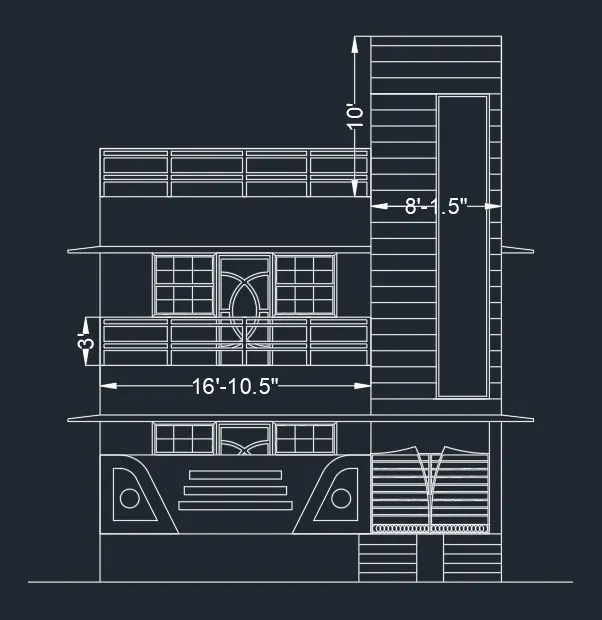
- ELEVATION
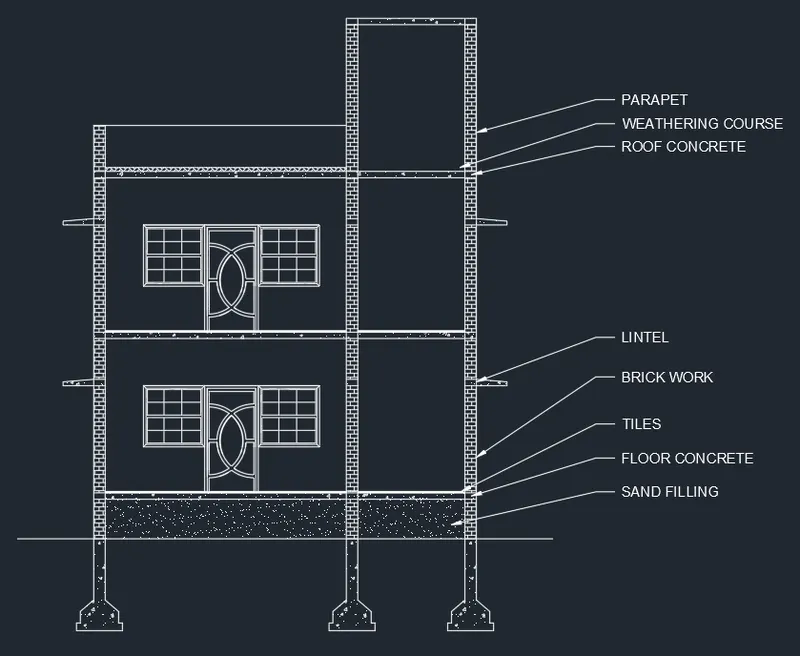
- SECTION
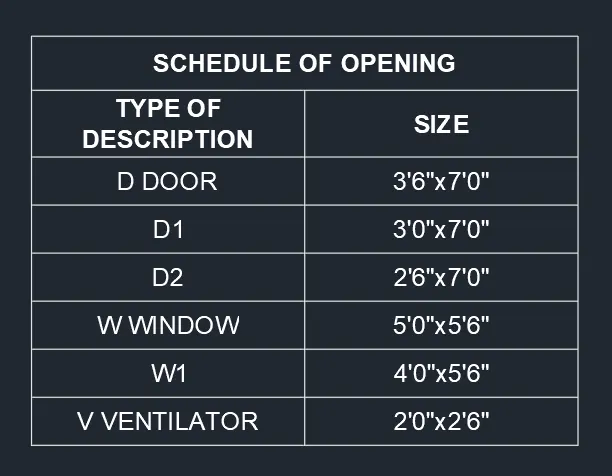
- SCHEDULE OF OPENING
- OVERALL PLAN
- FLOOR PLAN
- MATERIAL BROWSER
- STAIRCASE
- LIGHT SETUPS
- RENDERING
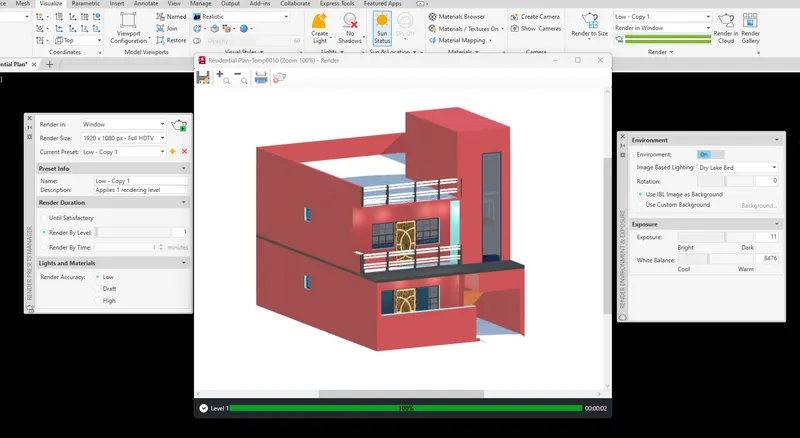
Result:
The culmination of this project is a highly detailed and accurate 3-dimensional model of a residential building, created using AutoCAD software. Through the utilization of architectural elements, extrusion techniques, and precise placement of components, an authentic representation of the building's design and layout is achieved. The rendered view, produced through the application of advanced rendering techniques, provides stakeholders with a realistic visualization of the building, aiding in the understanding and evaluation of the structure. AutoCAD's capabilities enable enhanced decision-making, resulting in efficient and effective architectural design processes.