Project 2_Creating a 3D rendered model for a Residential Building in AutoCad
1. Create a 3 dimensional model of the residential building with a rendered view.
Answer:
Aim: To draw a 3D model of the residential building with a rendered view.
Commands Used:
- Line
- Offset
- Extend
- Trim
- Rectangle
- Circle
- Erase
- Polygon
- Mirror
- array
- Copy
- Move
- Rotate
- Scale
- Chamfer
- Fillet
- UCS
- Region
- Extrude
- Substract
- Box
- Units
- Dimstyle
- 3D face
- 3Dorbit
- Explode
- Hide
- Move
- Copy
- Dist
- Solidedit
- 3D Mirror
- Union
- Boundary
- 3D rotate
- Plan
Procedure:
1. Open a new AutoCAD file, set the dimensions in feets inches and precisions to 0'0" and set the limits zoom enter, all enter.
2. Take construction line XL horizontal line, and vertical lines
3. Give the offset distance of 9" to both the drawn lines
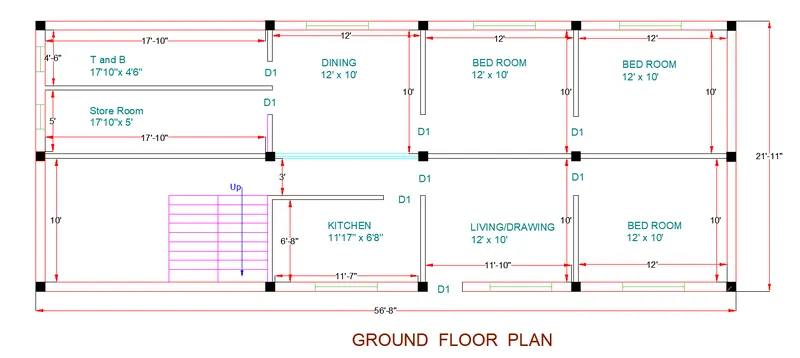
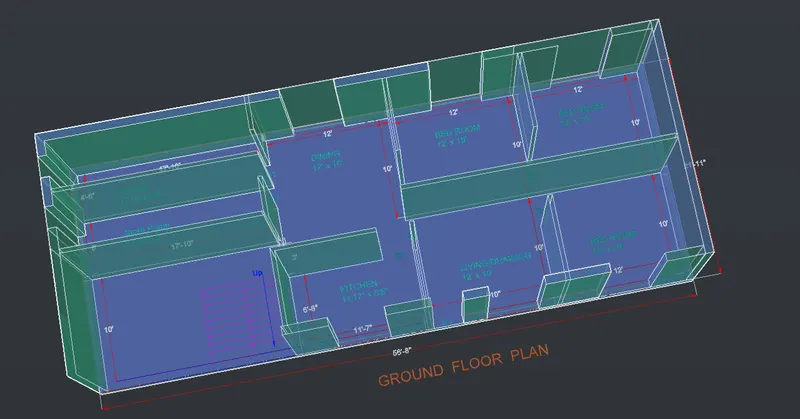
4. 18'x 10' for starecase area, 11'7"x 6'8"Kitchen, 12'x10'Living/Drawing room, three 12'x 10'Bedrooms, 12'x 10'Dining, 17'10"x 4'6"Toilet & Bathroom, 17'10"x 5'Store Room. for Ground Floor
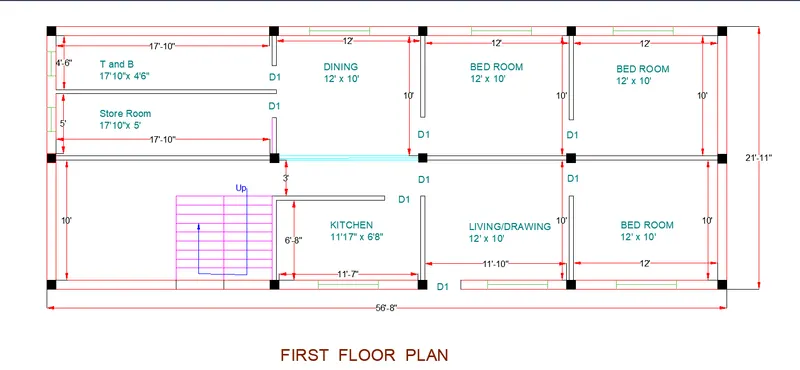
5. 18'x 10' for starecase area, 11'7"x 6'8"Kitchen, 12'x10'Living/Drawing room, three 12'x 10'Bedrooms, 12'x 10'Dining, 17'10"x 4'6"Toilet & Bathroom, 17'10"x 5'Store Room. for First Floor
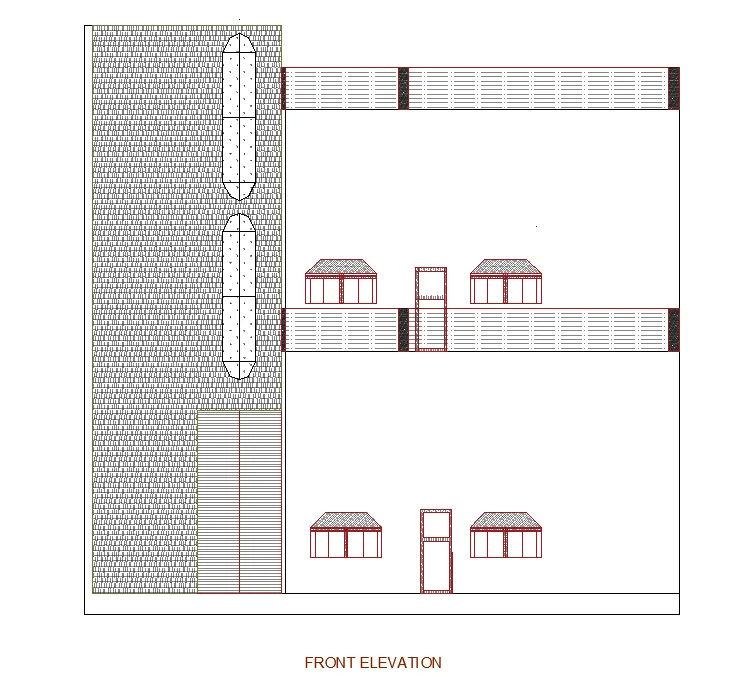
6. To make elevation, take the projection with respect to first floor plan or ground floor plan.
7. Hatch the Doors, window, balcony and staircase
8. Draw the doors of 7'height with the same position as per the plan.
9.. Draw the windows by using line command.
10. Use the command DIMLINEAR to specify all the dimension for the domcumentation.
11. Using multileader text finish up all the writeup works.
12. Now change the sheet from 2D to 3D cliking top right home button.
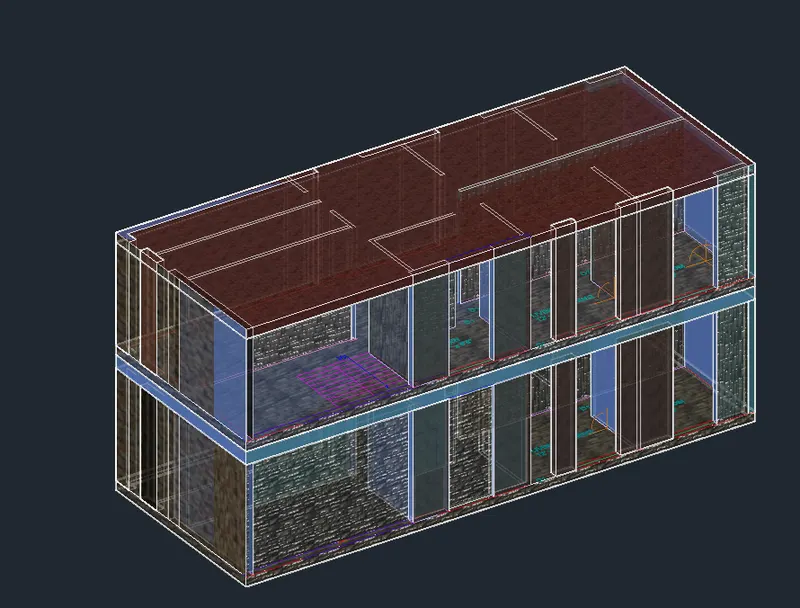
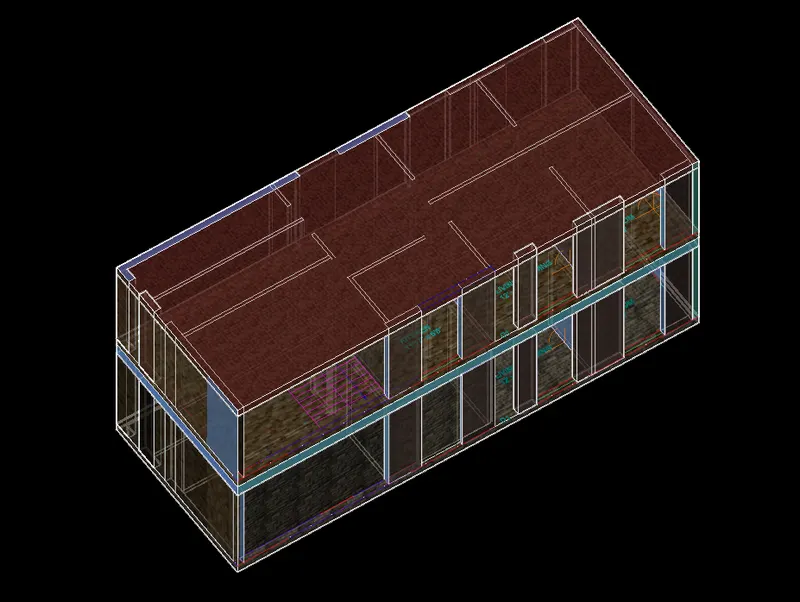
13. Make the regions for all walls and extrude it for 12'height.
14. Keep a copy of plan
15. select the outer extrenal walls and copy it to create bottom plinth of and create a region for the same.
16. Now extrude the created plinth region to height of 1'3"and move the plith tomthe bottom of plan.
17. Take UCS to the top face to create a slab, draw the rectangle with start and end point covering entire roof of the plan and select the rectangle and create a region.
18. Extrude this slab to depth of 1'and repeat then same for the first floor.
19. For rendering, choose the materials from the Autodesk library and assign to the walls, dooors, slab, floor, plinth, etc.
20. Pink the lights and camaera name and keep it where ever requirred.
21. Click the render to window option and wait for 100% render.
22. The materaials with camera, lights are clearly visible.
Result: The Residential Plan, Elevation is plotted and Create a 3 dimensional model of the residential building with a rendered view. in AutoCAD.
AutoCAD Result:
3D Drawings