Project 2_Creating a 3D rendered model for a Residential Building in AutoCad
Create a 3 dimensional model of the residential building with a rendered view.
Introduction :
Renderding : Rendered is a process of add shading , Color and to 2D to 3D wireframe in order to create a image . it can be done in the real time .
Light and materials can be added to a 3d model before a photoealistic image is renderred.
Rendering quality can be changed by using the camera, sunlight different types of light like point , spot ligt , distance light . to improve the rendering to great extent.
Procedure :
- Creat the Autocad with the Give the unit of architeture - pecision 0'-0" - inches - OK
- Give the outer wall of 9" and inner walls of 4.5"
- Using the rectangle command give the dimension of 60'X 20'
- Using the line command and give the offset of the each room According to the dimension and trim the unwanted lines .
- Give the Door and window for the floor and funiture
- And Give the layer command
- And Draw the section elevation using the Line Command
- And Give the Column position in the Floor Plan
- And Give the Dimension of the Flooe plan using the Dimlinaer and Dimcontionus .
- And Give the MTEXT For the Each Room
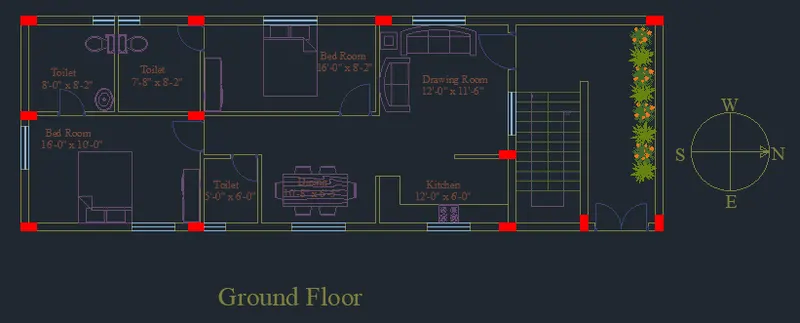
- Plan is to development in to the 3d model for residential buliding .
- architecture plan with windows ,doors , column , with standared sizes
- Creat the boundary command and creat the boundary for the plan and give the region for the plan
- And Creat the 3d layer set to the 3d model
- The extrude command the 2d line made as region to be elevated up to the height 10'-6" .
- The outer sketch is draw the building without door and windows .
- They are 3 types of doors with one main door and 2 types of windows and ventilateres .
- Creat the door and window as the given dimenstion the lintel heigt for door and window is 7'.
- Creat the door using the box command and again other box inside the frist box and using the subtract command and subtarct the second box from the frist command then it from the frame for the door .
- Repect the command and creat the other frame and using the move command combined the two frames and give the handle for the door using the cylinder command .
- And applie the 3d layer command for the door .
- Creat the door using the box command and again other box inside the frist box and using the subtract command and subtarct the second box from the frist command then it from the frame for the door .
- Repect the command and creat the other frame and using the move command combined the two frames and give the handle for the door using the cylinder command .
- And applie the 3d layer command for the door .
- Creat the window using the box command and again other box inside the frist box and using the subtract command and subtarct the second box from the frist command then it from the frame for the window .
- Repect the command and creat the other frame and using box command the box command and form the glass for it the move command combined the two frames and give the handle for the using the box command .
- Creat ventilater using the box command and again other box inside the frist box and using the subtract command and subtarct the second box from the frist command then it from the frame for the ventilater and give the box command and from the glass for the ventilater .
- And applie the 3d layer command for the window .
- And applie the material for the door and window .
- And using the move command place the door ,window and ventilater in the plan .
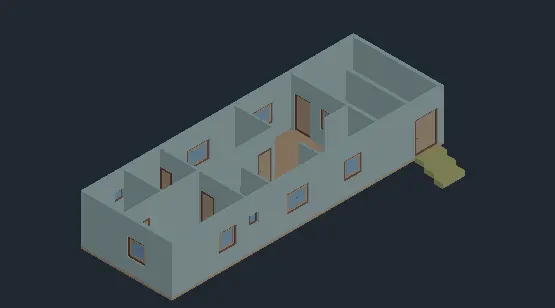
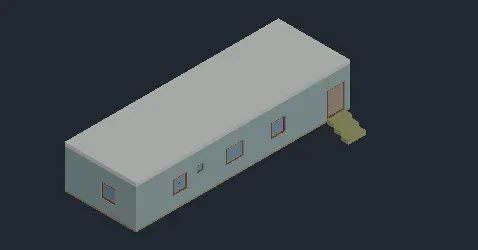
And Creat the roof and floor for the model and apply the material for the 3d model and give the light command and Set the light for it.
And set the camera to the require position is set .and give the renderder for the 3d model .
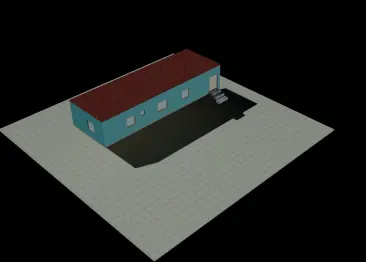
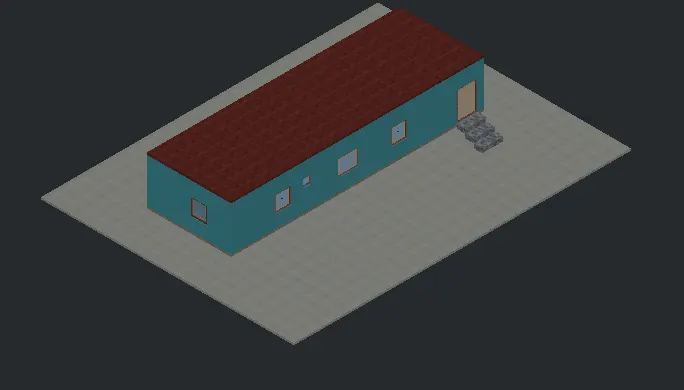
Result :
3d rendered for the residential buliding is created
And Apply the material for the building .
And give the camera position as set the view for the building as requried.
Rendering is done , light is used , 3d model as created using proper views .