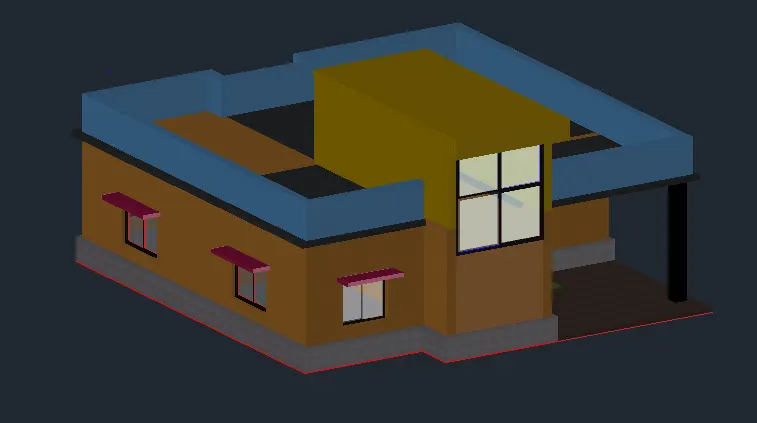
Project 2_Creating a 3D rendered model for a Residential Building in AutoCad
AIM:- Create a 3 dimensional model of the residential building with a rendered view
INTRODUCTION:-
Create the Residential building BED ROOM, KITCHEN, LIVING ROOM, PARKING SPACE,BOTH ROOM,STAIR CASE, DOOR, AND WINDOWS AND DRAW The Elevetion and section A-B and creating 3D model of the residential building propare dimension
Pro
STEP-1
1.First of all open the Auto CAD
2.Take the new drawing and set the LIMMAX AND ENTER
3.Then set the drawing Area in milimeter (10000,10000)
4.First of all take the XL and enter the V enter vertical constuction line
5.First of all take the command XL and enter the H enter horizental constuction line
6.Creat the plan in residential building
7.Creat the plan in kitchen.
8.Creat the plan in bed room.
9.Creat the plan in living room.
10.Creat the plan in parking area.
11.Creat the plan in stair case.
12.creat the plan in both room.
13.Trim the unwanted portion of the line
RESULT:- 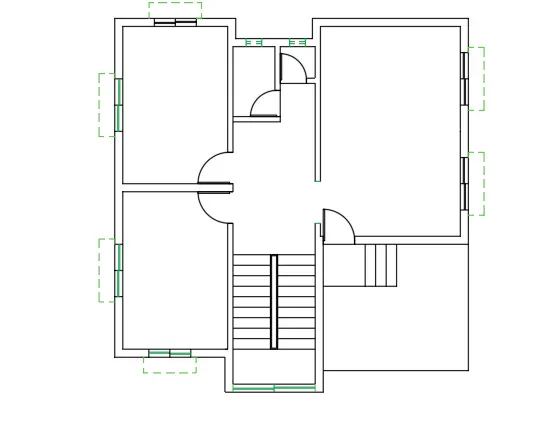
STEP-2
1.Creat the plan in residential building propar dimension.
2.Creat the plan in kitchen. 3*4.5m
3.Creat the plan in bed room. 3*4.5m
4.Creat the plan in living room. 4*6m
5.Creat the plan in stair case.
6.creat the plan in both room. 1.2*2m
7.Trim the unwanted portion of the line
RESULT:- 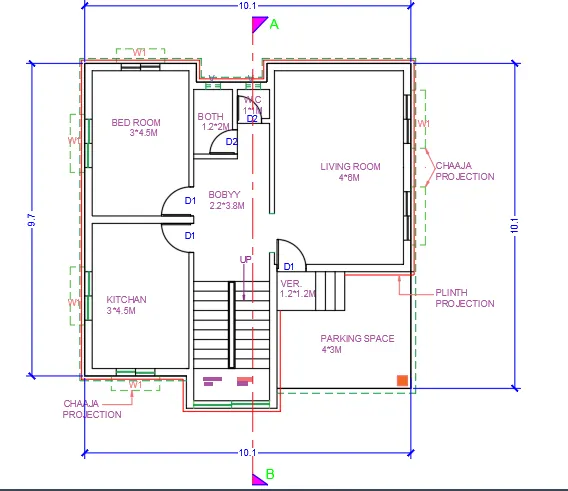
STEP-3
1.First of all take the XL and enter the V enter vertical constuction line
2.First of all take the command XL and enter the H enter horizental constuction line
3.first draw the external wall line bothe side
4. second creat the window line
5.Then use the offset command 'O'
6.creat the plinth 0.6m from ground level.
7.Then creat the slab hight in plinth
8. Draw the stair case window
9.Creat the parapet wall in slab to 0.9m
10 take the 'H' enter haiching
RESULT:- 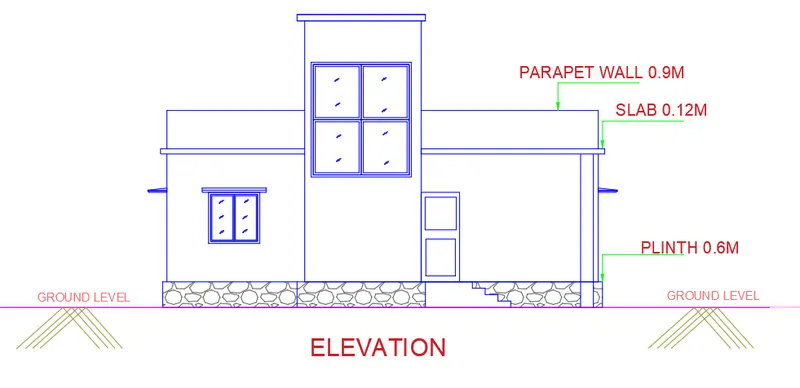
STEP-3
1.First of all take the XL and enter the V enter vertical constuction line
2.First of all take the command XL and enter the H enter horizental constuction line
3.first draw the external wall line bothe side
4. second creat the window line
5.Then use the offset command 'O'
6.creat the plinth 0.6m from ground level.
7.Then creat the slab hight in plinth
8. Draw the stair case 3.12m
9.Creat the parapet wall in slab to 0.9m
10.Creat the opning in 2.10m
11. take the 'H' enter haiching
RESULT:- 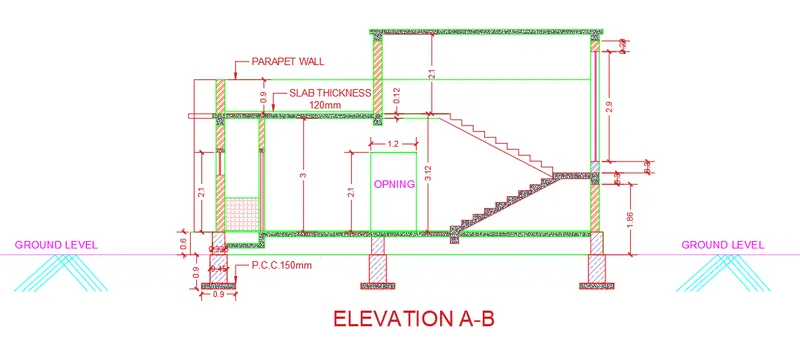
STEP-4
1.Creat the 2D plan and convert the 3d modling
RESULT:- 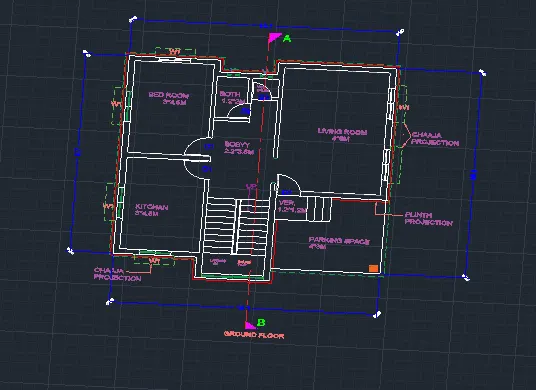
STEP-5
1.select the rectangale tool by entring 'REC' command in the in the command tab.
2.specify the first corner point as any corner point the window.
3.Specify the other corner as the opposite corner of the window.
4.select the extrude tool from the ribbon.
5.Again select the rectangale to a hight of 3m
6.then use forboundry command 'BO' and pick point
7.select the rectangle and use the presspull command
RESULT:- 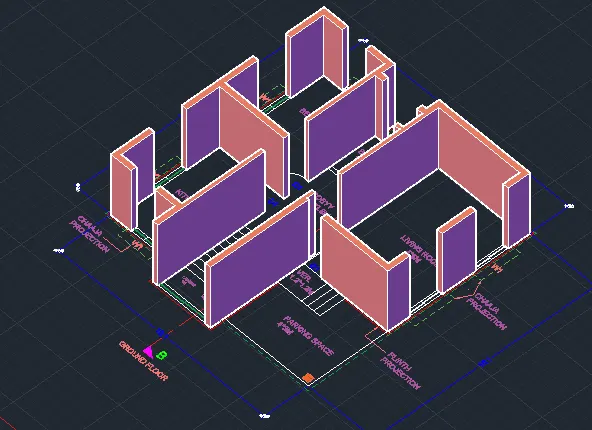
STEP-6
1.creat the window and door presspull command
2.select the presspull command and move the window hight 0.9m
3.select the preespull command and creat the door
RESULT:- 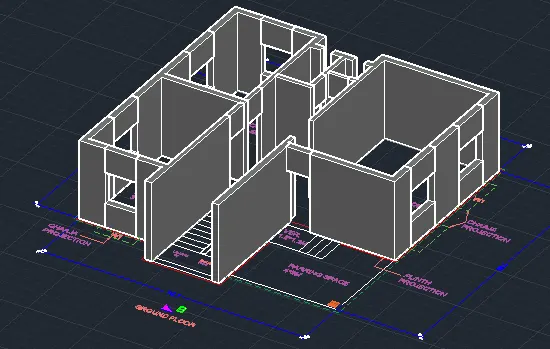
RESULT:- 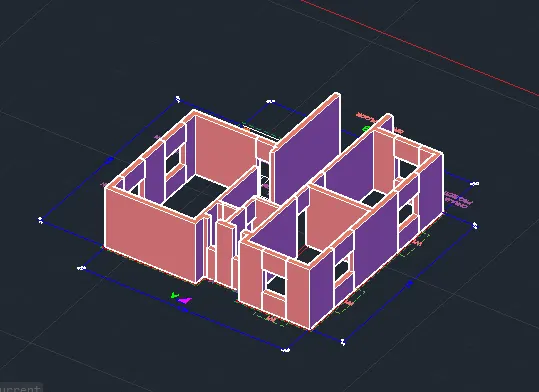
STEP-6
1.select the boundry command and pick point and creat the plinth
2.select the presspull command of Ribbon tool and plinth hight 0.6m
3.creat the pilnth stair use presspull connad and 4 ride and 4 thred
4. total plith heigth 0.6m the creat the stair ground to plint
RESULT:- 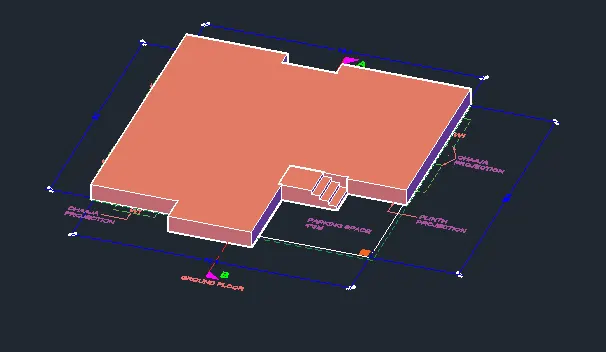
STEP-6
1.select the plinth and use union command
press Enreting then select plinth
2 use the Esc command
3.select the all plan and move up side 0.12m
4.select the plinth and slect the any specify point and and fix the plan
RESULT:- 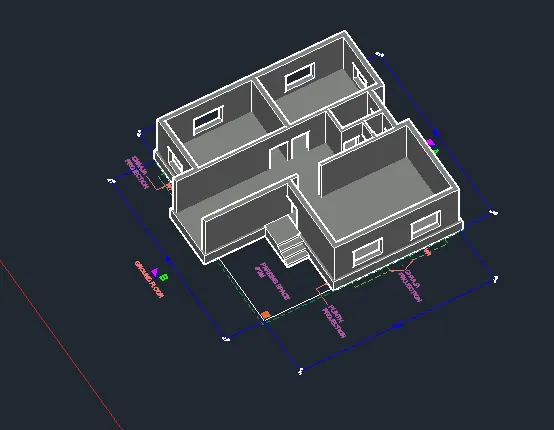
STEP-7
1.select the rectangle and Creat the window
2. Creat the door presspull command use
3.Creat the slab presspull command use
4.Creat the chhaja presspull command use
RESULT:- 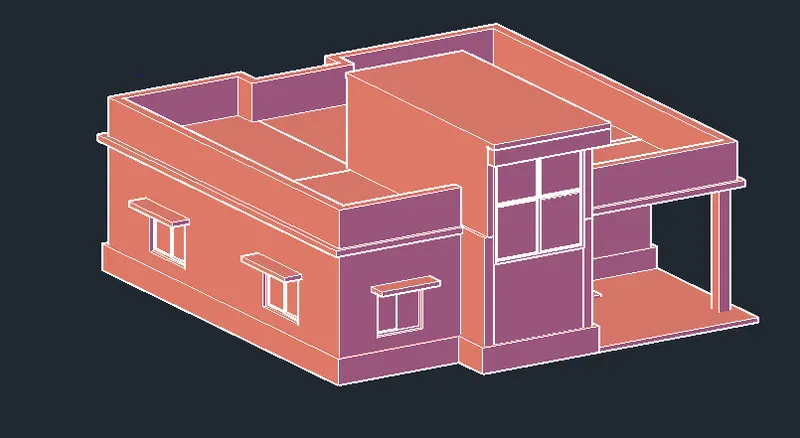
STEP-8
1.select the rectangle and Creat the window
2. Creat the door presspull command use
3.Creat the slab presspull command use
4.Creat the chhaja presspull command use
5. view and enter the use the material browser
6.material browser and take glass and sellect the diffrent type of glass use for window
7.take the wall color and diffrent types of color
8. Select the ston material browser and drage the plinth
9.take the marble color select then drage and select the column.
RESULT:- 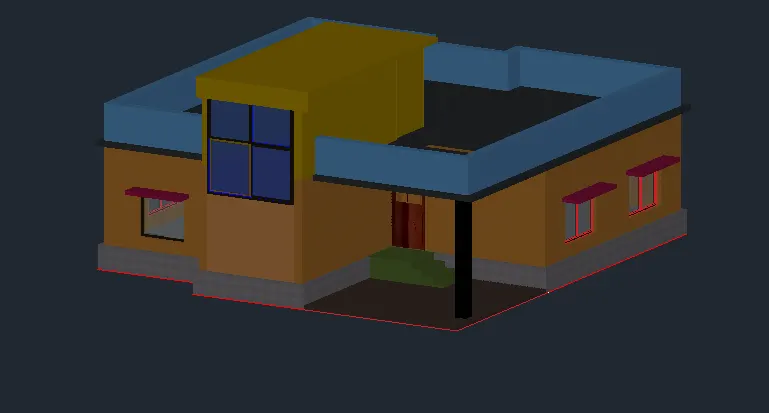
STEP-9BU
1.floowing 3D orbit thios drawing and view the othe side show
2.show the diffrent posision view the house plan
RESULT:-