Project 2 Adaptive Cruise Control
Aim: Build Model for Adaptive Cruise Control Algorithm by using the given requirement.
Objectives:
- Developing Adaptive Cruise Control feature as per the Requirement Document using MATLAB Simulink.
- Follow all the MBD related processes: Requirement Tagging & Traceability, SLDD creation, Configuration Parameter changes, Model Advisor check & Code Generation.
Simulink Model:
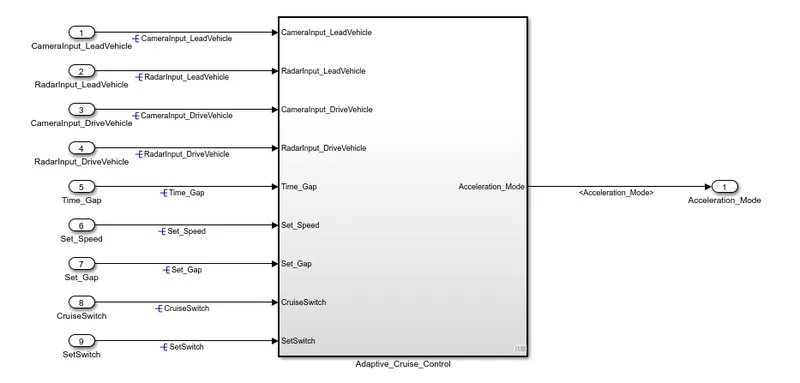
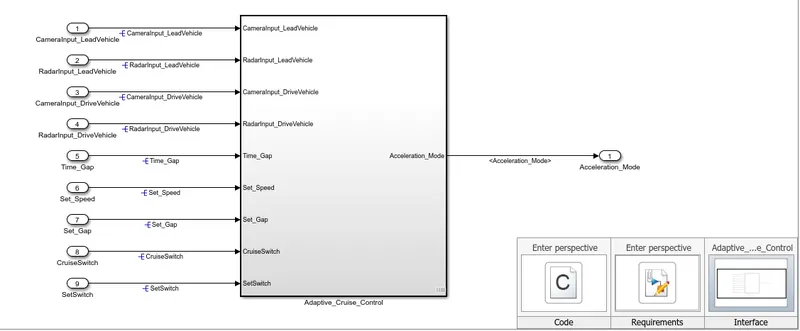
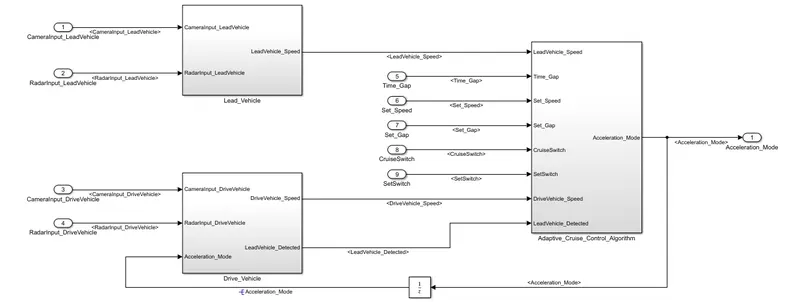
The above figure shows the Adaptive Cruise Control model, for these models 9 inputs are present and these models determine the Acceleration Mode as output. Inside the model 3 three more subsystems are present which is shown in the below figure.
Lead Vehicle Subsystem:
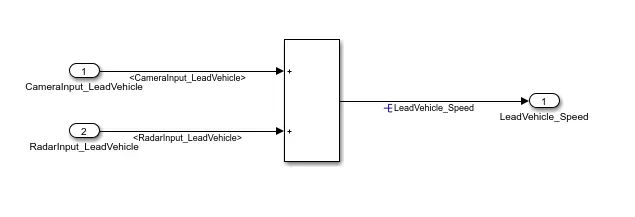
The above figure shows inside the Lead Vehicle in this Camera input lead vehicle and Radar input lead vehicle as input and lead vehicle speed is output. As per we can see in the above figure in this subsystem just add the input signal and send it as output.
Drive Vehicle Subsystem:
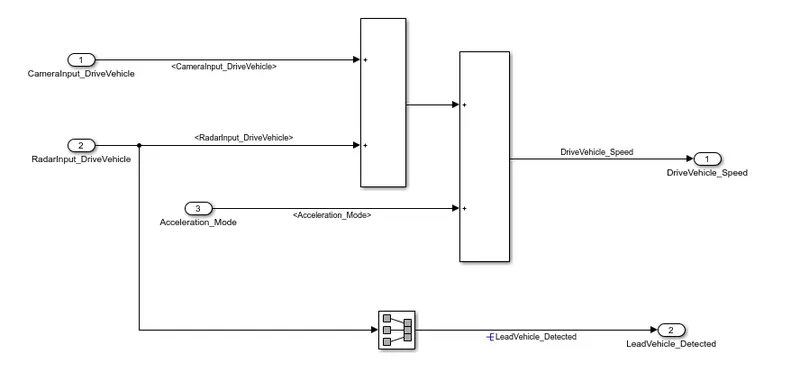
Similarly in this subsystem add all input and send it as output. Also, a signal conversion block connects to the Radar input drive vehicle and sends it as a second output. Therefore in this subsystem three input and two output one input come from Adaptive cruise control algorithm as acceleration mode. Because this signal is reverse fed to these subsystems, we need to attach the unity delay block.
Adaptive Cruise Control Algorithms:
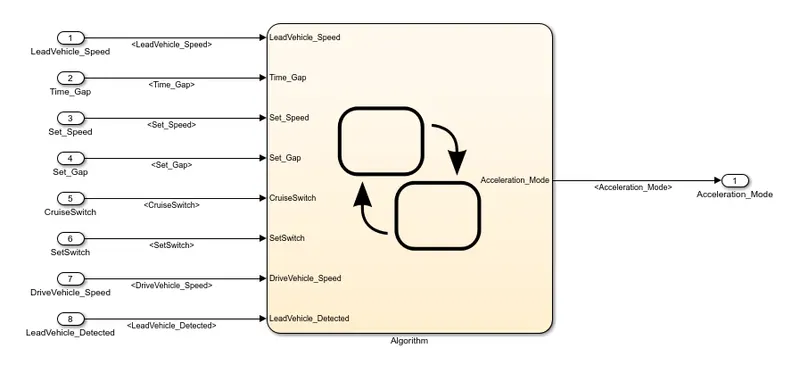
In this subsystem 8 input and one output present also for algorithms stateflow chart block is used. As per the mentioned in the requirement these algorithms are created by using state and transition conditions.
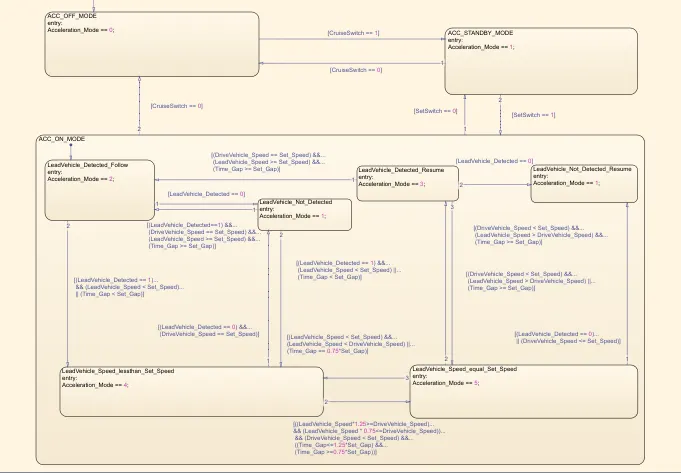
Requirement Tagging & Traceability:
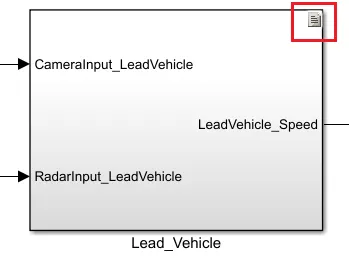
For requirement tagging and traceability at beginning we want write all requirement in the word file, then select those position which we want to link to the respective any one subsystem, then goto the model subsystem and right click on the subsystem and click on the requirement and select the link to selection in word. Now our subsyste is tagged to our requirement.
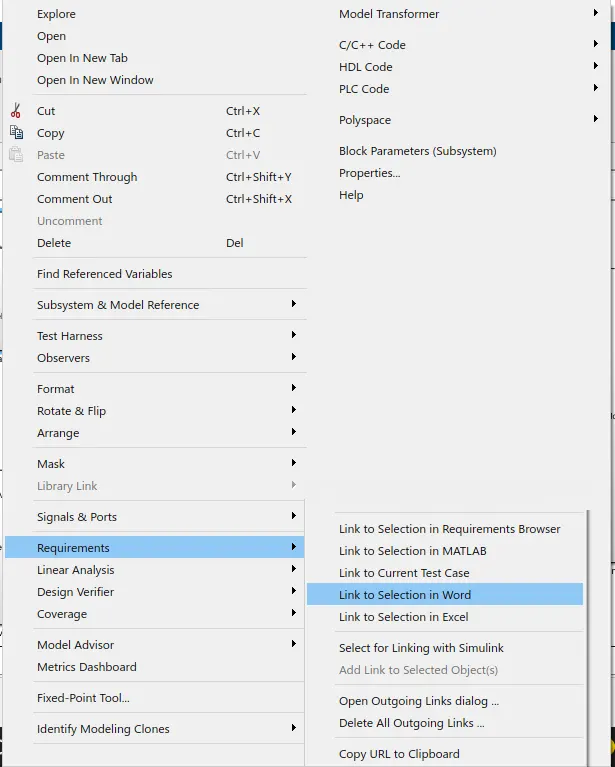
After tagging on subsystems one sign displays to redirect on the requirement file.
SLDD creation:
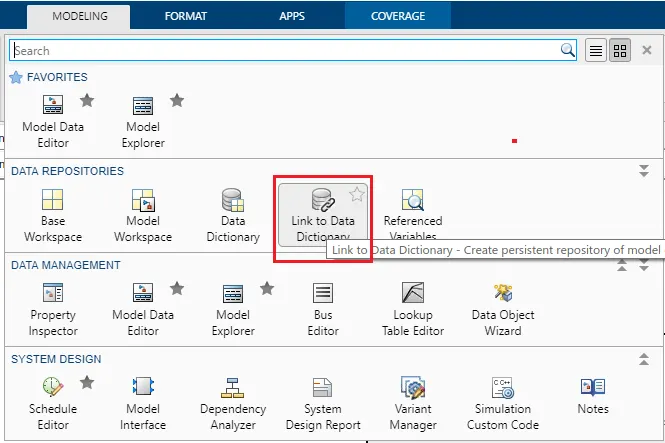
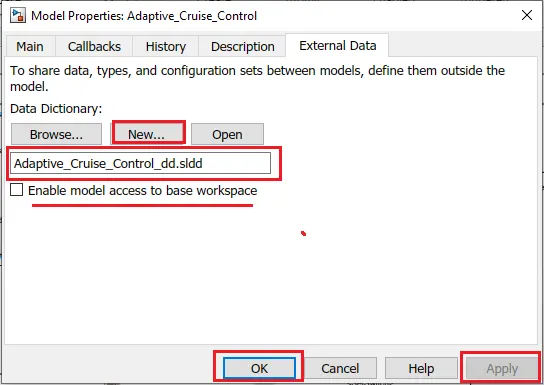
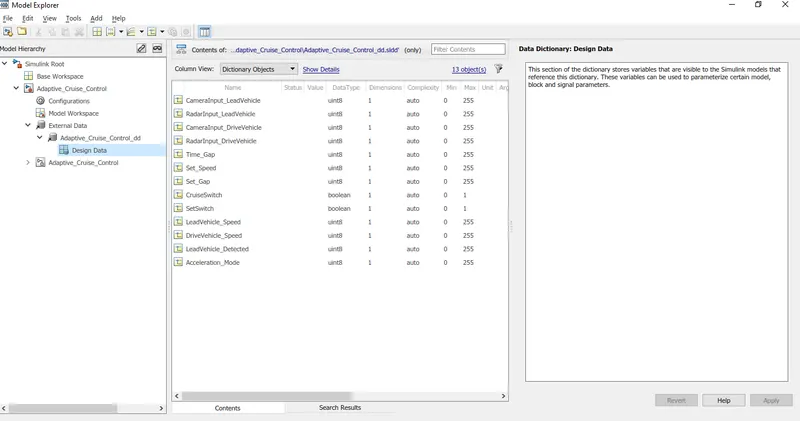
For creating the SLDD got the modeling then design section select link to the data dictionary then one window popup, in that type the name disable the ‘Enable model access to base workspace’ and click on new then this SLDD file save in the same folder where simulink model are present. Now SLDD file created we can click on the left bottom corner sign, open the SLDD file and make changes as per our requirement.
Configuration Parameter changes:
For the model based development needs to change the configuration parameters as per our requirement. For changing the model configuration parameters go to the modeling section select model setting and a new configuration parameters window will be opened.
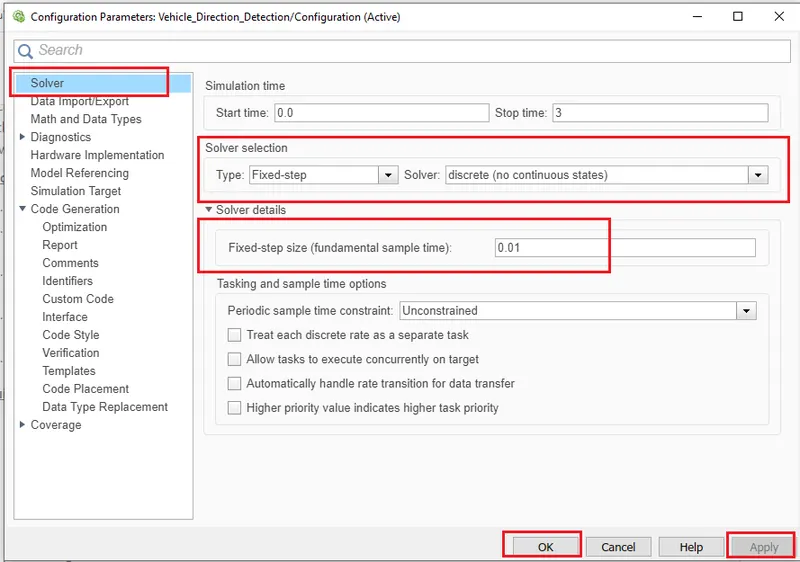
In the solver change the solver type as Fixed-step, in solver choose discrete (no continuous states) and Fixed step size is 0.01. Then for code generation we required some changes in the code generation section.
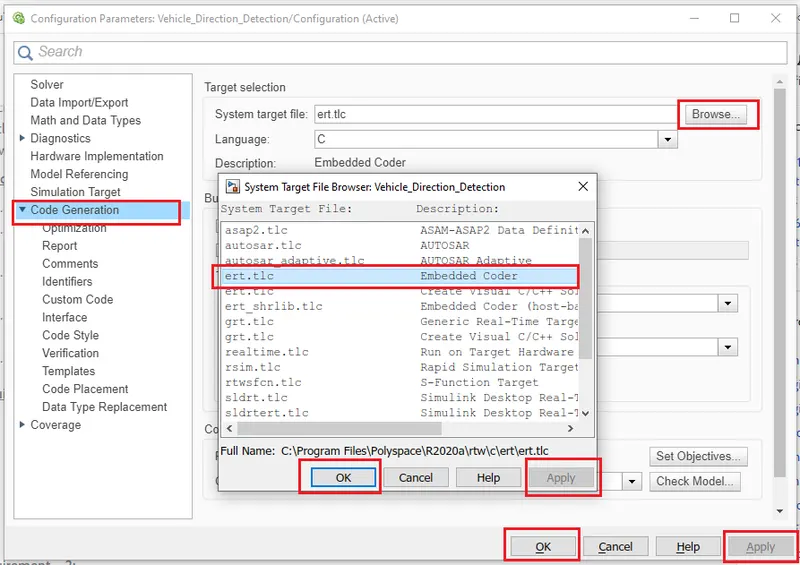
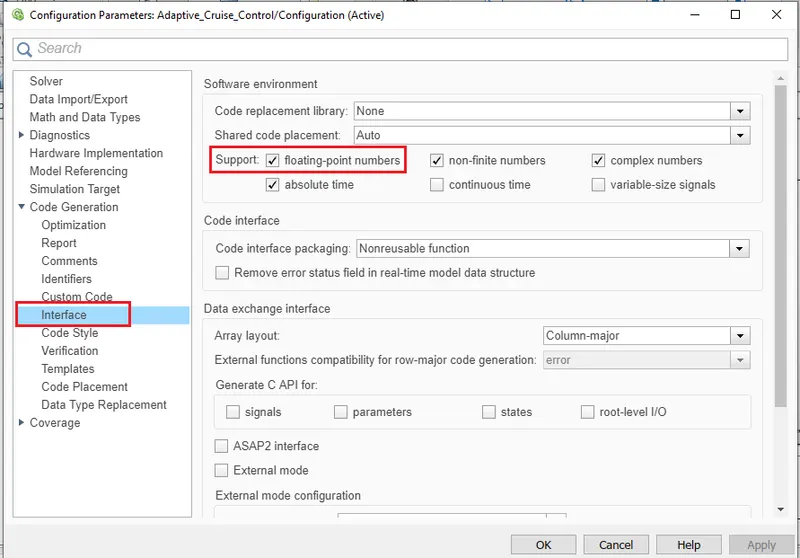
For code generation settings go to the code generation section select system target file as ert.tlc (Embedded Coder) by click on browse. Also as per mention in the question enable support floating numbers. For that goto the code generation > Interface and select support floating point numbers.
Model Advisor check:
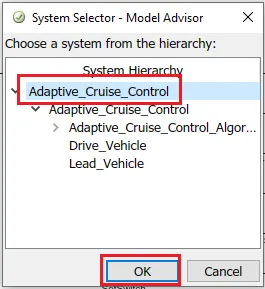
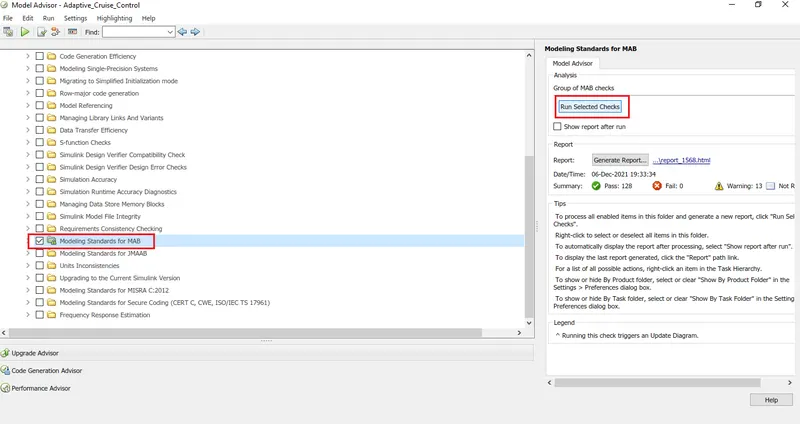
For model advisor check go to the modeling tab select model advisor then one window popup select our model and click on ok, now one new model advisor window open select Modelling Standard for MAB and click on run. Now model advisor checking starts after completing the checking resolve maximum warning and generates the model advisor reports.
Code Generation:
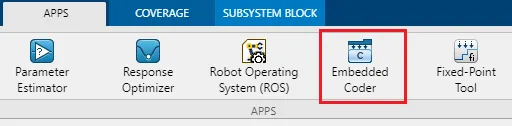
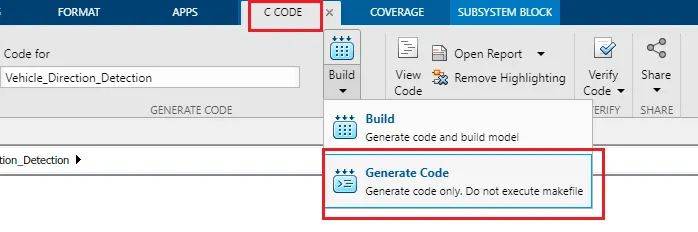
For code generation required model setting we already done, now for code generation goto the Apps select Embedded coder, after that new C Code tab open in that select build >> generate code. Now automatically code will be generated and displayed on the right hand side.
After successfully completing the C code, if we want to see the code again then we click on the right side bottom corner sign and select the C code, it will display the C code.