Project 2
Project Name - Education Centre Road
Assume - Calendar as 6 x 24 and start date on 22nd feb 2021
AIM OF THE PROJECT -
1. Develop the project schedule as per the criteria above
2. Use 3-Tier timescale with Year / Month / Weeks
3. Define and Add resources
4. Add a budget to your project - INR 6 cr.
5. Assign a baseline to the project
6. Add following expense:
Task - 1 - Rs 20,000/- (Item - Fuel)
Task - 2 - Rs 30,000 /- (Item - Maintenance)
7. Generate material resource costs curve
8. Generate an activity wise cost report
9. Create a reflection
10. In the reflection, auto update the project at 15 days from start
11. Open a TSLD view of the project in Visualizer
12. Add curtains up-to first 15 days of the project.
13. Find out the actual cost for labour, non-labour and material cost of the updated schedule
PROCEDURE -
STEP 1
OPEN PRIMAVERA CREATE A NEW PROJECT UNDER
EPS - SKILL LYNC EDUCATION AND
OBS - PROJECT MANAGER
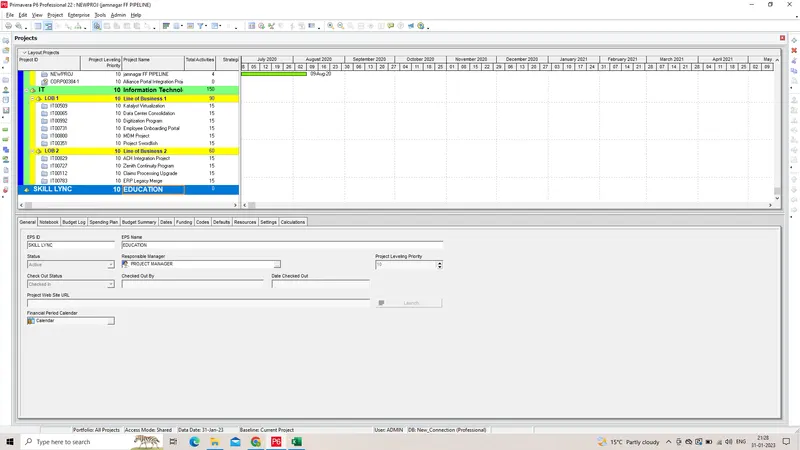
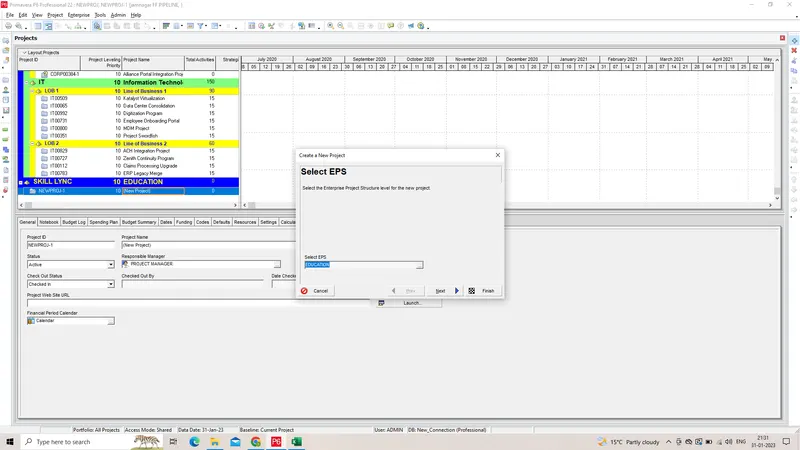
CLICK ADD + OPTION FROM RIGHT COMMAND BAR
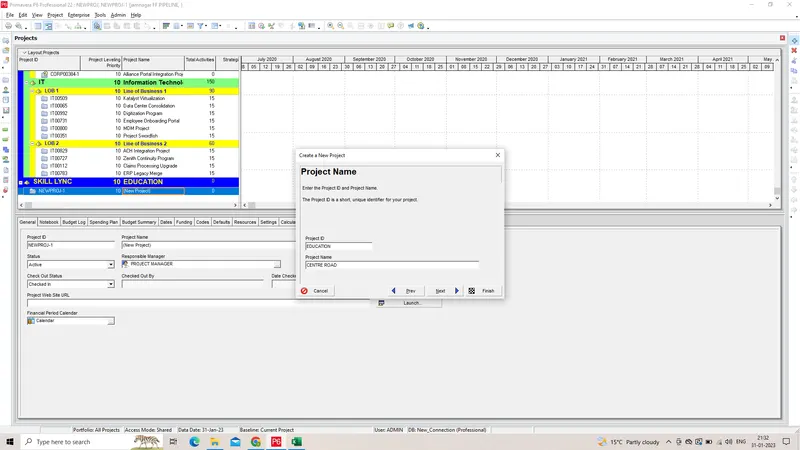
SPECIFY NAME AND ID FOR THE PROJECT
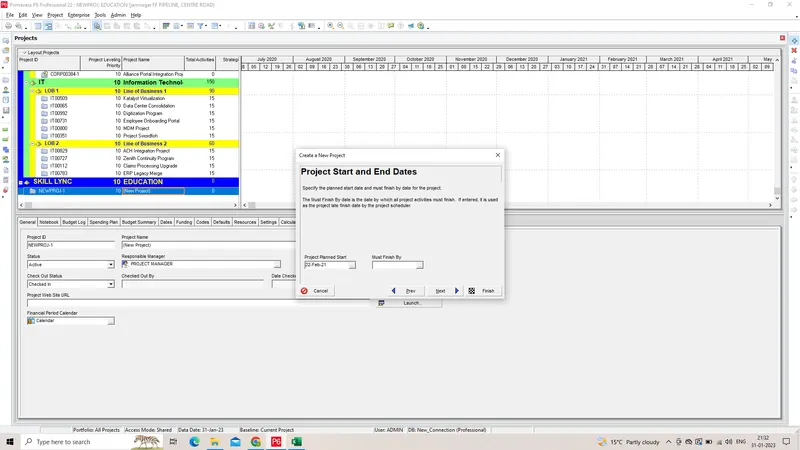
ASSIGN PROJECT START DATE
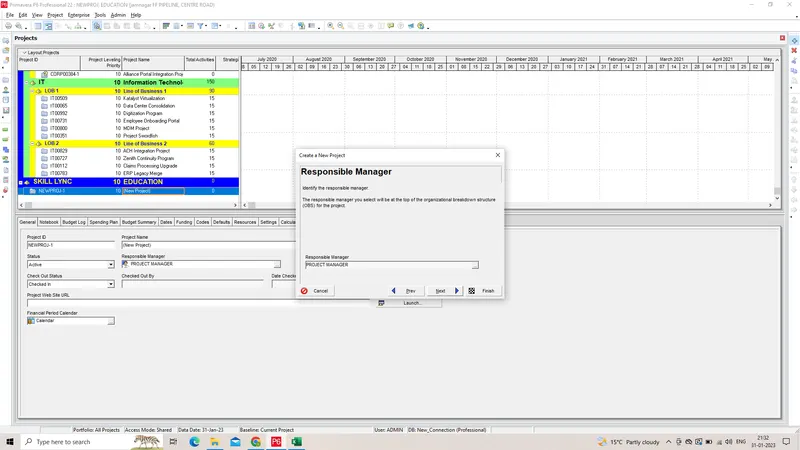
RESONSIBLE MANAGER BE SAME AS PROJECT 1 - PROJECT MANAGER
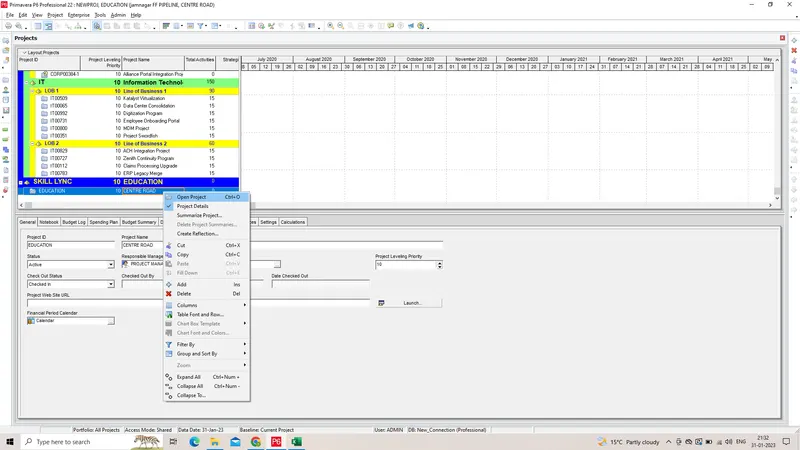
PROJECT CREATED SUCCESSFULLY , NOW RIGHT CLICK TO OPEN IT
STEP - 2
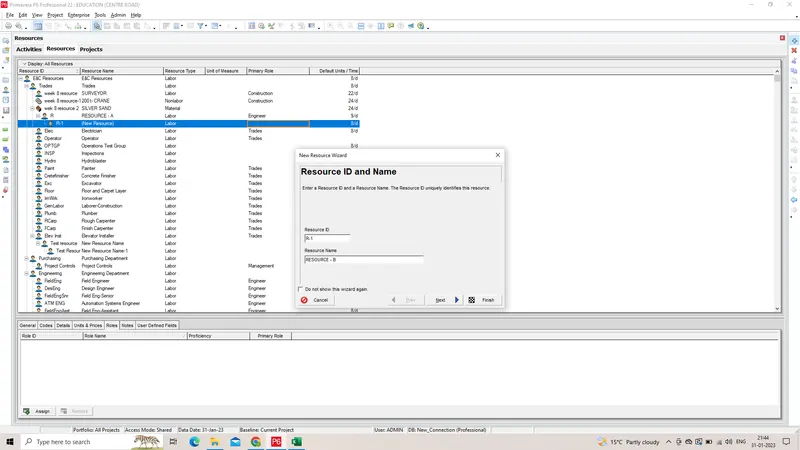
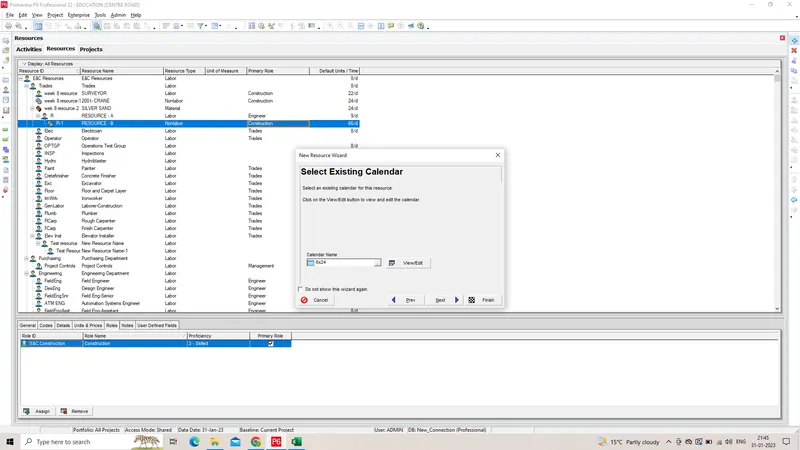
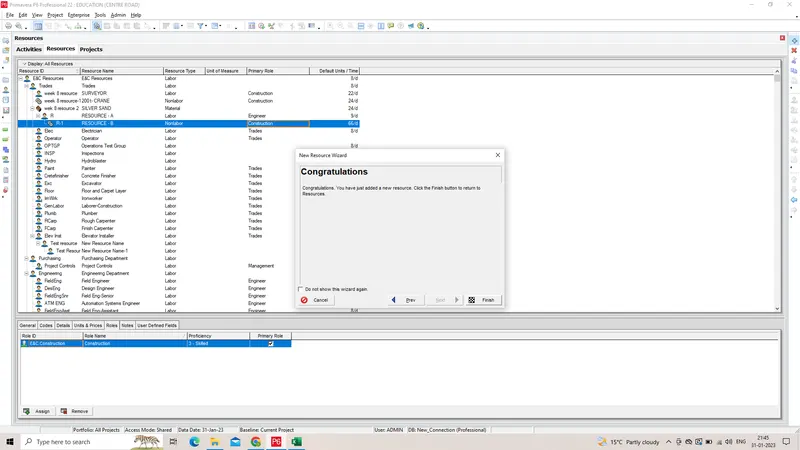
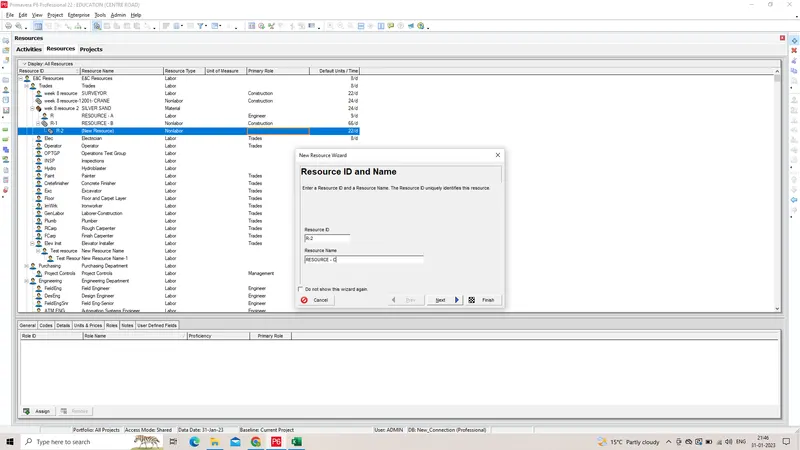
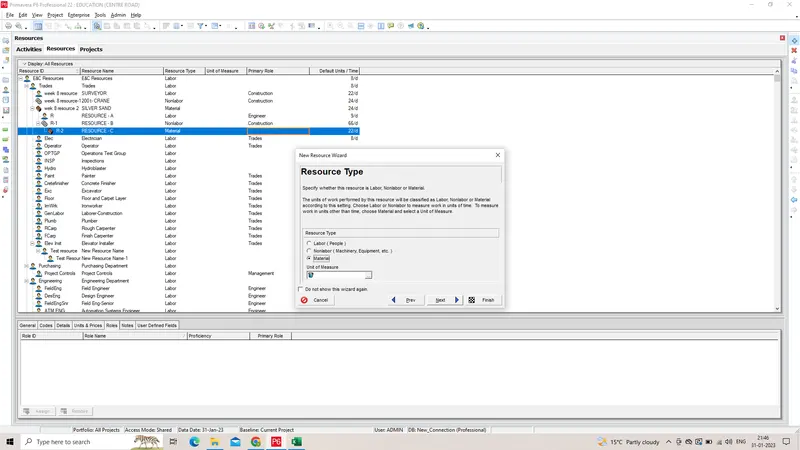
CREATE RESOURCES
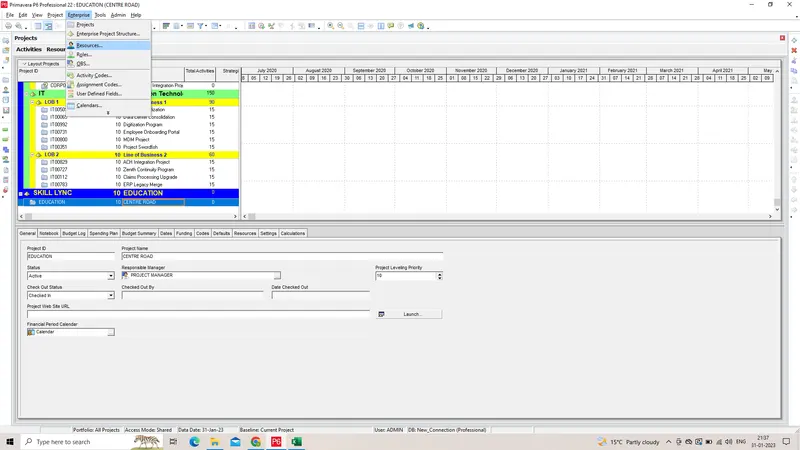
CLICK ON ENTERPRISE AND DROPDOWN , CLICK ON RESOURCES
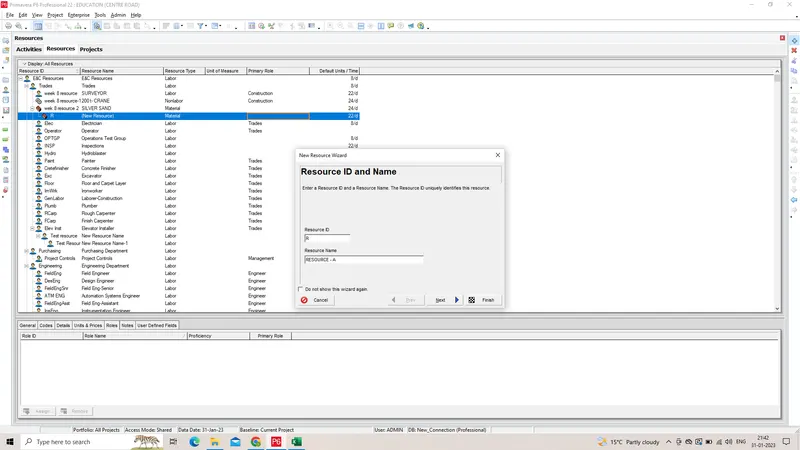
CLICK ON + FROM RIGHT COMMAND BAR AND ADD RESOURCES
ASSIGN RESOURCE ID AND NAMES TO THE RESOURCES
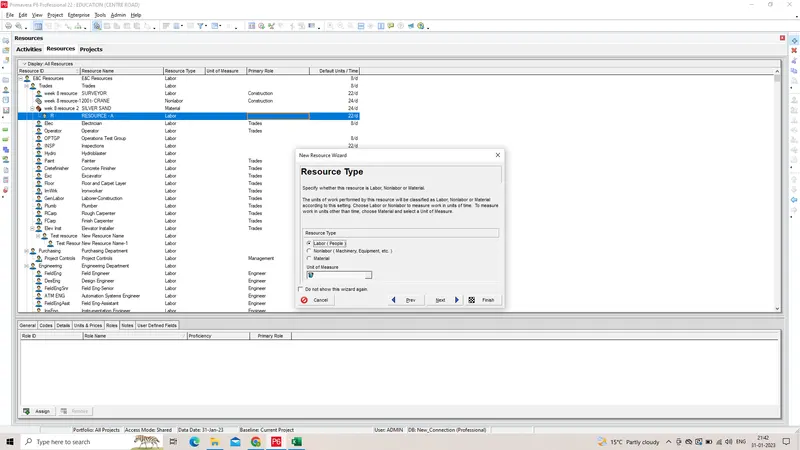
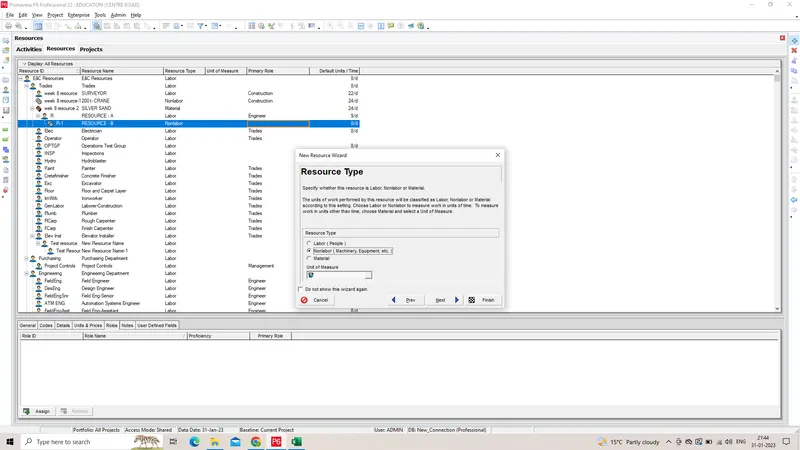
ASSIGN RESOURCE TYPE
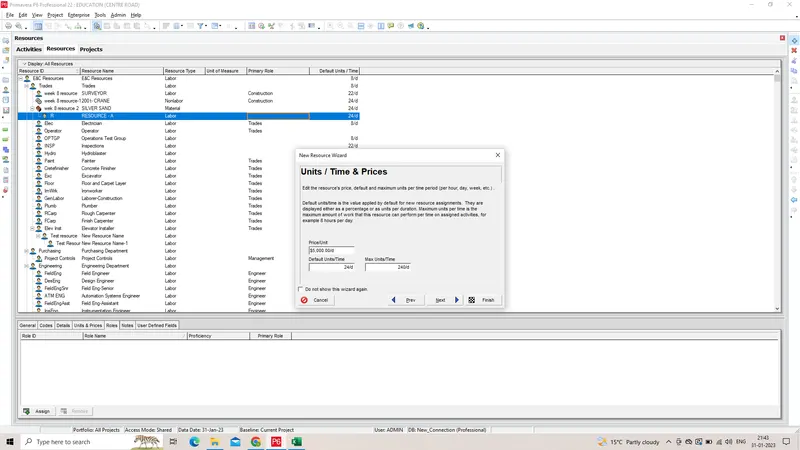
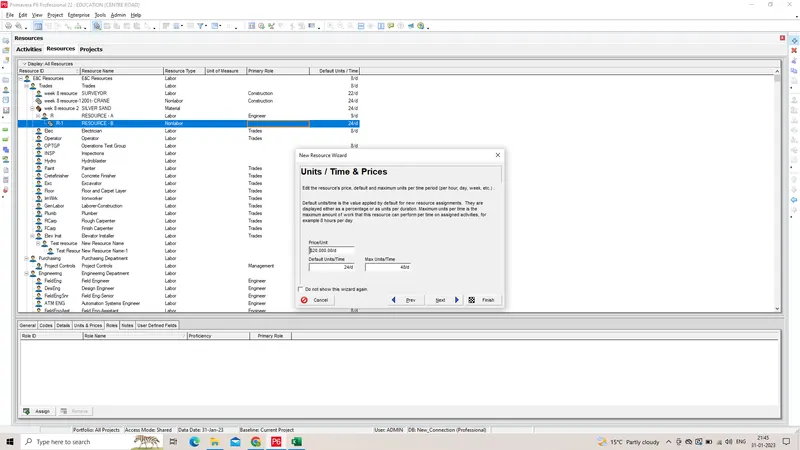
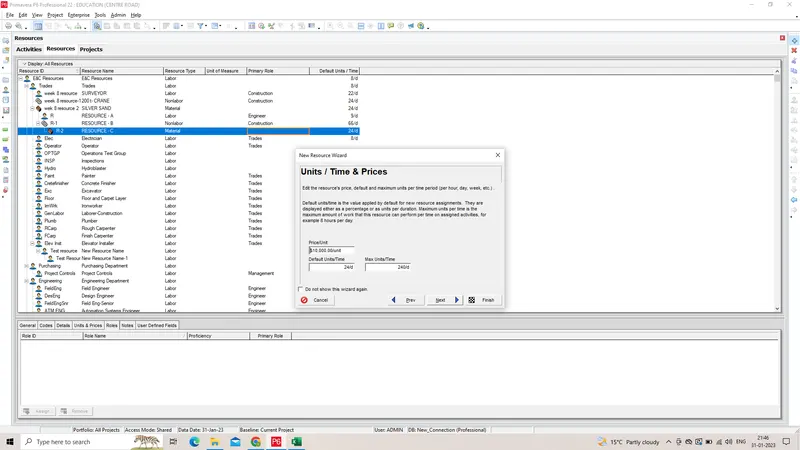
ASSIGN PRICES, MAXIMUN, AND DEFAULT
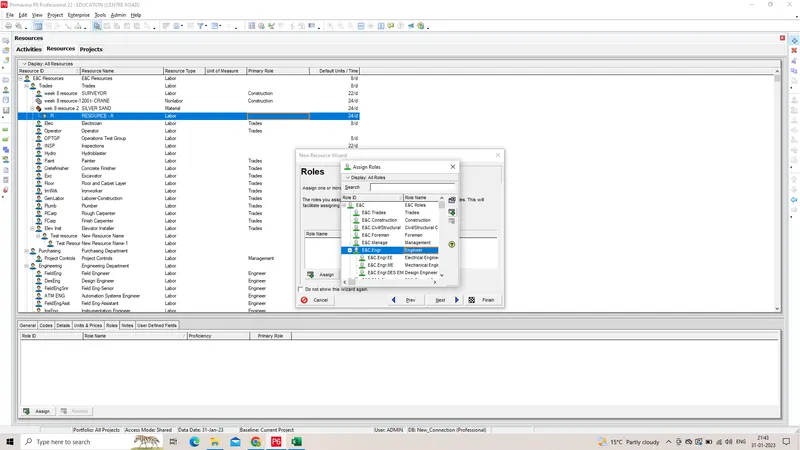
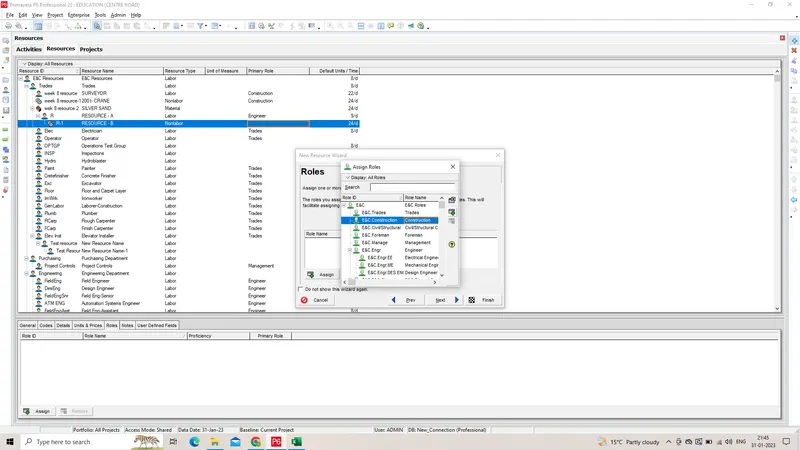
ASSIGN ROLES TO THE RESOURCE
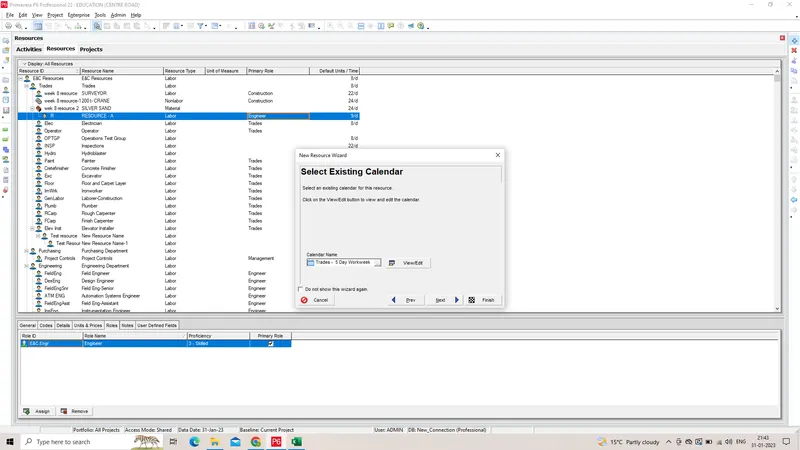
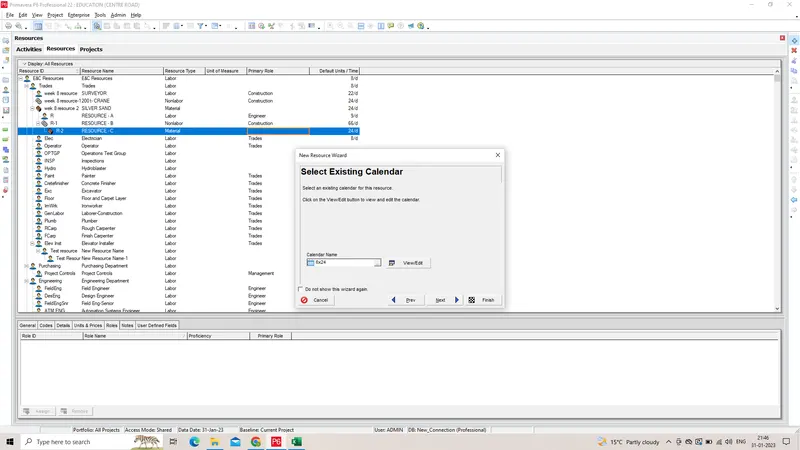
ASSIGN CALENDER TYPE
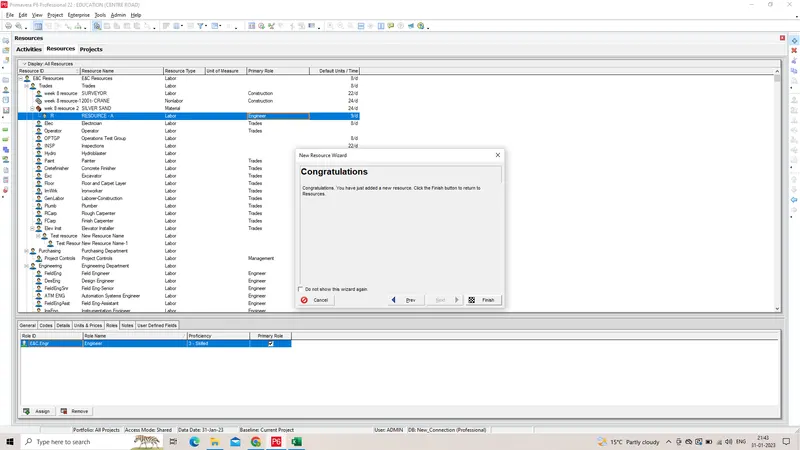
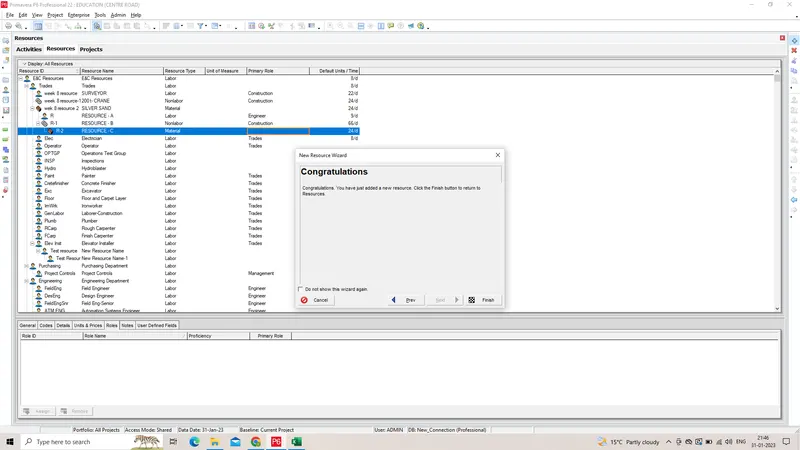
RESOURCE SUCCESSFULLY CREATED ,
SIMILARLY CREATE MORE RESOURCES.
STEP 3
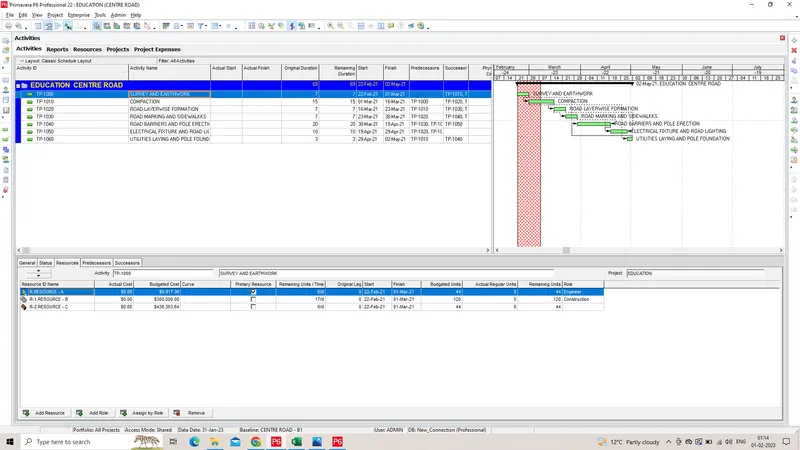
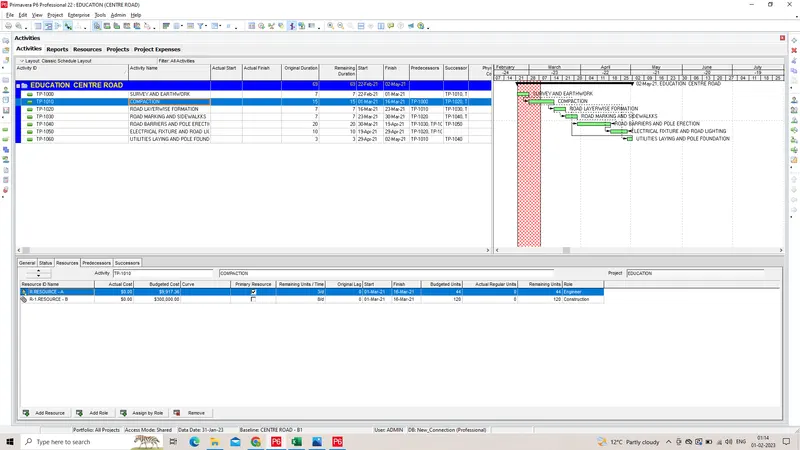
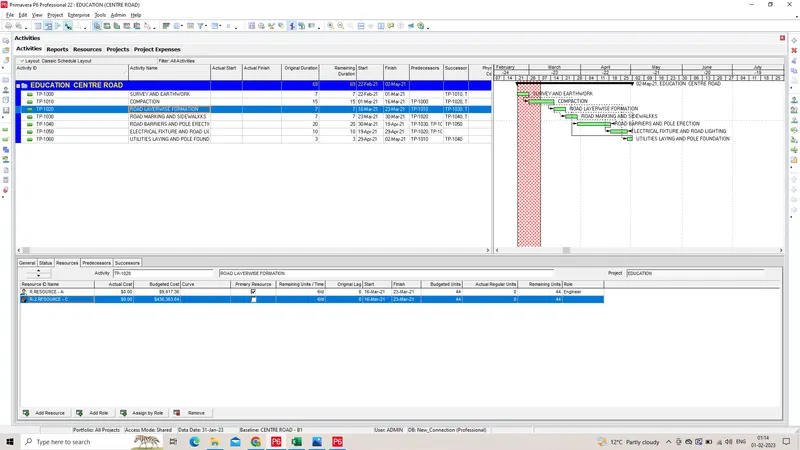
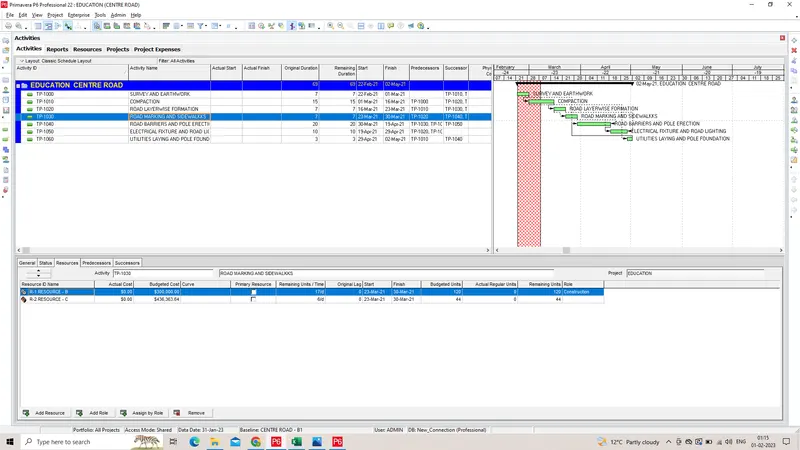
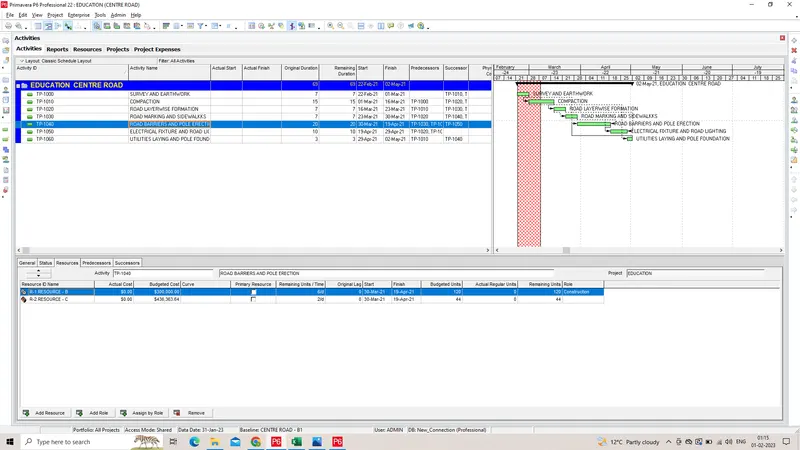
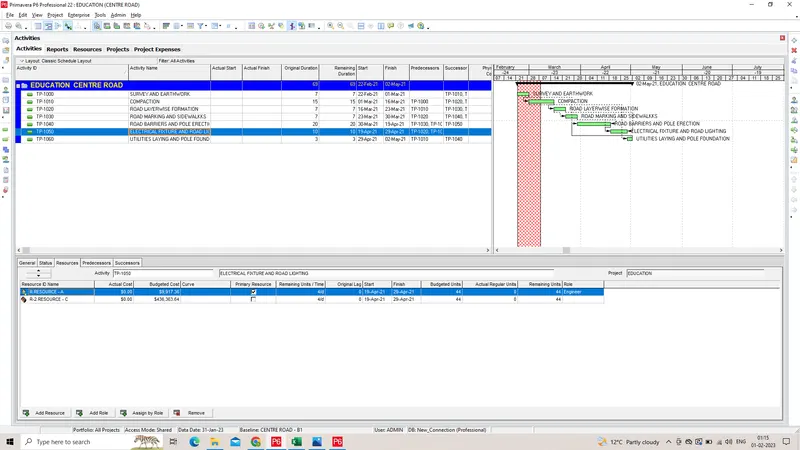
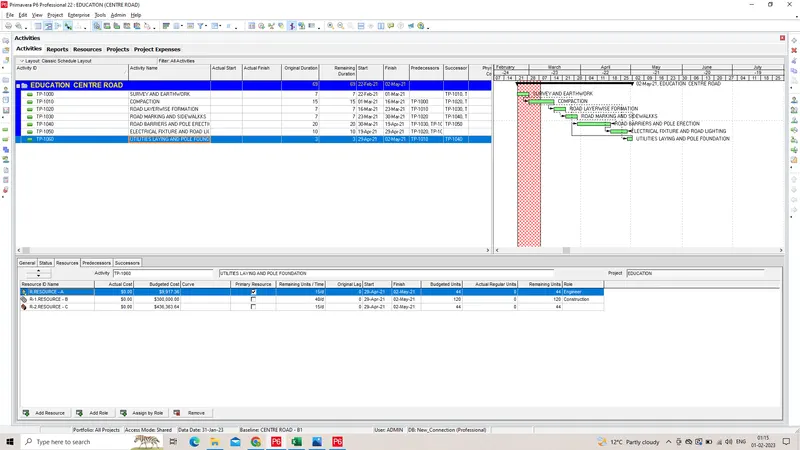
ADD ACTIVITIES
CLICK + FROM RIGHT COMMAND BAR TO ADD ACTIVITIES
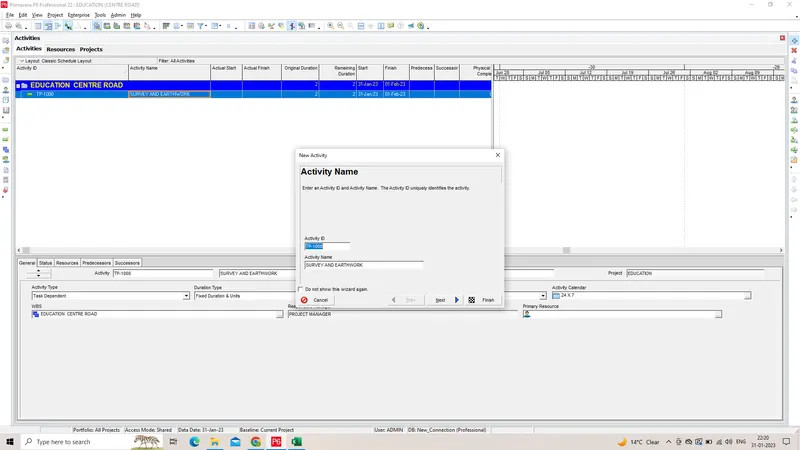
ASSIGN NAME AND ID TO THE ACTIVITY
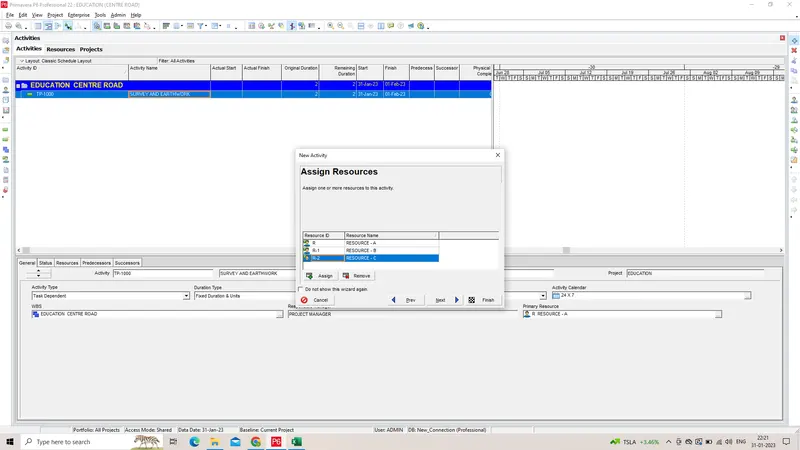
ASSIGN RESOURCES
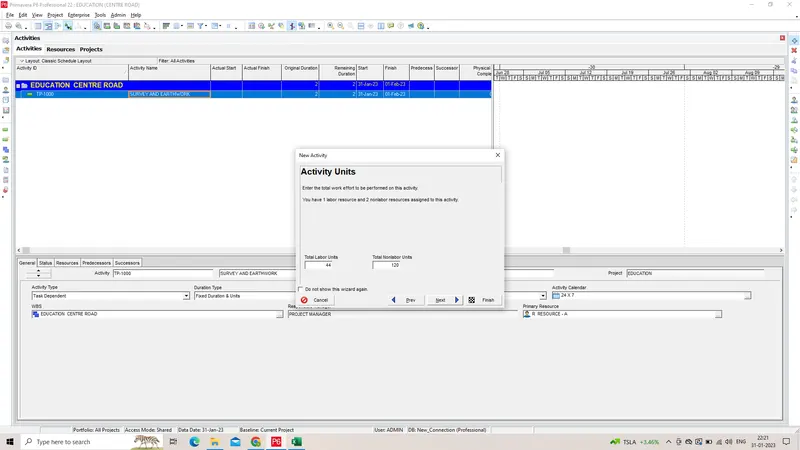
ADD DEFAULT UNITS
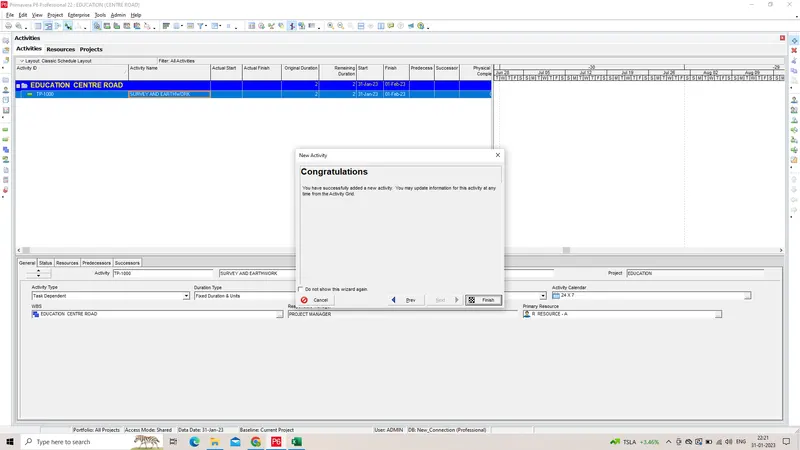
ACTIVITY CREATED SUCCESSFULLY
SIMILARLY CREATE ALL OTHER ACTIVITIES
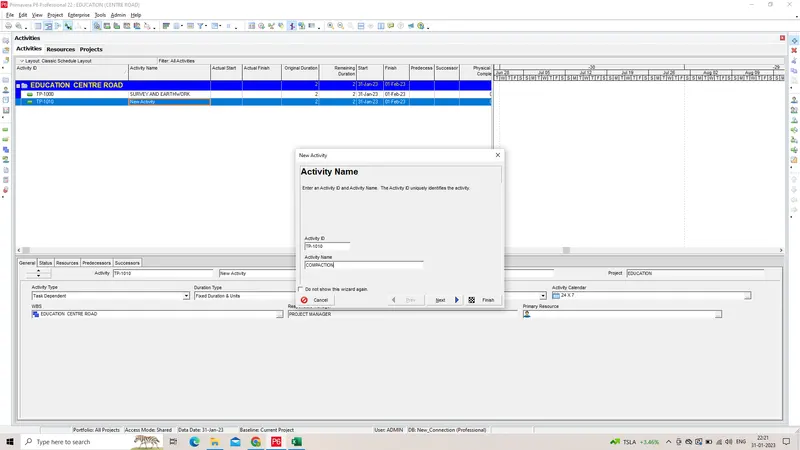
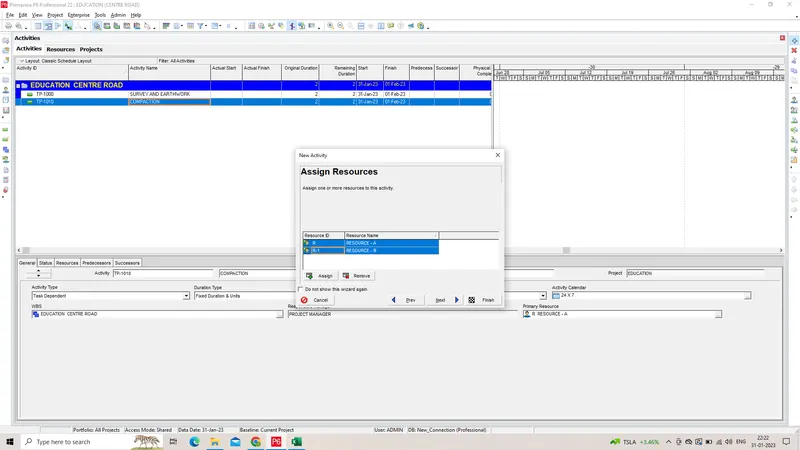
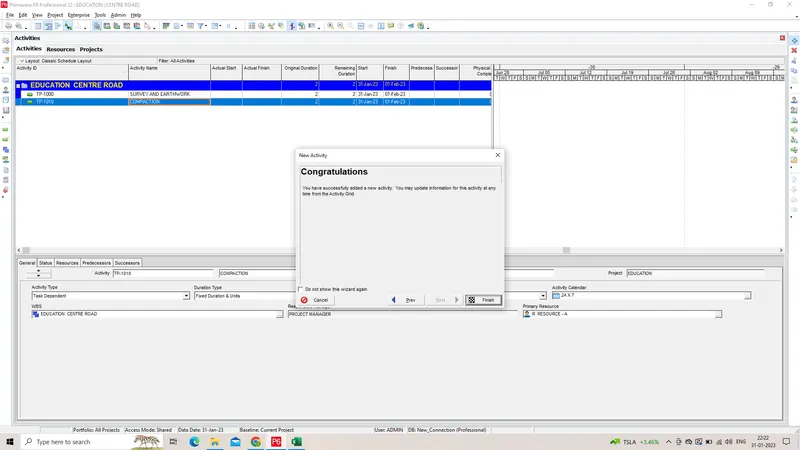
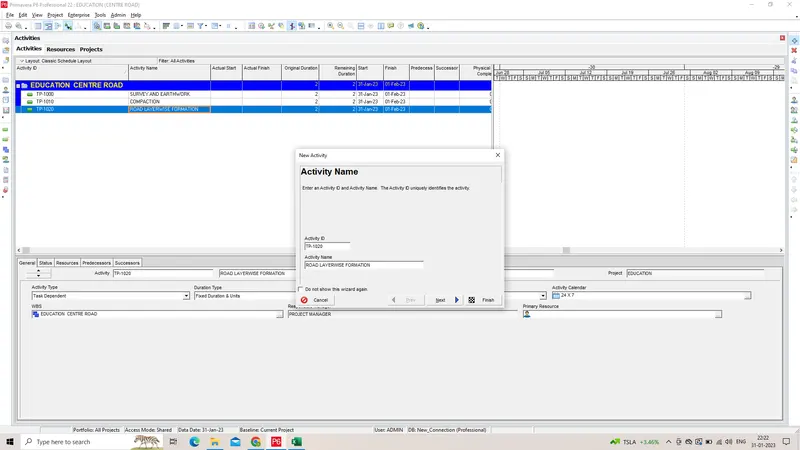
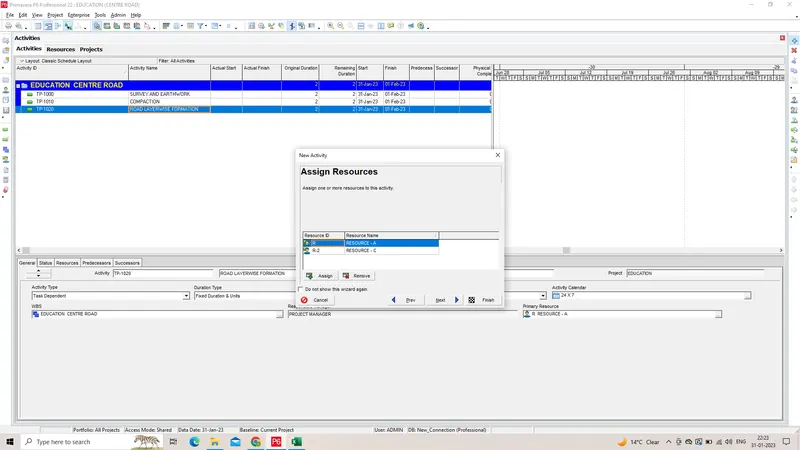
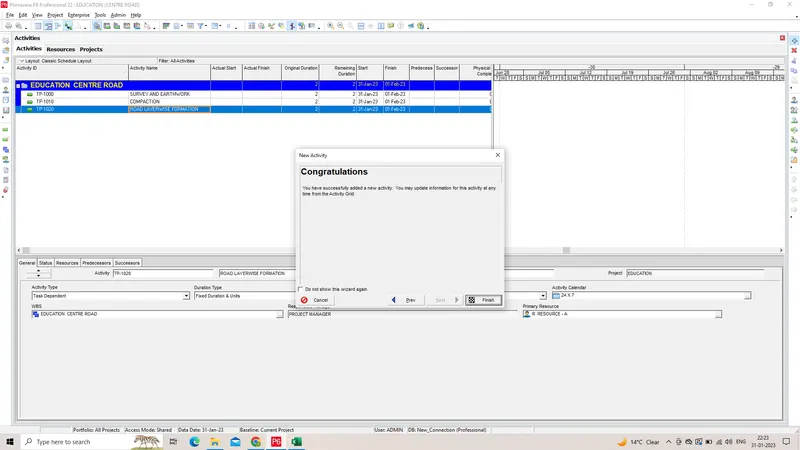
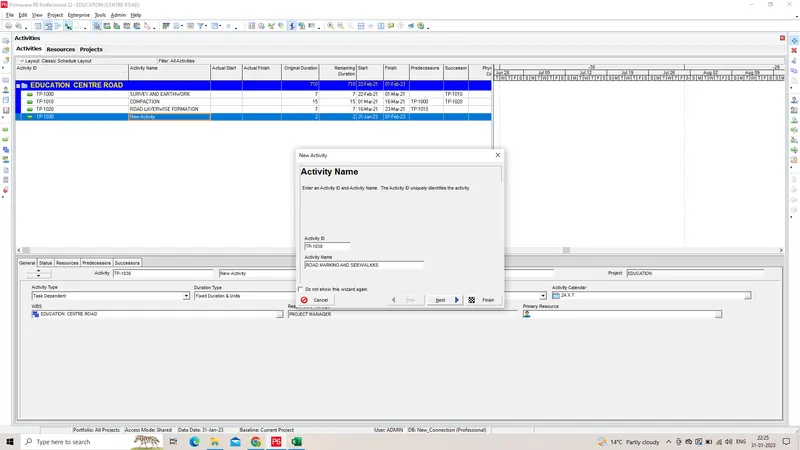
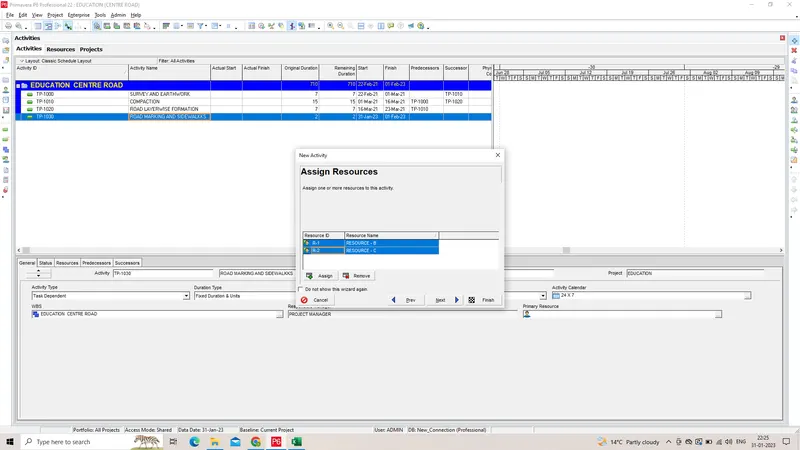
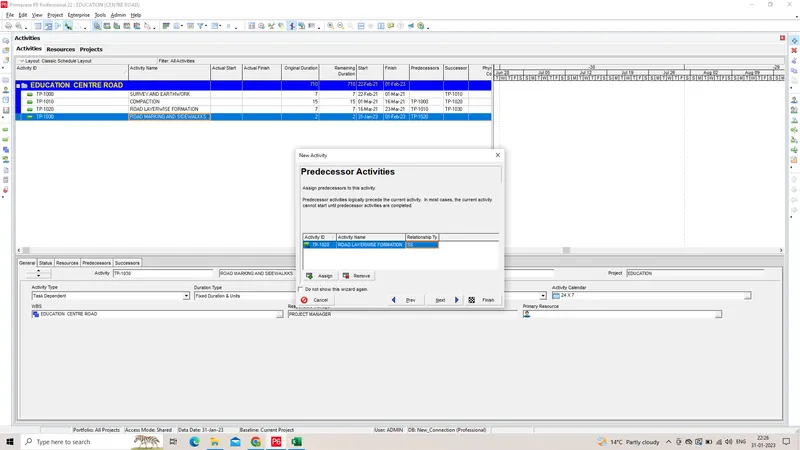
ASSIGN PREDECESSOR TO EACH ACTIVITY
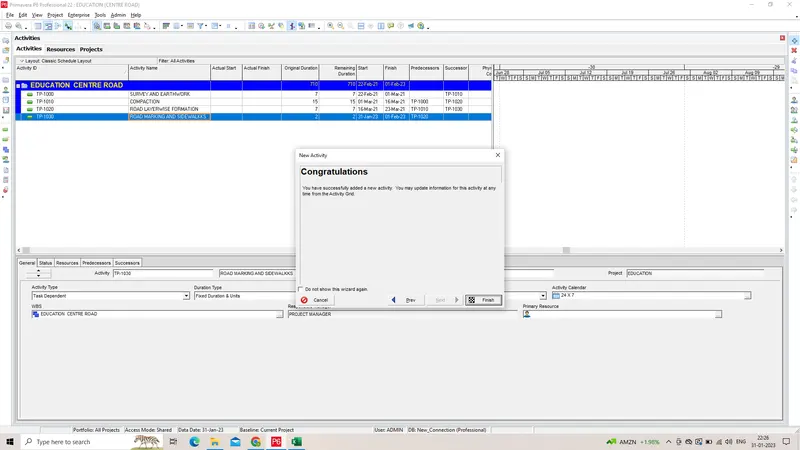
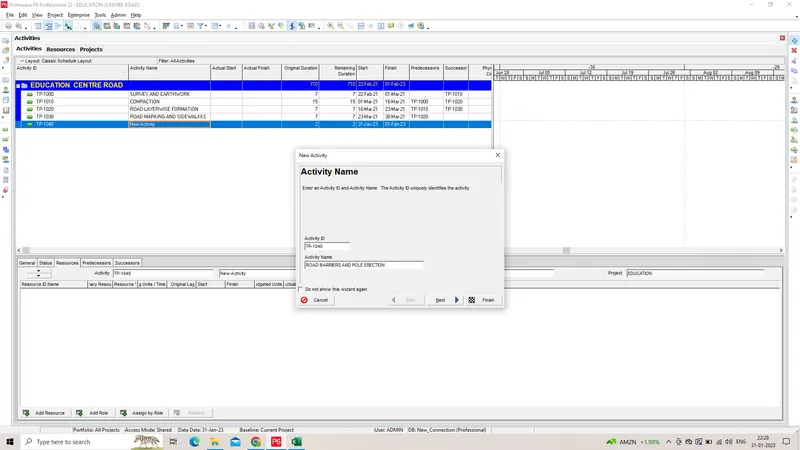
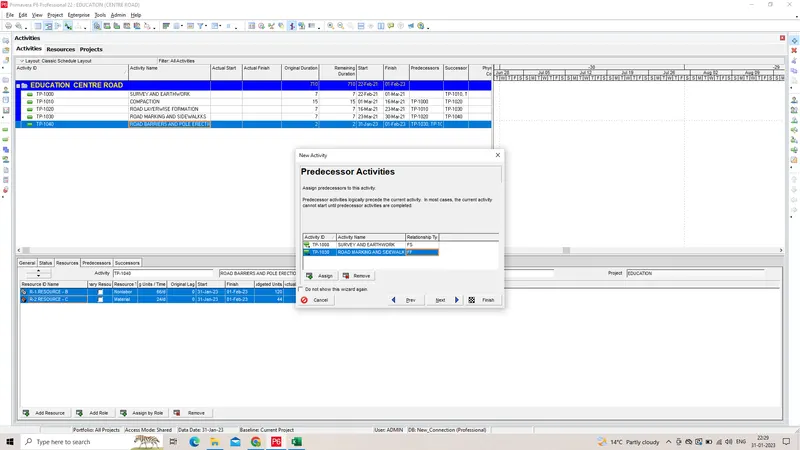
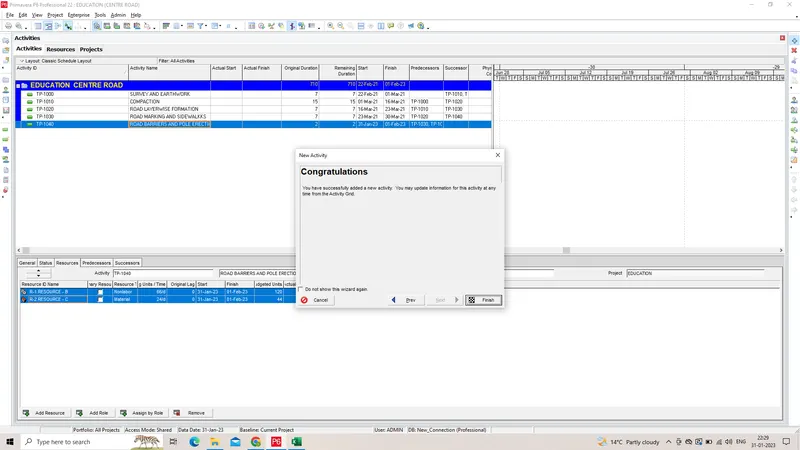
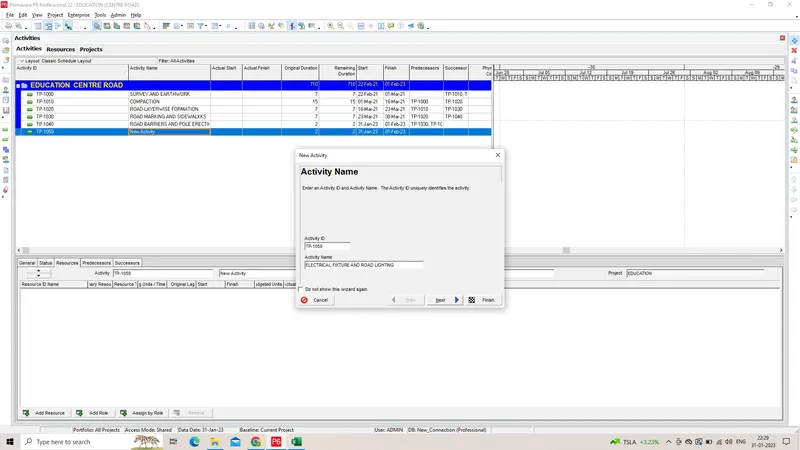
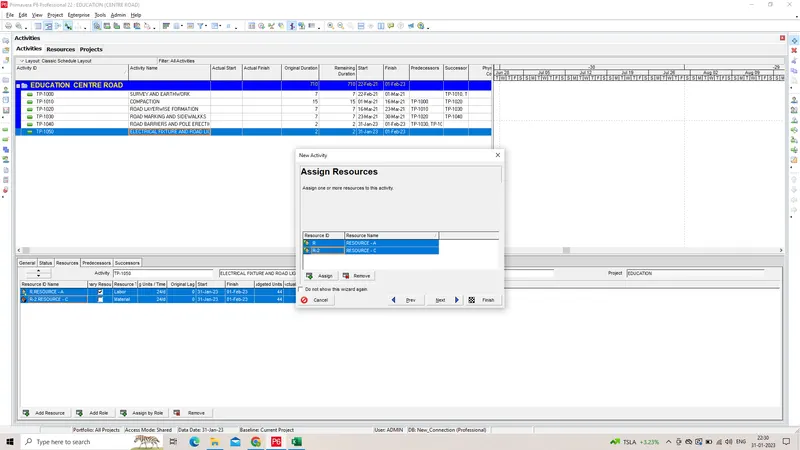
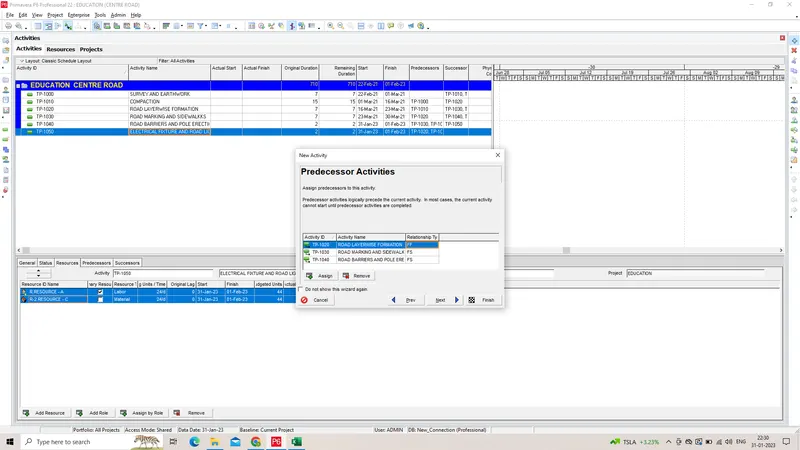
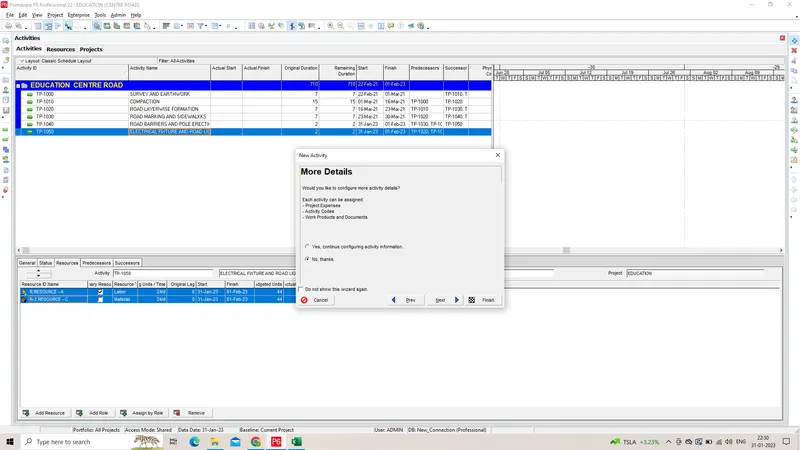
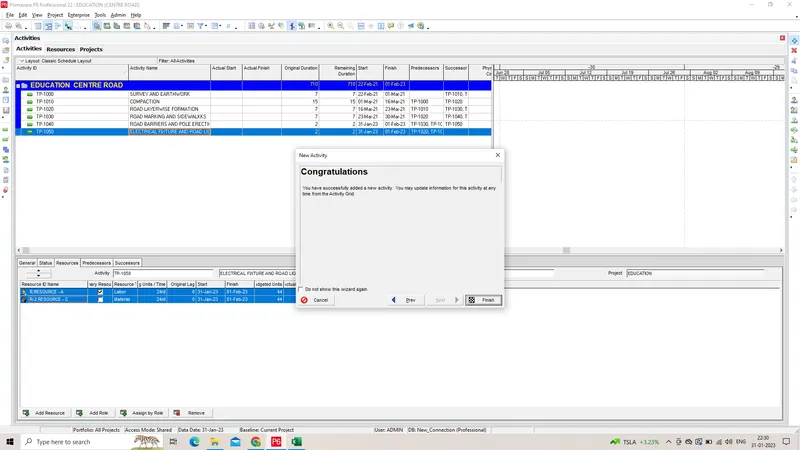
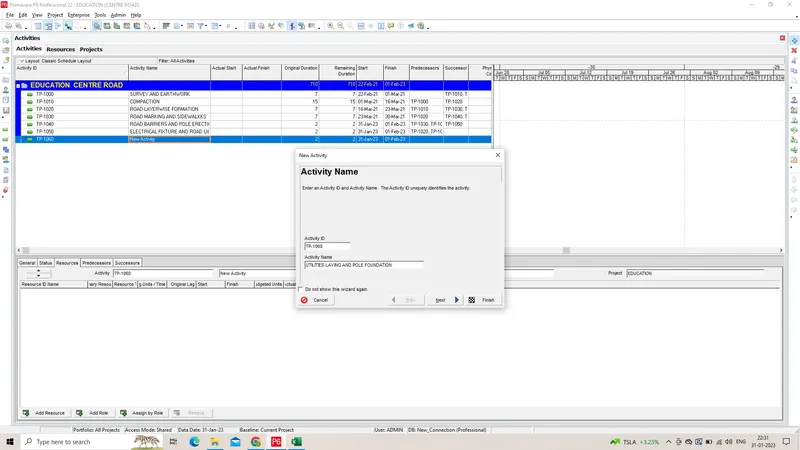
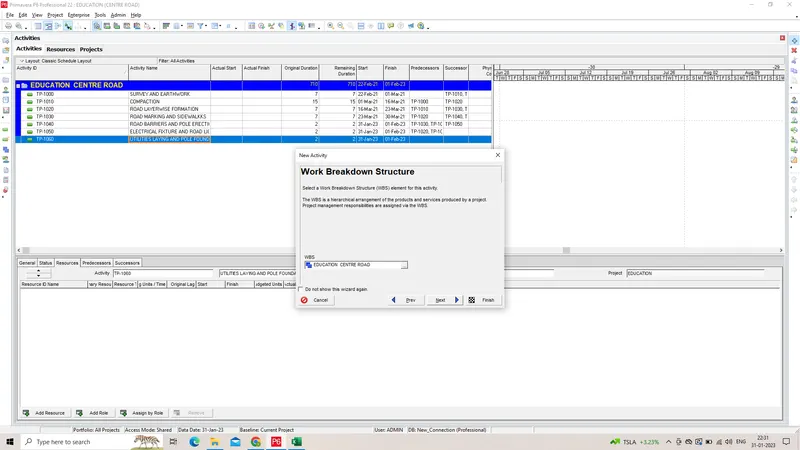
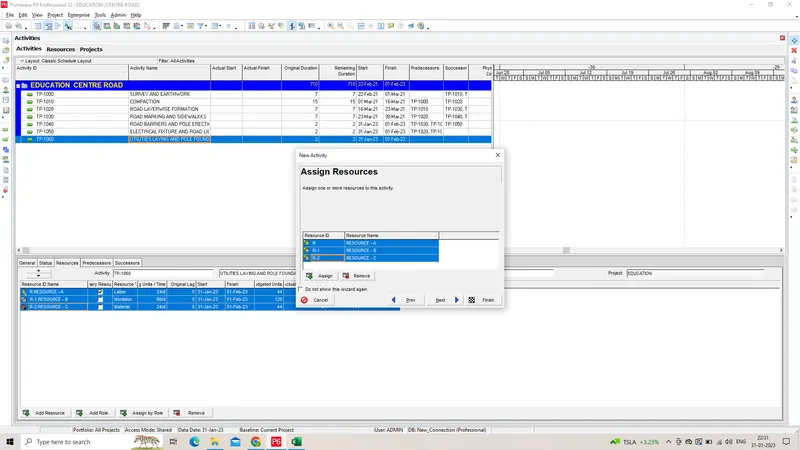
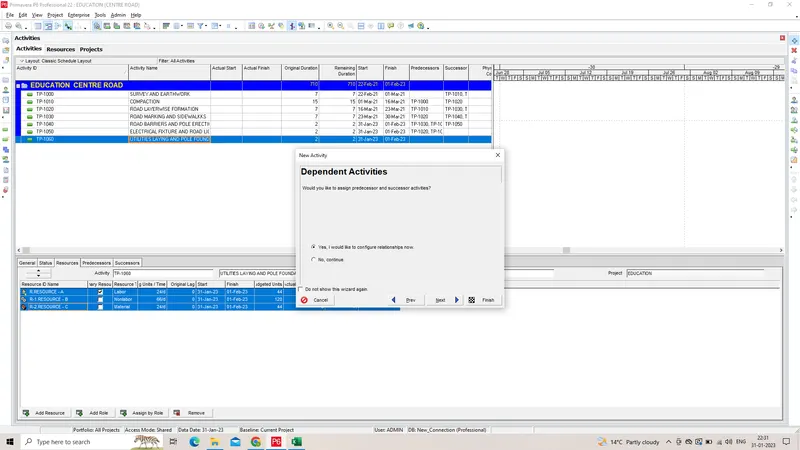
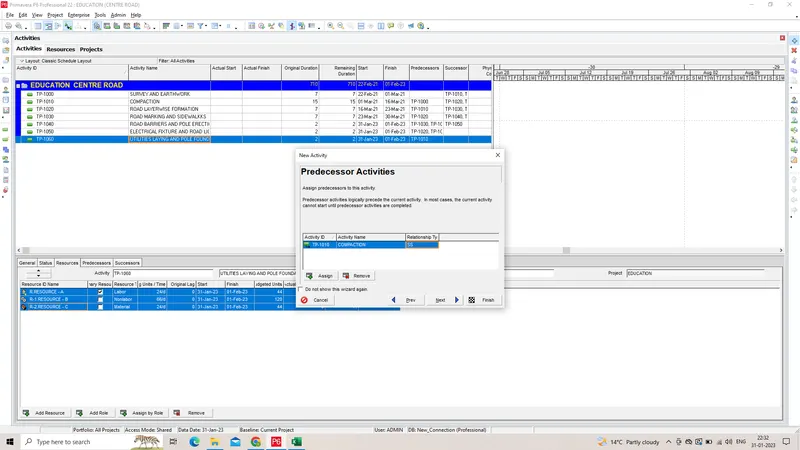
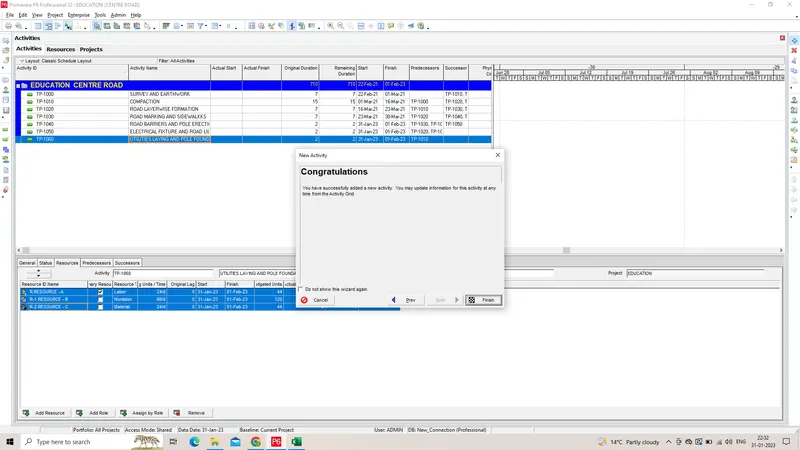
The project schedule as per the given criteria above
STEP 4 -
Use 3-Tier timescale with Year / Month / Weeks
- Right click the gantt chart and choose timescale
- Select 3 line option
- Choose month/week option
- Click apply
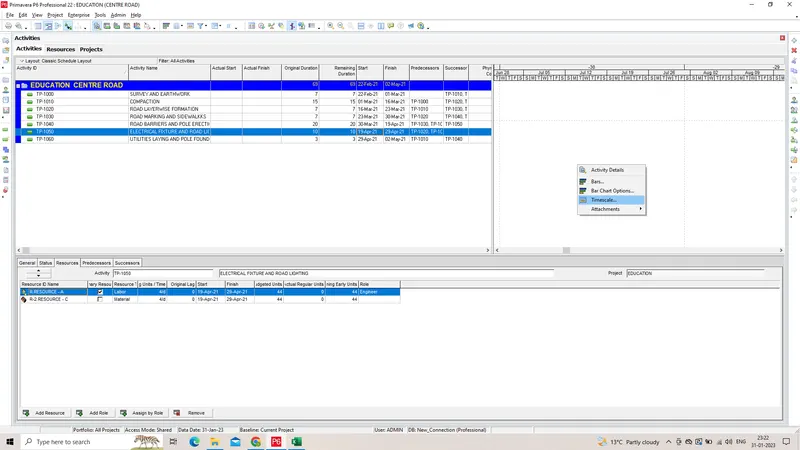
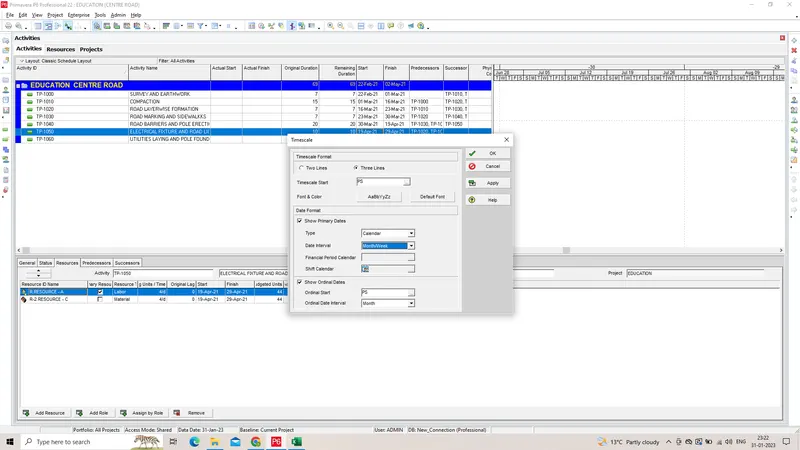
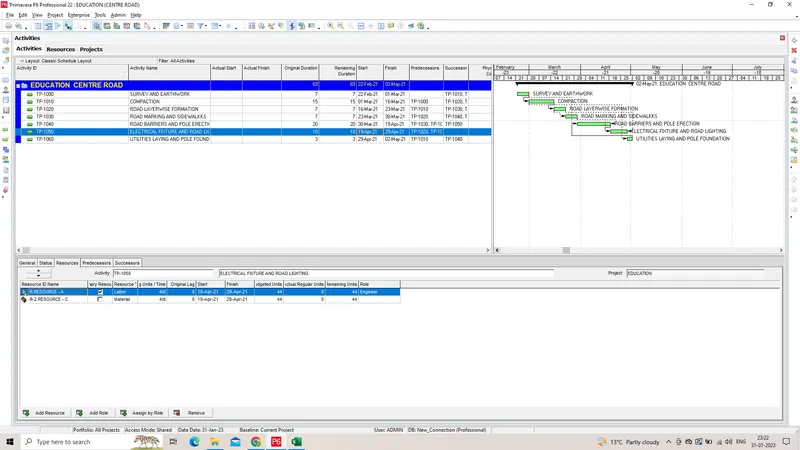
Timescale has been updated year/month/week wise
STEP - 5
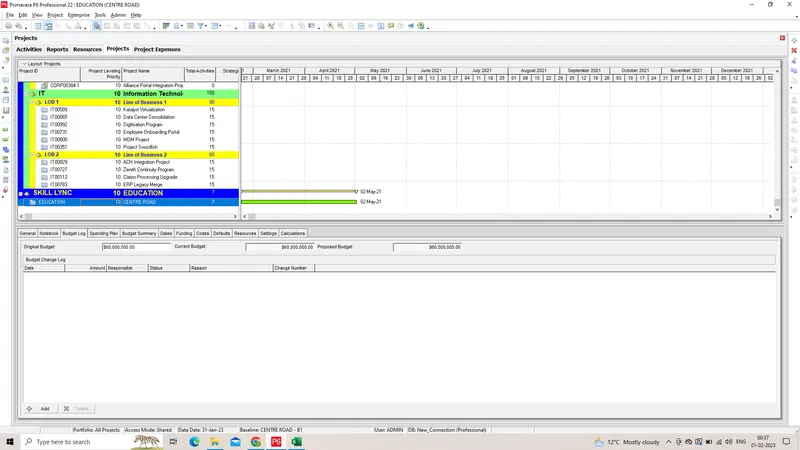
Add a budget to your project - INR 6 cr.
- Open report page and click the education centre road report
-
Go to budget log on bottom tool
-
Edit the original budget as 6 Cr.
STEP - 6
Assign a baseline to the project
Click project tab and choose maintain baseline option
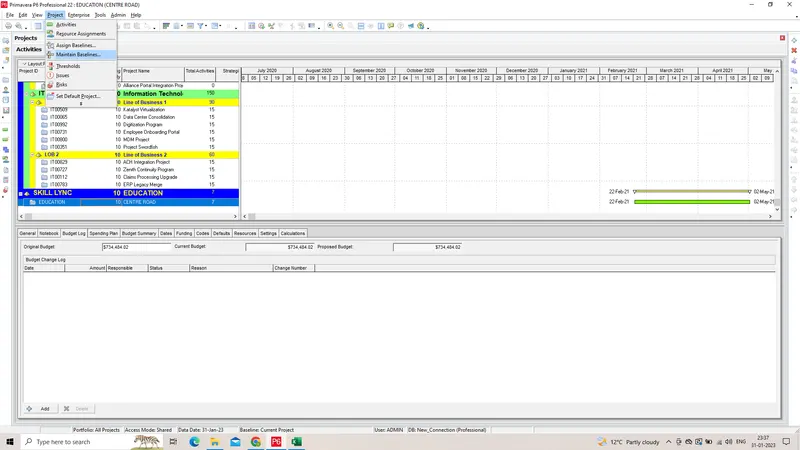
Provide the baseline name
On the bottom, choose the baseline type and cliCK ok
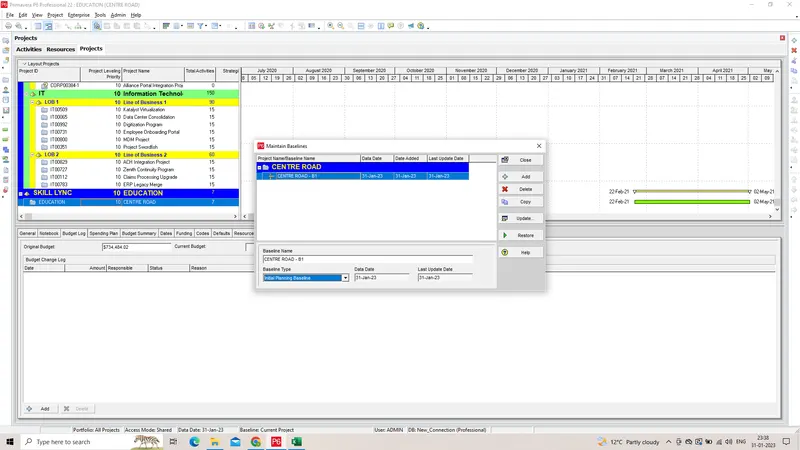
STEP - 7
-
Click update option
-
Choose all activity option
-
Click update and close
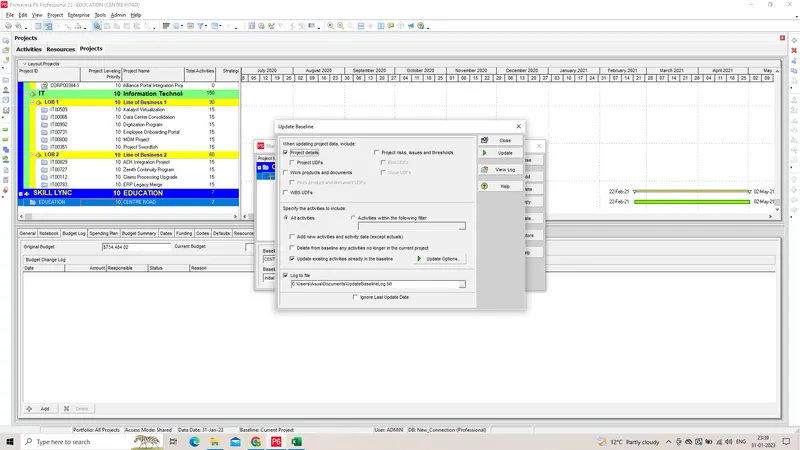
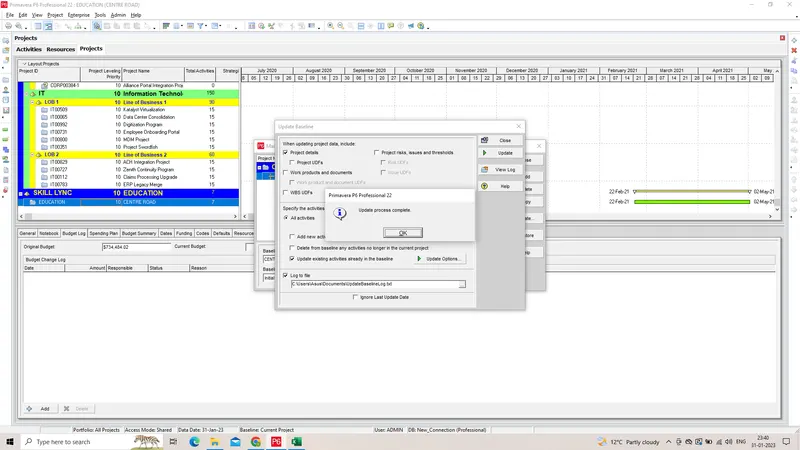
STEP - 8
Click project tab and choose assign baseline option.
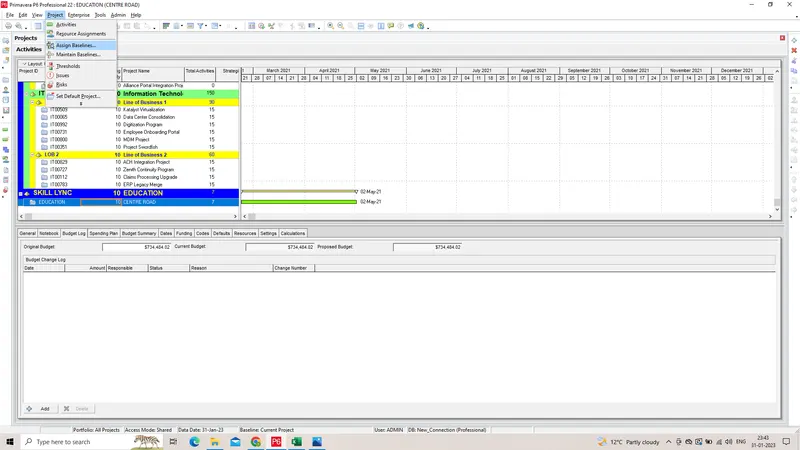
Choose the primary, secondary and tertiary baseline as Education centre road , CLICK OK
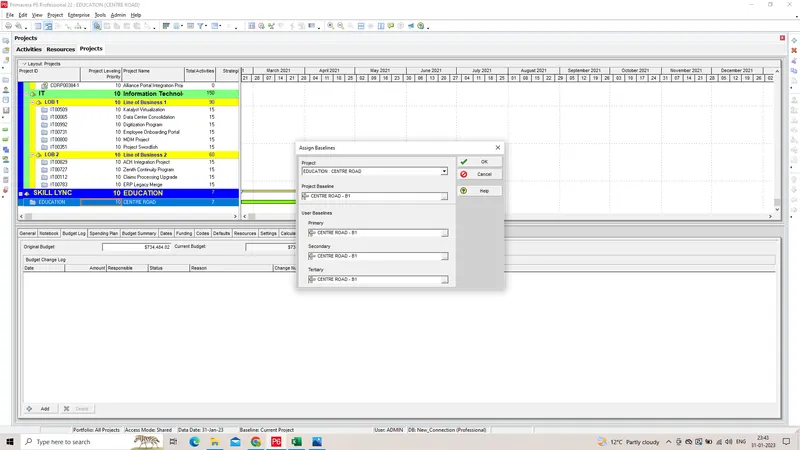
Baseline has been assigned successfully
STEP - 9
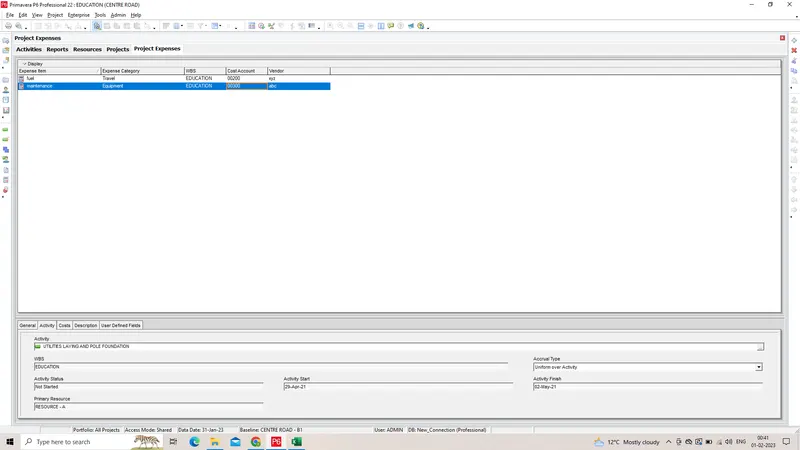
Add following expense:
Task - 1 - Rs 20,000/- (Item - Fuel)
Task - 2 - Rs 30,000 /- (Item - Maintenance)
>Go to Project tab and choose expense option
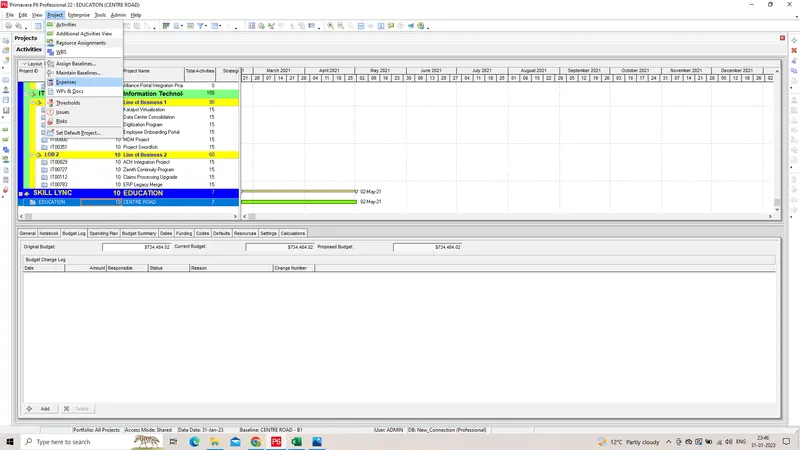
Click + button on top right of the screen , and choose the activities
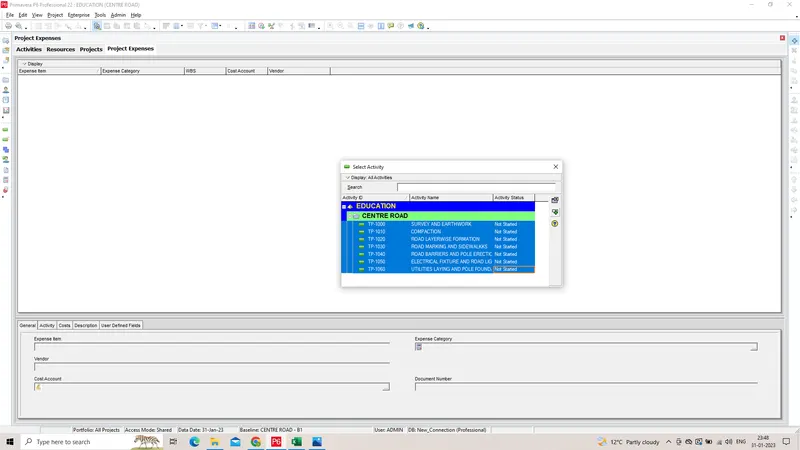
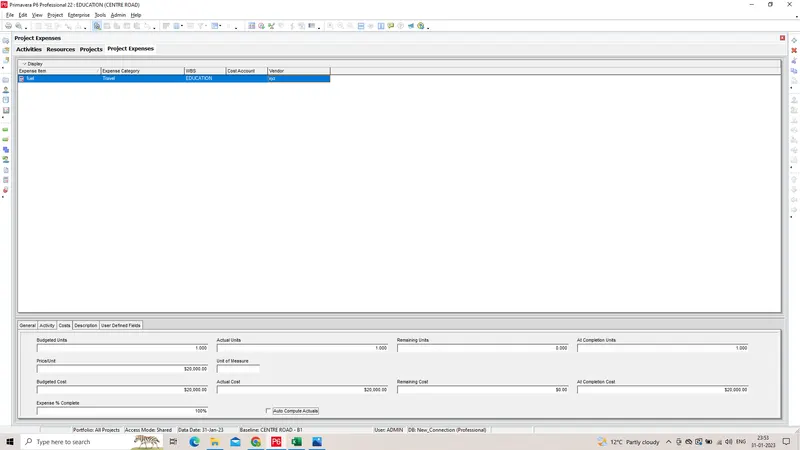
>Edit the expense name, cost and its vendor name
>Input the expense cost at the bottom of the screen
STEP - 10
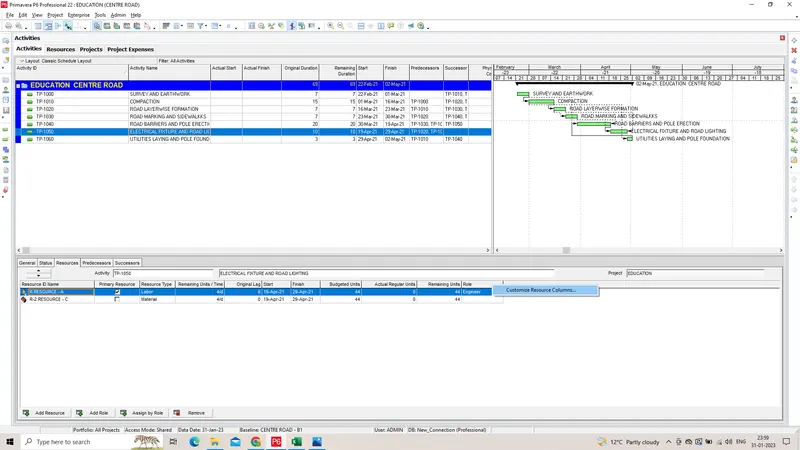
Generate material resource costs curve
-
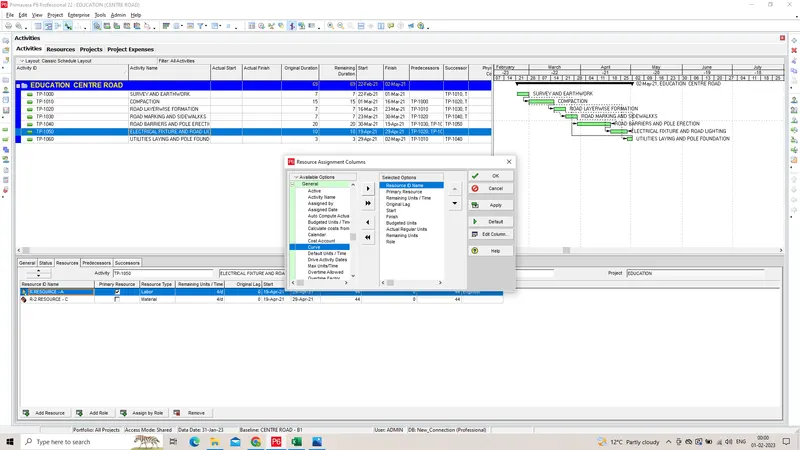
Click the resource tab and select customize option
-
Choose curve from general option
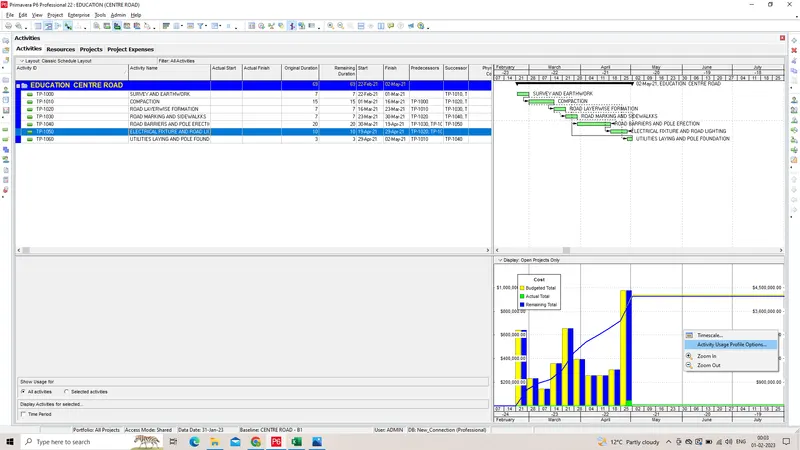
- Click activity resource usage option from top of the screen
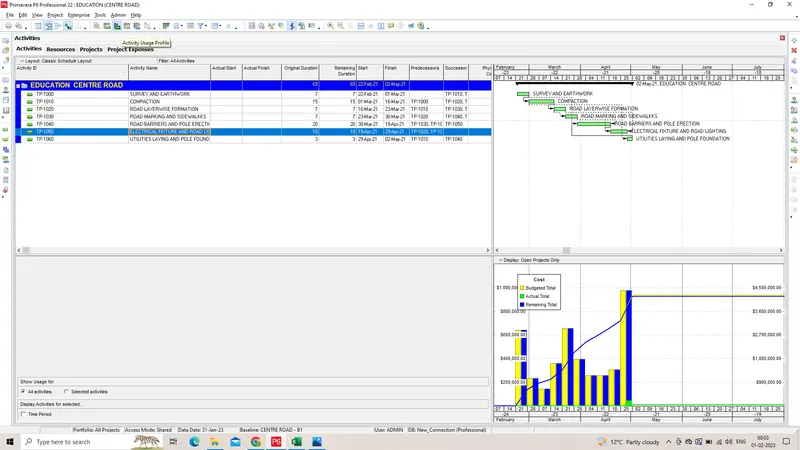
- Right click the curve and choose activity usage profile option
-
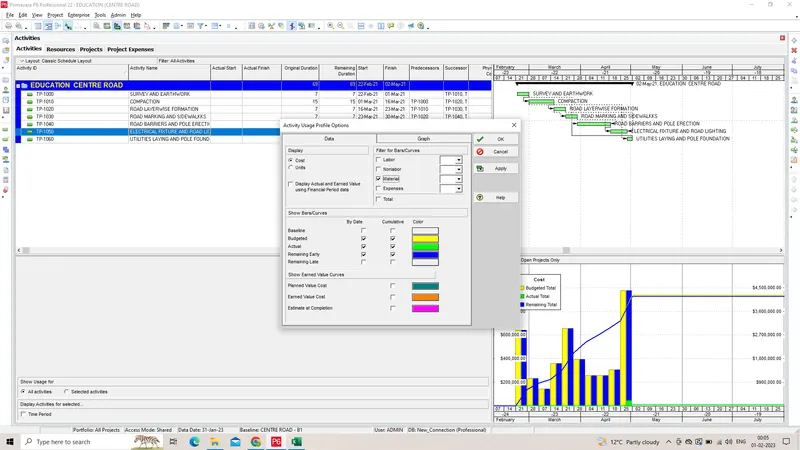
Click material option under the filter
-
click ok
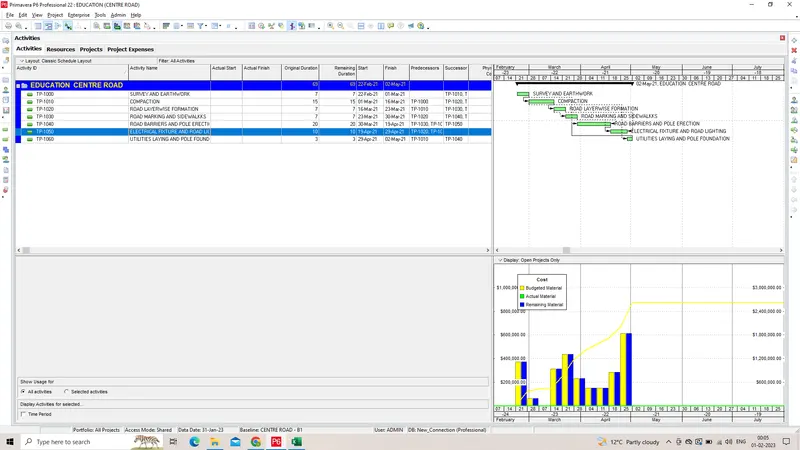
The material resource cost curve has been generated.
STEP - 11
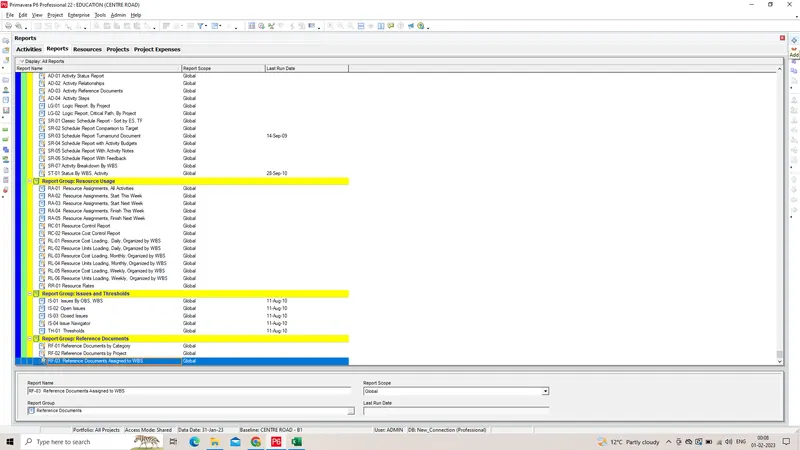
Generate an activity wise cost report
- Click report on leftside of the screen
- Click + button on top of the right screen
- Click next
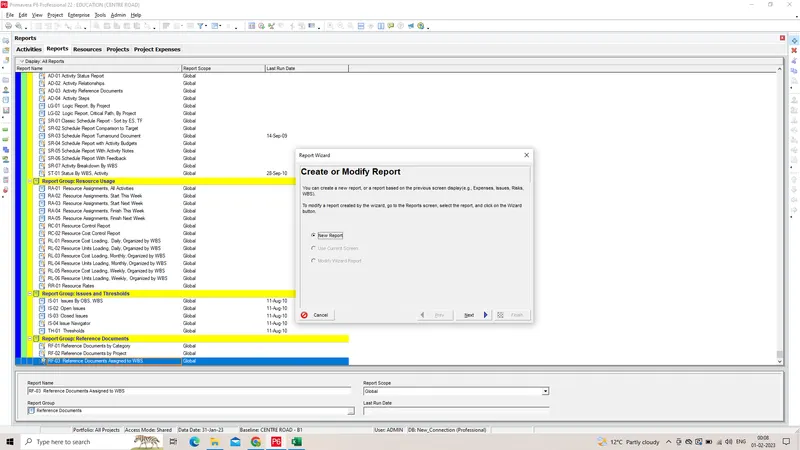
-
Choose subject area as activities
-
Click next
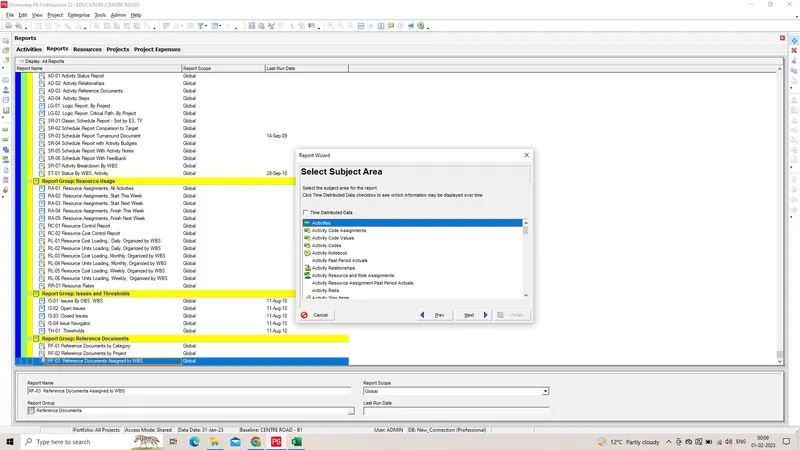
-
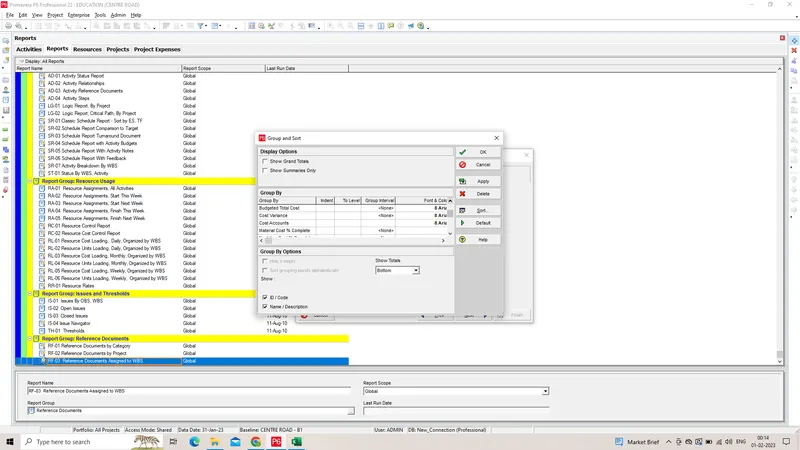
click group and sort option
-
Choose the costs and activity related options
-
Click ok
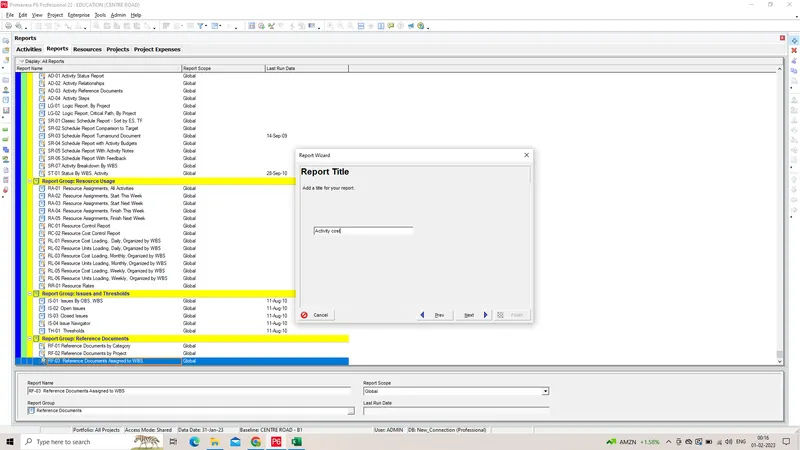
- Rename the report title as Activity cost
- Click ok
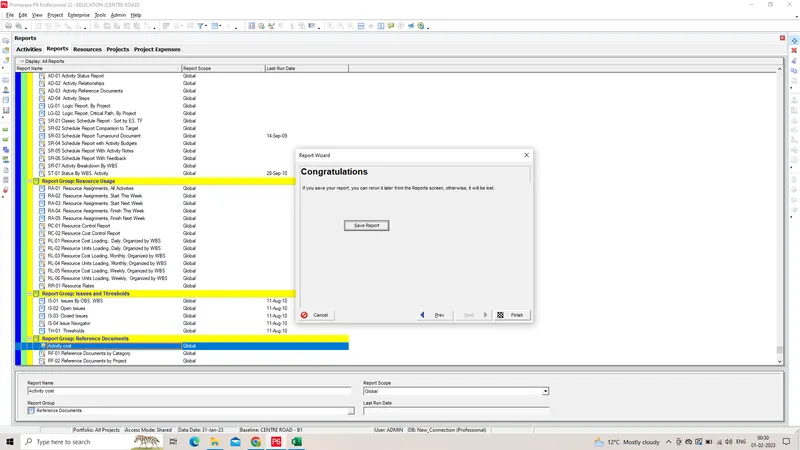
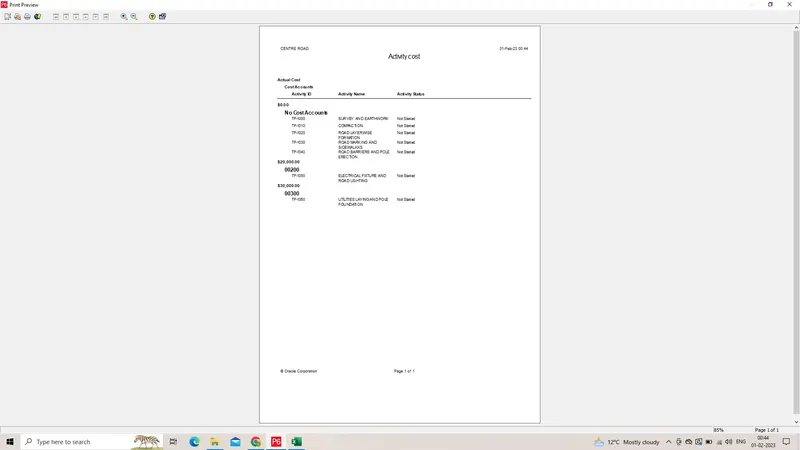
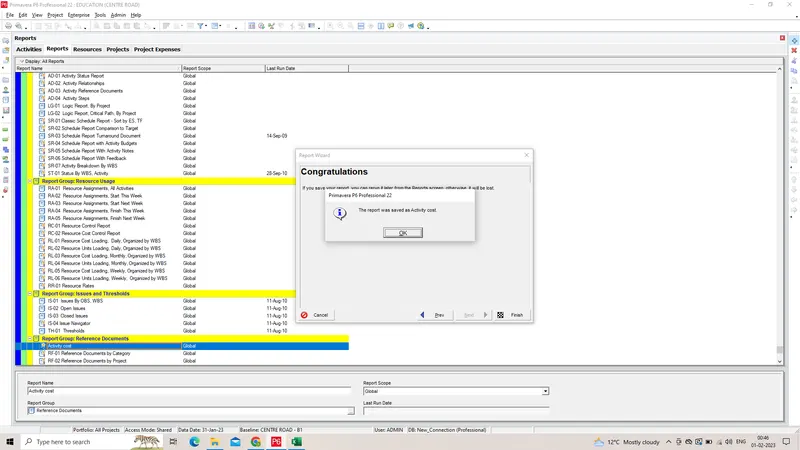
ACTIVITY WISE COST REPORT GENERATED
STEP - 12
Create a reflection
- Click project on leftside of the screen
-
Select the project of education centre road
-
Right click and choose create reflection option
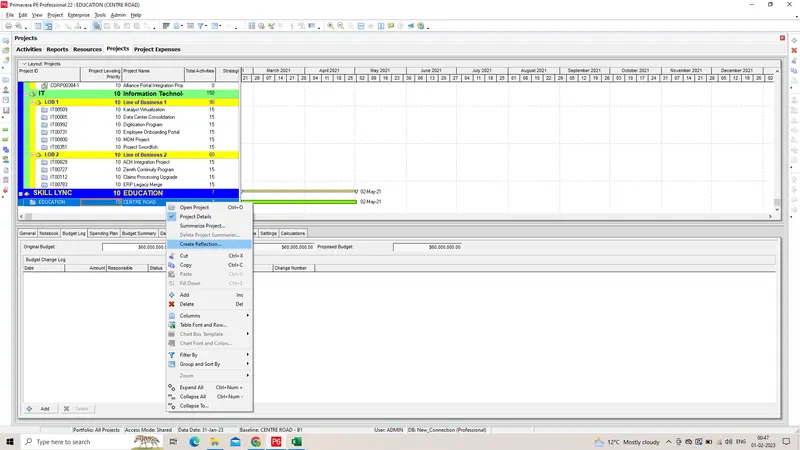
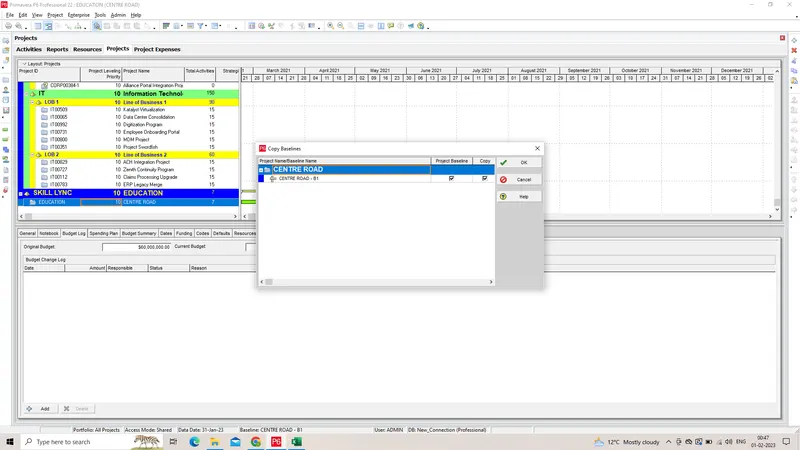
Reflection of the project has been created successfully
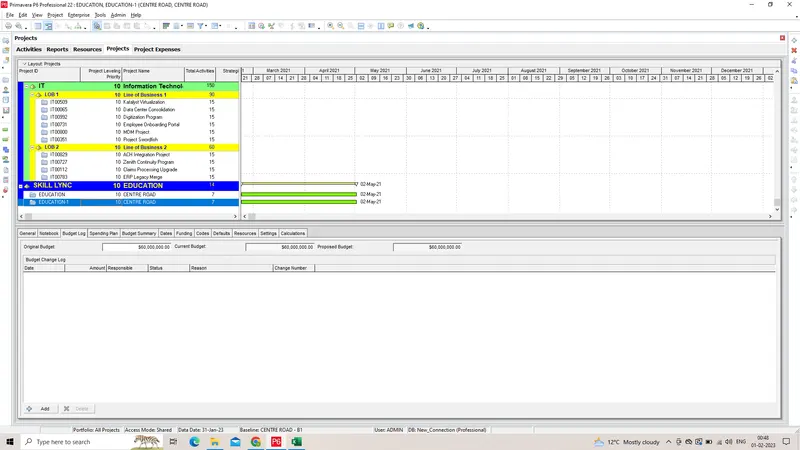
STEP - 13
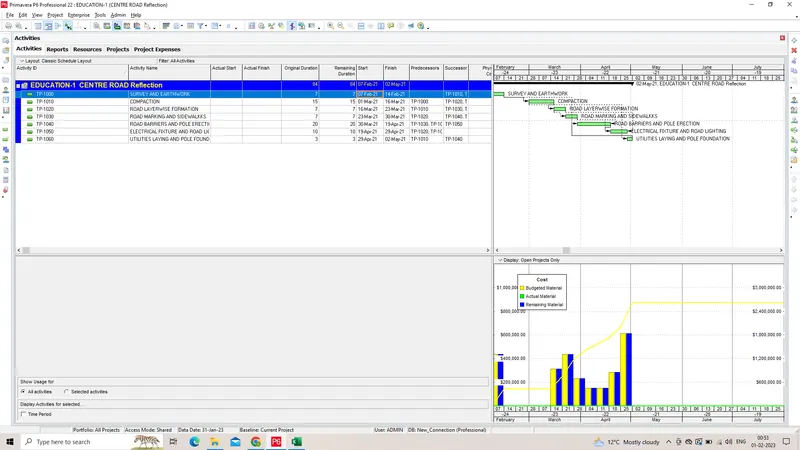
In the reflection, auto update the project at 15 days from start
- Right click the reflected project
-
Choose open project option
- Change the date of 15 days prior to the current project
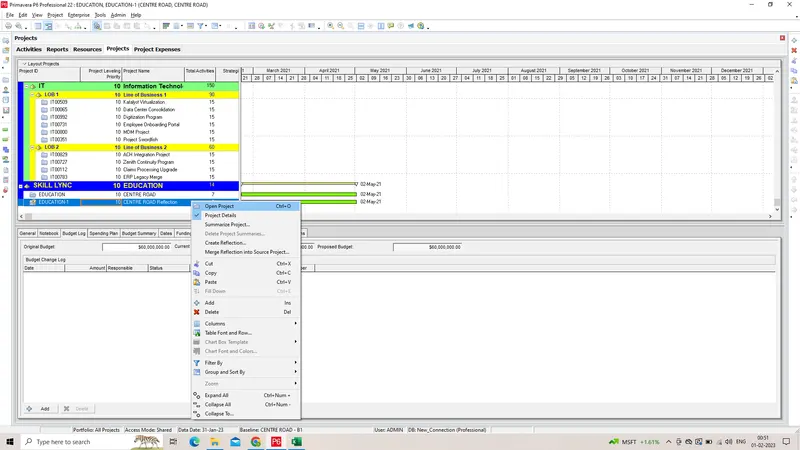
ACTUAL DATE
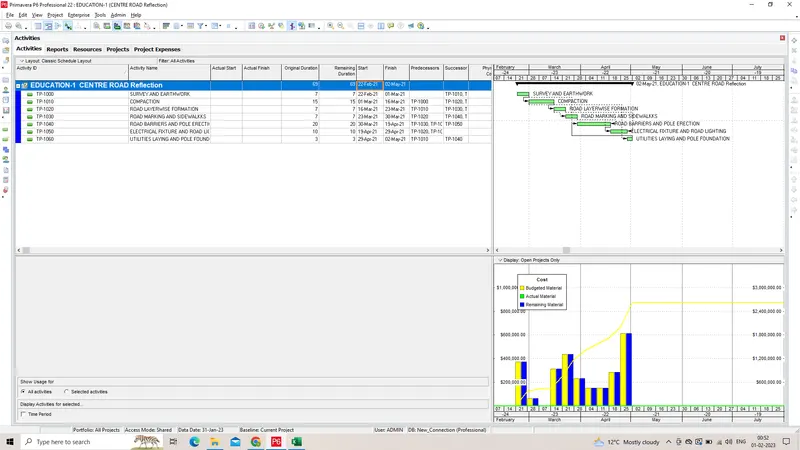
CHANGED DATE
-
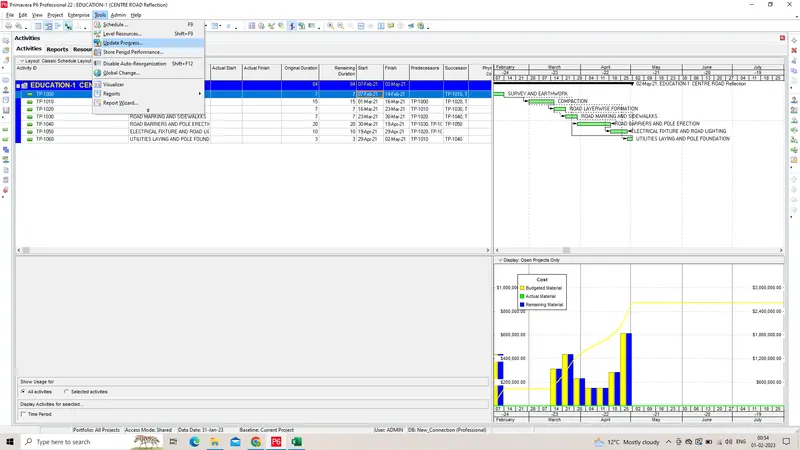
Click tools tab and select update progress option
-
click ok
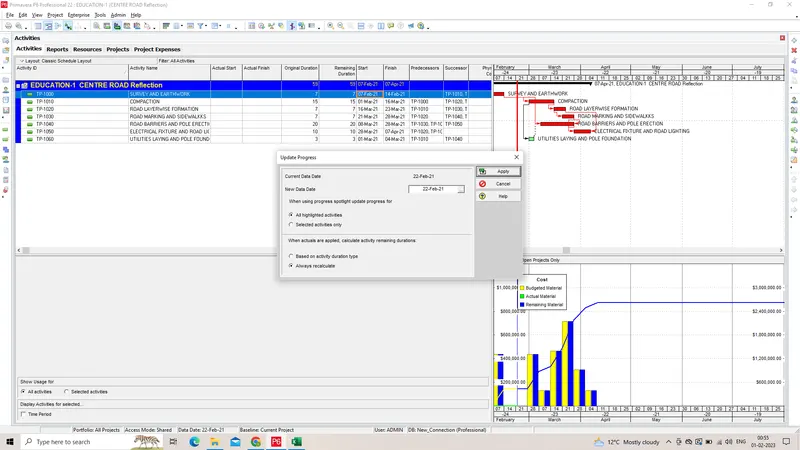
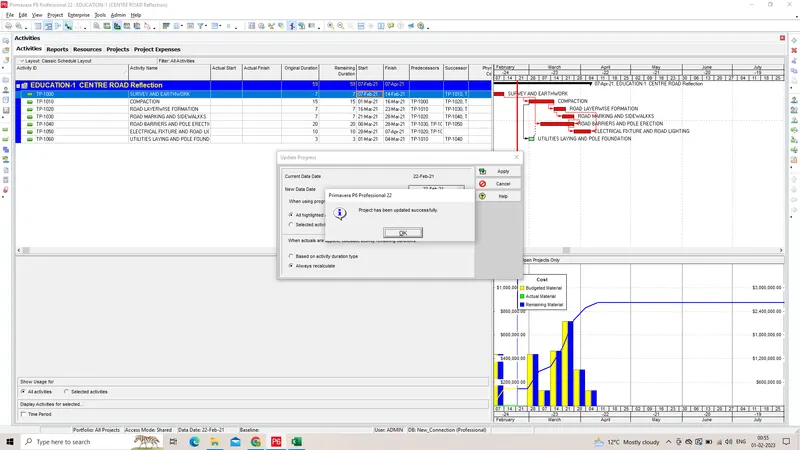
Schedule has been auto updated successfully
STEP - 14
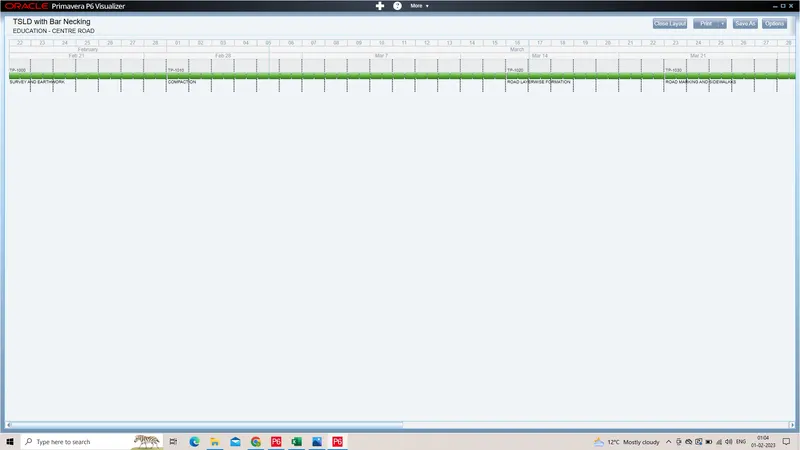
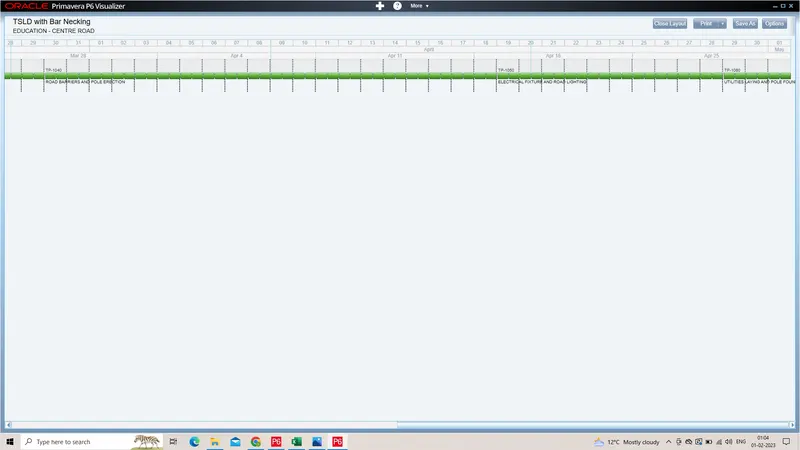
Open a TSLD view of the project in Visualizer
- Go to tools tab and select visualizeer option
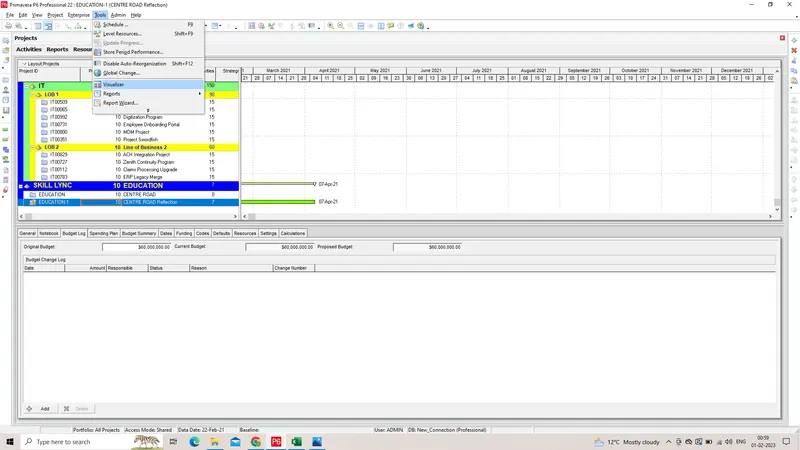
-
Click + button on top of the screen
-
Choose TSLD option
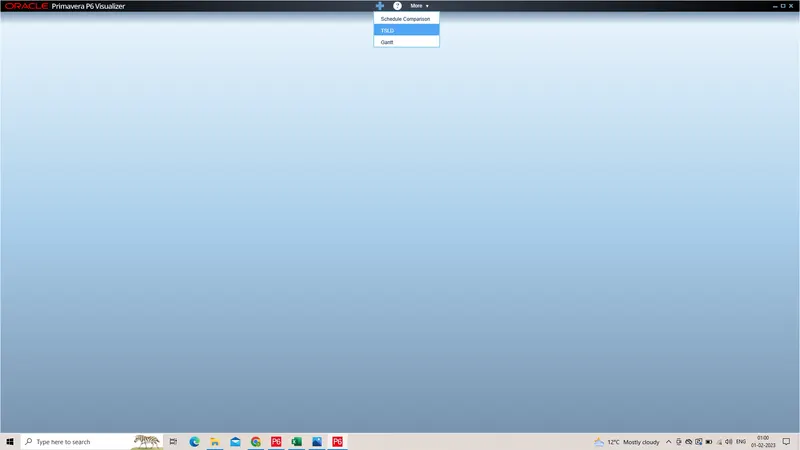
-
Choose the education centre road project
-
Click ok
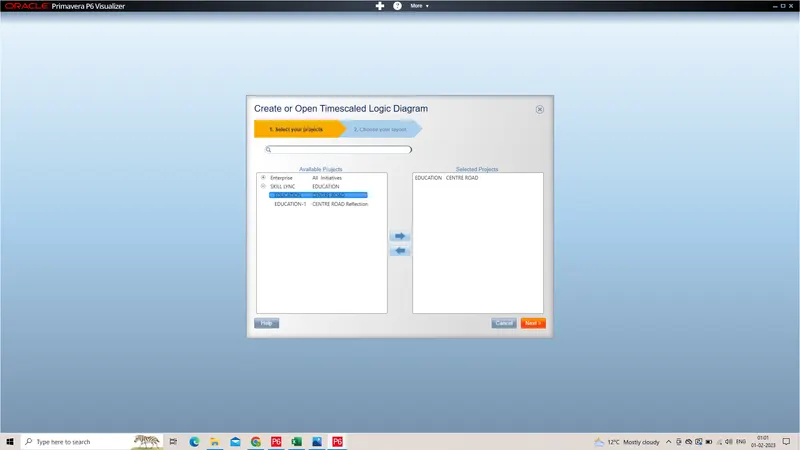
- Choose TSLD type
- Click draw
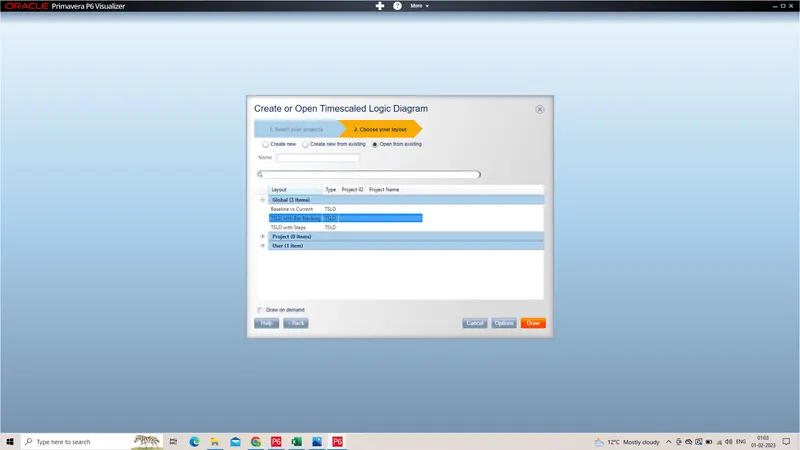
Project has been created in P6 Visualization
STEP - 15
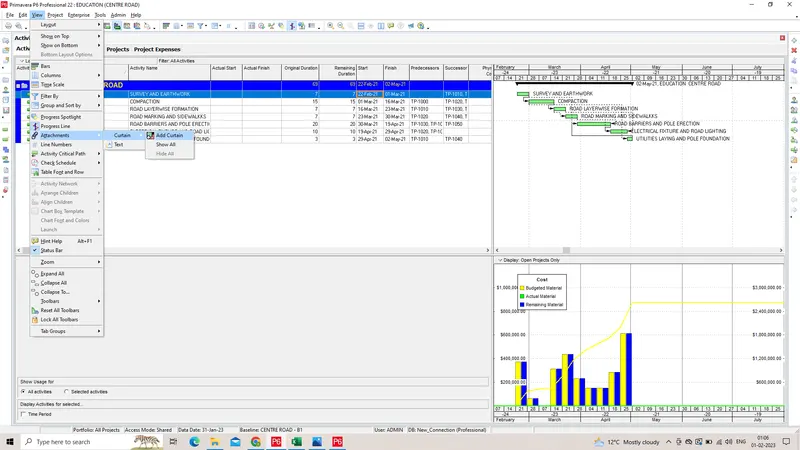
Add curtains up-to first 15 days of the project.
- Go to View tab and choose attachment option
- Select curtain and choose add curtain
-
Edit the start and finish date of the project
-
click ok
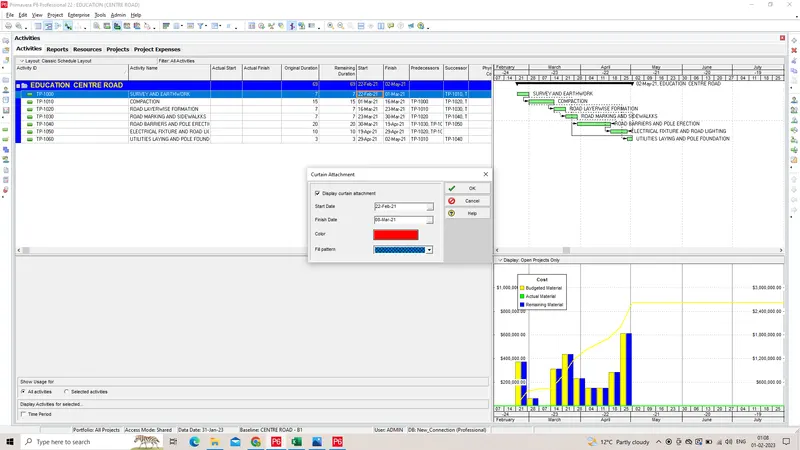
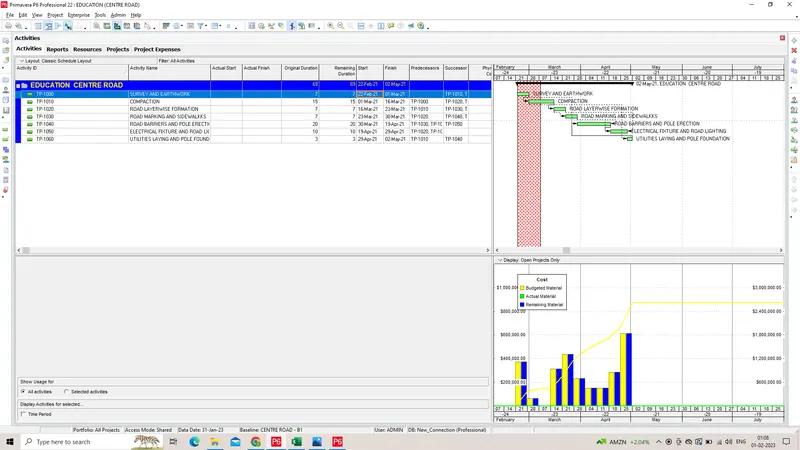
The curtain has been added successfully
STEP - 16
Find out the actual cost for labour, non-labour and material cost of the updated schedule
- Go to project page and click calculation tab
-
Select add actual option
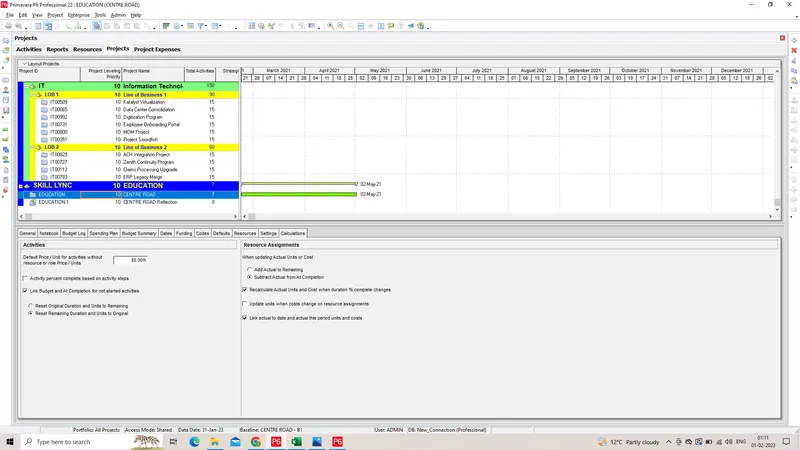
-
Click anyone of the project and choose resource option on bottom of the project
-
There we can find the actual and budgeted costs for each resource