Project 2
AIM :
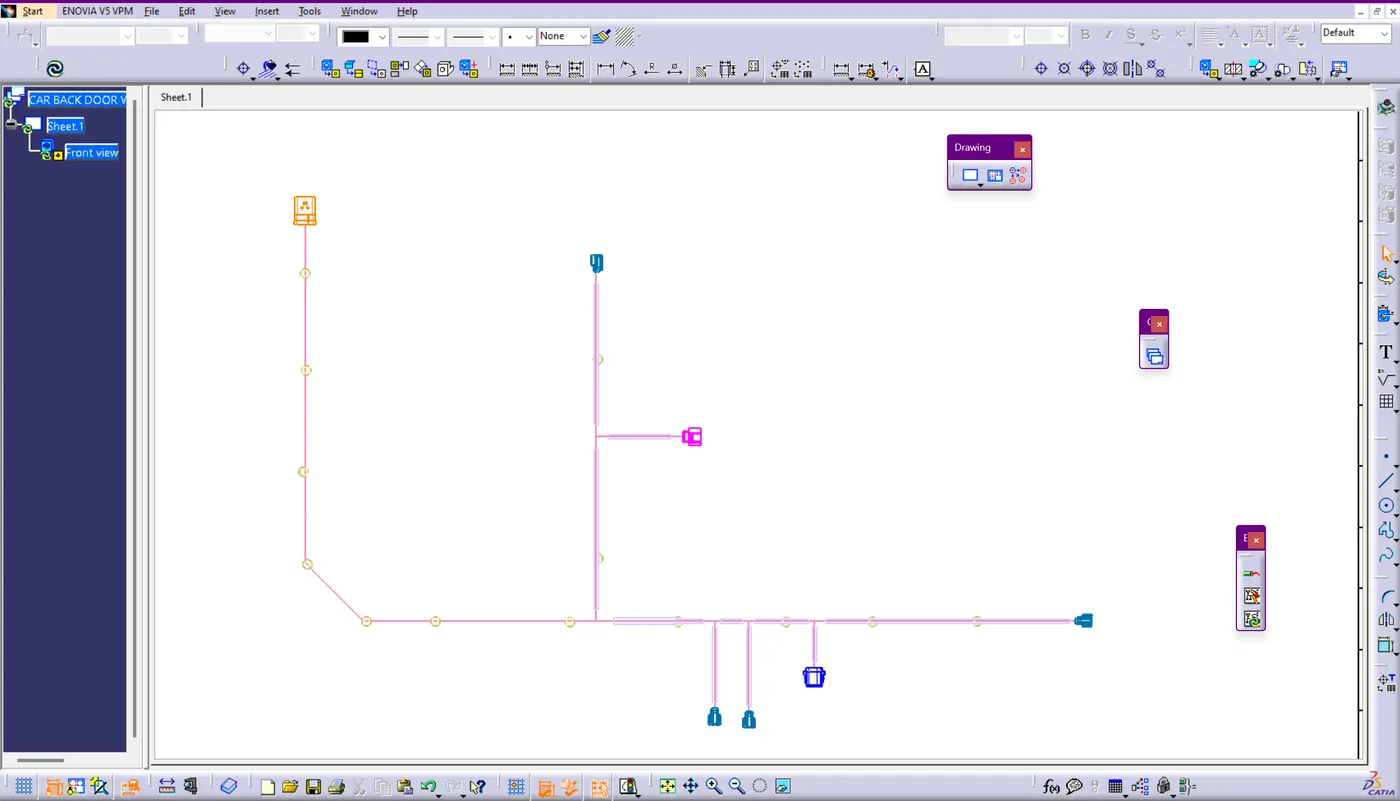
To route the Wirirng Harness on Car Back Door panel and prepare the detailed flatten view drawing with all the desgin packaging and industrial routing srandards by using CATIA V5.
INTRODUCTION :
Wirirng Harness is an organized set of wires, terminals, and connectors that relay electrical power and signals to various components located in or around the back door. wiring harness is an arrangement of electrical bundle which can transmit the electrical signal in electronic components. This application is used in two, four wheelers, commerical vechicle's. It can be designed in the way to geometric and electrical requirements of the system. Harness can be mainly embedded in the chassis, engine and Body (BIW) compartments. It can drastically reduce the installation time and it can increase the eas of servicability of the vechicle .
In Modern EV vechicle, using IPMsynRM ( Tesla Model 3 )motor is used instead of induction motor due to its power to its energy ratio so wiring of the system is essential to arranged in organised way to increase the fuel power efficiency. Where these Harness are made of durable materials, thus making the system durable too. They are designed in a way to perform extremely well under harsh conditionsand can aslo carry heavy power loads.
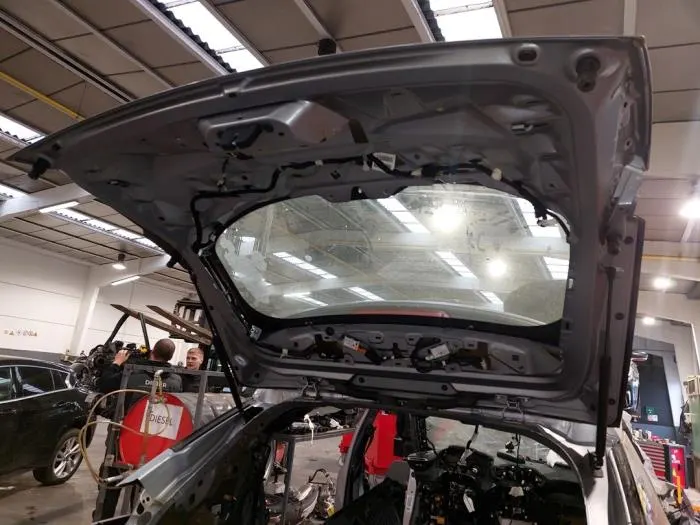
In this report we will develop the wiring harness for the given back Door. Back Door is also called as Tailgate of an vechicle. In some cars it have an passenger compartment but 90% of an vechicle have an storage area for luggages. The Gas stray can be used to lift the Door without any strain in modern vechicle the gas stray can be replaced with Electric motor's and some components like sensors, Camers, Brake lights, speakers, etc..
In this report we will develop the wiring harness for the given back Door. Back Door is also called as Tailgate of an vechicle. In some cars it have an passenger compartment but 90% of an vechicle have an storage area for luggages. The Gas stray can be used to lift the Door without any strain in modern vechicle the gas stray can be replaced with Electric motor's and some components like sensors, Camers, Brake lights, speakers, etc.. 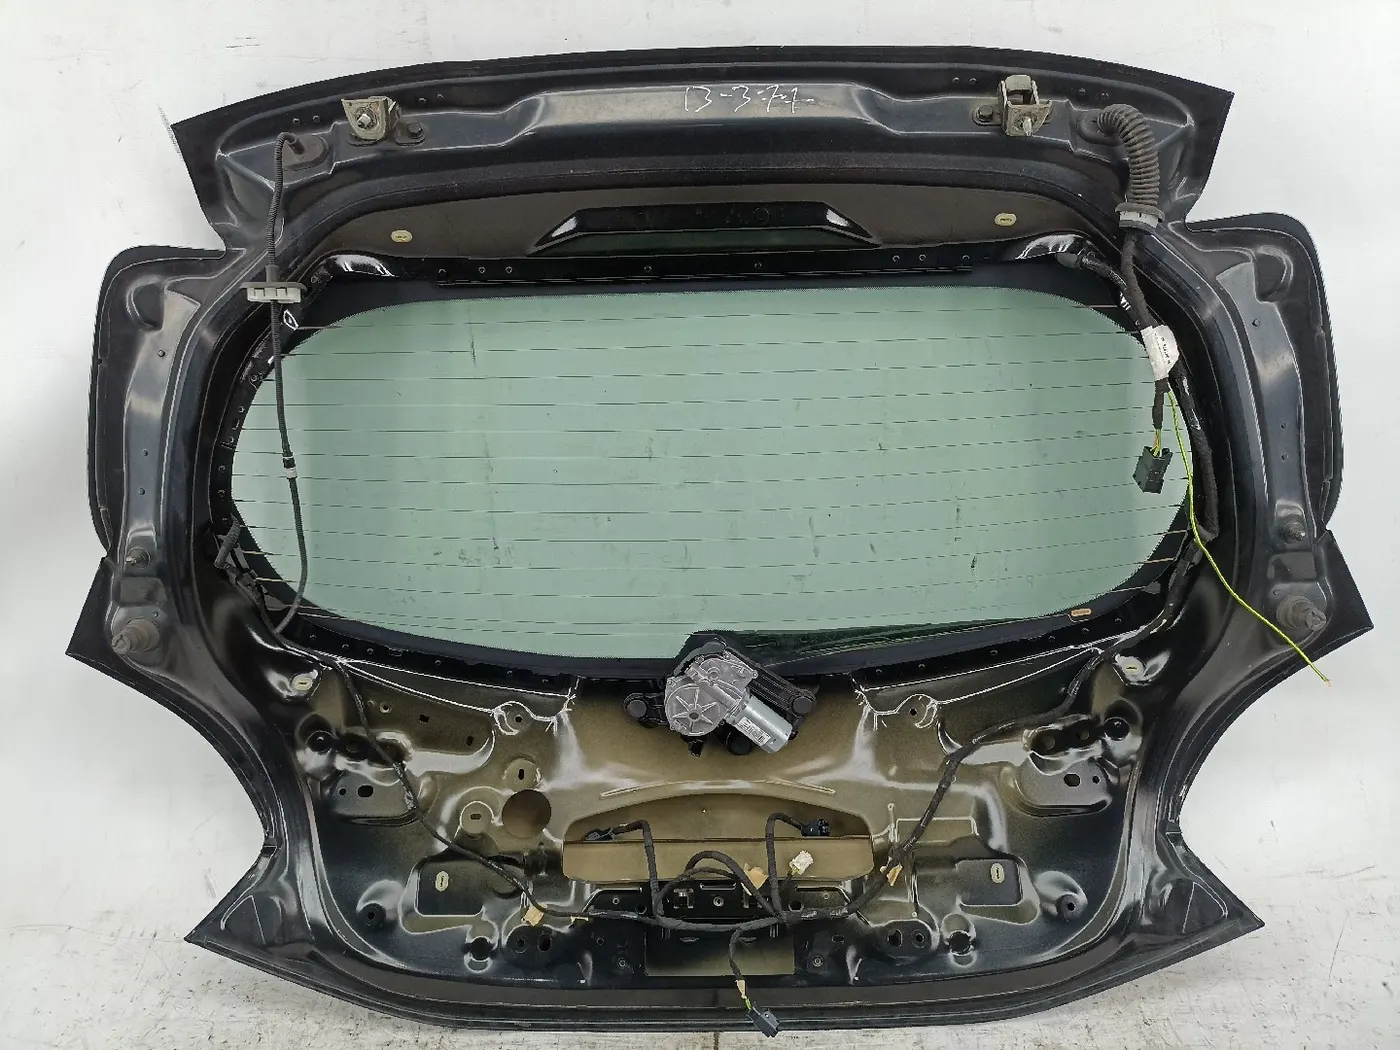
WIRING HARNESS DESIGN CRITERIA AND STANDARDS :
- Wire size can be define by the power carrying capacity for higher power line we need to use larger diameter if we use the smaller one the heat generated by the voltage can burned the wire.
- Ensure the wiring harness routed in a way to avoid interference.
- wiring harness should be secured properly so that it willnot get damaged by surrounding component interactions.
- Harness should be kept away at a distance of minimum 200 mm from heat zones like Mufflers, Engines,chargers to avoid damage May it lead to burning of whole vechicle.
- Ensure that any human or machine interaction are not causing any damage to harness.
- Use Rubber Gromments while routing through the sheet metal parts .
- Maintain atleast 50 mm between the two branch or supporting points.
- keep the slack 50 mm when in vehicledyanmic condition to reduce the tension in the harness assembly.
- Ensure the distance of 50mm from hydraulic lines, fuel lines, coolant lines, bolted screw, mounting clips etc.
PROCEDURE FOR WIRING HARNESS CREATION (CATIA V5) :
- Create a Product file and import the Back Door Panel as an product file (context assembly).
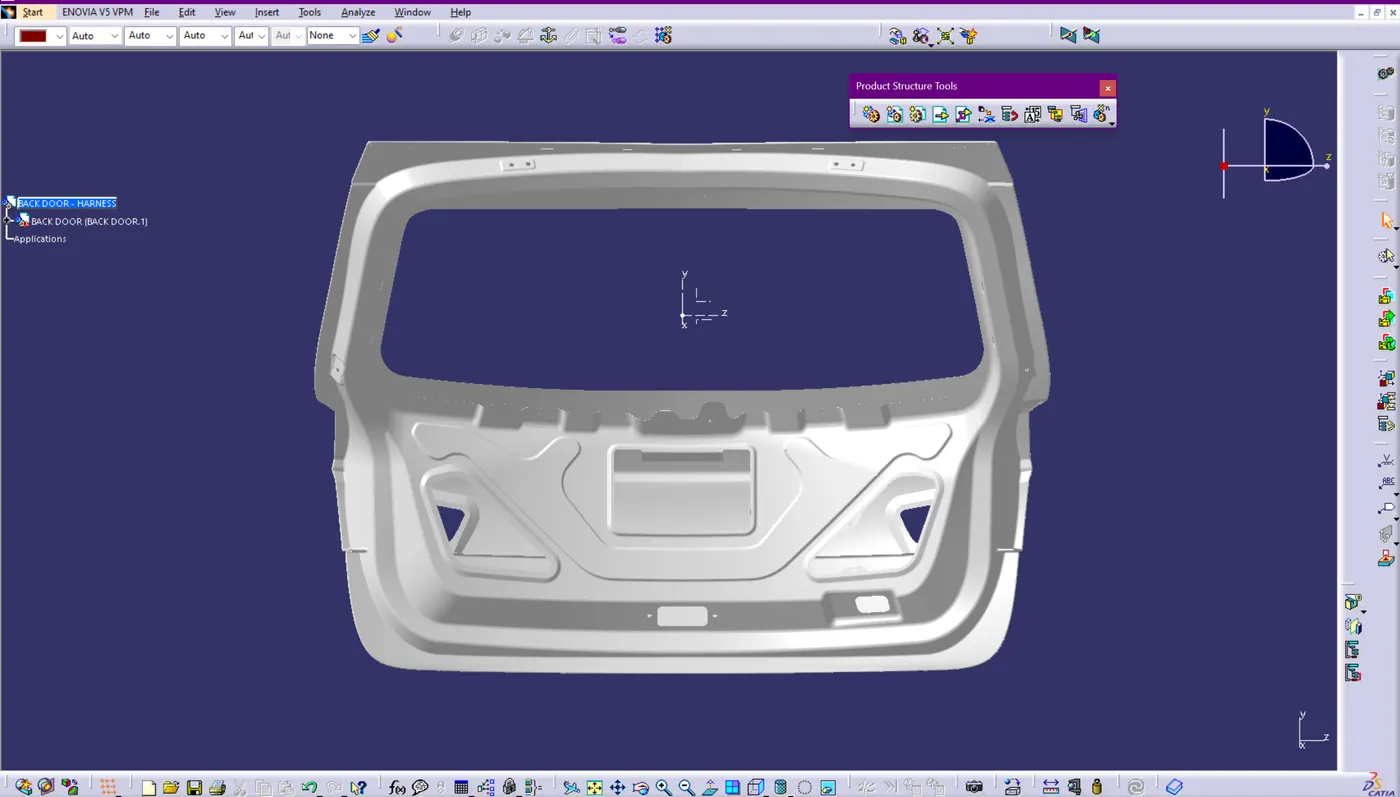
- Create another product file for Connectors in the assembly file for dynamic usage for further process.
- Download the necessary connector and mounting clamps for the harness assembly from the supplier sites which components are approved by our manufacturing unit.
- Develop the required points and switch the workspace to electrical part design and define the connector connection point and Bundle points and the basic terminal and description of the connectors.
- In Connector connection point is used to connect the Male connector to the mating female connector.
- Bundle point is nothing but the Binding point between the wire and the connector points.
- Connector point can be easily disassembled whenever in service or any failure situation.
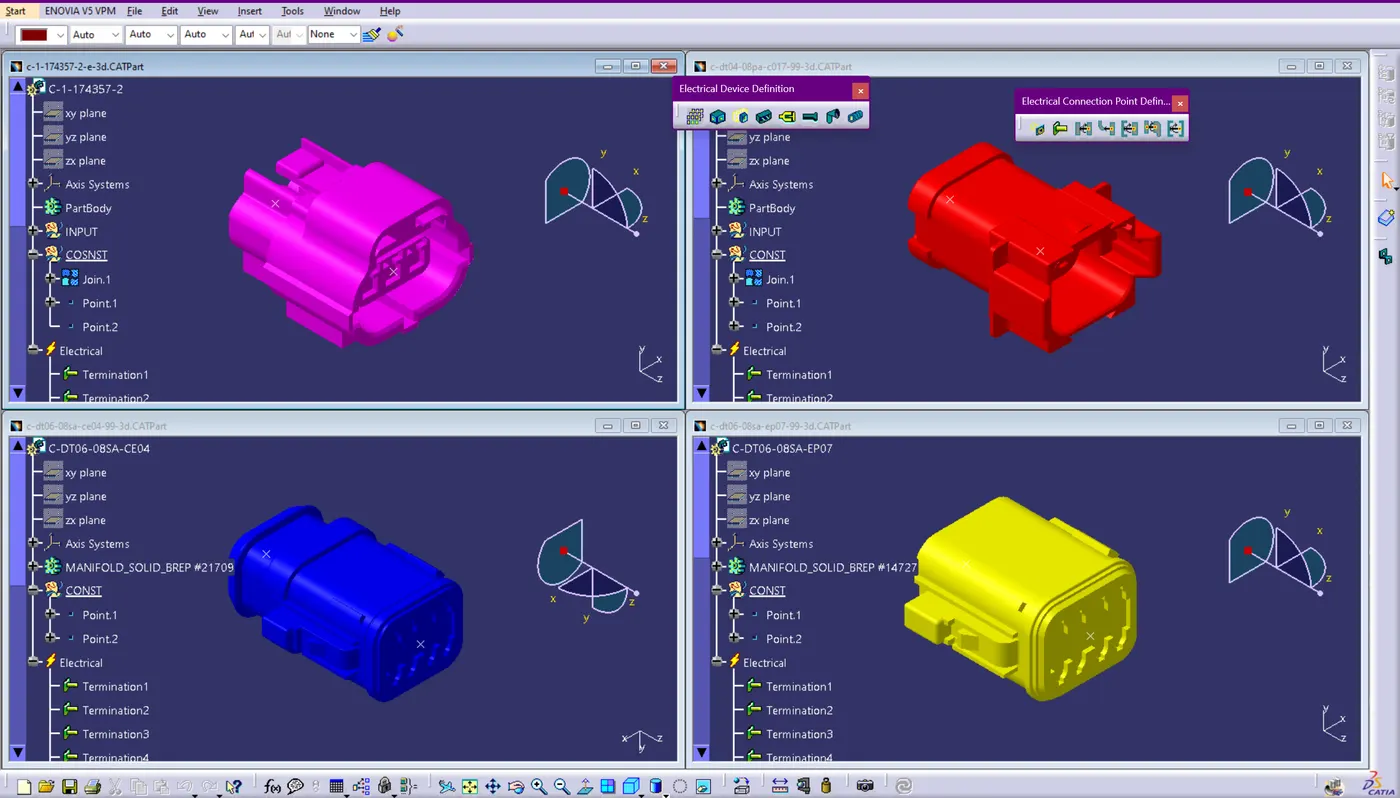
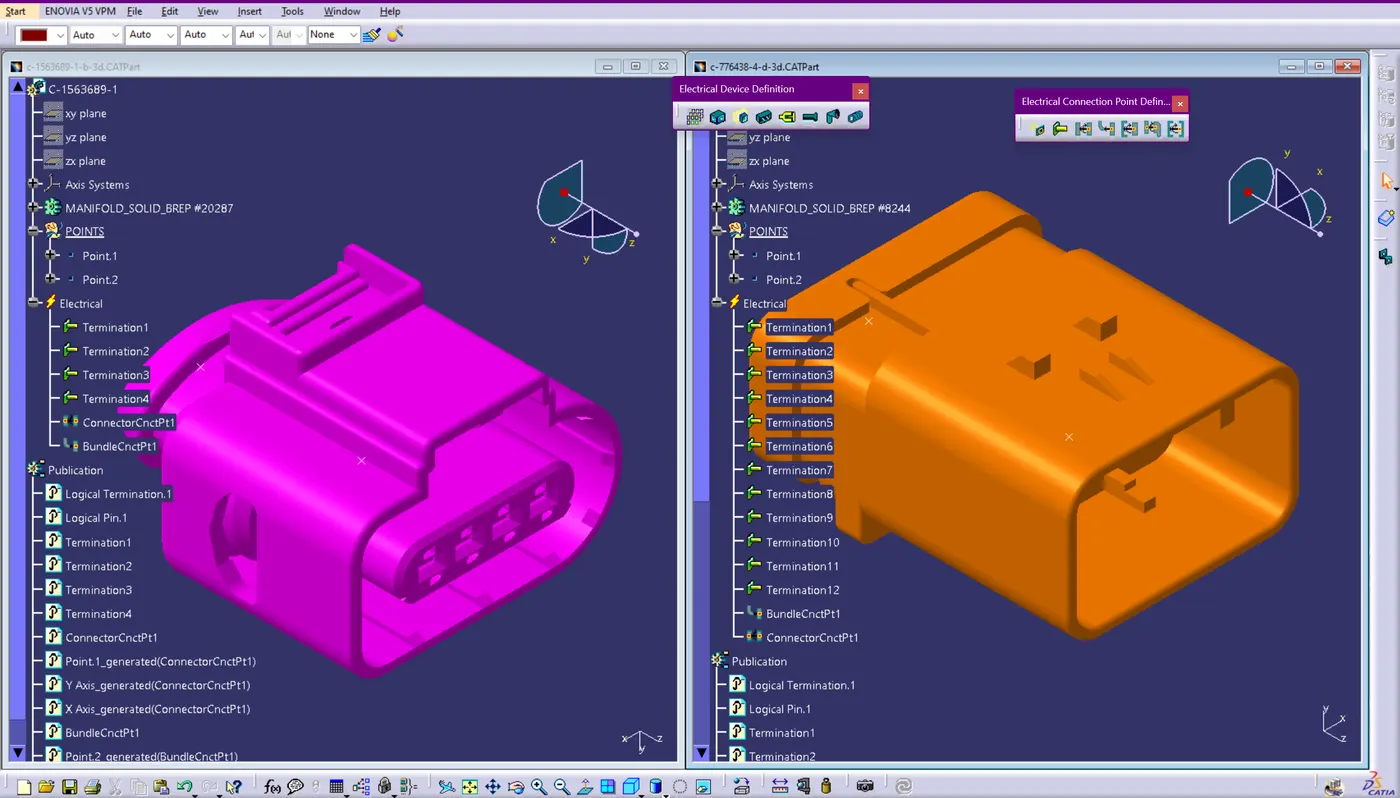
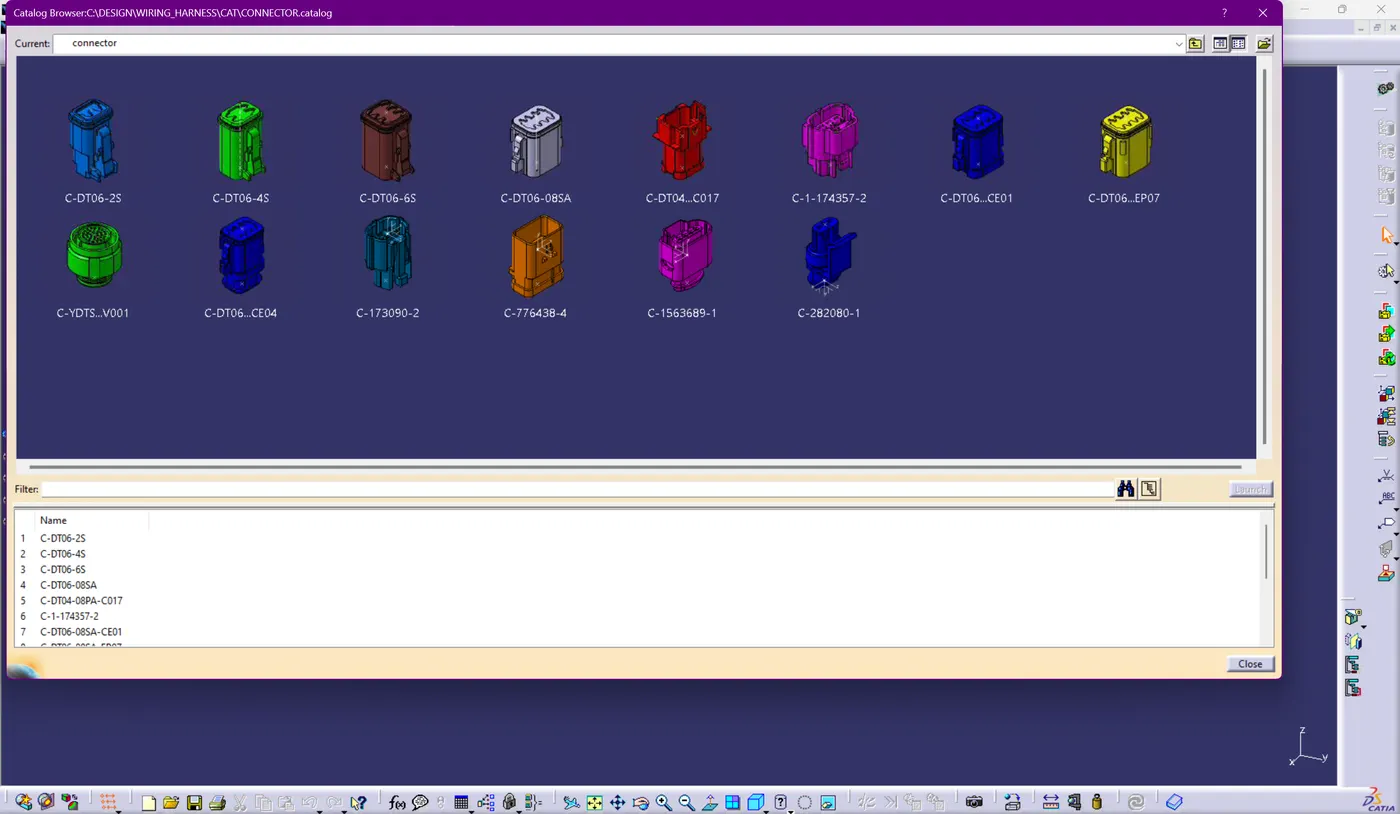
- After the definition of the individual components , make a catalogue of it for future usage.
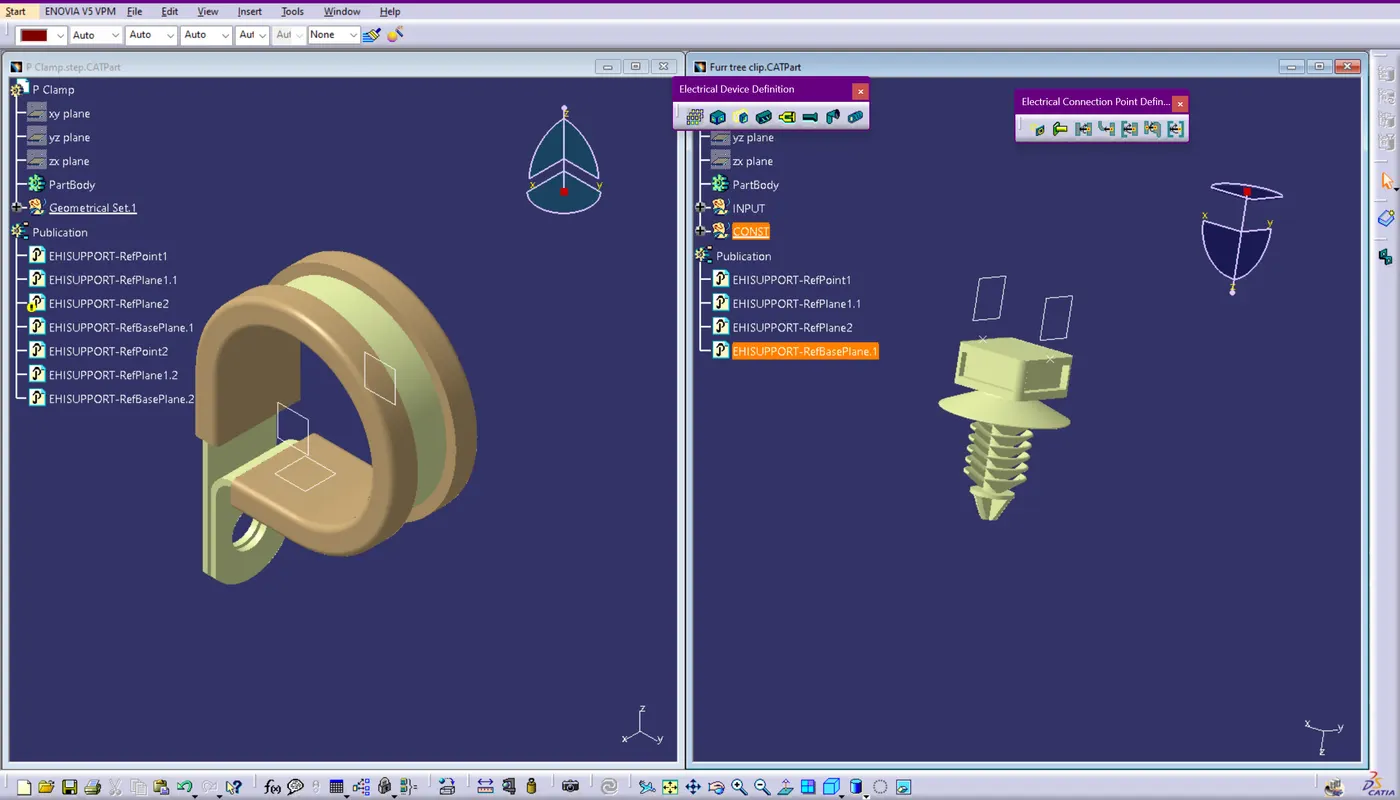
- Define the Mounting Clips and P clamps by using the appropriate commands.
- Where " P " Clamp it is in the shape of letter " P ". It is also called as cable clamps or saddle clamps, are versatile component used to organize the cables, wire, hoses, etc.. P clamp Commonly madde of, metals and plastic materials.
- It is Available in the PG sizes according to our cable or wiring sizes select the clamp and use it. These clamps are easy to install using screws, bolts, or other fasteners. They can be attached to walls, Panels or other surfaces, making them practical solution for both temporary and permanent installation.
- Create a new product file and import all the recommended connectors to the main product file.
- Switch the workbench to mechanical assembly design and position the mounting and connectors in the back door with ease of installtion and servicability.
- Use " Smart move " command for quick component positioning.
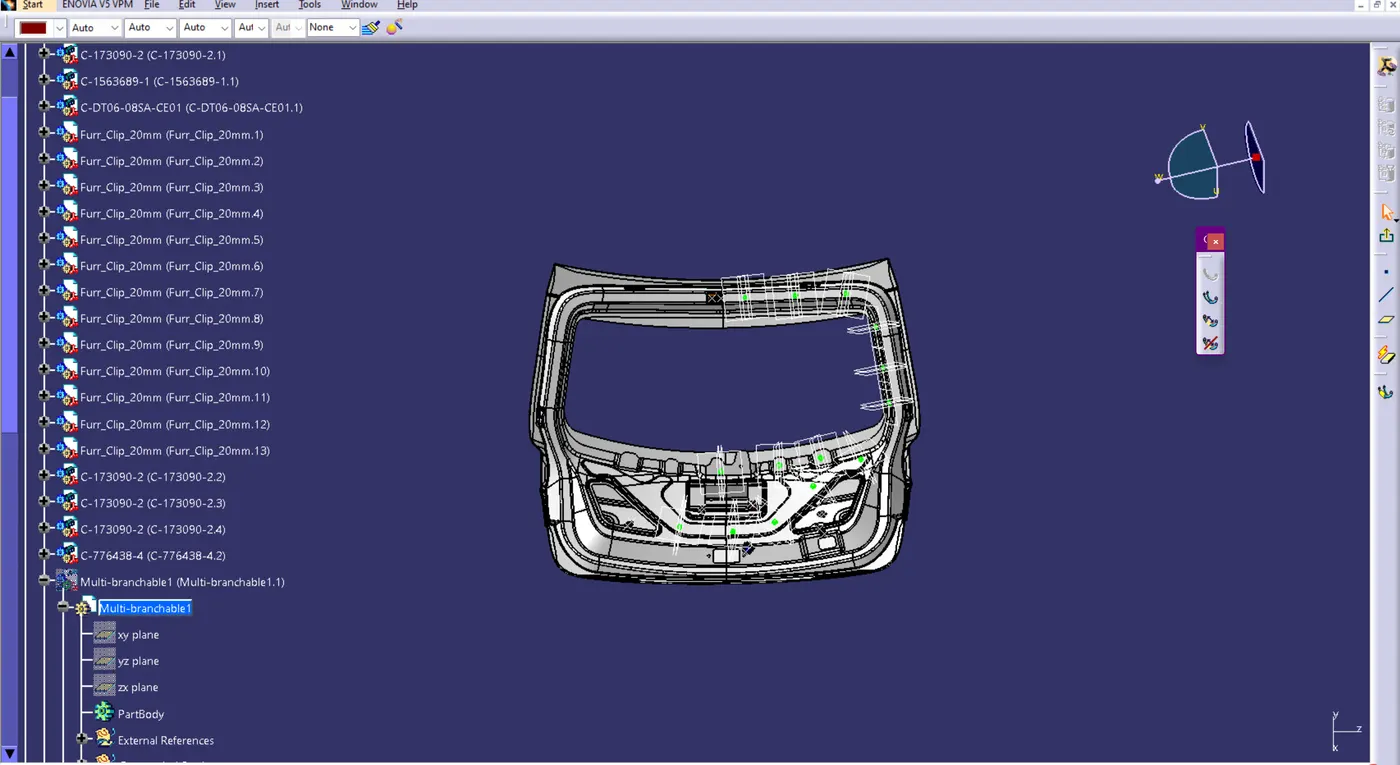
- Then switch the wrokspace to elctrical wiring harness , and define the connector assembly as Geomentric bundle.
- Select Multi Branchable command and start routing between the connectors and supporting components.
- To add a Sub branches use the Branch point command to create a point between the existing routed wire and define the point distance.
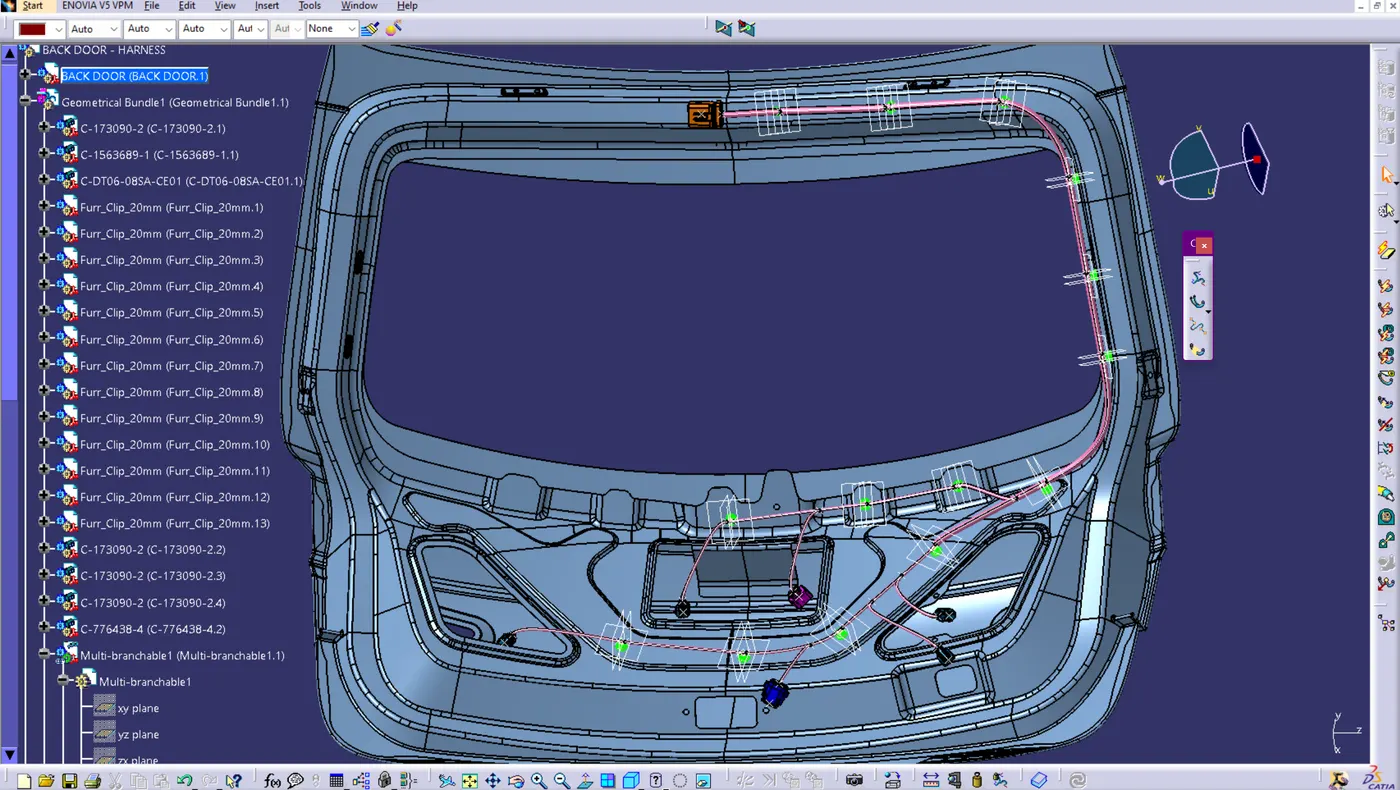
- After the routing completed , add protective cover to all the wires for secure from environmental hazards.
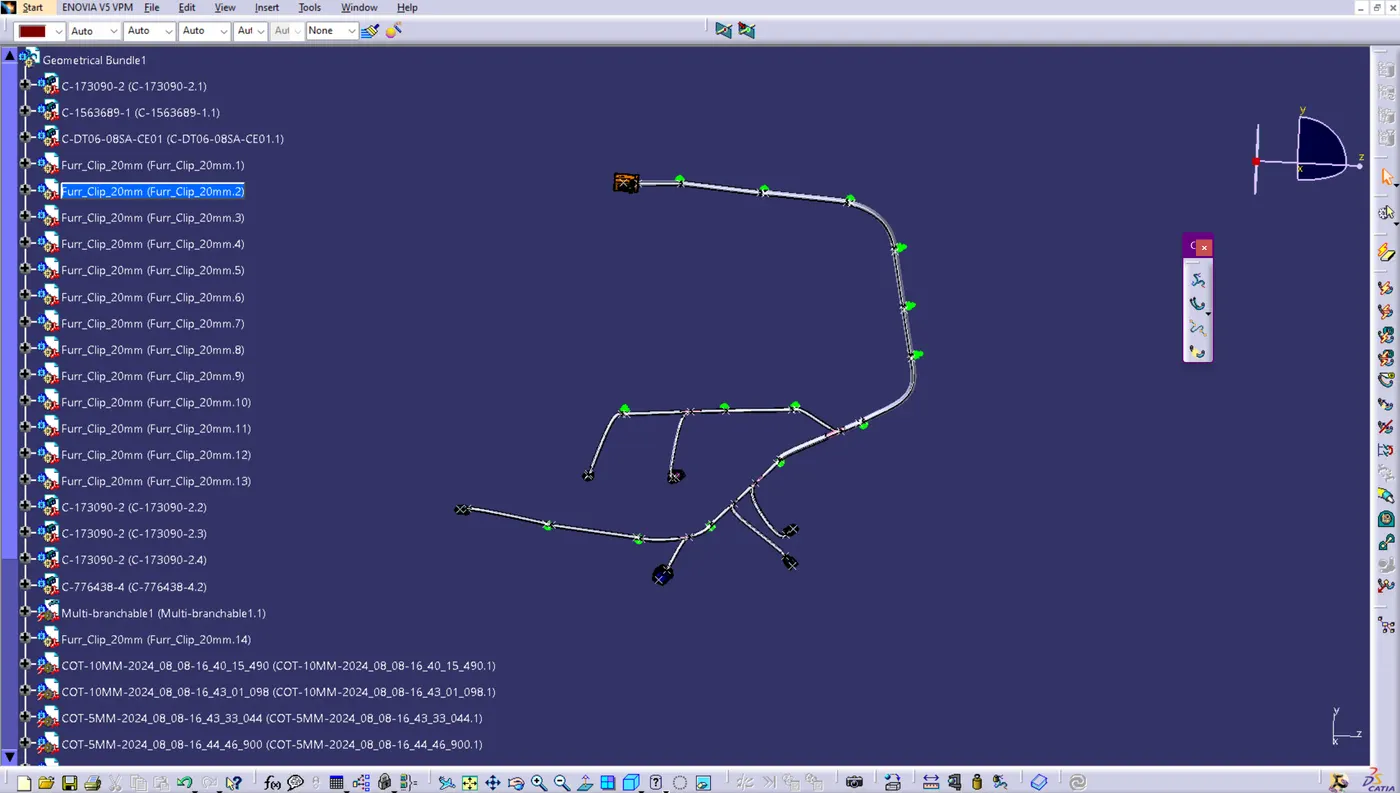
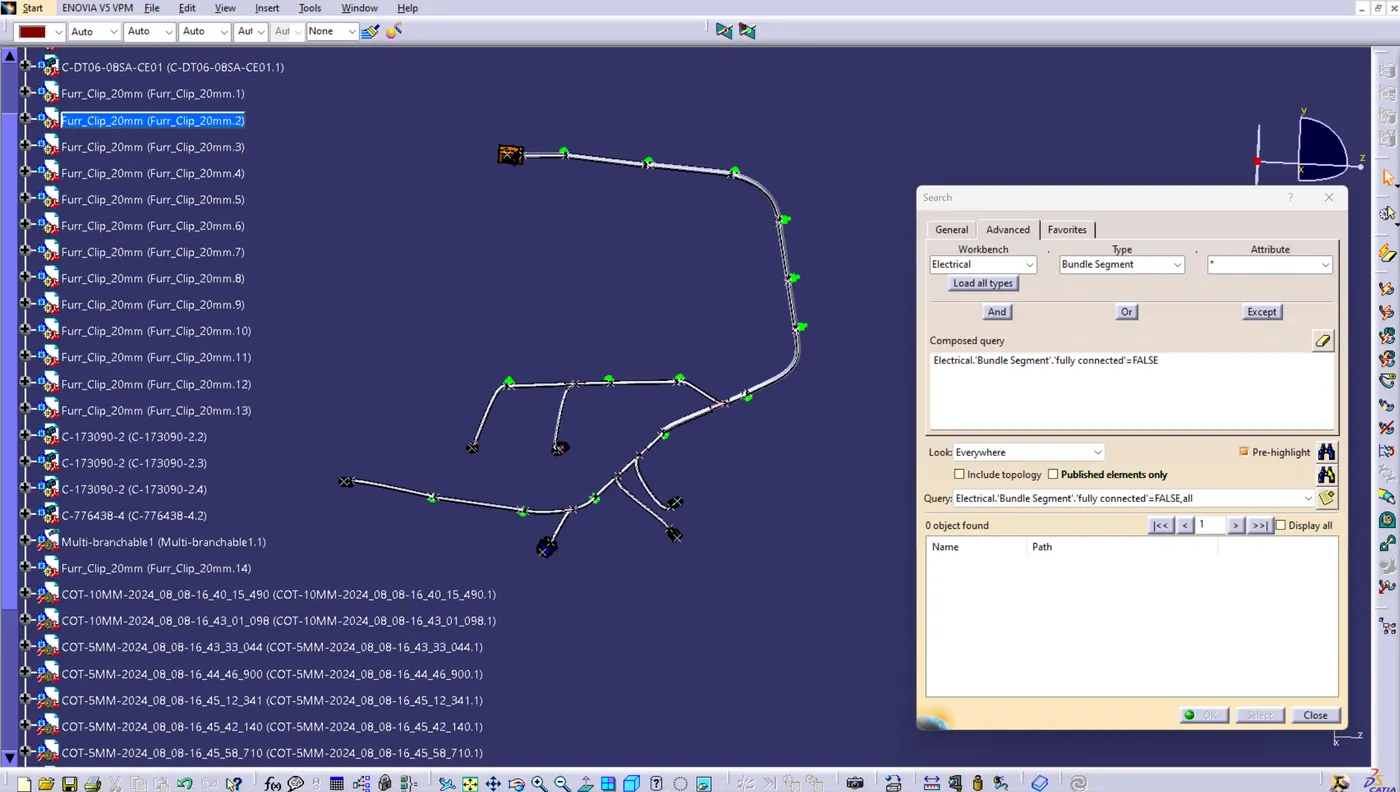
- Verify the Bundle continuity by using Edit > Search > Advanced > and set the workbench as electrical and select type as bundle segment and attribute as fully connected.
- Create New product file and define it has electrical wiring flatten and select the bundle for flatten.
- Do the necessary positioning of an flattened model to accomodate the details in the drfating layout area.
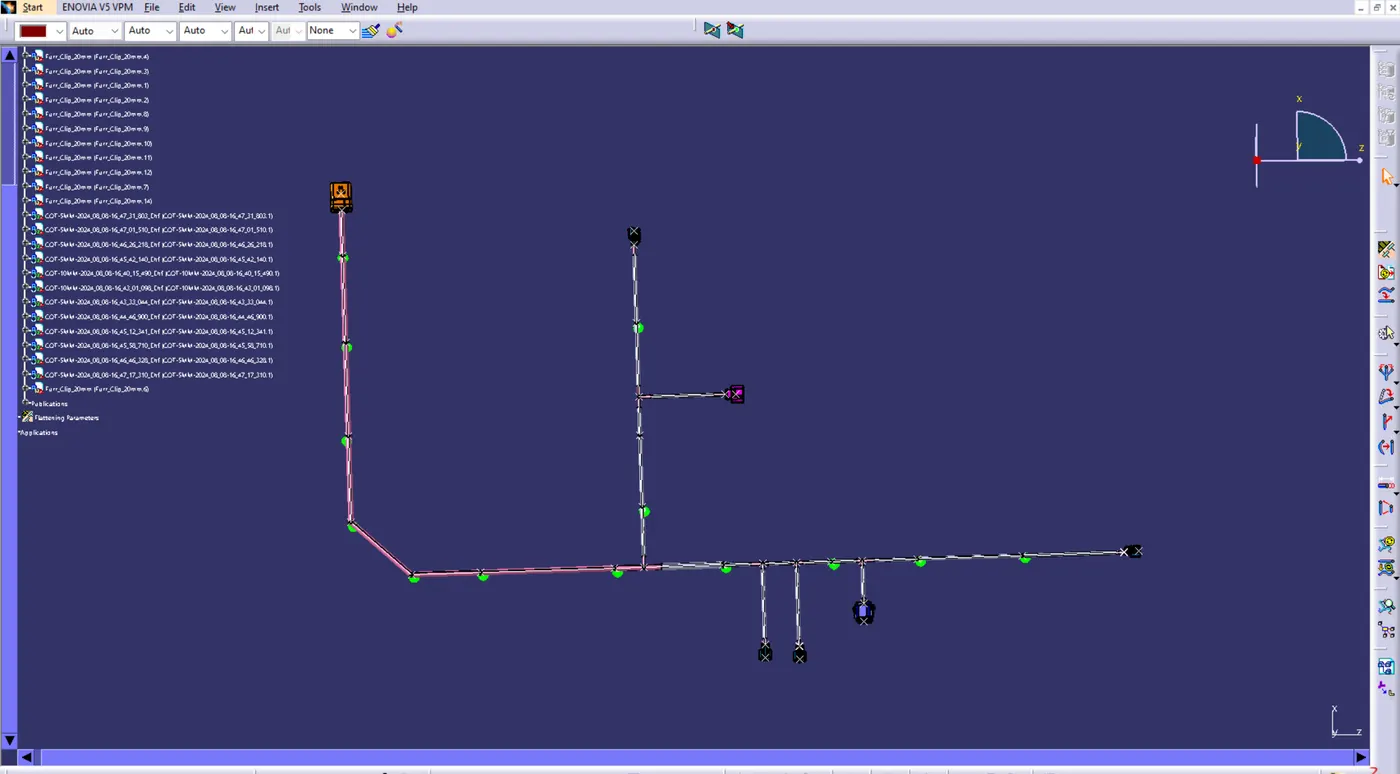
- Create a new drafting workbench and import the necessary viwes of an flatten to understand the routing process and add the Bill of materials and standards.
- In any ciritcal requirement mention the Mill certification and IP standrads in the drafting area.
CONCLUSION :
Prepared a priliminary wiring harness proposal of Car Back Door with design consideration and industrial standards. After the final design is approved make a detailed drafting and released.
Drive Link : https://drive.google.com/file/d/1aVA4aK84trsP2HT27l4Fy48brp4ckKBY/view?usp=sharing