Rear-Suspension Assembly mesh generation and deployment of rigids and welds using ANSA
Objective:
- To import the rear car suspension geometry into ANSA.
- Clean up the geometry until no topological errors are found.
- Generate volume mesh for the parts.
- Generate mid - surface and 2D mesh for some parts.
- Improve the mesh flow and element quality
- Give rigid connections to the rear suspension for NVH analysis.
Abstract:
In this project, ANSA pre-processor is used to generate volume mesh and 2D mesh for the rear suspension assembly. The quality criteria for different parts are different. Accordingly, I have meshed the entire assembly. I have also generated bolt and weld connections to make the model ready for further pre-processing.
Introduction:
The suspension has been an essential component of automobiles as long as they have been in production. The rear suspension of a vehicle performs the same general function as the front suspension, but the specific construction is typically quite different. The ideal suspension for a vehicle depends a lot on the vehicle's body style and performance requirements.
The suspension is mechanically more complex for a pair of wheels that receives power from the engine. The suspension must be able to handle the transfer of engine torque effectively to the wheels while resisting the rotational force of the driveshaft. In vehicles that have rear-wheel drive, the rear suspension usually has more components than the front suspension.
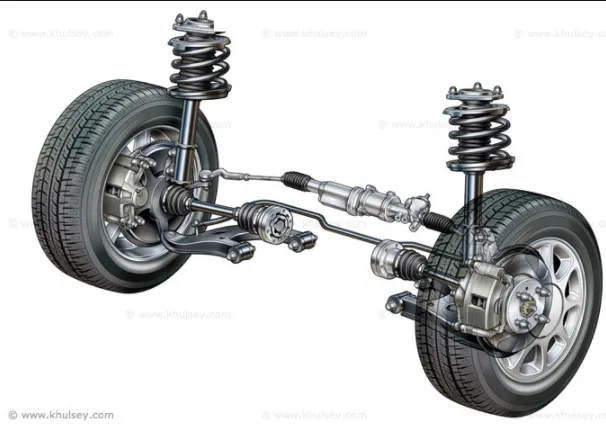
Suspension Assembly
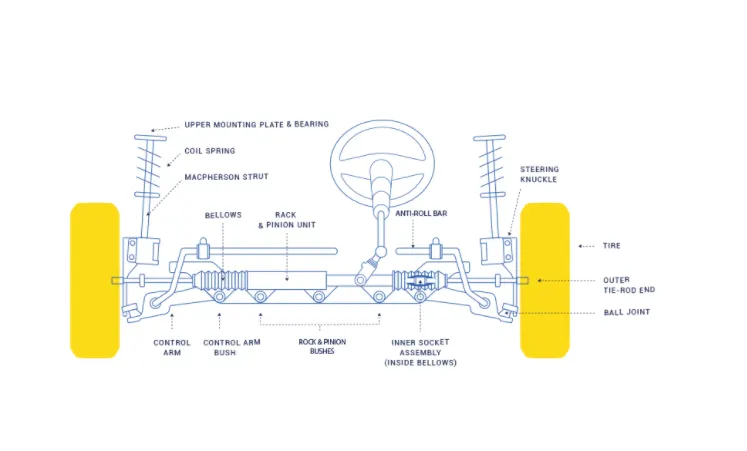
Schematics of the suspension assembly
Suspension systems are generally classified into dependent and independent systems. The wheels in a dependent system are perpendicular to the axle and parallel with each other. The most common suspension of this type is leaf-spring rear suspension, which consists of multiple metal bars, or leaves, bound together. It is an older design but is still most common on trucks and other heavy vehicles.
Quality criteria used:
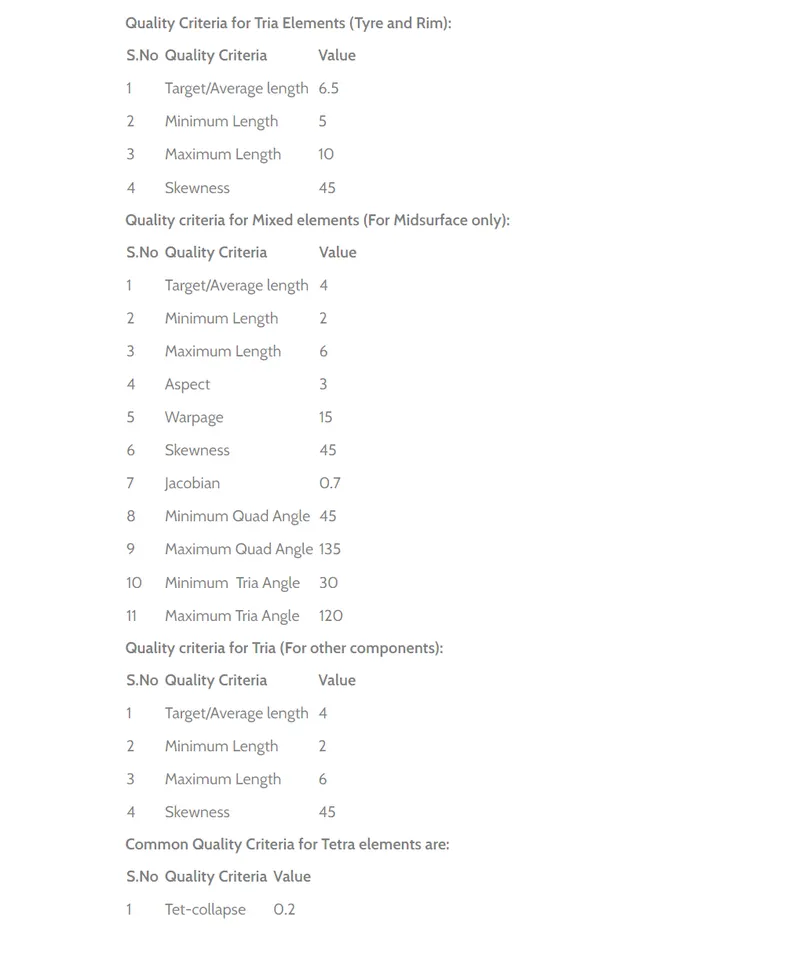
Procedure:
Step 1: Import the geometry into ANSA and stitch the required surfaces using the 'topo' option. Isolate and set each part's PID.
Step 2: Clean up the geometry using checks manager. Enable unchecked surfaces, collapsed cons, triple cons, needle faces, overlapped faces, cracks, single cons. Clear all these issues until no error is found. One can also use 'fix' option in the quality checks manager to clear all the errors automatically.
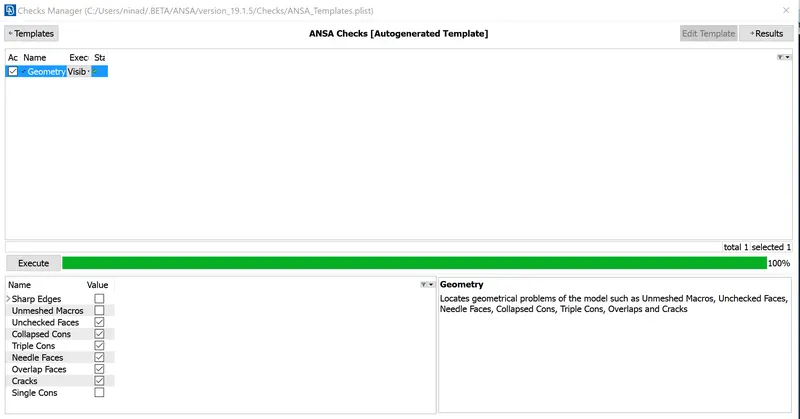
Step 3: Surface Mesh Generation for Tyre and Rim
- Since the quality criteria for these two components are different from other components, these are meshed separately.
- The meshing process can be done either by utilizing the batch mesh option or by meshing each component manually using Spot mesh.
- Since manual meshing leads to better quality, spot mesh option has been used.
- Quality criteria are cleared using 'move', 'split', 'reconstruct' and 'smooth' commands.
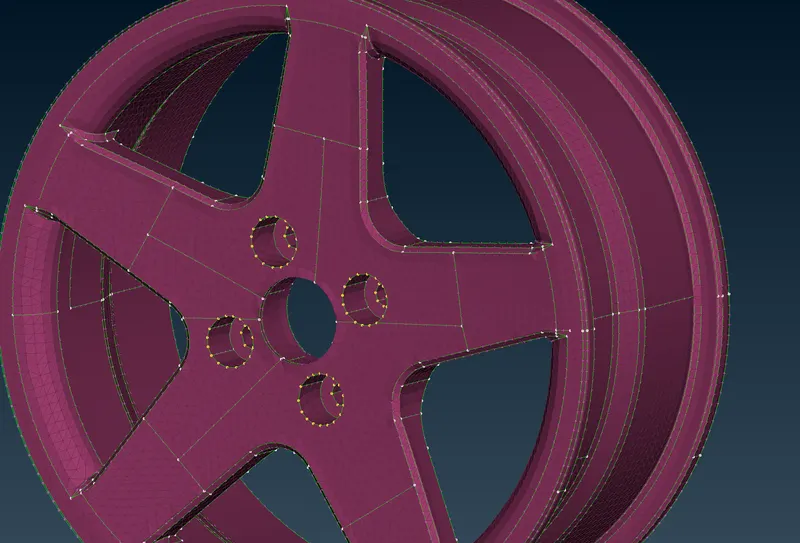
Rim Surface Mesh
Volume Mesh for Tyre and Rim:
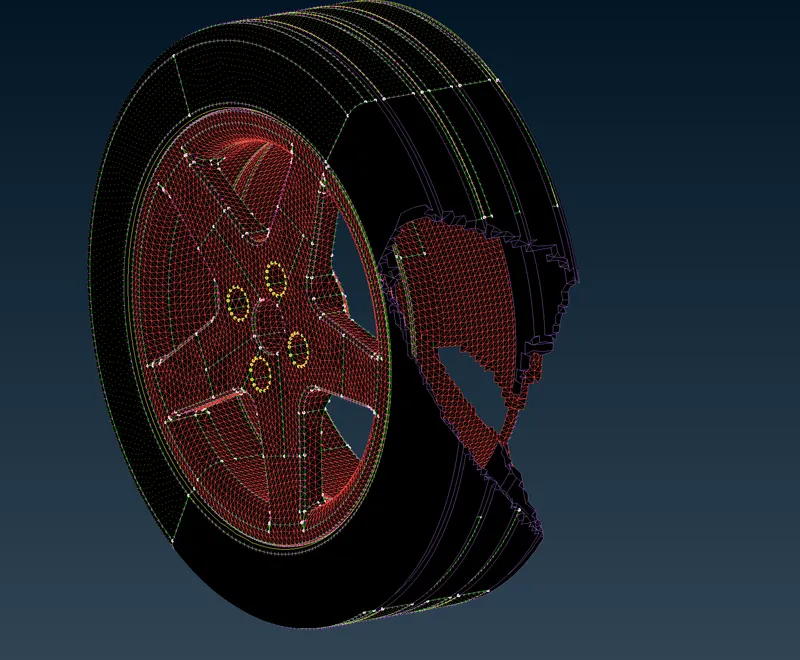
- After clearing the 2D quality criteria on the surface mesh, the 3D volume mesh was generated.
- The geometries were defined as a closed volume manually.
- Penetrations and intersections due to 2D elements were removed.
- The geometry was then meshed using Tetra Rapid. Tetra rapid and Tetra FEM can be used for generating the unstructured mesh.
 '
'
Tyre and Rim volume
Step 4: Mid-surface generation for macpherson strut outer surface and swaybar link kit.
- The offset option is used to generate the mid-surface of the said component.
- The thickness of this component is around 3 mm.
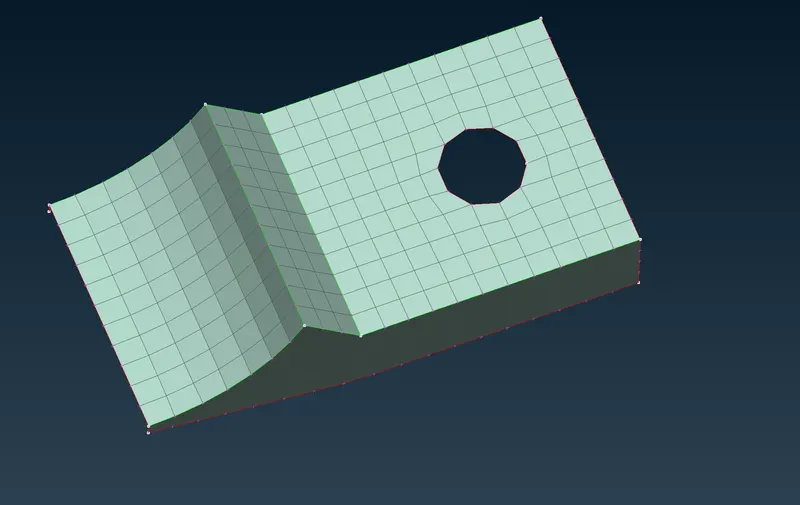
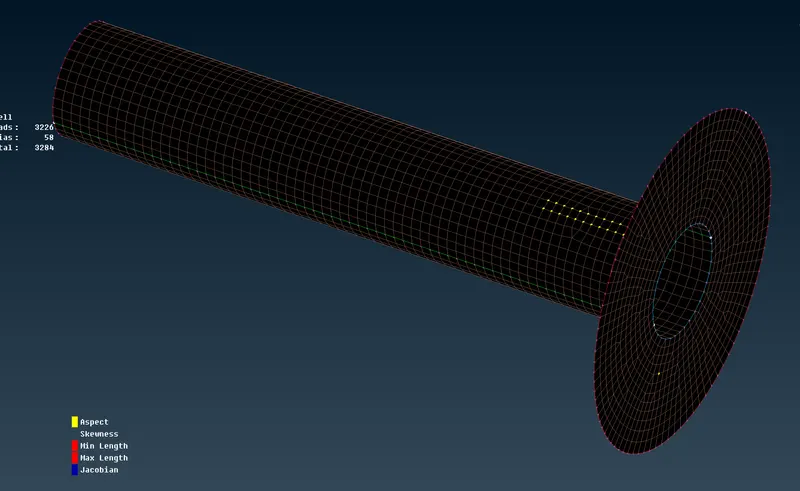
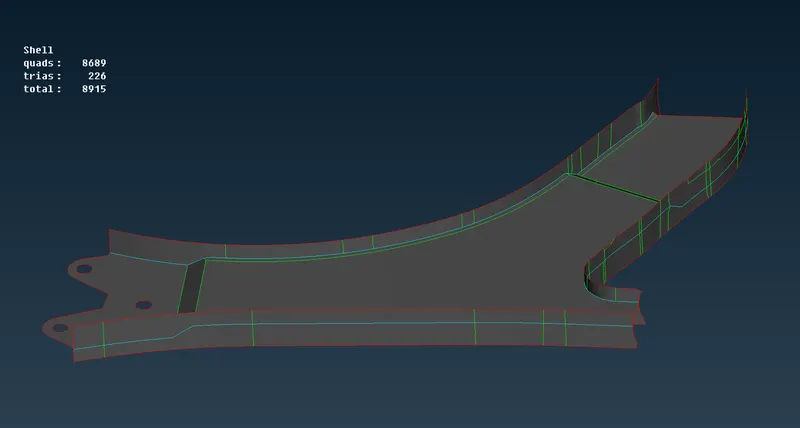
Mid surface and surface mesh of strut and swaybar link kit
Step 5: Surface and Volume mesh generation for the remaining parts.
- For most of the parts except the spring, a volume mesh has been generated using the criteria specified.
- Trias and ortho-trias were used as surface mesh for these parts.
- After surface meshing, the volumes were defined individually for these parts.
- The mesh was checked for tet-collapse of 0.2.
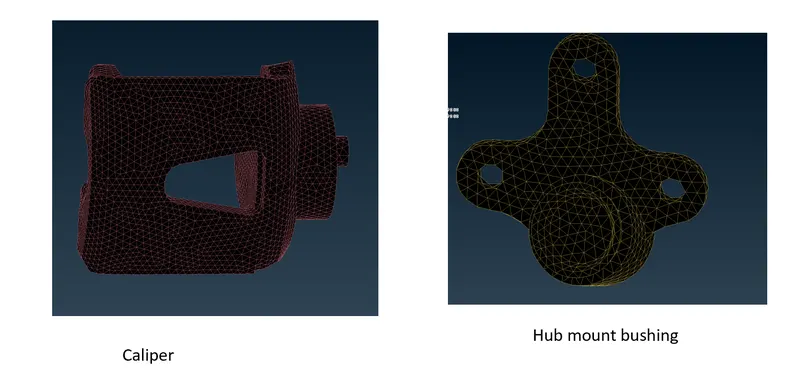
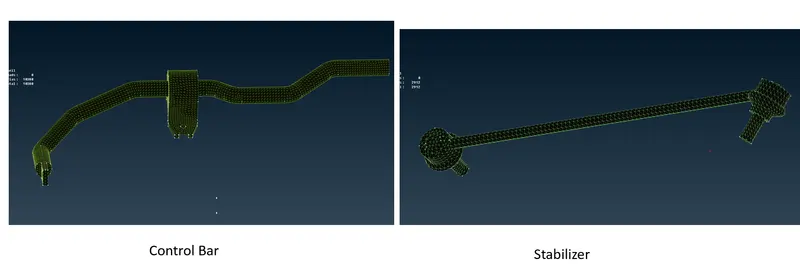
Step 6: Modeling Suspension Spring:
The suspension spring can be either modeled using 3D volume elements. Another way of modeling them is to represent them using CBAR elements. The method used for that is as follows:
- A middle curve is defined using 'middle' option in curves.
- Using the CBAR option in the NASTRAN deck, select the curve middle curve for CBAR representation.
- Input the value of radius and ANSA calculates inertia values.
- Enter the element size and click the middle mouse button to get the CBAR.
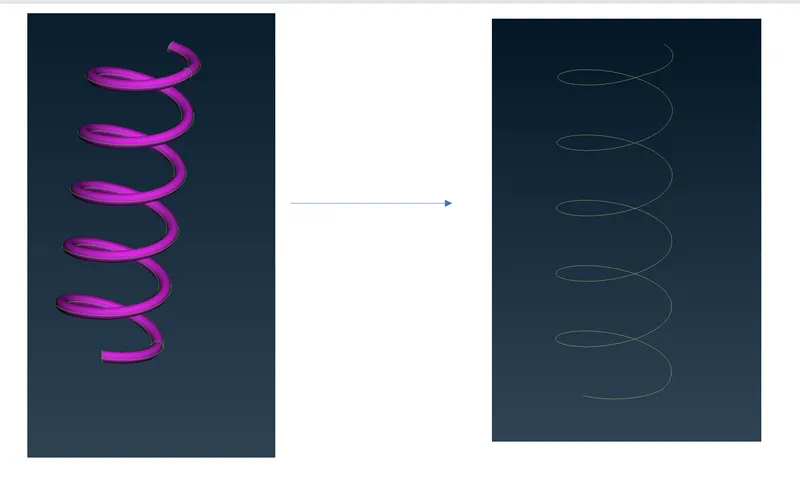
Spring
Step 7: Setting up connections for the rear suspension
Connections for rear suspension
- After completion of mid surface and volume mesh, rigid connections are established using RBE2 and seam weld connections.
- Bolt connections are generated using RBE2 option in the NASTRAN deck.
- I have given bolt connections by connecting 2 RBE2 elements for most of the parts.
- Another way of creating a bolt connection is to first get a COG point, convert it into bolt and then establish the connection in the connection manager.
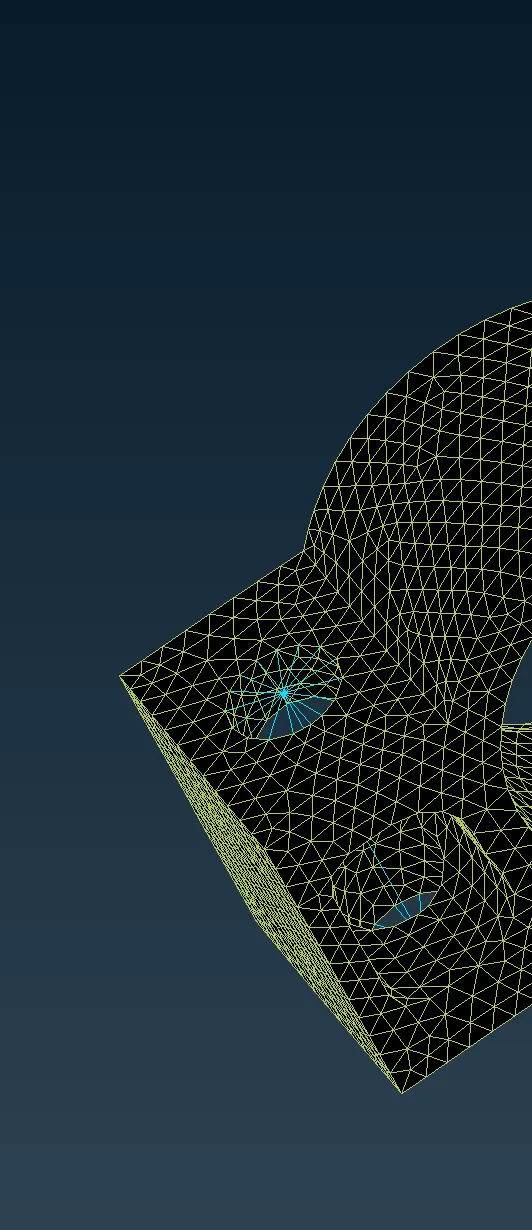
RBE2 connection
Setting up seam weld between surfaces:
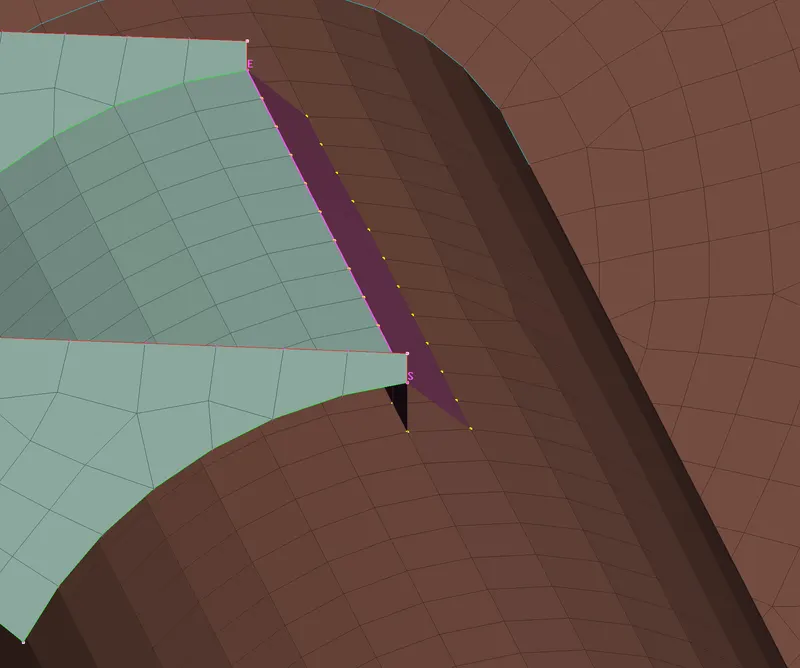
Seam weld deployed
- Seam weld is a weld connection deployed between 2 surfaces.
- Using the 'feature - to - curve' option, a curve is created.
- This curve is converted to a seam line.
- Using the connection manager, the parts representing the seam weld are selected and an overlap shell seam weld option is used to convert seam line into a seam weld.
The final model:
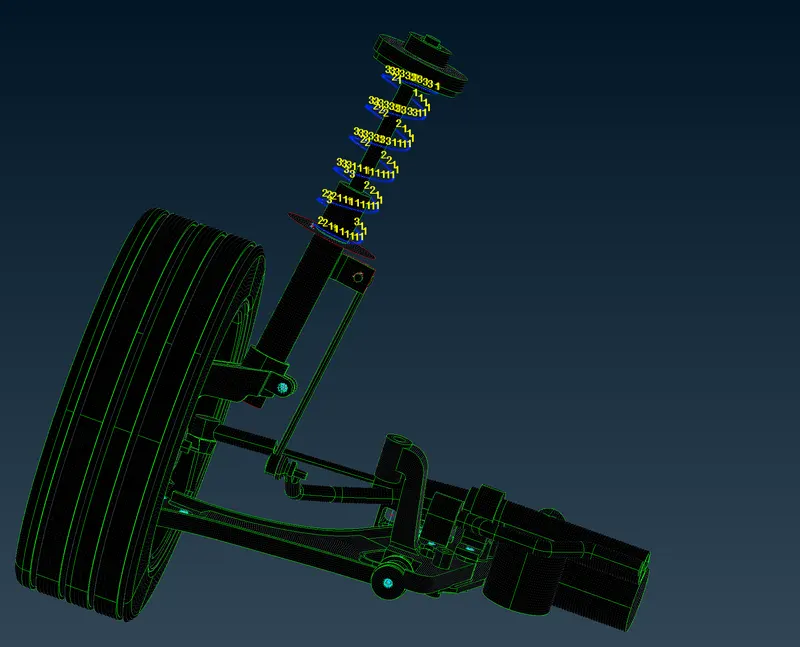
Lastly, the transform option is used to mirror the model on the other side.
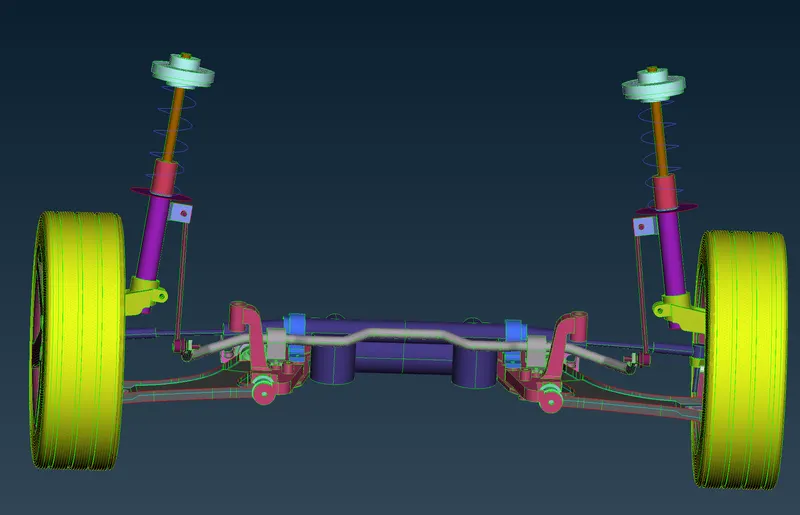
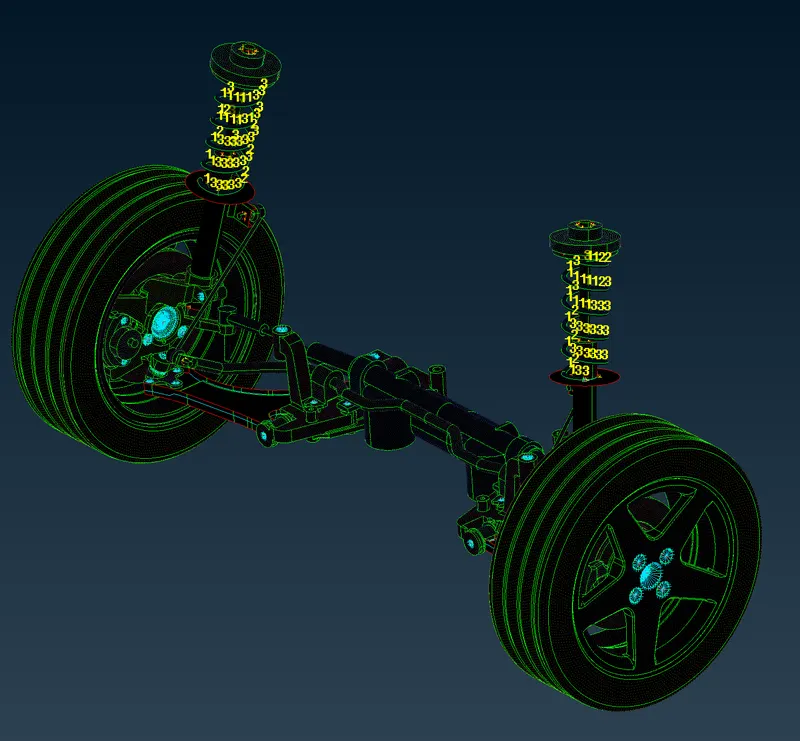
The meshed model of the suspension assembly
Project outcome:
- I was able to generate mid-surfaces, surface mesh, and solid mesh using different options available in ANSA.
- The mesh quality was ensured using quality criteria for each component.
- Connections were deployed to match the physical reality of the model.
Conclusion:
I was successfully able to complete the pre-processing of the model of Rear Suspension Assembly.
https://drive.google.com/file/d/1VBJ74GZs3CtnrIJOSBwucpUf_XjdLX77/view?usp=sharing