Project 2
Introduction
The car back door electrical harness is a wiring system that connects the electrical components of the back door, such as the lock, window controls, and speakers, to the car's main electrical system. It is essentially a set of wires and connectors that allows electricity to flow between the back door and the rest of the car, enabling the various functions of the back door to work properly. The electrical harness is typically located inside a protective sheath or casing to prevent damage from moisture, dirt, and other elements.
Design consideration
Wire routing and bundling: Wires should be routed in a way that minimizes the risk of chafing or abrasion, and they should be bundled together neatly to avoid tangling or interference with other components,Wire sizing, and insulation: The gauge of wire used must be appropriate for the current it will carry, and the wire insulation must be able to withstand the heat and vibration of the vehicle's operation, Connector selection, and placement: Connectors must be chosen based on their intended use and placed in accessible locations to allow for easy servicing and maintenance, Grounding: Proper grounding is essential for the safe and reliable operation of the electrical system, so grounding points must be carefully chosen and connected, EMI/RFI shielding: Electrical harnesses may be subject to electromagnetic interference (EMI) or radio frequency interference (RFI), so proper shielding should be employed to reduce the risk of signal degradation or disruption,Testing and validation: Electrical harnesses must be tested and validated to ensure they meet the necessary electrical and safety requirements, and any issues must be addressed before the harness is installed in the vehicle.
work procedure
The type of connectors used are given below-
1- Interconnection connector
2- 2 pole connectors used for light, sensors, and motors.
3-Clip and clamp are used to set the location of the wire
4-FIR tree clip
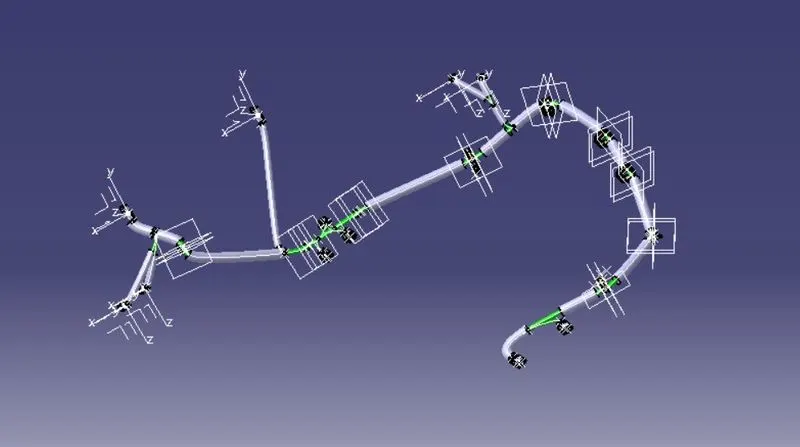
download the engine CAD data and required connectors CAD data from the given source, Download the required Connectors from the source and convert the mechanical connectors electrically by using the electrical part design workbench in the below steps, First download the connectors and mounting clip from the given link source, Get into the mechanical part workbench to create required geometrical parameters. Create a connector connection point and the bundle connection point on the required sides of the CAD part, Create an axis system on the connector connection point in such a way that the Y coordinate faces normally to the connector face, the X coordinate faces towards the locking mechanism and Z coordinate facing to the top, Create cavity connection point for connectors having the cavity for mounting clips, Using the geometrical parameters created, Define part as an electrical connector, Define bundle connection point, Define connector connection point, Define cavity connection point, Download and Define the plastic channel electrically, Procedure for electrically defining the Channel, Create bundle entry point and exit point, Create a line curve between the main entry and exit points for creating the multi-branch able using external curve inside the channel, Create 8 bundle entry points on the openings for connecting the injector connectors,Using the geometrical parameters, define the channel electrical using the define mounting equipment option ,Create define bundle entry points using the “define bundle connection point option.”Create Channel symmetrical assembly and define the symmetry bottom channel electrically using the define mounting equipment option and also create all the required geometrical parameters on it, Context assembly is nothing but the product file which contains the engine 3D-CAD data and the engine harness geometrical bundle. Here the geometrical bundle product contains all the connectors and other mounting pieces of equipment, clips, and clamps which are electrically defined for the assembly. Sheet metal L-clamp are added in the main context assembly The Given V16 engine 3D-CAD model requires a total of 23 connectors to be placed on it and an interconnection connector for the engine wiring harness assy. The connectors used in this engine are as follows 8 numbers connectors are required on the fuel injector sensors on each cylinder head, i.e.; a total of 16 fuel injector sensor connectors are needed. Total 4 numbers of cam-shaft sensor connectors are needed.1 neutral position sensor connector and 1-speed sensor connector on the gearbox housing.1 engine coolant temperature sensor placed at the center of engine Adding 4 pole connectors to all fuel injector sensors as well as for the camshaft sensors 4 pole connectors should be added in the geometrical bundle using copy paste connector or directly import from the catalog created earlier Connectors can be added again by copy-pasting the 1st imported connector Place the connectors on all the fuel injector sensors and cam-shaft sensors using the manipulation tools like move, smart move, snap tool and also using the compass Distance between two clamps on a straight branch should be minimum of 200mm. The minimum branch length should be 50mm Minimum distance between the clip and the nearest branching point should be 25mm. The minimum distance between two straight connection points should be 200mm The minimum distance between two breakout points should be 50mm To limit the number of branches from a single branch point to 4 Avoid routing the wiring harness near the exhaust manifold and its components and also from other unshielded heat sources. If re-routing is not possible then maintain a minimum distance of 200mm Try to avoid the use of too many metal brackets on the engine. Try to use the available threaded bosses on the engine or demand it Enough clamps shall be provided to ensure positive clearance with surroundings and safety of the wiring harness P - Clamps, Fir tree clips, and other clips can be added to the Geometric bundle as they are electrically defined and are part of the Wire harness routing and should be provided with the Wire bundle package Enough slack should be provided to the wiring harness which helps it not to get damaged during the Engine rocking or starting condition The wire harness routing should be done in such a way that it is easy in manufacturing and serviceable The wire routing should be done keeping in mind the cost-effectiveness of the bundle package To avoid the harness routing and clipping in blind zones of the operator during the assembly and the service provide proper slack at end connectors so that there will be no tension on the wire bundle To avoid sharp edges on the sheet metal parts and if it is not possible then provide protection parts to prevent damage to the wire bundle To provide separate branch points for separate connectors to ensure Poka-Yoke Keeping all the above packaging rules we can start the routing of the wire and provide clipping and clamping wherever necessary during the routing process ENGINE with all the components for wiring harness routing
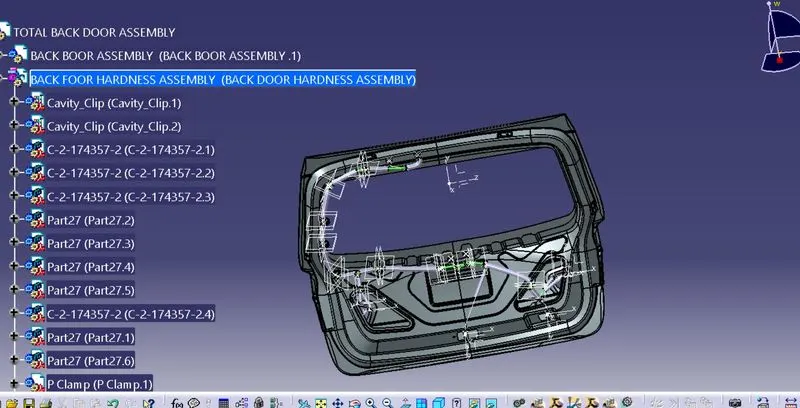
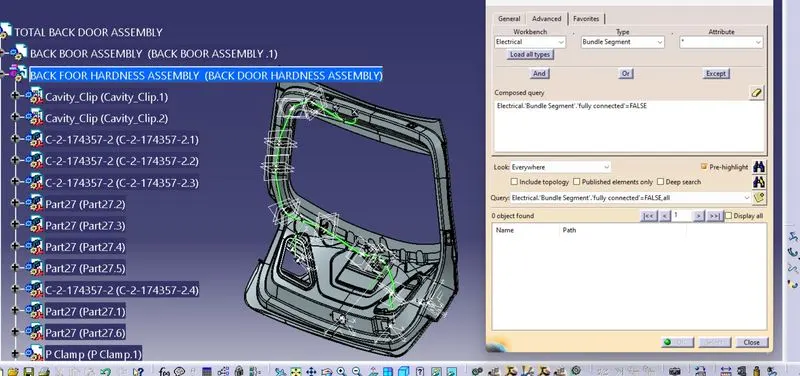
Bundle continuity check
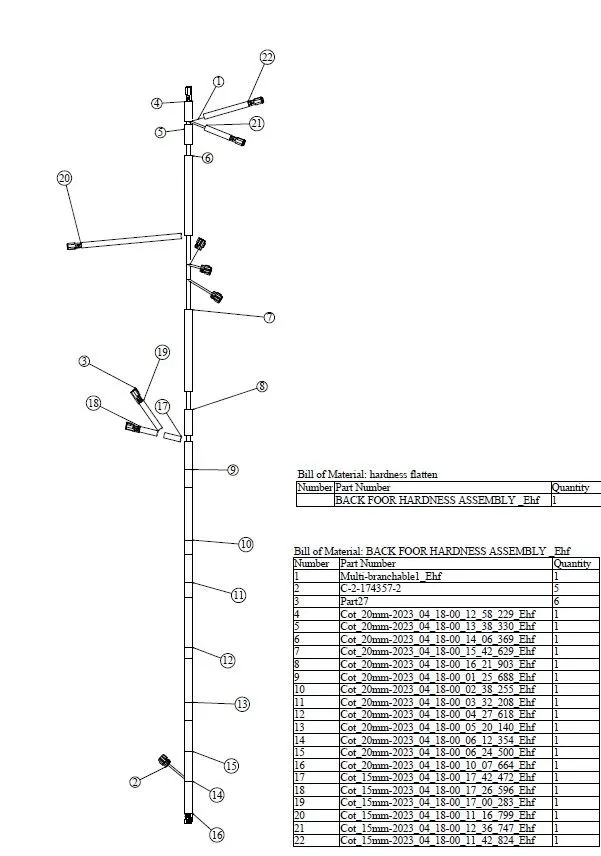
flatten the view & Creating a flattened view drawing