Project 2
WIRING HARNESS CREATION
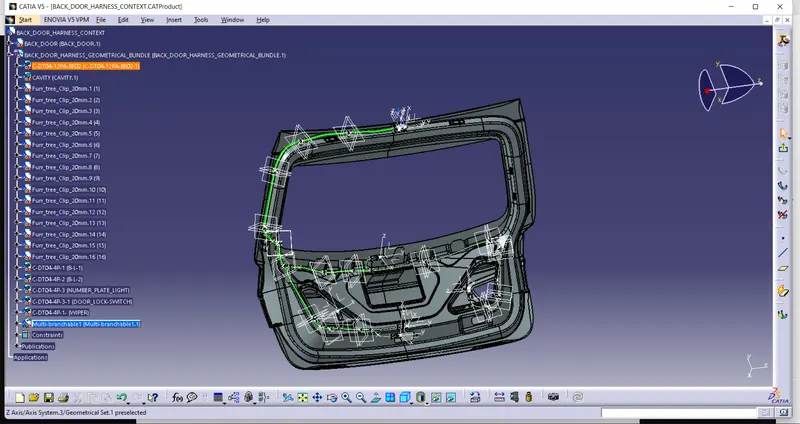
For creating the back door harness design first of all downloaded the Door CAD file. after that learn the door and identifyed what are the electrical components required. Then downoaded all the requried connectors and defined ellectricaly.Created a new product file named as BACK DOOR HARNESS CONTEXT and saved after that copy the door CAD file in to the product file. Then created an another product file named as BACK DOOR HRNESS GEOMETRICAL BUNDLE then copy all the whanted connectors and pasted in to the geometrical bundle file. After that positioned all the connectors and clamps at the right positions. Then define electricaly the GEOMETRICAL BUNDLE product file only. Then rout the wiring harnes between the connectors and make the corect roating.
FLATENING OF HARNESS
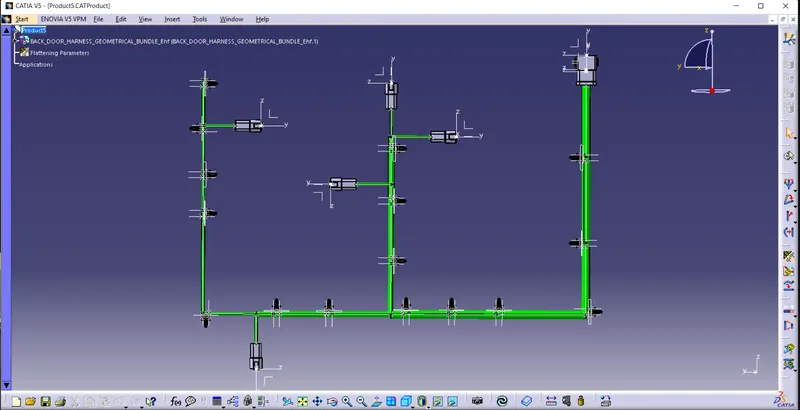
After succssefull roating we need to flaten the HARNESS to get all the connectors and clamps in one view..
For Flatten the harness assembly first created a product file in "Ellectrical Harness Flatening" workbench and after that for activating all the necessry tool in the workbench, first click on the "Harness Flatening Parameters" tool and give all the inputs required for flatenging view of the harness. Saved the product file in a desired location. For which harness we need to flatten first bring the harness file to same location where the flatene product file locate. After that Extract the harness assy by arrange the 2 windows verticaly and smilutaneously open. After the extracted file we can arrange all the connectors and bundles in the manner look better. The bundle continuity is necessery for getting the complet drawing.
DRAWING CREATION
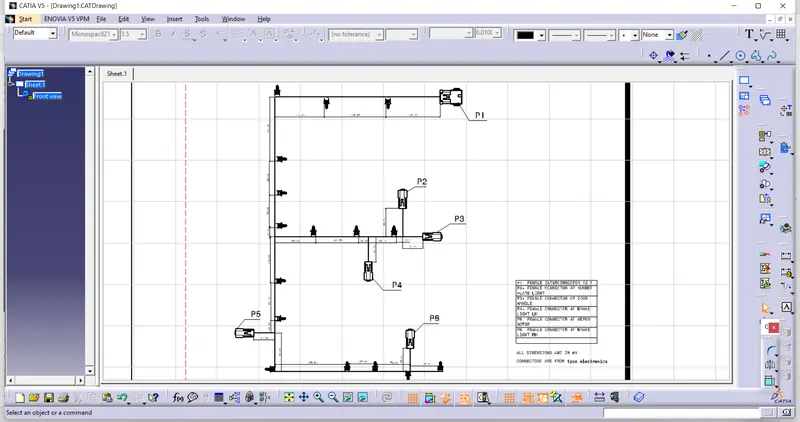
For Place the flattened view on drawing sheet first need to create "Drawing file" also set the sheet style like A3, A4 etc.. for of the drawing sheet. Arrange the flatten view and drawing sheet windows vertically. click on drawing sheet window and click on front view tool from tool bar and after that click on the top of the tree structure of the flattened harness file or product file. Then the front view of the flattened Harness assy is now comes to the drawing sheet and we can place the drawing correctly. After that give the required data like name of the connectors, dimension of the wirings bundles (length, diameter, etc..), the vendor details.