Project 1 - Interfacing a 16*2 LCD with Arduino using I2C protocol
Project 1 - Interfacing a 16*2 LCD with Arduino using I2C protocol:
Overview of the Project:
In this project implementing the Code for “Interfacing a 16*2 LCD with two Arduino’s (one for Master and one for Slave) using Inter-Integrated Circuit (I2C) communication protocol” by sending the message to LCD using I2C communication protocol and display the message on LCD screen.
I2C PROTOCOL:
I2C stands for the inter-integrated controller. This is a serial communication protocol that can connect low-speed devices. It is a master-slave communication in which we can connect and control multiple slaves from a single master. In this, each slave device has a specific address.
The I2C is developed to overcome the complexities of transmitting data through other communication protocols, including Universal Asynchronous Receiver Transmitter (UART) and Serial Peripheral Interface (SPI).
UART is an asynchronous transmission protocol. It is a device using them that should agree ahead of time on a data cost. The clocks of the machines should also have clocks with almost the same data rate. The data rate in UART is decreased because of the requirement of additional start and stop bits.
BLOCK DIAGRAM:
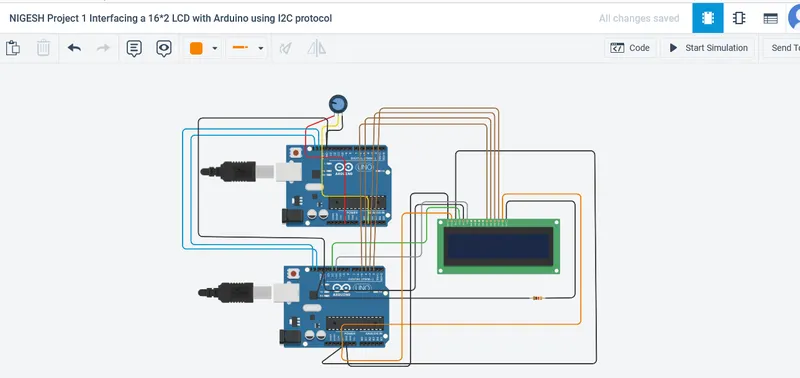
Here in this block diagram we have taken the following component,
Arduino Uno 2nos,
LCD 1no,
250 kΩ Potentiometer 1no,
1 kΩ Resistor 1no.
Connected the TWO arduinos in MASTER AND SLAVE concept to explain the I2C CONCEPT.
MASTER AND SLAVE CONCEPT:
The devices on the I2C bus are either masters or slaves. The master is always the device that drives the SCL clock line. The slaves are the devices that respond to the master. A slave cannot initiate a transfer over the I2C bus, only a master can do that.
WORKING:
We take 2 arduinos and one as master and another one as slave.we have an potentiometer to change the value and the SLAVE display it. We take input analog value at arduino pin A1 from (0 to 5V) by using potentiometer and convert them into Analog to Digital Values (0 to 1023). Then these ADC values are further converted into (0 to 127) as we can send only 7-bit data through I2C communication.
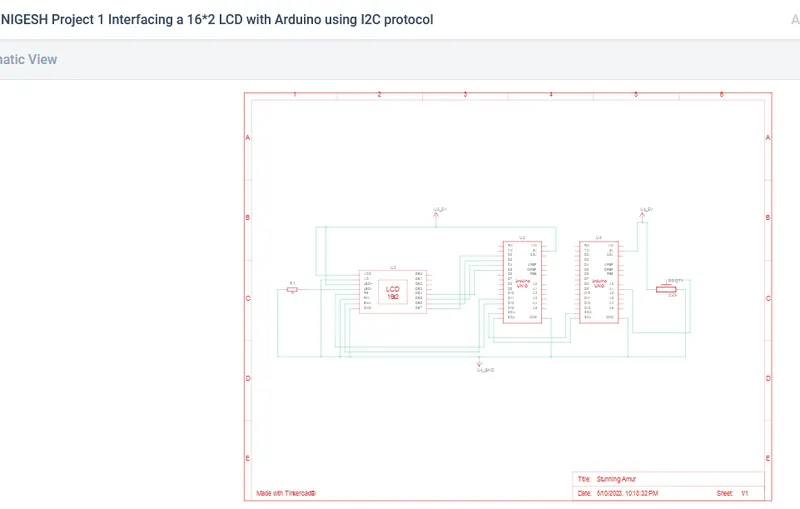
SCHEMATIC DIAGRAM:
CODE FOR MASTER:
//MASTER
#include<Wire.h> //header file provides a way for two Arduinos to communicate with each other using I2C protocol.
void setup()
{
pinMode(A1, INPUT); //setting pin A1 as input pin
Serial.begin(9600); //Initializing serial communication at a baud rate of 9600
Wire.begin(); //Initializing the I2C bus using the Wire library.
}
void loop()
{
float value=analogRead(A1); //Reads the analog value on pin A1 and stores it in a variable called value
signed int voltage=(value*5)/1024; //calculating value of voltage using formula result in voltage variable
Wire.beginTransmission(1); //Begins an I2C transmission to a device with an address of 1
Wire.write(voltage); //sending the voltage value to the other device.
Wire.endTransmission(); //Ending the I2C transmission
delay(50); //Waiting for 50 milliseconds
}
CODE FOR SLAVE:
//SLAVE
#include<Wire.h> //Wire library and the LiquidCrystal library provides an easy way to interface with a 16x2 LCD screen
#include<LiquidCrystal.h>
LiquidCrystal lcd(12,11,5,4,3,2); //LCD is initialized with the pin numbers for the RS, E, D4, D5, D6, and D7 pins of the LCD.
void setup()
{
Serial.begin(9600); //initializing serial communication at a baud rate of 9600. This is used for debugging and printing information to the serial monitor.
Wire.begin(1); //Initializing the I2C bus using the Wire library with a slave address of 1.
Wire.onReceive(ruso); //Sets up an interrupt handler function called ruso() to be called when data is received over the I2C bus.
lcd.begin(16,2); //initializing the LCD screen with 16 columns and 2 rows.
}
void loop() // loop function, which runs repeatedly after the setup function has finished. In this case, it does nothing but wait for 50 milliseconds before starting the loop again
{
delay(50);
}
void ruso(int y) // interrupt handler function that is called when data is received over the I2C bus
{
signed int voltage=Wire.read(); //Reading the data that was sent over the I2C bus using Wire.read() and stores it in a variable called voltage.
lcd.setCursor(0,0); //Setting the cursor position on the LCD screen to the beginning of the first row
lcd.print("the voltage is"); //Printing the string "the voltage is" to the LCD screen
lcd.print(voltage); //Prints the voltage value to the LCD screen
delay(50); //Waits for 50 milliseconds
}
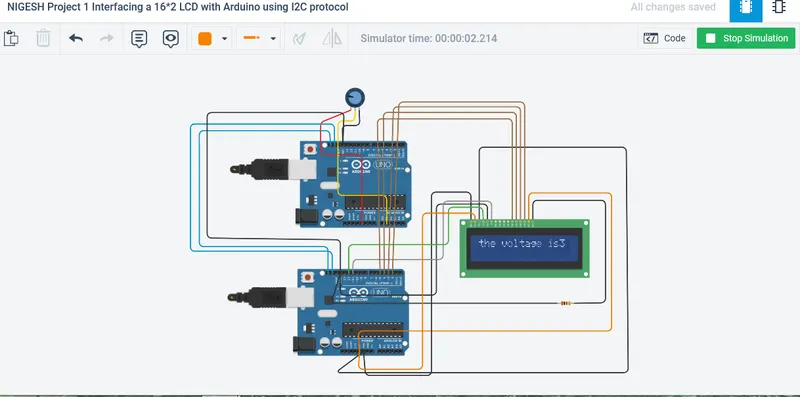
OUTPUT: